HOLIDAY DONATION DRIVE - SUPPORT MSW - DO YOUR PART TO KEEP THIS GREAT FORUM GOING! (83 donations so far out of 49,000 members - C'mon guys!)
×


Dowmer
-
Posts
378 -
Joined
-
Last visited
Content Type
Profiles
Forums
Gallery
Events
Everything posted by Dowmer
-
 Coming right along. I realize it’s a steep learning curve but you are managing very well.
 -
What!! No stun’sls!!!.......😫 But they are so characteristic of the clipper..... Just kidding Rob, it’s going to look great. 😁
- 1,208 replies
-
- 3
-

-
- great republic
- clipper
- (and 1 more)
-
Syren Rope Rocket
Dowmer replied to DelF's topic in Rope Making/Ropewalks's Commercial sources for ropewalk machines
Its also to get the fuzz to lay down on line. Anyway, that’s why I use it. It also gives the line a bit of that tarred look if you use a dark colored wax.- 42 replies
-
- 3
-
-
- ropewalk
- rope rocket
- (and 1 more)
-
Syren Rope Rocket
Dowmer replied to DelF's topic in Rope Making/Ropewalks's Commercial sources for ropewalk machines
Yes, wet the line then stretch it. It will help it set. Even real rope was stretched after making it.- 42 replies
-
- 4
-
-
- ropewalk
- rope rocket
- (and 1 more)
-
Rob, When you have time would you detail how you make the paper sails, materials, techniques etc. I’ve seen many different techniques, but your sails look very nice. 😃
- 1,208 replies
-
- 4
-
-
- great republic
- clipper
- (and 1 more)
-
Practice makes perfect 😁. If things get too ugly you can get some replacement parts from Model Expo
-
I wouldn’t worry too much. I had 11 strakes on my build. Just make sure they all fit without any gap left over. Once again, watch Chucks build of his 1/48 scale boat. Also his cutter Cheerful build. He goes over measuring out strakes, fairing and tapering planks.
-
Dont worry, I broke the stem on mine too. Just glue it back. This is a very fragile model. You will find that the basswood in this kit makes it difficult as well. Fuzzy, soft horrible stuff. Other woods are easier to work (sand, carve etc). But basswood will be good for you to learn the ropes.....so to speak.
-
Daforunia, I dont believe the sheer is tapered or the wale plank directly below it. The rest will have to be tapered or spiled to fit the required space. Whenever possible, reference the plans. Chuck is building a larger 1:24 version with a lot more detail. If you have a chance read through it and see a detailed version of what you are building. Lots of great tips to pick up. The 1:48 version you are building can be difficult for a beginner due to the small size and advanced planking required. Just go slow and take your time. Welcome to shipbuilding. A very rewarding but slow and tedious process.
-
Beautiful work Ed. I especially appreciate the arrows you have added to draw our attention through the web of lines. By the way, the natural droop of the chain you refer to is called a "Catenary" curve. Cheers,
- 3,618 replies
-
- 1
-
-
- young america
- clipper
- (and 1 more)
-
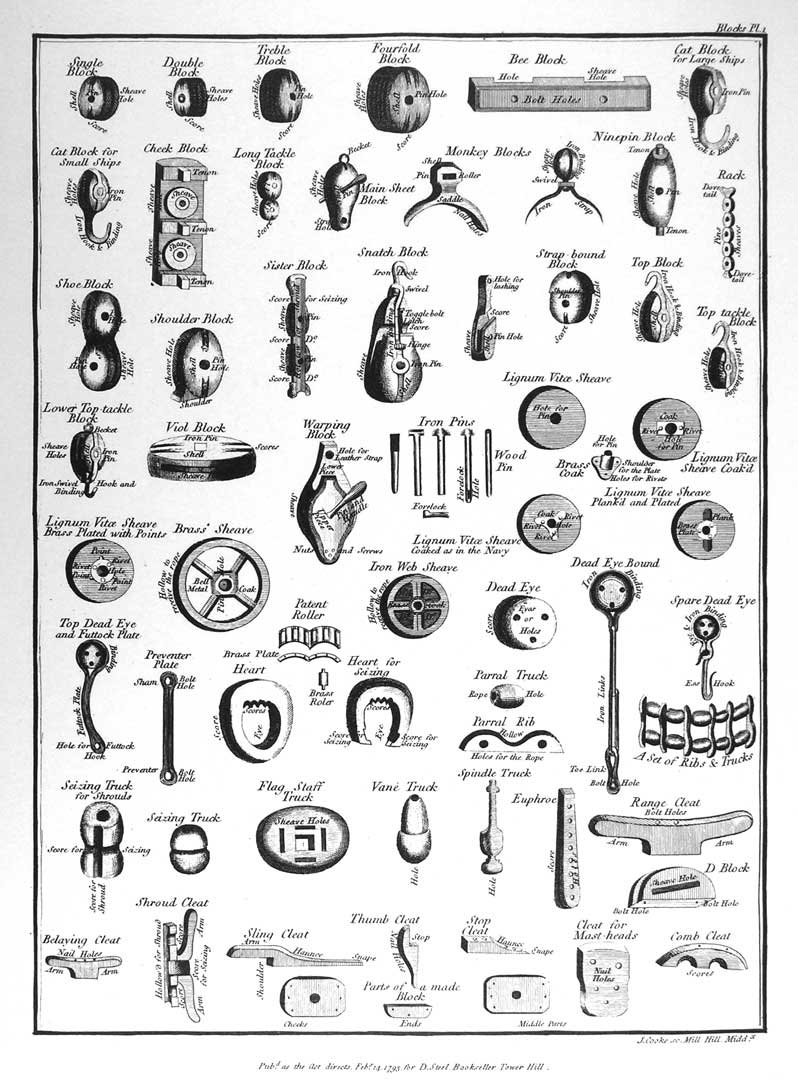
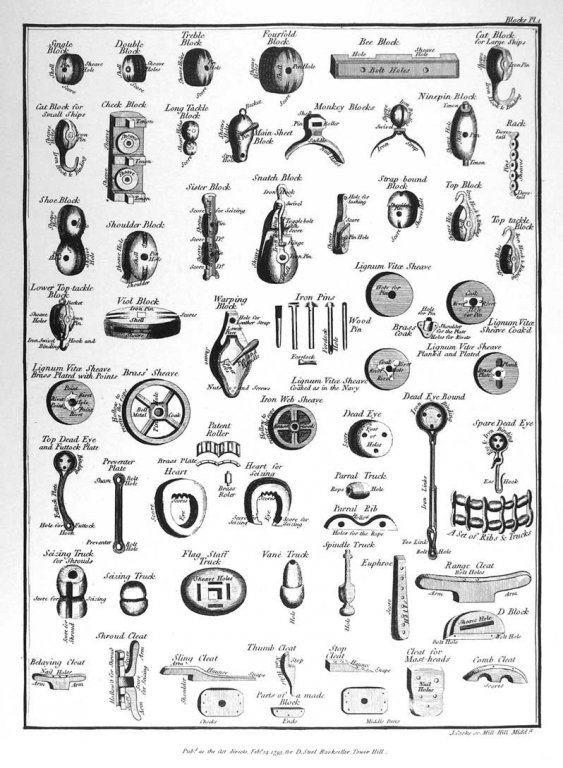
According to Steel, he shows sheaves on each side, so athwart as well as fore and aft. But Ive seen others with only fore and aft etc. So I guess its up to you. You might check Levers "Young Sea Officers Sheet anchor". He might have another picture of one as well. I dont have my book in front of me right now.
-
Bob, oh the horror !!!!!!!!!! 😁 No worries Bob, sometimes you just have to pick your battles.
-
In the first movie of Pirates of the Caribbean the crew was holy stoning the deck. Wouldn't that make it lighter? 🤔
-
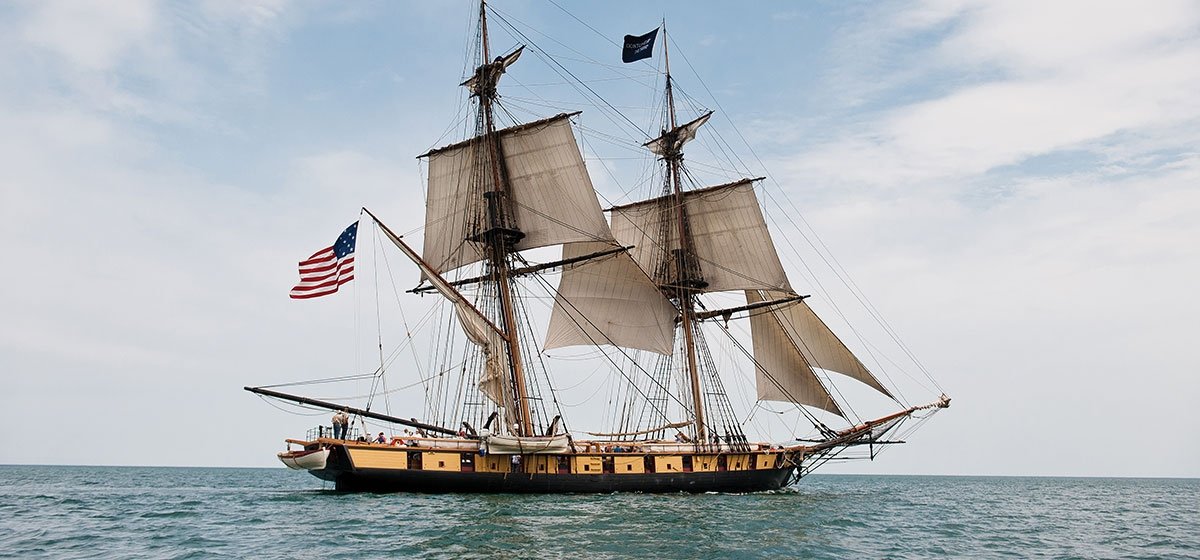
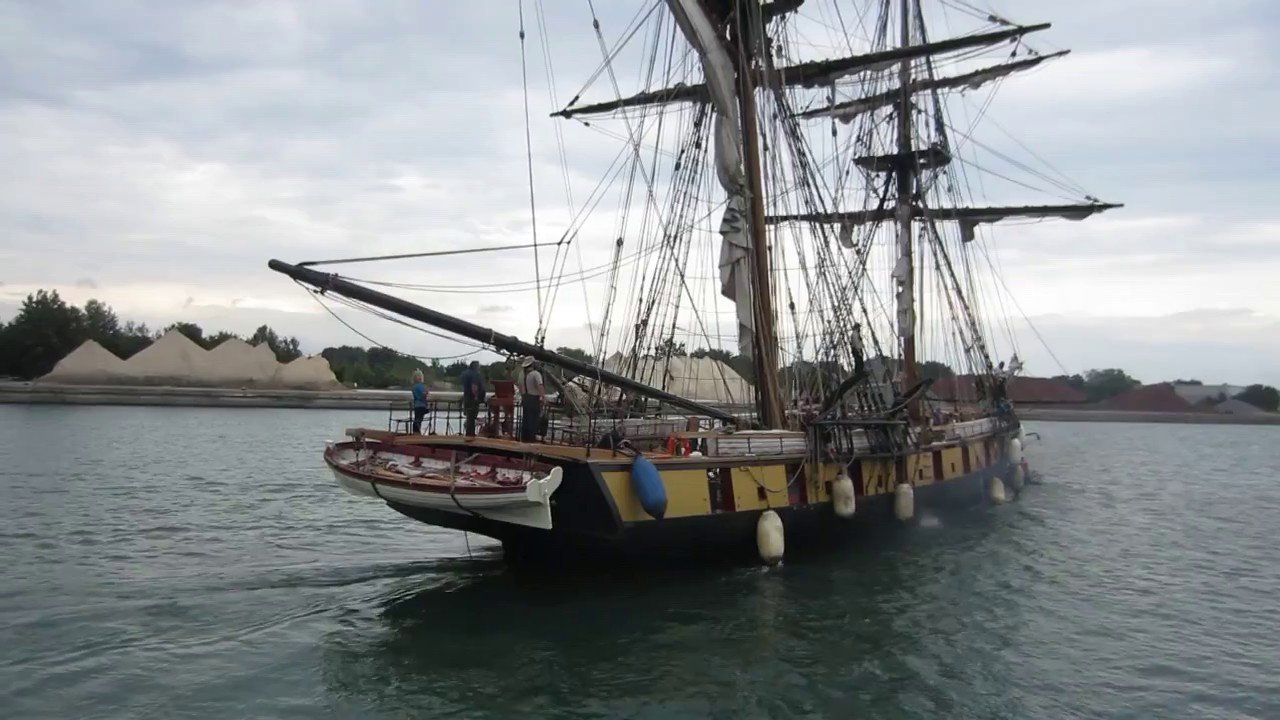
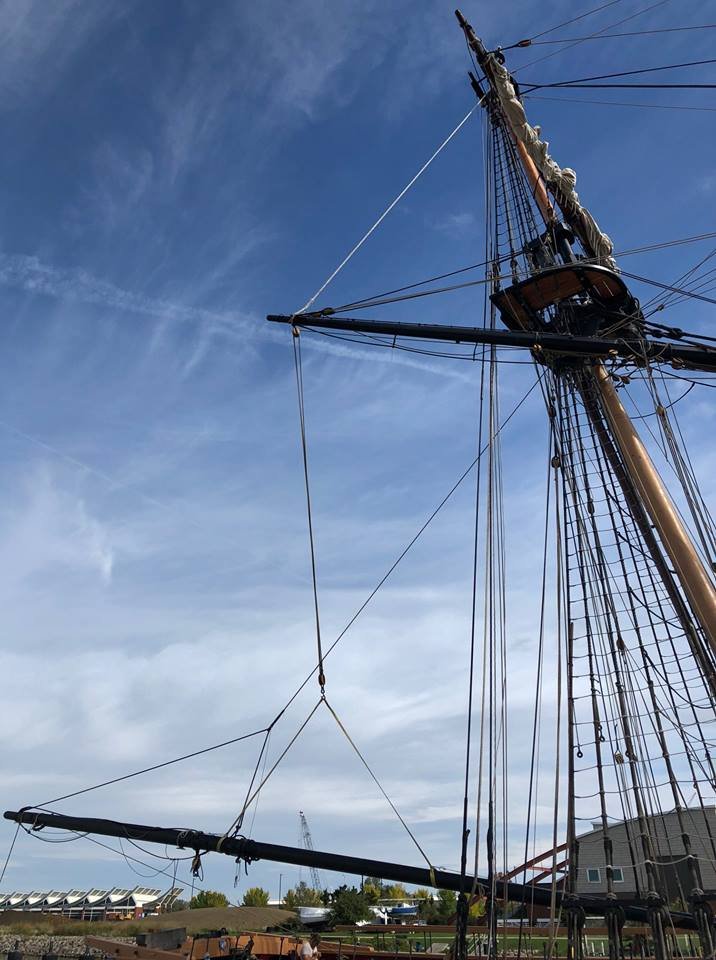
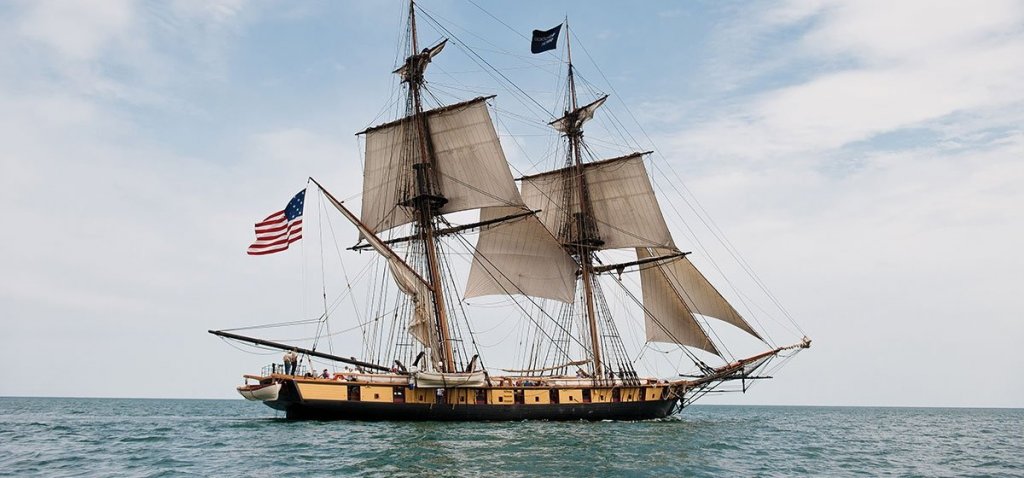
Delicate work Ed, nice job. What are you going to do about the holes left in the boom from the previous position? I saw a few pictures of a topping lift on an actual working sailing ship "Niagara" like yours set up. I thought you might enjoy the pics. Below was on their facebook page last week. They are currently removing the spanker boom. Here we can see how the crew uses the main yard like a crane to lift the spanker boom before they swing it over the side of the ship. Hope you enjoyed it. Your setup looks pretty close to the placement on the boom with the exception of you have the extra tackles on the pendants.


- 3,618 replies
-
- 4
-
-
- young america
- clipper
- (and 1 more)
-
Oh my goodness Ed, look what I started 😁 I must admit, its facinating stuff and the input from everyone is excellent at the risk of straying from Ed's masterful build. By the way, for what its worth...less than .02 pence if that...........I'd go for the dark brown color for all the reasons stated, but I think Ed was edging that direction anyway.
-
Ed, beautilful work. Its progressing nicely. For the deadeye lanyard rigging you have in the channels, is that rigging supposed to be tarred as well like the shrouds? I thought I read that somewhere, that working ships tarred them. That would make the lanyards dark brown or black instead of light natural. Of course this could be a preference too I suppose. I see a lot of ship models like this. Just curious as I see it different ways. Beautiful workmanship 🙂
- 3,618 replies
-
- 1
-
-
- young america
- clipper
- (and 1 more)
-
I personally like the red one above. But that's just my preference.
- 421 replies
-
- 4
-
-
- medway longboat
- Syren Ship Model Company
- (and 1 more)
-
Mike, Why not try some Alaskan yellow Cedar?
- 607 replies
-
- 2
-
-
- winchelsea
- Syren Ship Model Company
- (and 1 more)
-
Thanks Mike! I love using wood colors to replicate painted colors when possible.
-
Better than me Fernando 😀 How did you insert a window to your Norfolk build? Is there a button or something?
-
Johann, looks pretty good. You have a fairly tight twist or “lay” which is good. Perhaps just a bit more but it is looking real good. I’m anxious to see how your linen will lay up.
-
OC, Im in too. So tell me. How do you know the dimensions of the Black Pearl? Its ficticious but are there some kind of plans etc? What are you using for reference?