

.jpg.1f80adf1a9b14a937cfcf2ca6af0f0d4.jpg)
WalrusGuy
-
Posts
1,007 -
Joined
-
Last visited
Content Type
Profiles
Forums
Gallery
Events
Posts posted by WalrusGuy
-
-
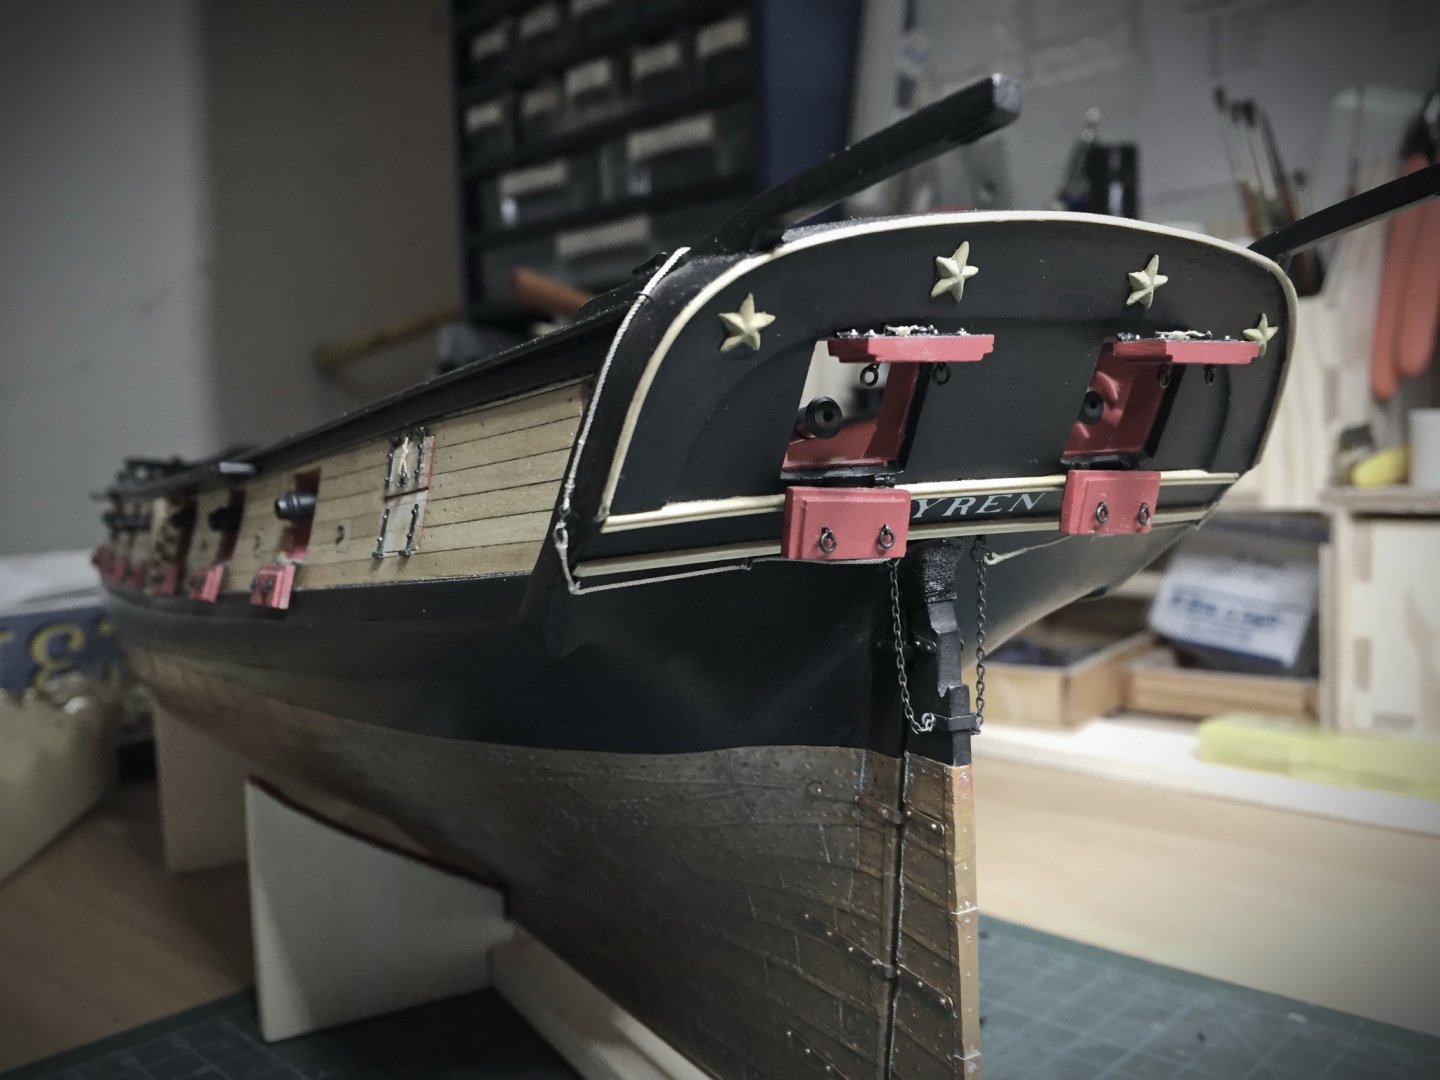
The painted quarter badges look really good! I really like how the windows and frames are highlighted.
I'd go for #2 with a template over the black region with a very thin sheet but with the above and below sections also covered up to look uniform. But maybe others also have some better advice they can give.
Could leaving it black also be an option? I haven't seen many Syren models with the transform painted black (it'll make your model even more unique). Here is one from Dubz:

-
20 hours ago, desalgu said:
Just checking in. All I can do is echo all the previous comments and say "Wow"! Your Syren is really a museum piece. Love all the photos. You do a great job with them also. You are getting very close to being done. I find the little differences between yours and mine very interesting. I still haven't gotten around to taking some final photos of mine. This time of year I get distracted with yard work and stuff outside.
Still working on finish on display case, but getting there. Maybe another week. I assembled the frame and it sure got big! It's going about like my Syren, ok, but not by any means perfect. Is there a way to send more of a private message to you? Just curious what you're working on in grad school. i was aero engineer...long time ago, ha!
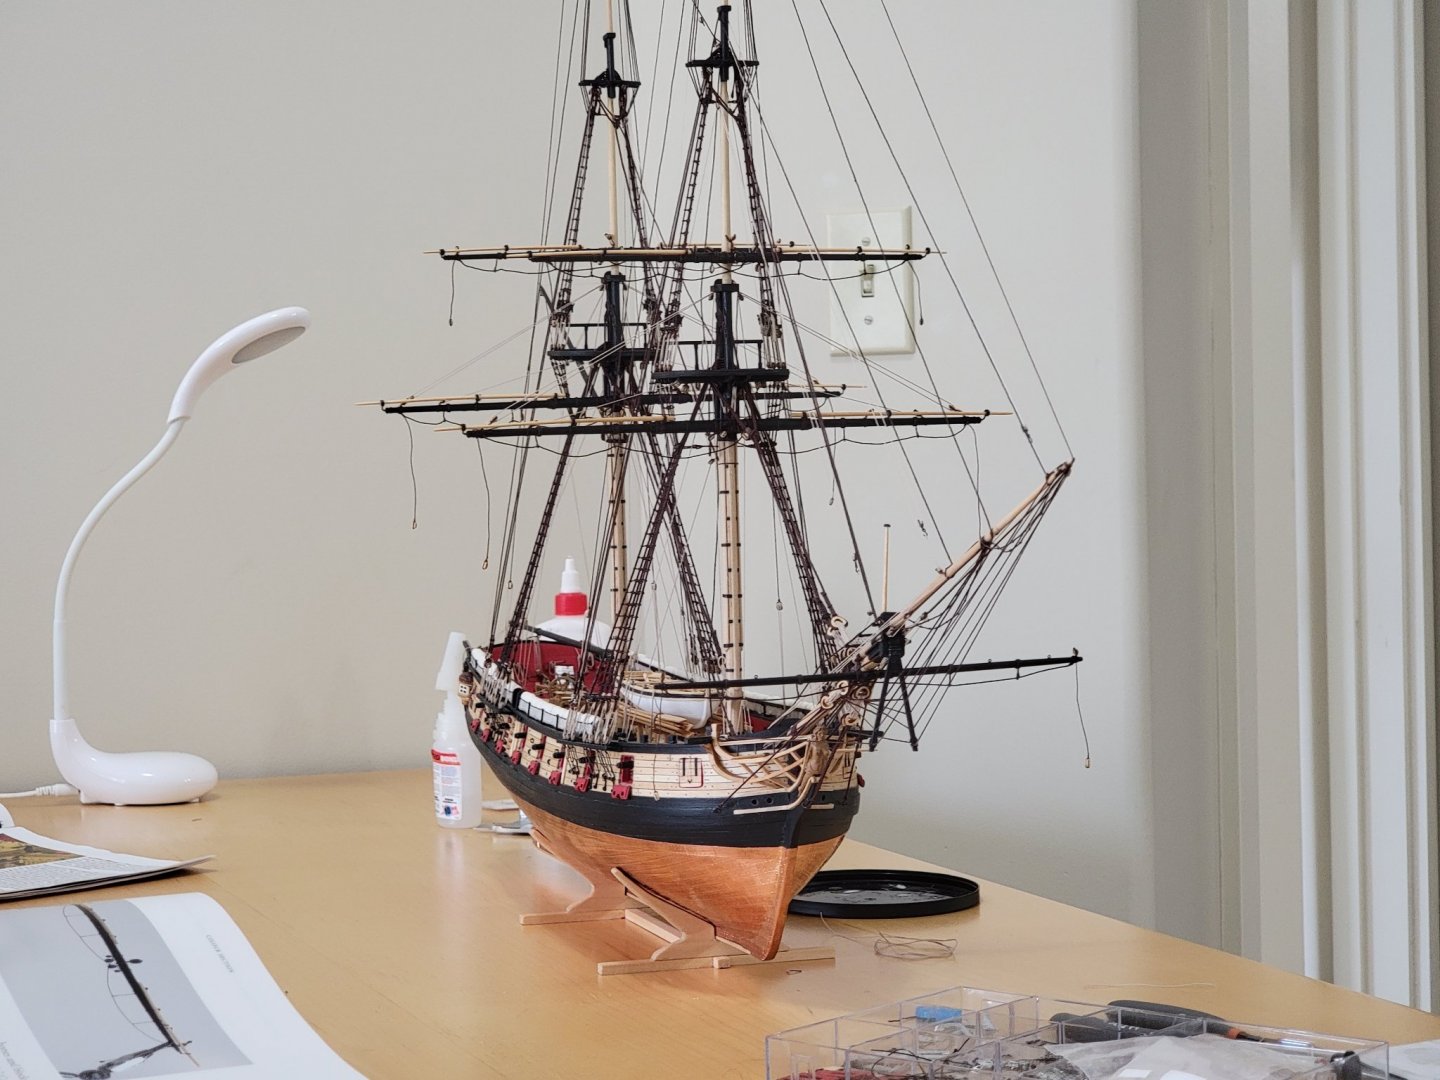
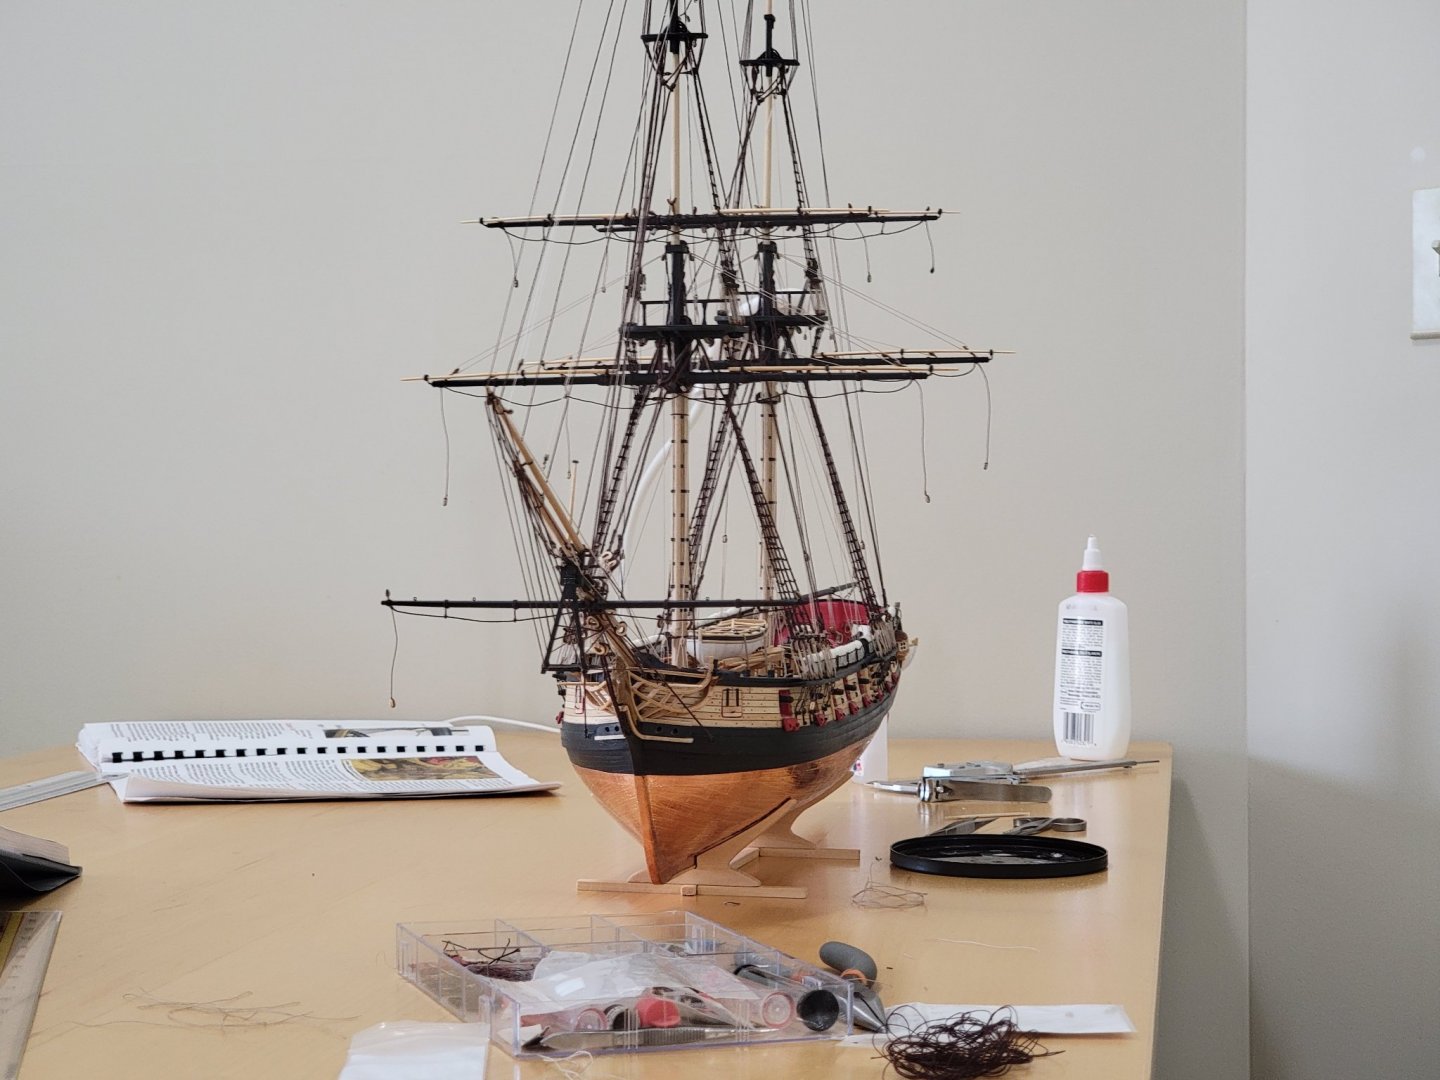
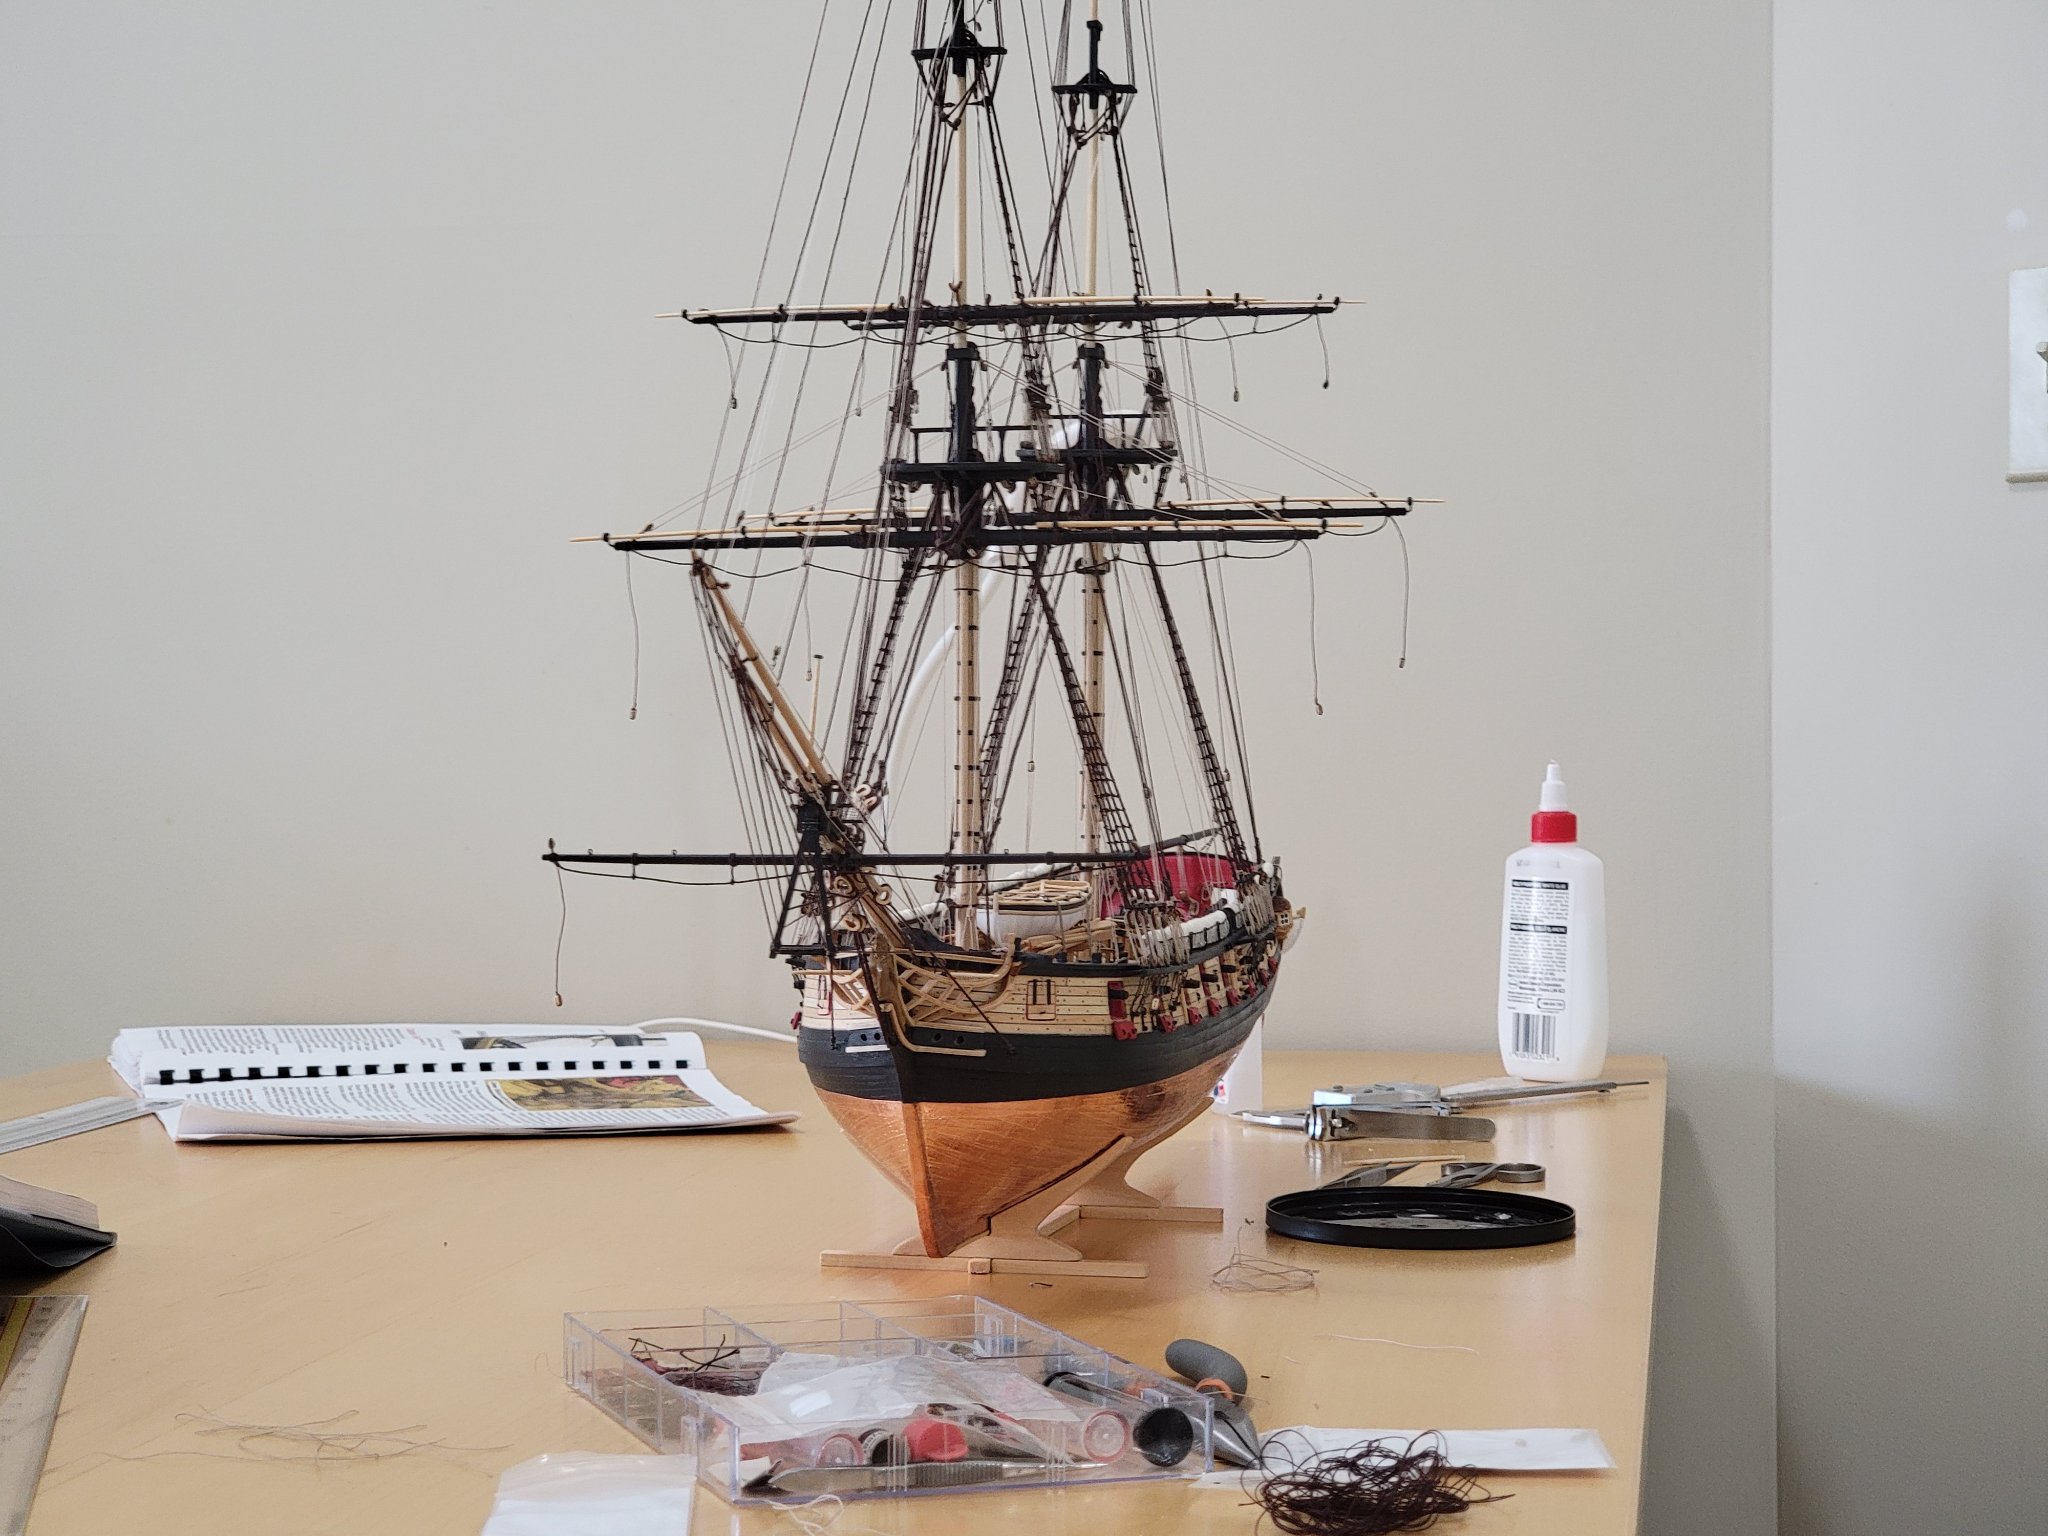
Many thanks David! The ship is really getting busy with so many ropes, so I decided to take a couple days break from it. I don't want to rush these critical steps towards the end of its completion (I am finding I keep pulling ropes with my tweezers if I am not too careful). I am still deciding where I will display her, and am on the lookout for a nice display table. I saw your display case, it's giving me ideas and inspiration on what I'll do for mine.
You can send a private message by clicking the message icon on the top right corner of the screen, then click on 'Compose New'


I am taking Mechanical Engineering! I just finished all the course work, so now just need to complete my thesis and call it a day 😄
-
Thank you @VTHokiEE!!
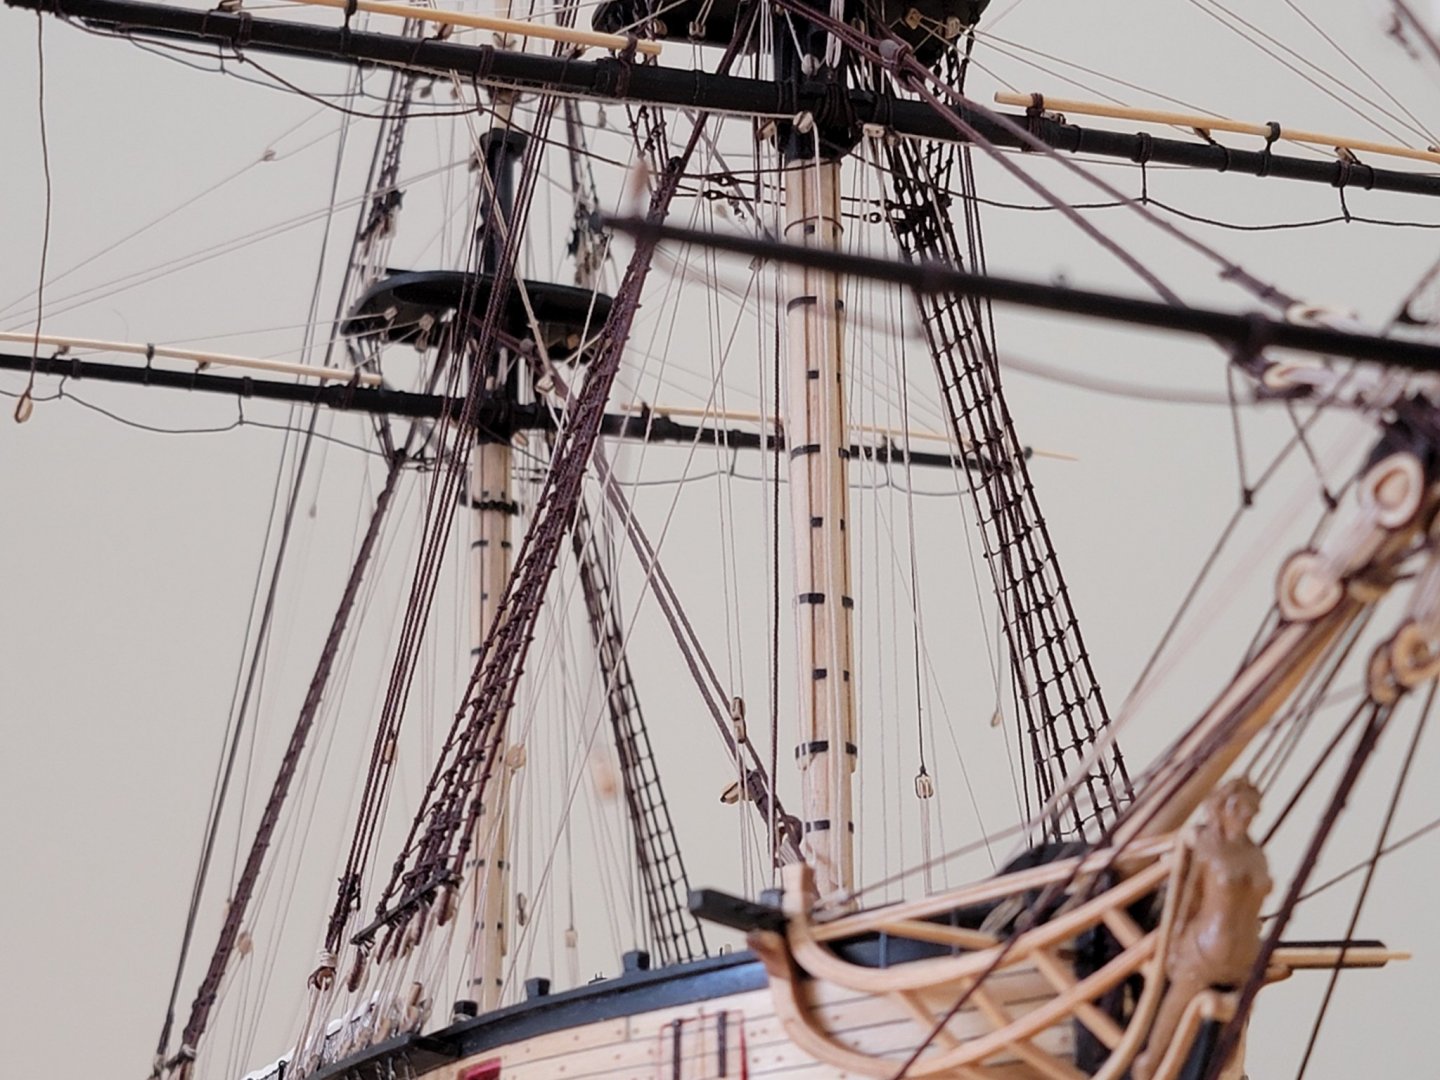
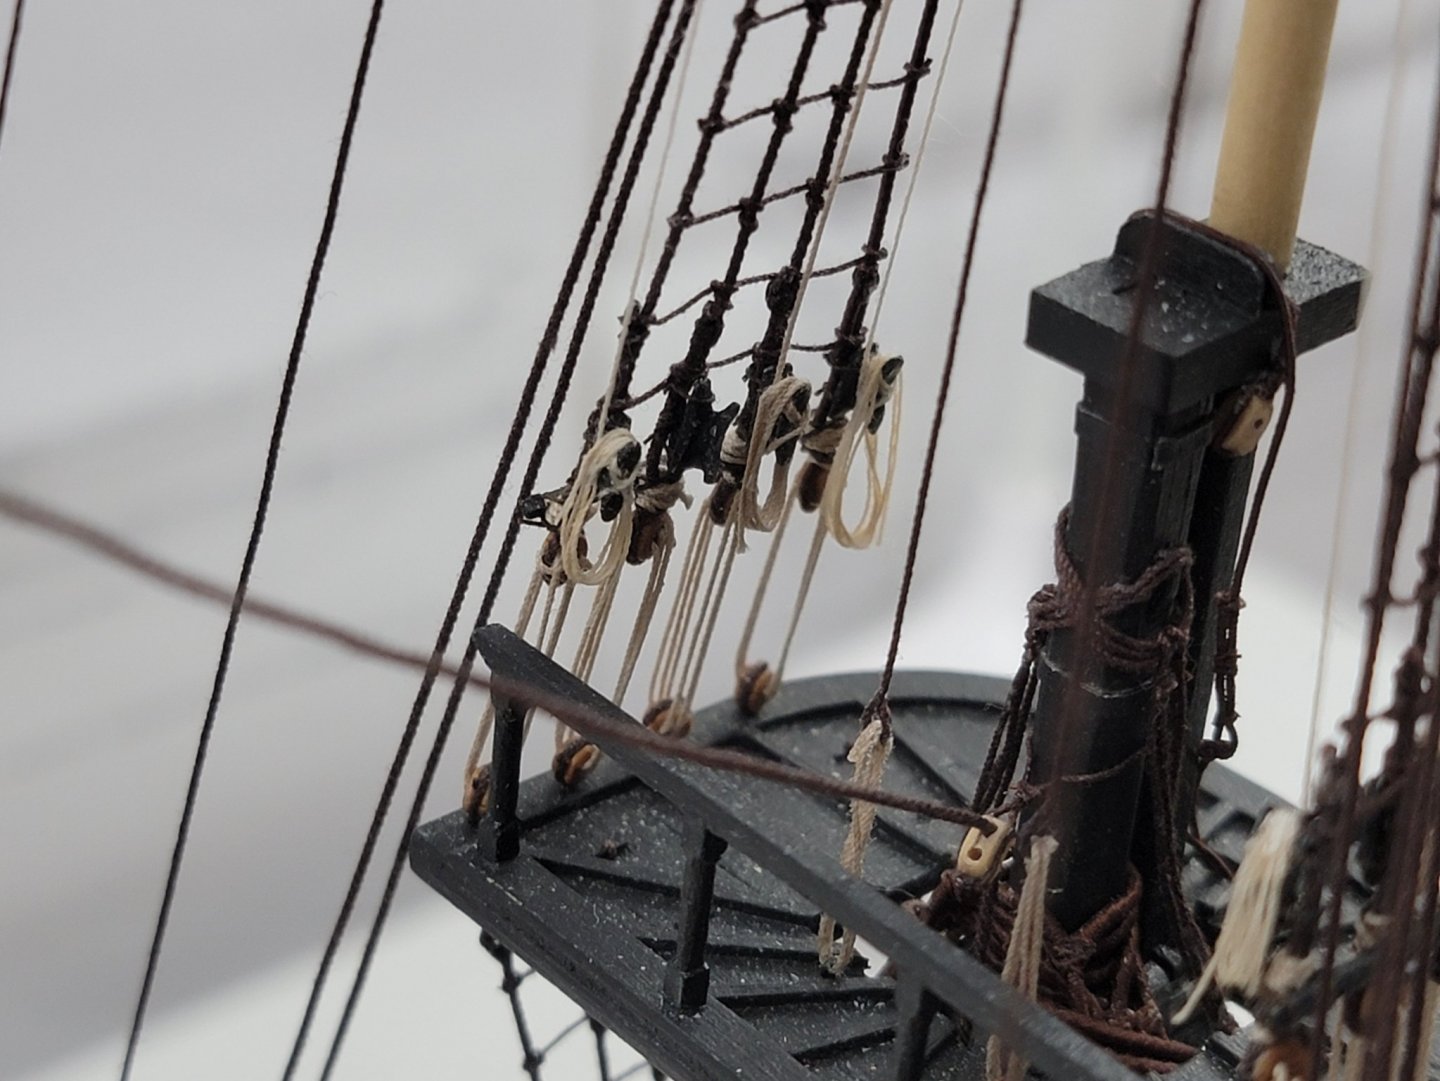
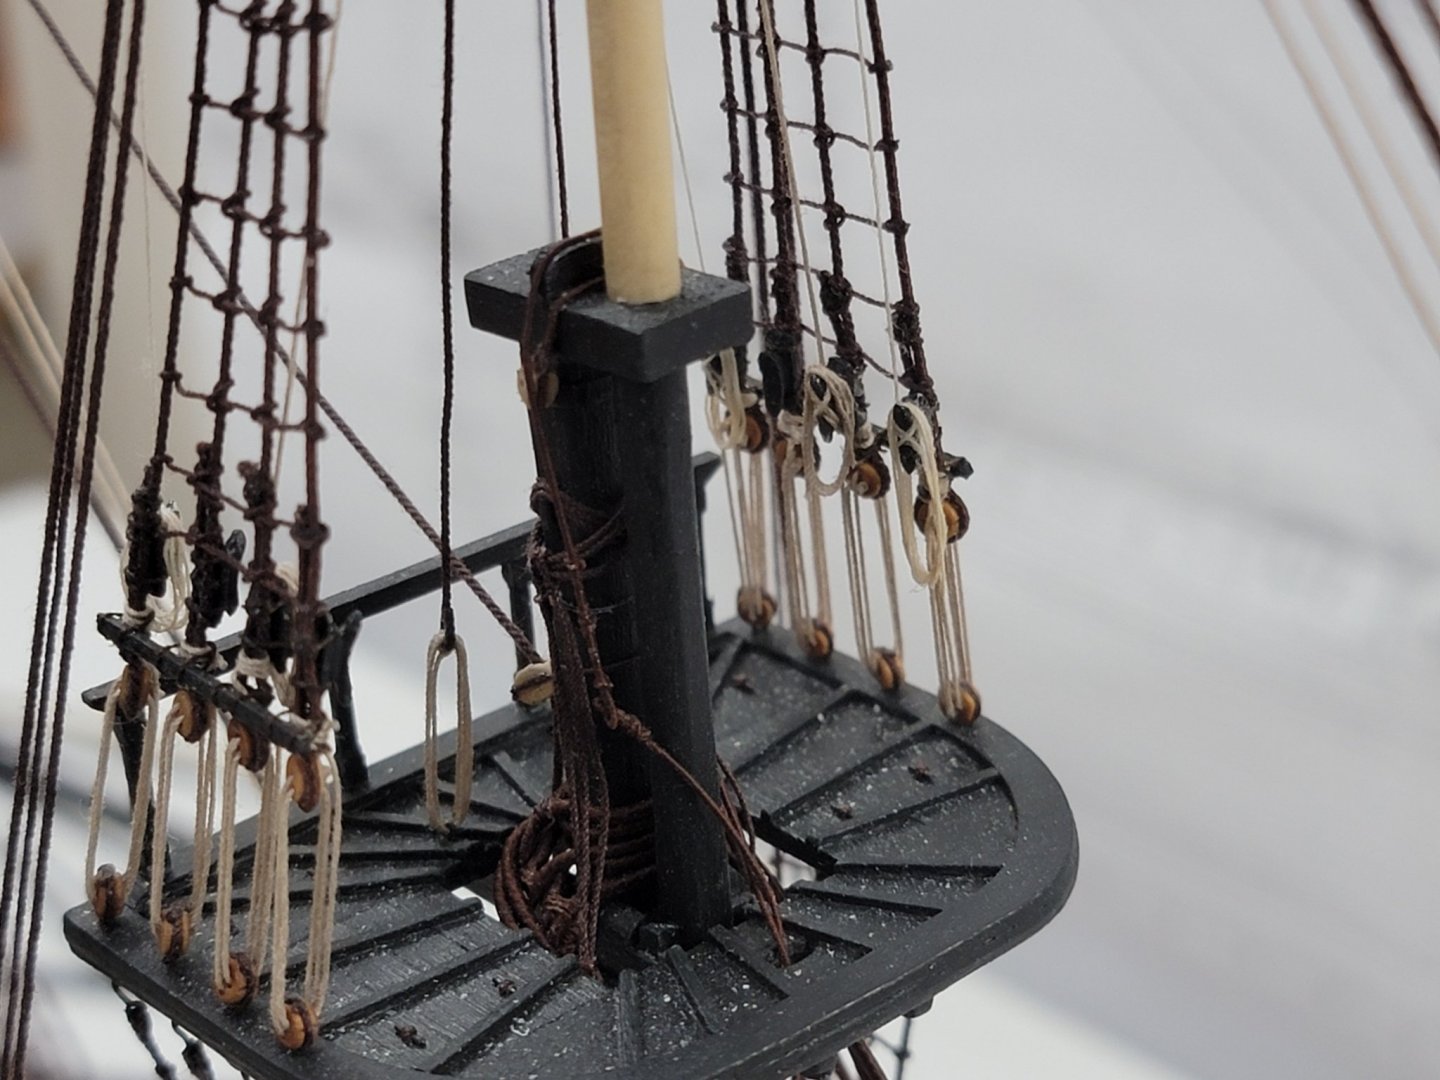
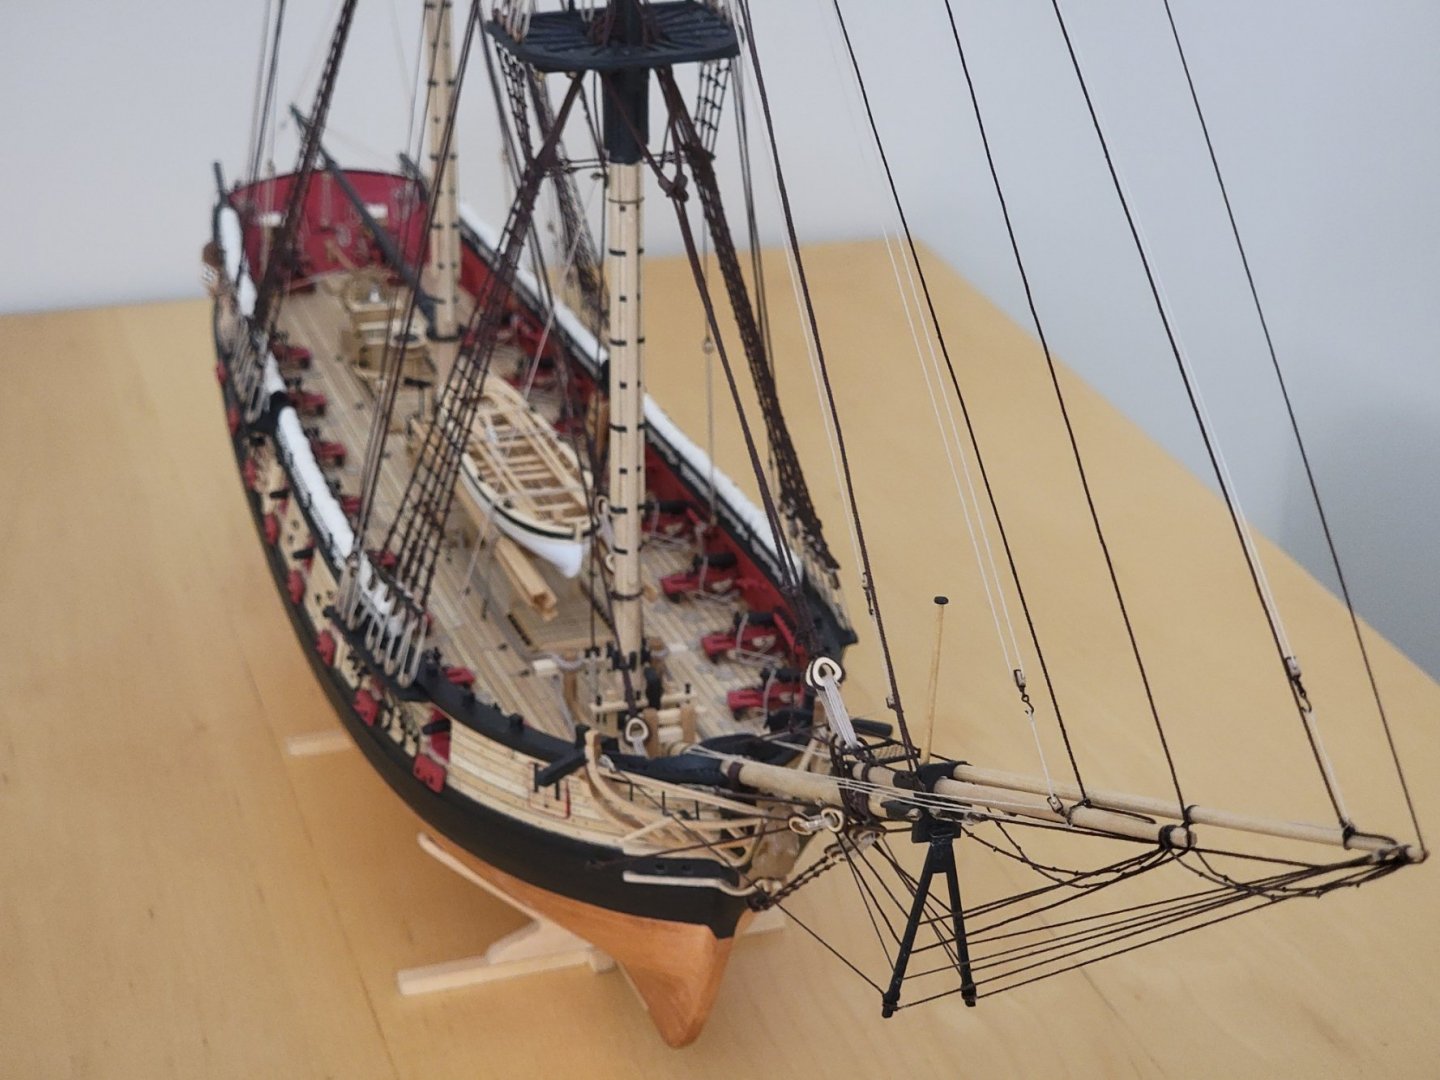
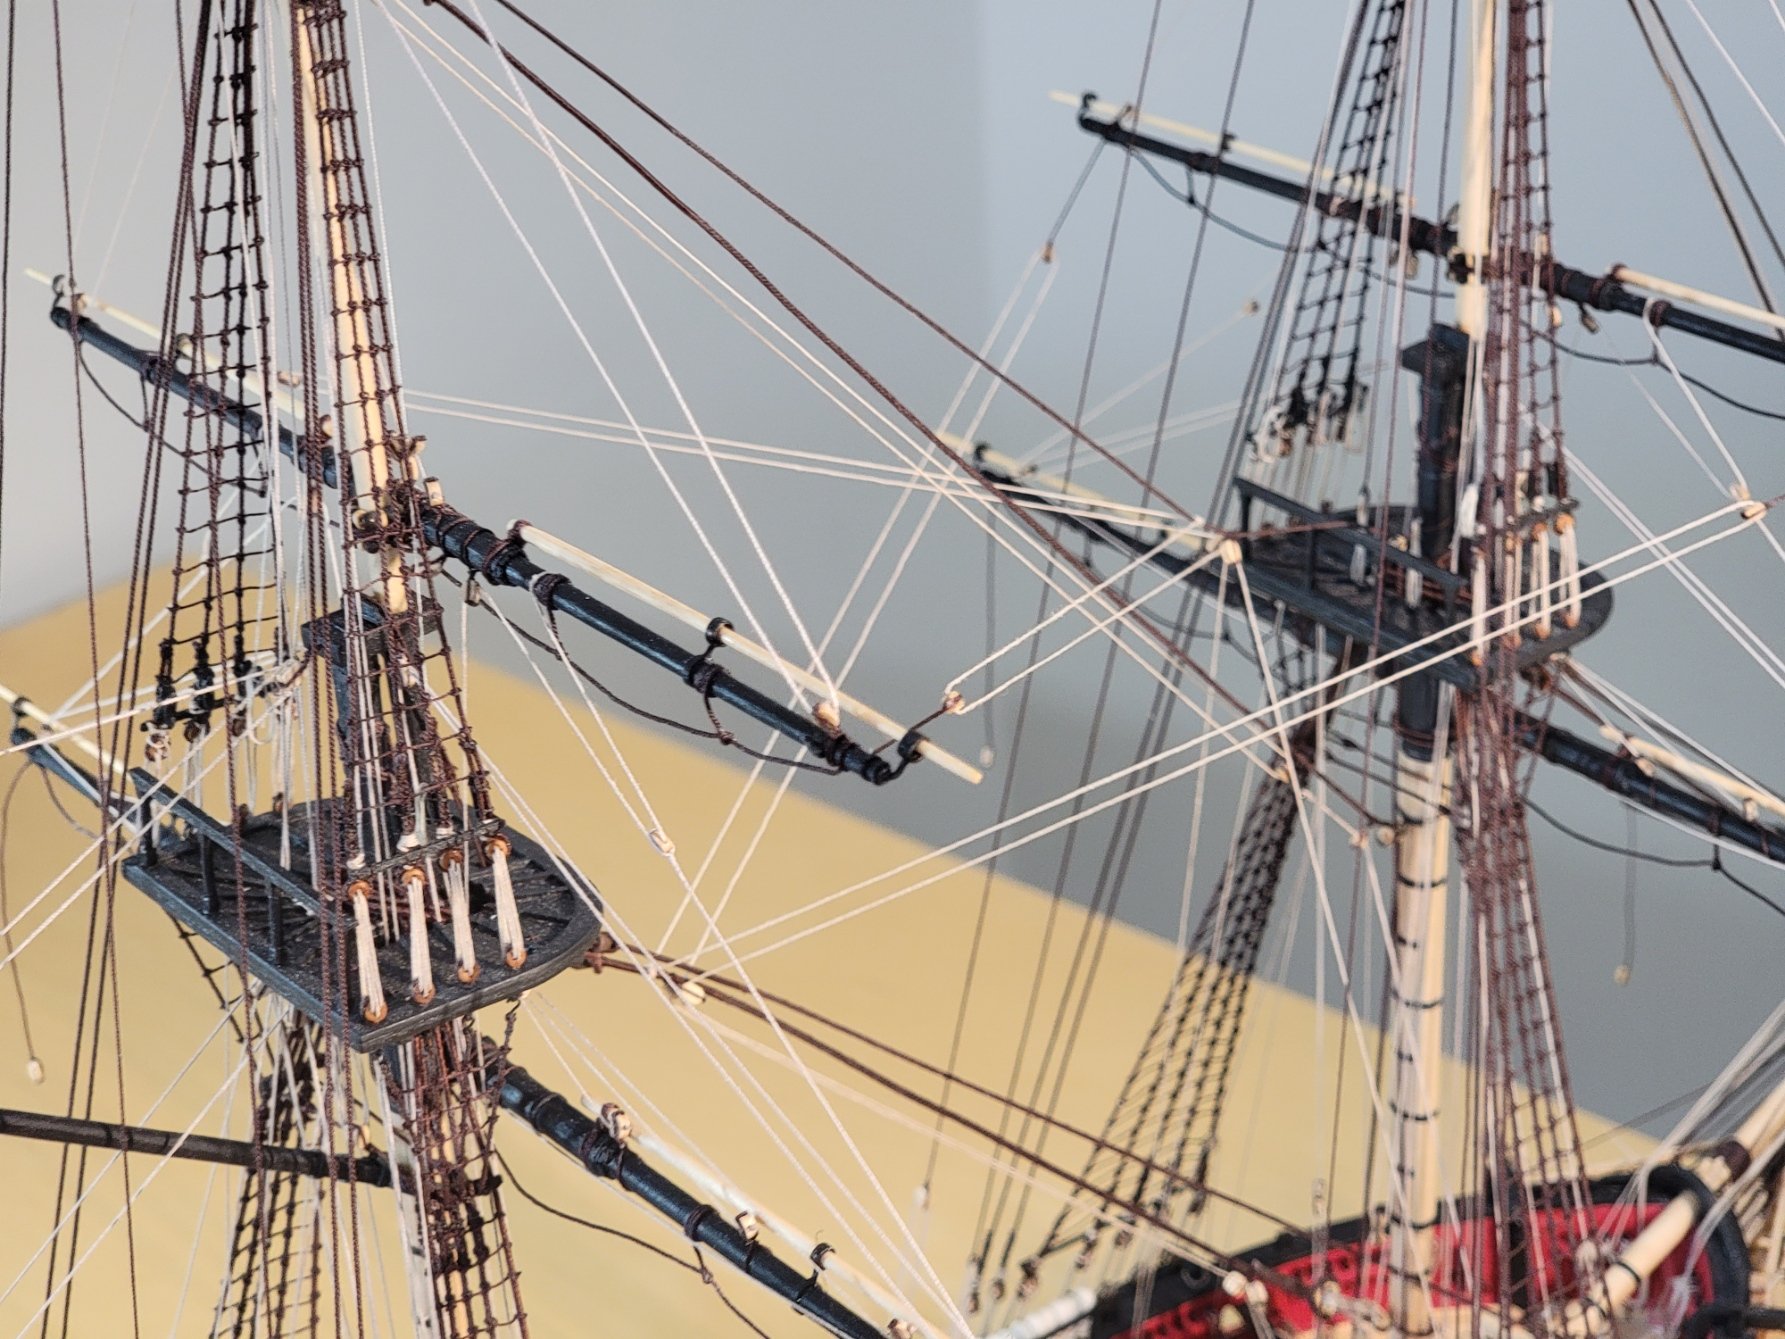
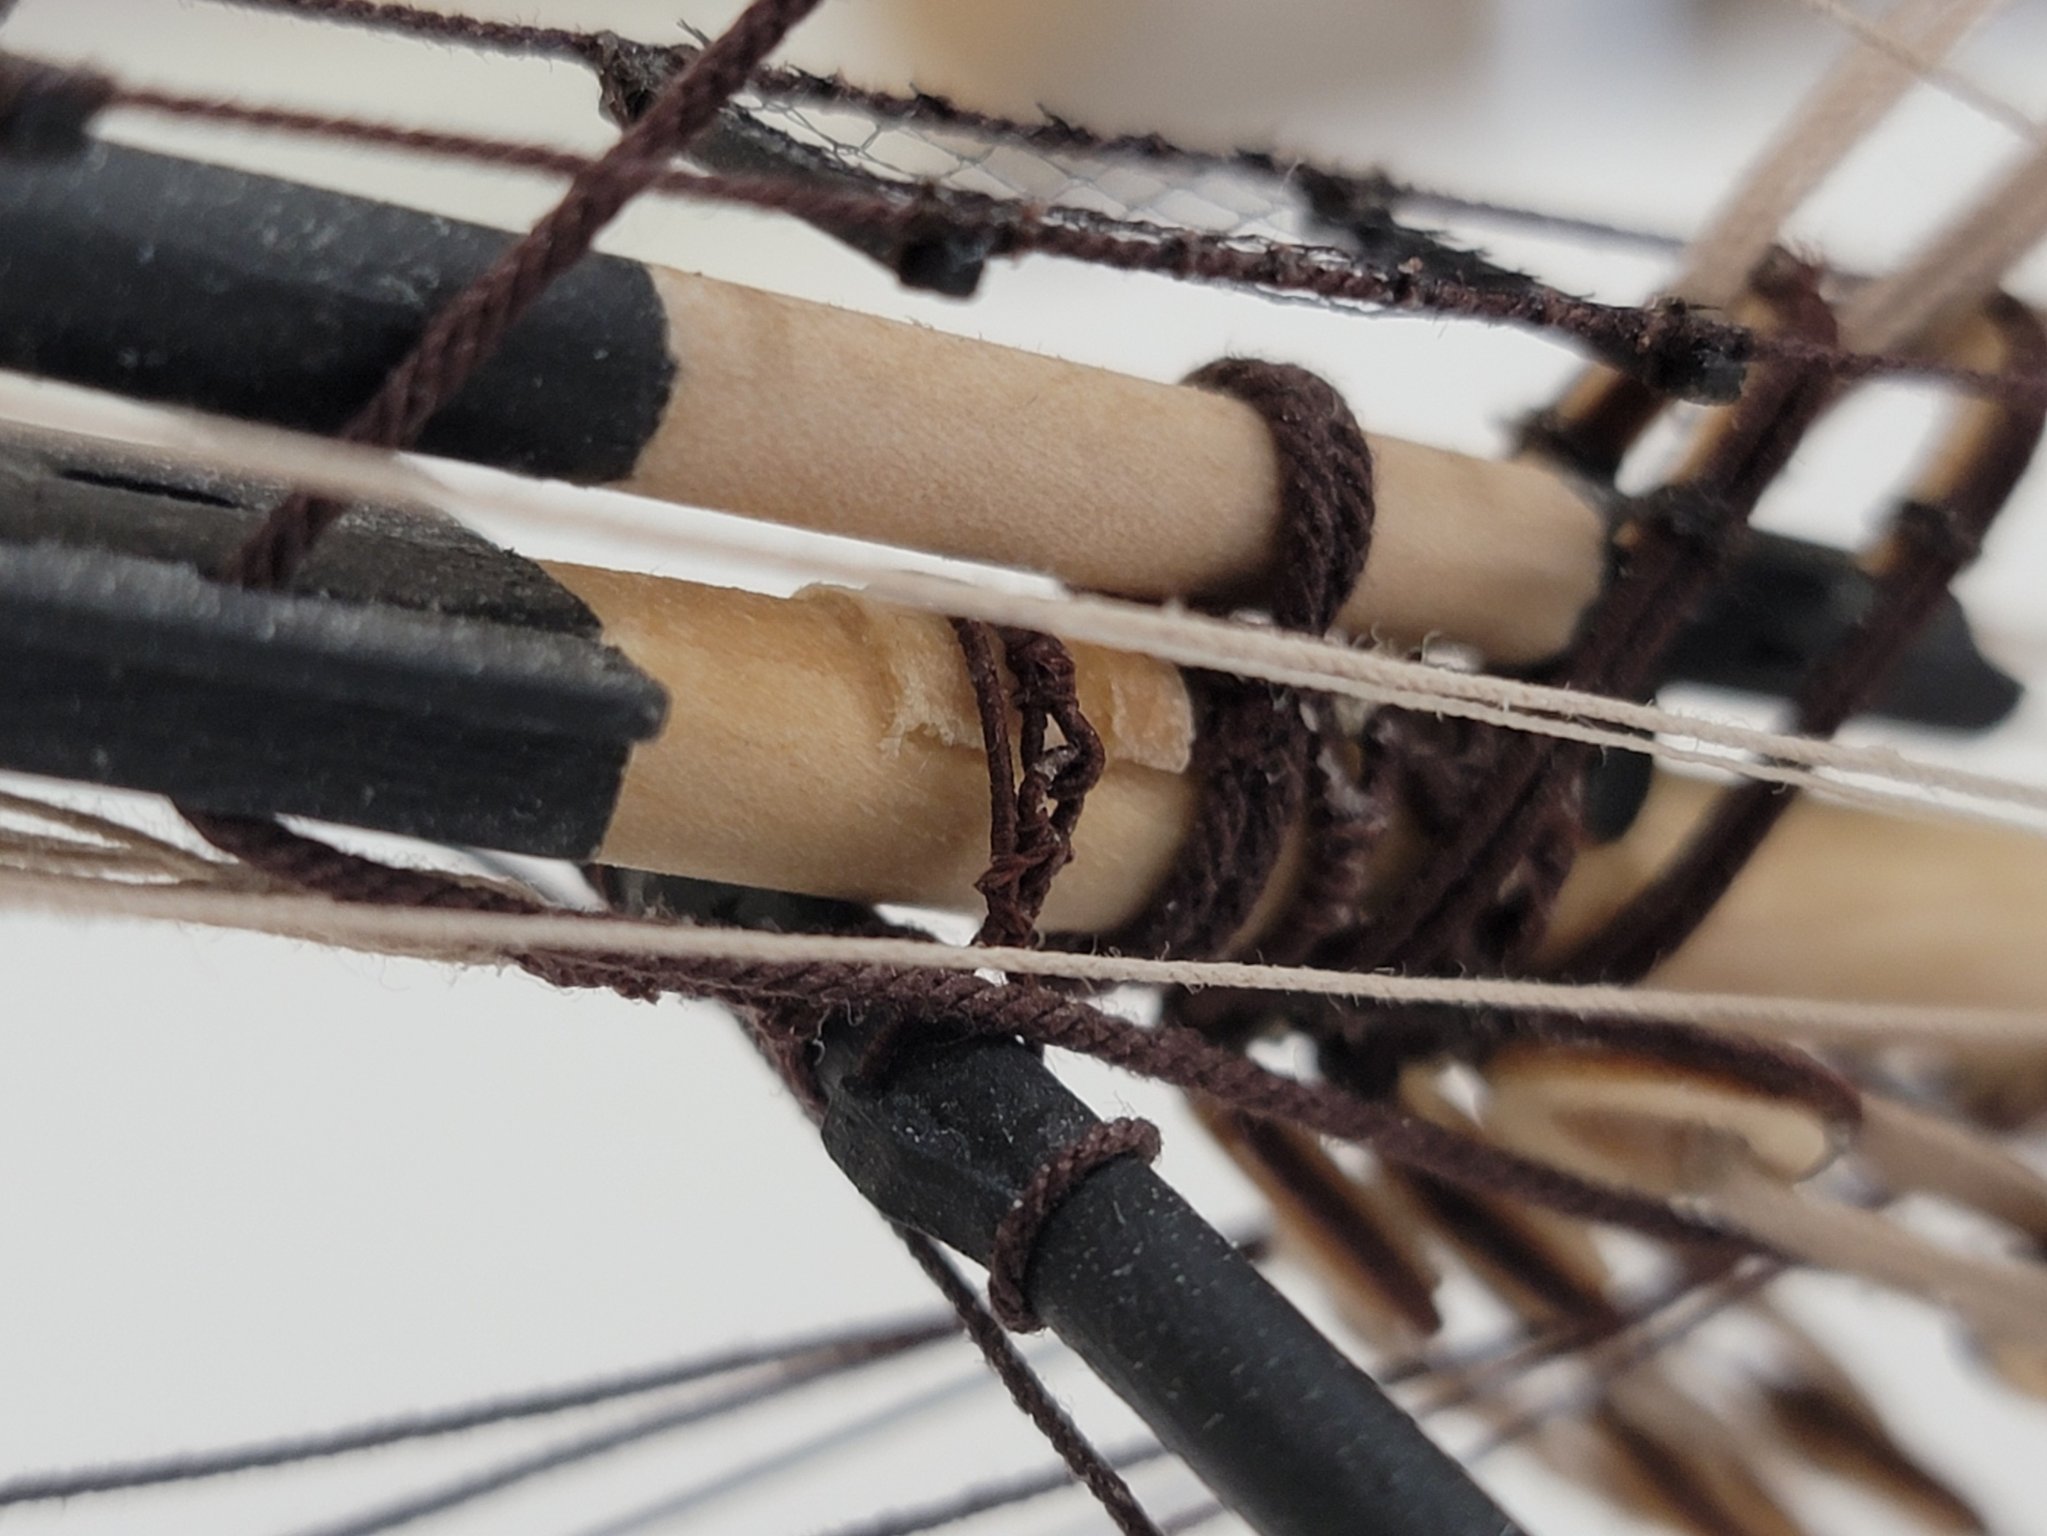
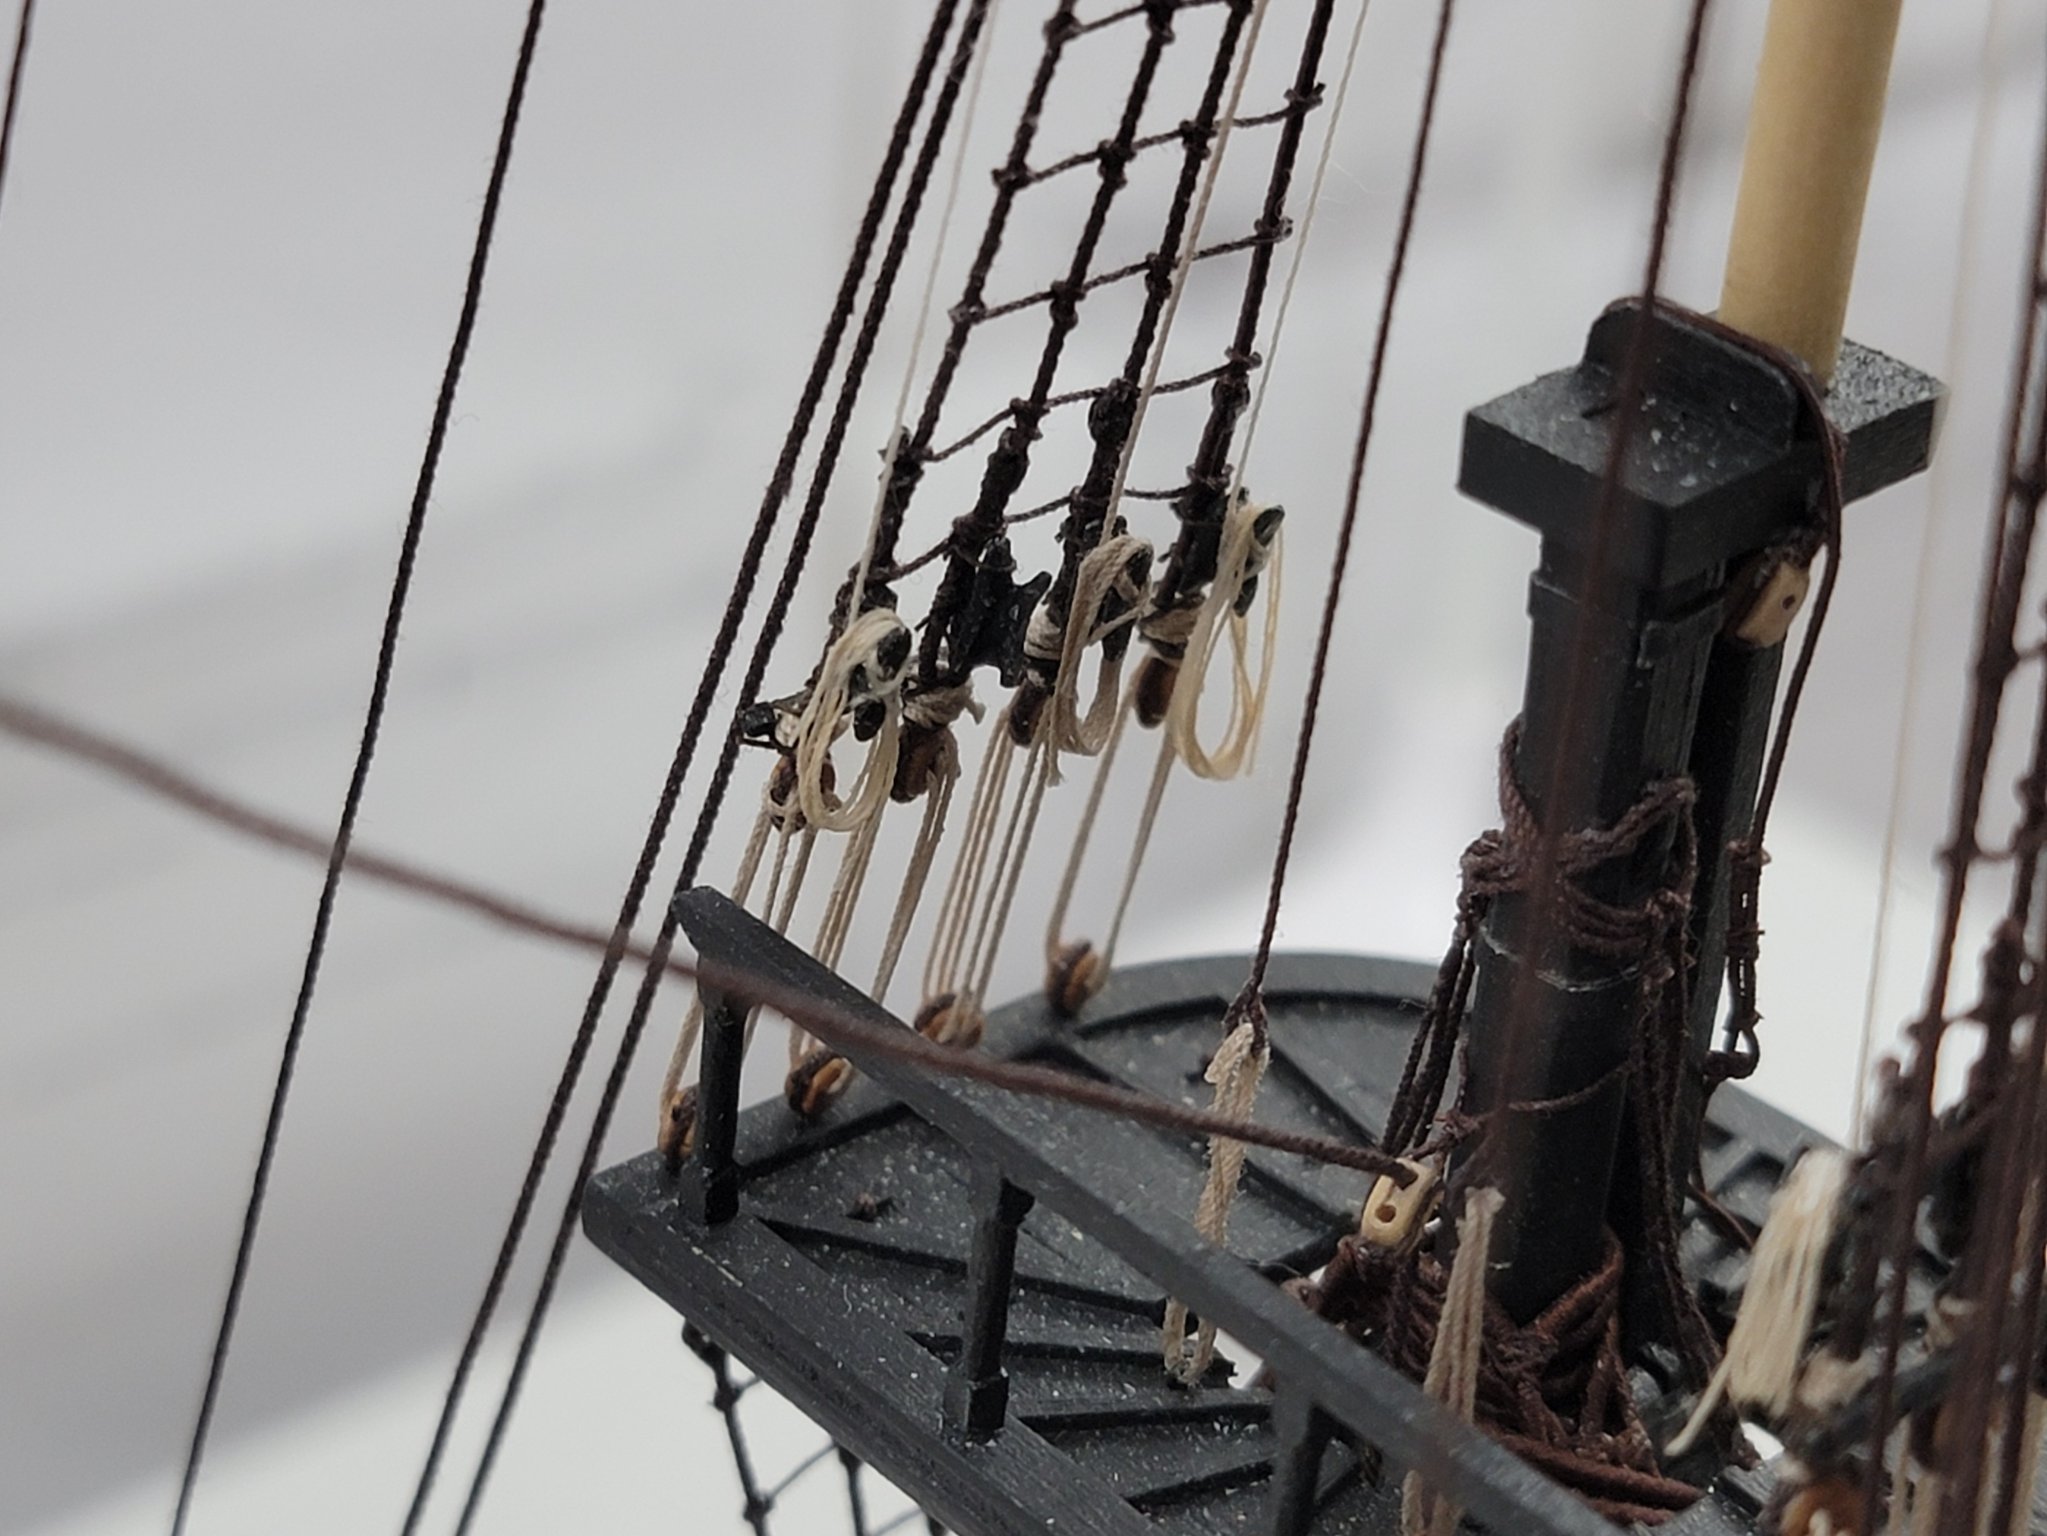
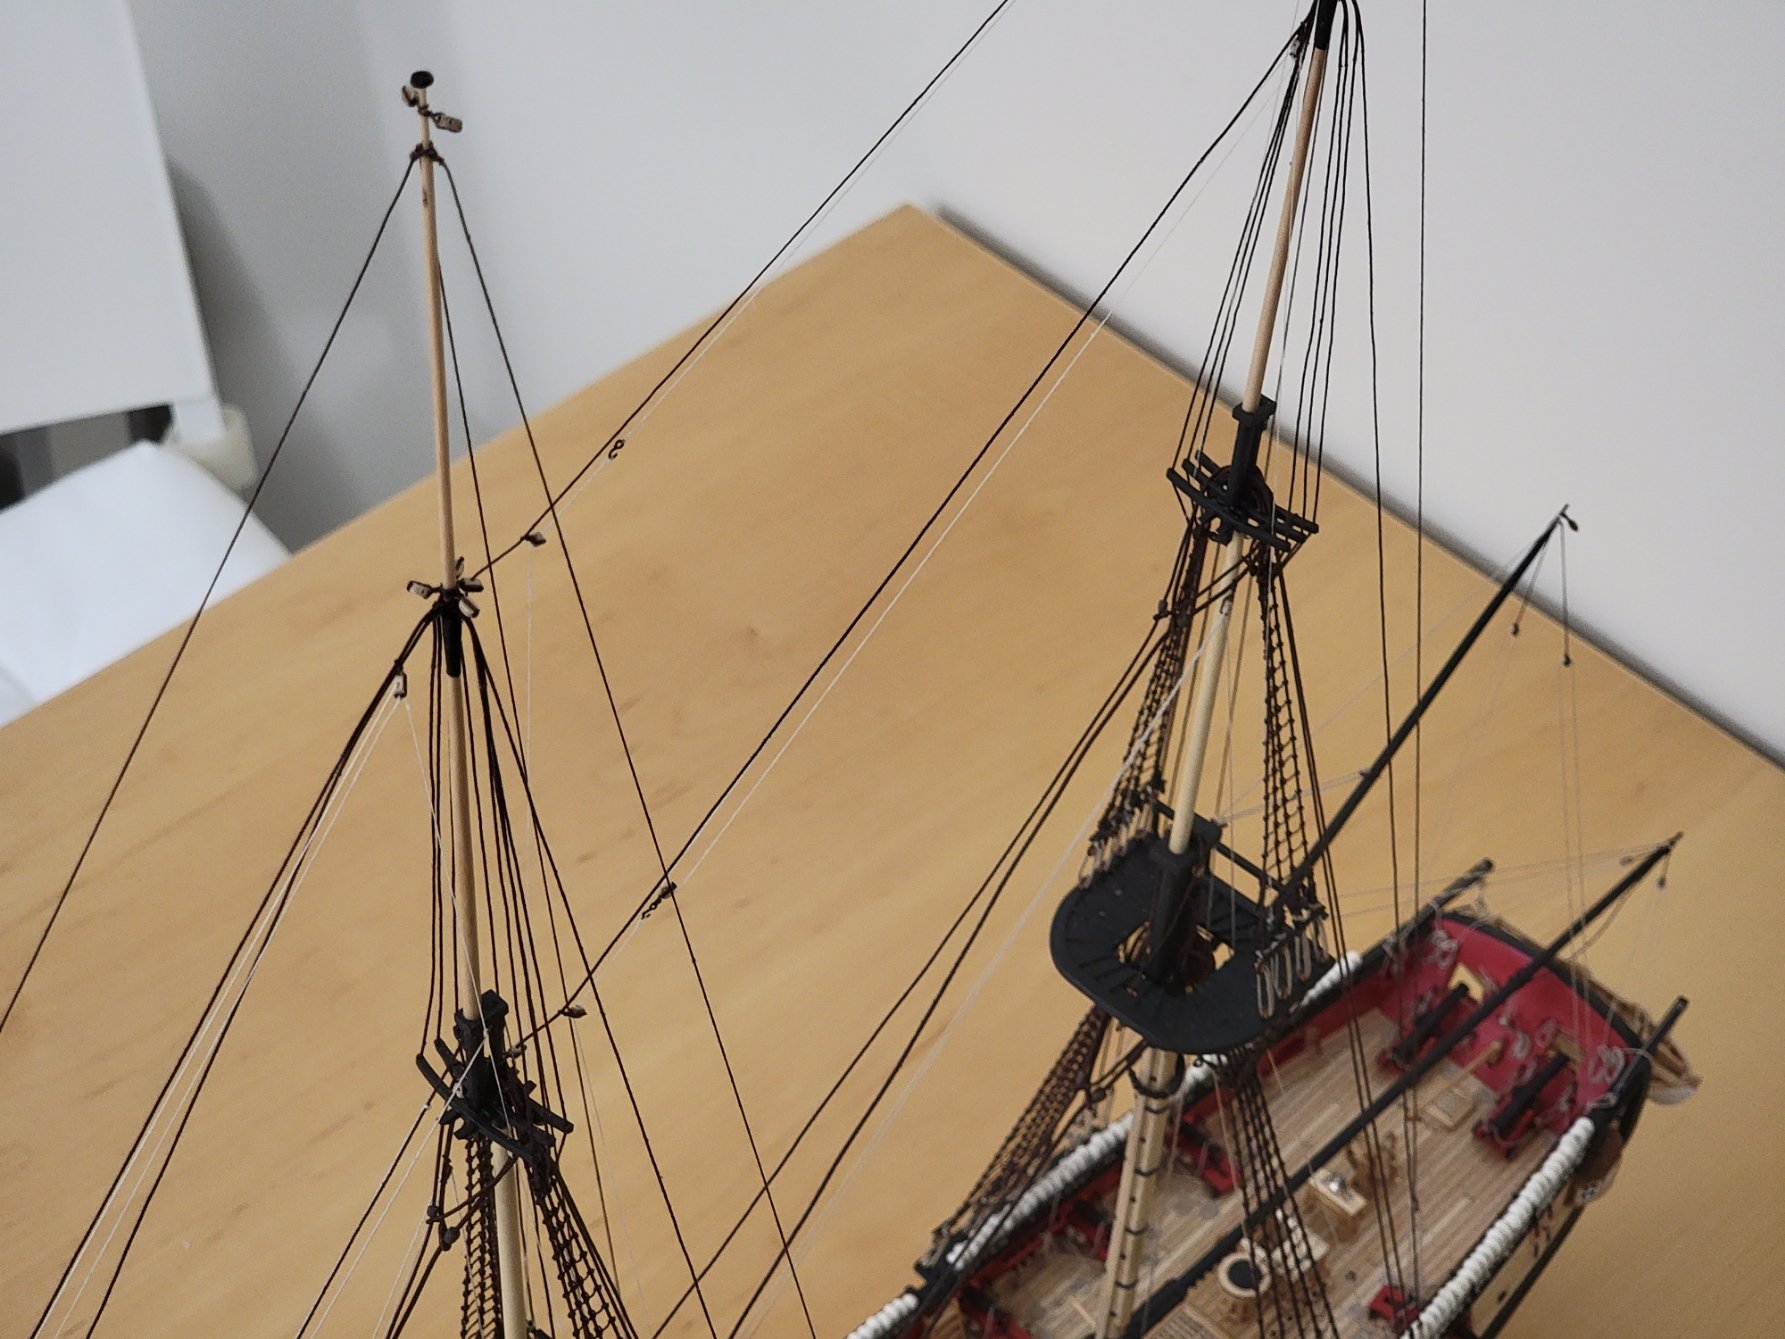
I've run out of some black rope that's needed to secure the remaining yards in place, so while I wait for some more to come in I'm thinking of catching up on the rope coils. I'll avoid gluing the ones close to the neighboring empty pins since they'll come in the way when belaying lines. Anyways, here is another pic of the remaining yards hung via the ties:
-
16 hours ago, Justin P. said:
Looking fantastic! You are inspiring me to carry-on with mine!
8 hours ago, Gahm said:Beautiful work! Your Syren looks great!
Thomas
7 hours ago, abelson said:Fantastic work and photography!!!
Thank you Justin, Thomas, and Steven! As always, the comments are much appreciated! 🙂
-
Thanks so much Bill and Steve!! 😀
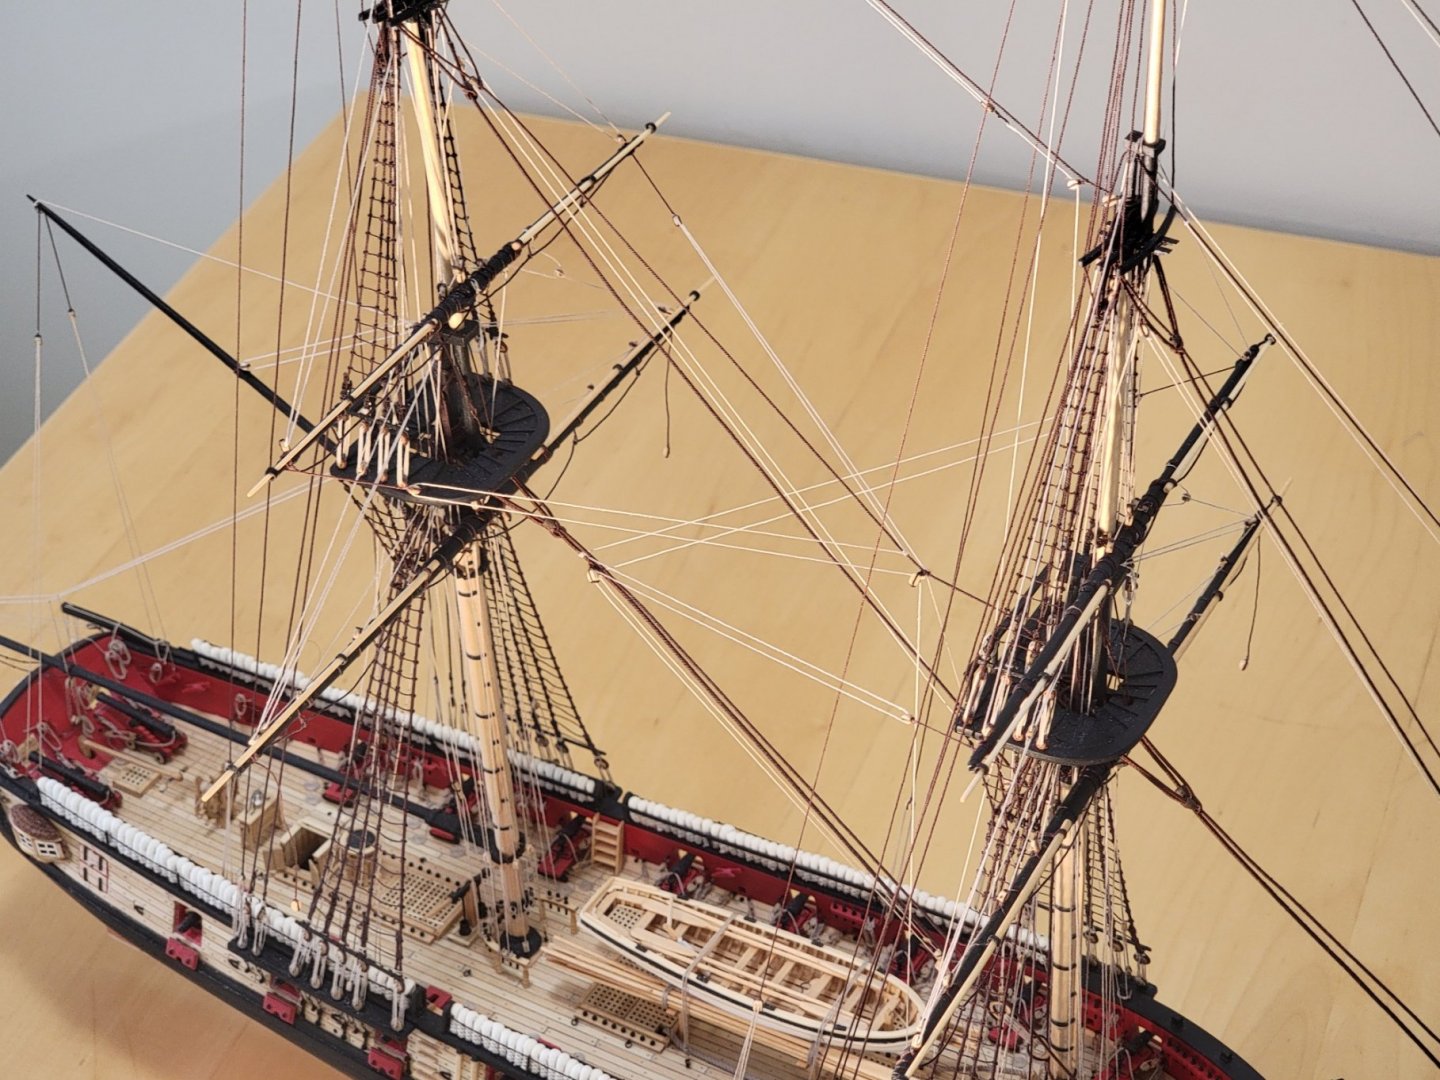
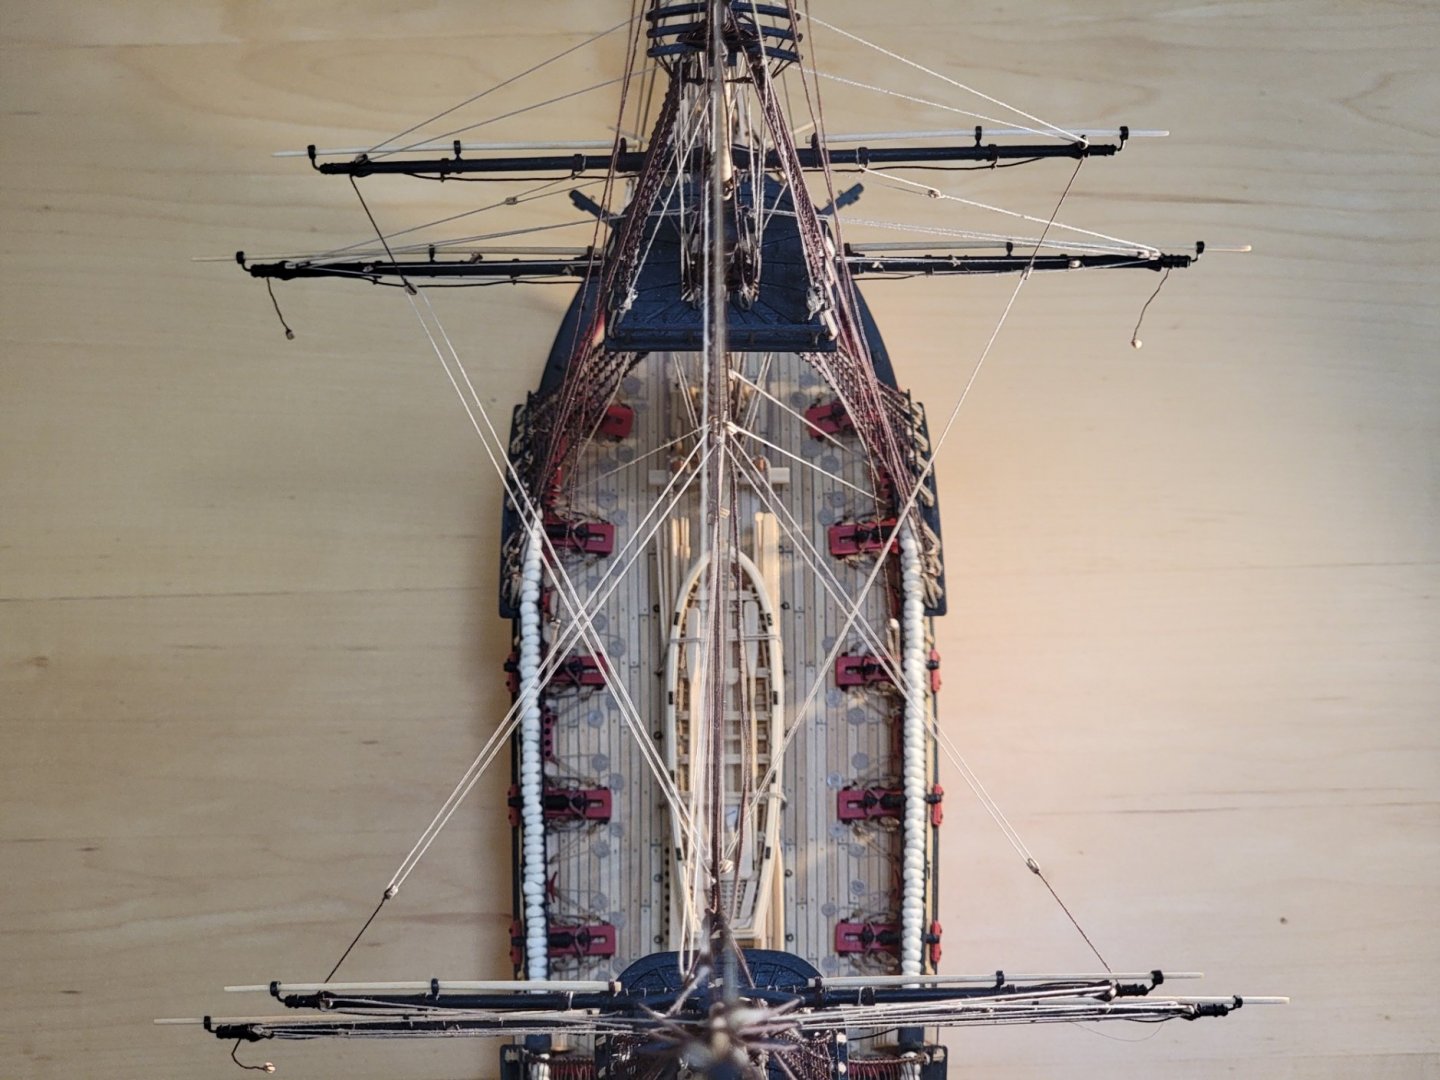
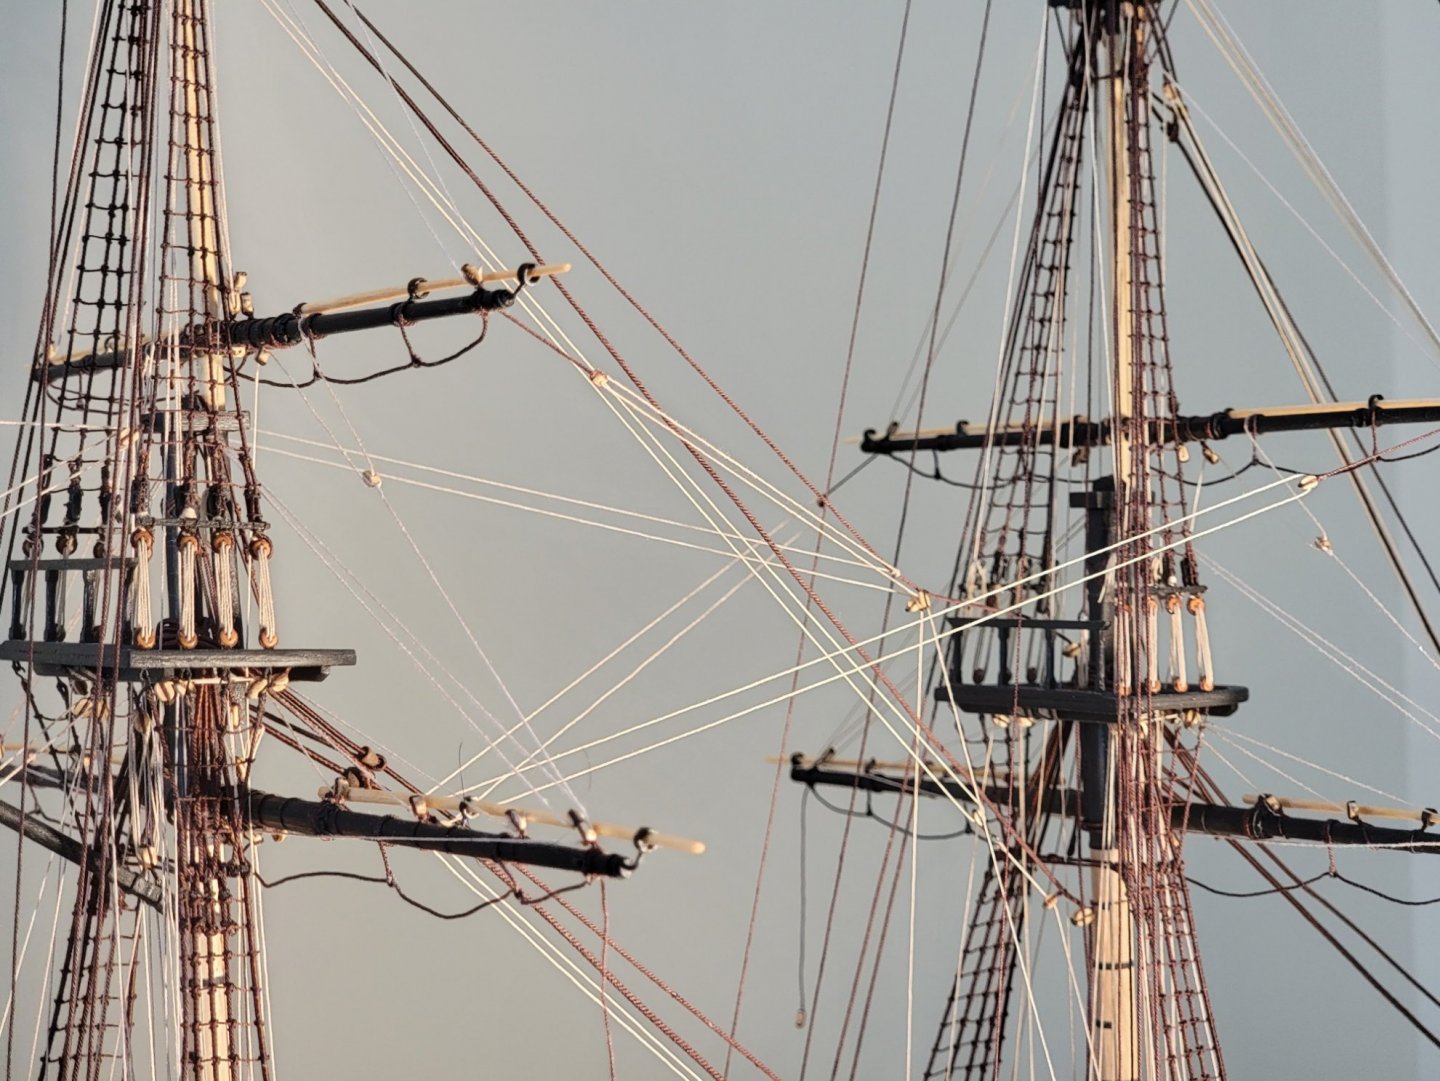
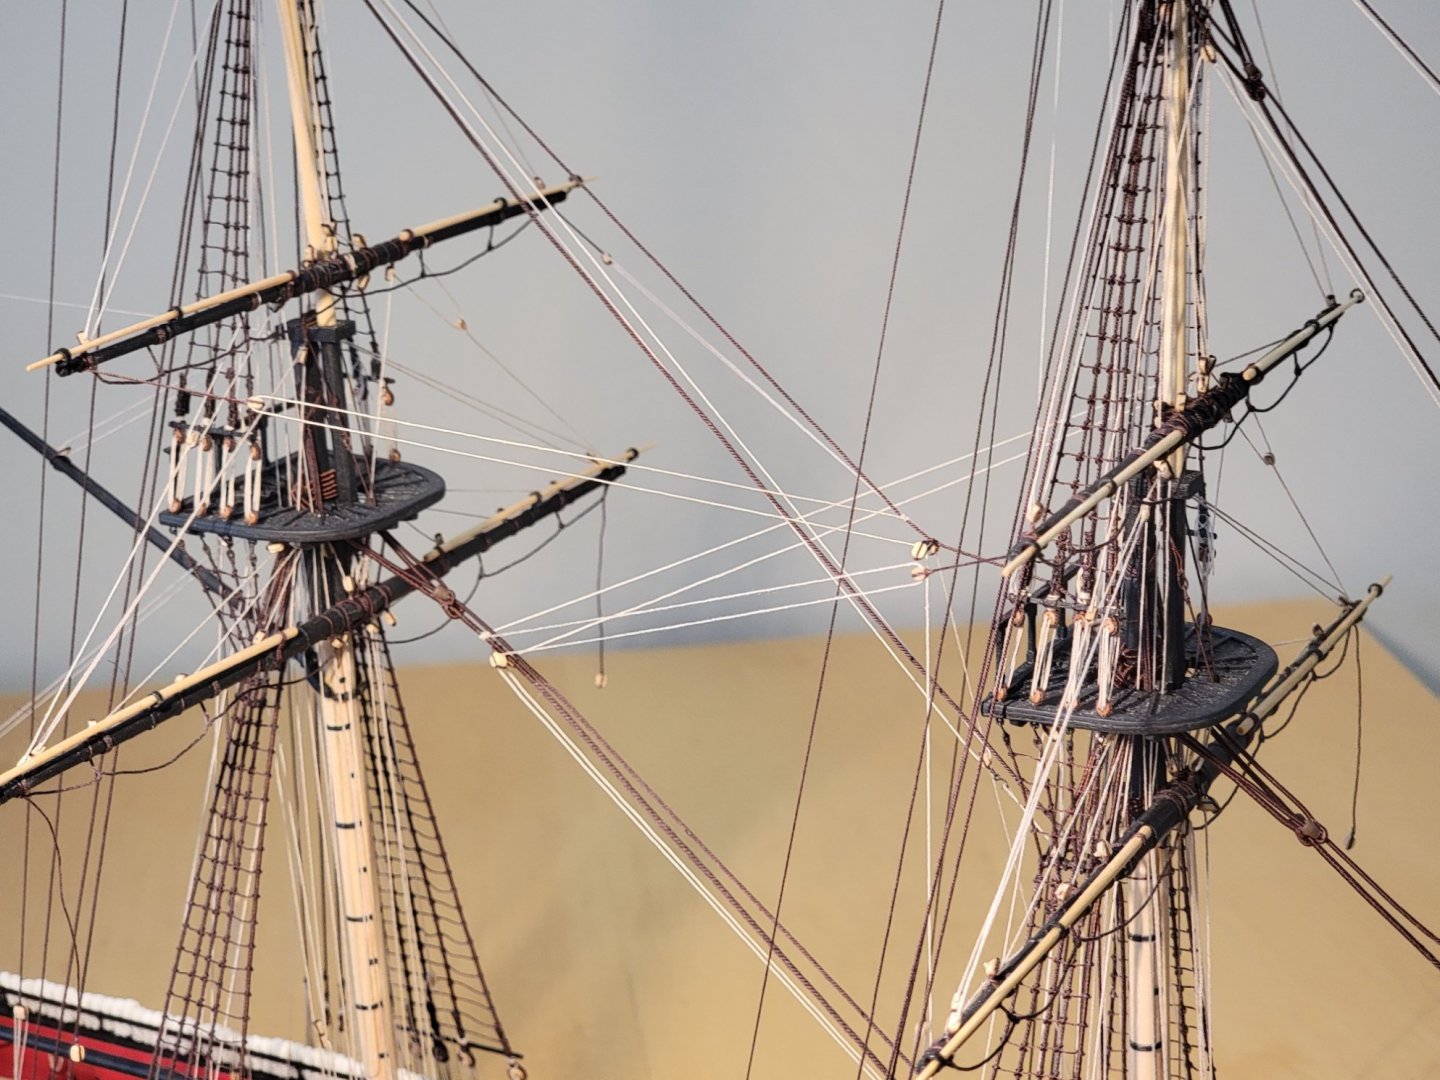
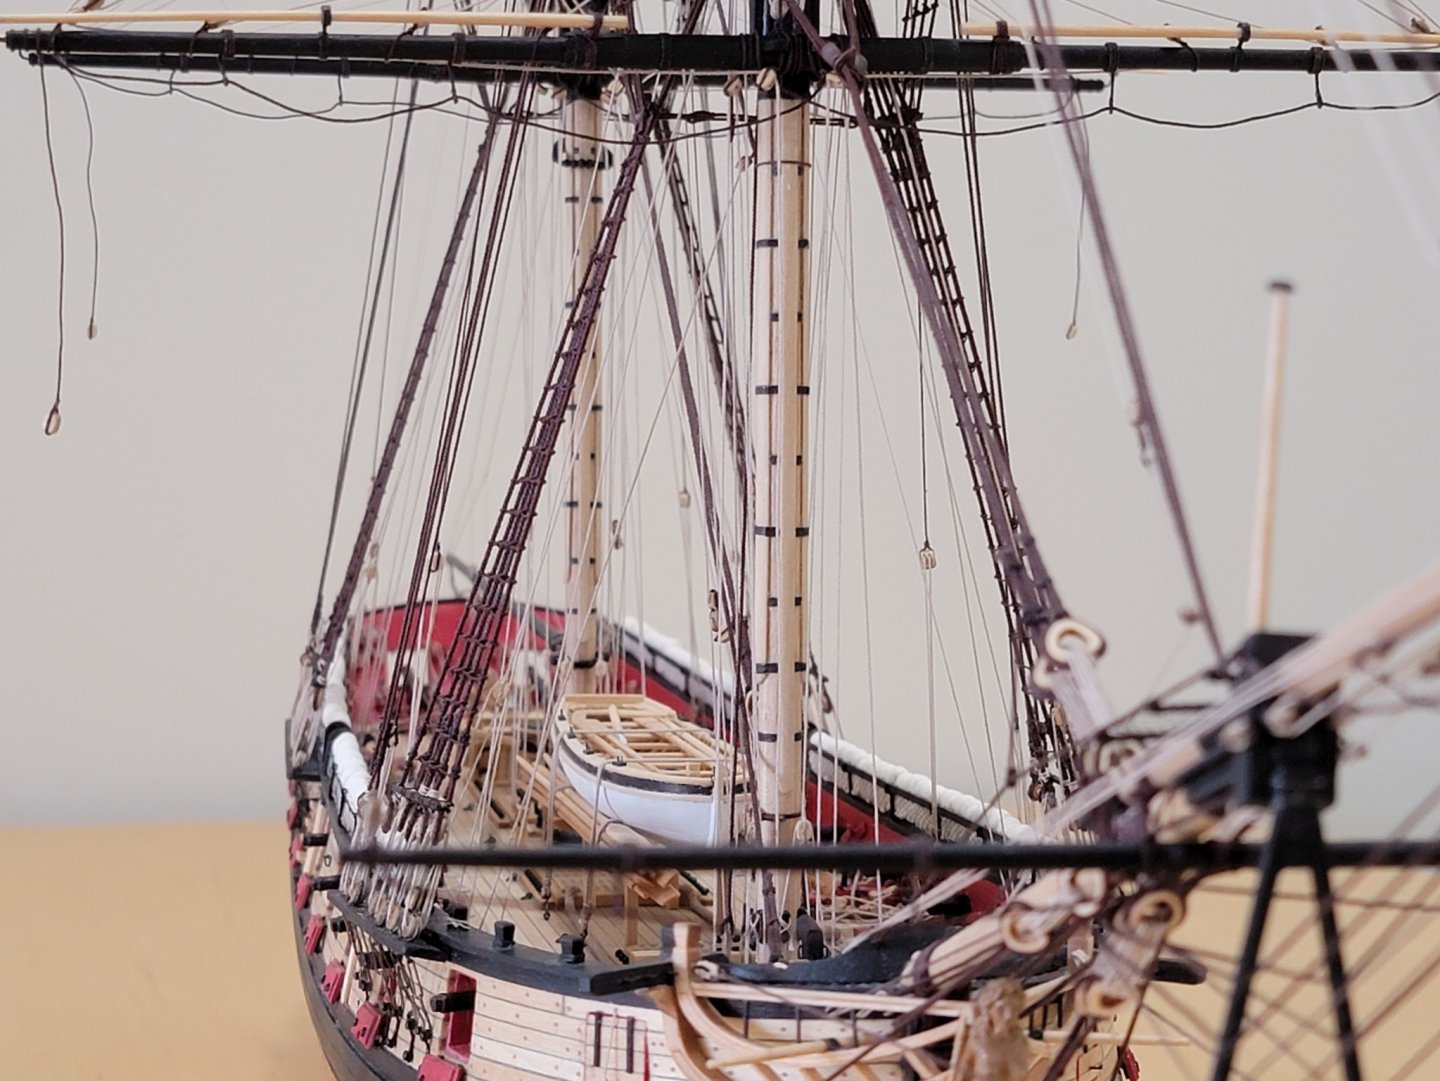
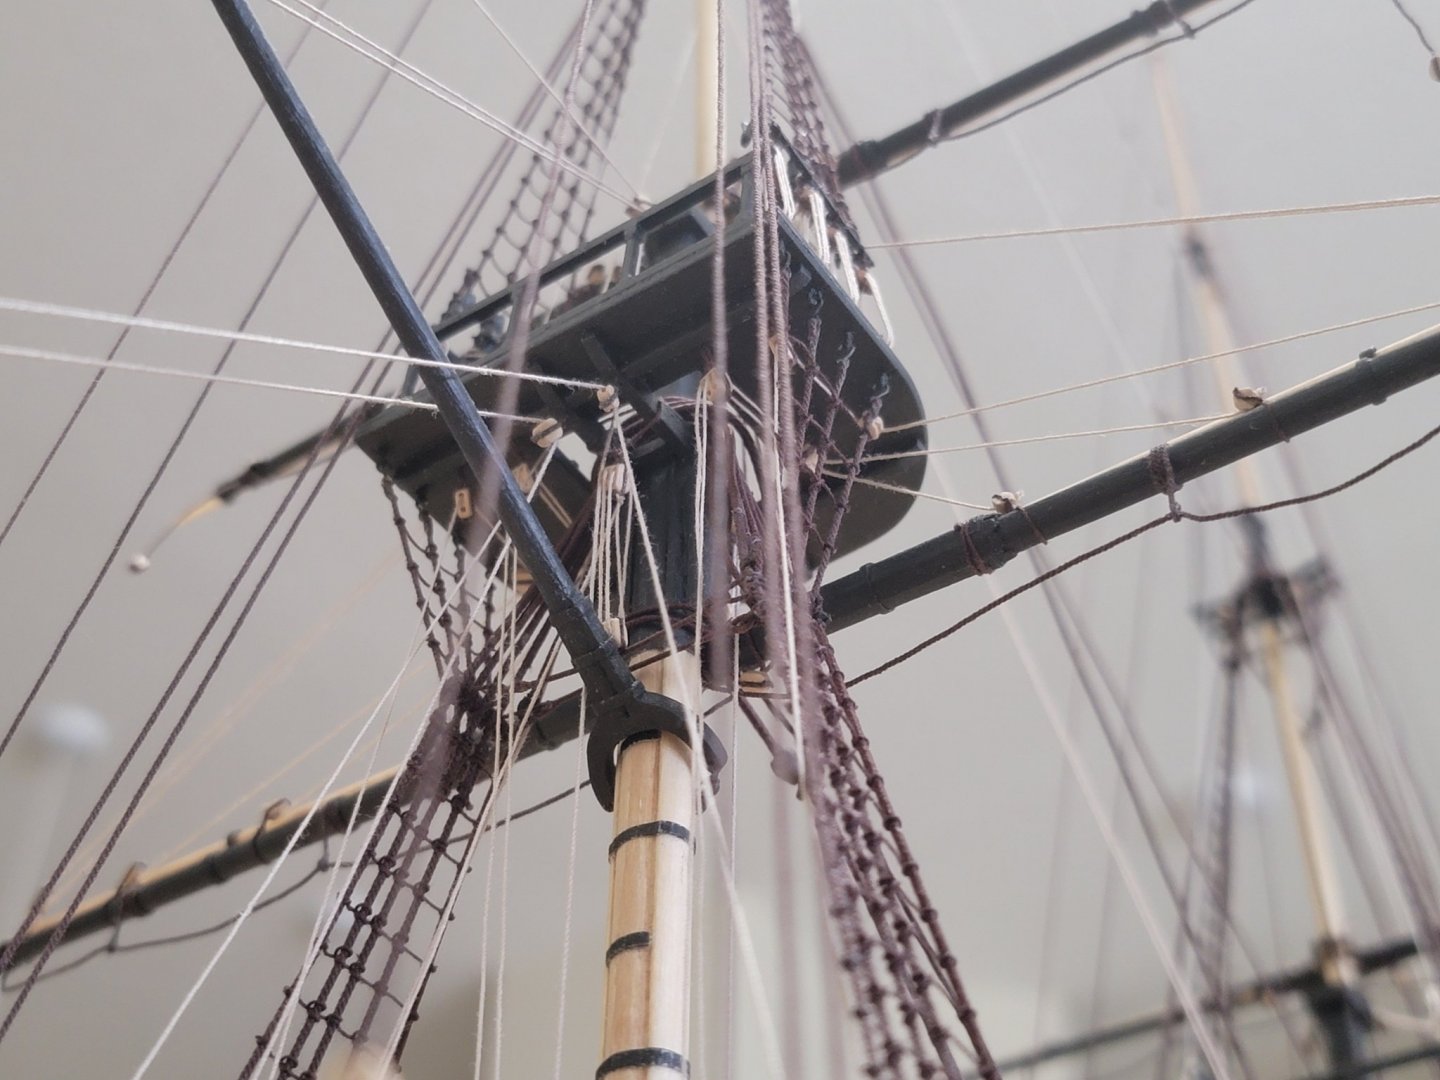
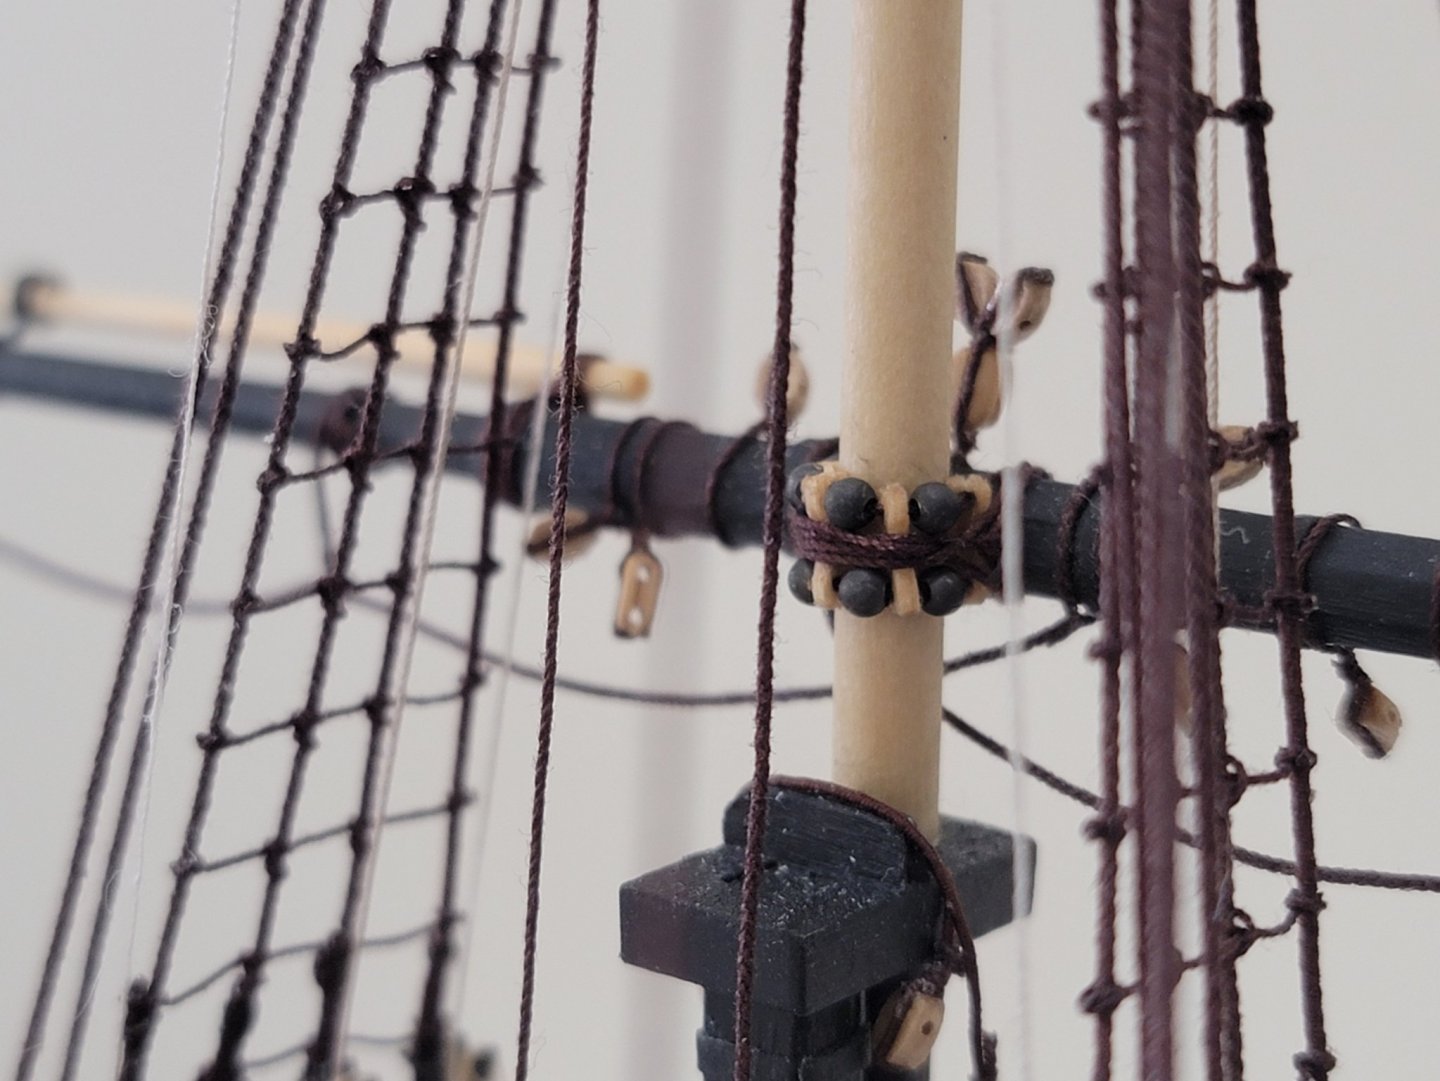
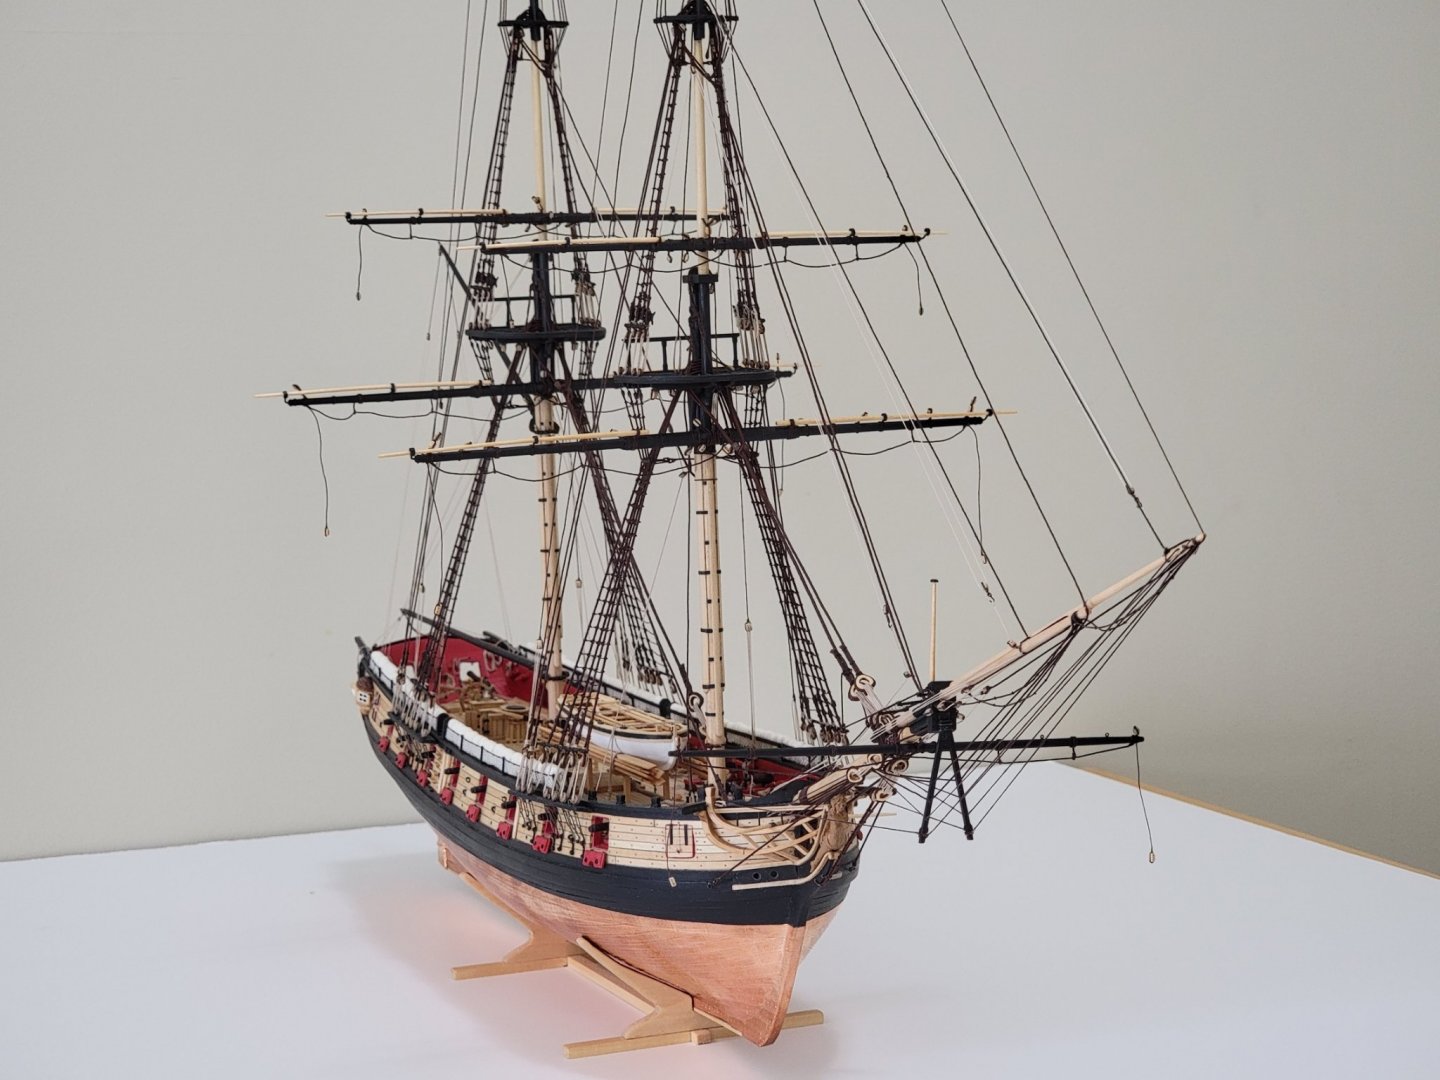
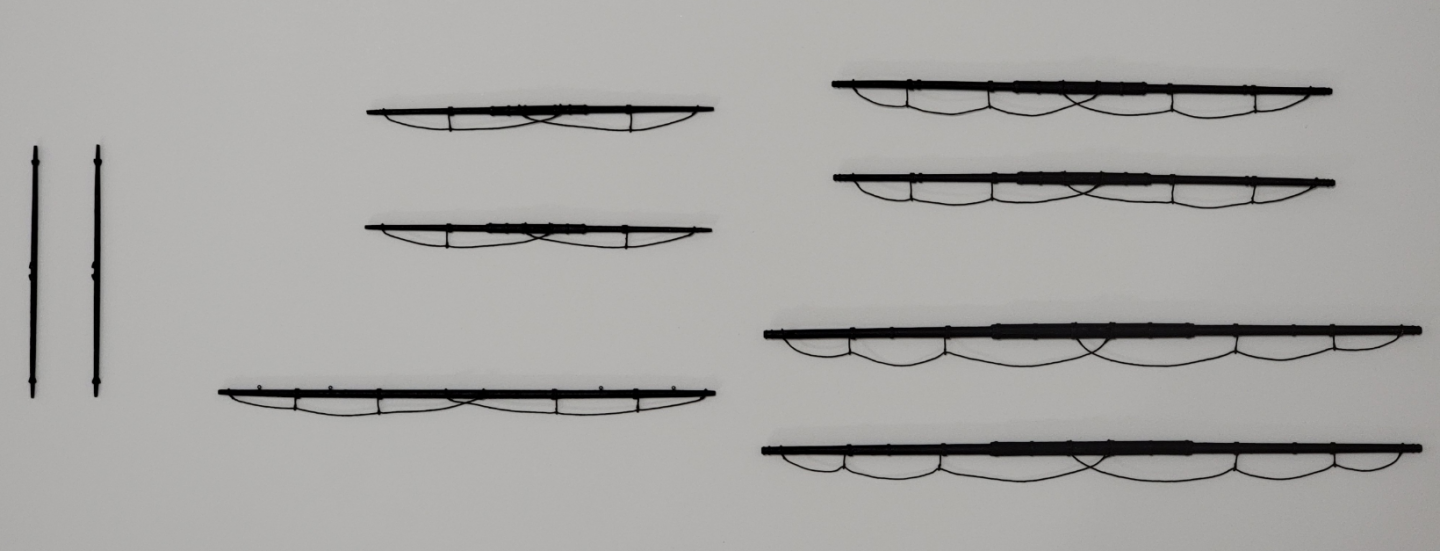
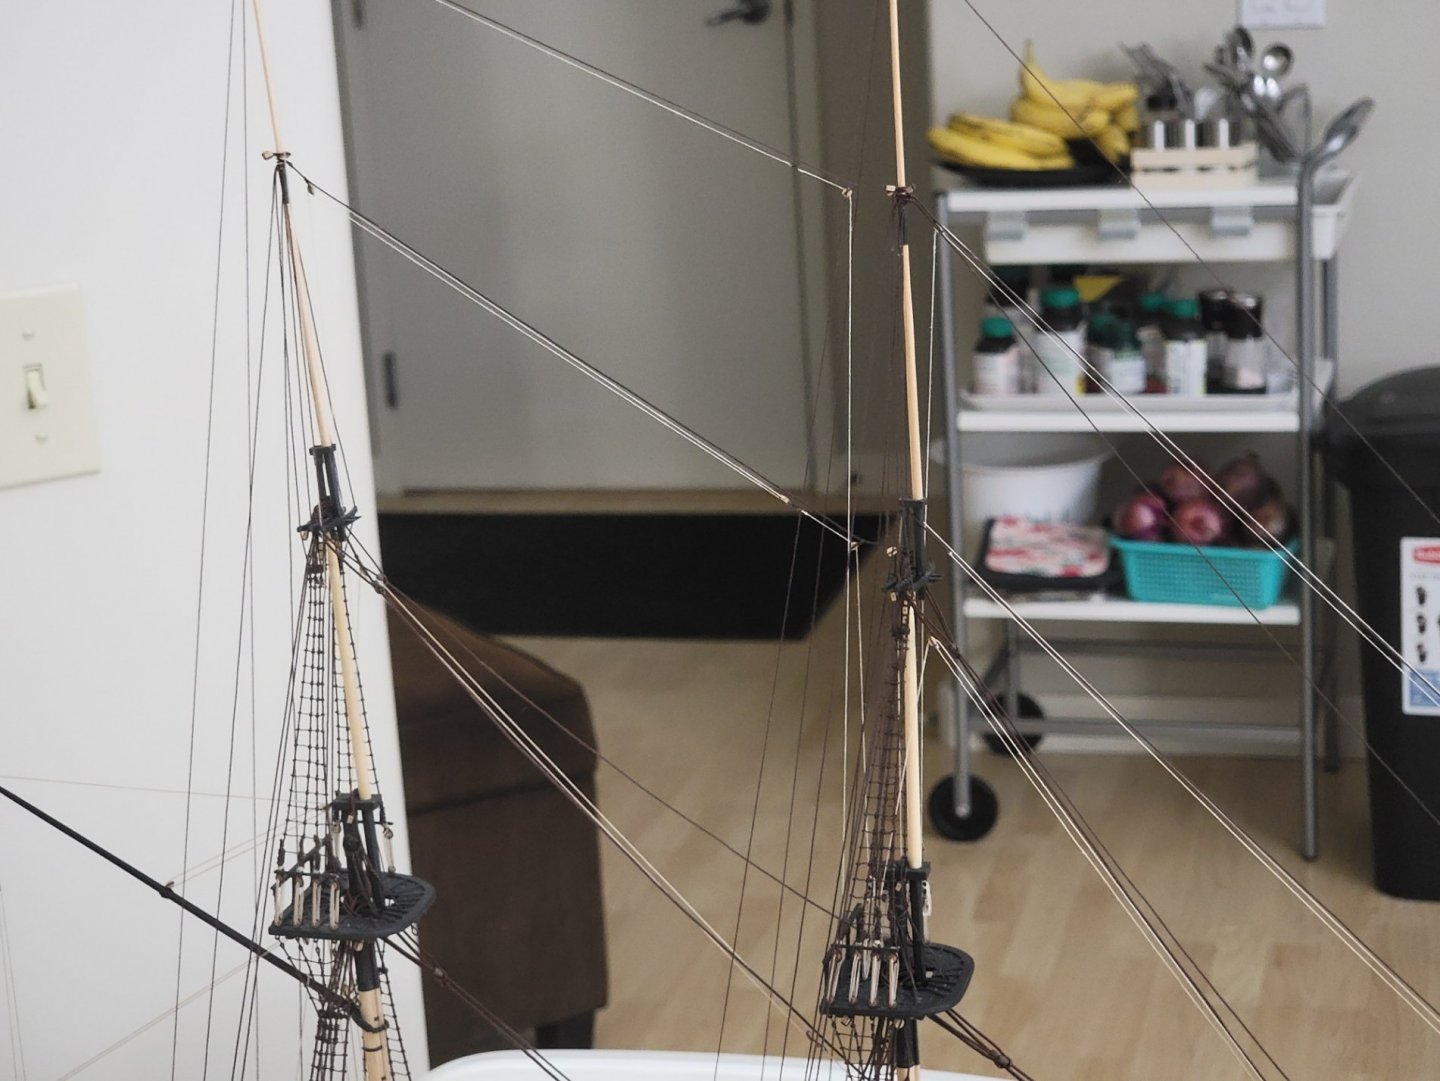
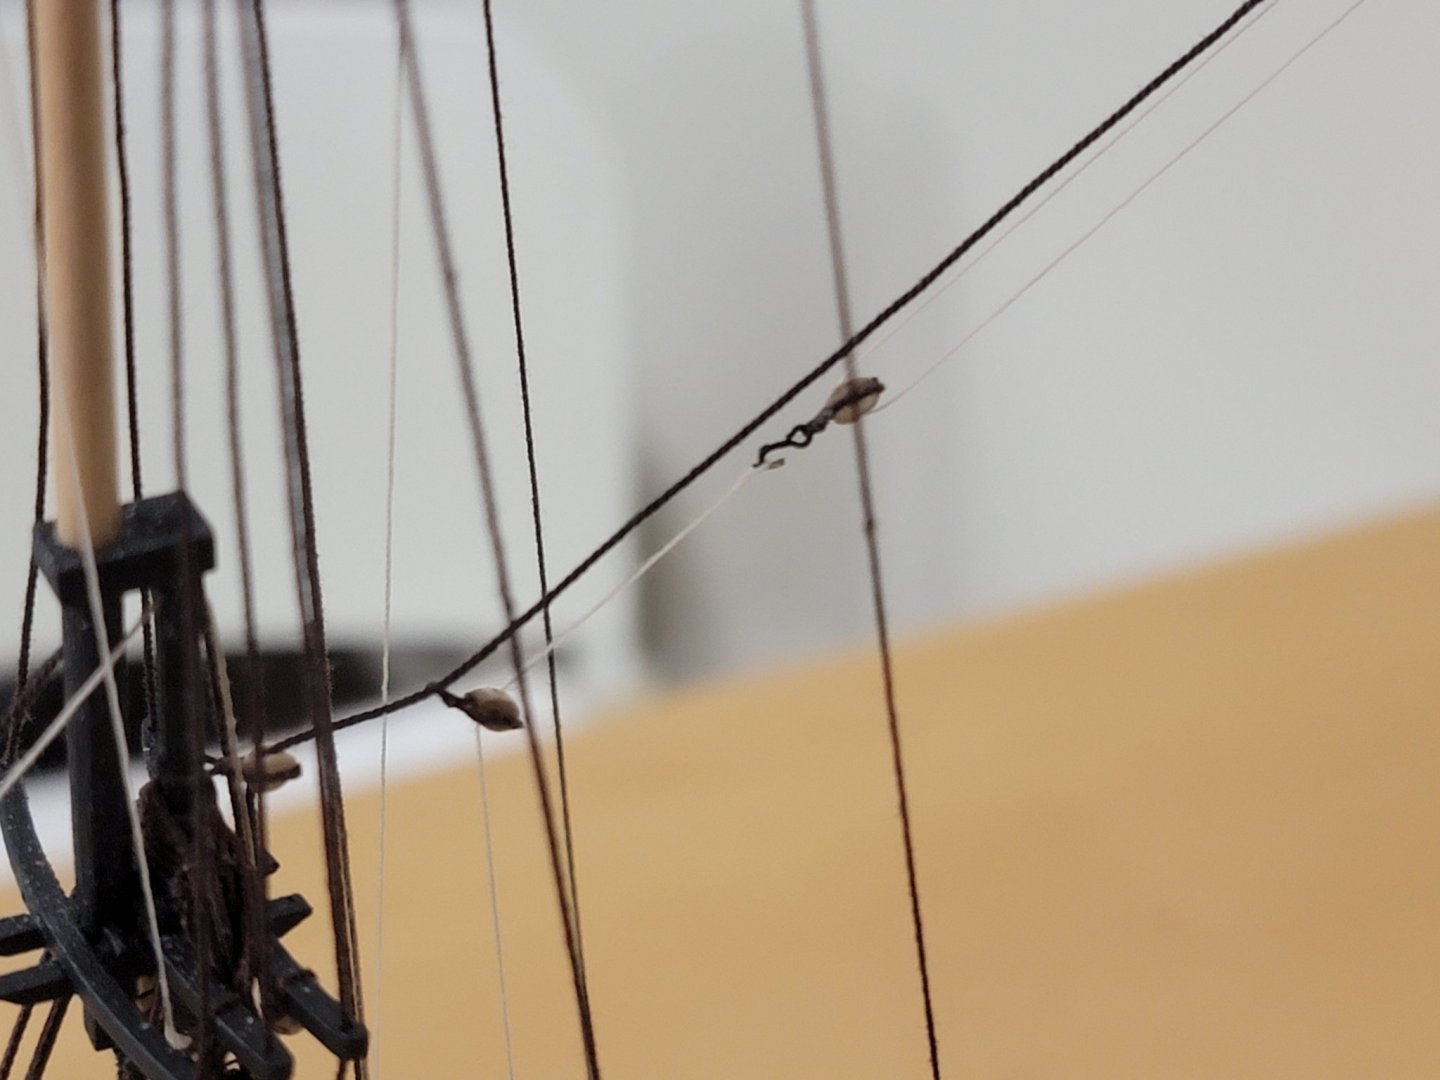
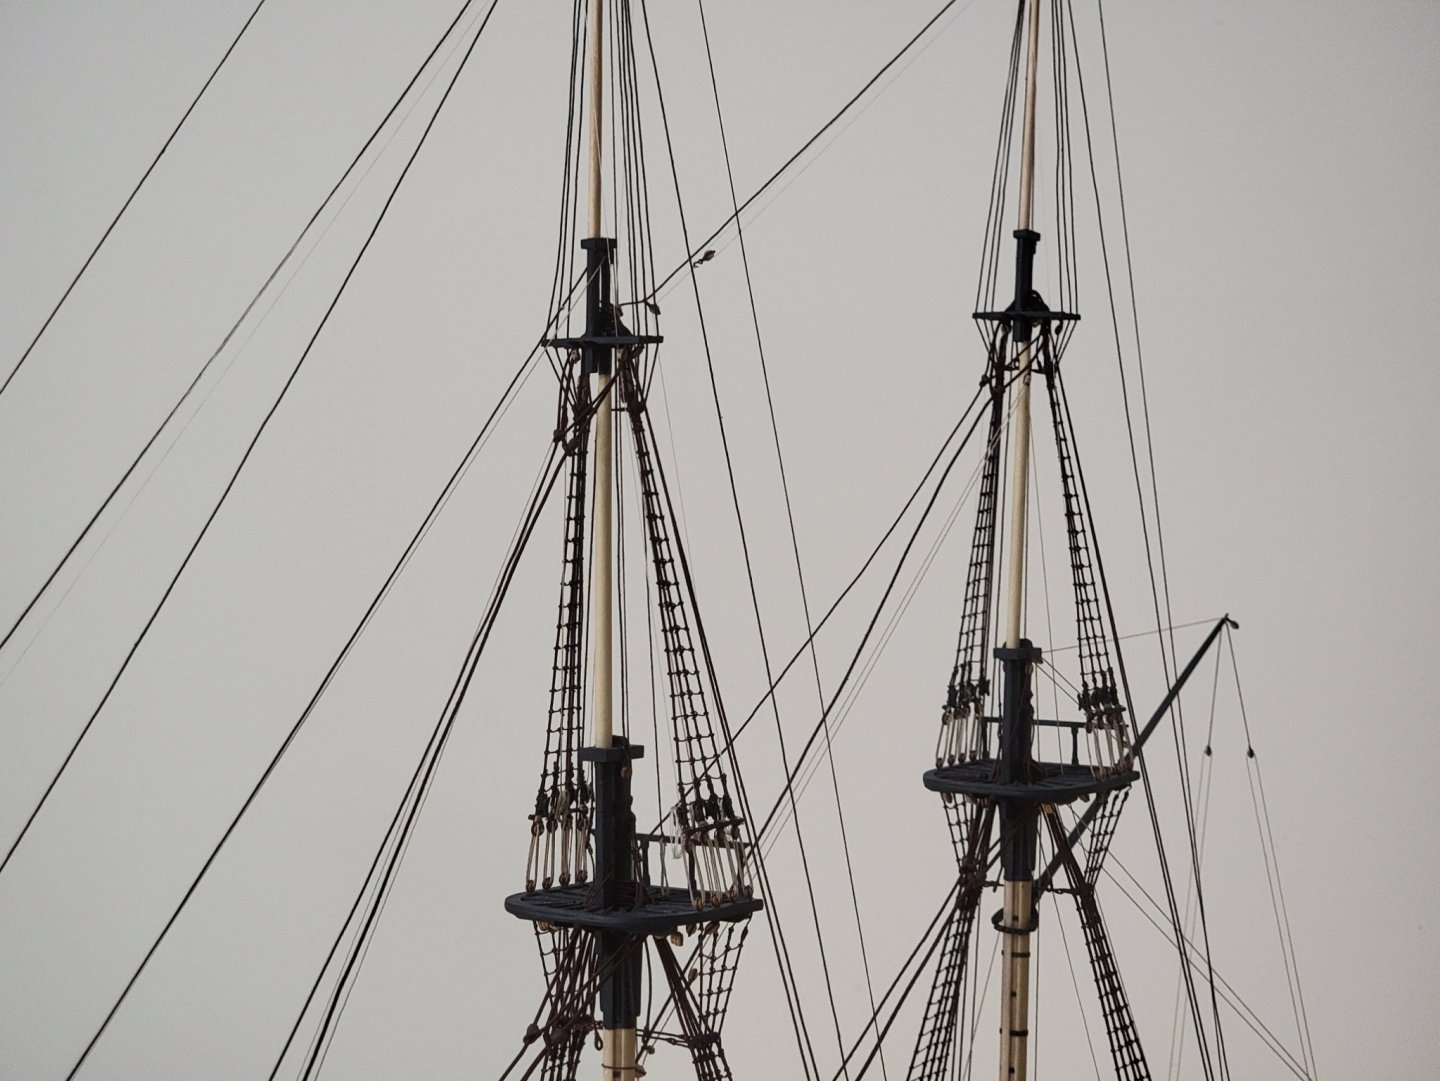
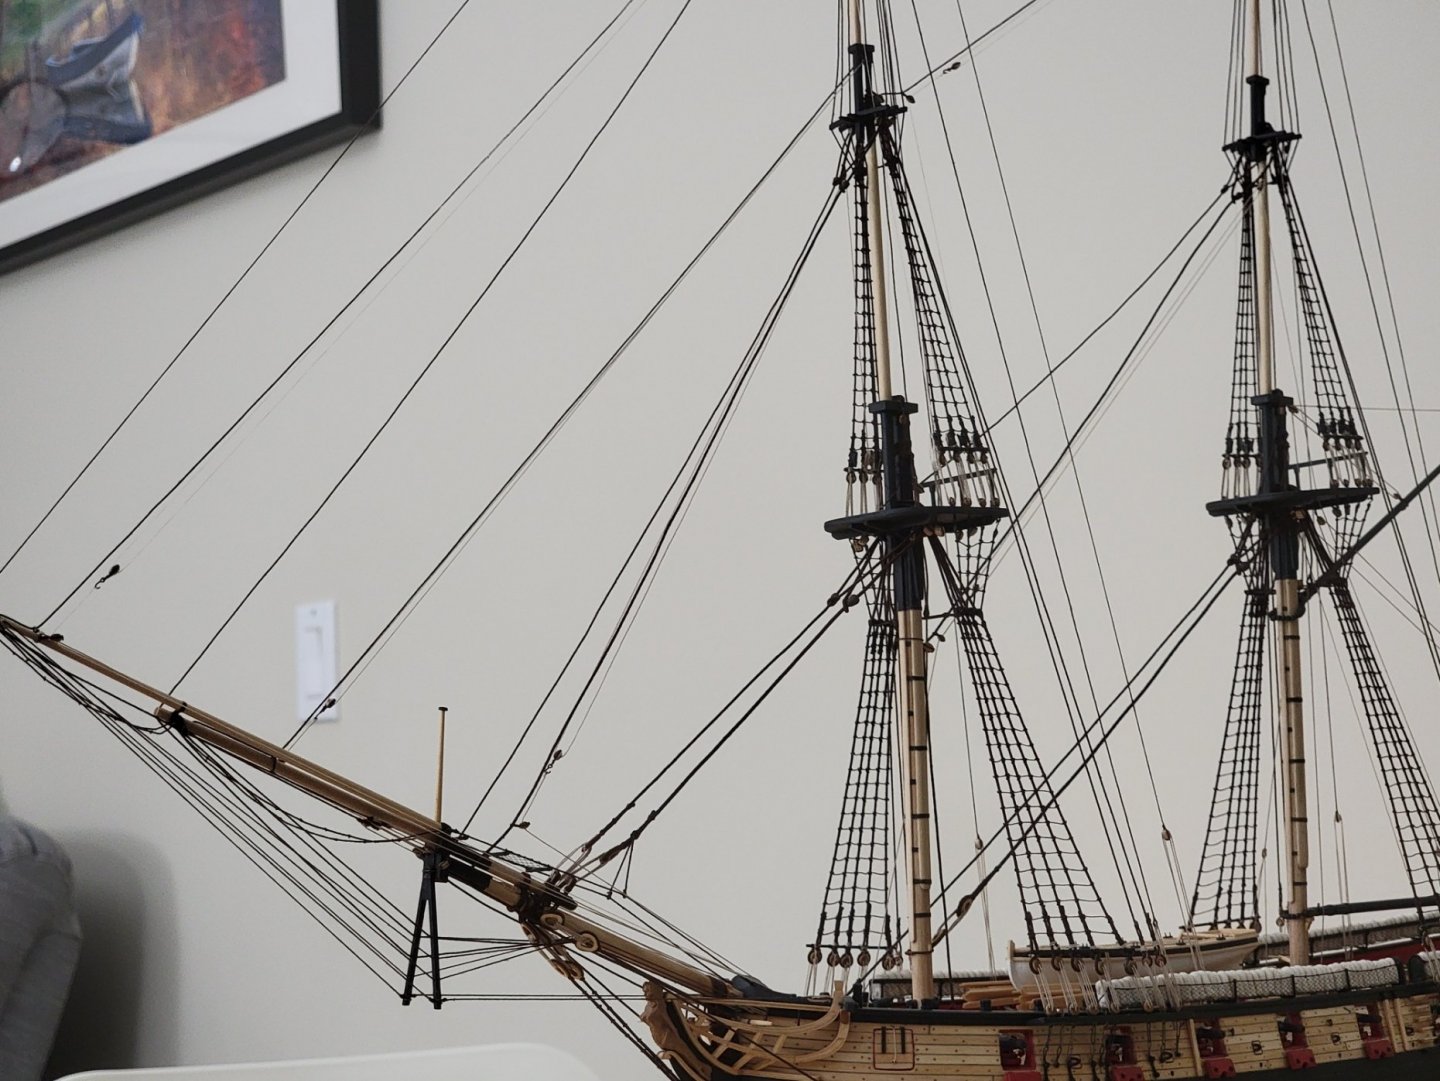
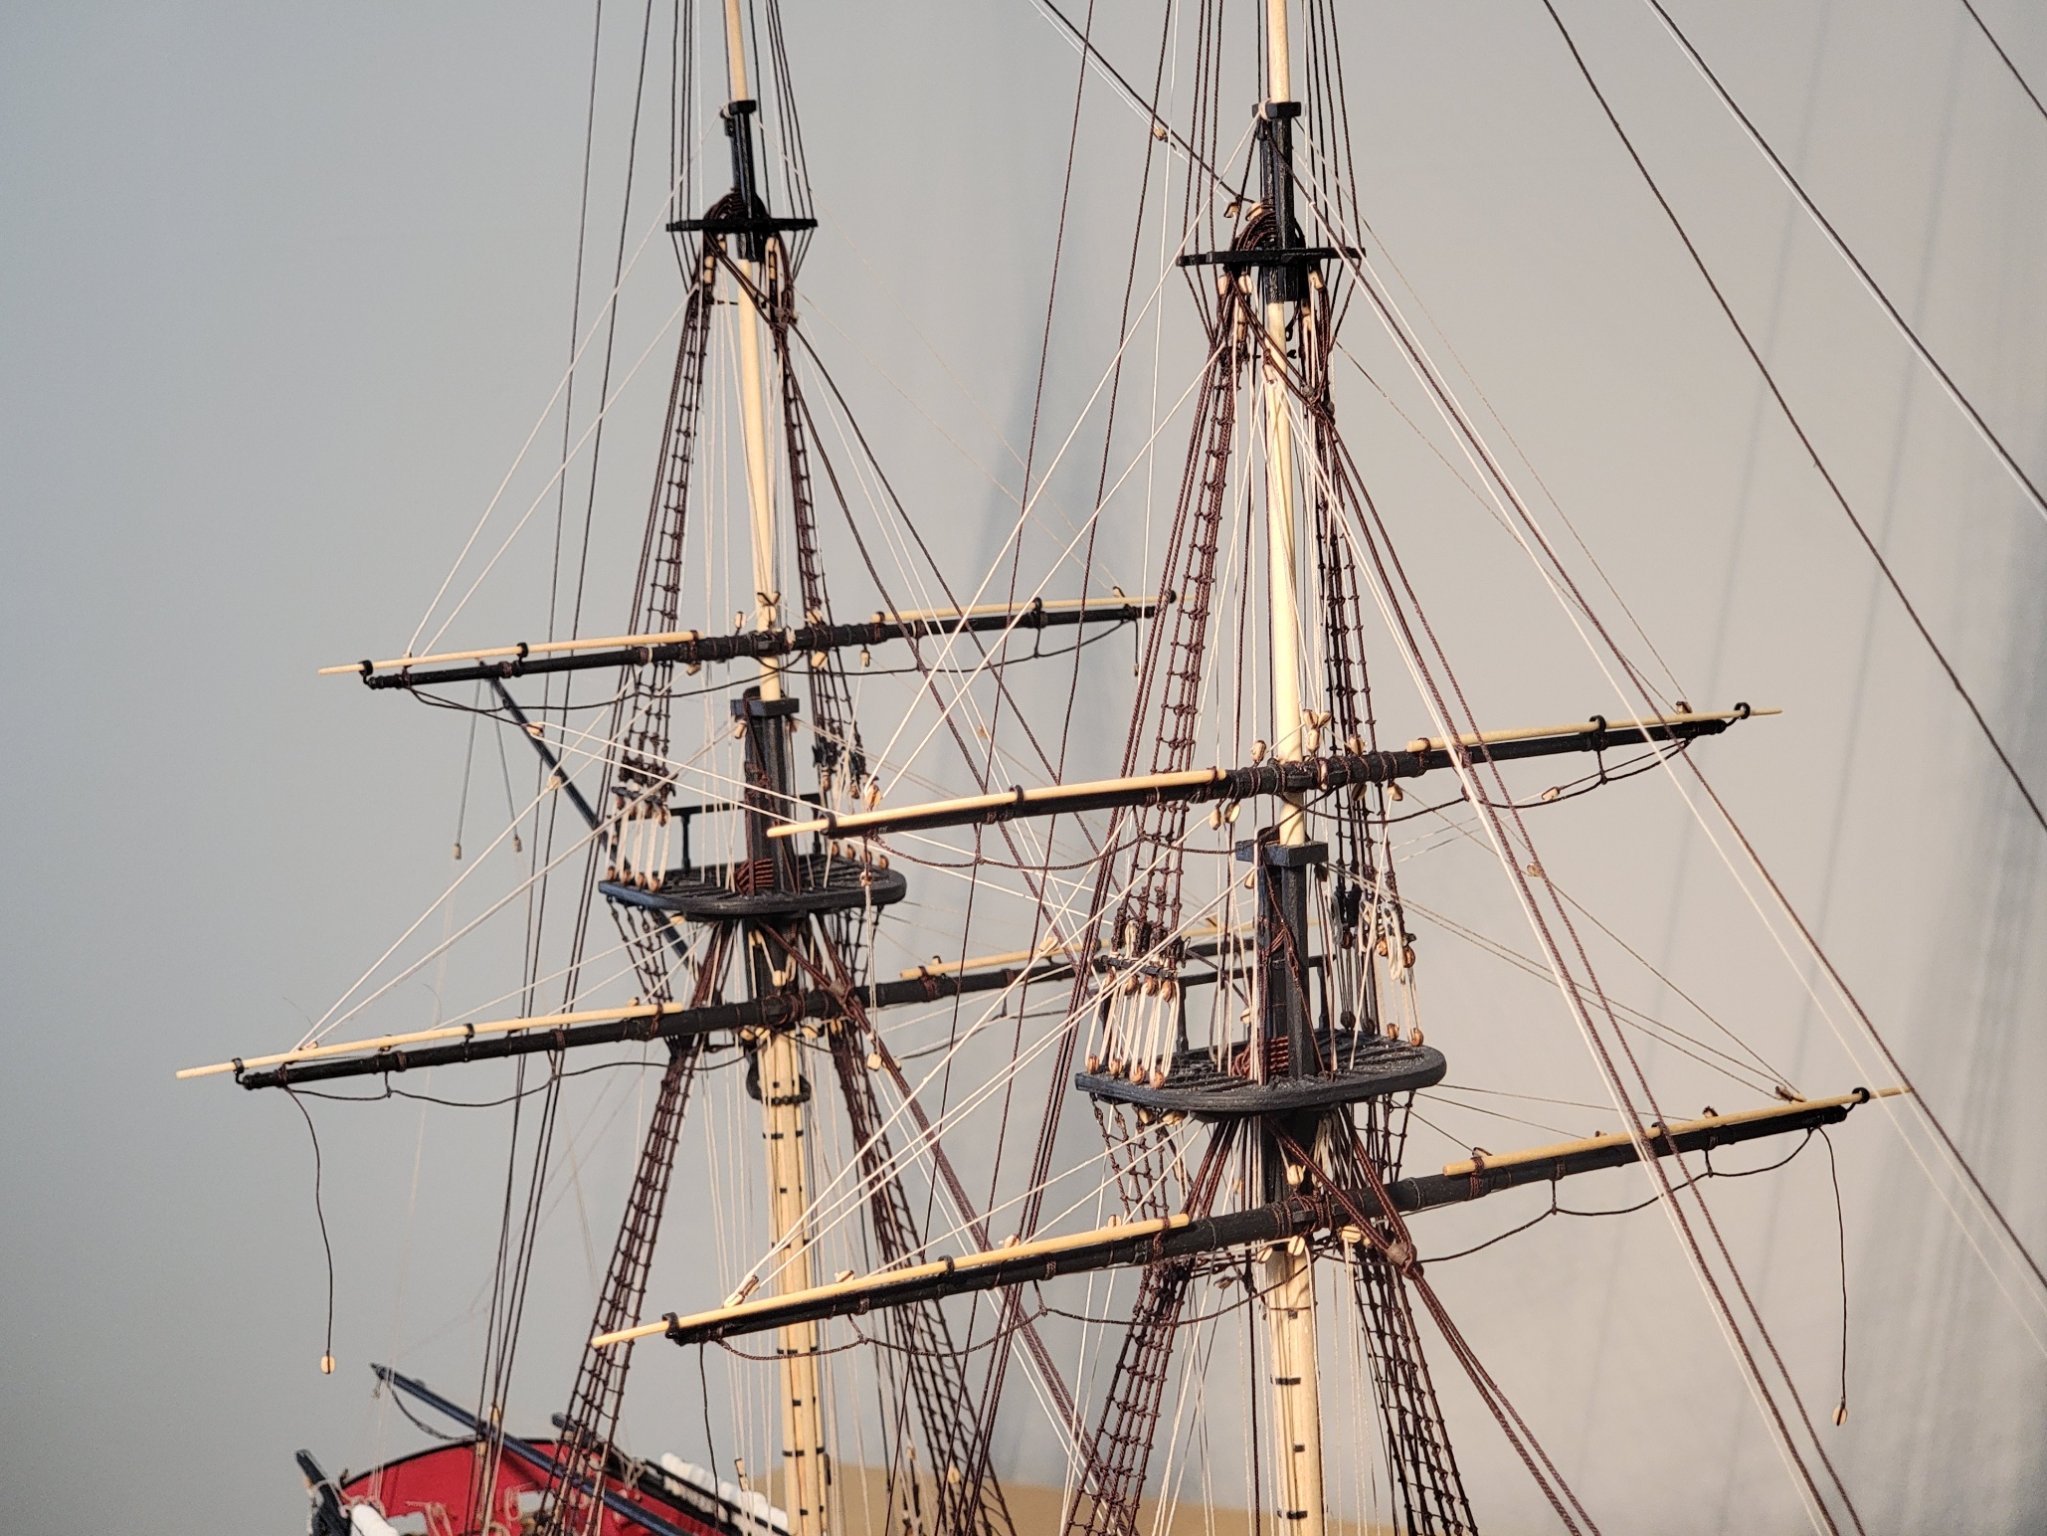
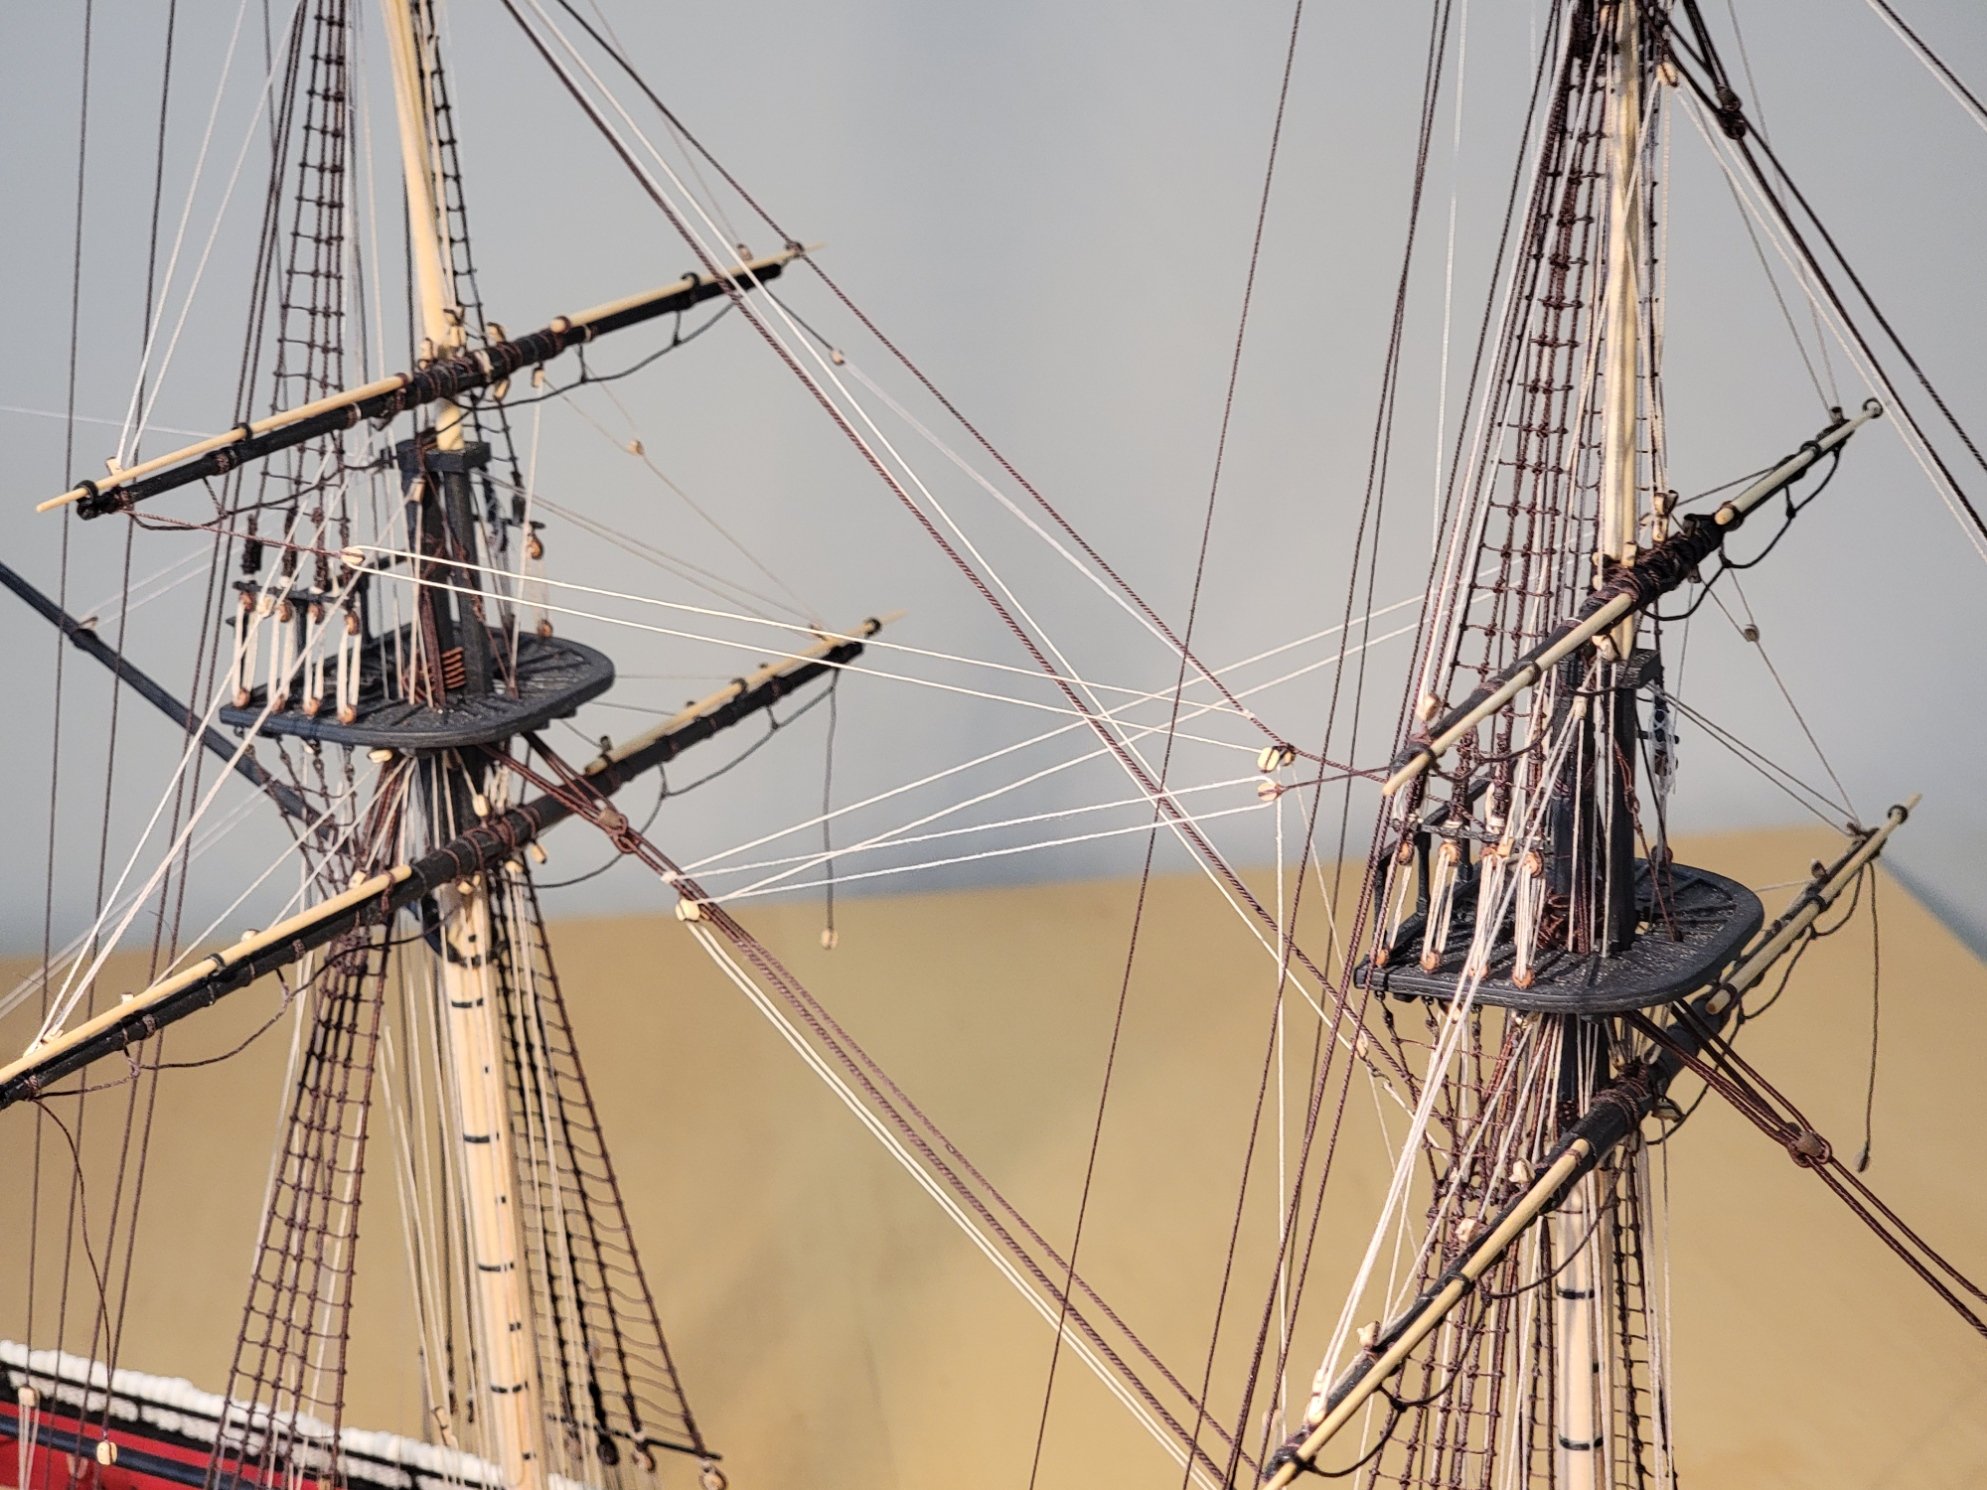
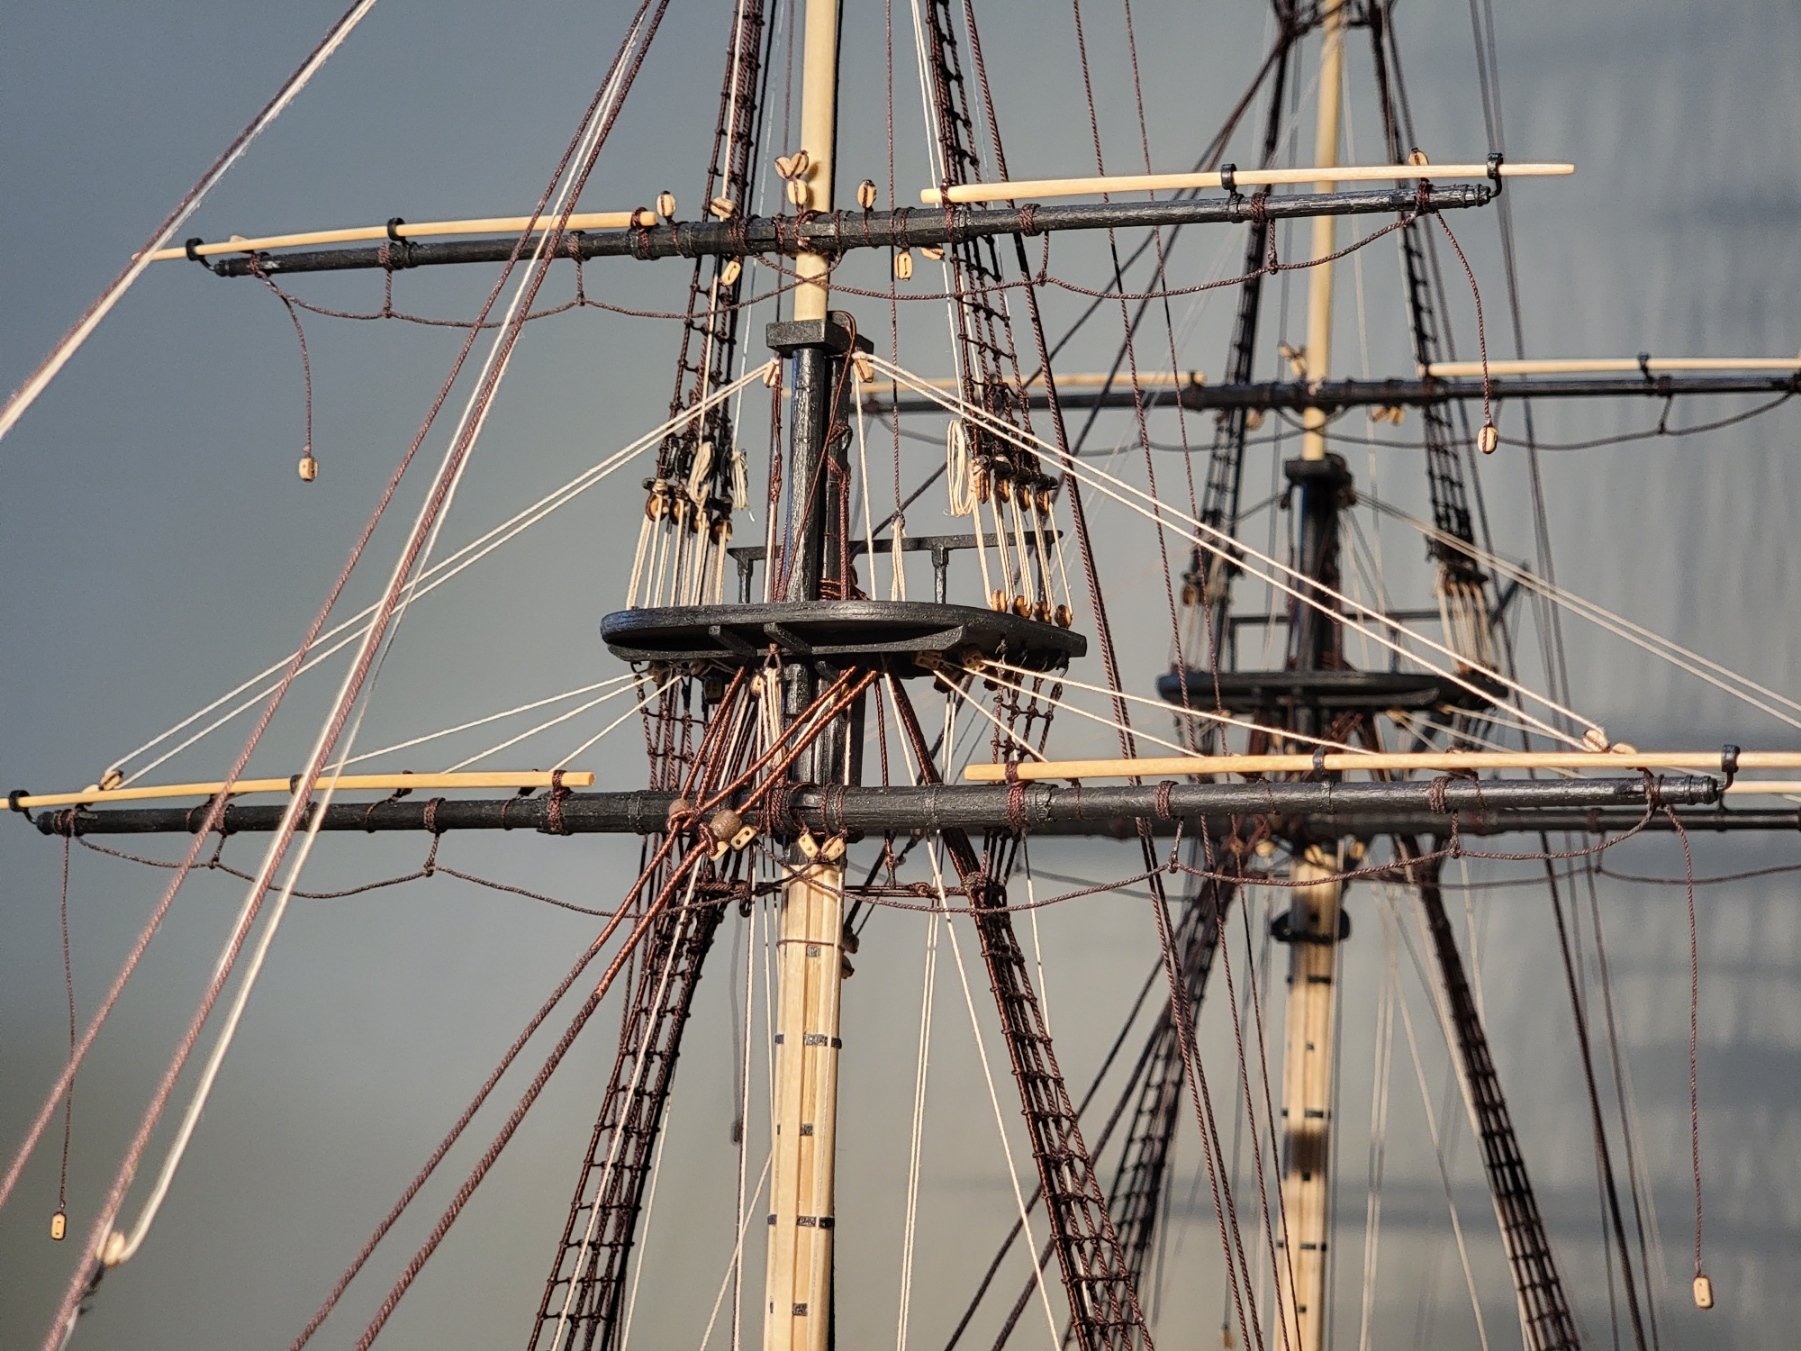
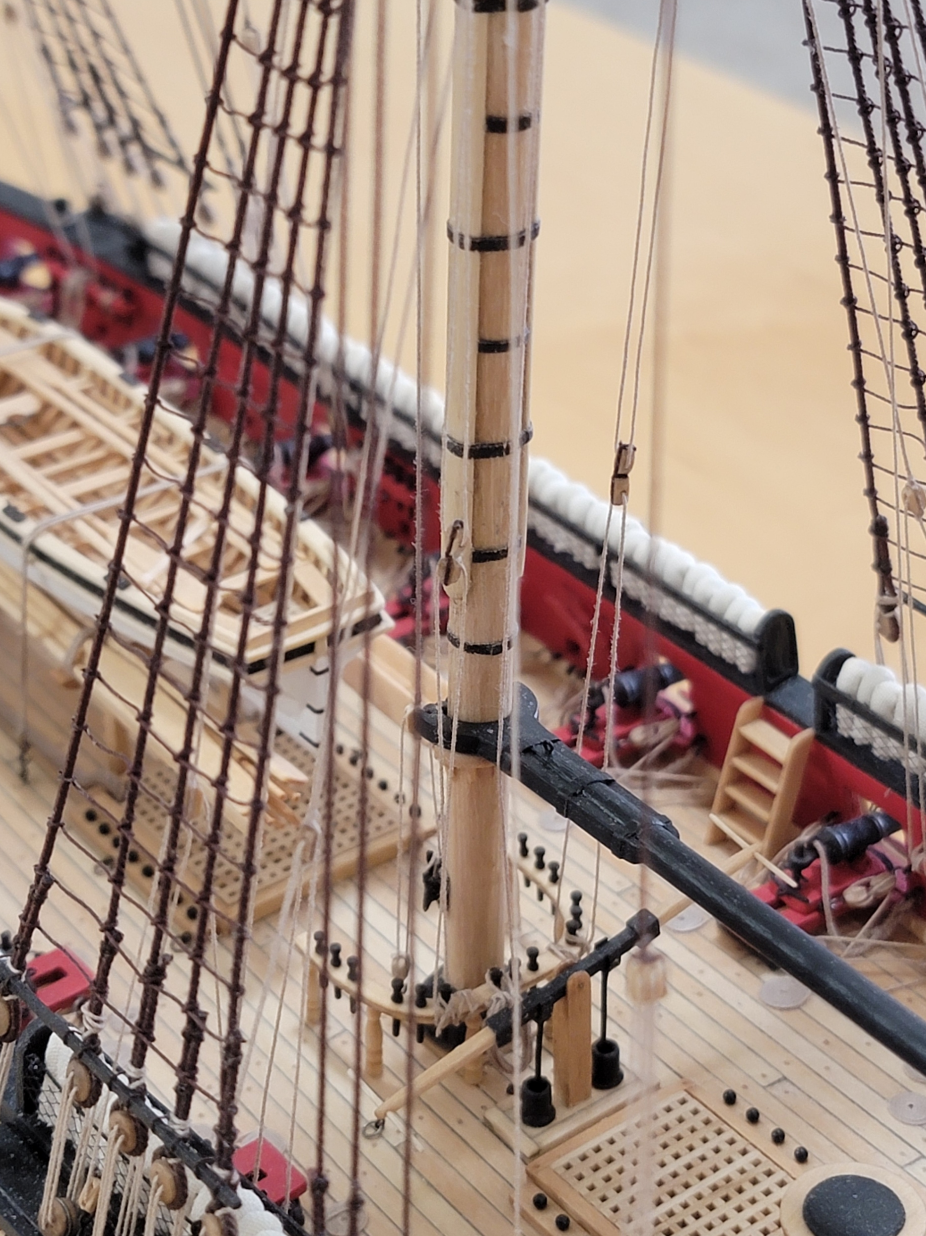
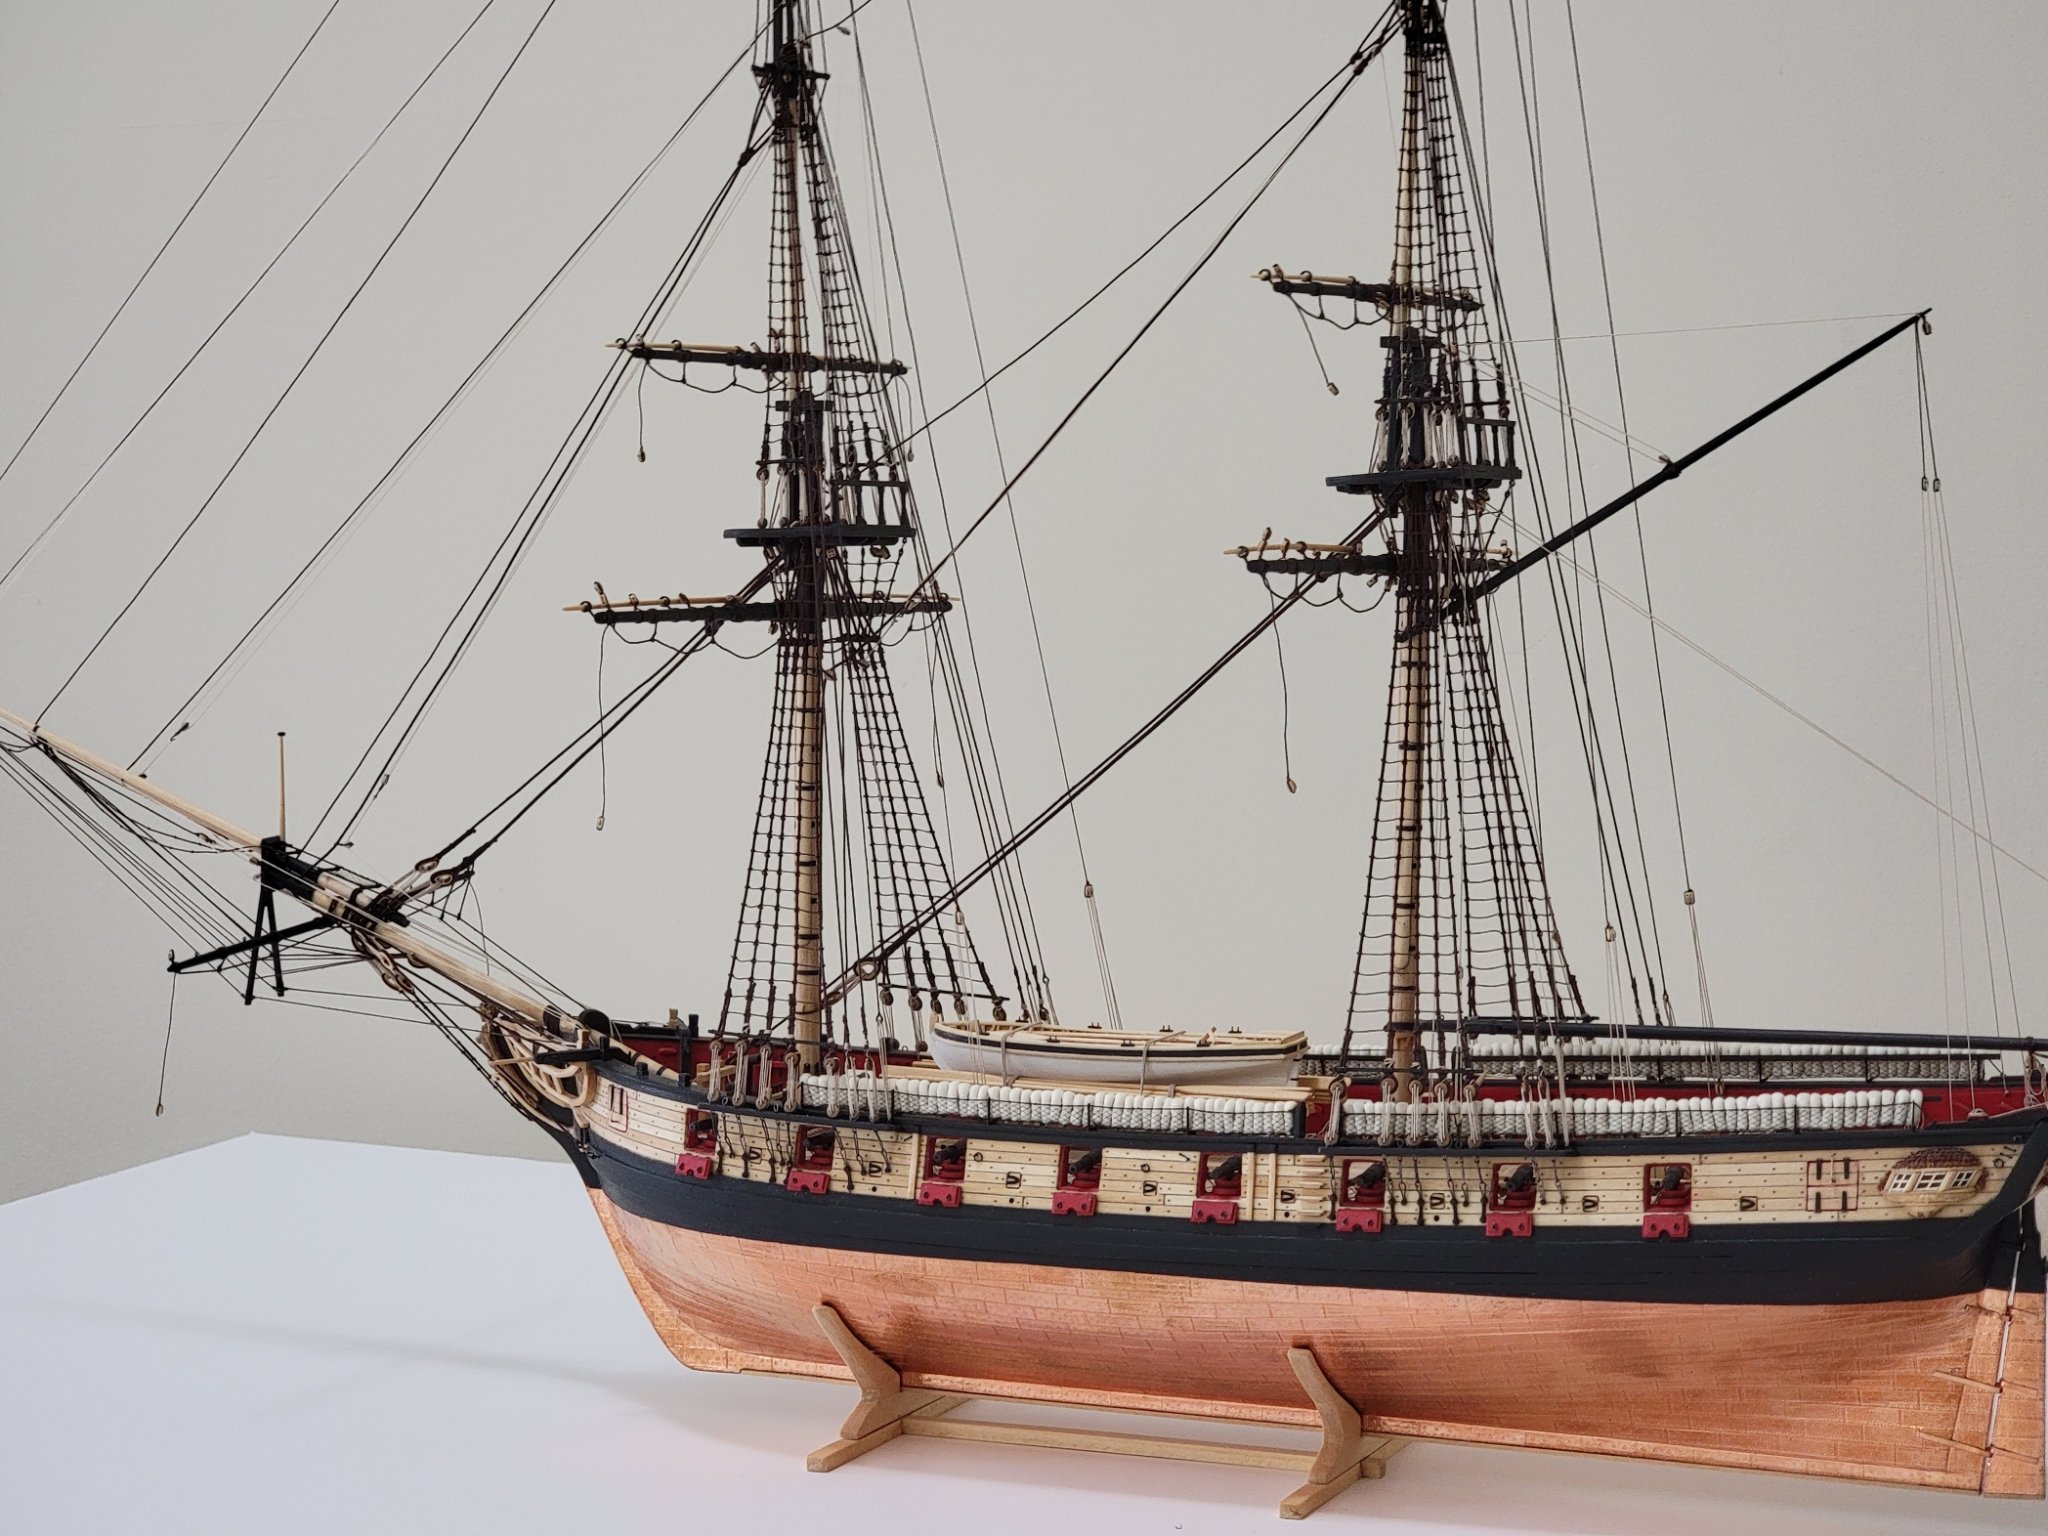
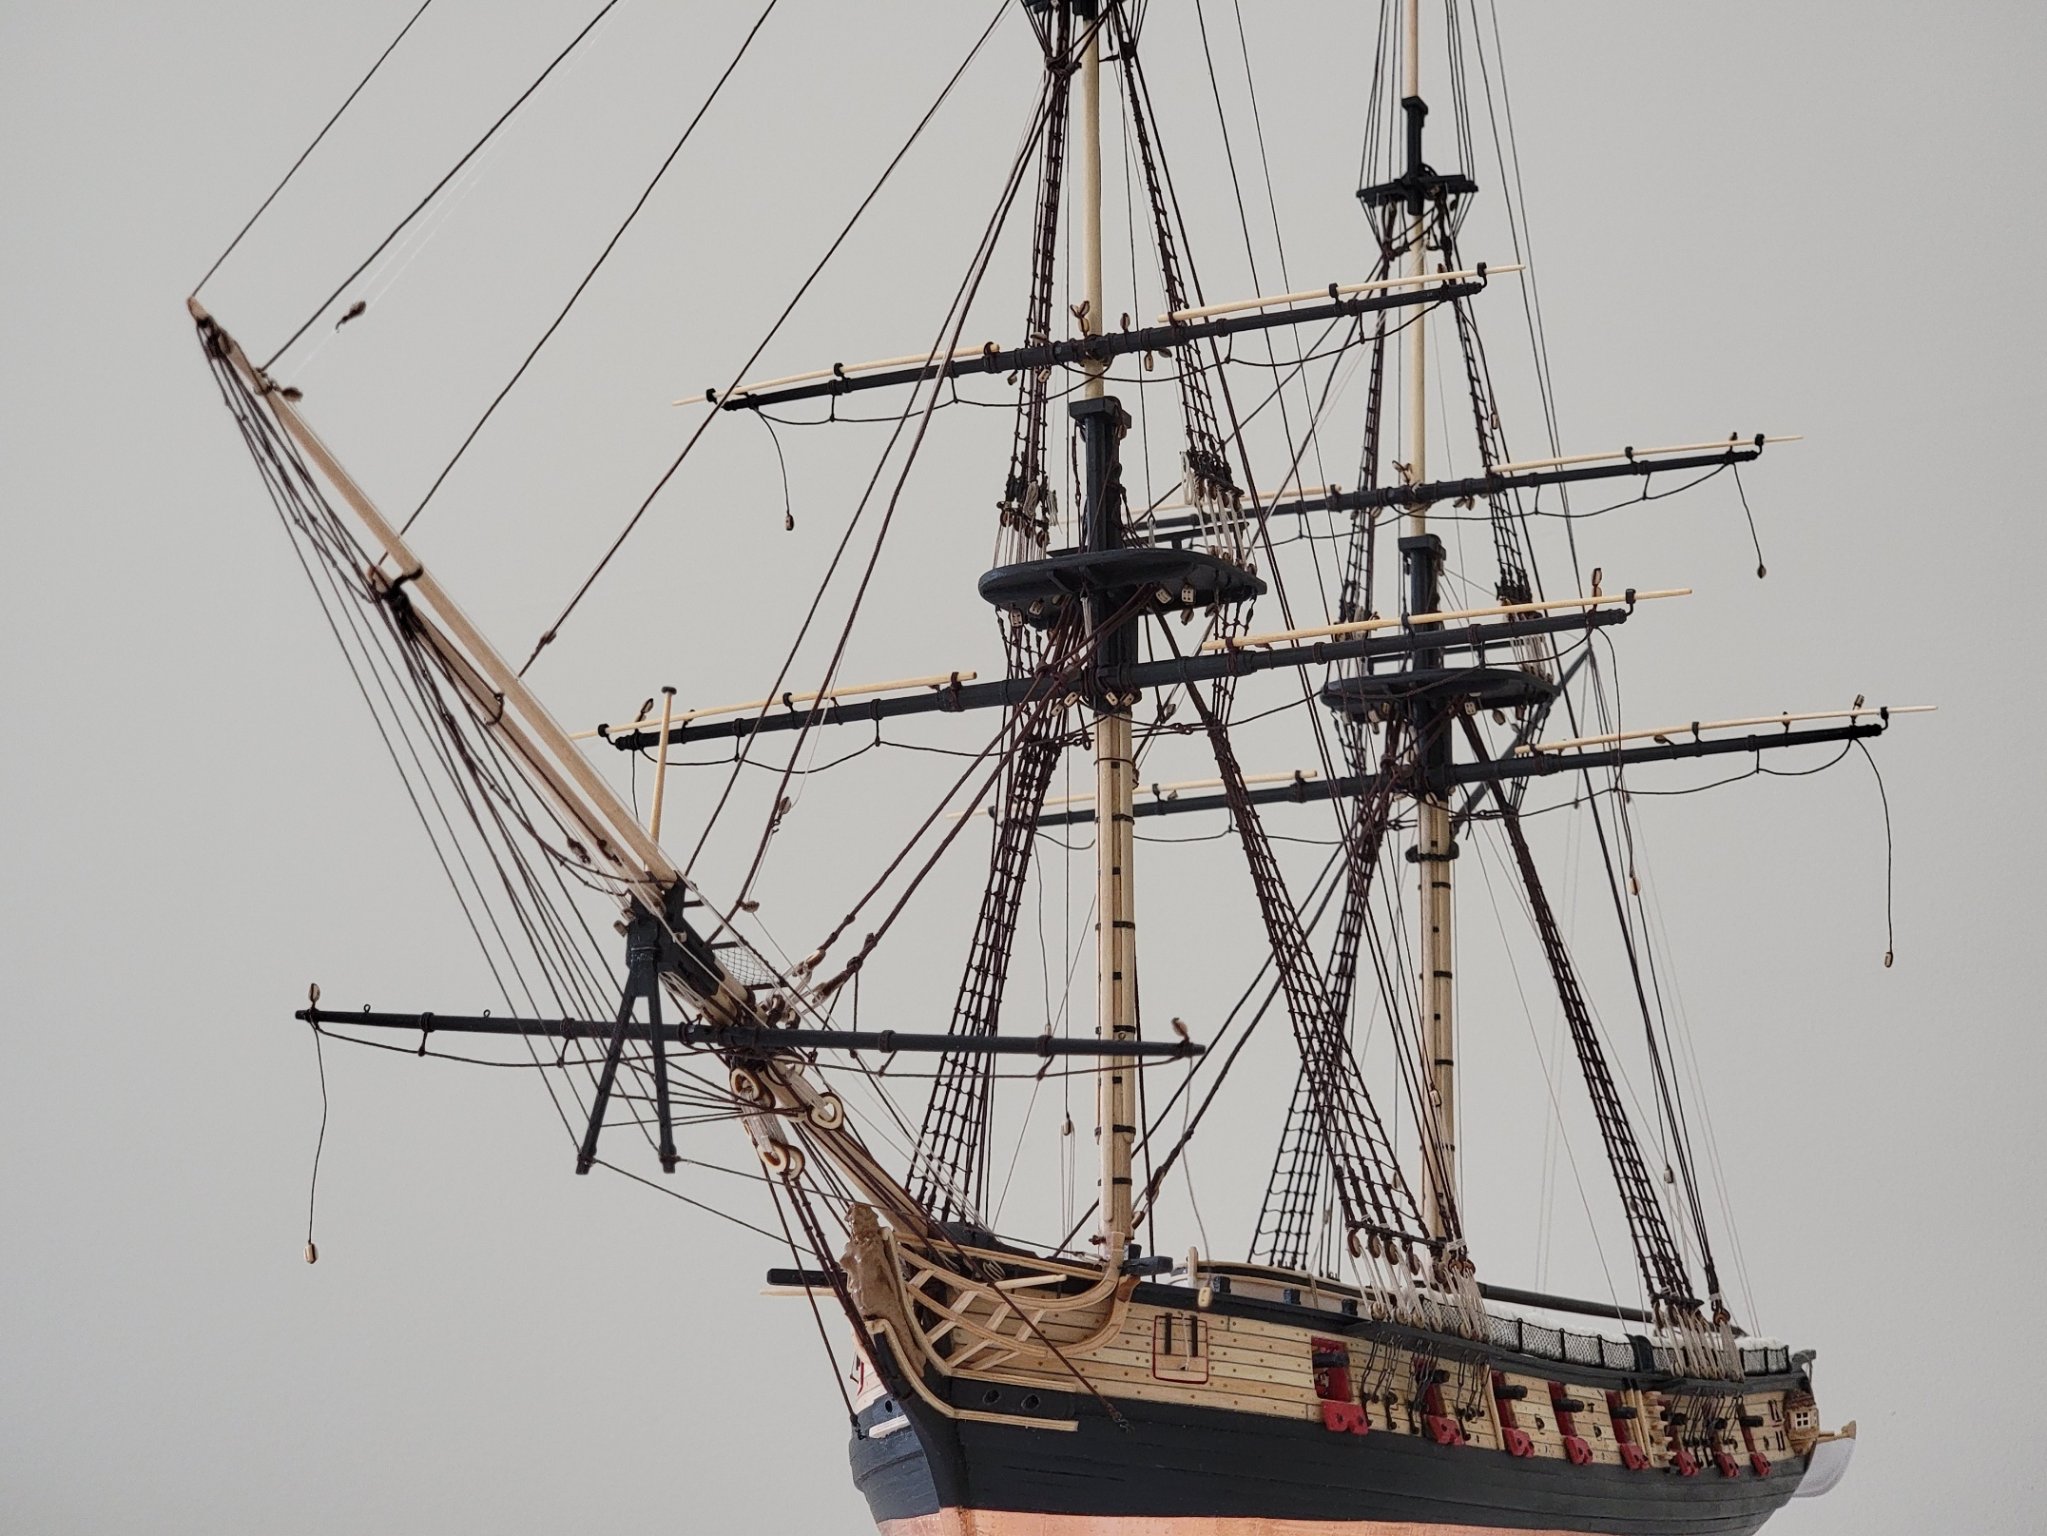
I finished rigging the top sail yards. I have not put any rope coils yet since I found they came in the way when belaying the lines. I might make some after the topgallant yards have been rigged.
I was again playing with the lighting to show the lines better:


- Peter Bloemendaal, BenD, Barbossa and 12 others
-
 15
15
-
Have you tried soaking the plank in some water? I did that in my build and that made the strip much more malleable to bend in those tricky sections. Then you can use clamps to hold them in position to dry. Also look at Chuck's technique (dry bending)
-
-
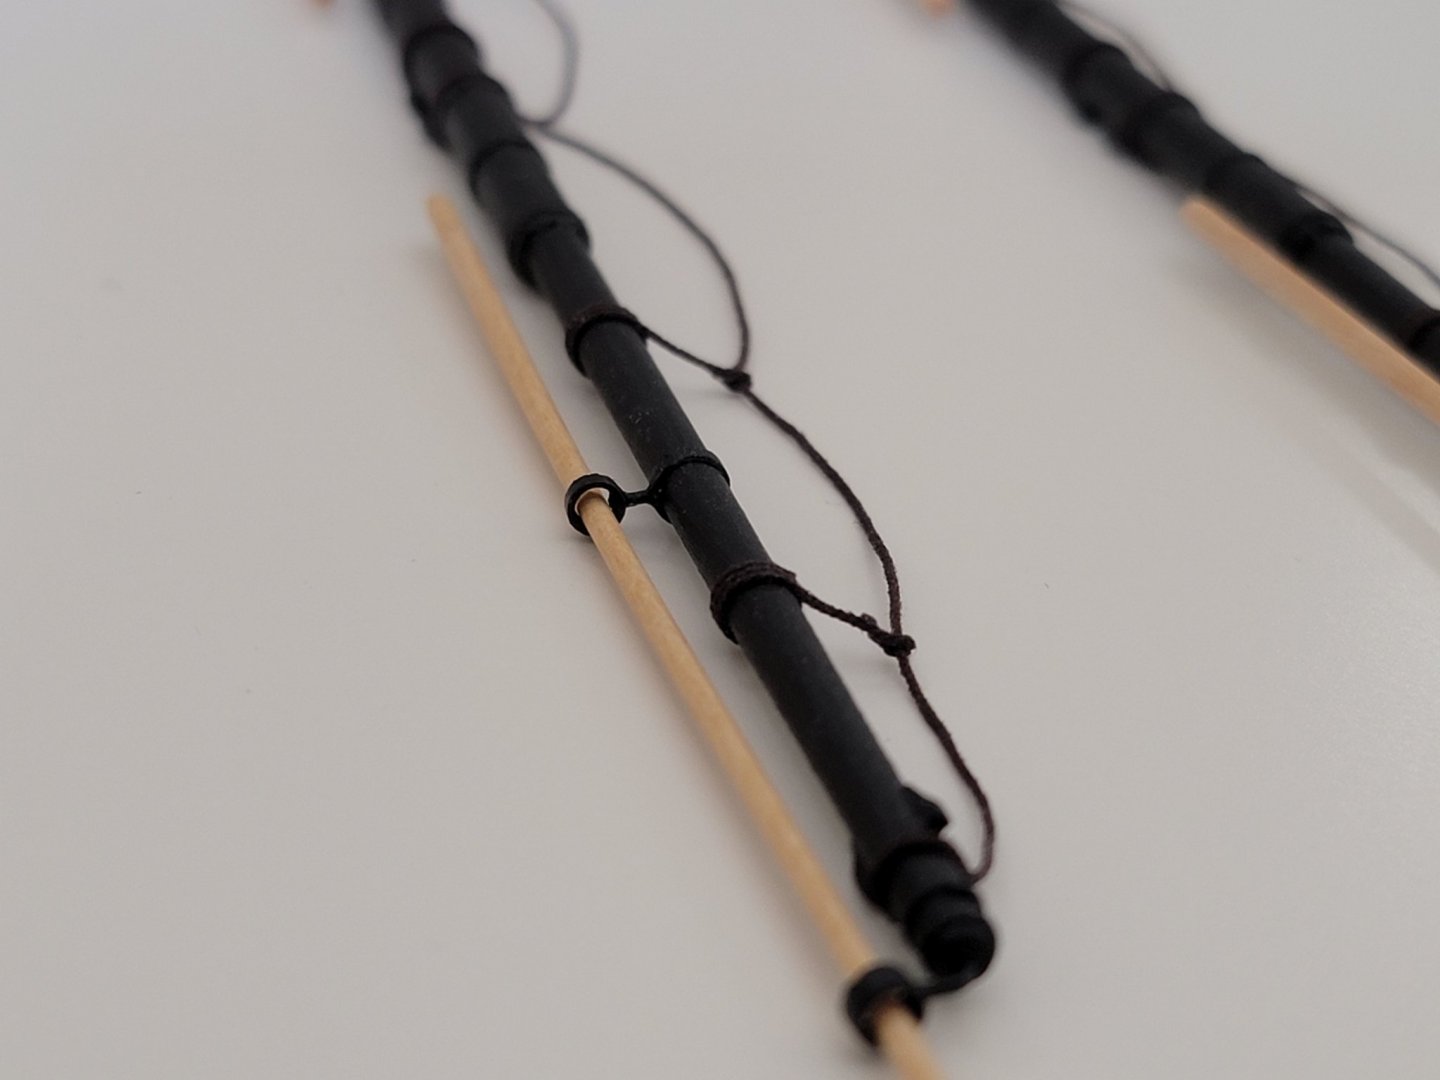
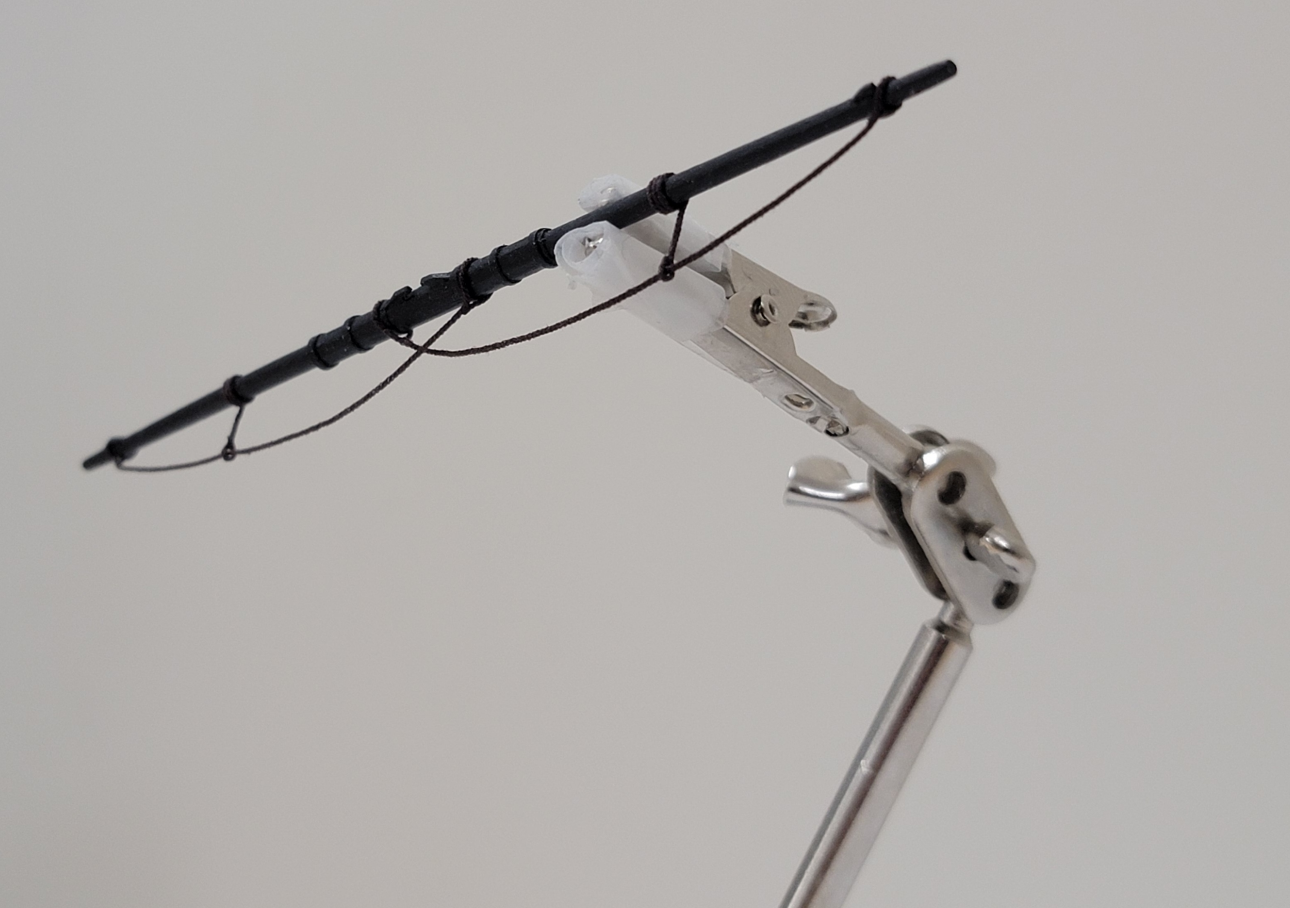
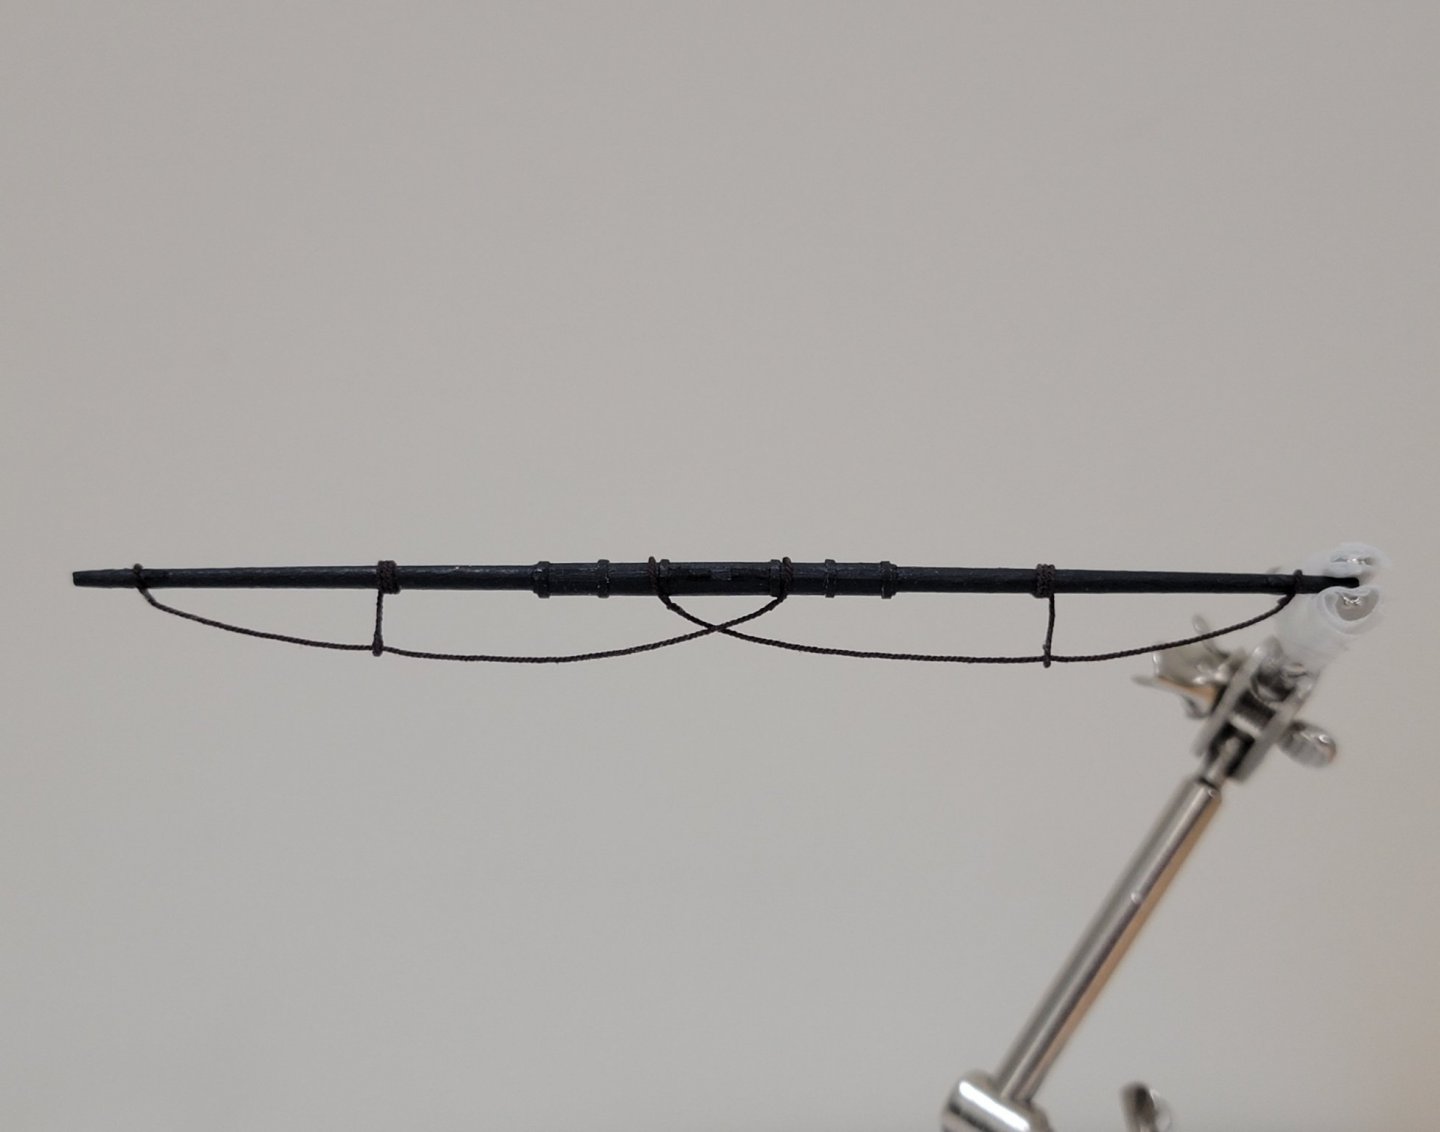
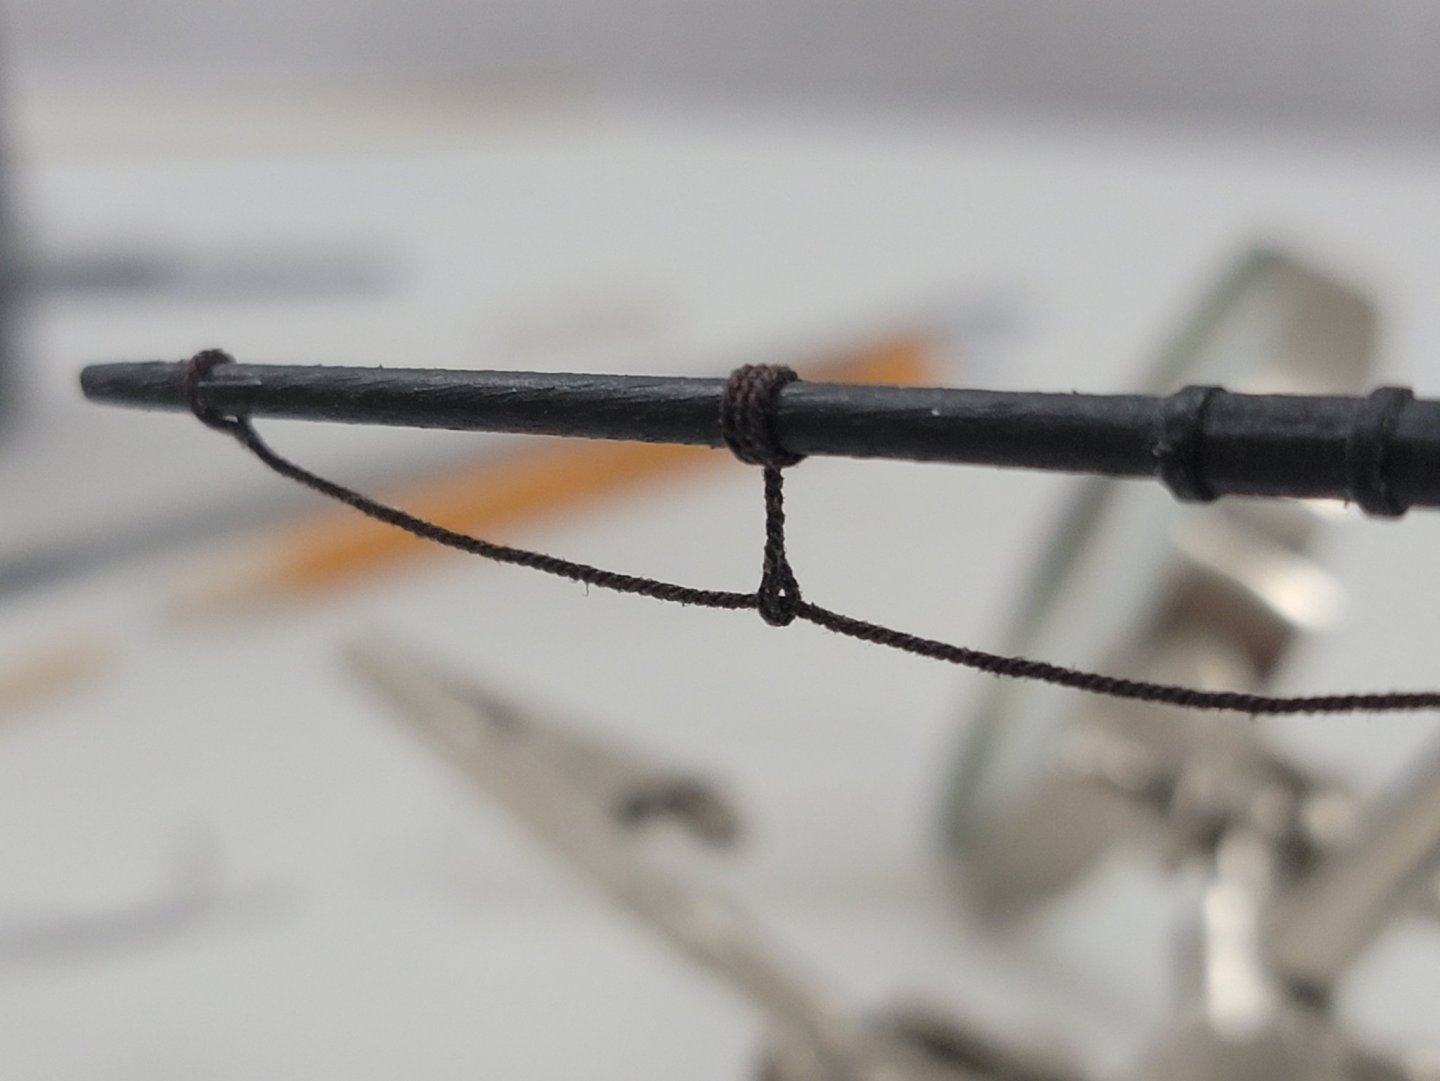
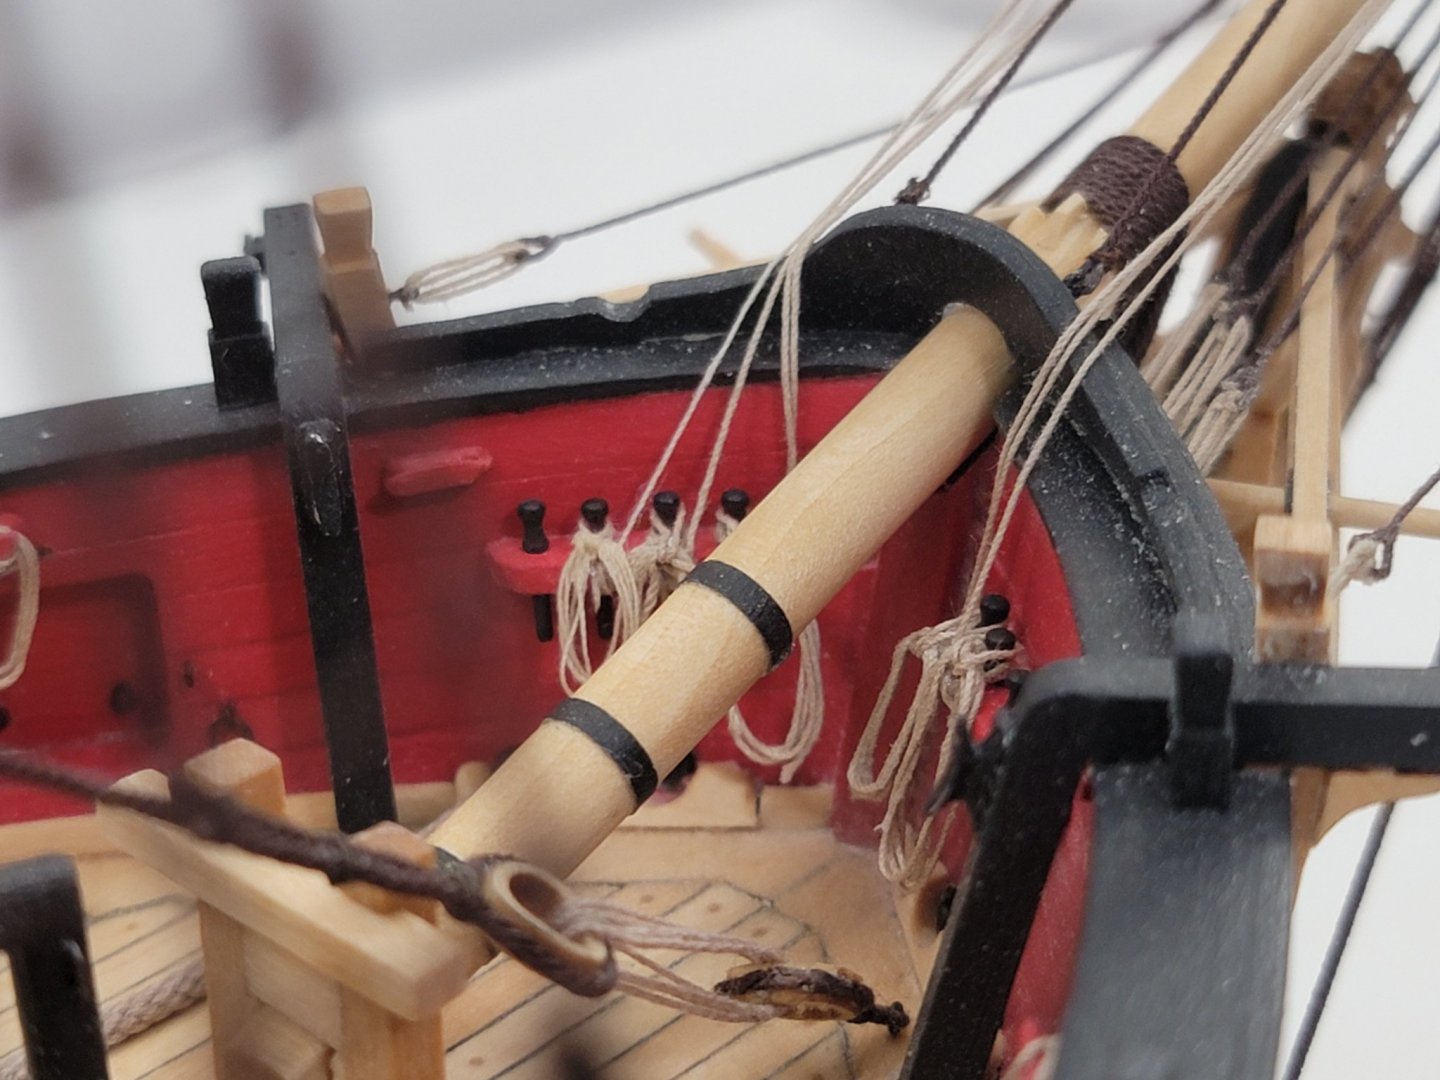
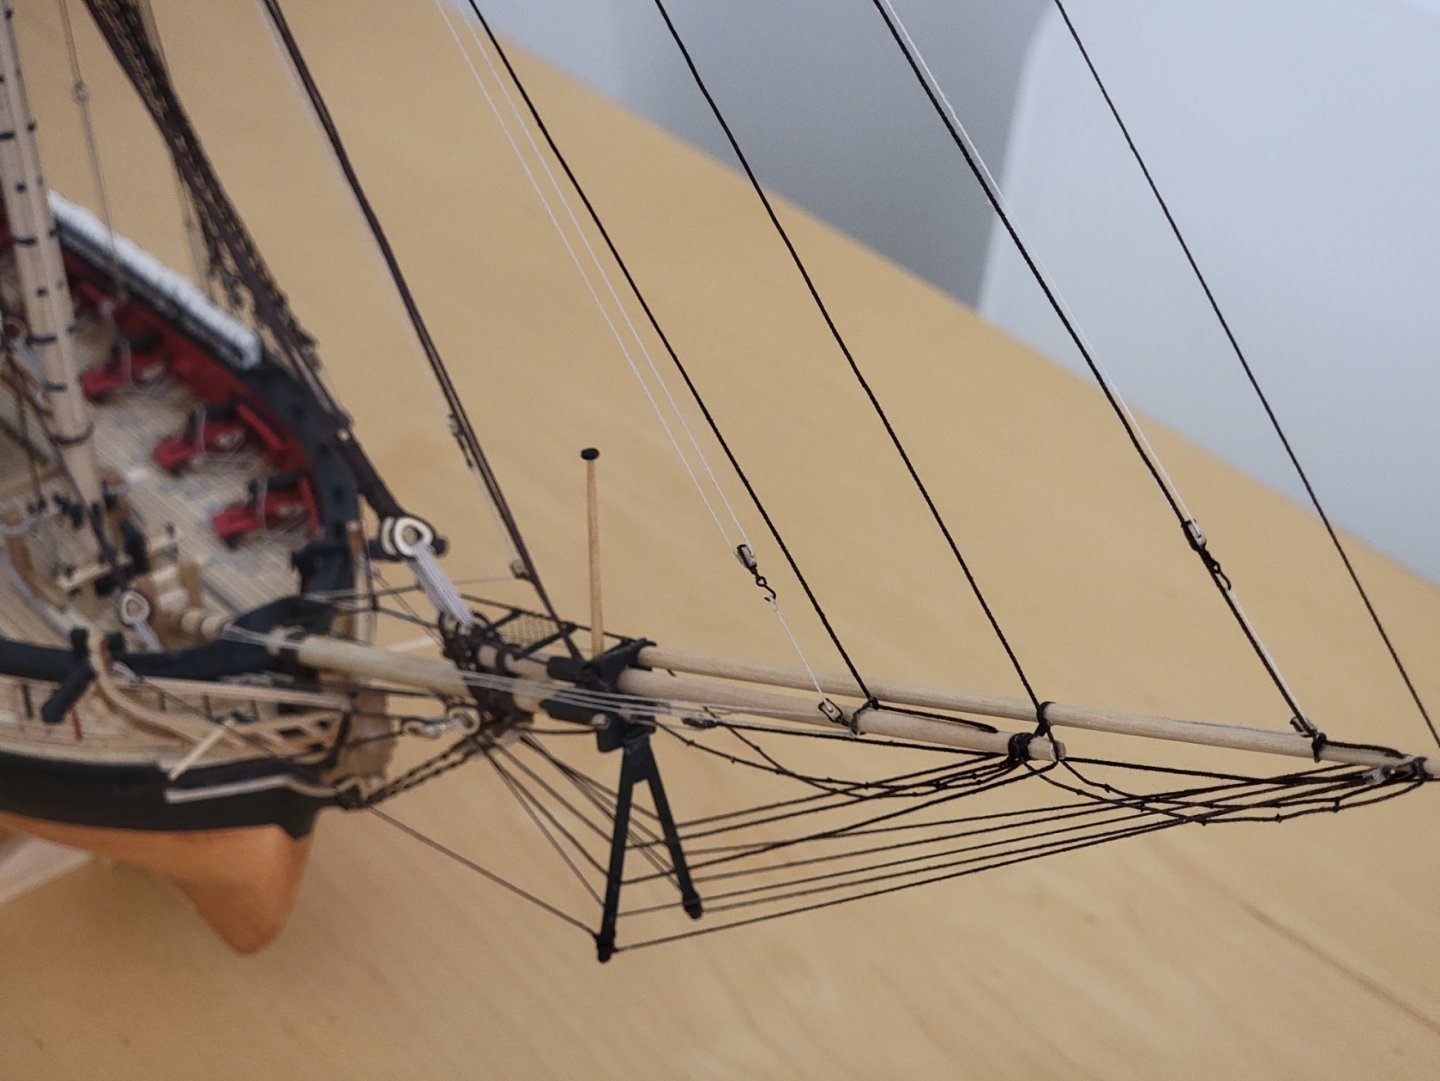
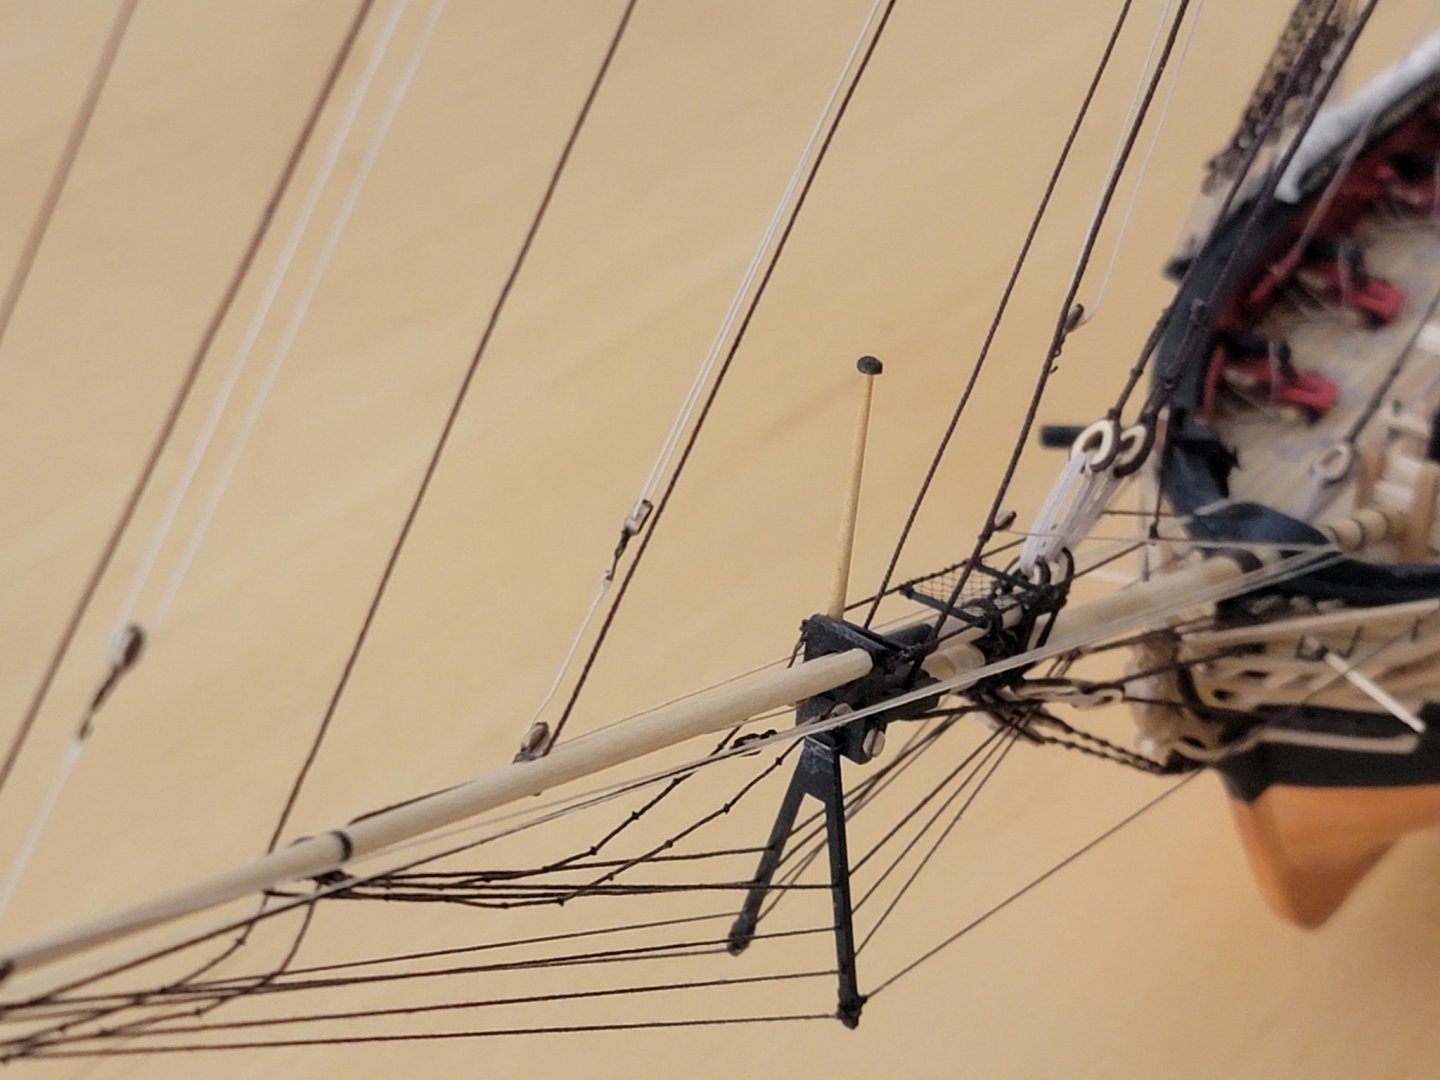
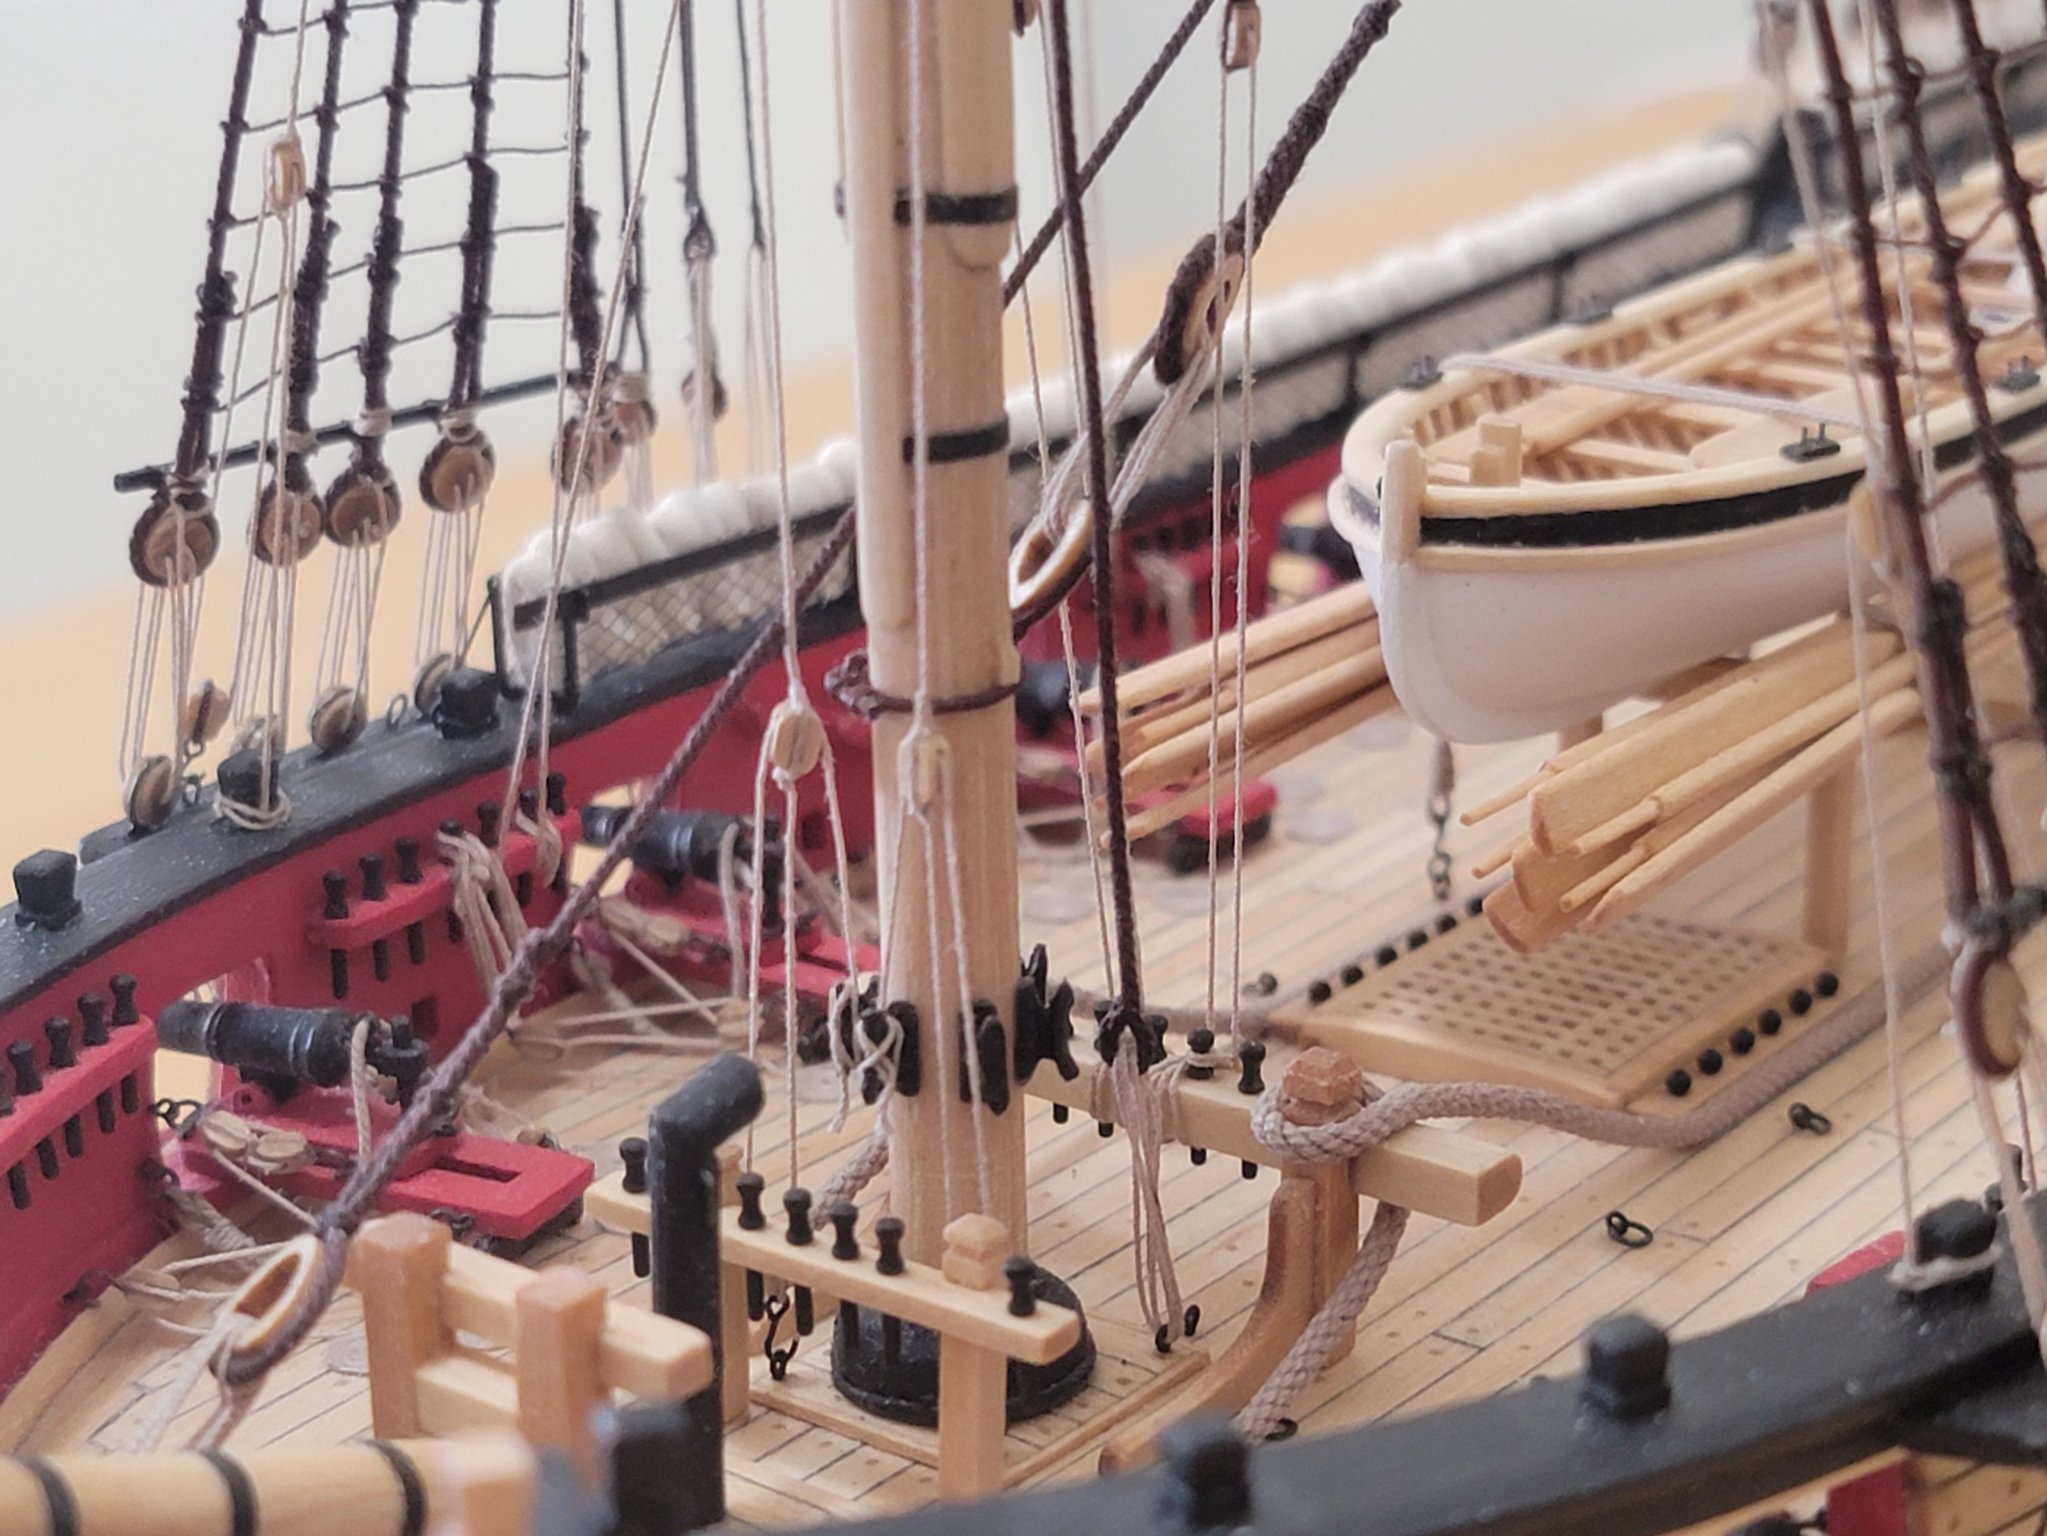
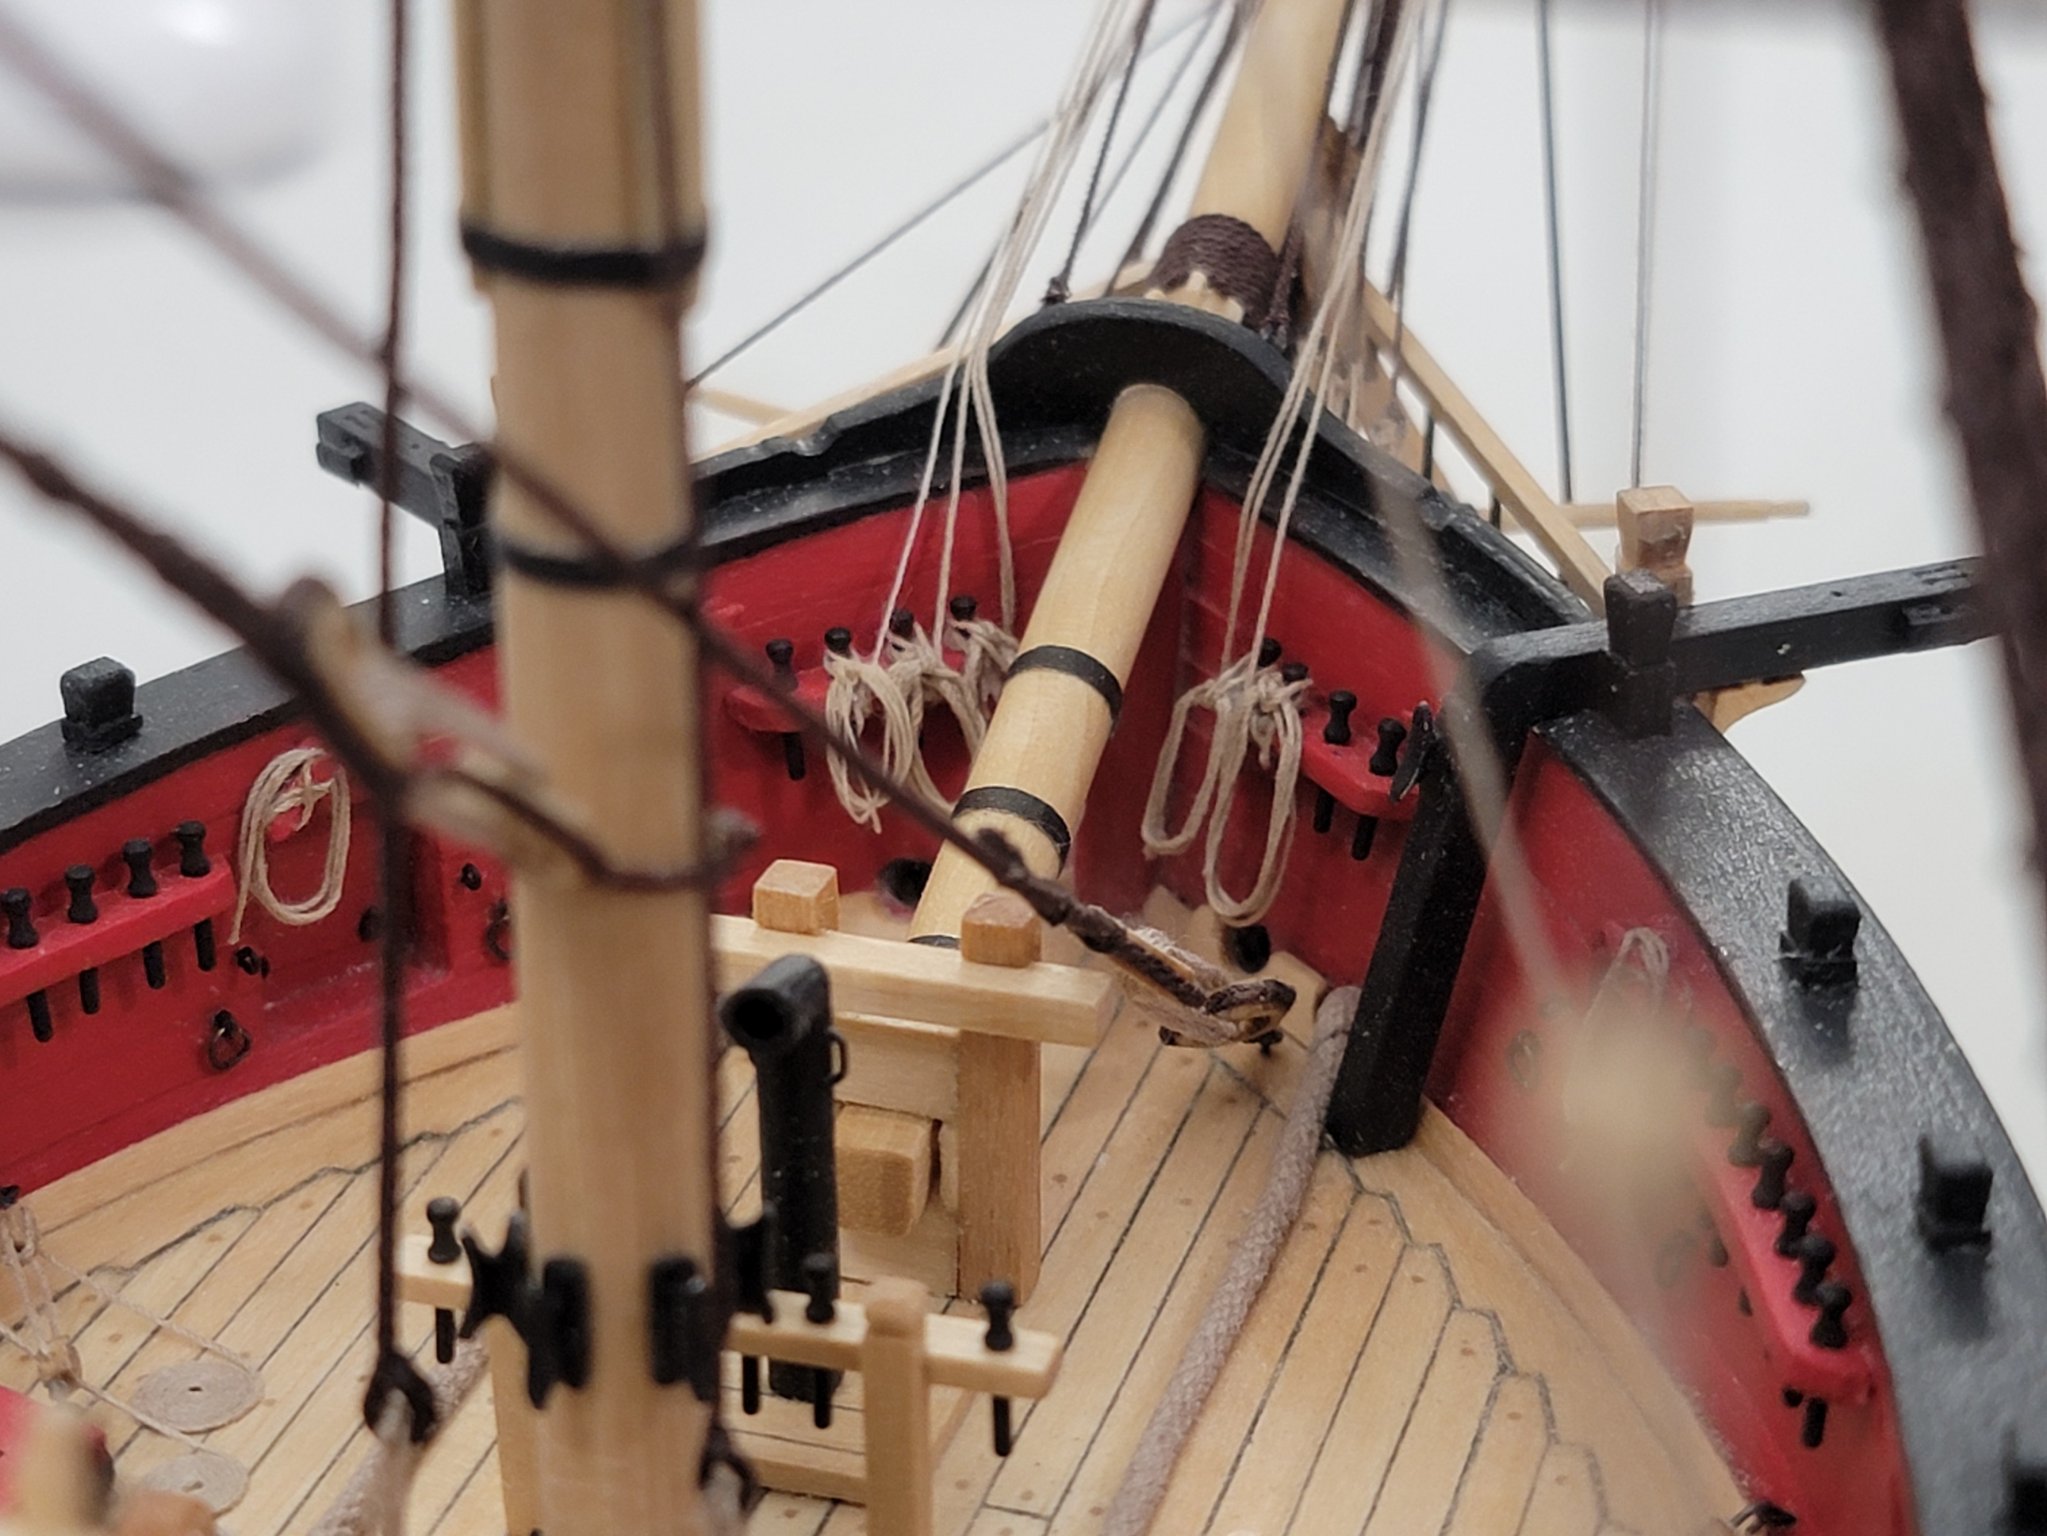
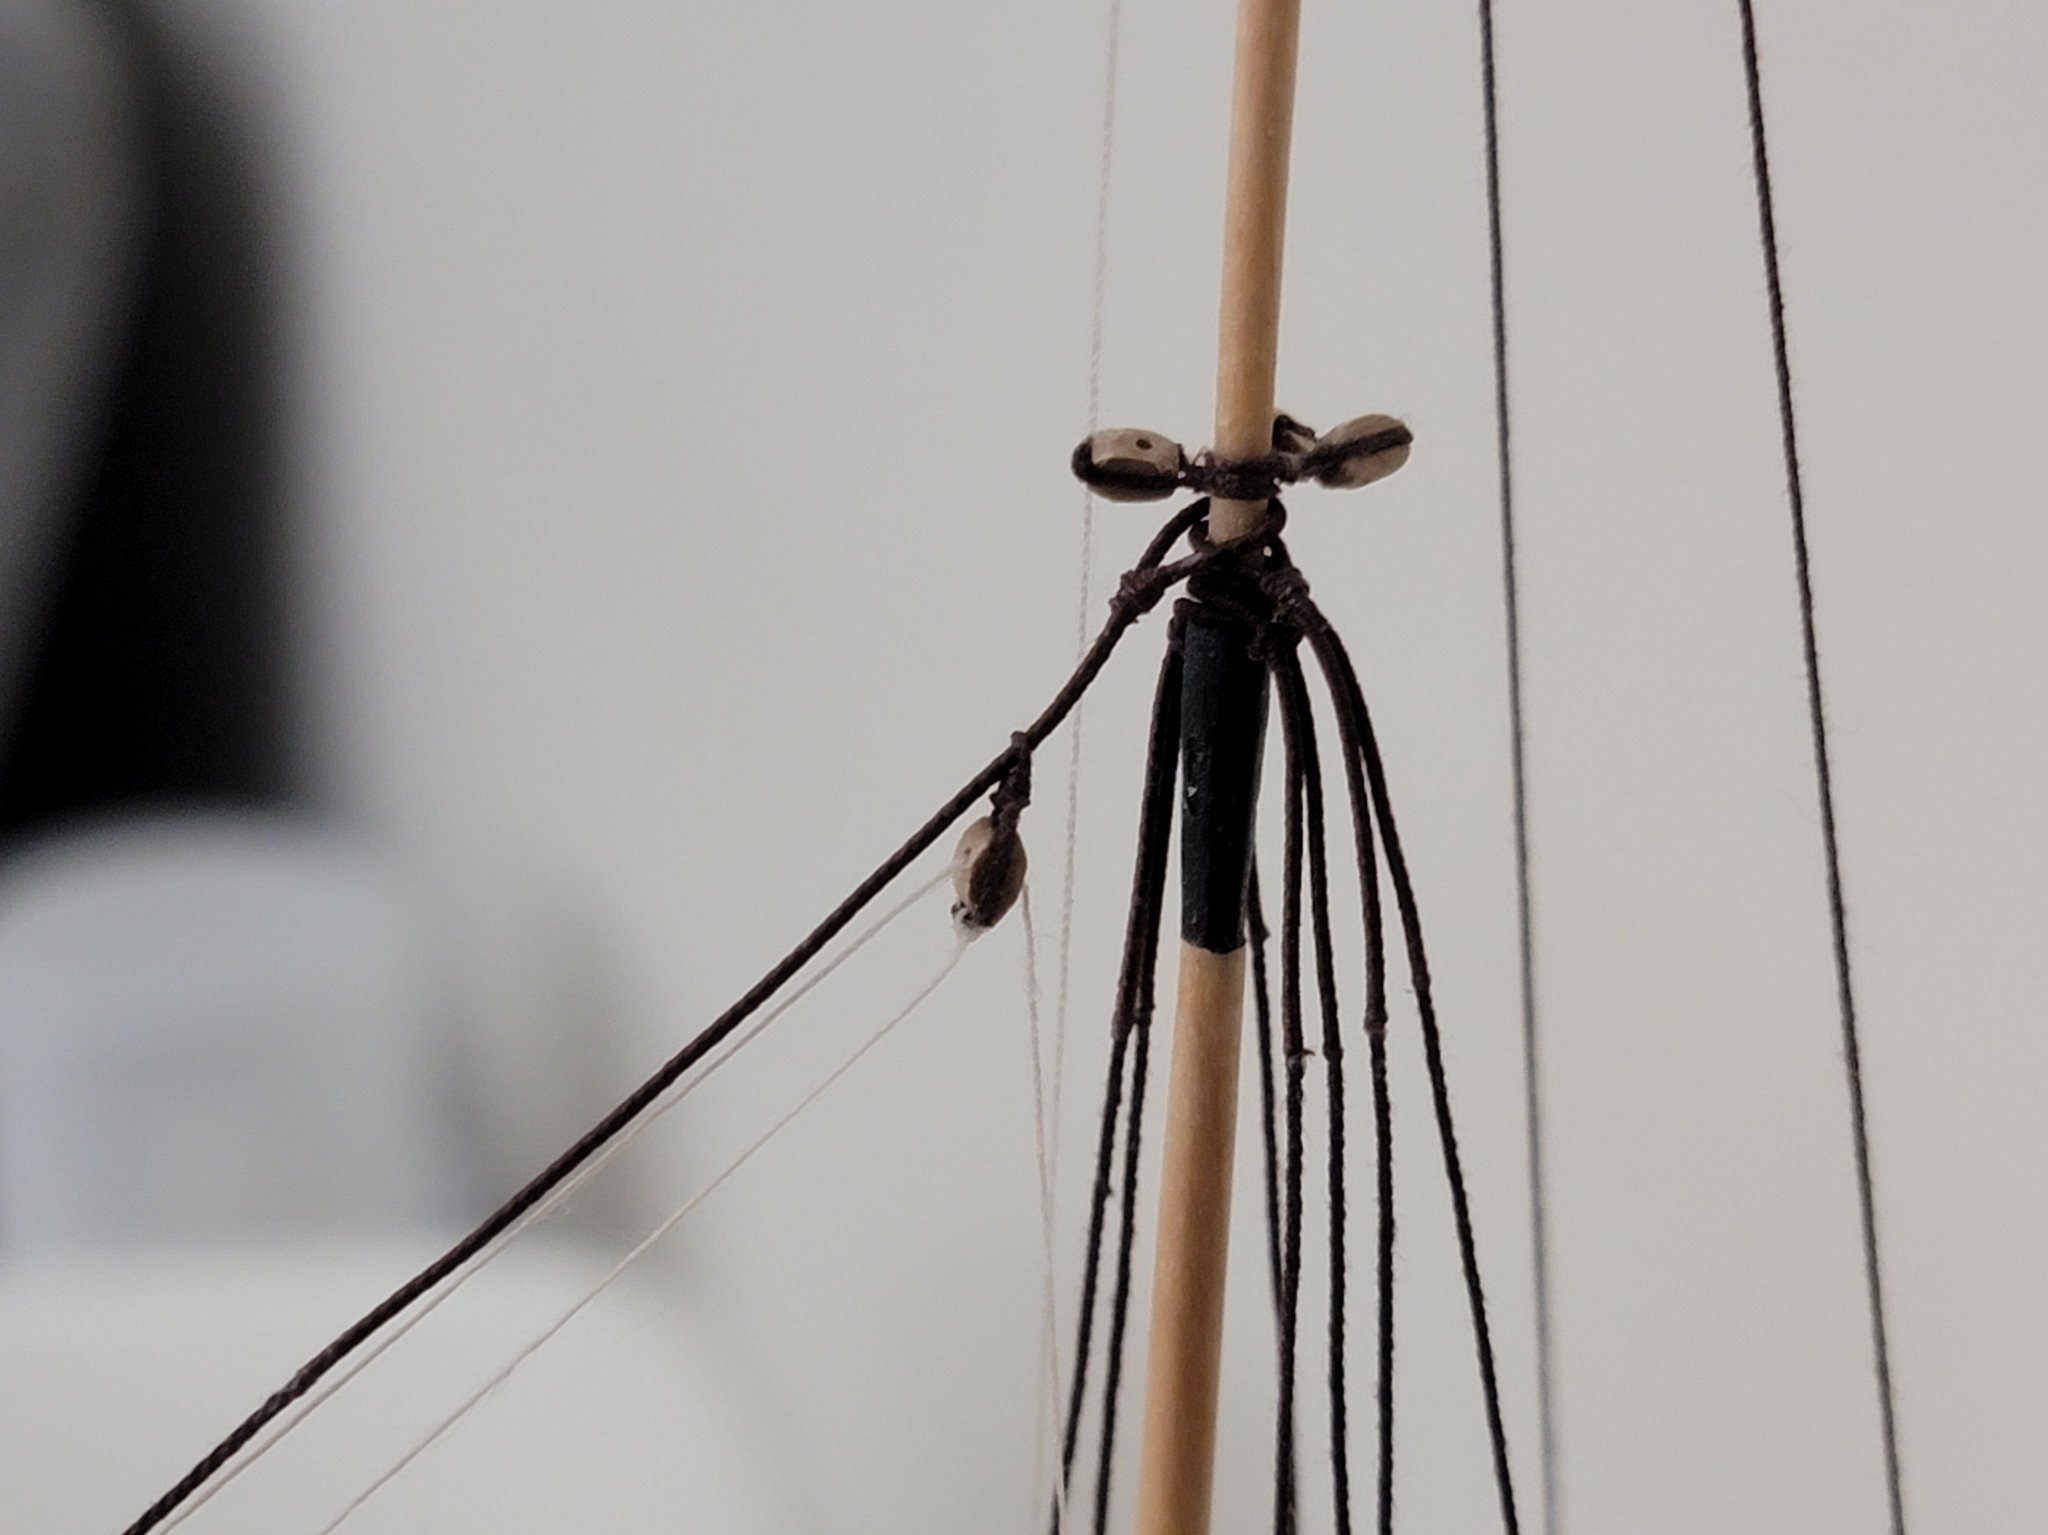
I finished rigging the lower yards (except for the braces etc which might come in the way). Threading the ropes through the blocks was a bit tricky, but its very satisfying seeing how it all comes together

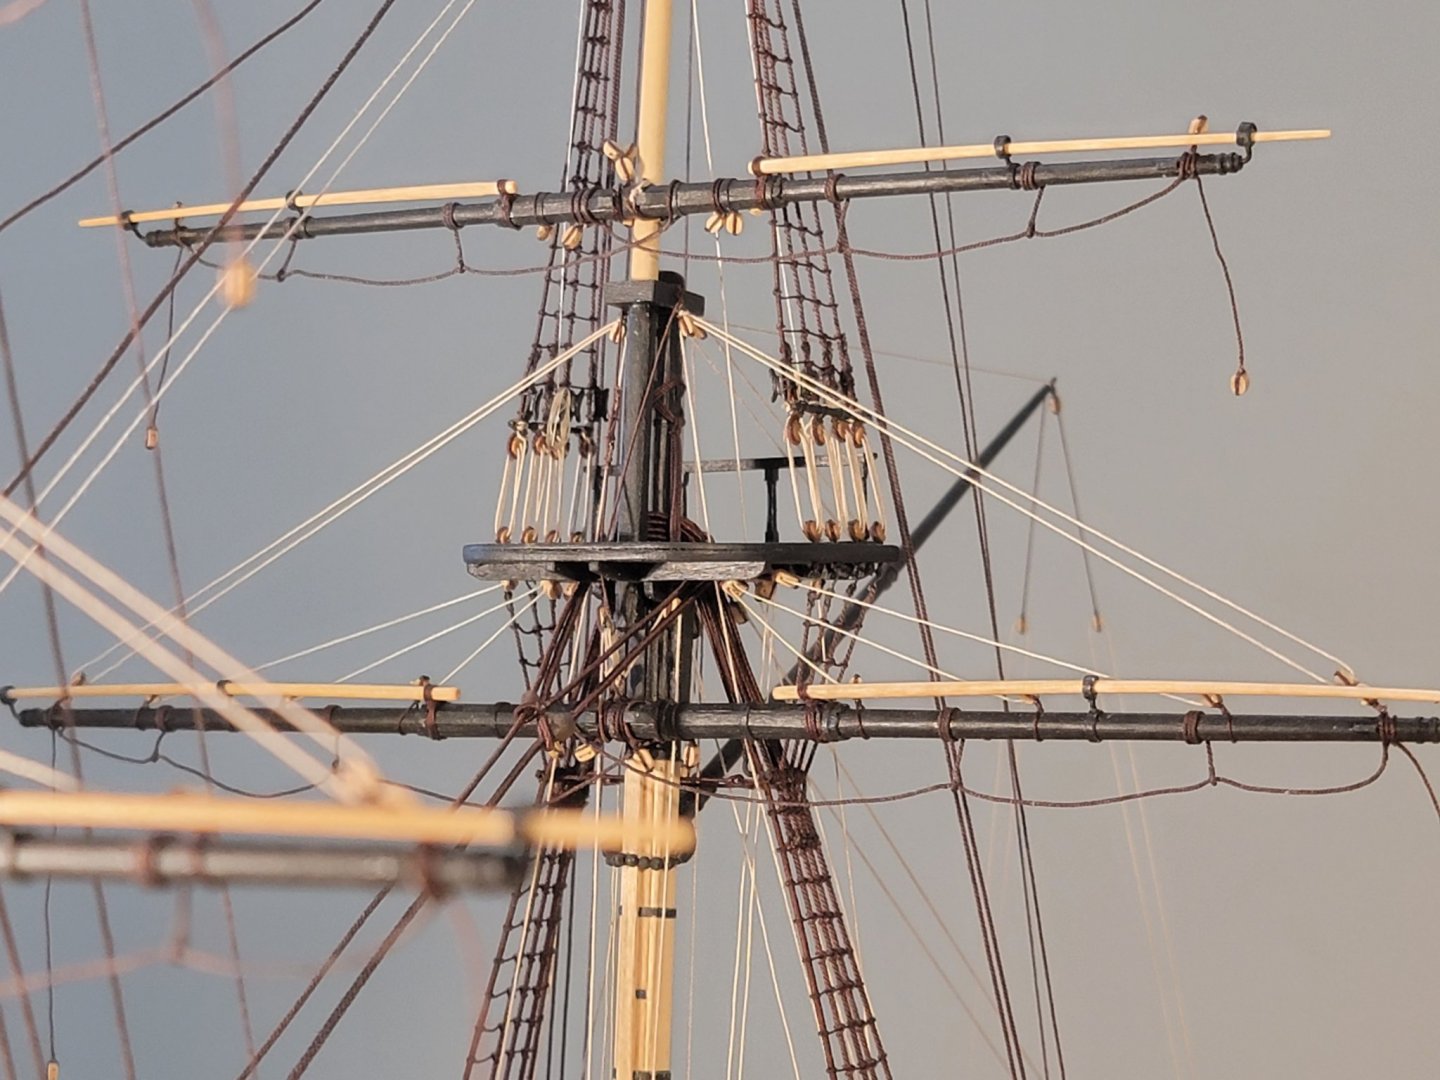


I also tied these ropes on the topping lifts as I saw Chuck did this too later on in the build. I think its to tighten the boom sheet as mine was a bit slack before.
-
Thanks so much Will, Thomas, and Justin! The comments are very motivating!! 😄
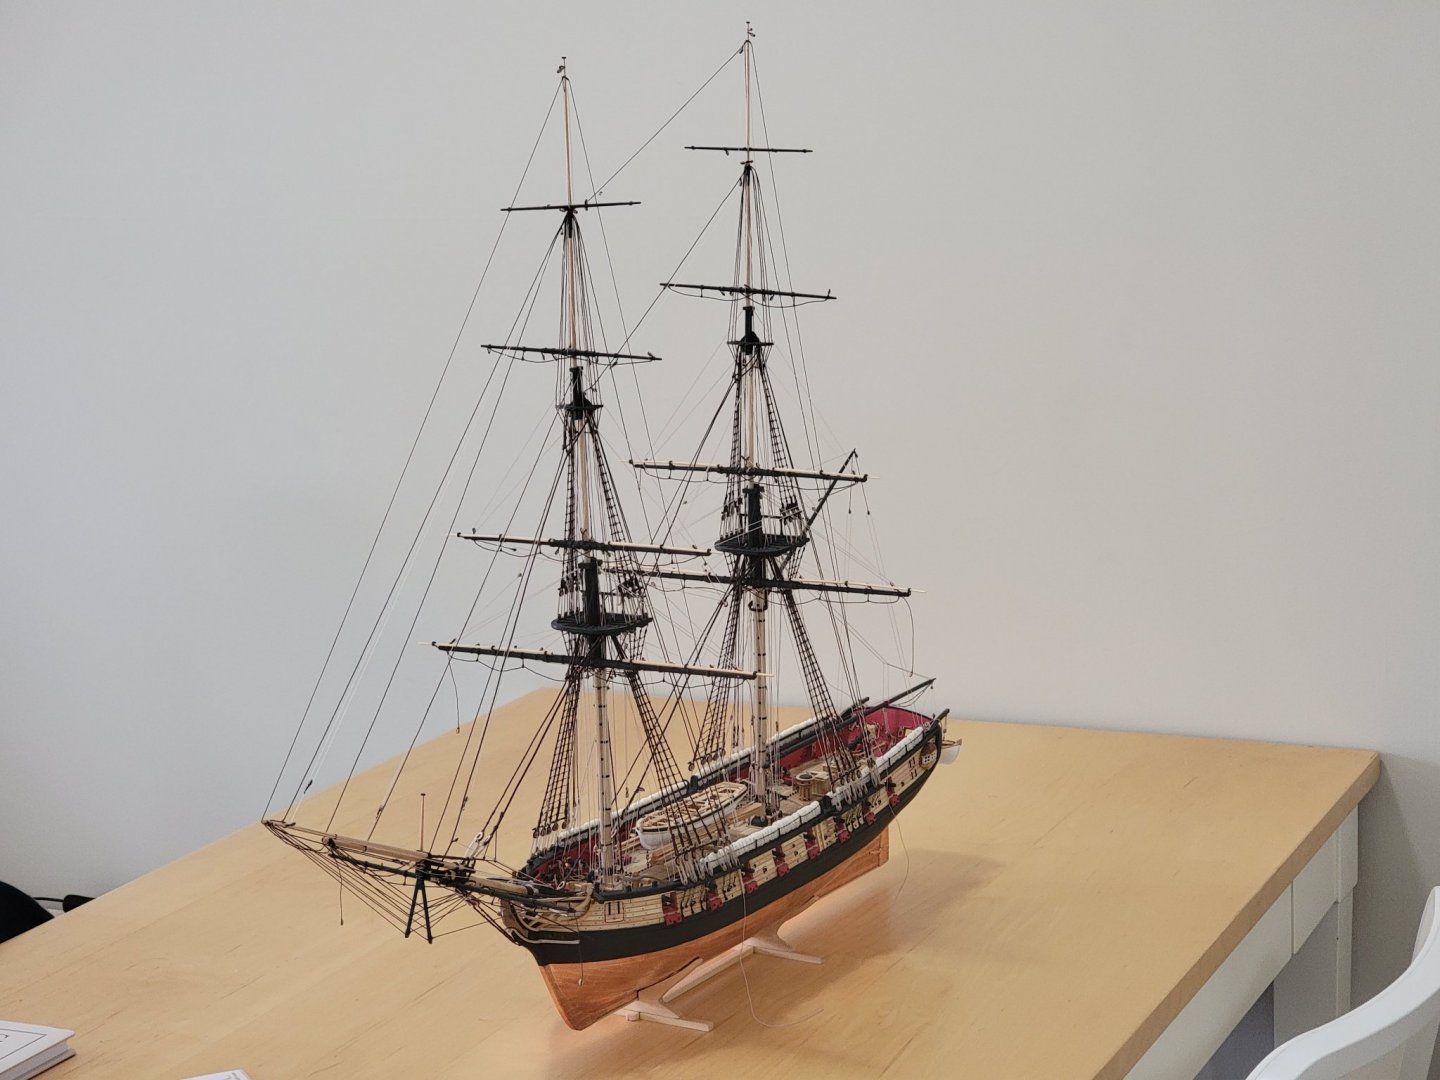
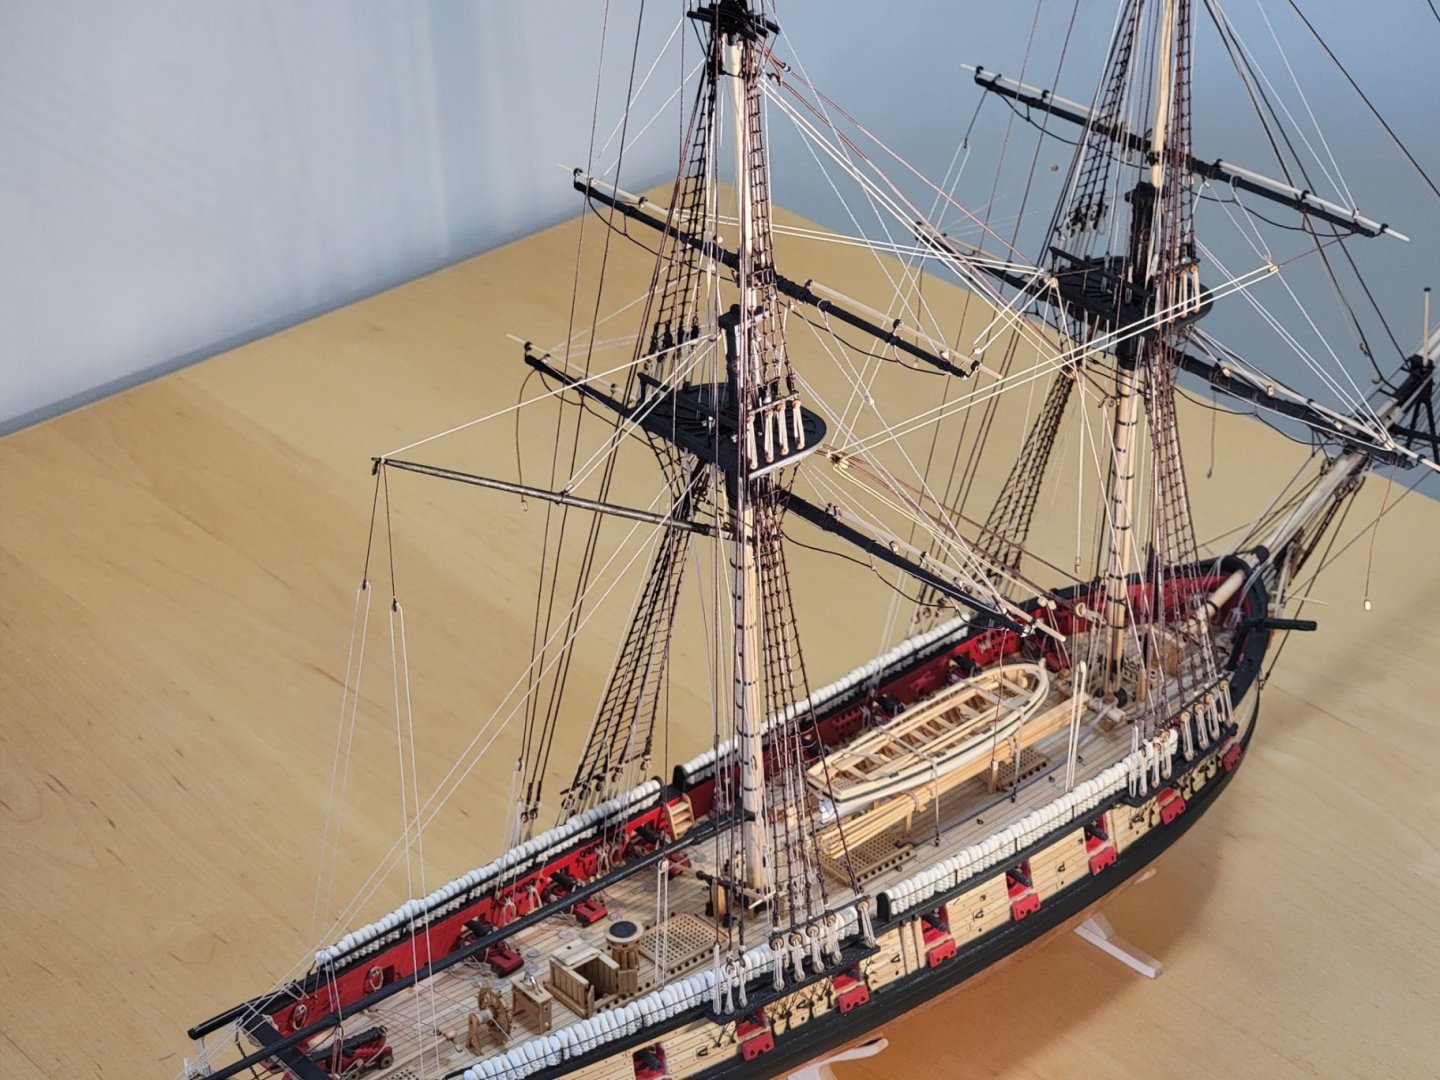
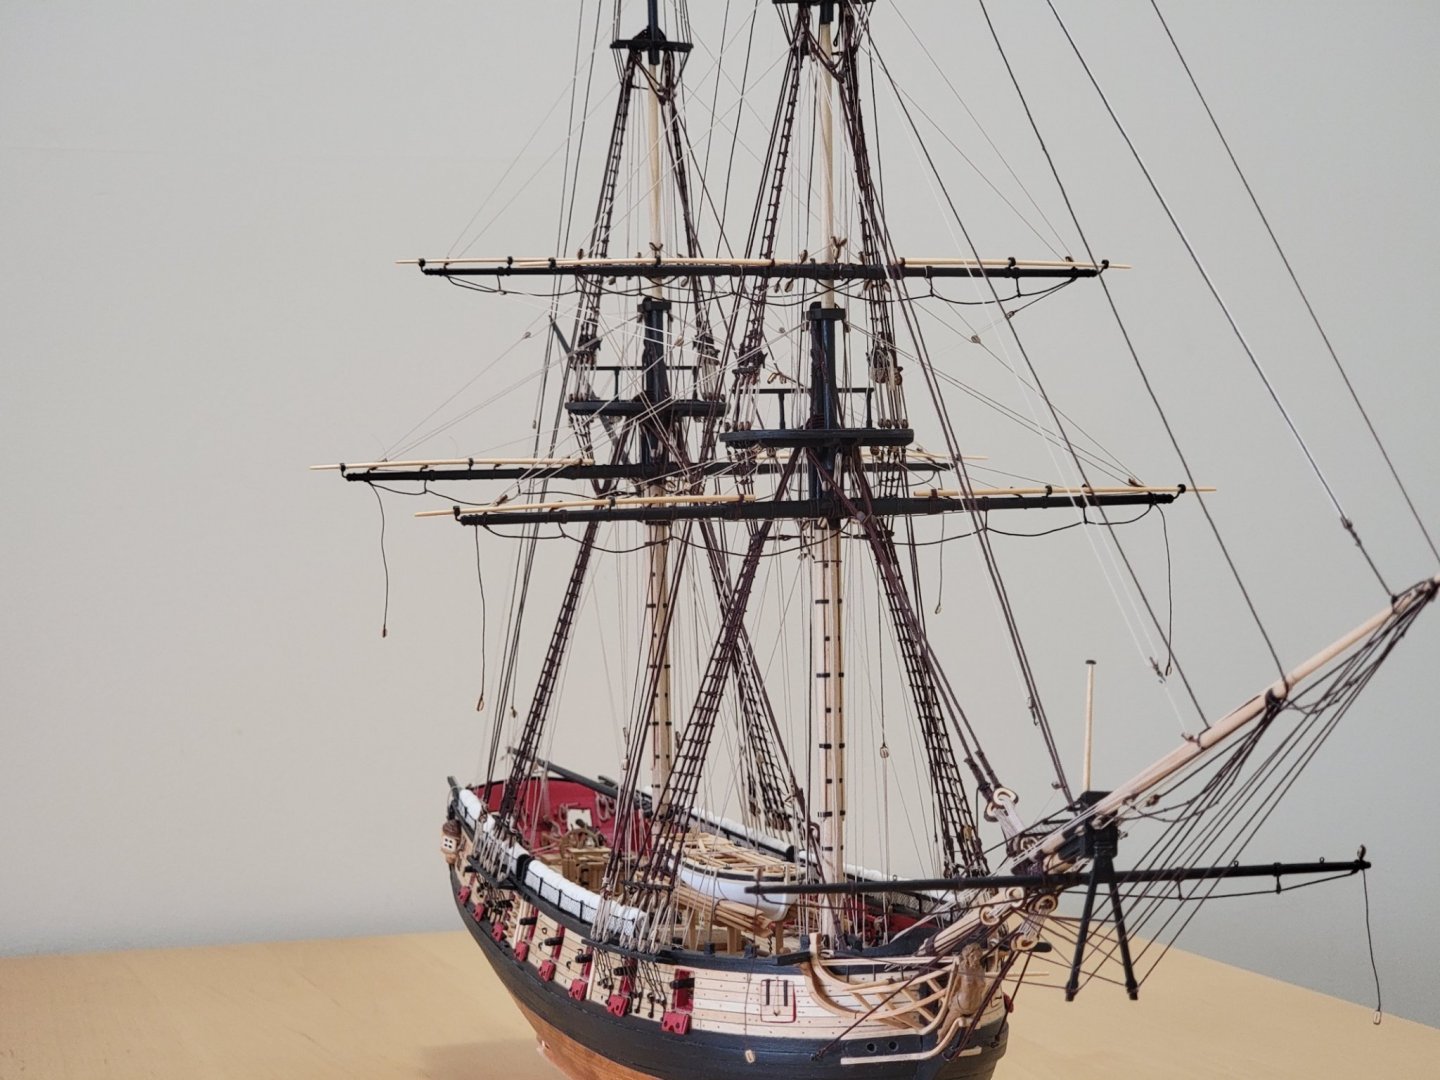
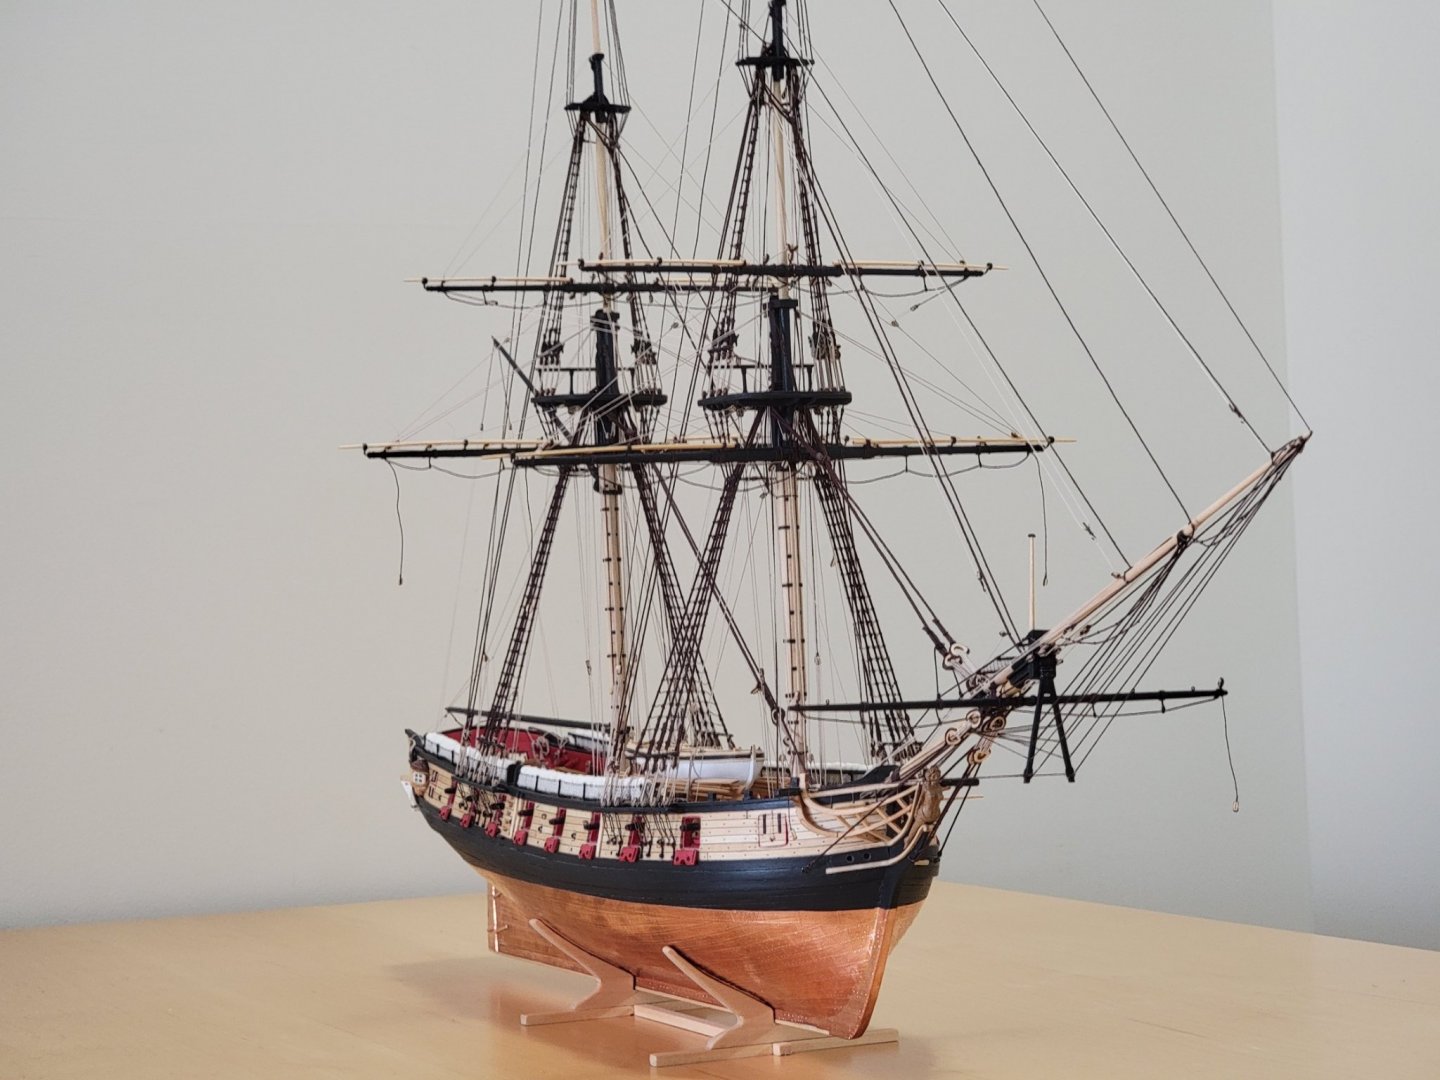
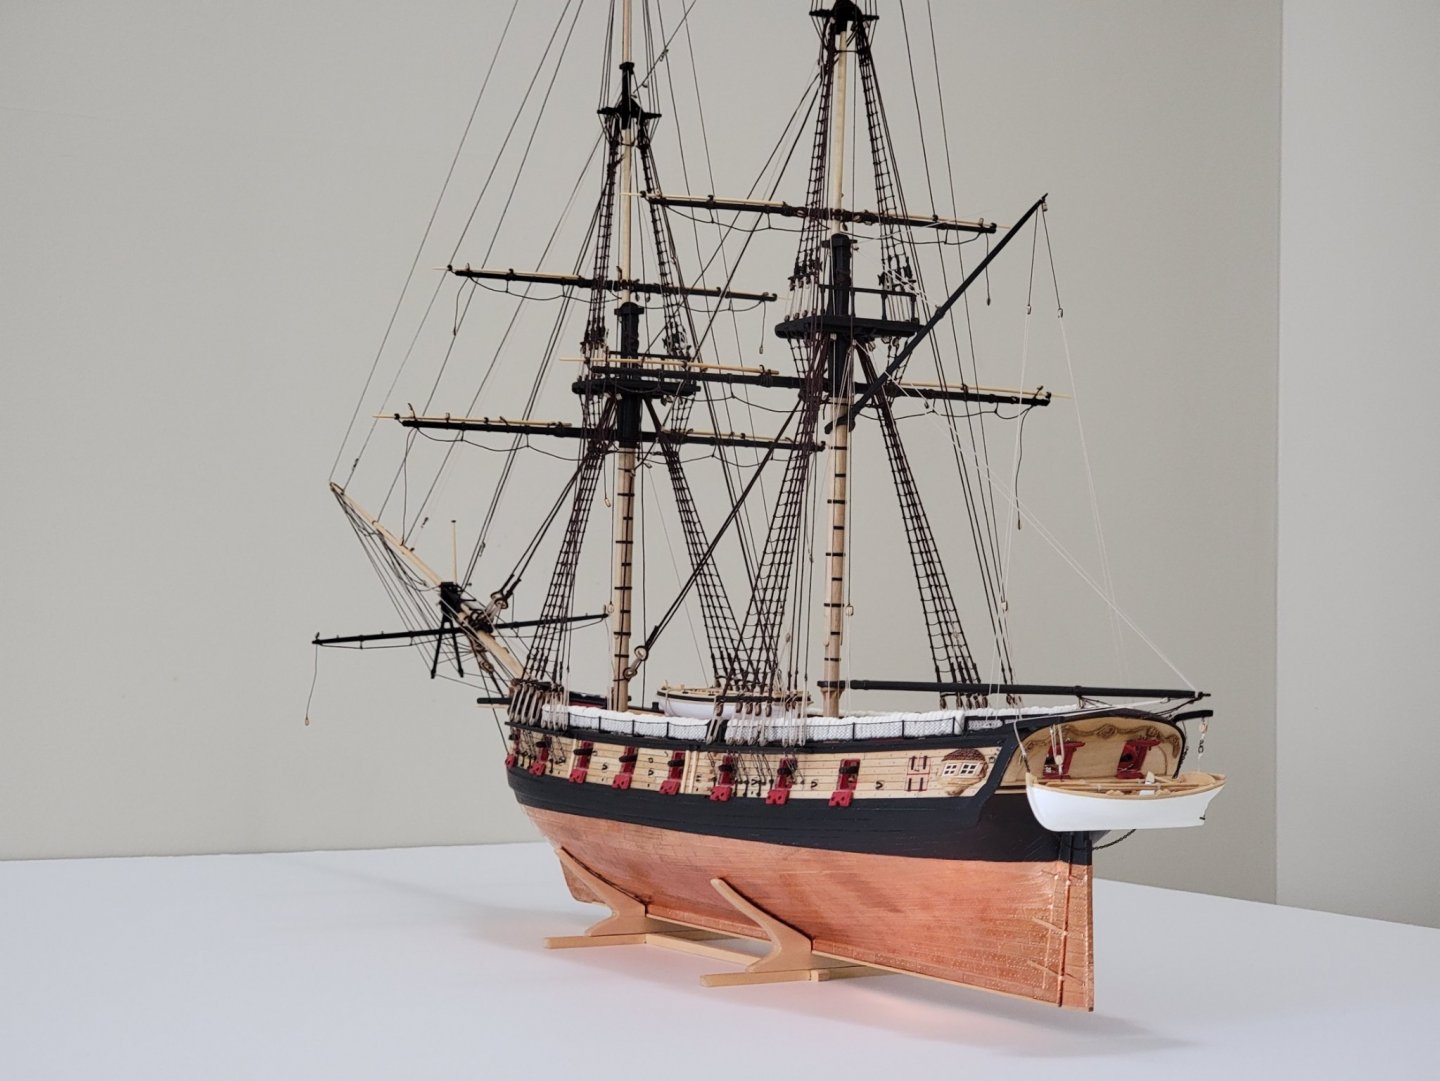
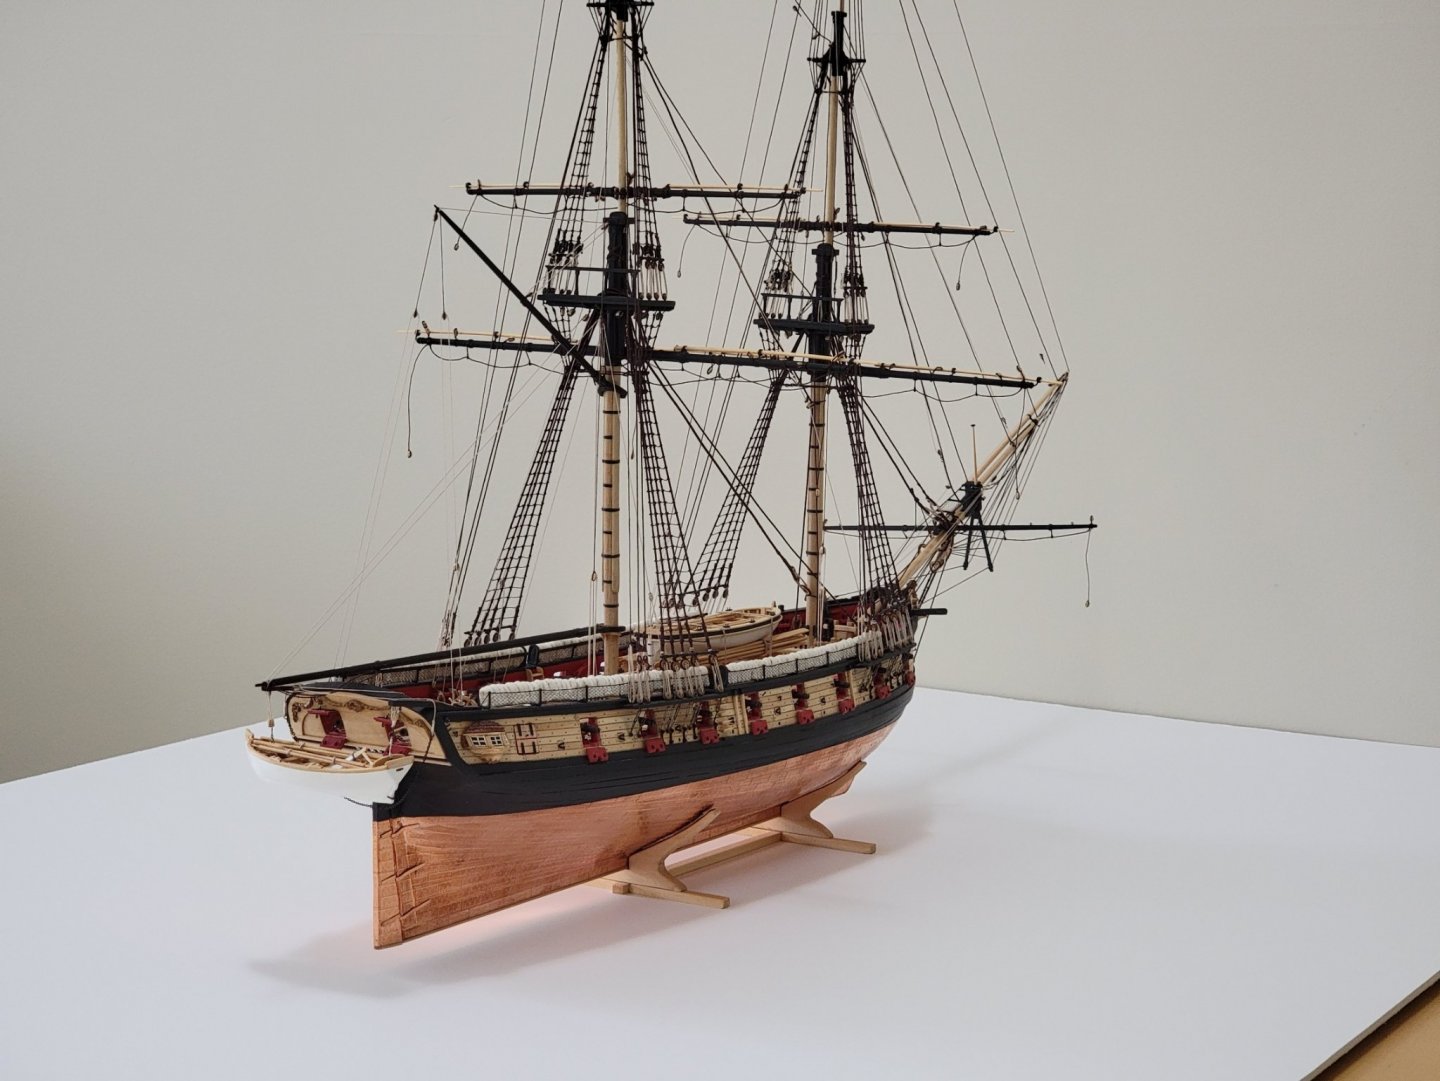
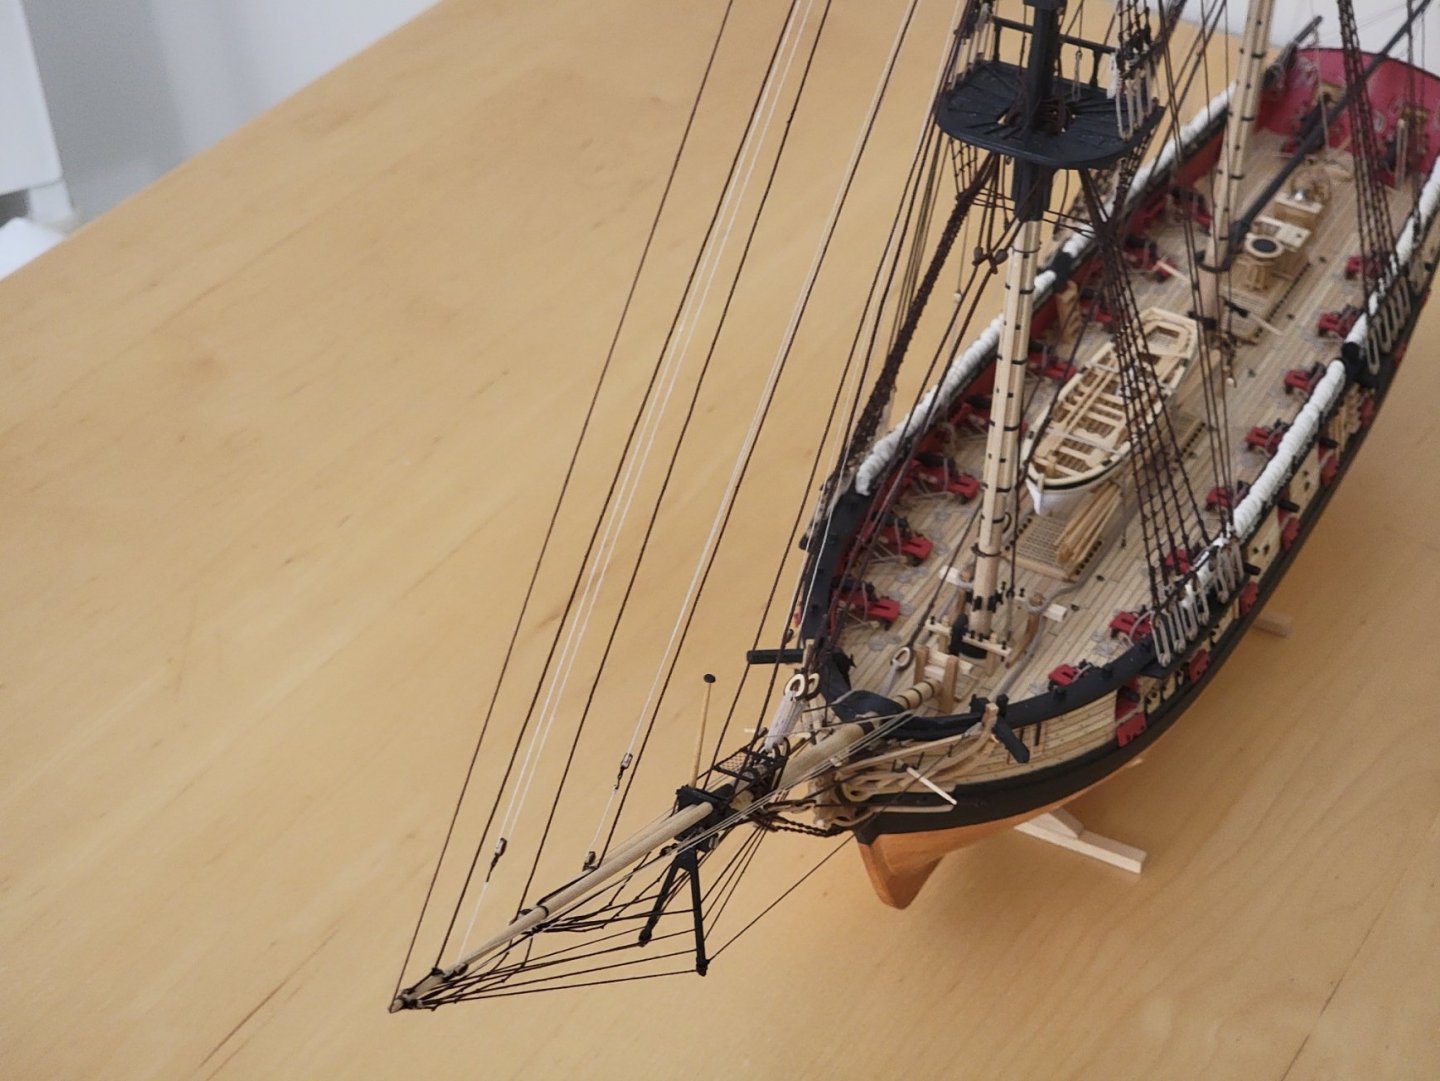
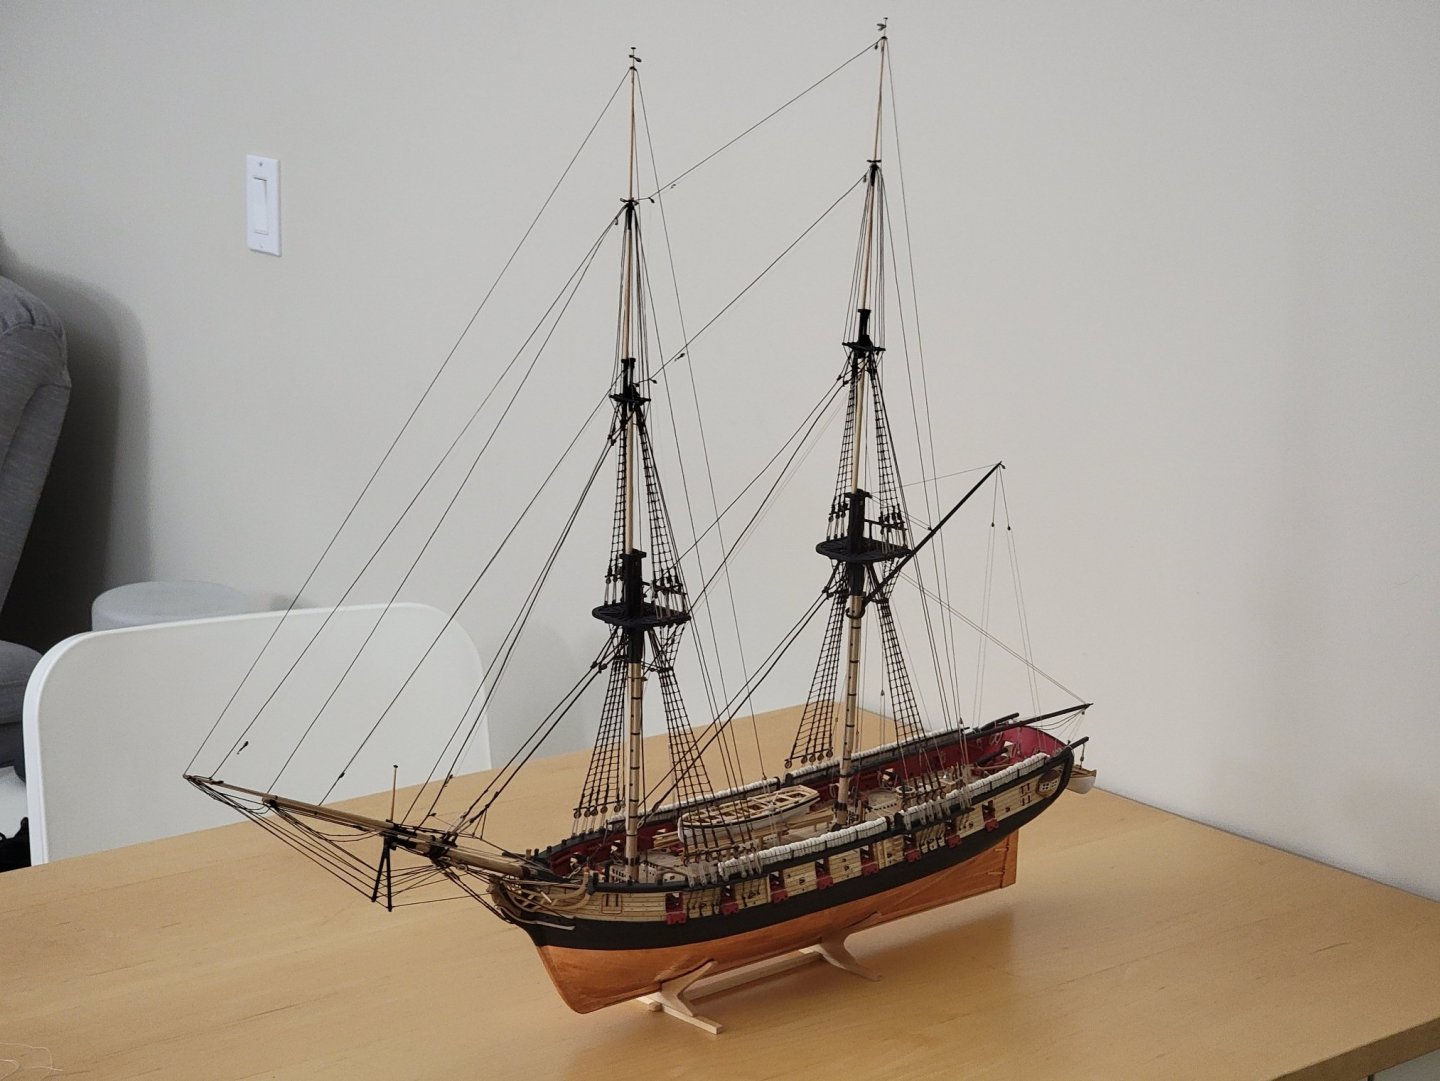
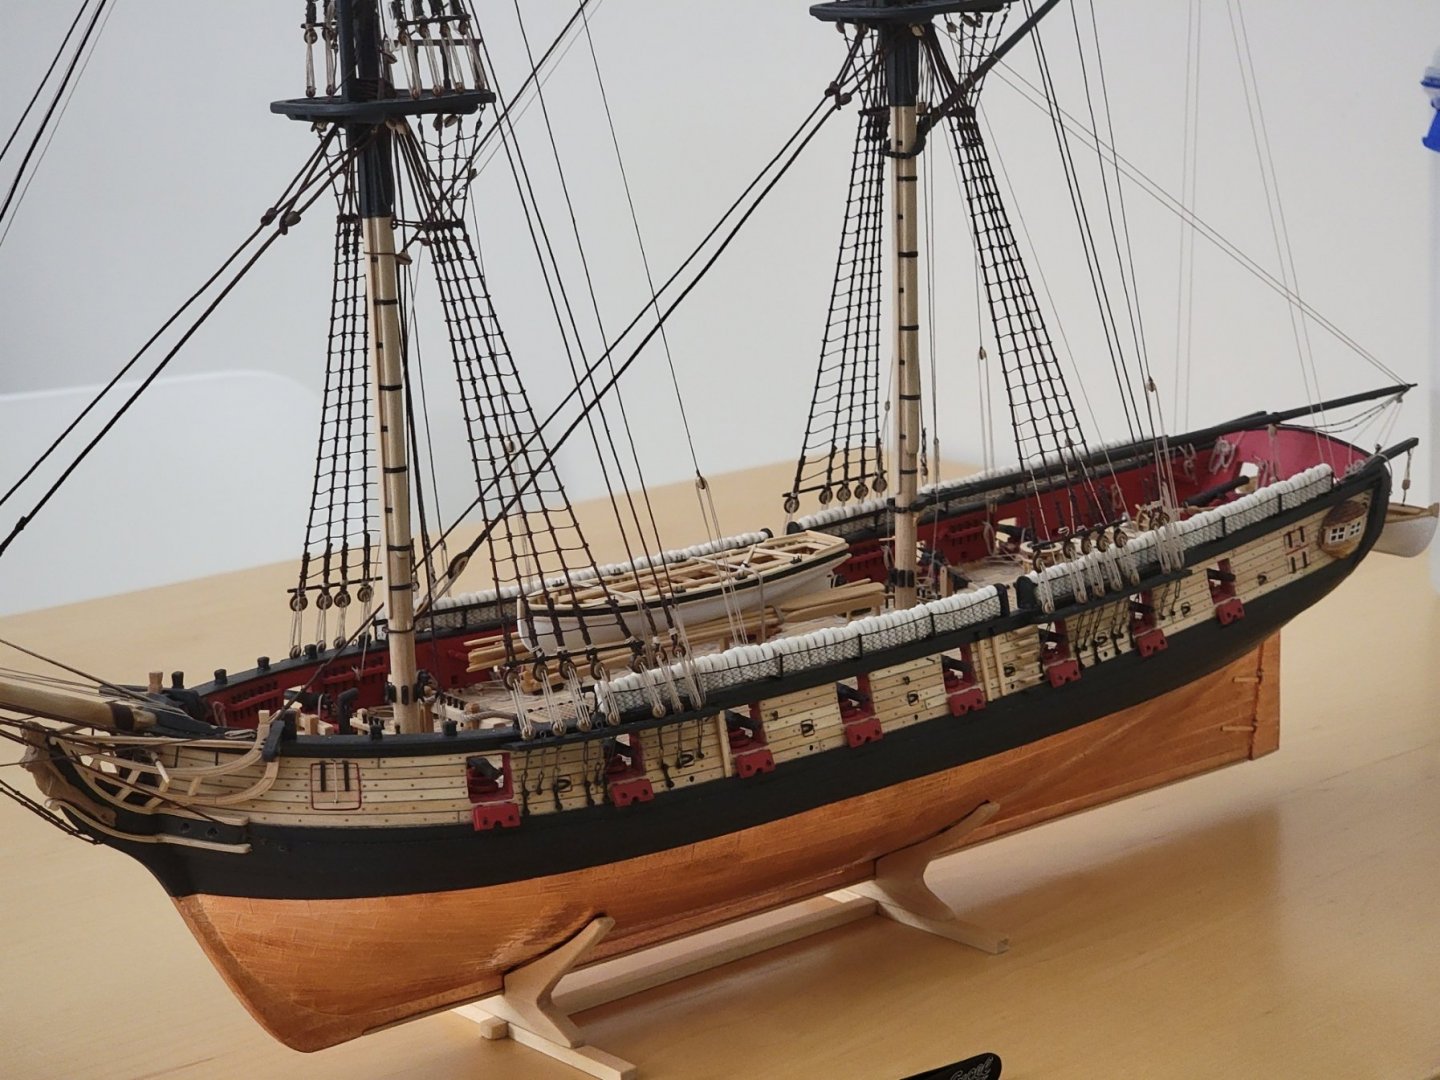
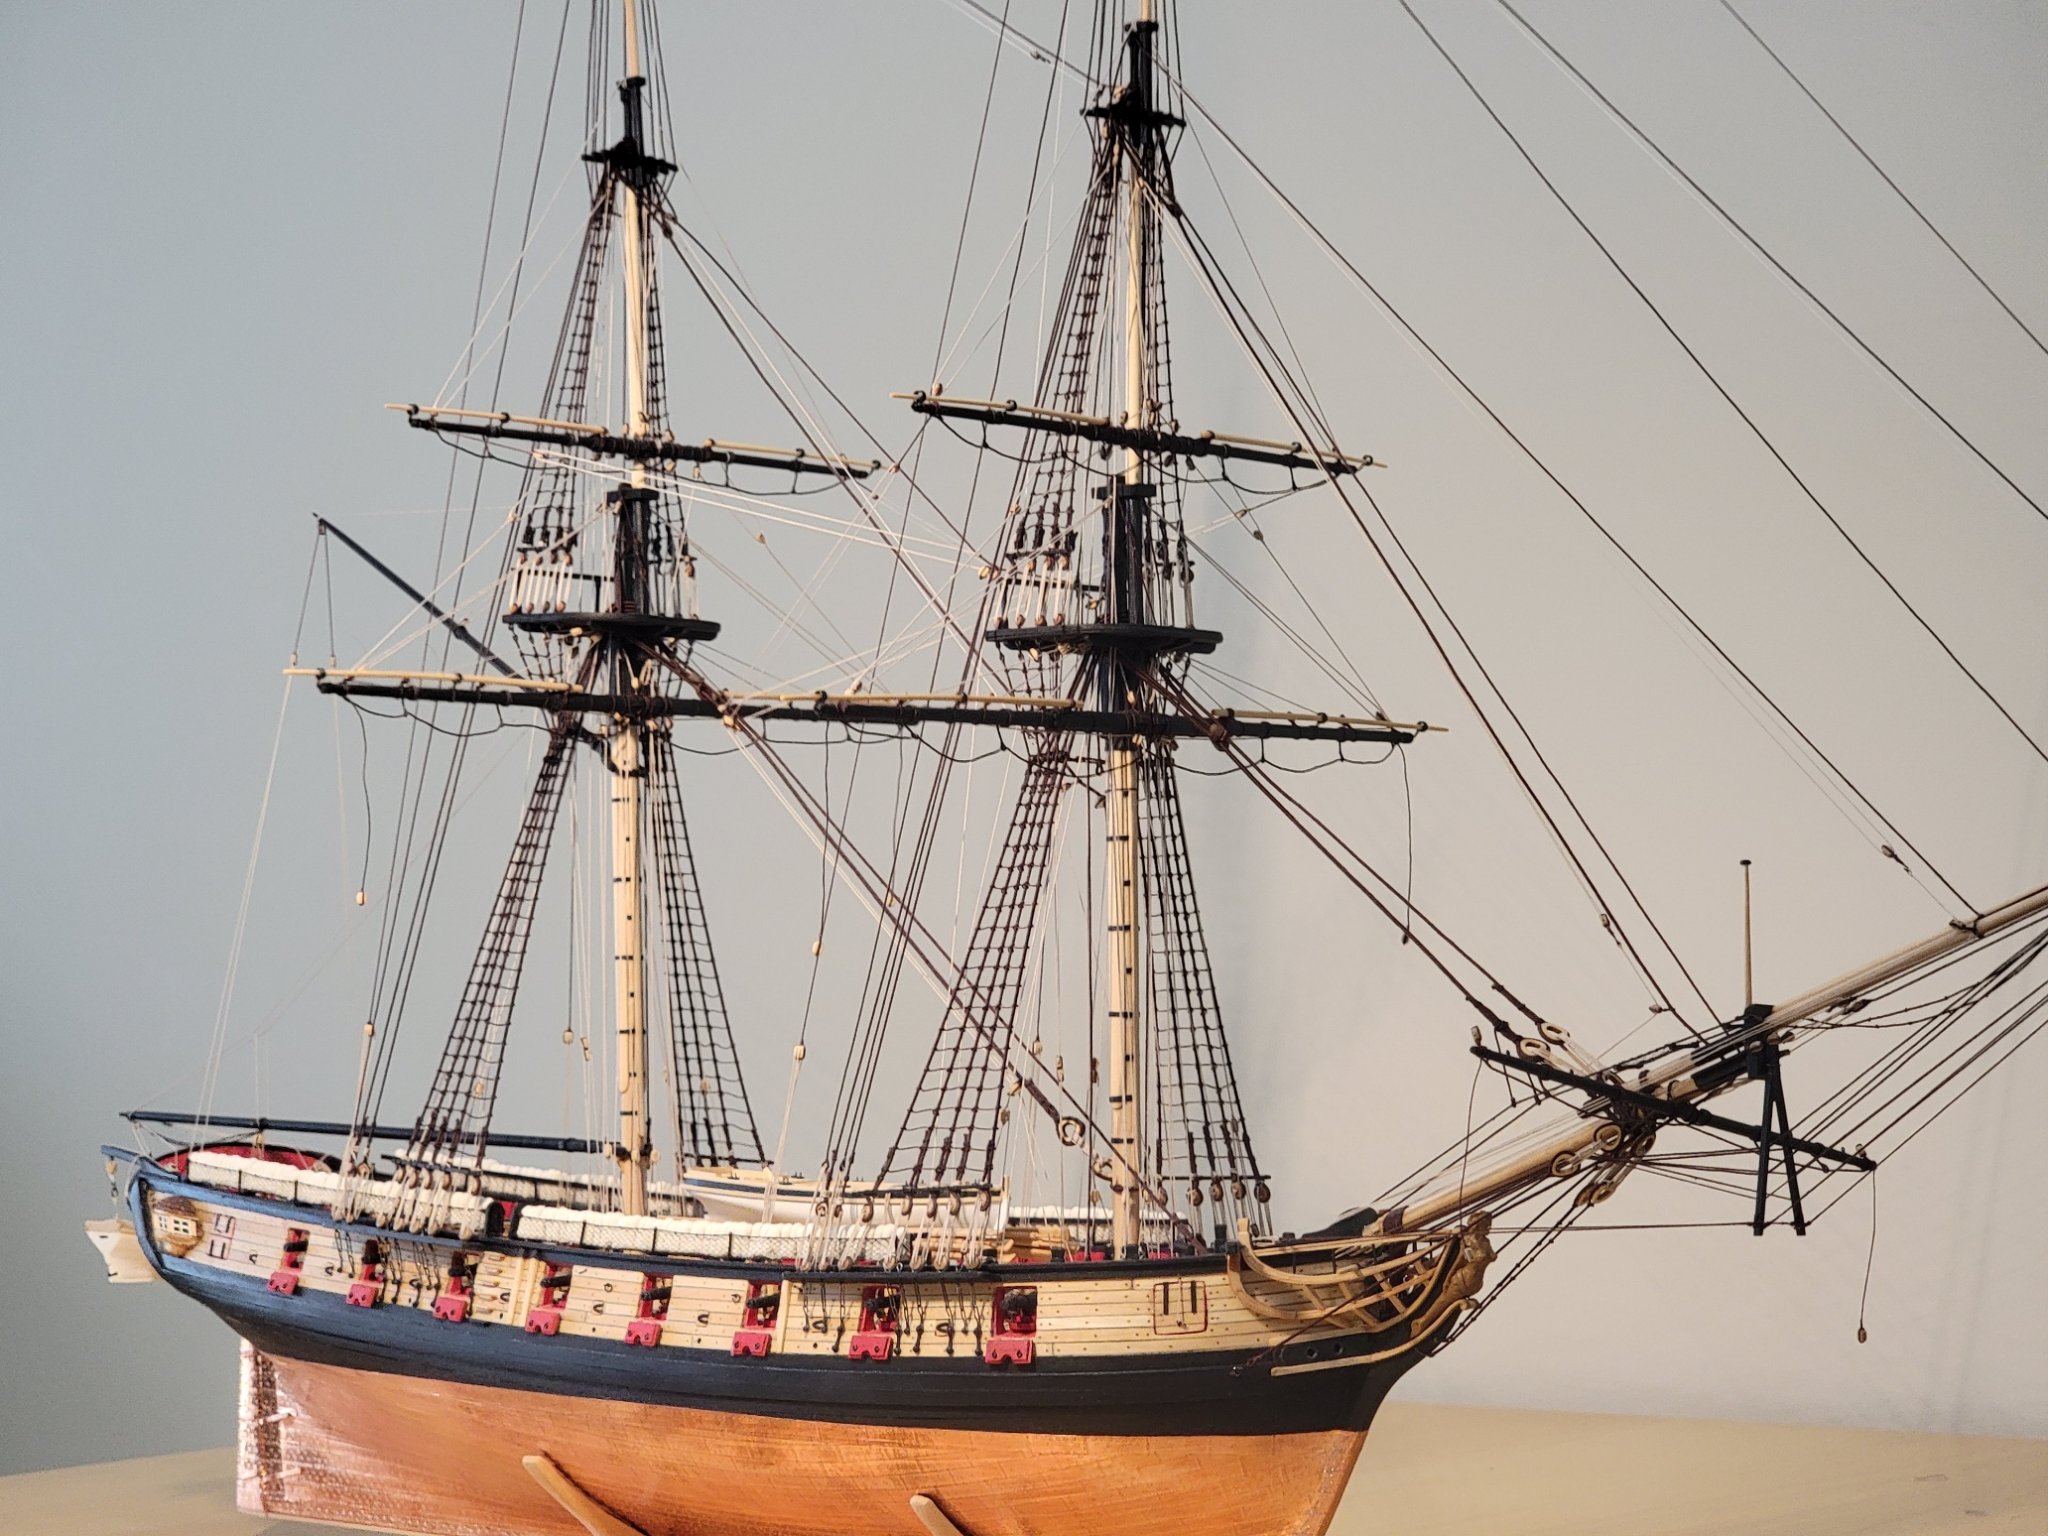
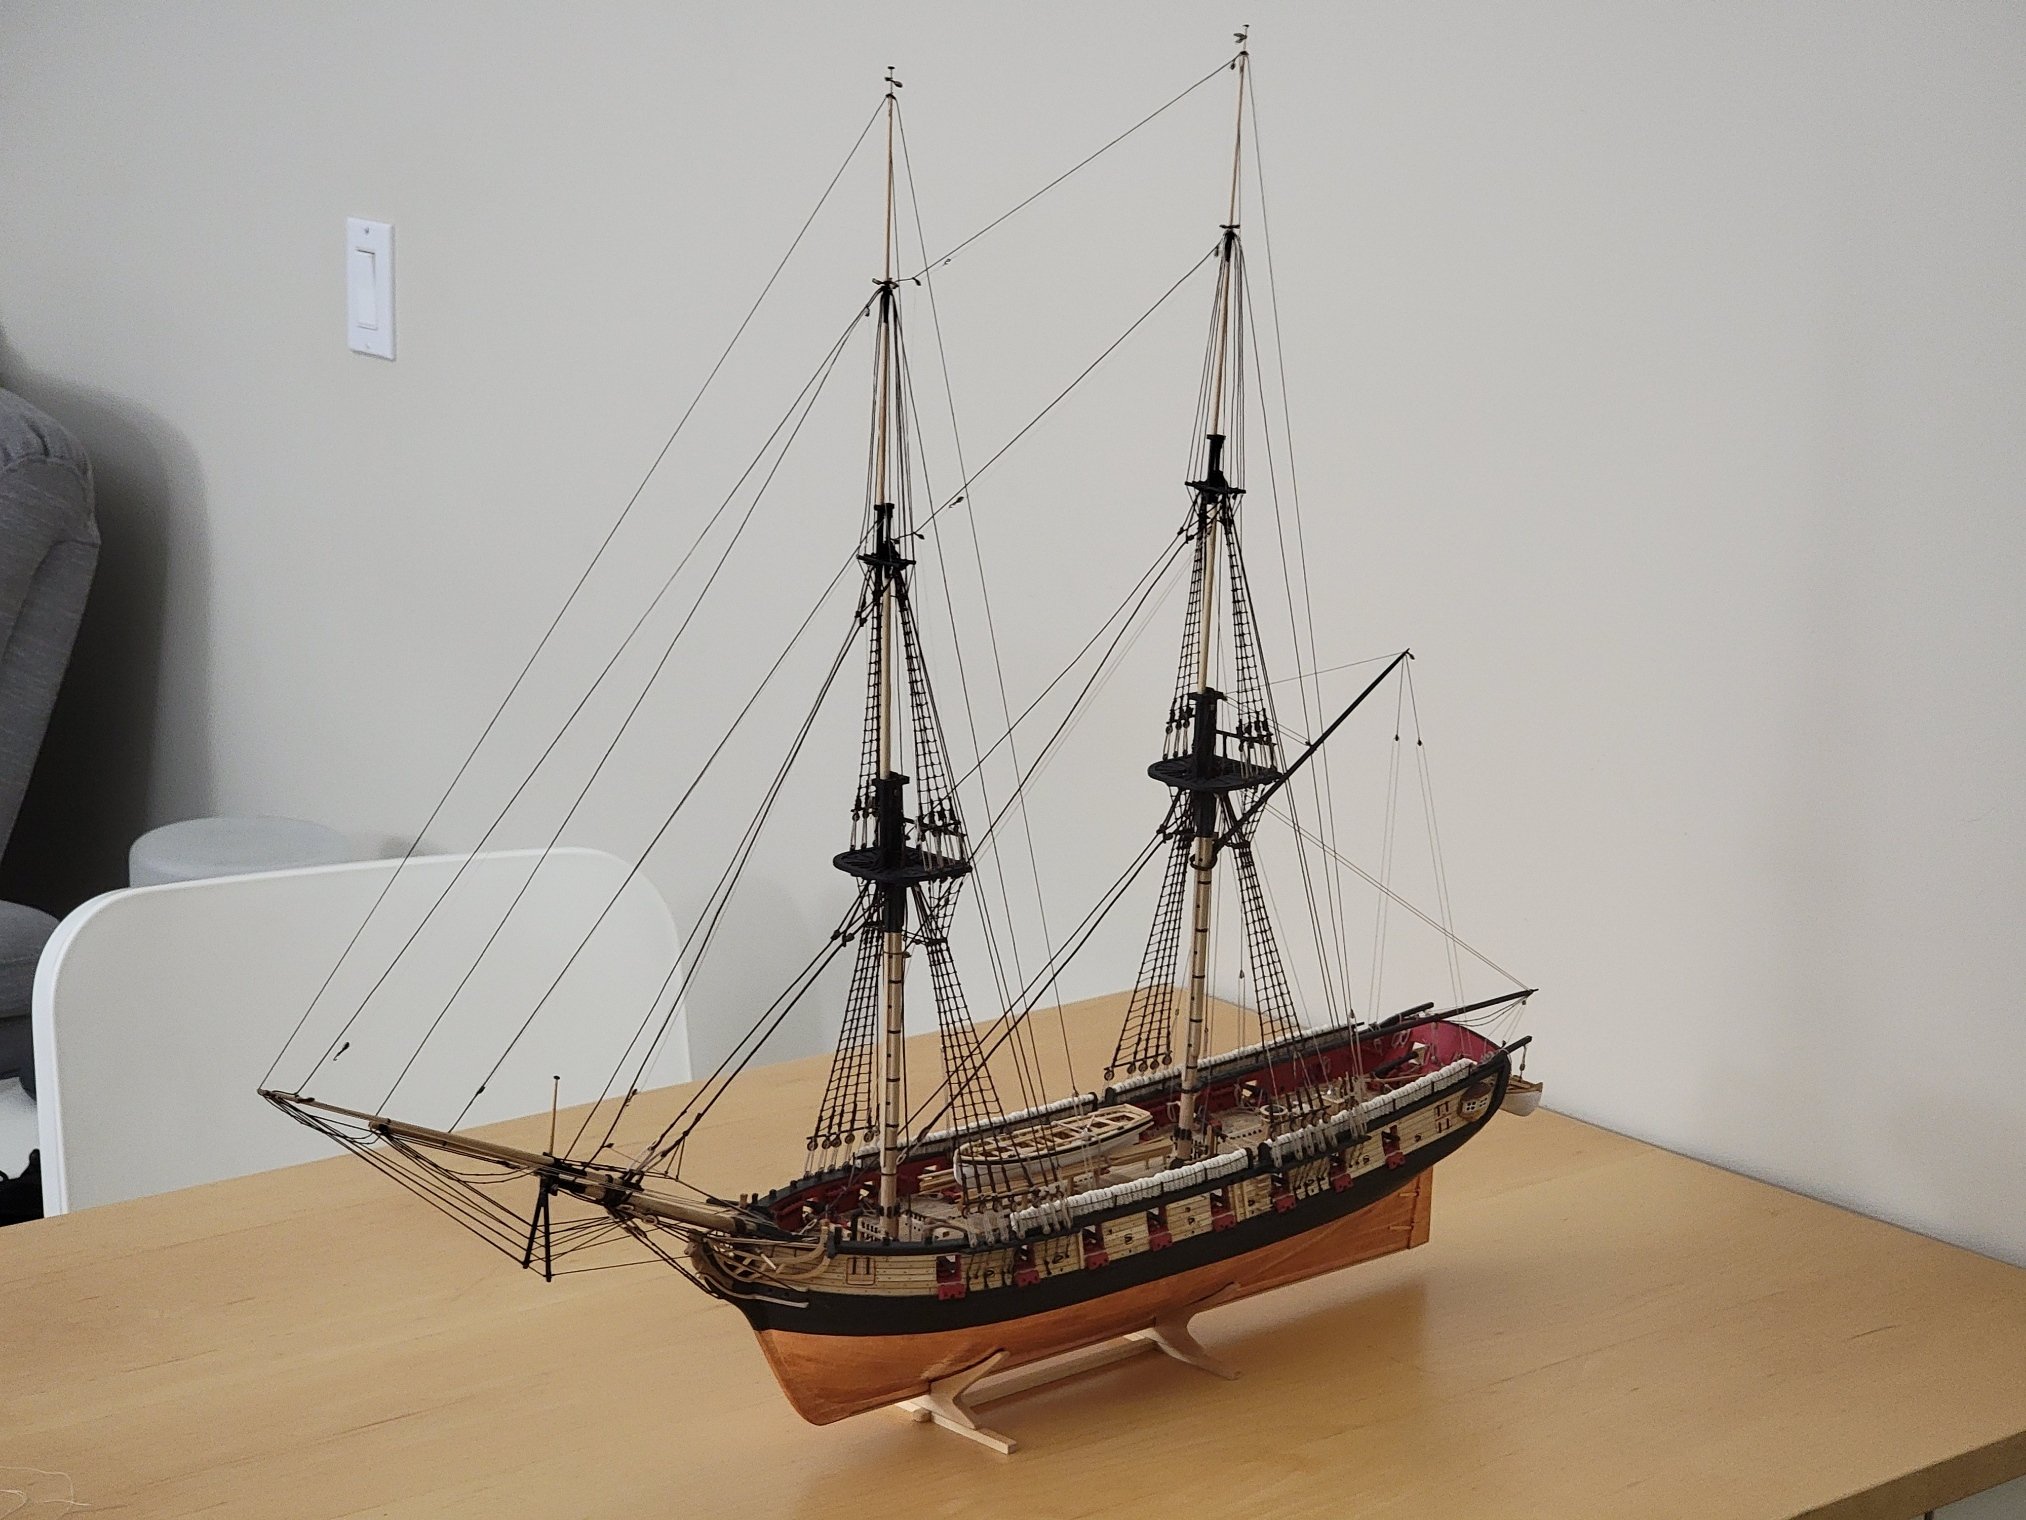
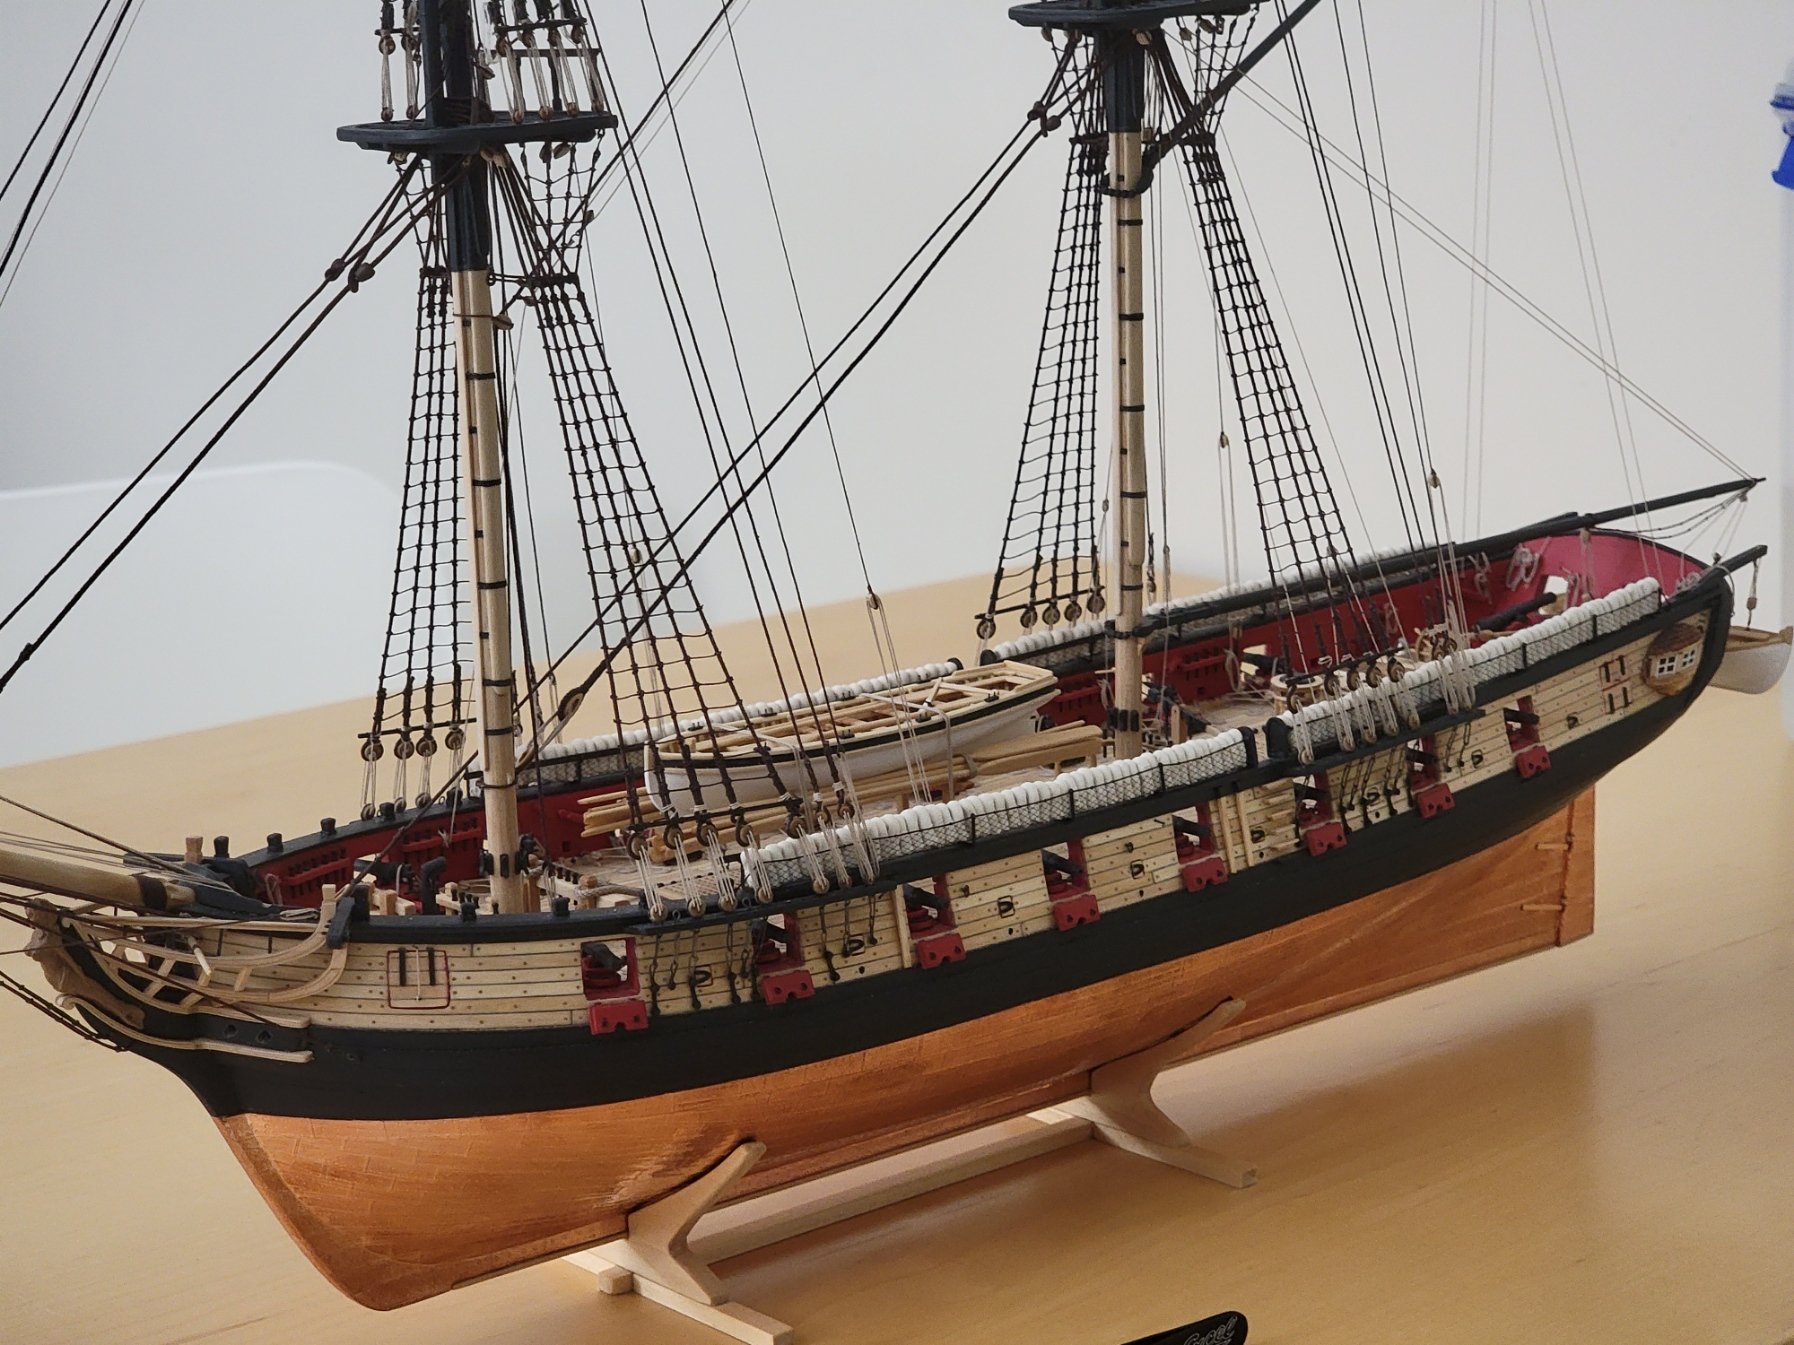
Here is another couple of pics of the ship in the messy "workshop". As you can tell from the amount of photos I've been posting, I'm really loving the look of this ship. Everytime I see it I can't believe I've reached this far.
I guess as I continue with the running rigging progress will slow down. It's already starting to get difficult with the limited amount of working space for my hands.
-
Thanks Will! Thanks for the likes as well!!
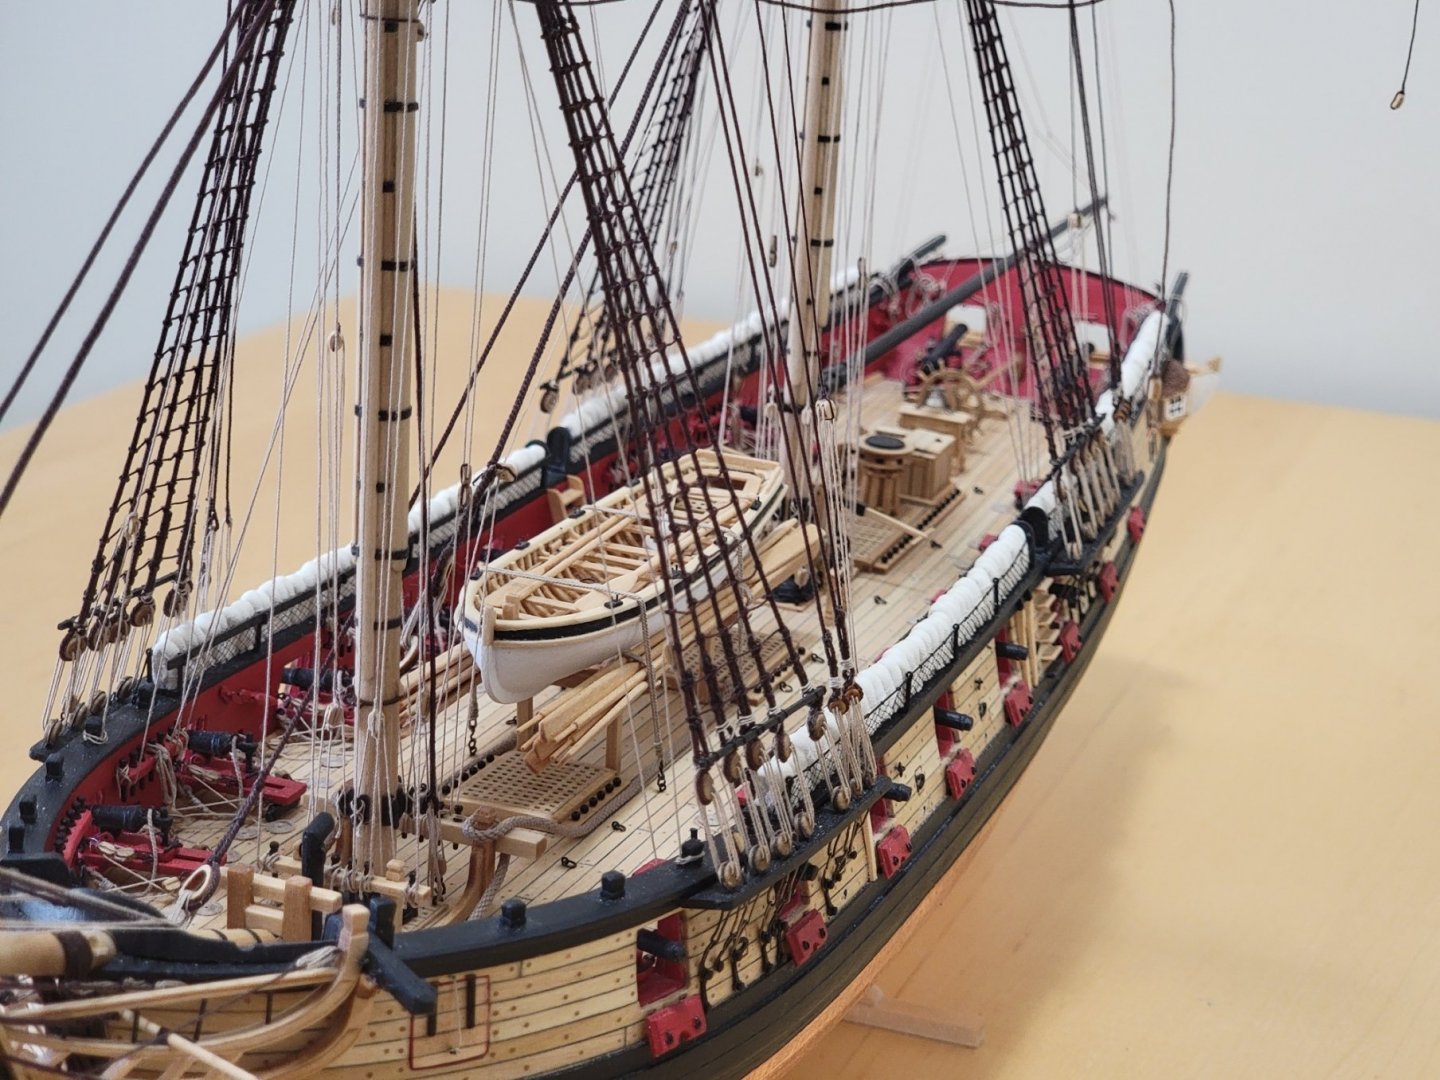
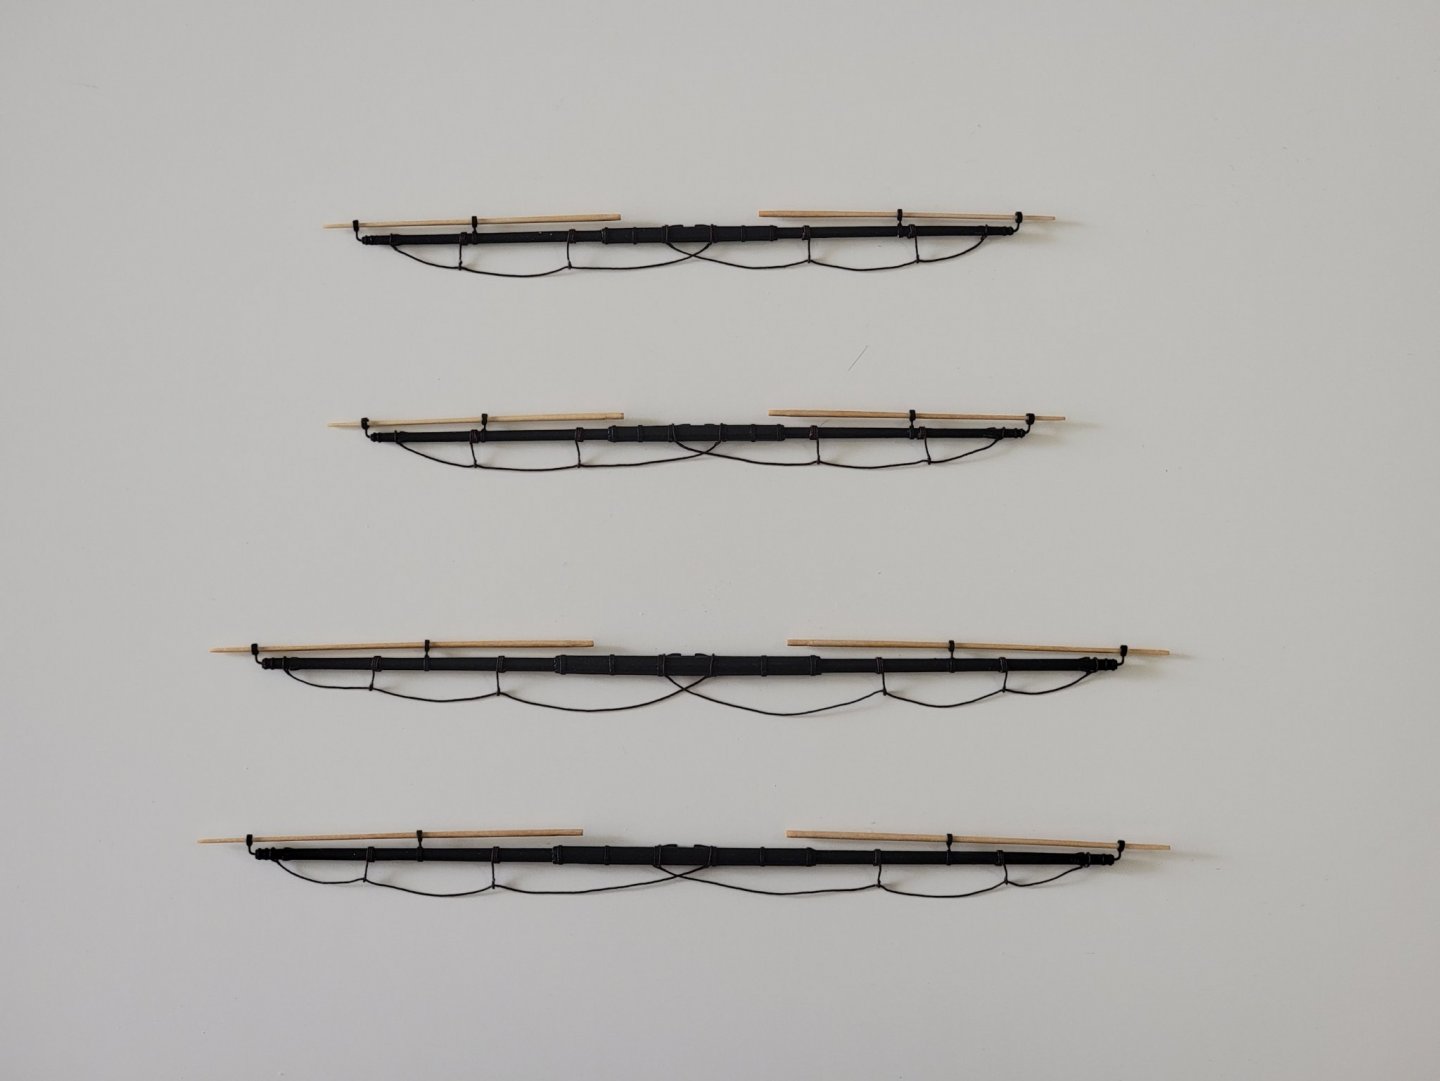
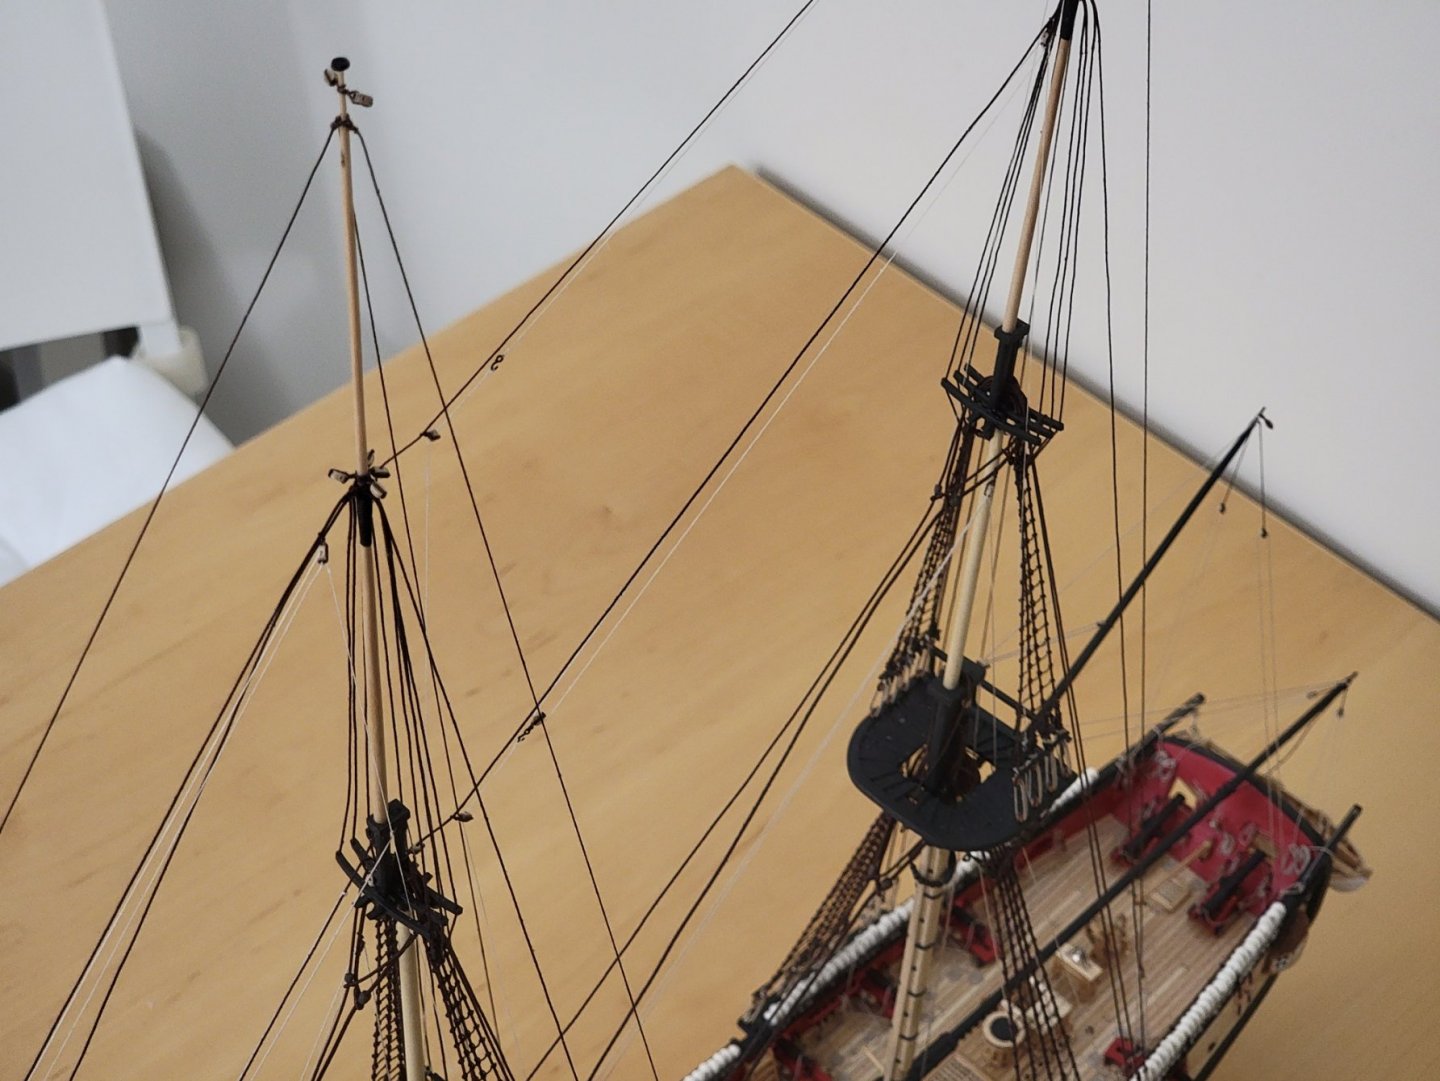
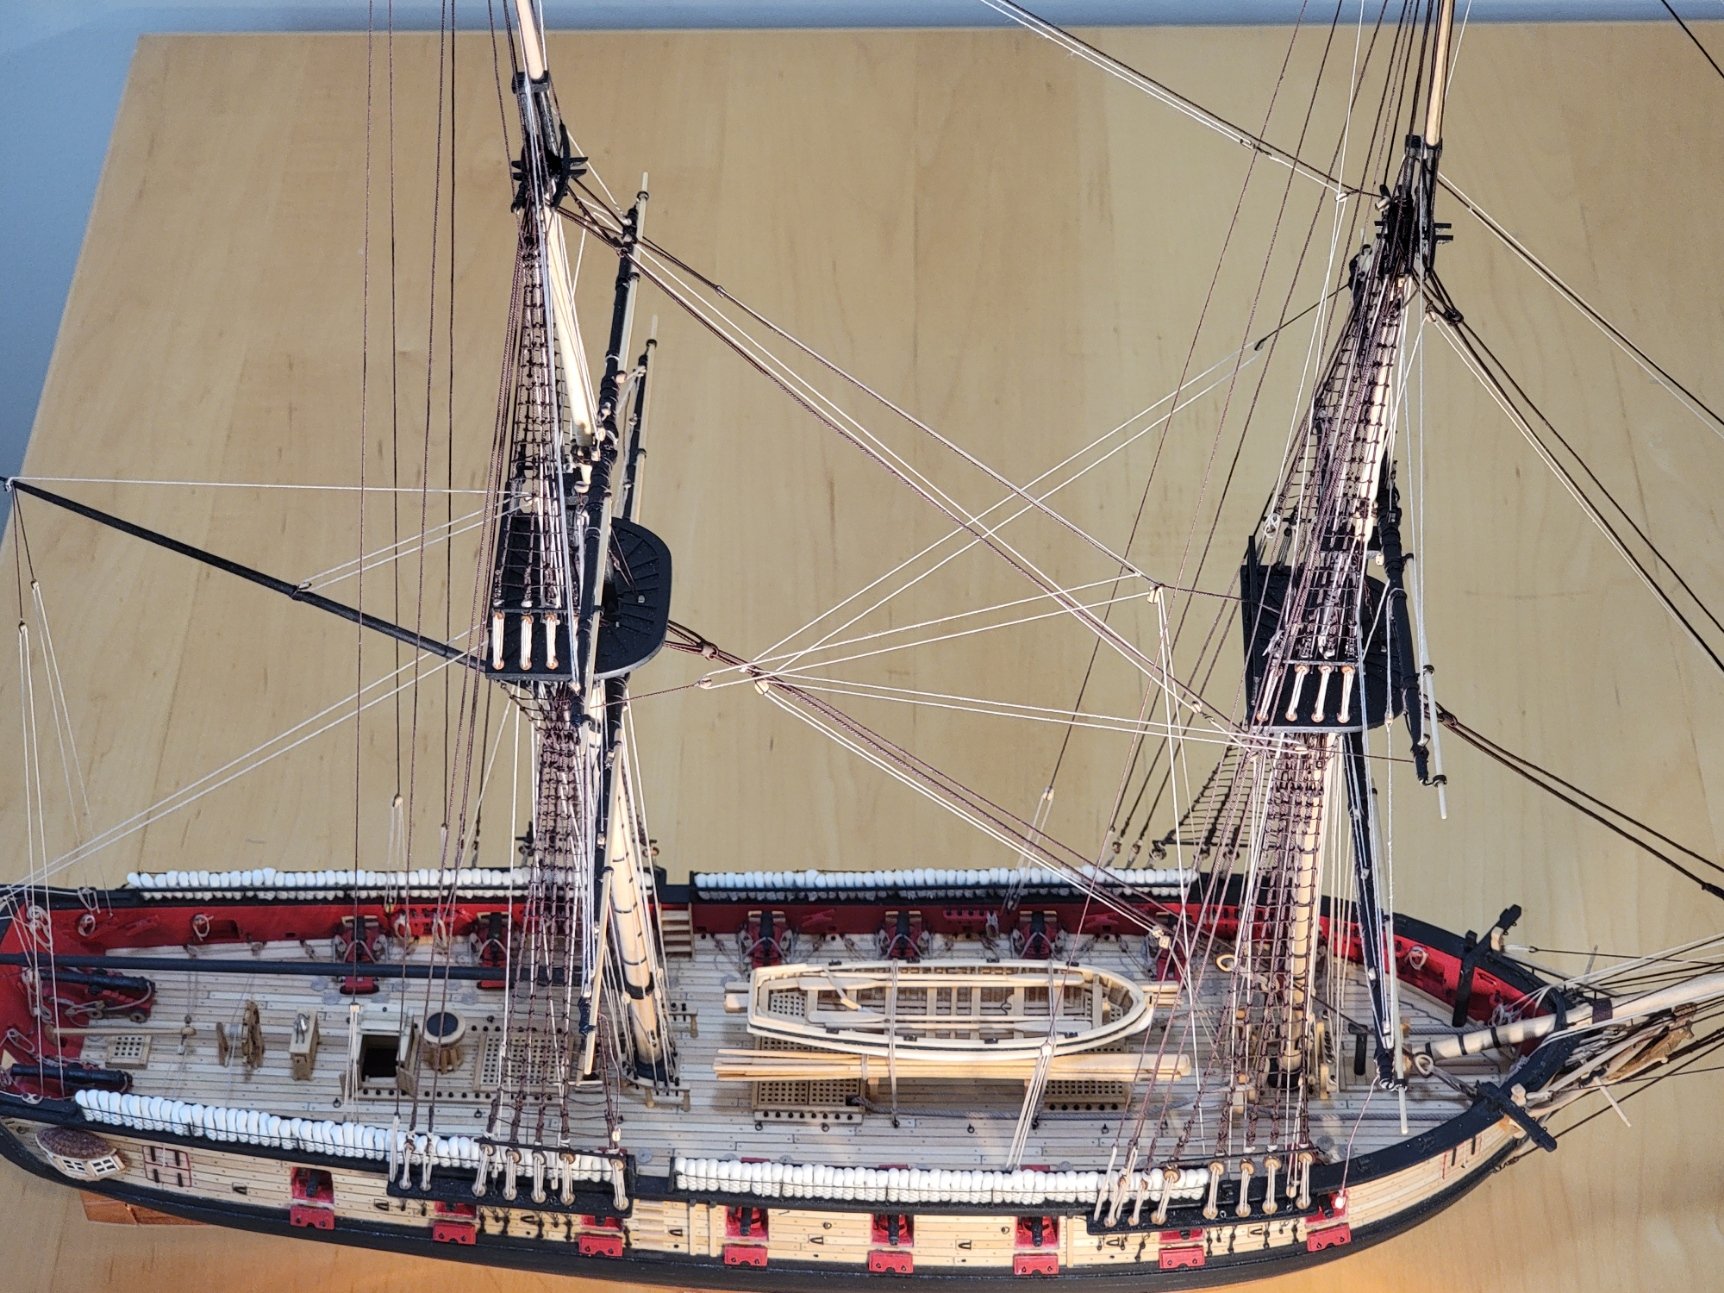
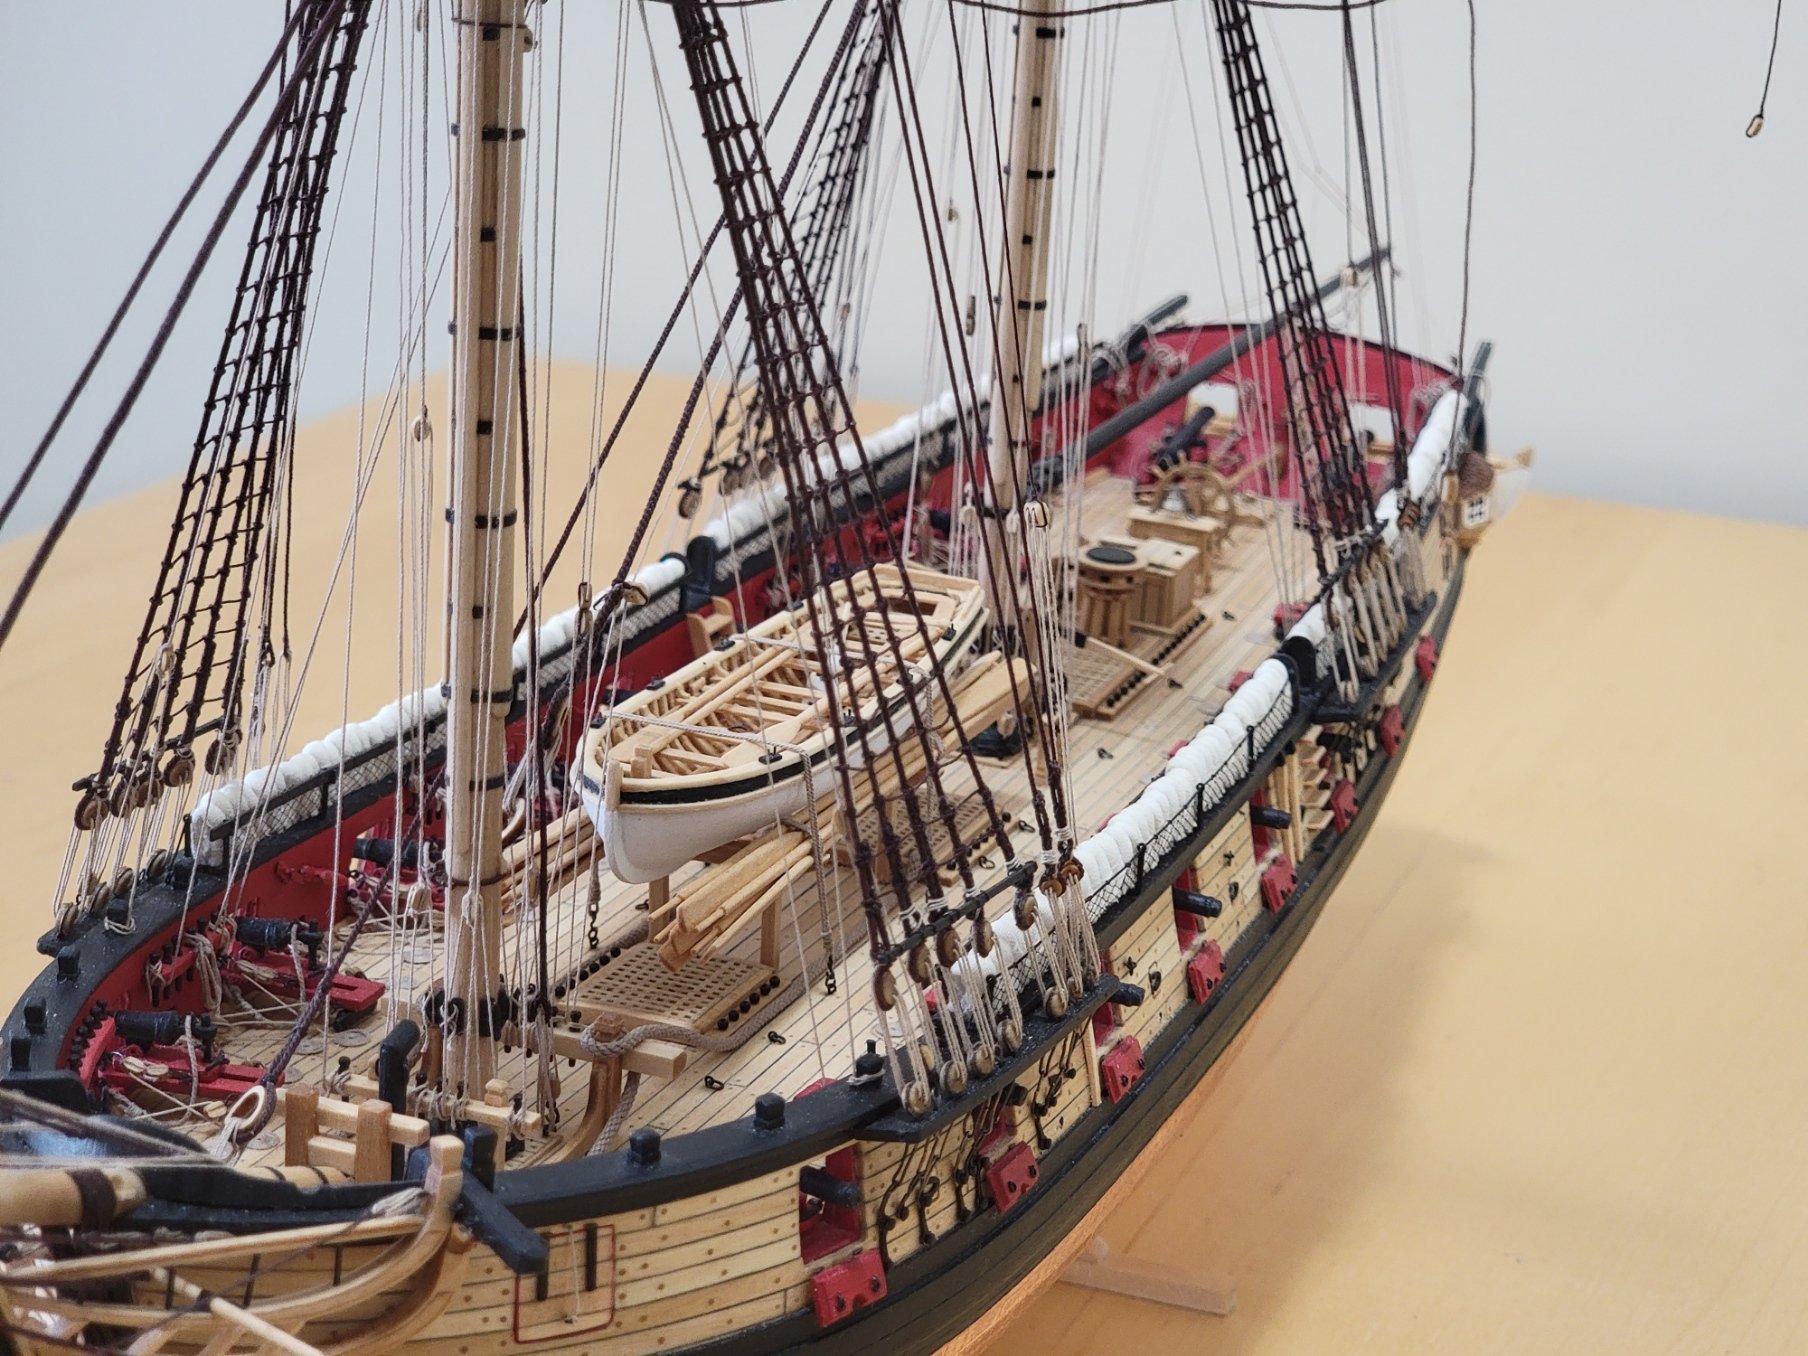
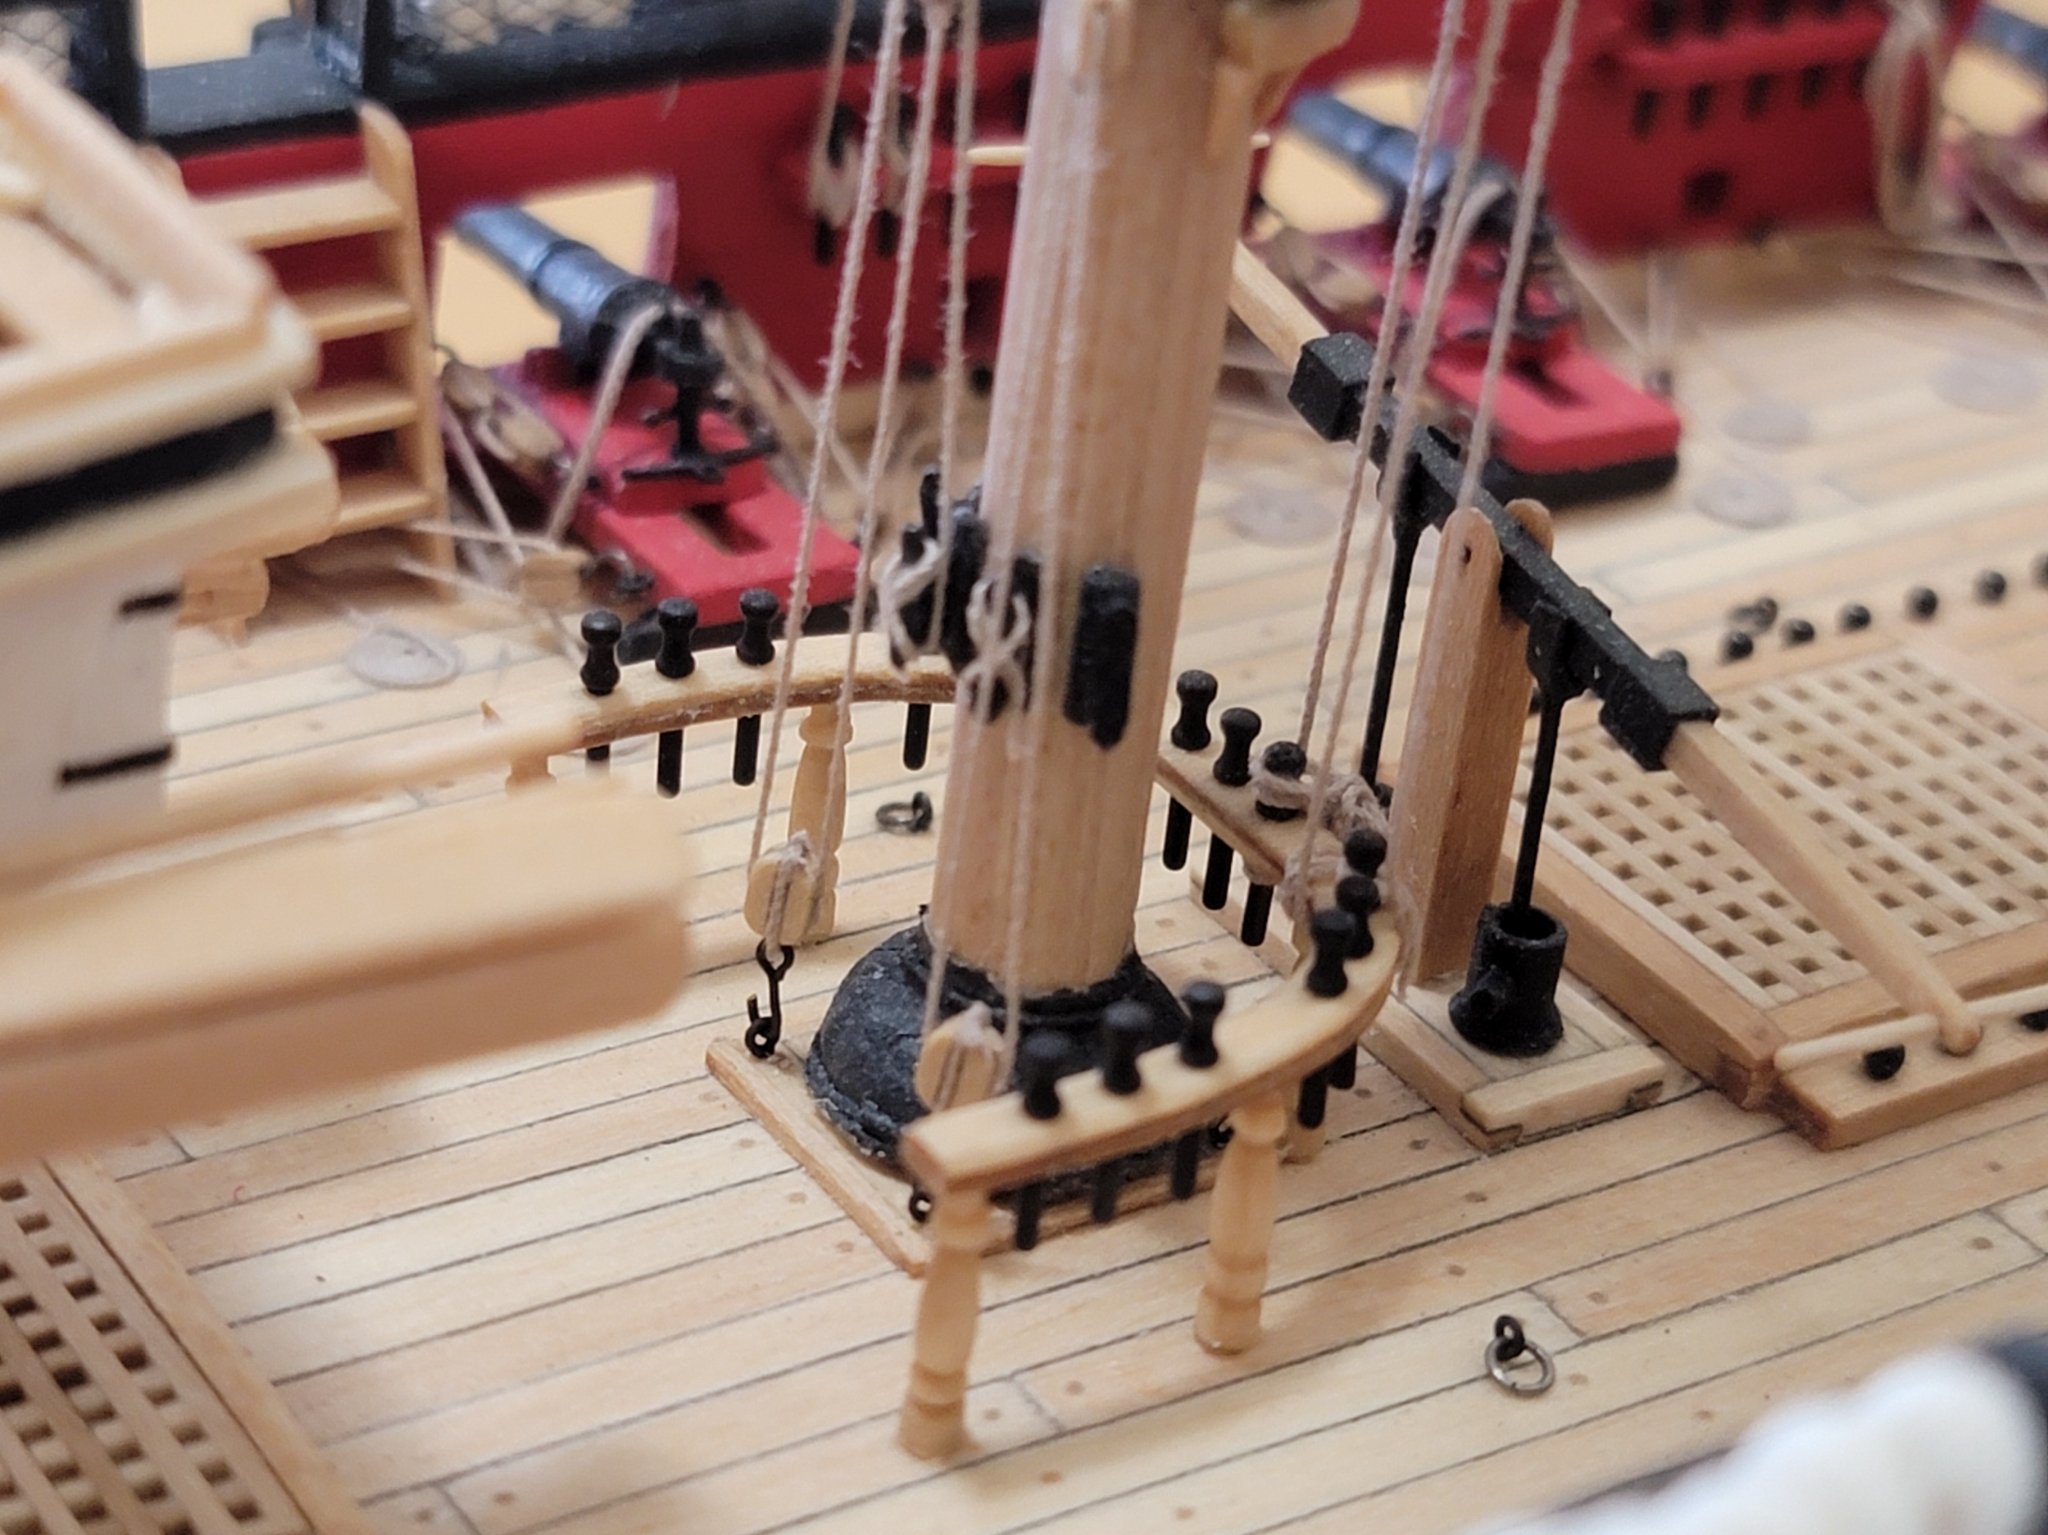
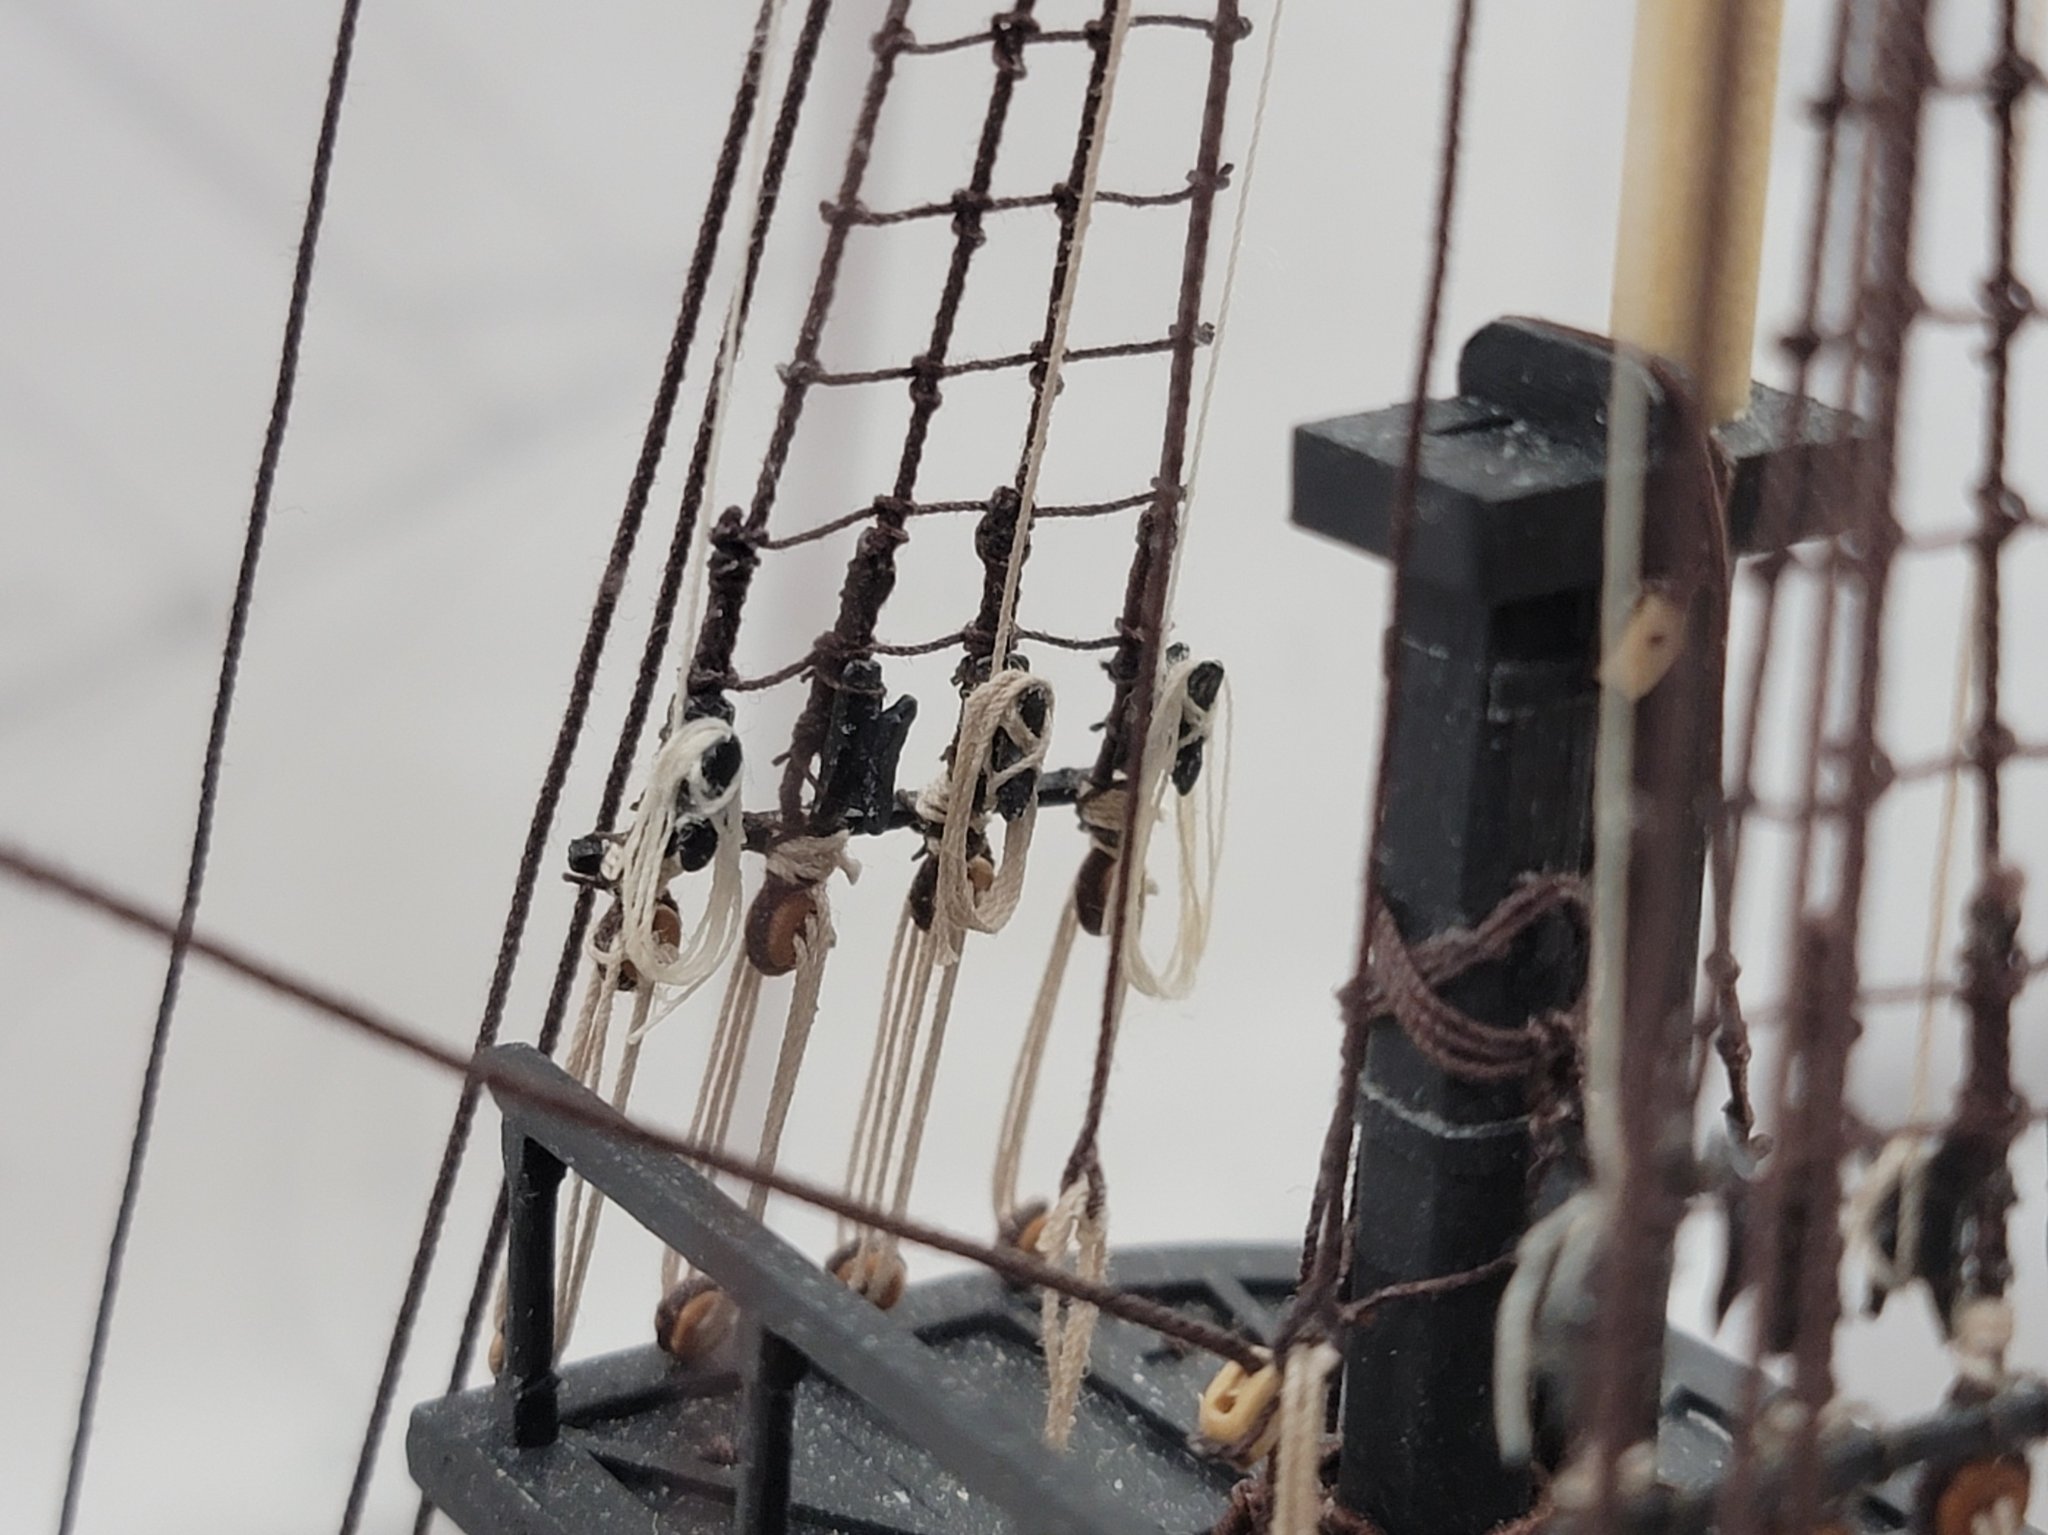
So now it's really starting to look like a ship with some of the yards in place. Here are a couple of pics with them pinned and lashed in position.


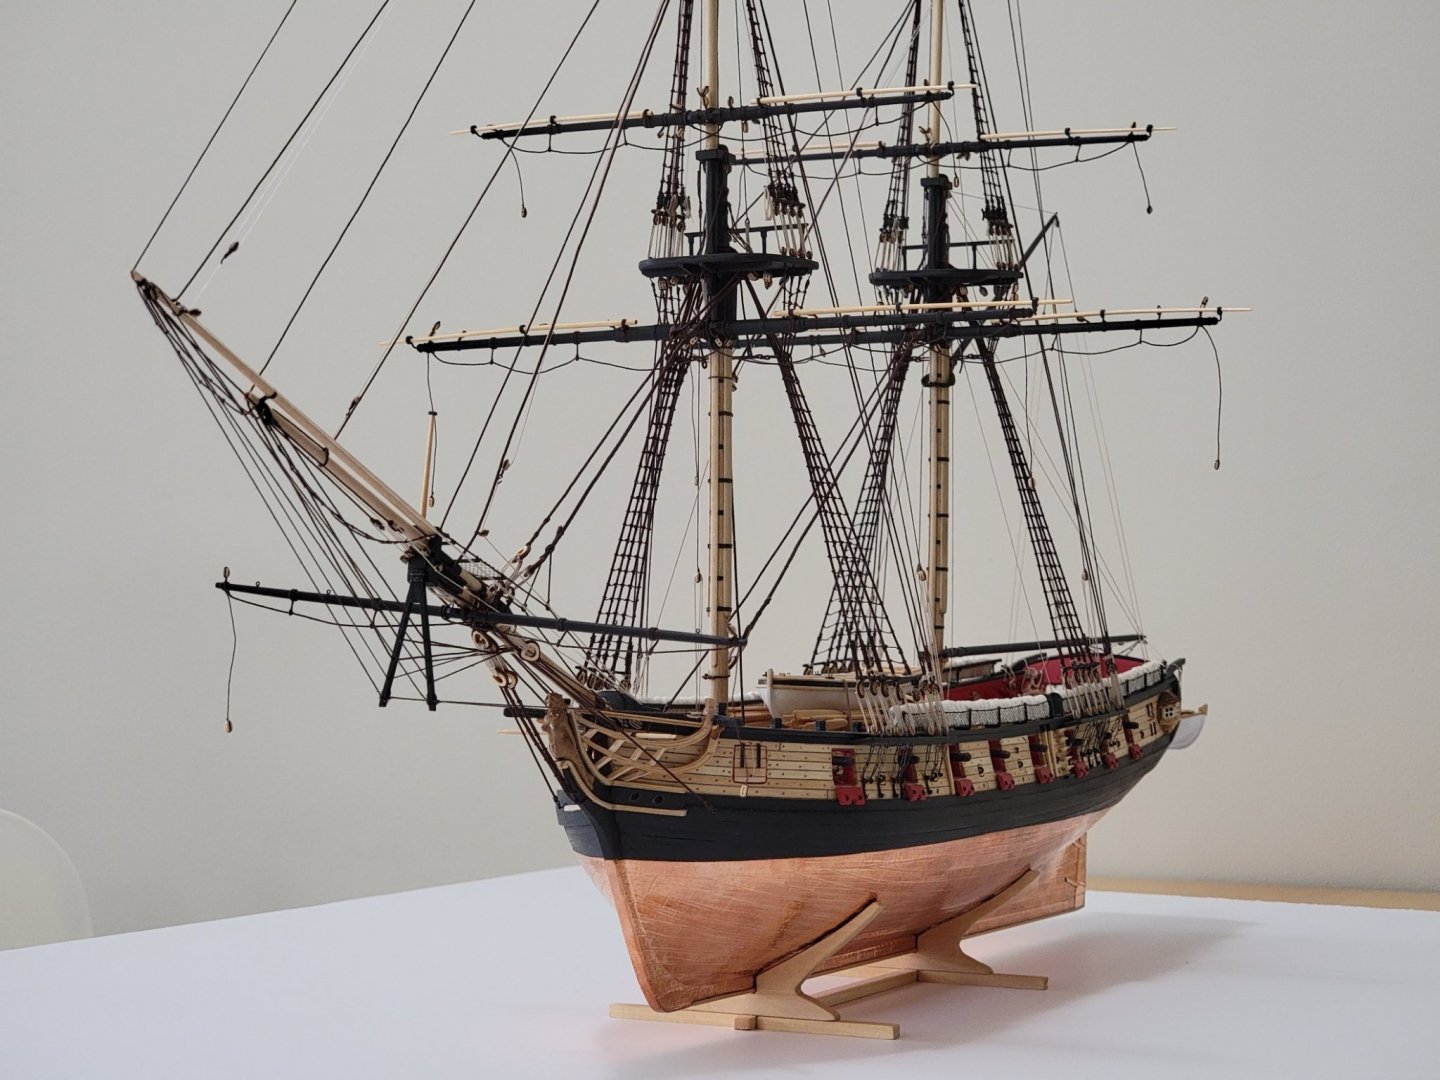

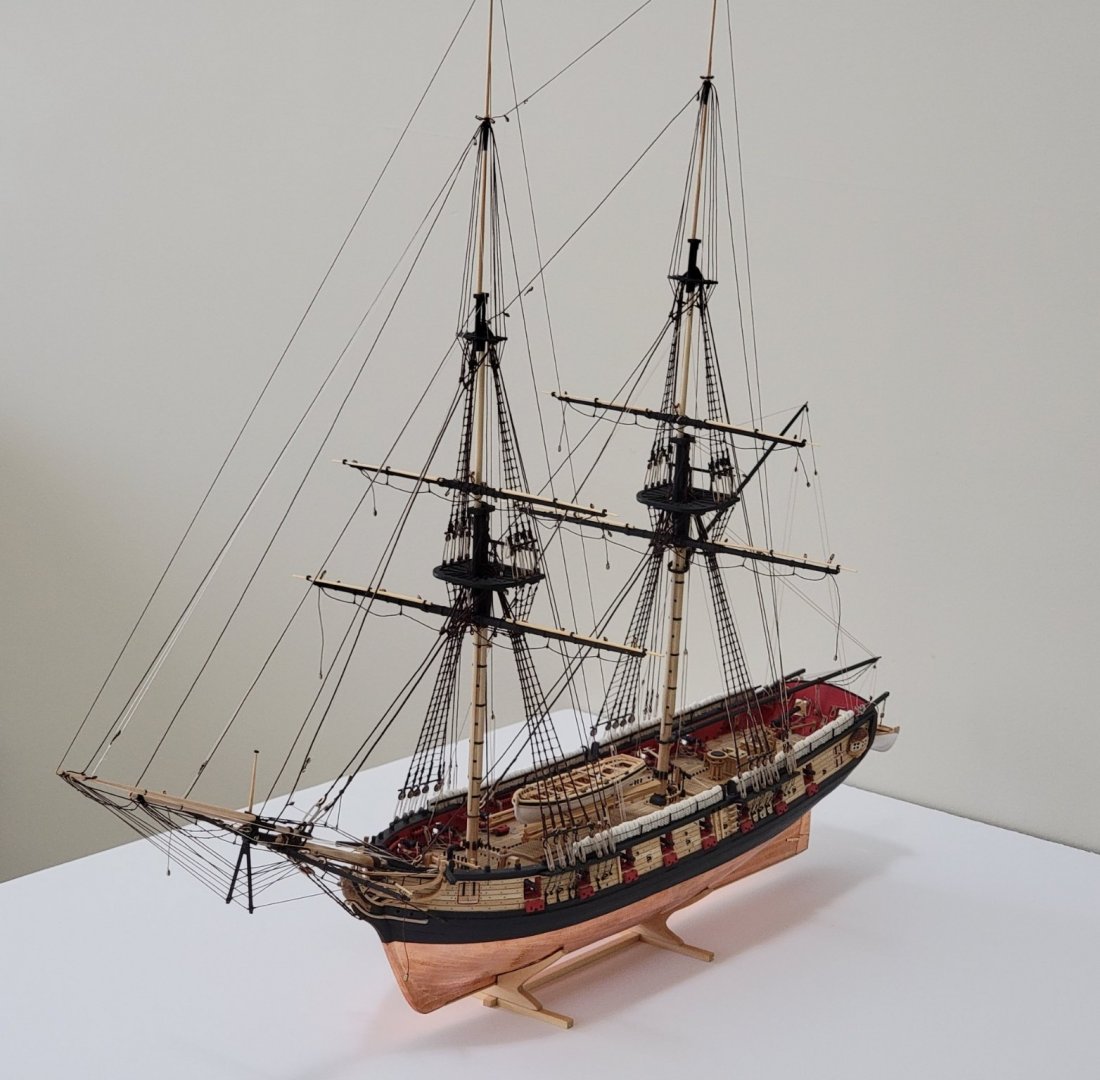
I'll next start rigging them 😀
- whitejamest, Gahm, niwotwill and 12 others
-
15
-
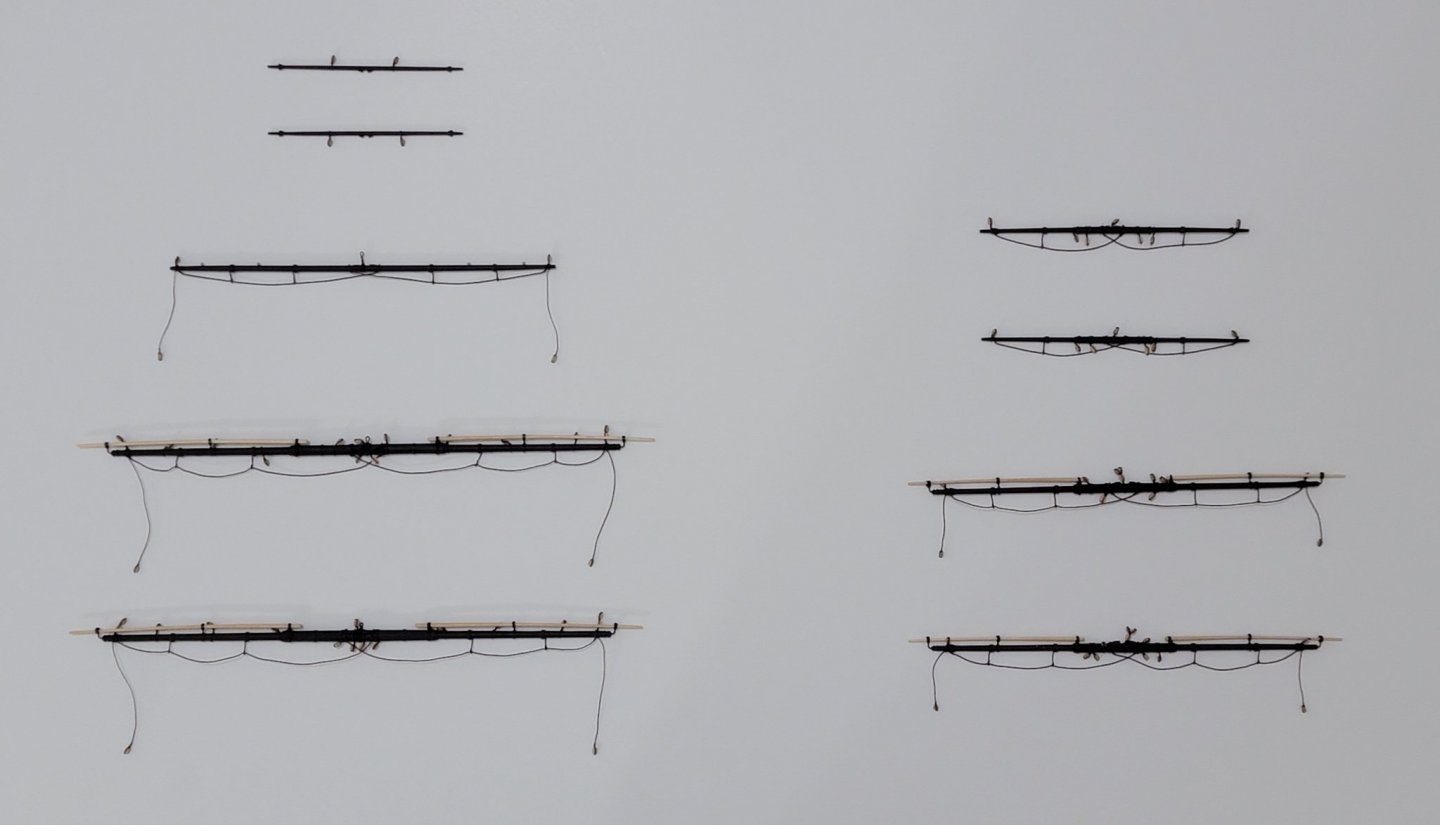
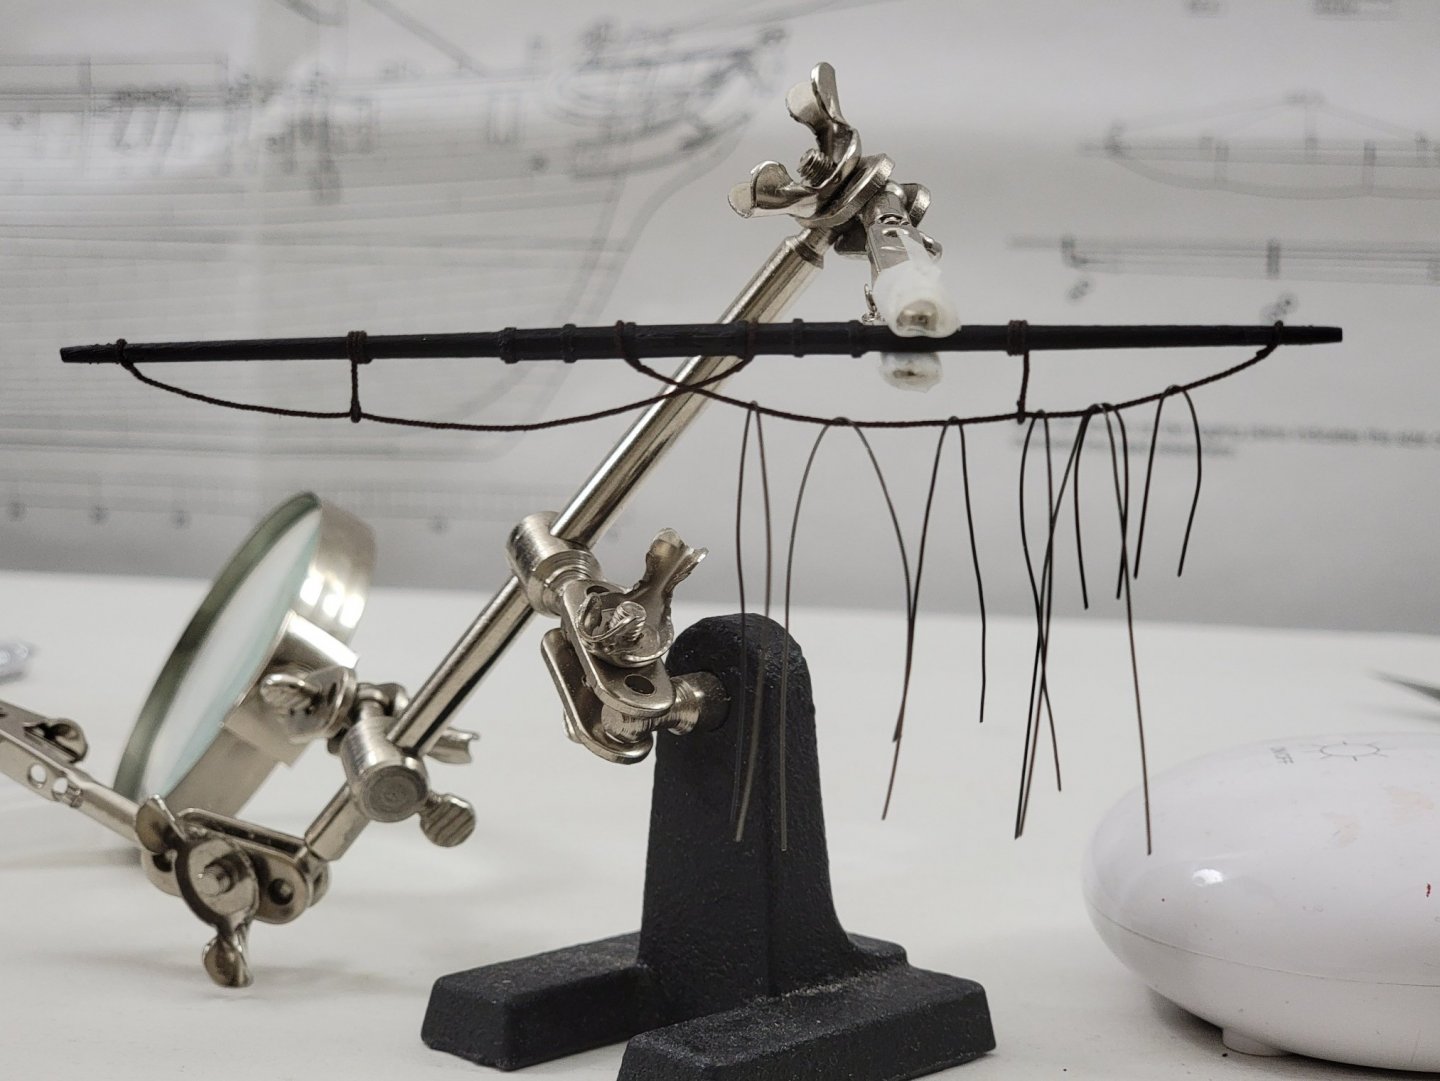
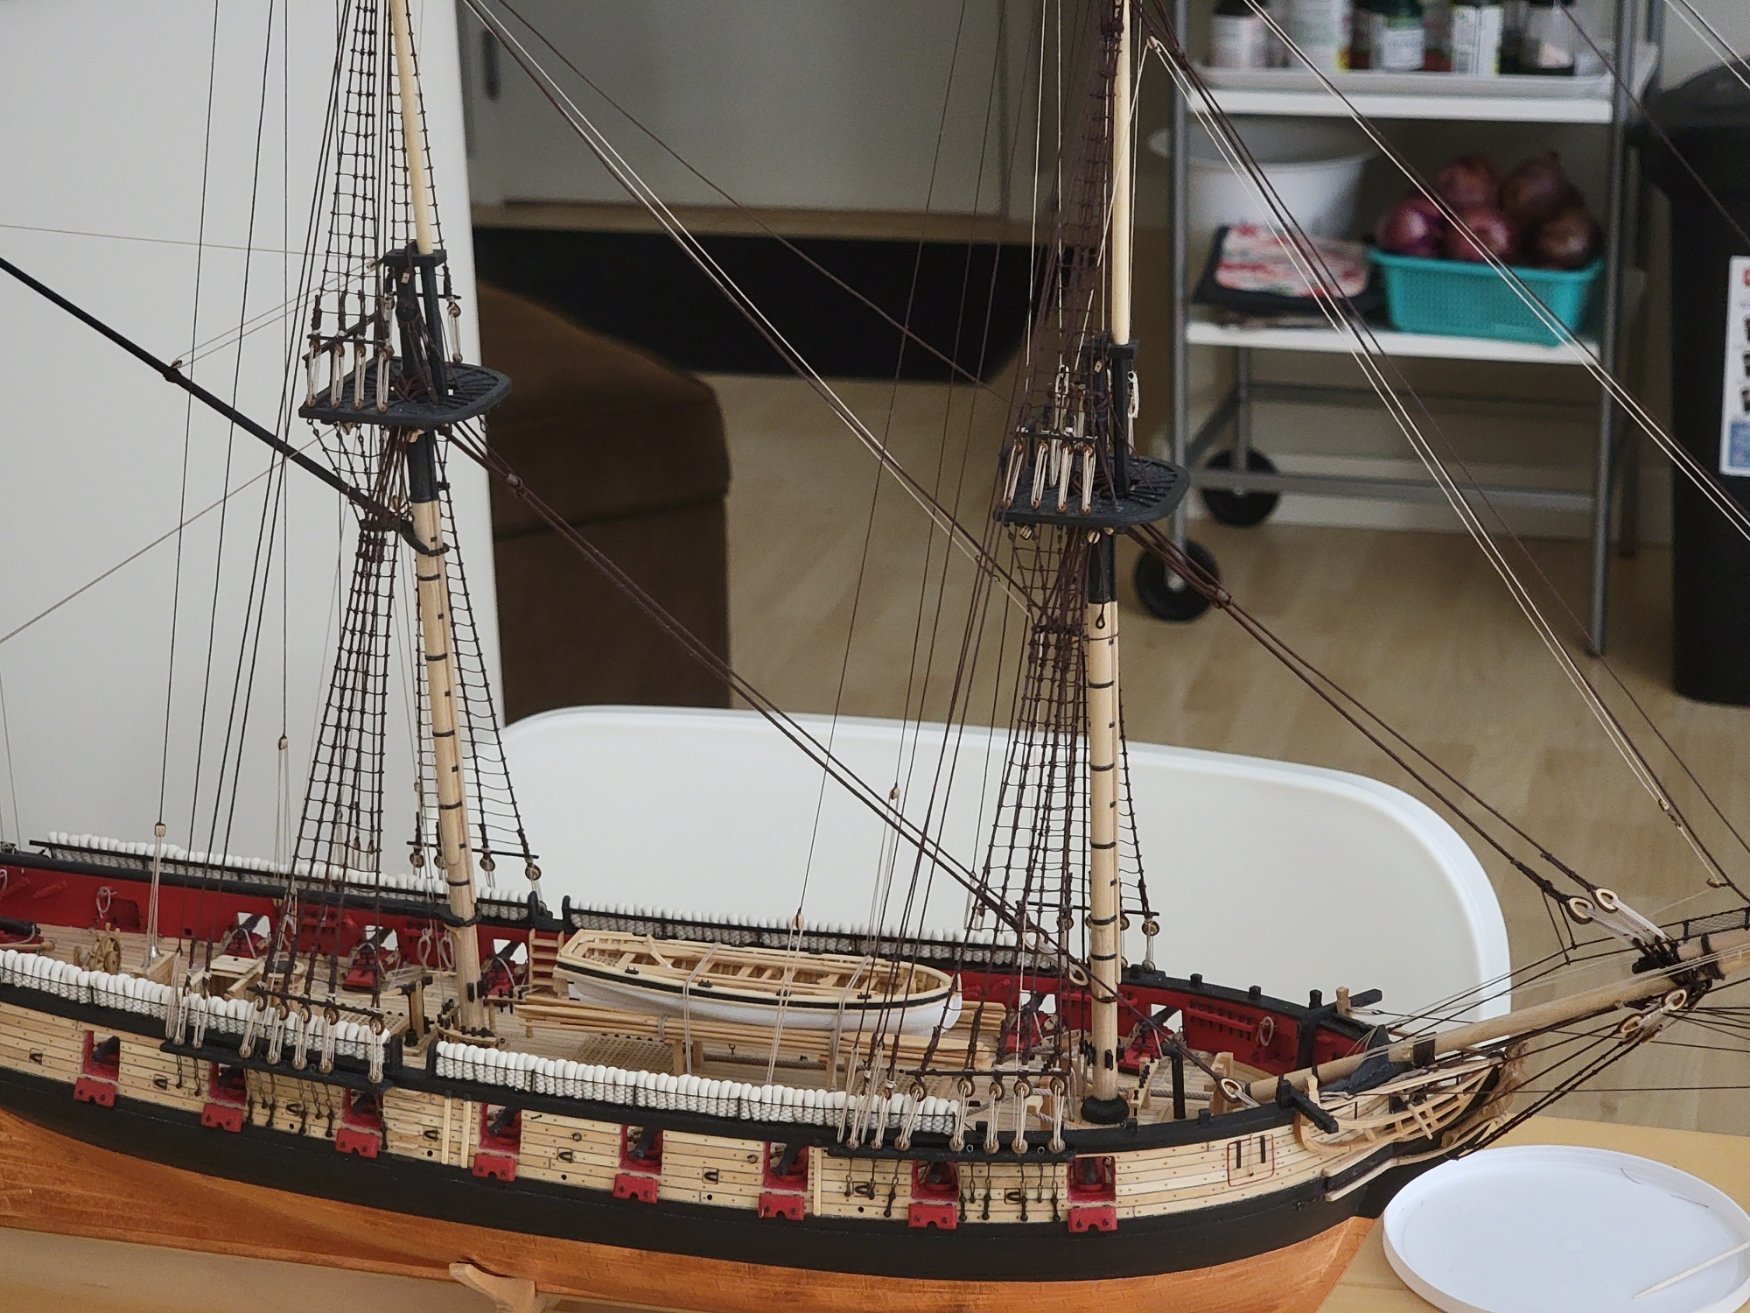
I finally finished up attaching all the blocks and items to the yards. I thought it would never end! Here is a quick photo before I start pinning them to the ship:
- egkb, niwotwill, Edwardkenway and 4 others
-
7
-
-
19 hours ago, abelson said:
Nice work on the boom irons. Did you drill them with the push pin drill and did you score the tube. BTW, your photography is superb. This is not germane, but are you an Oilers fan?
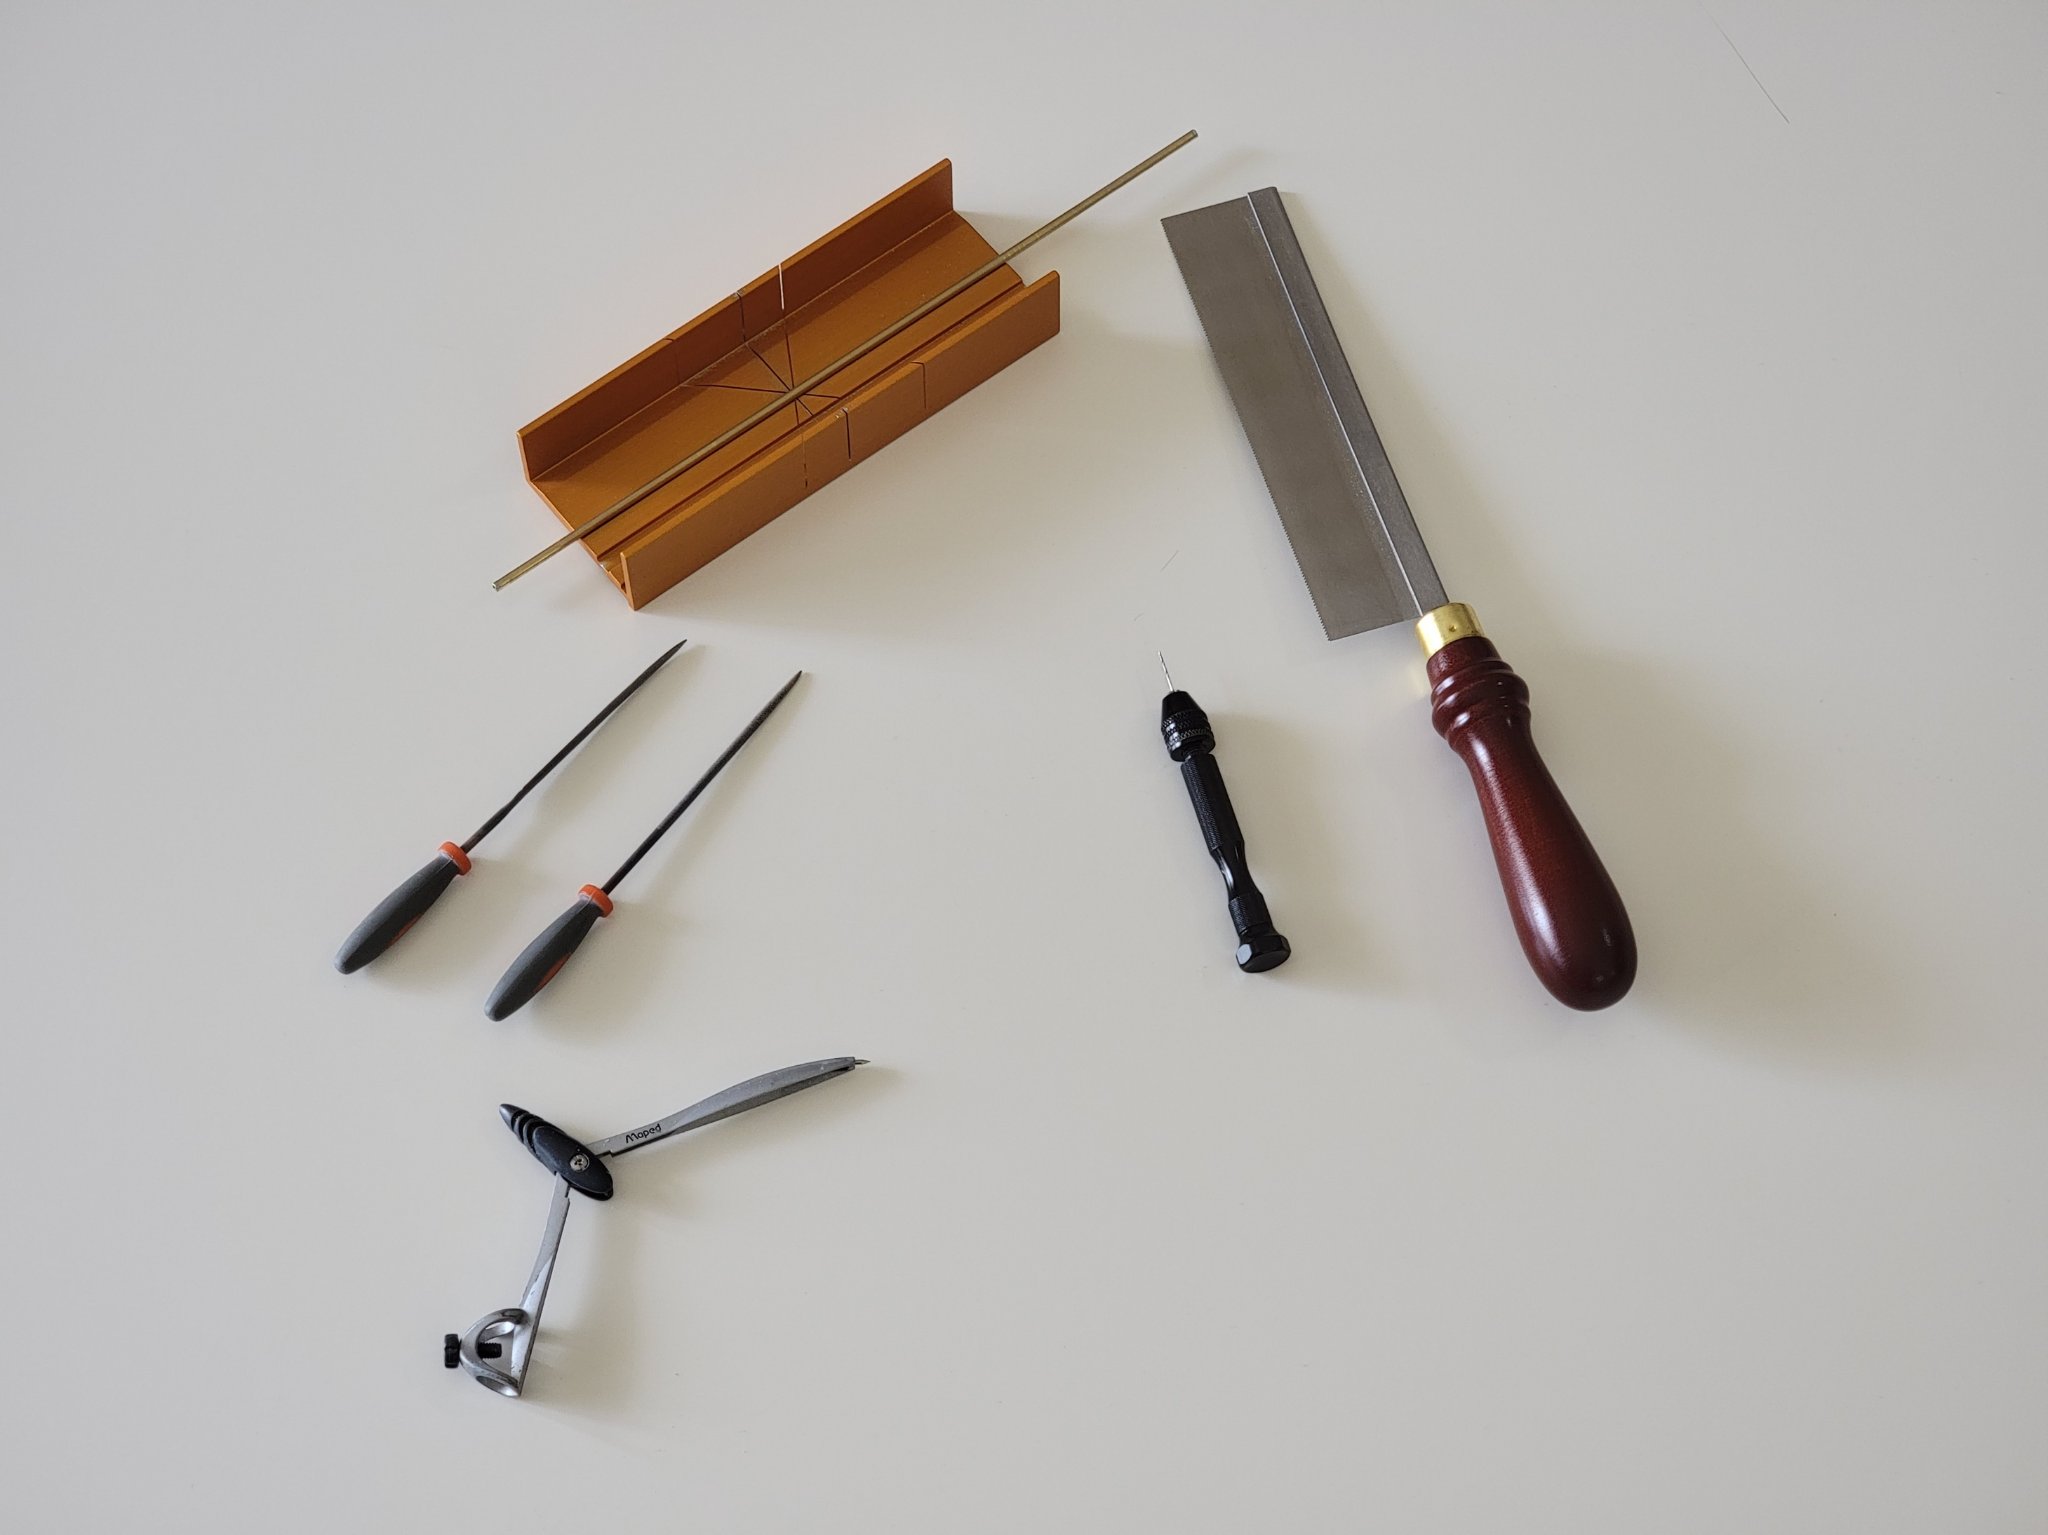
Many thanks Steven! I first scored the tube as suggested by the manual, then used the pin from the compass to indent the center. I then used the pin vise to drill the hole (starting with a smaller drill bit then the larger one to fit the wire in).
I don't watch much hockey 😬, but I used to watch Aussie football back in Australia. I'm a bit of a fan of West Coast Eagles! 😀
-
On 4/22/2021 at 10:16 PM, desalgu said:
Just checking in. Every time I look at your photo's I say "wow!". Love the boom irons. Looks like you used brass tubing. I used aluminum tubing because it's softer and easier for me to work with, plus I had some laying around. Yours always come out cleaner and more precise than mine. Very impressive!
I'm making slow progress on 18th century longboat. It's much needed practice for me, and hardly a beginner's model. Display case is on hold waiting for warmer weather to work in garage. Shouldn't have to wait long, but in you never know in Kansas.
Thanks so much David! Yes I used brass tubing for the irons. They were a bit difficult to cut. And some of them were cut a bit larger comparing to others, but it's hard to spot once they were all installed. I'm really eager to see your model in the case!!
13 hours ago, BobG said:Nice job! What is that tool at the bottom left of your photo?
Thank you Bob! That's a compass to draw circles. I used the pin end to indent the brass tubing so the drill bit doesn't slip. I drilled the holes before I cut the irons out since I could hold the whole tube more easily.
Also, I didn't notice how many blocks there were on the yards until I started installing them... 😅 It will probably be a couple of days work of attaching the blocks and finalizing the yards. I'll post some pics when they are all done. I'm very much looking forward to finishing this tedious stage. They just don't seem to end!
-
-
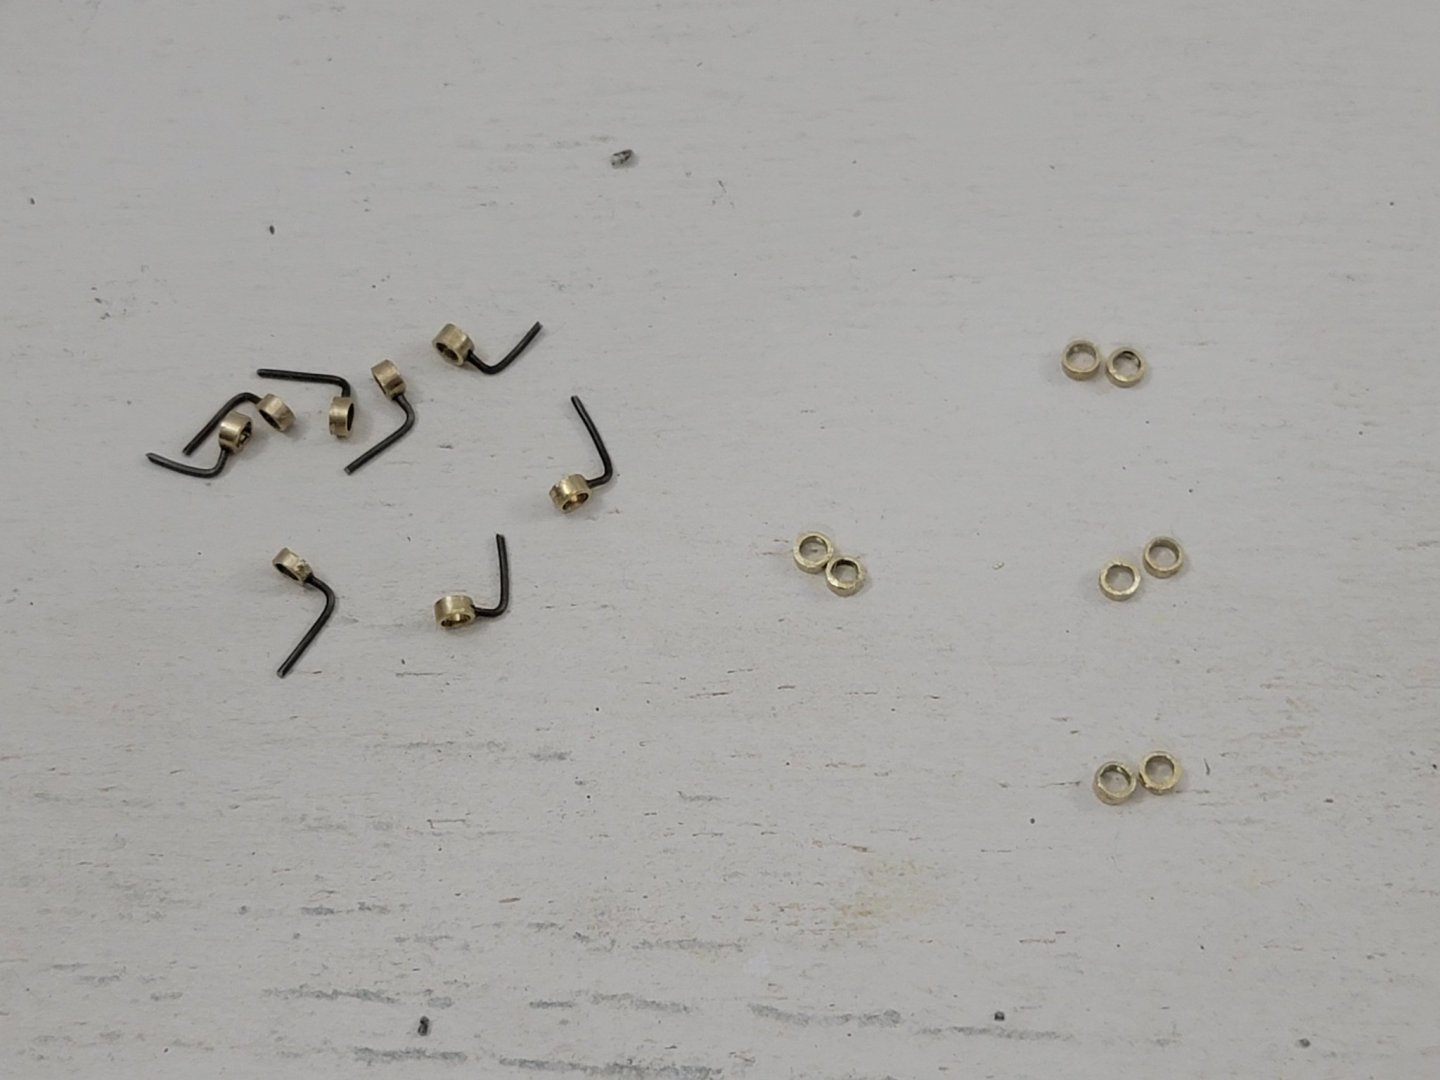
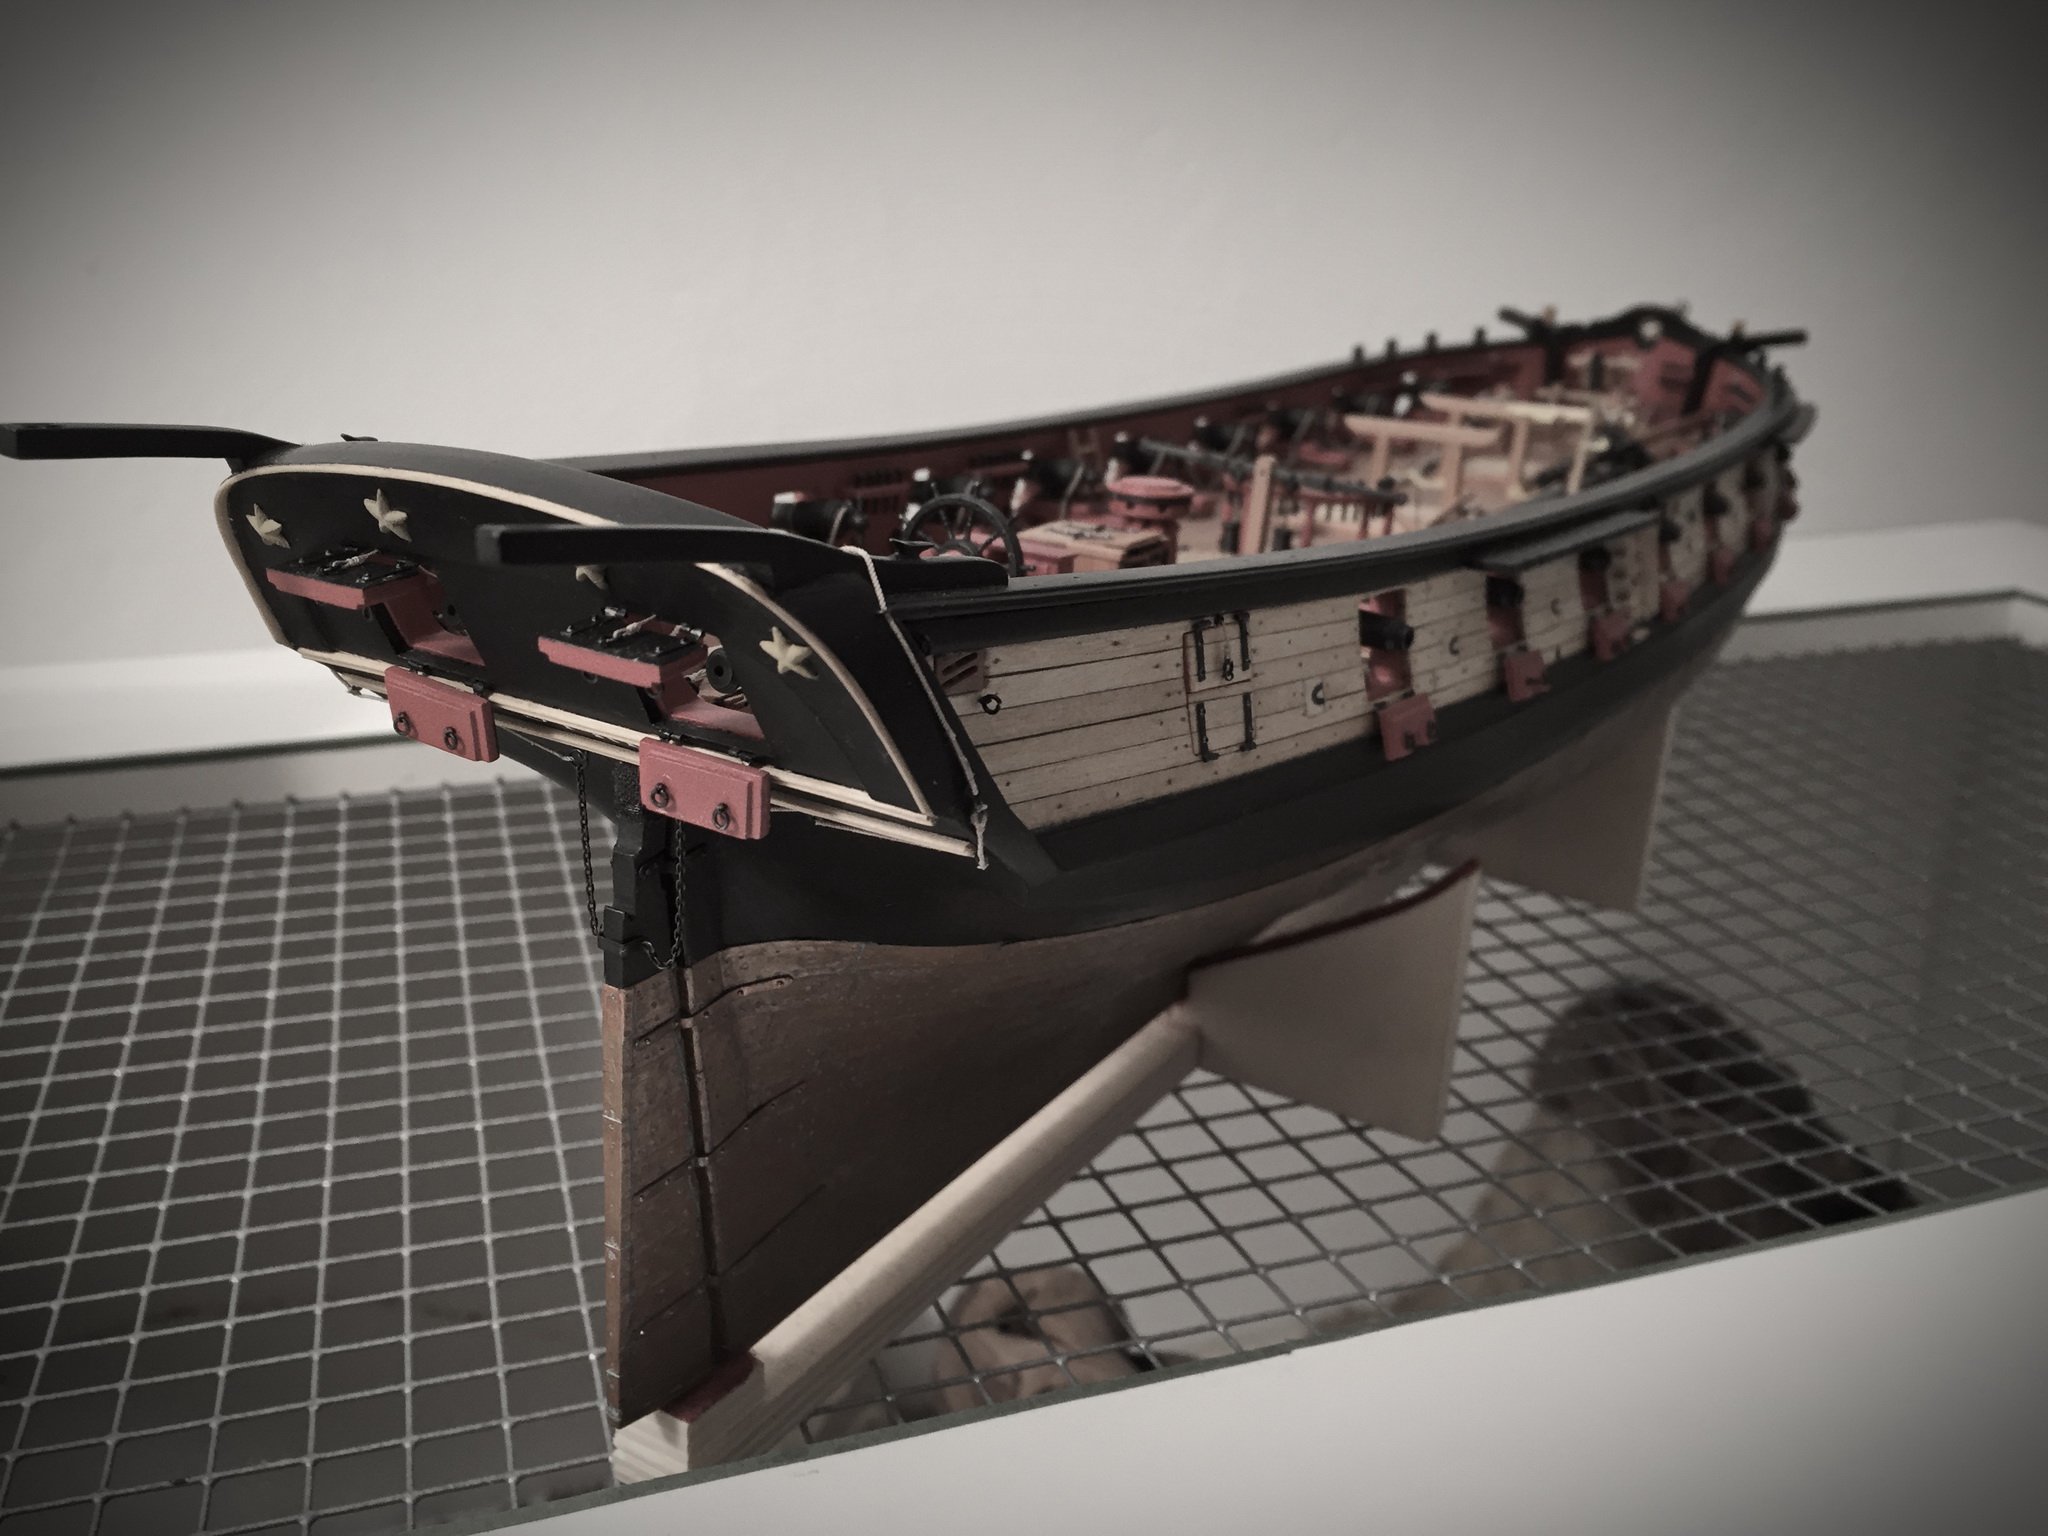
It was another hectic couple of days wrapping up the semester. Got a few more hours of free time so I got to complete the boom irons
I just followed the instructions to make these. Here are all the tools I used:

Back then I was a bit nervous on how I would complete this step without power tools since it was dealing with metal. But somehow I managed it with the above.
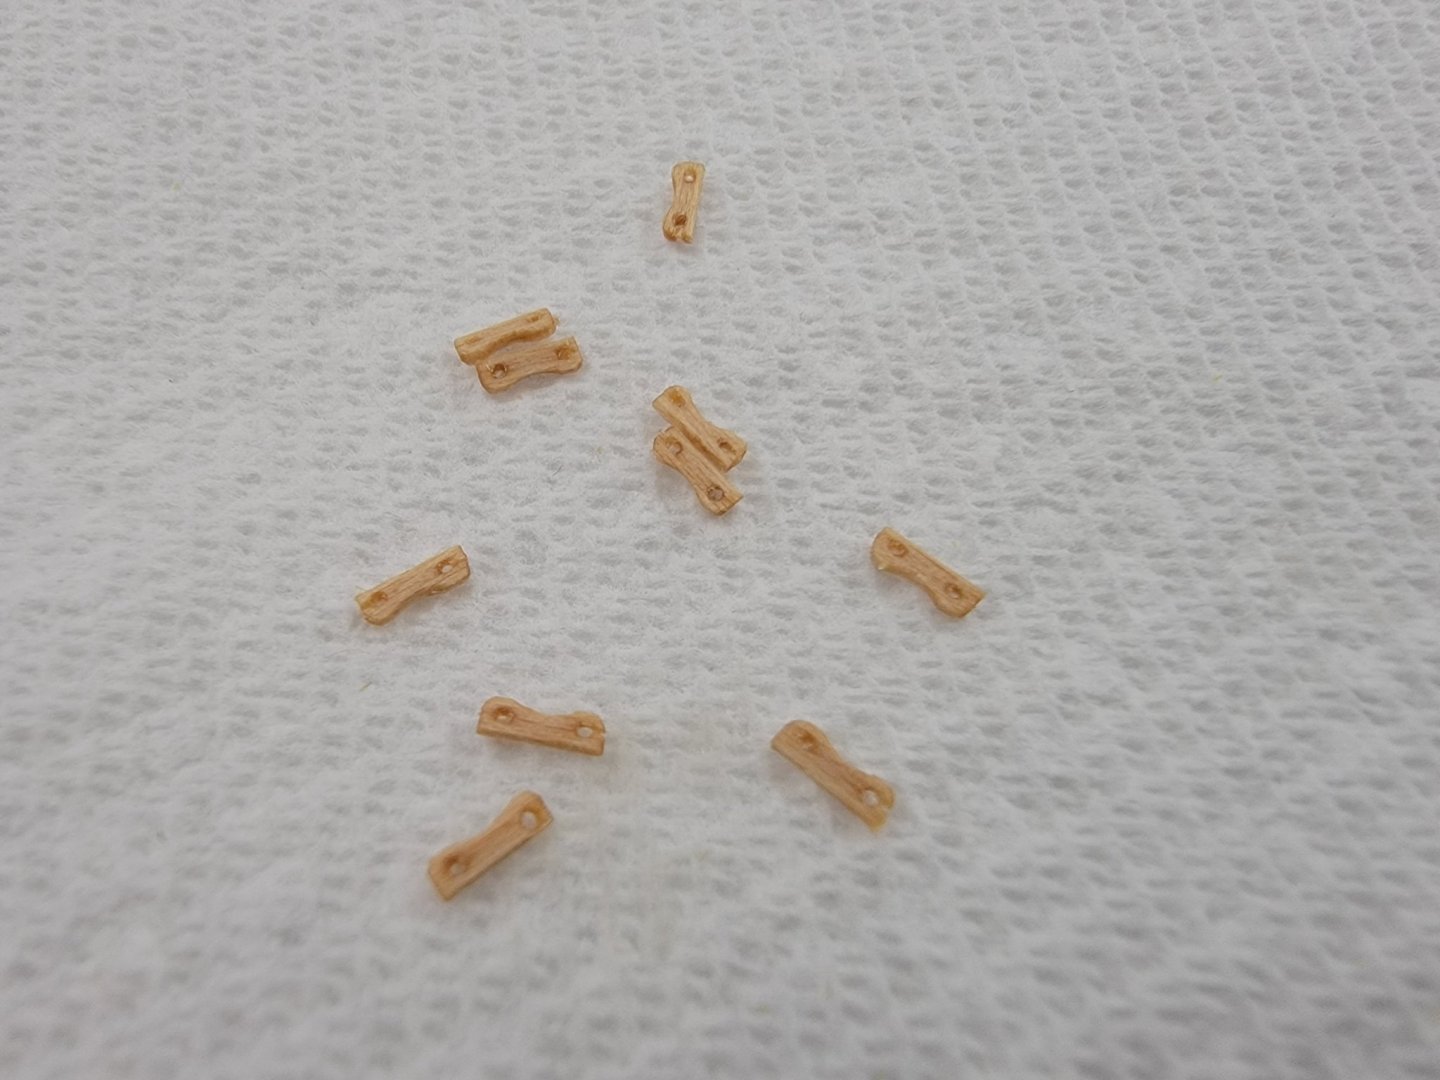
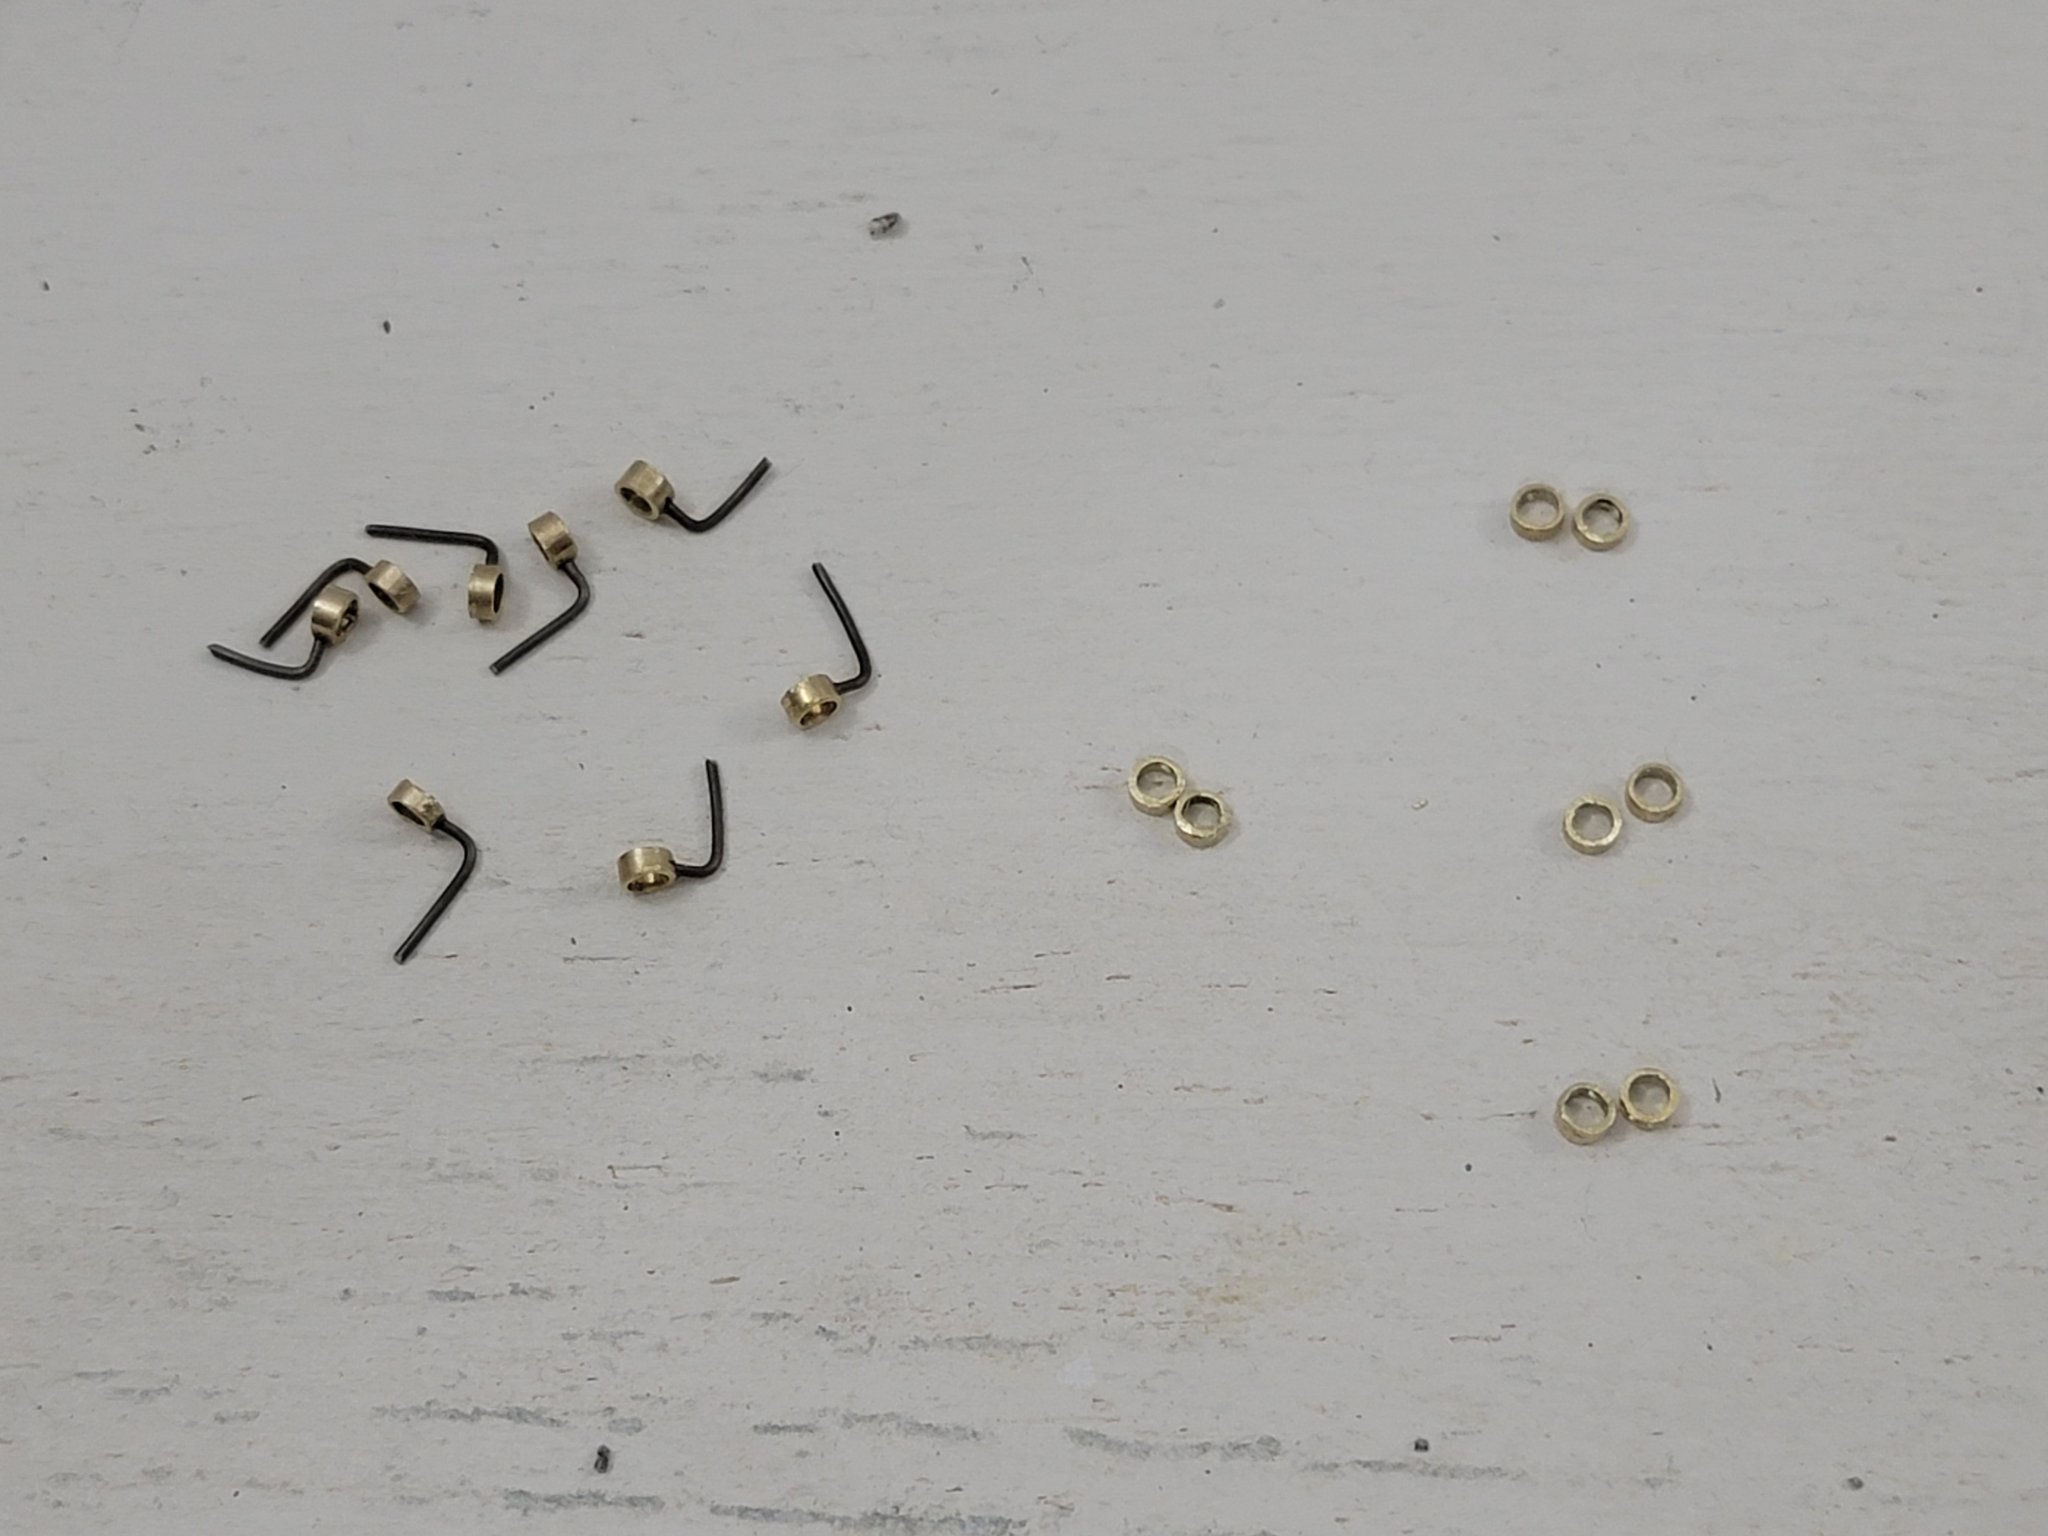
Here are a couple of pics of the irons freshly cut and holes drilled:
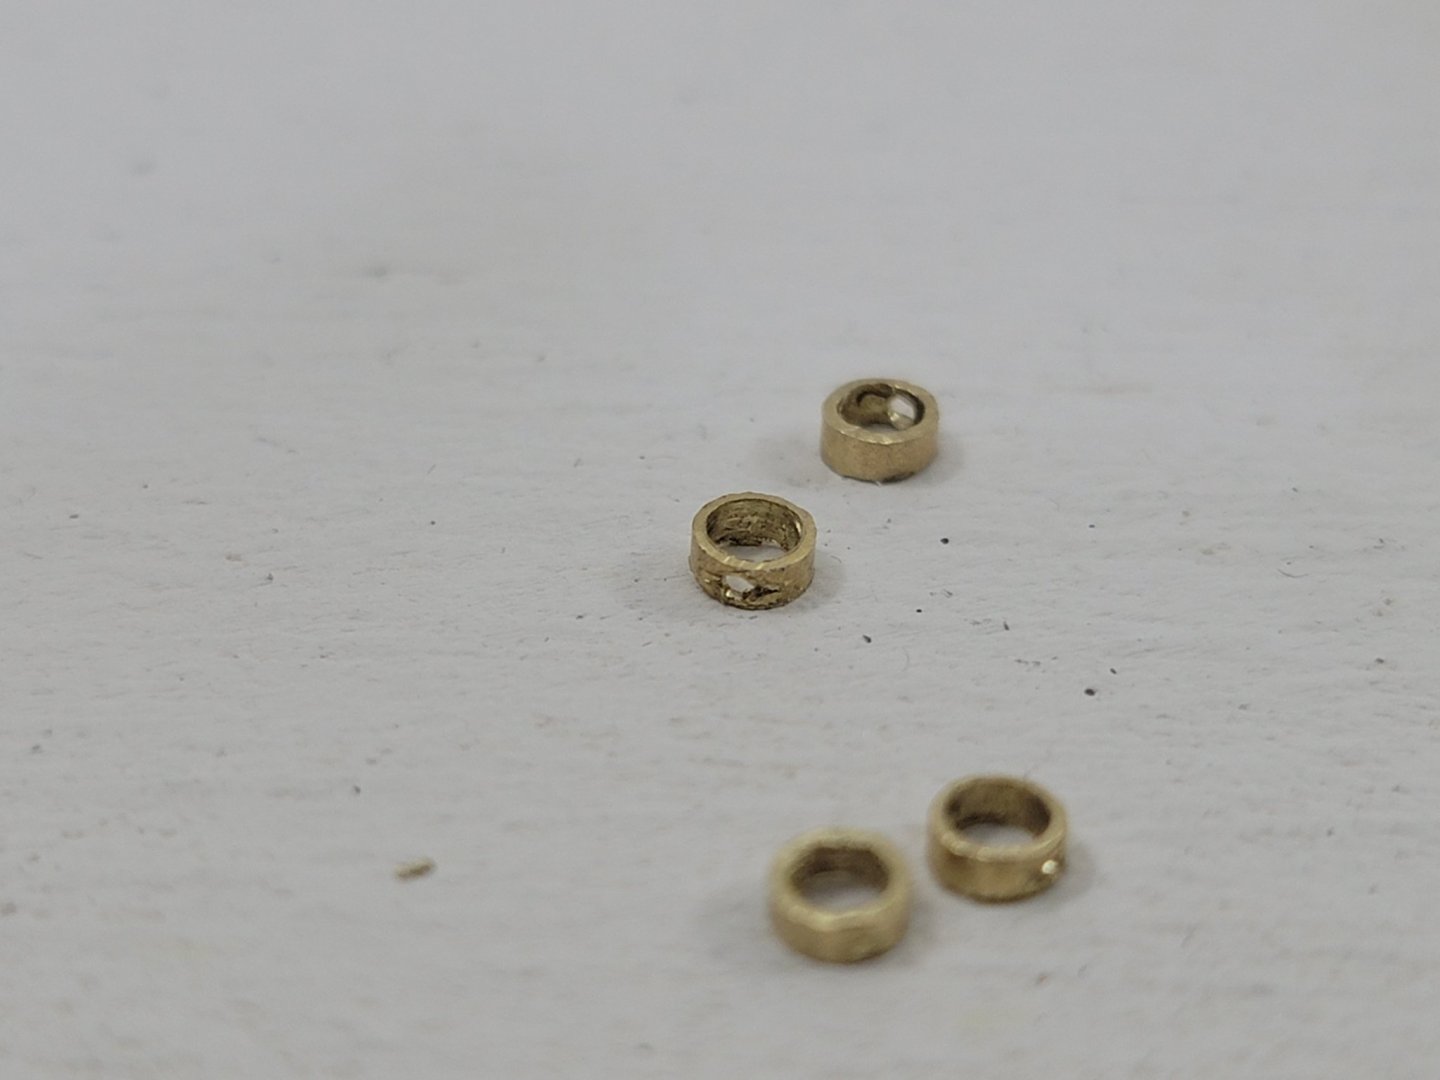
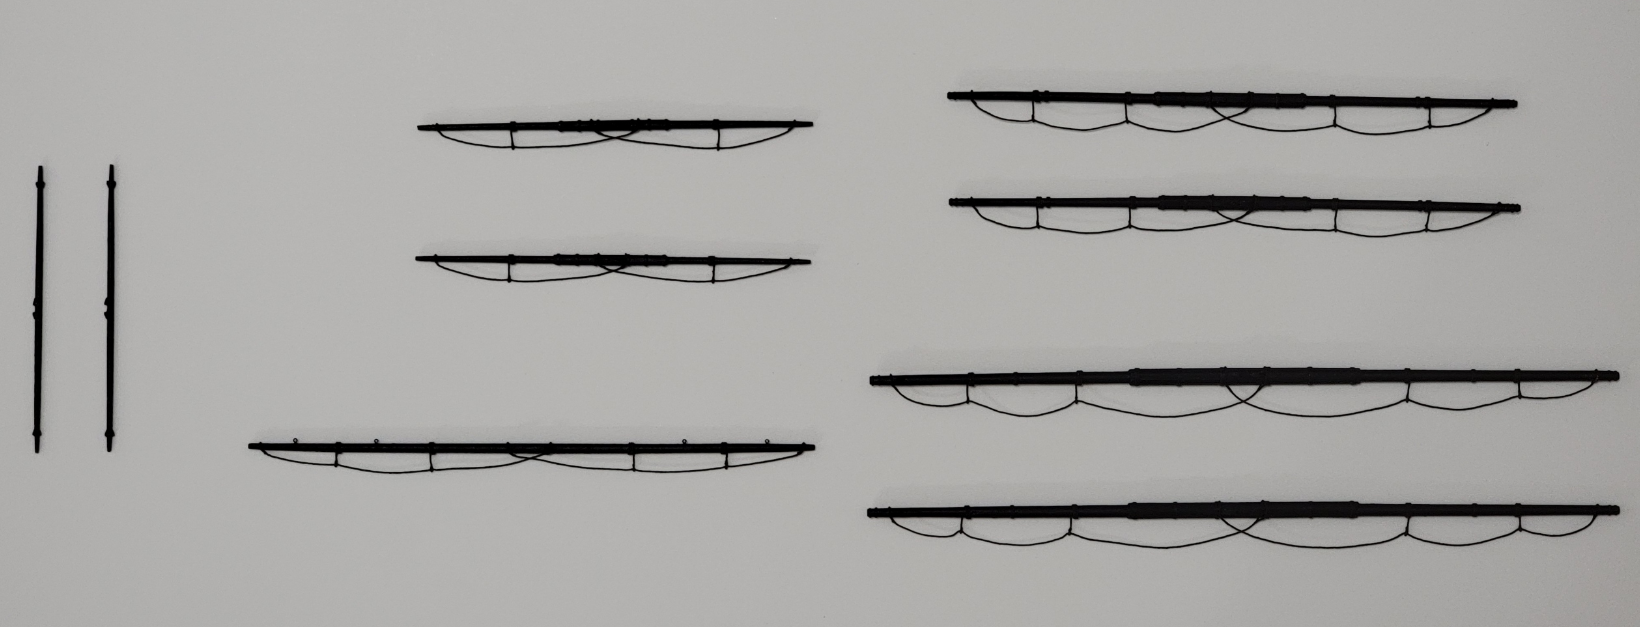
And some photos of them installed on the spars and painted:
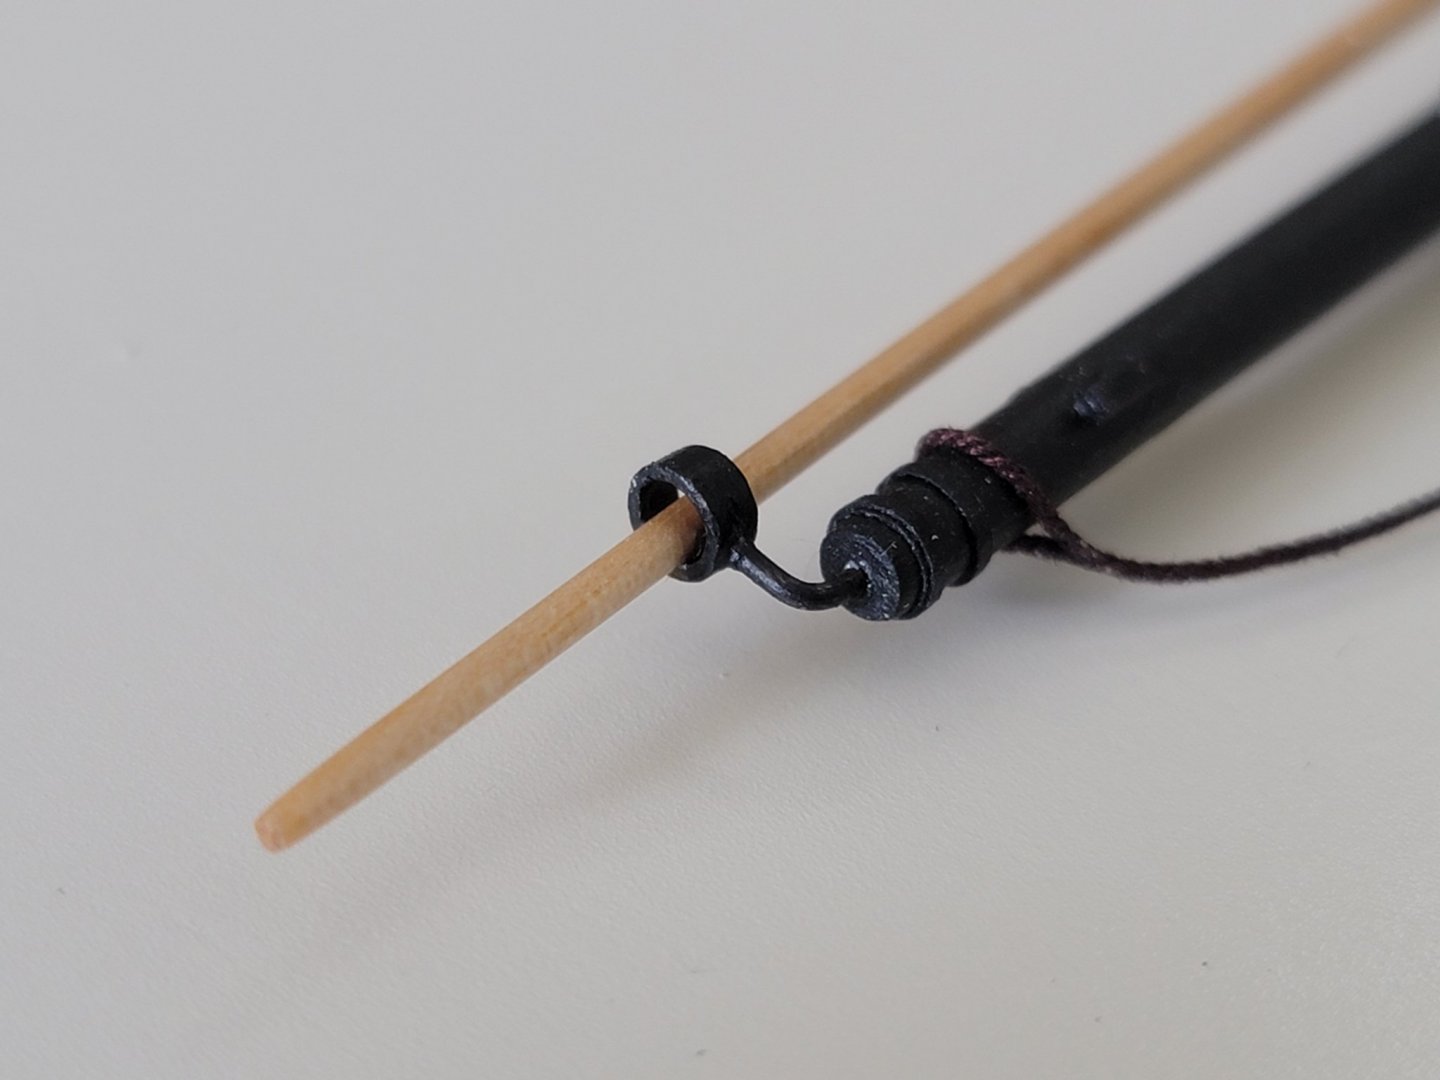
I also did not simulate the hinges on the iron. I thought they looked a bit over scale, so I opted not to include them. Next up I'll be attaching all the blocks to the spars, then will finally get to rig them!!
-
On 4/19/2021 at 10:03 AM, BobG said:
Wonderful work and a superb build log!
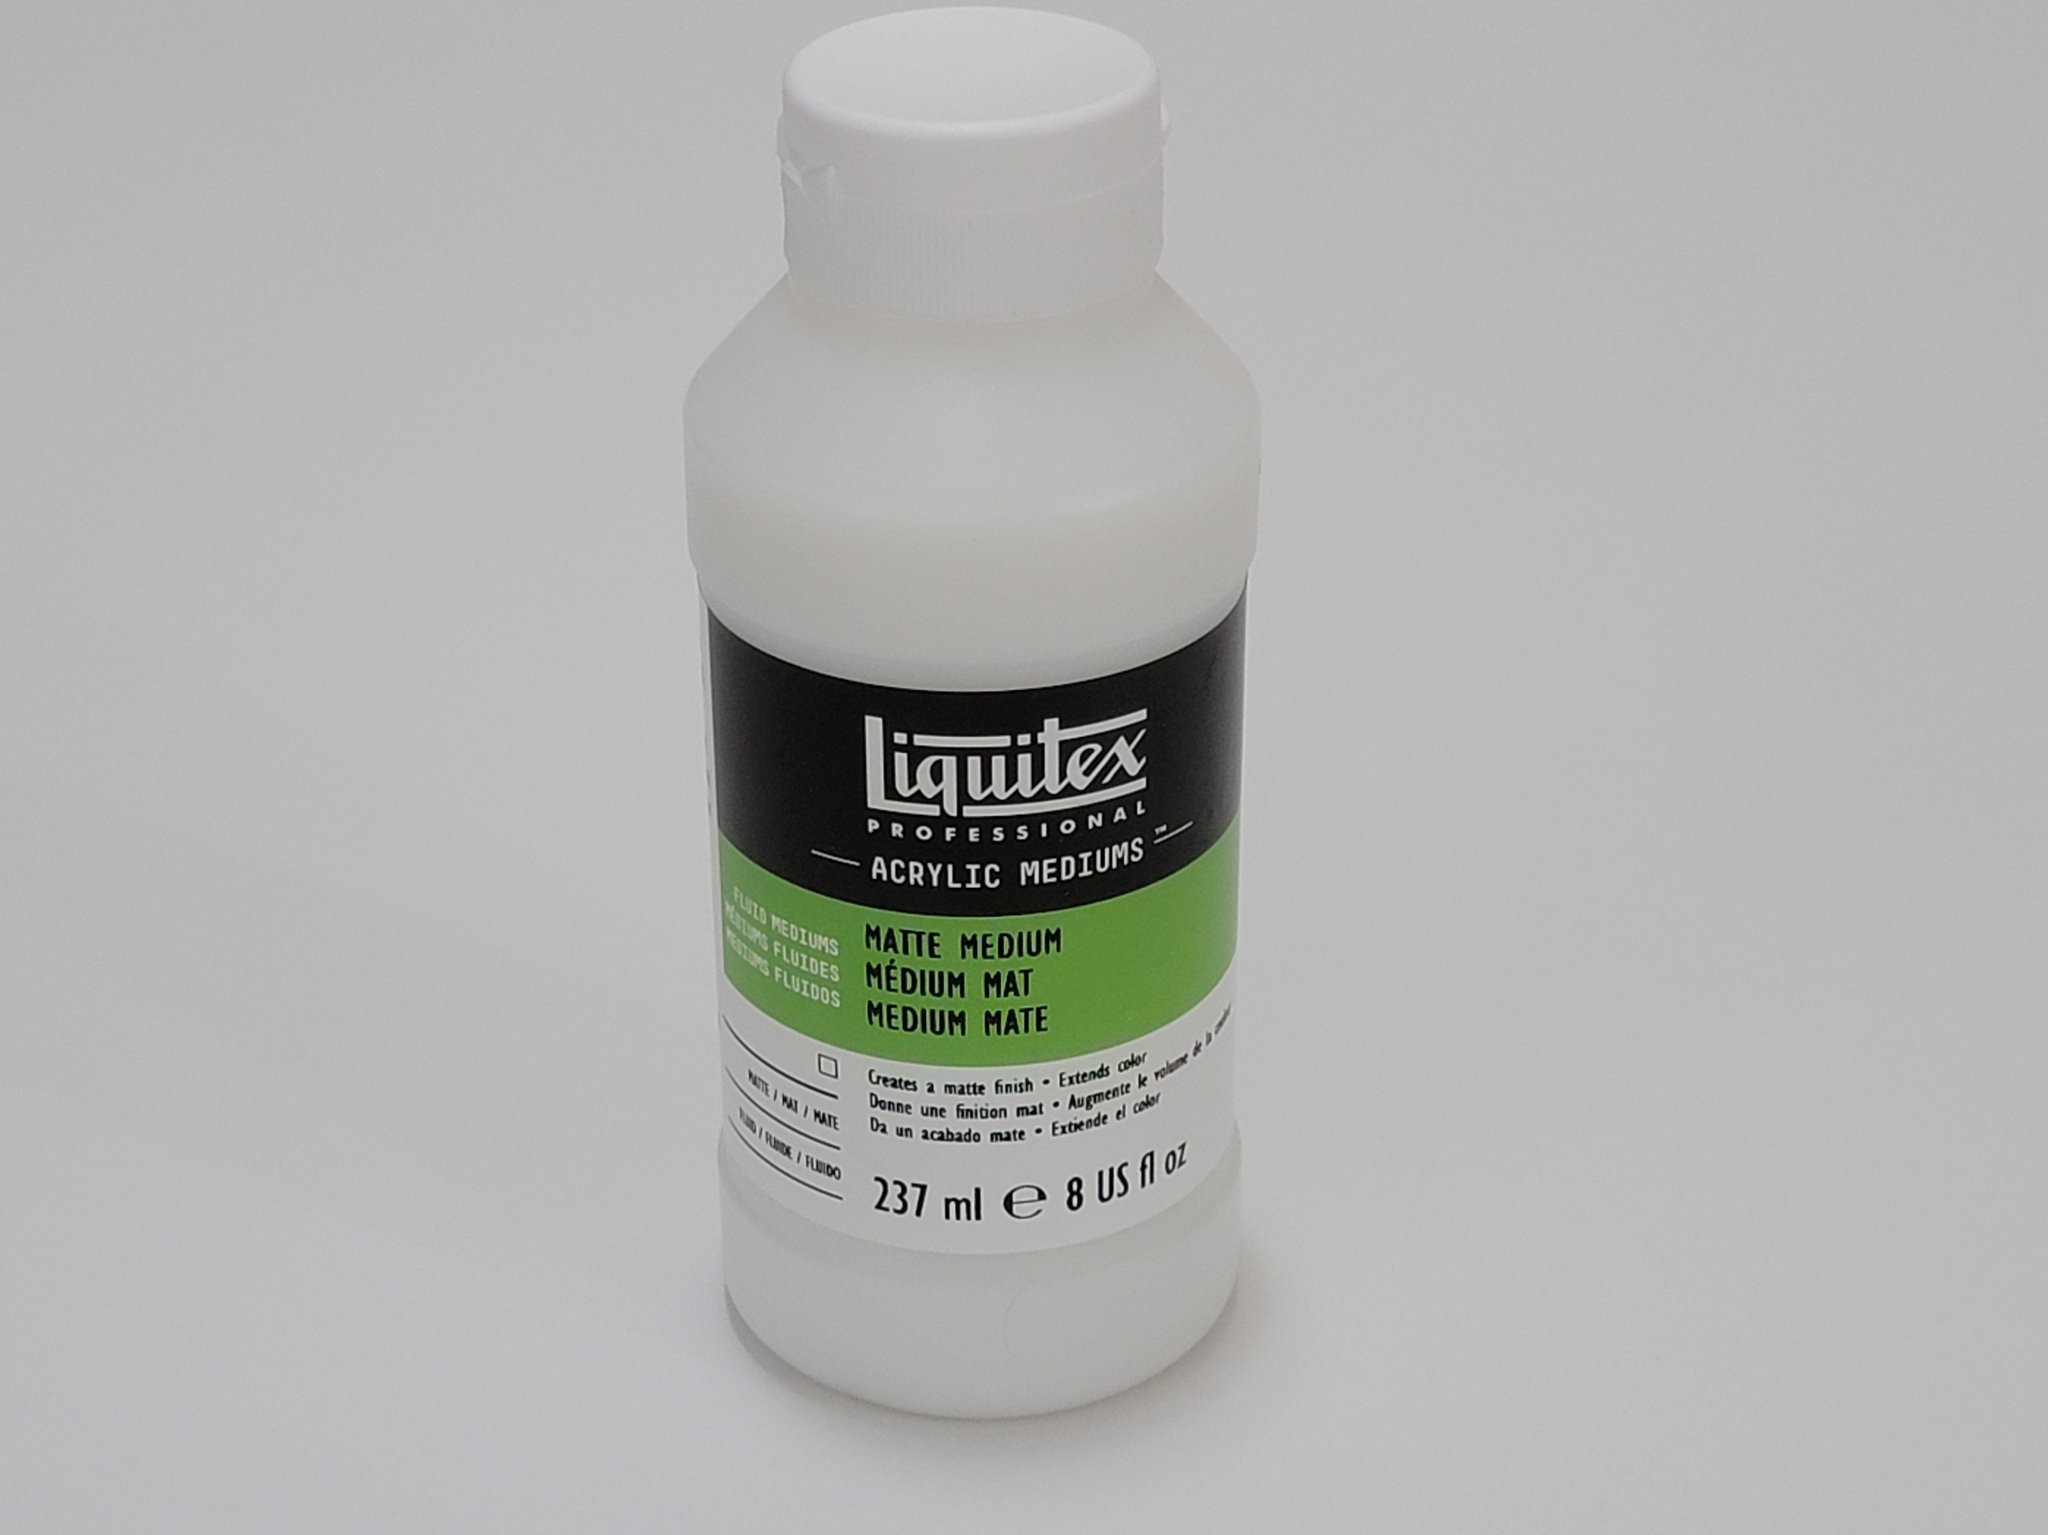
On 4/19/2021 at 5:18 PM, niwotwill said:Again the foot ropes drape is great and thanks for the liquitex medium formula.
Stay Well and Stay Safe
Will
 On 4/19/2021 at 5:32 PM, Justin P. said:
Just catching up! Everything looks really great, those yards especially.
Thank you Bob, Will, and Justin! And thanks all for the likes and interest as well 😀
-
Many thanks for the nice words Will and David!!! Thanks all for the likes as well!
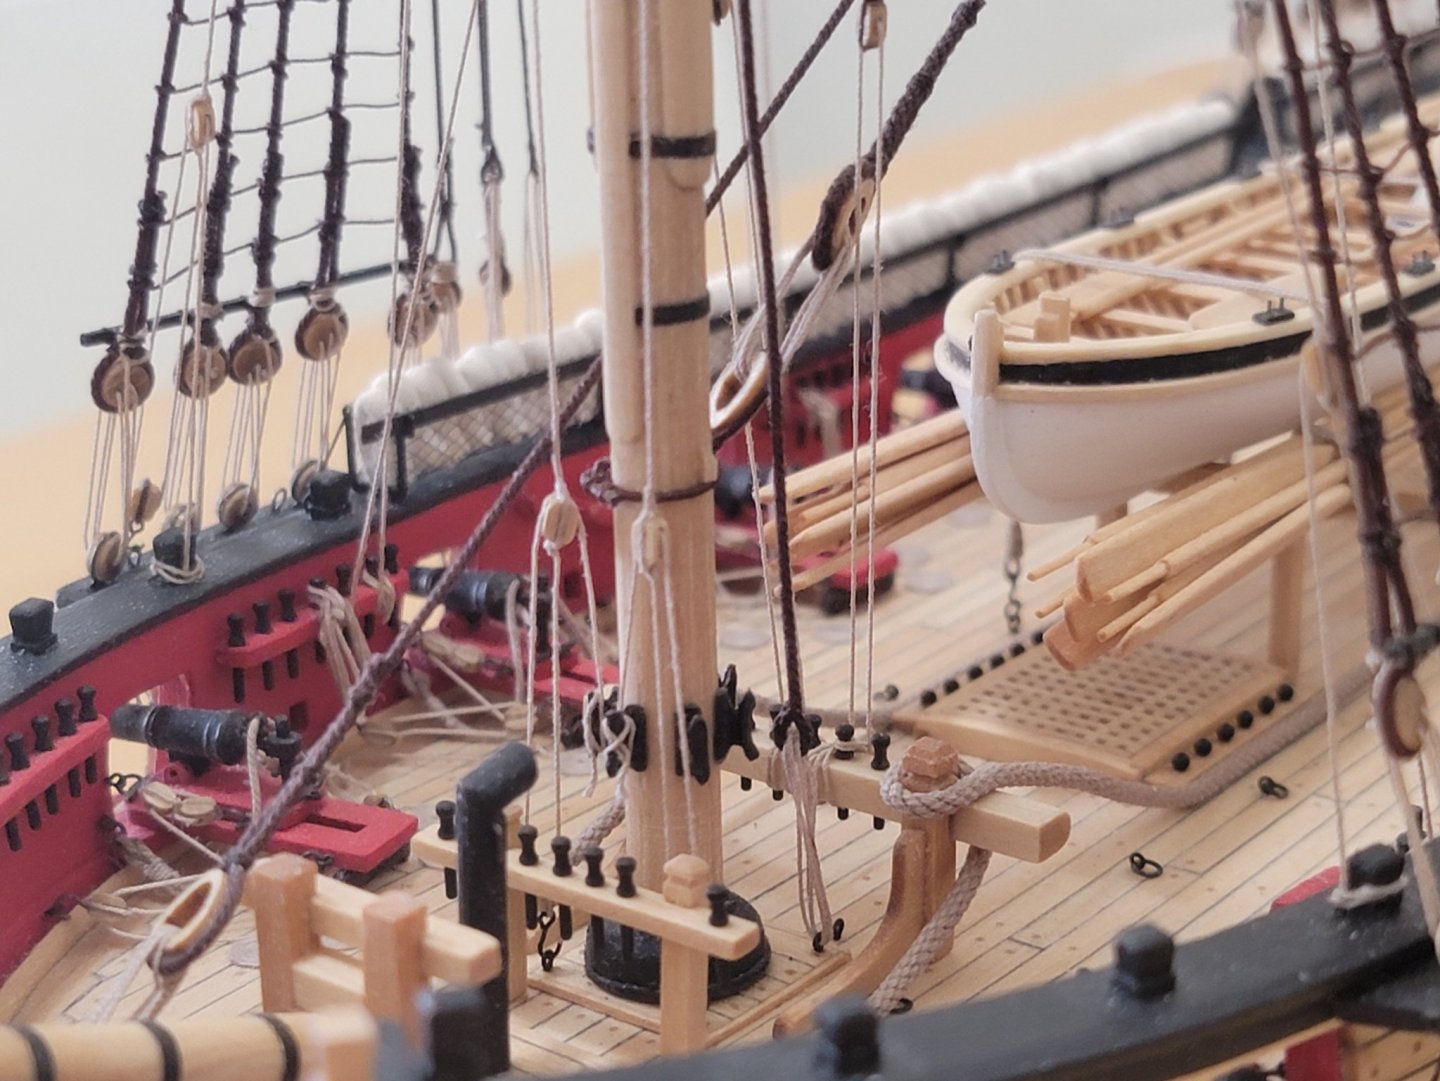
Progress unfortunately slowed down this week. It's the end of the semester so was busy with exams and reports. Most of the work is done so I got some time and got back to finish the foot ropes on all the yards. Here is a picture of where they are at
And here is the solution I used to make them. I just used a drop mixed with two drops of water then applied on the ropes

Next up I'll work on the boom irons that attach on the spars, then the blocks
-
I finished rigging one of the yards with the stirrups and footropes. For this I ended up using the rope, and the rope held its shape with diluted acrylic matt medium. Here are some pics:
Used wire to shape them while the matt medium dried:
As usual, any comments or suggestions are more than welcome! 🙂
-
Thanks so much Thomas!! 😃
I dyed the sewing thread rope coils with some tea. I think that did the job. I just applied the tea with a toothpick, and allowed the strings to dry a bit. It's still a bit light, but matches the other ropes a bit better. Here are some pics:
And of the other rope coils


Really enjoying making rope coils as an intermediate step. I don't think I'd feel the same if I did them all at once at the end 😬
Will now continue working on the yards, very curious on how they turn out (especially the footropes!)
- Barbossa, egkb, Edwardkenway and 6 others
-
9
-
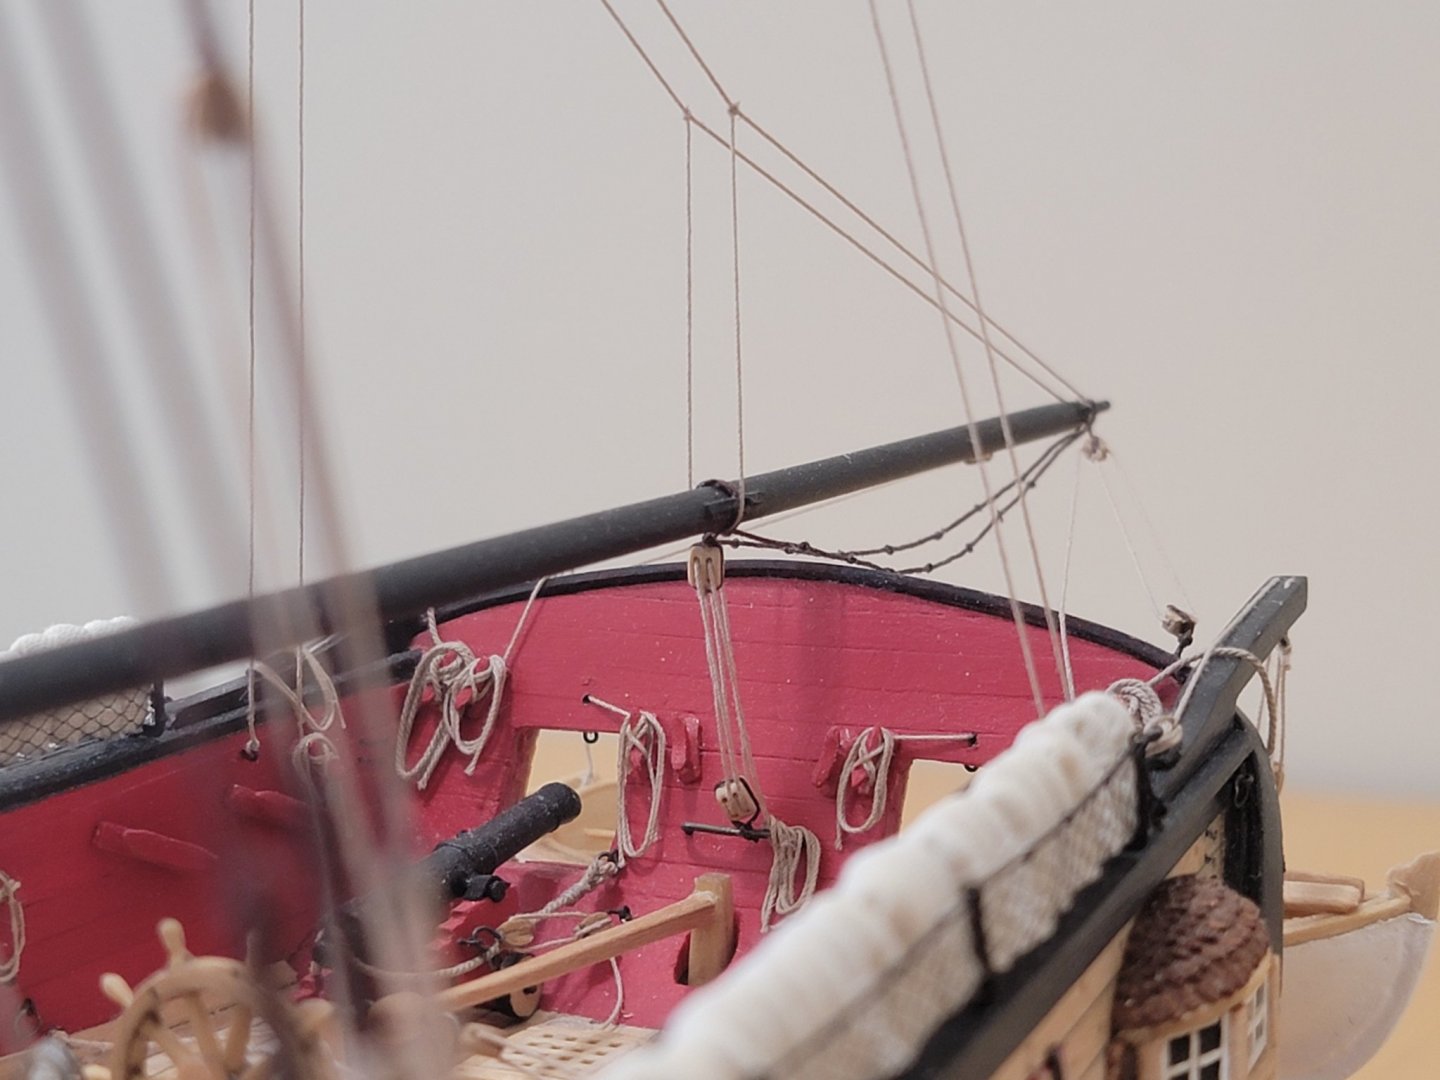
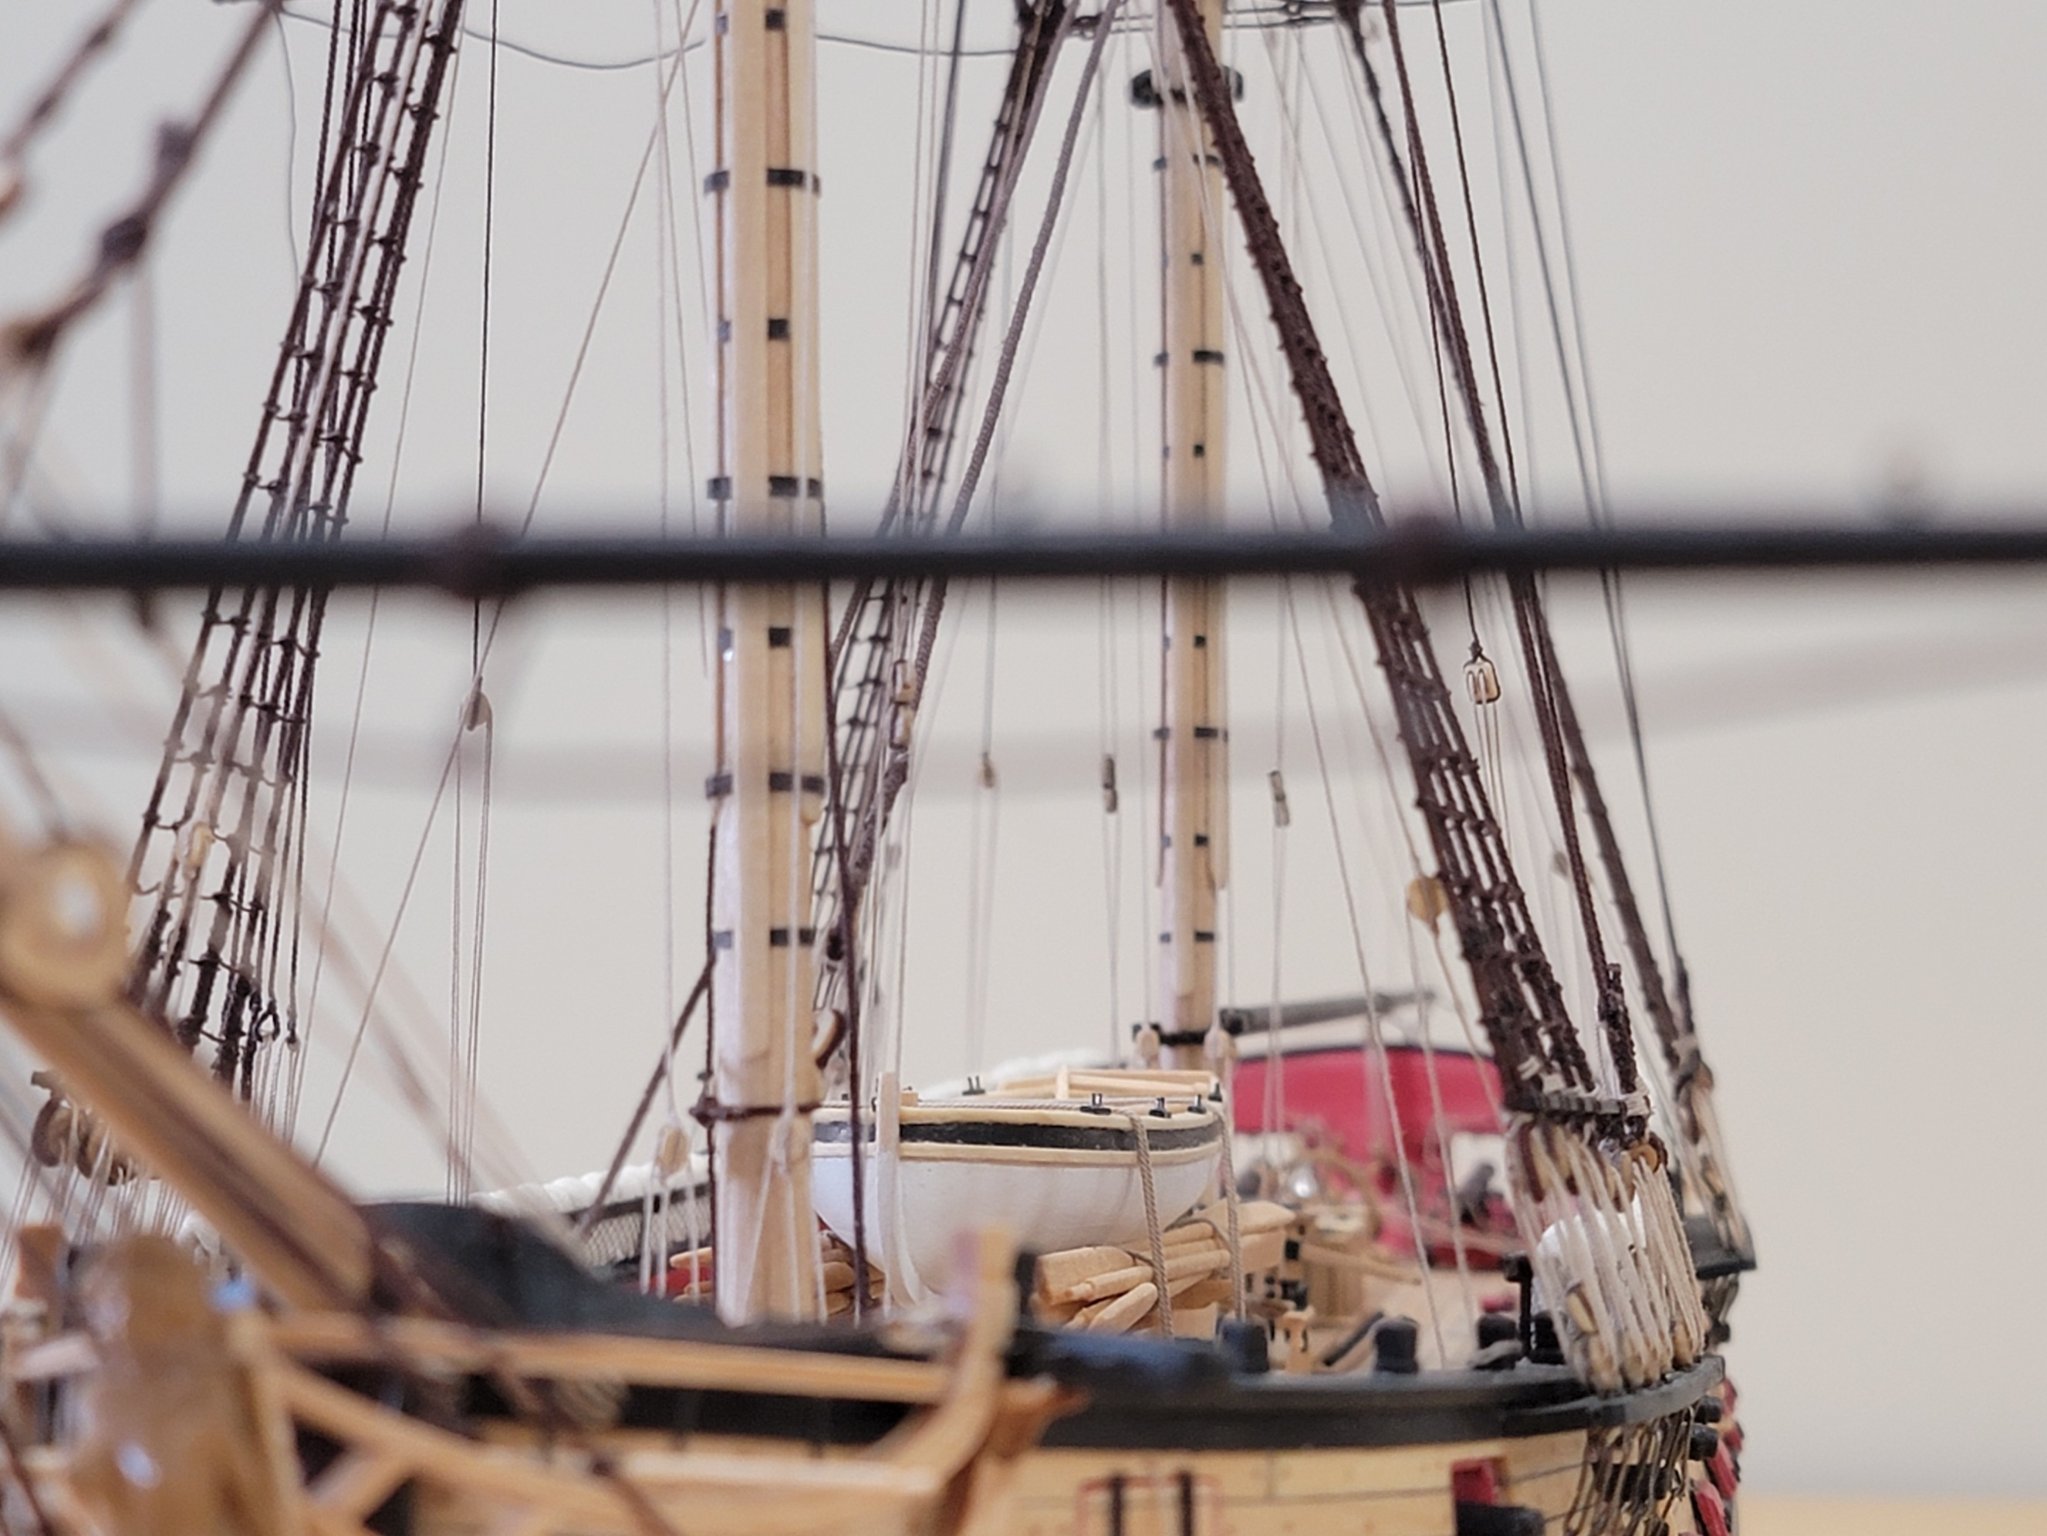
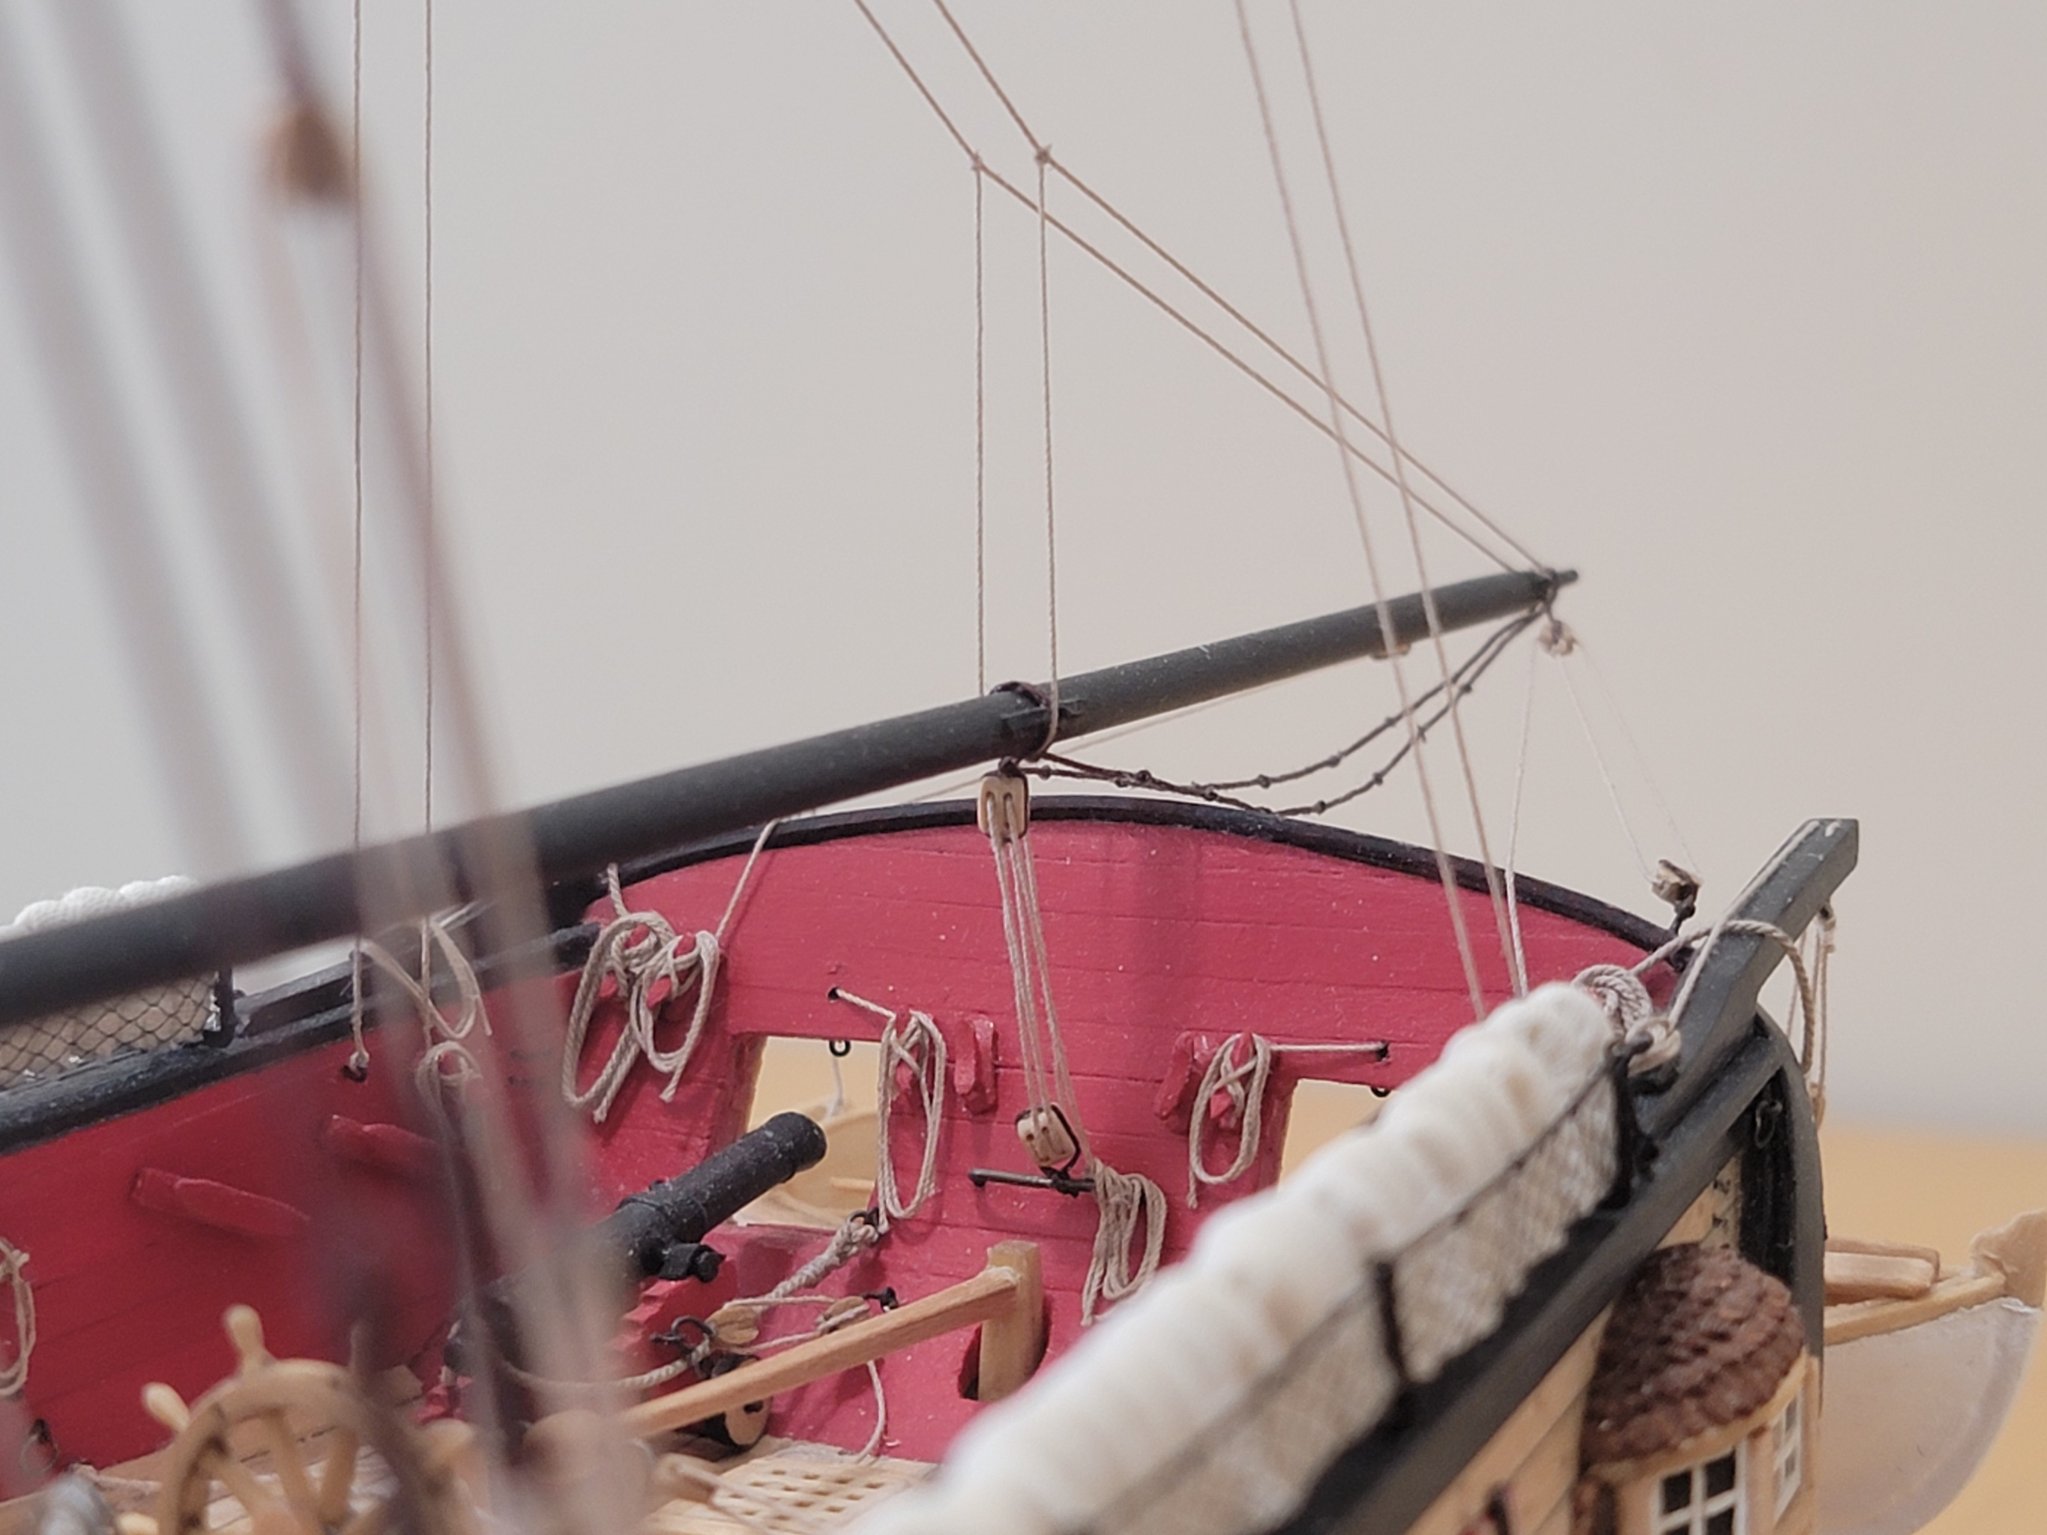
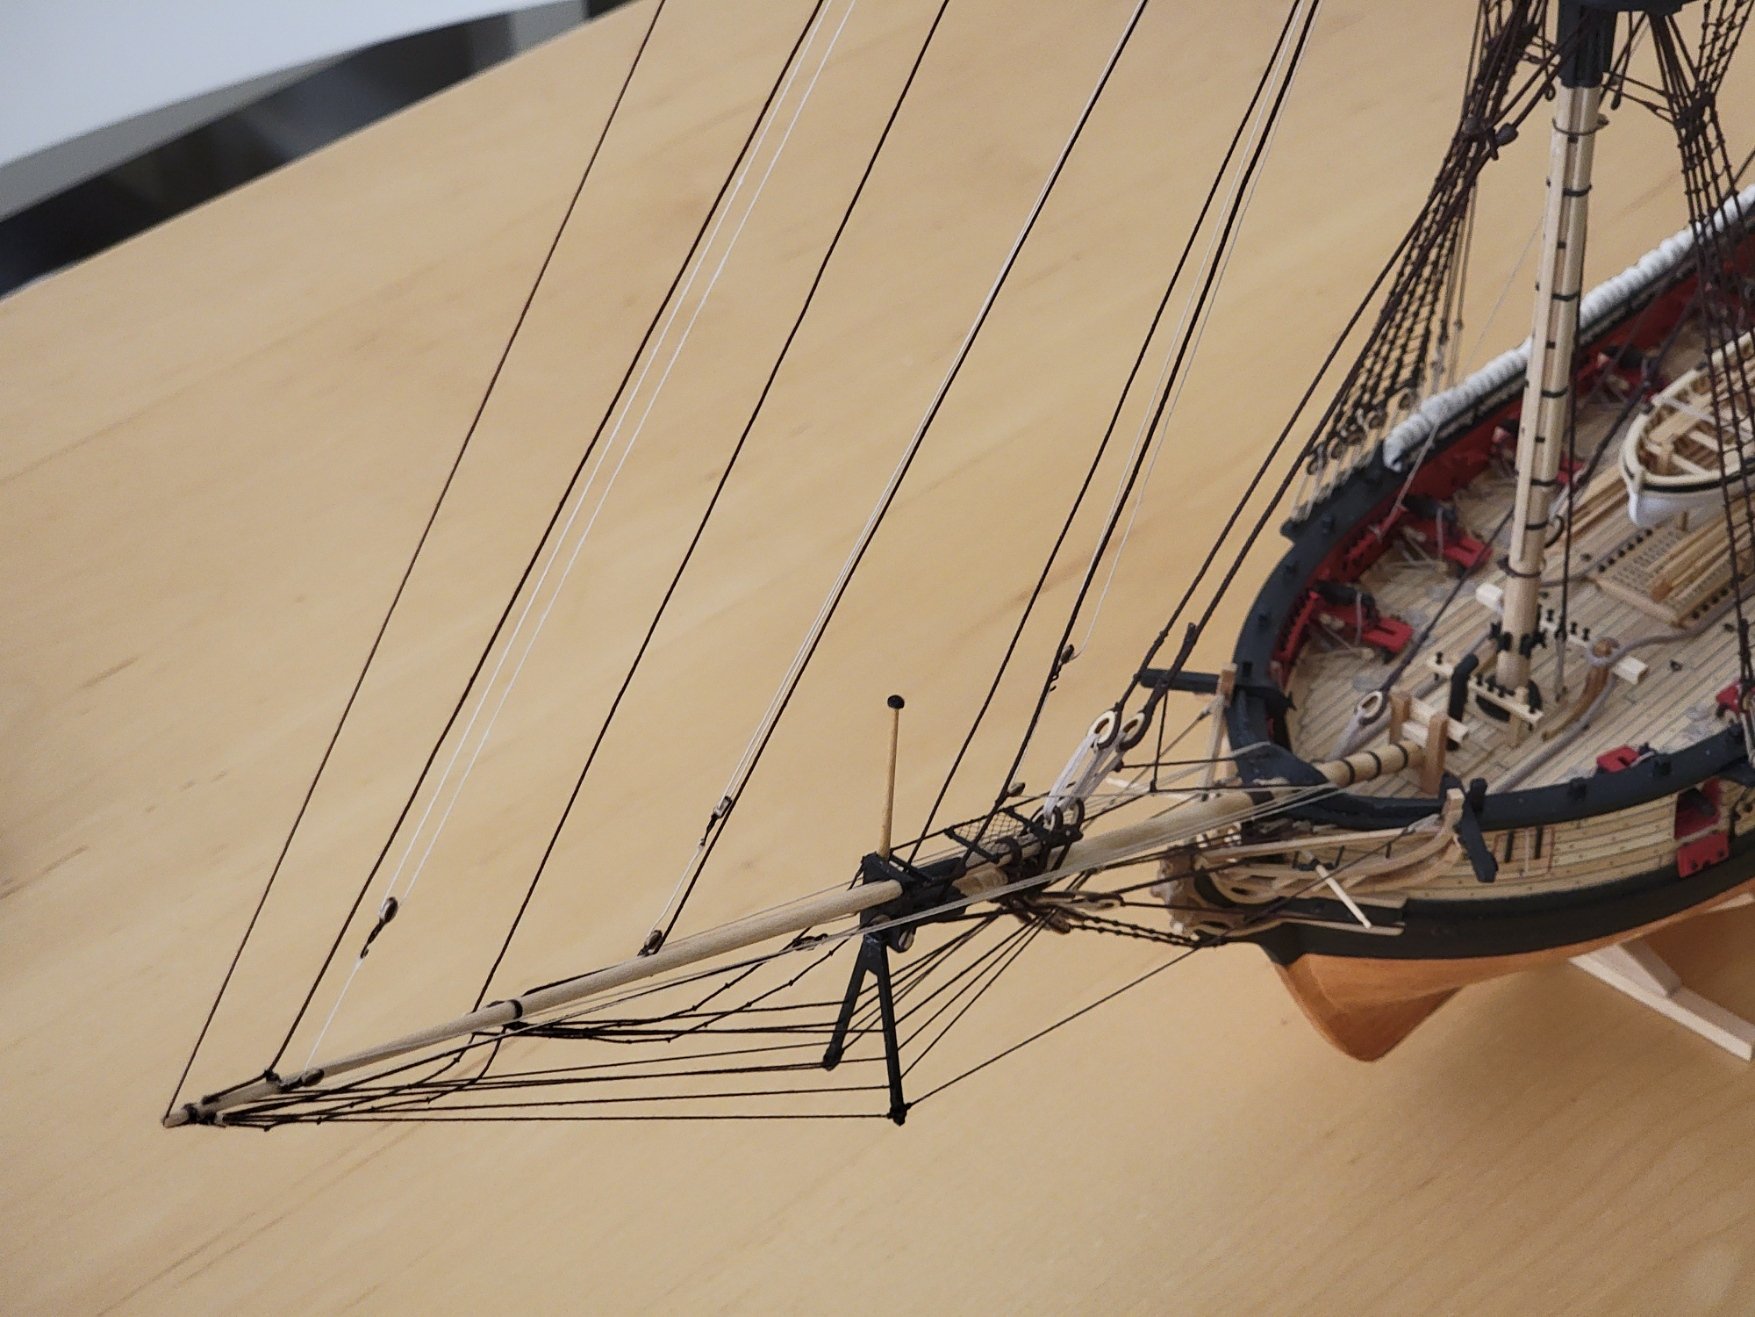
I decided to go ahead and finish up the staysail rigging rather than work on the yards. For some reason the stirrups and footropes felt a bit daunting to attempt at this time. I will be trying to use thread with matt medium acrylic applied to stiffen them. I have never used this product, so very interesting to see how it all works.
For the staysail rigging I used waxed sewing thread (with beeswax) wherever ST was written on the plans. After installing the ropes, I started to make the coils, then I realized the thread I used is a tint lighter than Syren's ropes..... So I am planning to just dye the coils up a bit with very dilute tea water. Hoping this does the trick to match the colors. Here is a pic of the photo of the lighter colors contrasting with the thicker Syren rope.

And here are some pics of the staysail rigging. It was very hard to show the ropes with the white and cream background, so I tried to play around with the lighting to see if they show. I will be on the lookout for a greyish board/fabric I can use to contrast against the rope colors 😁


I'll next try to sort out the color issue with the rope coils, then will continue on with the yards.
-
3 hours ago, druxey said:
It's gesso and sand and repeat time now.
Can sanding sealer serve the same purpose? I guess this is just to make the curve as smooth as possible without any seams?
- thibaultron and mtaylor
-
2
-
4 hours ago, Edwardkenway said:
Just stunning!
Been catching up on your progress. What a glorious brig 😉
2 hours ago, NovaStorm said:Just wonderful looking at your progress. Moving along nicely is an understatement
")
Many thanks for checking in and leaving the nice comments, Edward and Robin. And glad to see you back Robin! Looking forward to seeing progress in your beautiful Syren build 🙂
-
The assembled gratings and cannon ball rails look great! I remember this chapter was a lot of fun. All the tasks are very varied and not monotonous like other parts of the build.


US Brig Syren by WalrusGuy - FINISHED - Model Shipways - Scale 1:64 - Second wooden ship build
in - Kit build logs for subjects built from 1801 - 1850
Posted
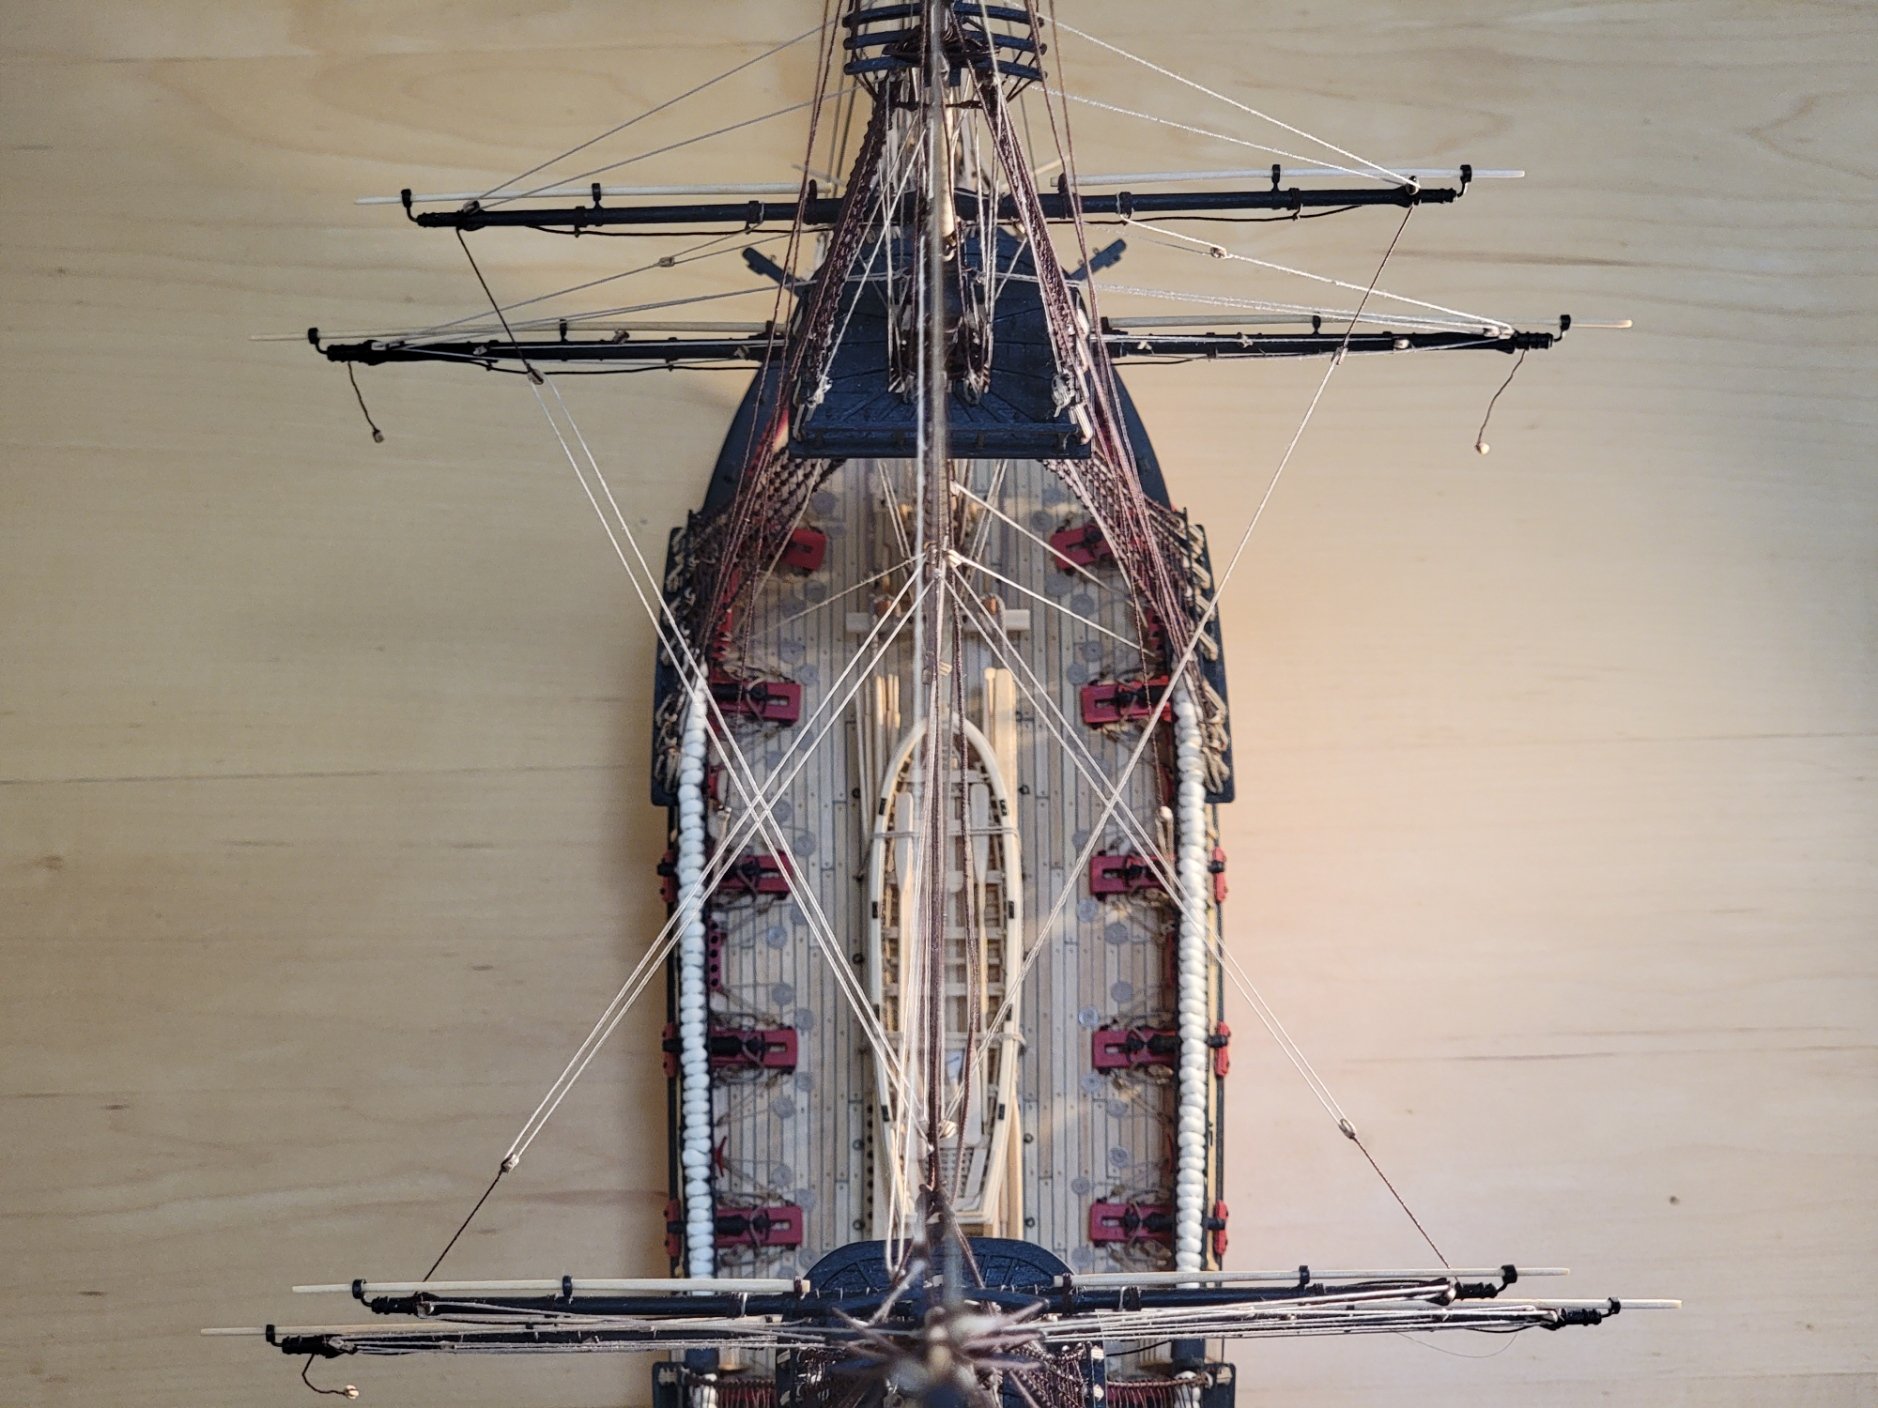
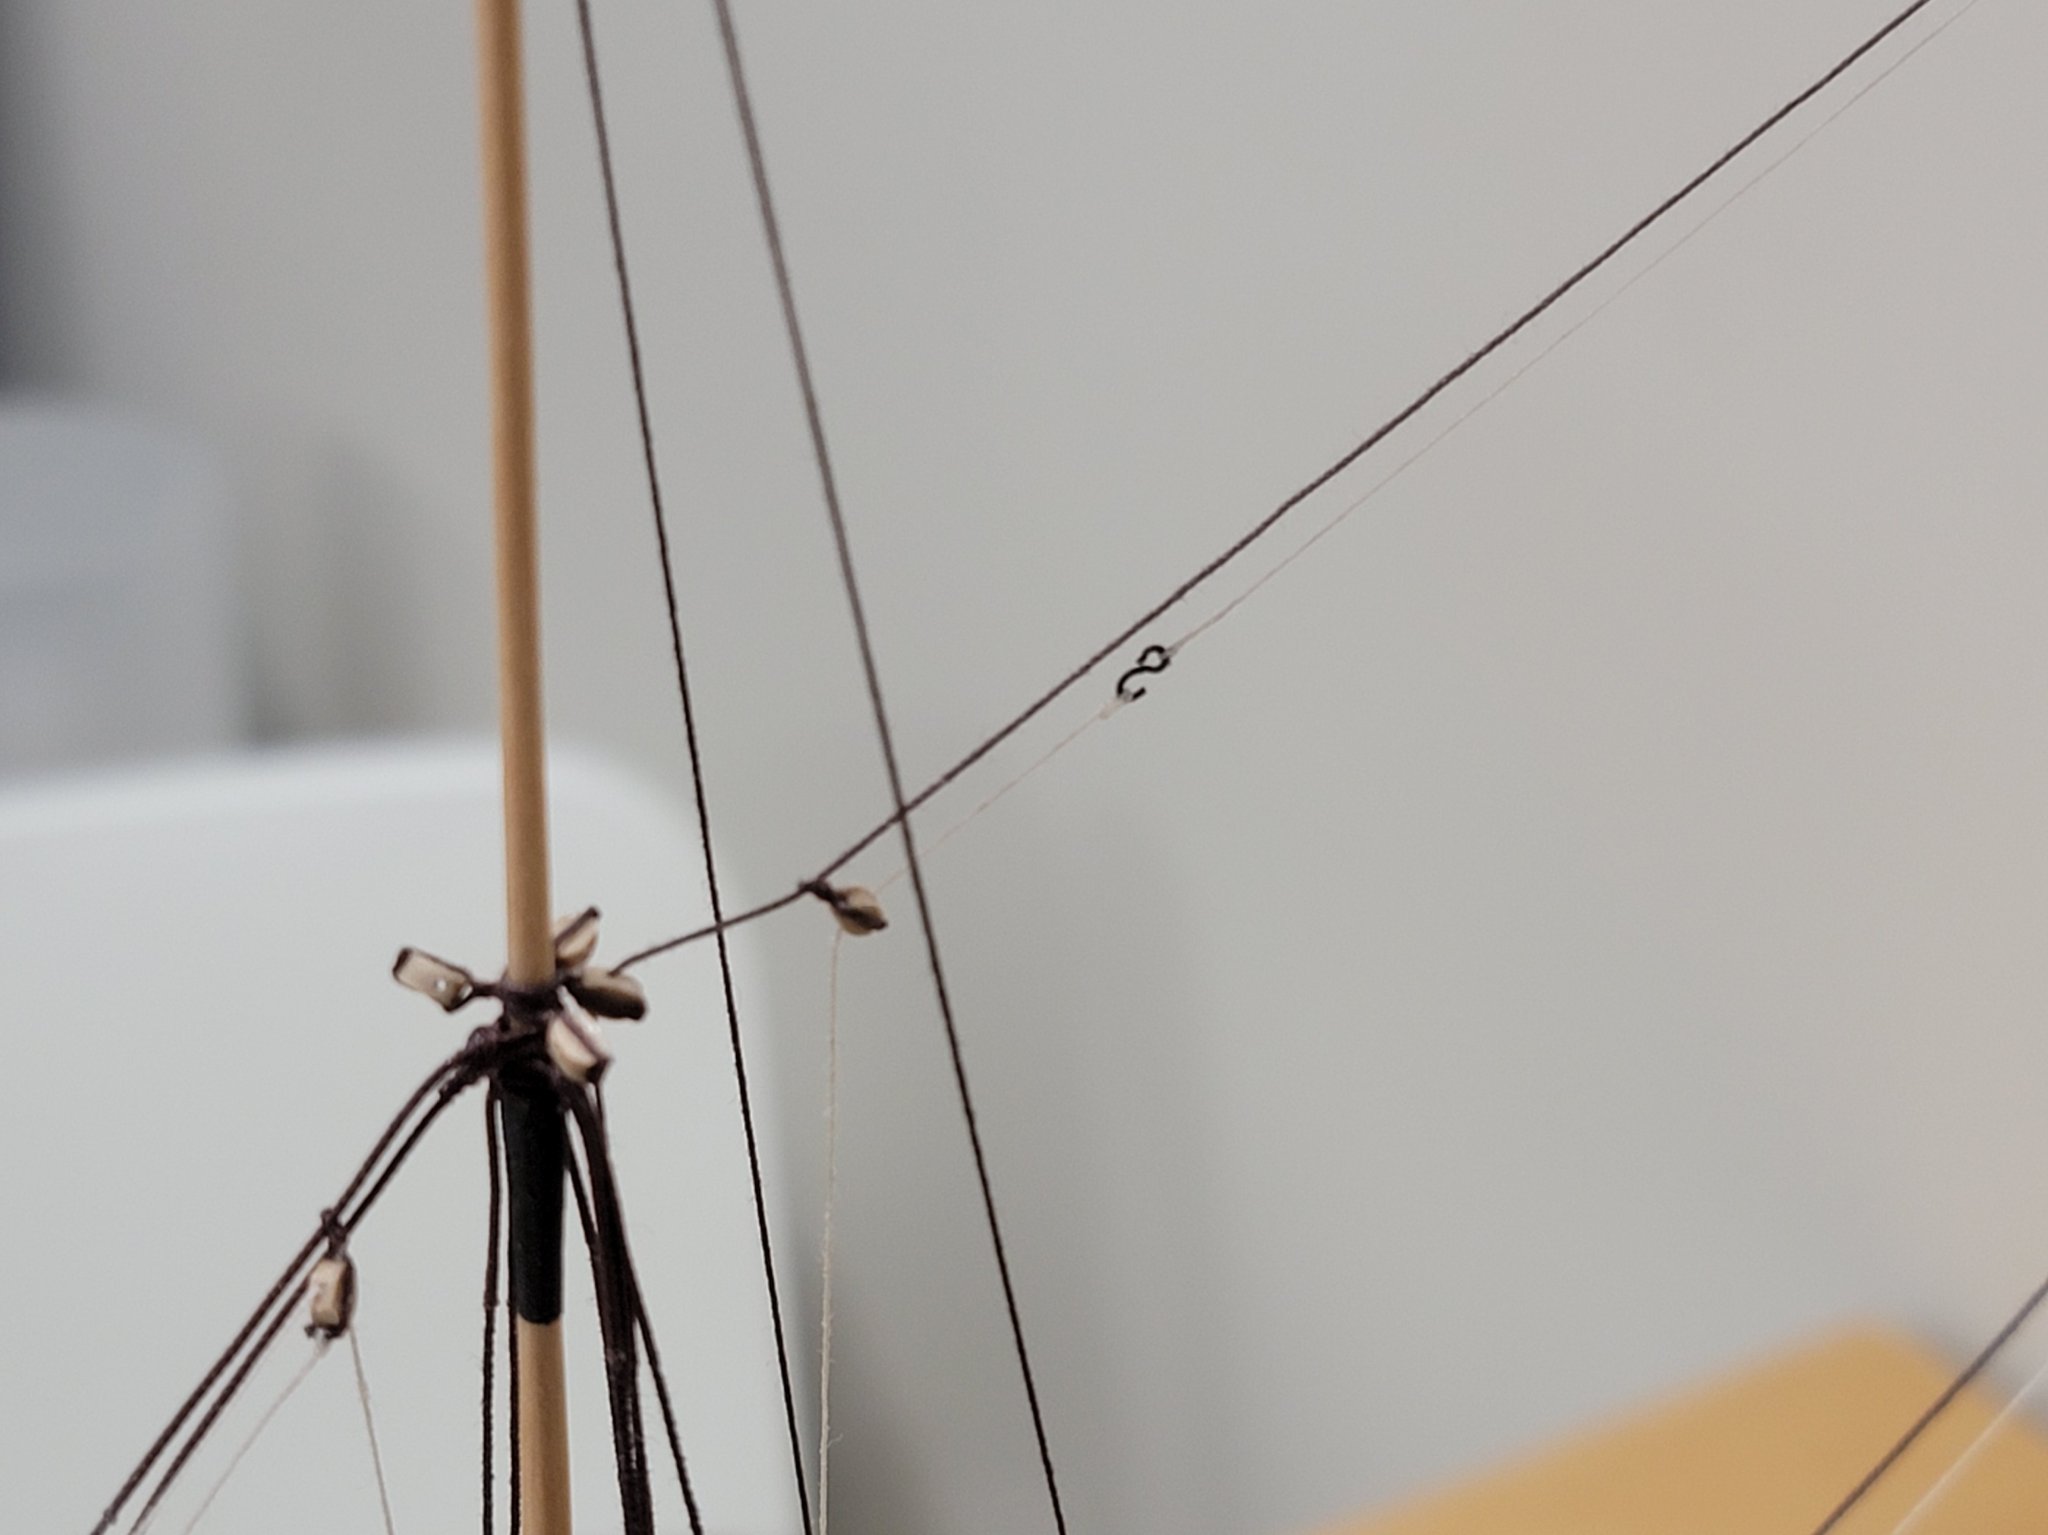
Just wanted to post a quick update. I decided to continue rigging and will work on the rope coils after. I'm currently almost done rigging the royal yards. I also received the additional rope so I can work on the rigging without worrying of it running out!