

.jpg.1f80adf1a9b14a937cfcf2ca6af0f0d4.jpg)
WalrusGuy
-
Posts
1,007 -
Joined
-
Last visited
Content Type
Profiles
Forums
Gallery
Events
Posts posted by WalrusGuy
-
-
On 4/7/2021 at 9:39 AM, niwotwill said:
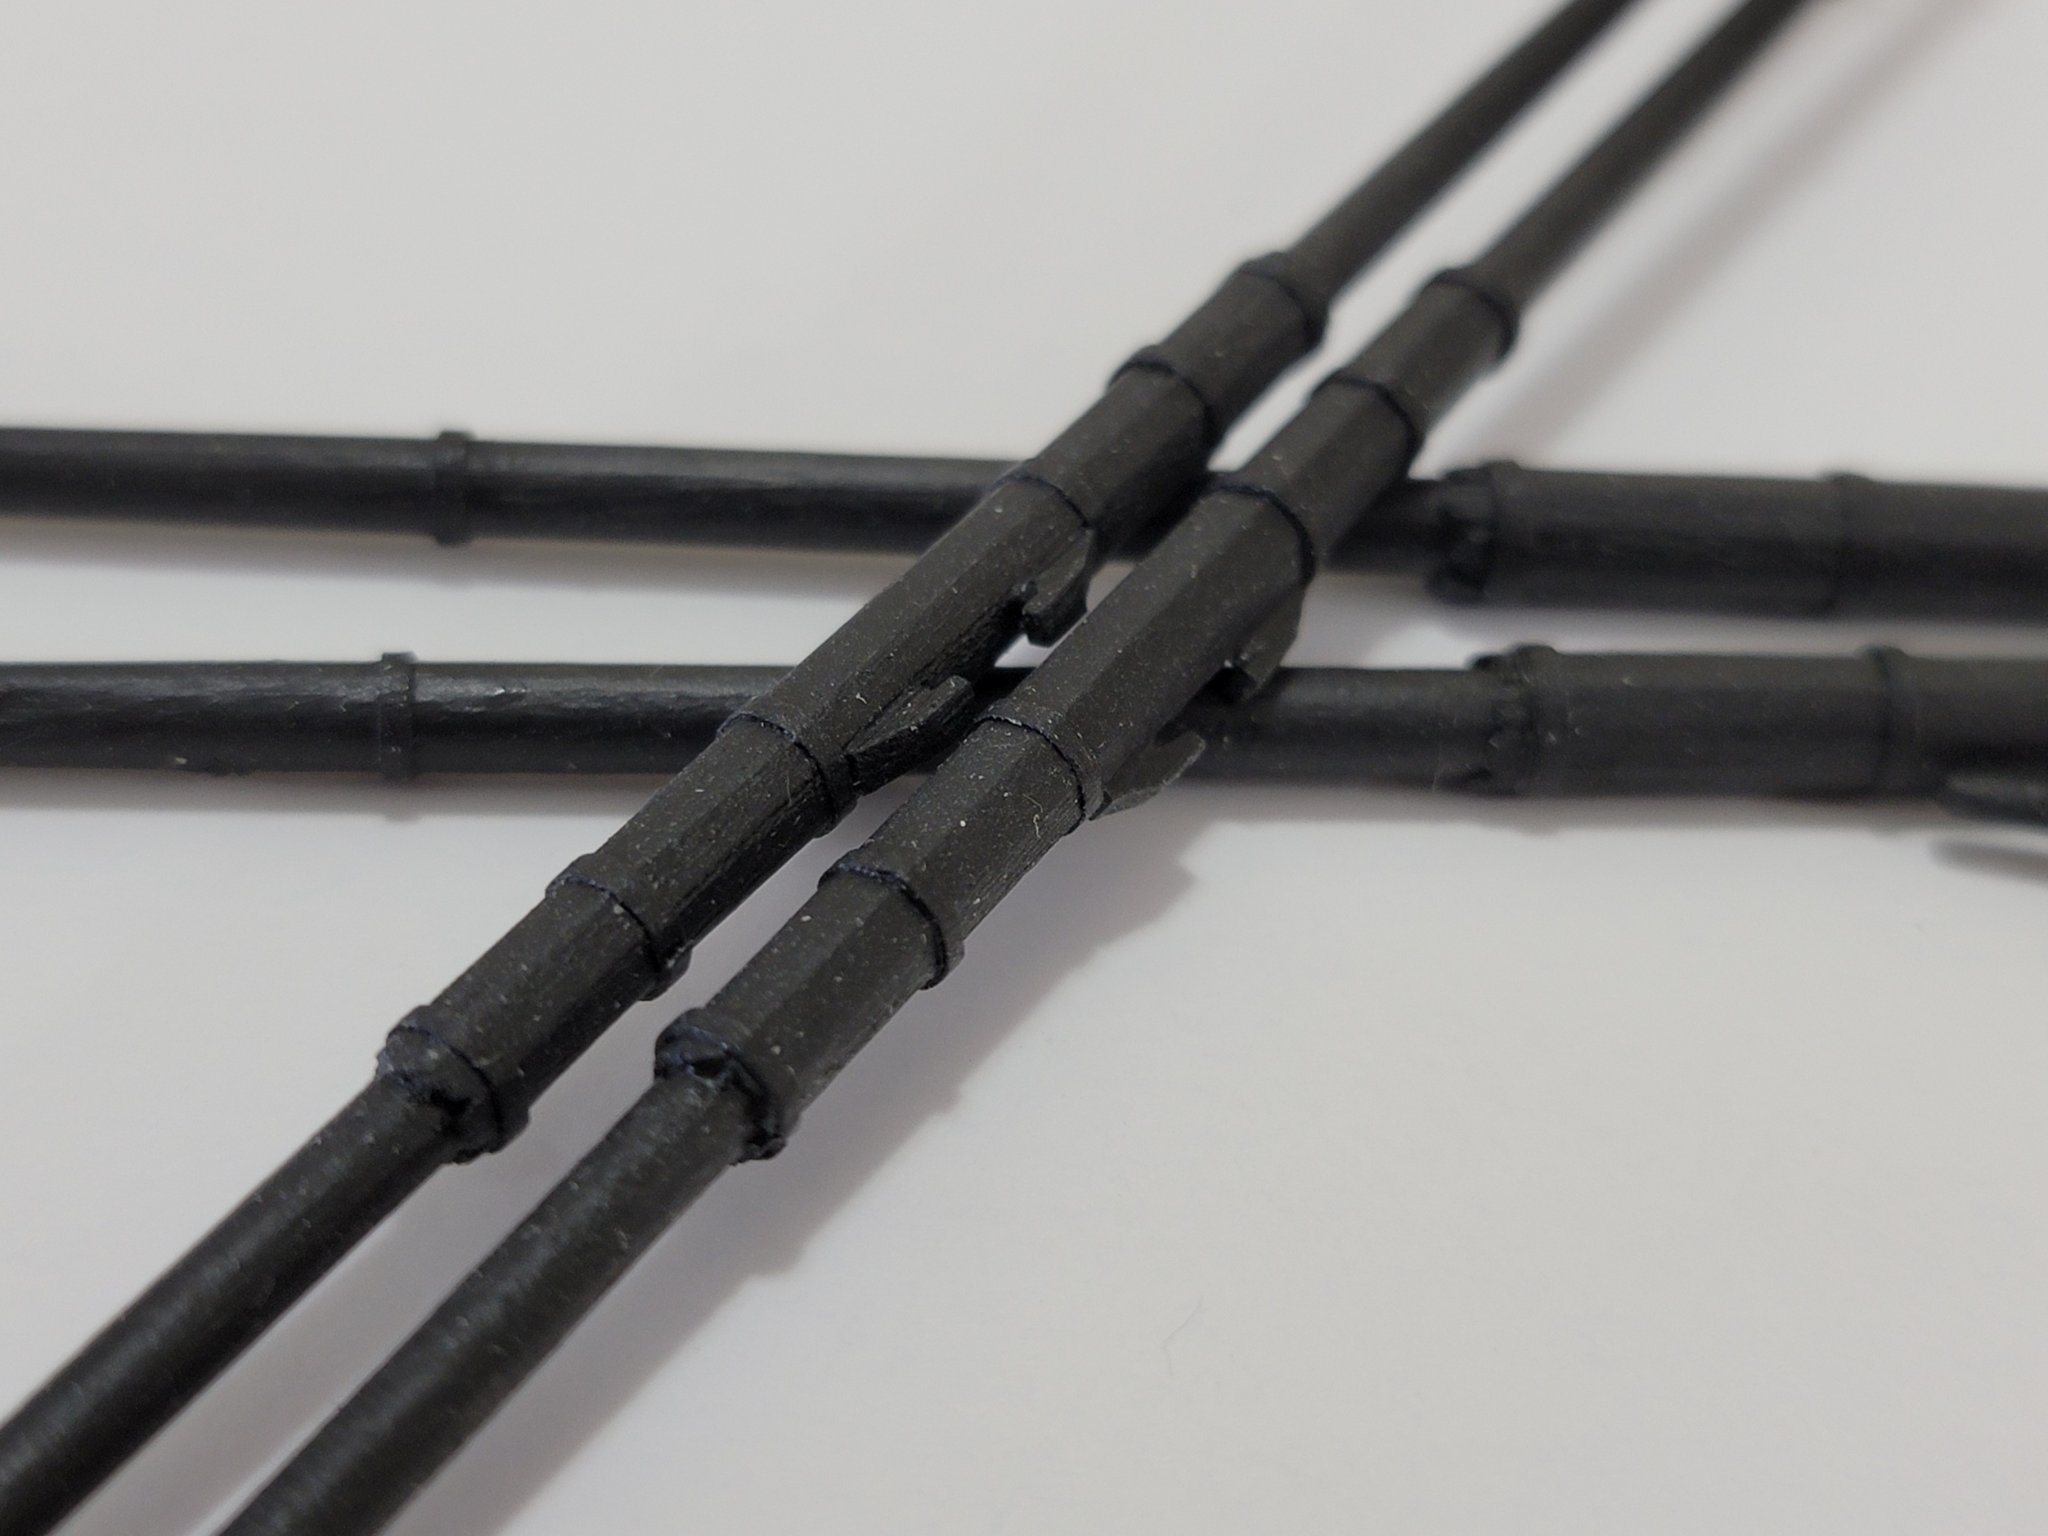
The iron bands make the spars. The small deviation adds the detail making them visually stunning. Great work what did you use for the bands?
Stay Well and Stay Safe
Will
 22 hours ago, captain_hook said:
Very nice! You‘re approaching the finish line. Keep up the good work!
18 hours ago, abelson said:I like the bands on the spars - a nice addition. I think I'll copy you when I reach that stage. Looking good. You better slow down or you'll be starting your next build soon. haha.
13 hours ago, desalgu said:I haven't checked in for a while, and I'm always stunned at your rapid progress, and how clean and crisp it looks in closeups. Amazing craftsmanship! This will be a stunning model when finished. You'll be amazed at what a difference it makes when you start adding each yard and rigging.
Glad you caught the extra block on the crosstrees (I think that's where it was). I didn't notice it, and adding it after you have a lot of rigging on was a bit difficult. Much easier to get all the blocks and details on beforehand.
I agree with comments about iron bands around the spars. A very nice detail to add, and kind of surprised it wasn't mentioned in the kit as an optional detail. Chuck added so many small details like this, it really makes the kit. And you have to draw the line somewhere.
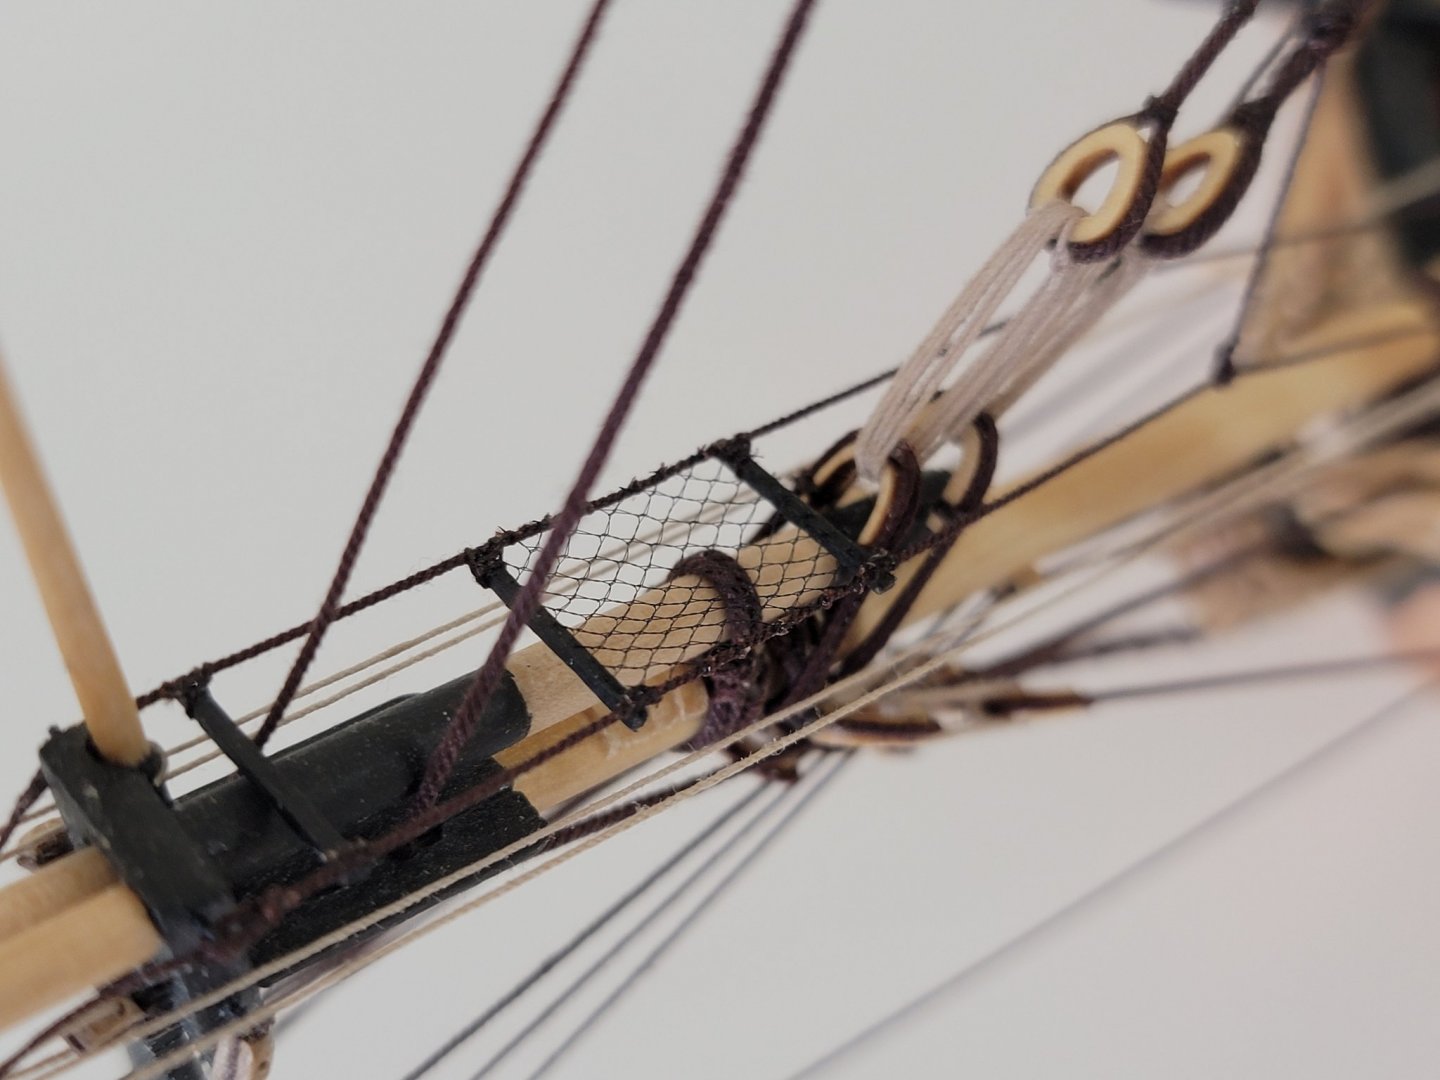
Yours always looks better than mine in the photos. I had a hard time with the netting on the bow. It was hard to trim to the right shape because it wanted to deform, and when I started tying it, it didn't want to stay flat. I managed, but yours looks a lot better. Perhaps eyes and fingers about 50 years younger than mine make a difference? Ha, ha! It's just patience and your knack for getting details right. I'll be patient for a while, and then get going too fast and make little mistakes.
Display case is coming along slowly. I've been sanding & spraying on coats of lacquer on the parts. I'll assemble after I get the parts finished except for a final coat.
Thanks so much for the motivating comments! 🙂 I was also surprised on how the spars looked with the bands. The end seems near, yet so far away. I am really excited to see how she'll look with all the spars. I took a bit of a break from the spars and started to work on rigging the boom and gaff. I will post photos in the next couple of days once I finish. The running rigging is even more fun than the standing rigging 😄! I am just having a bit of trouble with is belaying the lines in the cramped spots with all the ropes on the way. After doing a couple I think I am getting used to it.
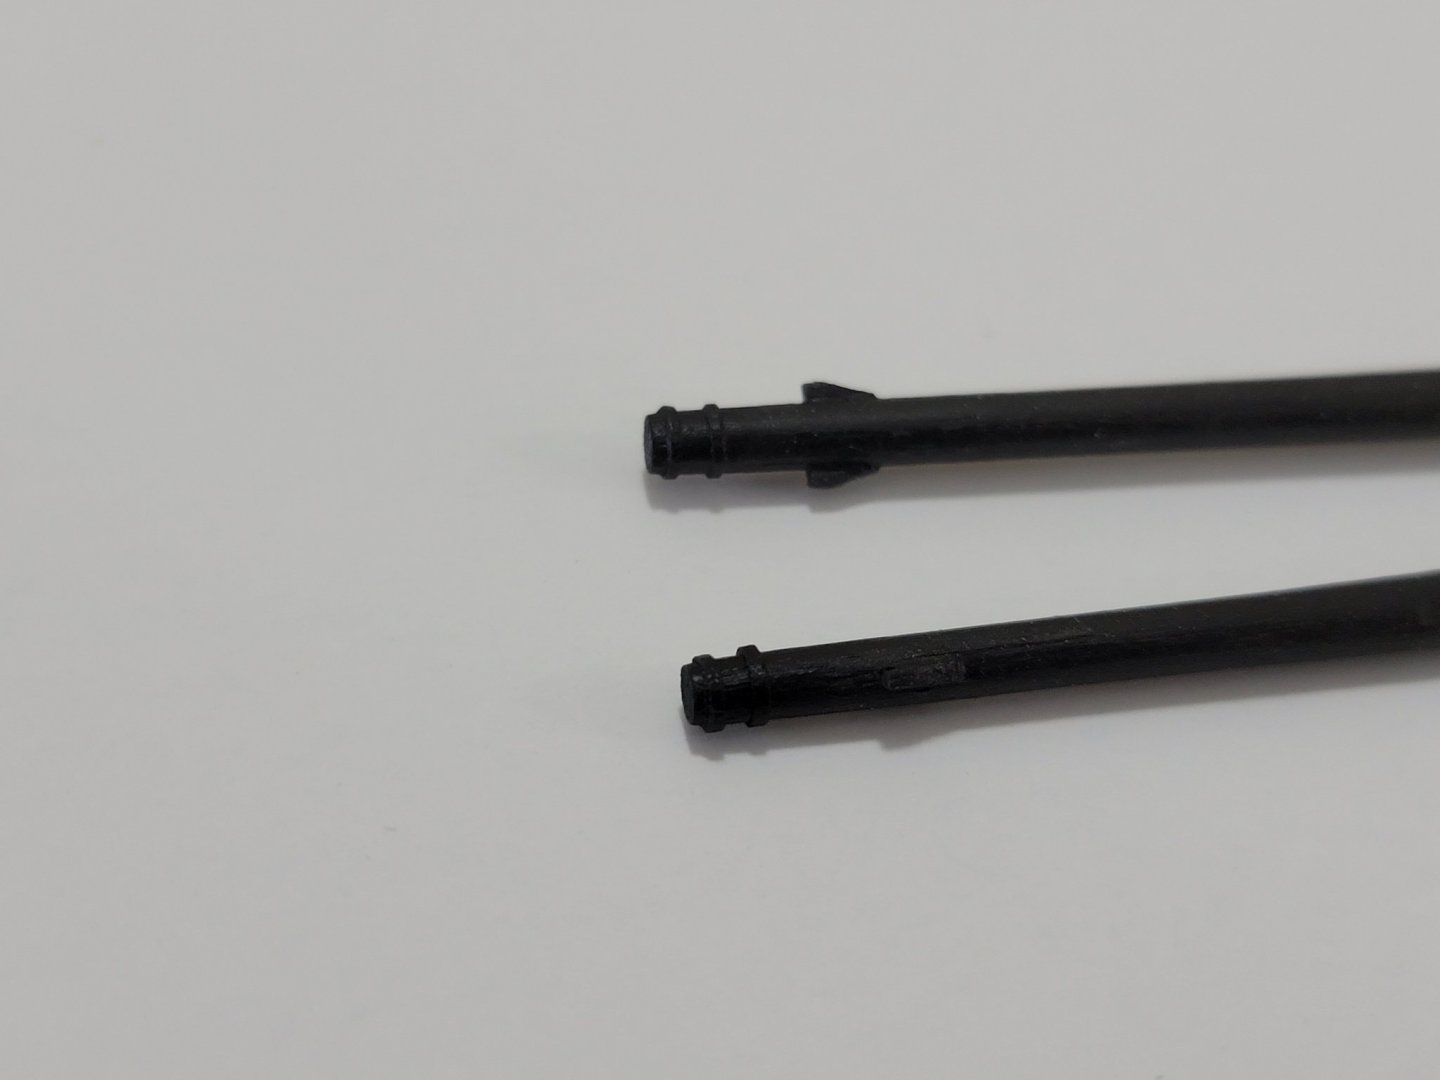
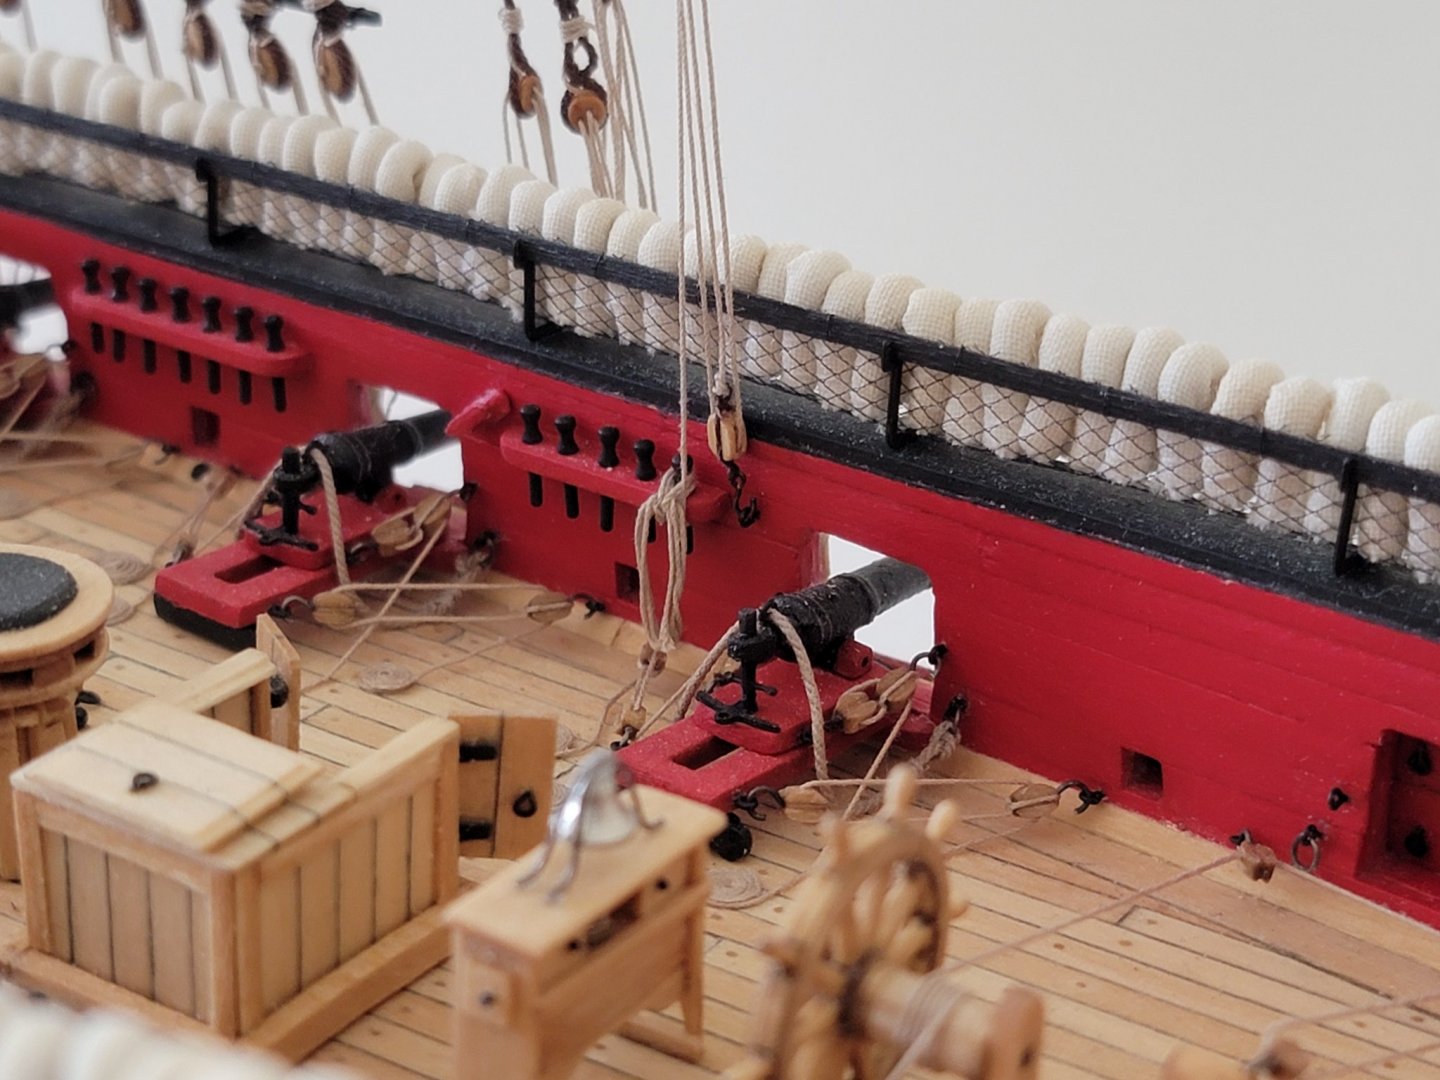
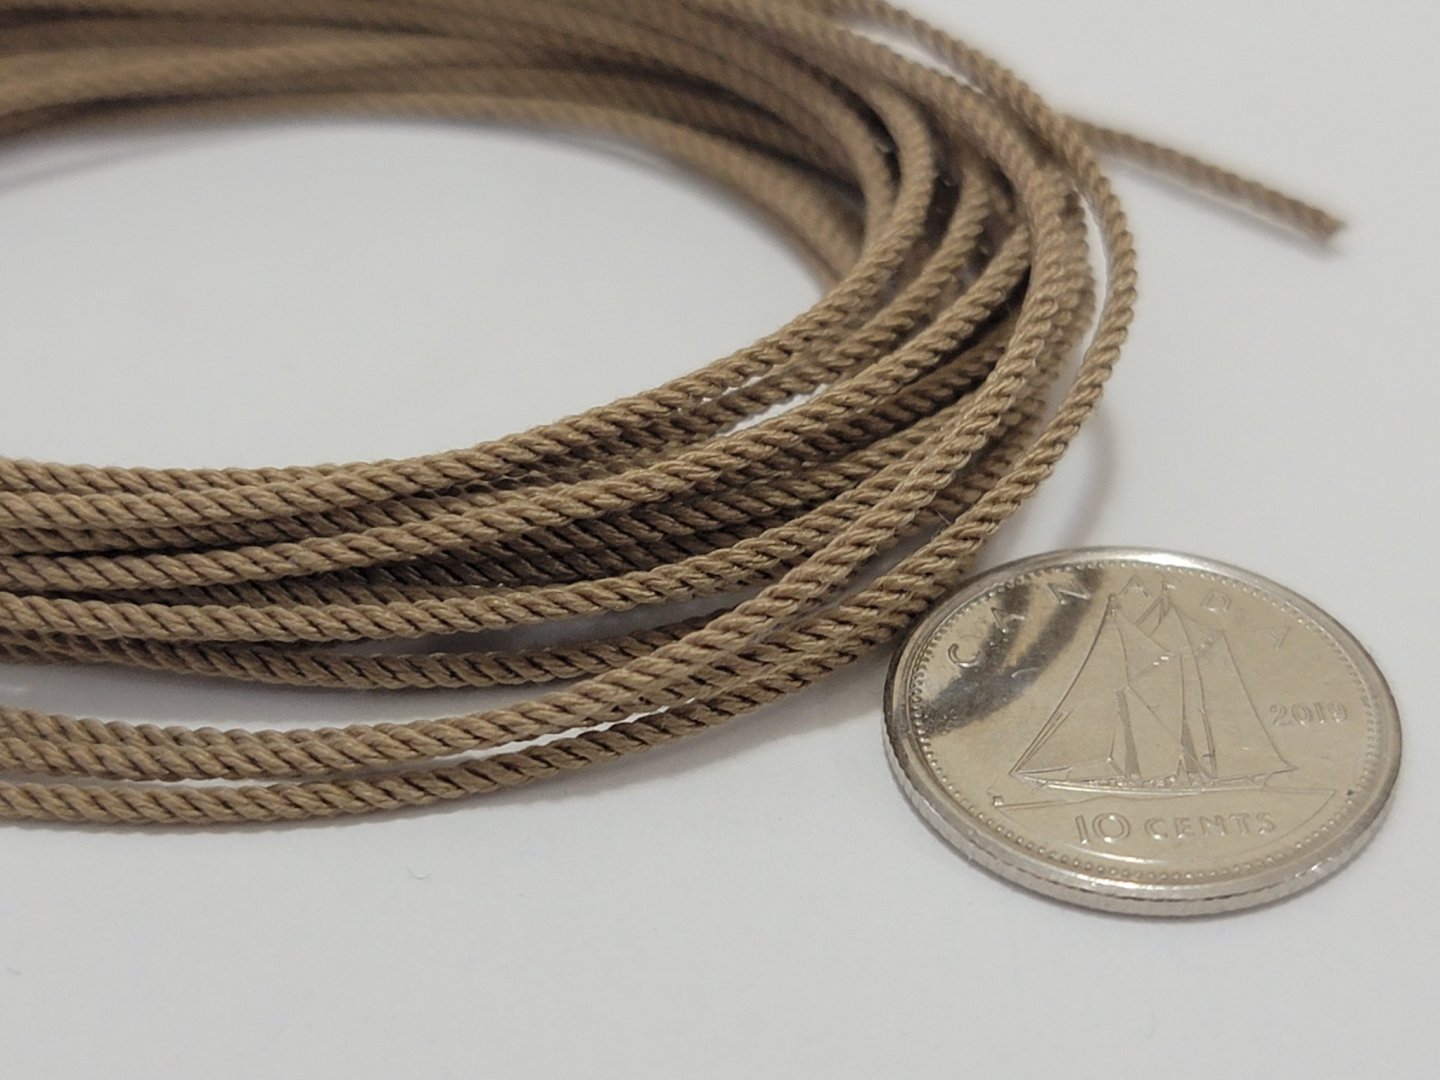
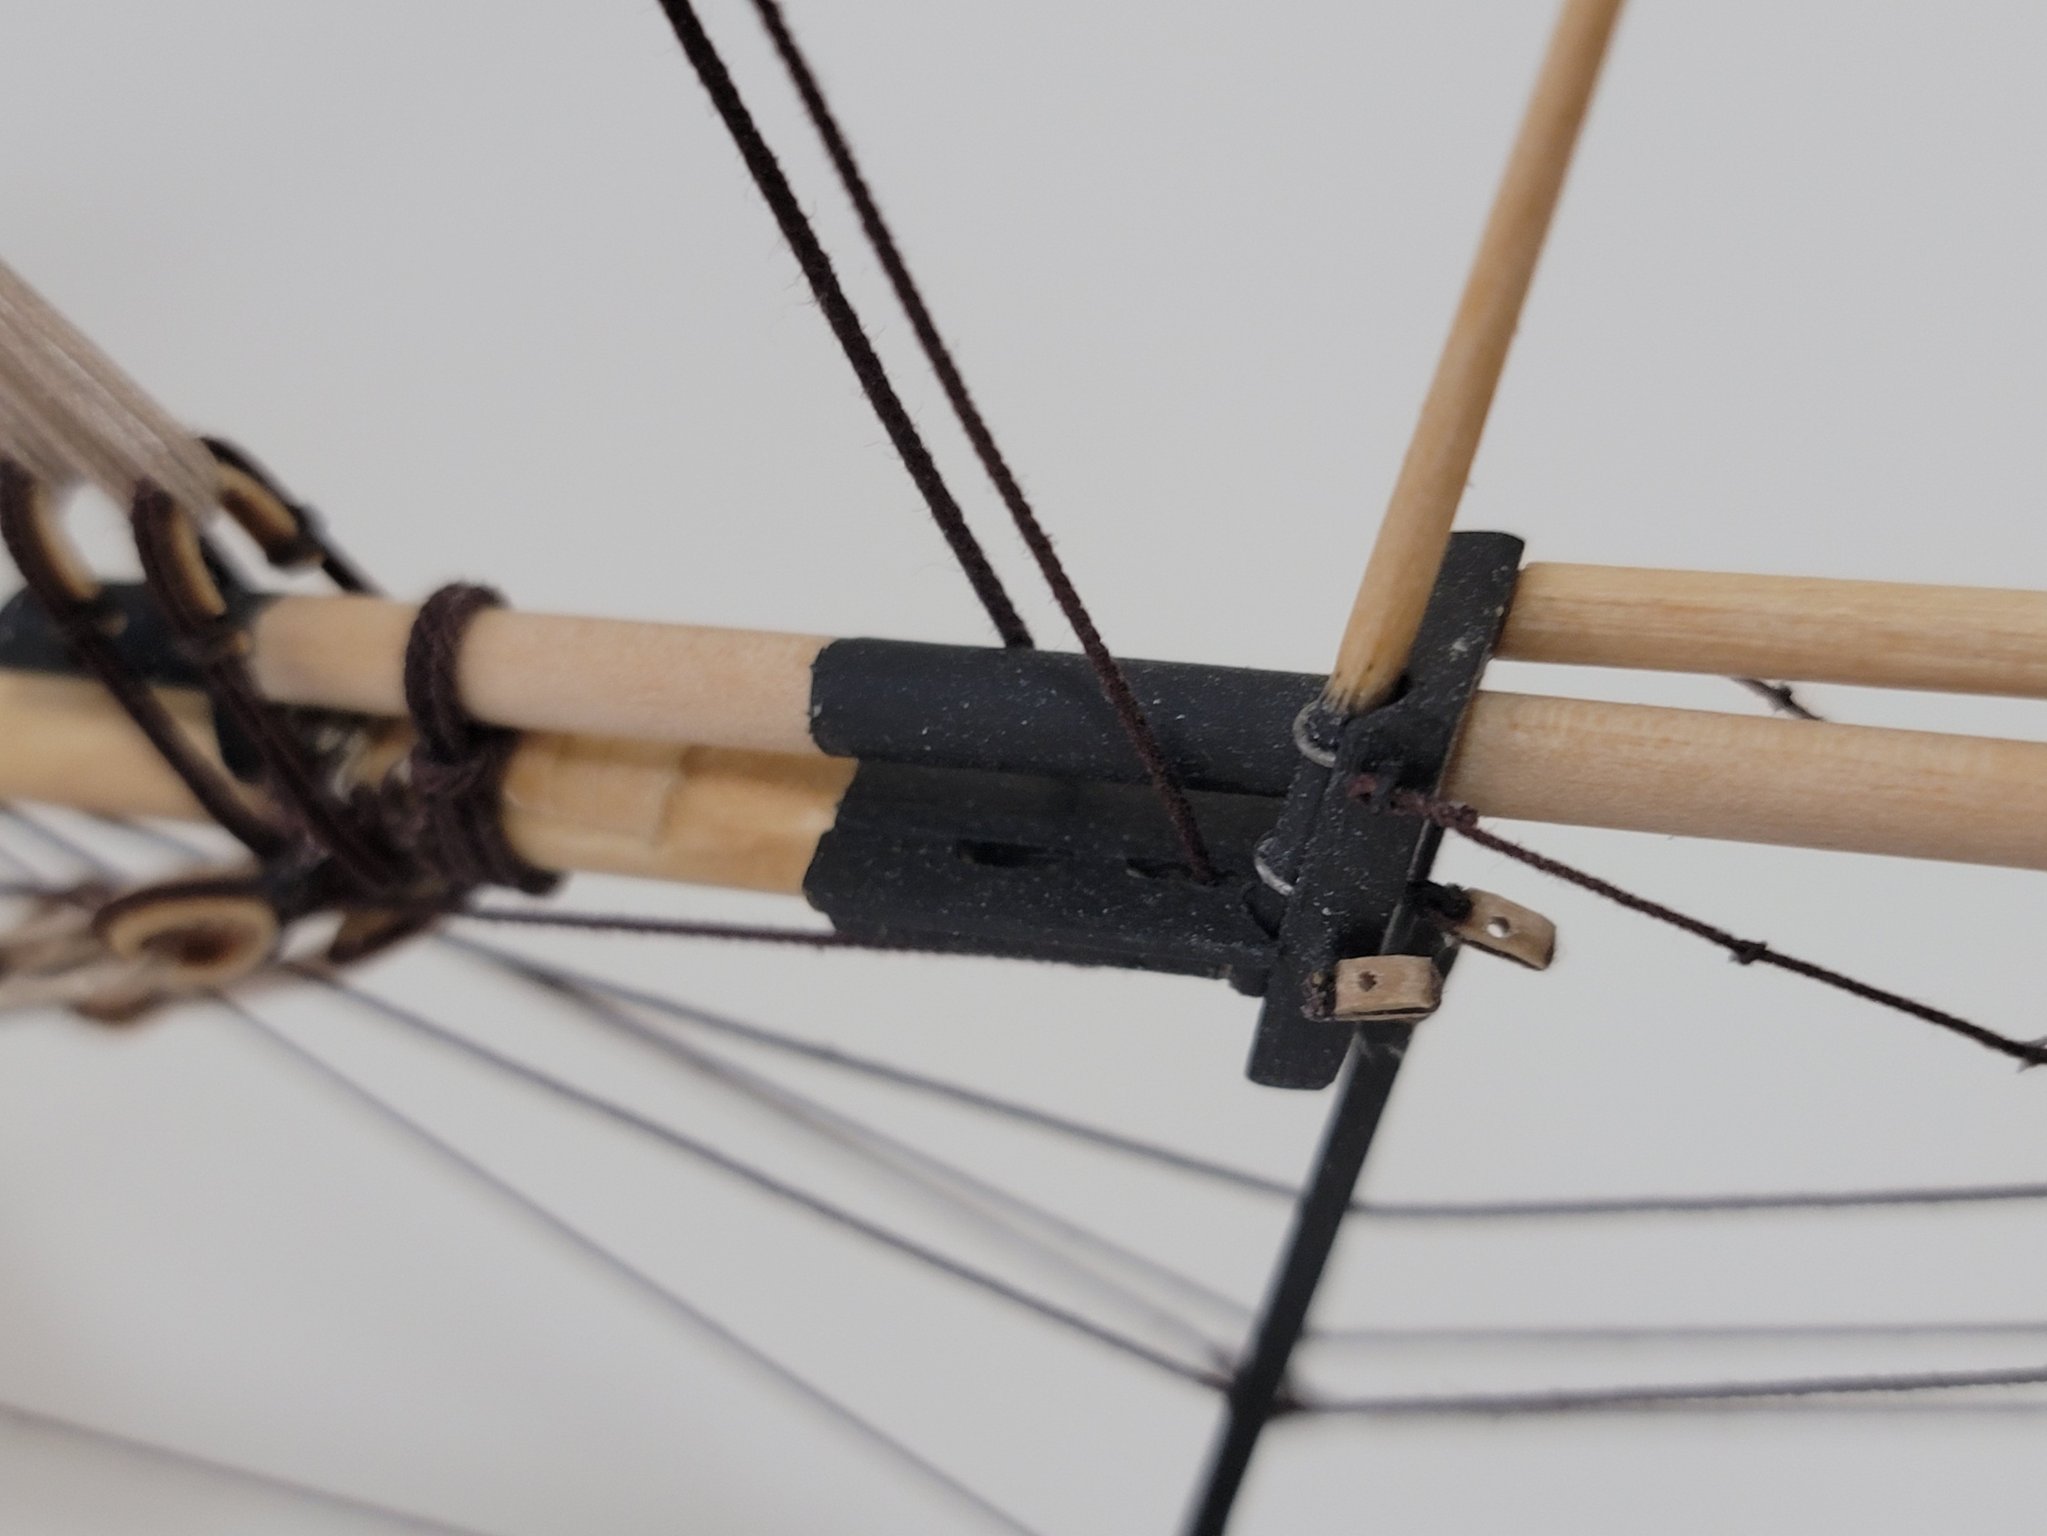
Will, I used a black tape for the bands. I first stuck it on a flat piece of wood, then used a ruler as a guide to cut the small strips. Since the tape's adhesive is very weak, I put superglue on the ends to prevent it from peeling off. Here is the photo of the tape. Unfortunately there is no branding on it, so I am not sure what is actually called. Also, since the edges are a bit whitish, I painted it over again with black paint.
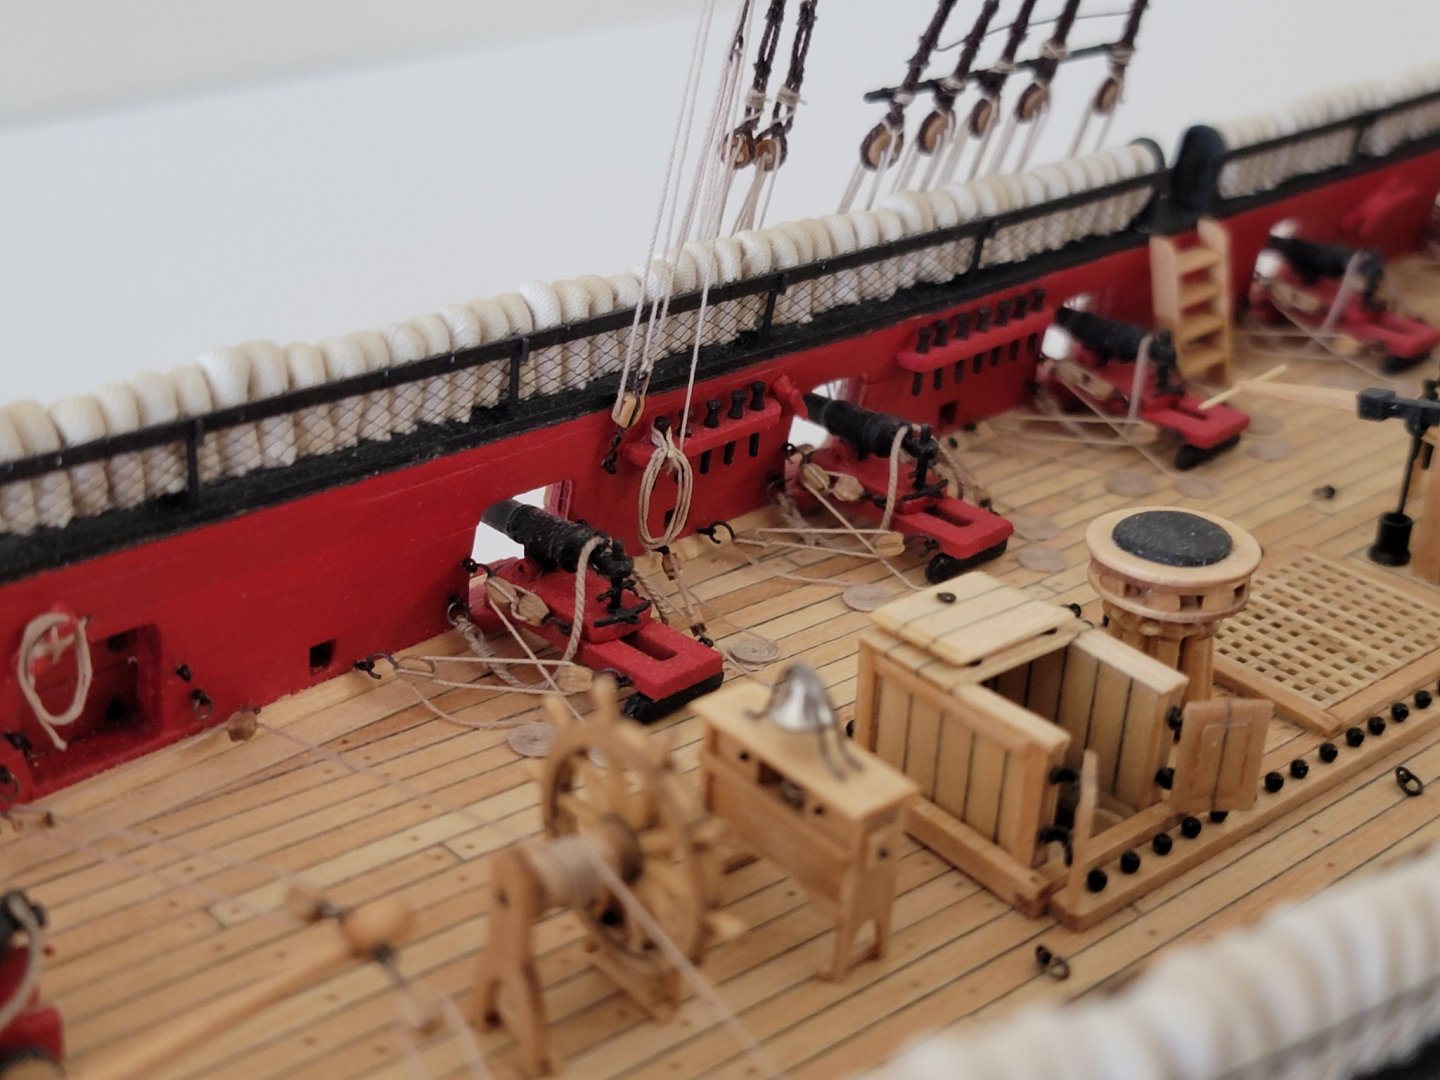
David, I also had a bit of trouble with the net. I ended up using a bit of an oversized piece of net, then seized the corners. After I seized all the links in the middle. Then I trimmed off the excess pieces with a small pair of scissors. I just took a look at your display case. The wood after staining is gorgeous! Can't wait to see it all come together.
-
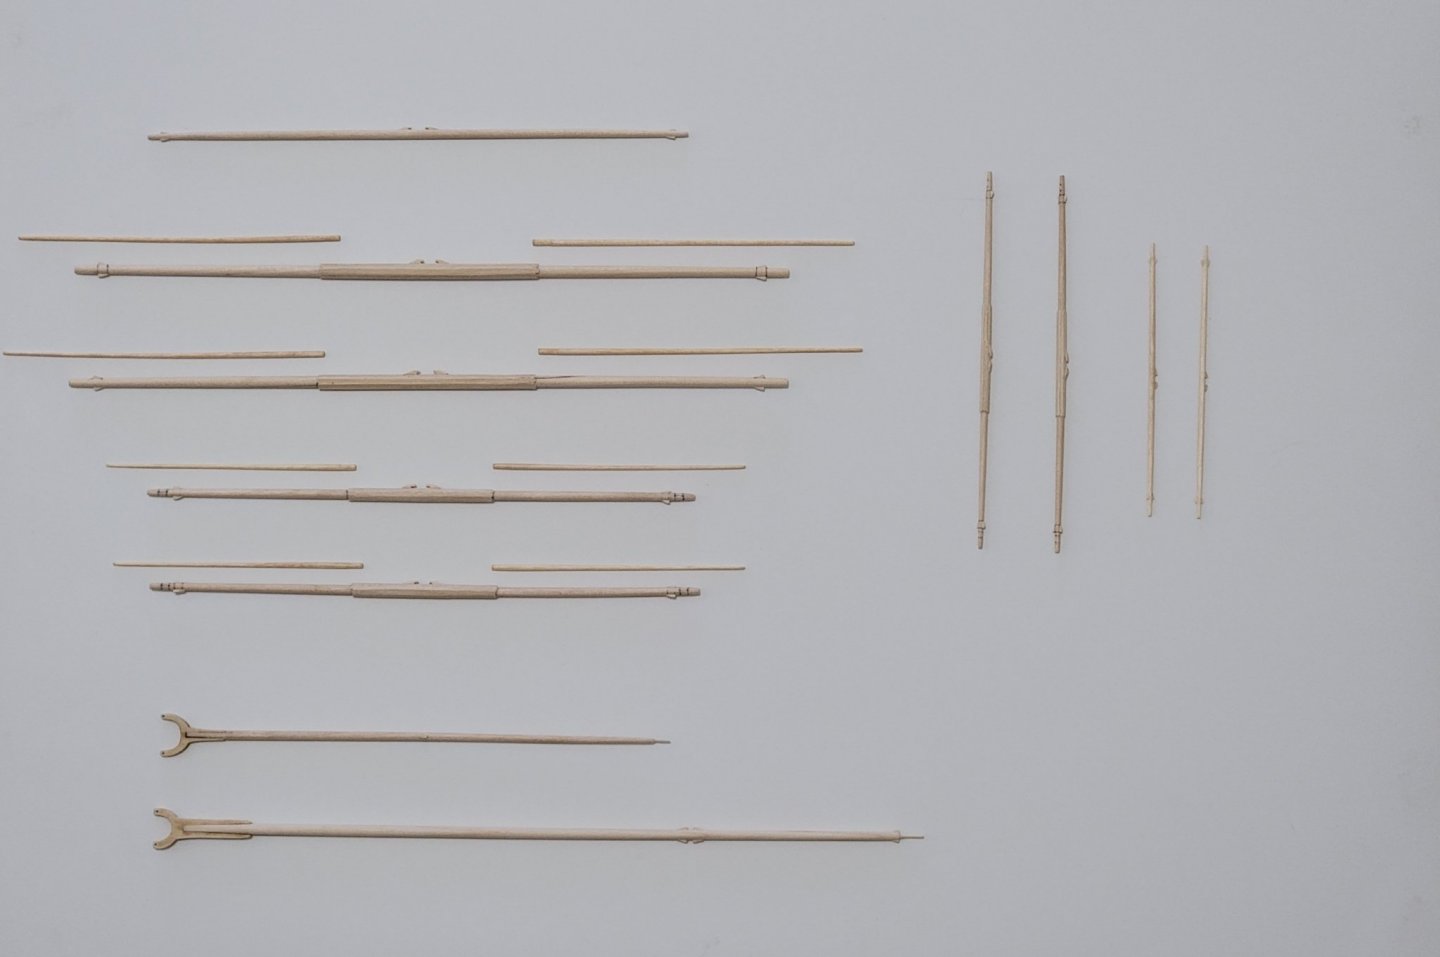
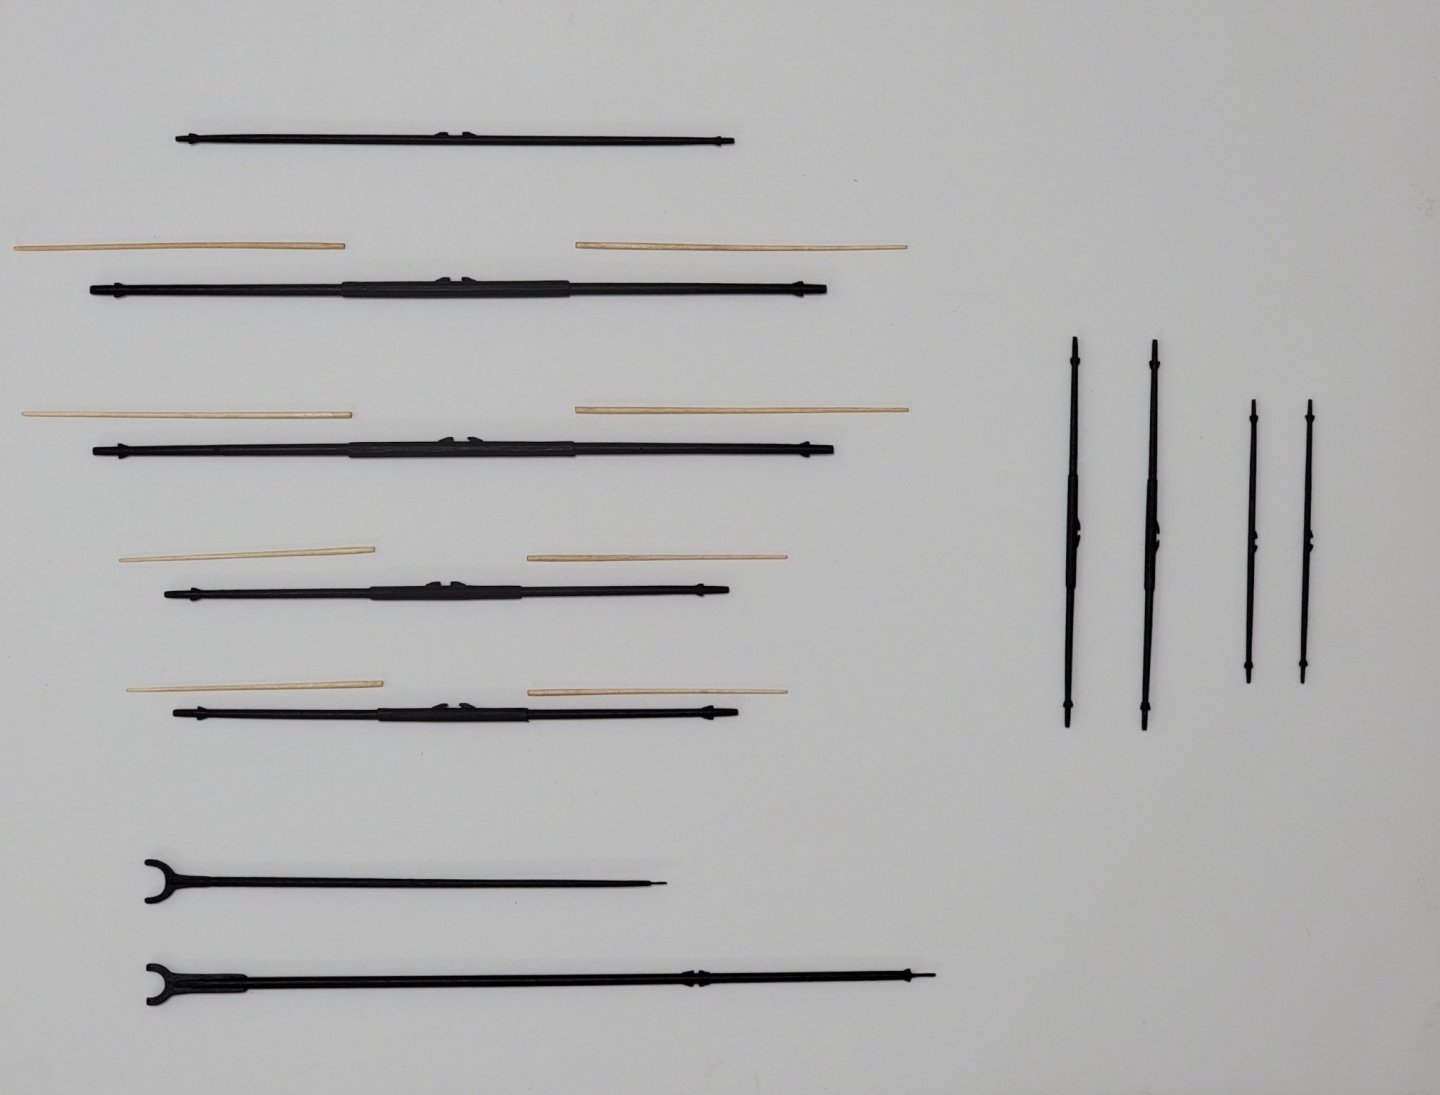
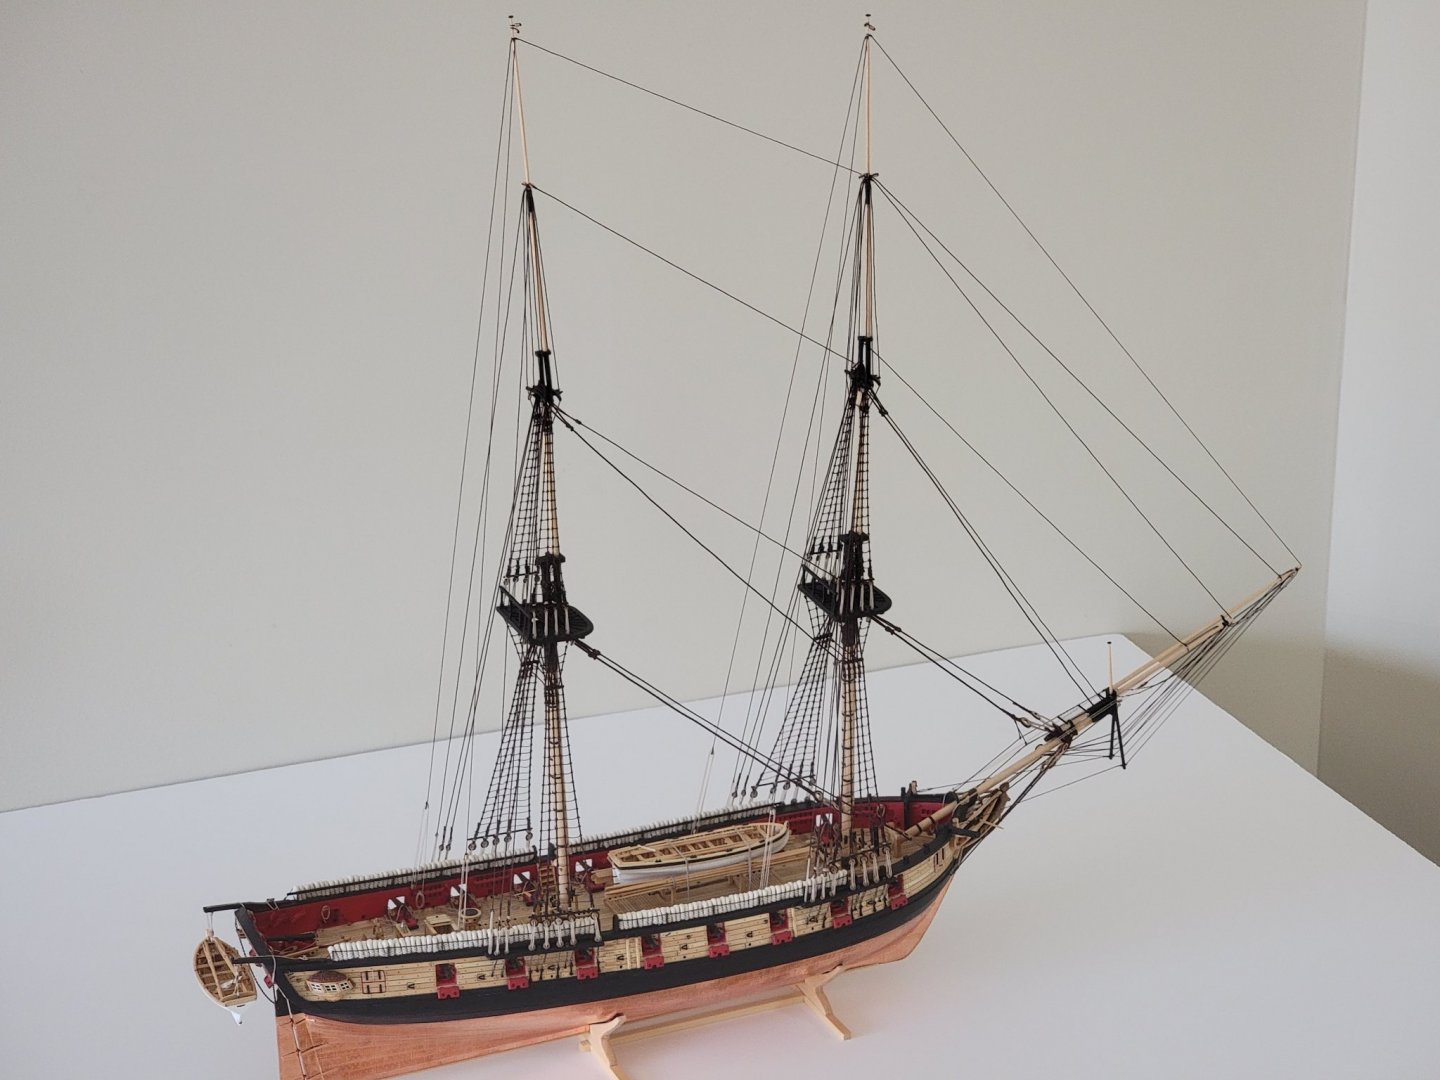
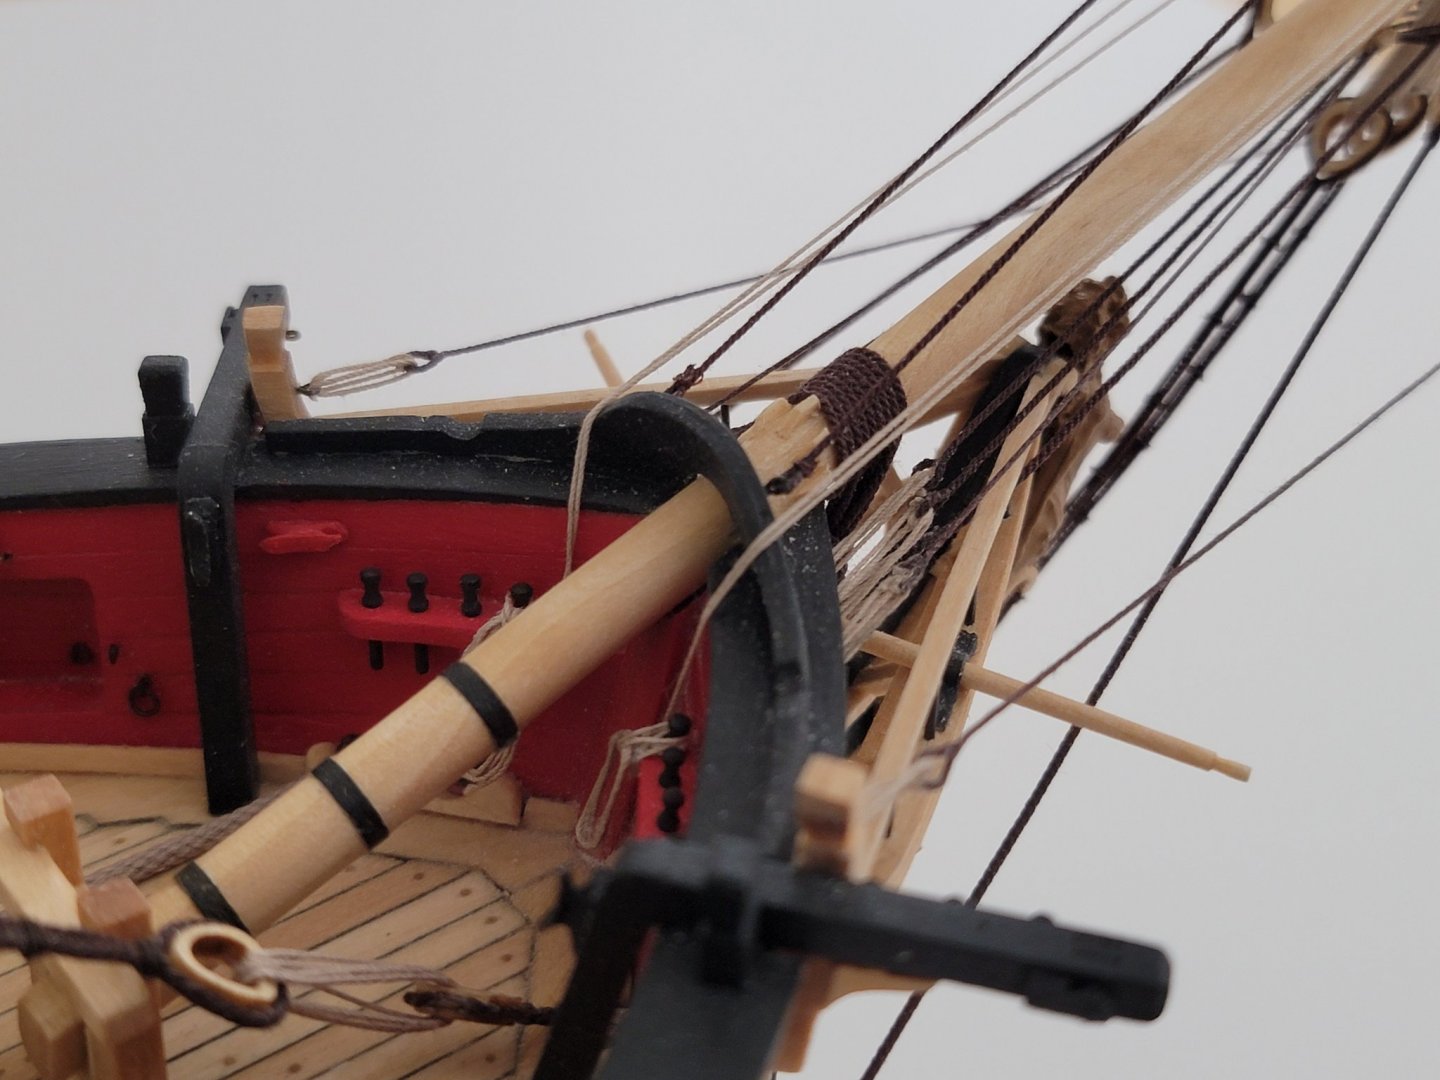
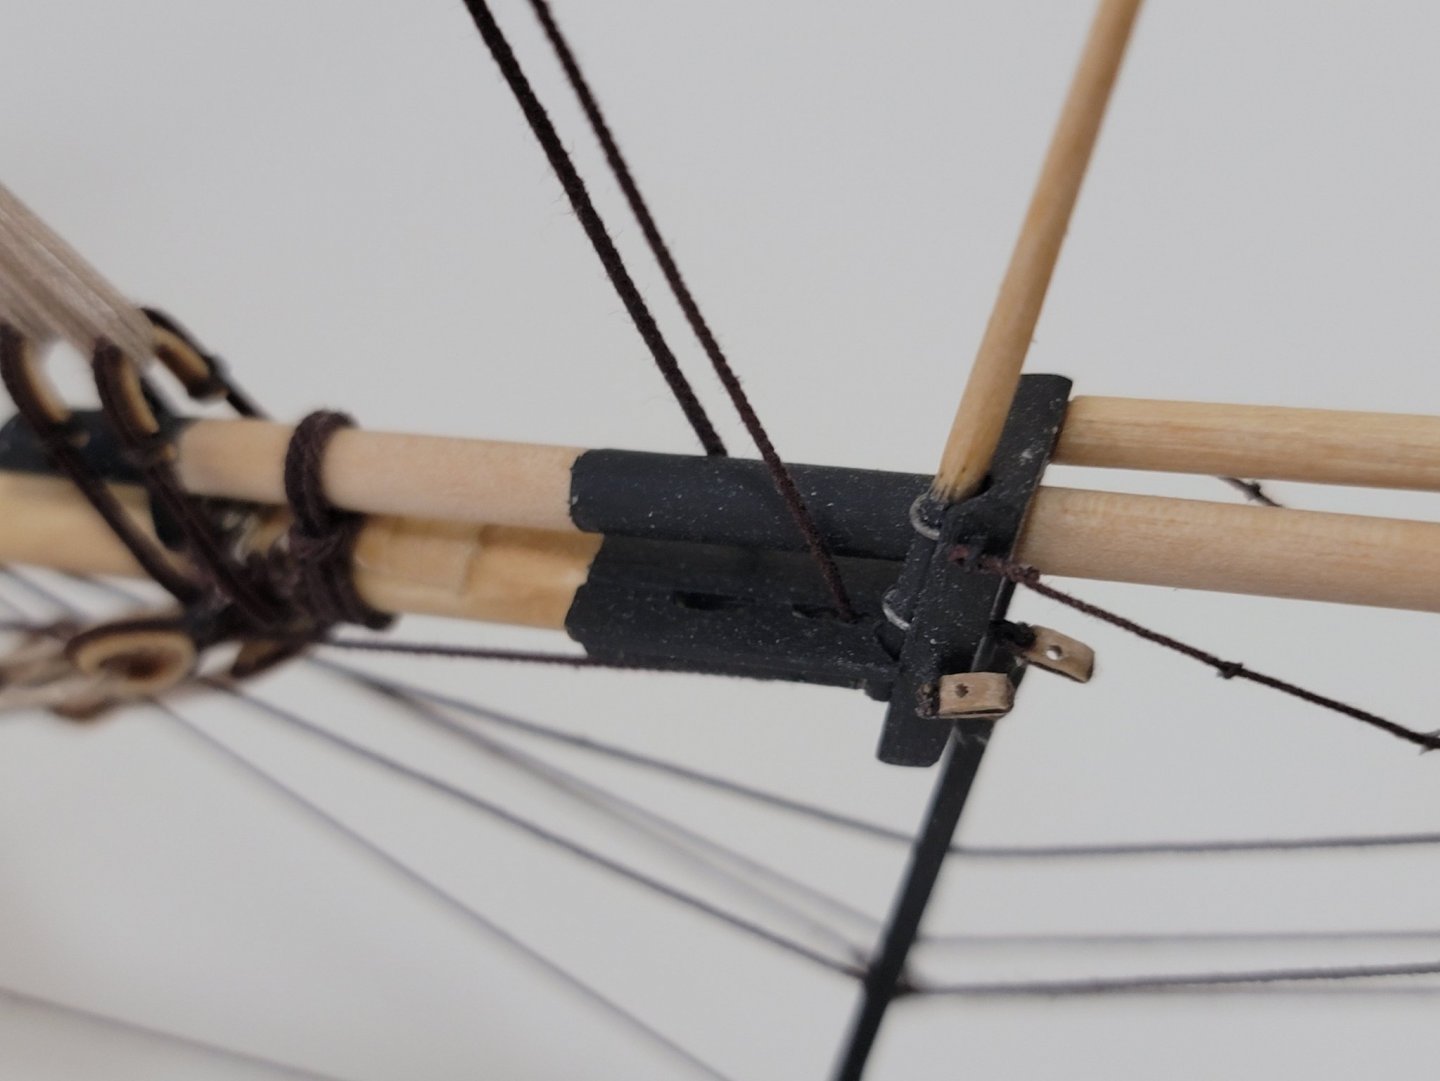
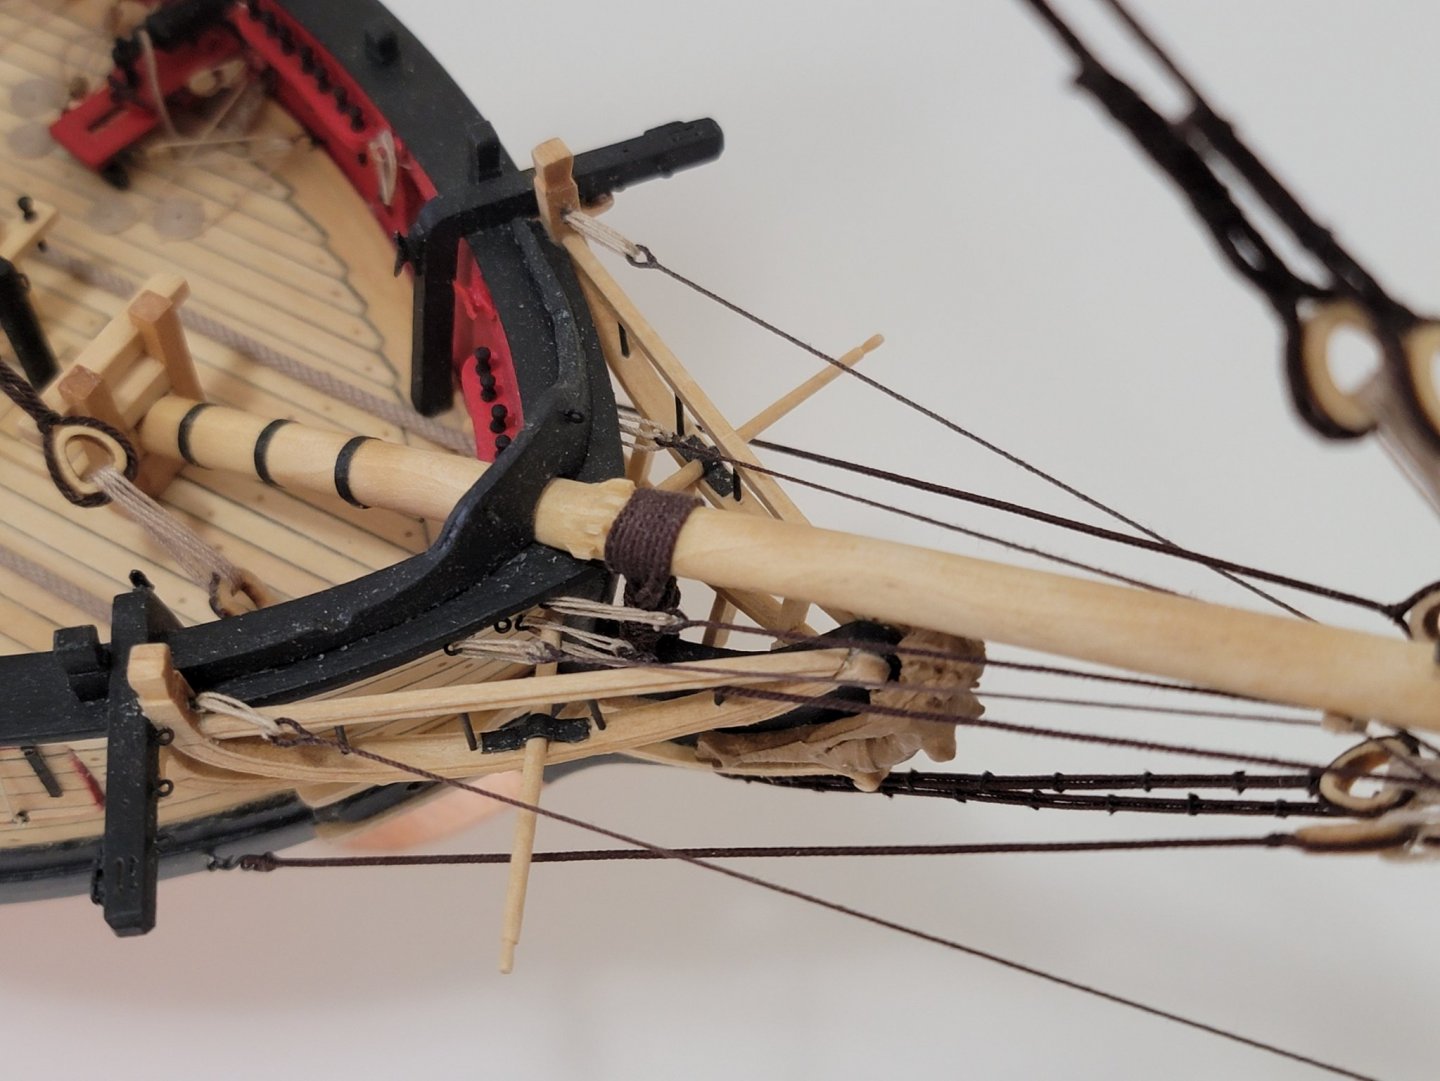
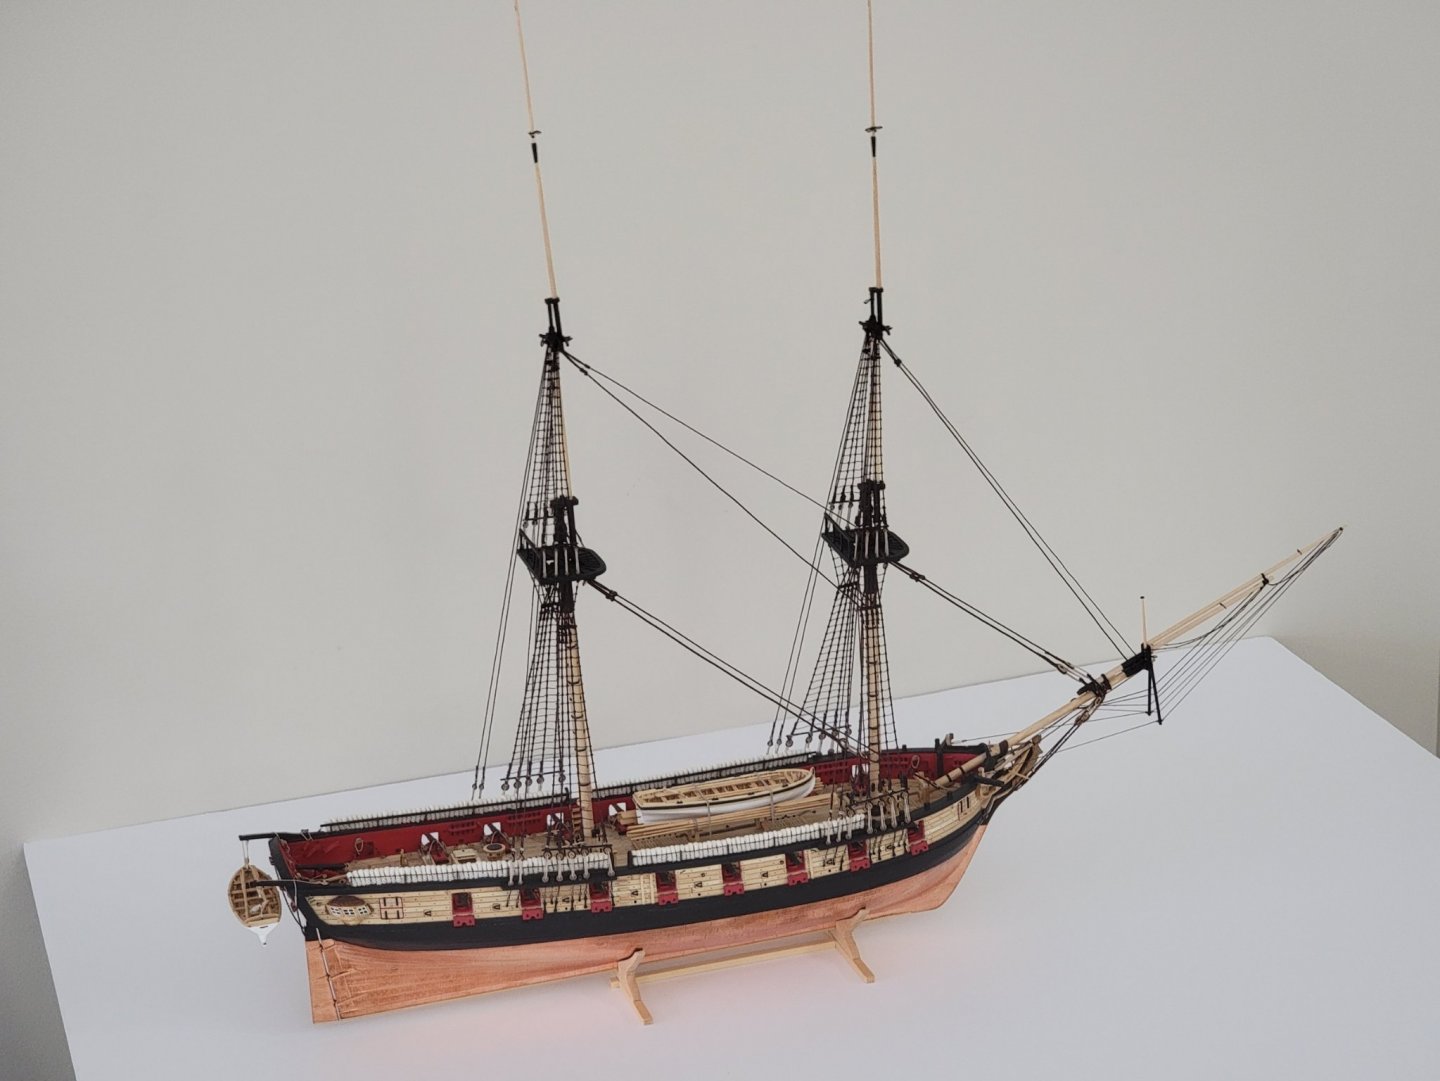
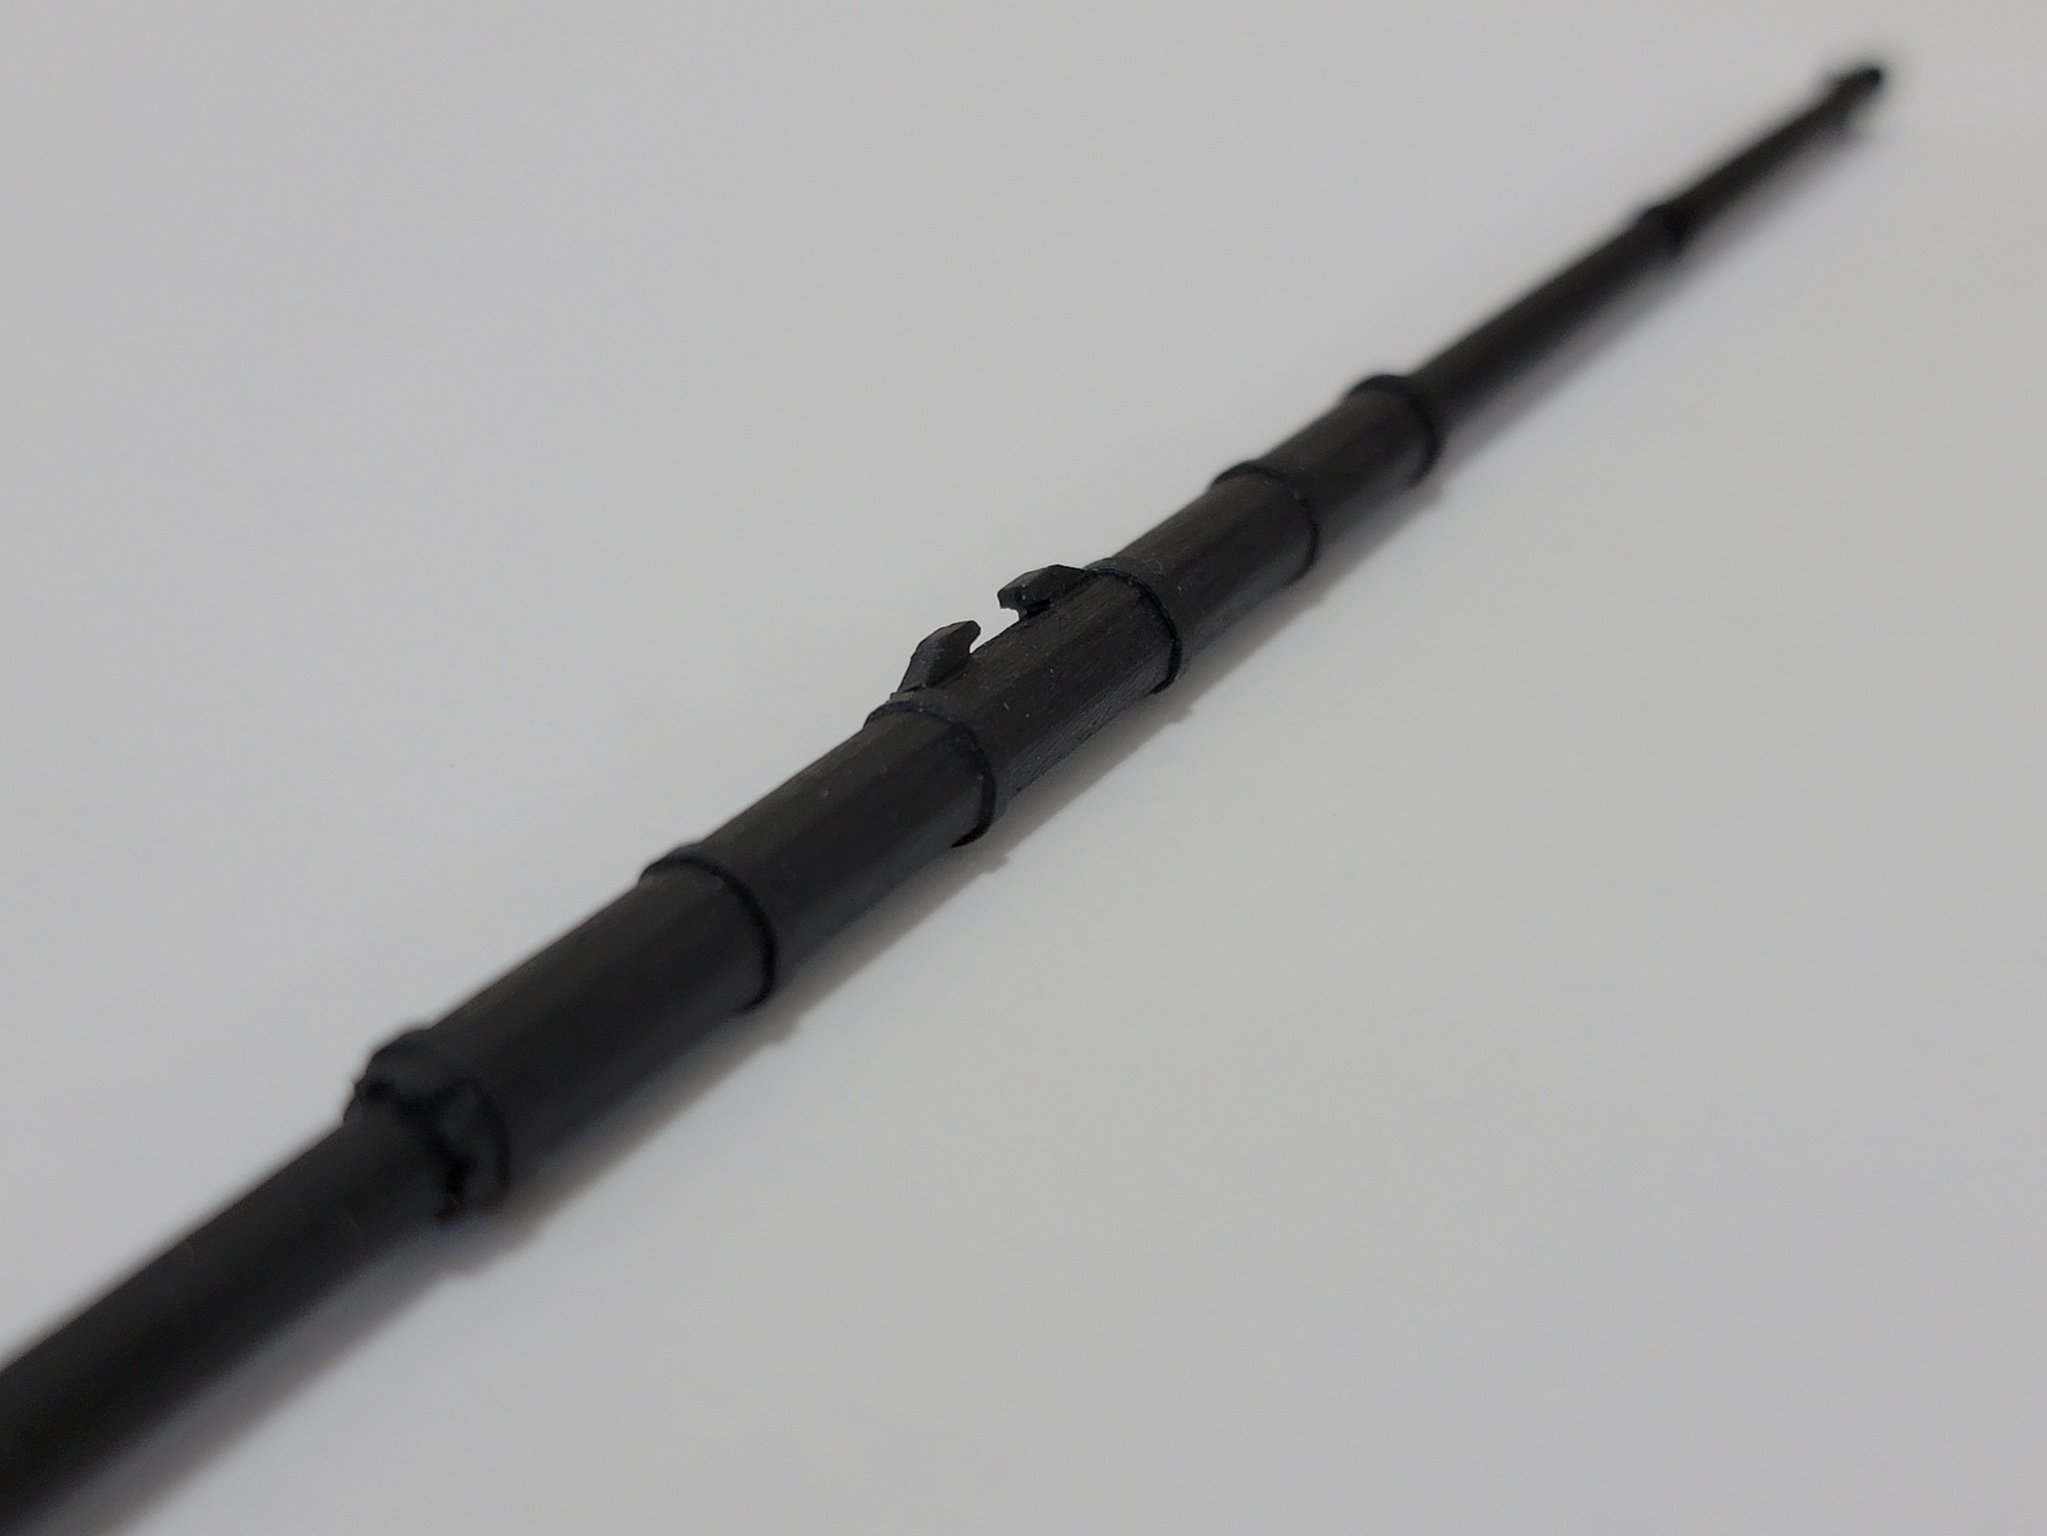
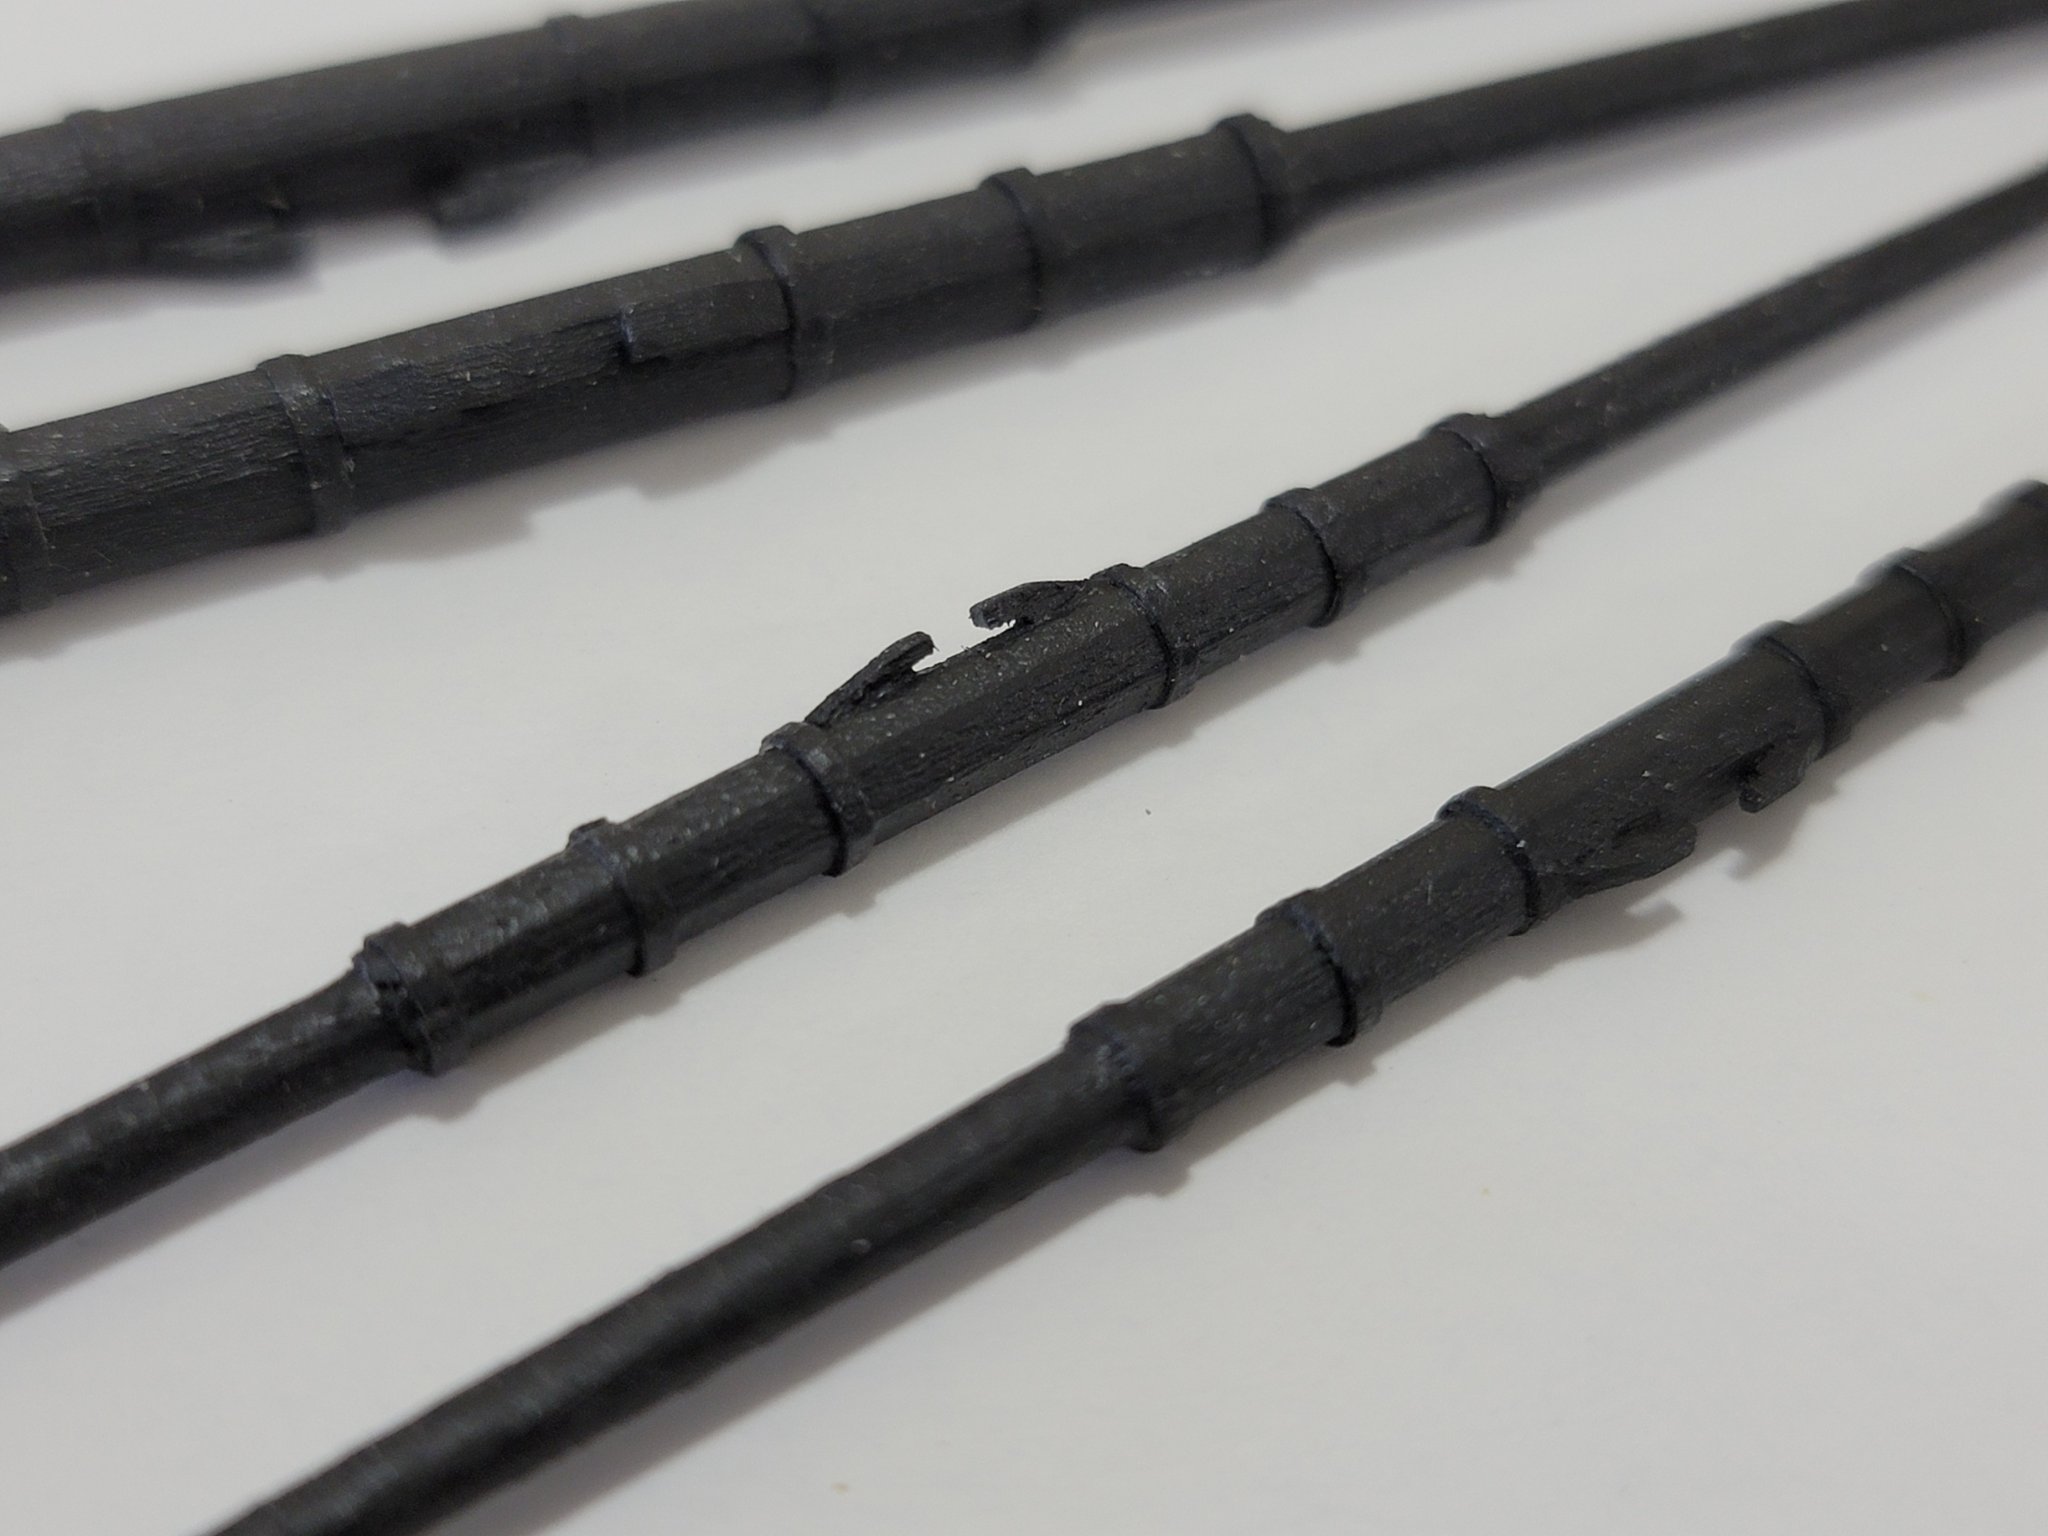
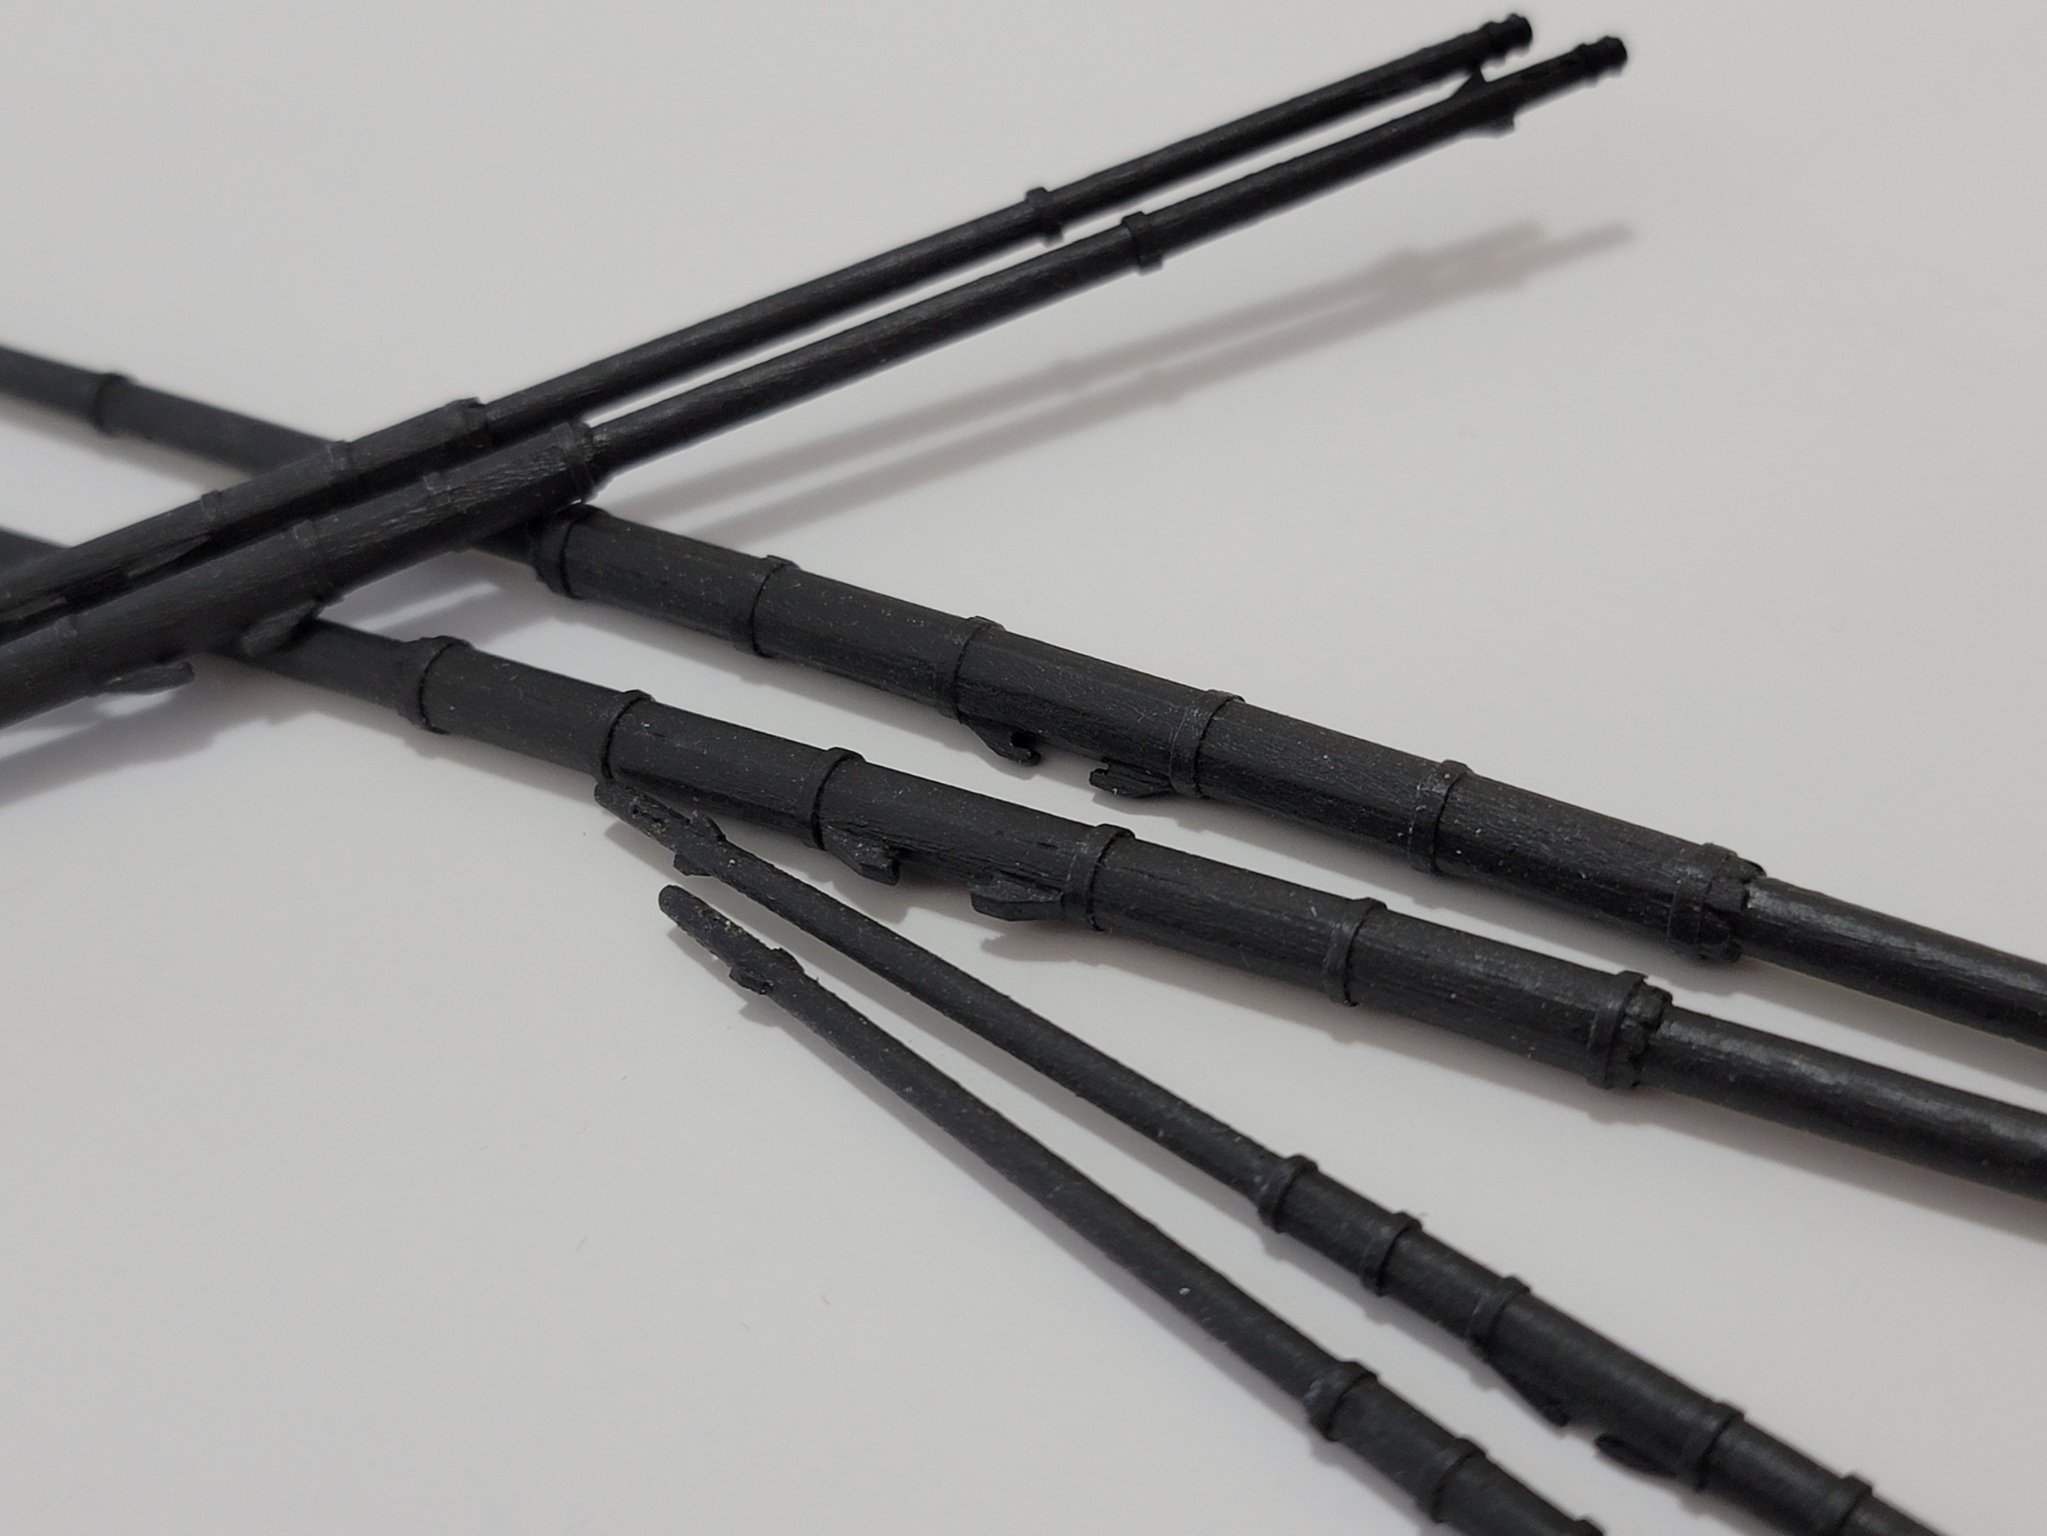
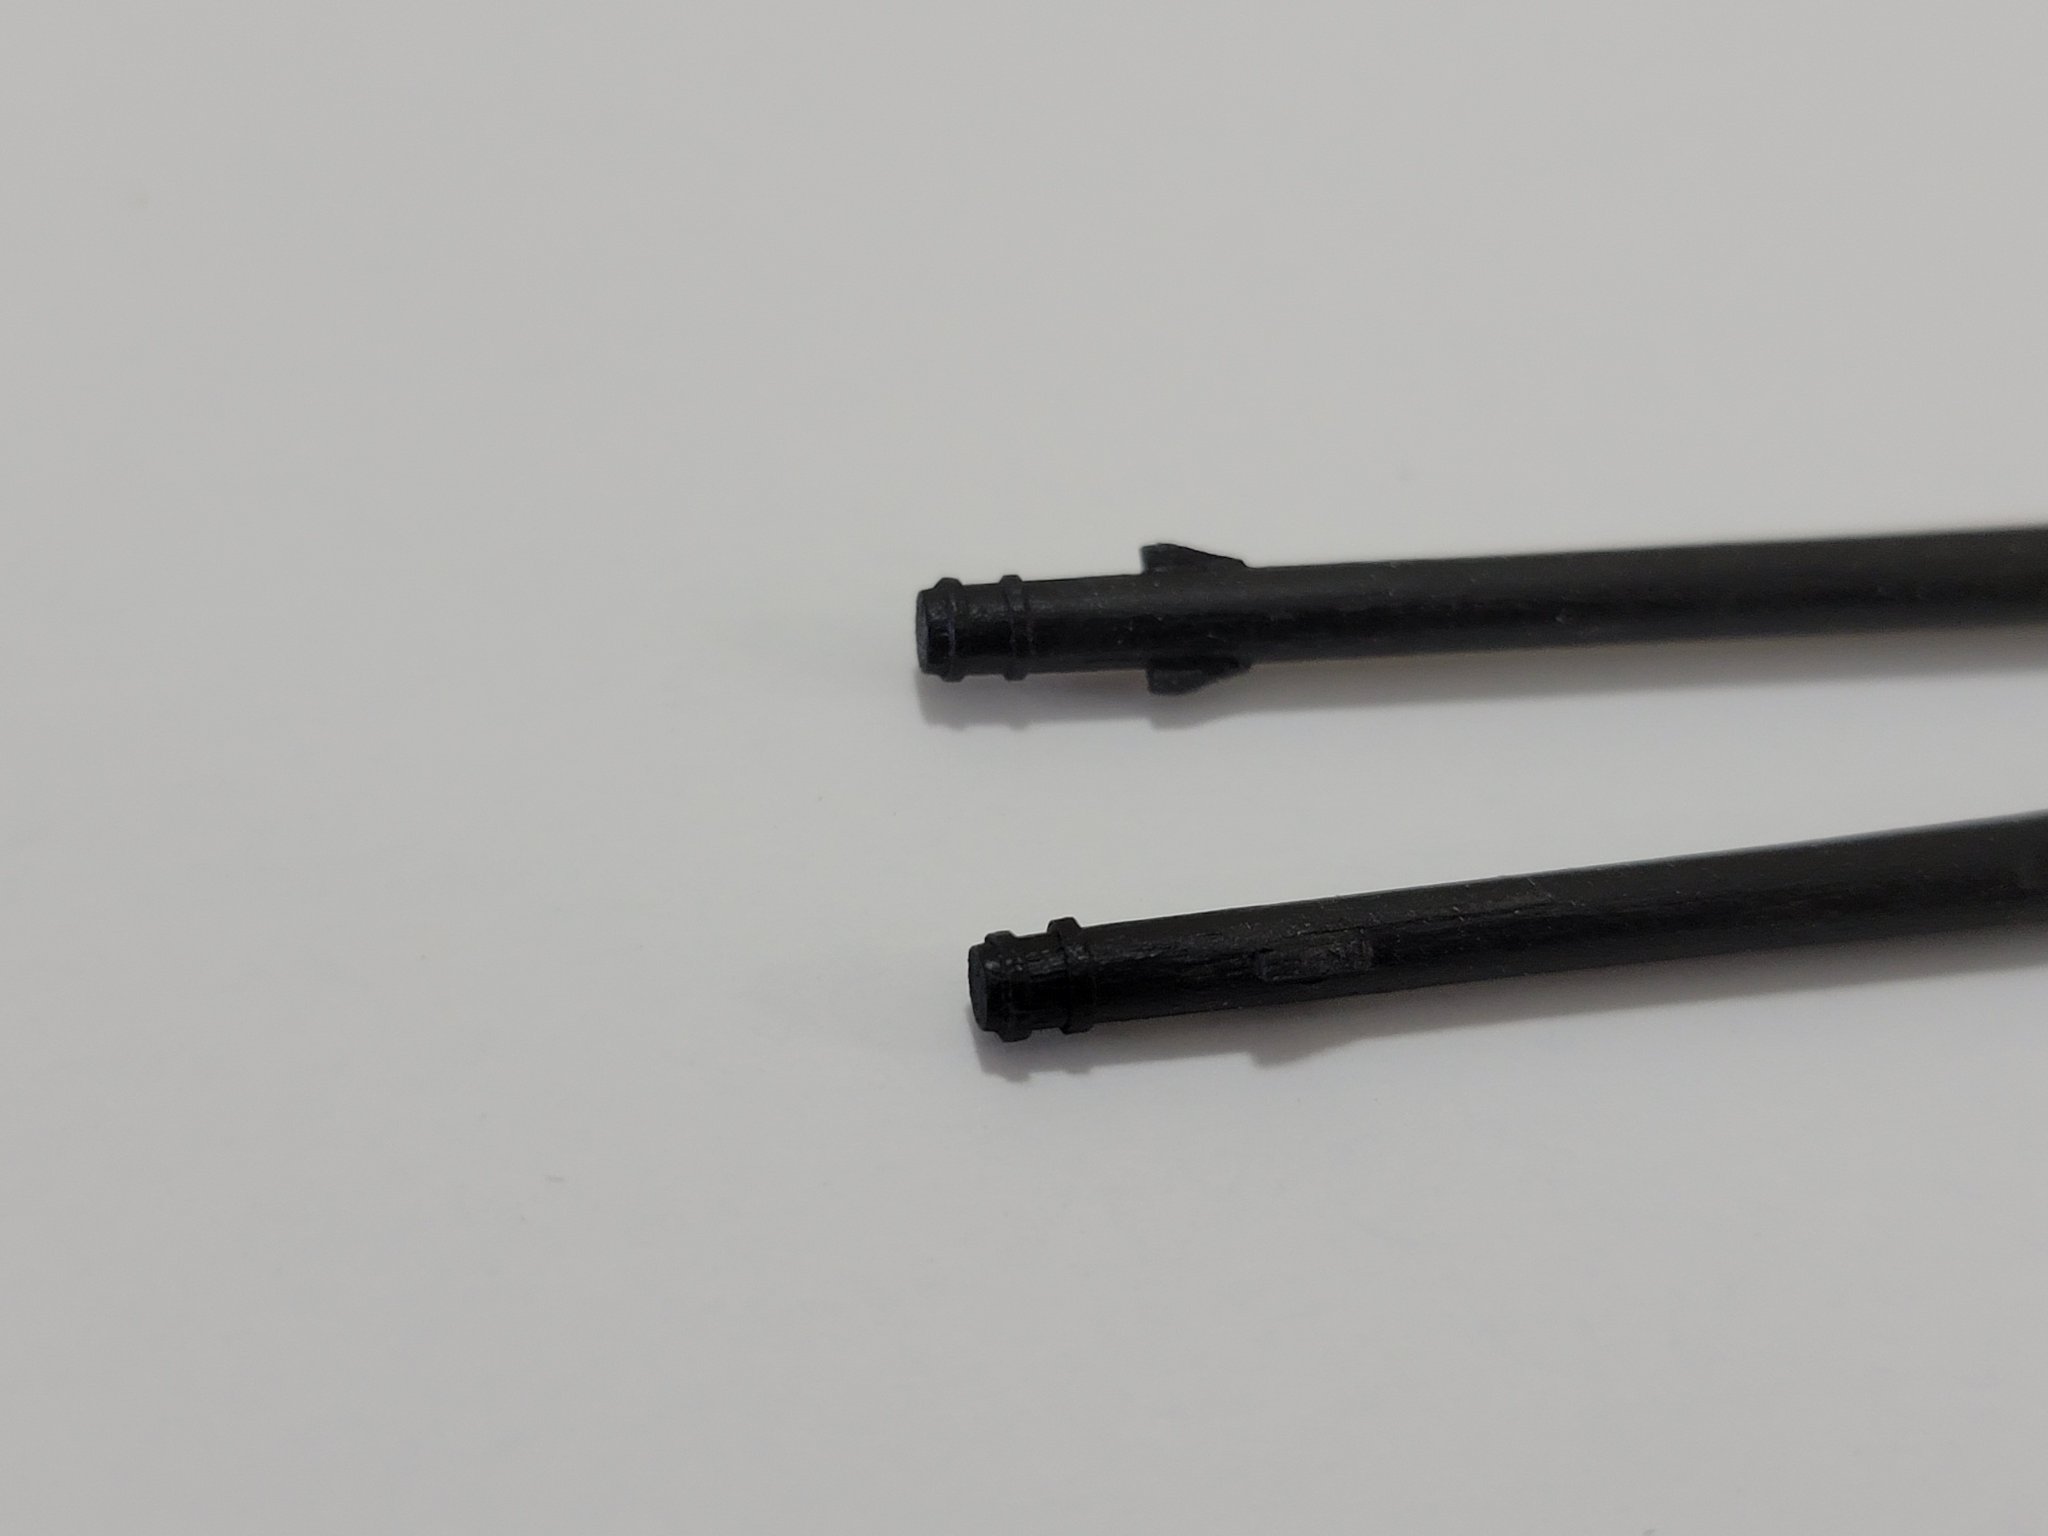
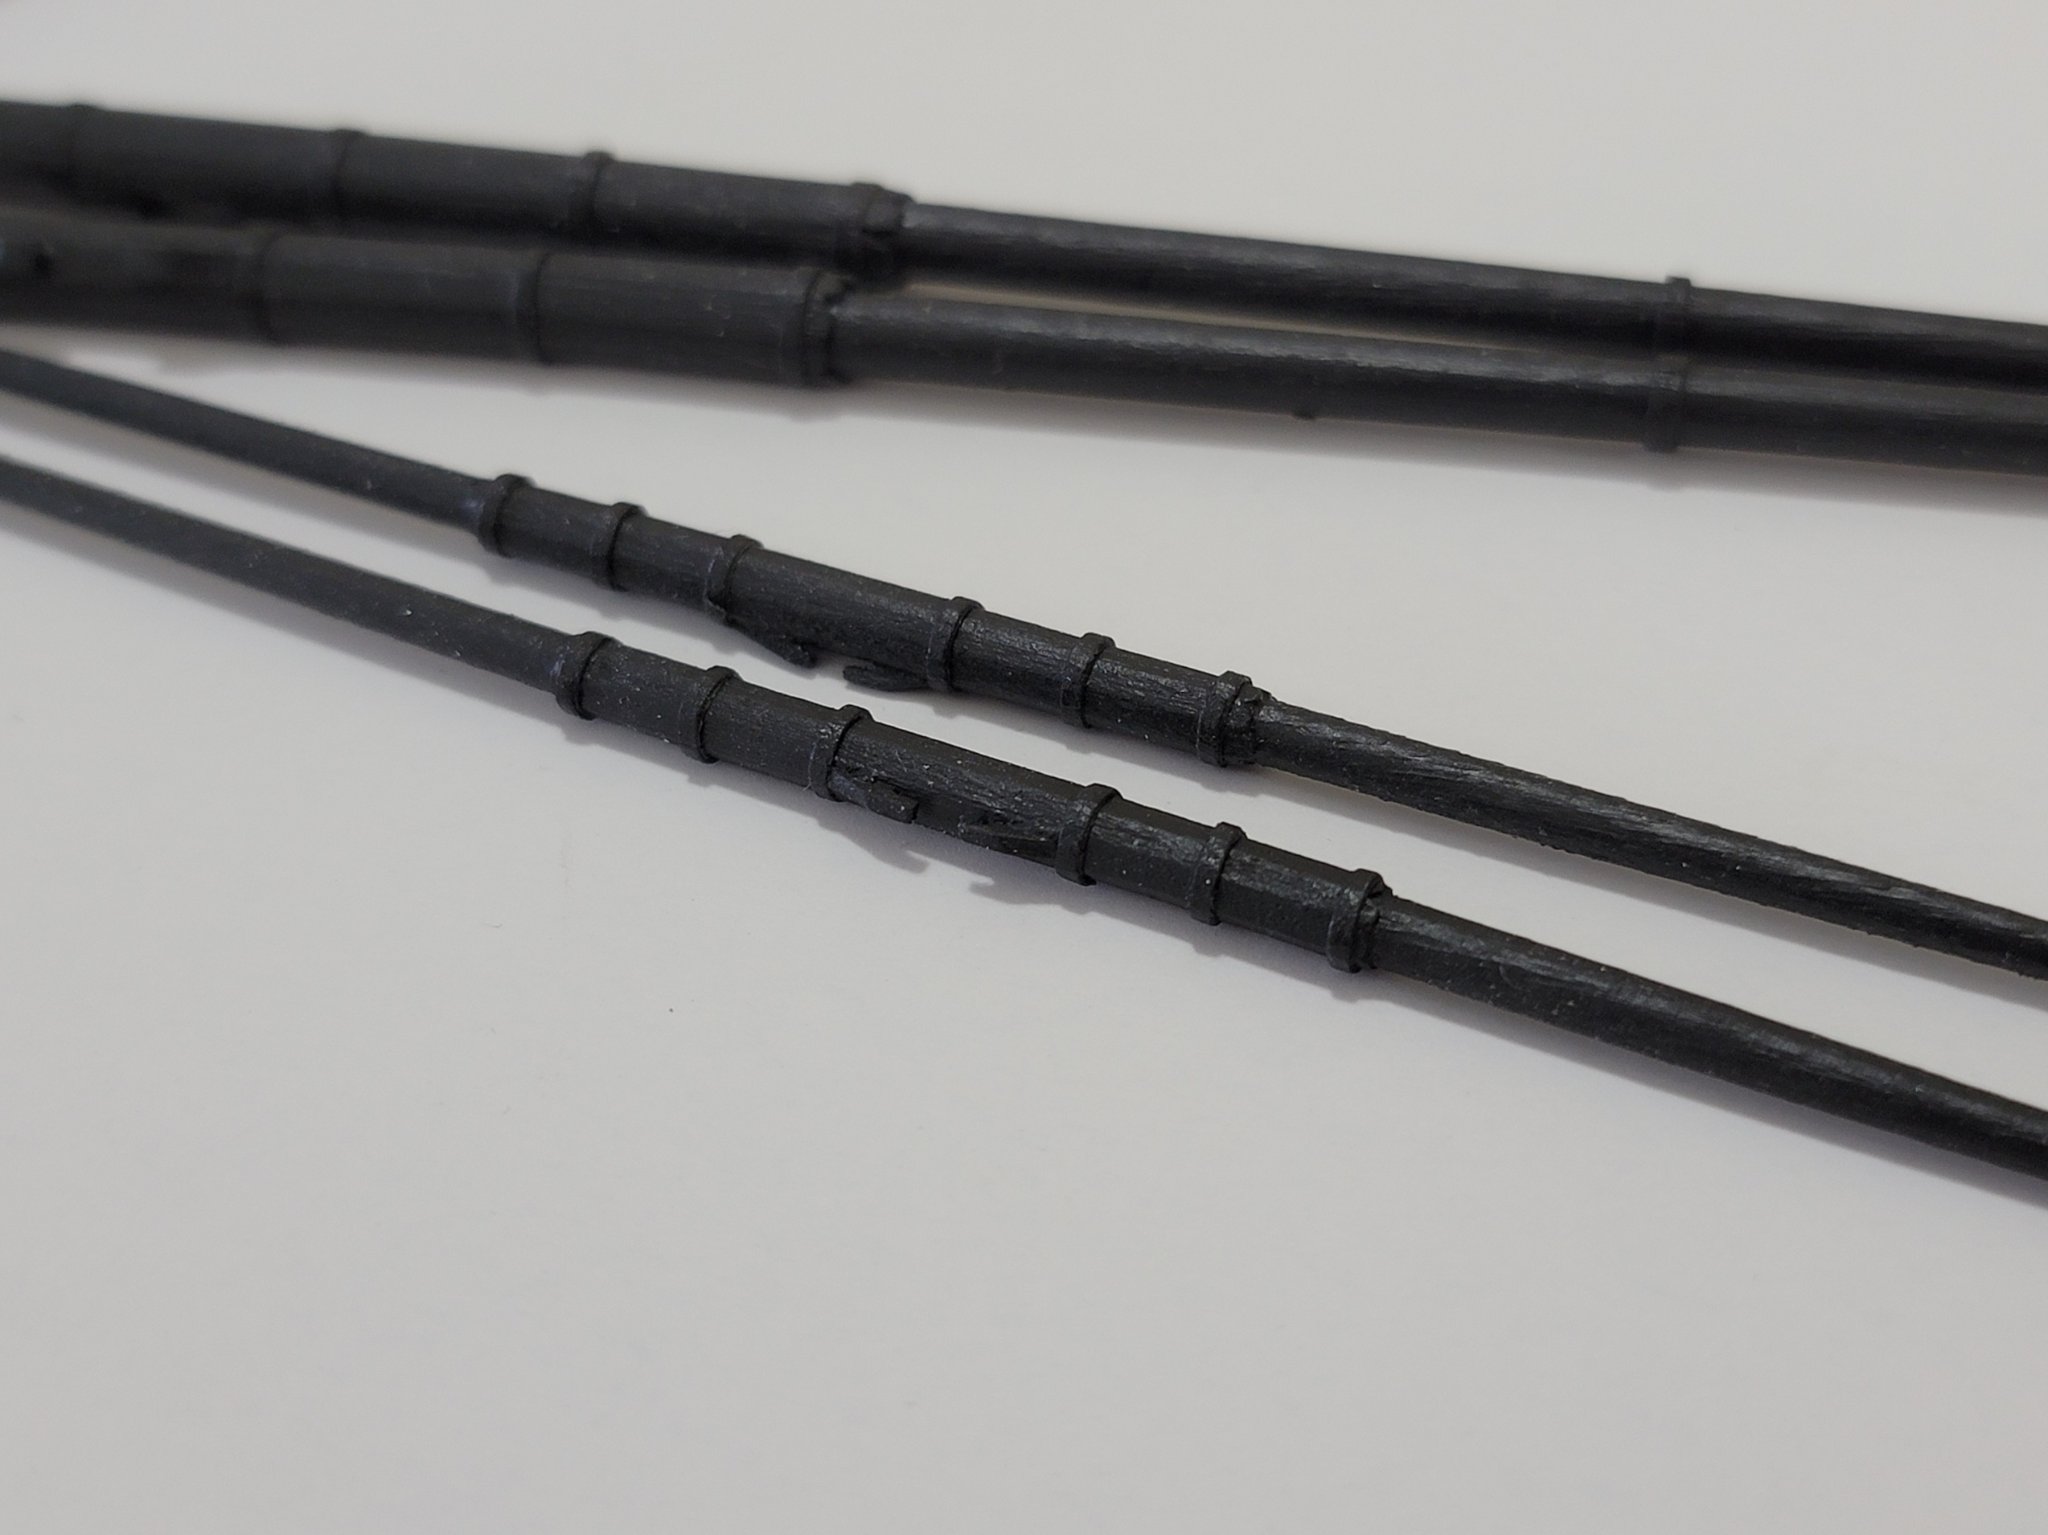
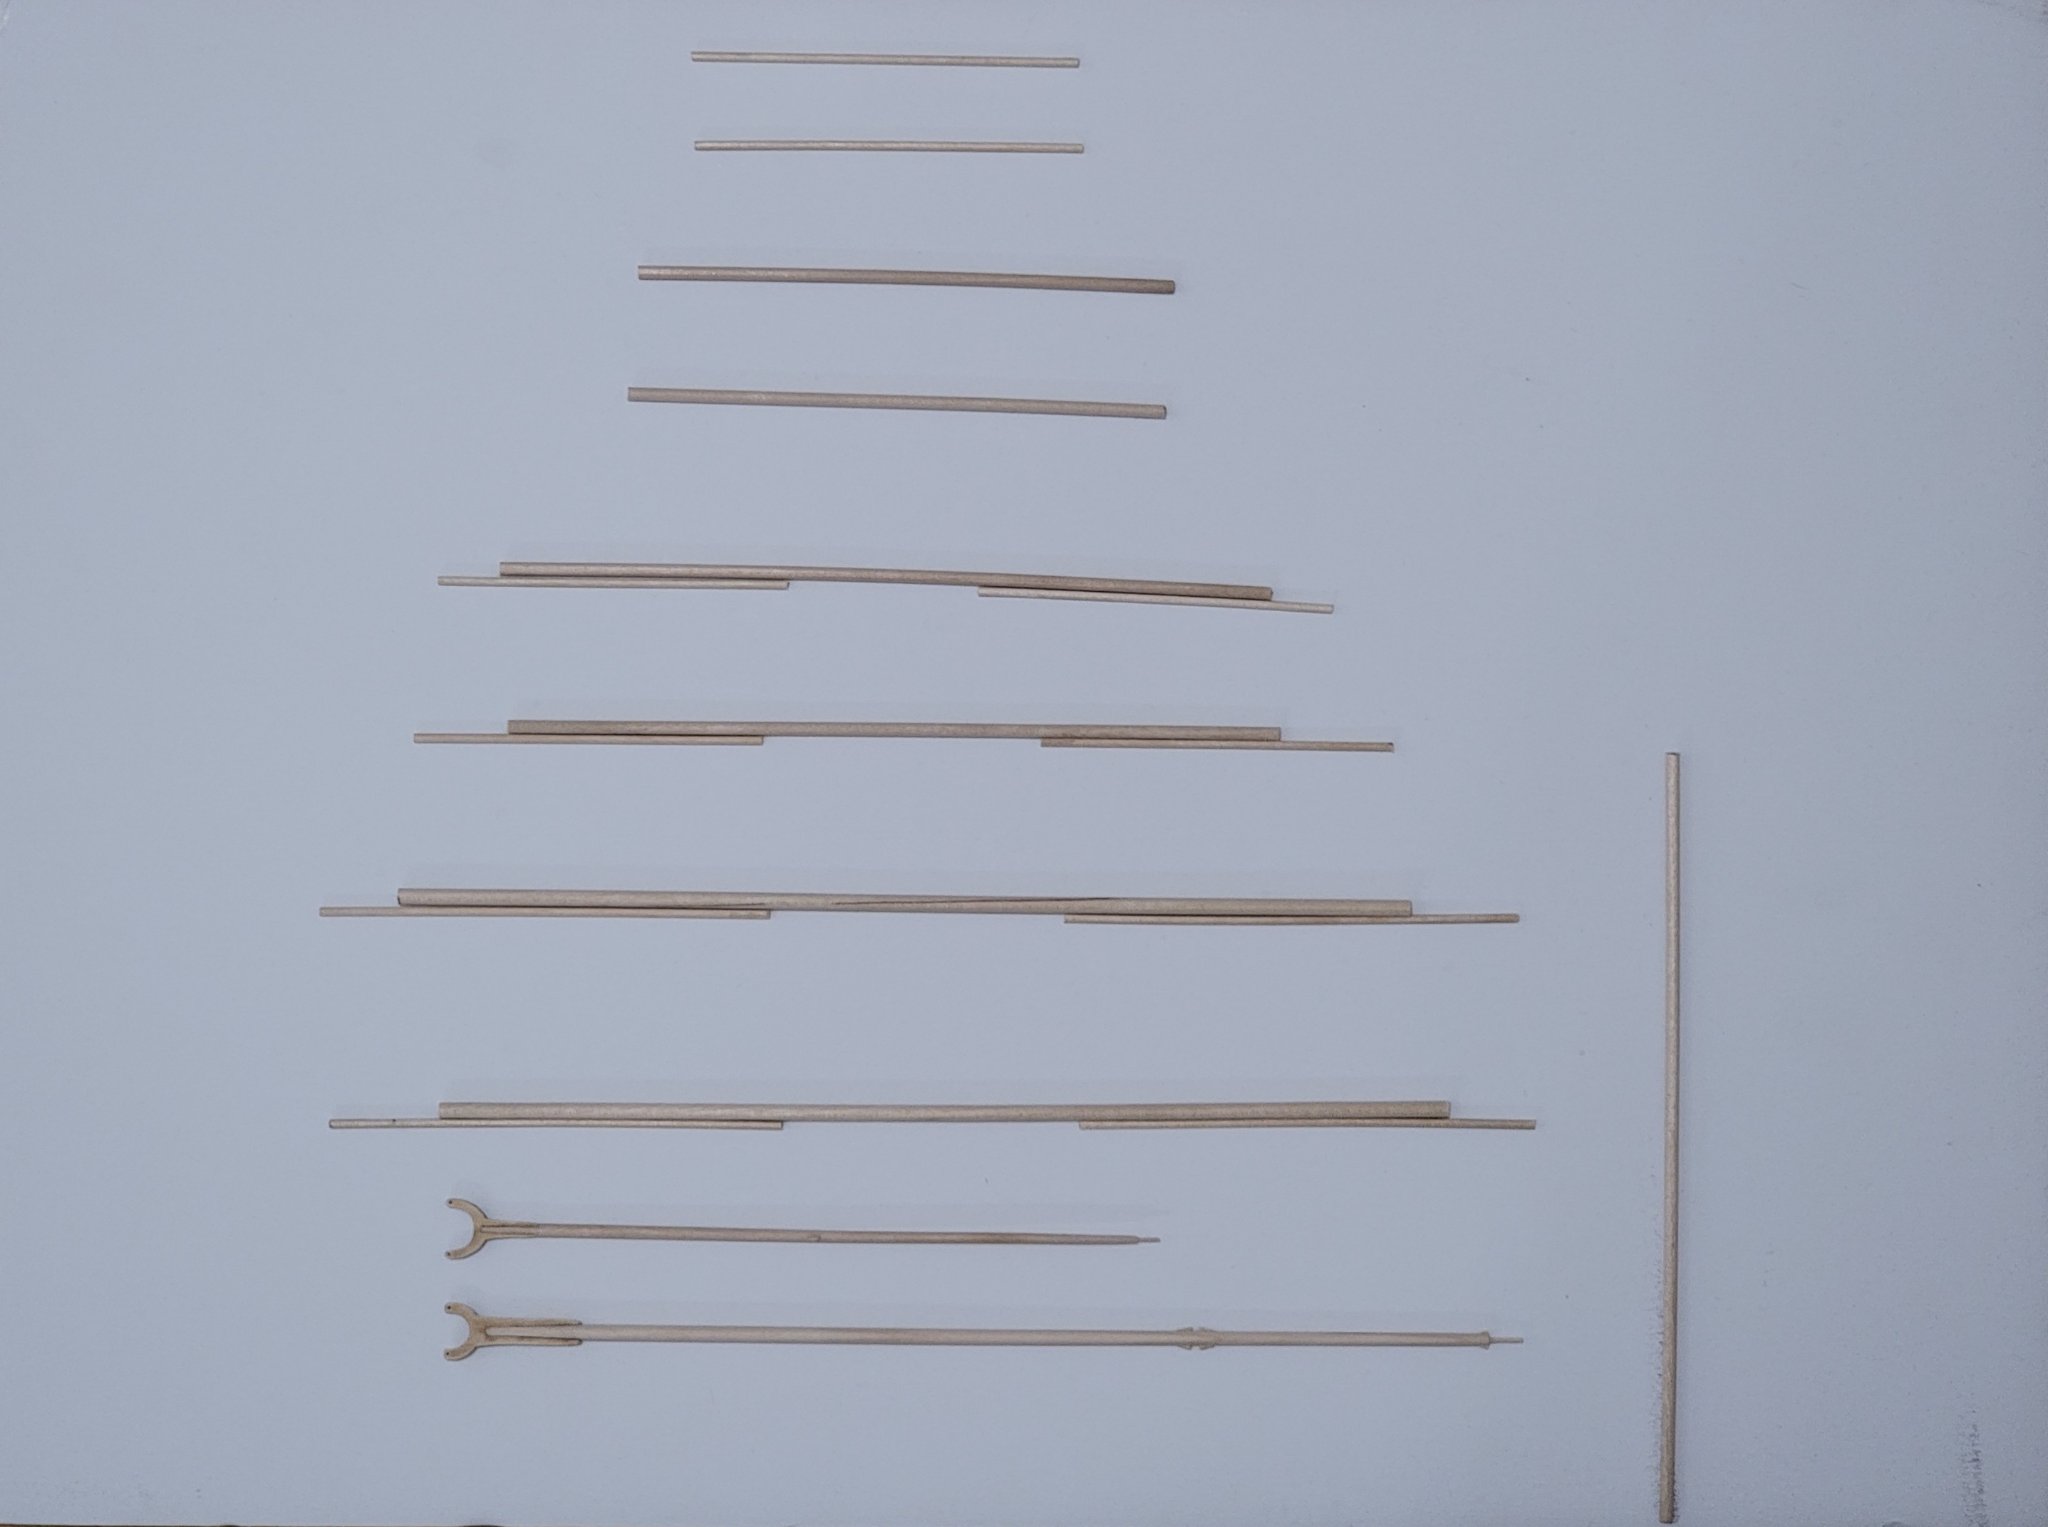
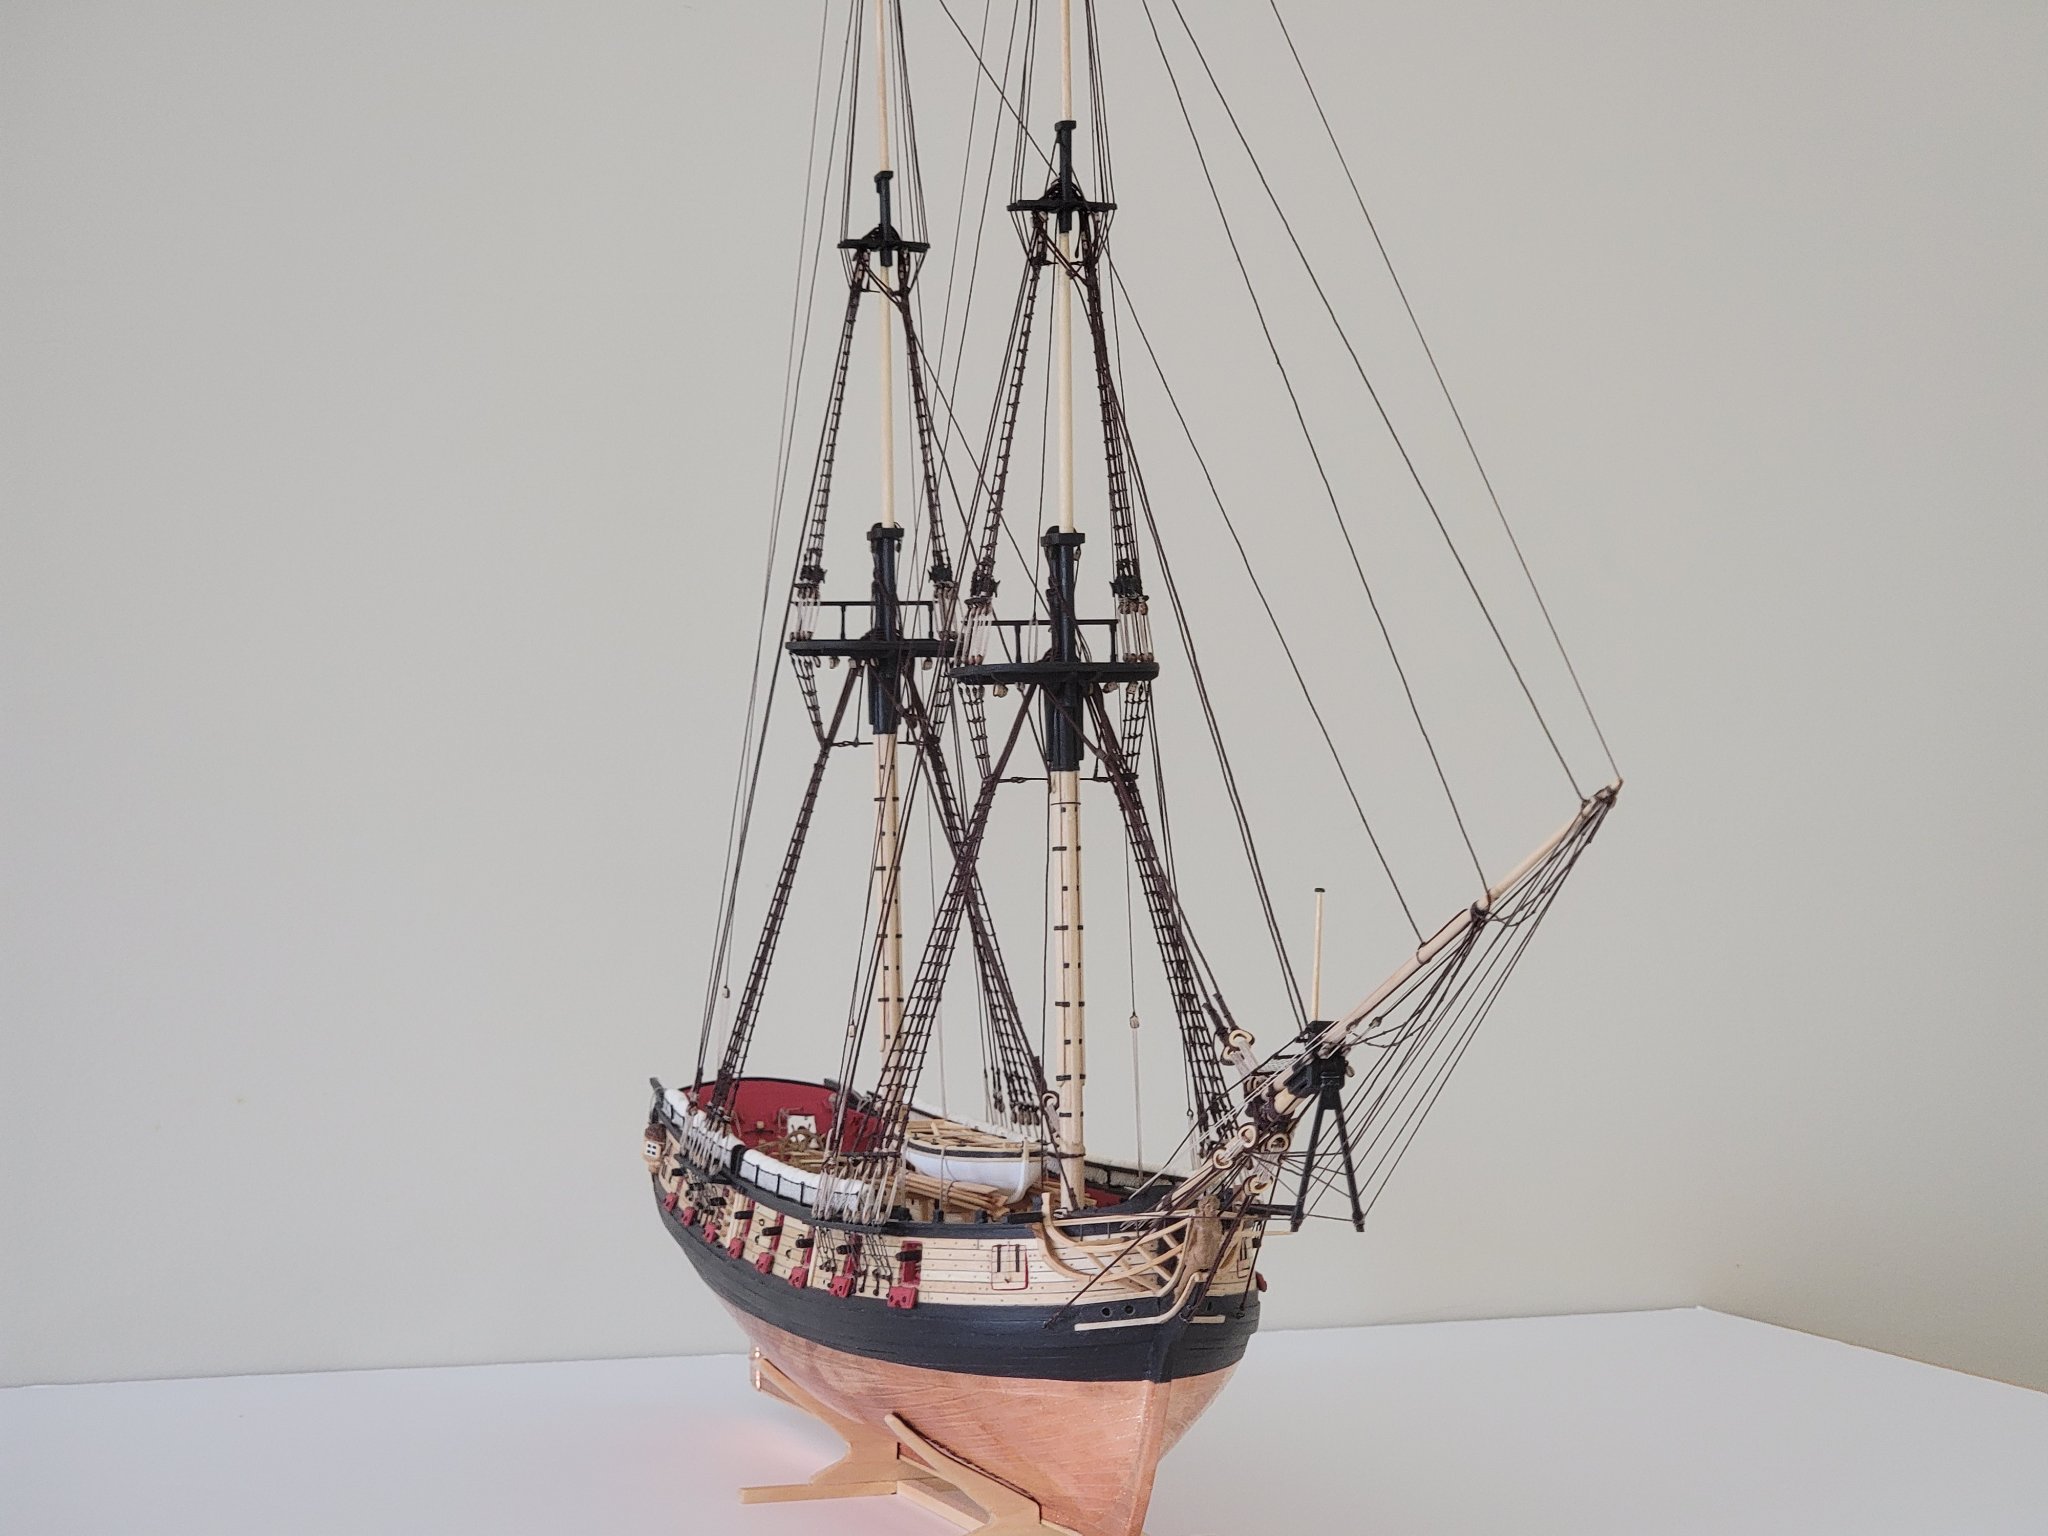
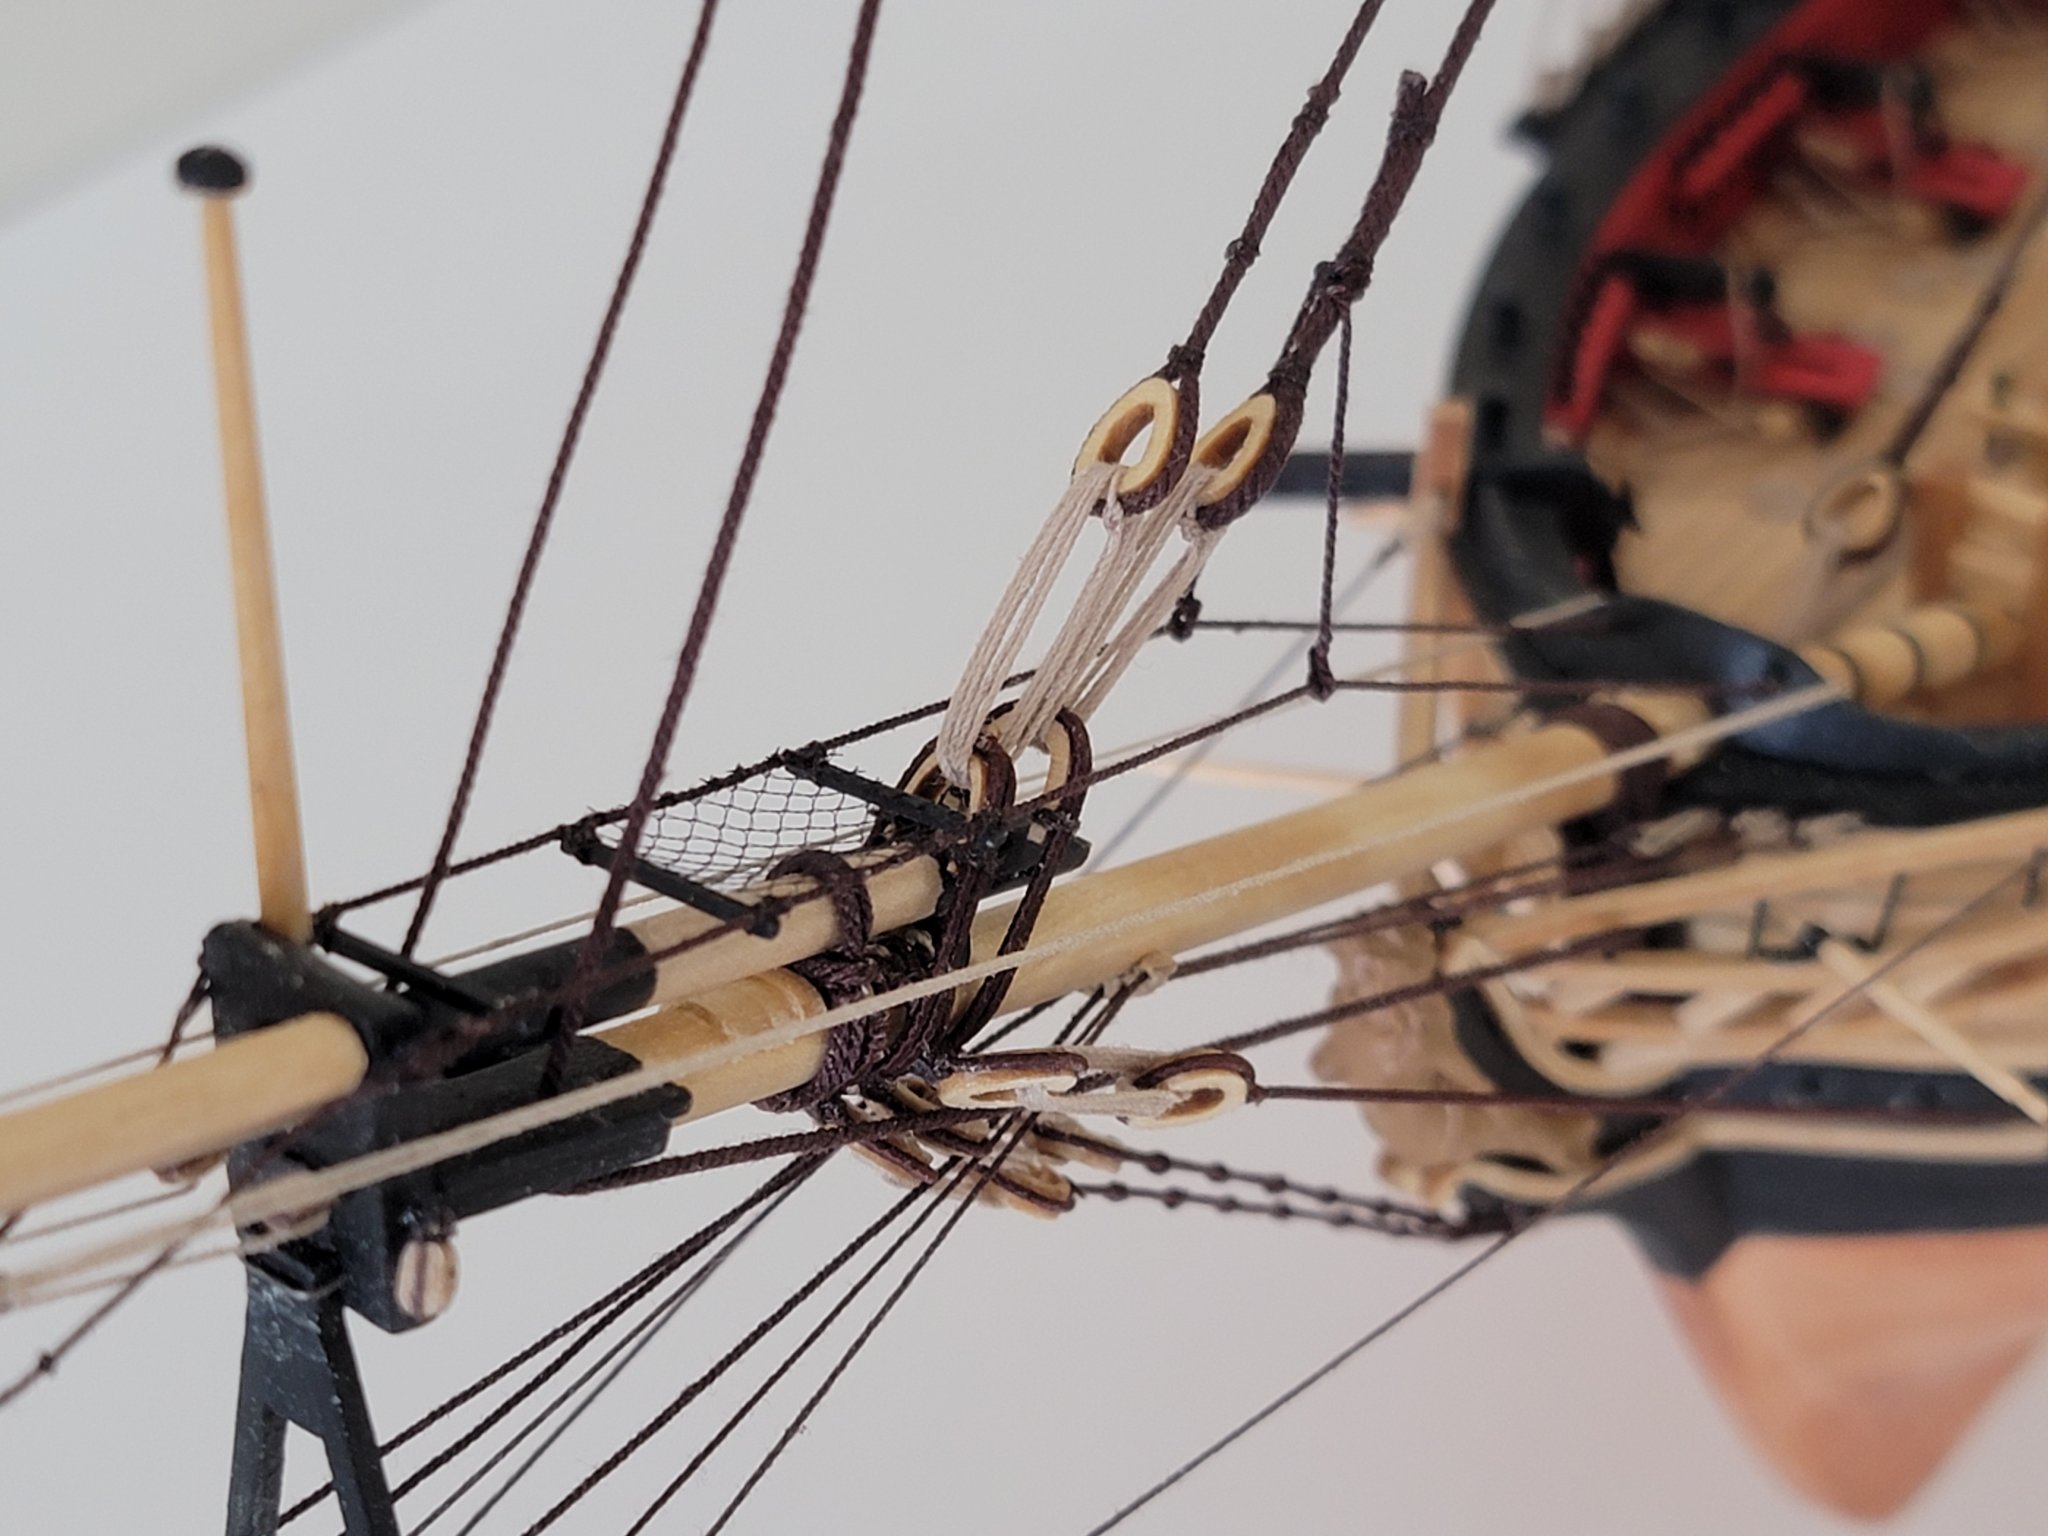
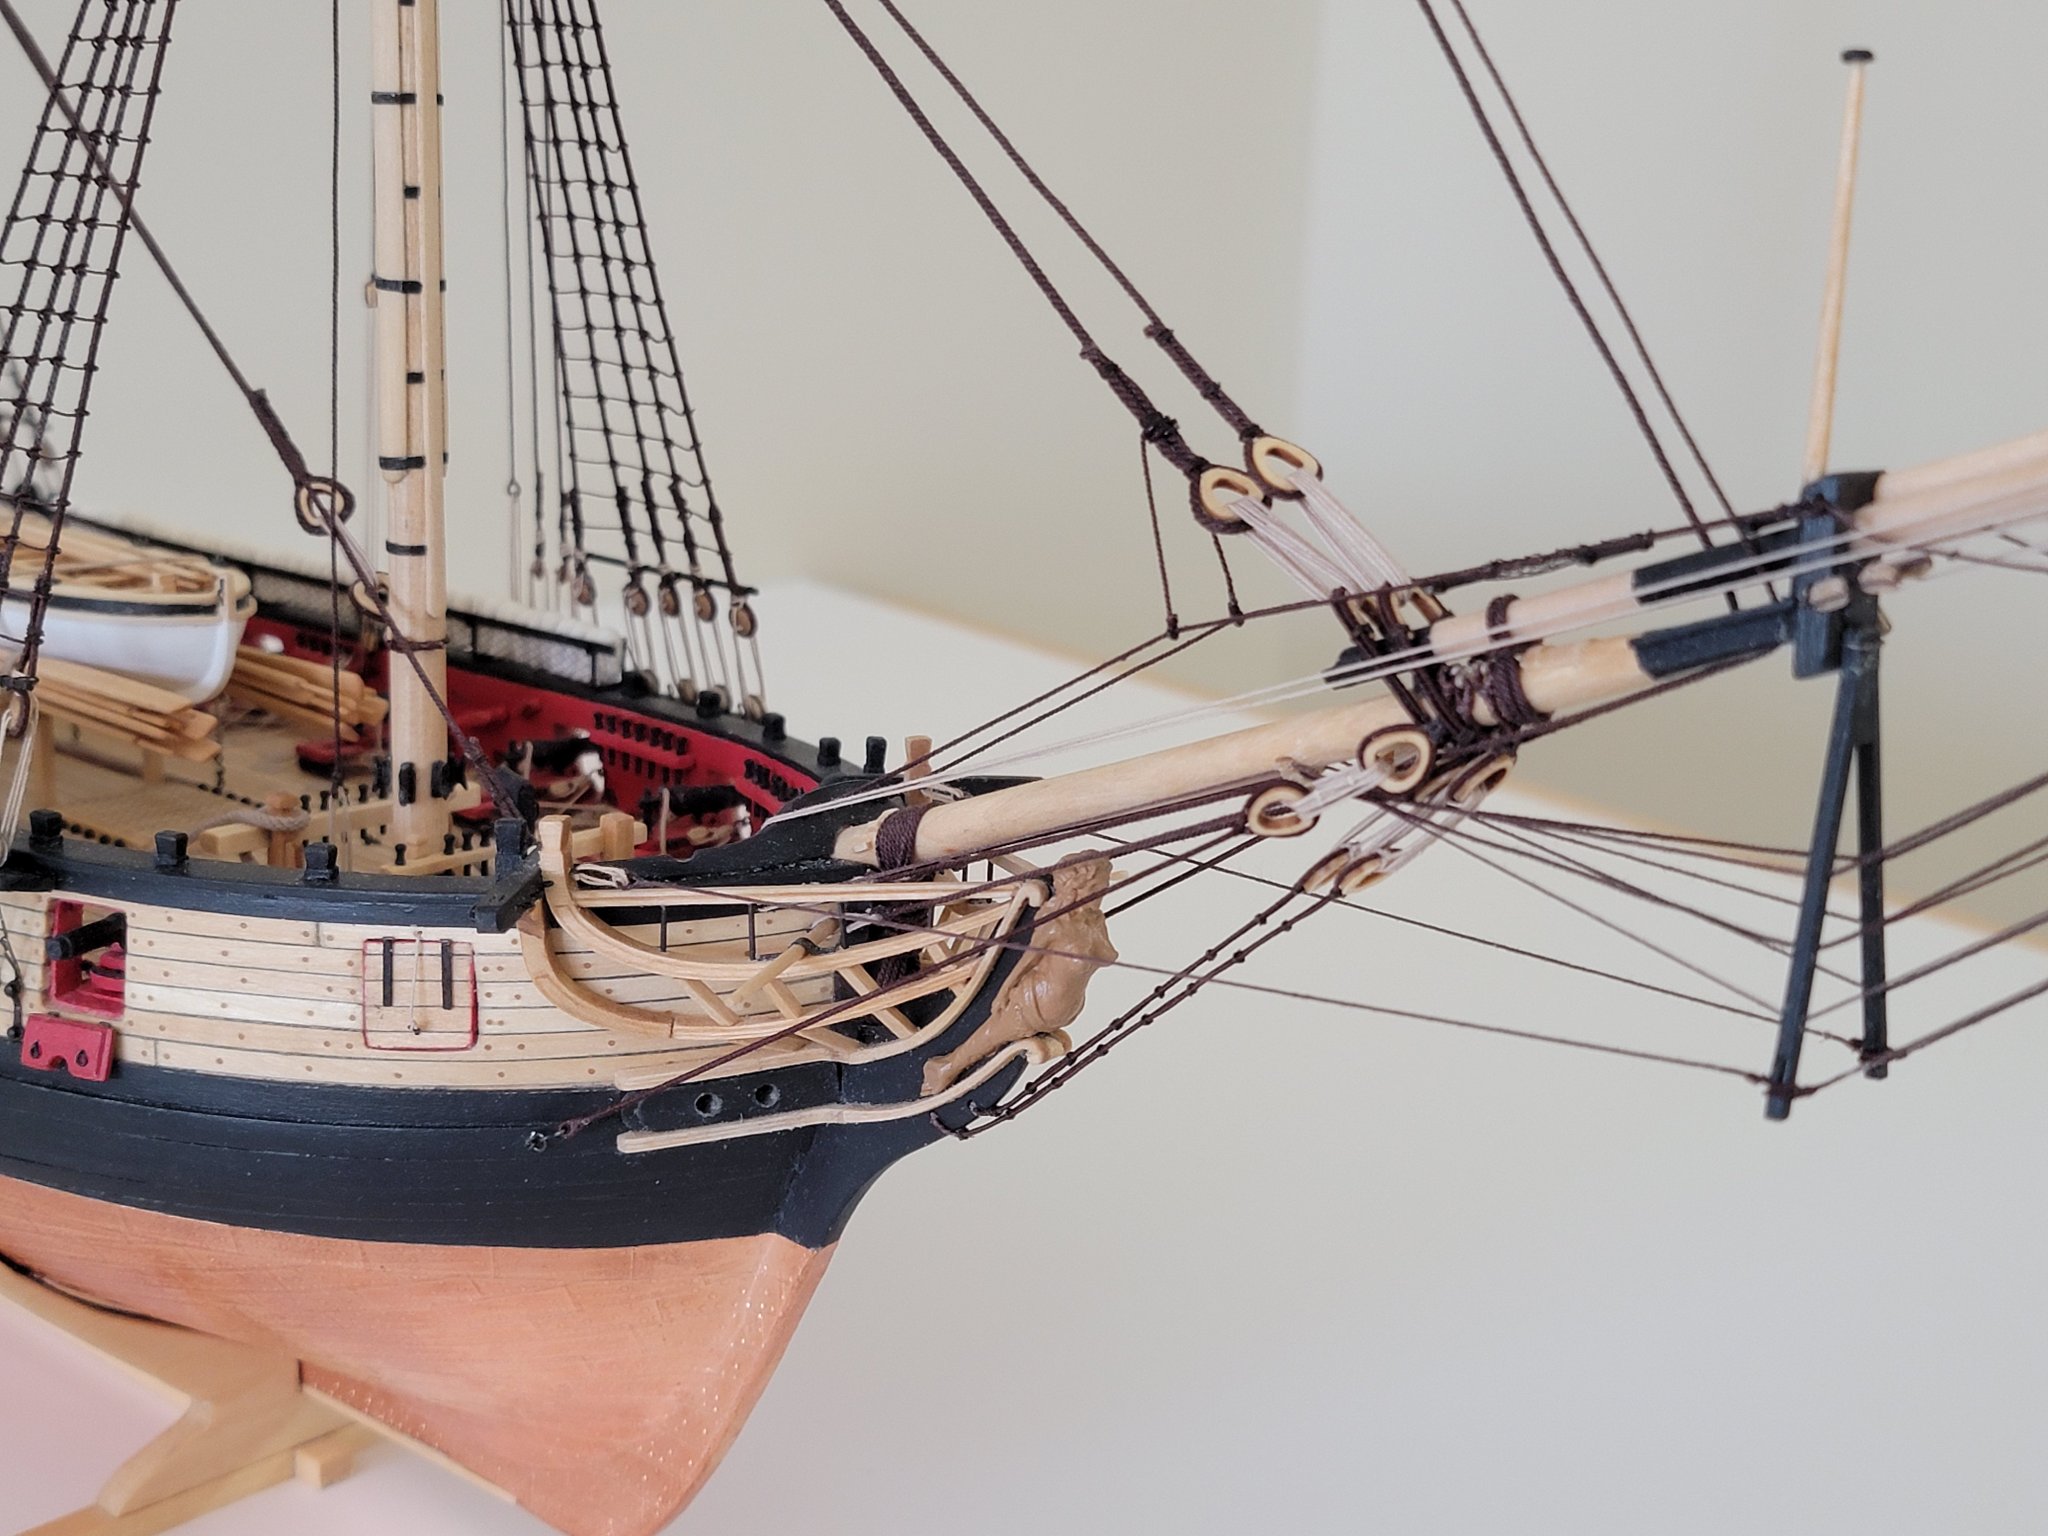
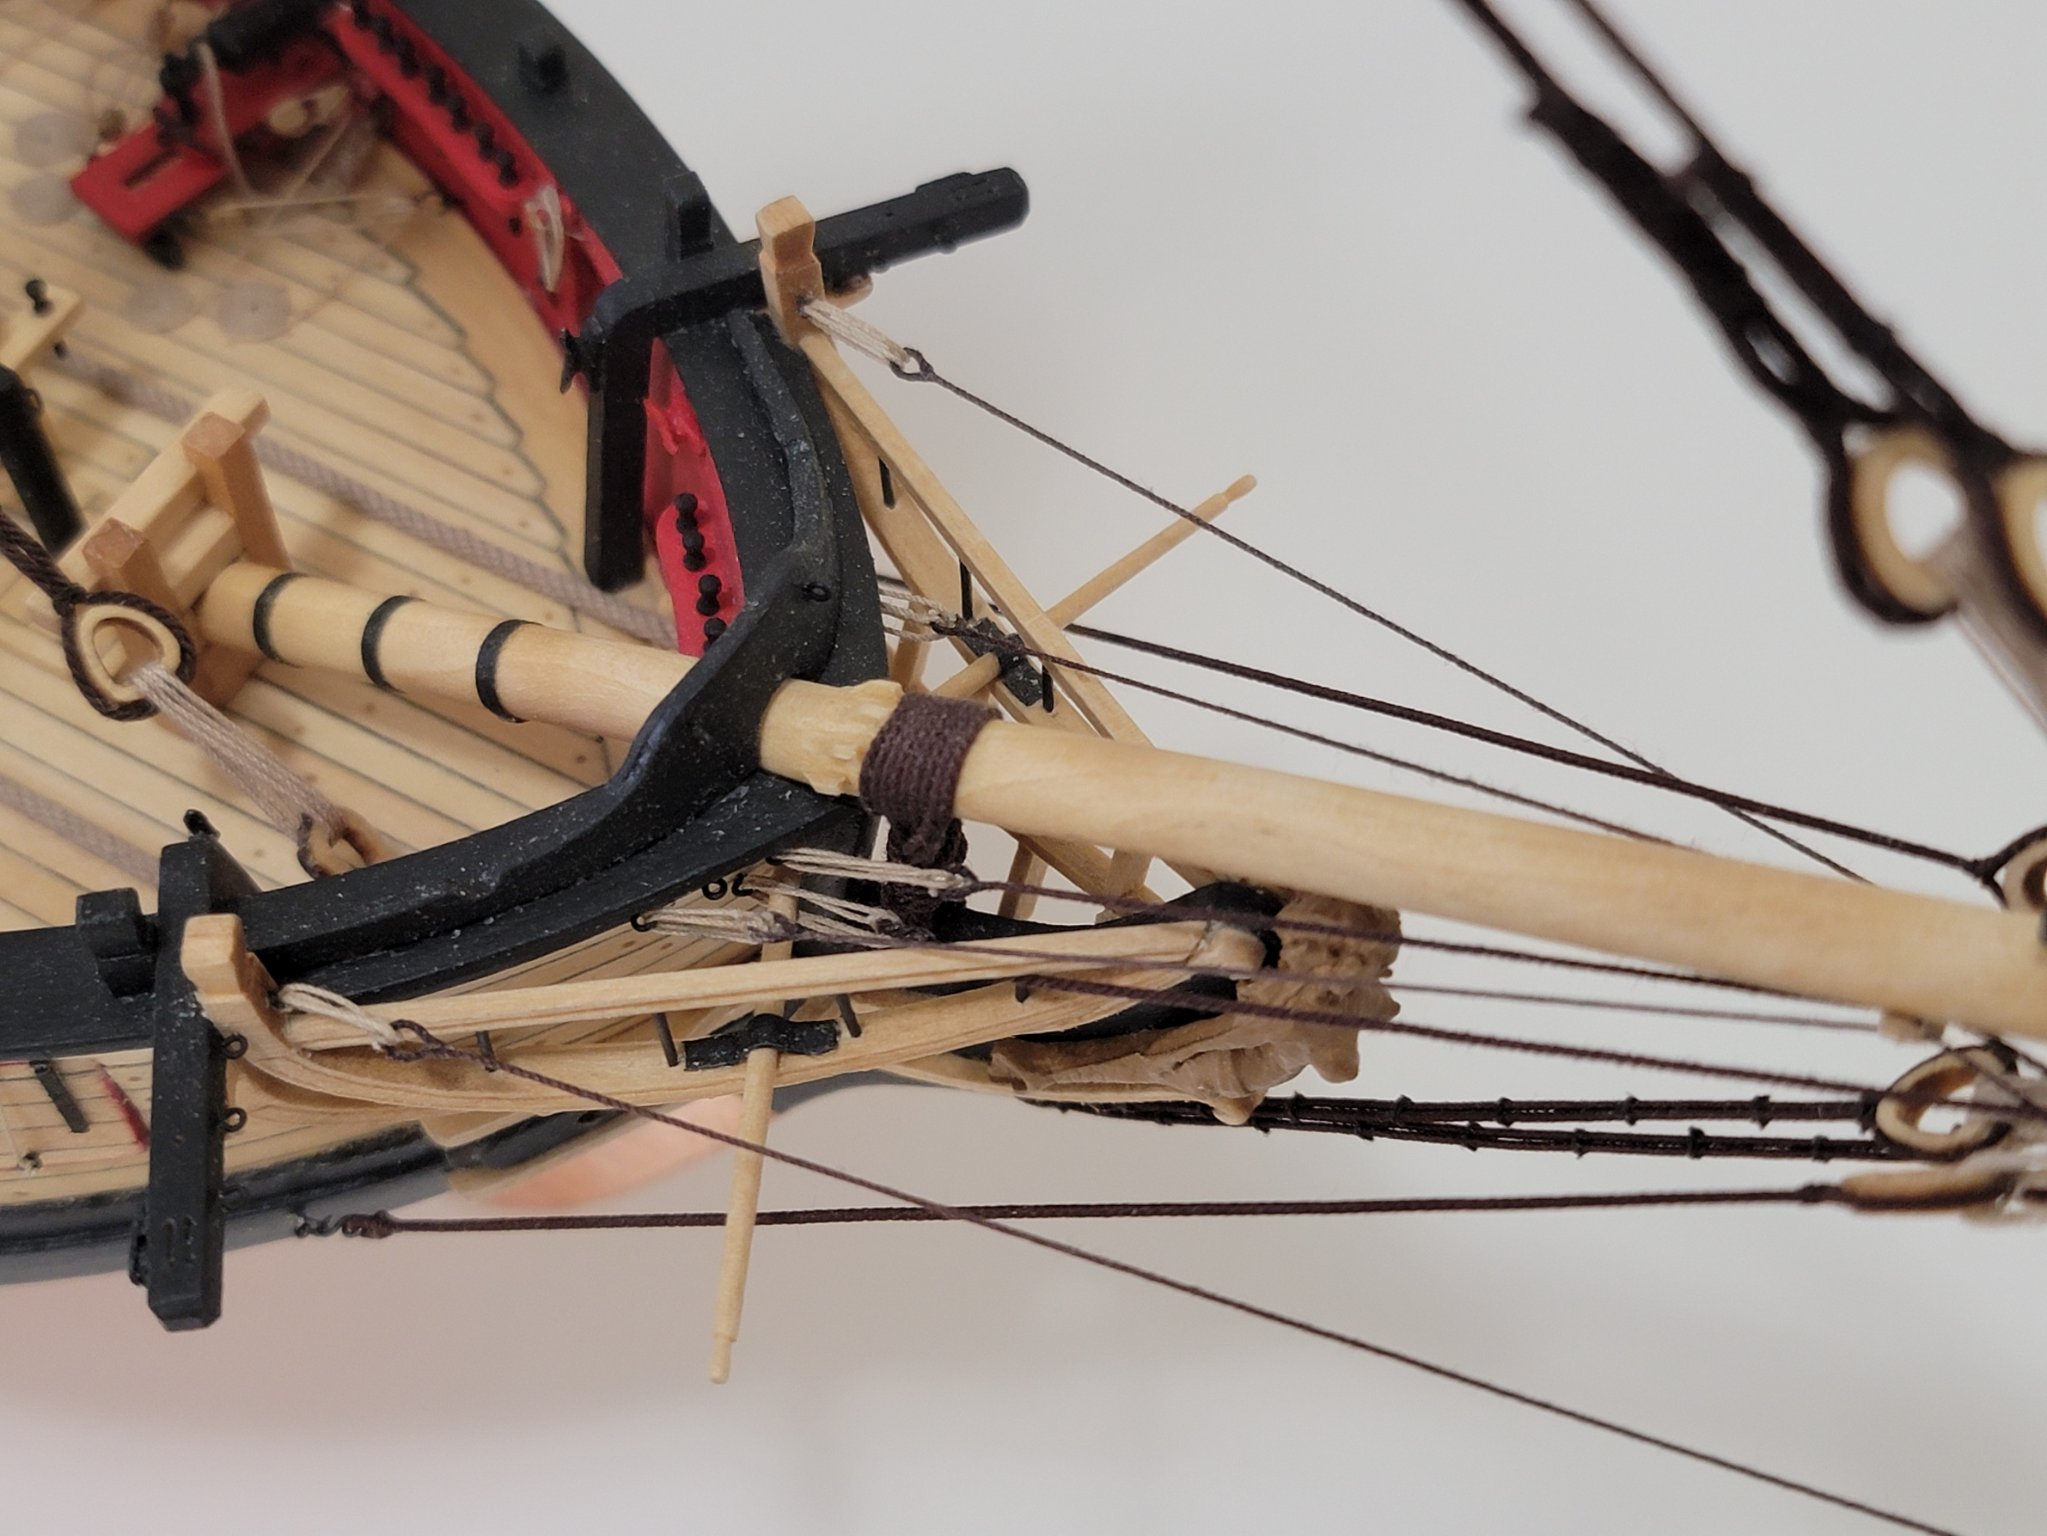
I finished installing all the iron bands on them. From Lee's book, I read that if a spar had battens, iron bands were also used to hold them in place. So I deviated a bit from the instructions to include this small detail. Here are some pics of where they are at
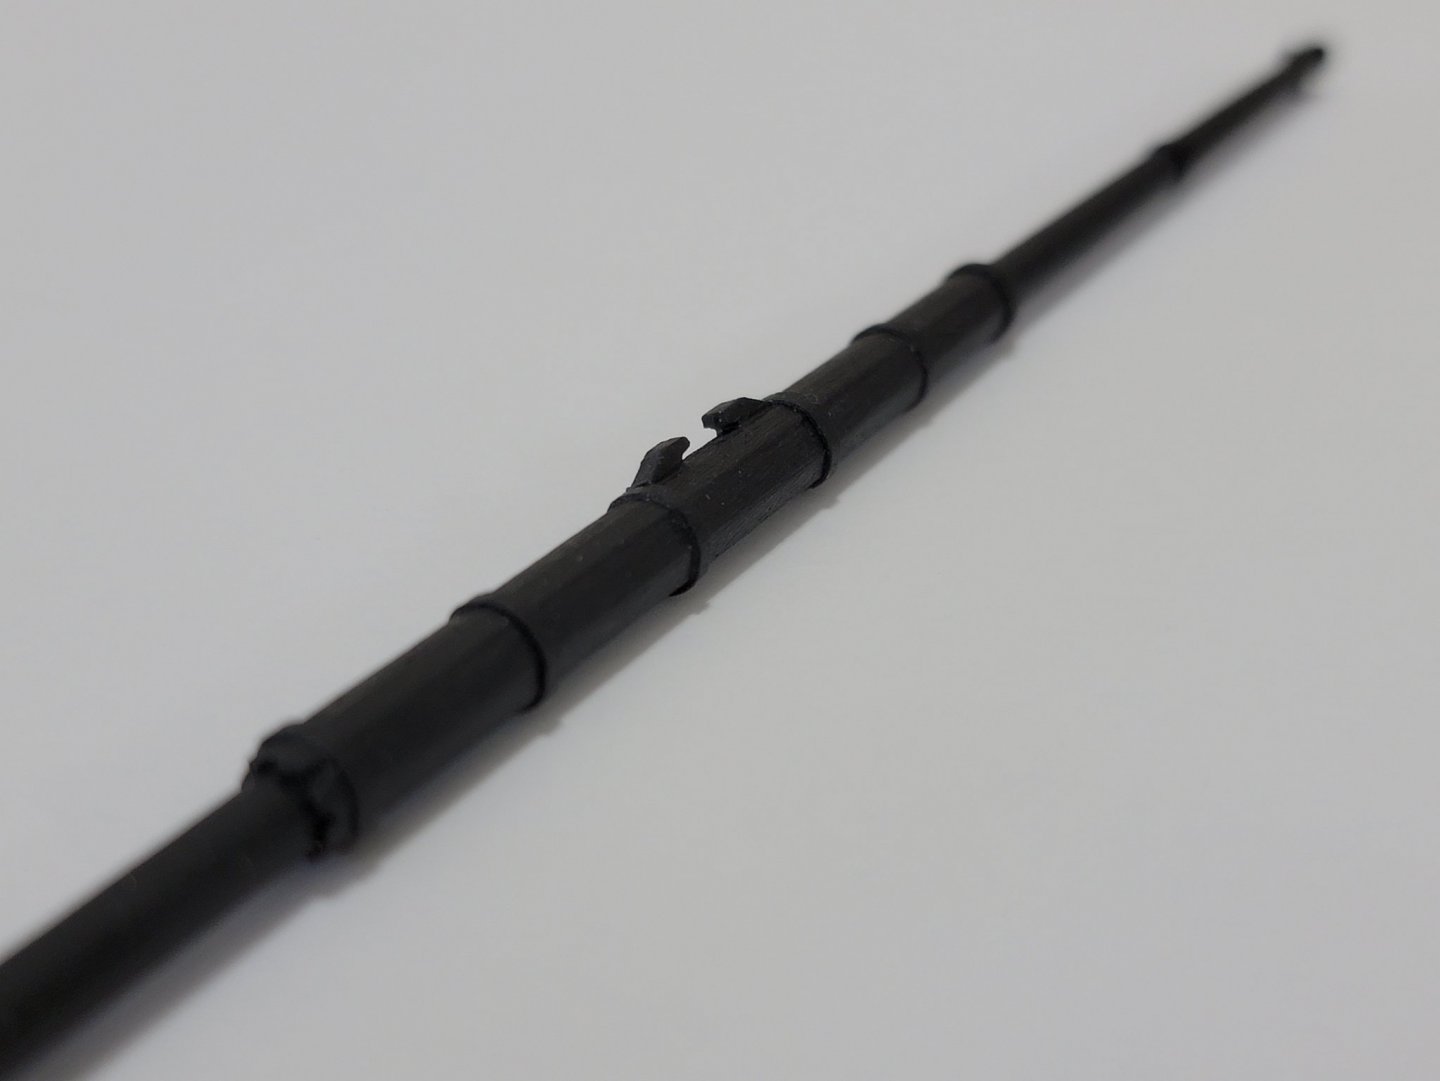
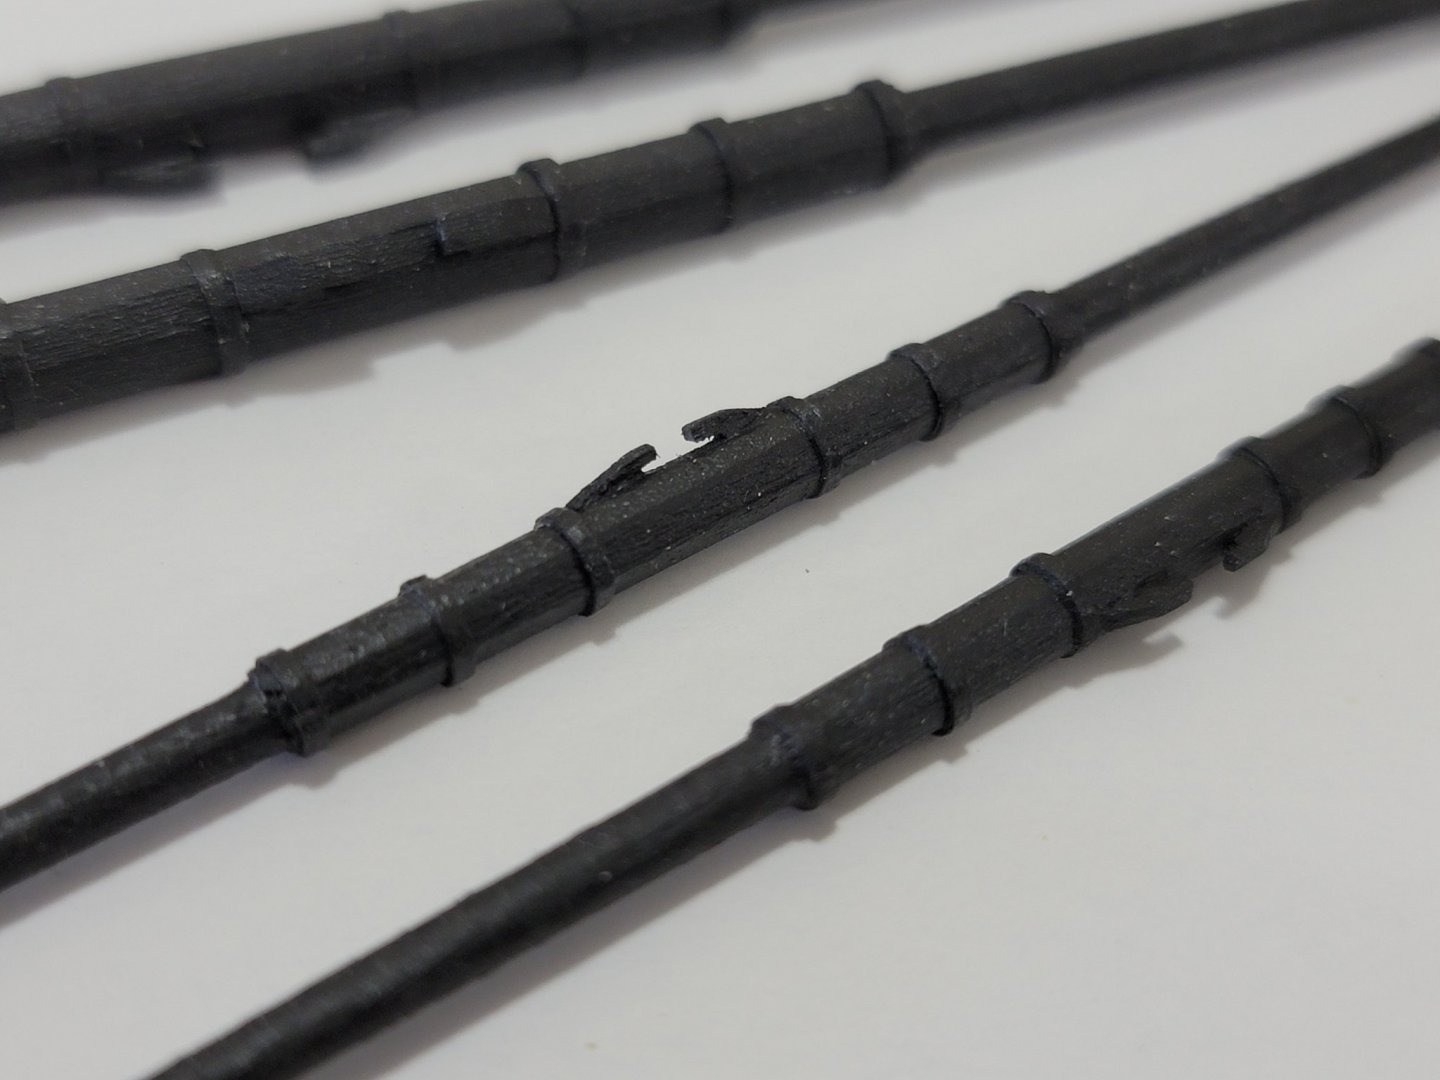

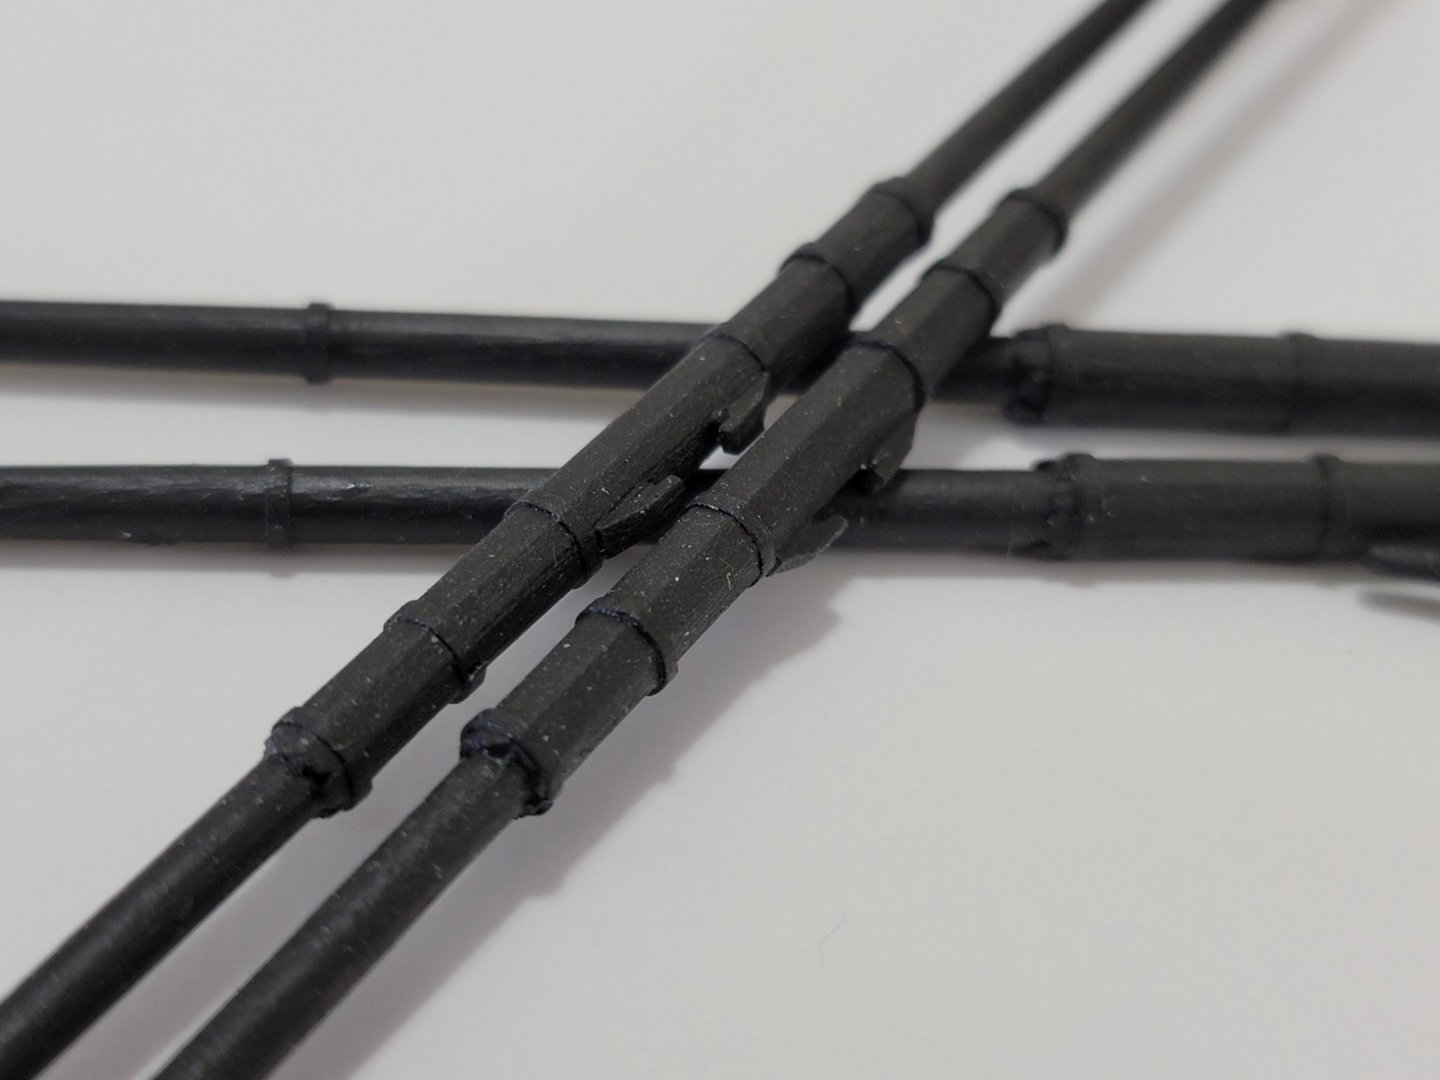
Still lots of work needed on the spars (installing blocks, footropes, stuns'l boom irons etc etc)
- Cathead, Edwardkenway, KurtH and 8 others
-
 11
11
-
11 hours ago, KHauptfuehrer said:
The best models are the ones that look pristine and clean no matter how close the camera gets. Yours is one of those. Congrats!
Thanks so much Kurt! 🙂
-
1 hour ago, BobG said:
When I think of a ship I always think of a large vessel. What's the dividing line between a ship and a boat by definition?
I read somewhere that the distinction between the two is how they behave during sharp turns. When turning, boats lean inwards and ships lean outwards.
- Captain Slog and mtaylor
-
2
-
51 minutes ago, niwotwill said:
Gotta watch out for places like Lee Valley they have so much stuff that I need/want, but a good set of chisels are a great investment. Its even fun to sharpen them between usages. Oh the yard and gaff look great also.
Stay Well and Stay Safe
Will
For sure! I had to control myself 😄. I just got some of their miniature tools (chisel, spokeshave, and honing guide). Next on the list is their block plane. Too many options!!
Here are the chisels I got
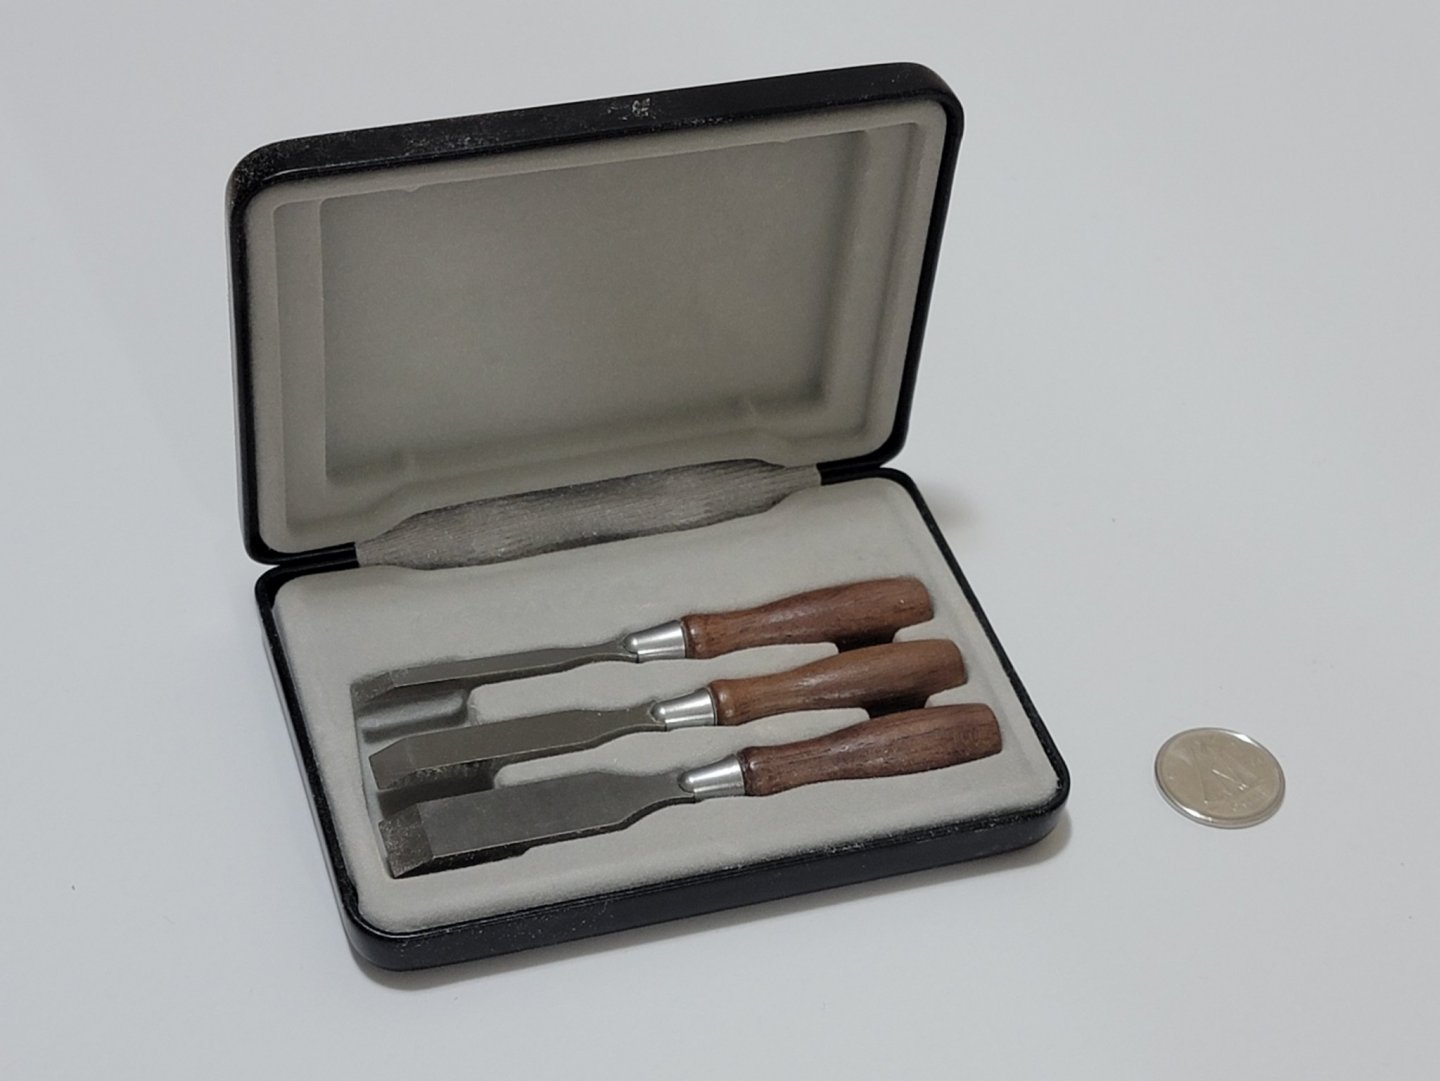
They are really a pleasure to work with. I haven't tried sharpening them yet. I bought some small diamond credit card sized whetstones of different grits for that (hoping those will be good). Have never sharpened tools before, so once they get a bit blunt I'll try it out.
-
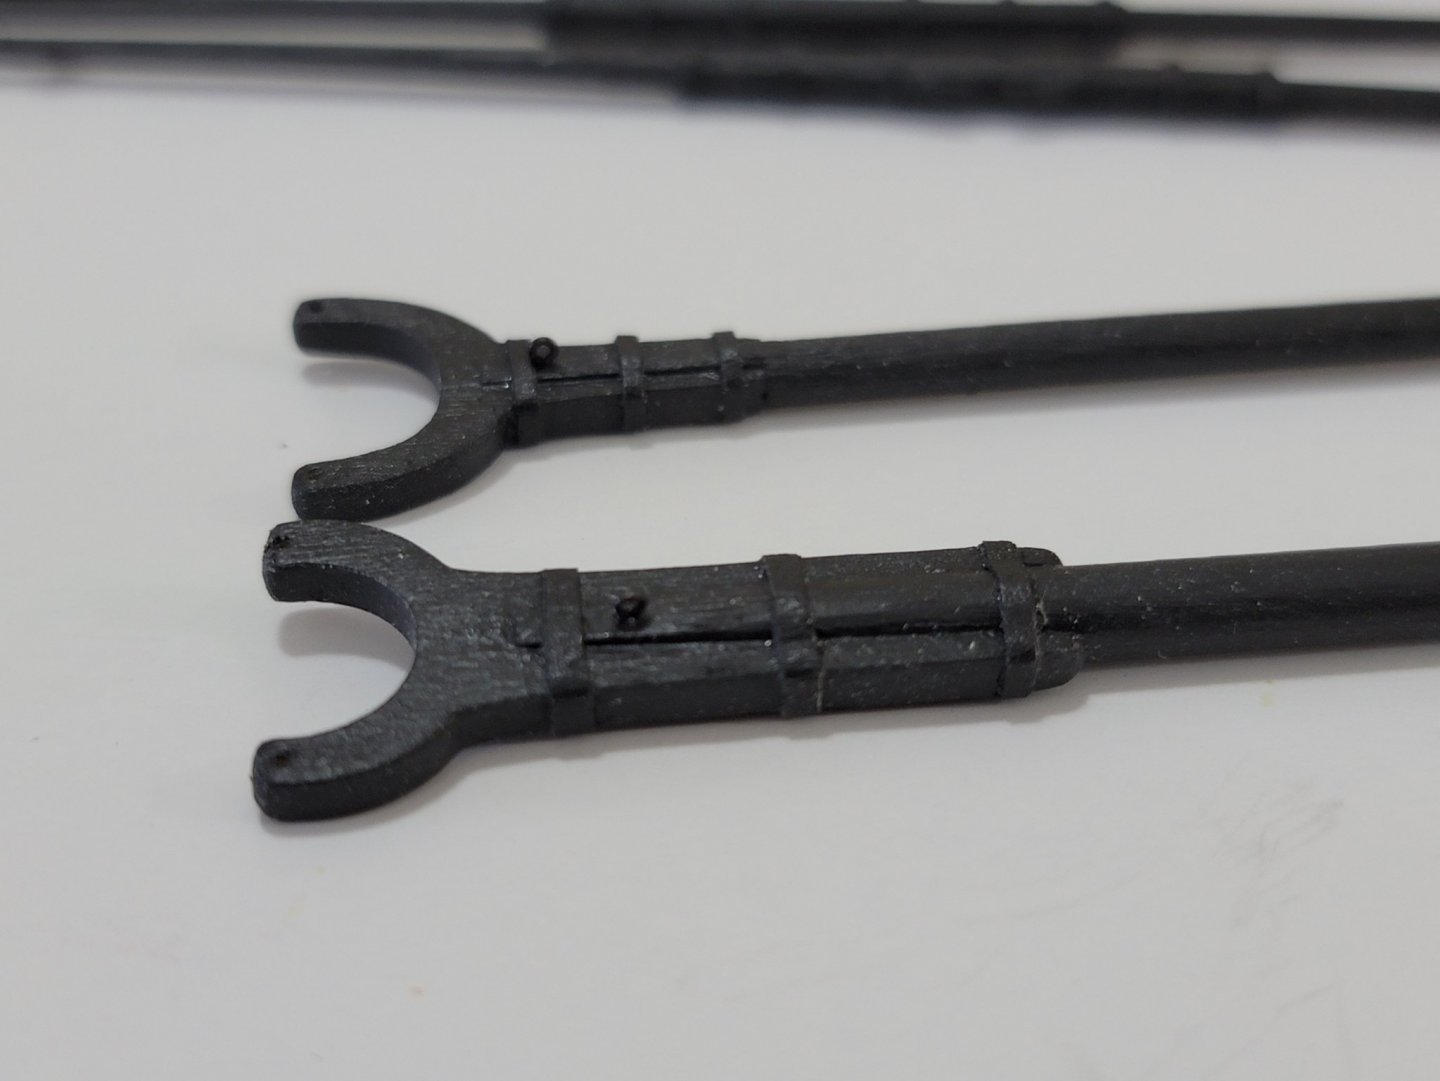
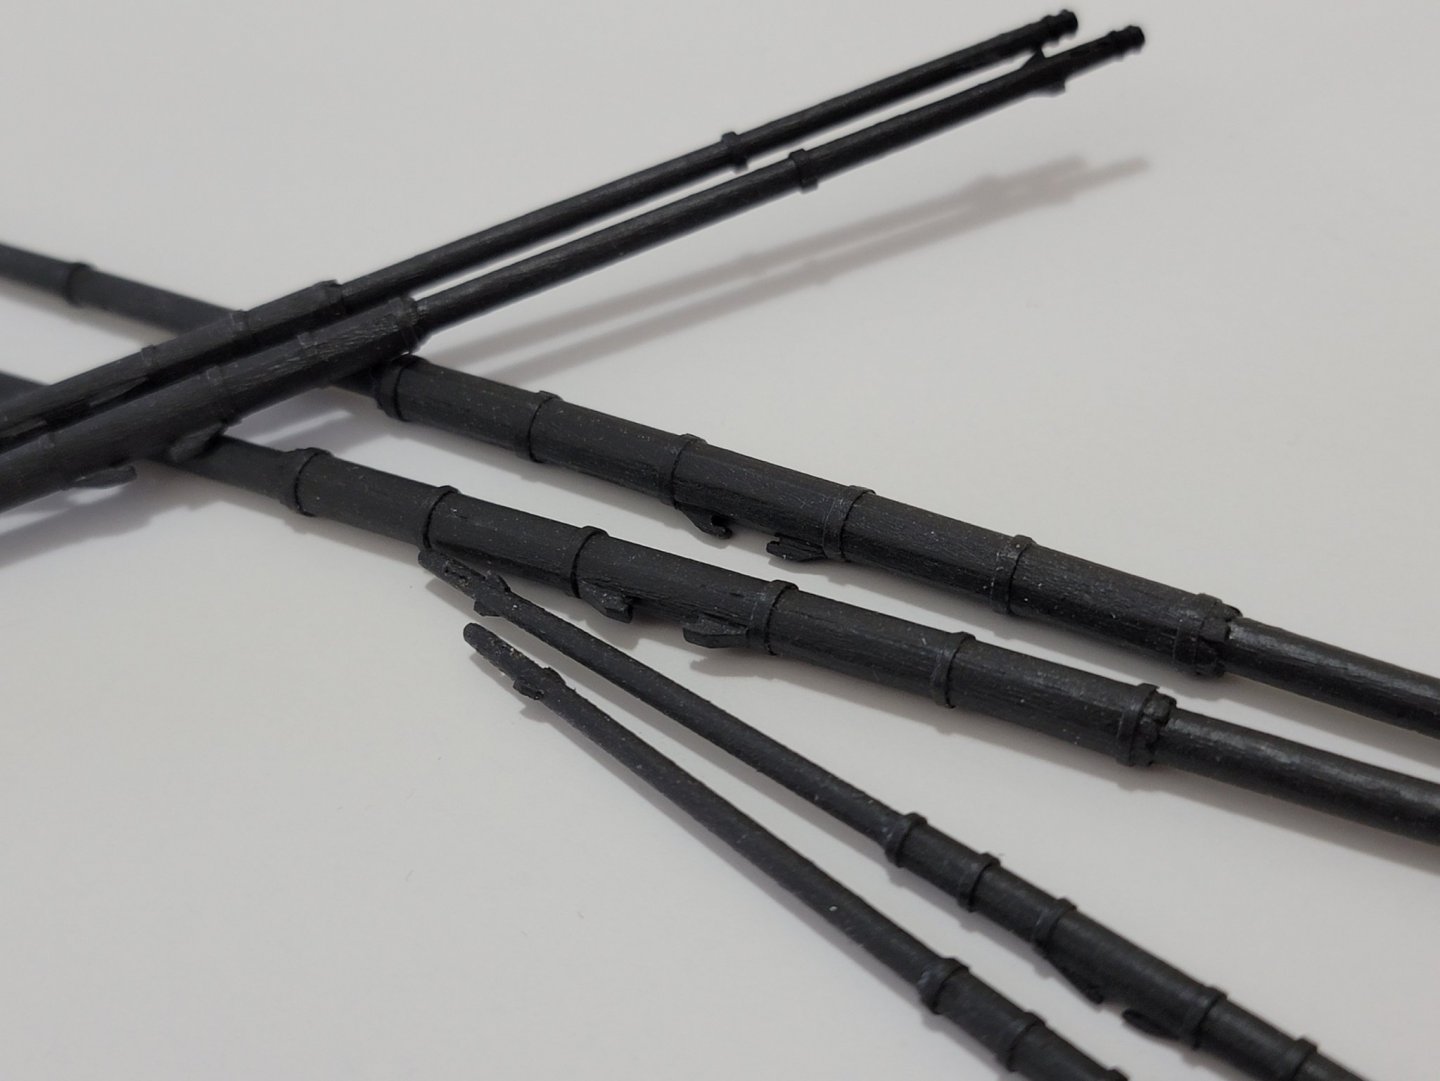
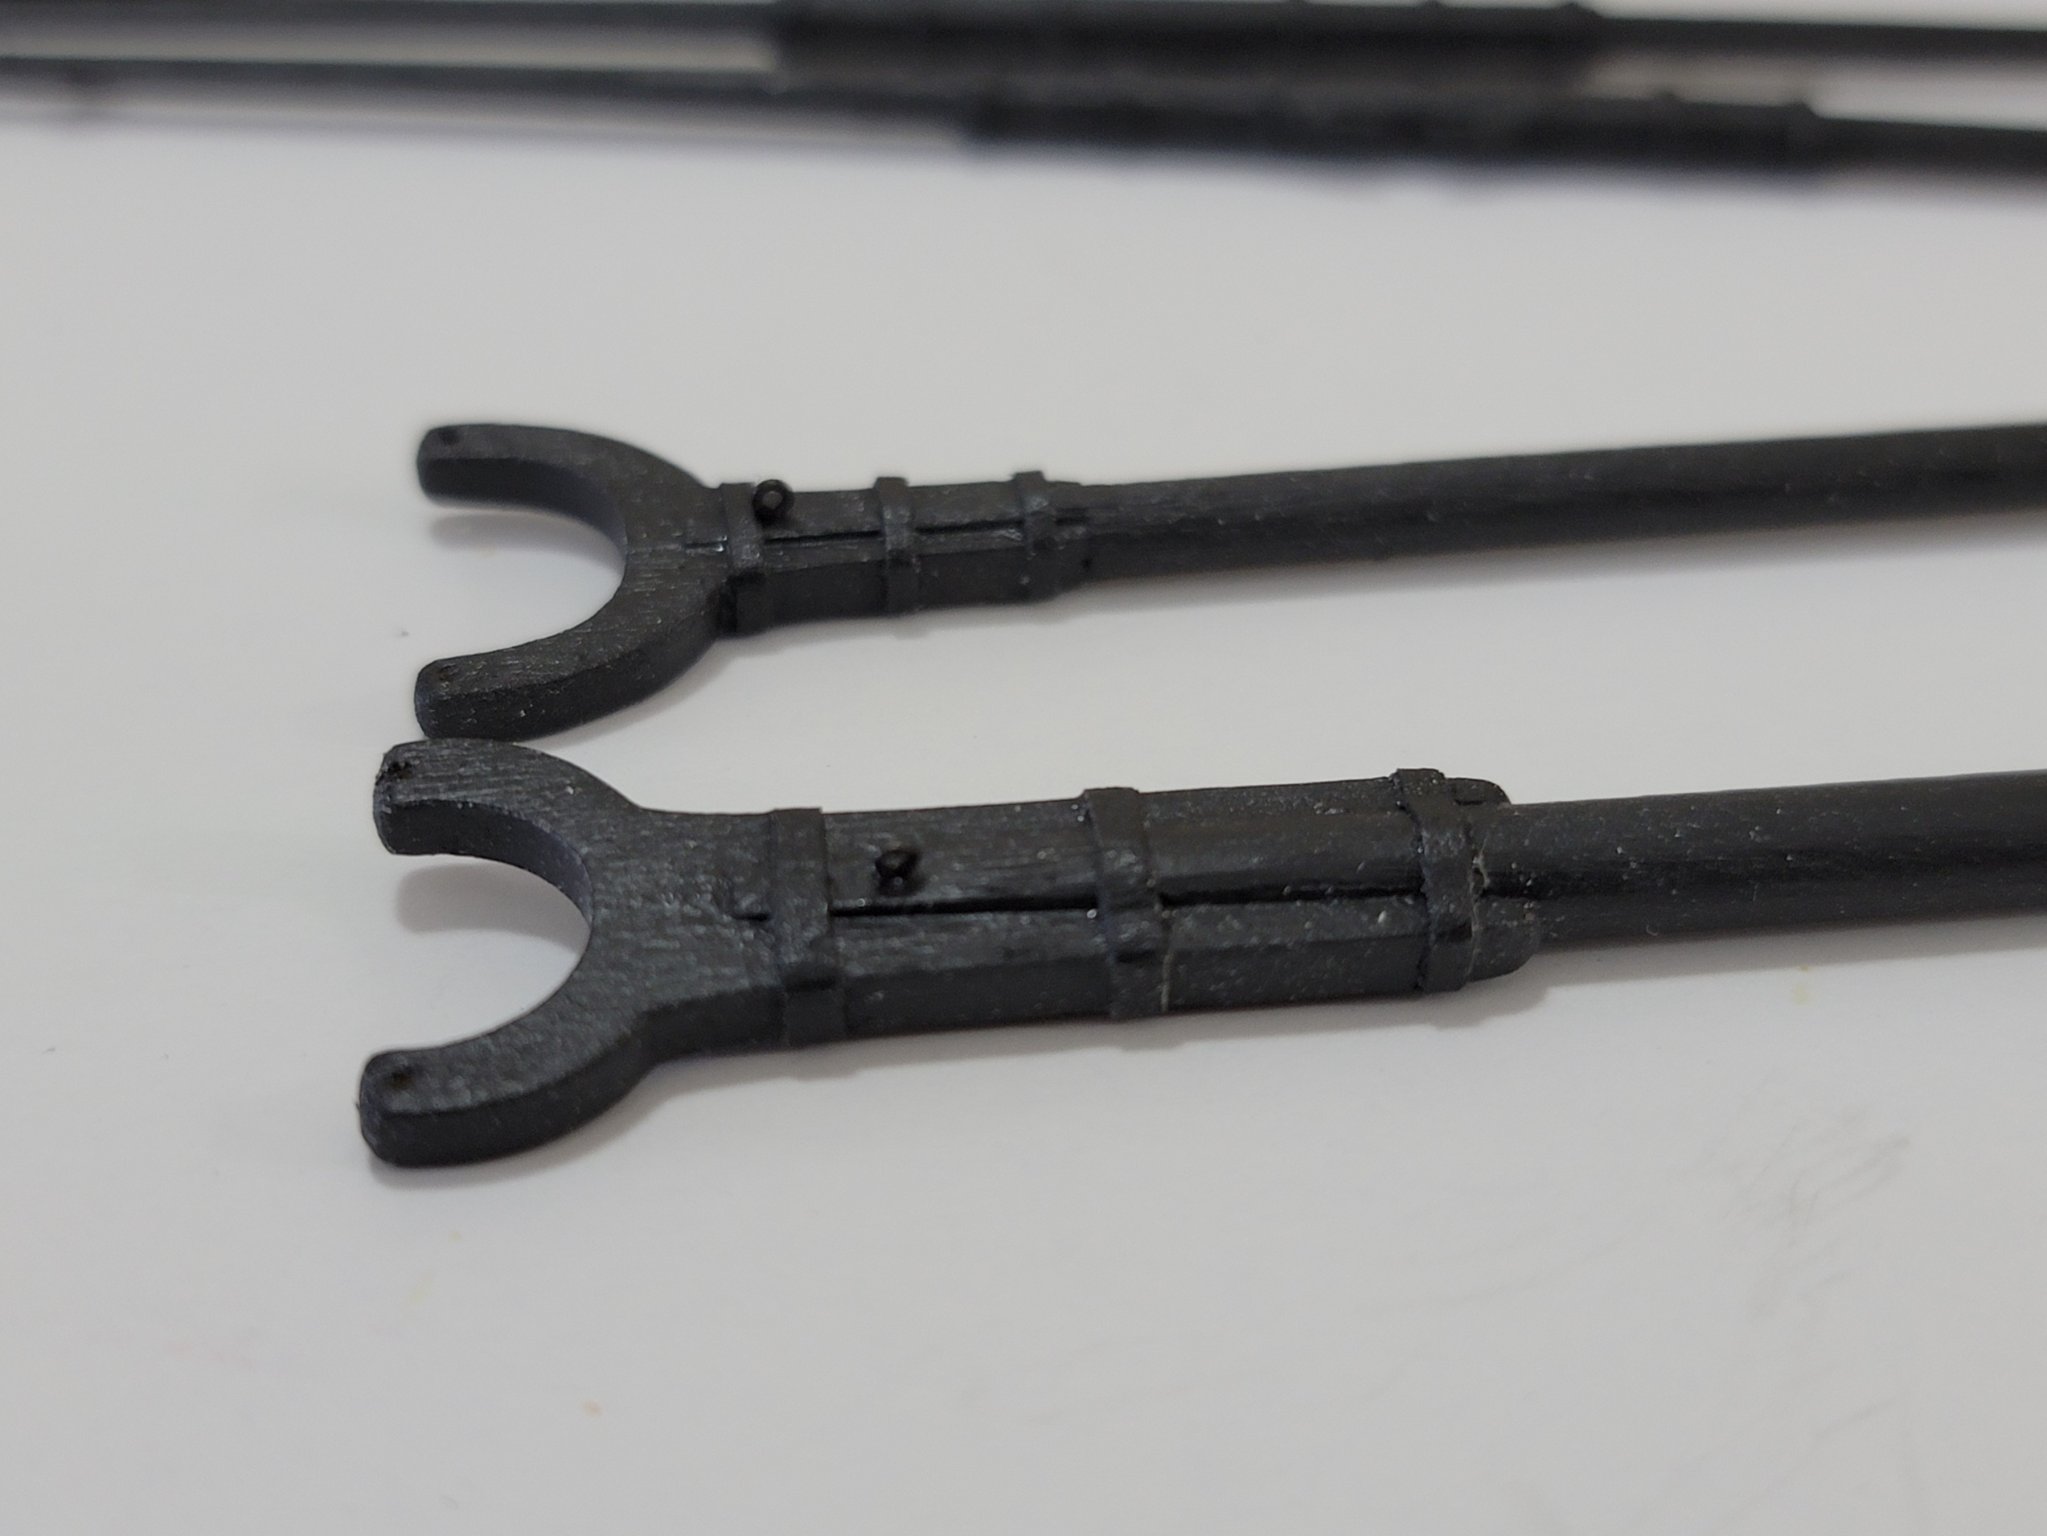
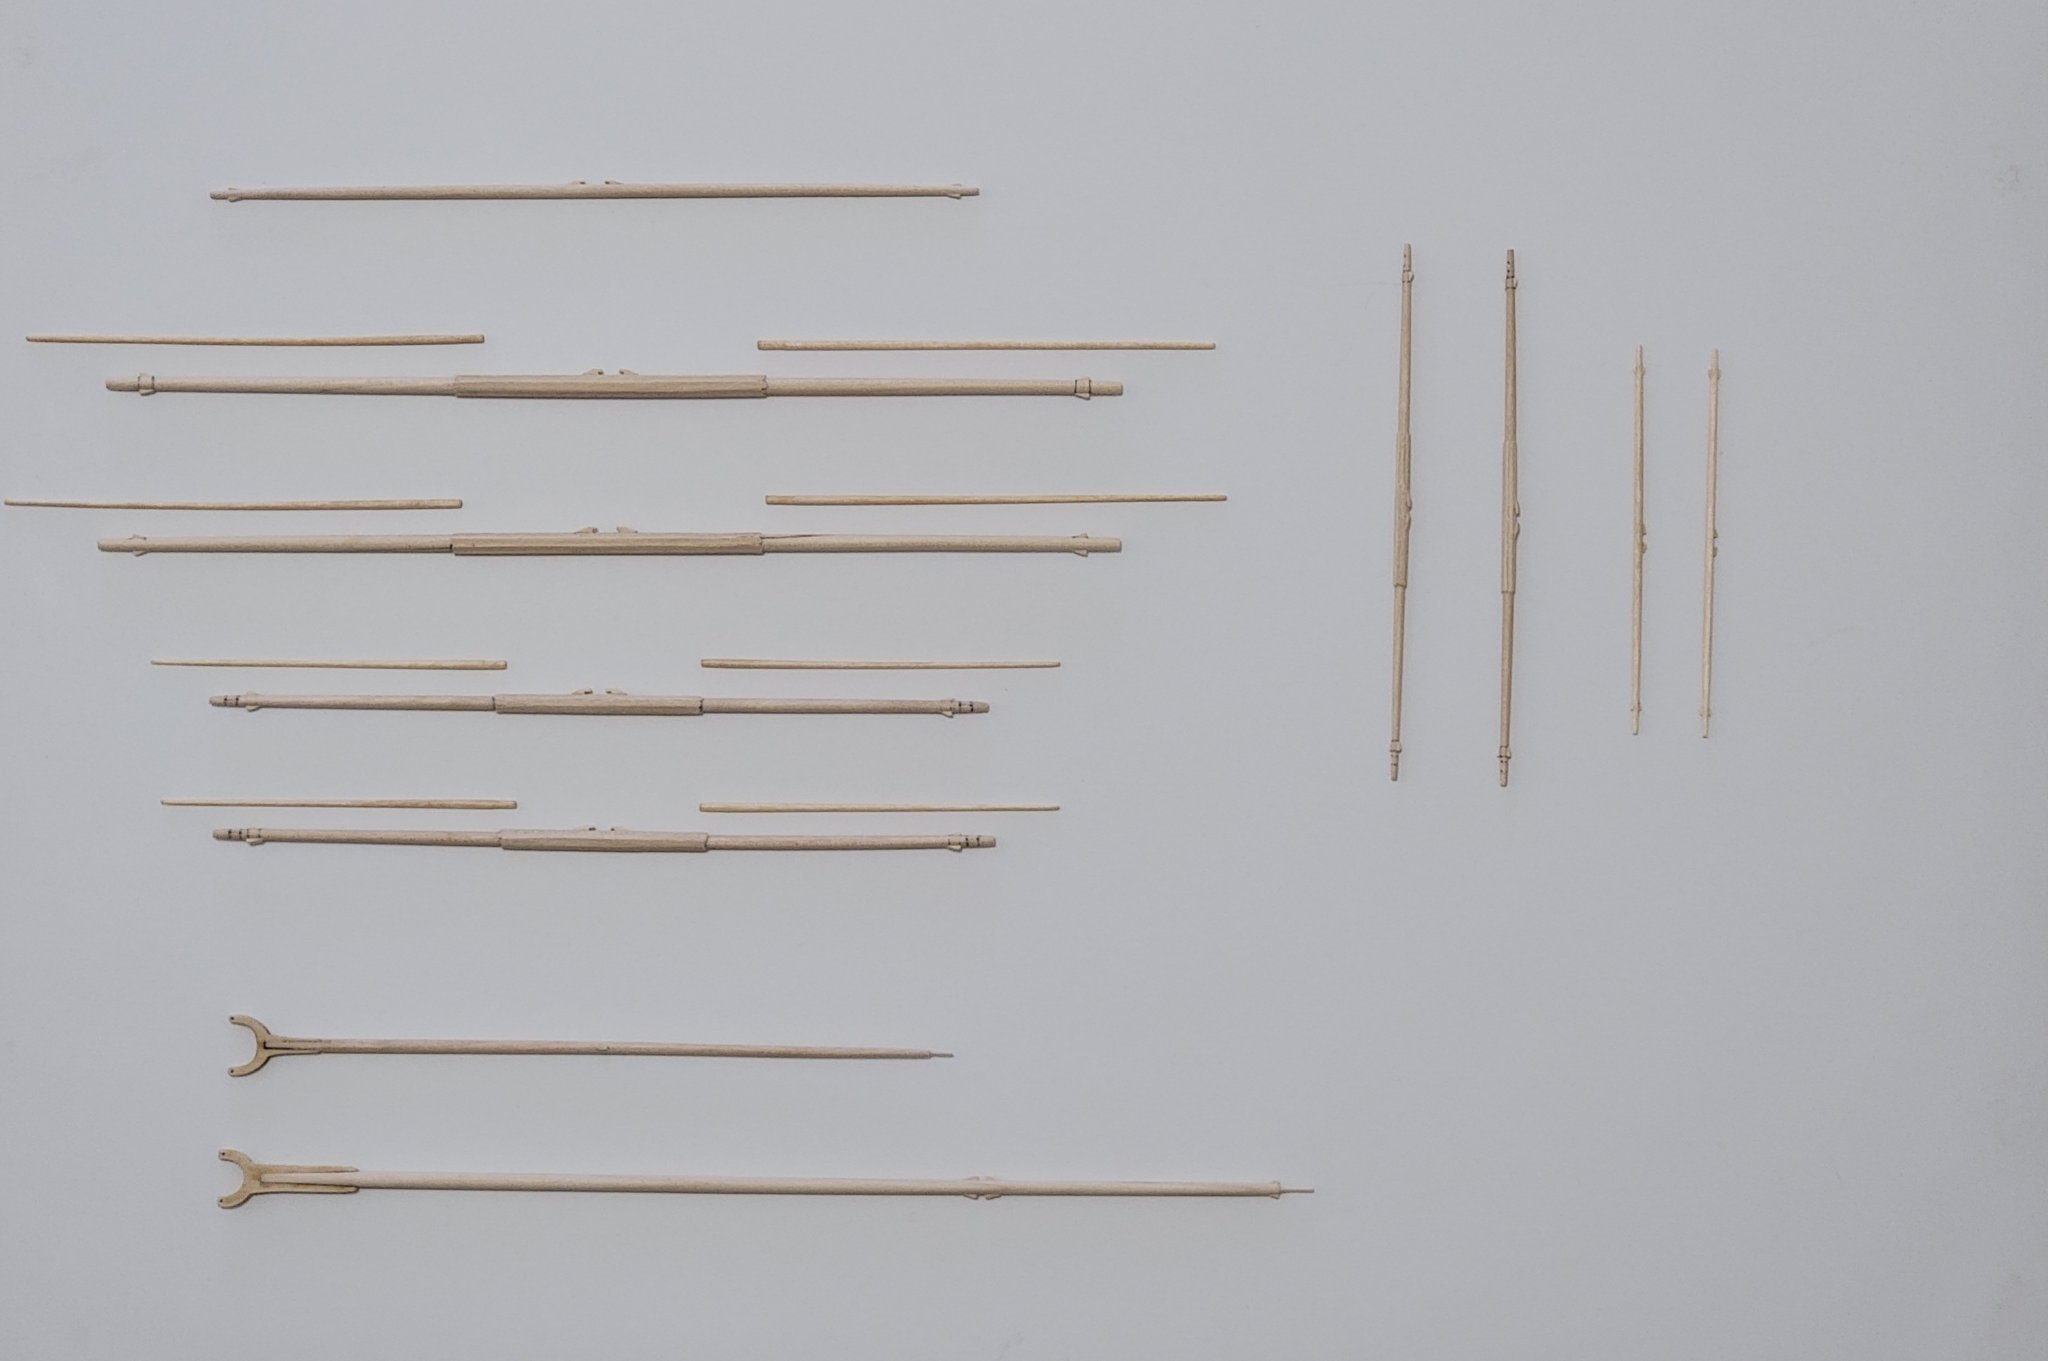
Just a quick update, I finished up shaping up and painting the yards, boom, and gaff. I used tung oil for the stunsl' booms. I bought the mini chisels from Lee Valley, and they helped to speed up the tapering process! It was also a lot of fun using them 😃
Here are some pics:
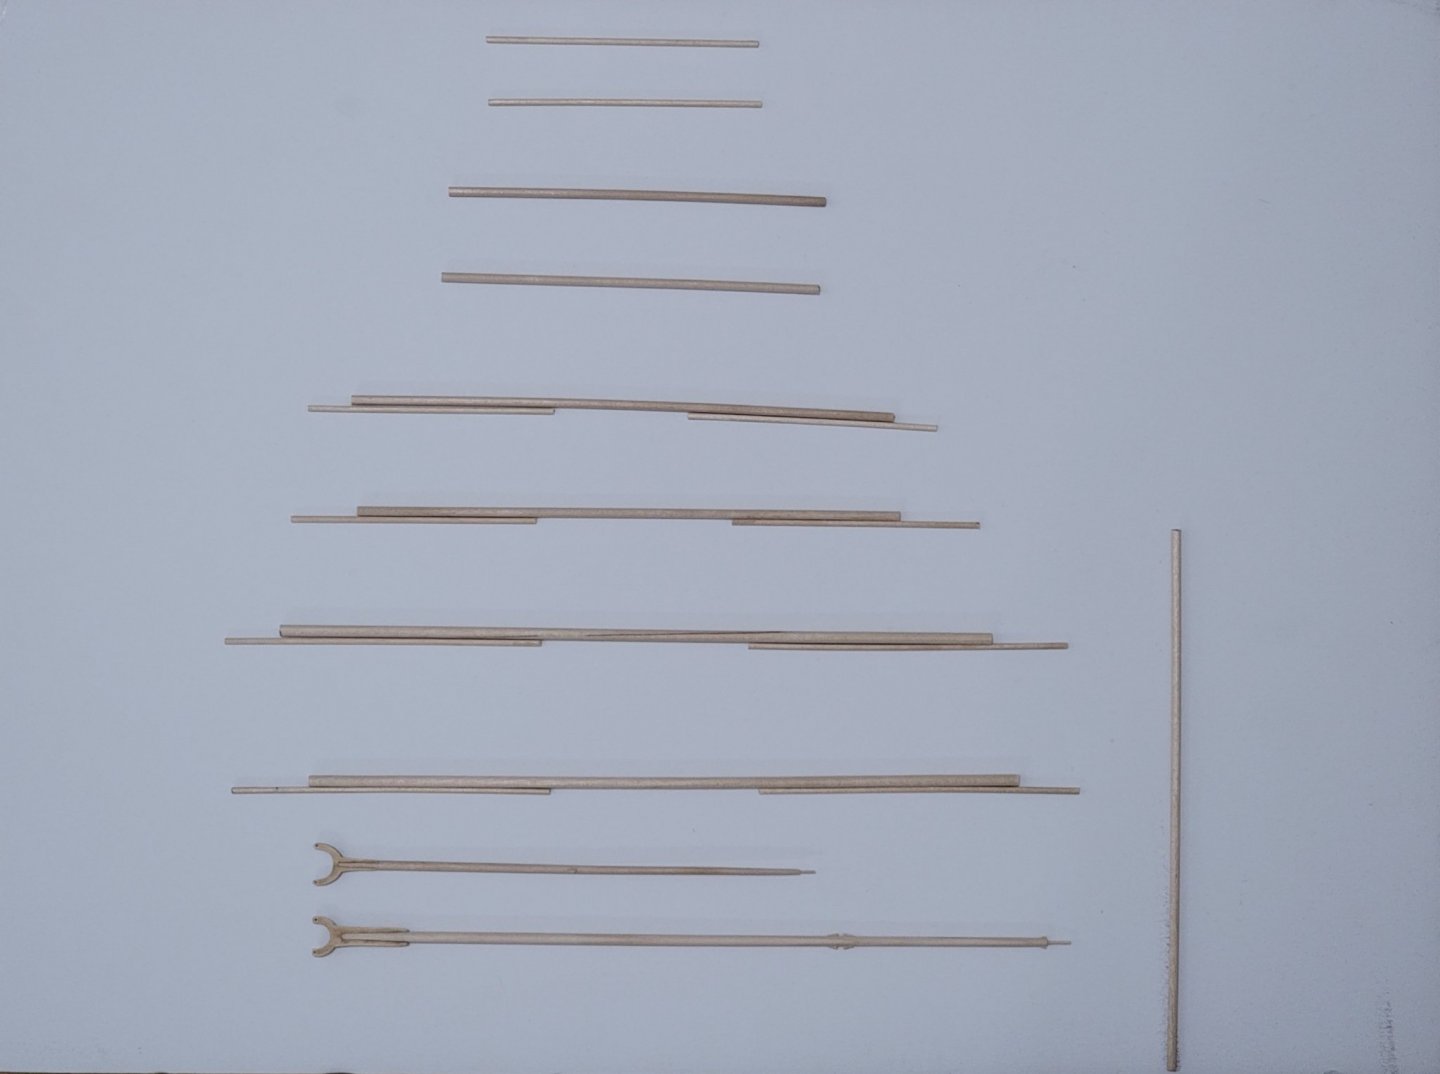
Still deciding what to do next. Might go ahead and finish up detailing all the yards, gaff, and boom before I start rigging them.
-
On 3/31/2021 at 4:50 AM, egkb said:
Magnificent .. Just Magnificent !!
Eamonn
On 3/31/2021 at 8:58 AM, JpR62 said:Wonderful! This brig is absolutely gorgeous. A real pleasure to admire all the perfectly executed details.
On 4/1/2021 at 4:30 PM, niwotwill said:Just checking in your build. I love to go back and admire the photos of your work.
Stay Well and Stay Safe
Will
Thank you so much for the nice comments, Eamonn, Jean-Paul, and Will. It's very much appreciated!!
-
2 minutes ago, glbarlow said:
Two posts back to back. Thank you for the comments, hope you also enjoy the completed hull photos.
I really enjoyed the photos! Very beautiful and clean work. Really looking forward to seeing the rigging!!
-
-
On 12/4/2020 at 8:02 AM, druxey said:
Might I suggest that, for a scale model, stitching is not the best or easiest option? However, fine the stitching, it will always be way over scale. Also, as you've discovered, stitching a straight line is very tricky. Let me suggest another possibility:
First, gently stretch the uncut material over plastic wrap. Give it a dilute coat of acrylic matt medium to slightly stiffen it. Also, when you cut the material, it will not fray. When it is dry, mark out the shape of the sail in pencil, then another set of lines outside this to give the 'hem'. Draw pencil lines the width of the sail cloths apart or, if this is at a large scale, a double set of lines. Using a straightedge this should be easy!
Cut the sail out to the outer lines. Turn over the edges and either glue them down with white glue or matt medium. Detail the sail to taste and you are done.
I did not want to create another topic, so will ask here.
What is acrylic matt medium diluted with? Is it just water?
-
-
2 minutes ago, stuglo said:
boring and frustrating
But once done it looks so good! It's very satisfying seeing the smooth curves! 🙂
- Jorge Diaz O, dvm27 and mtaylor
-
3
-
2 hours ago, TimC said:
Wonderful job so far. I’ve referenced your work frequently! What did you use for your netting? I’m struggling to find anything that meets scale and looks decent
Tim
Thanks Tim! I'm using the net provided by the kit. Maybe check with Model Expo to see if they sell these separately. The part number for netting is WP2828.
-
1 hour ago, Retired guy said:
Hi Wally just spent an hour catching up on your brilliant build, you are doing a fantastic job on her well done mate.
Regards
Richard
Thanks for checking in Richard, and glad to have you back! Looking forward to seeing your beautiful Bluenose build take shape will all the detail work 🙂 (got to admit, I find myself browsing through your log every now and then admiring the craftsmanship and metal work)
-
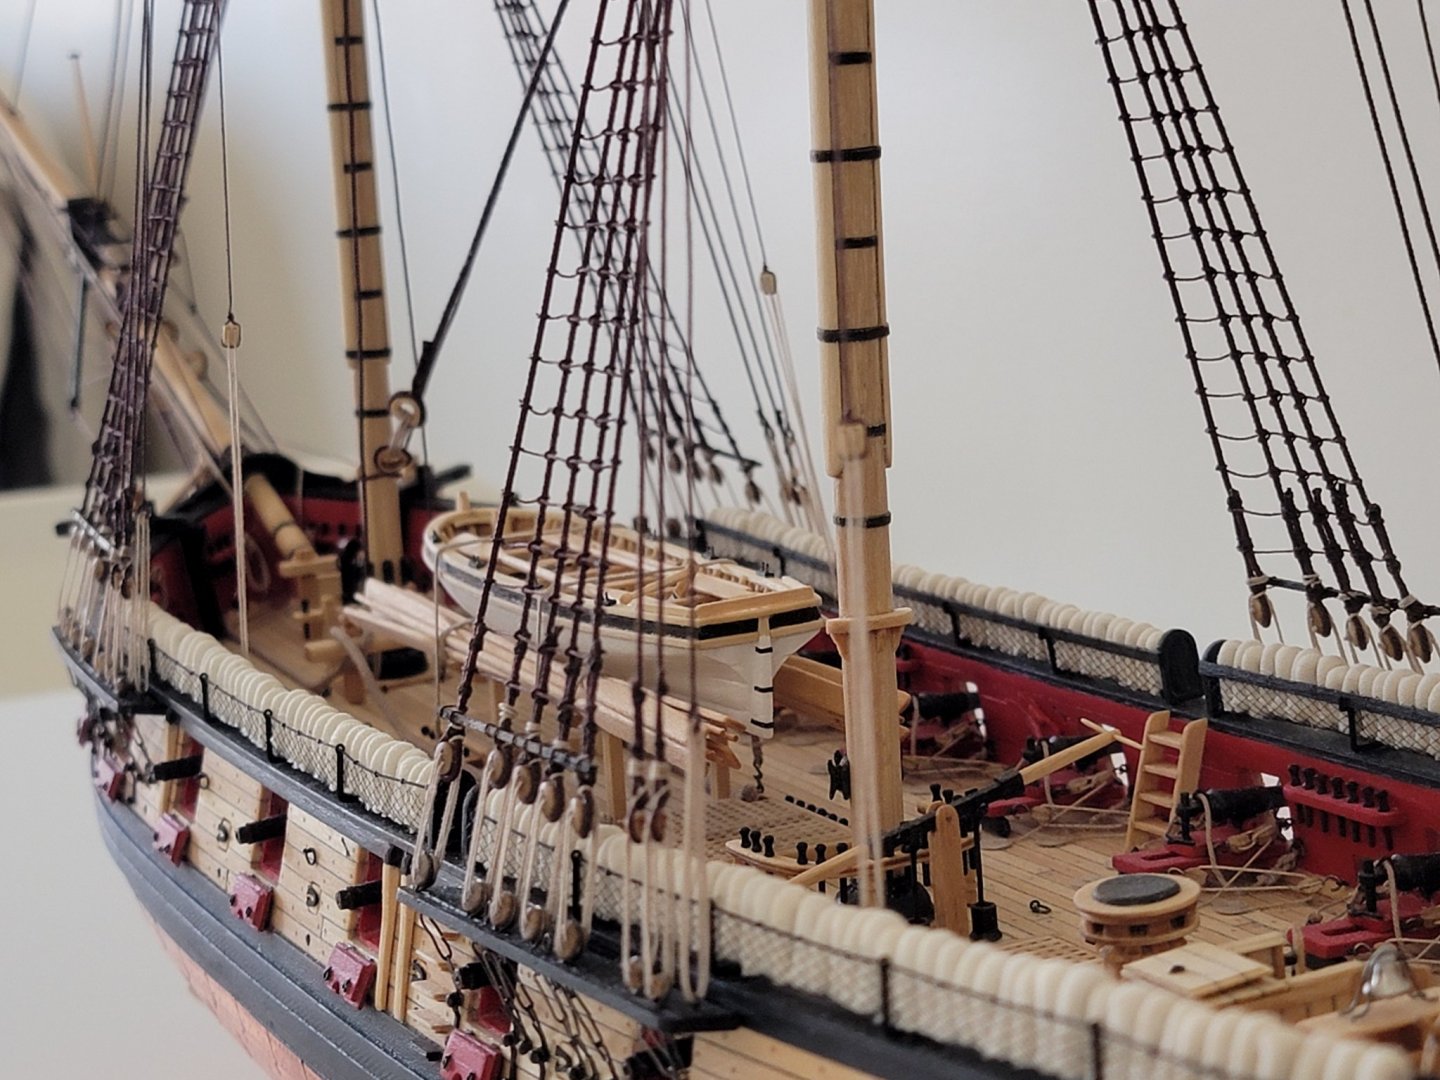
Amazing!! Nice work with the plating 🙂
-
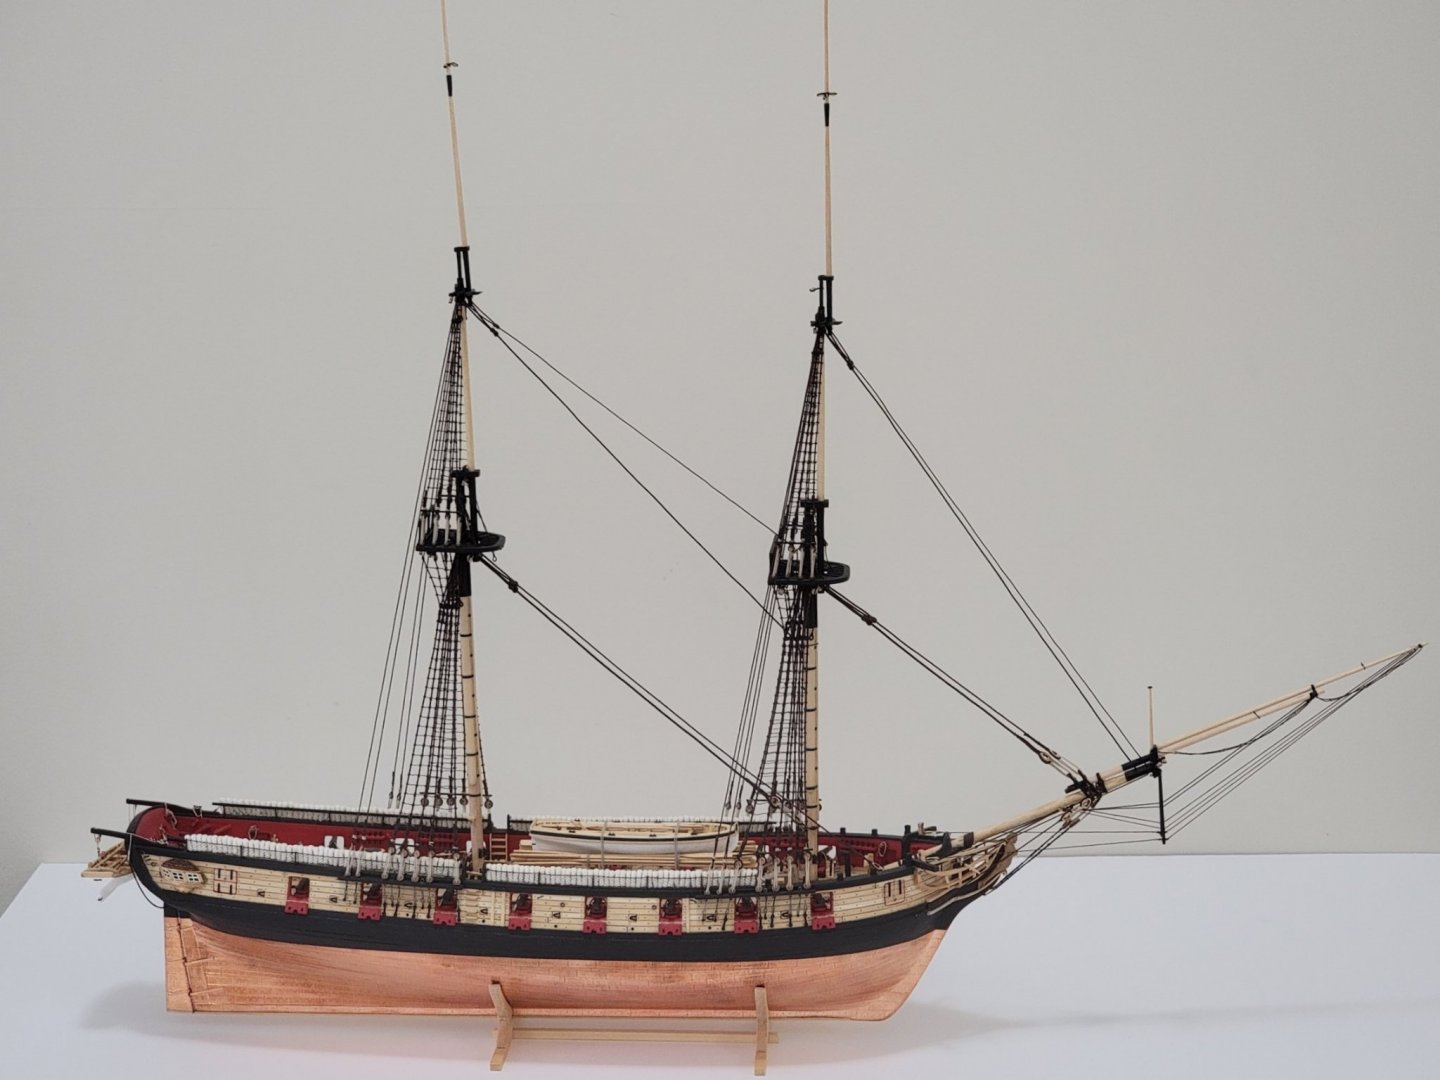
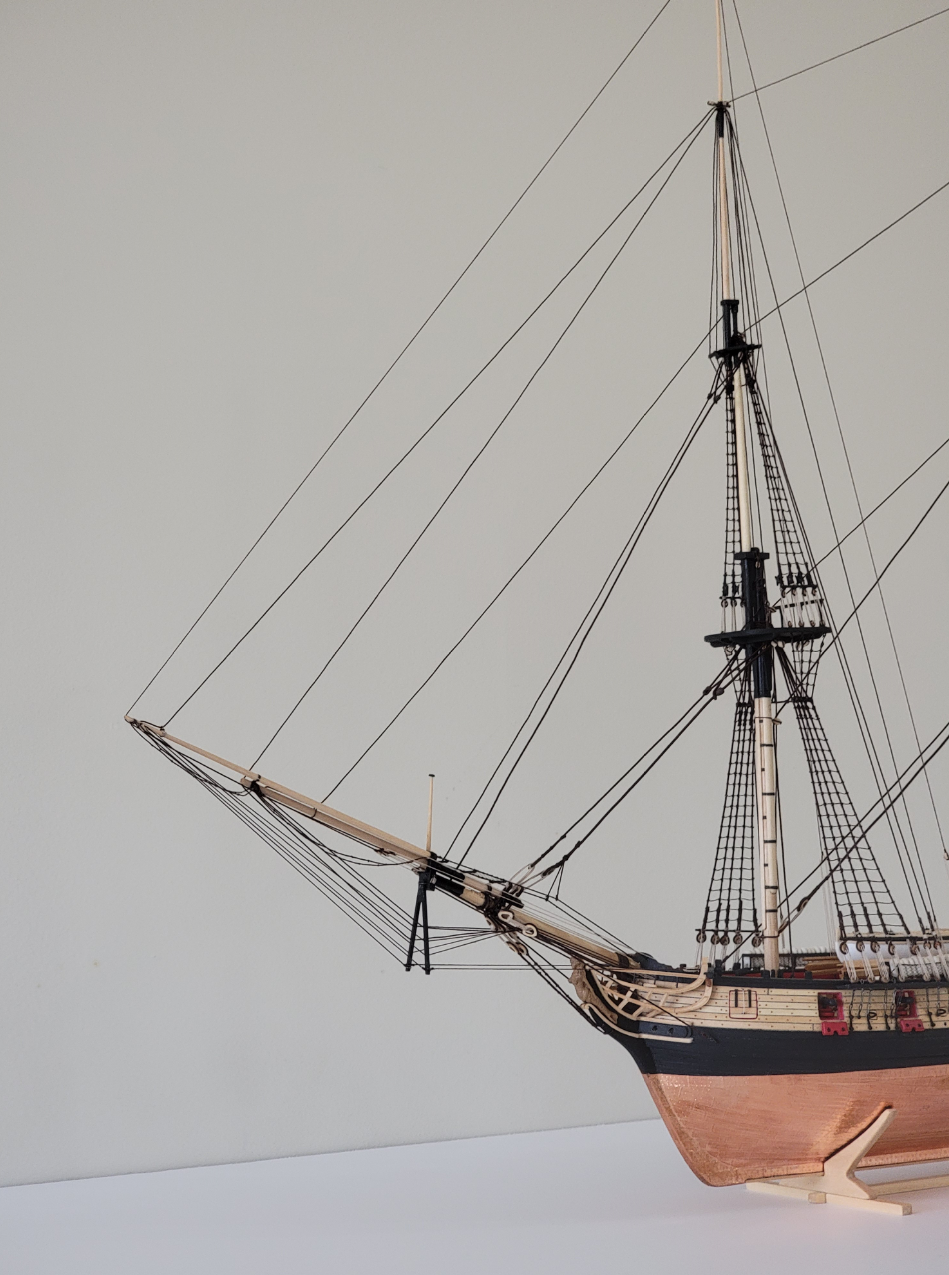
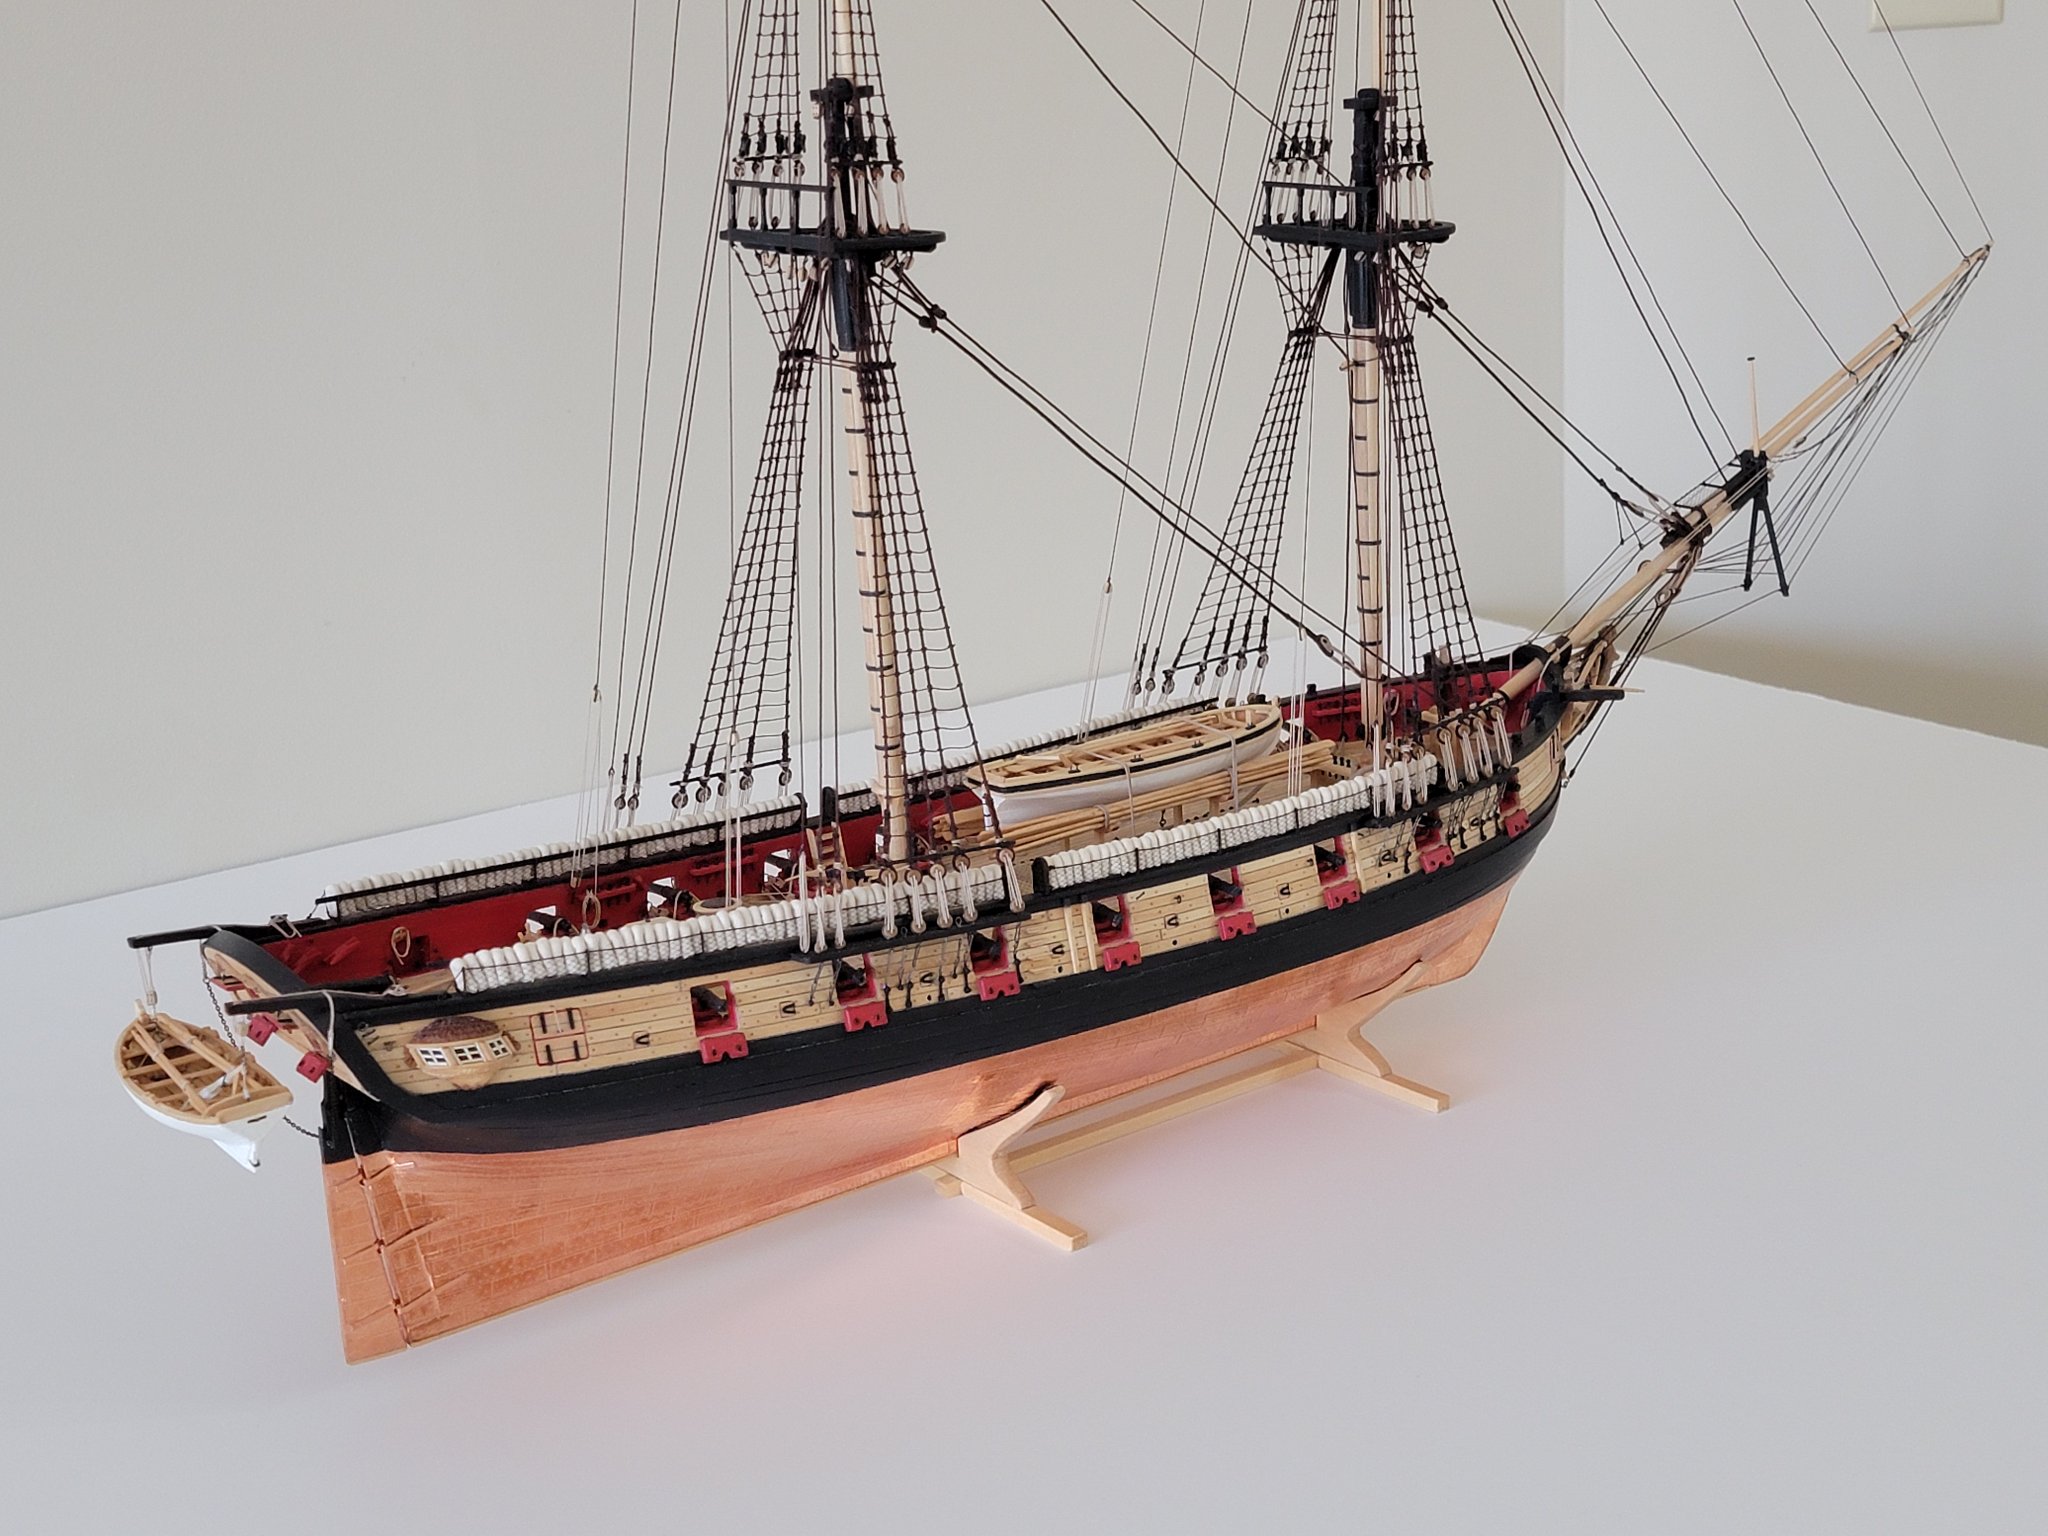
Thanks so much Thomas and Will!! I agree, I can't believe how much of a difference the standing rigging makes to the looks of the ship. I can't wait to see how the ship will look once the yards are all made and rigged!
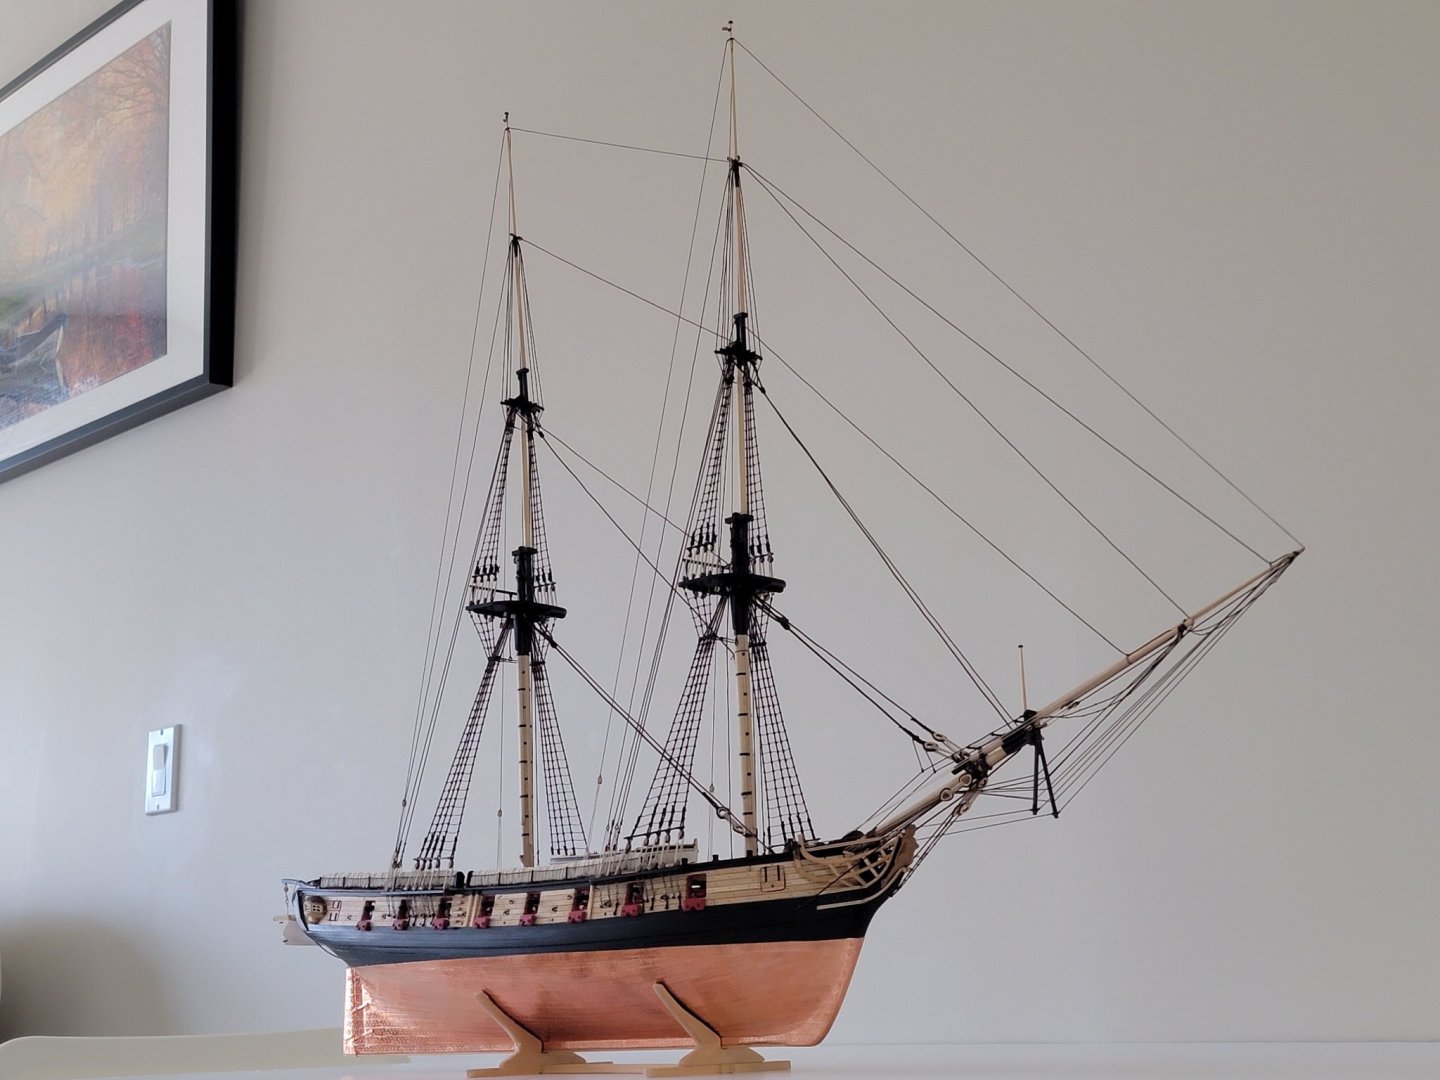
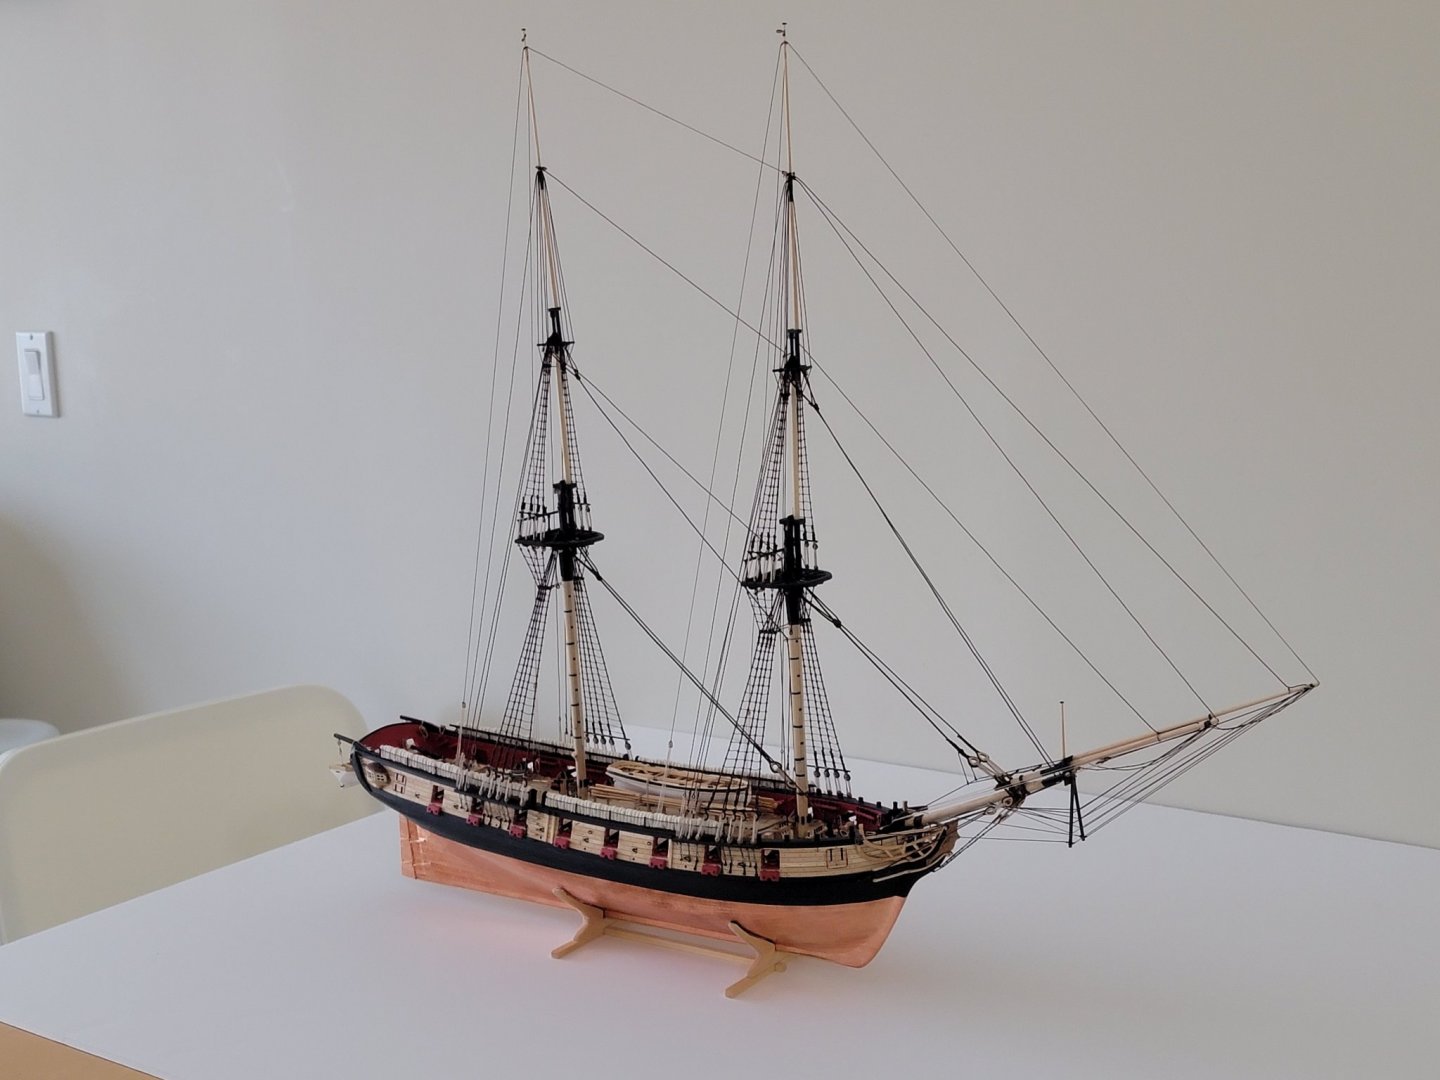
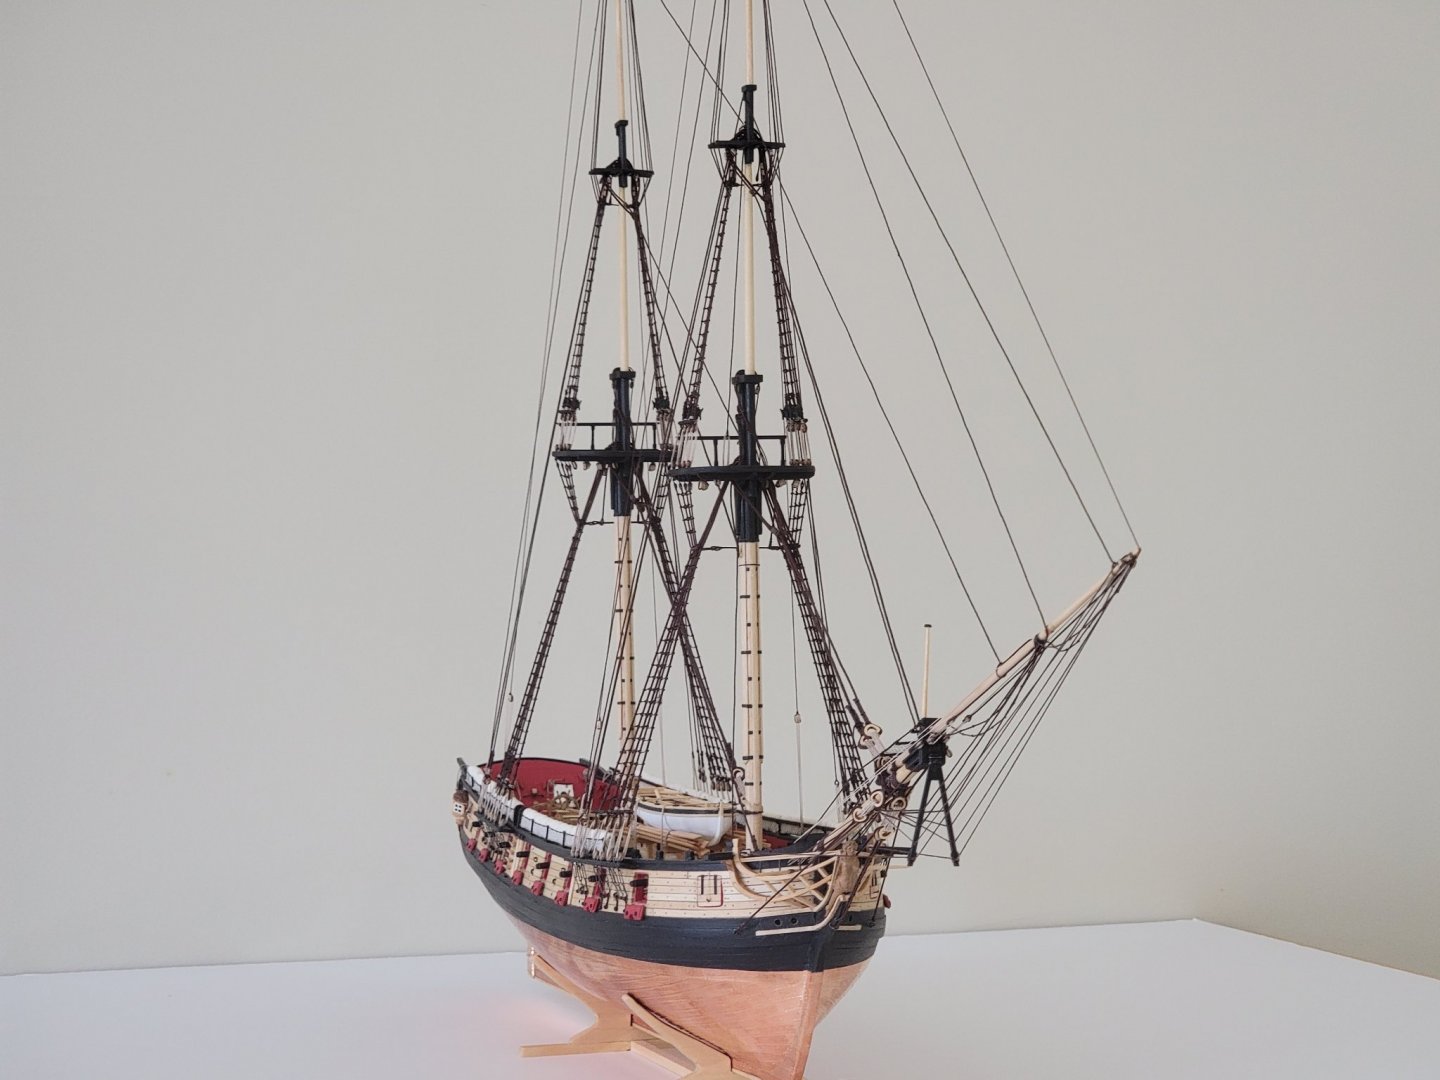
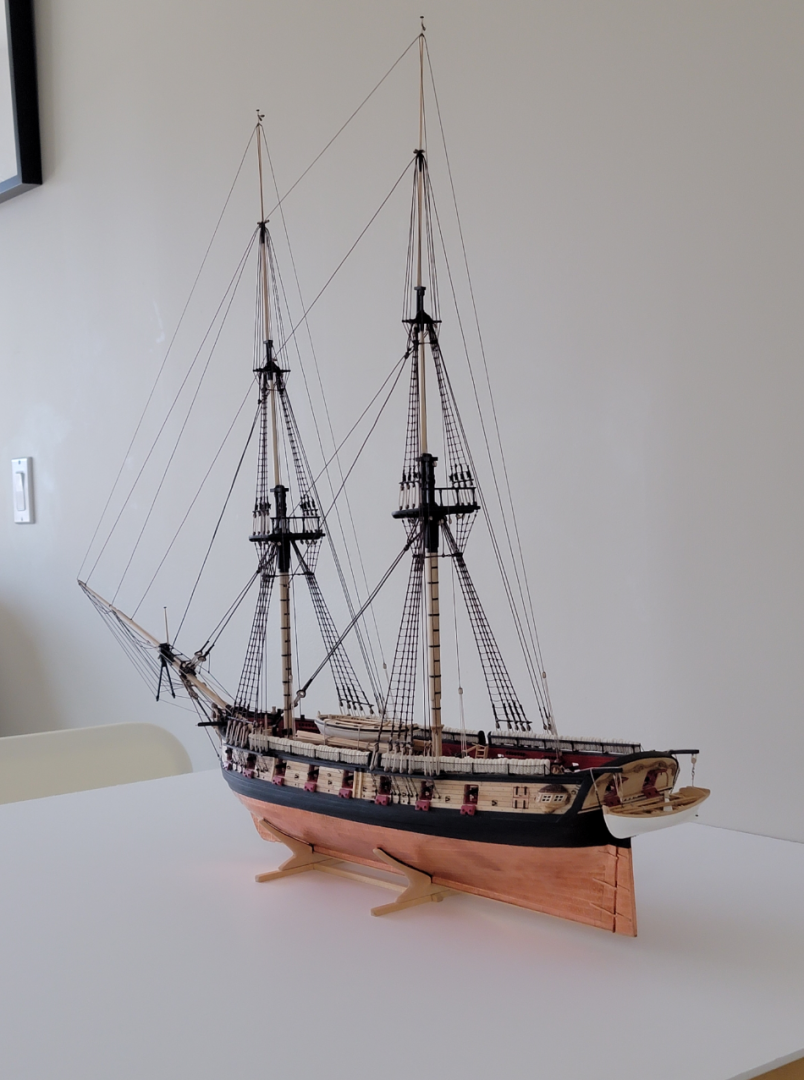
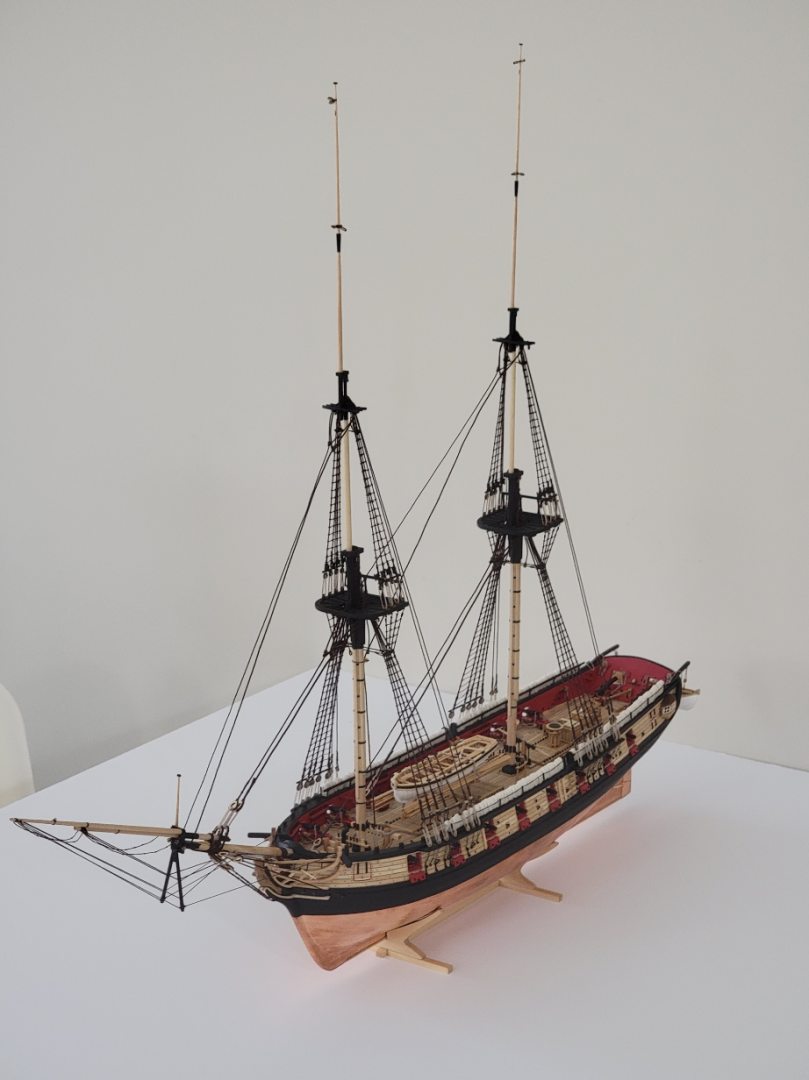
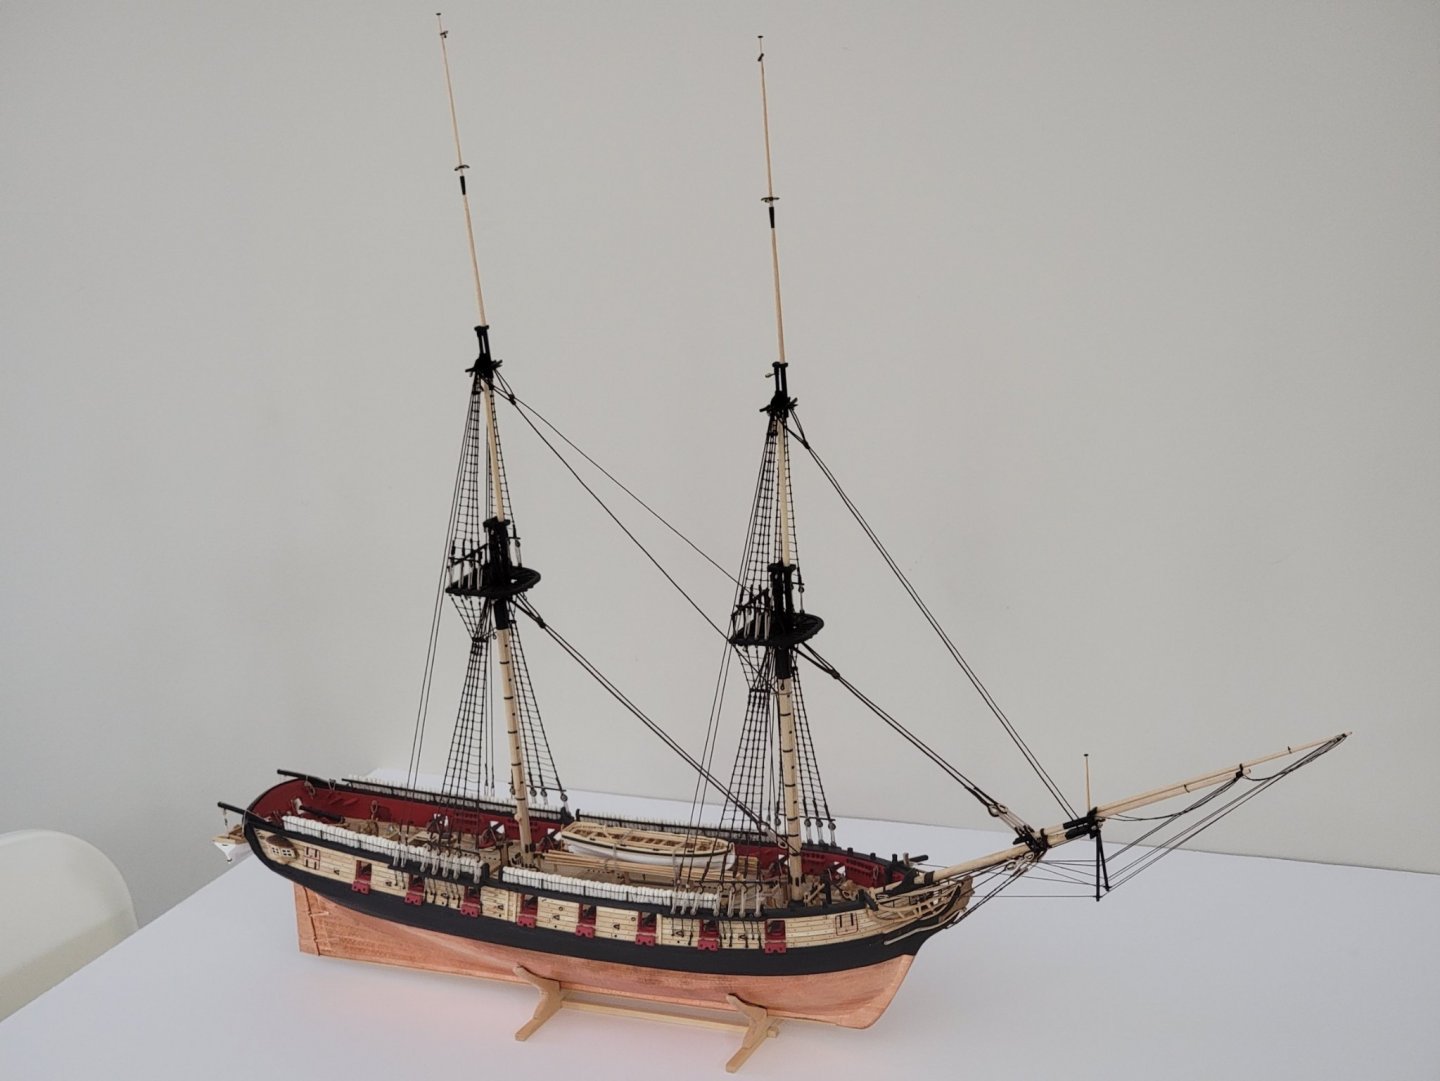
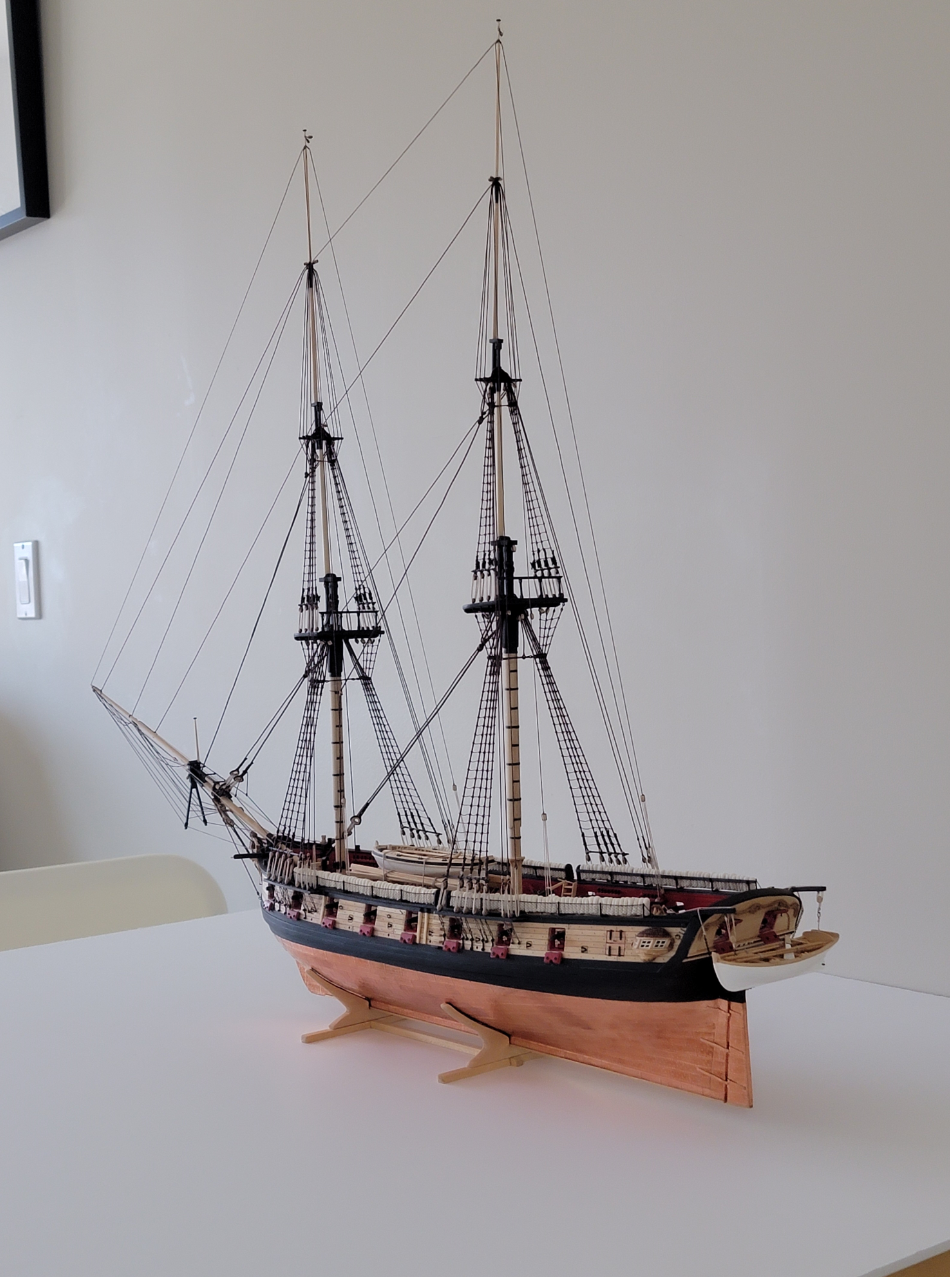
Standing rigging is finally finished! Here are some pics to mark the completion of this chapter:


.thumb.jpg.5119f2622b722277fe1bee9292dd728a.jpg)


And some pics of the rope coils (these were harder/trickier to make than the ones on cleats, at least for me...). I again followed Ed Tosti's method to make these from his Young America build.

-
Thanks so much for the motivating comments, Bradley, Steven, Michael, and David. They are very much appreciated! Thanks all for the likes as well and for looking in 🙂
Pictures of the display case will definitely be interesting to me, David. As I slowly approach the finish line, I'm wondering how and where I'll display her.
Anyways, I'm very close to finishing up the standing rigging. Thought I'd share a few pics of the messy 'workshop' before completion of this chapter.
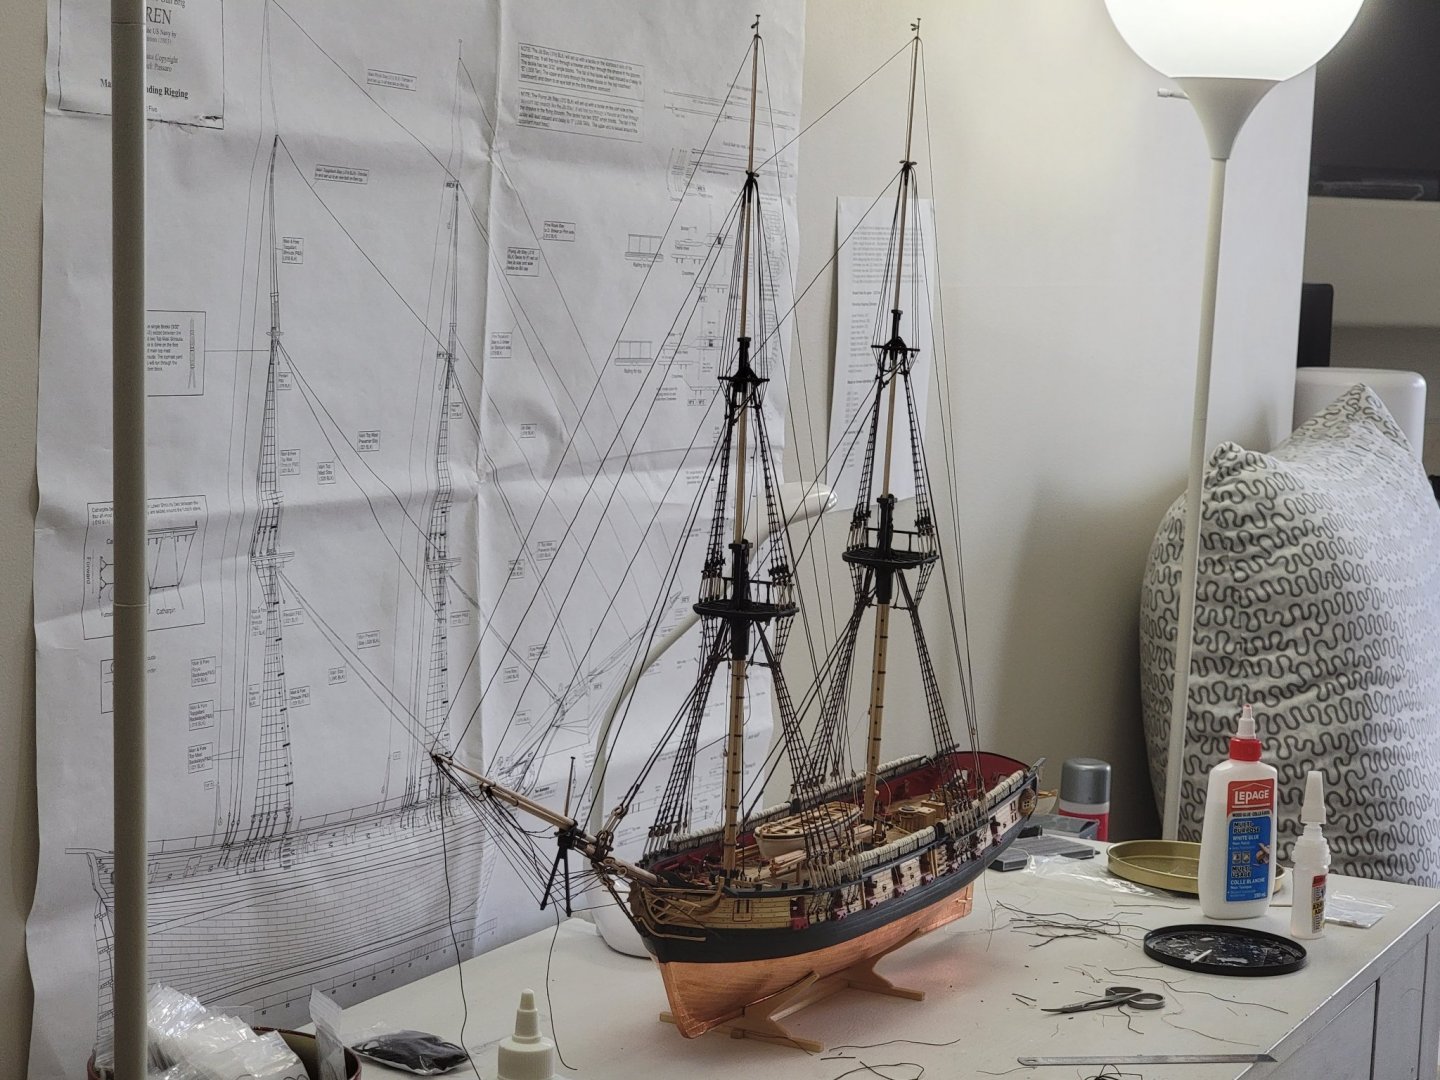
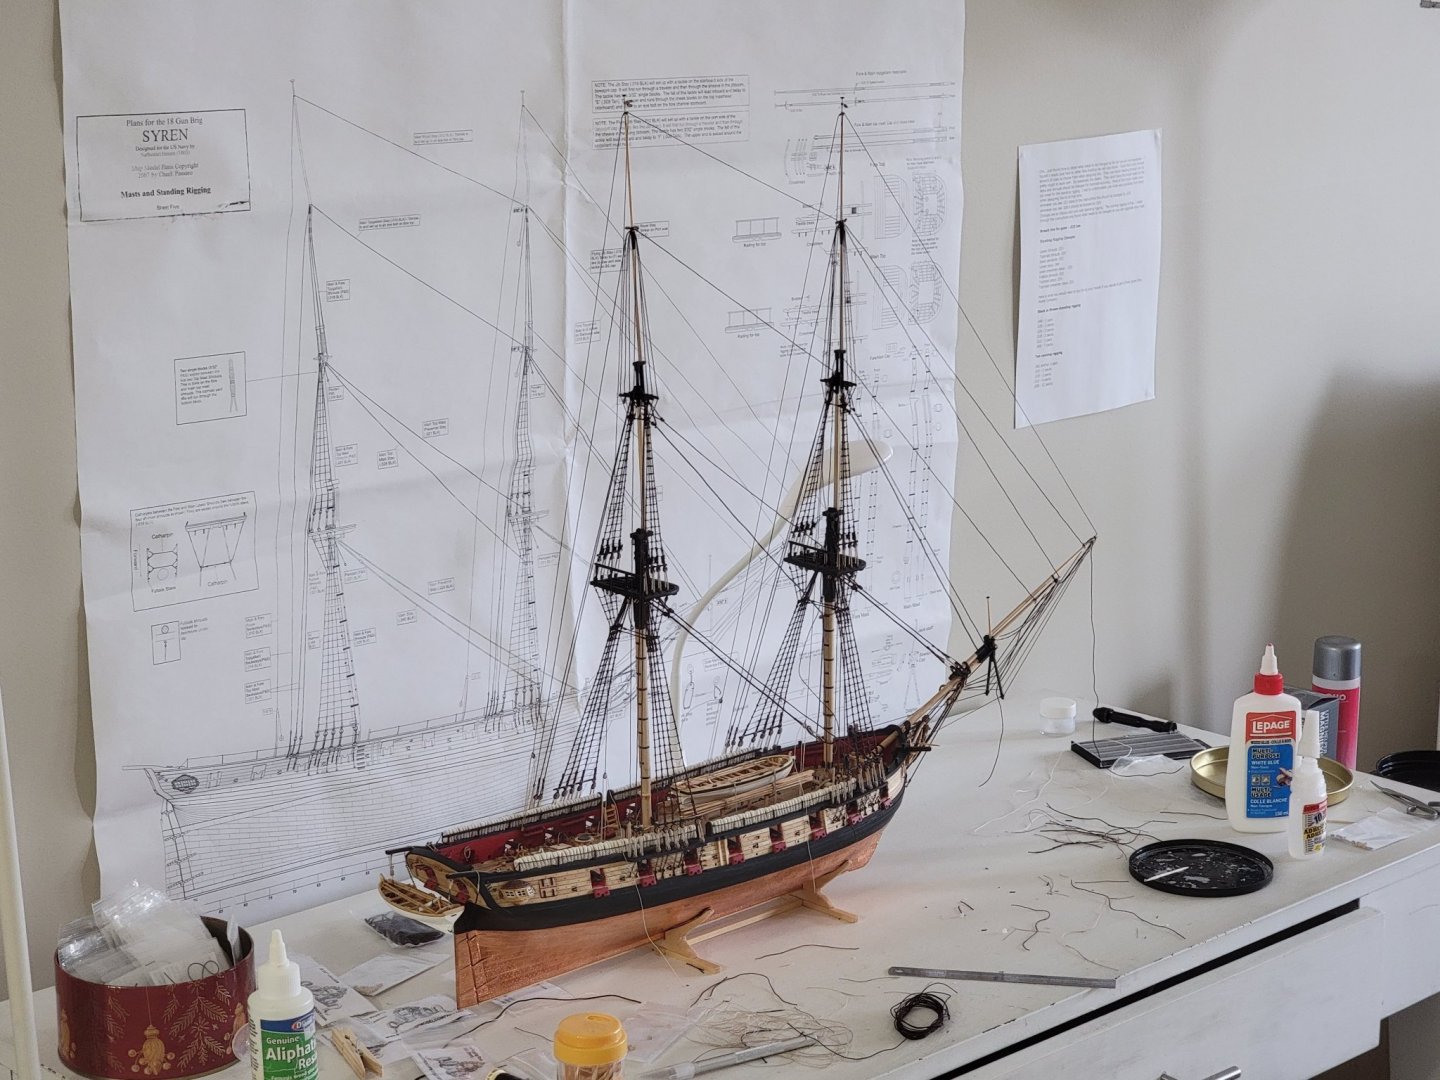
And took down the plan in preparation of running rigging 😀
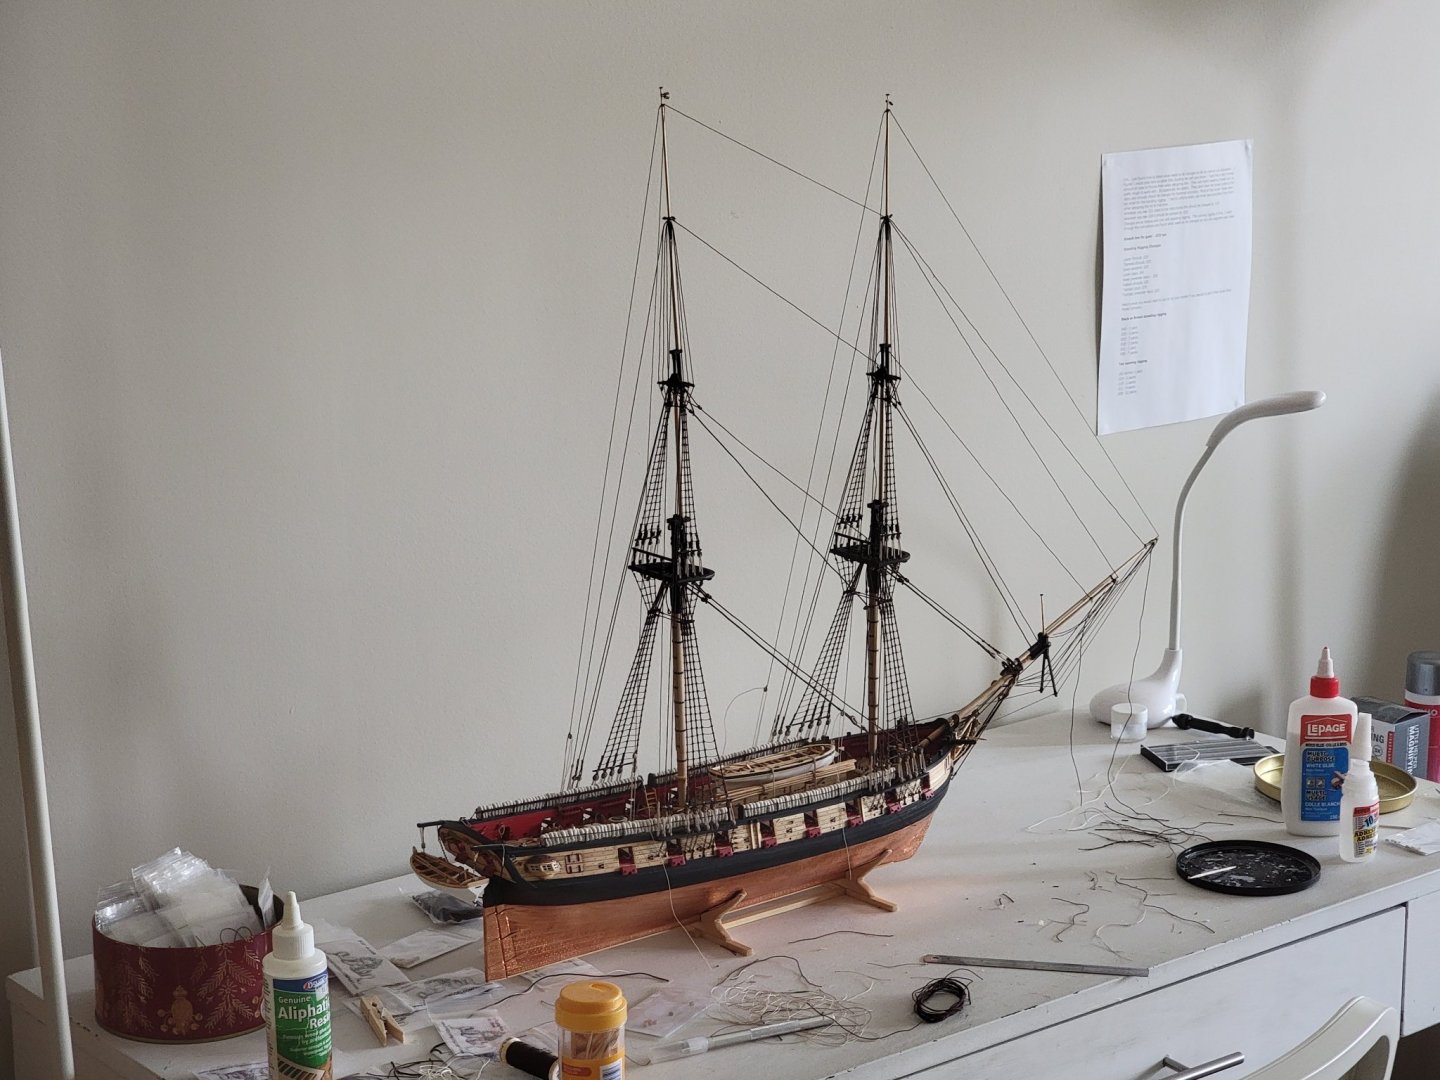
I just need to belay the royal backstays, secure the jib stay and flying jib stay with the tackles and their respective inhauls for the travelers, and install the horses. I'll also finish up with the rope coils before moving on.
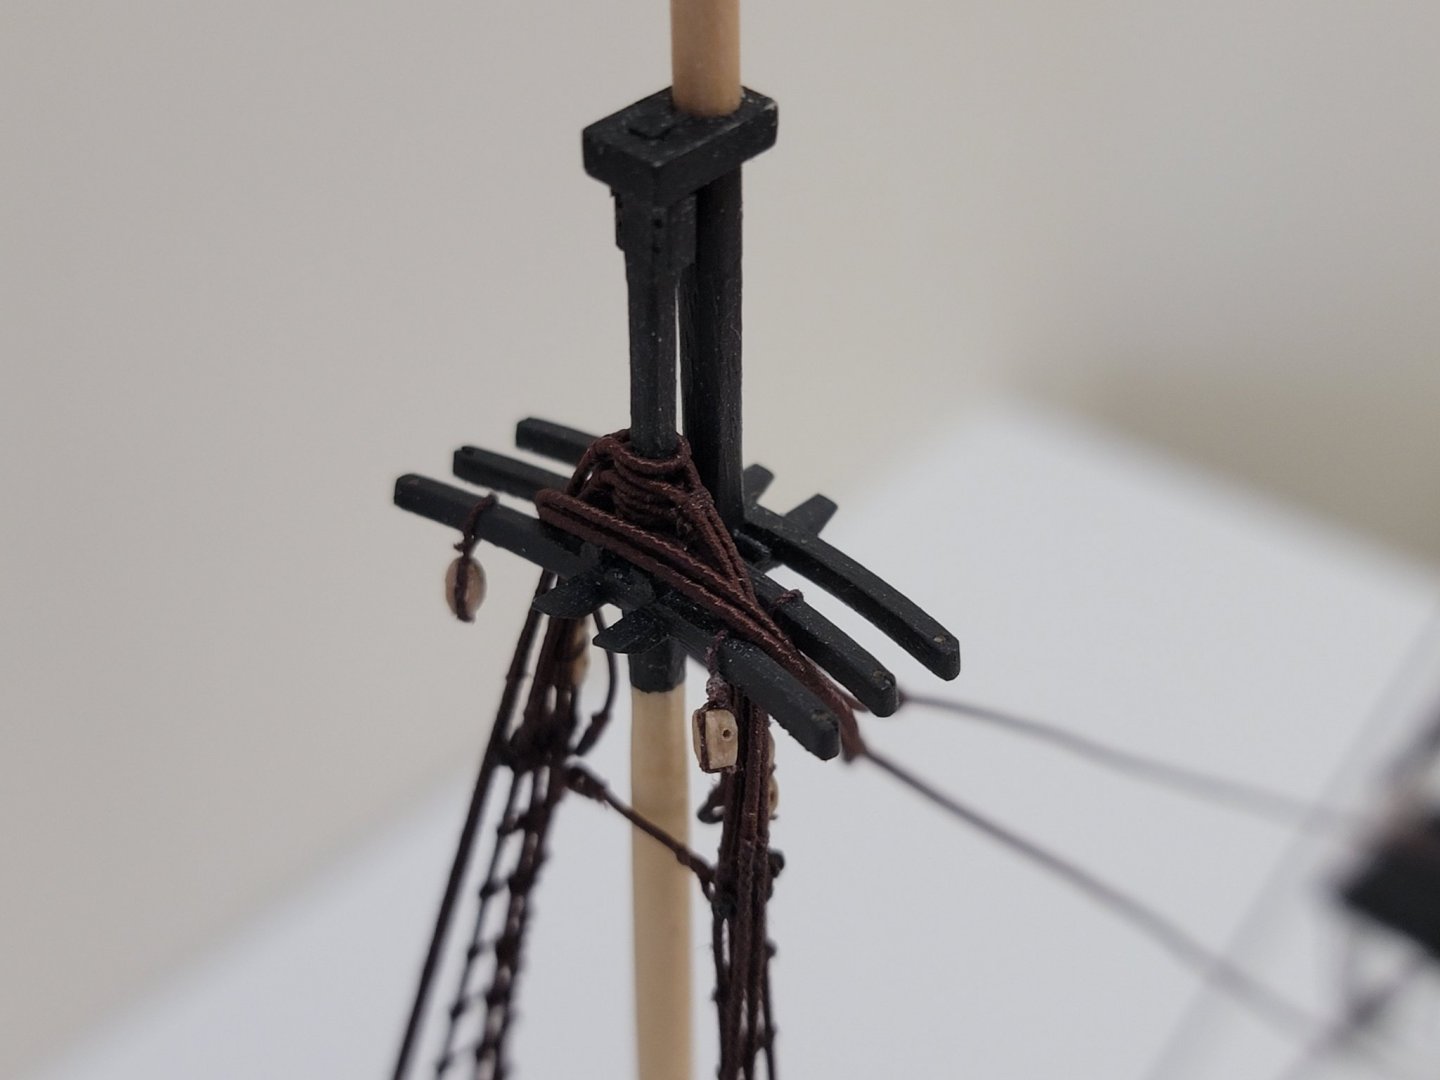
Also, I didnt realize there were two extra blocks needed for the gaff on the main top.... I read this on Peter's log a while back, but completely forgot about it. These are the blocks I'm talking about:
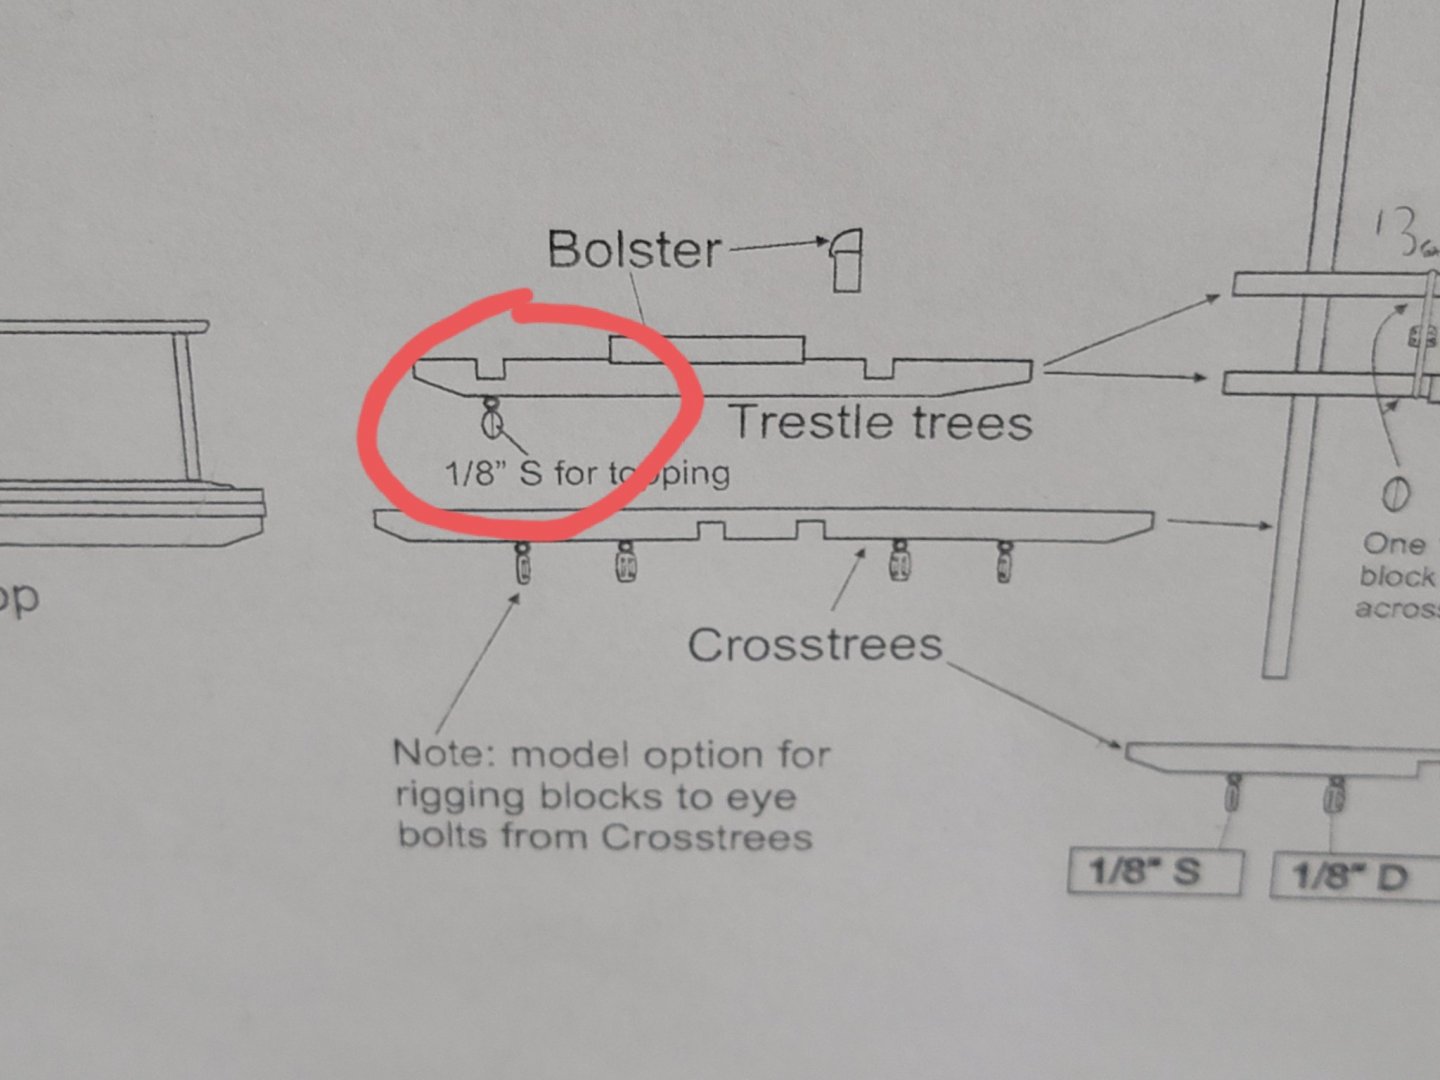
So once all these tasks are done, I'll post a series photos to mark this milestone of the build 😁. Again, this part of the build has been a blast! Seeing everything come together is very addicting 😄
-
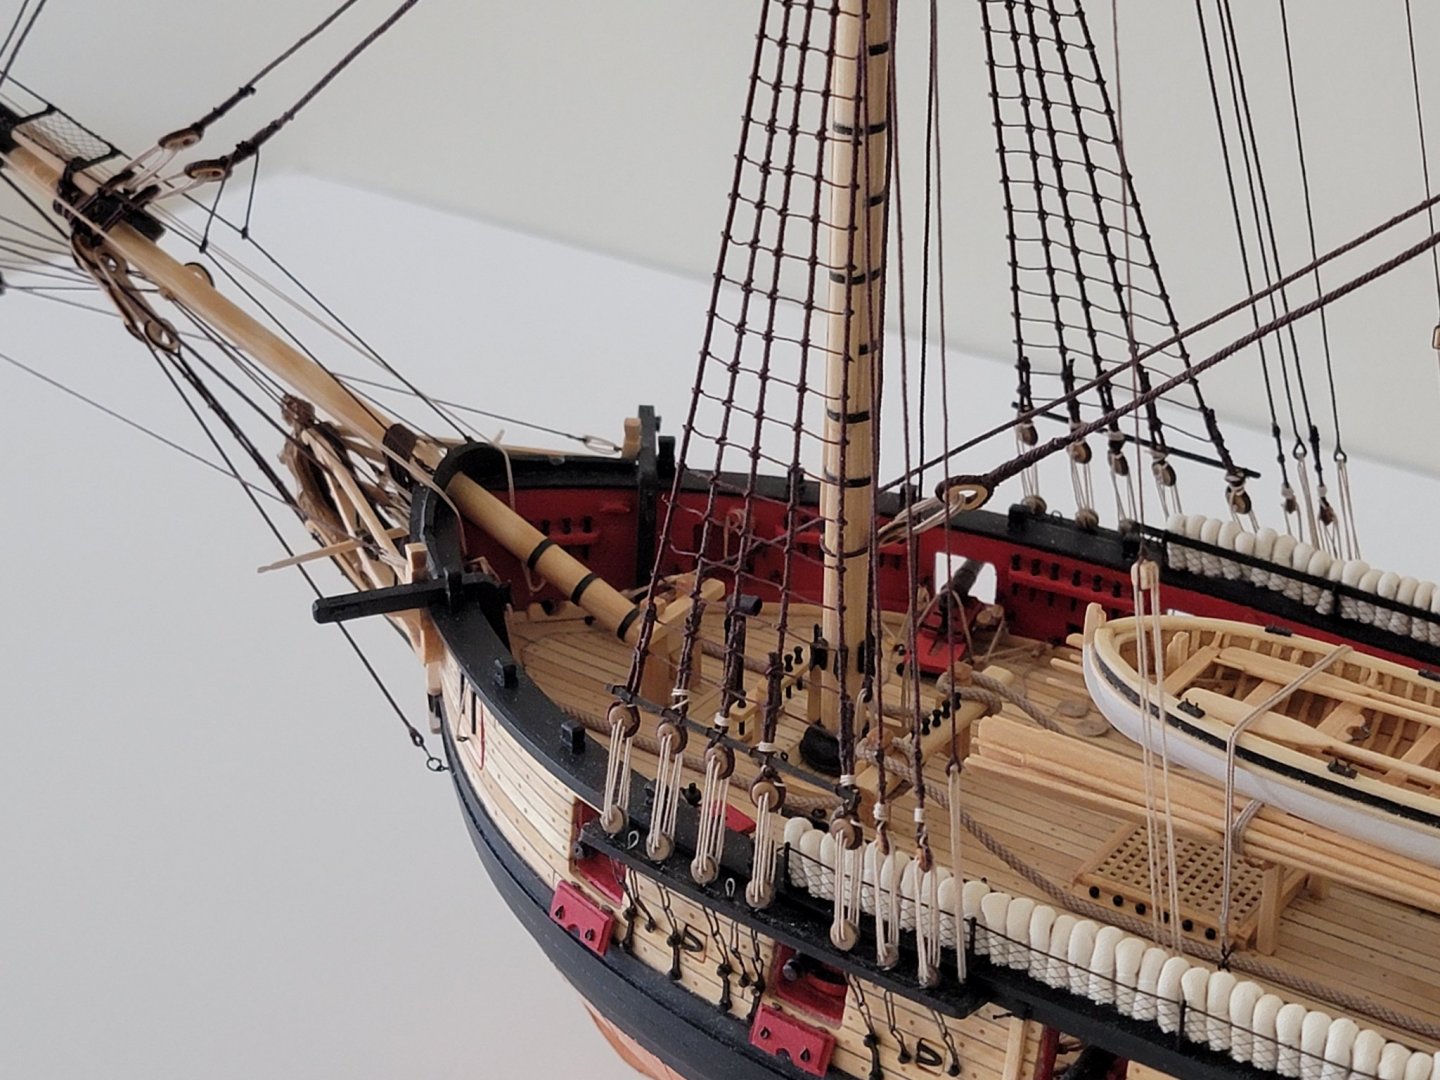
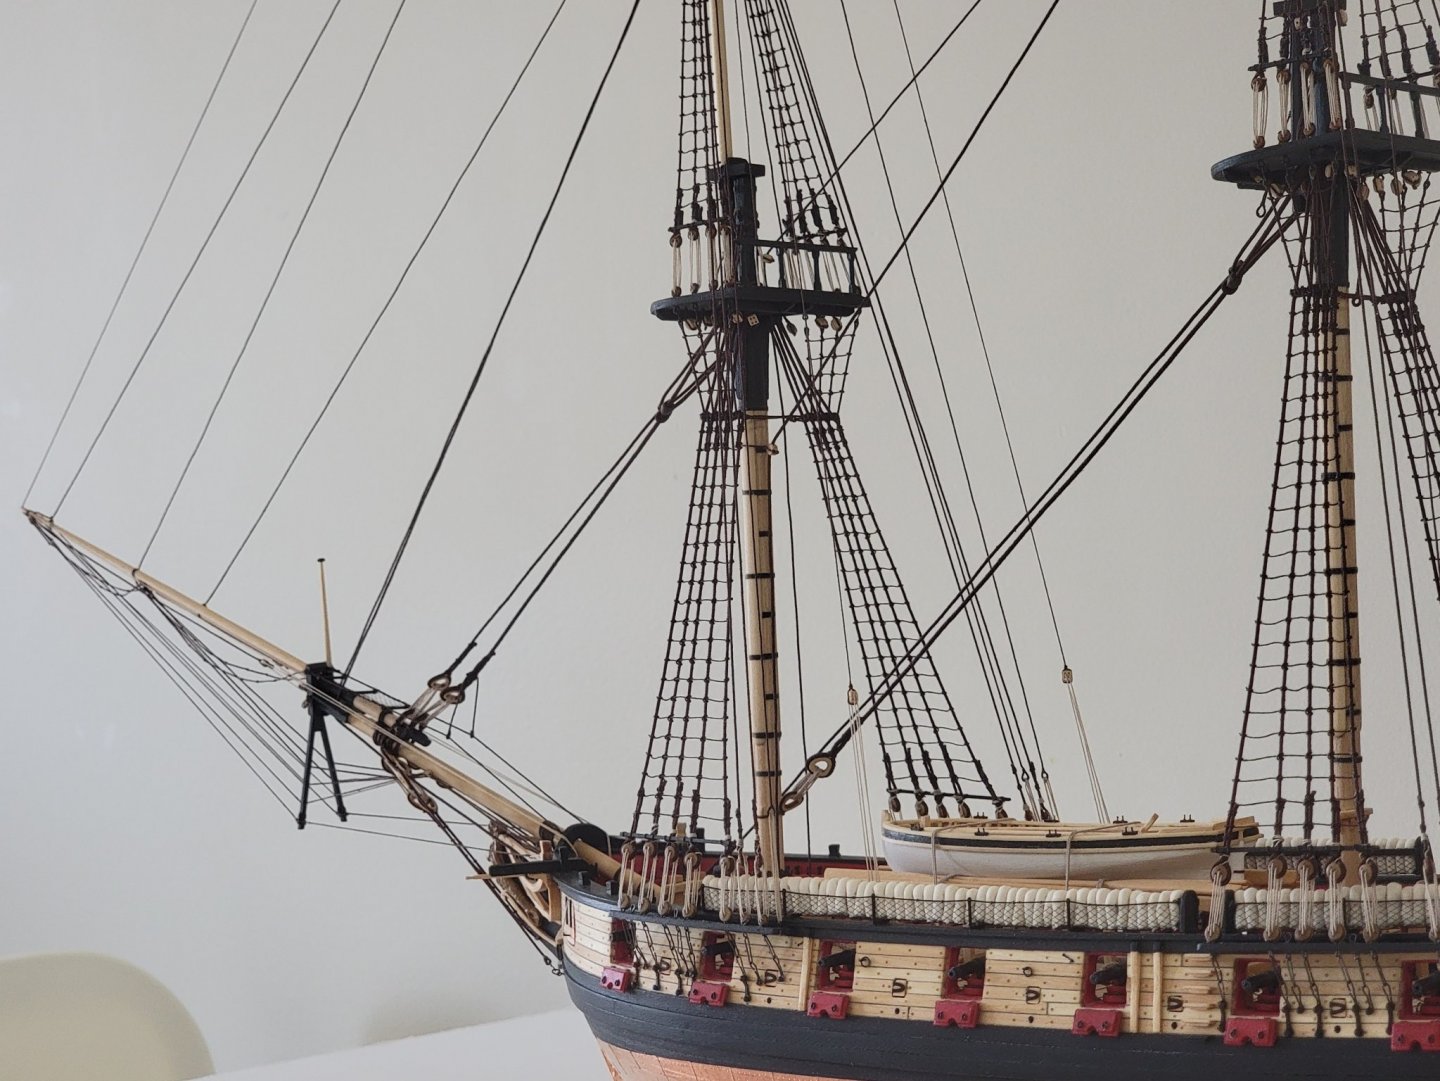
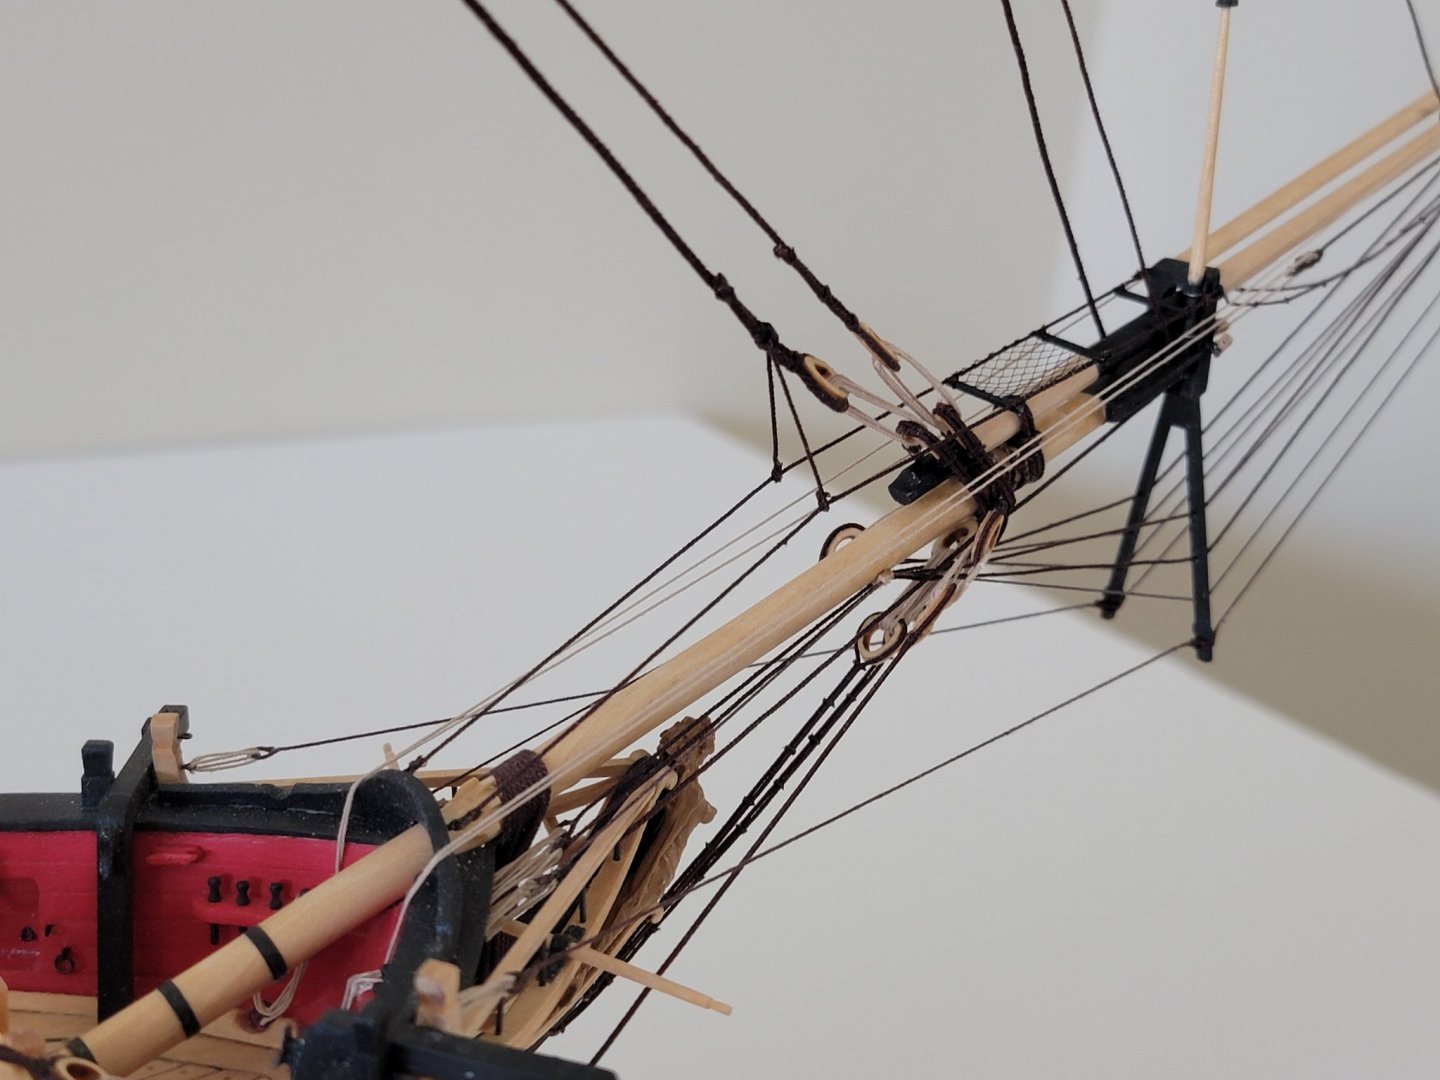
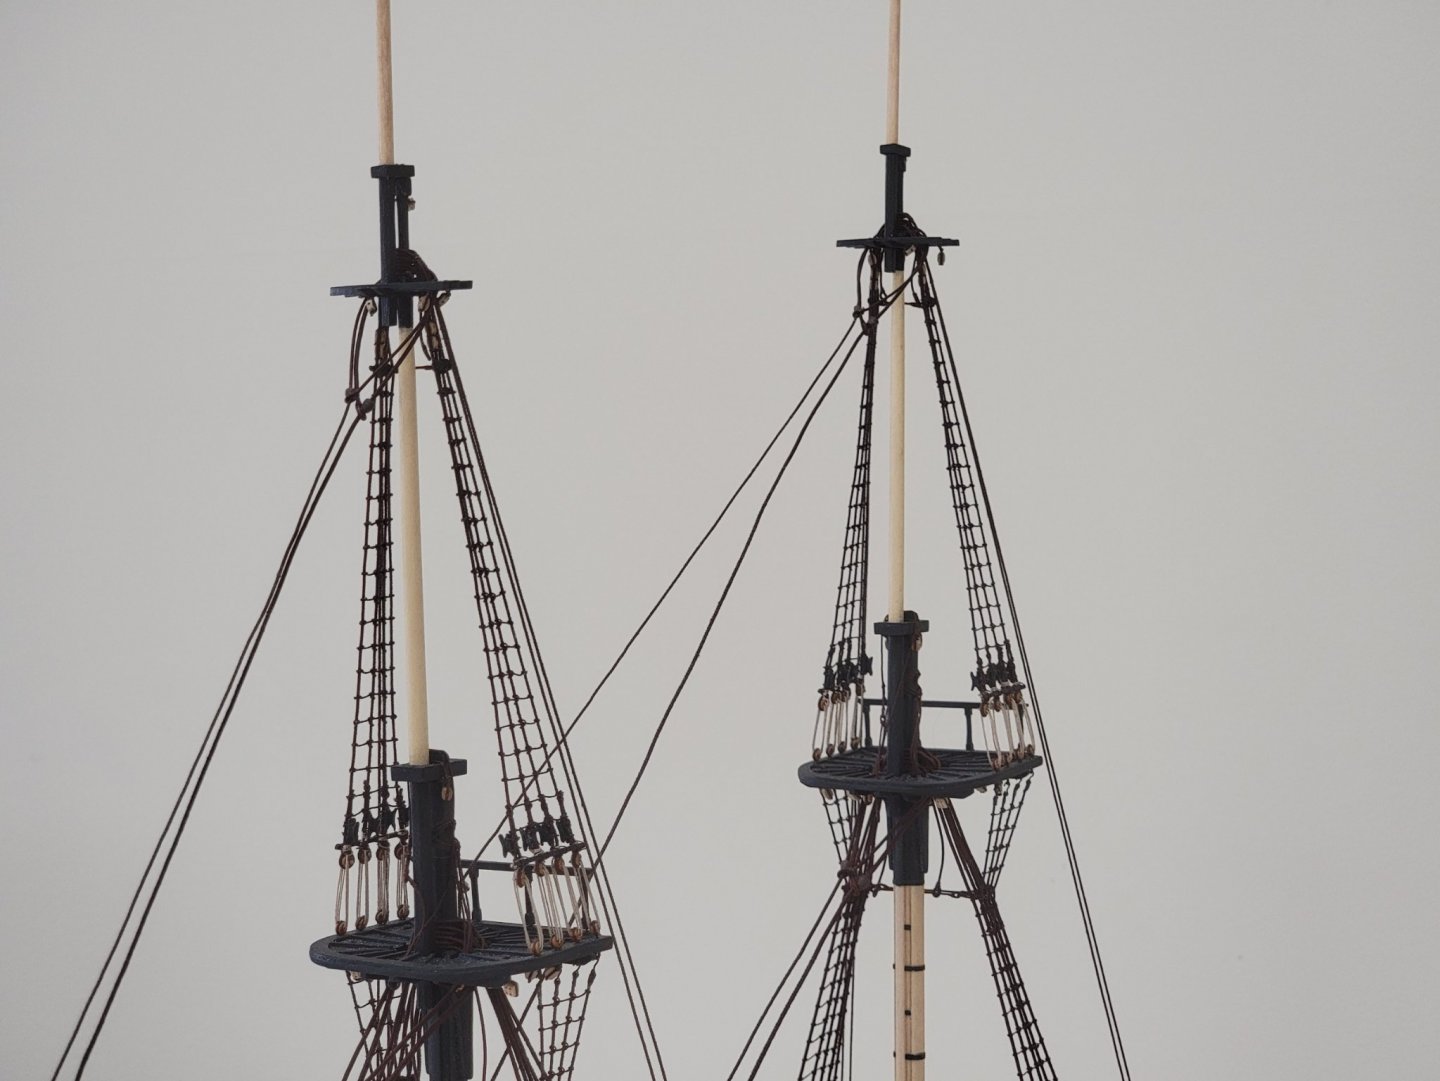
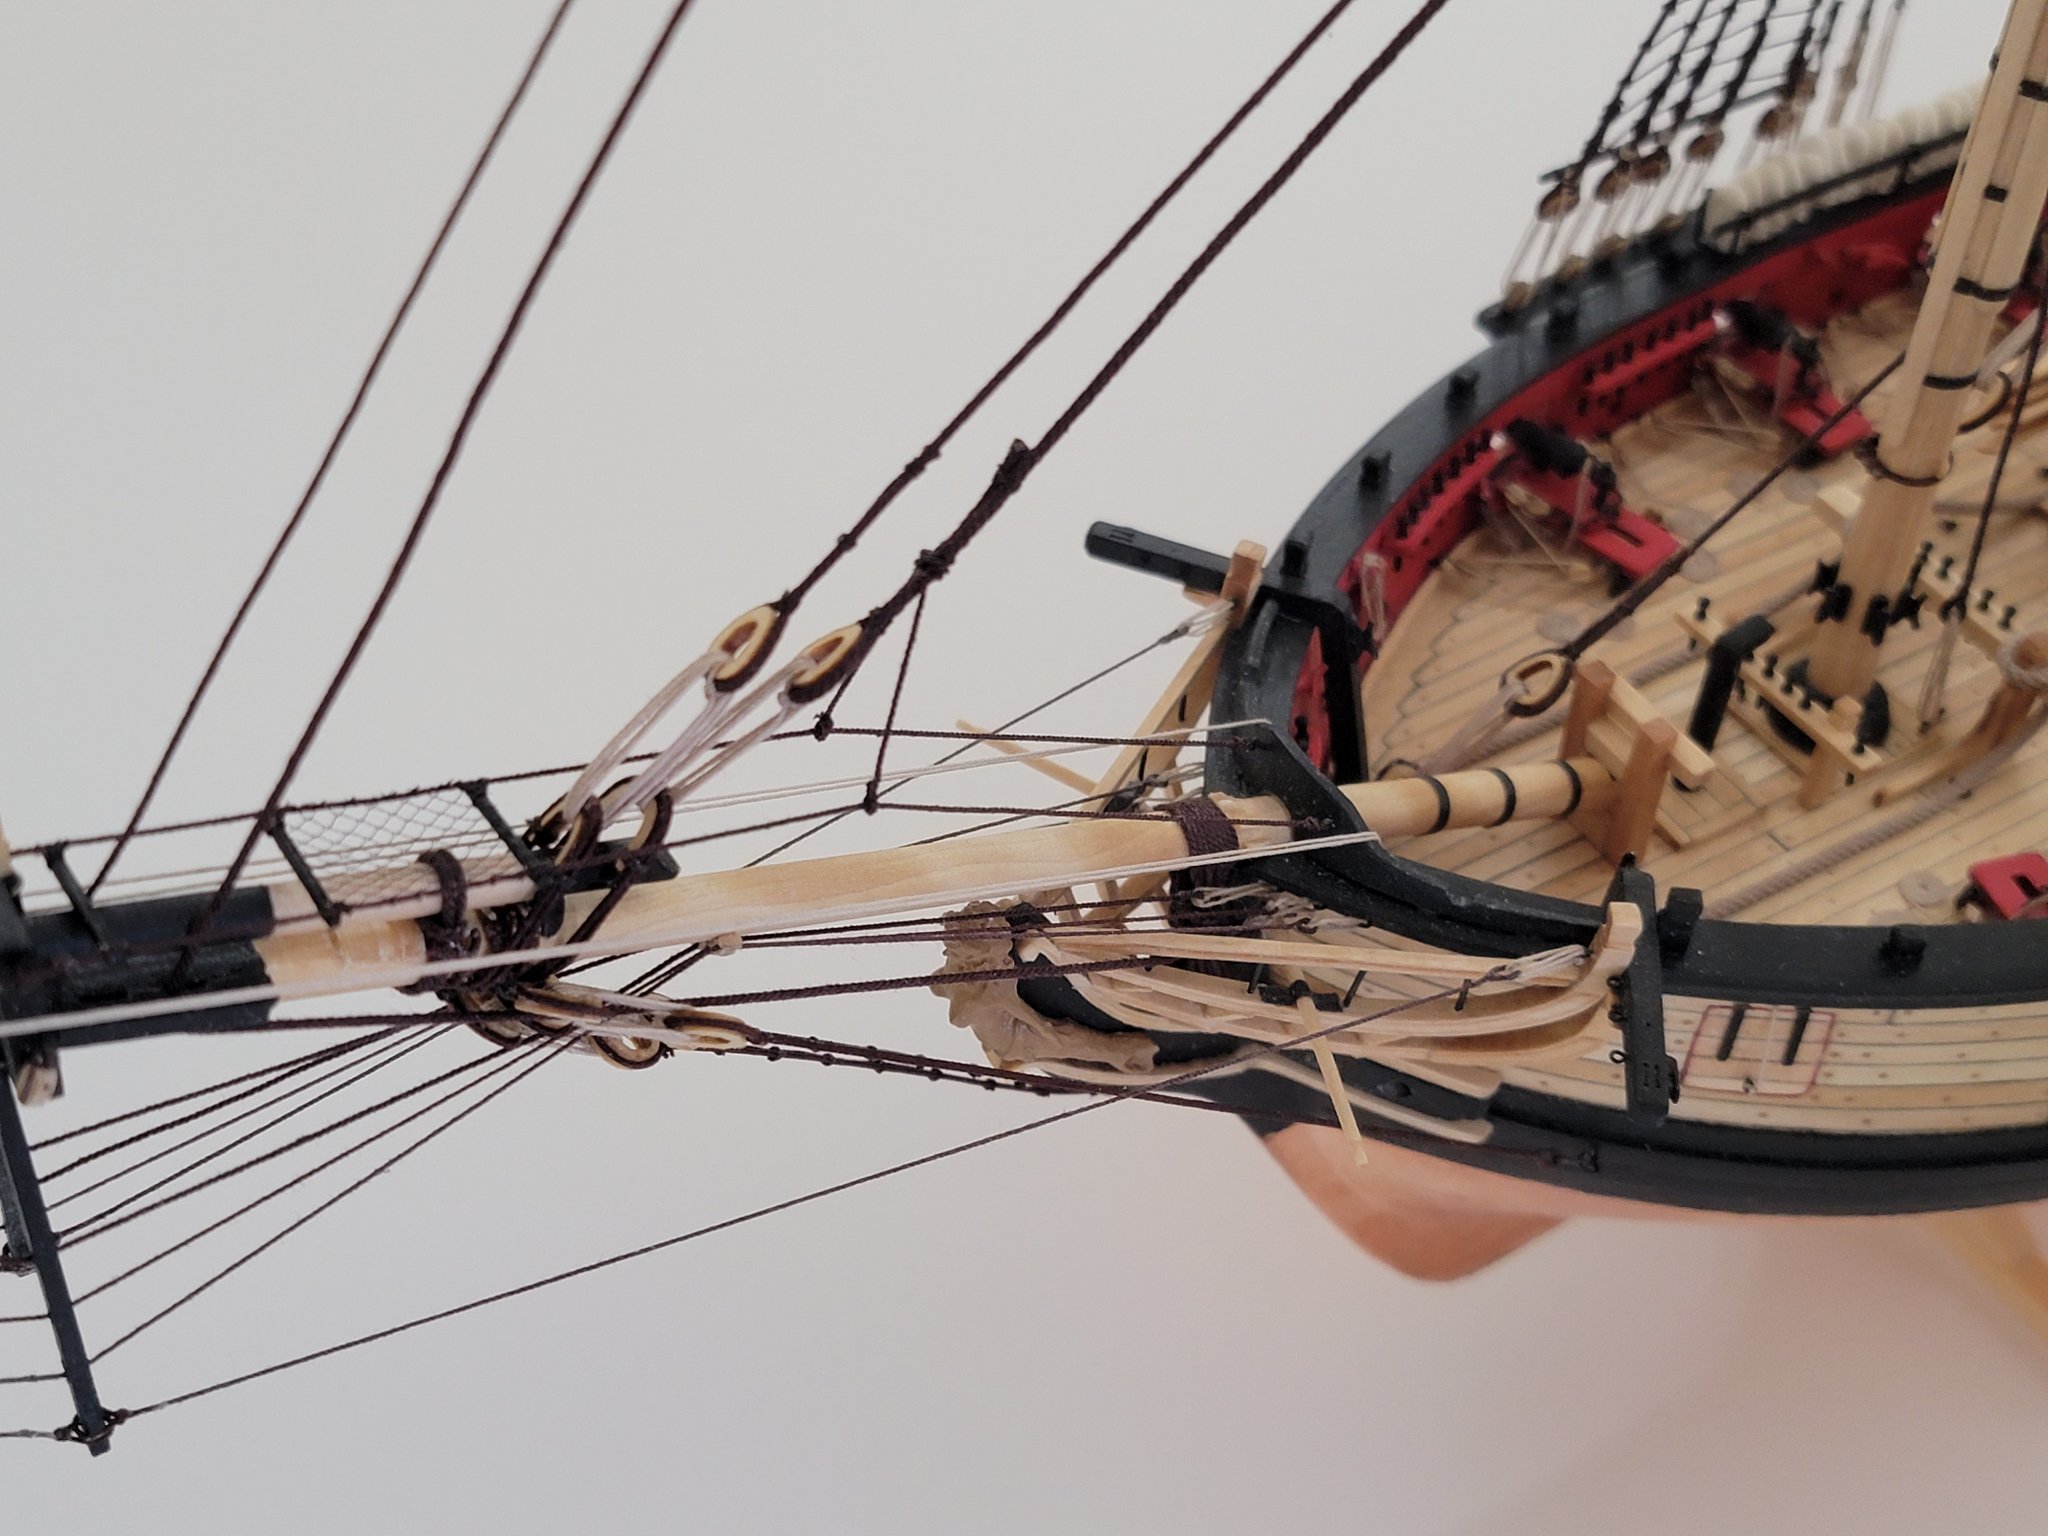
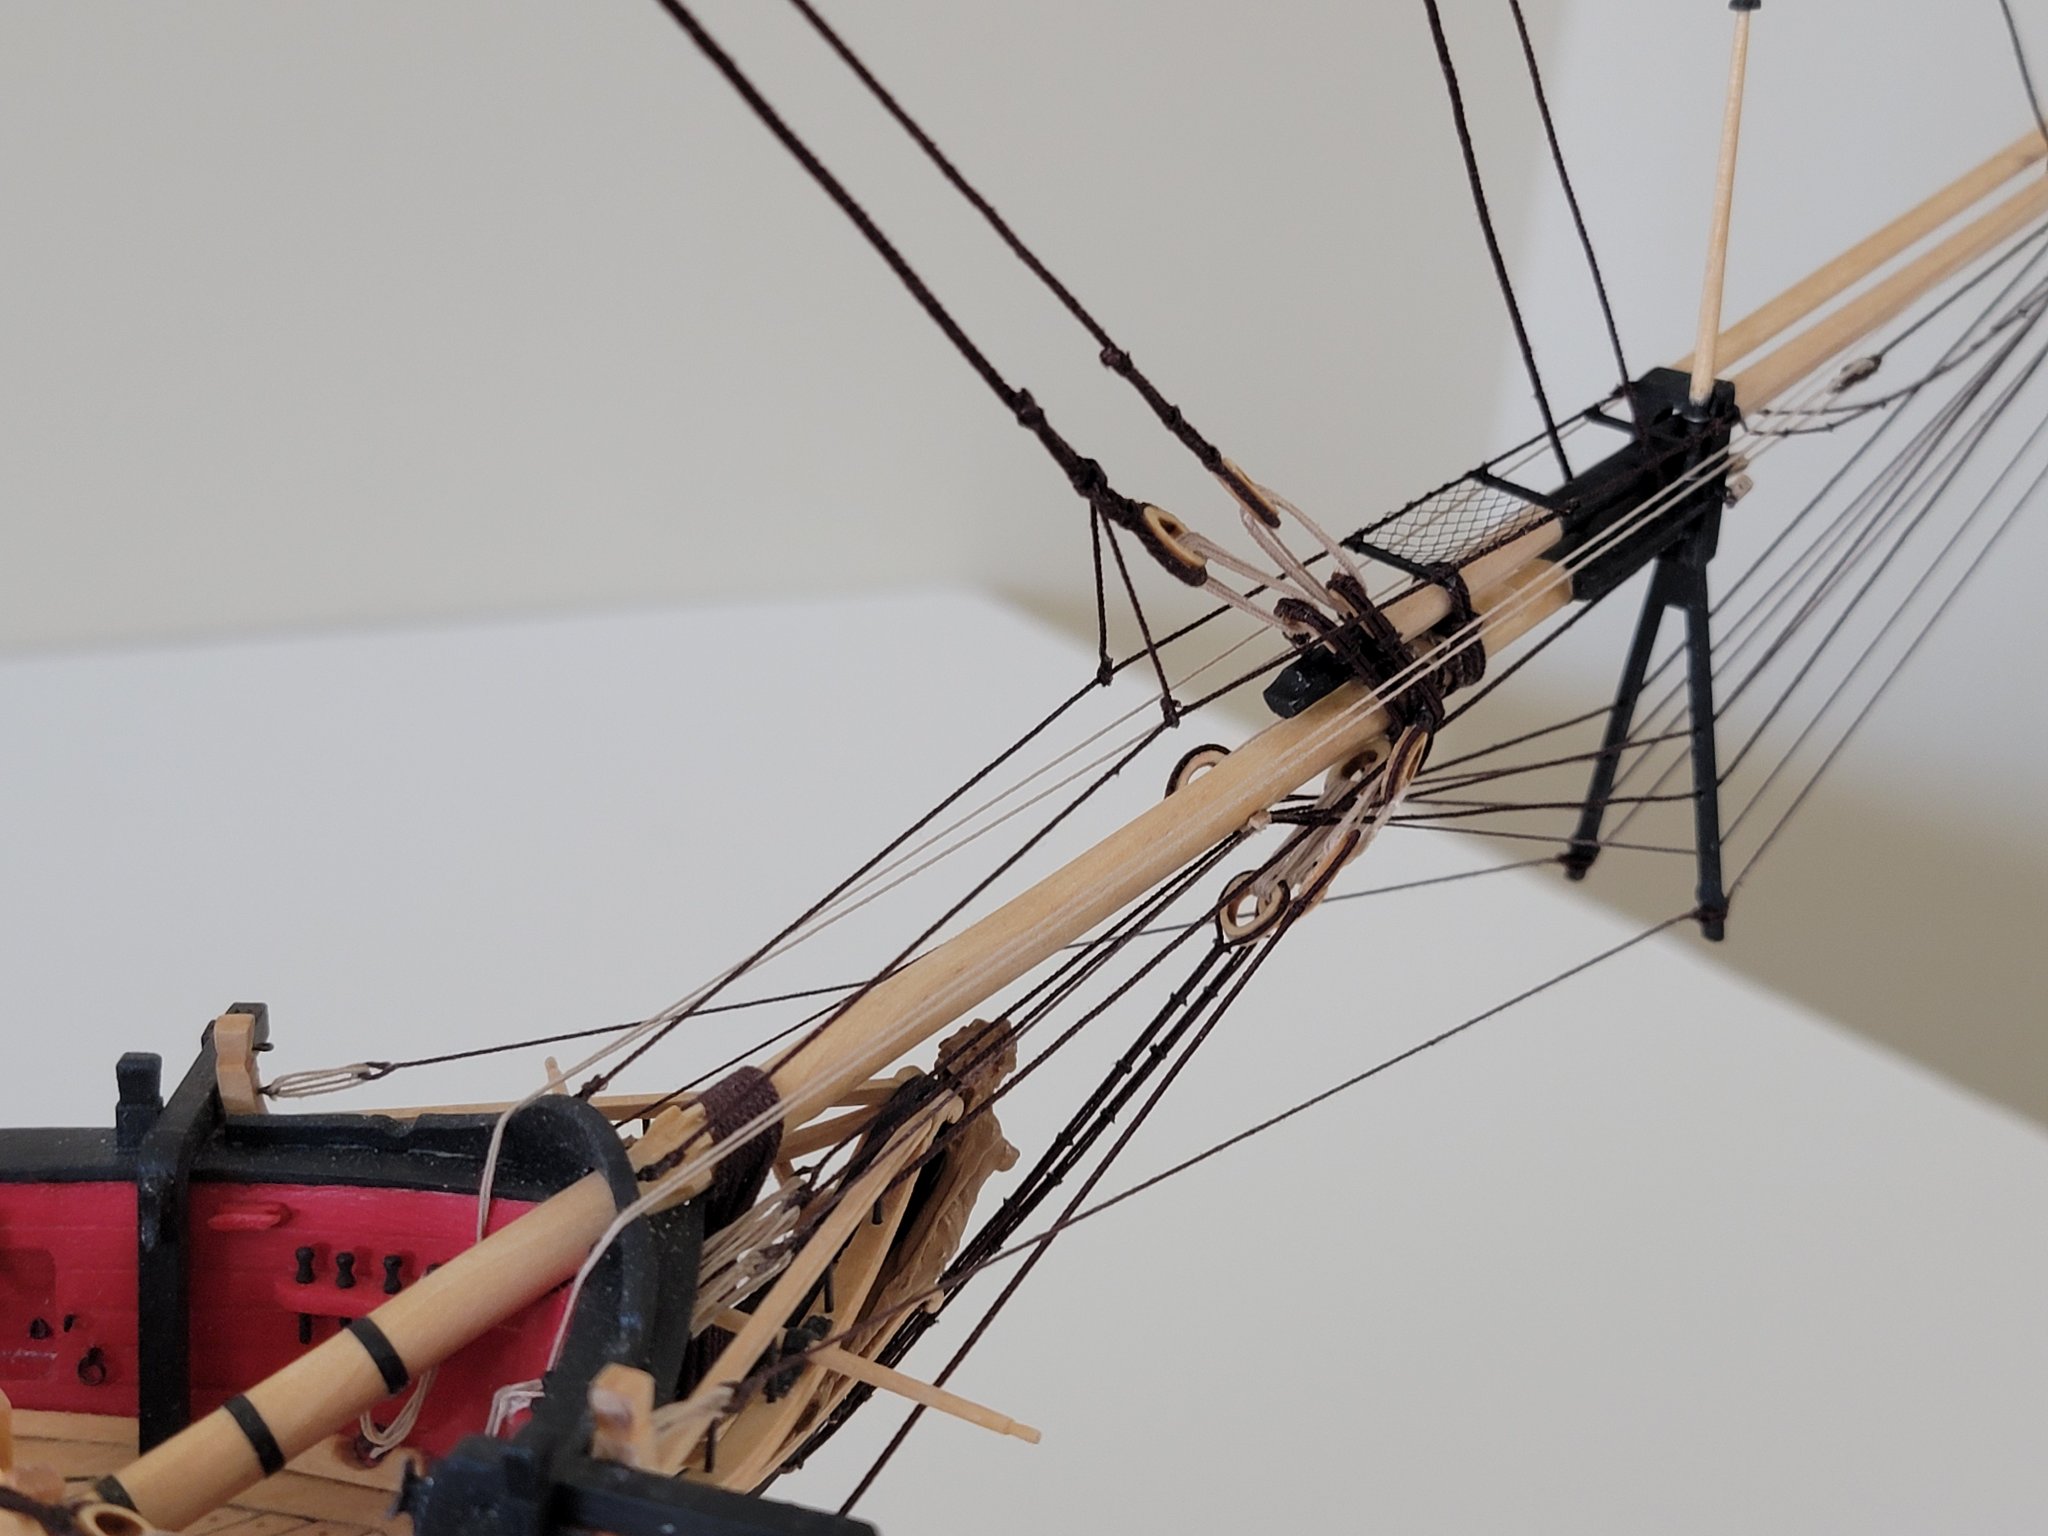
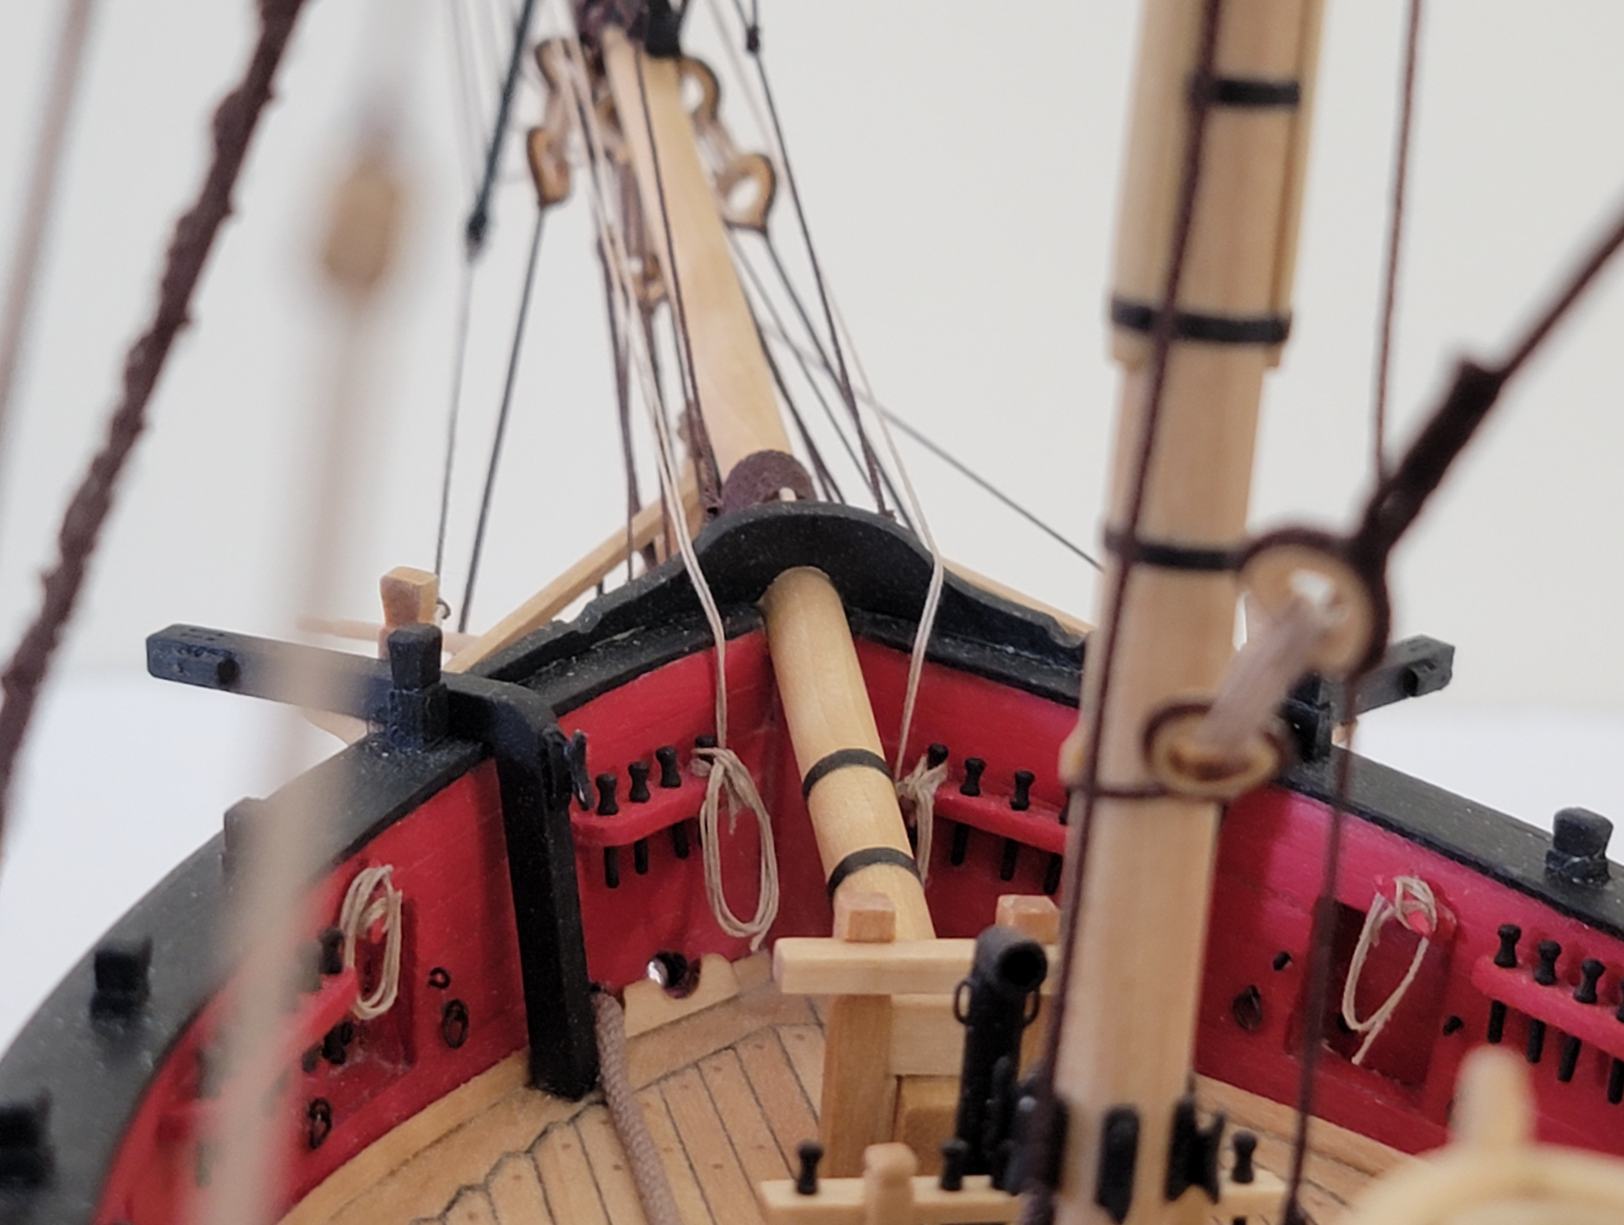
I finished installing the backstays and stays for the topmast. Here are some pics:


- Barbossa, Edwardkenway, egkb and 9 others
-
12
-
On 3/24/2021 at 9:16 AM, niwotwill said:
Rope looks fantastic. Yes it is fun to make rope. The hardest thing for me is keep the receipt and record for future use. I haven't used poly rope yet but yours looks really nice so maybe I'll give it a try.
Stay Well and Stay Safe
Will
Thanks Will. Chuck has provided the thread sizes needed to make the rope, so no need to record test results 🙂. Here is the PDF
-
-
2 hours ago, Chuck Seiler said:
What thread are you using? Gutermann Mara?
Hi Chuck,
Yes, I used Gutermann Mara. Purchased them from Wawak.ca
-
Just now, Matt D said:
Your rope looks excellent! Was it hard to make on your first attempt?
Thank you Matt! Getting the tension on each strand was a bit difficult to get right, but I think with more trials it'll become easier.. Other than that it was very easy! I just followed Chuck's videos on YouTube for the whole process.
- Matt D and Overworked724
-
2
-
Thanks for the nice words!! It's really good to hear my log can be useful to others. 🙂
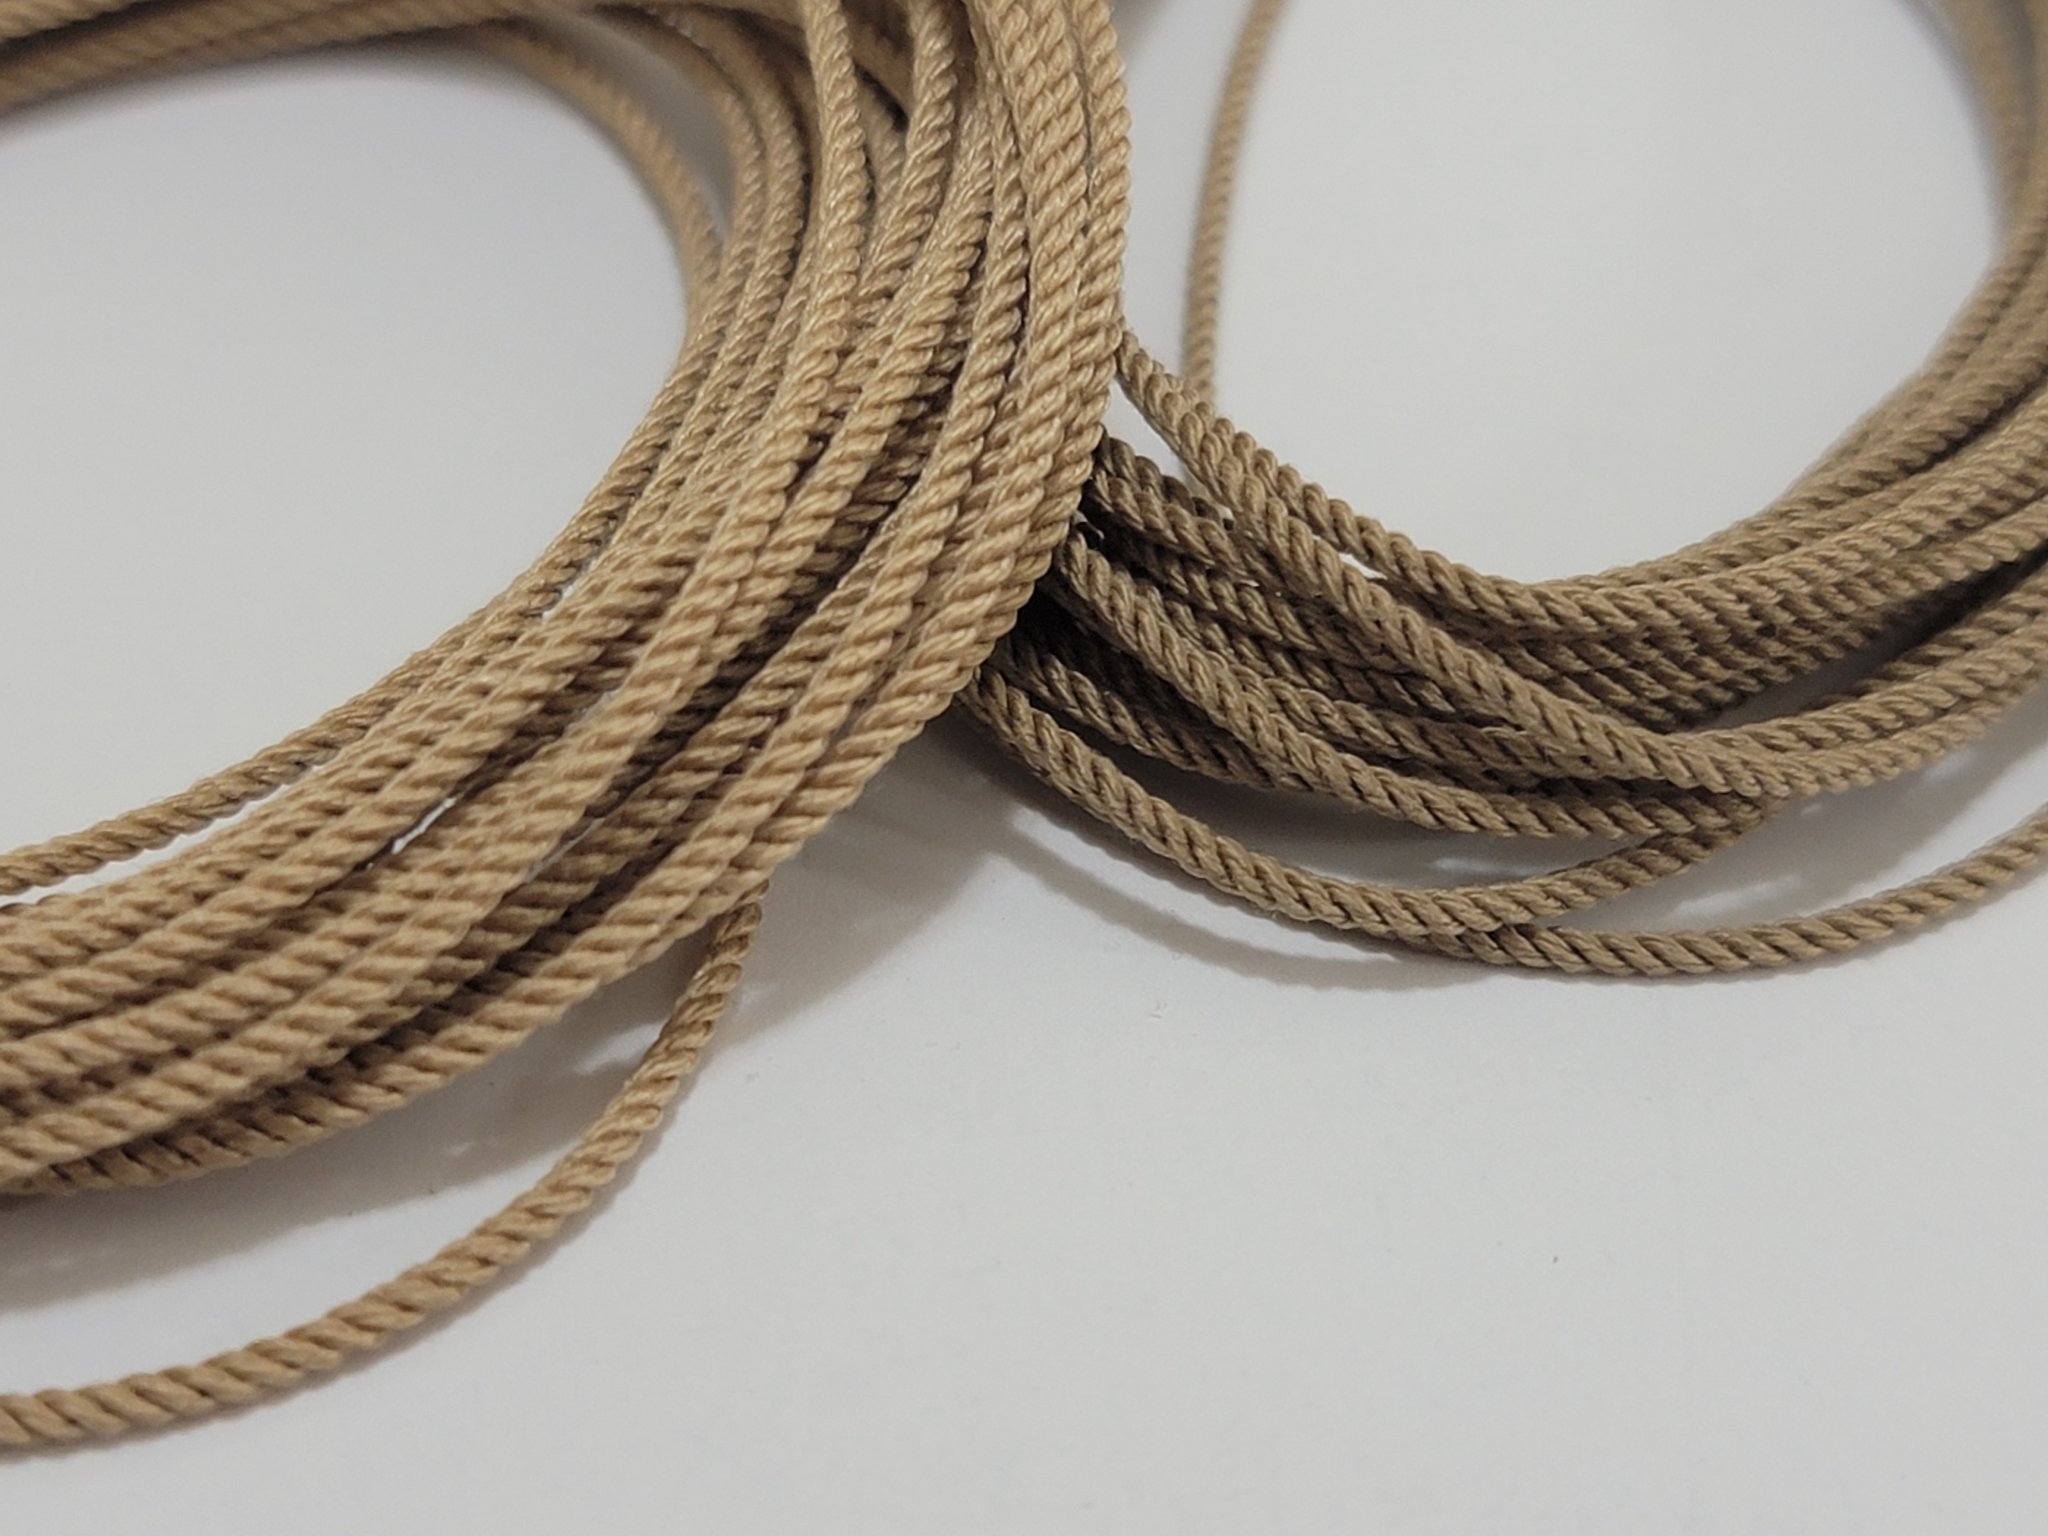
I made some rope using the ropewalk, didn't know where to post it so thought I'd put it here. I really like the crisp look of it. Here's a pic of #265 (left) and #2899 (right) color (0.045" thick rope)...
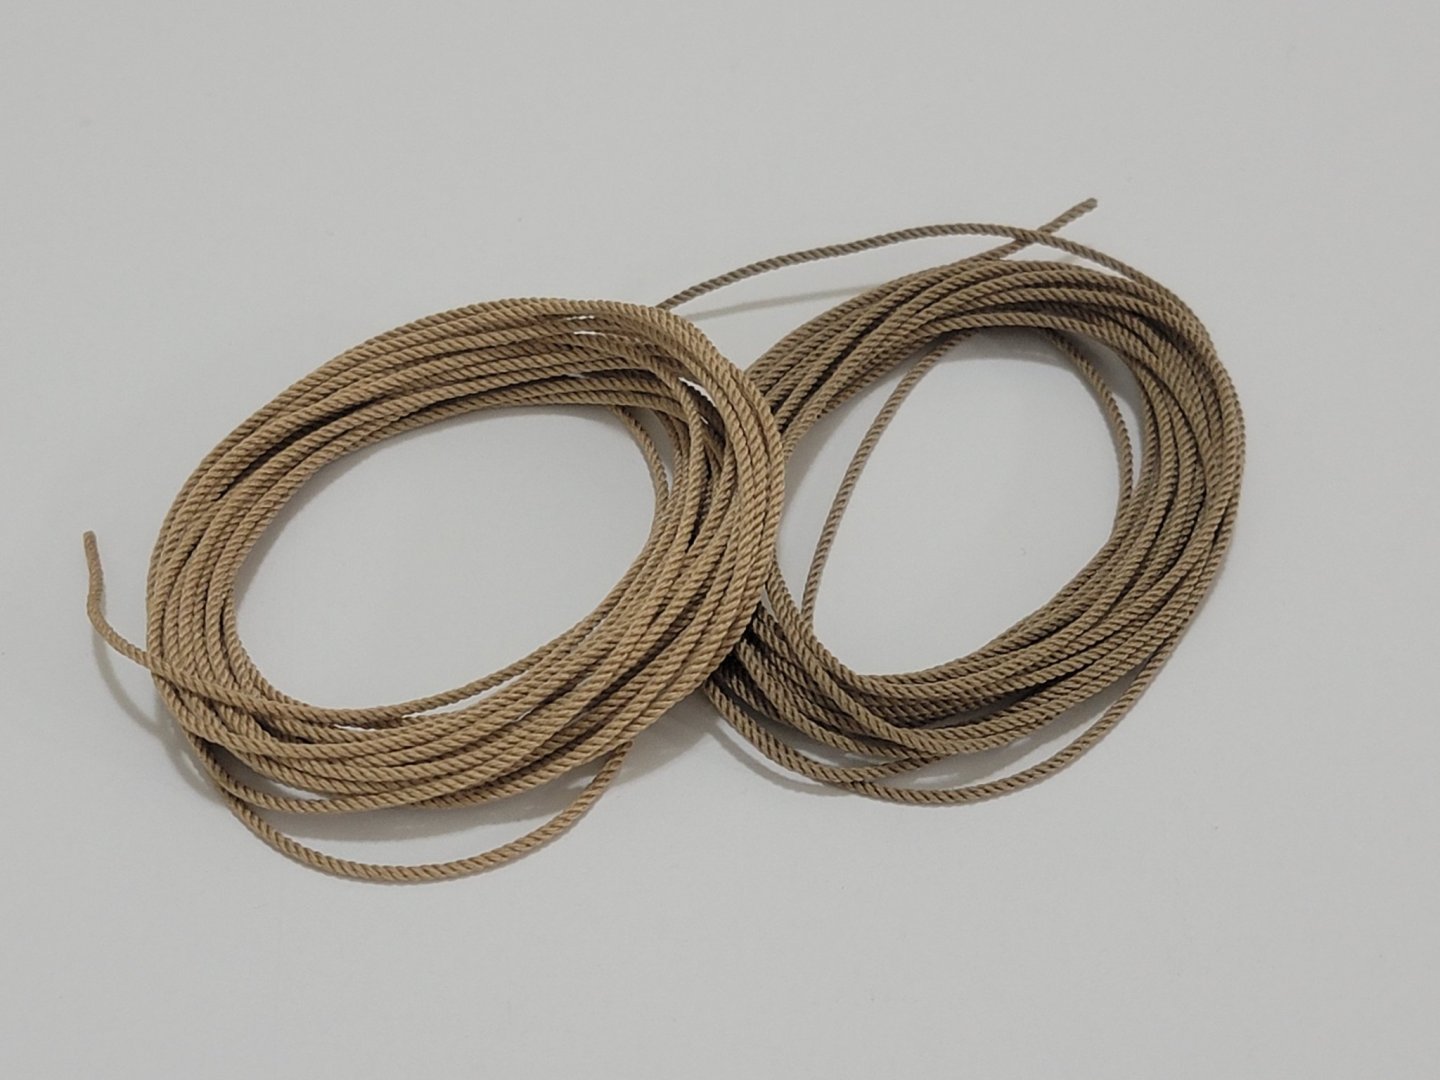

And a close up pic of the #2899
Had a lot of fun doing these trial runs. They were not waxed at all, just baked at 350 deg F for 4 mins.Thank you @Chuck for providing your recipe! 😁
- Matt D, Chuck Seiler, VTHokiEE and 11 others
-
14
-
Thanks Thomas! It's nice to have finished most of the repetitive parts of the build! 😀


.jpg.fa74ae1a41719bd0c175611dfc600ef4.jpg)


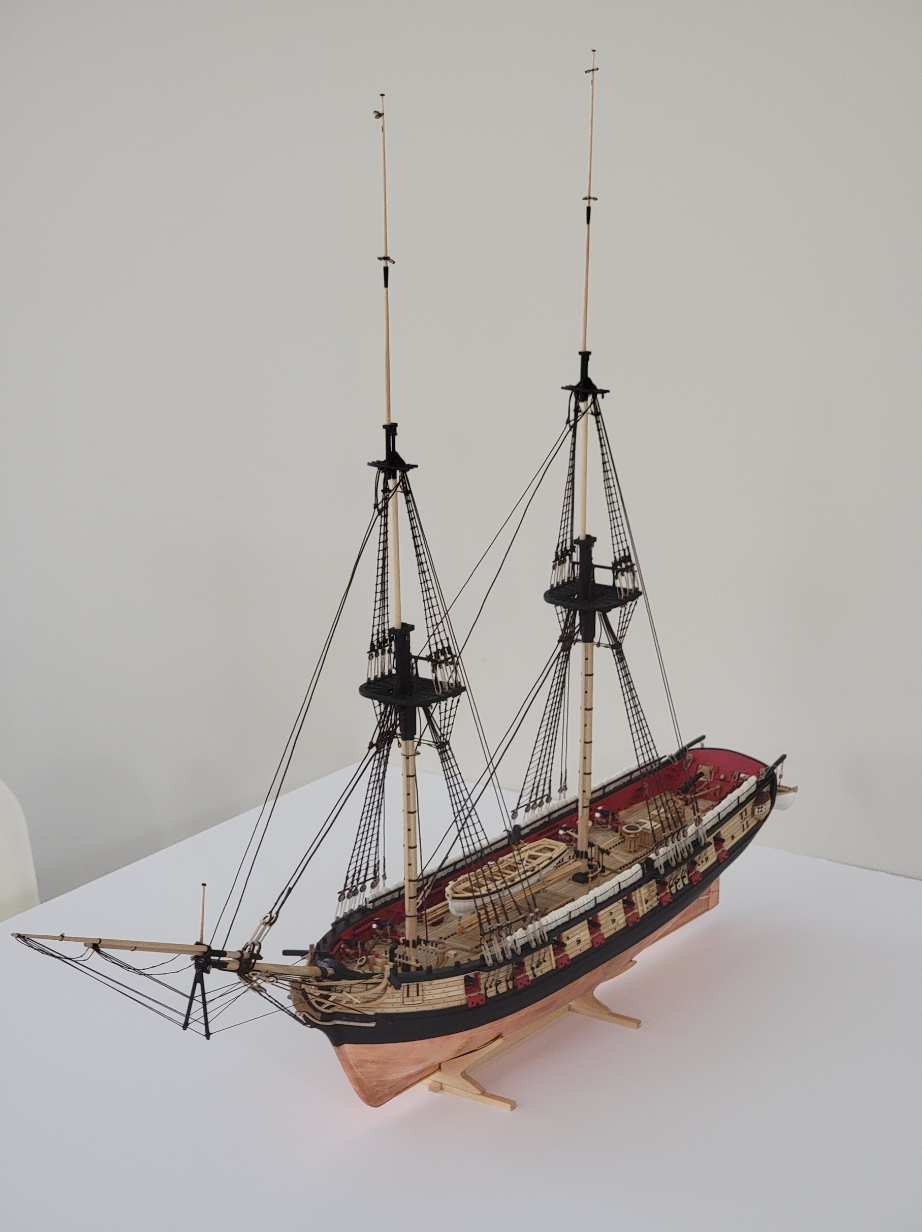


US Brig Syren by WalrusGuy - FINISHED - Model Shipways - Scale 1:64 - Second wooden ship build
in - Kit build logs for subjects built from 1801 - 1850
Posted · Edited by WalrusGuy
Finished up rigging the boom and gaff, and added the rope coils. I am thinking I'll add rope coils after each section of the rigging. Otherwise there will be too many to handle all at once!
And pics of the rope coils:
I'll next continue working on the spars. I might also do some work on the stay sail rigging as a break from the spars.