

.jpg.1f80adf1a9b14a937cfcf2ca6af0f0d4.jpg)
WalrusGuy
-
Posts
1,007 -
Joined
-
Last visited
Content Type
Profiles
Forums
Gallery
Events
Posts posted by WalrusGuy
-
-
She's looking great Will!!
3 minutes ago, niwotwill said:But first I have to go to Lowes for a 1/4" dowel having no idea where the kit piece went it was here when I inventoried the kit at the beginning.
You can also order from ModelExpo, they have an excellent replacement policy!
-
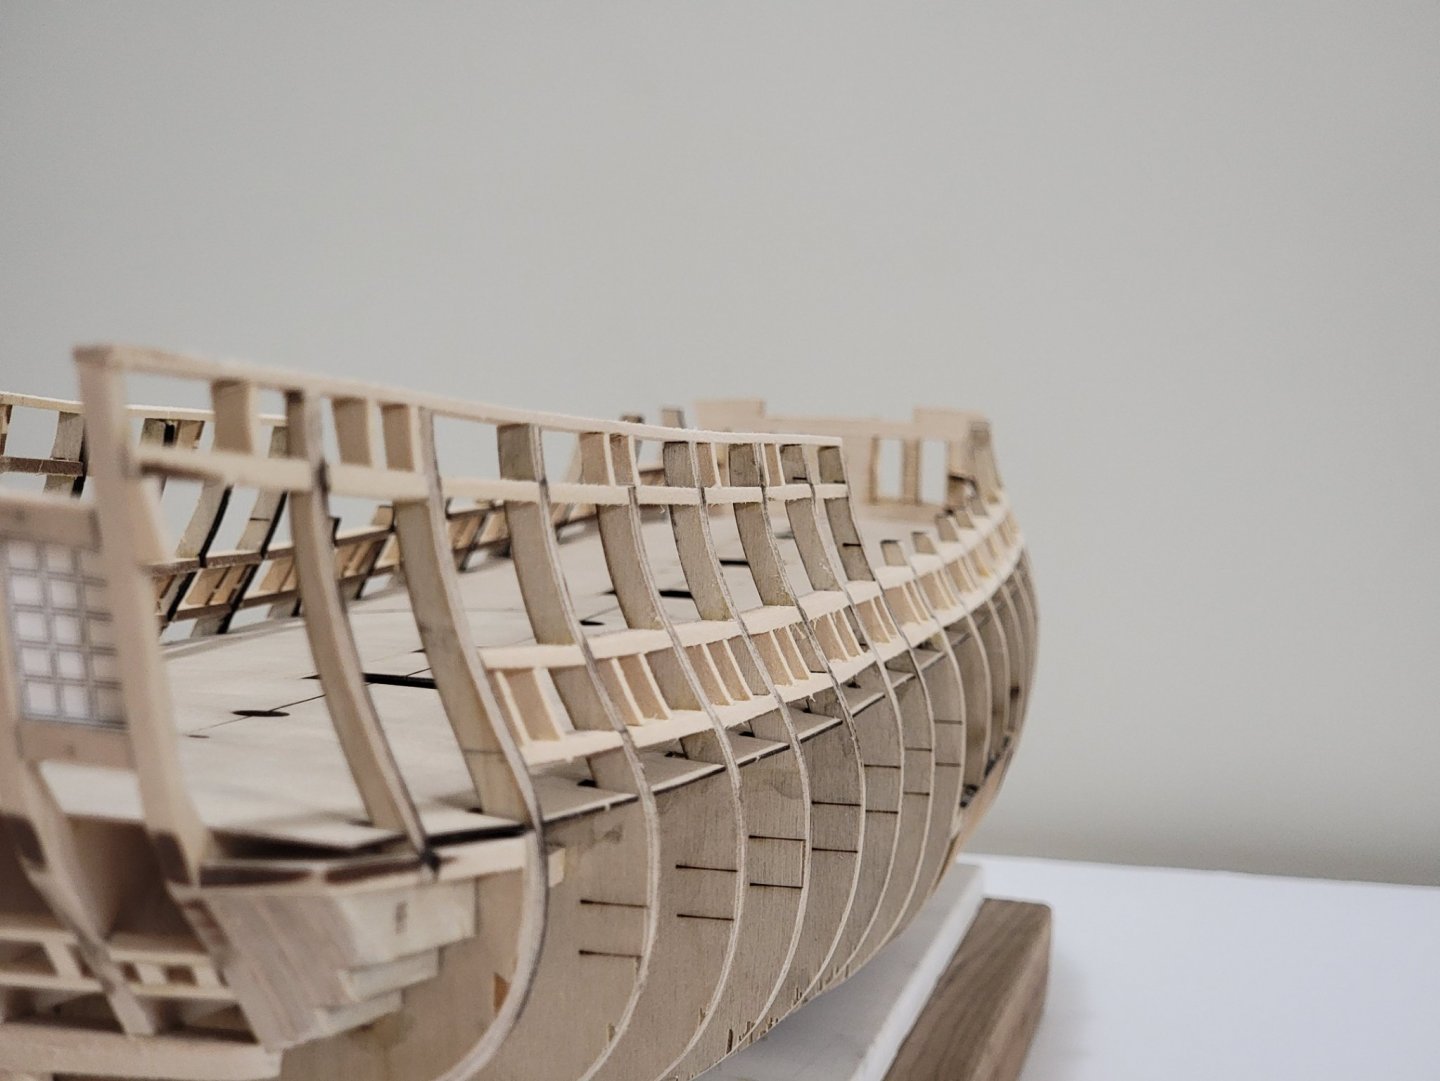
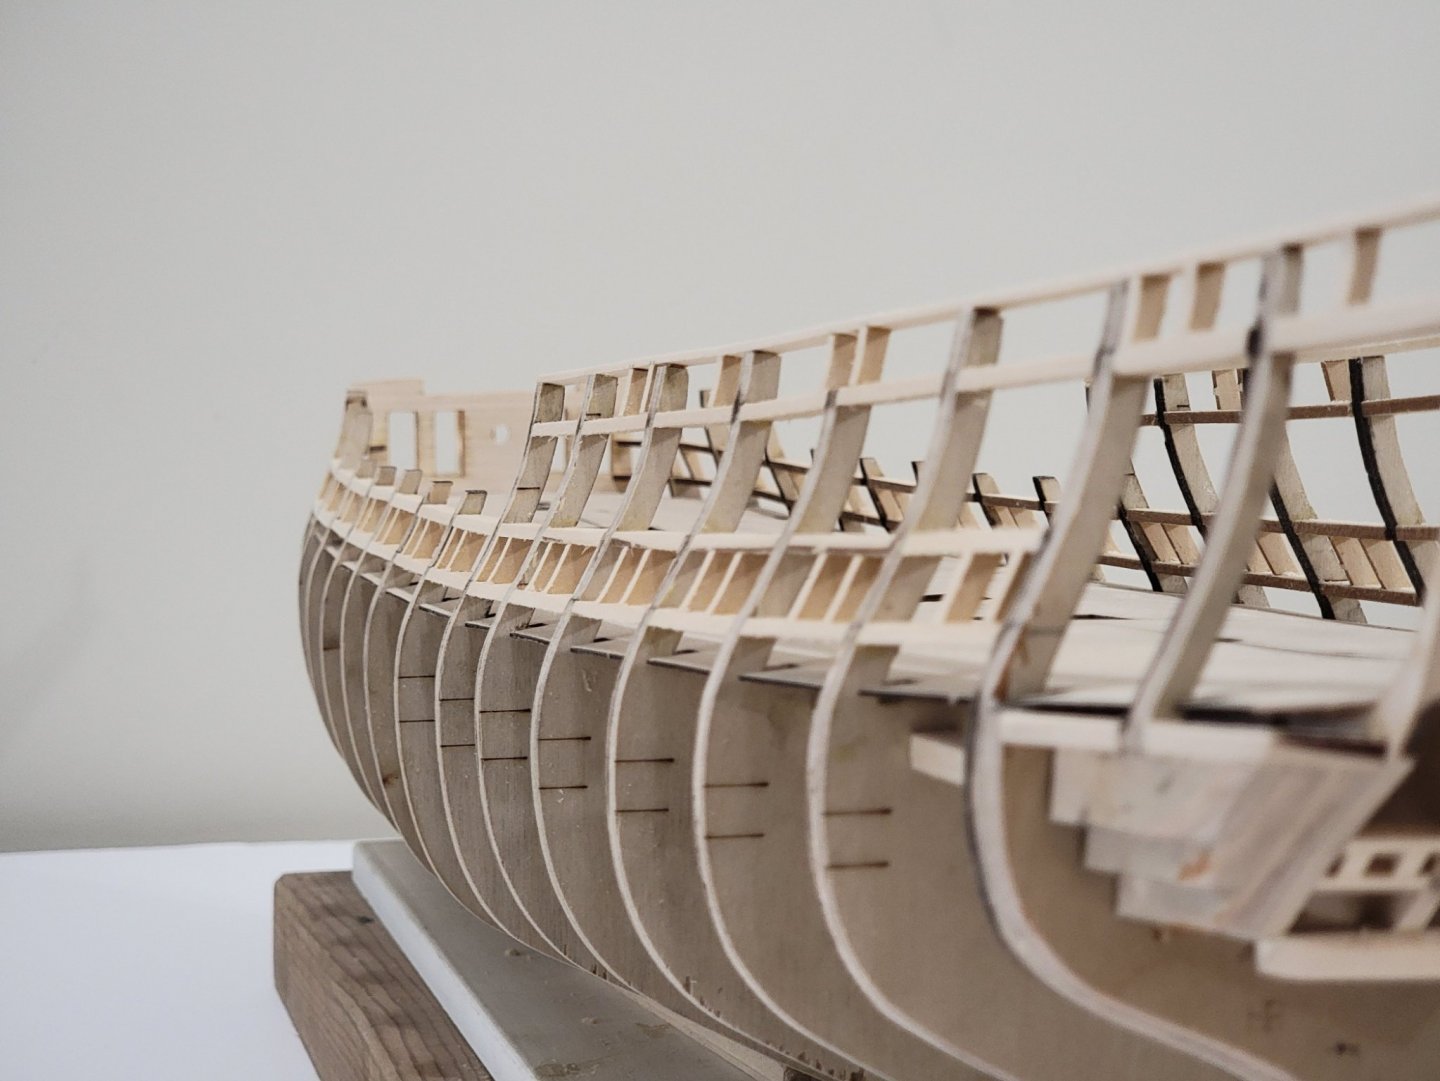
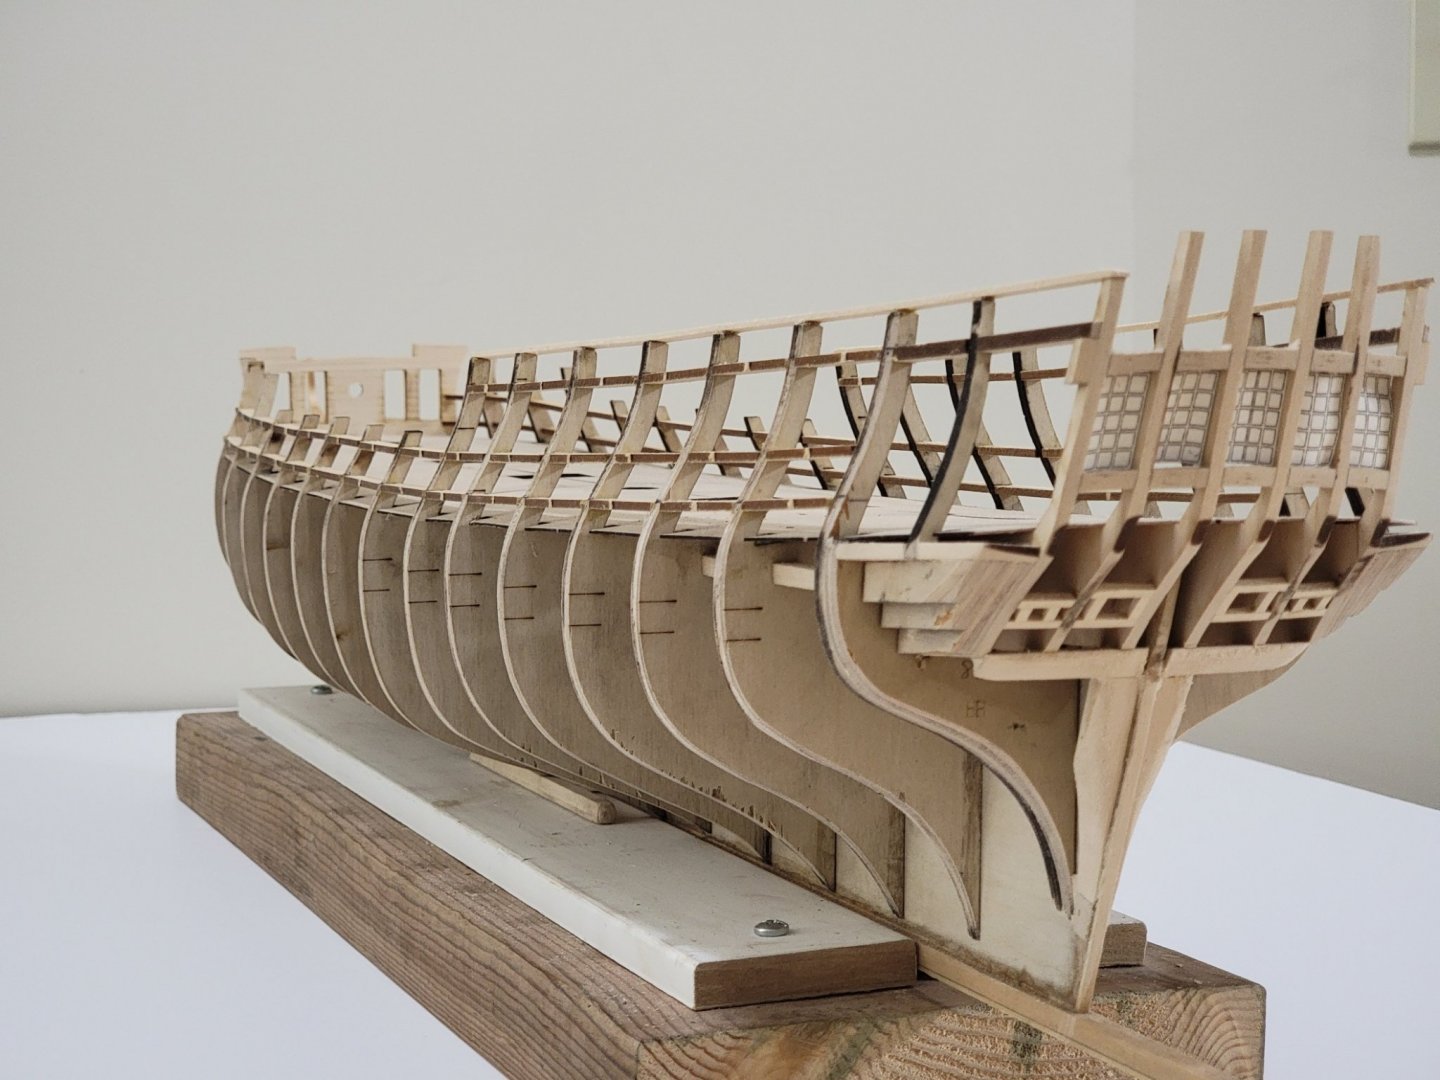
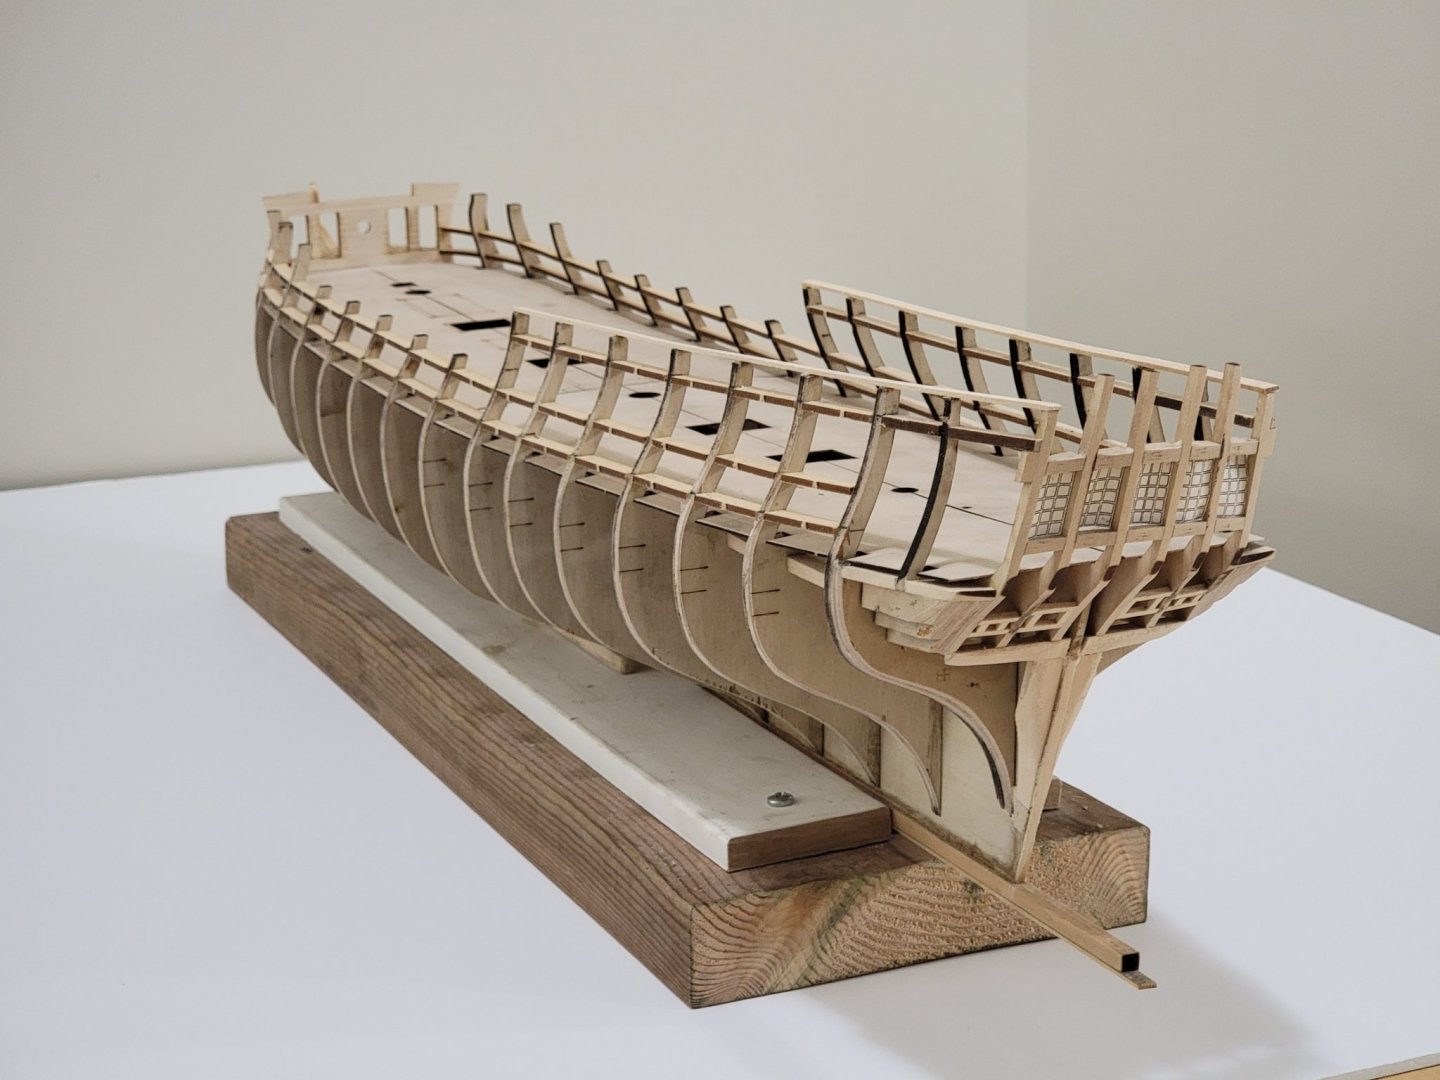
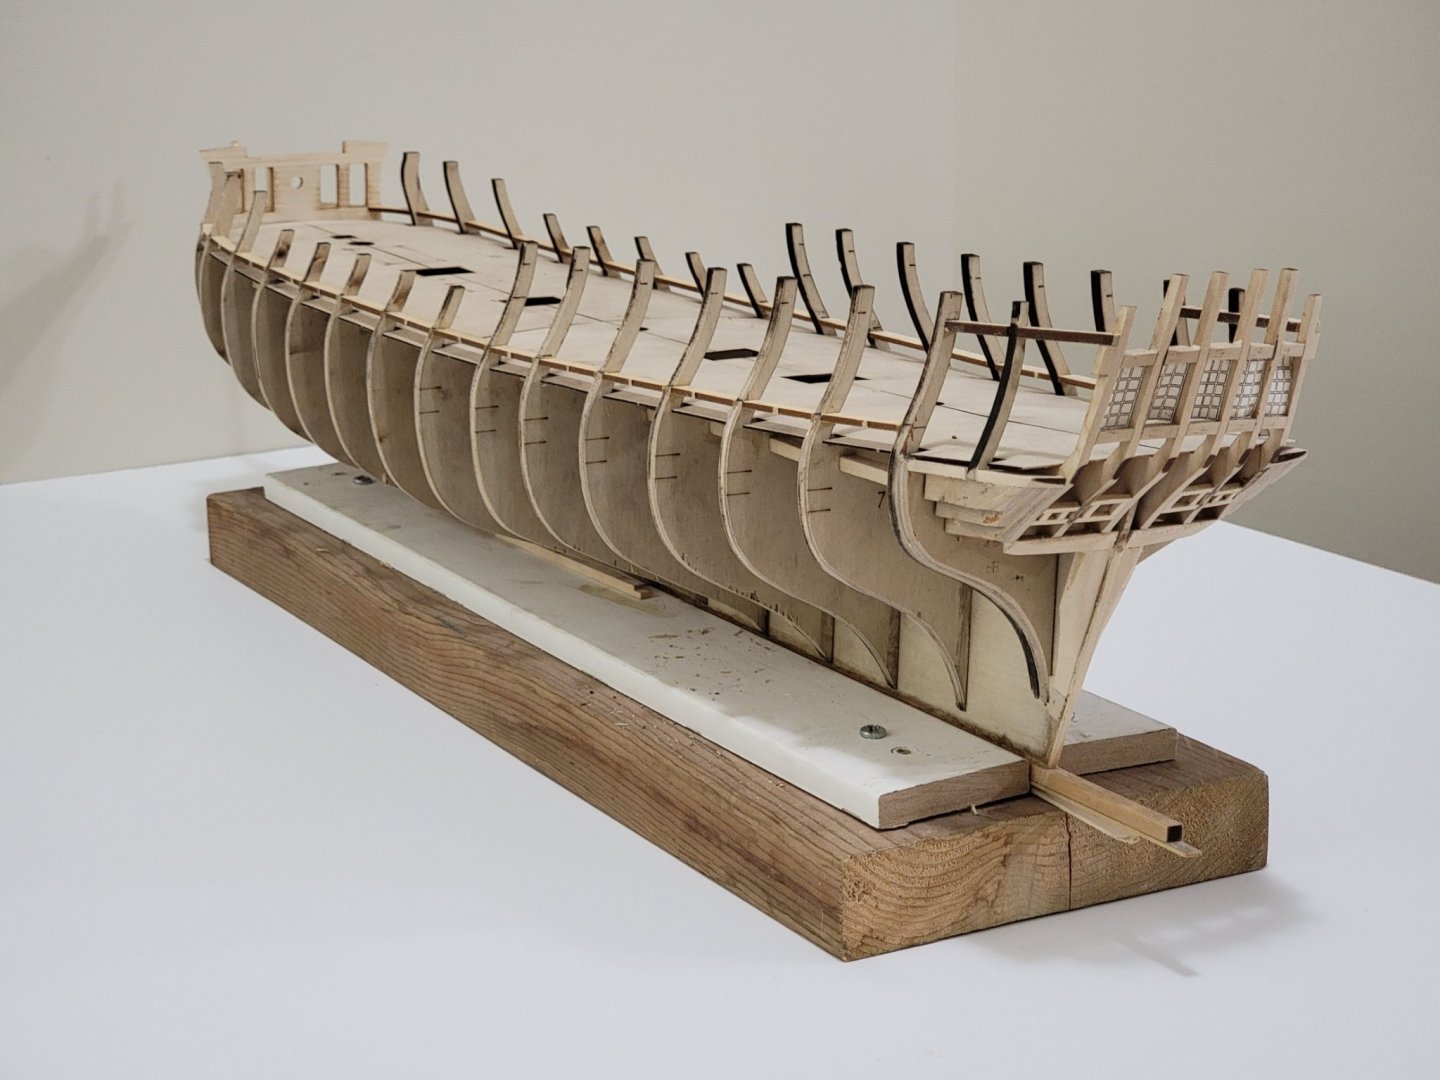
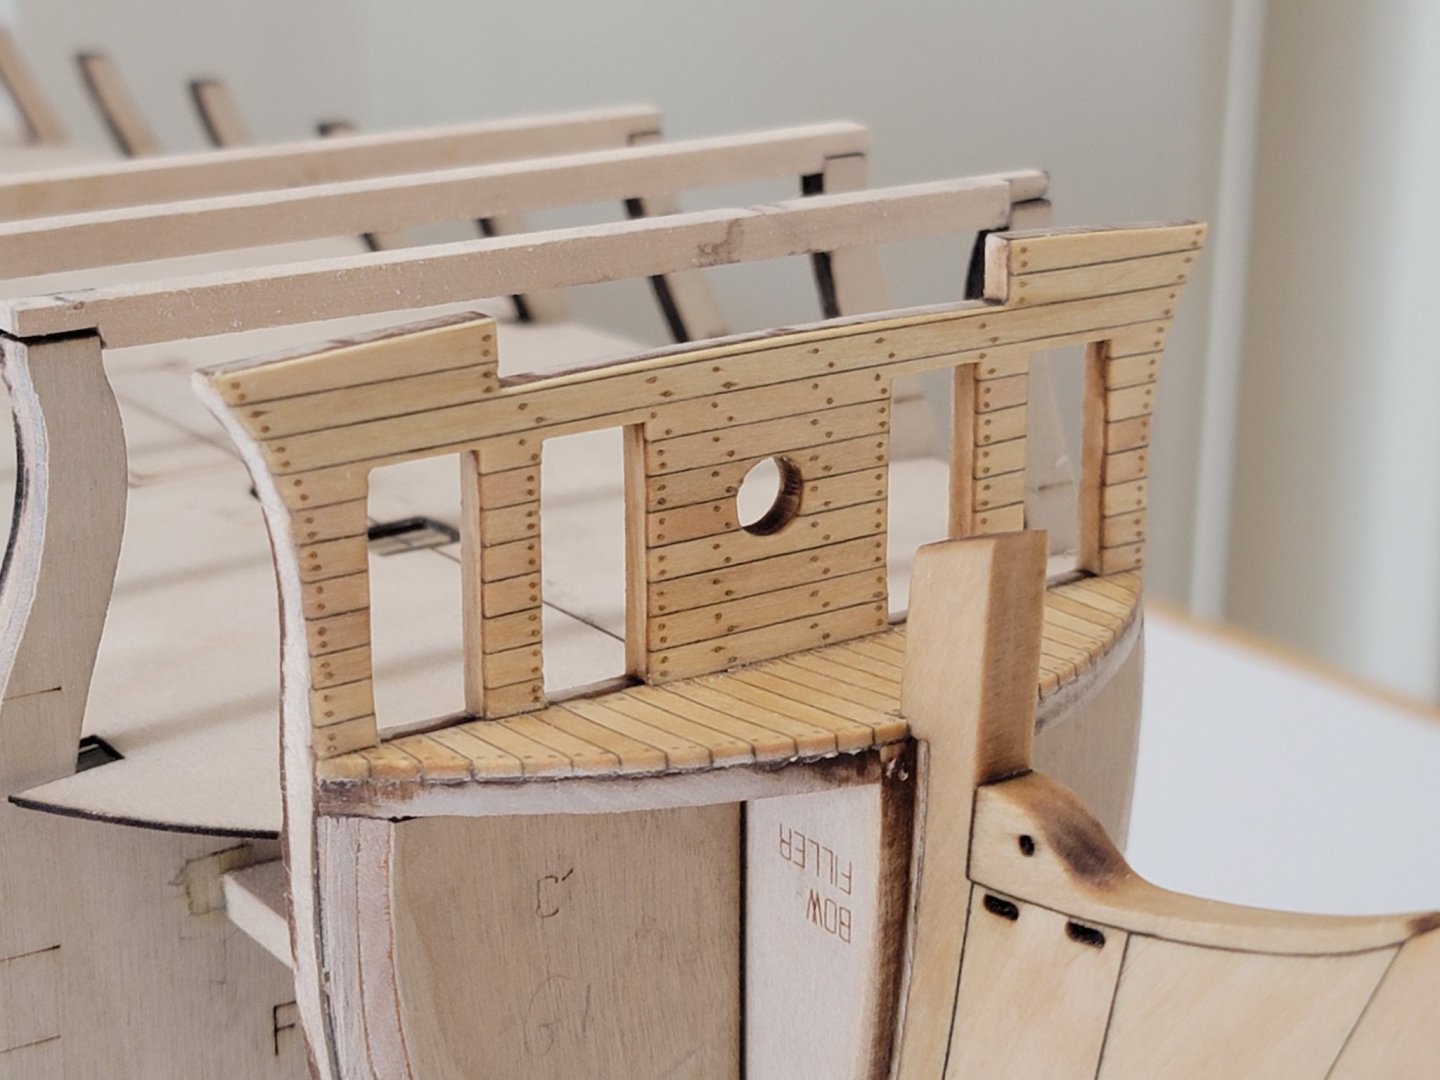
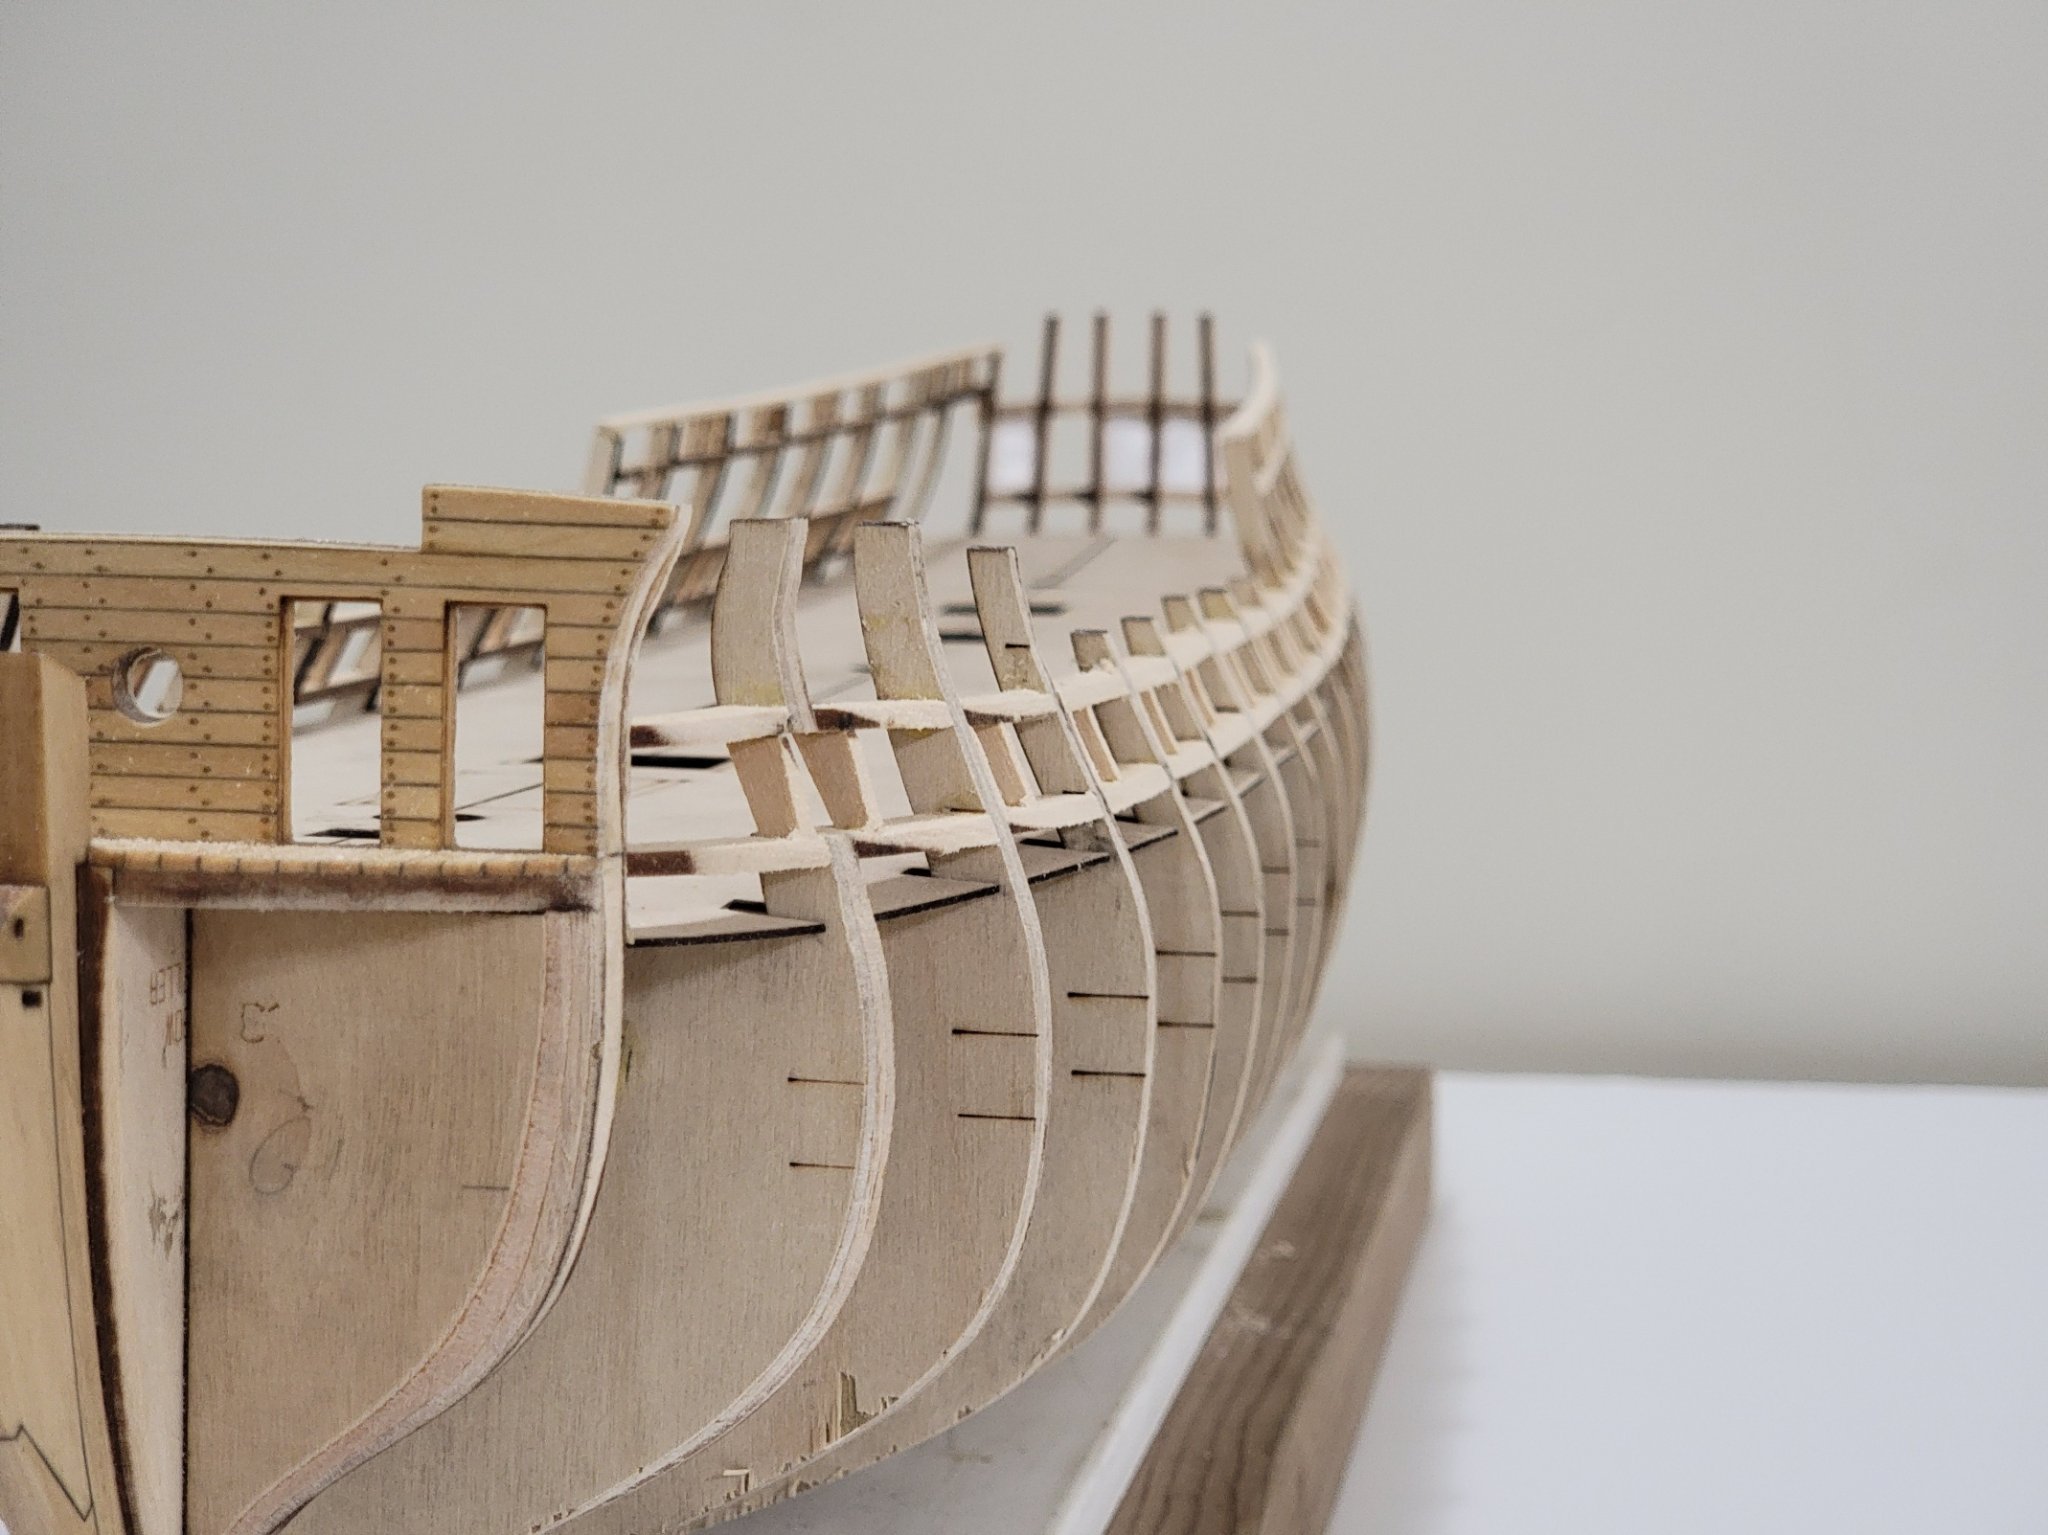
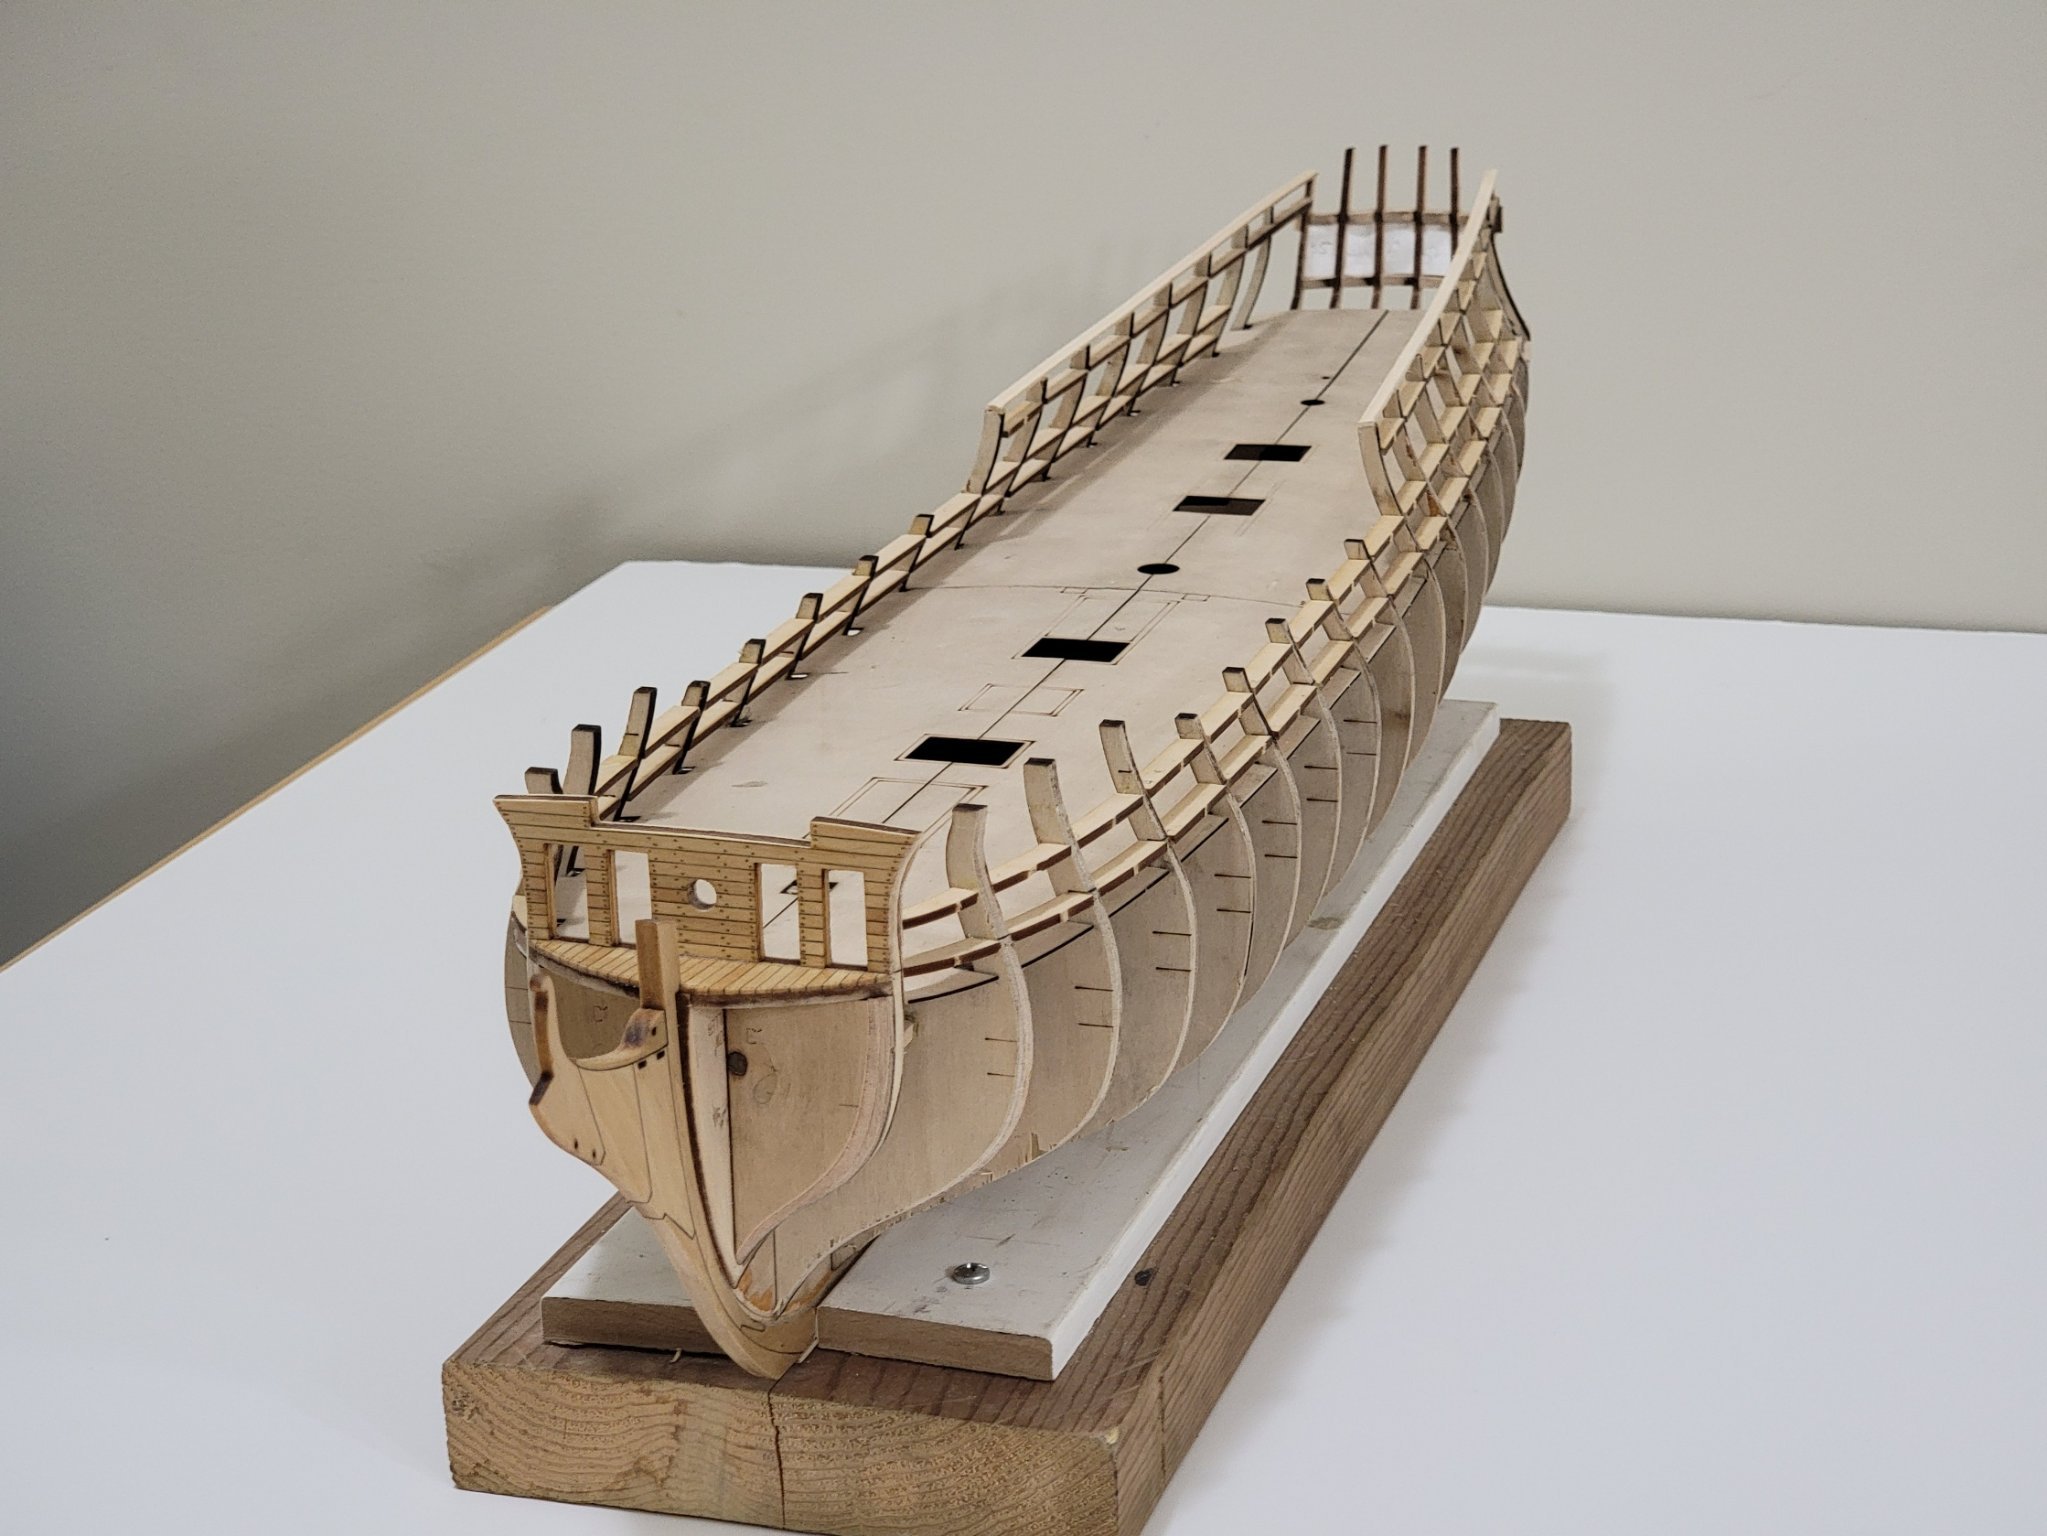
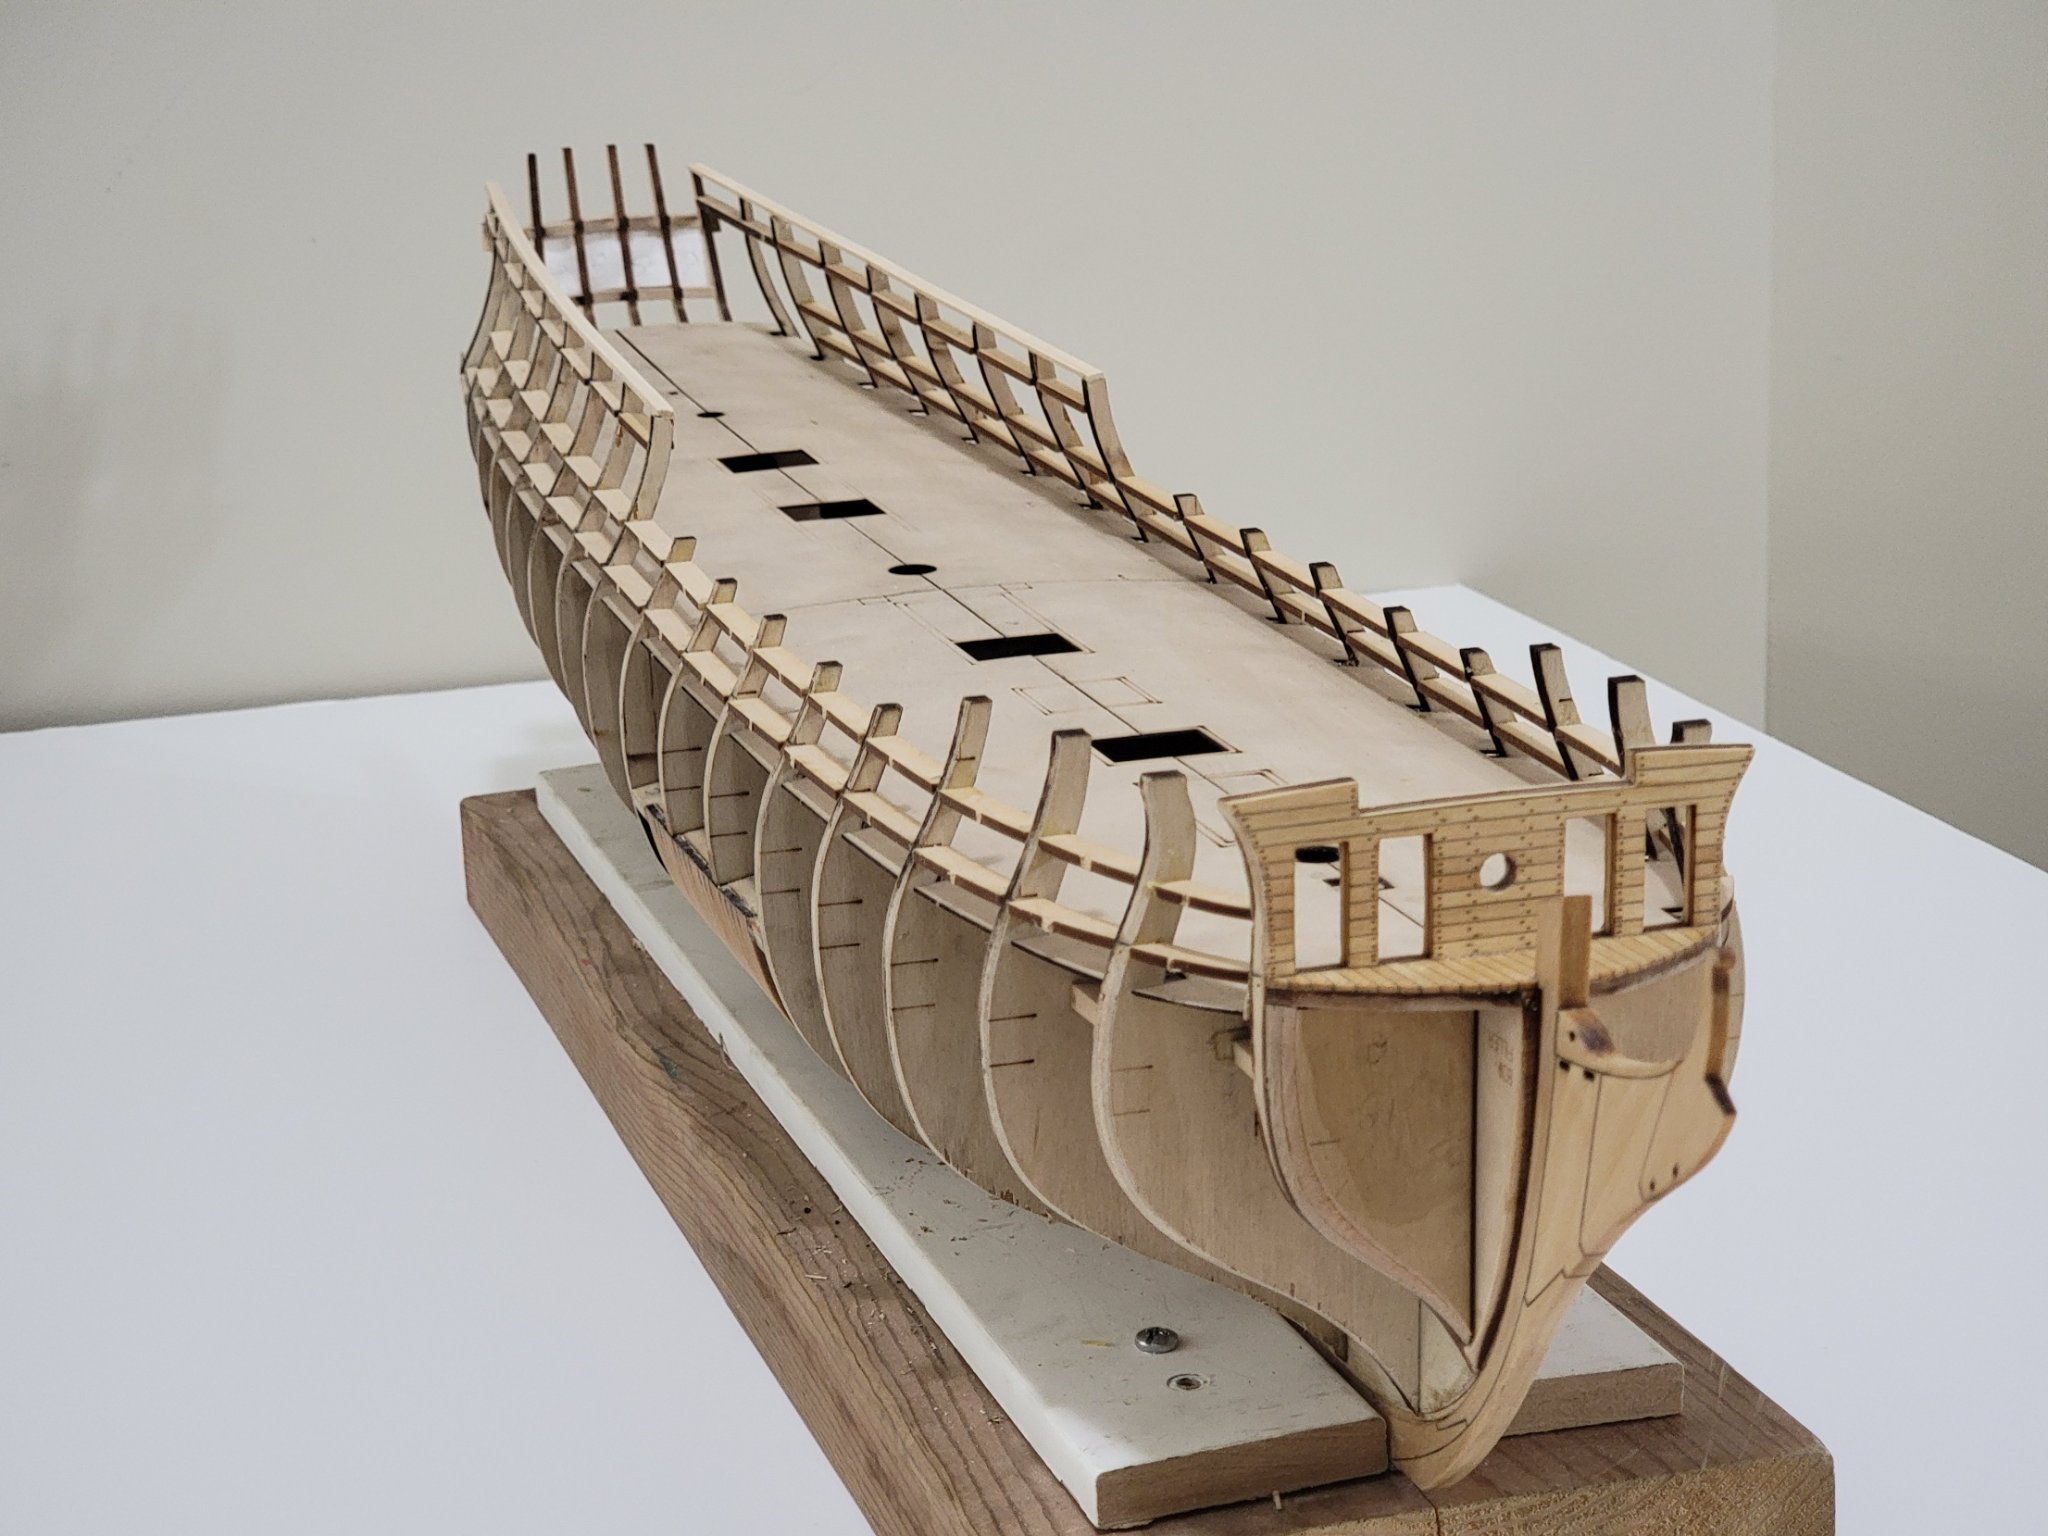
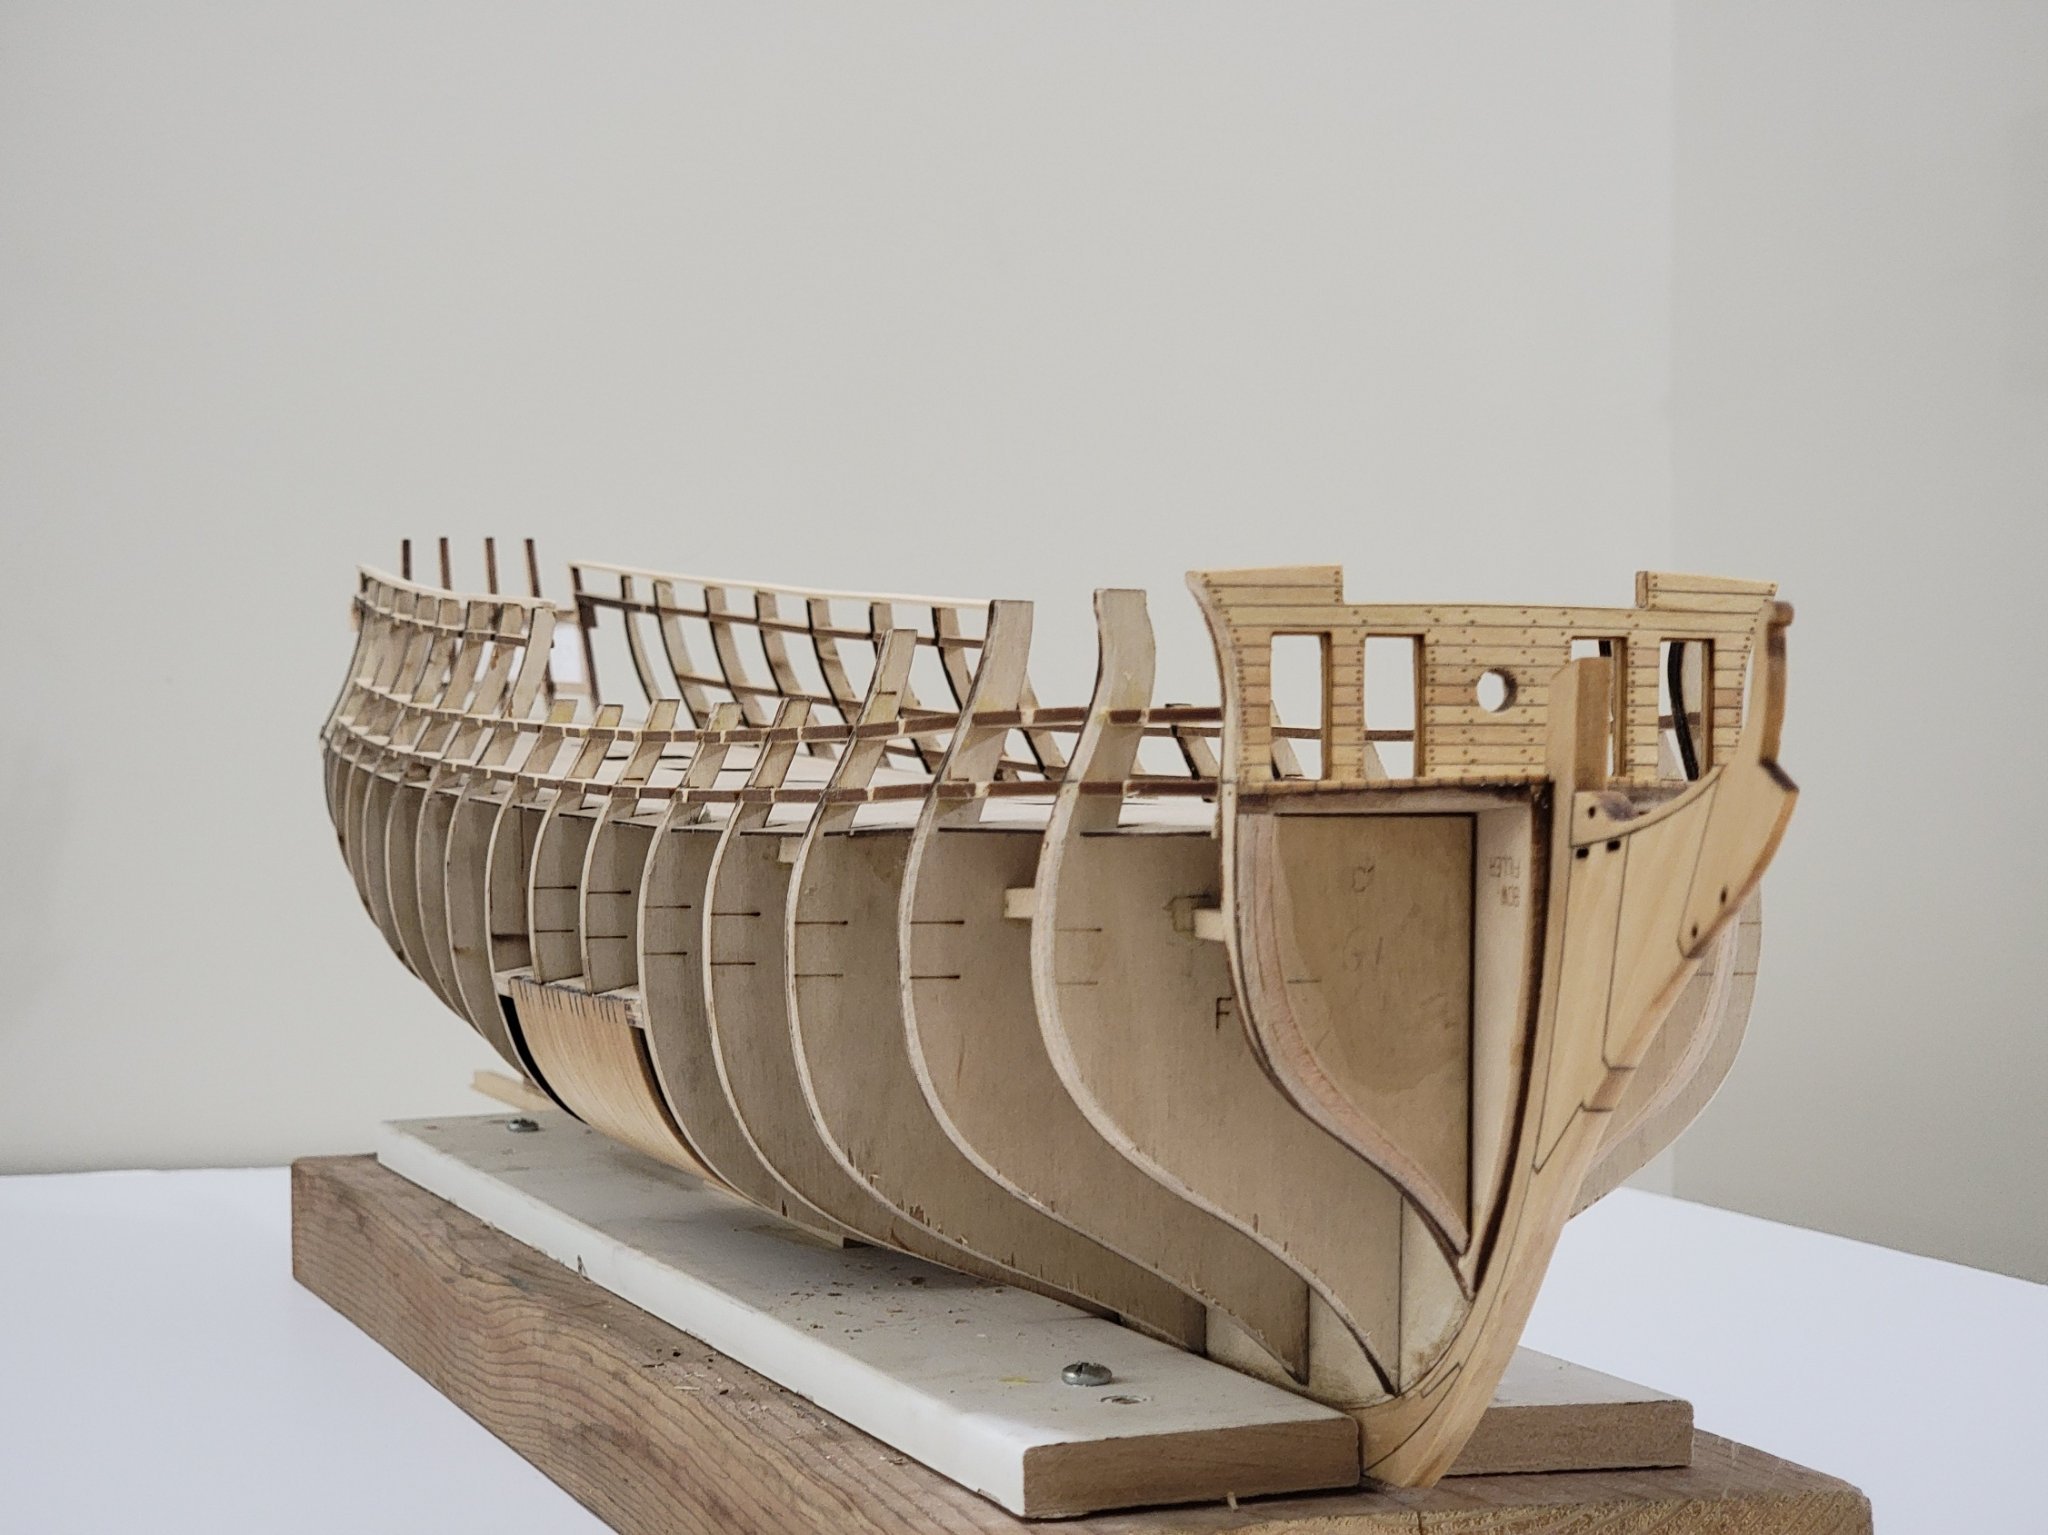
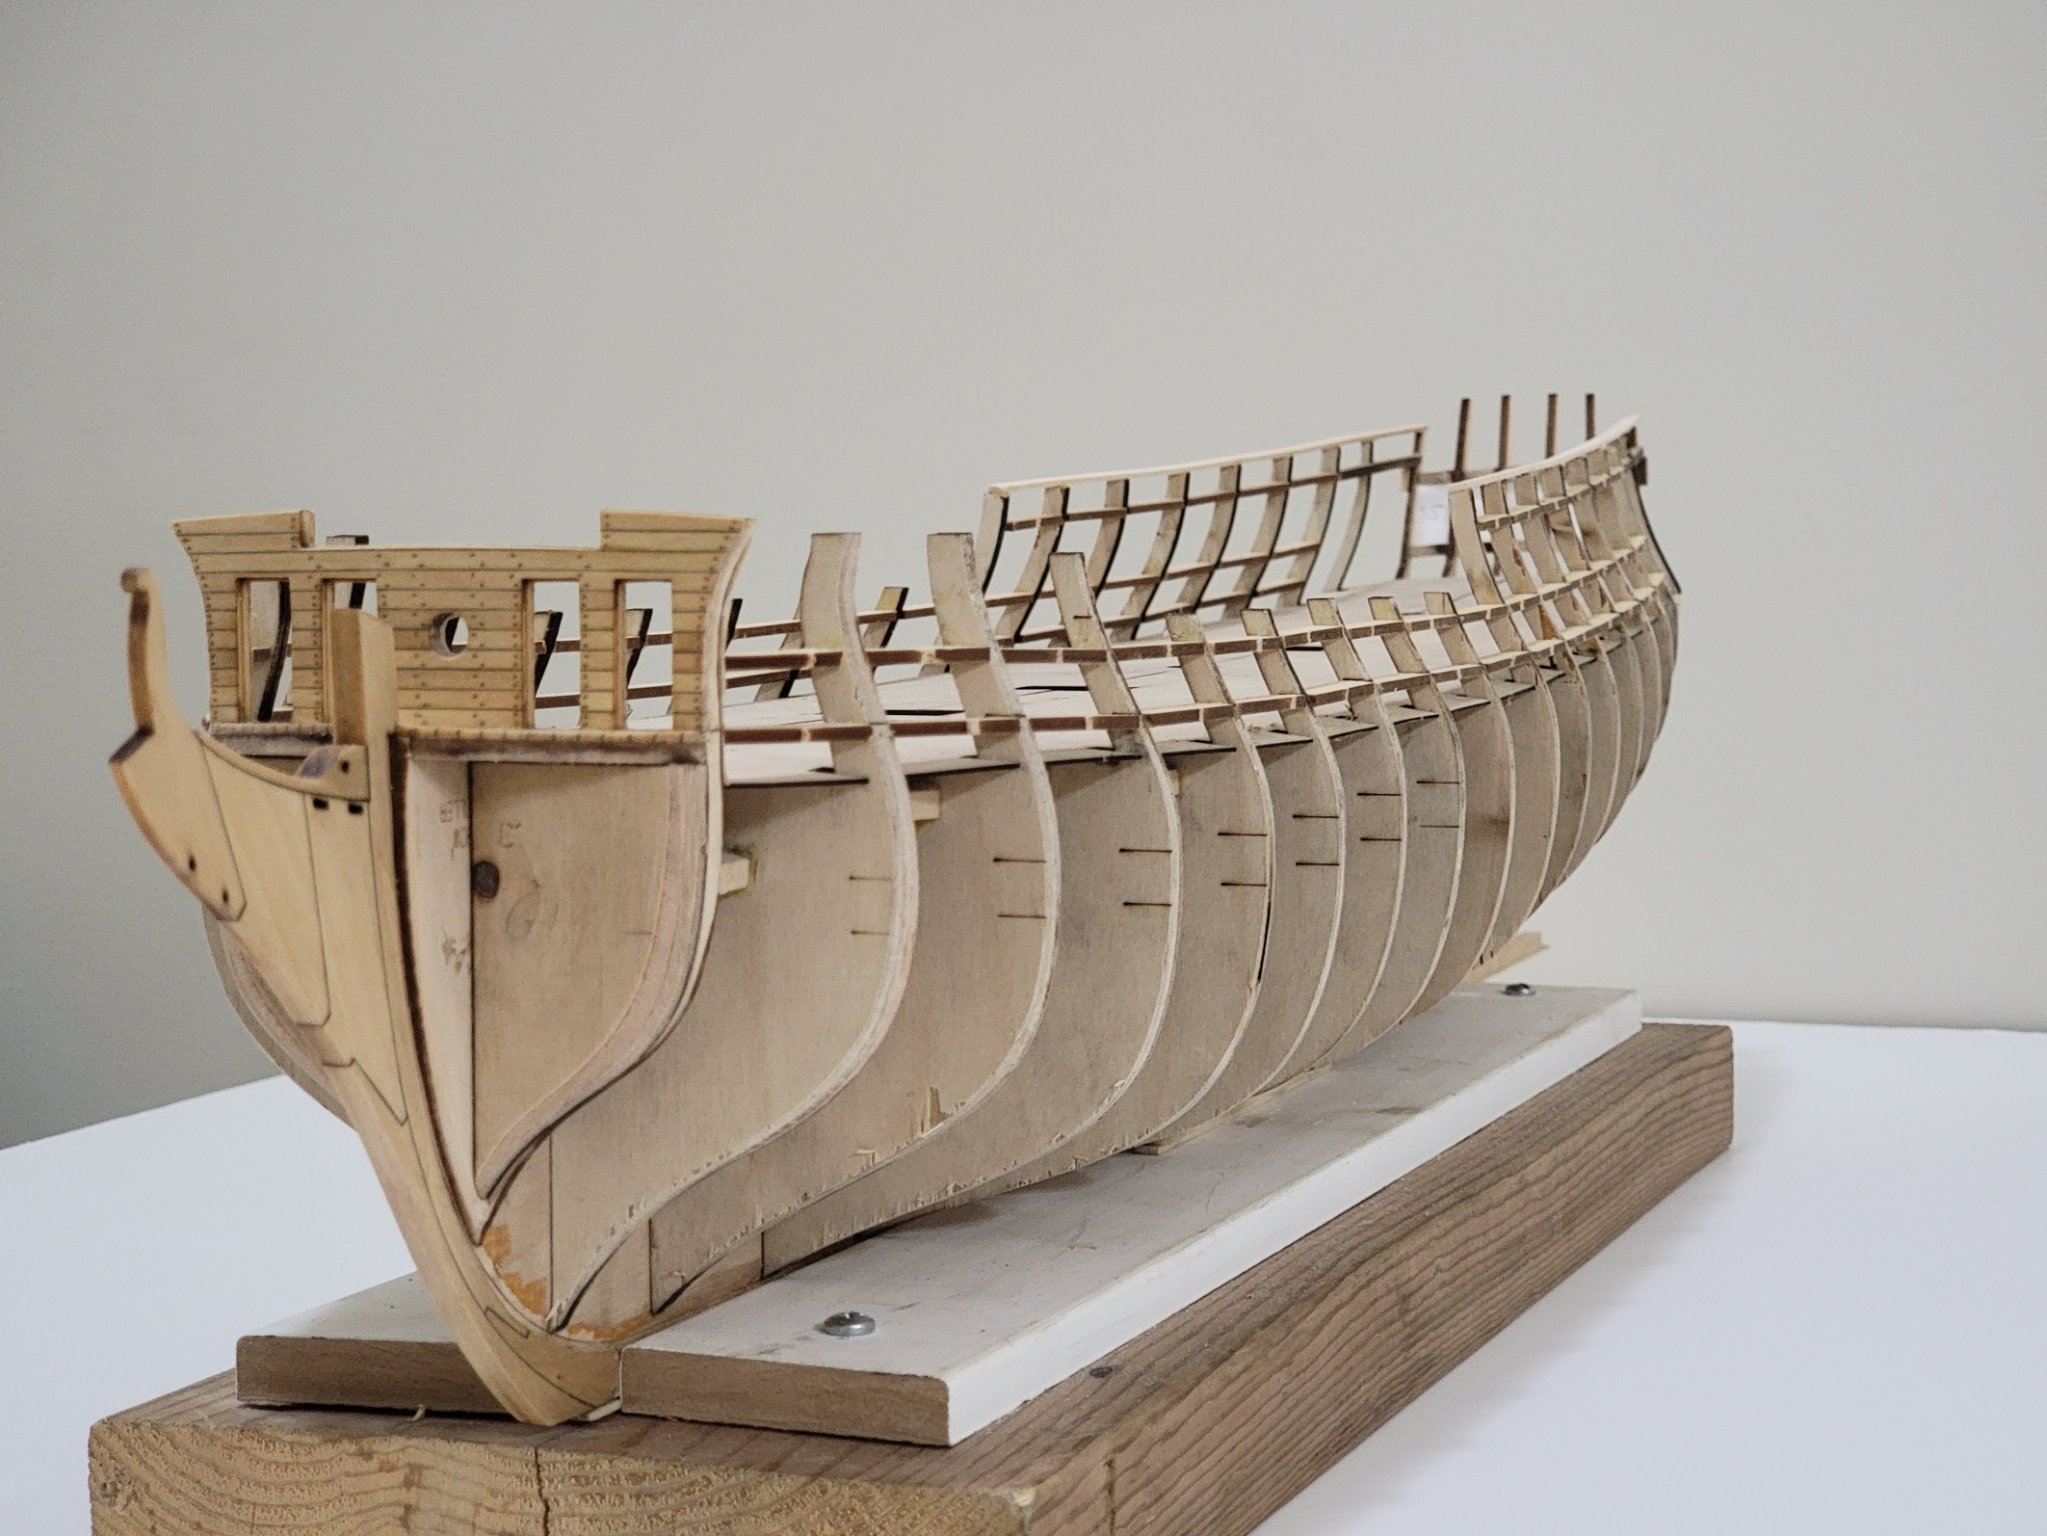
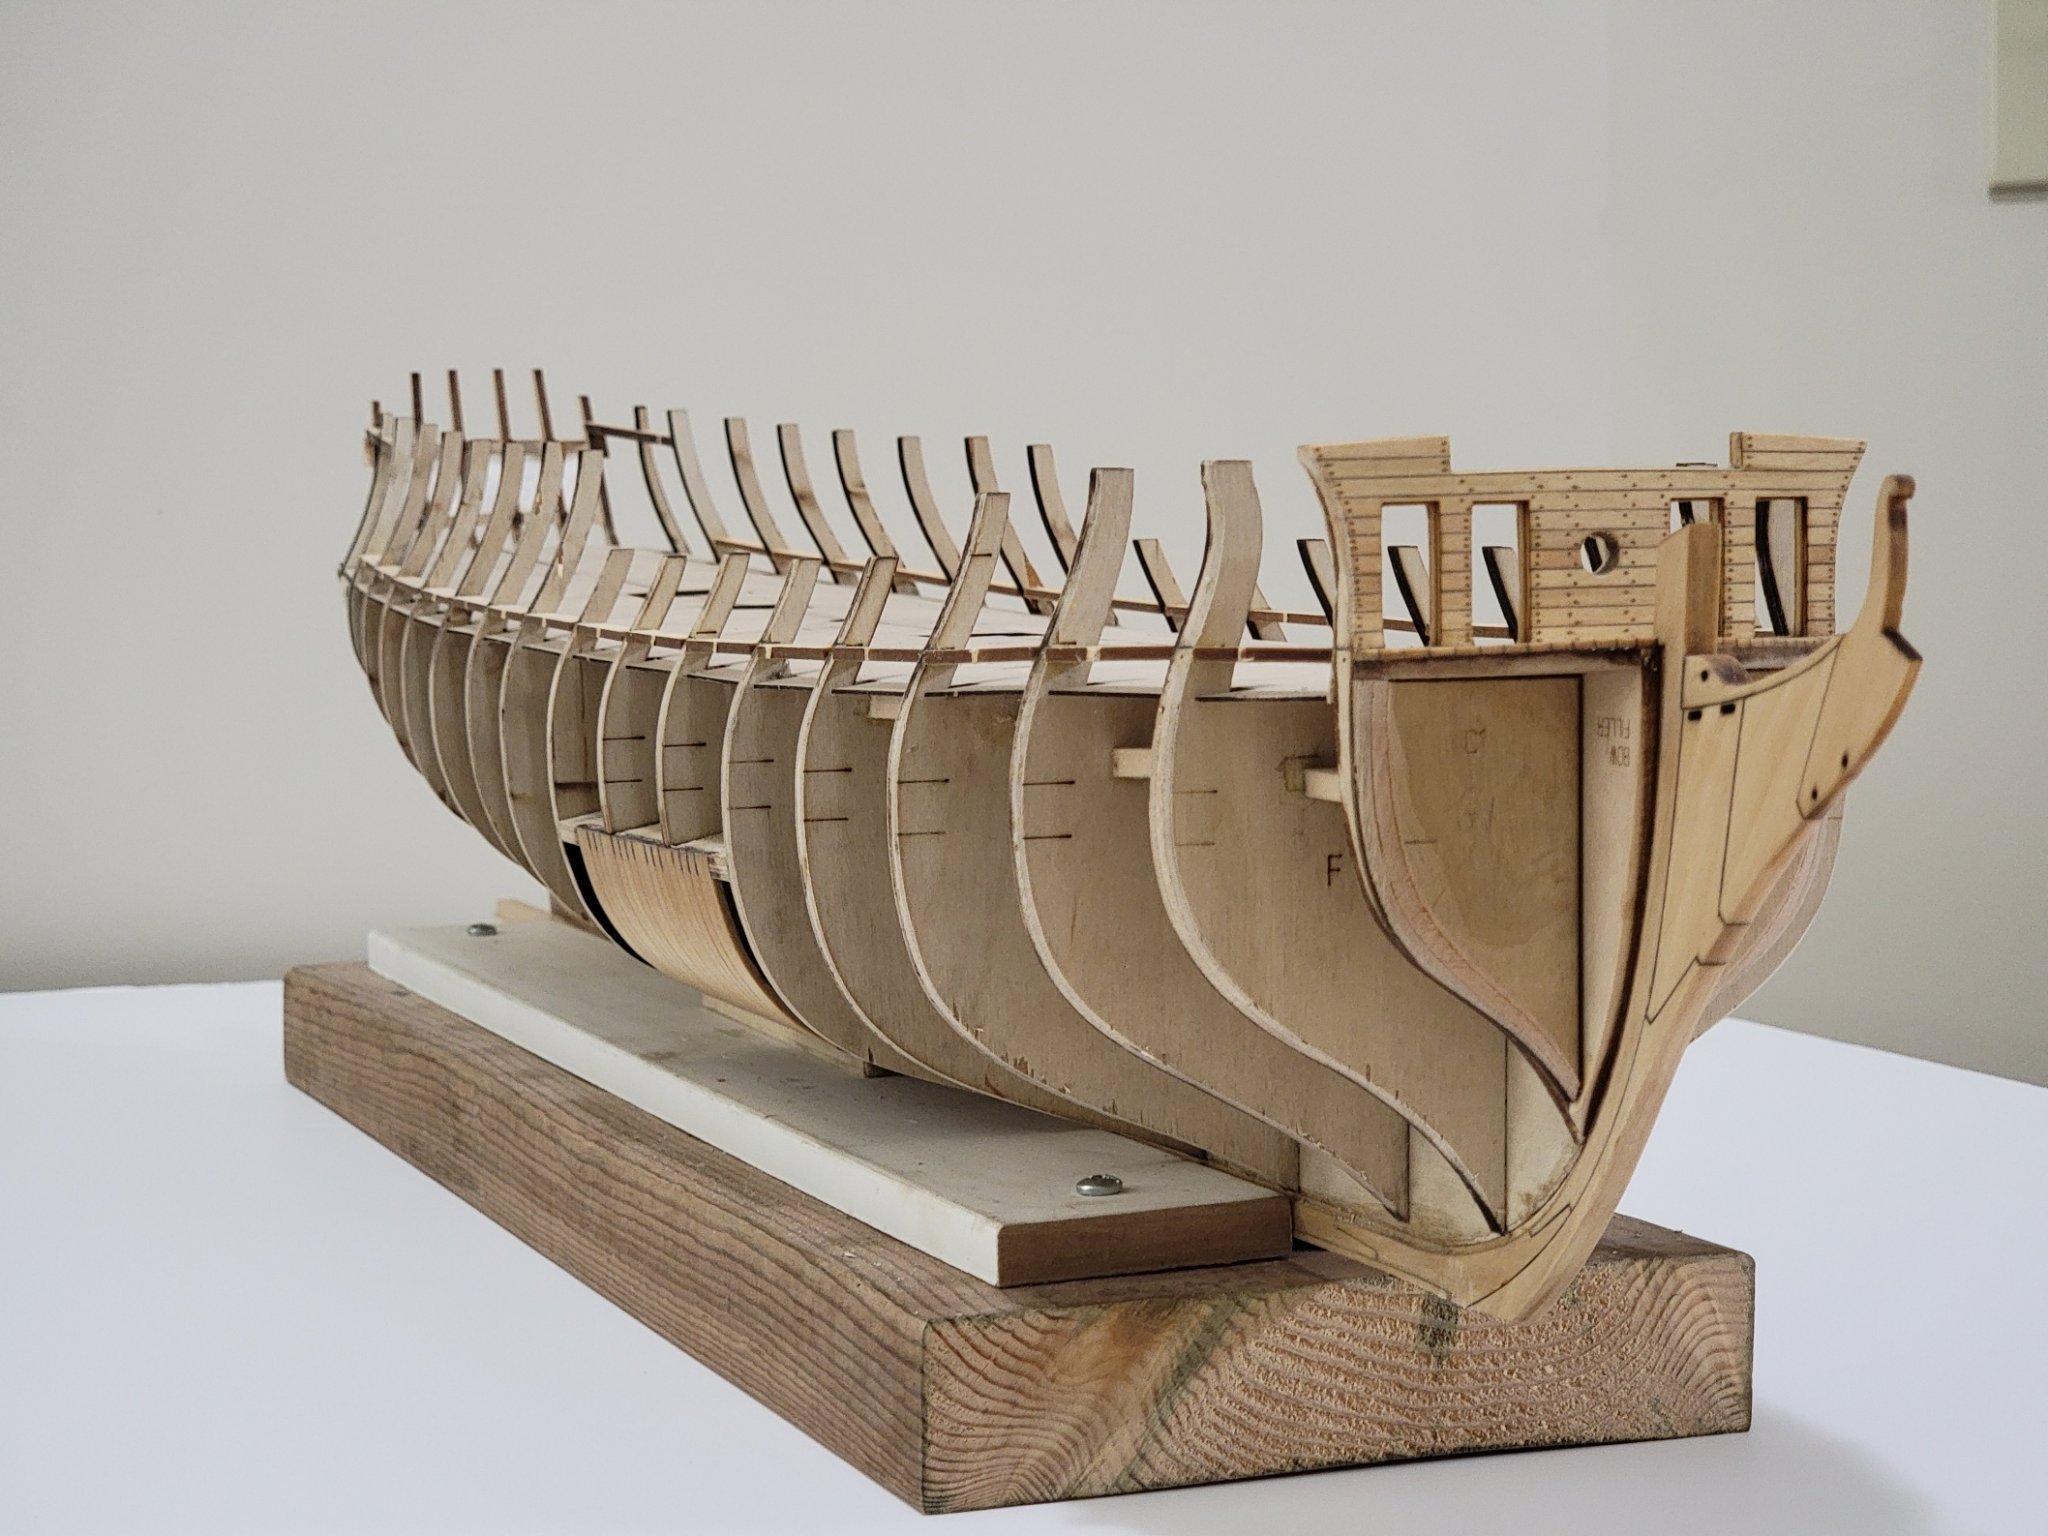
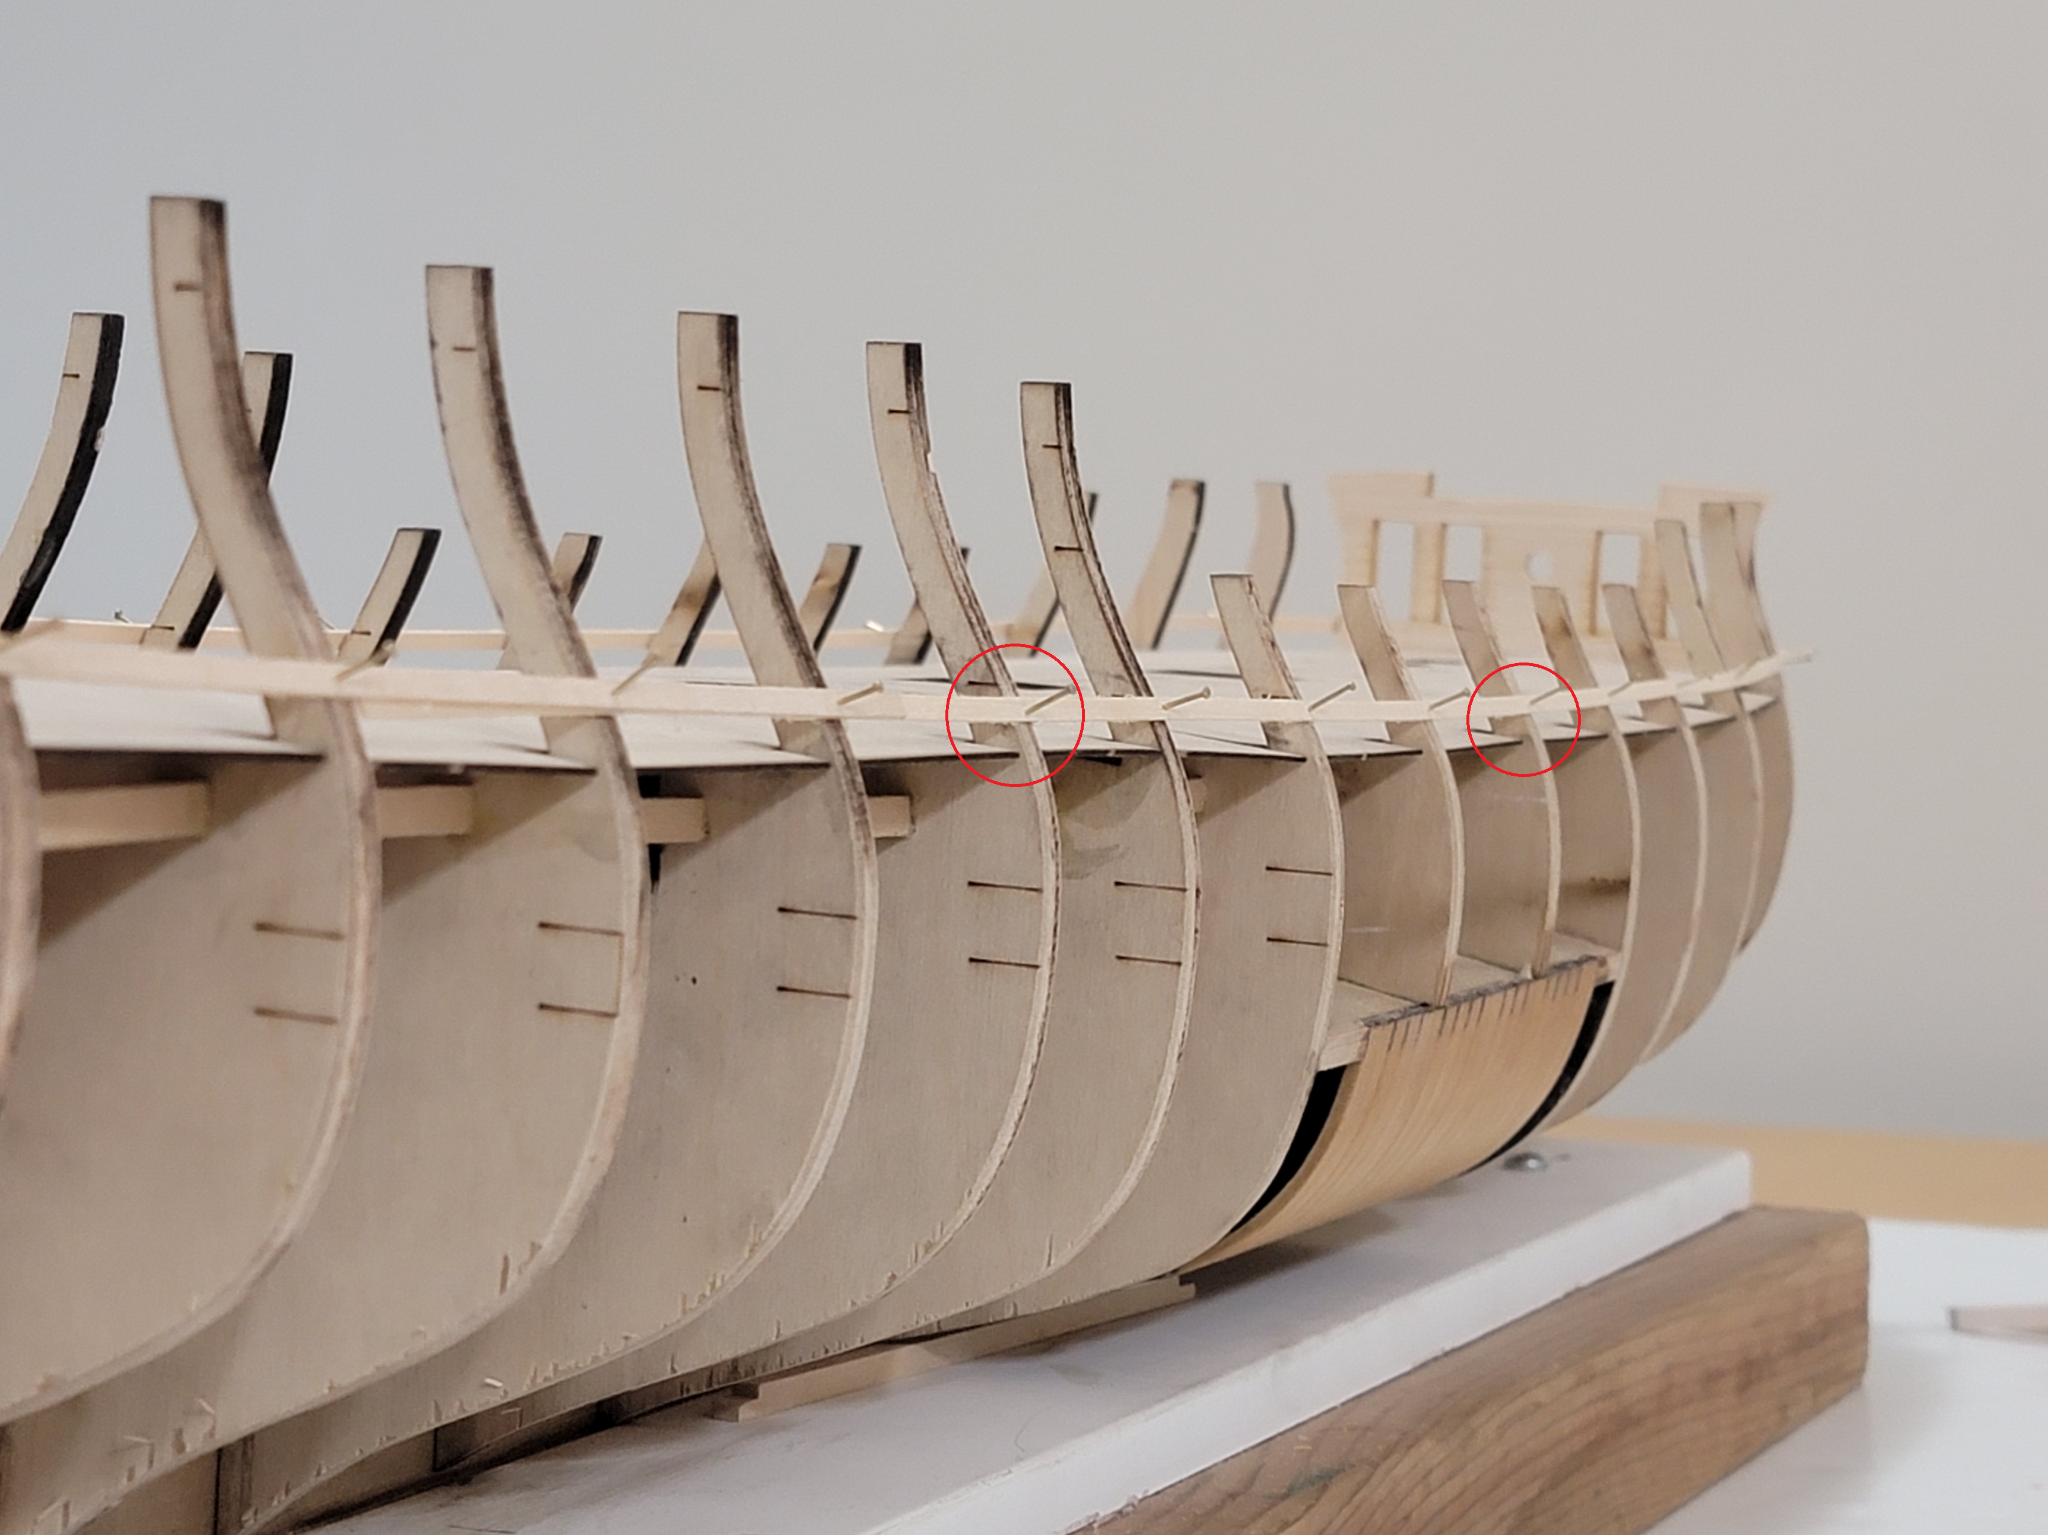
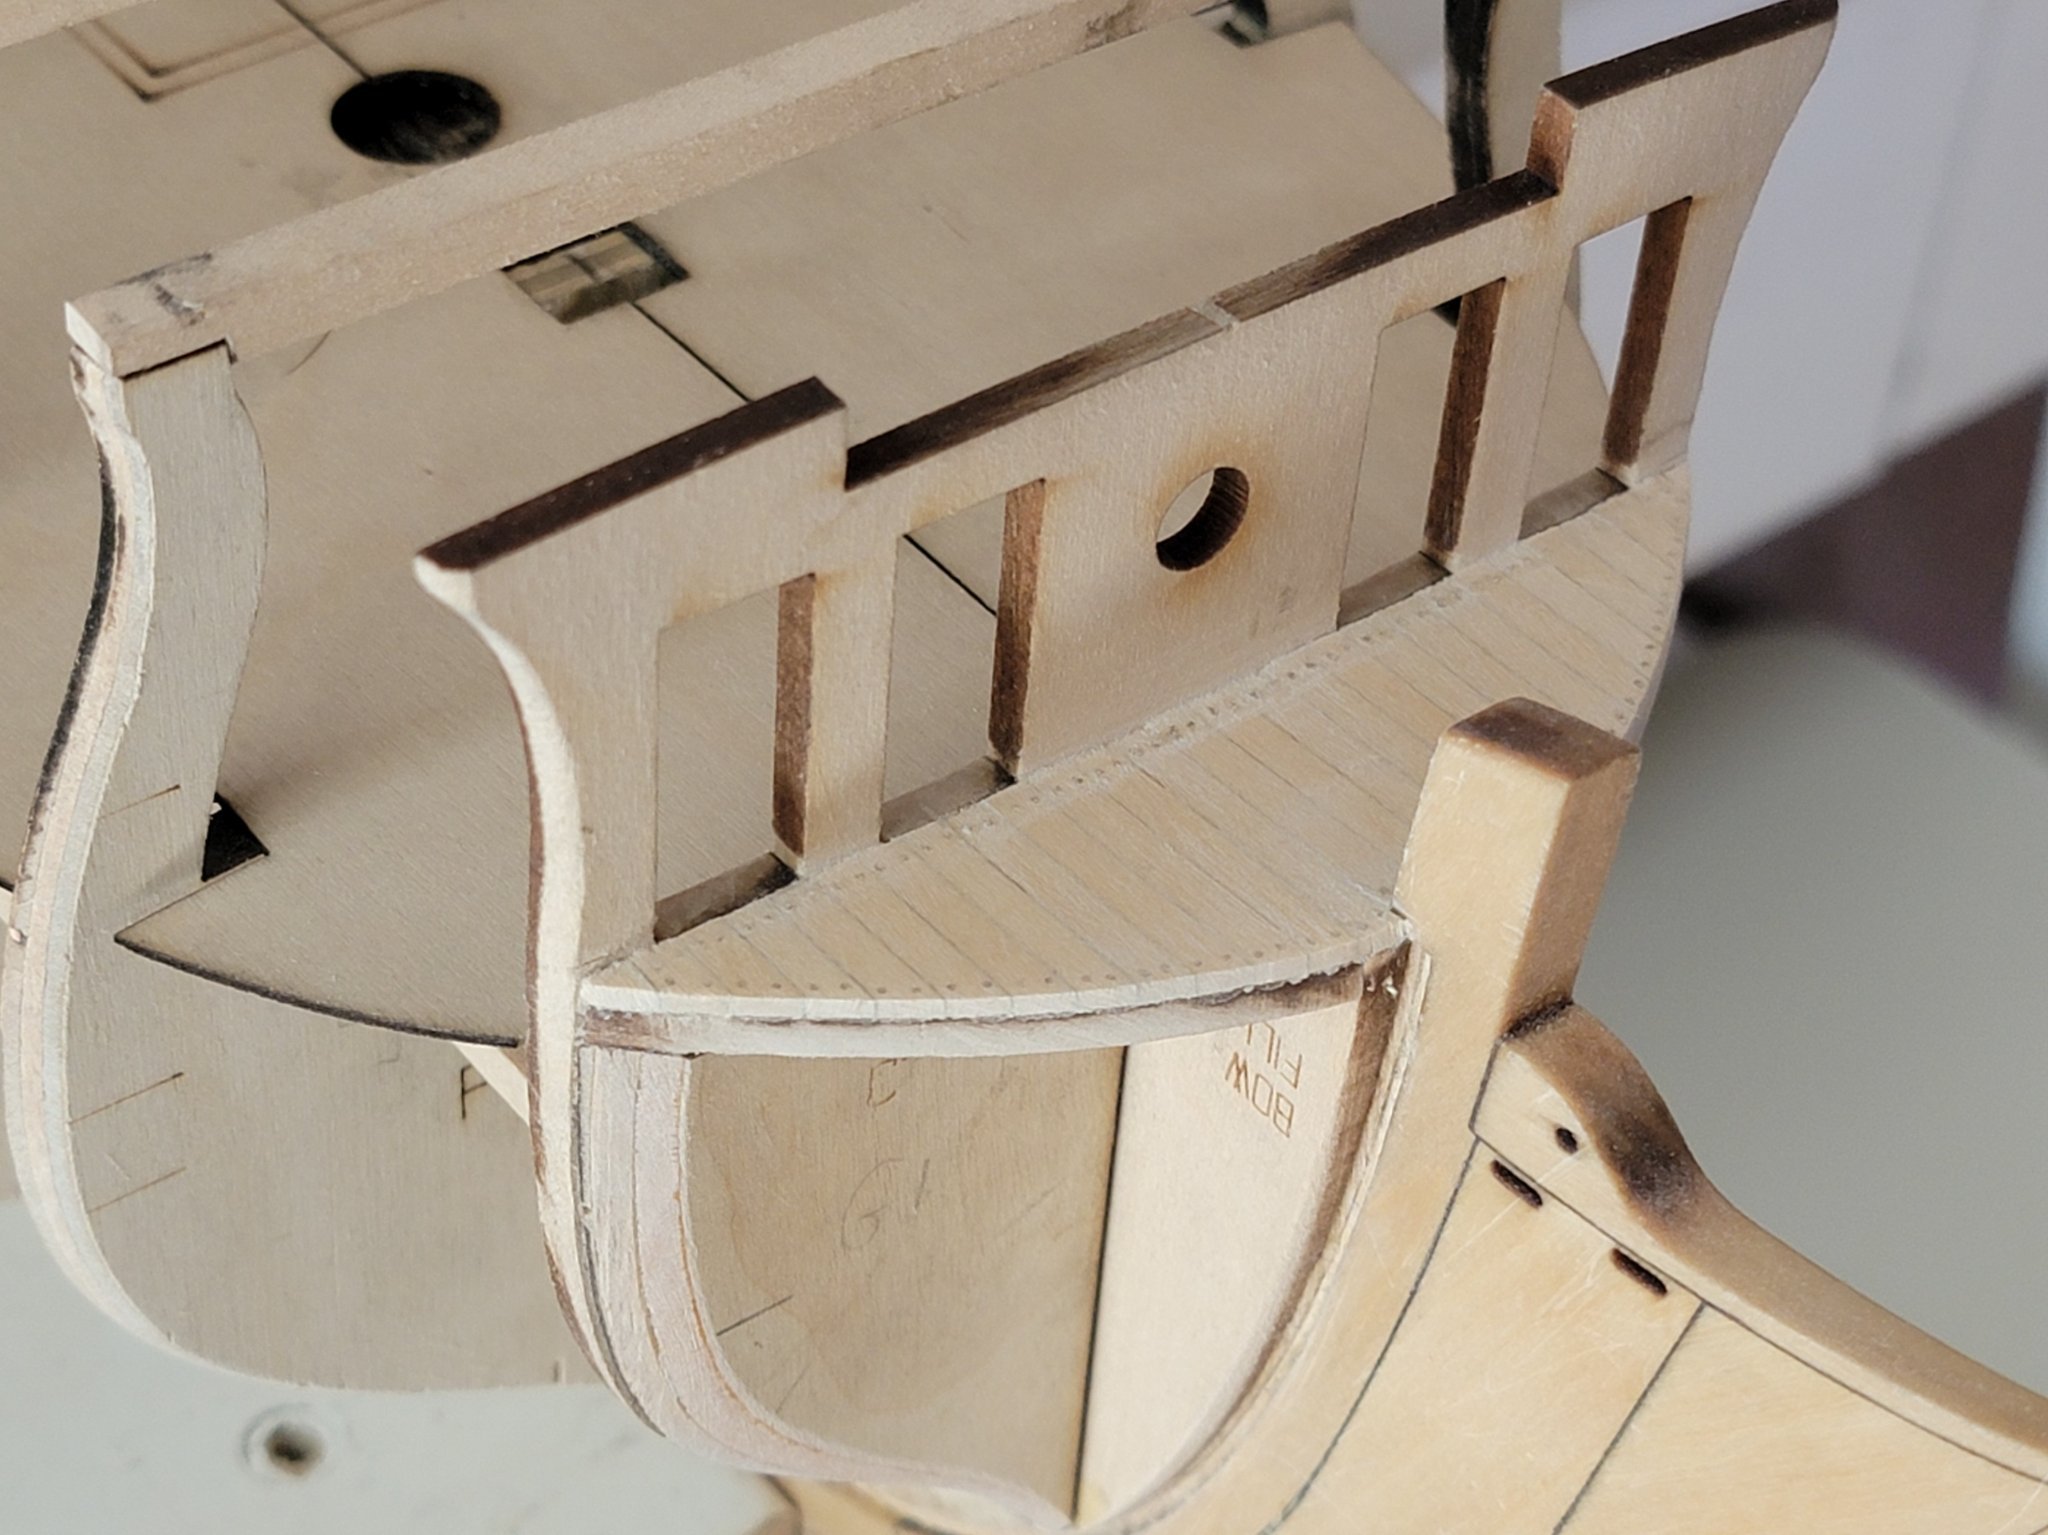
The sides of the gun ports have now been framed and faired. It was very satisfying vacuuming the area revealing the smooth lines!
There were some areas where the bulkheads were not truly perpendicular to the keel, so I had to glue some extra pieces so that the framed sides are symmetrical between both sides.
Anyways, here are the photos!


- chris watton, egkb, Edwardkenway and 16 others
-
 19
19
-
-
4 hours ago, Wahka_est said:
Looks really good. Better than mine as i used a lot of glue to make it stick. The lintels were coming off when sanding so i glued it permanently

Thank you! A couple of mine also came out, so will need to put some extra glue, but I think the vertical pieces will help with making it more secure 😄
-
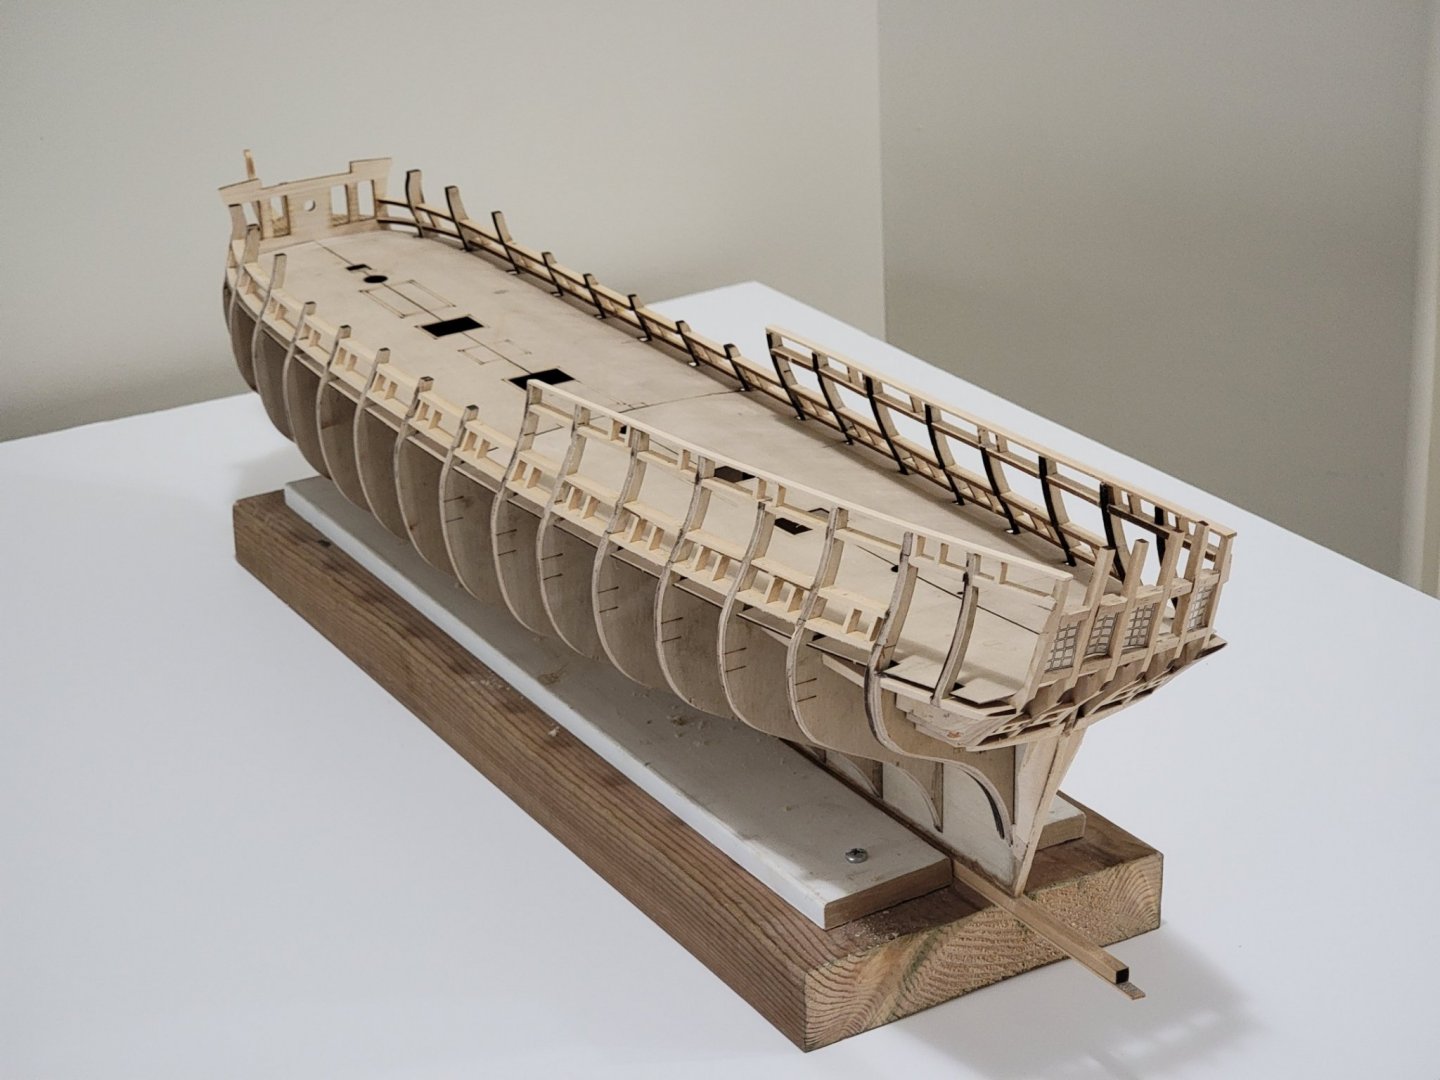
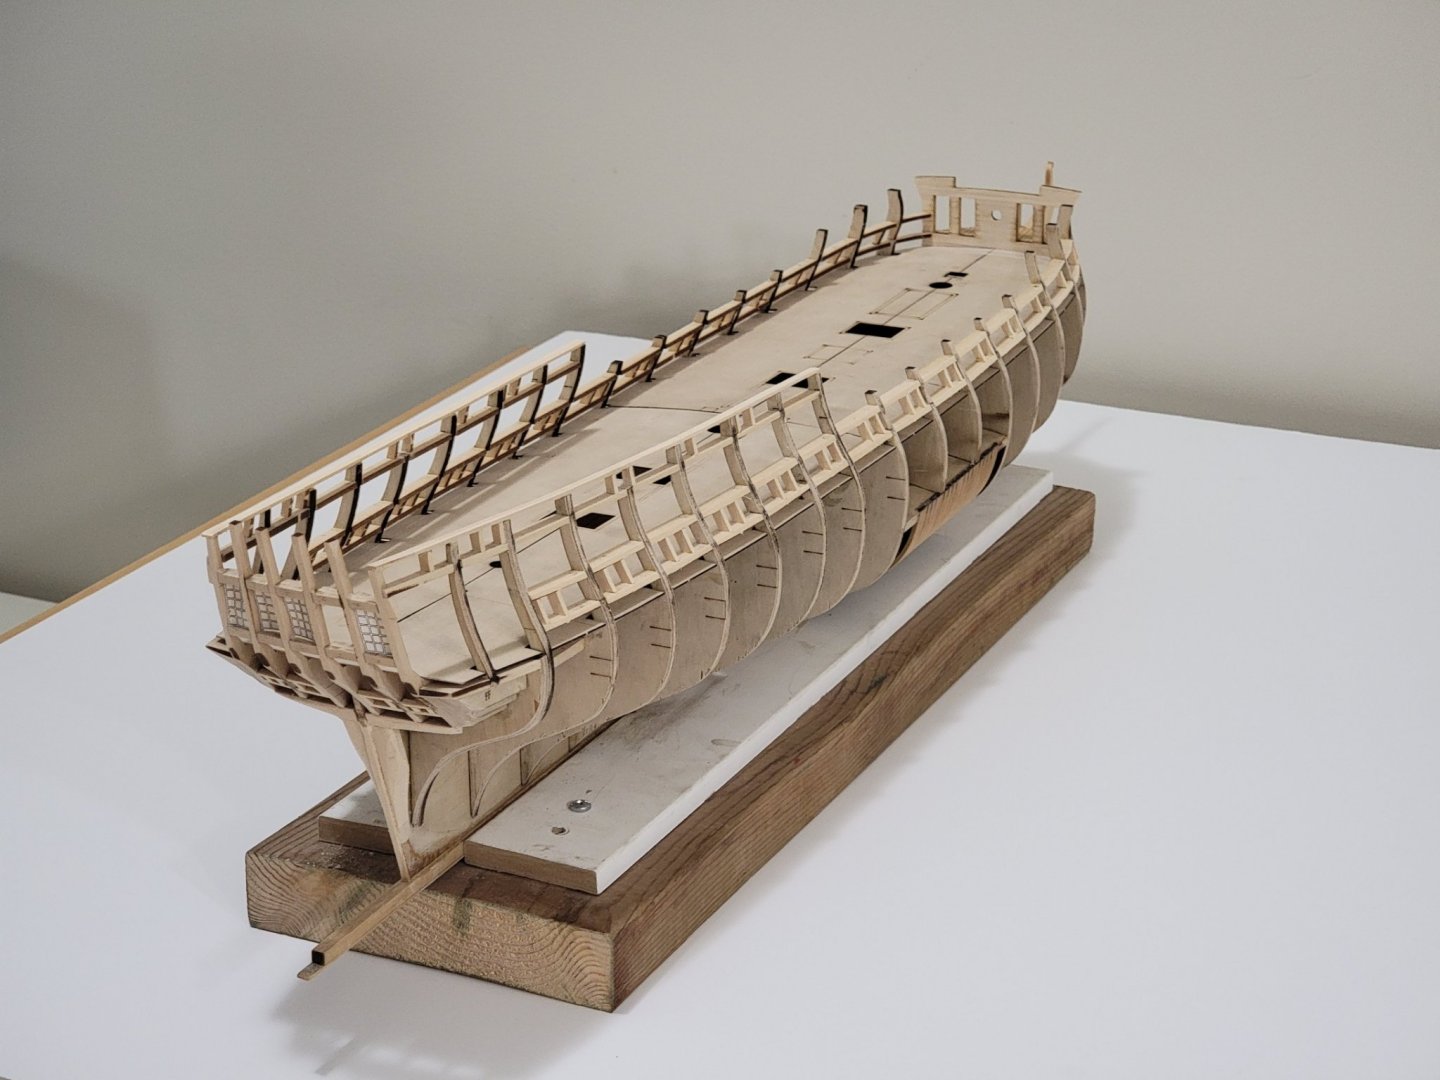
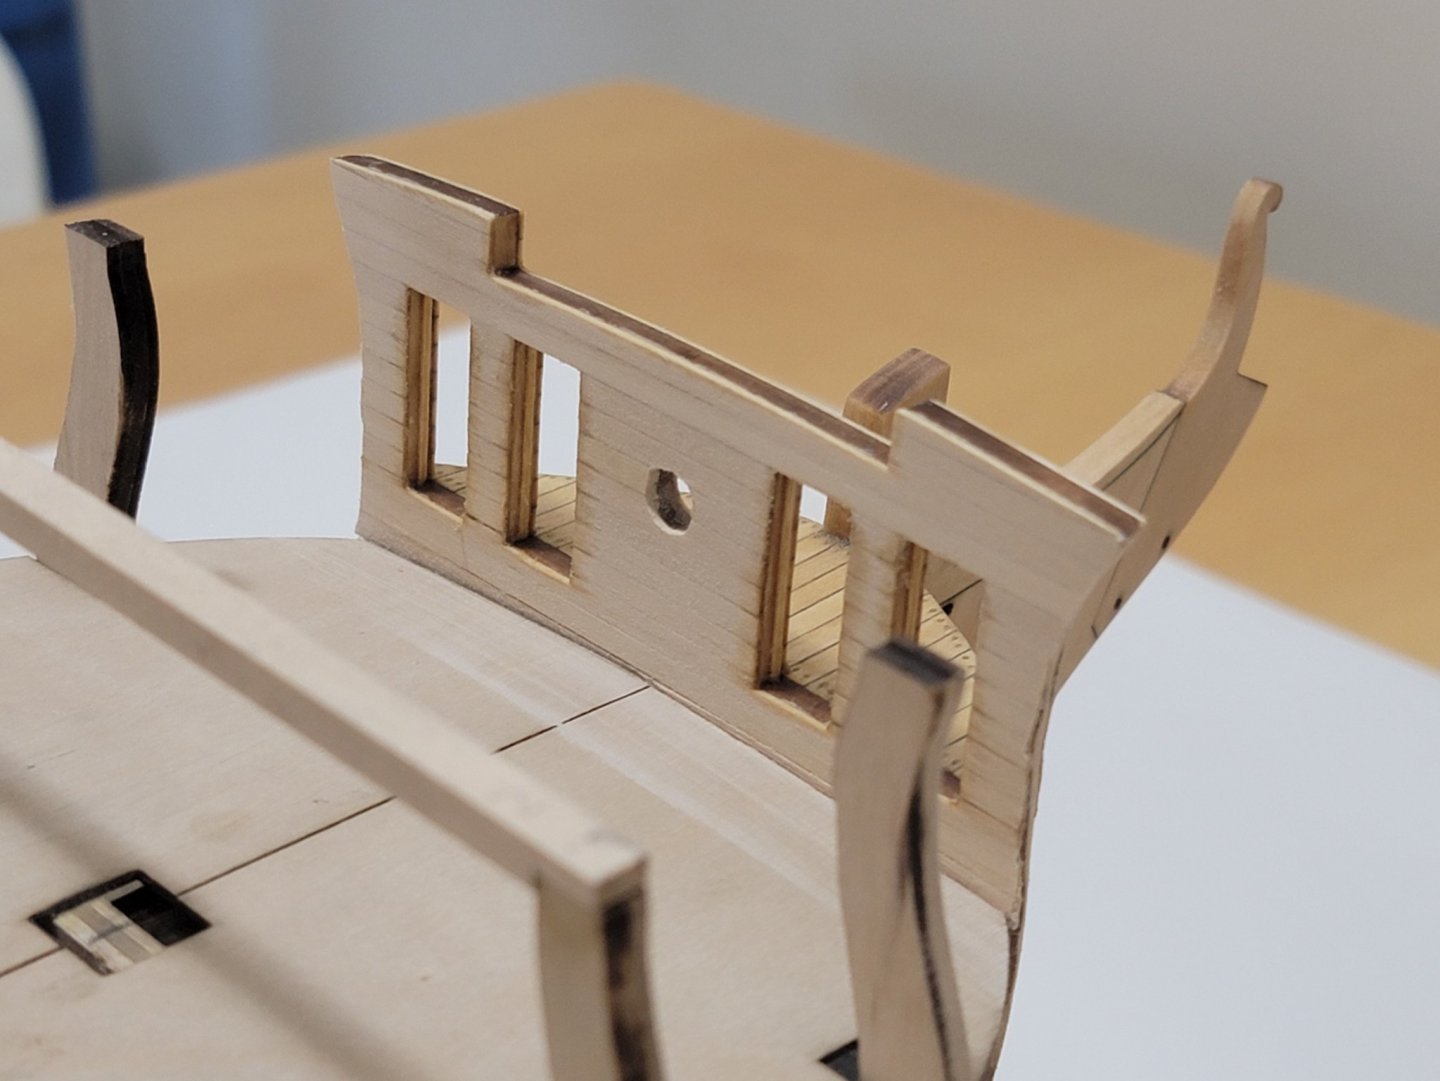
Moving along at a slow but steady state. The lintels and sills are now all glued permanently. For the lintel of the quarter deck, I used binder clips to hold the slight curve in position while the glue dried. Here are a few pics before I start the vertical parts of the framing!


Also, please do not hesitate to comment if I made any mistakes 🙂.
-
-
On 7/8/2021 at 9:51 PM, desalgu said:
deadwood area
Correct me if I am wrong but this is the section where there is no cavity in the ship (like at the stern).

The planking is looking great btw! Can't wait to see the entire hull covered up 😁
-
Thank you Steven!
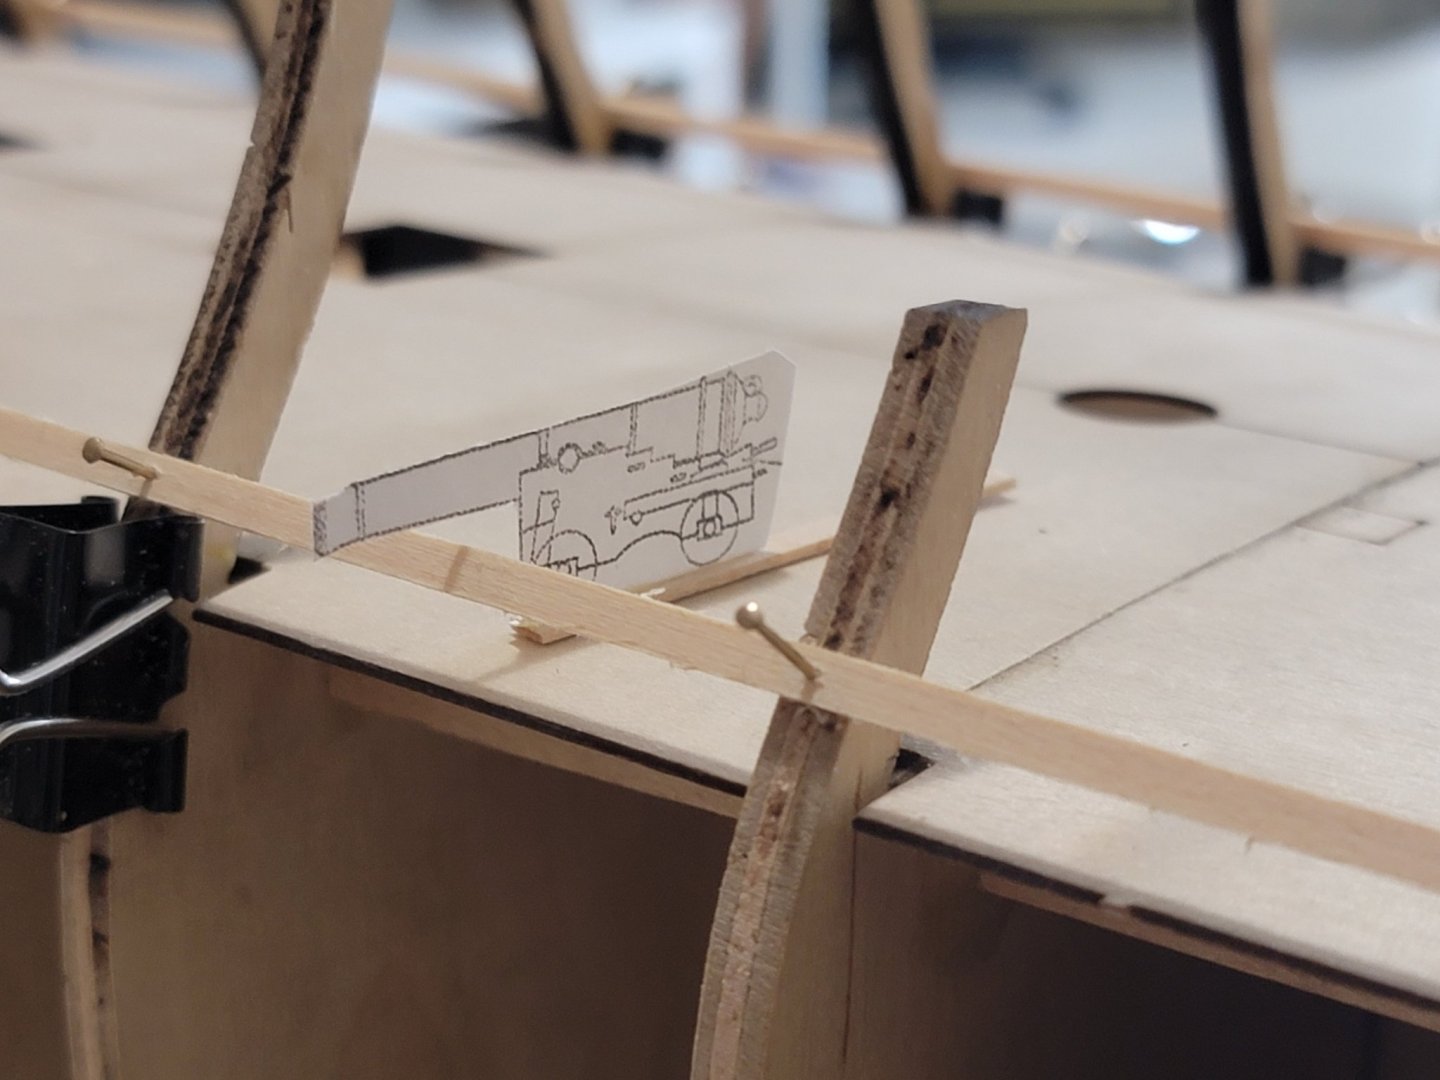
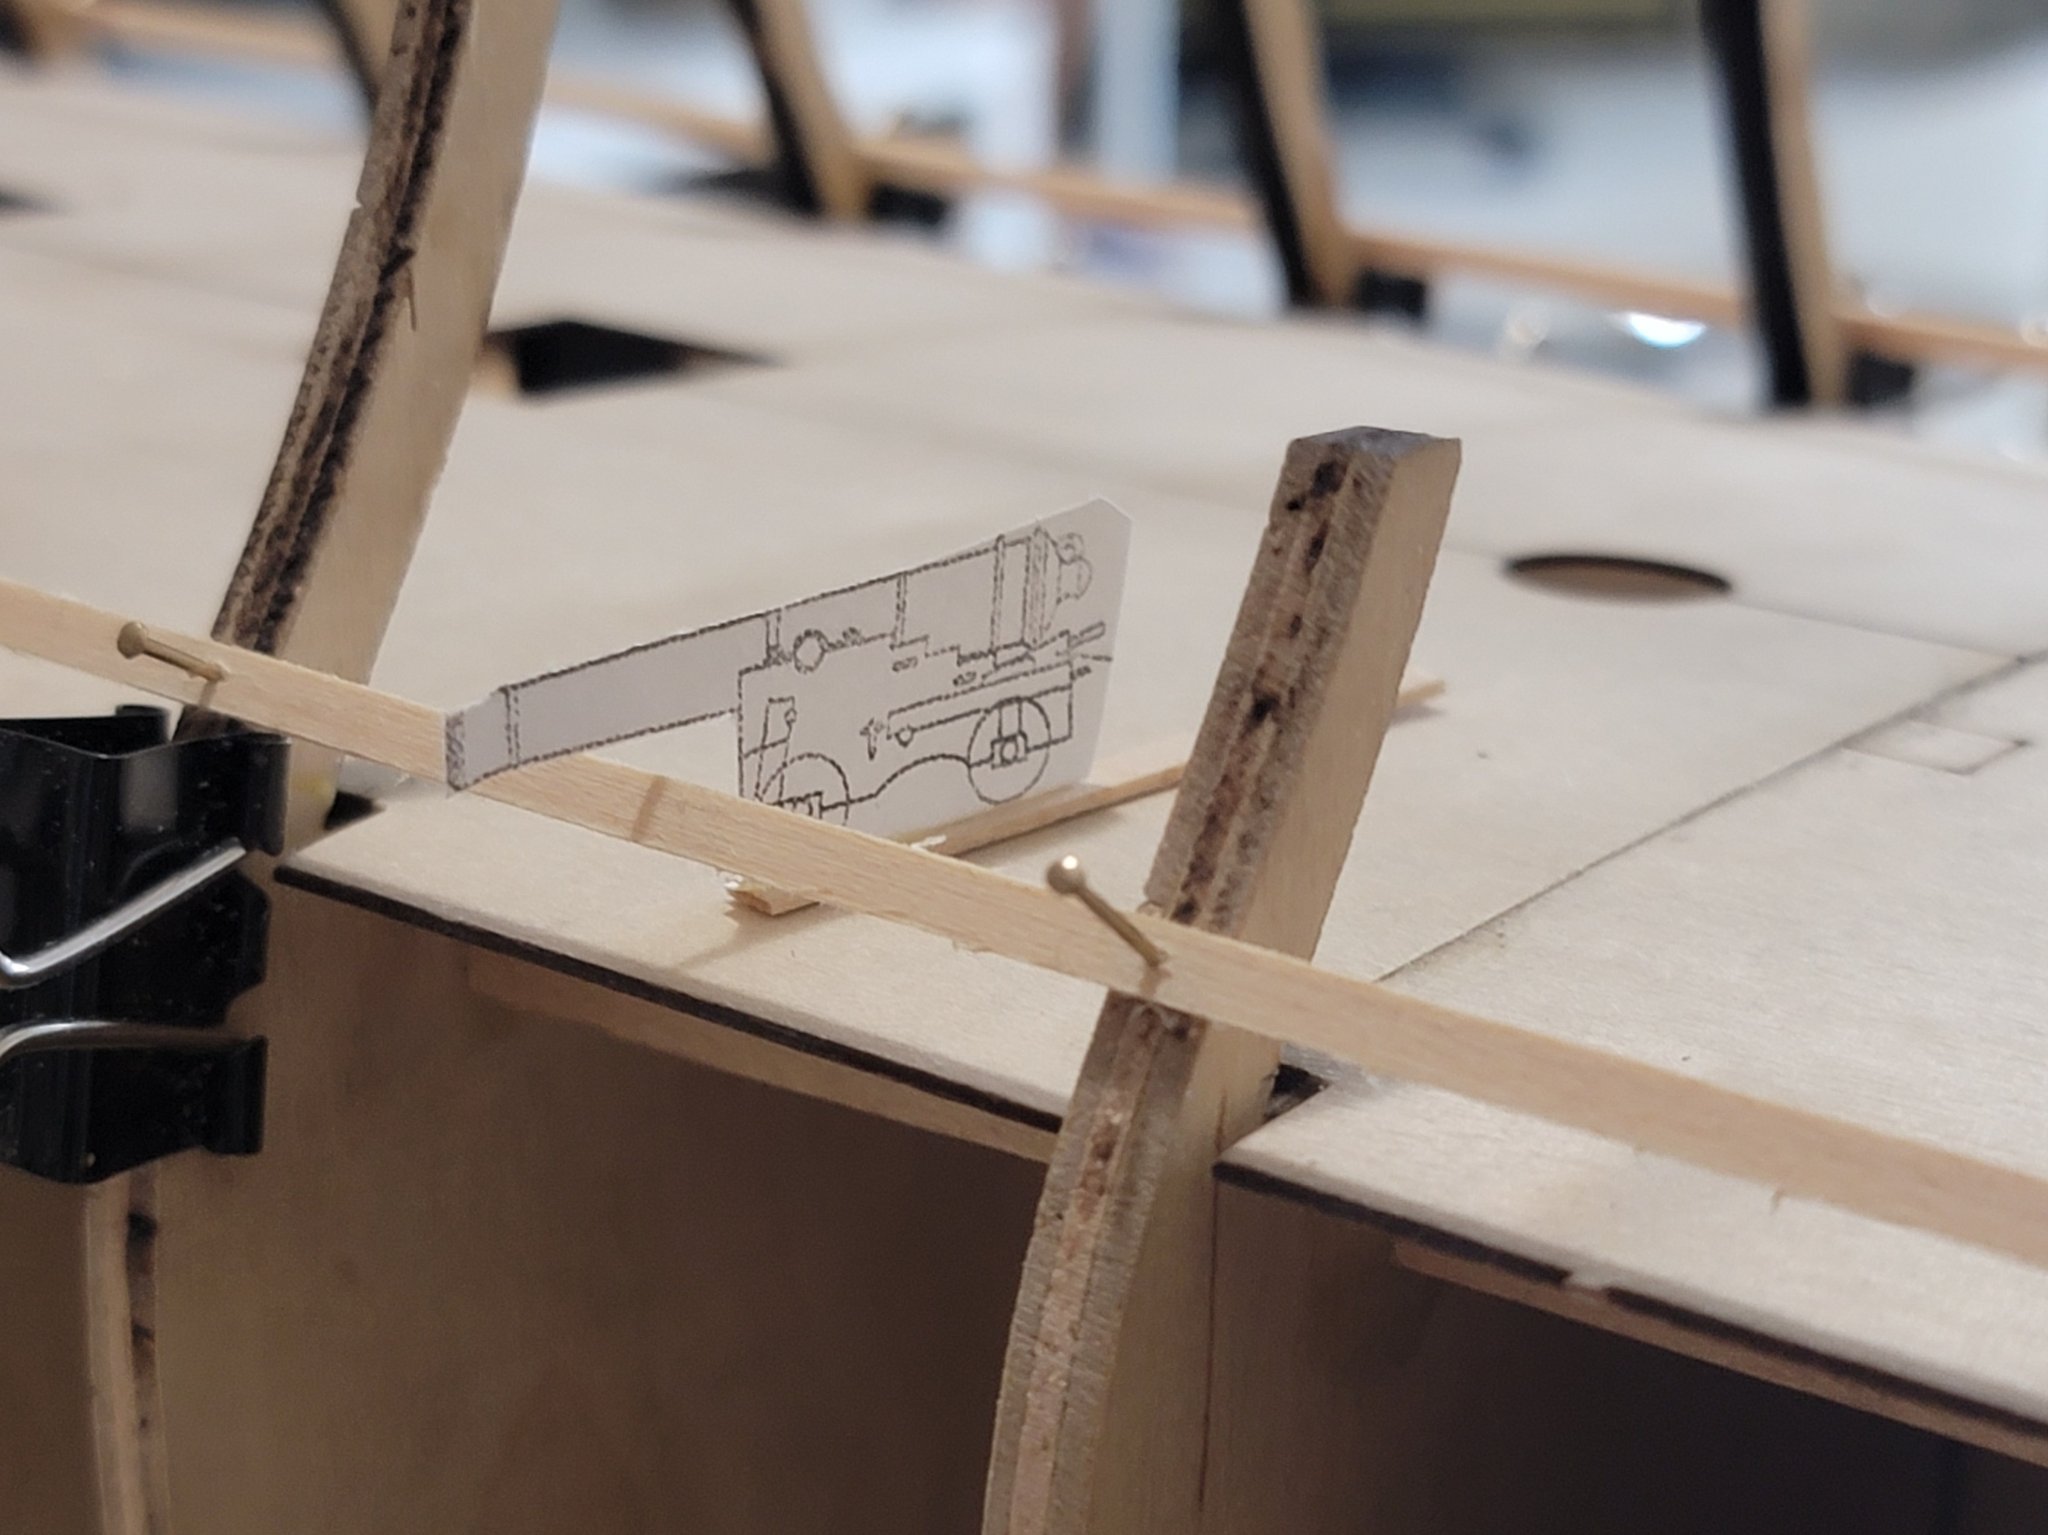
I made the small jig of the canon, and it seemed to clear the batten at all locations by the same distance:
I then started gluing in the sills. First, to cut them I lined them up at the bulkhead, used a sharp #11 blade to mark the location of the cut, then used the hand saw to cut them out. This resulted in most of the pieces fitting nicely in the first go. I then glued pairs from both sides together to make sure they are completely horizontal. This was done by resting a ruler on them to make sure they were flat. Here are a few pics showing where I am at:


Next up are the lintels. These should be a bit easier than the sills as I will use a strip of wood to act as a spacer, so no need to adjust each piece very carefully.
-
I hope you continue working on the model. I'm loving the progress you've made. The photos are like eye candy!
-
Never mind! I think I fixed it. I used the second option of removing bits and pieces from about 2 cm in to the edge of the bulkhead using a #11 blade. It was very tricky, so I had to be a bit slow and deliberate when removing the excess material. I used these clips to hold the the false deck so I could see if it is level or not. Seems to be good now (or at least much better!). Before permanently assembling the sills, I will make sure the guns can fit nicely using a cutout of the plans. So that will be the next step..

- Gahm, abelson, Retired guy and 13 others
-
16
-
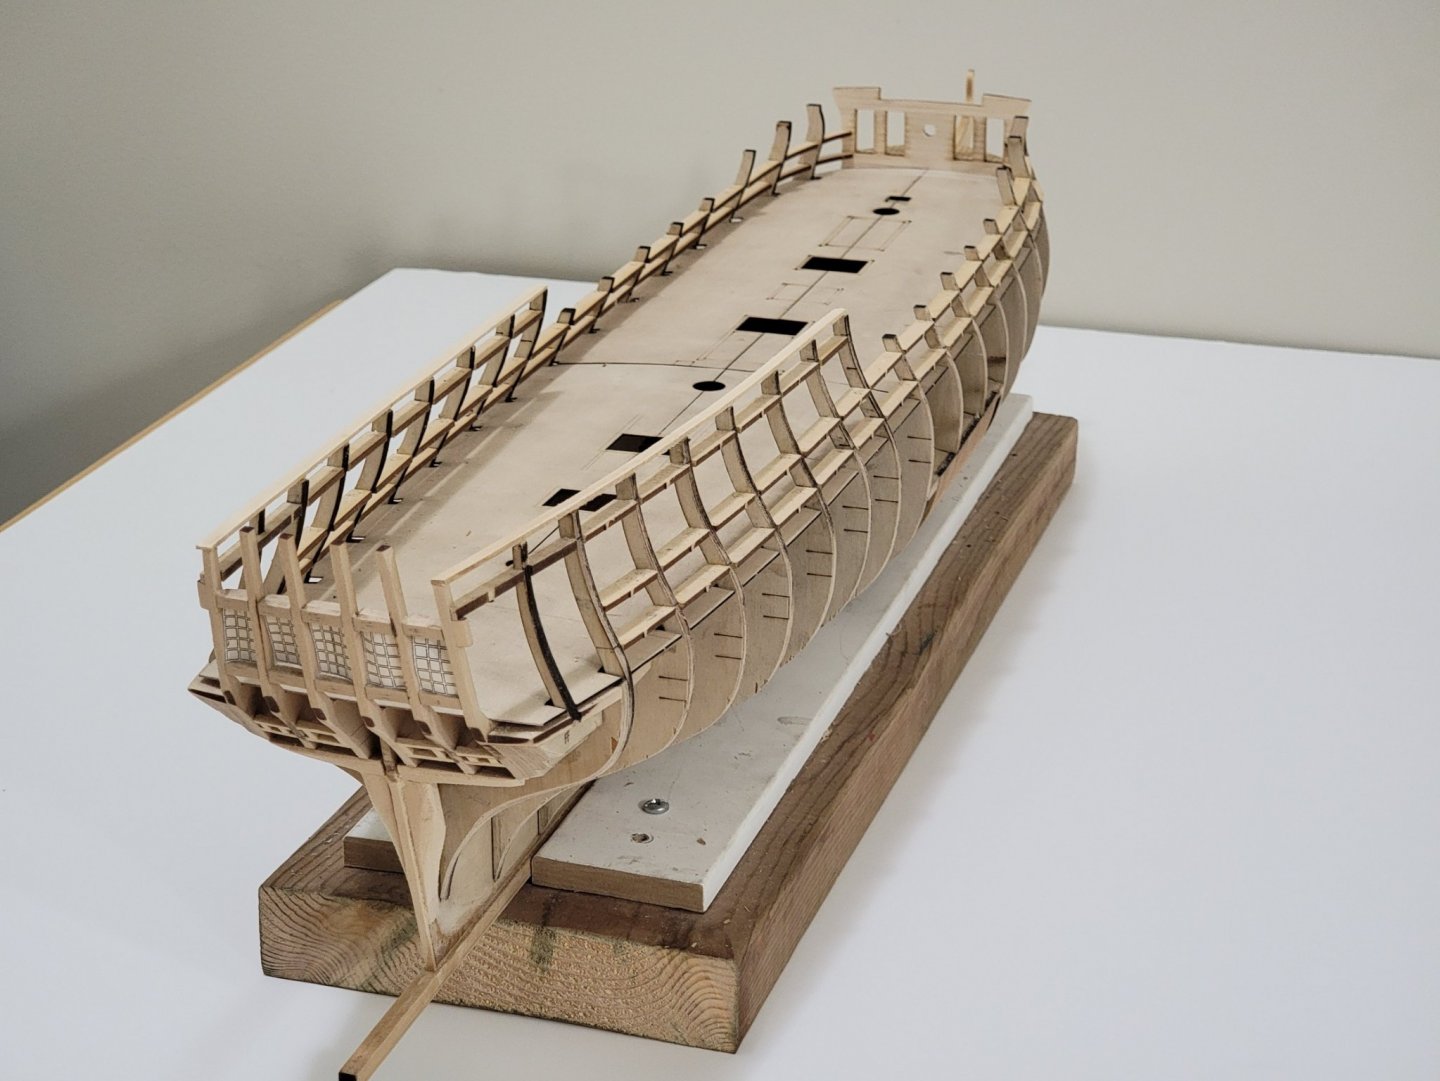
I hit a bit of a snag when using the testing batten to see the sills of the gun ports. I noticed I did not completely sand my bulkheads flat before gluing down the false deck. So now there are two spots where the deck is not level at the ends of the bulkhead. Here is a picture that shows this issue:

All these issues arose because the two problem bulkheads did not fully enter the slots for them. Only if I had quadruple checked!!

To resolve this, I think I have to carefully remove the false deck and sand the tops again to be level with each other. Another (tricky) way would be to remove bits and pieces of the bulkhead below the false deck until it remains flat. I will probably spend a day or two deciding what to do... If anyone has any idea I am all ears! I was also considering asking for replacement parts from ModelExpo and start the thing again, but I will try fixing this before I go that route.
- Edwardkenway, abelson, Cathead and 1 other
-
4
-
The display case looks amazing! Very professional. Awesome work!!!
-
4 minutes ago, CaptMorgan said:
all of the deck fittings removable
I hope I remember this for my Confed build. The decking is looking great!!! 😀
- FrankWouts and CaptMorgan
-
2
-
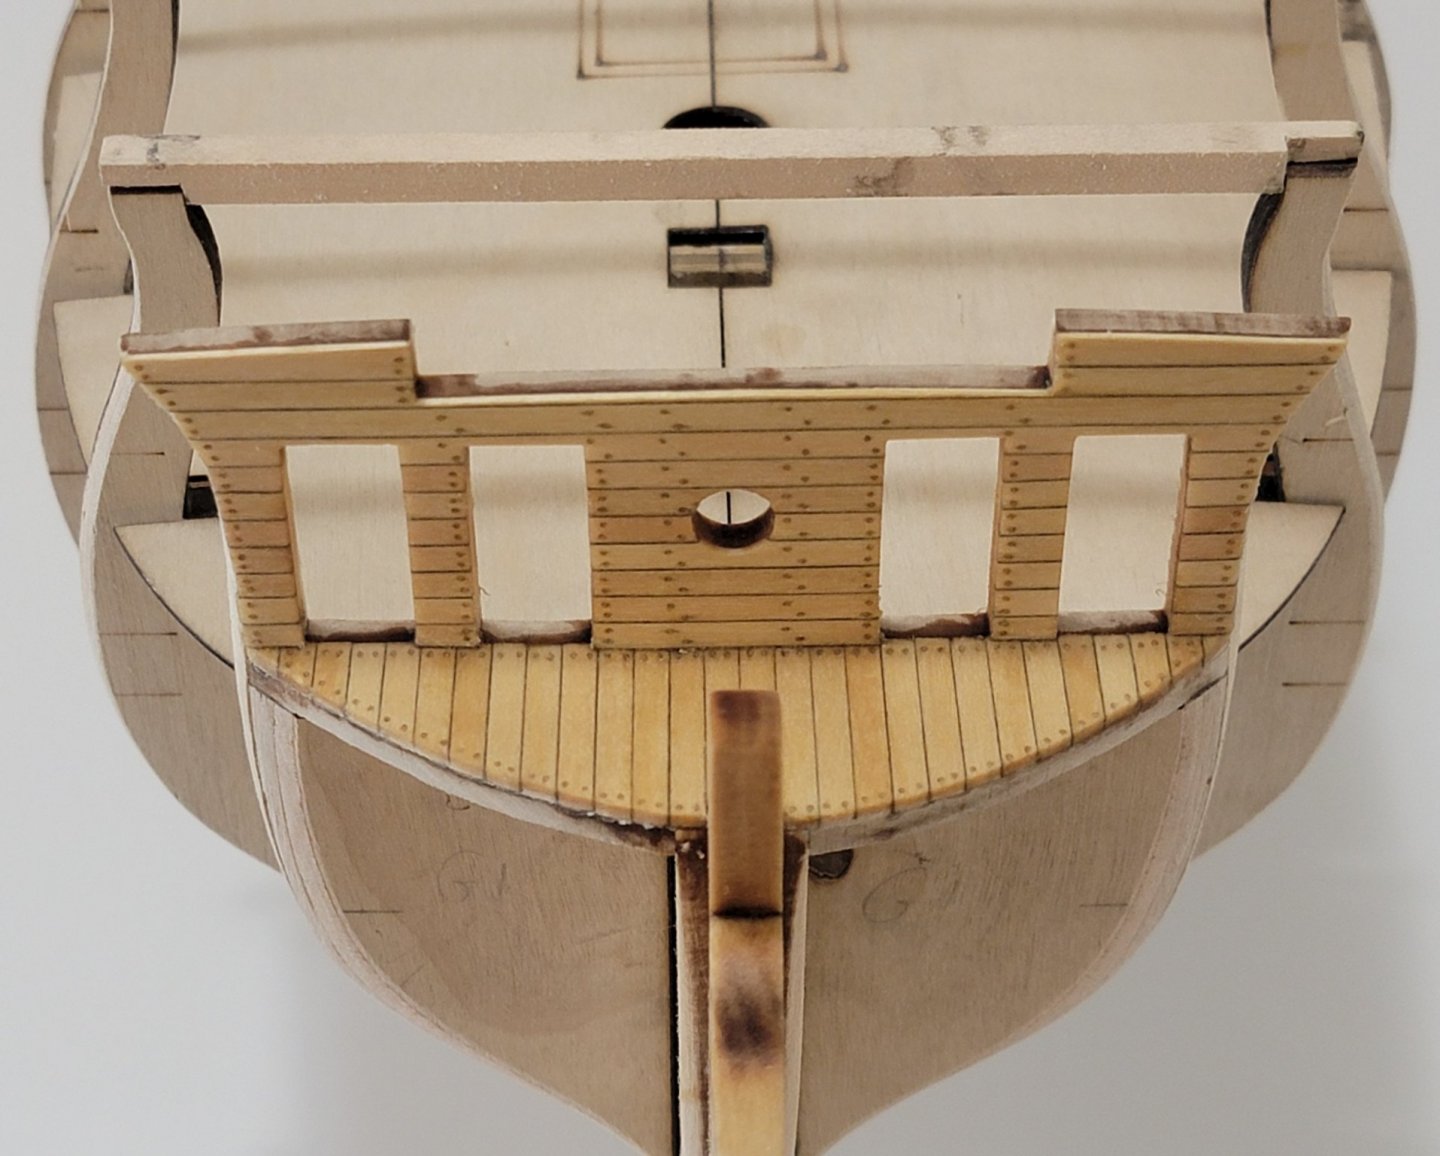
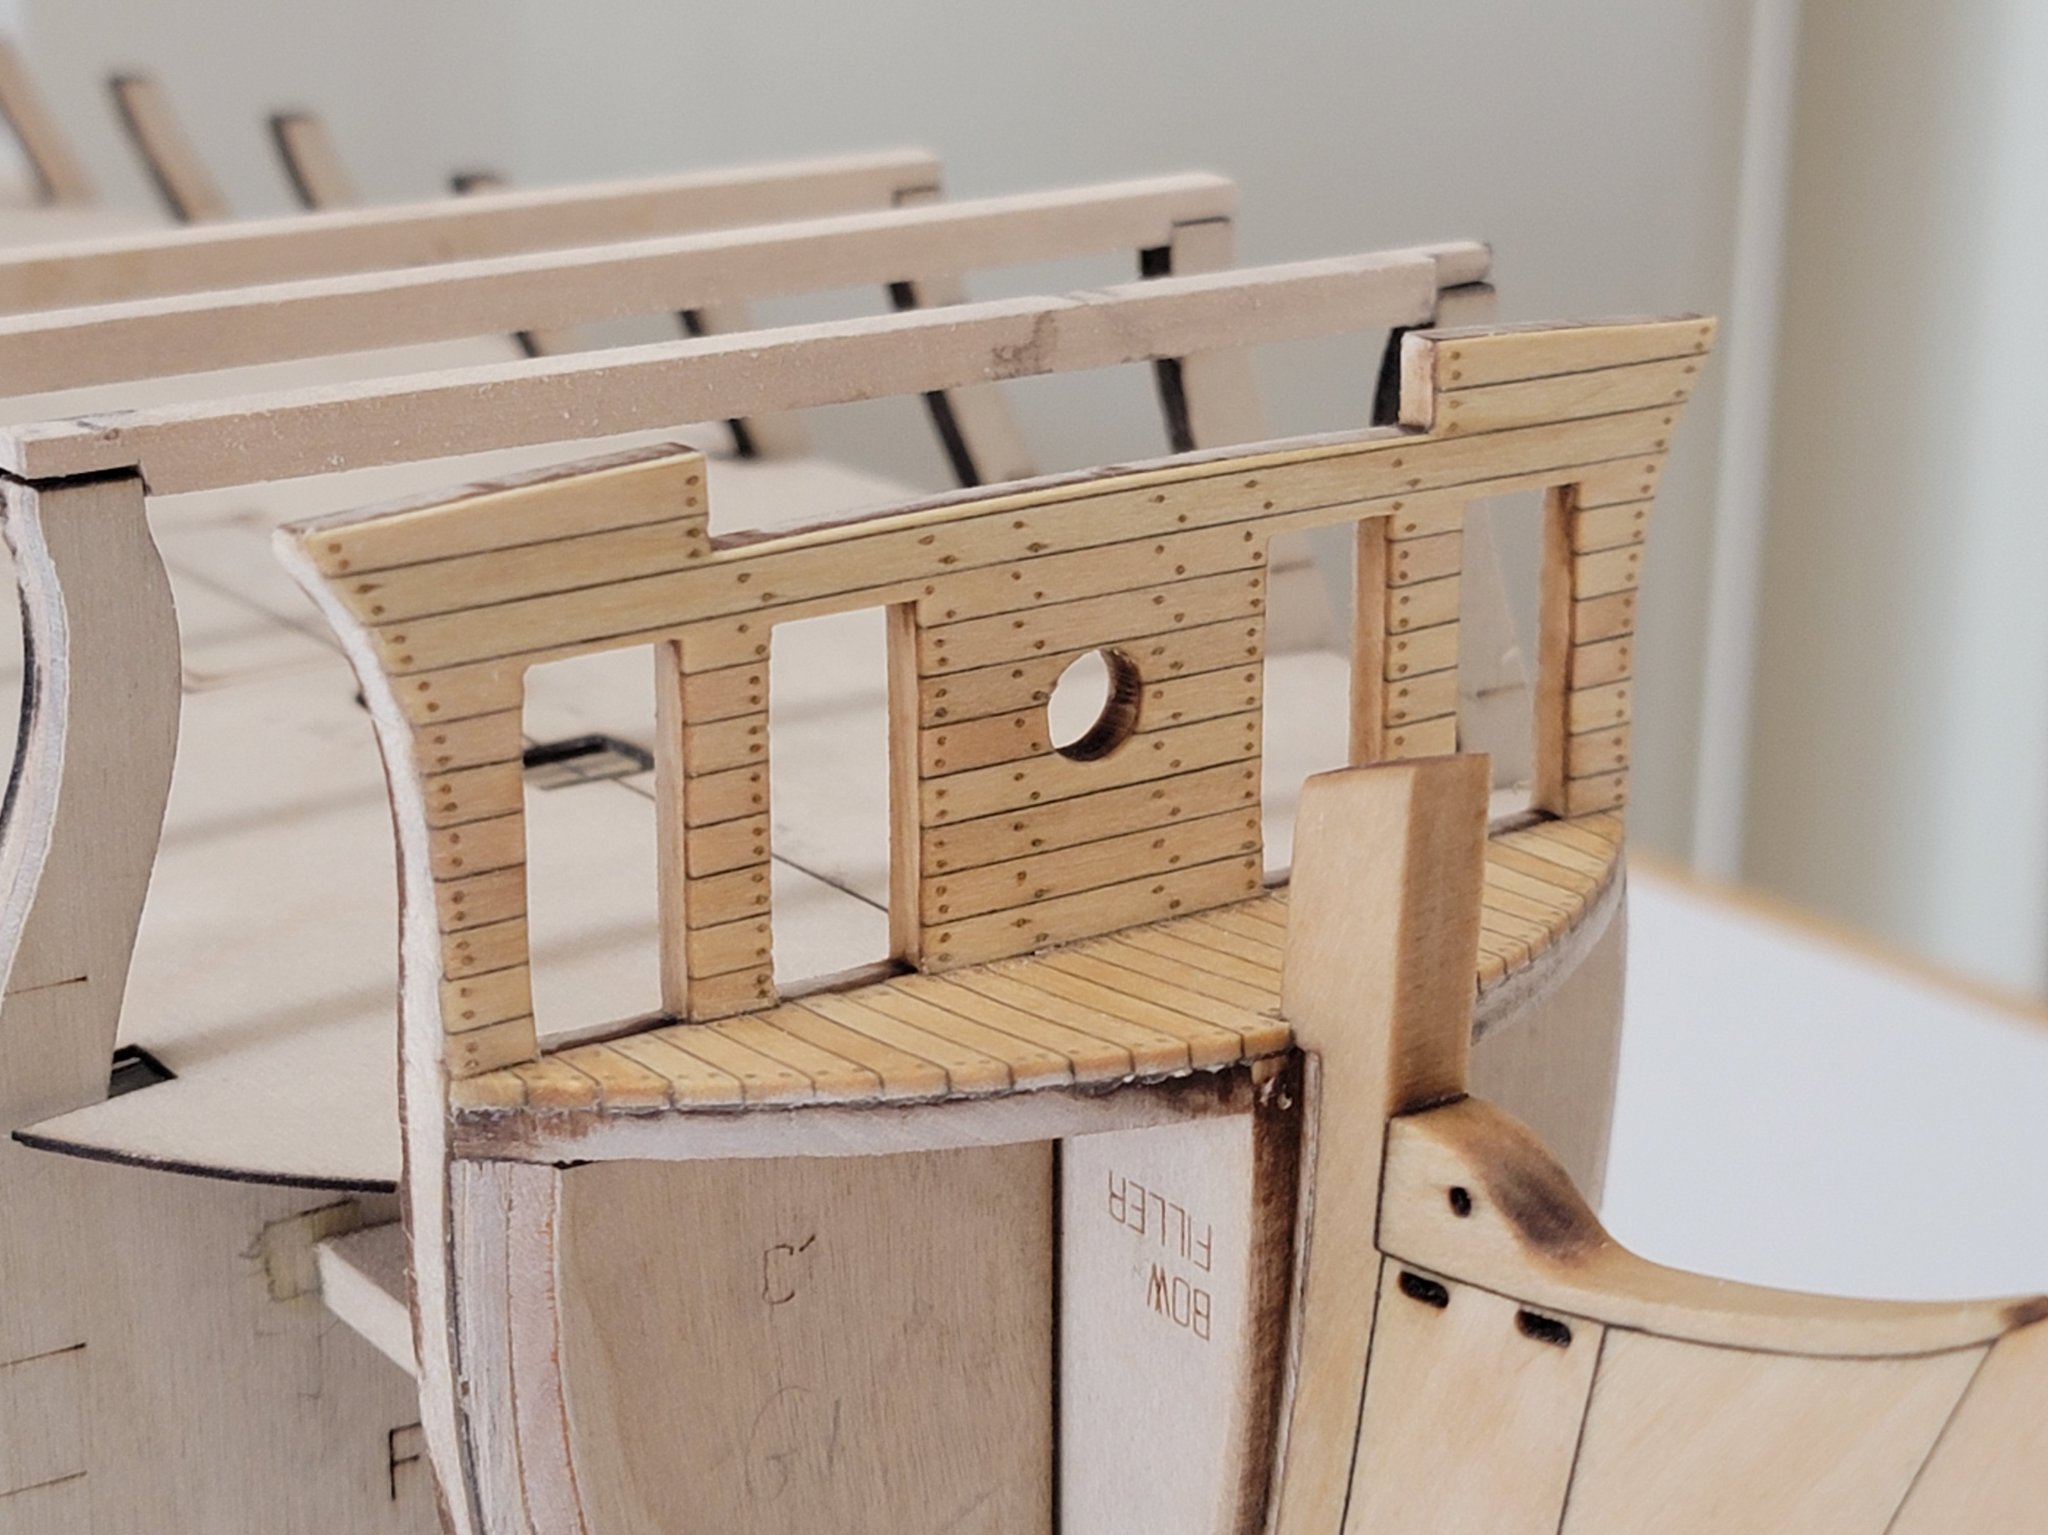
The aft side of the bulkhead is now planked. I installed the door jambs first which was not too great of an idea. I should have planked it first so I could file the edges more easily. I managed to cut the planks to shape, so it was not too bad, just took a bit longer. Here are some pics:

Next up is the gun port framing. This ship has lots of guns, so this will take a while 😄
-
Everything is looking top notch!
-
12 minutes ago, Overworked724 said:
By the way, forgot to say thank you for the kind kudos, Walrus. I constantly refer back to your build. 👍🏽No worries! I am really enjoying your progress and how you are improving what the kit offers. The realistic sheaves look awesome!
-
13 hours ago, desalgu said:
After seeing your tests, I like tung oil the best also, and I'm glad you decided to use that. It really brings out the grain in the wood. The planked parts you've done look super nice!
When you get to a place that you think you want to use sealer or acrylic again, do another test comparing it with tung oil. I think oil will be hard to beat and will still give you enough contrast with other wood. I'm thinking I'd better get some and give it a try.
9 hours ago, Peta_V said:That looks great!
Thank you for the compliments! I may try some other finishings later down the road if I feel inspired. But for now, tung oil is a pretty safe bet! 😉
-
All the best during your surgery, Michael. Get well soon!
- Keith Black and mtaylor
-
2
-
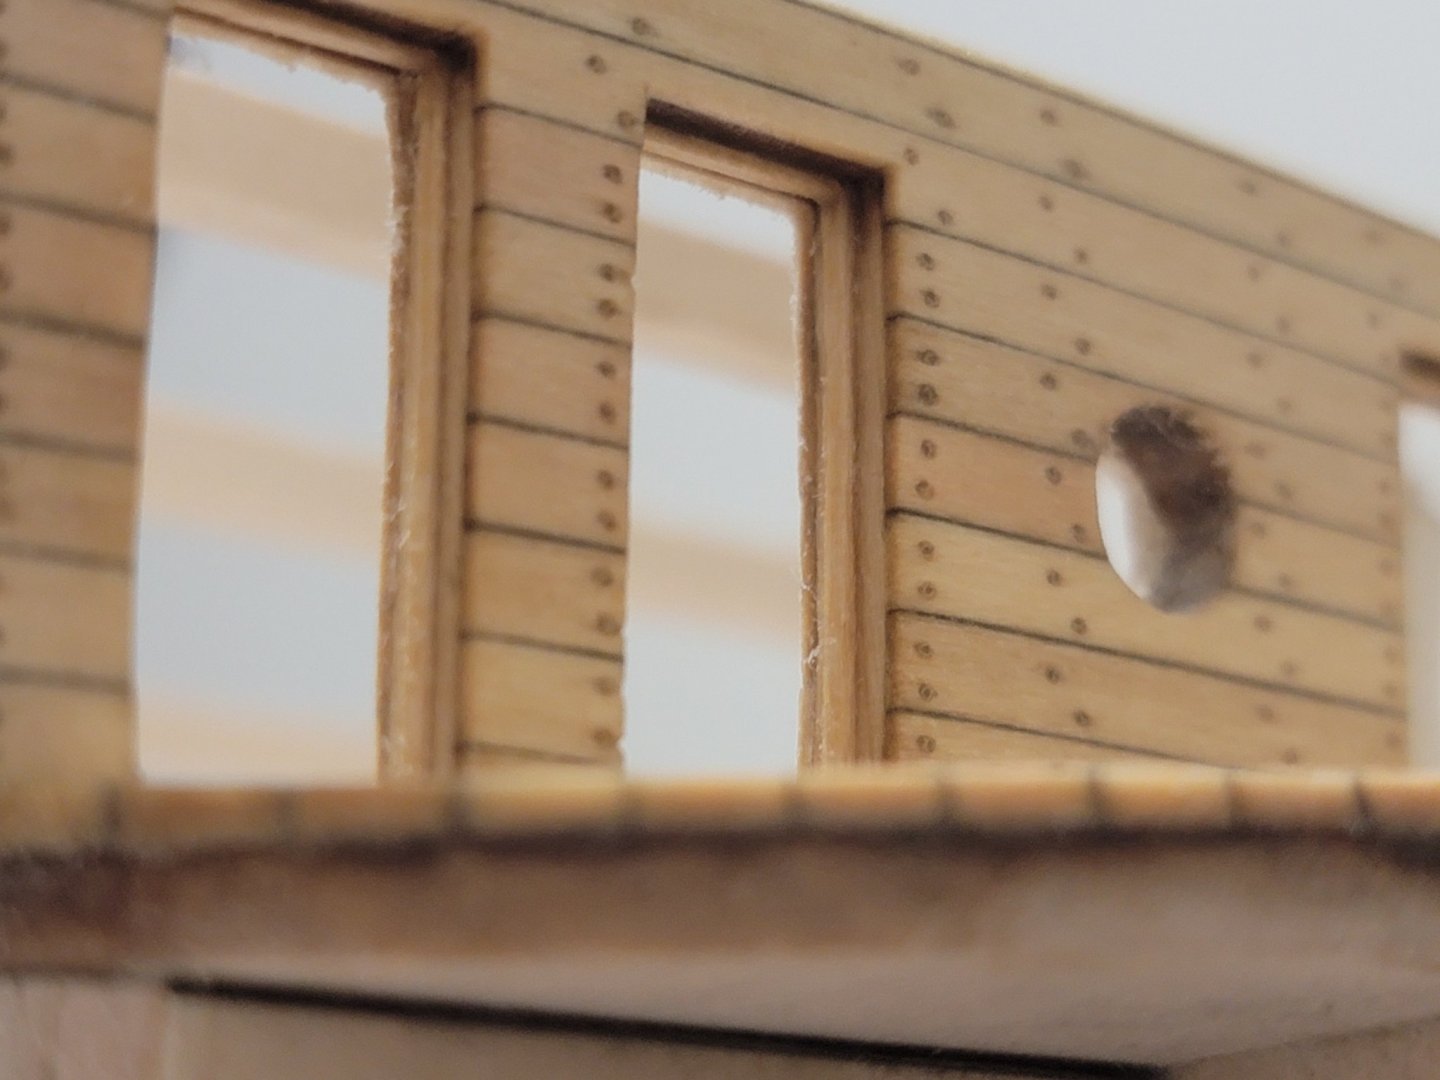
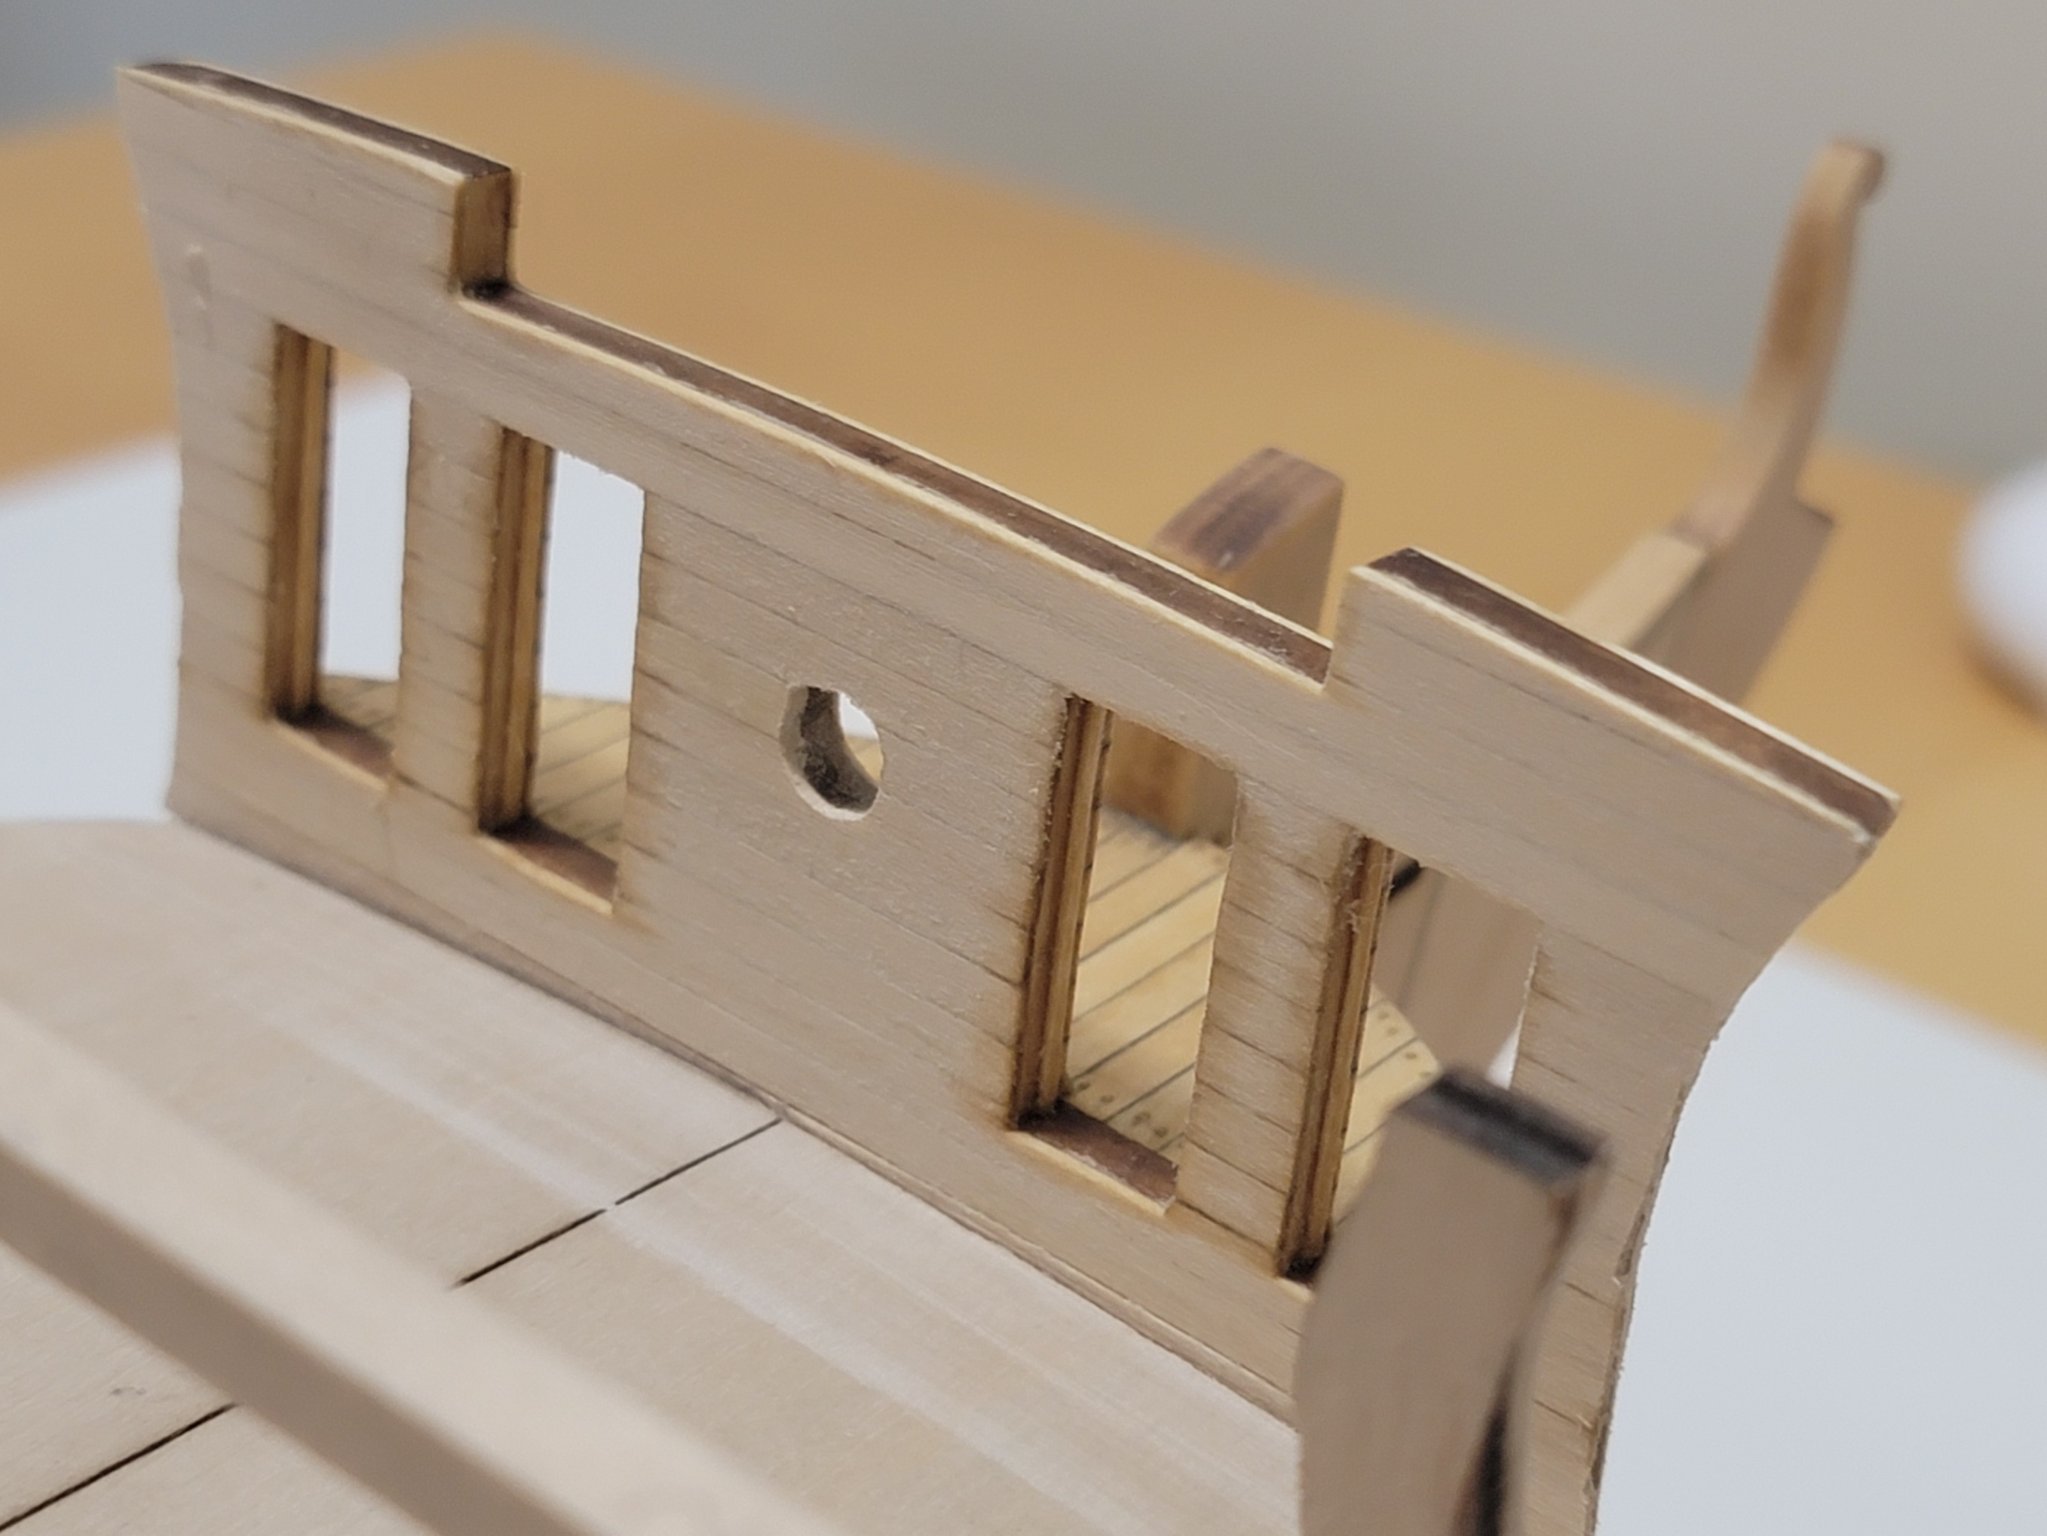
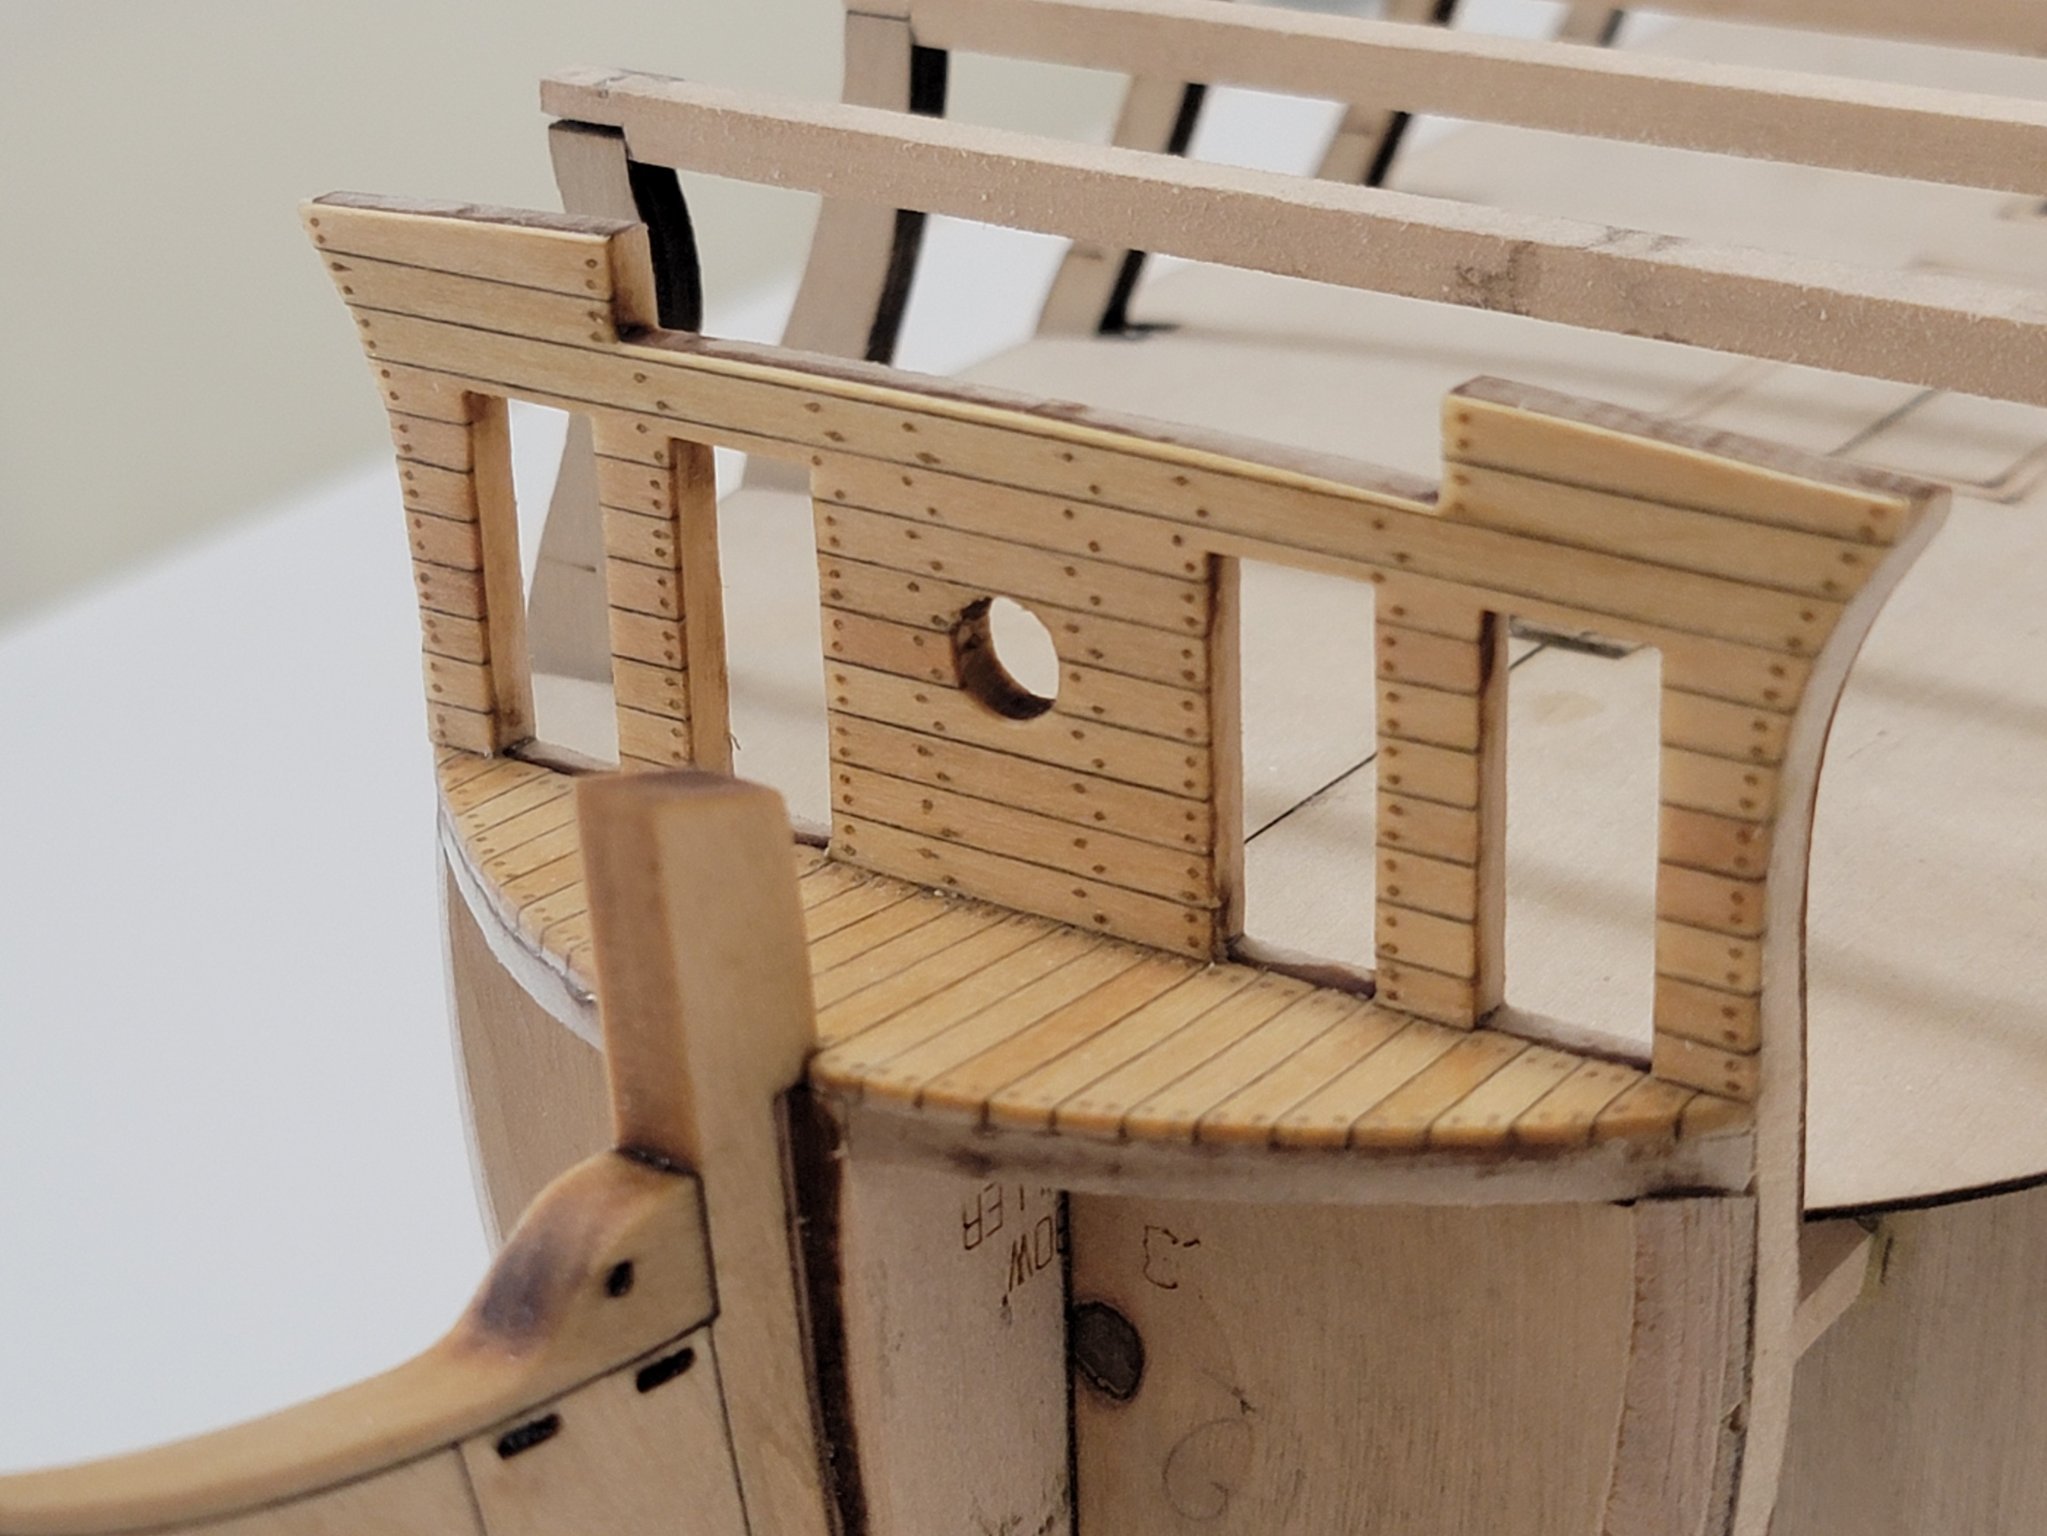
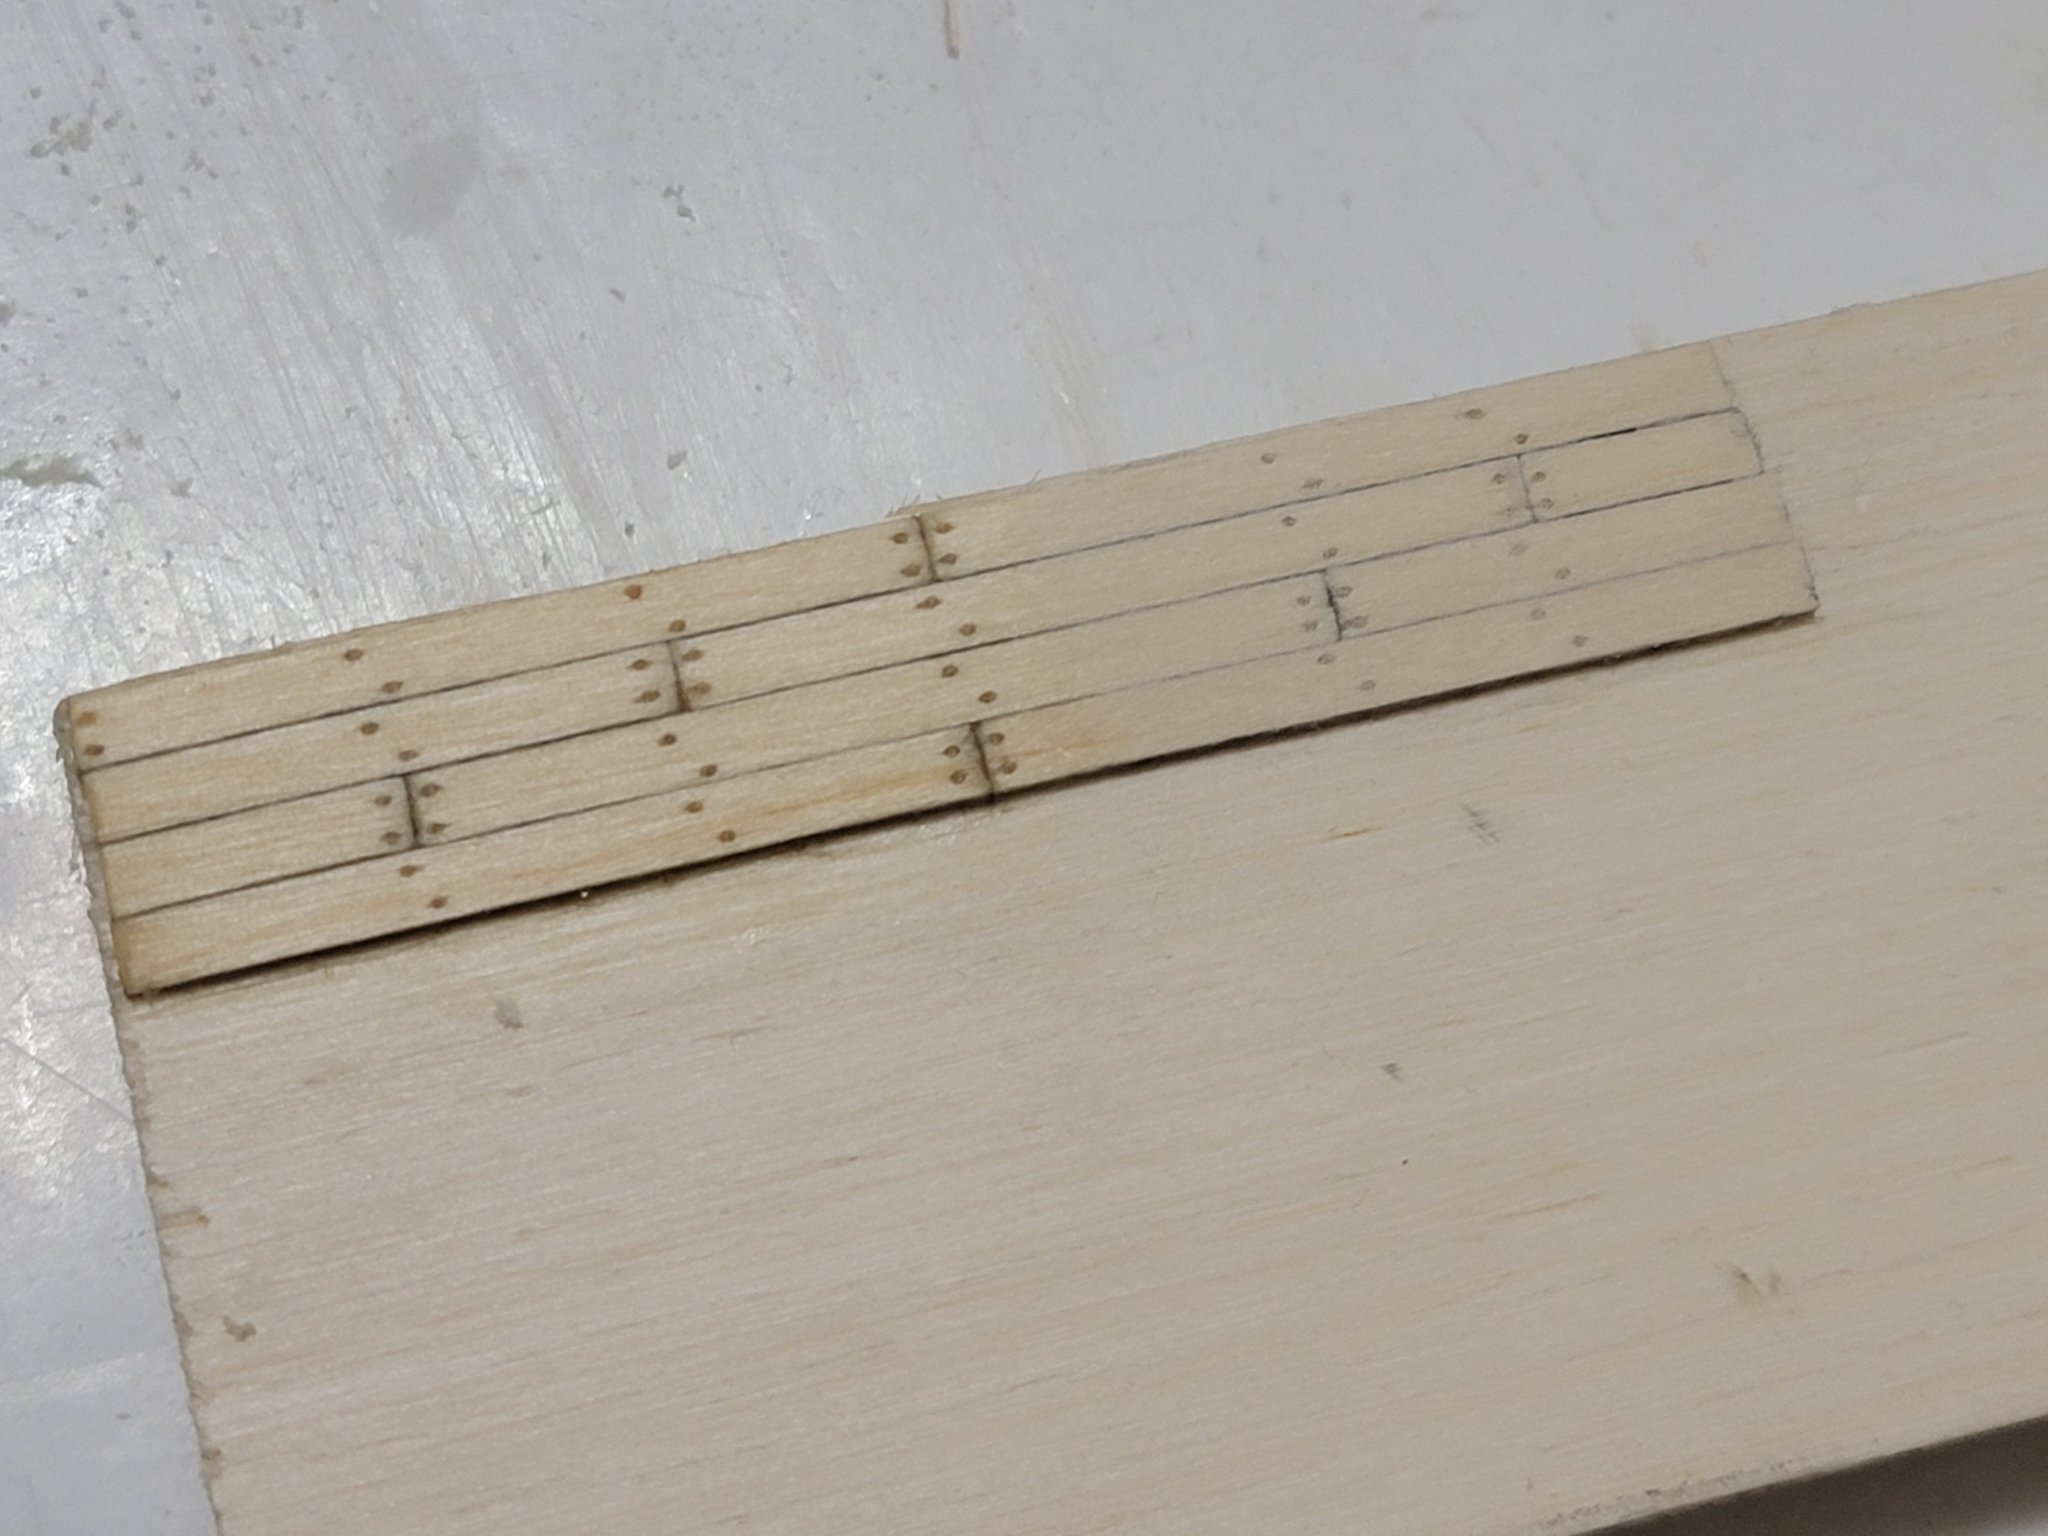
I finished planking and treenailing the vertical section (the bamboo skewers were thinned down to the third last position on the drawplate). After some sanding I applied tung oil:

I'll next plank the otherside of the same bulkhead, put in the door jambs, and fix a slight warping issue on the false deck..
- Tim Curtis, Gahm, ccoyle and 20 others
-
23
-
Hey Chuck, sorry if you have mentioned earlier, but what wood finishing did you use on the deck and hull? Or was it left in the natural state?
-
3 hours ago, PRS said:
I like the look of the tung oil without the sealer first. Seems to bring out the color of the wood better.
Thanks Paul. I decided to go with Tung oil for the deck and hull. I'll probably be using sanding sealer for the wood below the wales for a little bit of contrast.
I'll start planking the vertical section and then will apply the tung oil.
-
Would it be possible to use actual wood for that small piece than the plywood? You could try scratch building that piece so you do not need to bend it. And do you have any pics of what piece needs to be bent?
-
On 6/23/2021 at 8:07 PM, desalgu said:
Beautiful work, as always. Interesting to me how low the stern gunports are, just above the waterline I'd guess. Not quite sure how you could see anything to shoot at from there.
Out of these two finishes, I like tung oil the best. Sealers have fillers in them which doesn't let the wood show thru as much. They tend to have a cloudy look to them. Matt or flat finishes are similar, but with a lot less filler. If you put multiple coats of matt or satin finishes on something, it will tend to get a "cloudy" look or hide the wood grain a little bit. I've learned the hard way making little end tables that for furniture it's best to use glossy until the last couple of coats, and then put on final satin or flat coat. You don't notice it with 1 or 2 coats.
You might try clear matt or flat acrylic that you get at art stores. I've used this before and it's worth trying. Easy to use since it's water based.
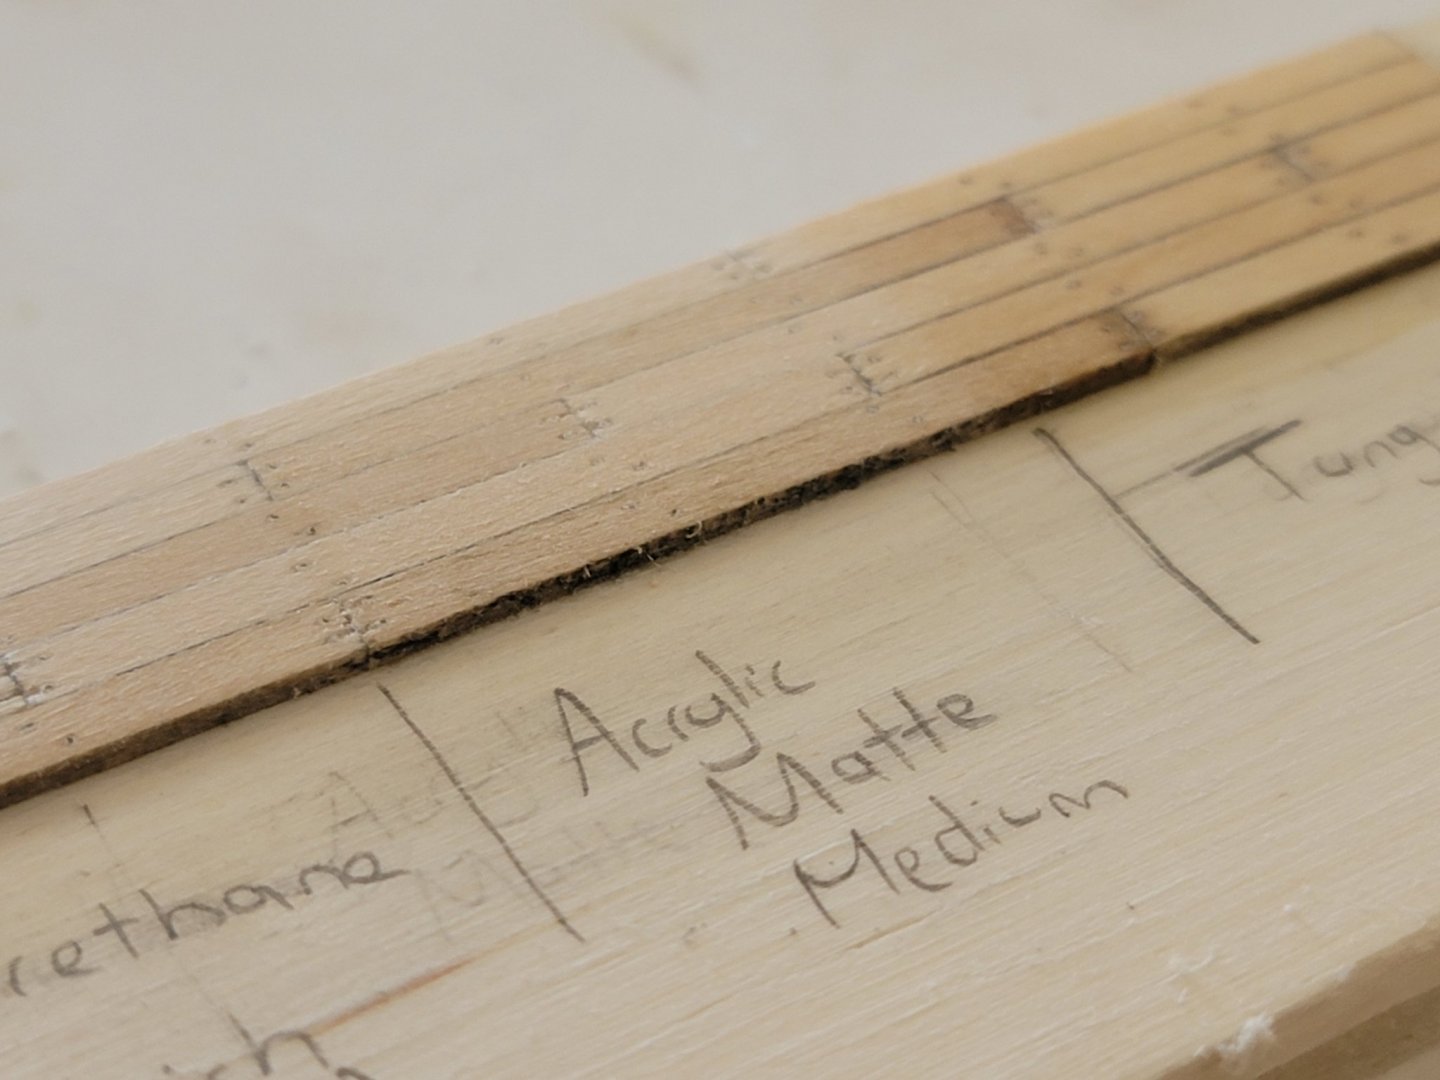
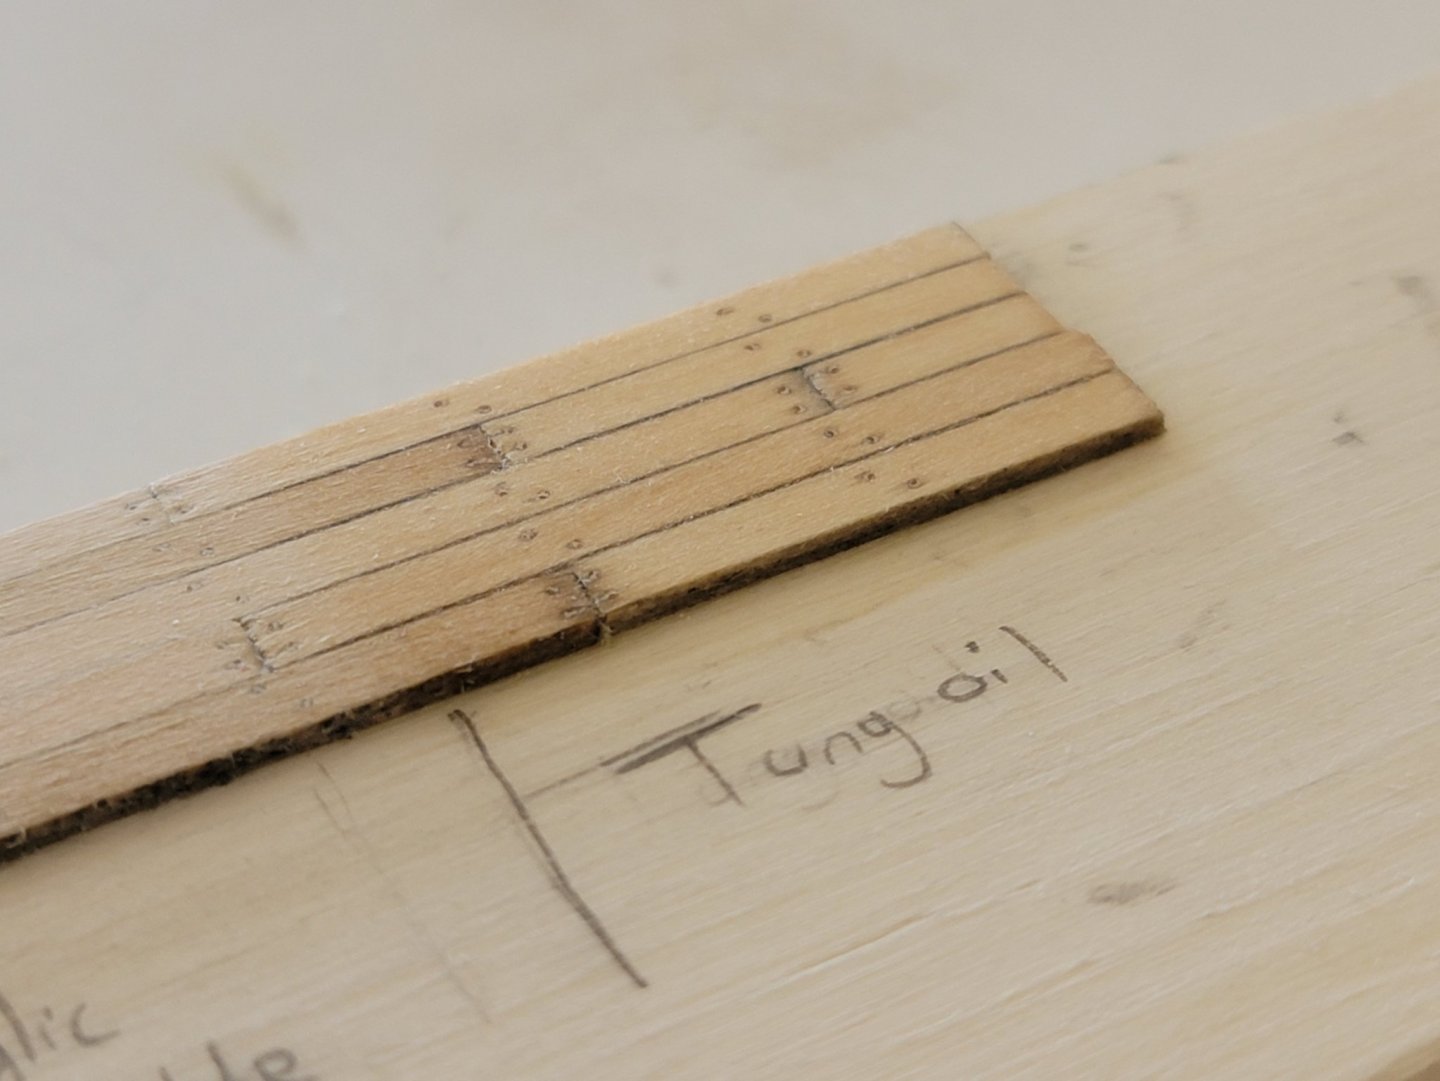
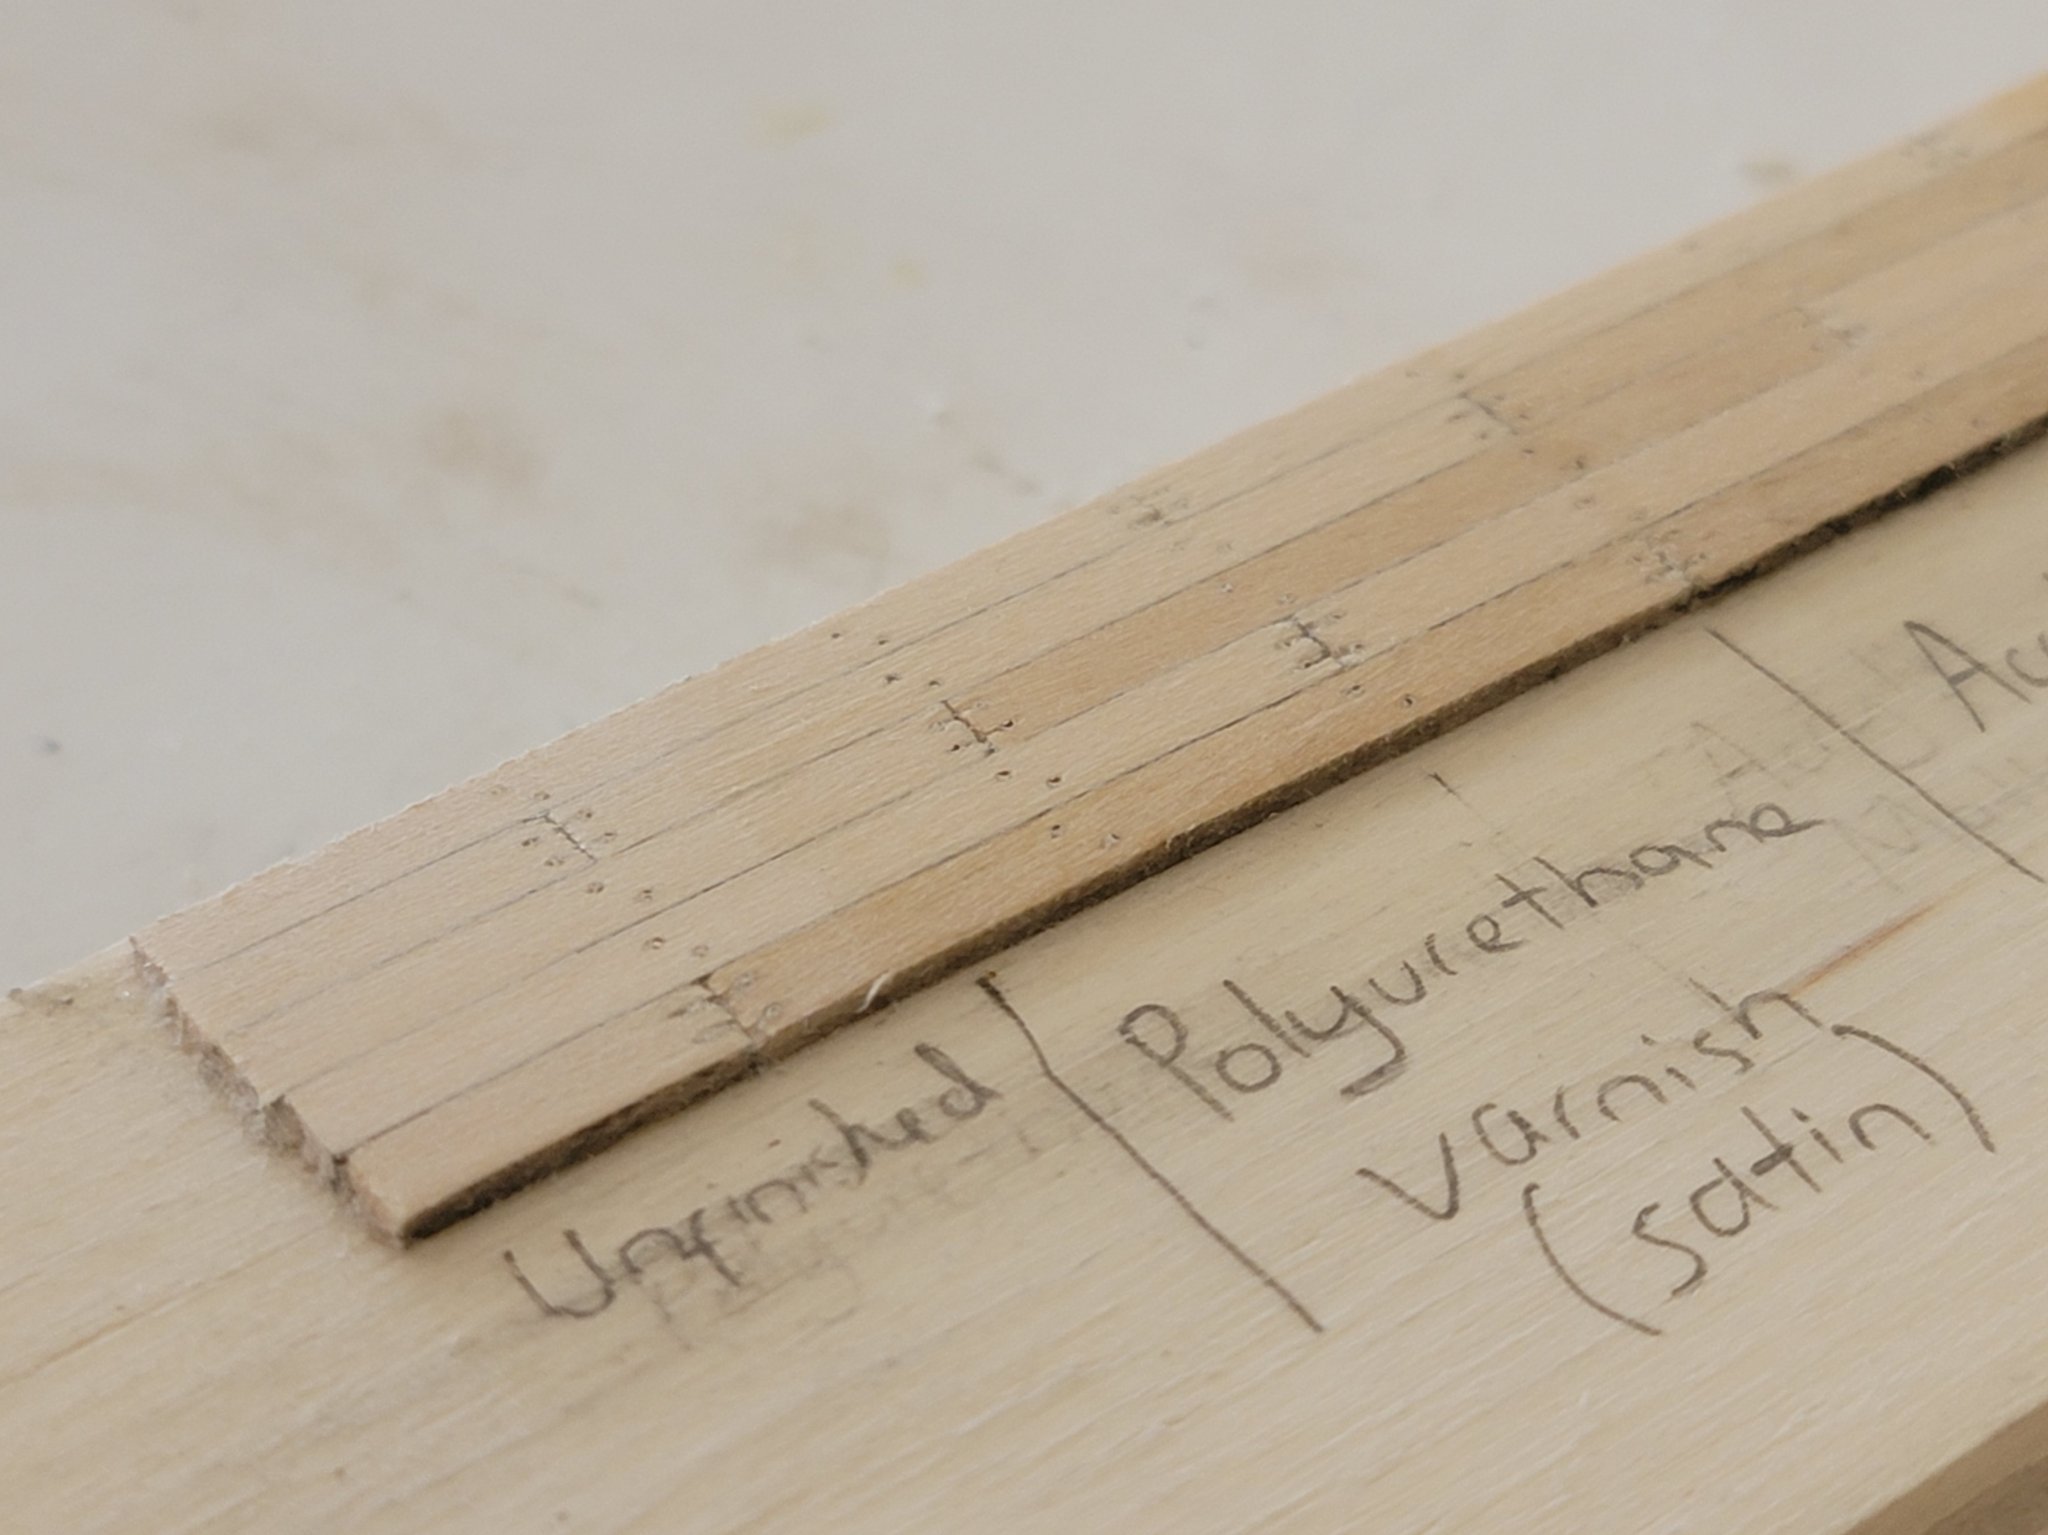
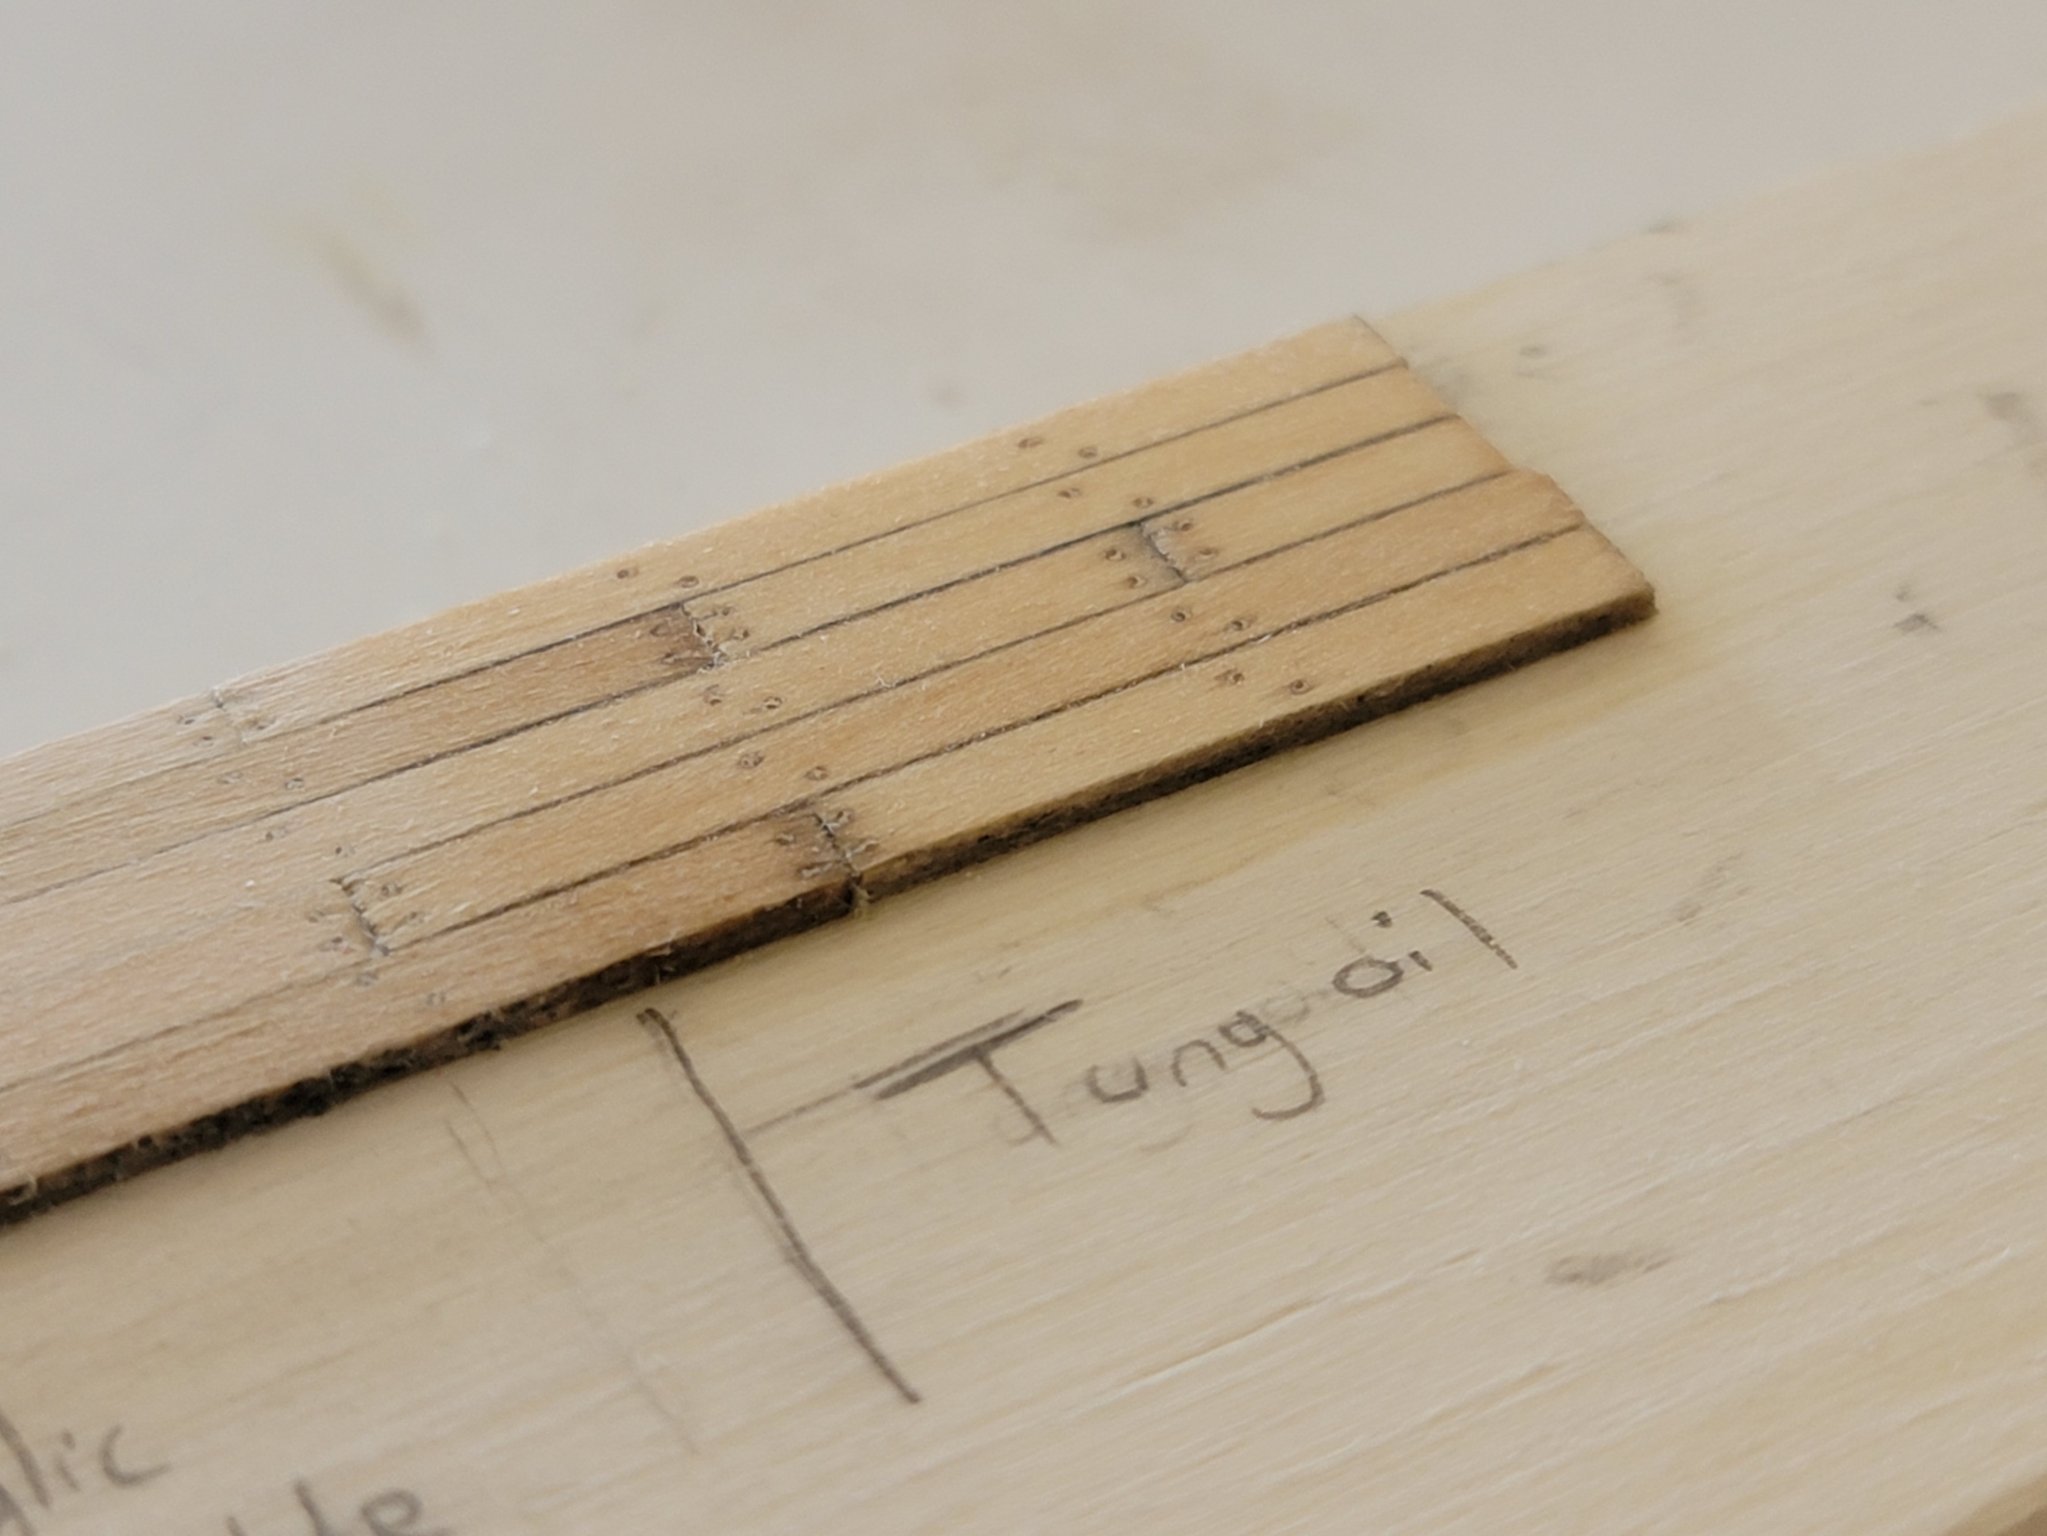
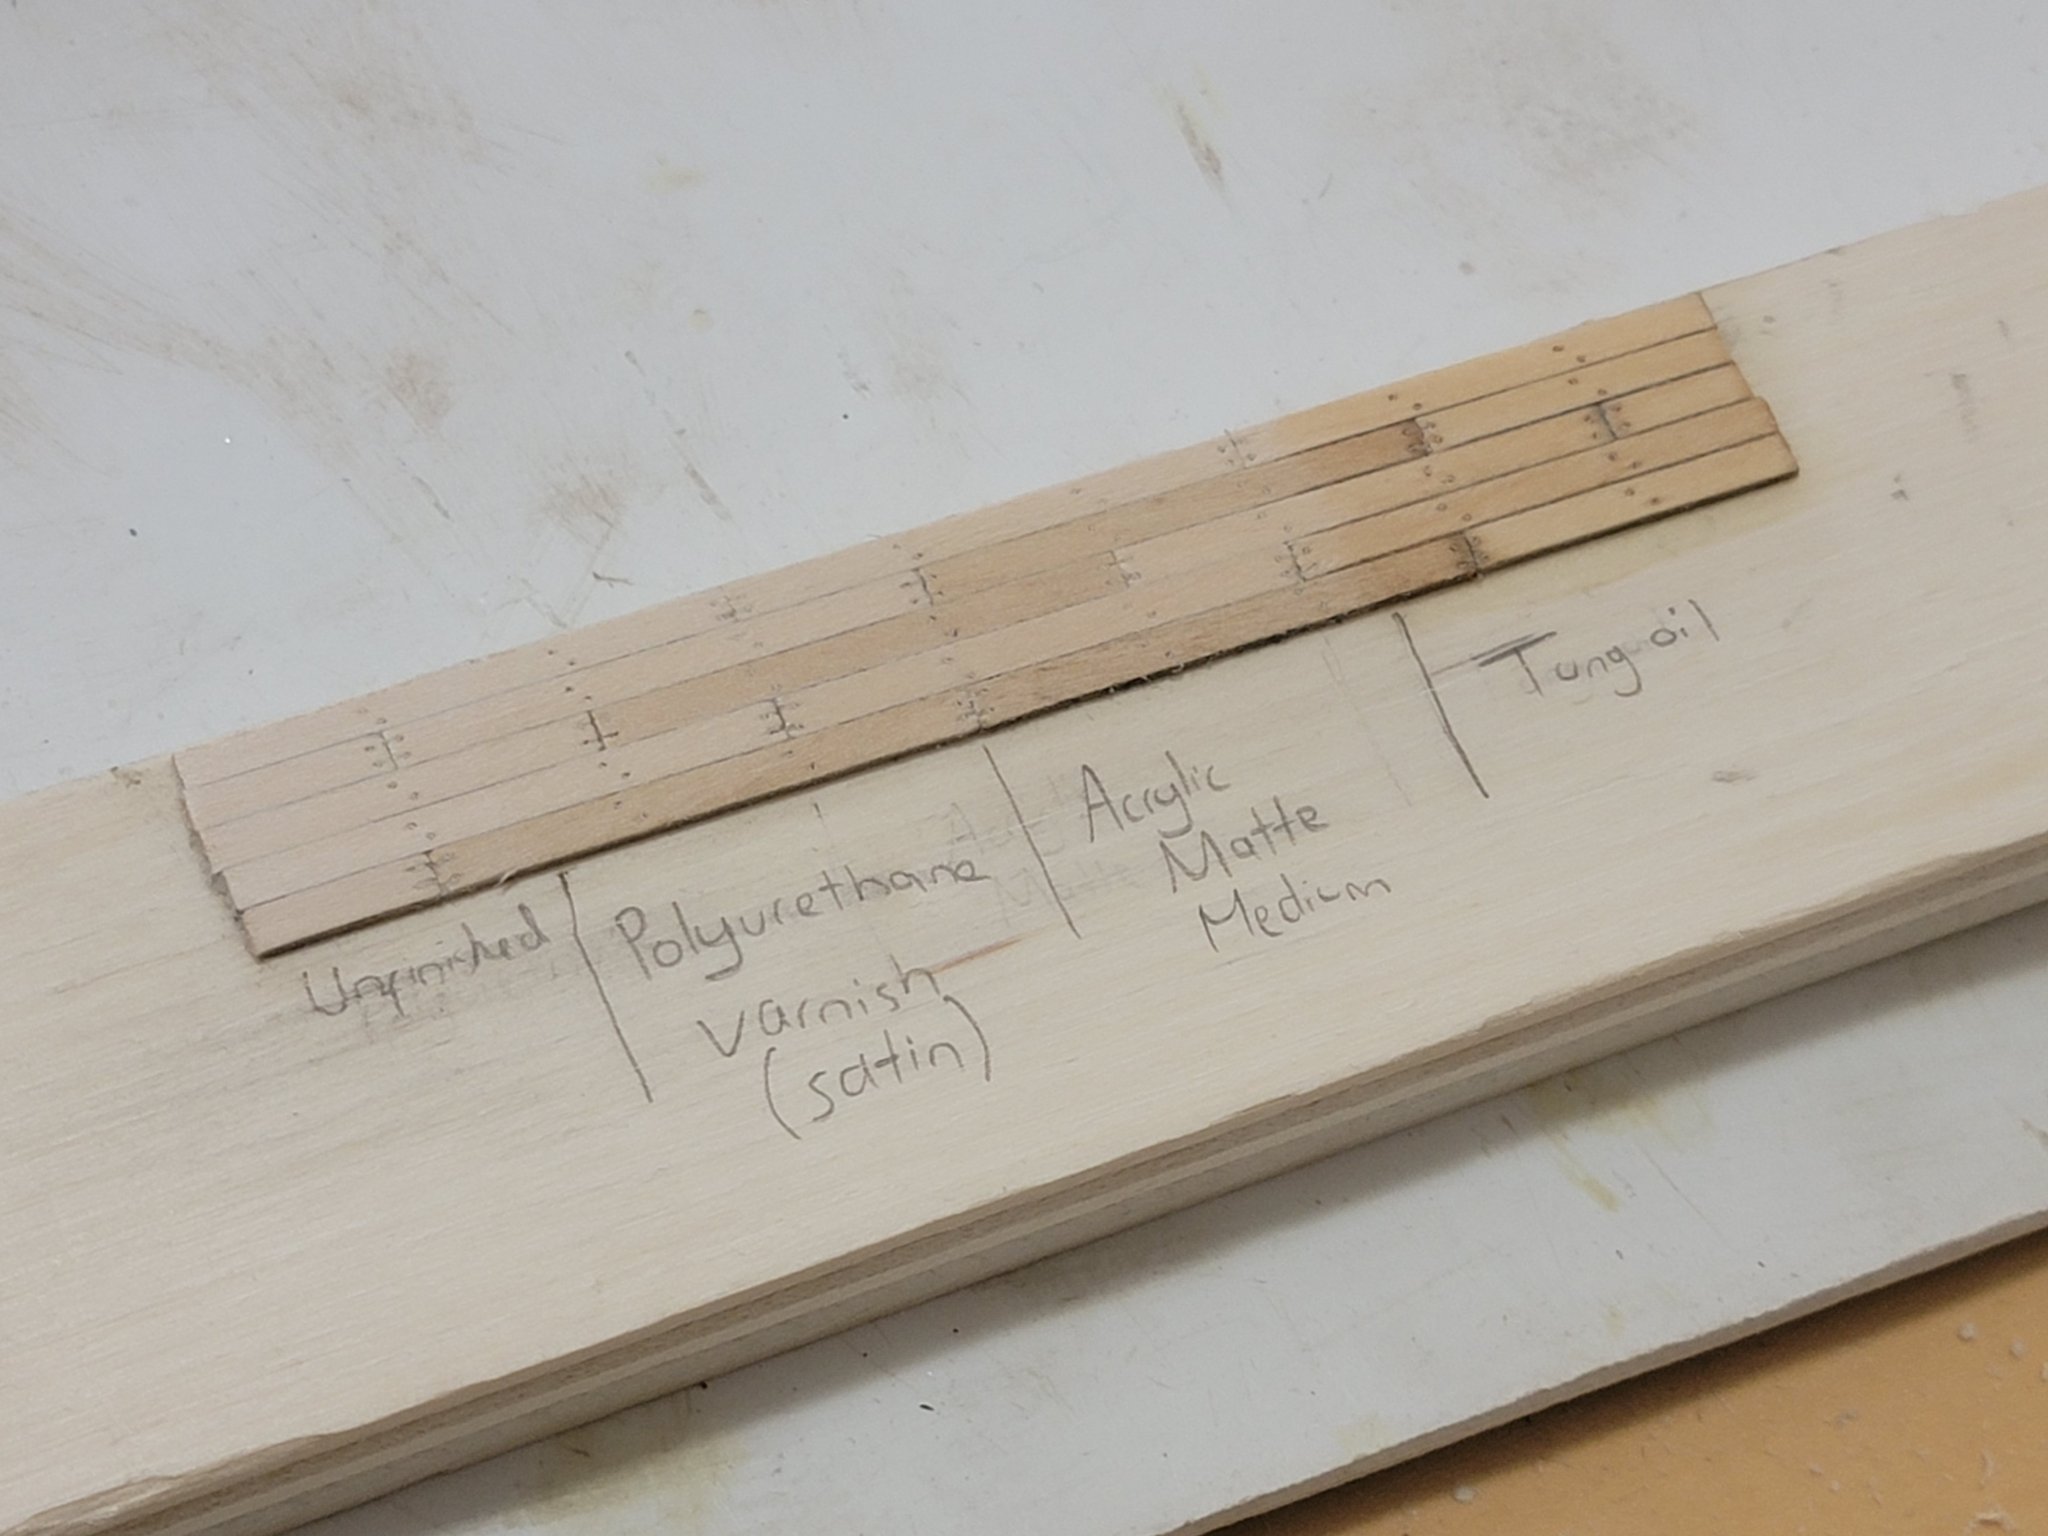
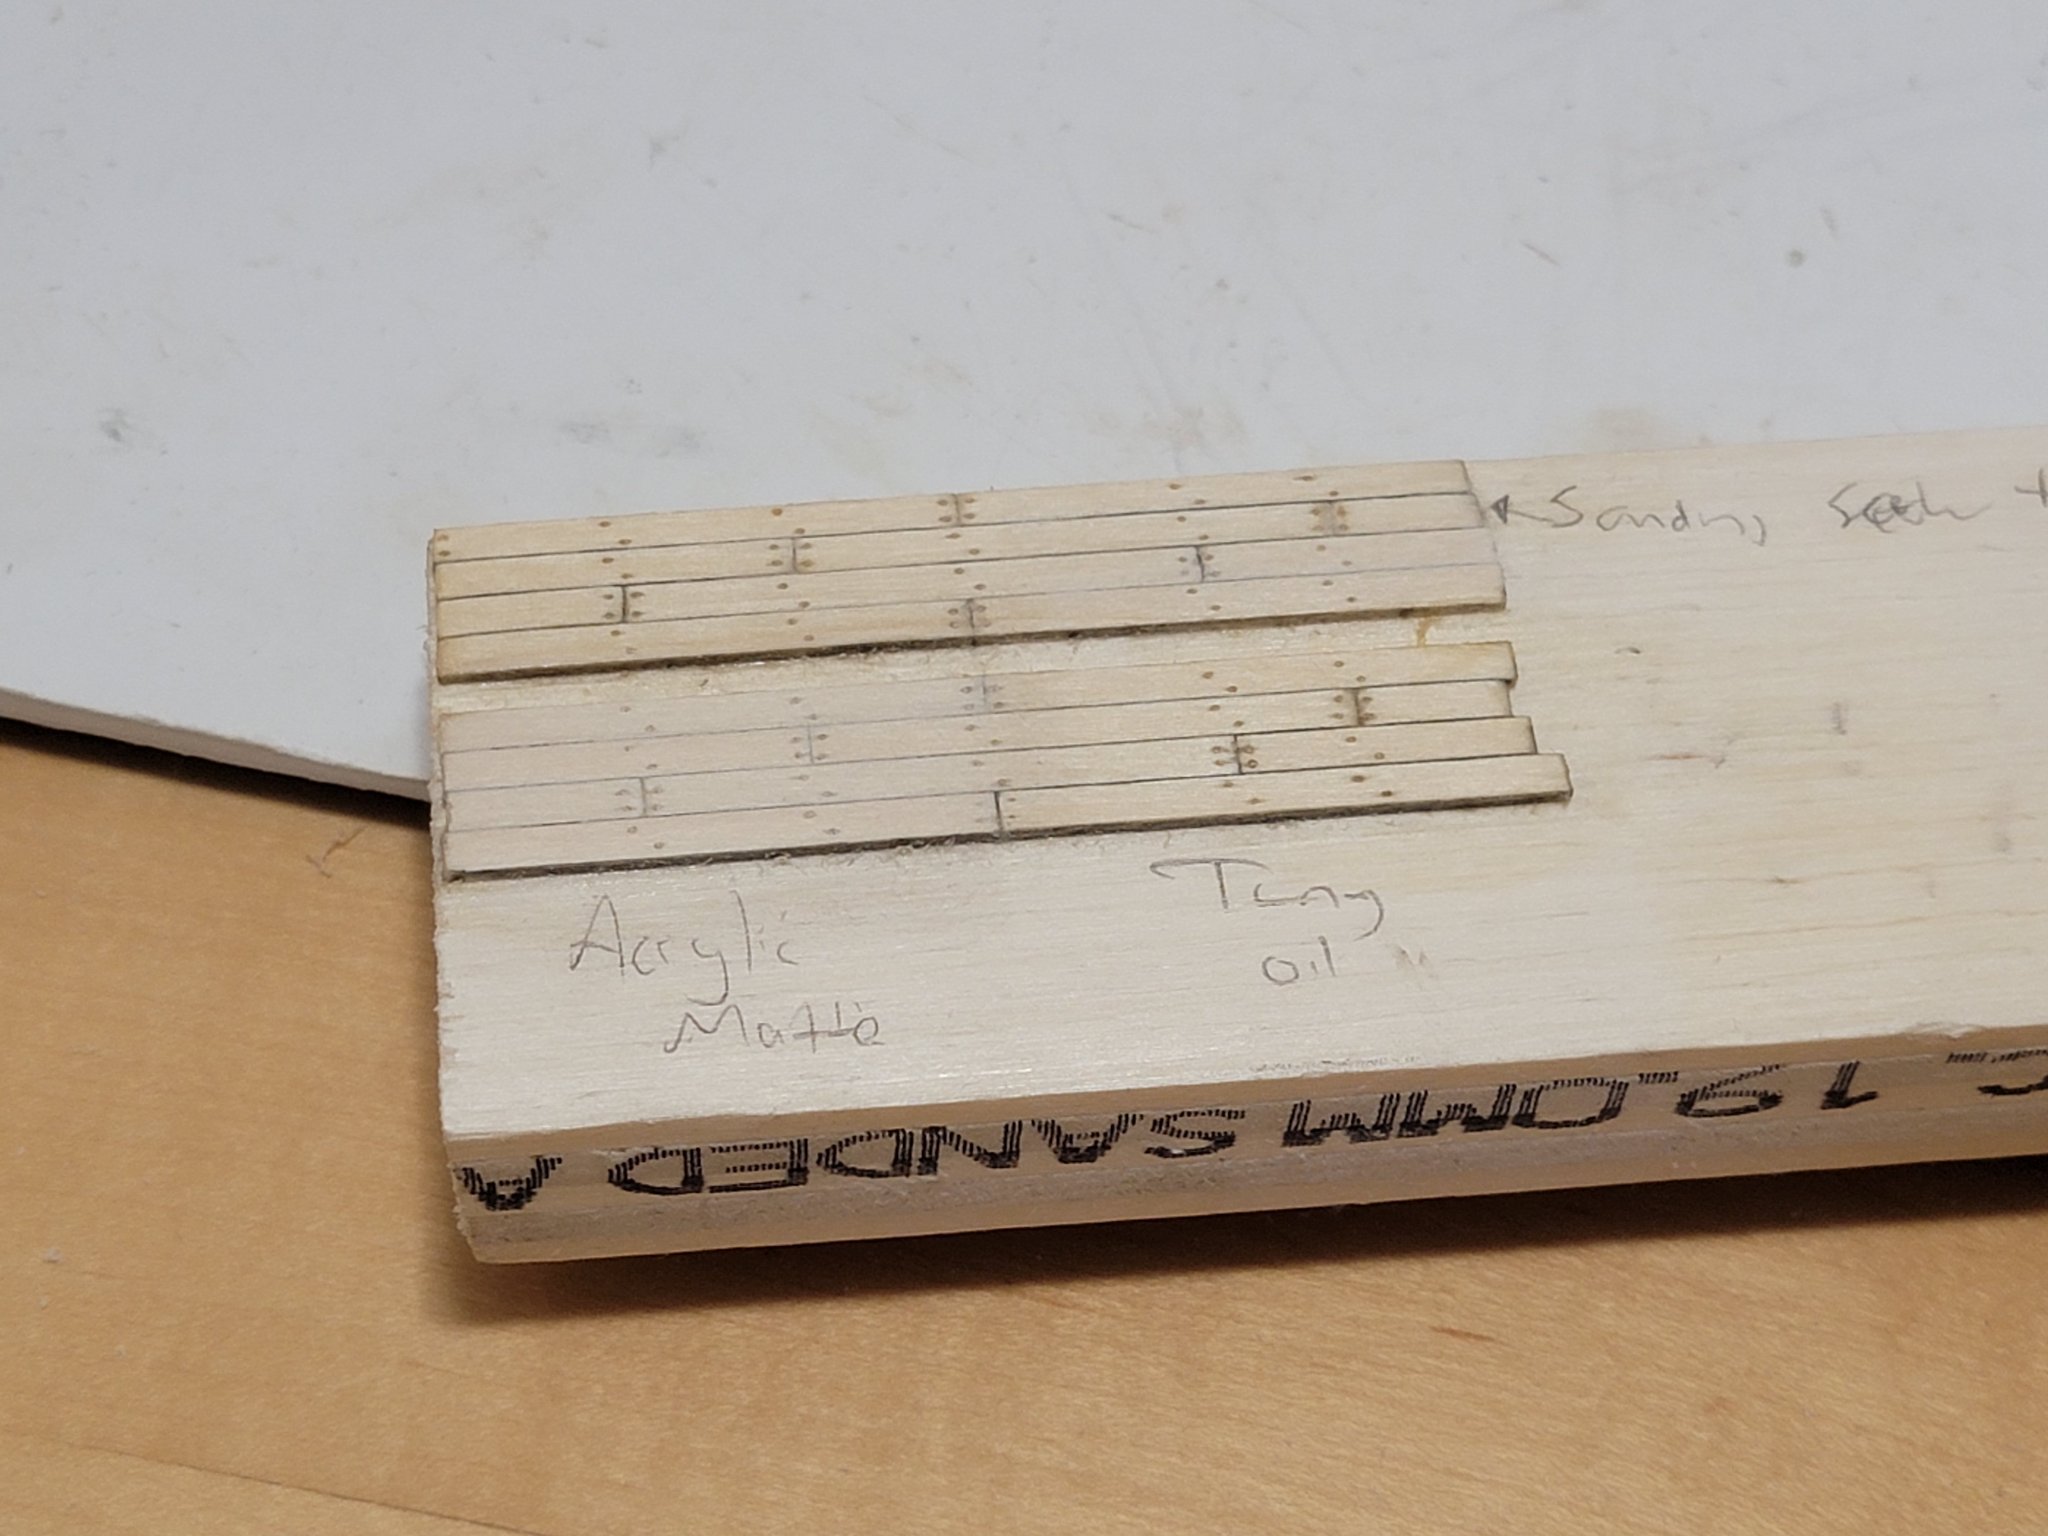
Thank you David!! I tried using the matt acrylic as suggested. It is very similar to the first coat of the sealer. I also made another deck testing station, and tried a polyurethane satin varnish. Here are a few pics of the results (with just natural light):
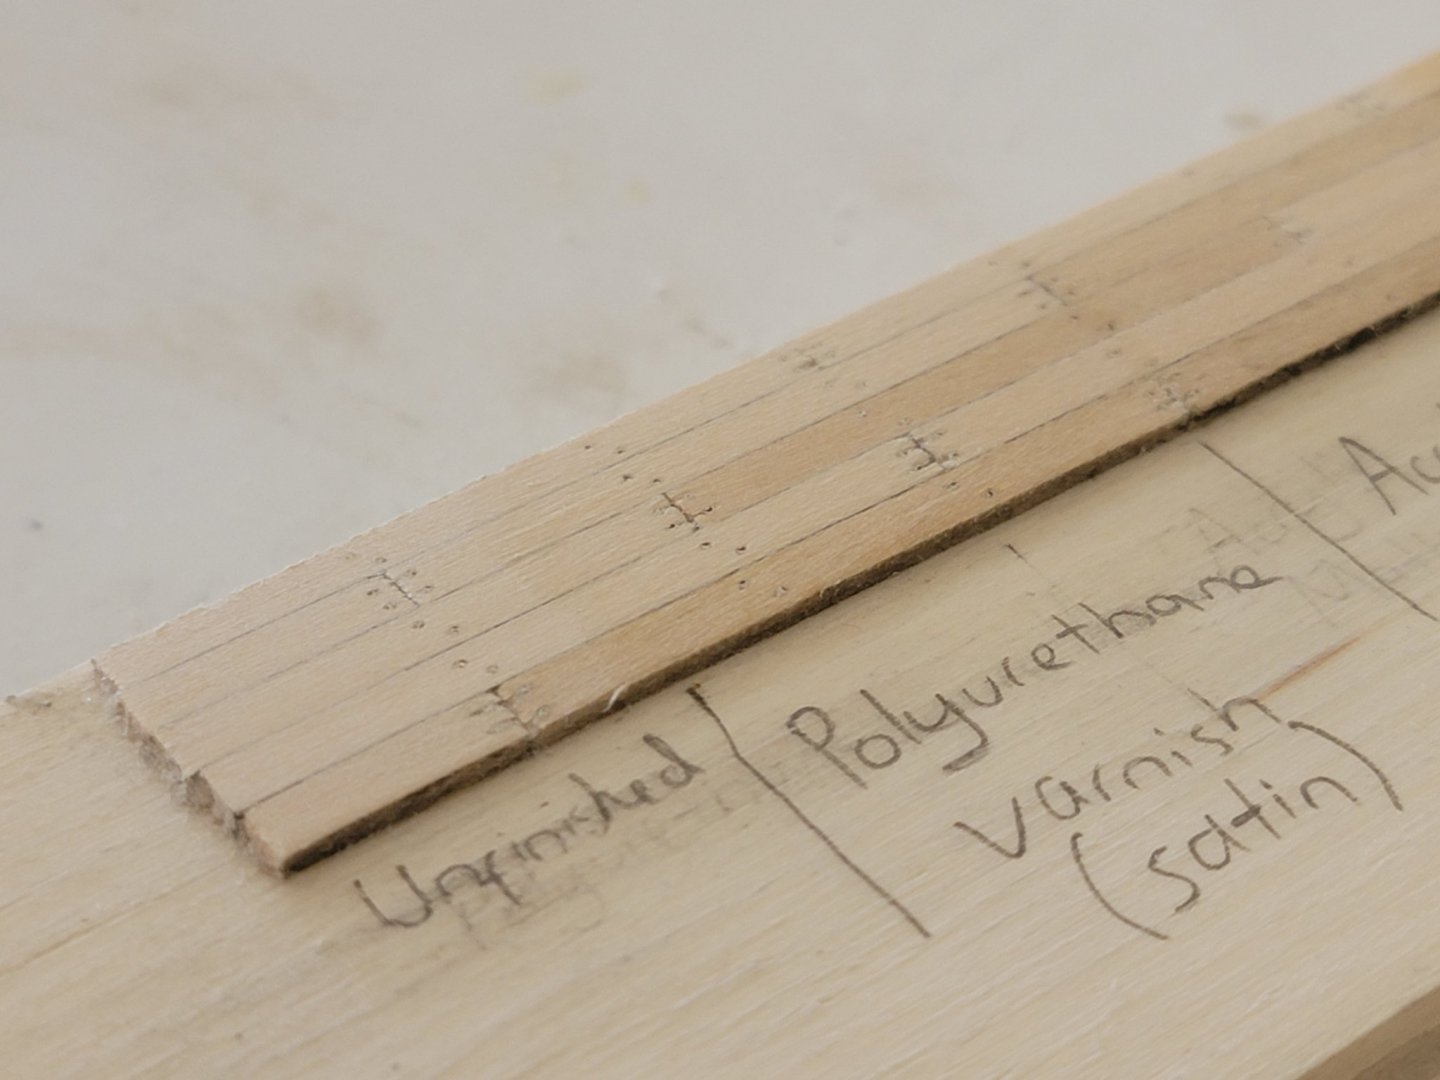
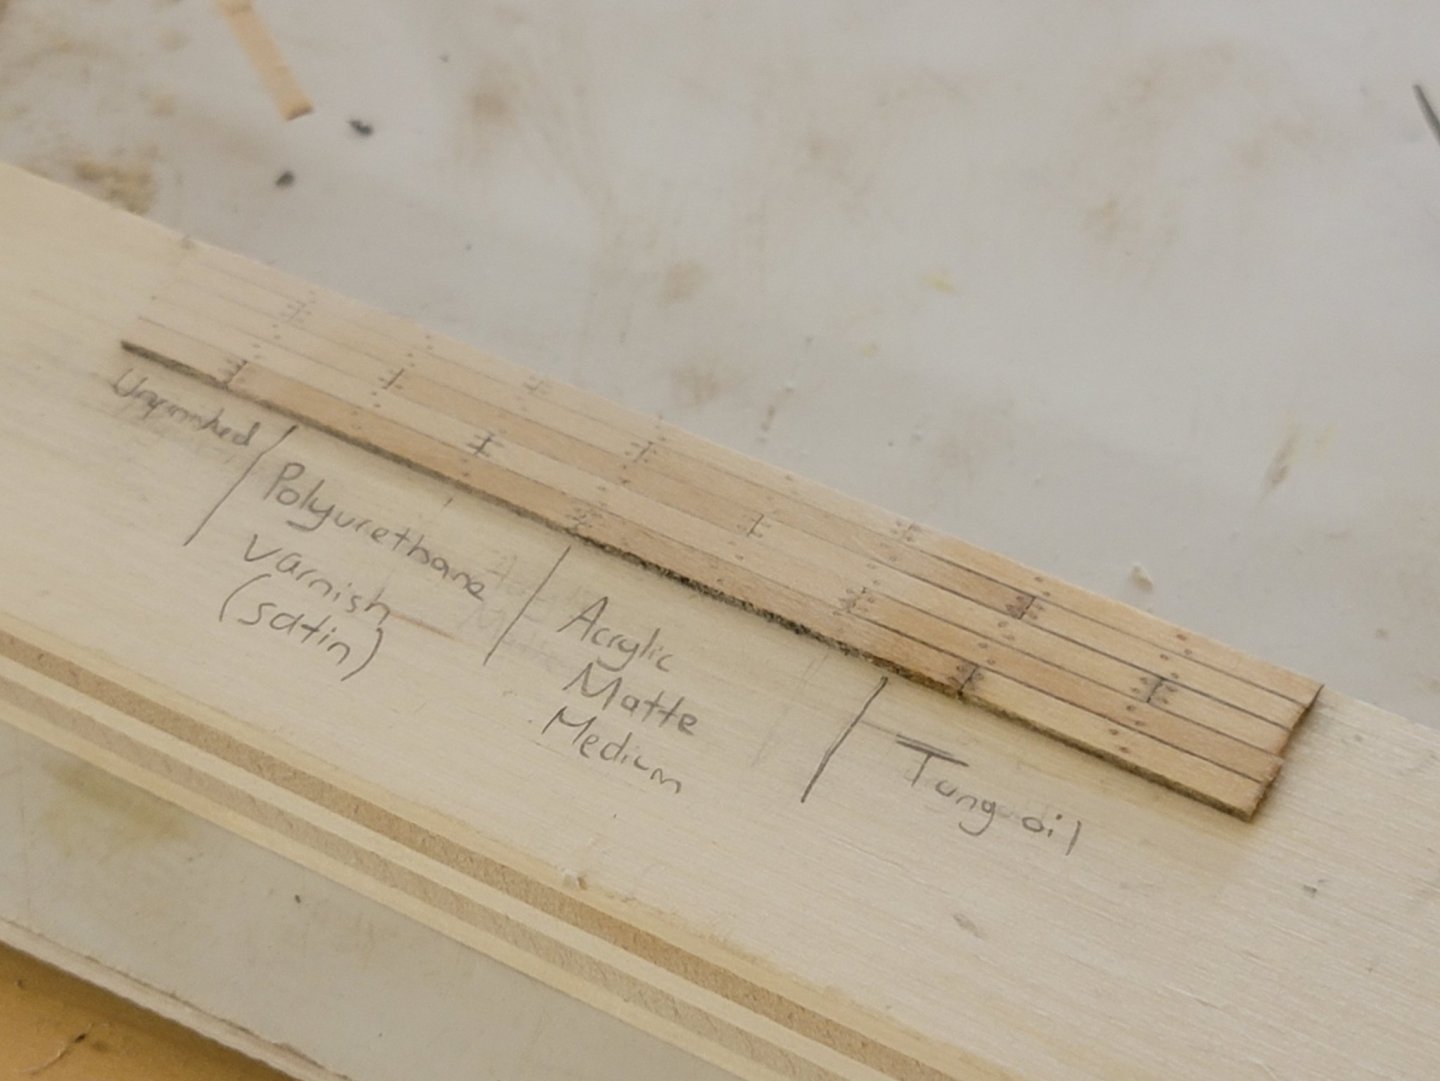
Another pic with the overhead lights switched on:

I am now very confused on what to do. Before I was thinking of having the decking appear lighter than the hull planking, but I just like the look of basswood with tung oil too much. The treenails also look darker with tung oil, and I like that look then the muted ones from other finishes. I may just use tung oil for everything. Would love to hear other opinions though!
Another option I was thinking about was putting tung oil on the sanding sealer. I applied the oil on the section I did before and the nails appeared darker like what I was hoping for:

I am now also considering this option.
I also finished decking a small section at the bow. So I will think about the finishings before I start planking the vertical part of the bulkhead.

- Edwardkenway, Retired guy, egkb and 12 others
-
15
-
Thank you all for the likes!
Just a quick update, I made a sample deck to try out some finishes. On the left I used Tung oil and on the right is a sanding sealer. I wanted some contrast between the deck and the hull planking (a lighter deck and darker hull). I will be trying out some more varnishes/finishes before making my decision. Any suggestions are more than welcome!


Viking longship by Cathead - Dusek - 1:35 - FINISHED
in - Kit subjects built Up to and including 1500 AD
Posted
Those are some great shots, Eric! I really enjoyed looking at them, thanks for sharing them and also for writing up the excellent build log on this cool vessel 🙂.