

.jpg.1f80adf1a9b14a937cfcf2ca6af0f0d4.jpg)
WalrusGuy
-
Posts
1,007 -
Joined
-
Last visited
Content Type
Profiles
Forums
Gallery
Events
Posts posted by WalrusGuy
-
-
Thanks so much for the nice comments @Justin P. and @desalgu!! Really looking forward to seeing your model in the display case, David.
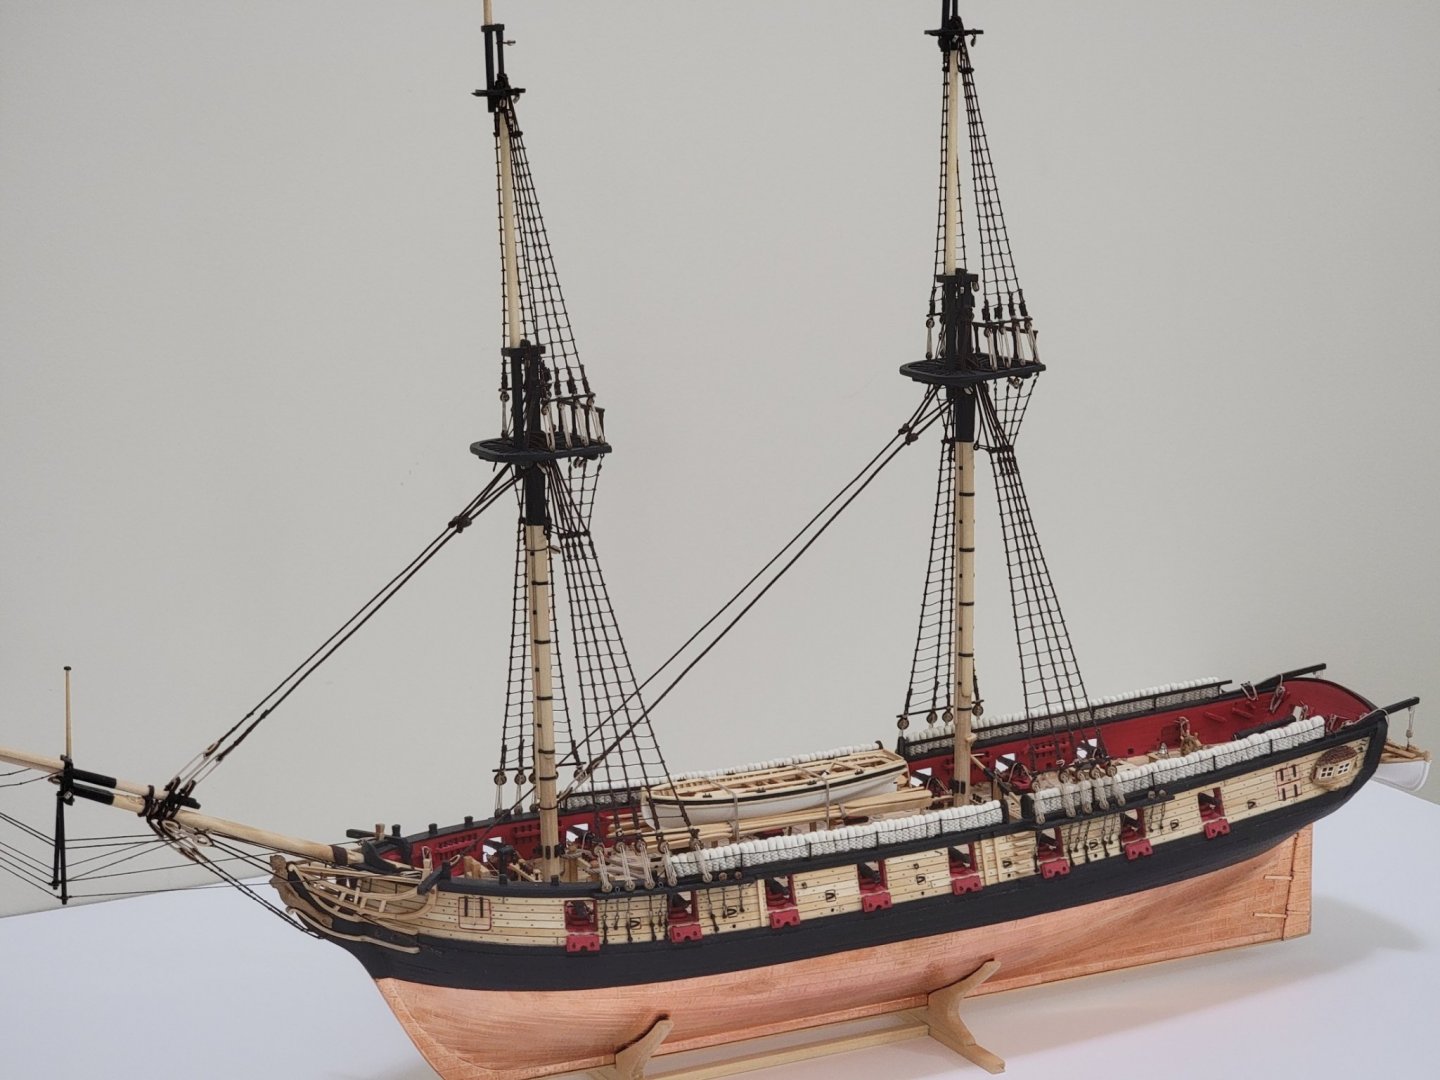
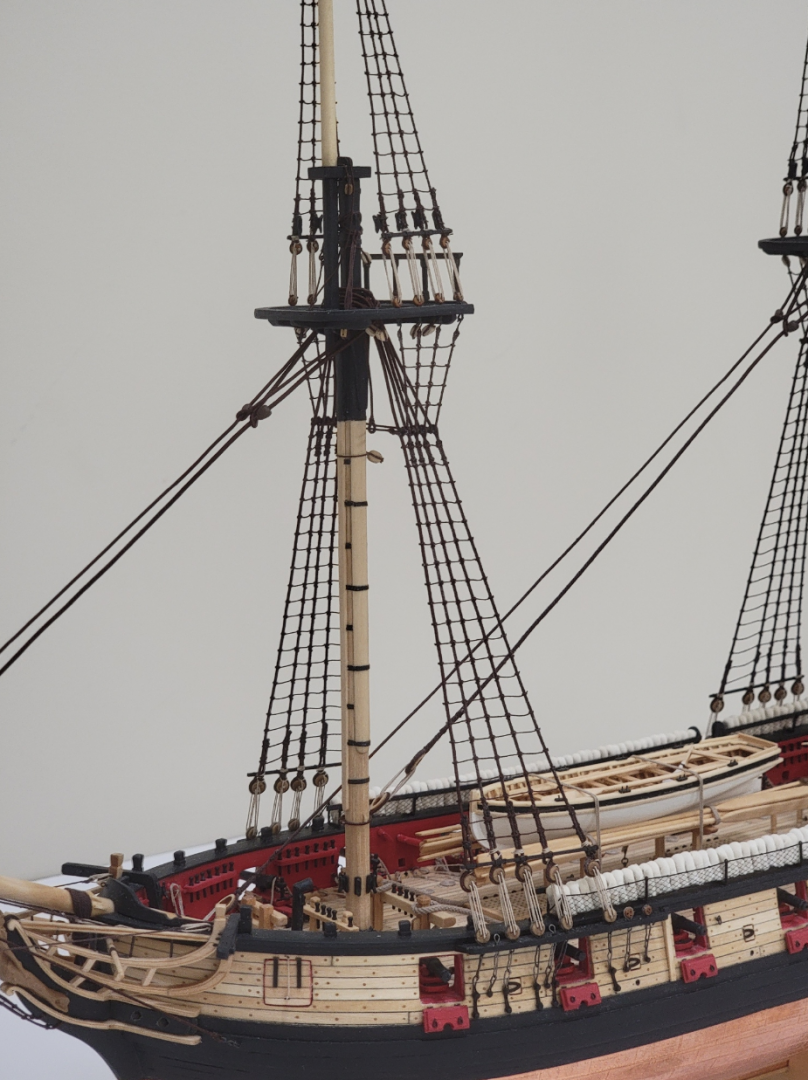
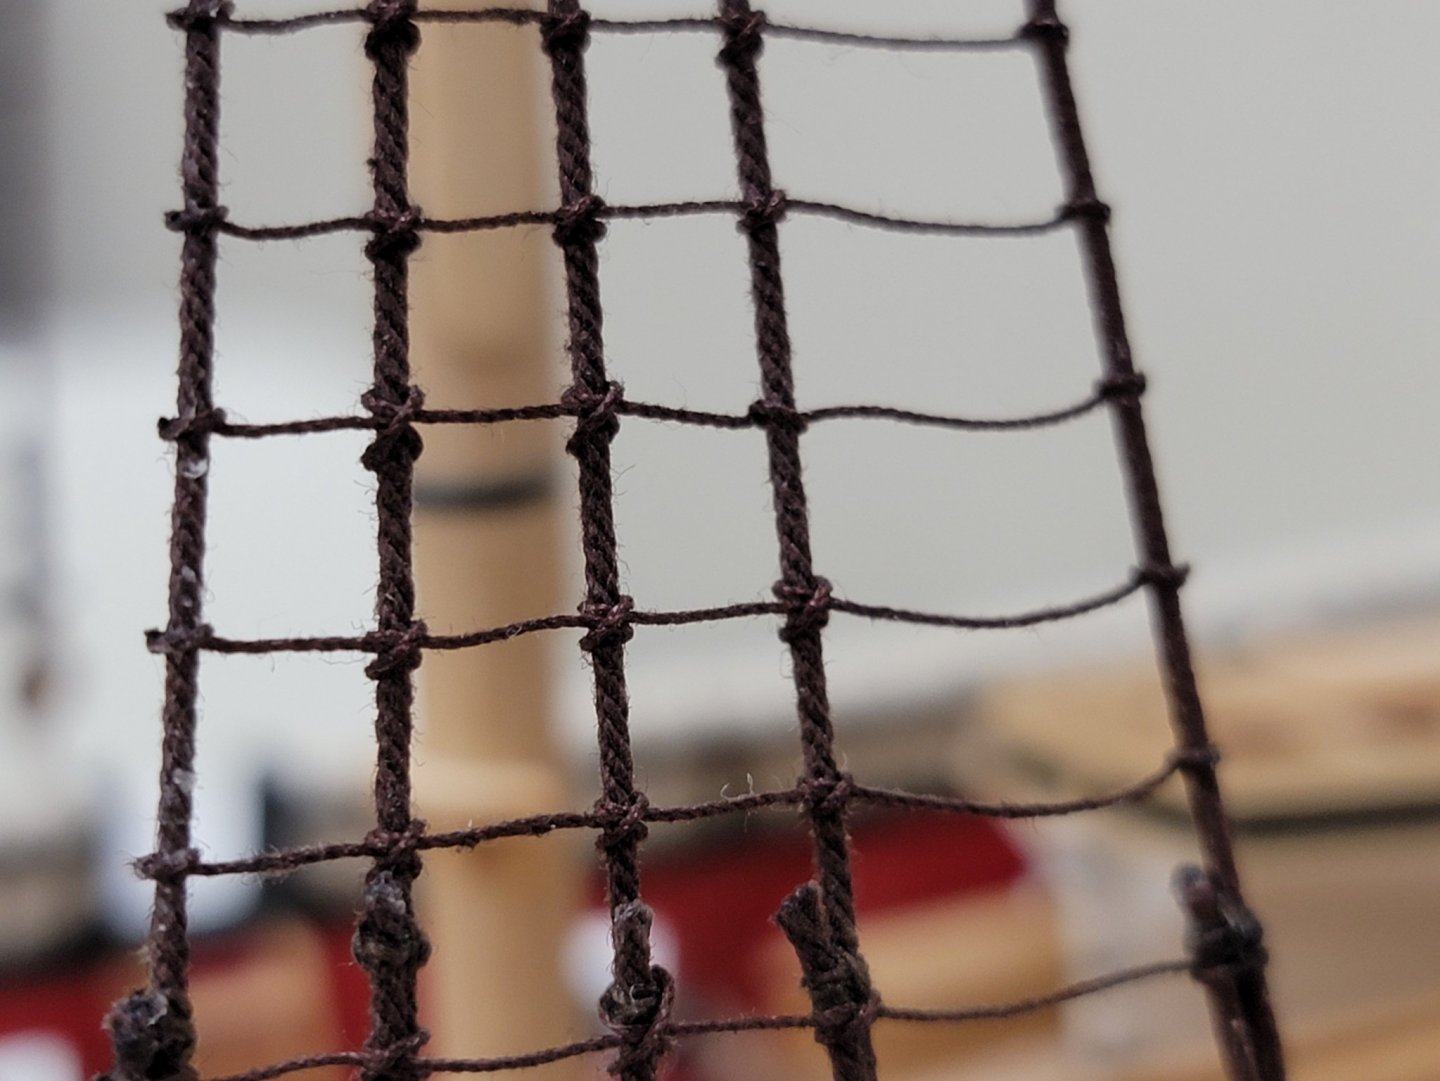
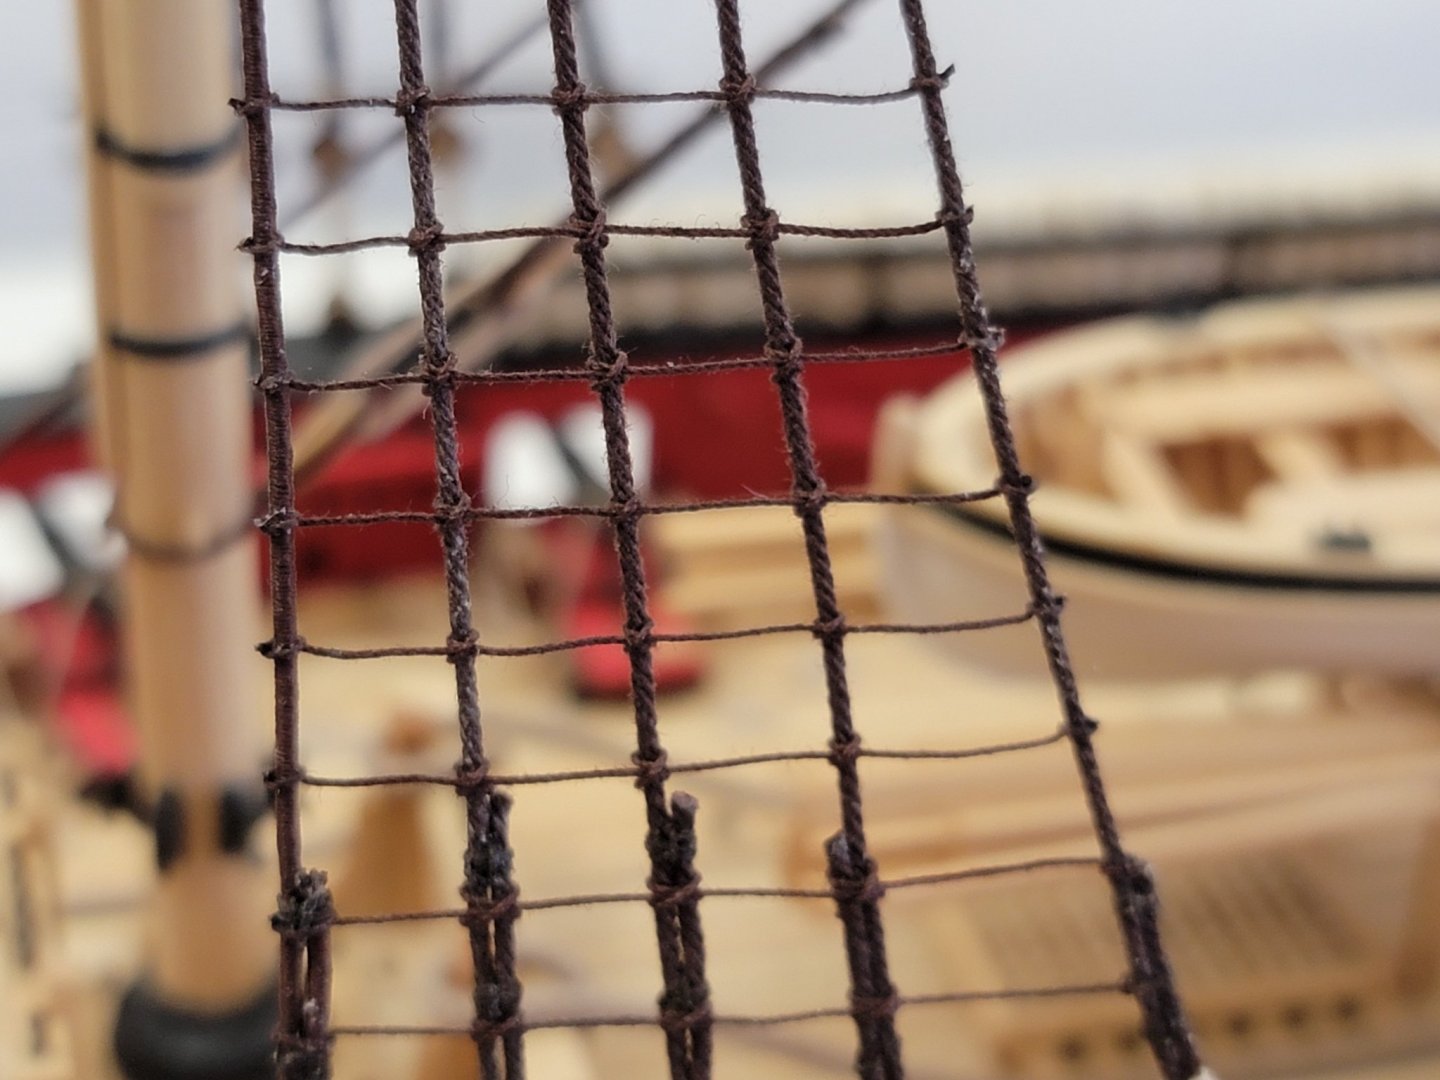
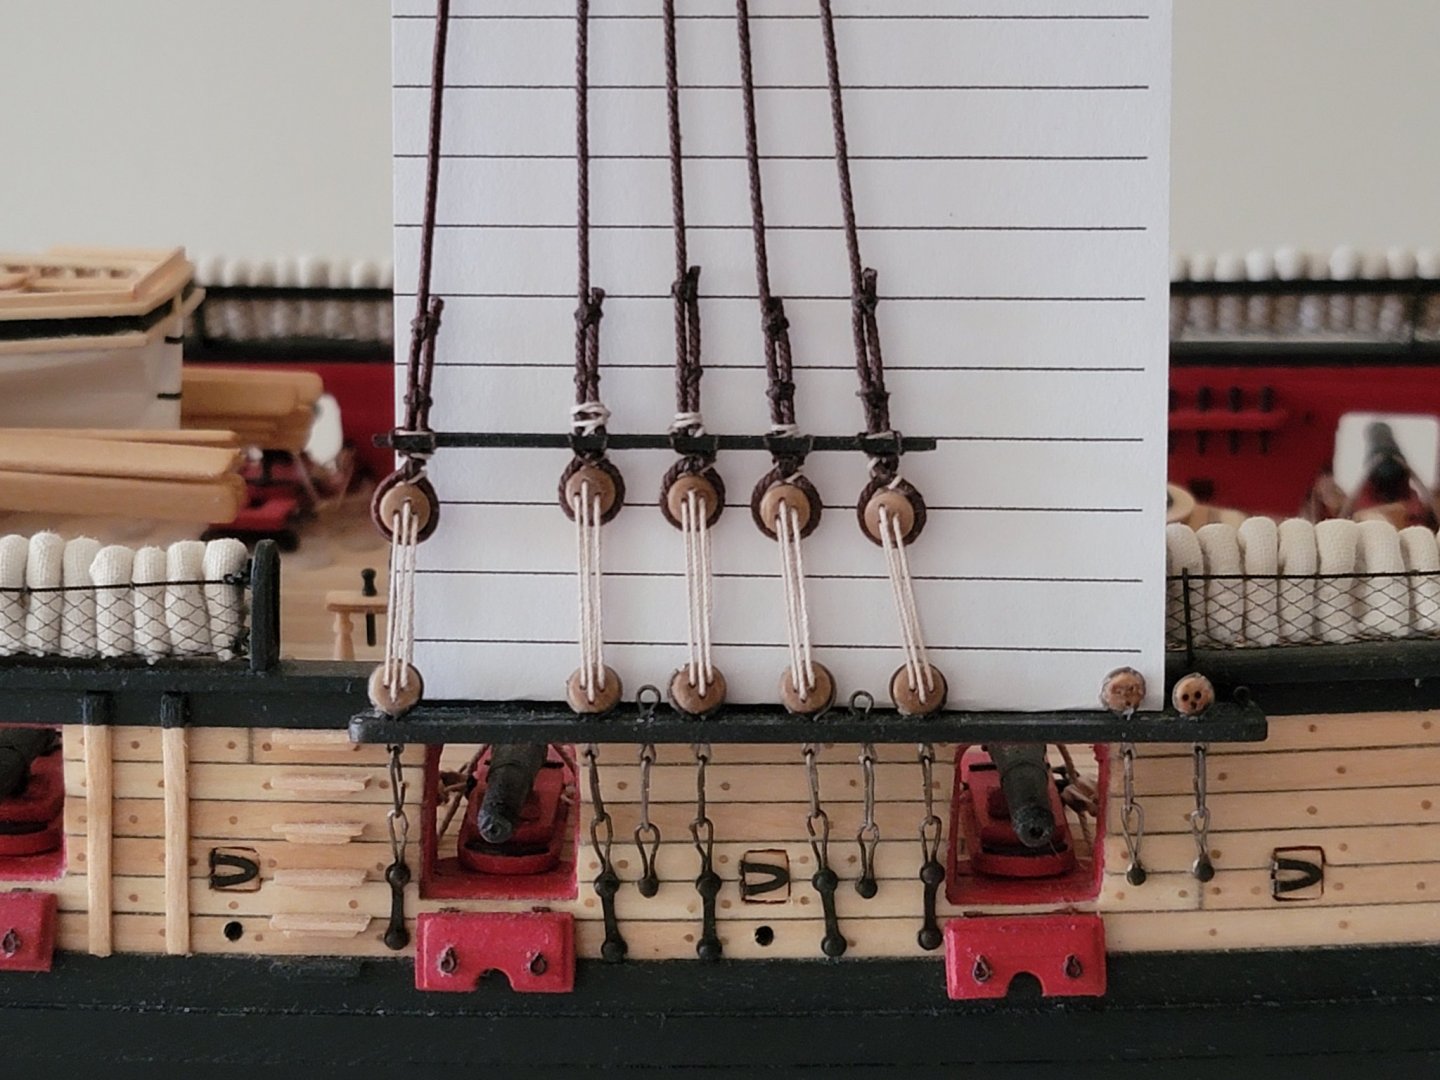
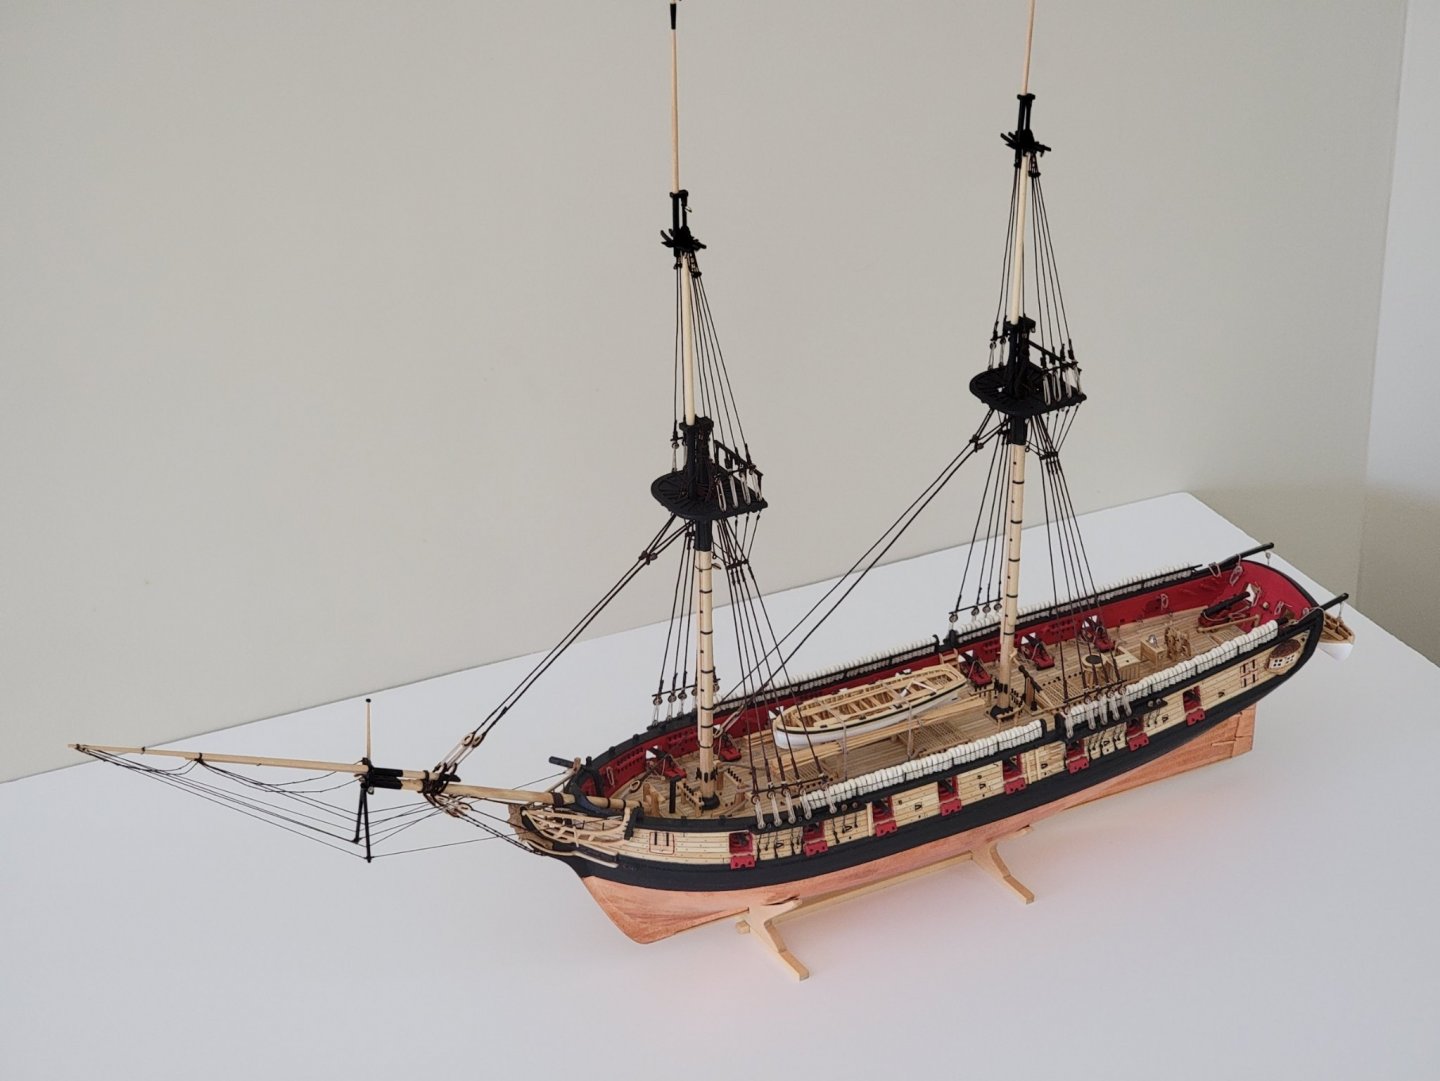
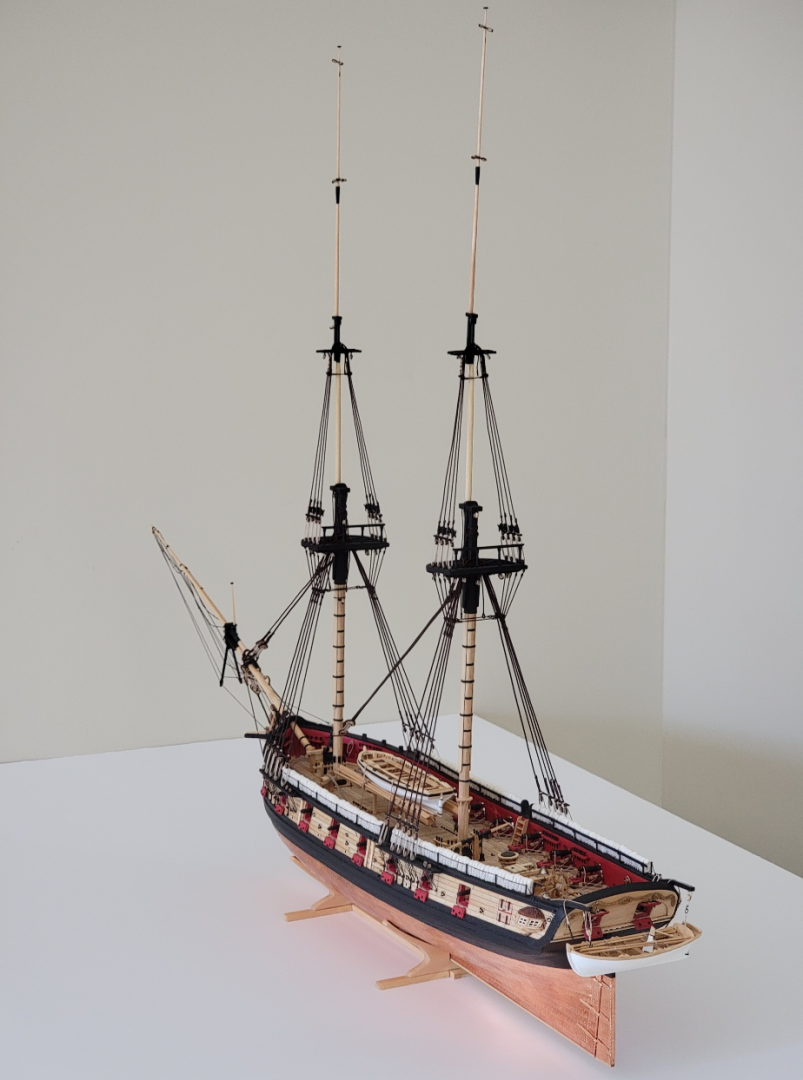
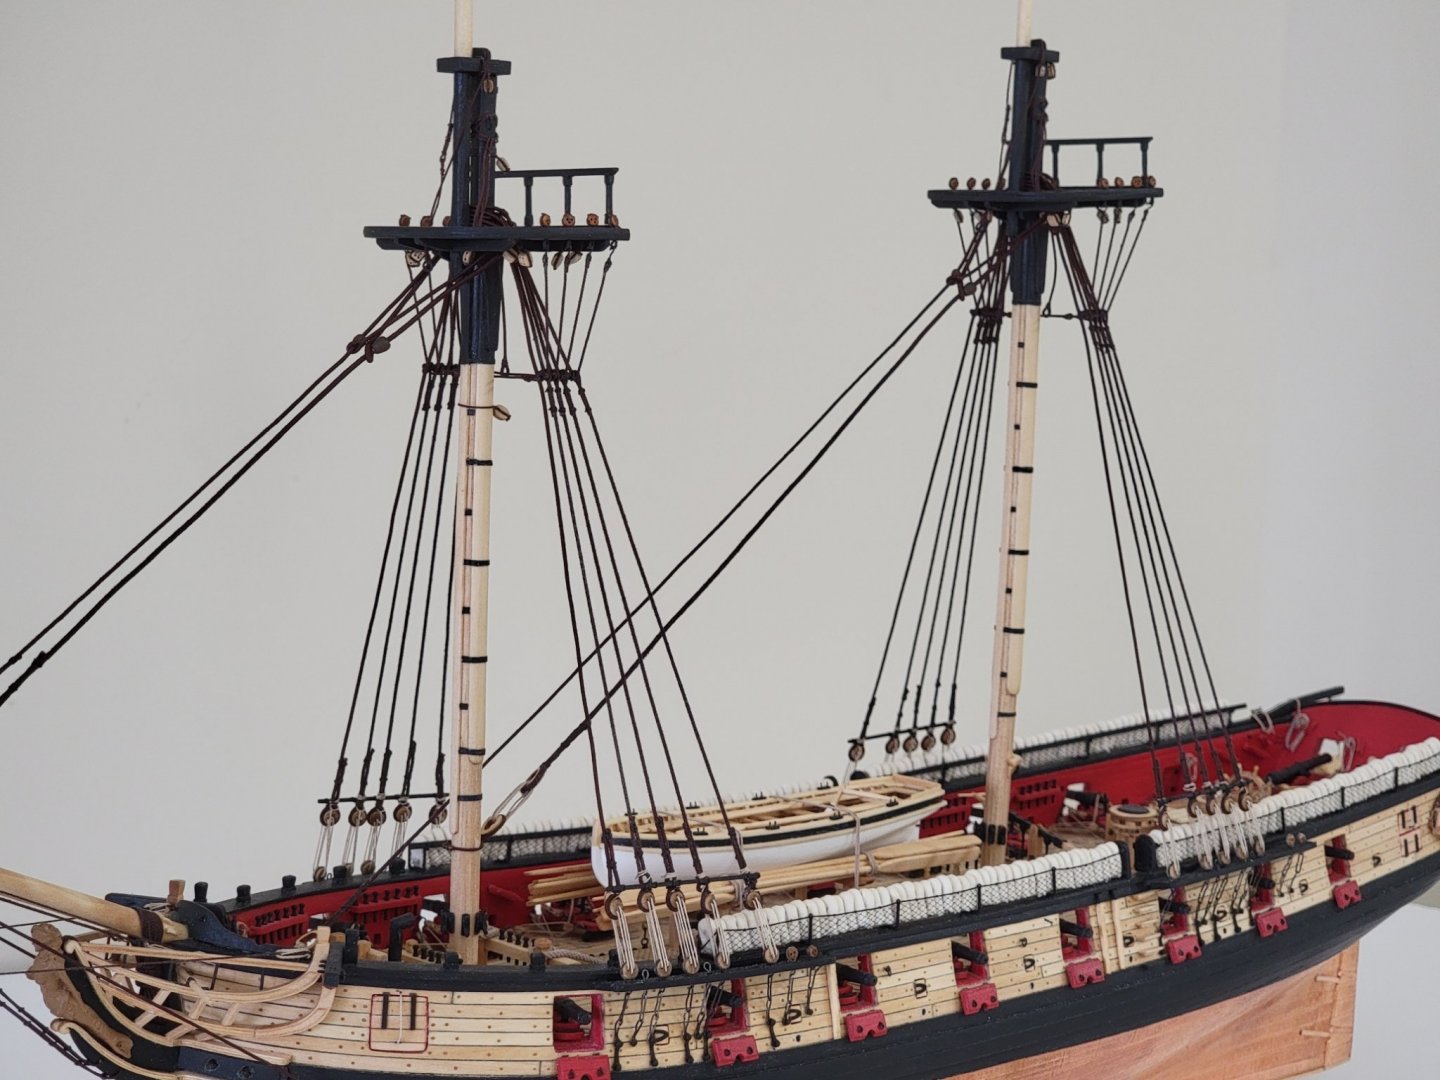
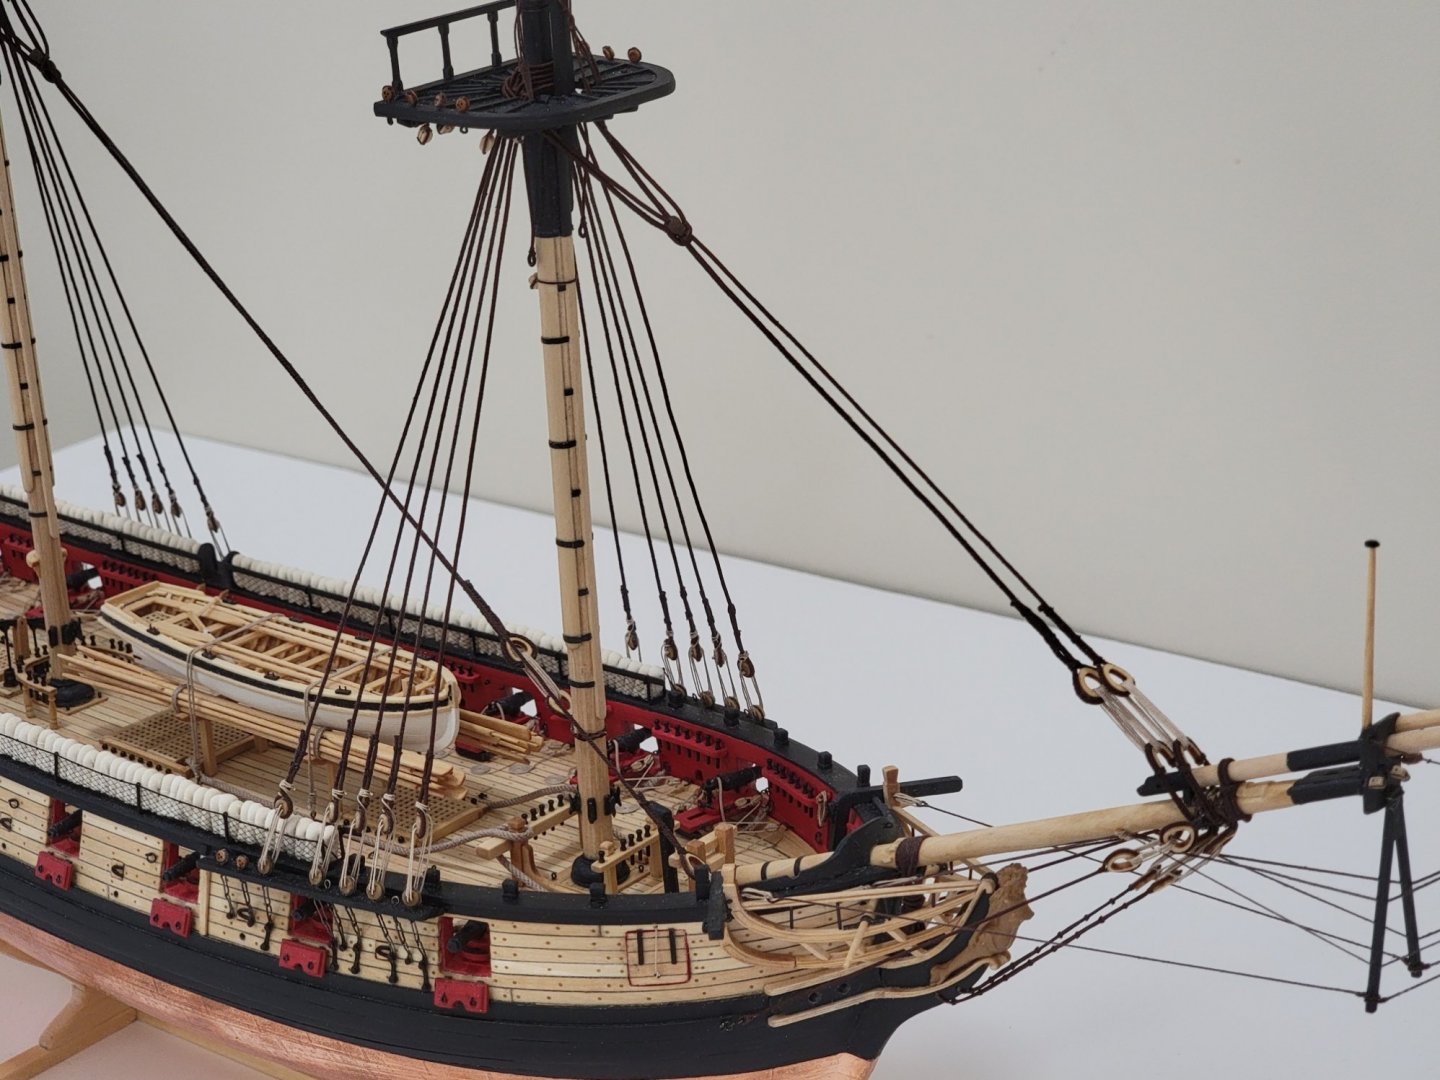
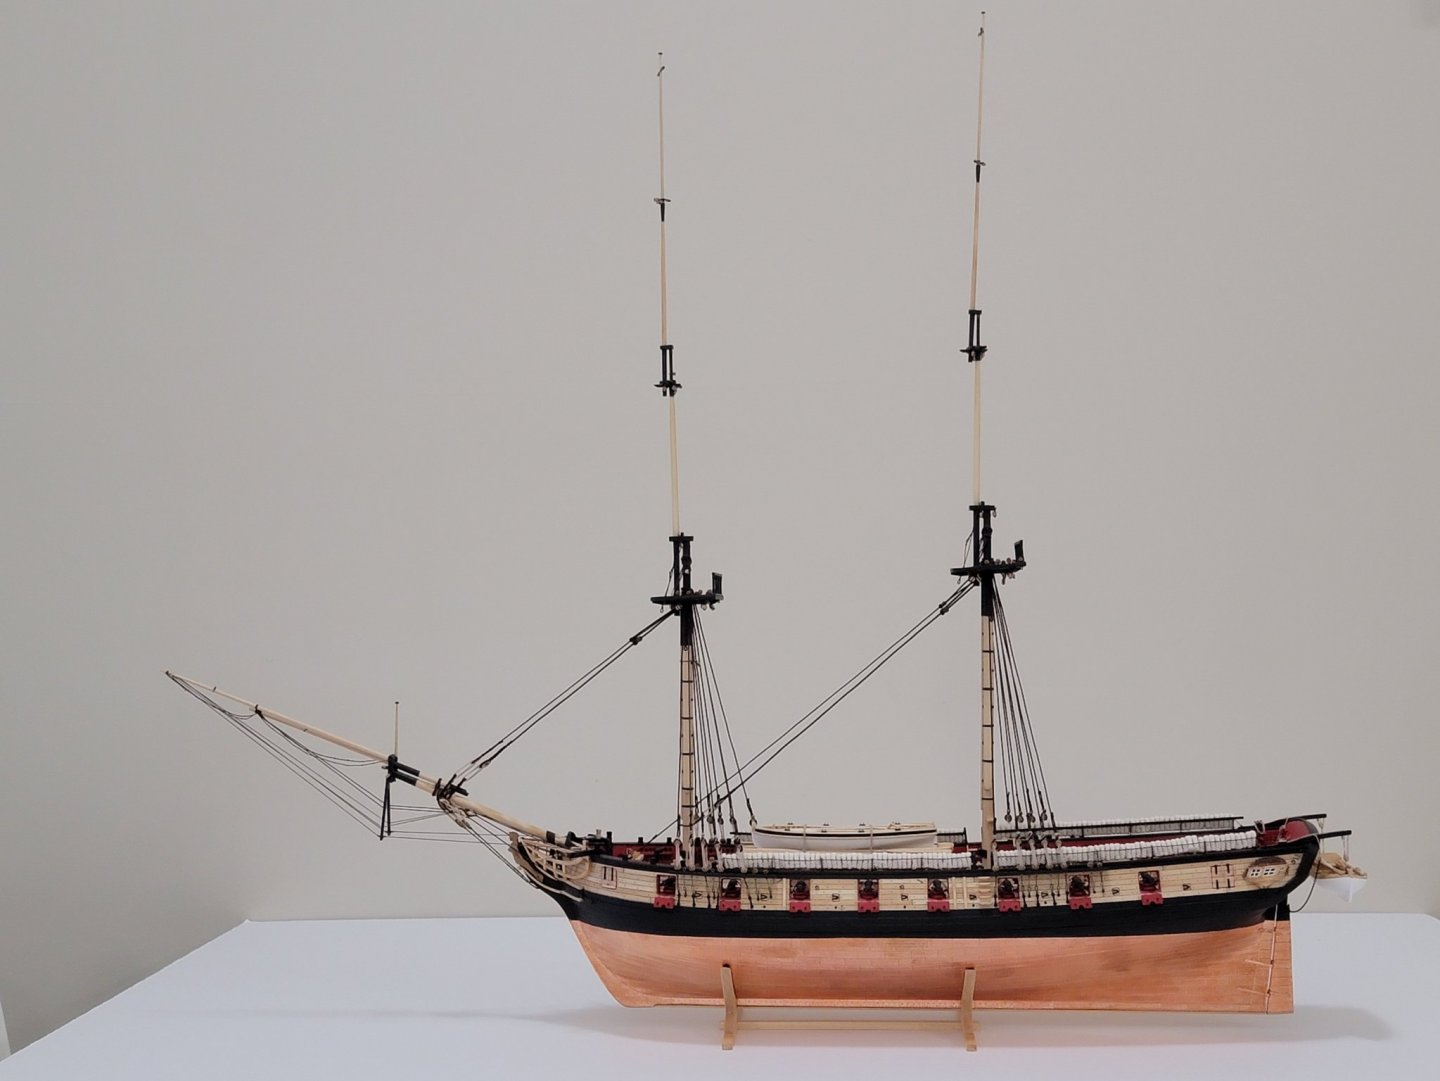
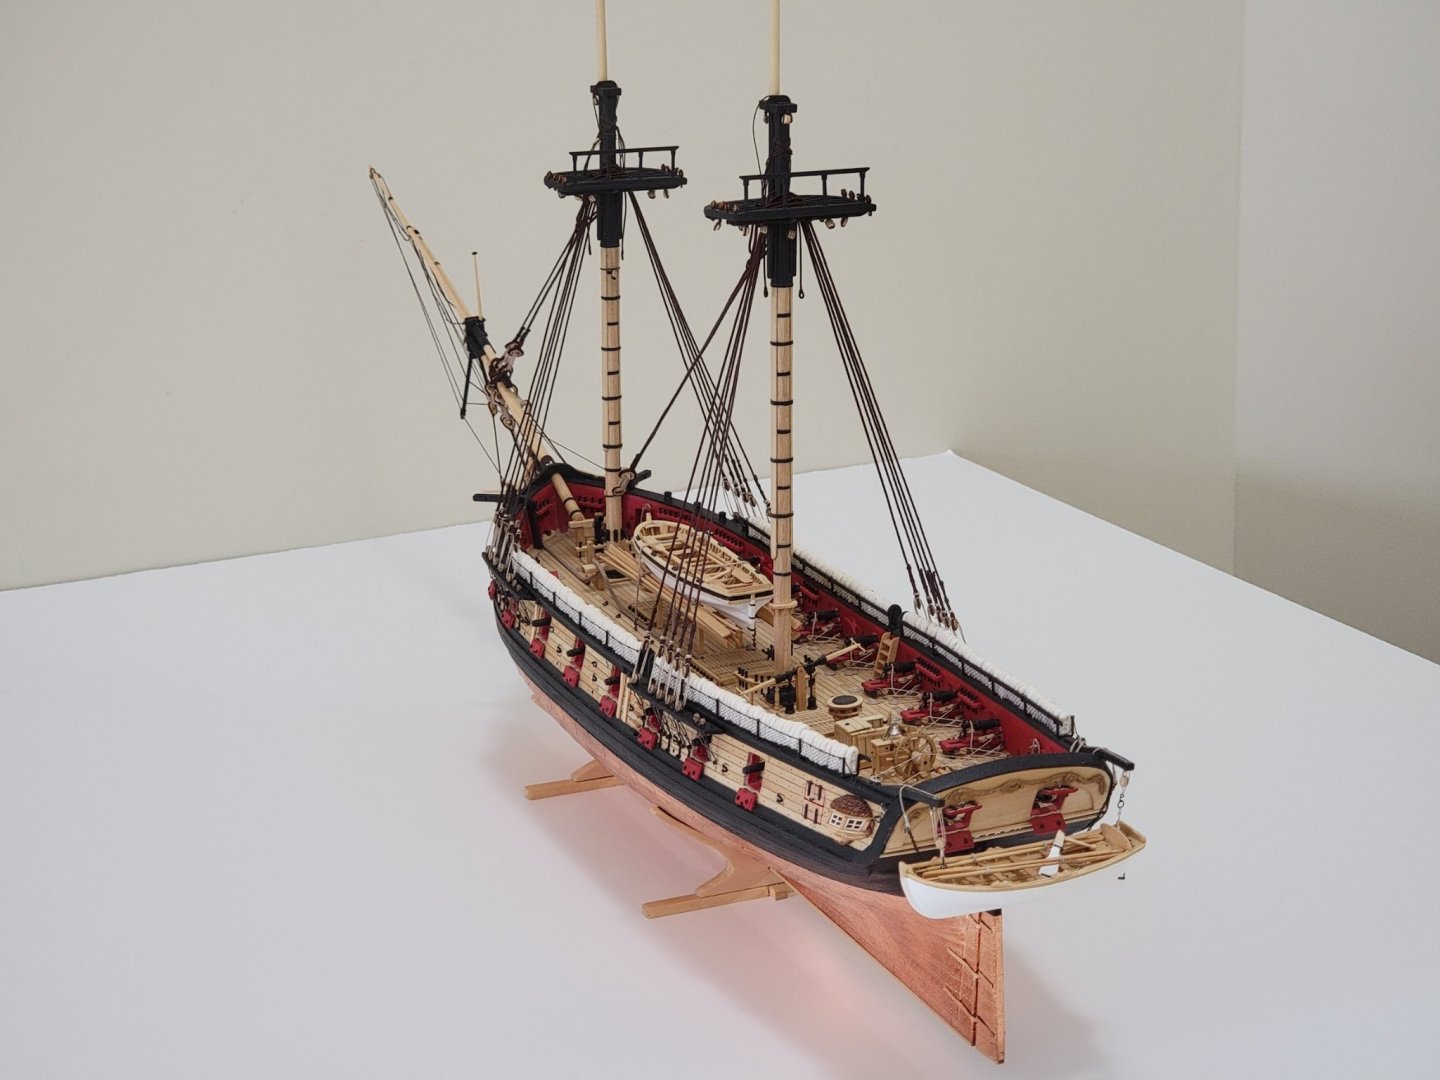
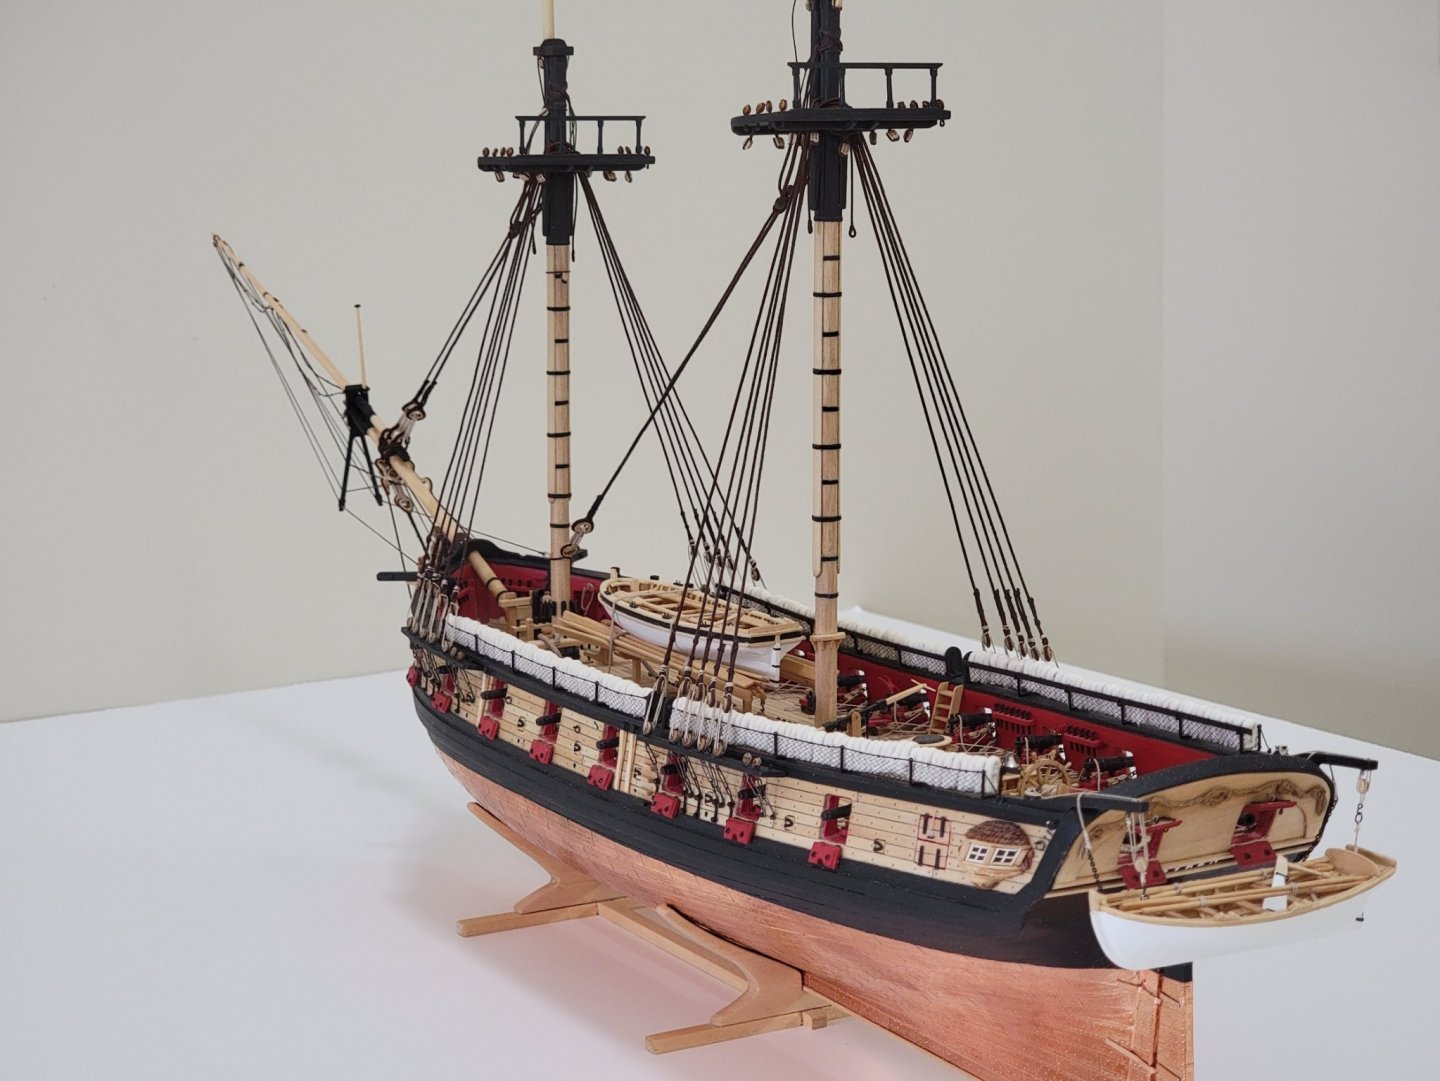
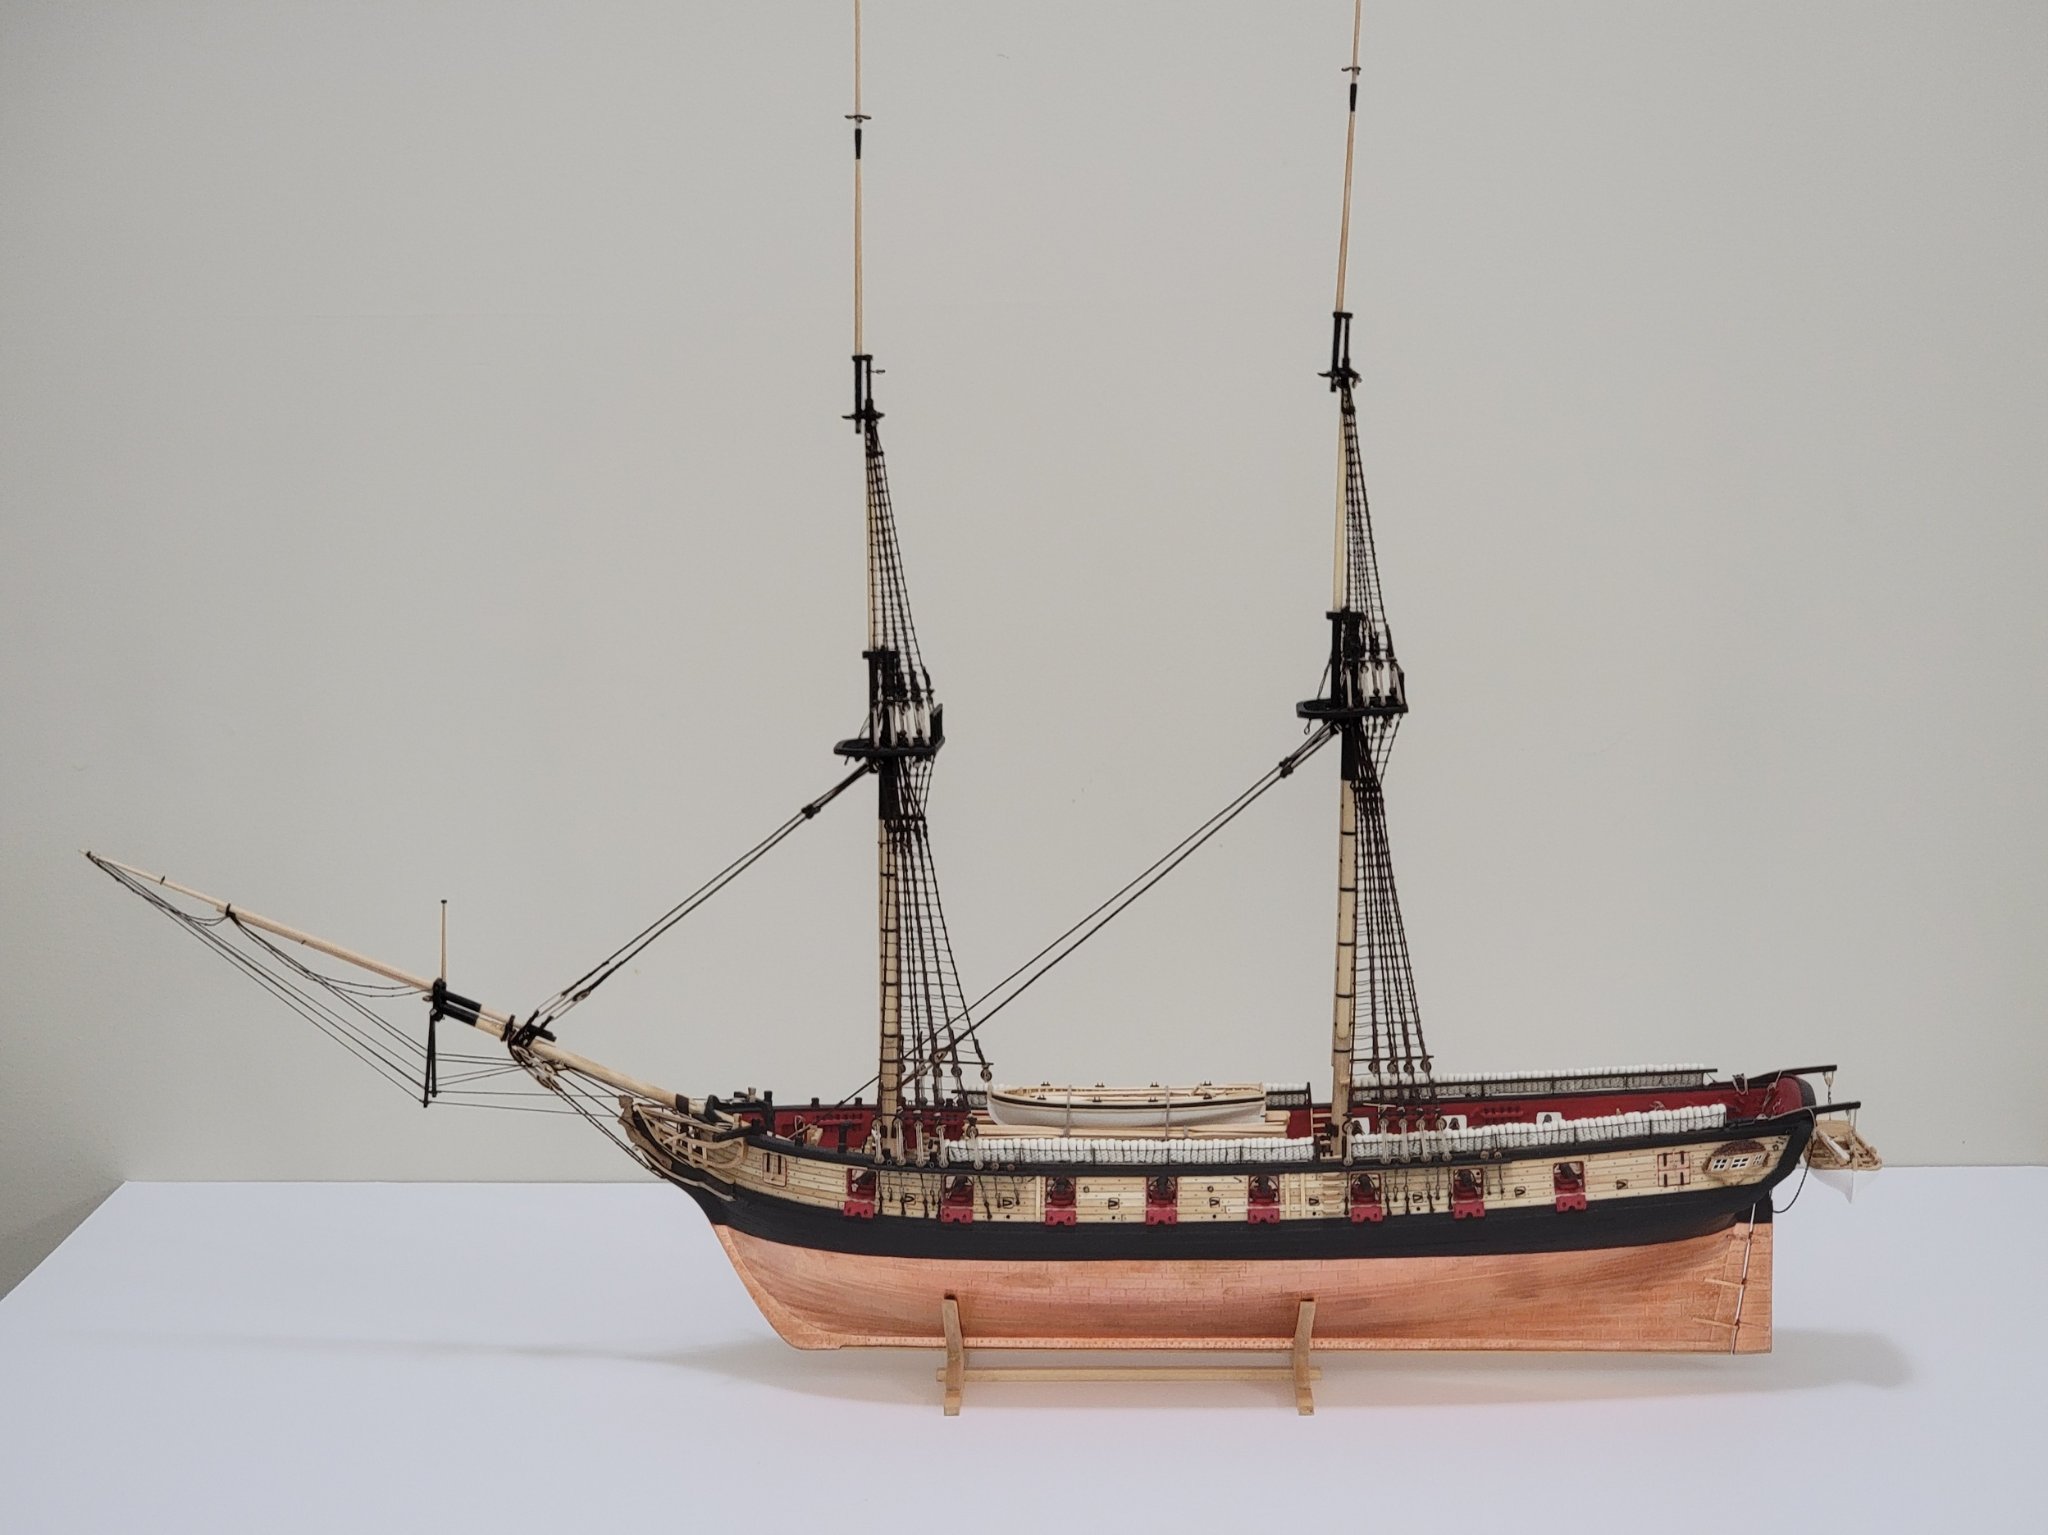
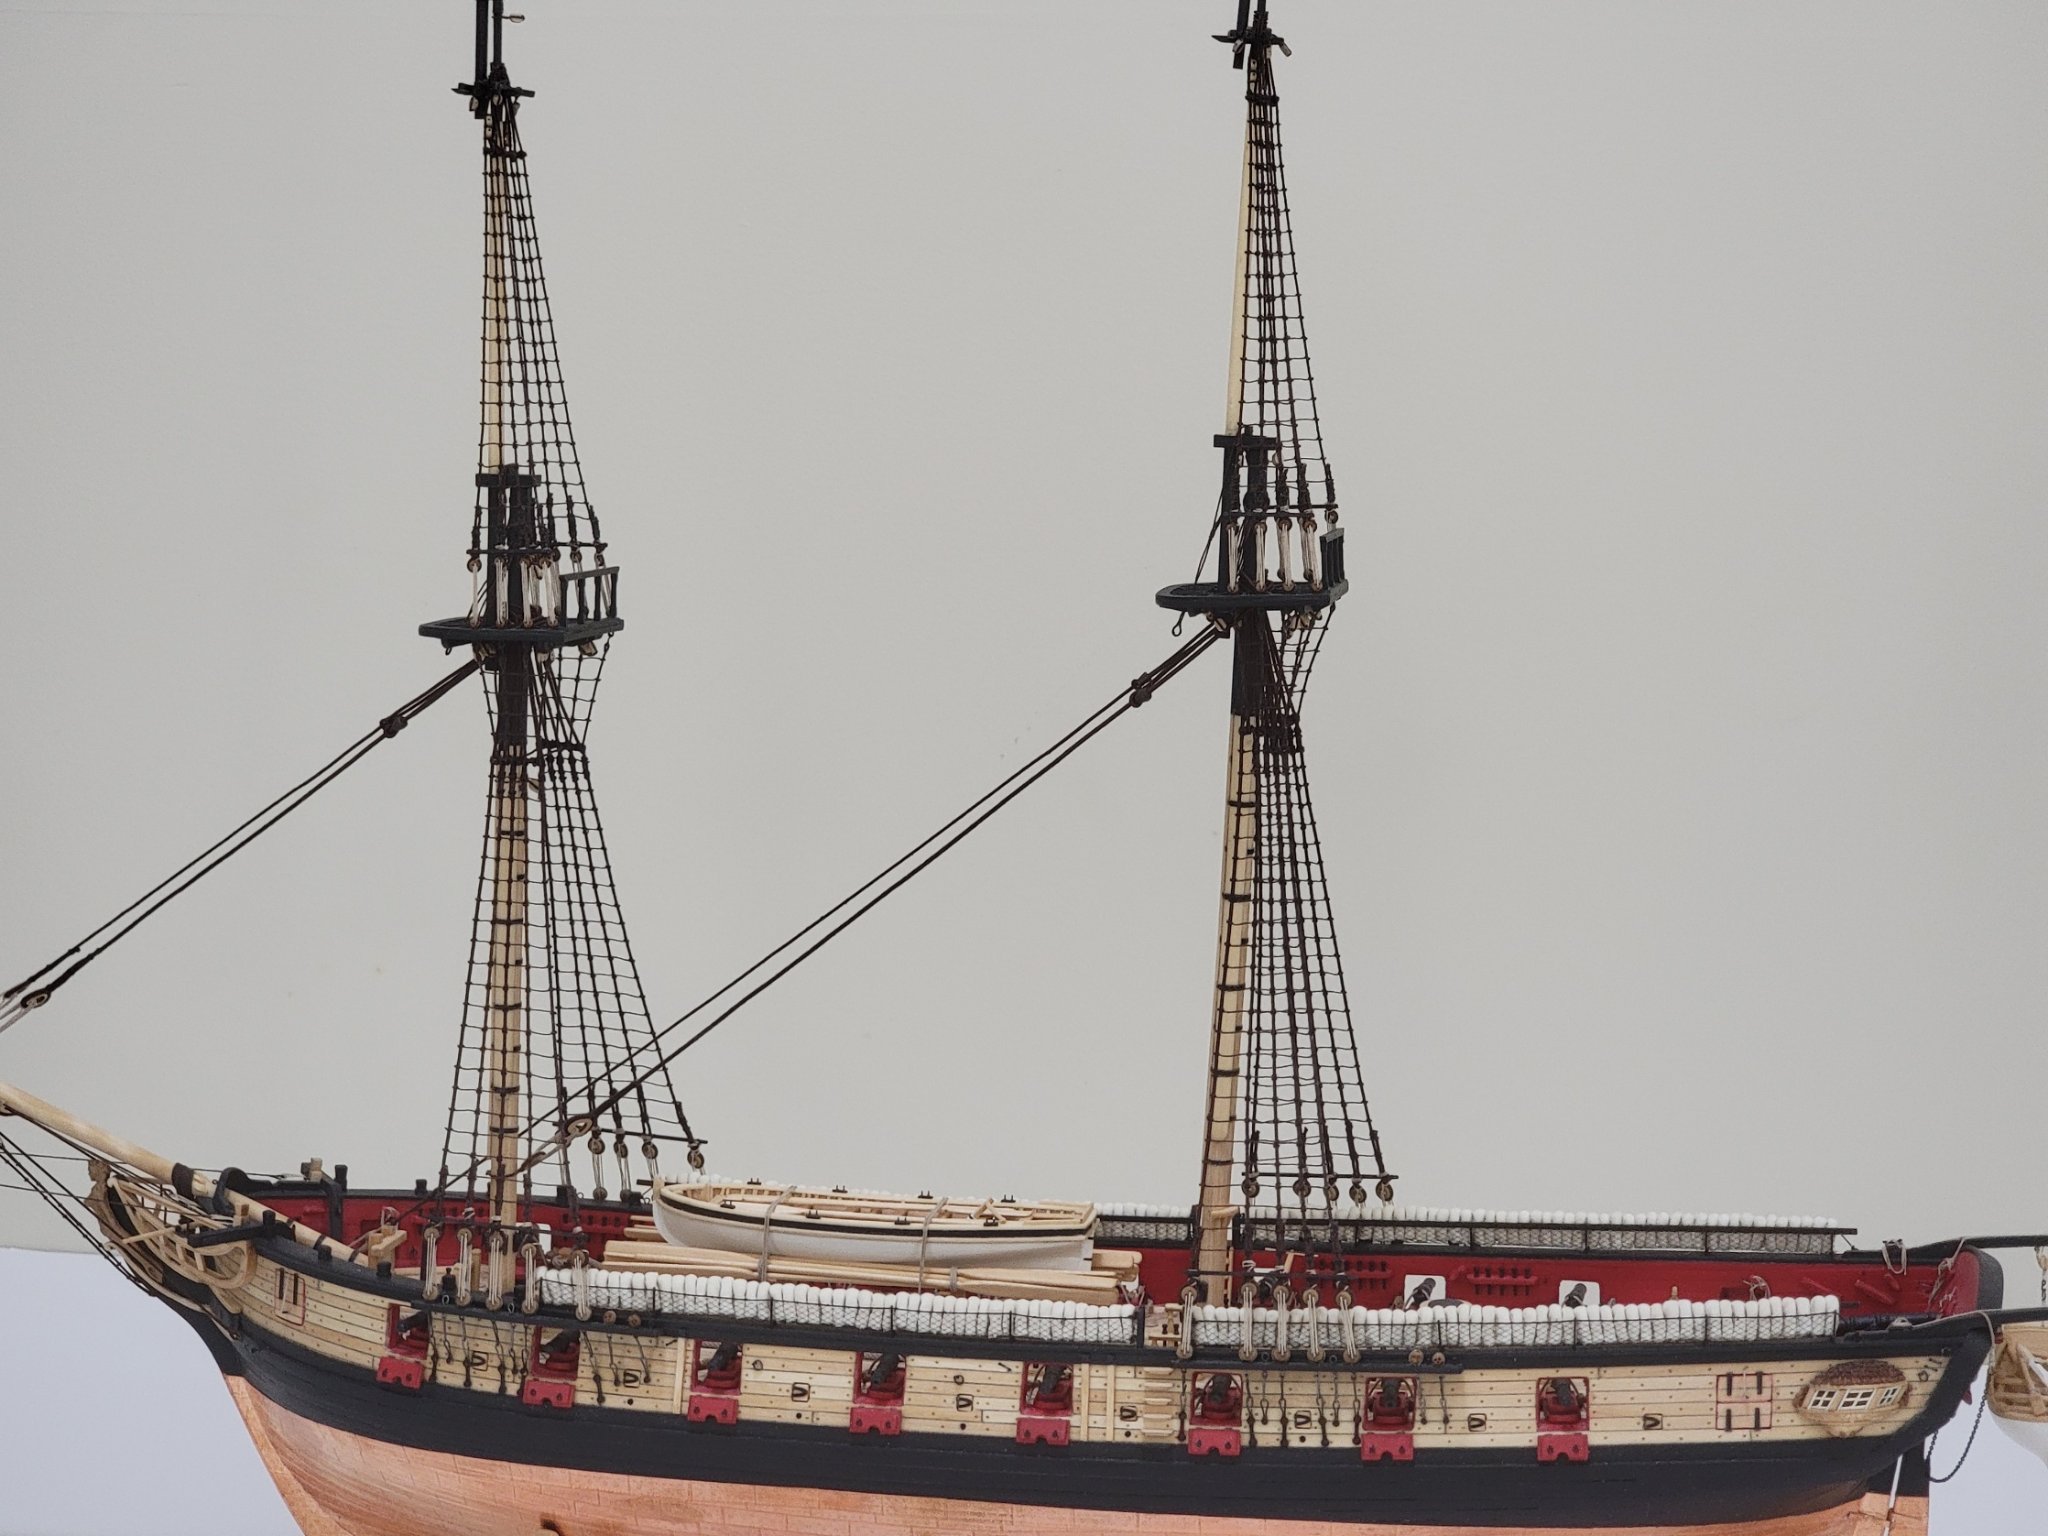
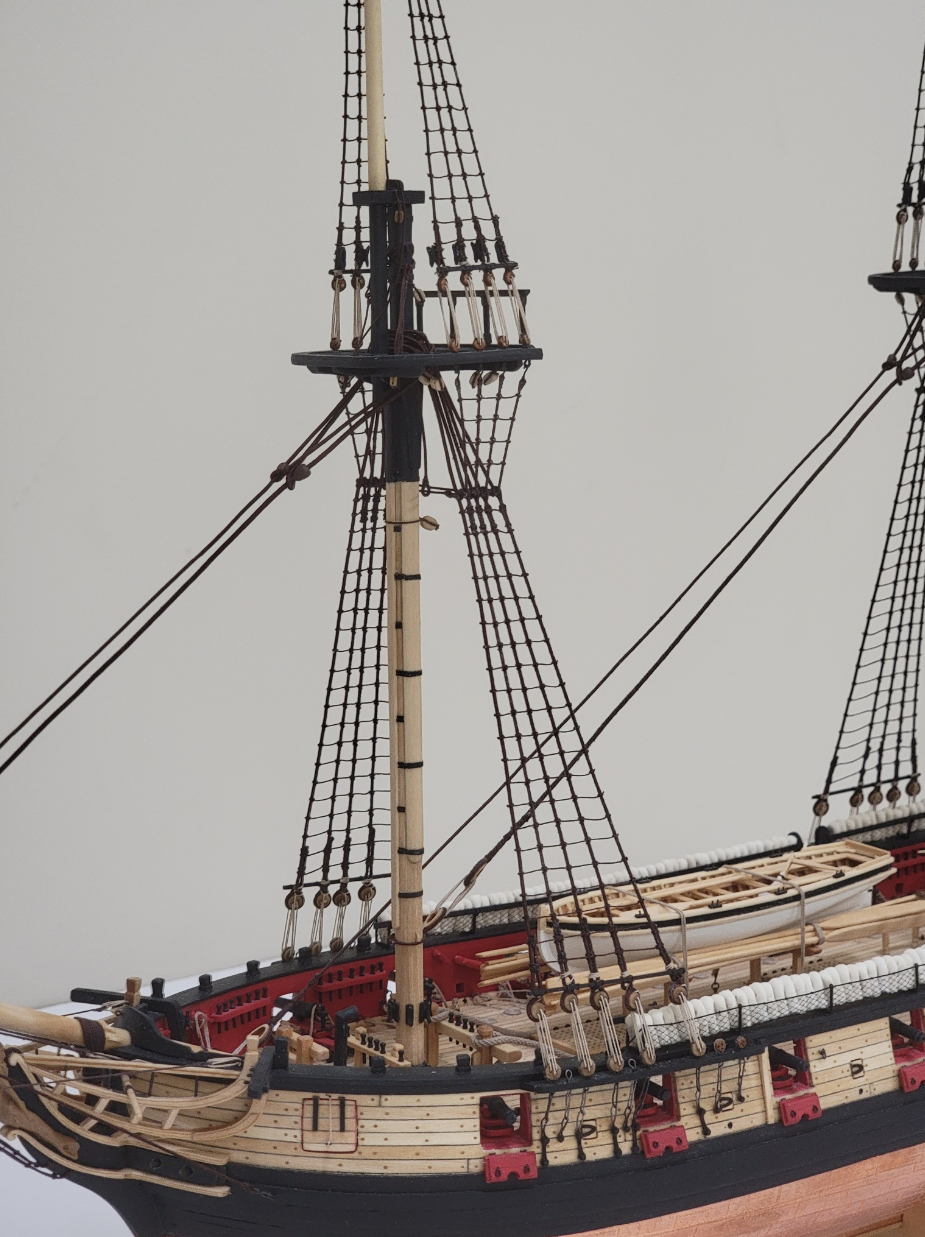
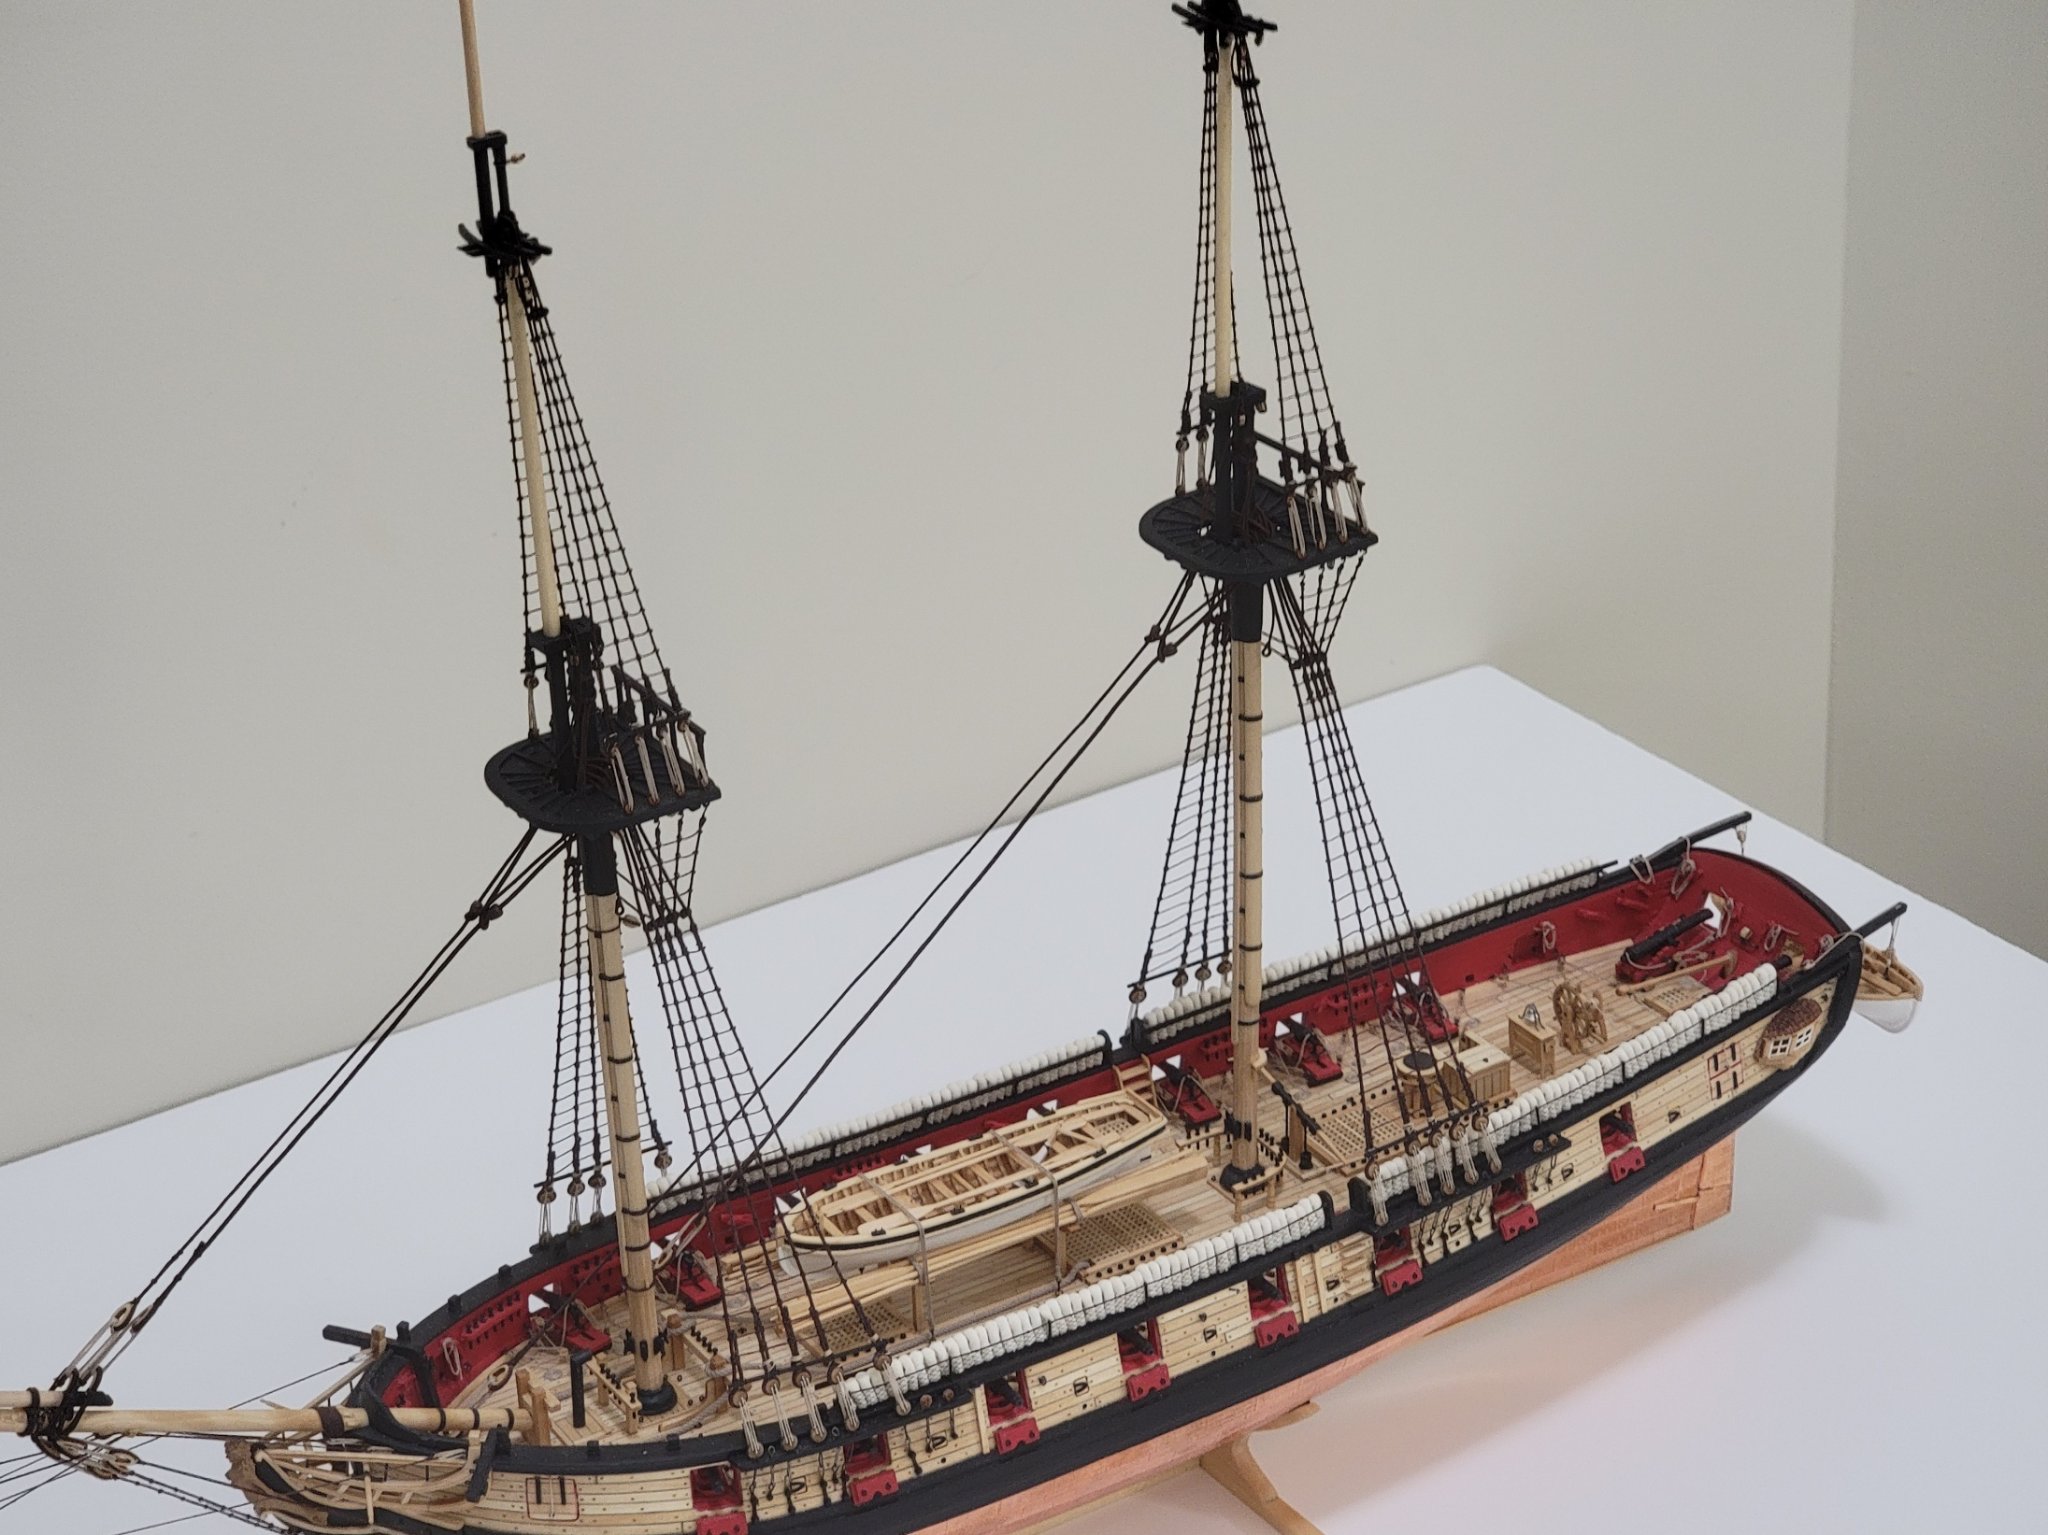
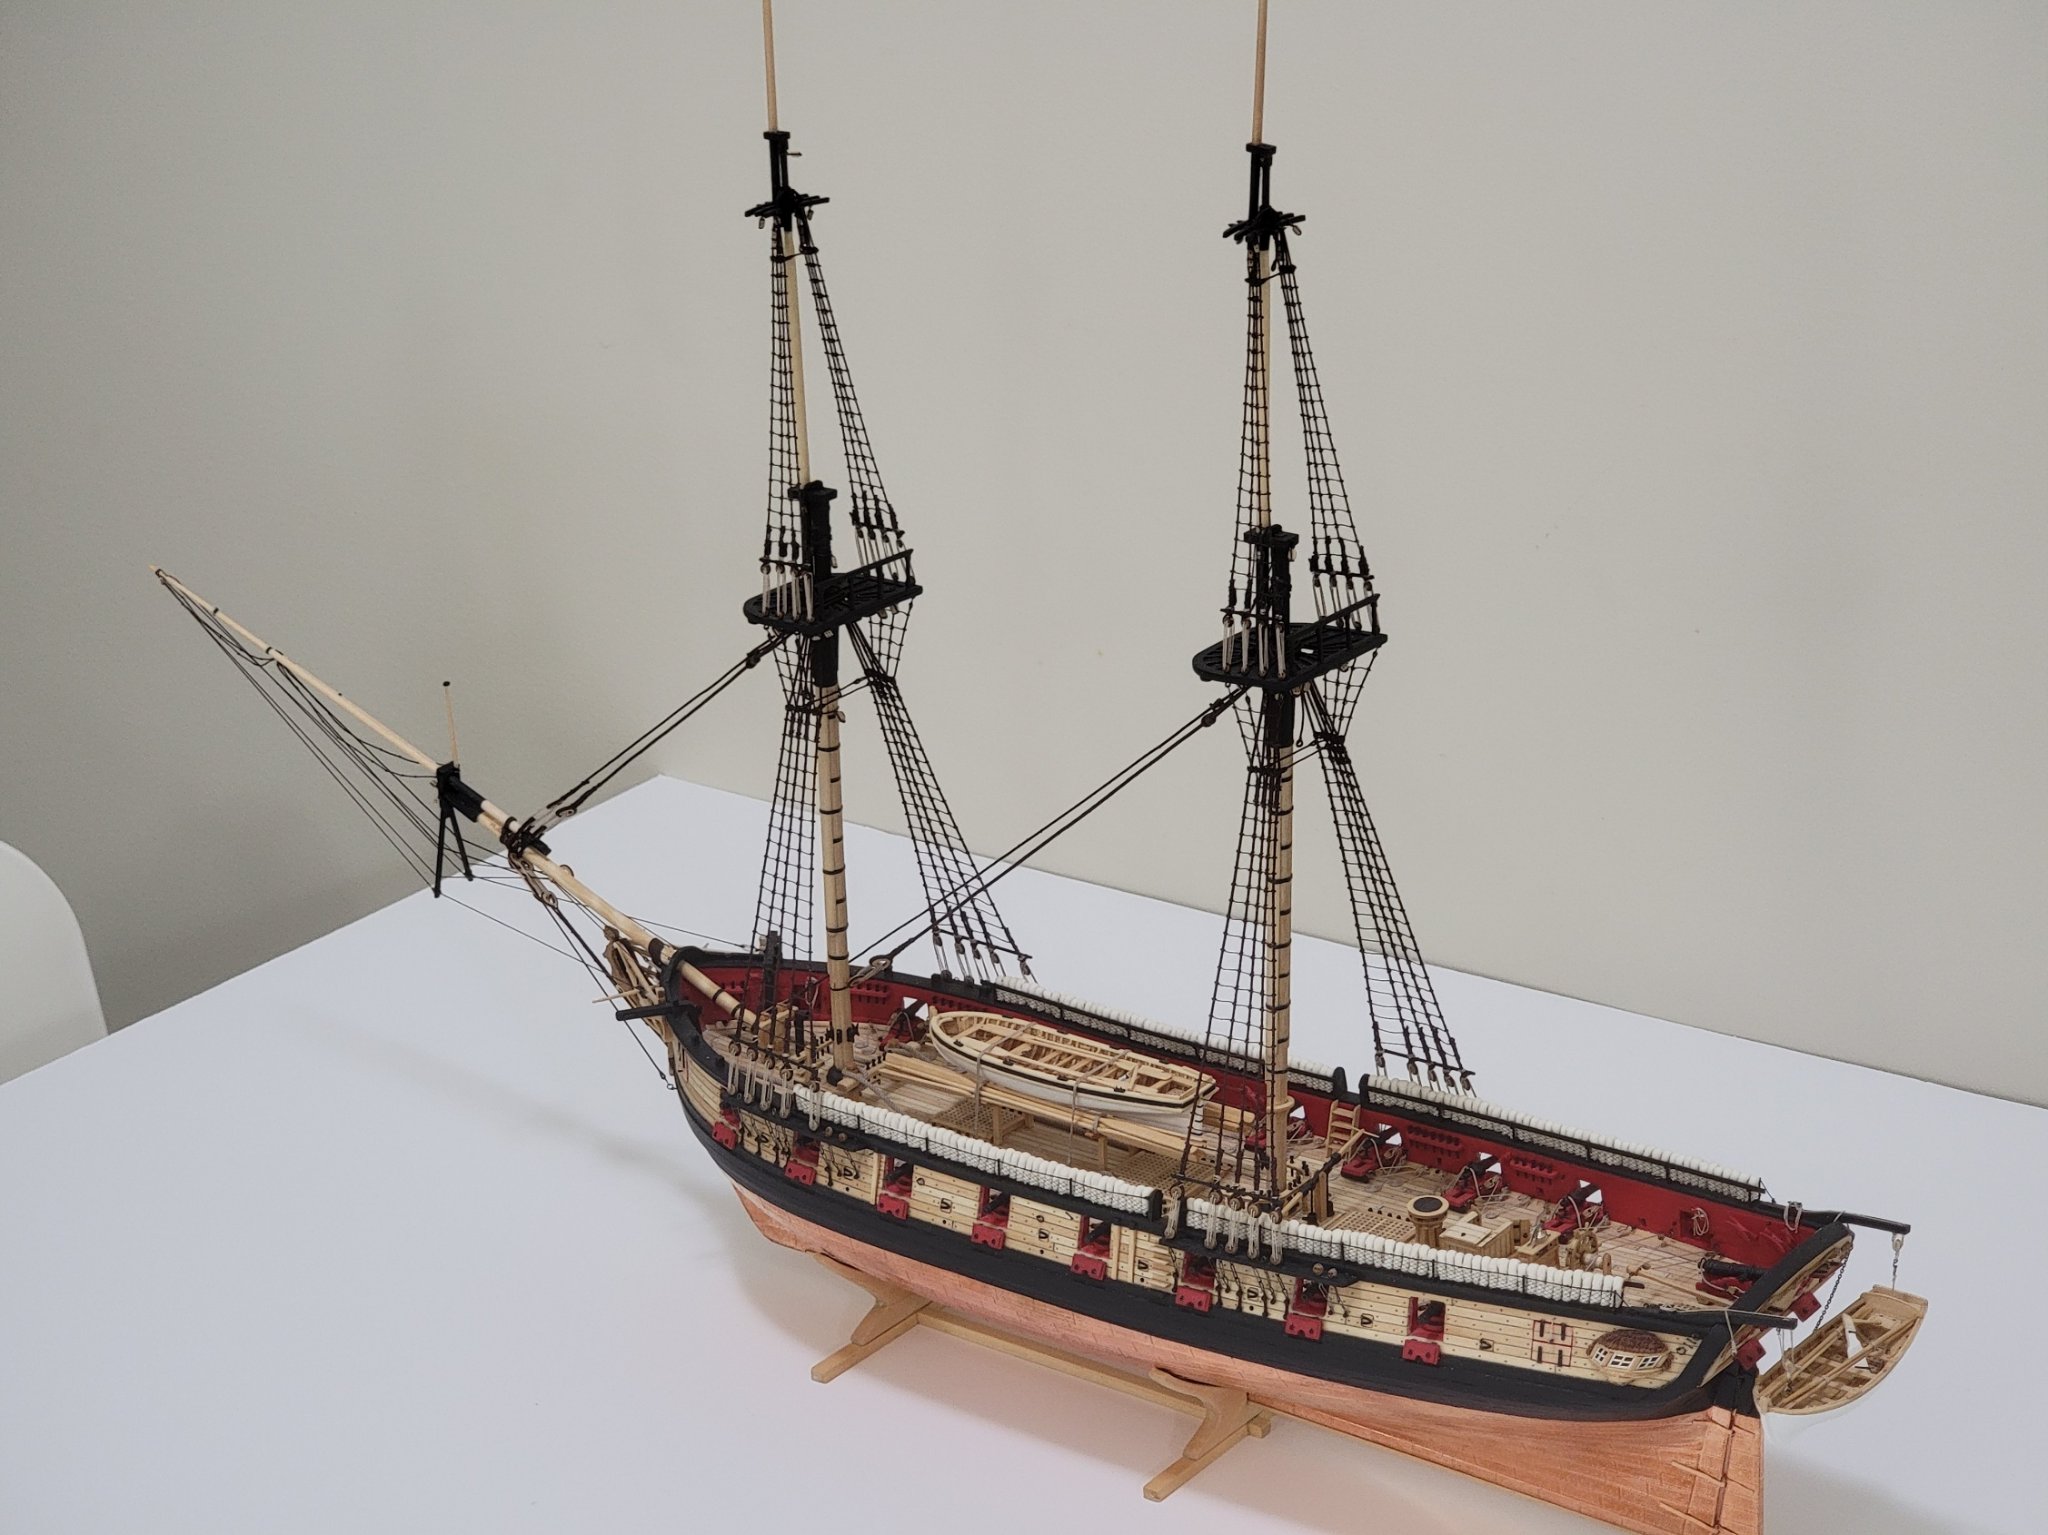
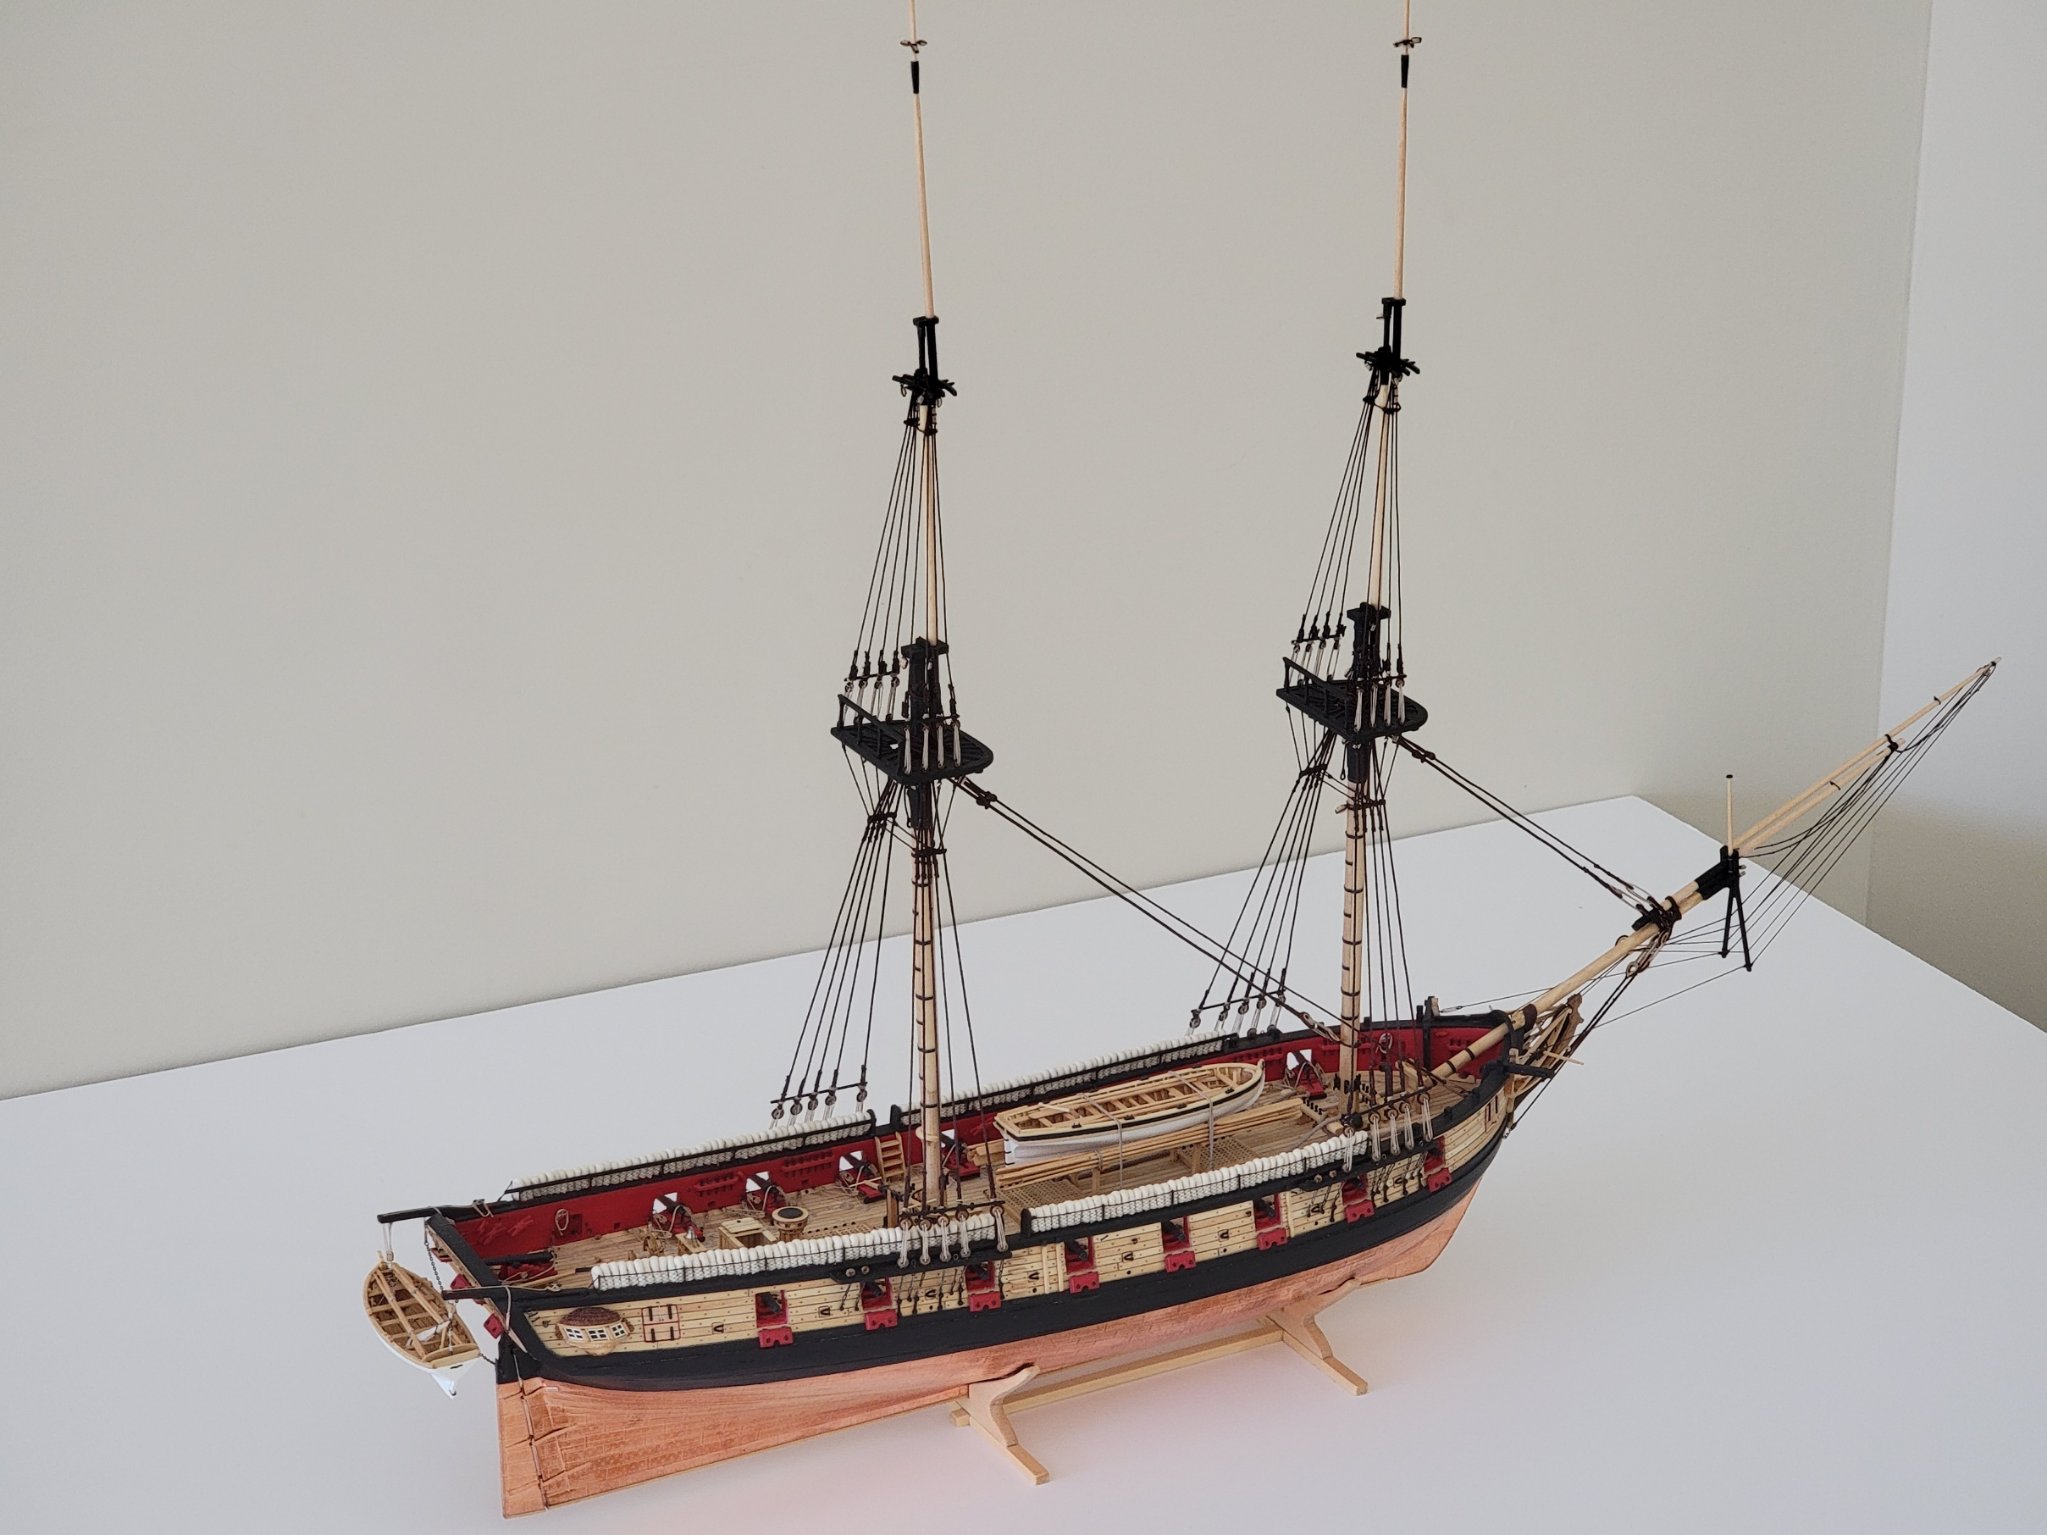
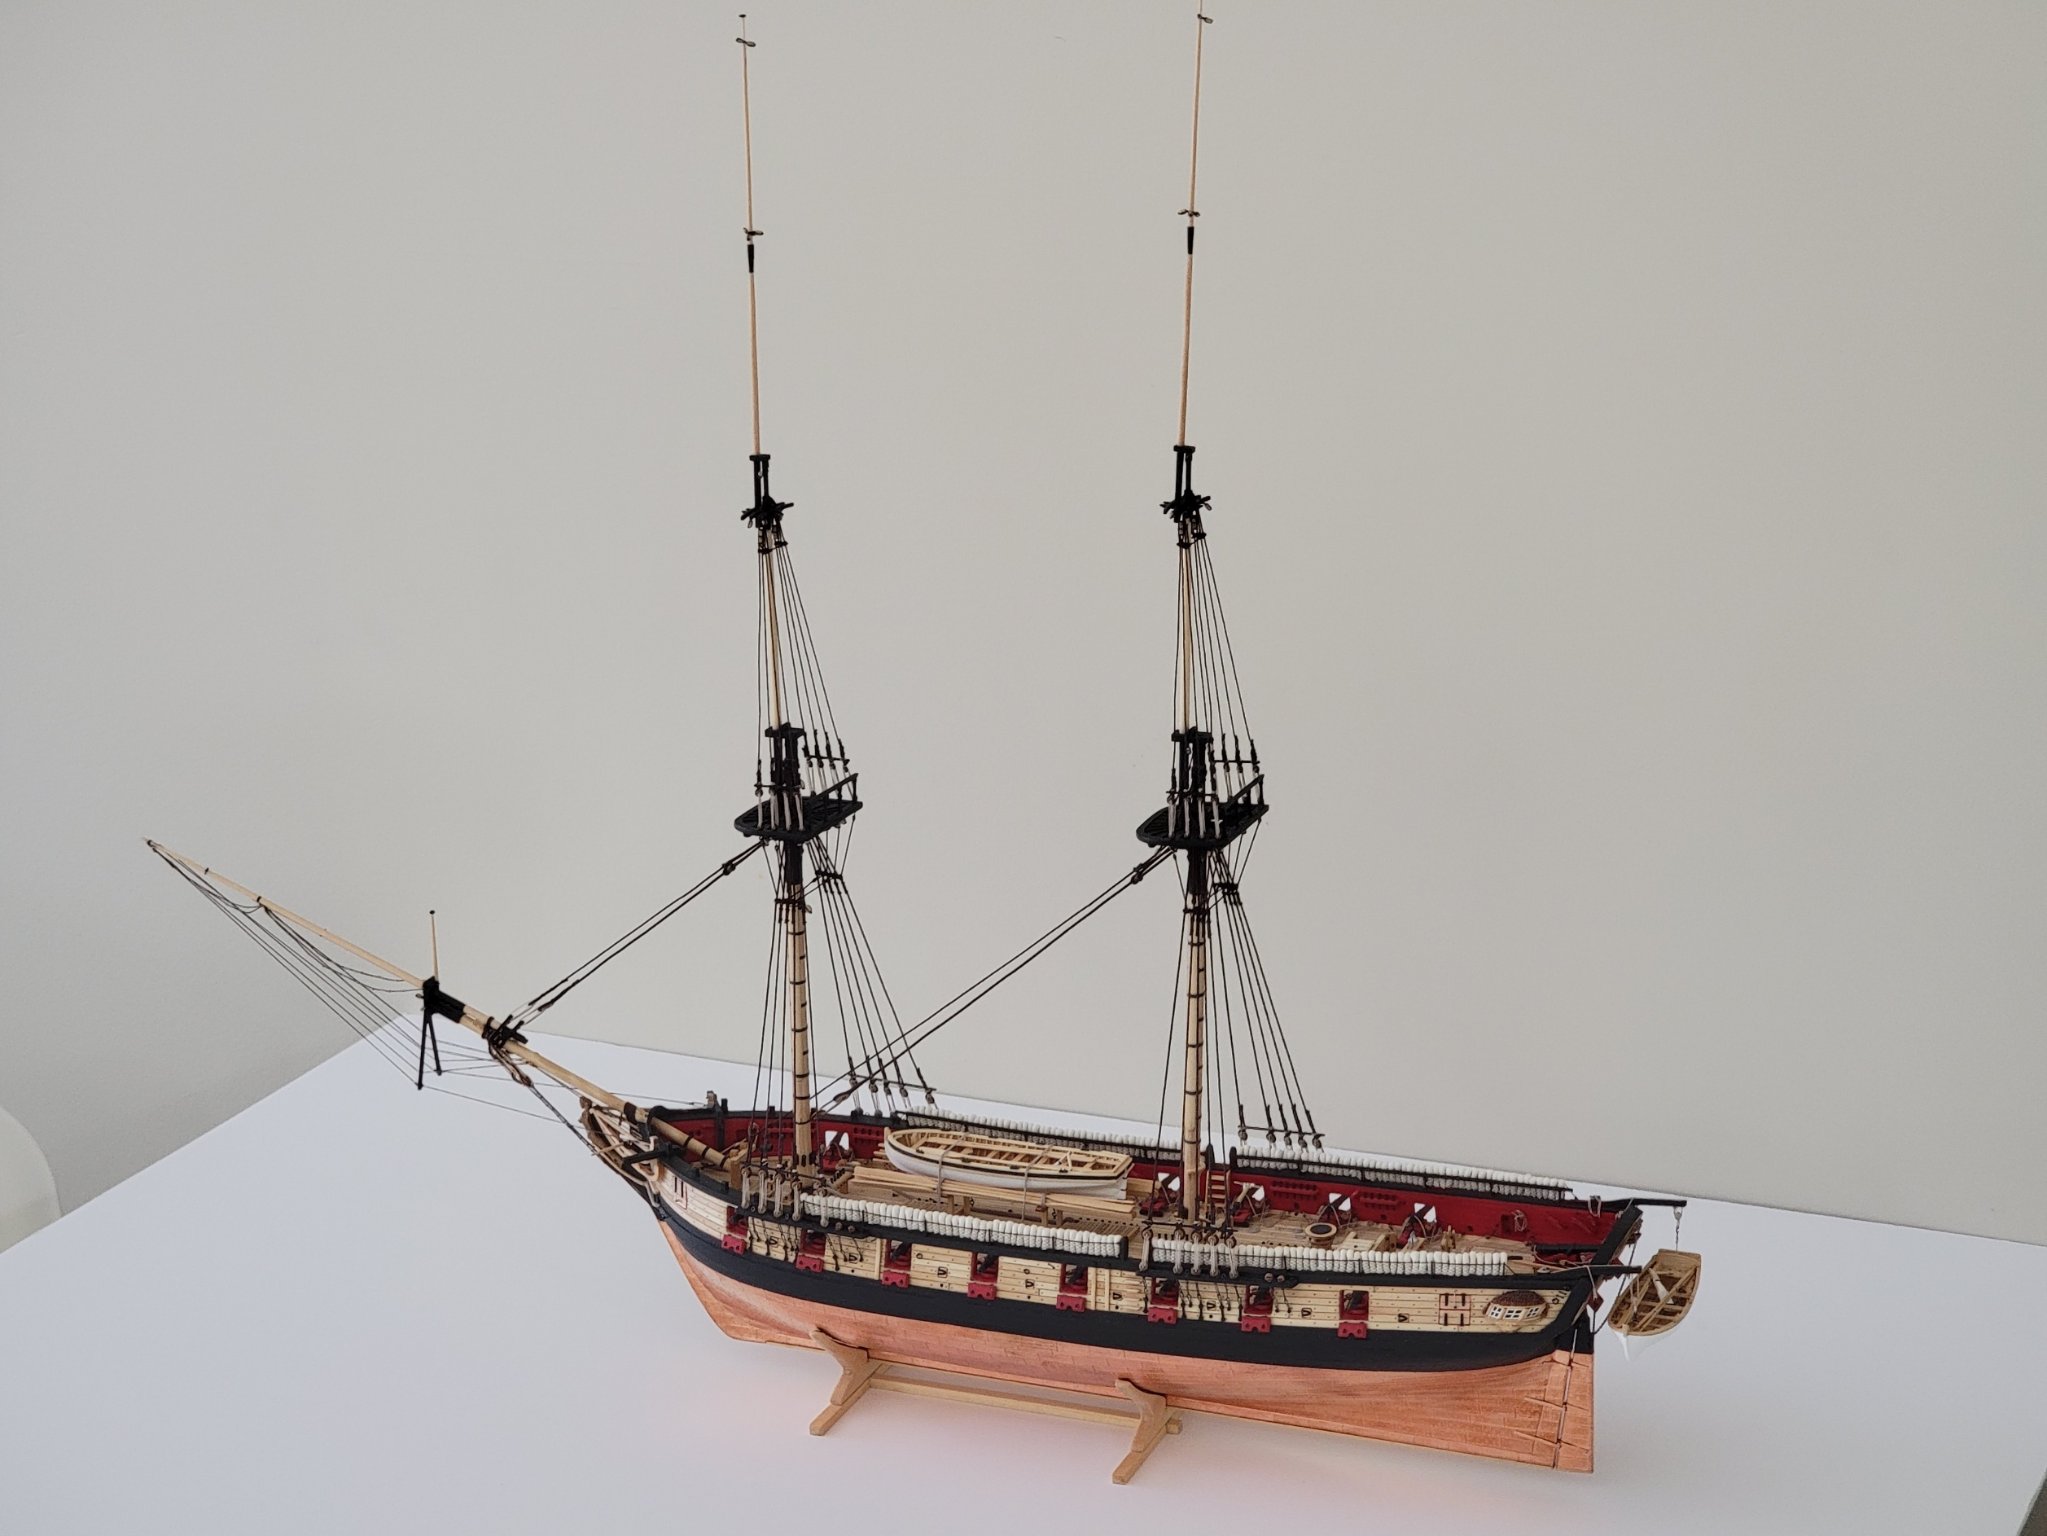
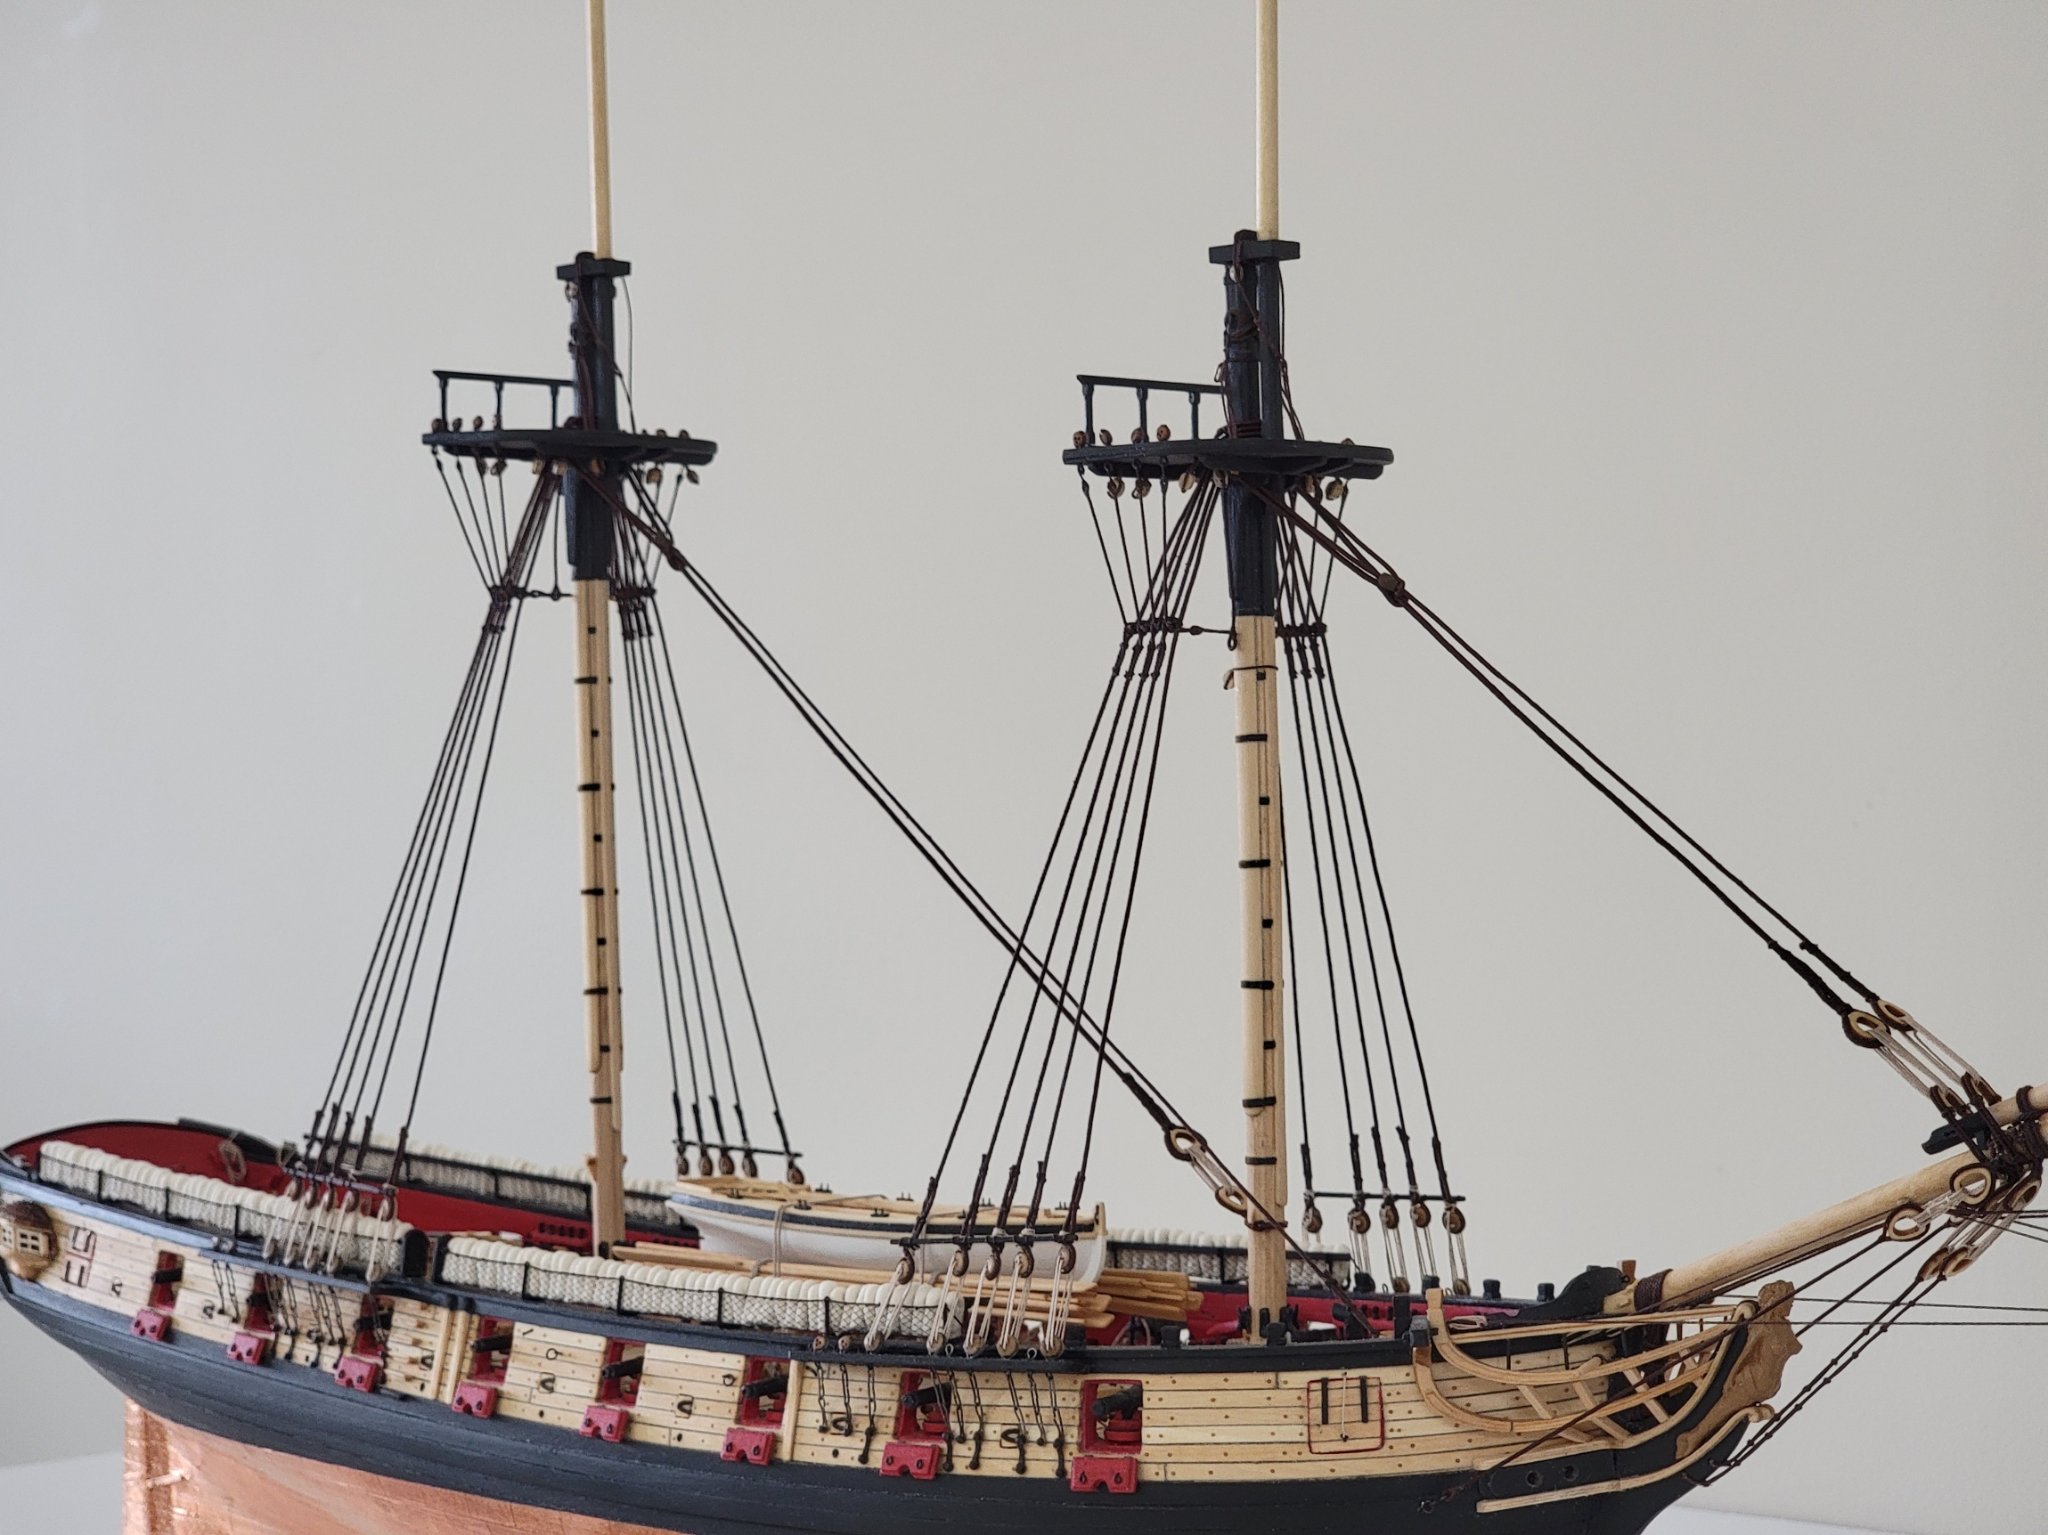
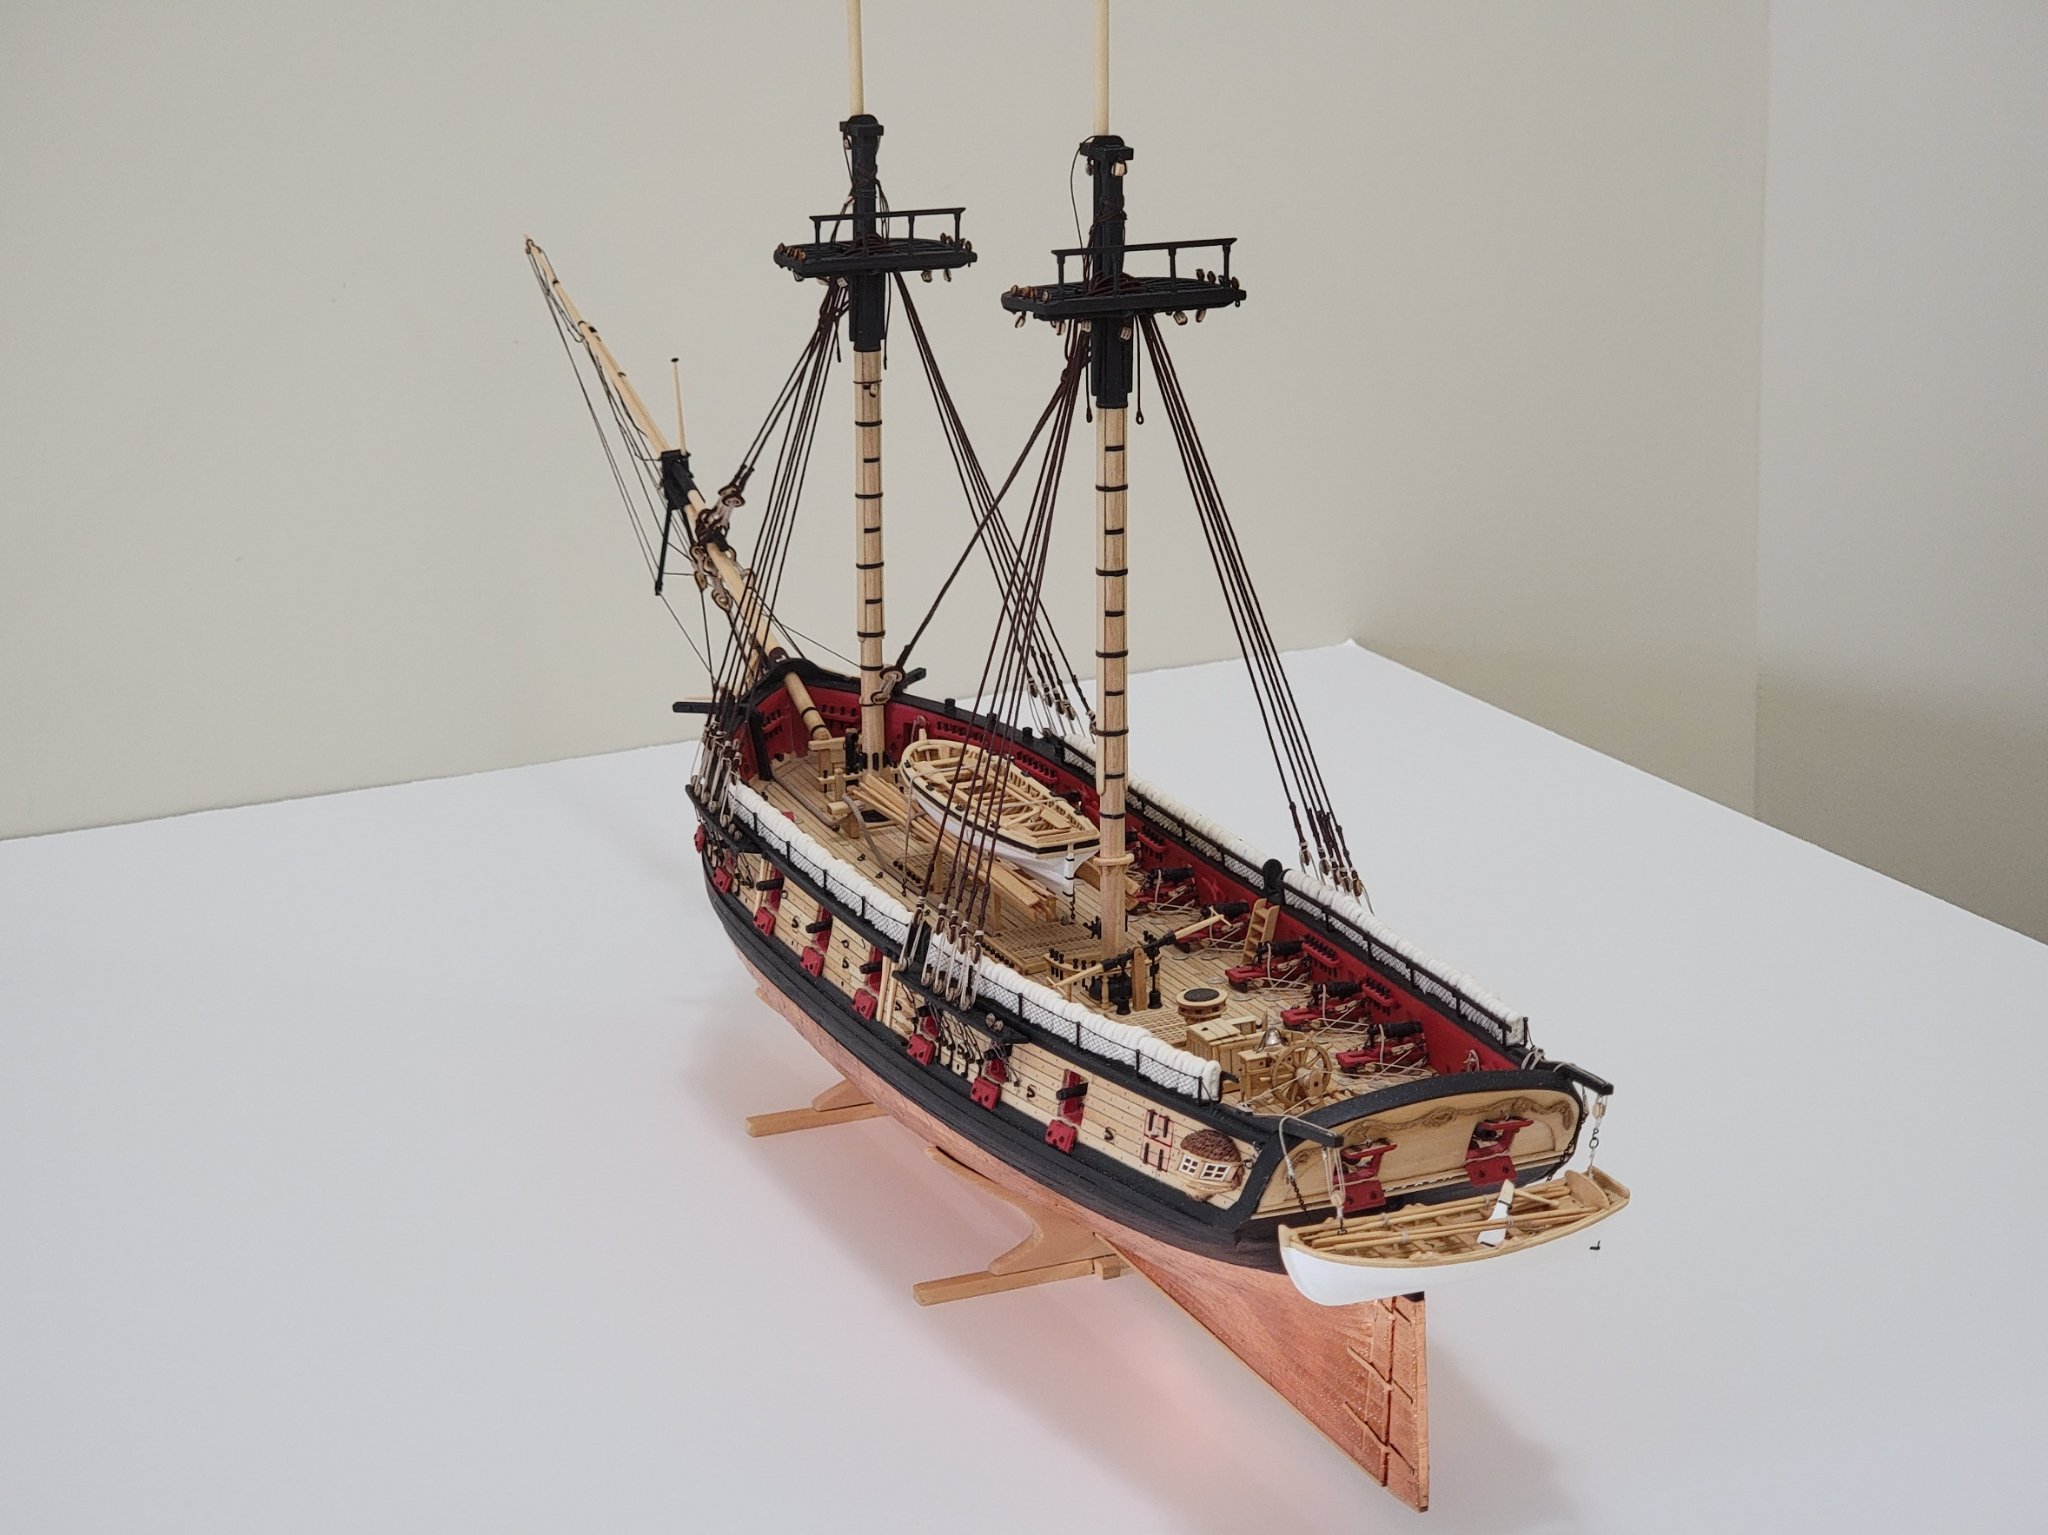
I finished the ratlines today, I found that the ones on the shrouds close to each other came a bit loose. It's only visible if I really look for it (or when taking close up shots), so I think I'll leave it as is. Tightening them caused some issues when finishing them off on the foremost shroud... Anyways, here are a bunch of photos to mark this milestone of the build:
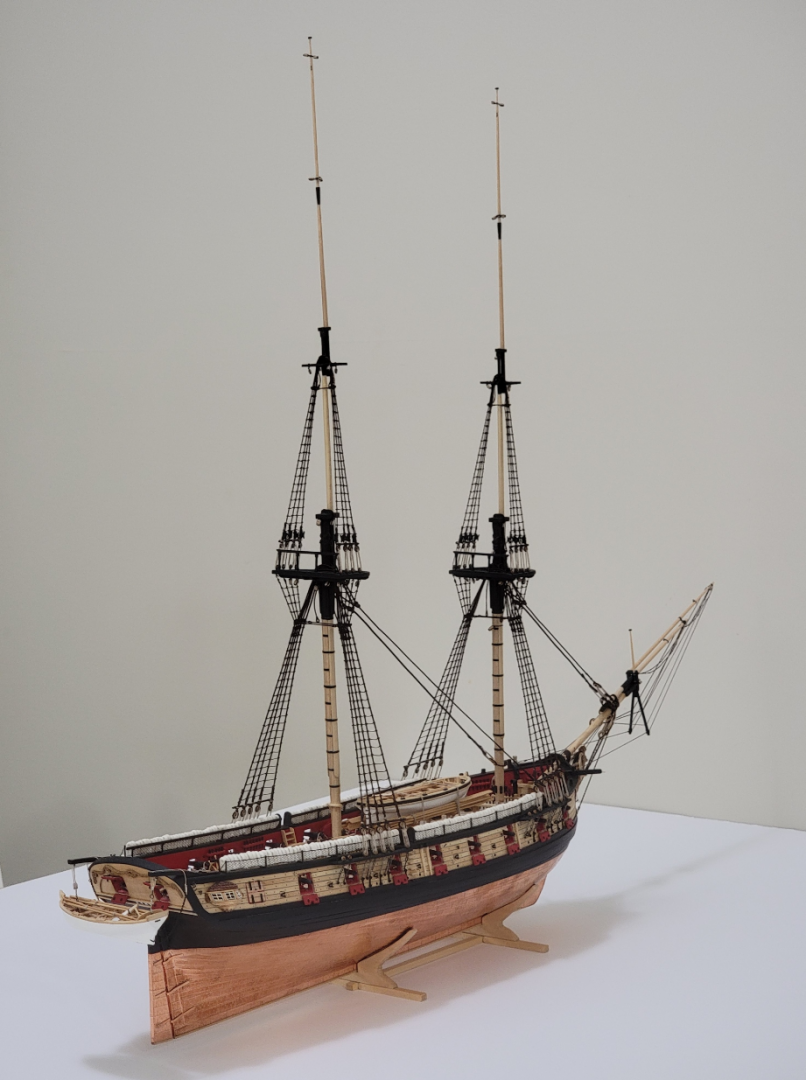


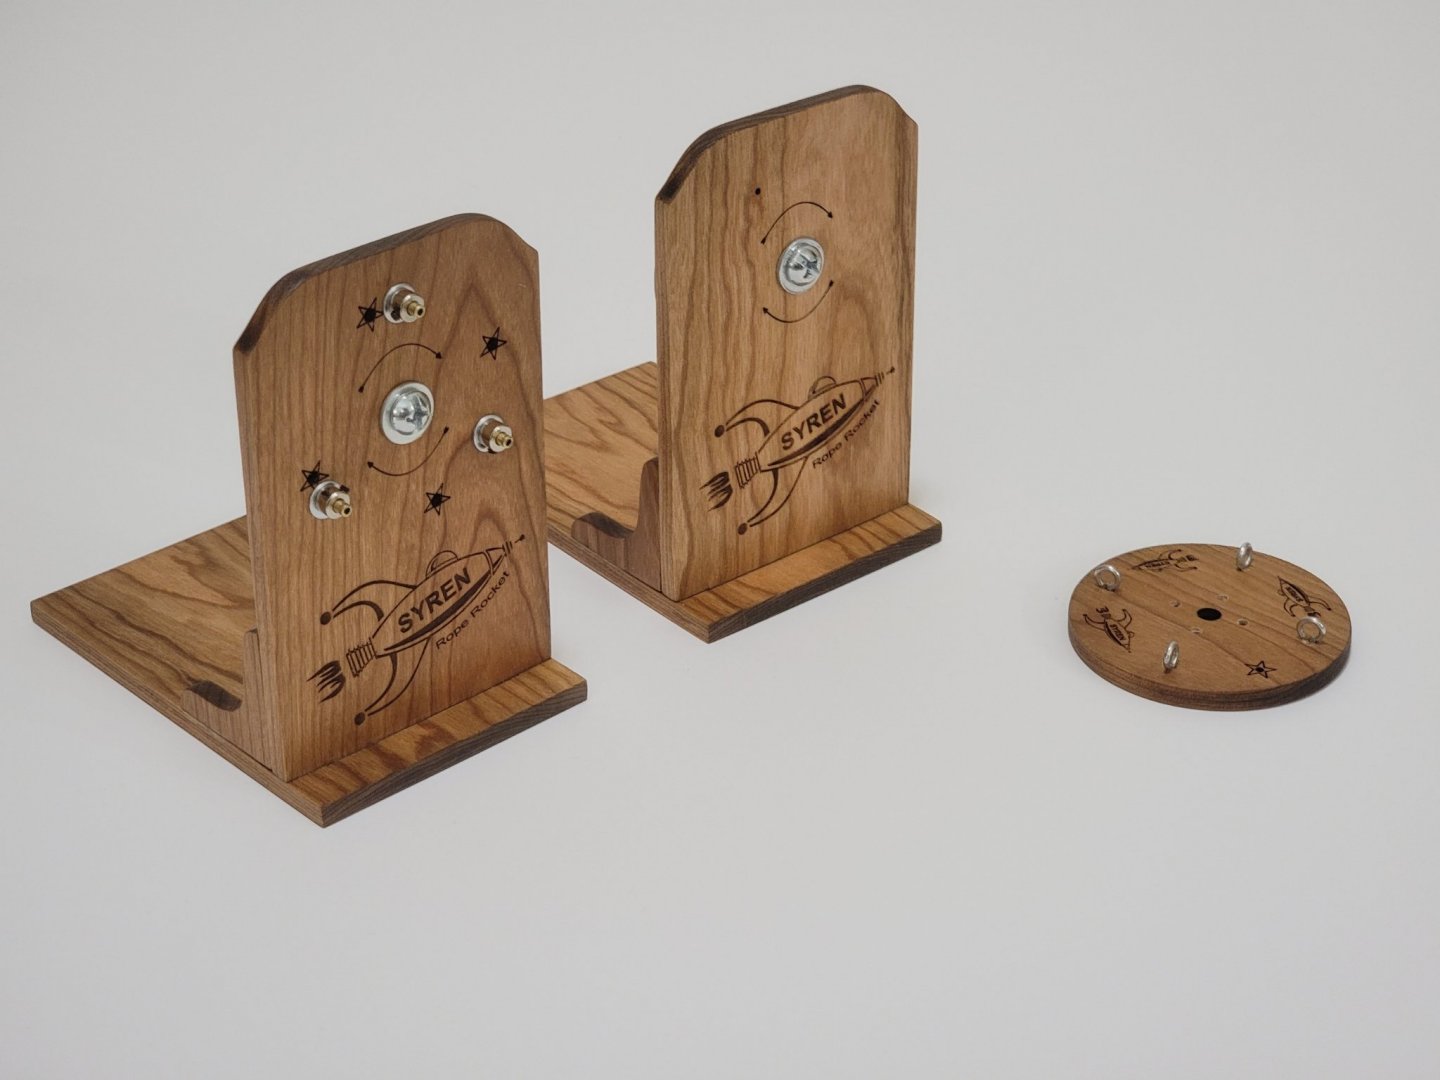
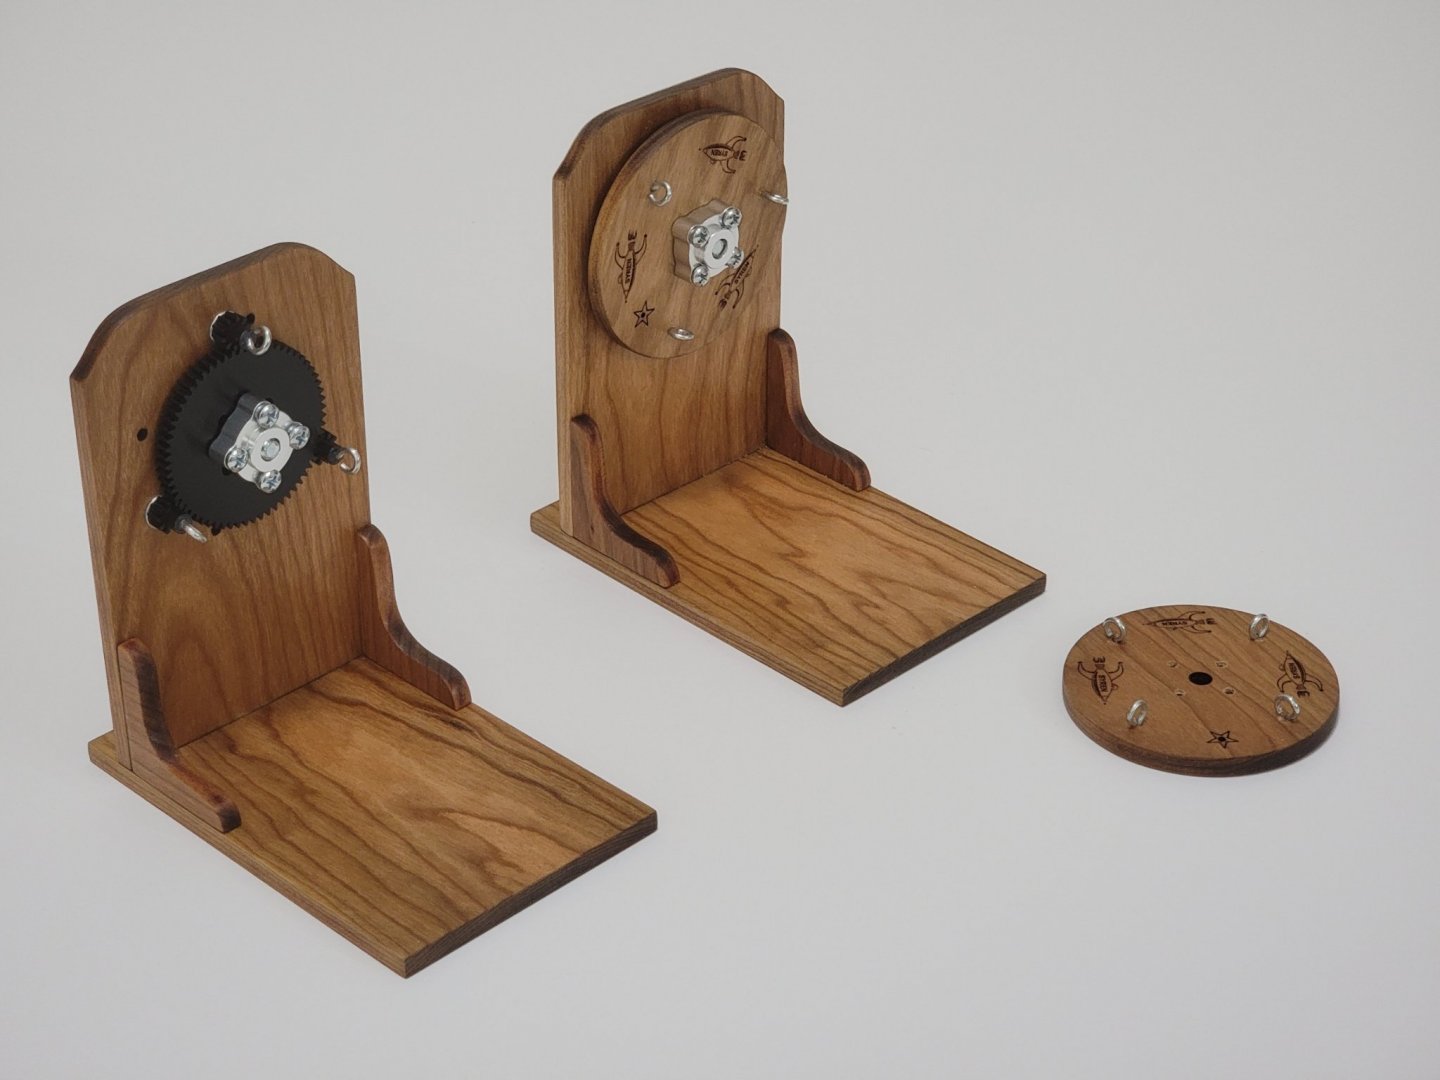
I also finished working on @Chuck's ropewalk. The cherry wood is just beautiful, and really glows once tung oil is applied. I applied two coats of tung oil, and took my time in assembling them when I got fatigued from working on the ratlines:
- Edwardkenway, Barbossa, abelson and 9 others
-
 12
12
-
Congrats Mark! She's a beauty!! 🙂
-
Nice progress on the plates! There's no need for stealers, it's just that the plans are 2D so the shapes of the plates look different in the curved section. I applied the plates just following the hull with the same overlap distance. The last line of plates will follow the waterline and will neaten things up.
Check out my post linked here for the plate layout
-
The framing looks really good! I'll be sure to use chisels next time. I remember I spent hours sanding them to shape
-
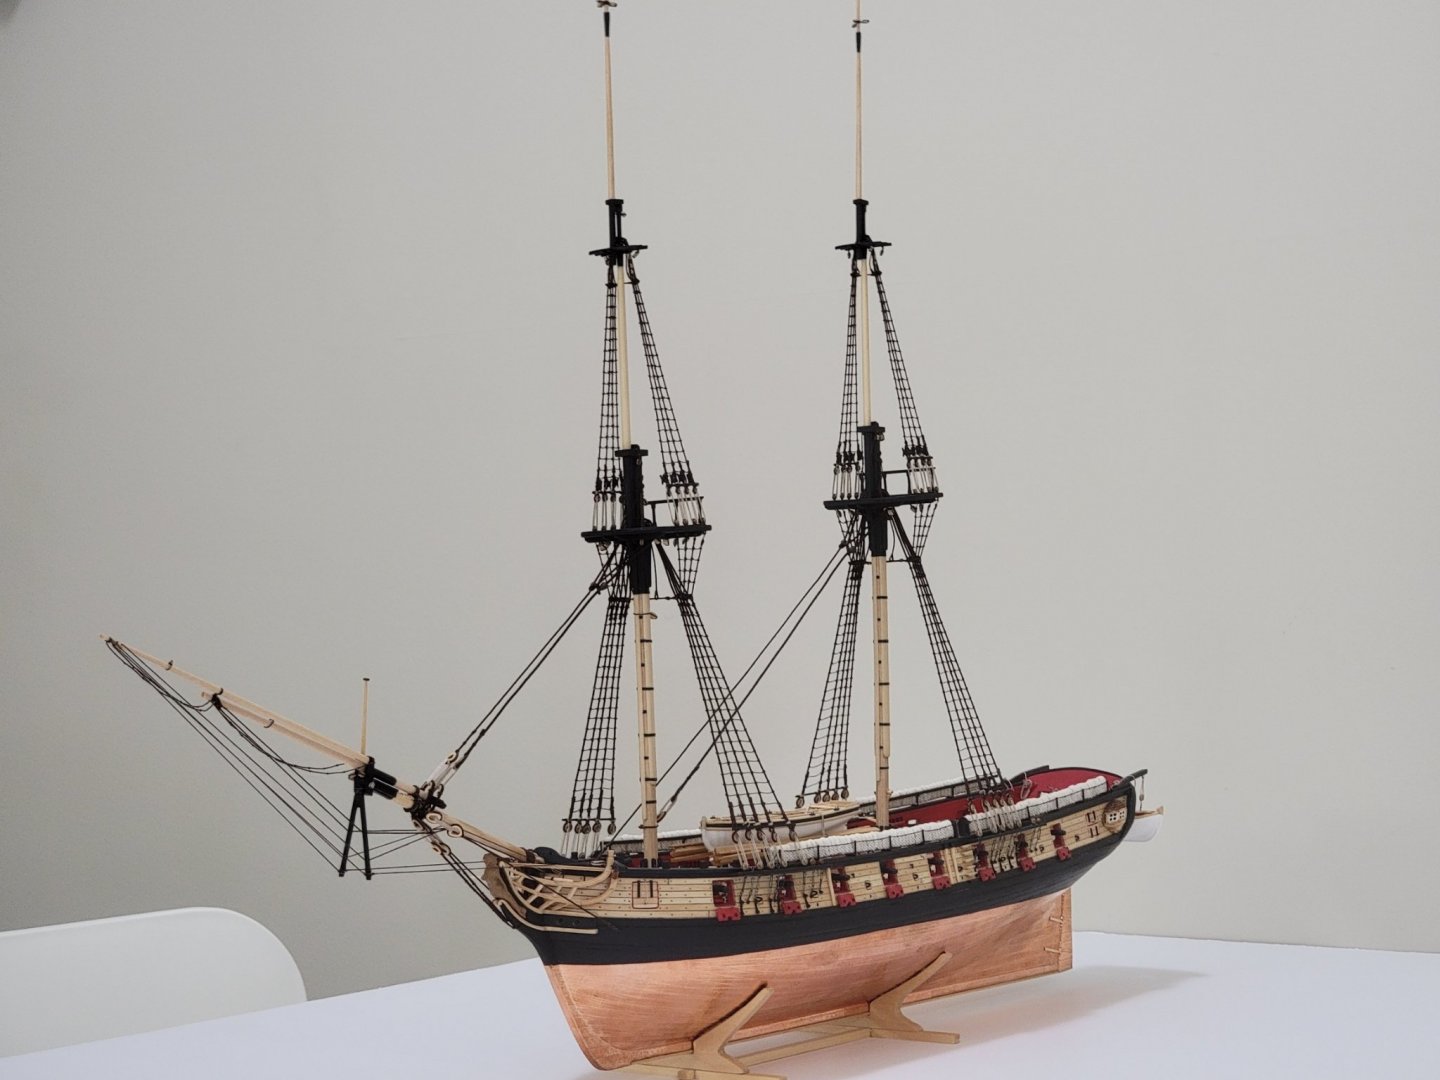
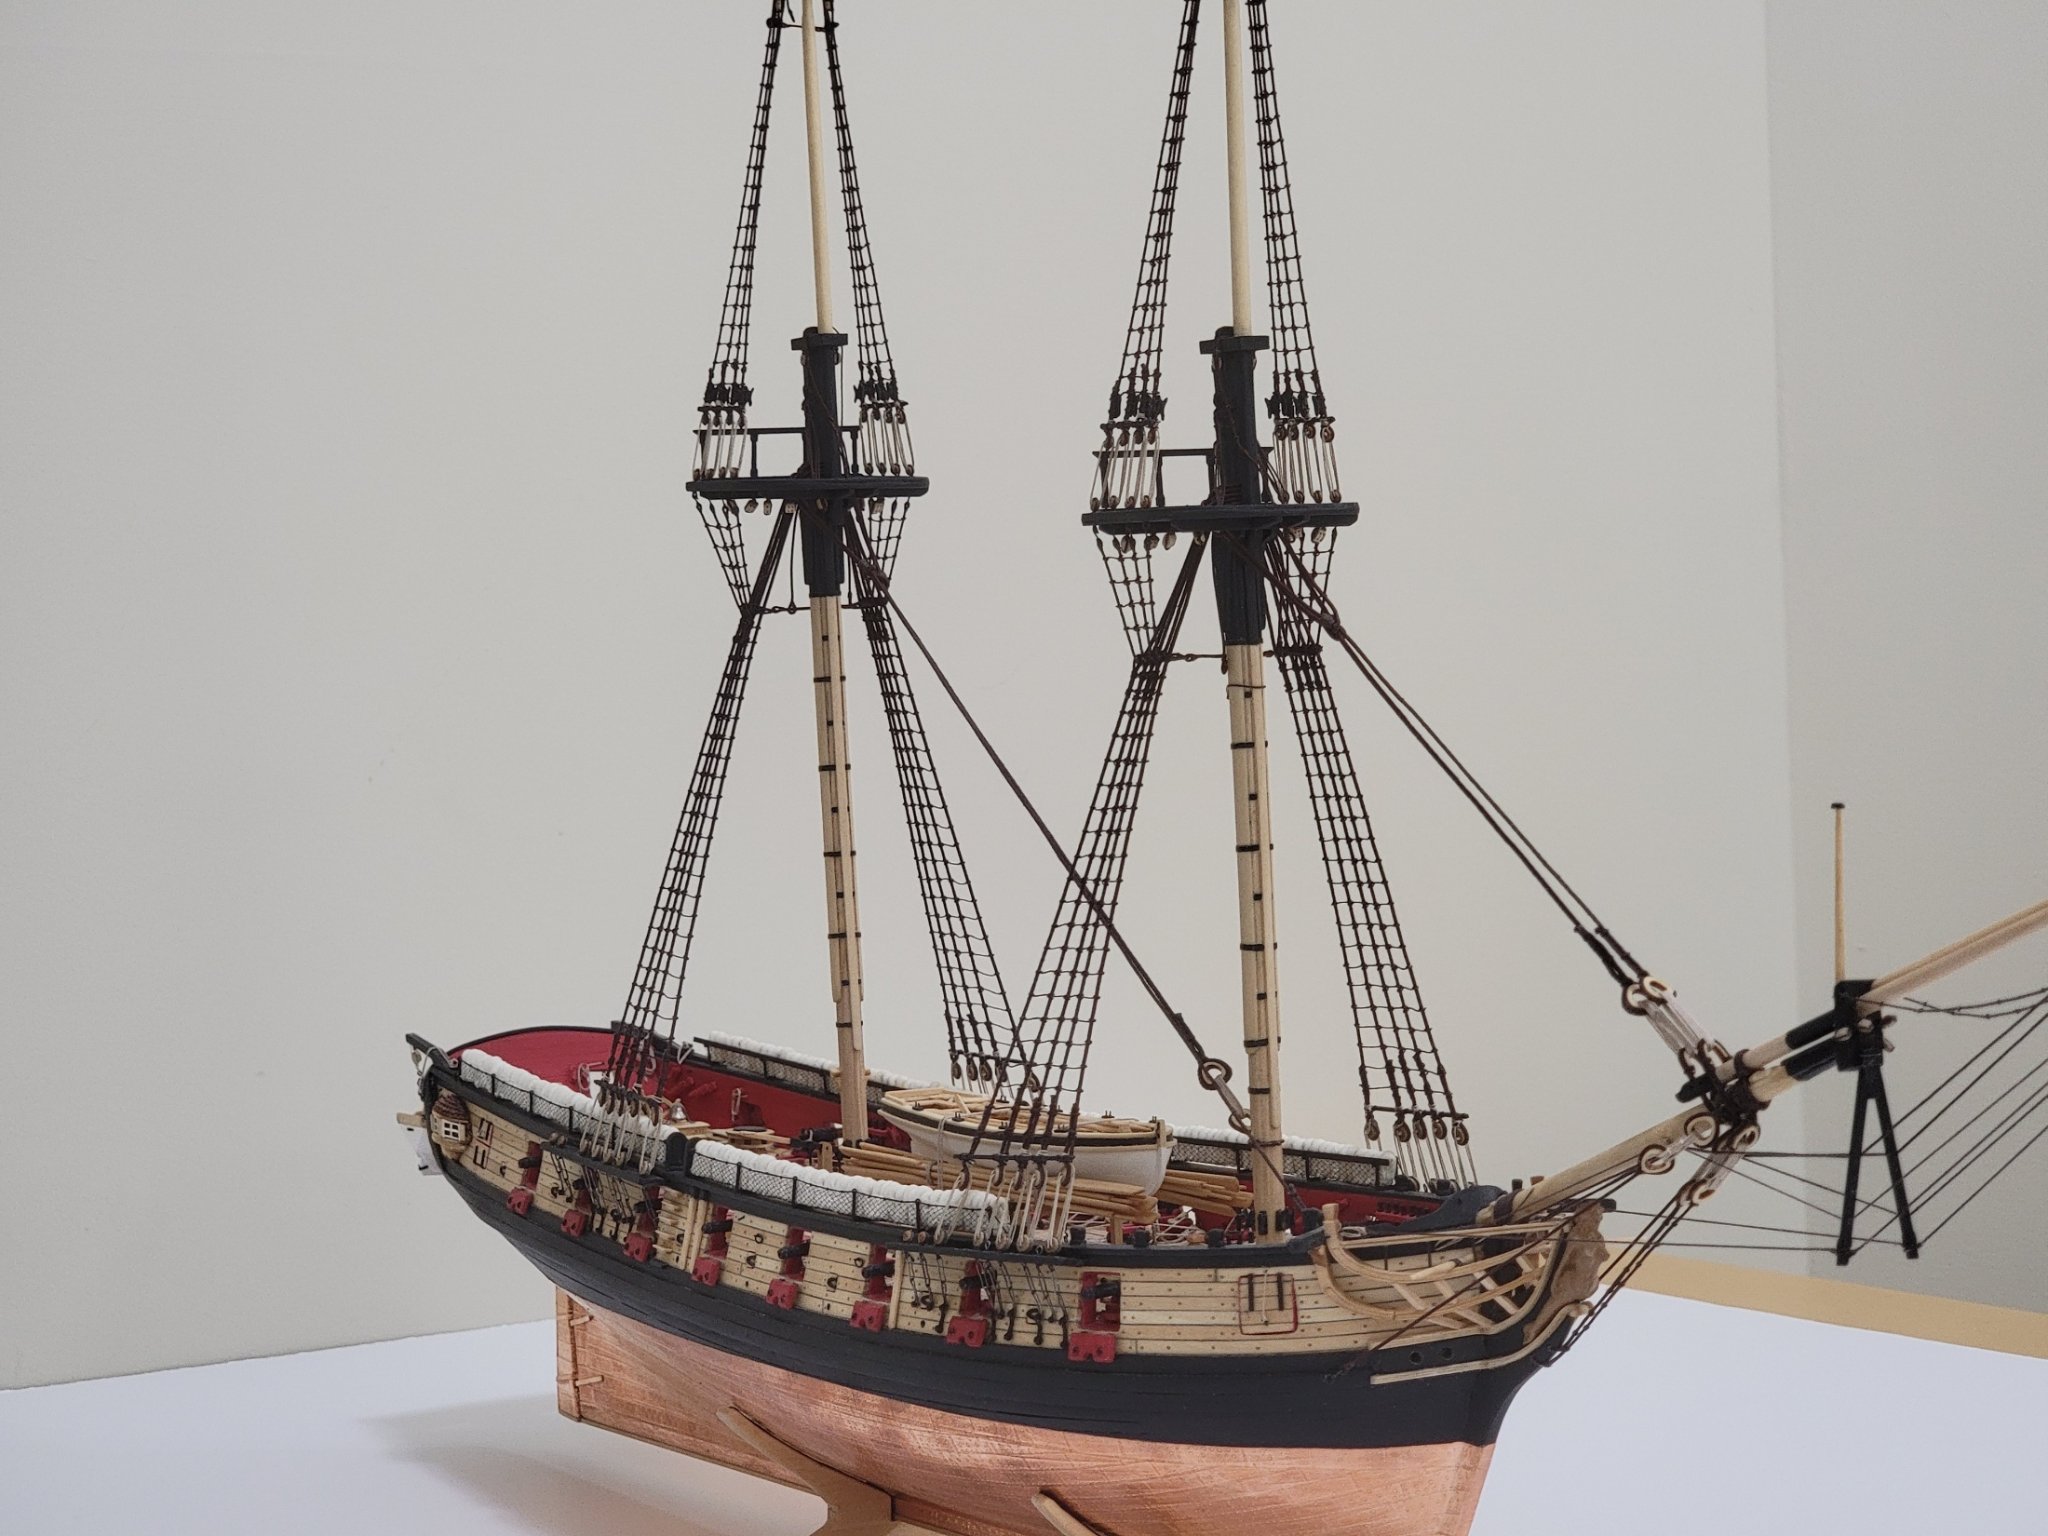
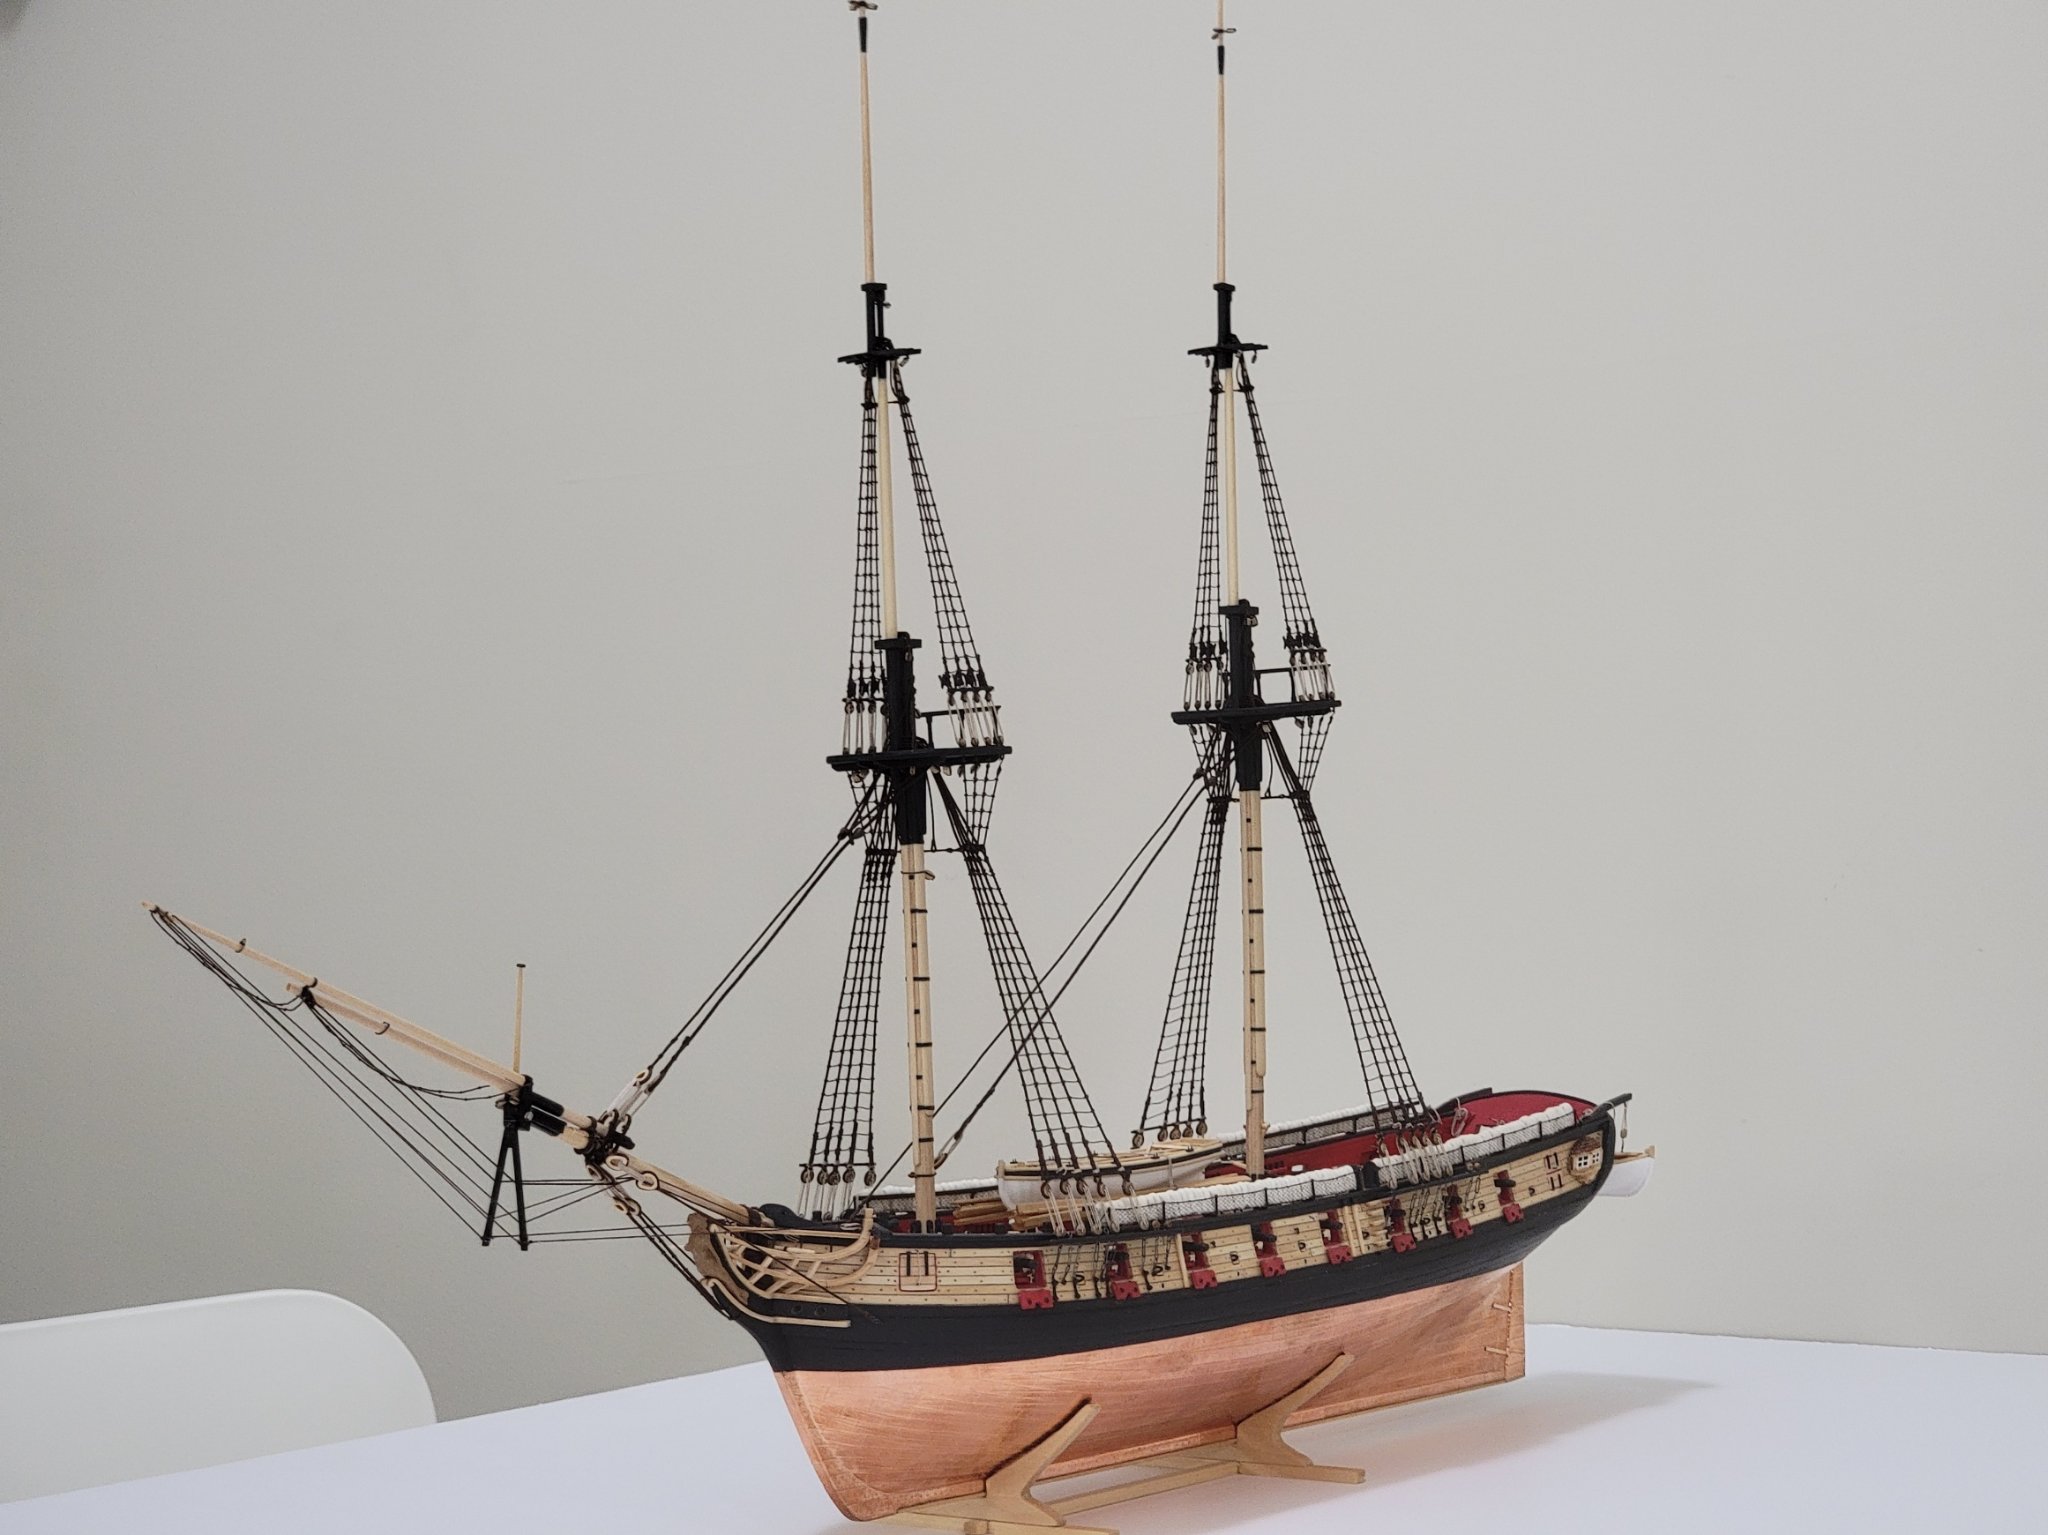
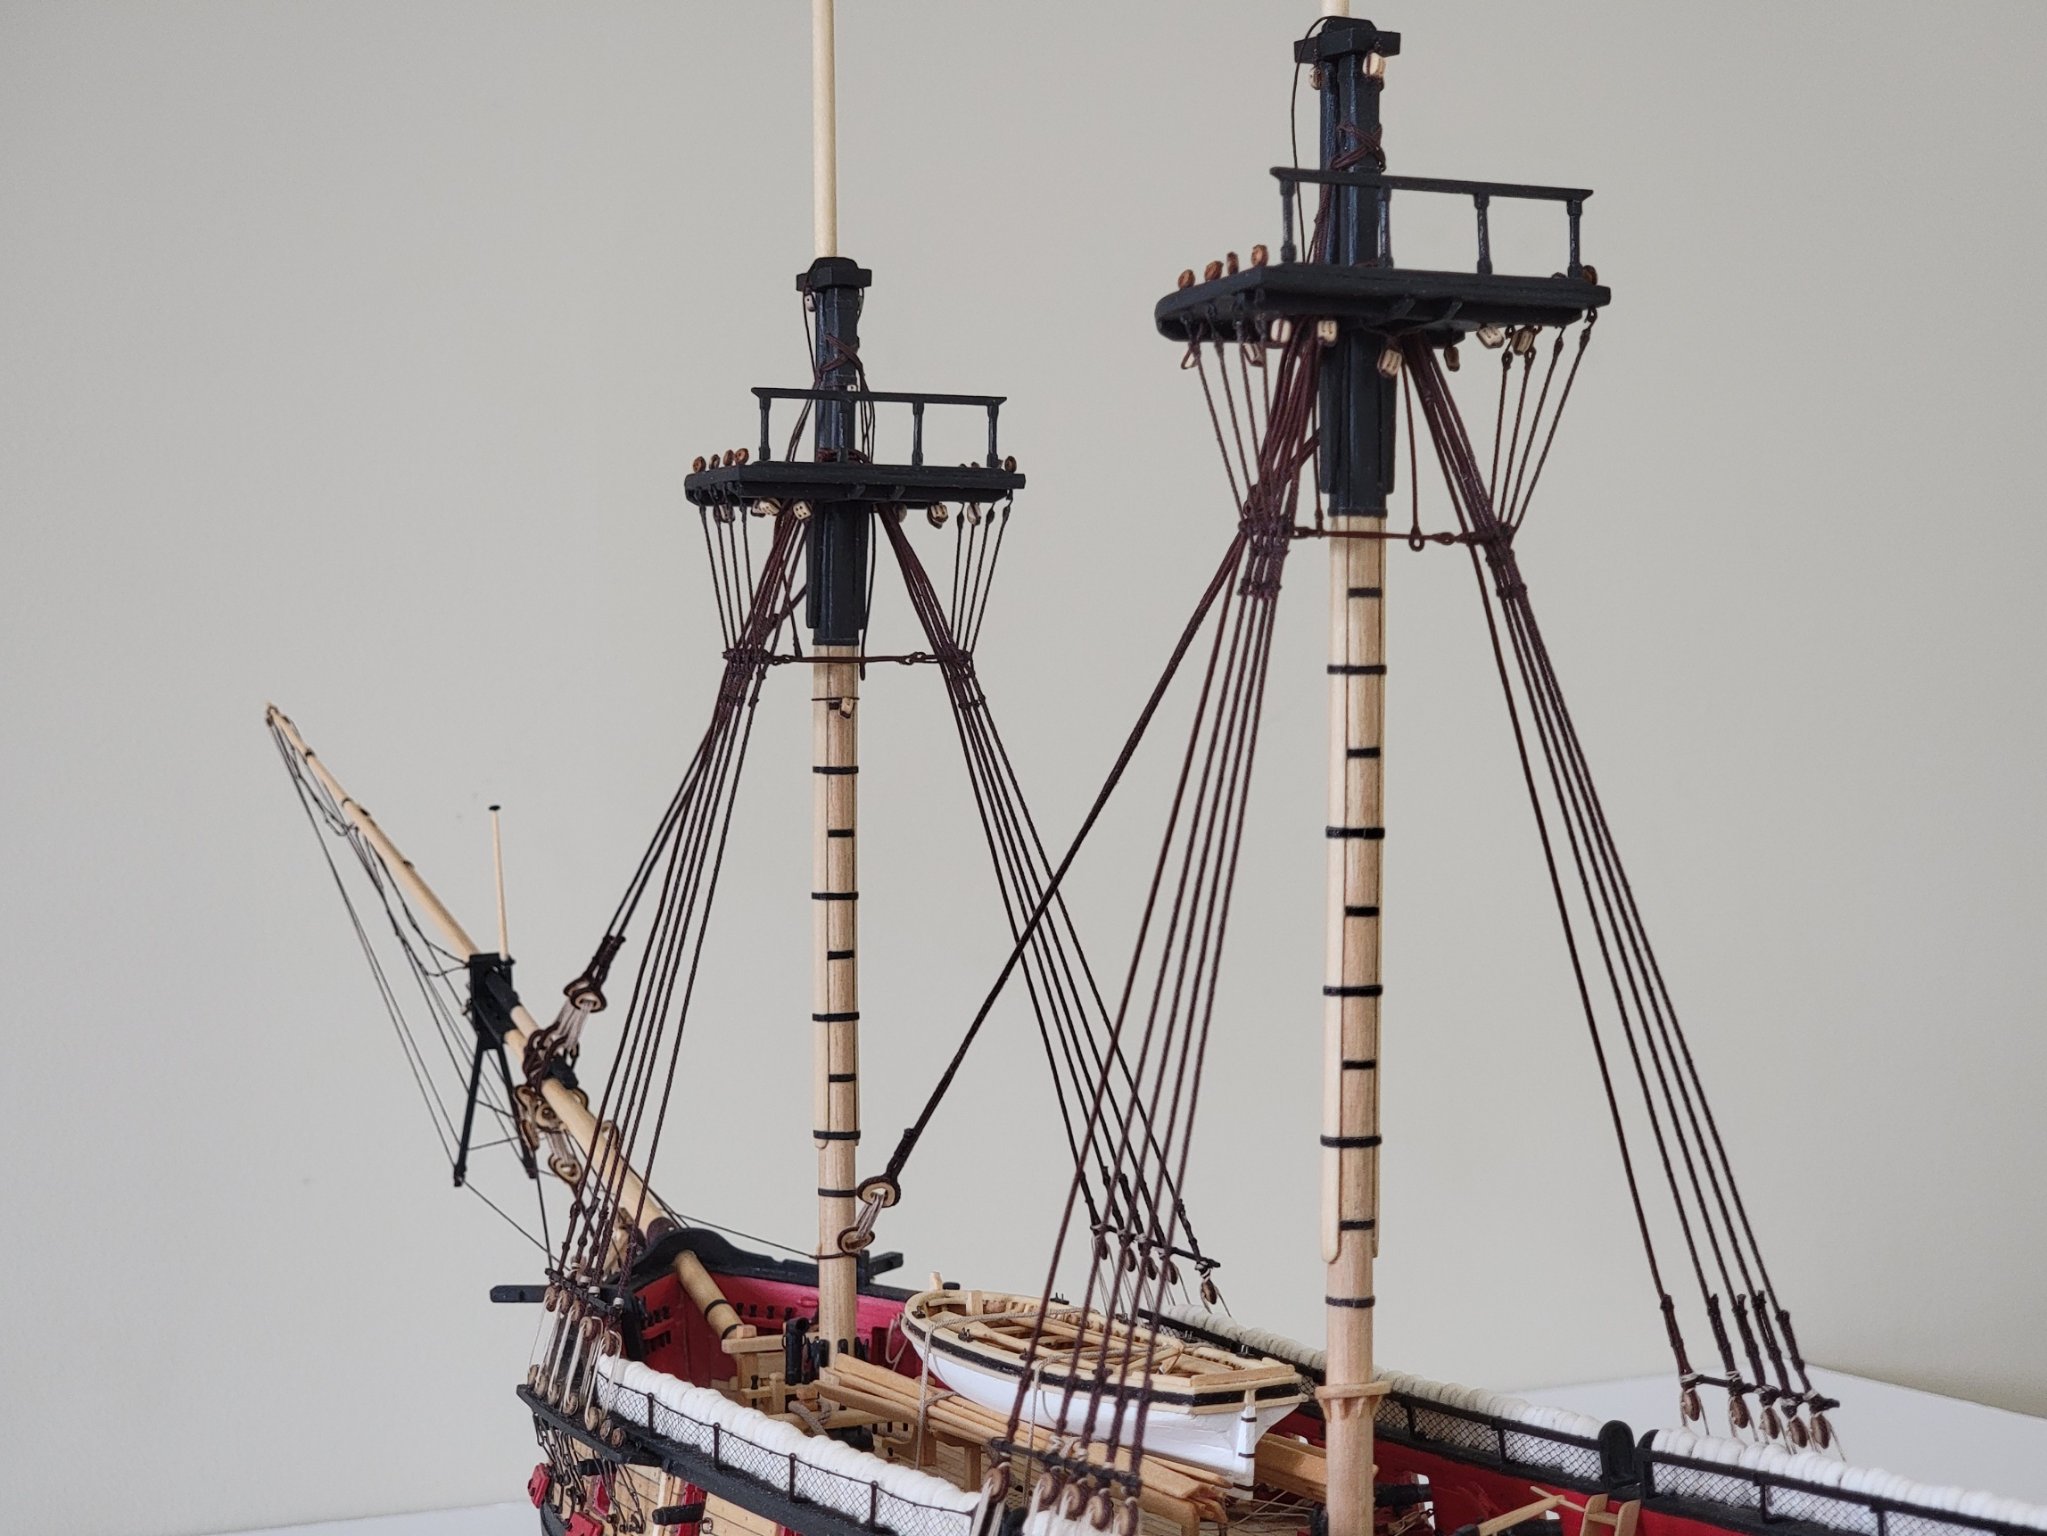
Small ratline update:
I finished installing all the ratlines on the portside, and neatened the lower foremast ones. I am really enjoying this stuff 😄 Tightening the clove hitches is somehow really satisfying!! And after making the first couple of the lines, it's become second nature and I can do them really quickly. That's how I managed one whole side in just two evenings. When gluing the outer ones I took my time to straighten them out and carefully snipped the end once it's dried
Here are some pics:
 .
.


- egkb, JpR62, Retired guy and 7 others
-
10
-
-
Thanks for the motivating comments Patrick and Michael! I'll start rattling down in a couple of days.
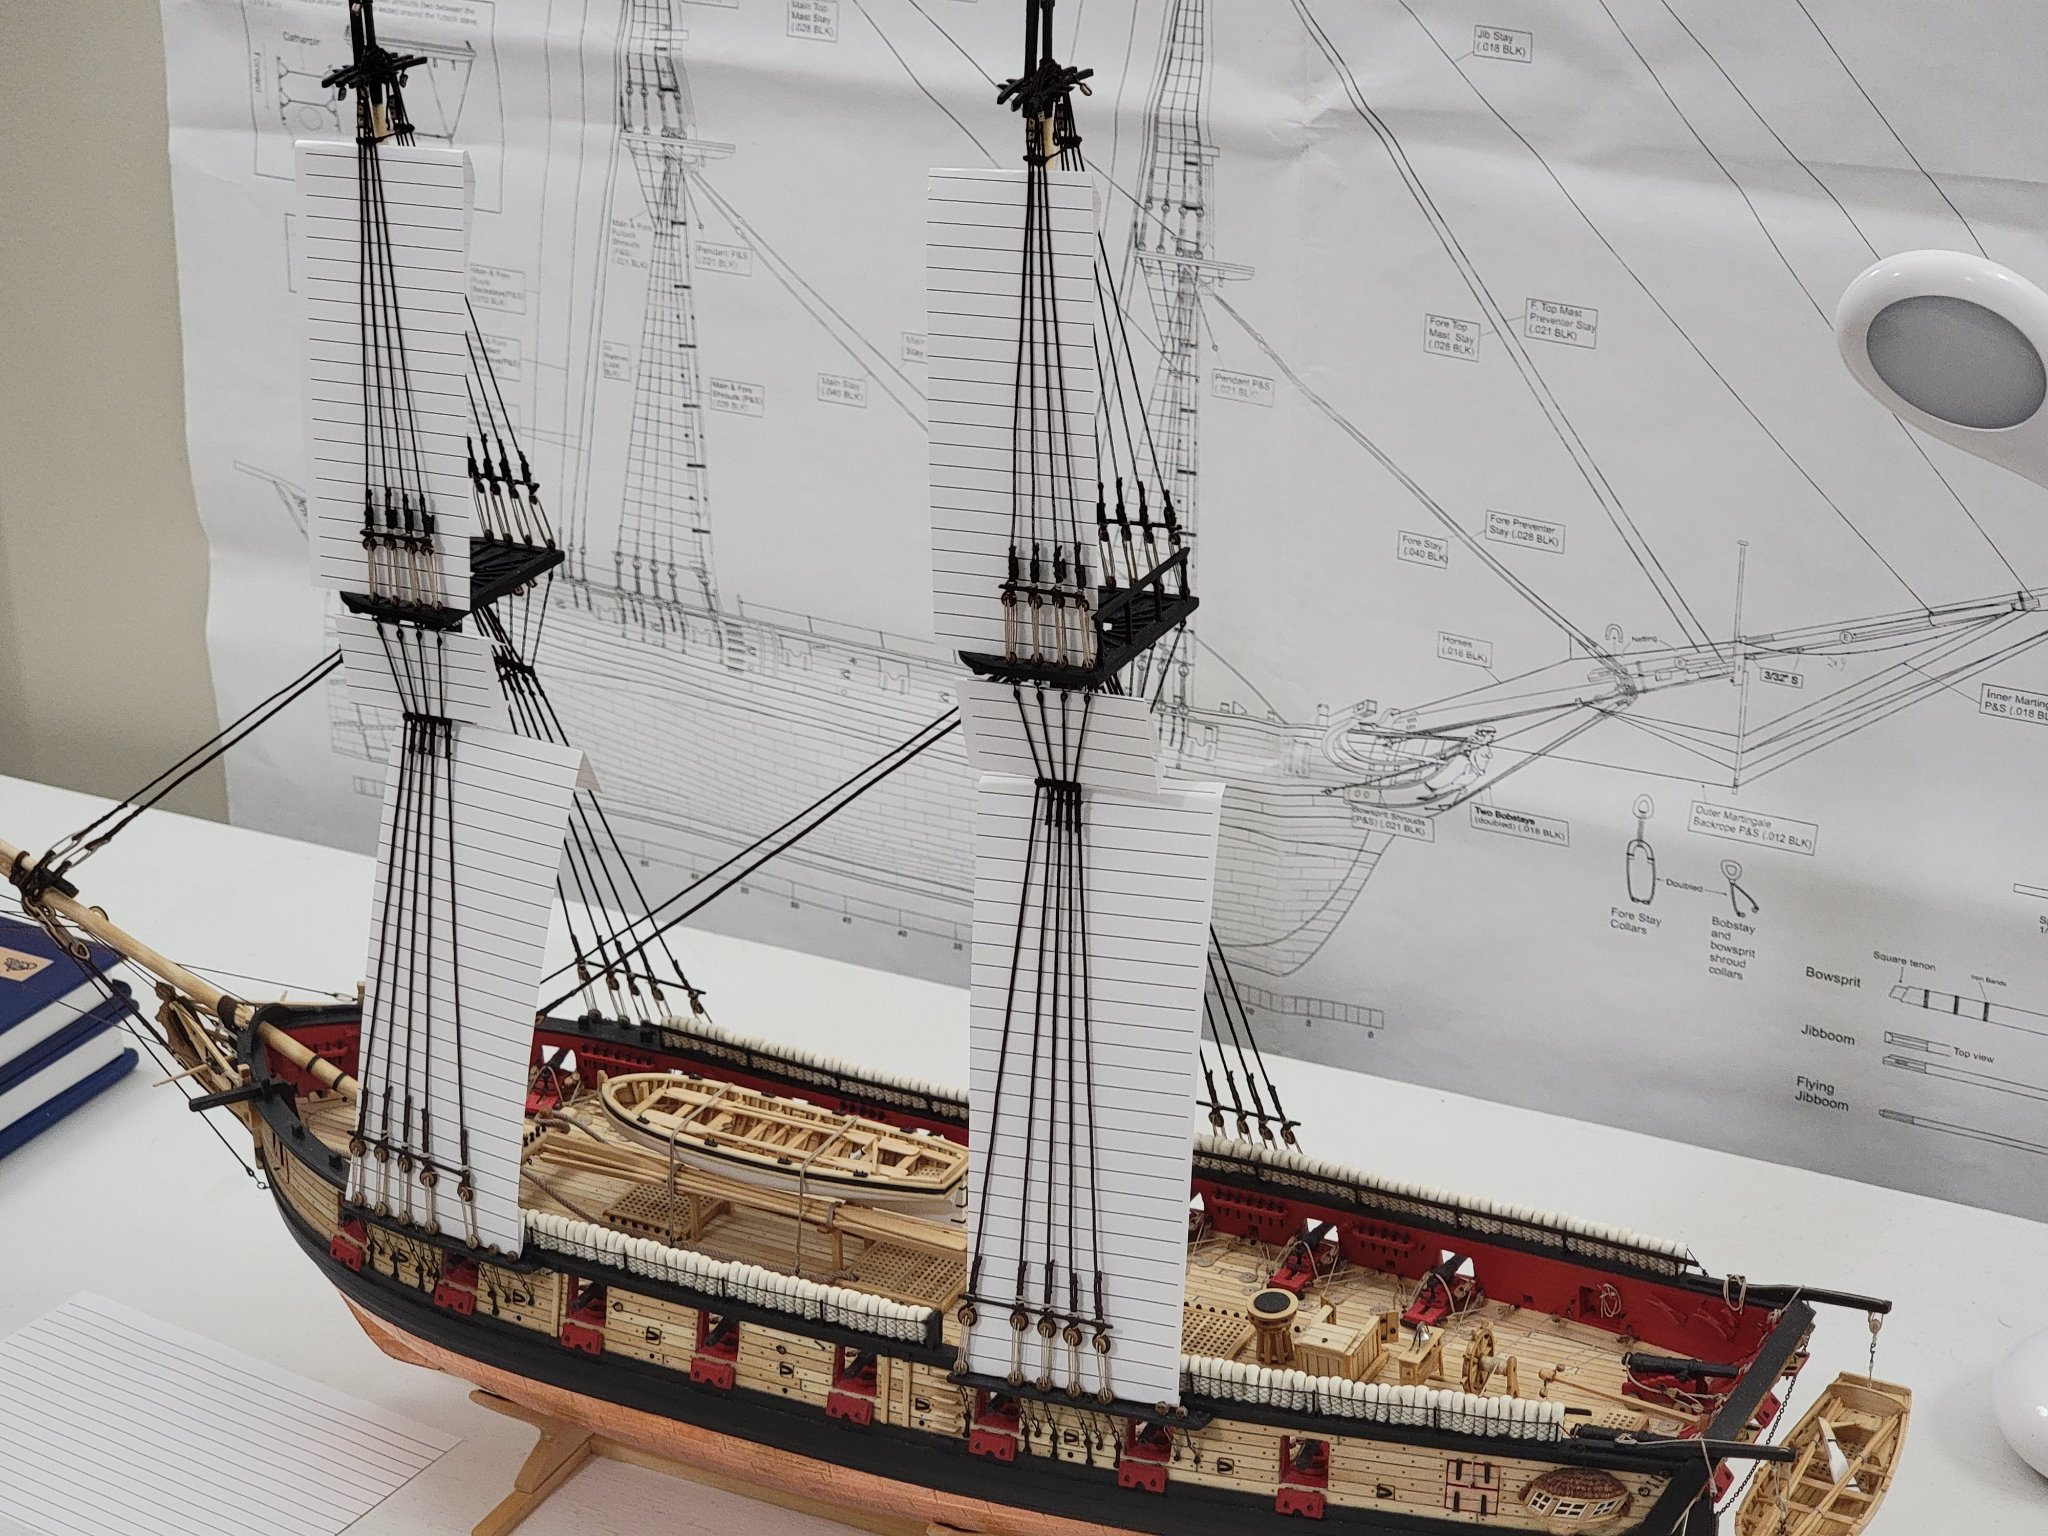
In the meantime I printed the lines spaced 0.21" from each other (using the table spacing feature on Word)


I plan to tie every 5 to 10 ratlines first to help prevent the hourglass shape when tying them. Also, at first I planned to do the proper technique at the end shrouds (eye spliced lines), but after seeing how many I need to make I quickly changed my mind. I am now thinking of just following what Chuck did for his Cheerful build by tying simple square knots on the end shrouds.
-
9 hours ago, michael mott said:
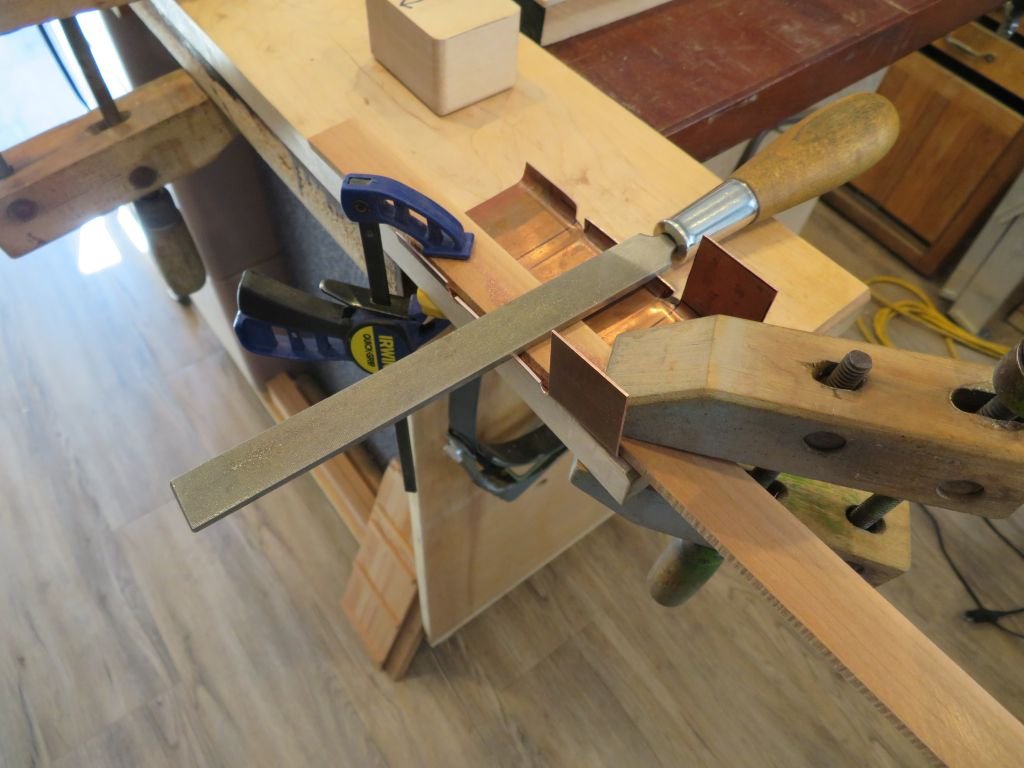
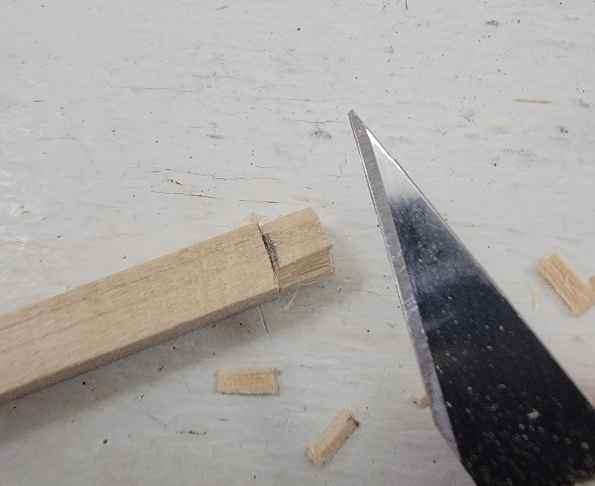
It depends on the thickness of the material and the number of teeth. The coarser blades are generally easier for the wood. In this case the blade was fine enough to also cut the copper because it was sharp and had not become dull from cutting metal before.
This graphic representation shows the .031 copper and the #1 jewelers blade that has 47 teeth per inch next to the edge of the metal there need to be at least 2 teeth engaging with the metal or the blade will catch and there is a possibility of ripping off a tooth and or snapping the blade.

I hope this answers your question. I also have some #8/0, #5/0, #3/0 The #8/0 is the finest.
Michael
Thank you for taking the time to explain, Michael. The schematic also helps me to understand clearly 🙂
- druxey, mtaylor and Keith Black
-
3
-
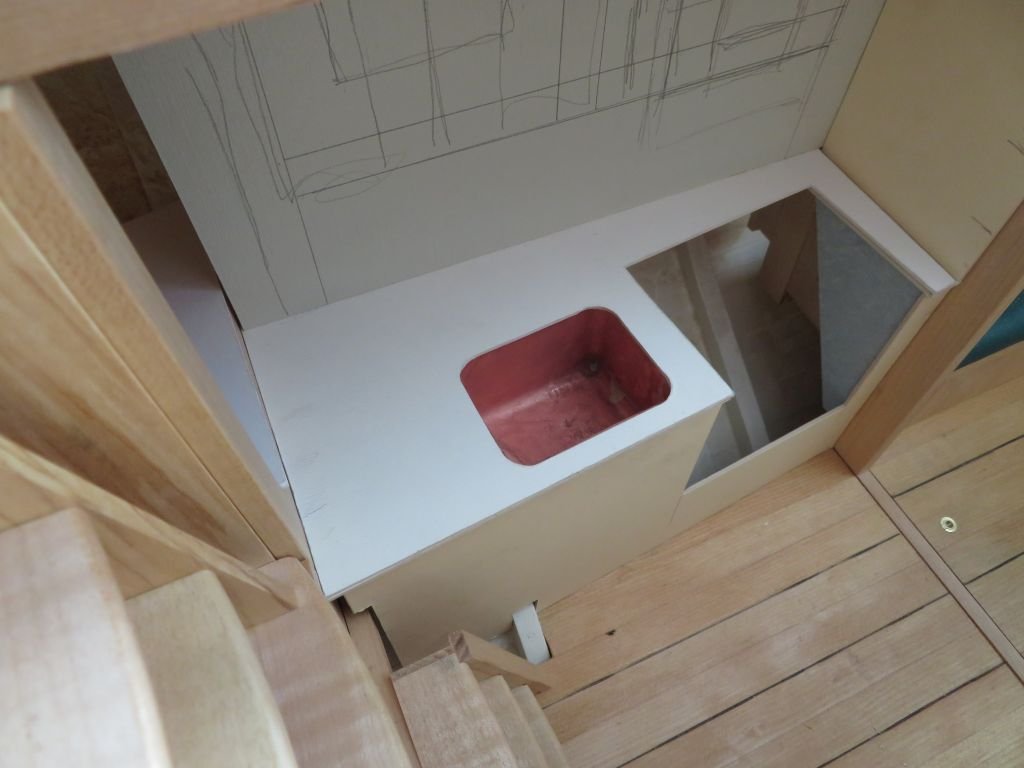
7 minutes ago, michael mott said:
Well here is the truth about the new sink.
First task was to start with a new former
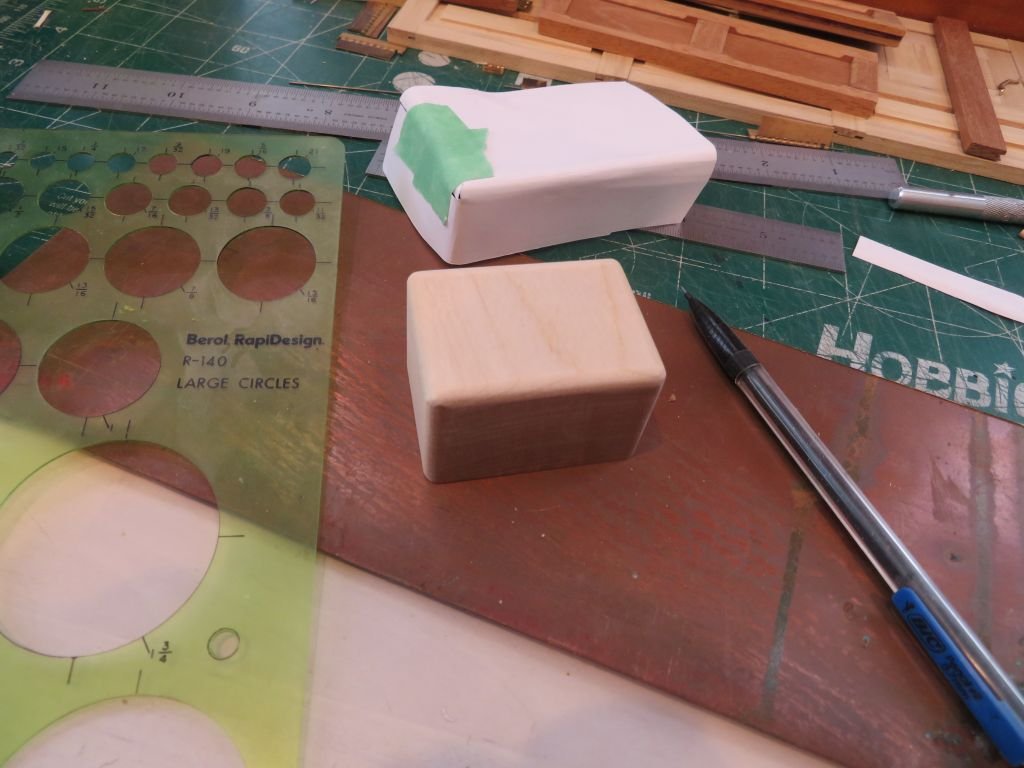
And cut a new sheet of copper .031"
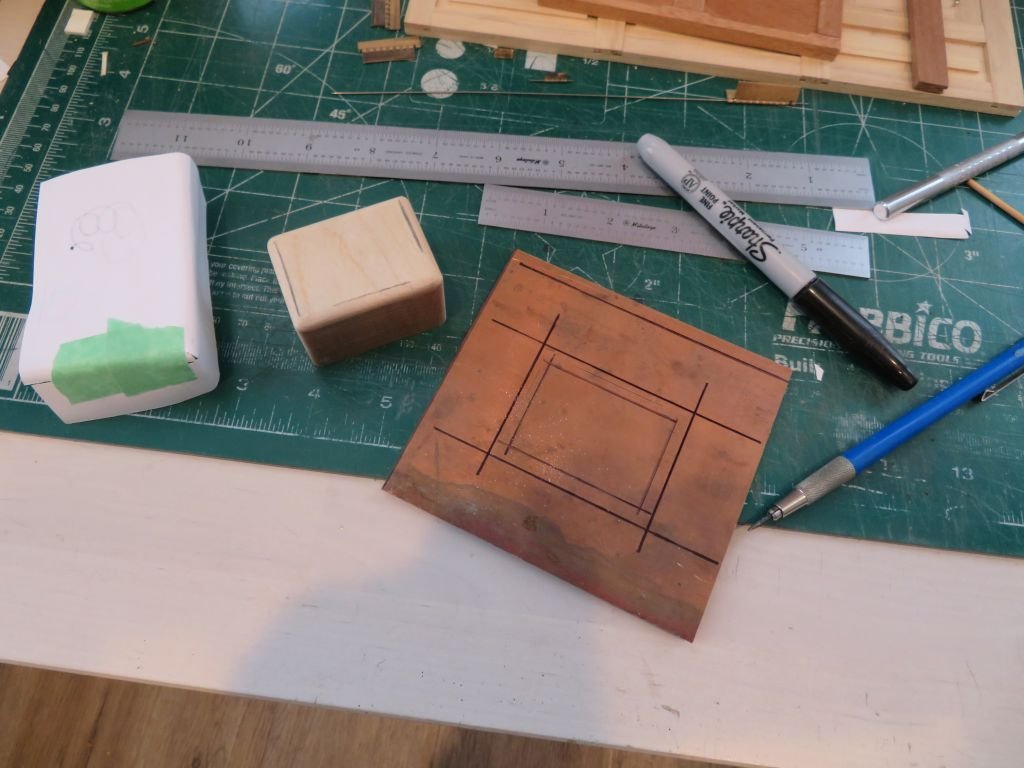
After laying out the cuts use jewelers saw.

Then without any annealing begin the folds
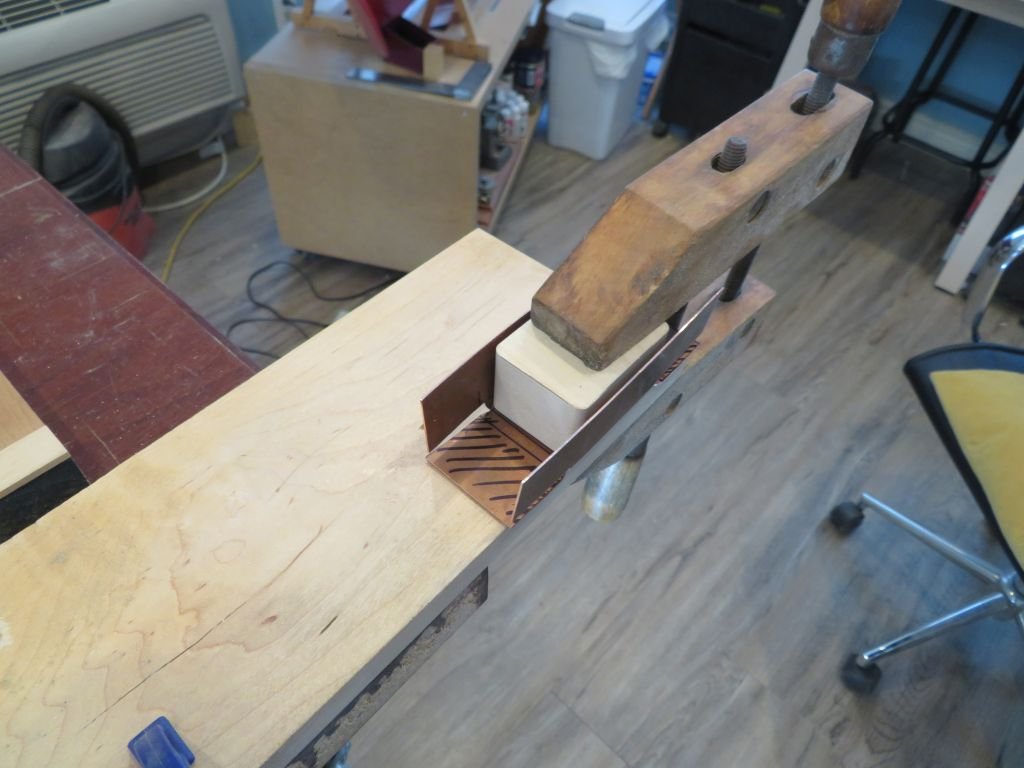
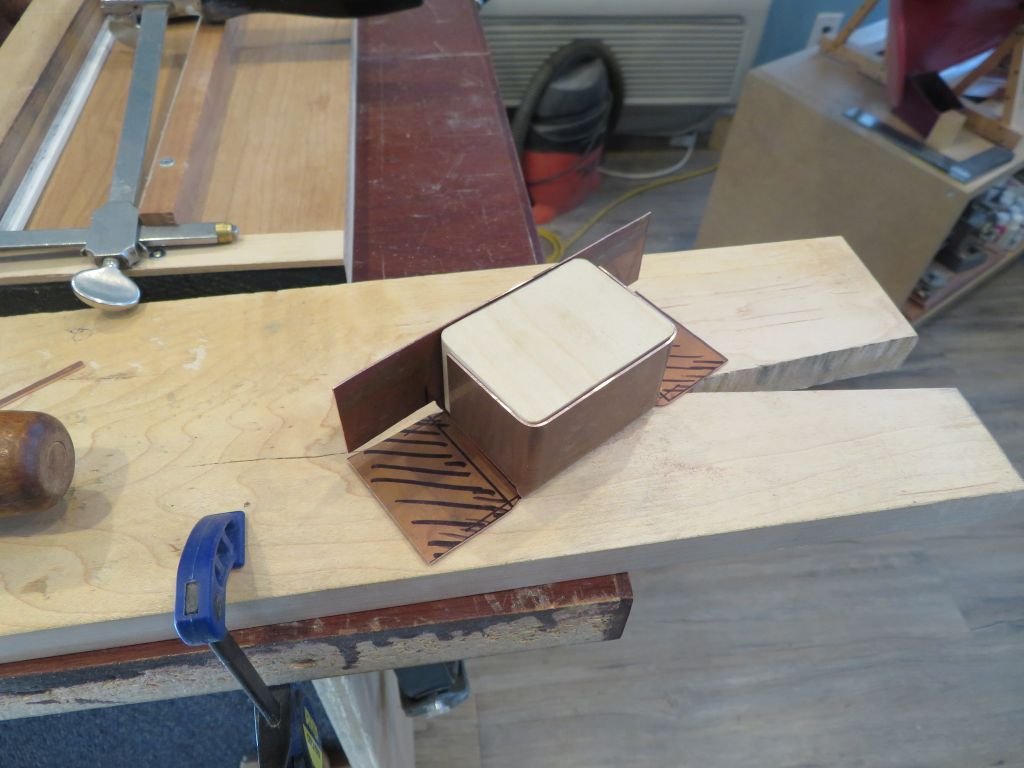
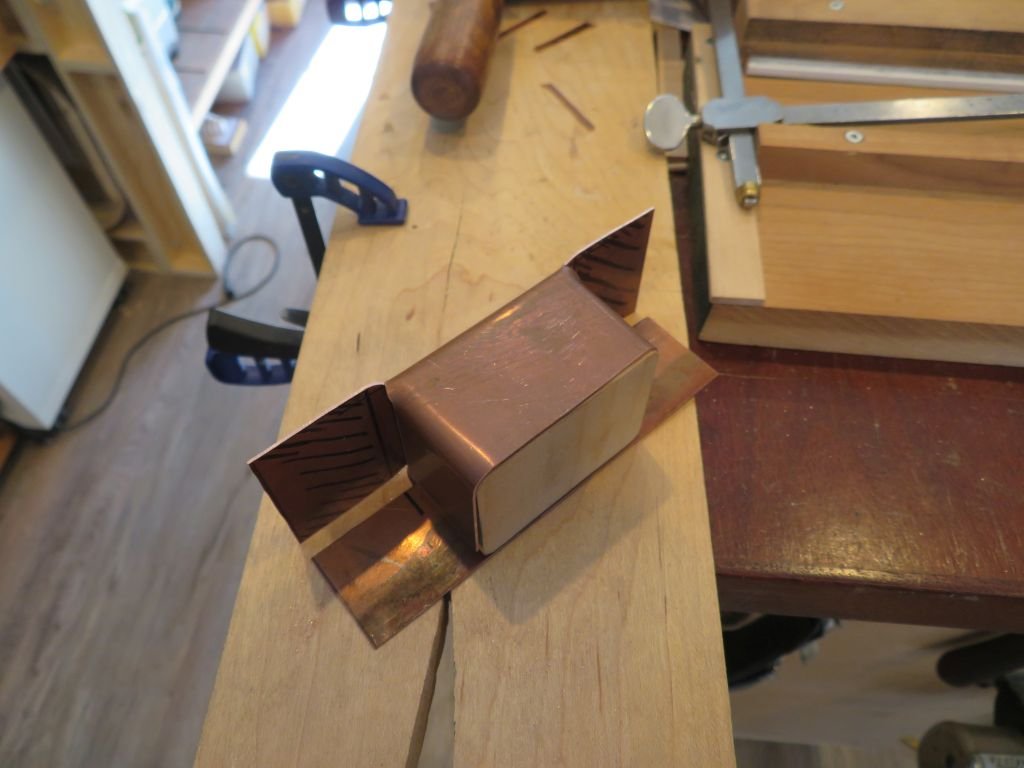
At this point I needed to do some cutting and used a small nibbler
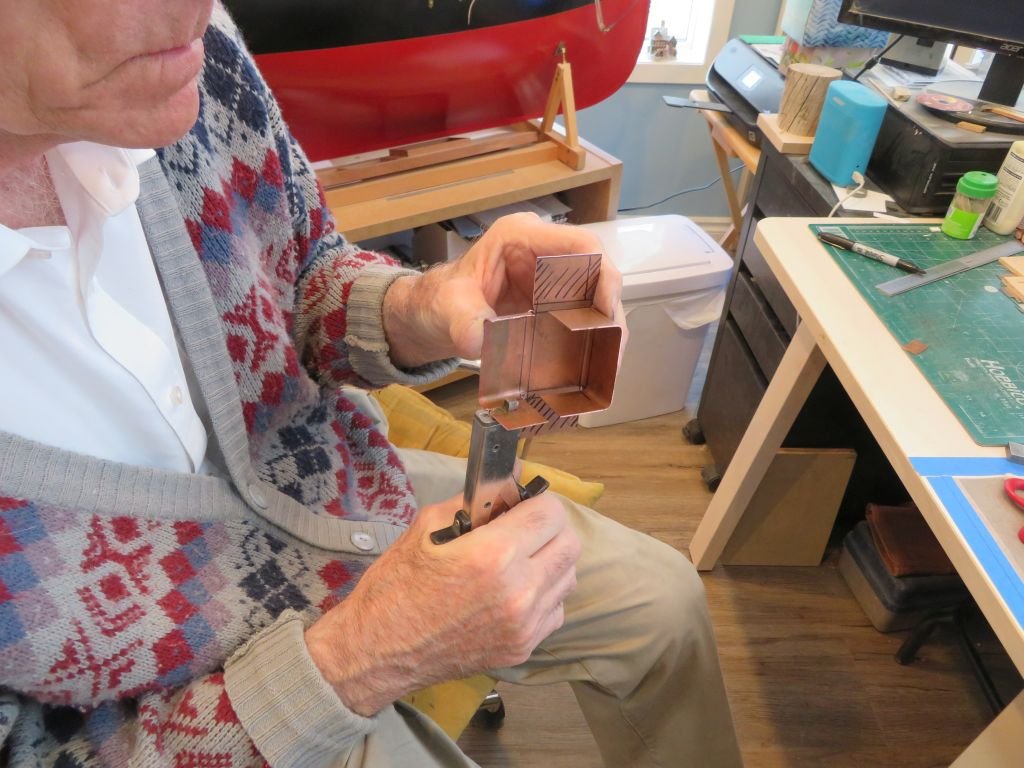
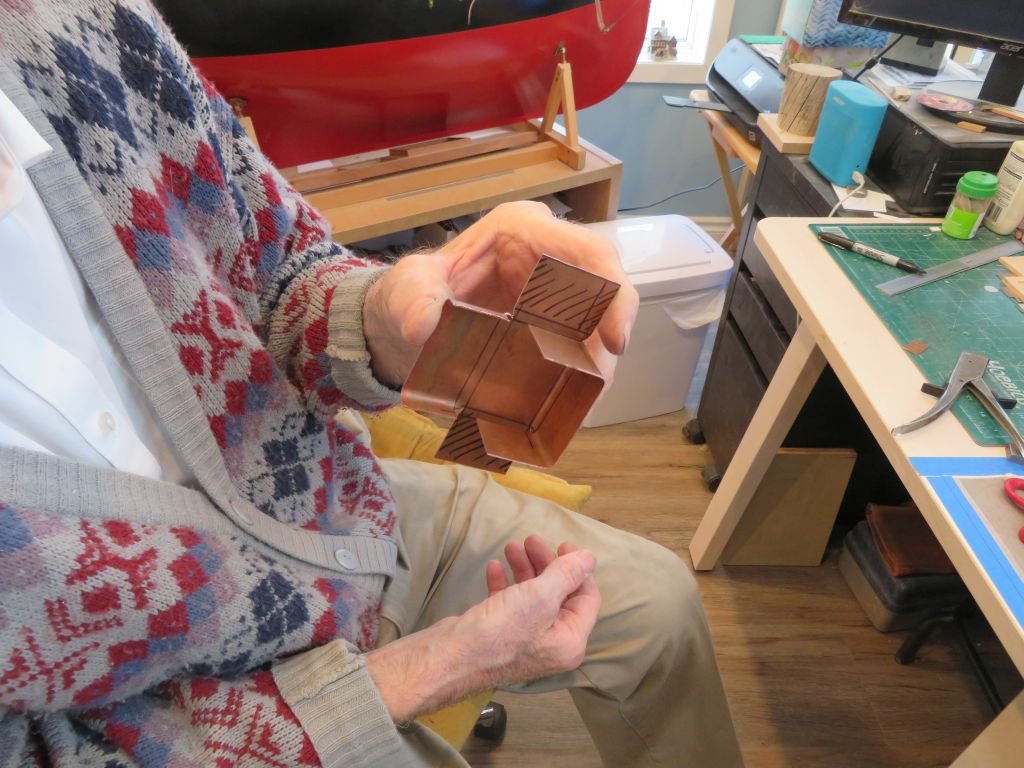
Then the trimmed edges need to be cleaned up this was done by first unfolding the metal a little
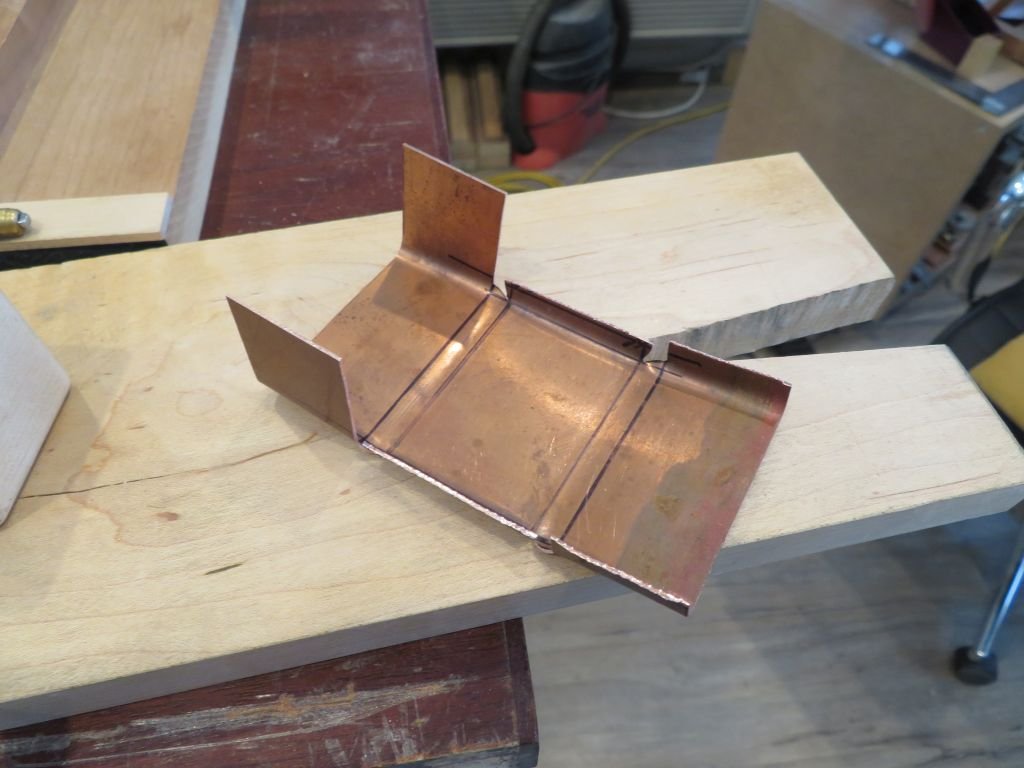
Then using a bit of wood as a guide filed the edges.
The refolded and wired the seams together and used easyflo silver solder to join the seams. My silver soldering skills still leave a lot to be desired but I am improving.
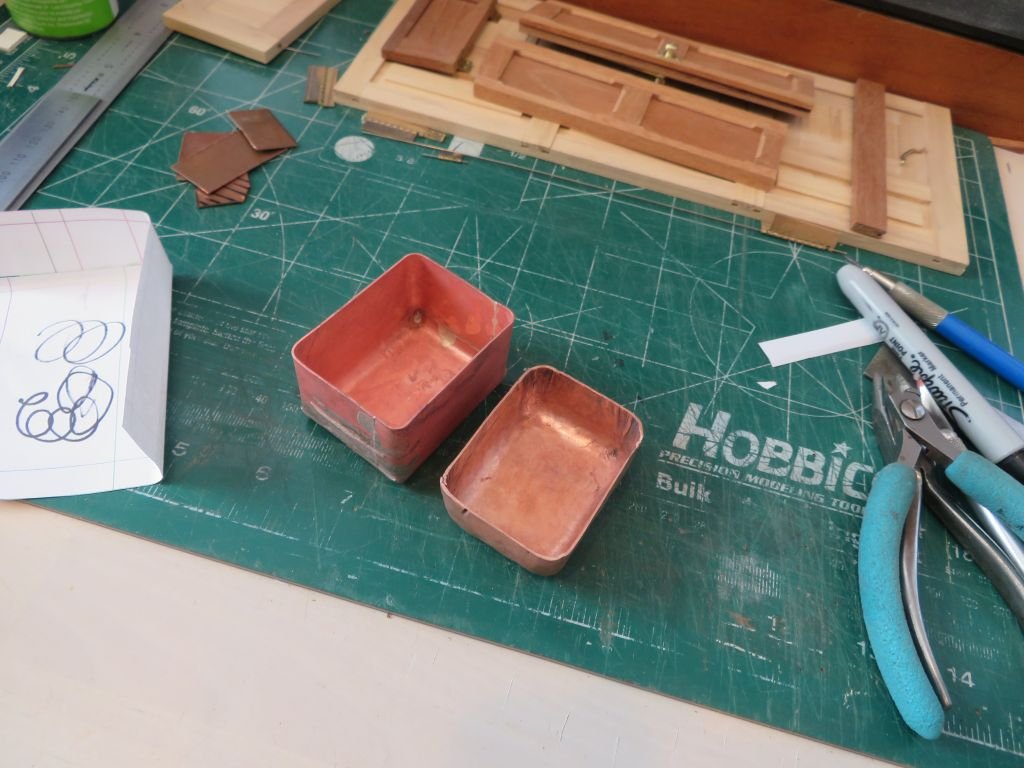
and it looks better than the first one.
I would do it differently if I had to do it again, making only clean corner joints...... but that's for another boat.
Michael
Thank you so much for writing up such a detailed log. I never knew on how powerful a jeweler's saw can be. Are you using the same blades as the ones to cut wood? Or are they completely different for metalwork?
- mtaylor, FriedClams, Keith Black and 1 other
-
4
-
-
On 3/11/2021 at 11:29 PM, Eugenio Treviño said:
I hope I will not break them while rigging.
Great progress! If they come loose, you may want to peg them with some wires then insert into predrilled holes on the hull. Here's what I did in my build:
-
Thank you Thomas! I also can't wait to see what magic you do with the rigging! 😀
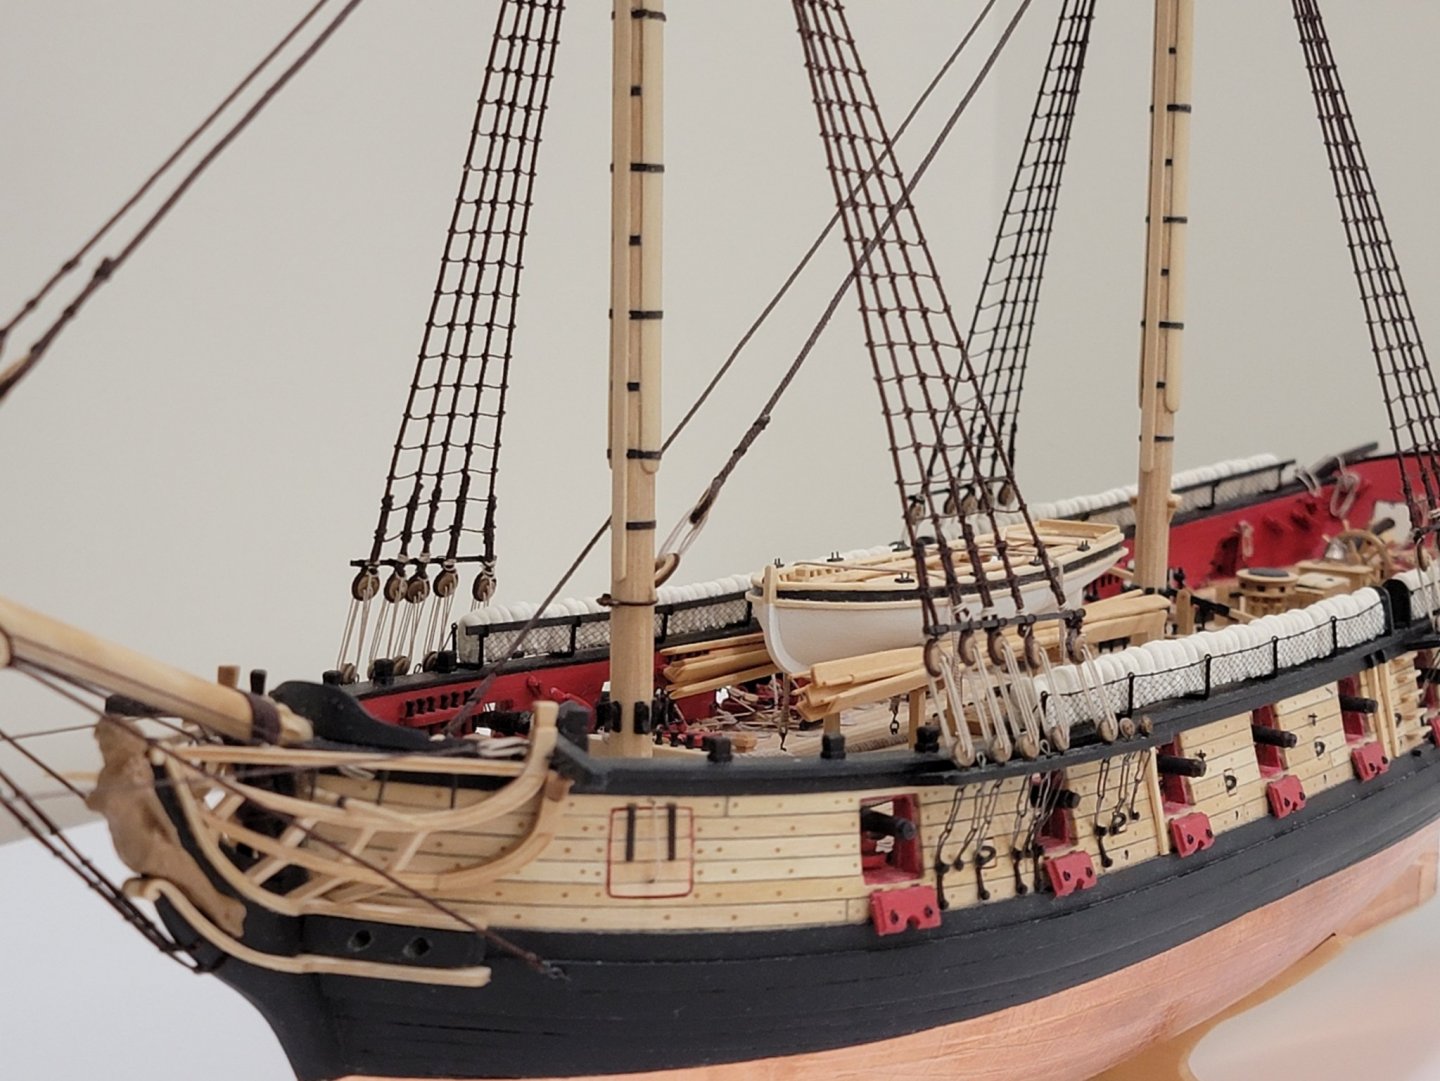
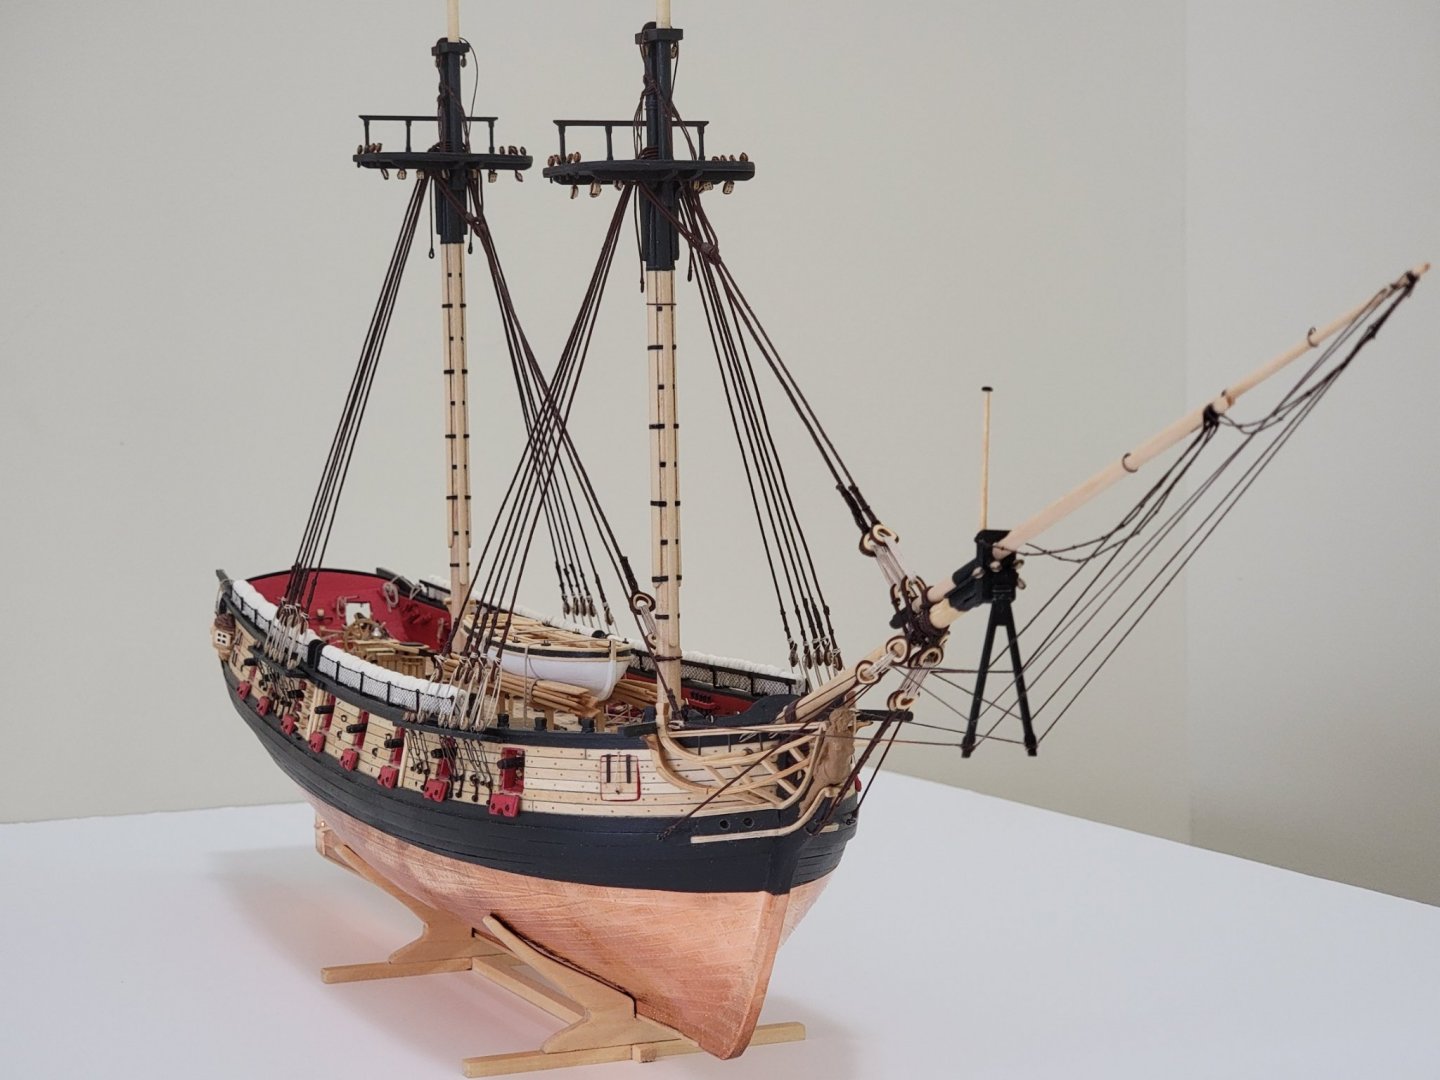
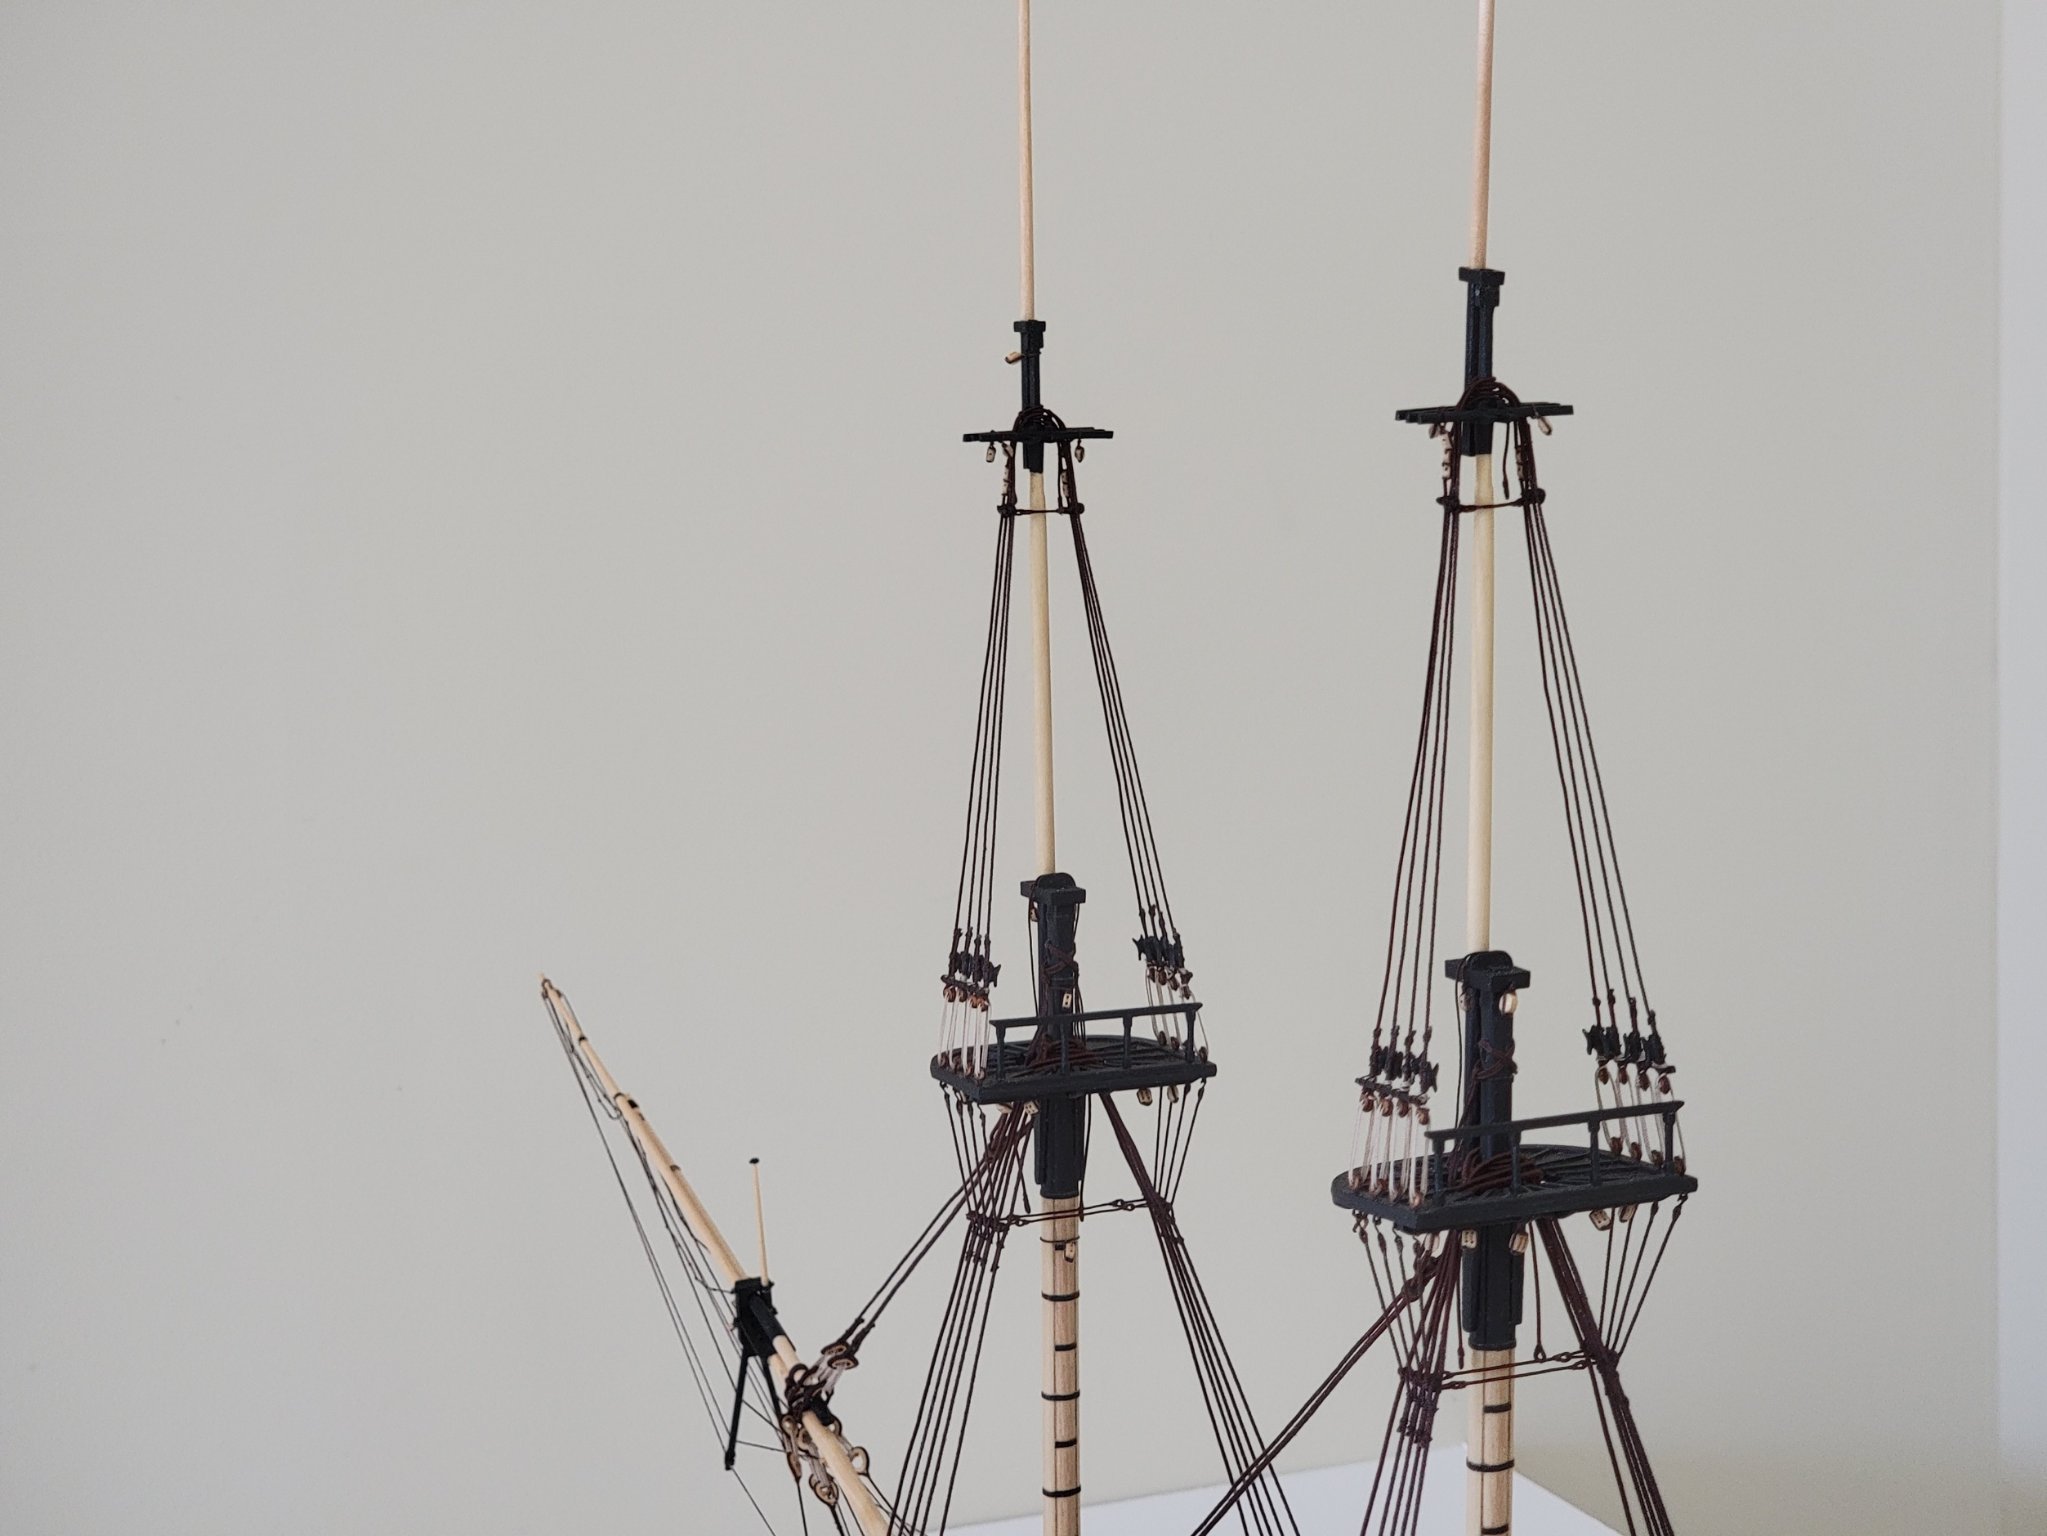
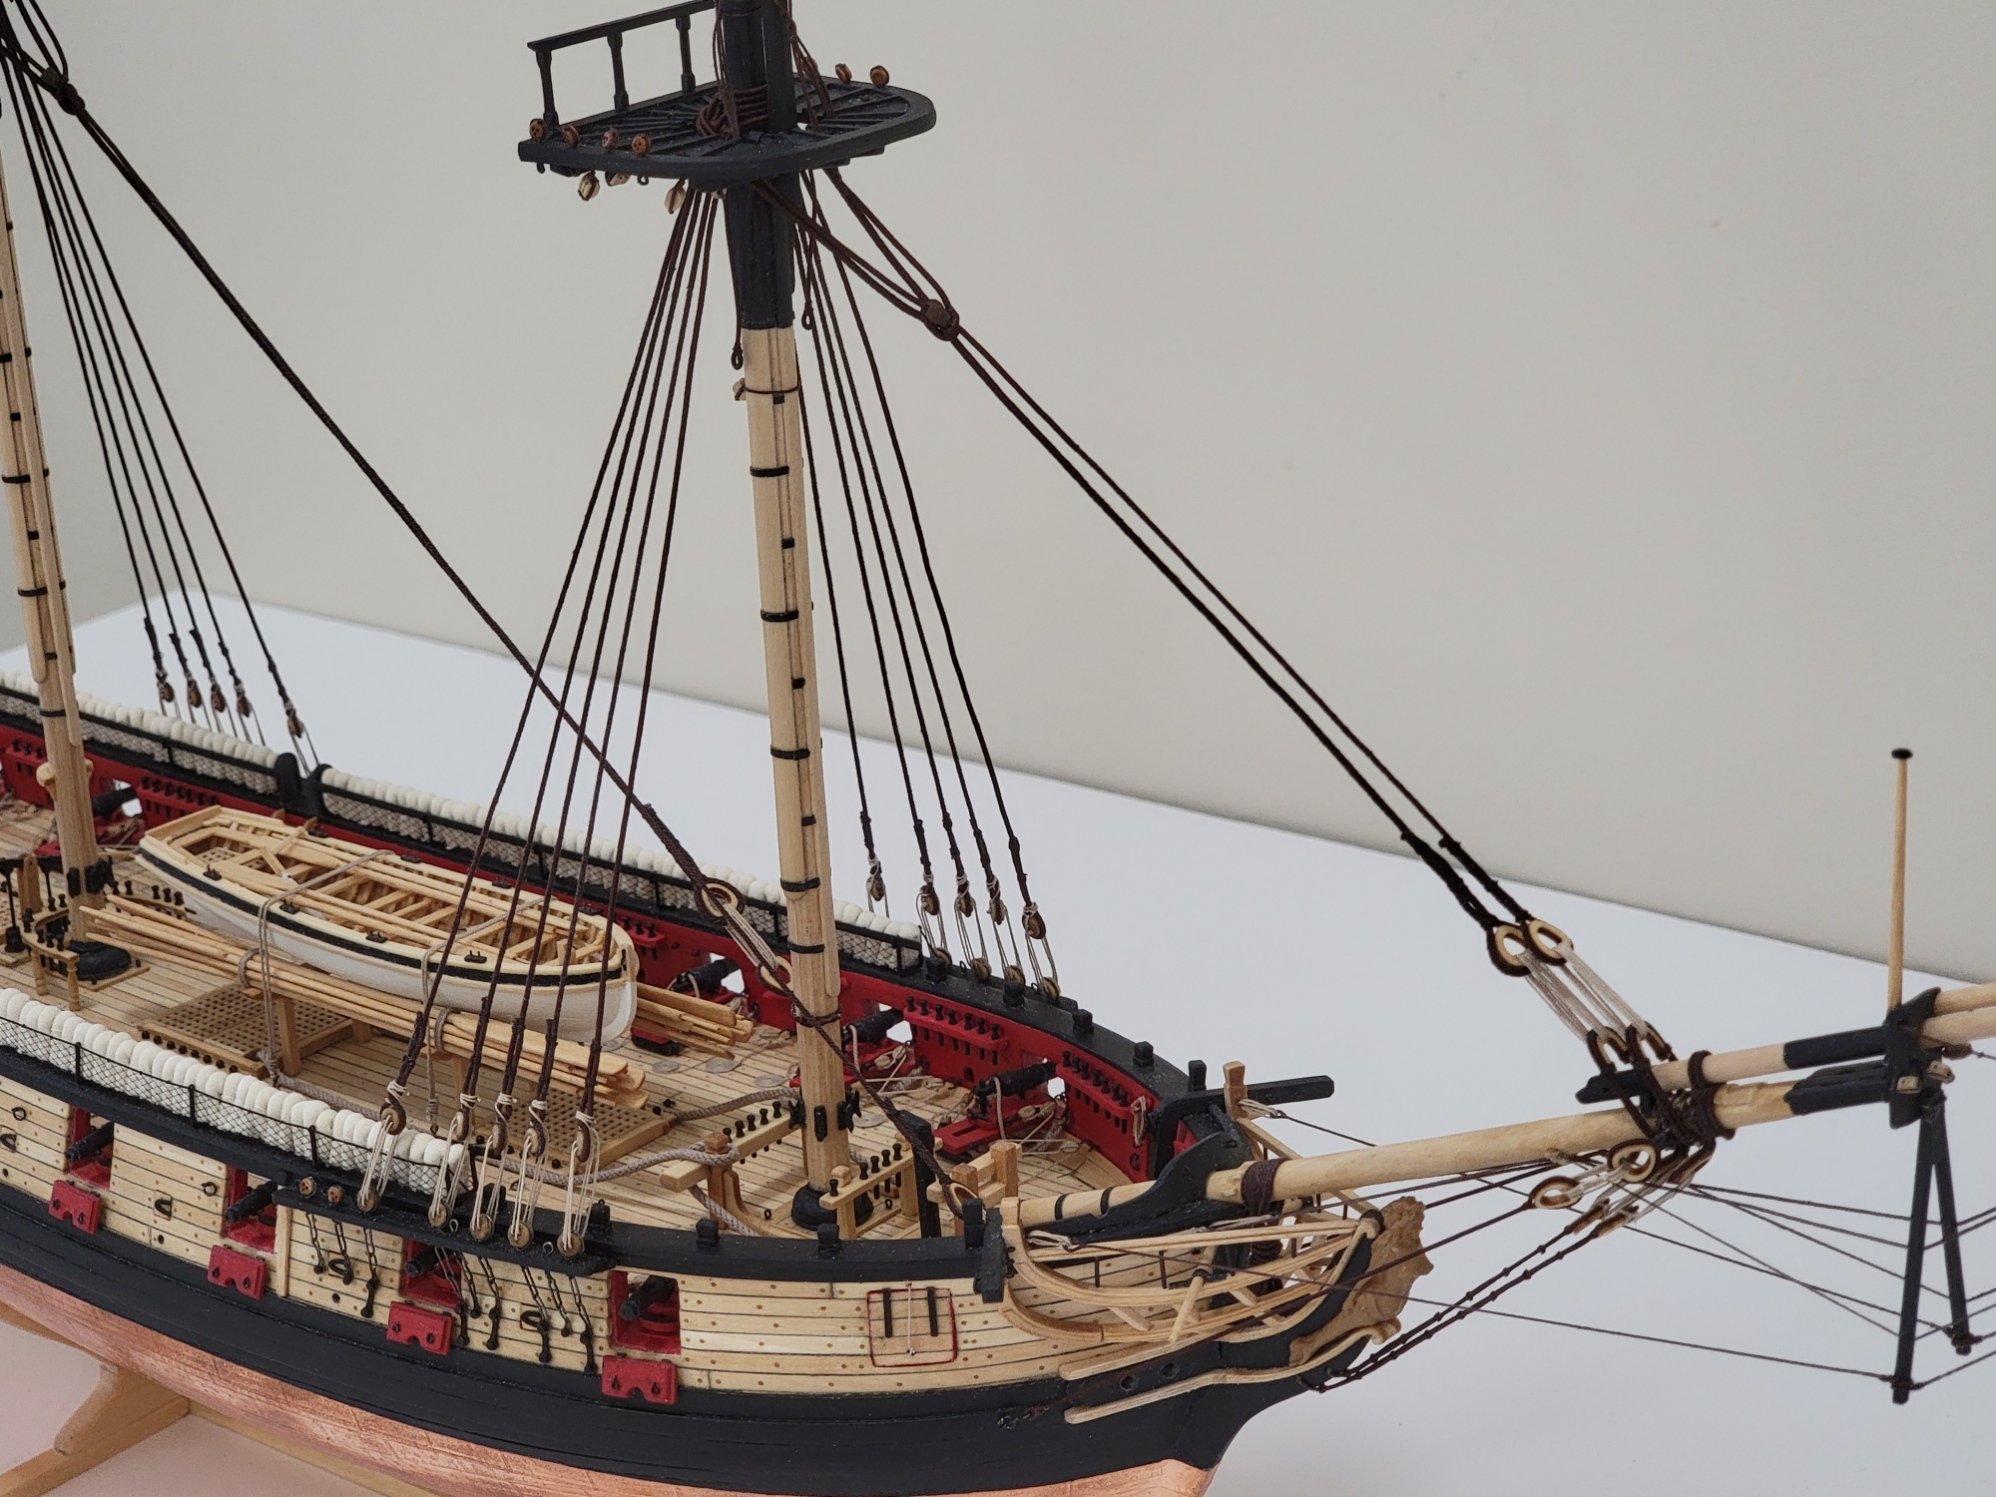
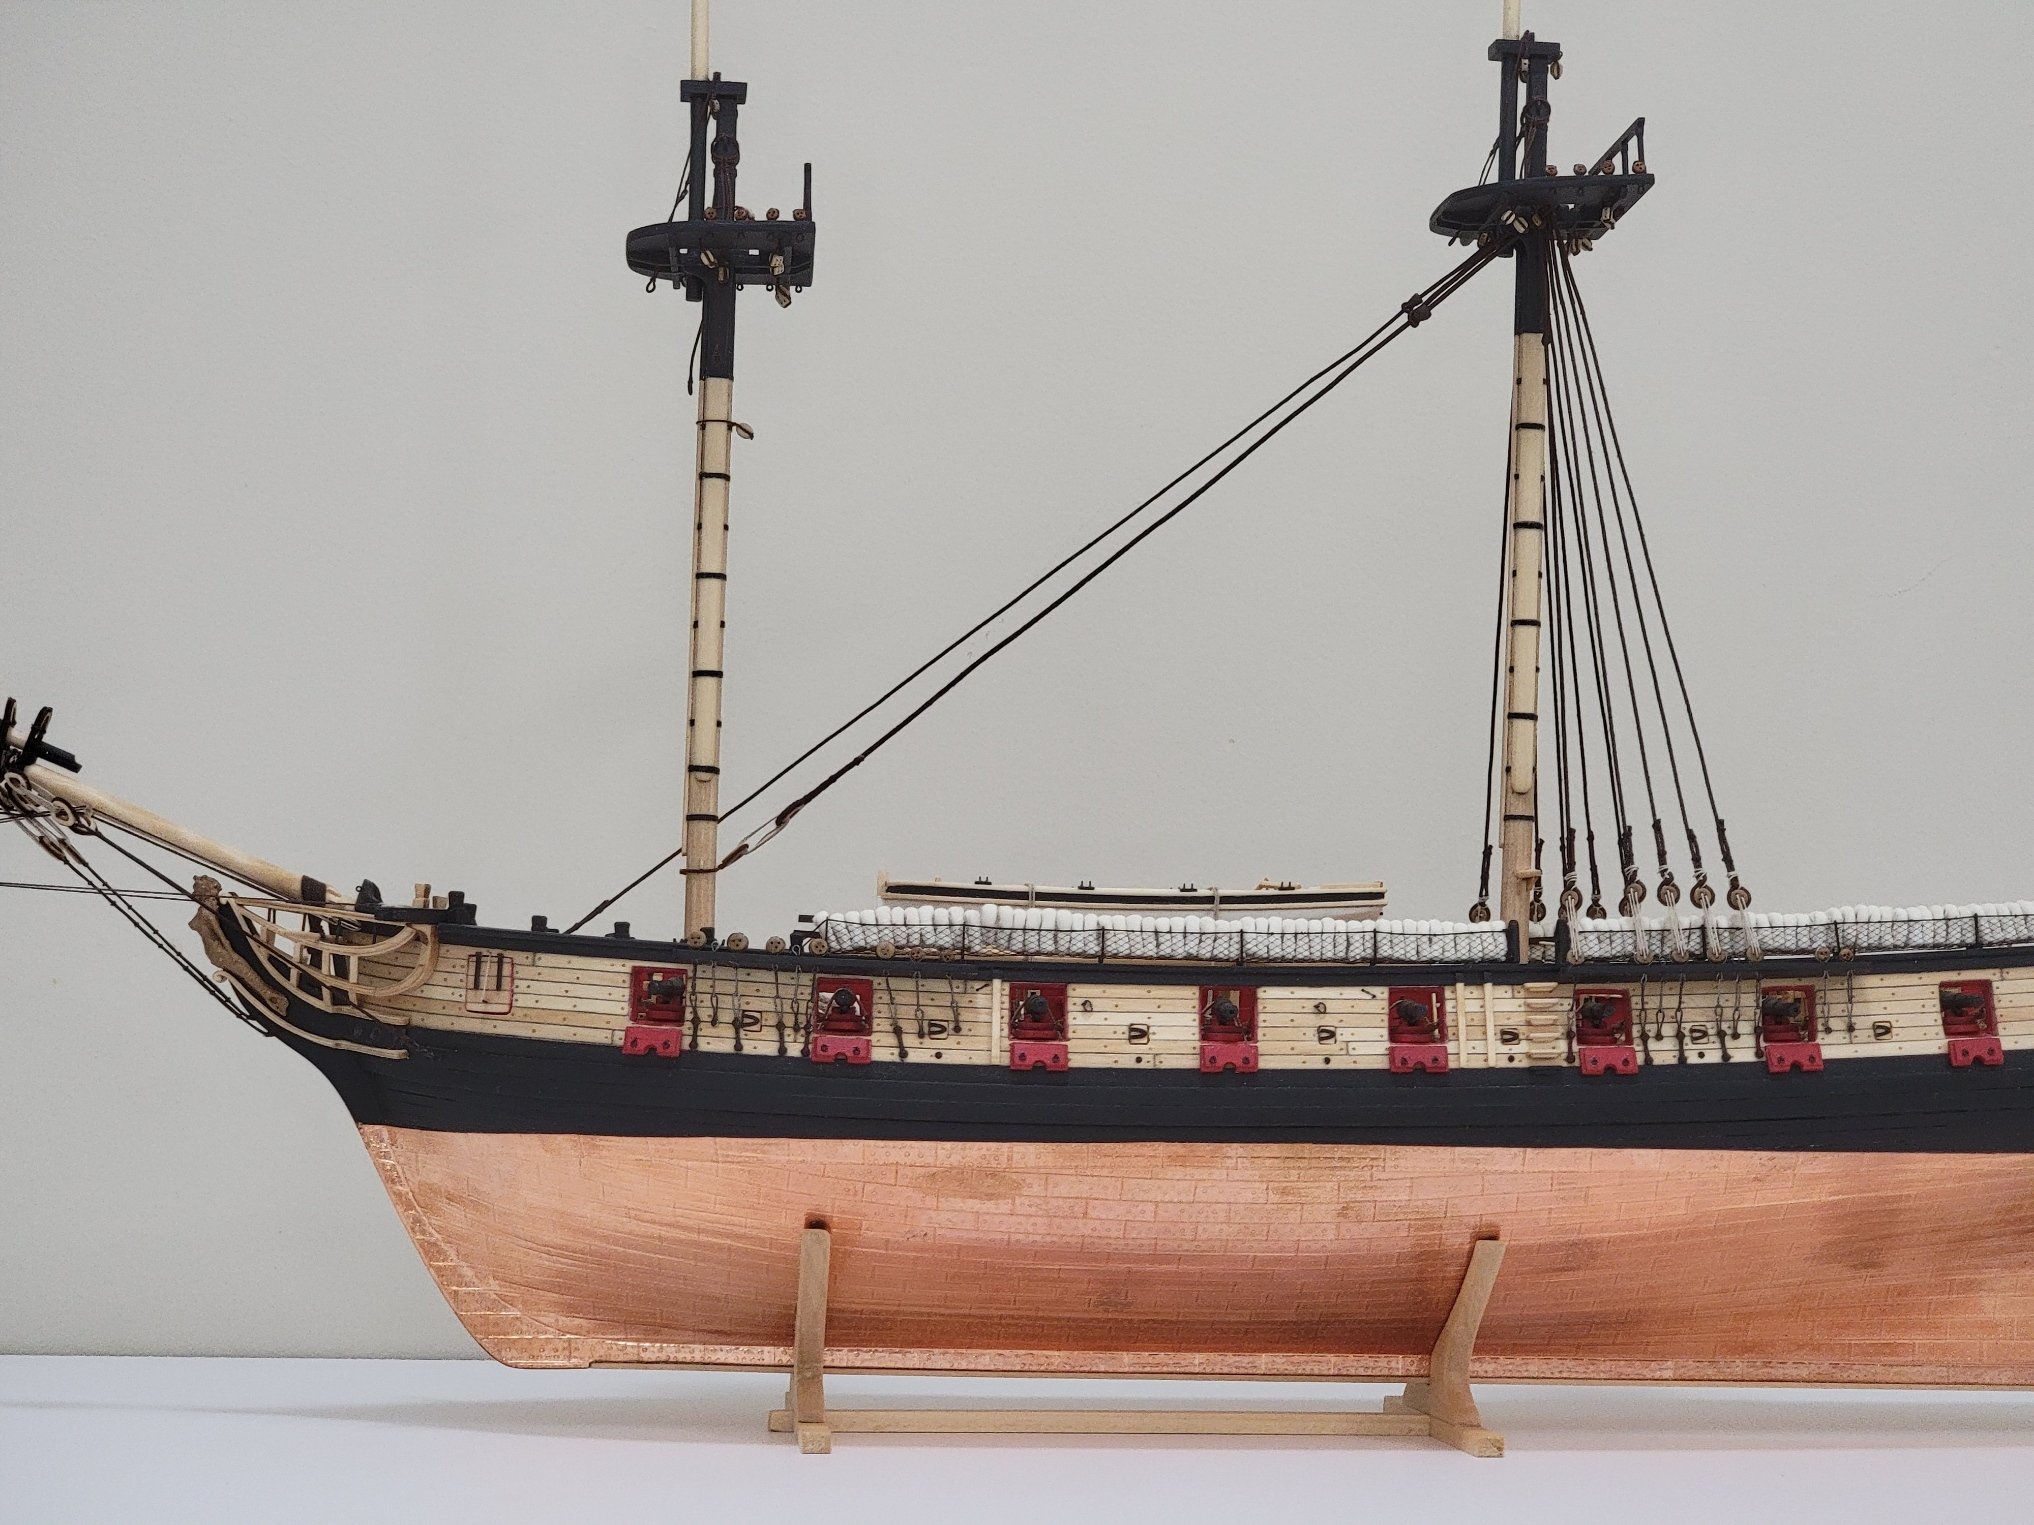
I finished repeating the entire process for the topmasts. Now the model is ready for the ratlines. I'm equally nervous and excited for this step. I'll be sure to take my time with it. Anyways... here are some pics:
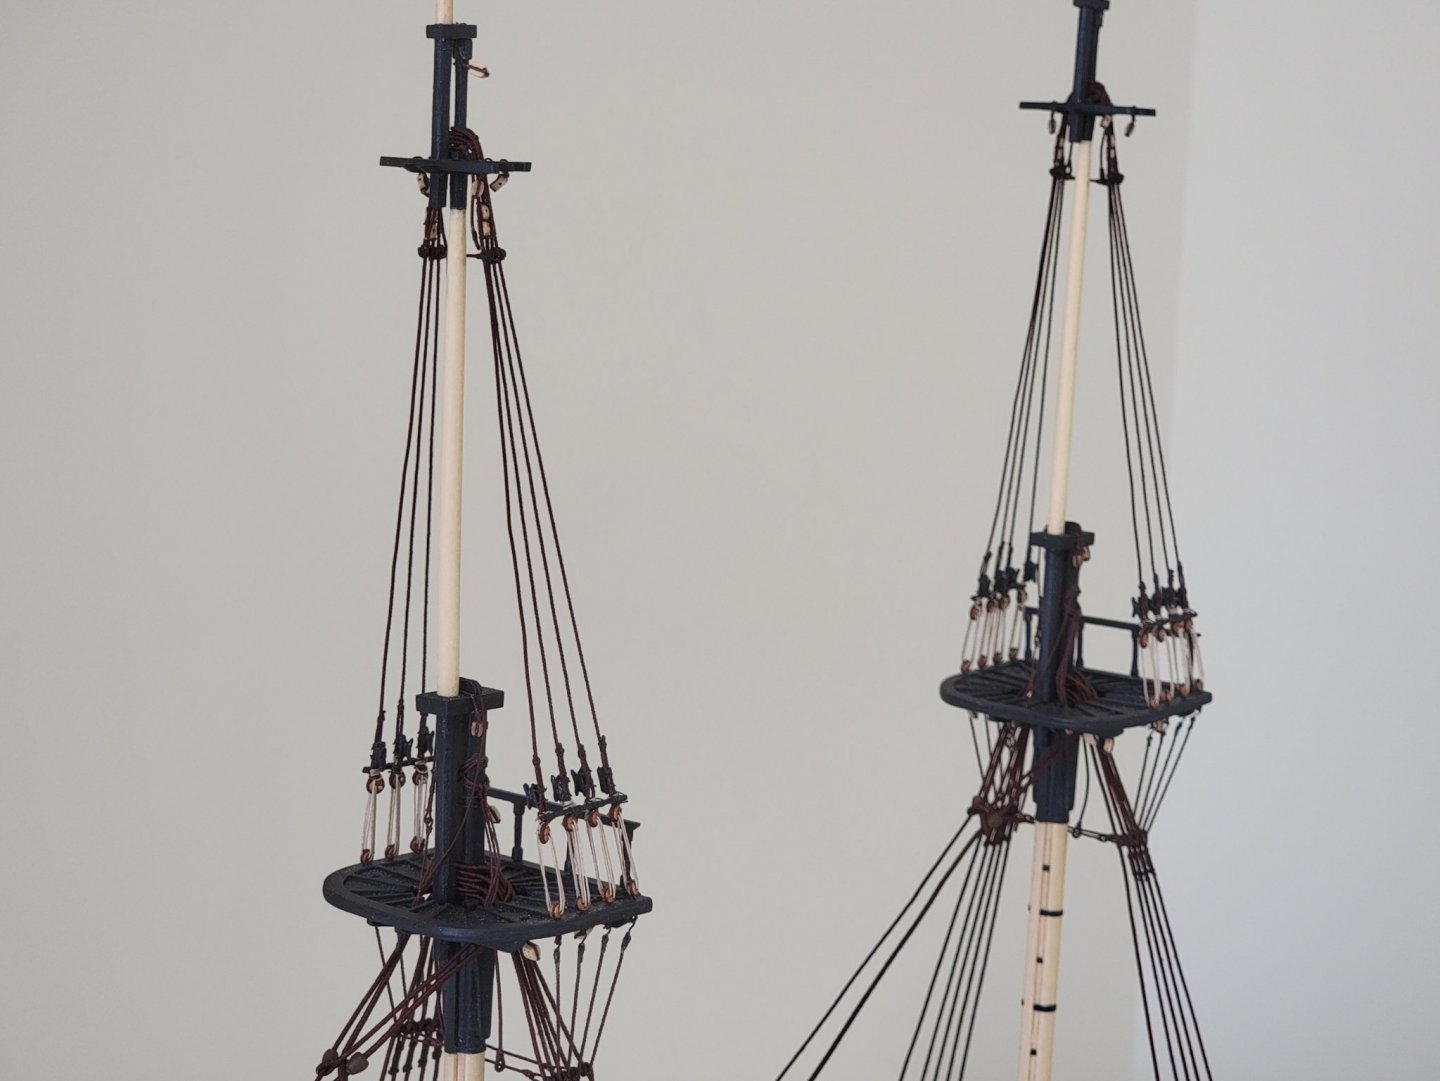
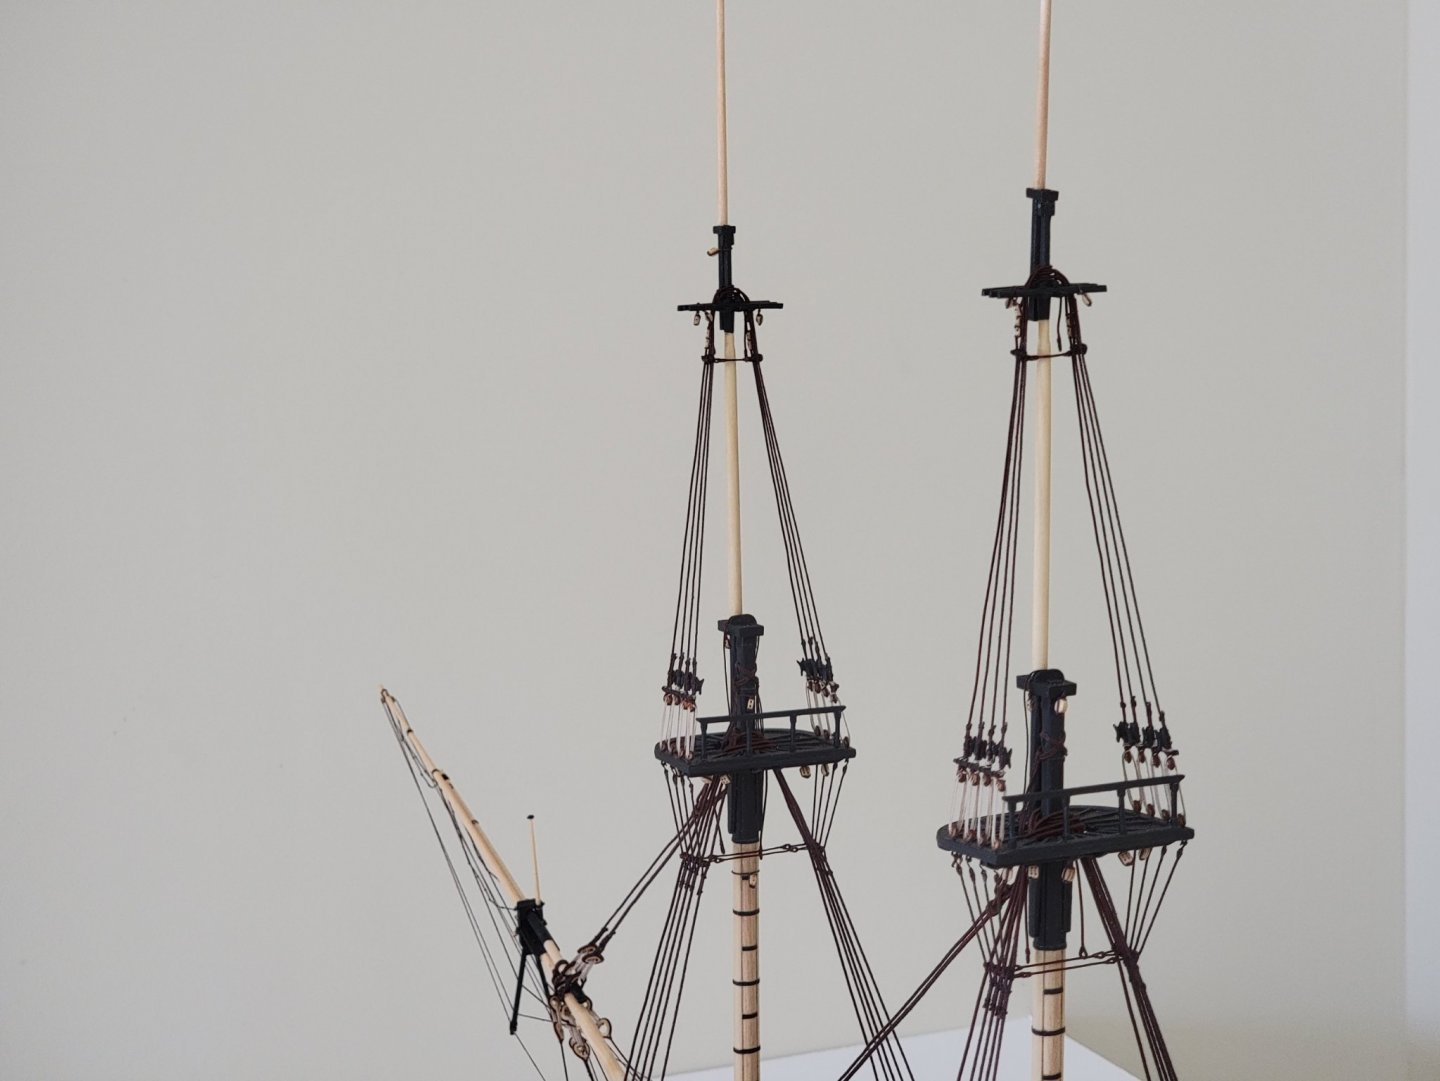
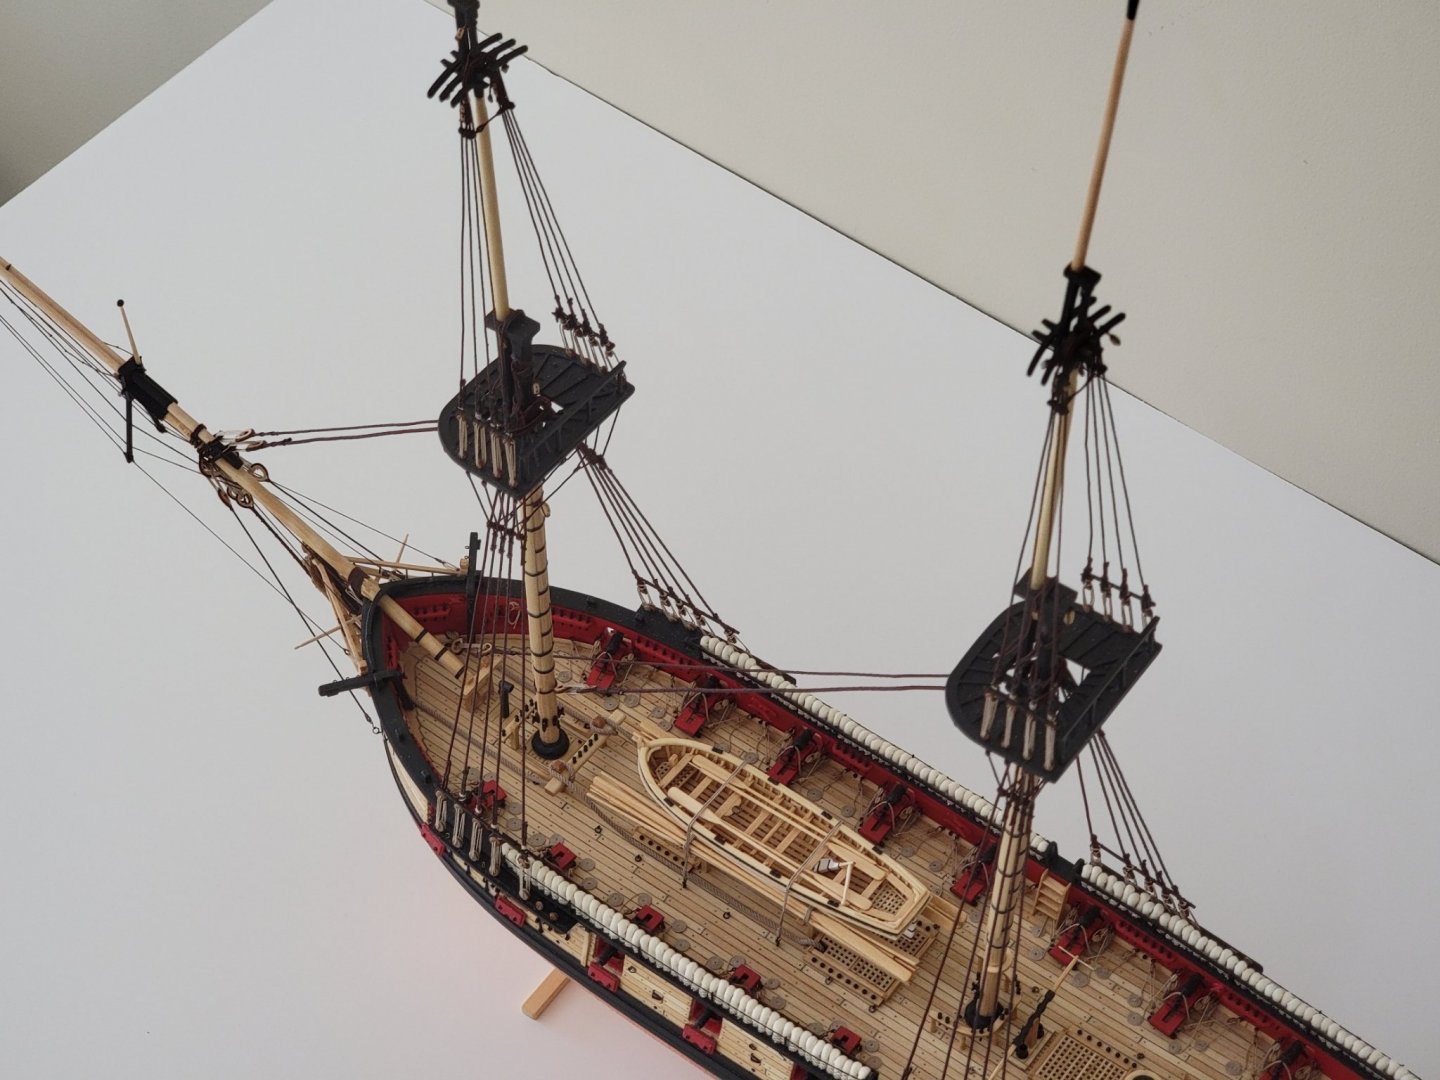


I guess after ratlines are done, the rest of the standing rigging will progress through fairly quickly. I'm really looking forward to how she'll look at the end of this chapter. 😄
-
-
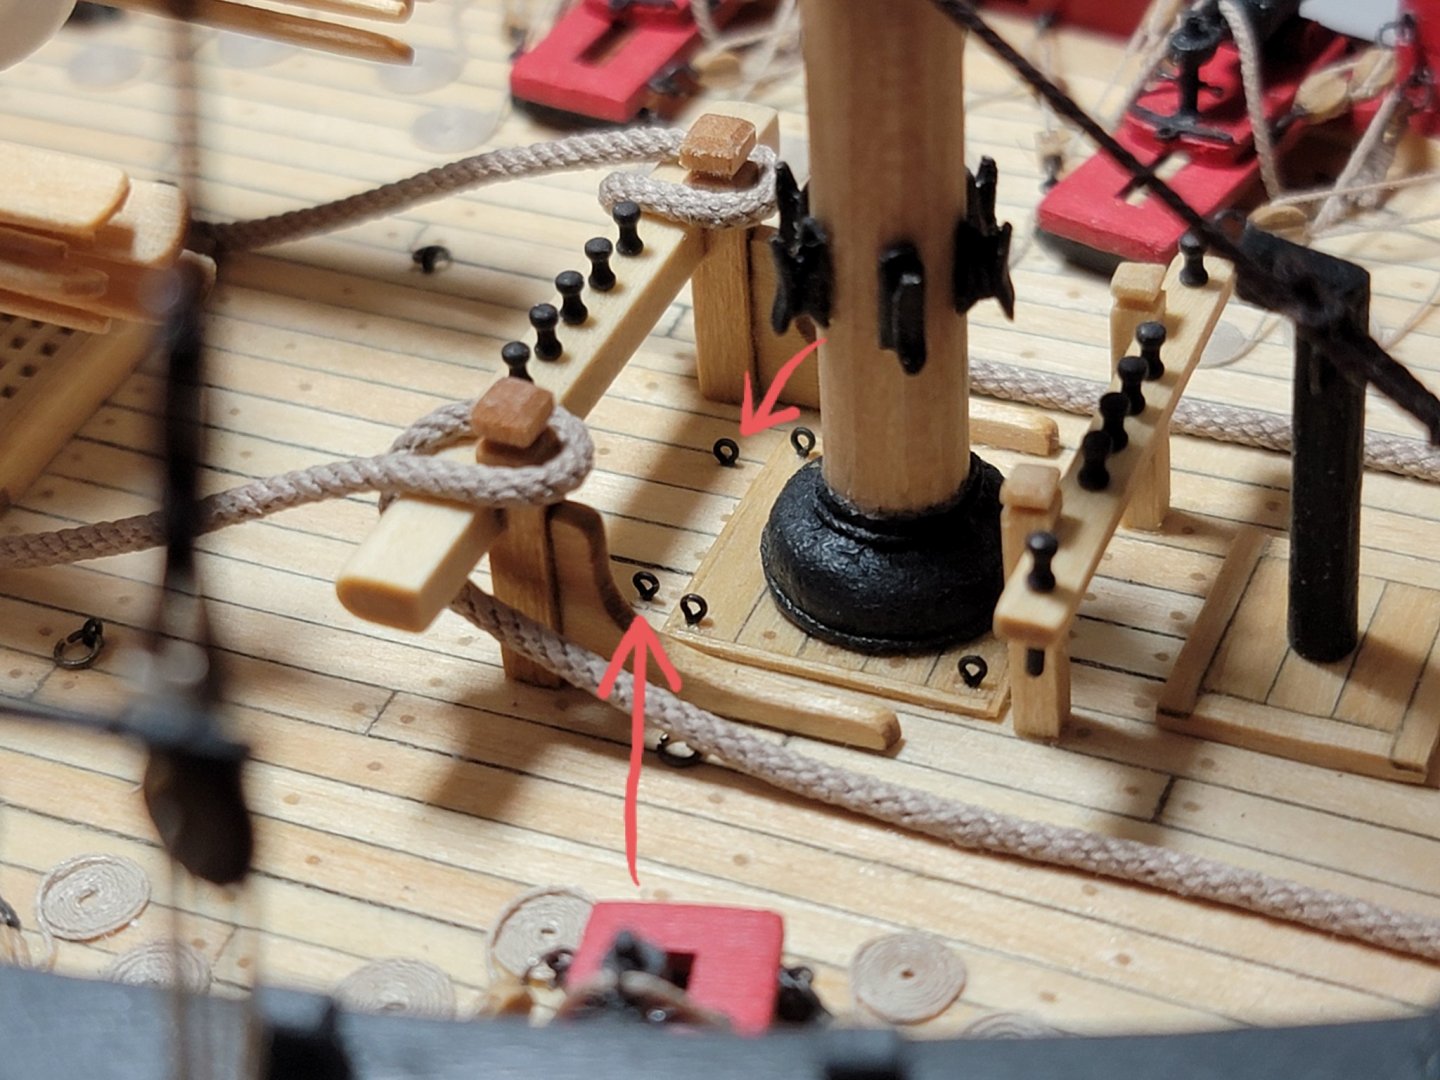
Thank you Justin!
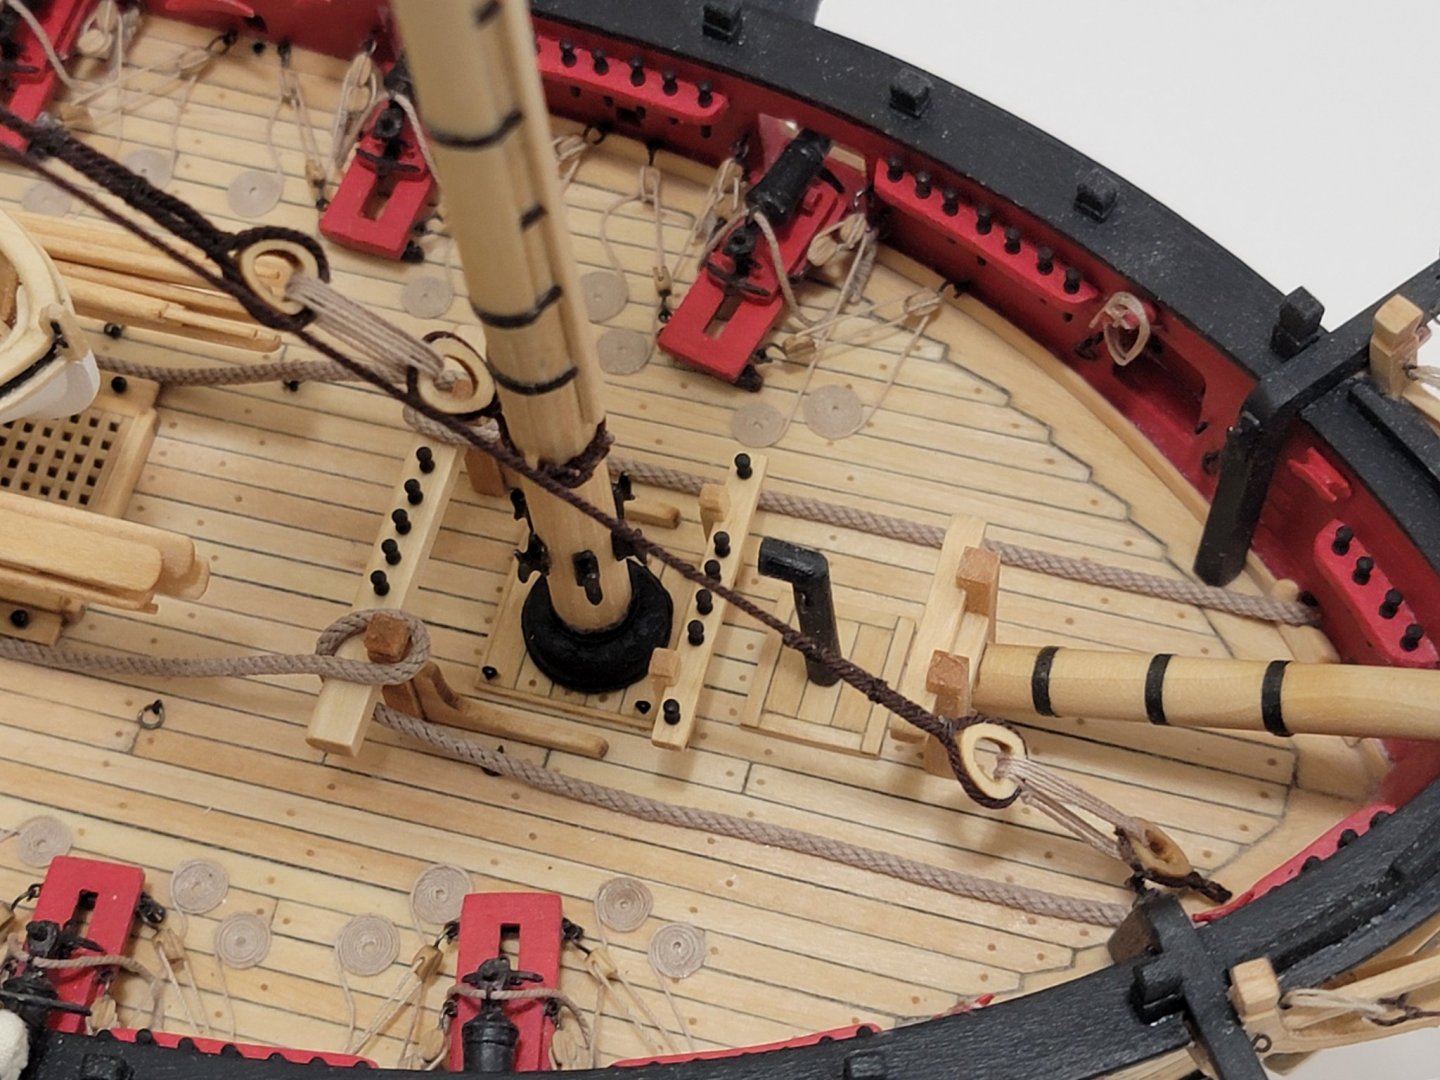
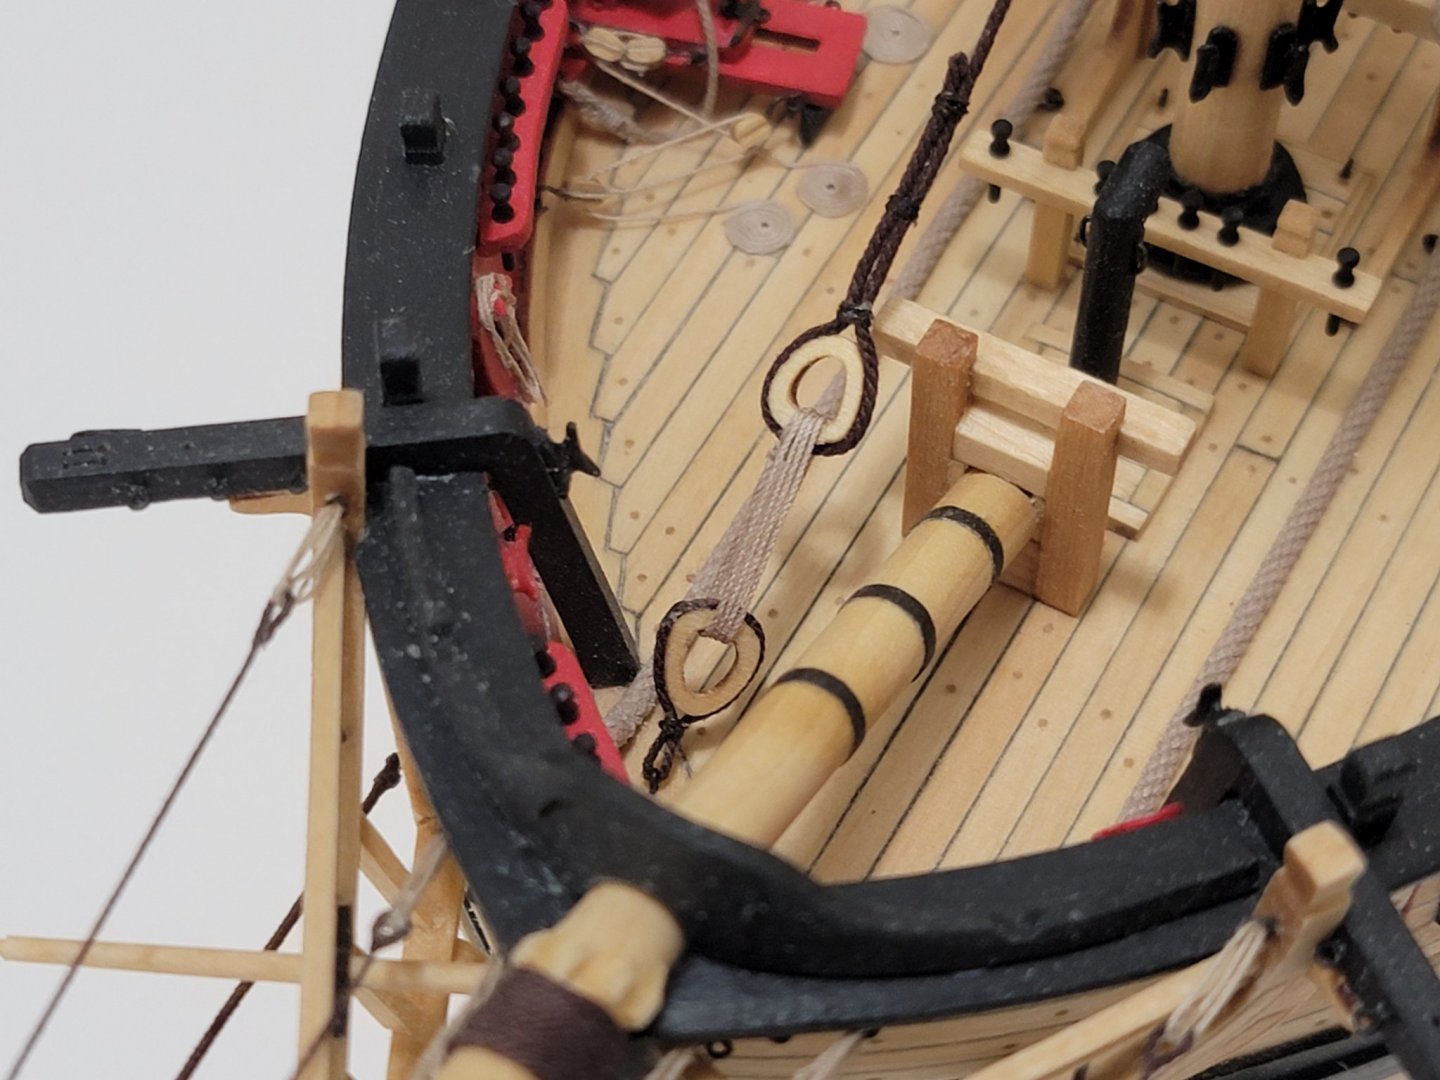
While working on the top mast pendants and shrouds, I realized I forgot to install the two eye bolts aft of the foremast. I'm glad I caught this early on than later with many more ropes in place. I installed them without too much trouble, but had to navigate a bit with the shrouds and stays coming on the way. So for anyone who is following along while building the Syren, don't forget these two!!
- uncarina, Overworked724, KurtH and 8 others
-
11
-
14 hours ago, desalgu said:
No need for you to be nervous about ratlines. They look worse than they are. And based on what you've done so far, which is extremely impressive, you'll do great. If I remember right mine are spaced about 1/4" apart.
I love your rope eyes and cartharpins. When I was at this stage, I was having a hard time making they rope eyes. It got easier much later on. I did cartharpins the simple way. I'm wondering how you managed to get into the area and tie knots. I could get in there, but only to do simple overhand knots. I had little control over threads.
I'm glad you are taking lots of detailed pictures. Once you get all the rigging done, it will be difficult to see all the details.
I've been slowing cutting wood for display case and planking long boat. I'd never bent planks edgewise before, and didn't understand that you could even do it. On Syren planks were short enough that I forced edgewise bends as I glued them on. It worked, but I wasn't that happy about how I did it. So now I've learned new way of doing things thanks to your log and all the other info here.
Thanks David. Hearing that makes me feel more confident for doing the ratlines.
It was really tricky rigging the catharpins. I just used tweezers and required a lot of patience. I had to take a couple hours break when doing the first one since it was very frustrating and I was almost going to give up... but then something just clicked the rest were much easier, I was able to do them in just a few minutes.
For planking, another trick is to precut the planks to the correct shape. I did this for the jolly boat following the outline for the enlarged drawings of the Master Korabel kit. It would require more planning to get the right shape, so maybe the edge wise bending would be the best bet. For my next build (Confederacy), I'll try the edgewise bending.
-
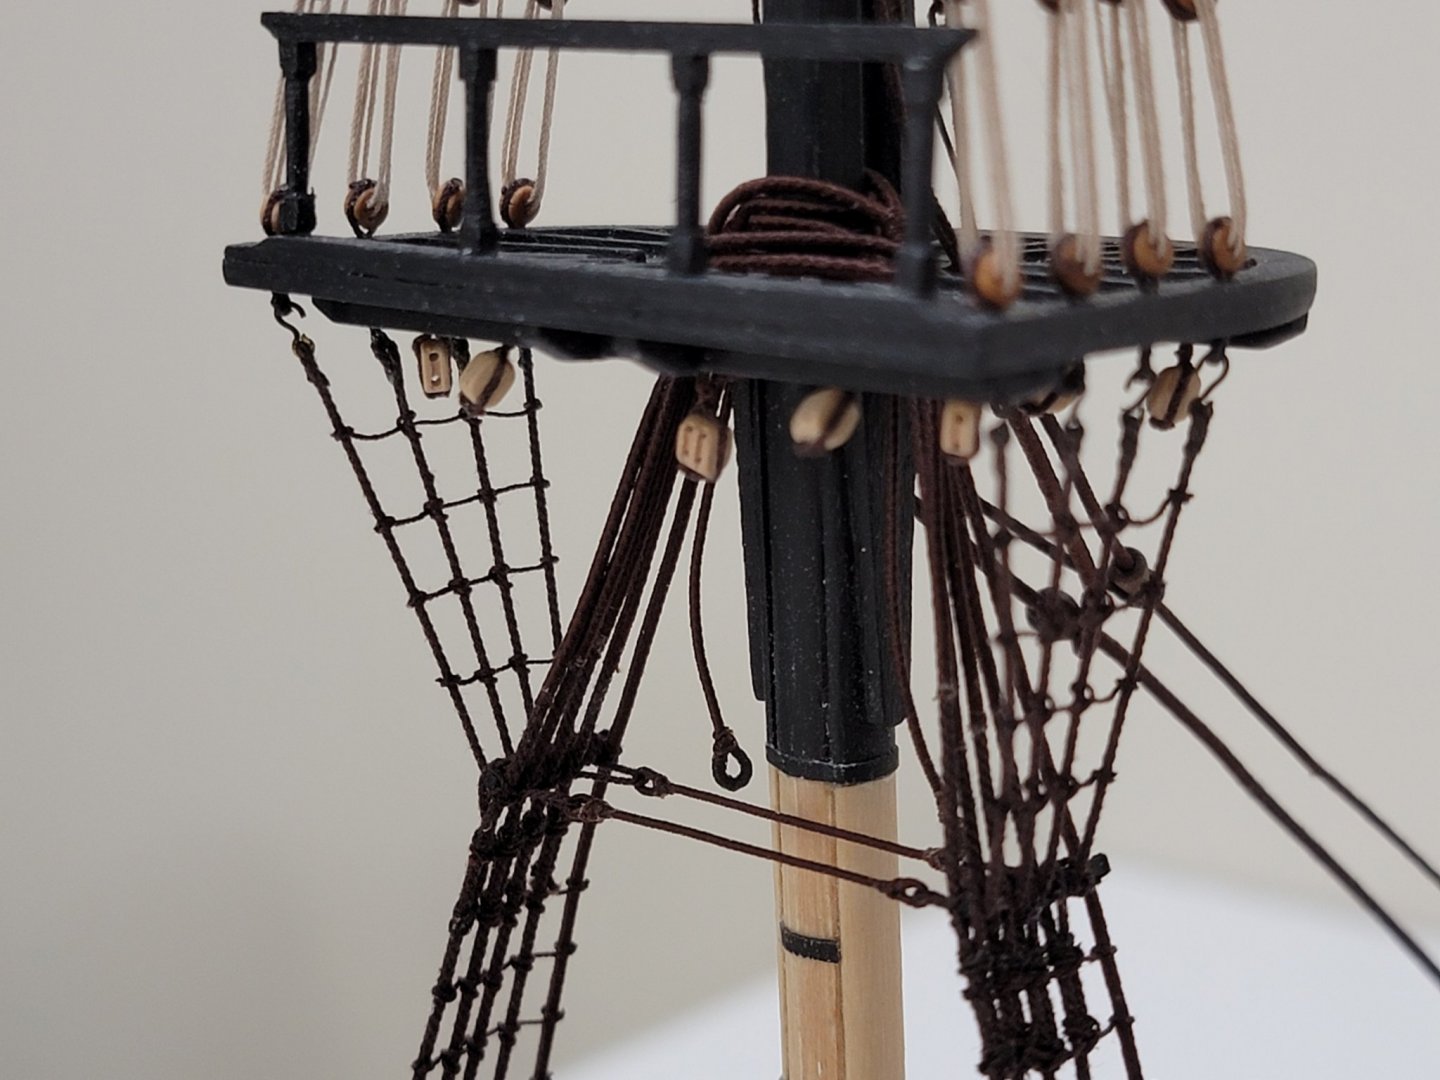
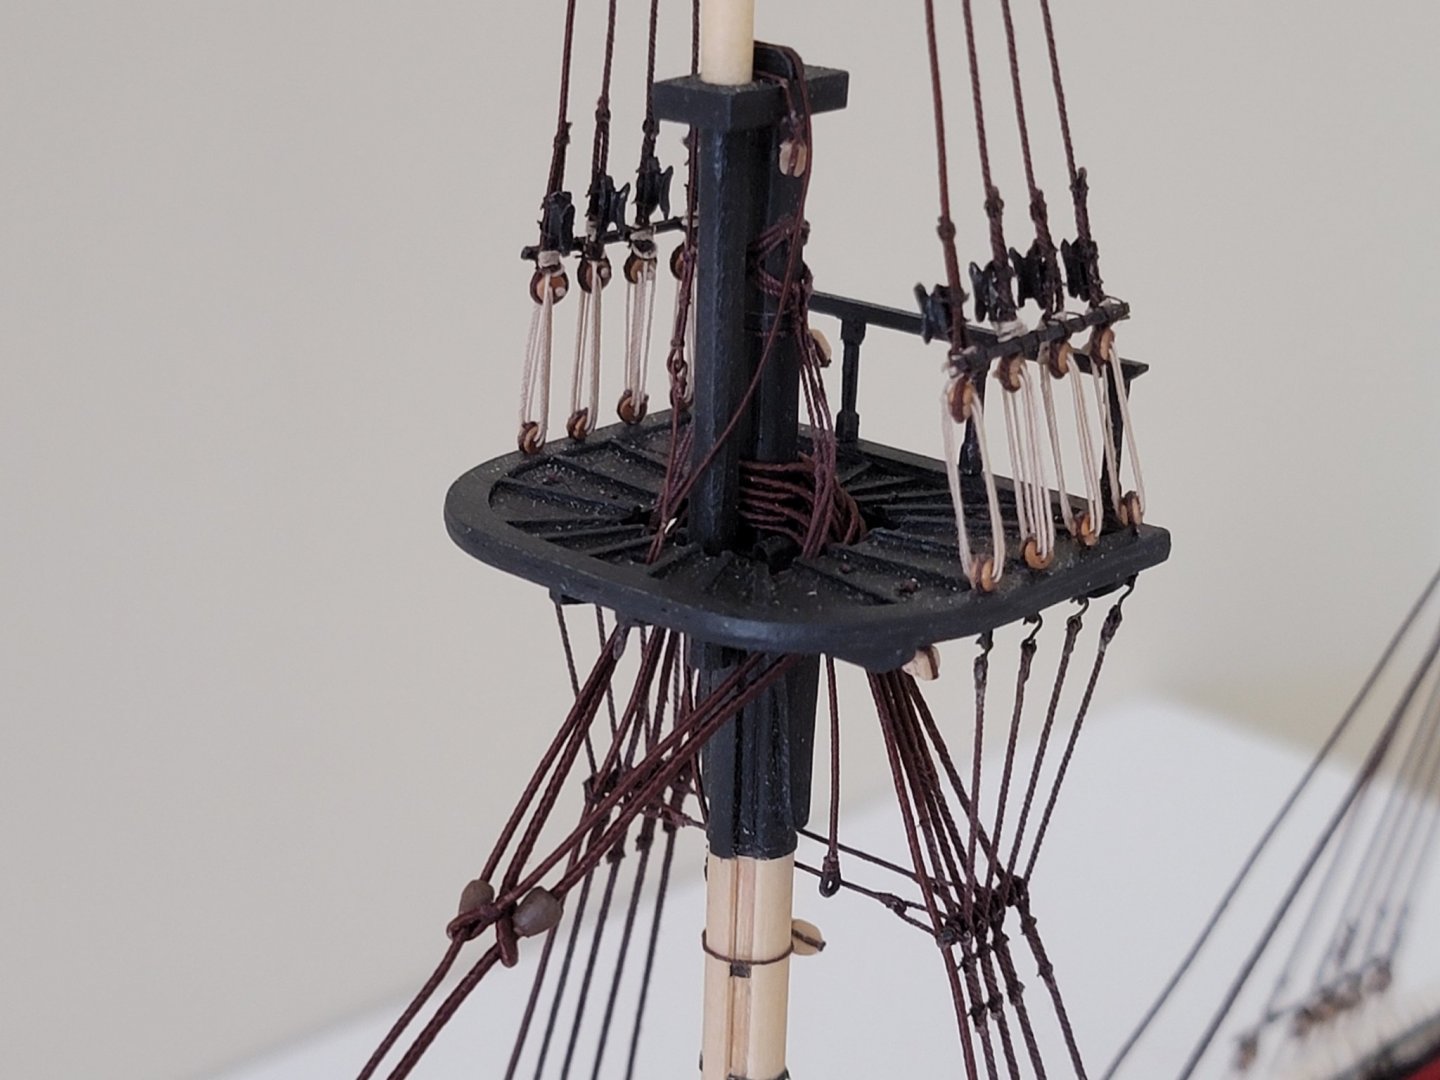
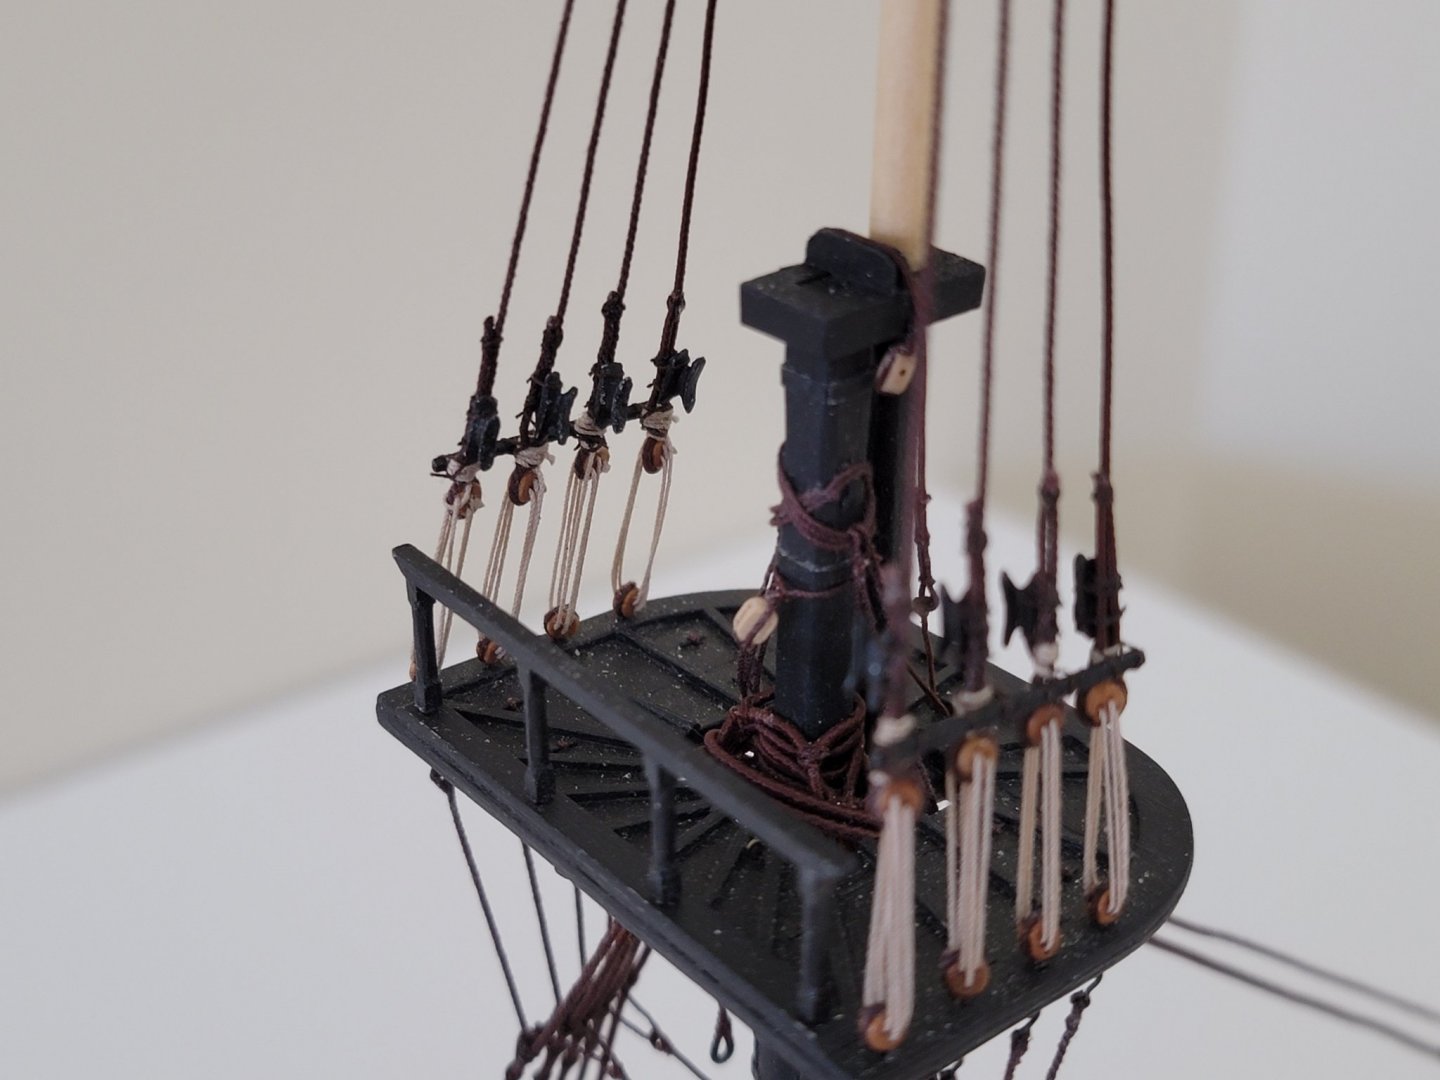
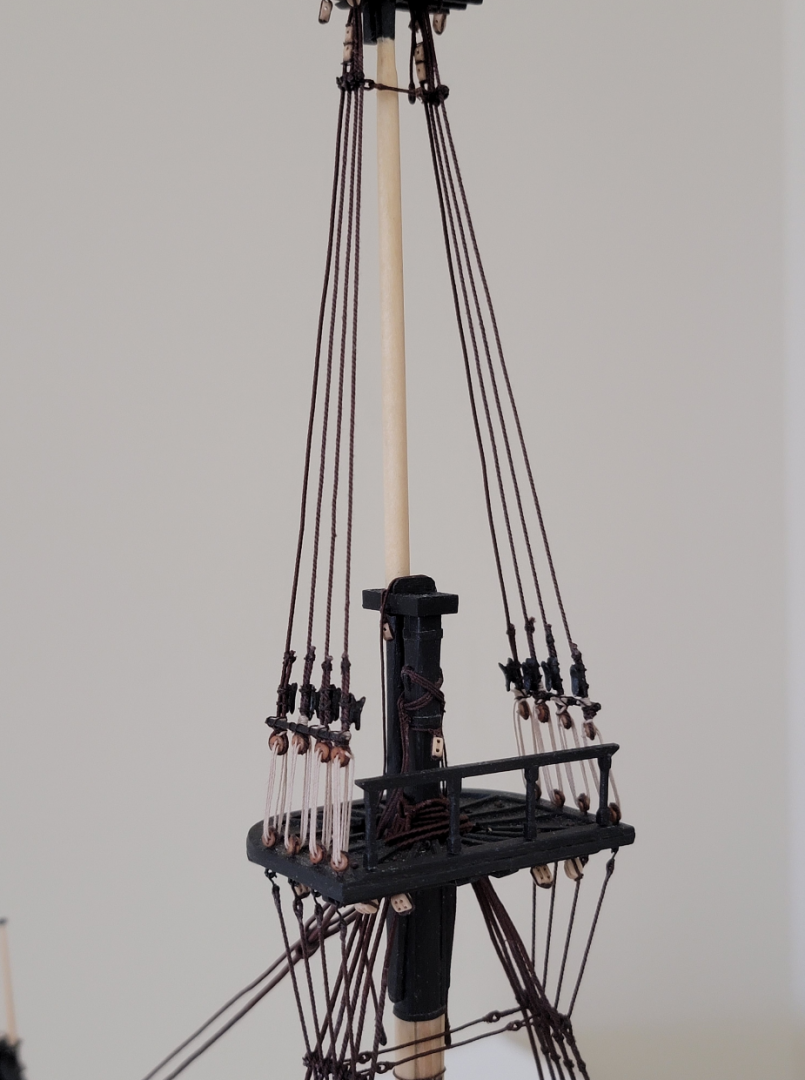
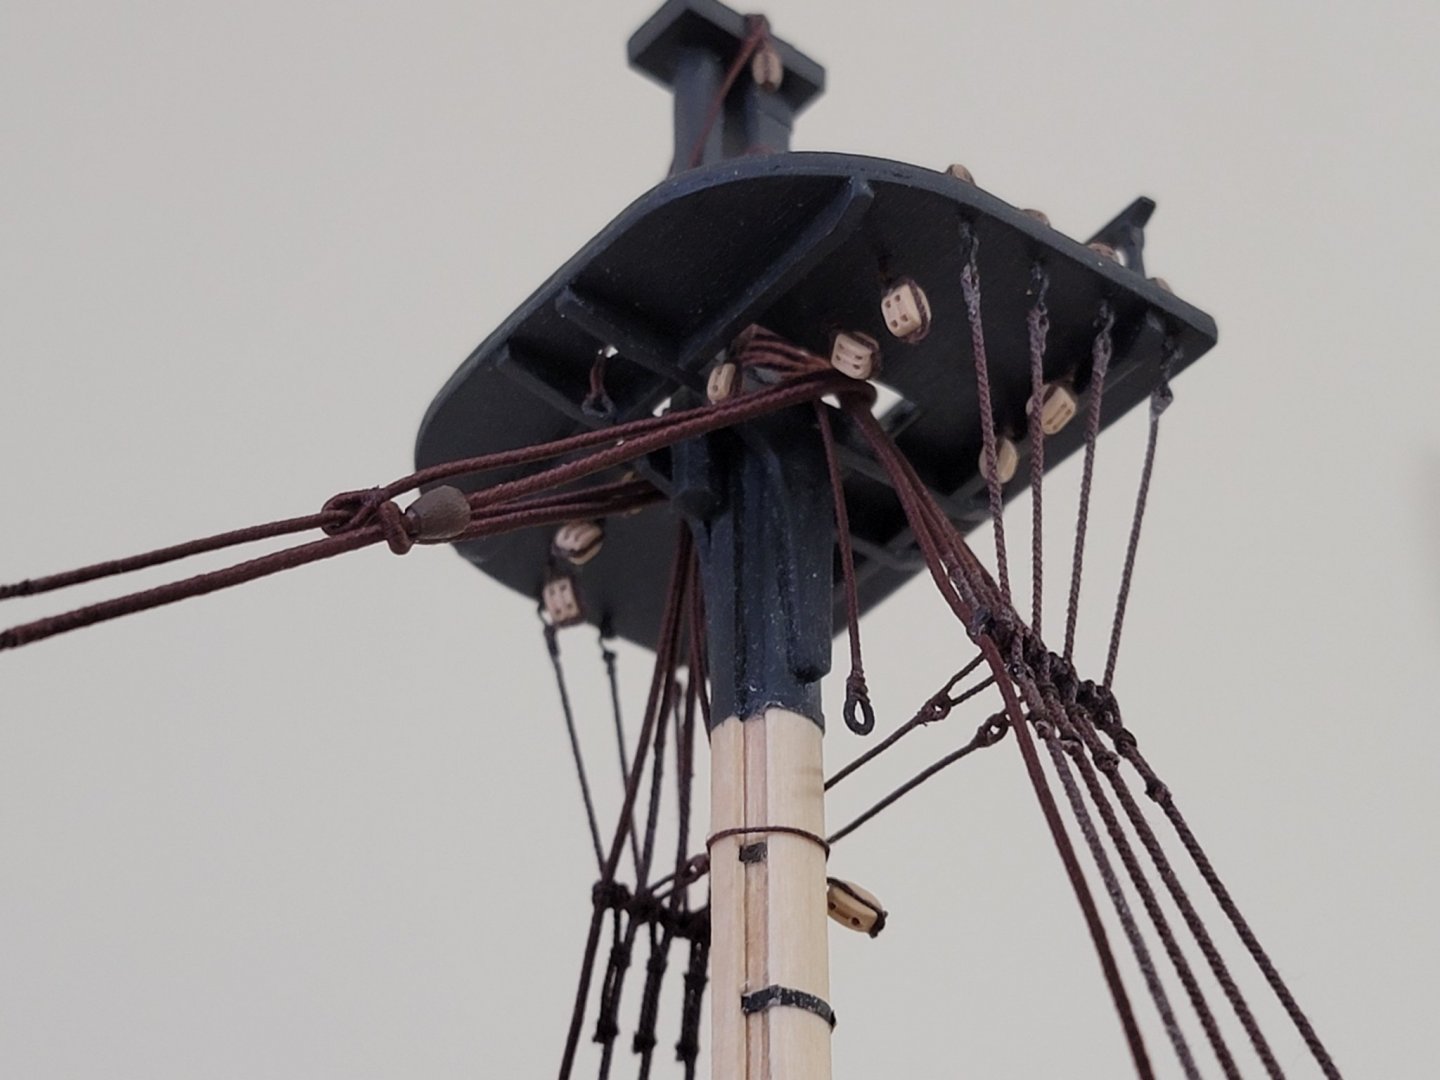
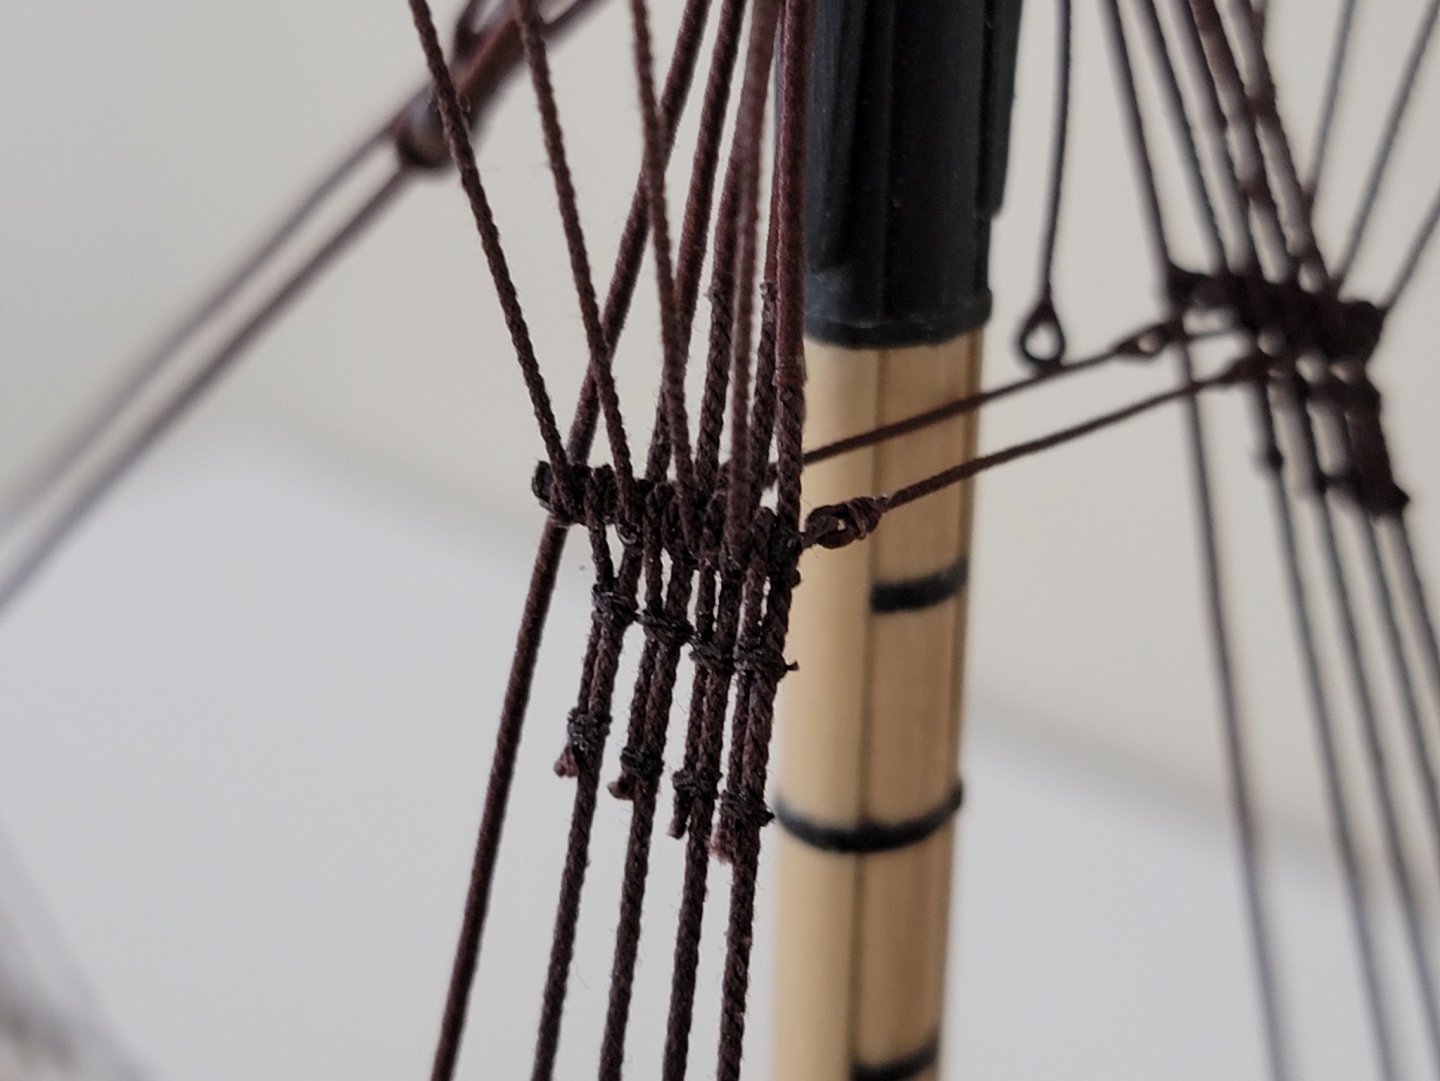
Thanks so much for the great comments and likes!!
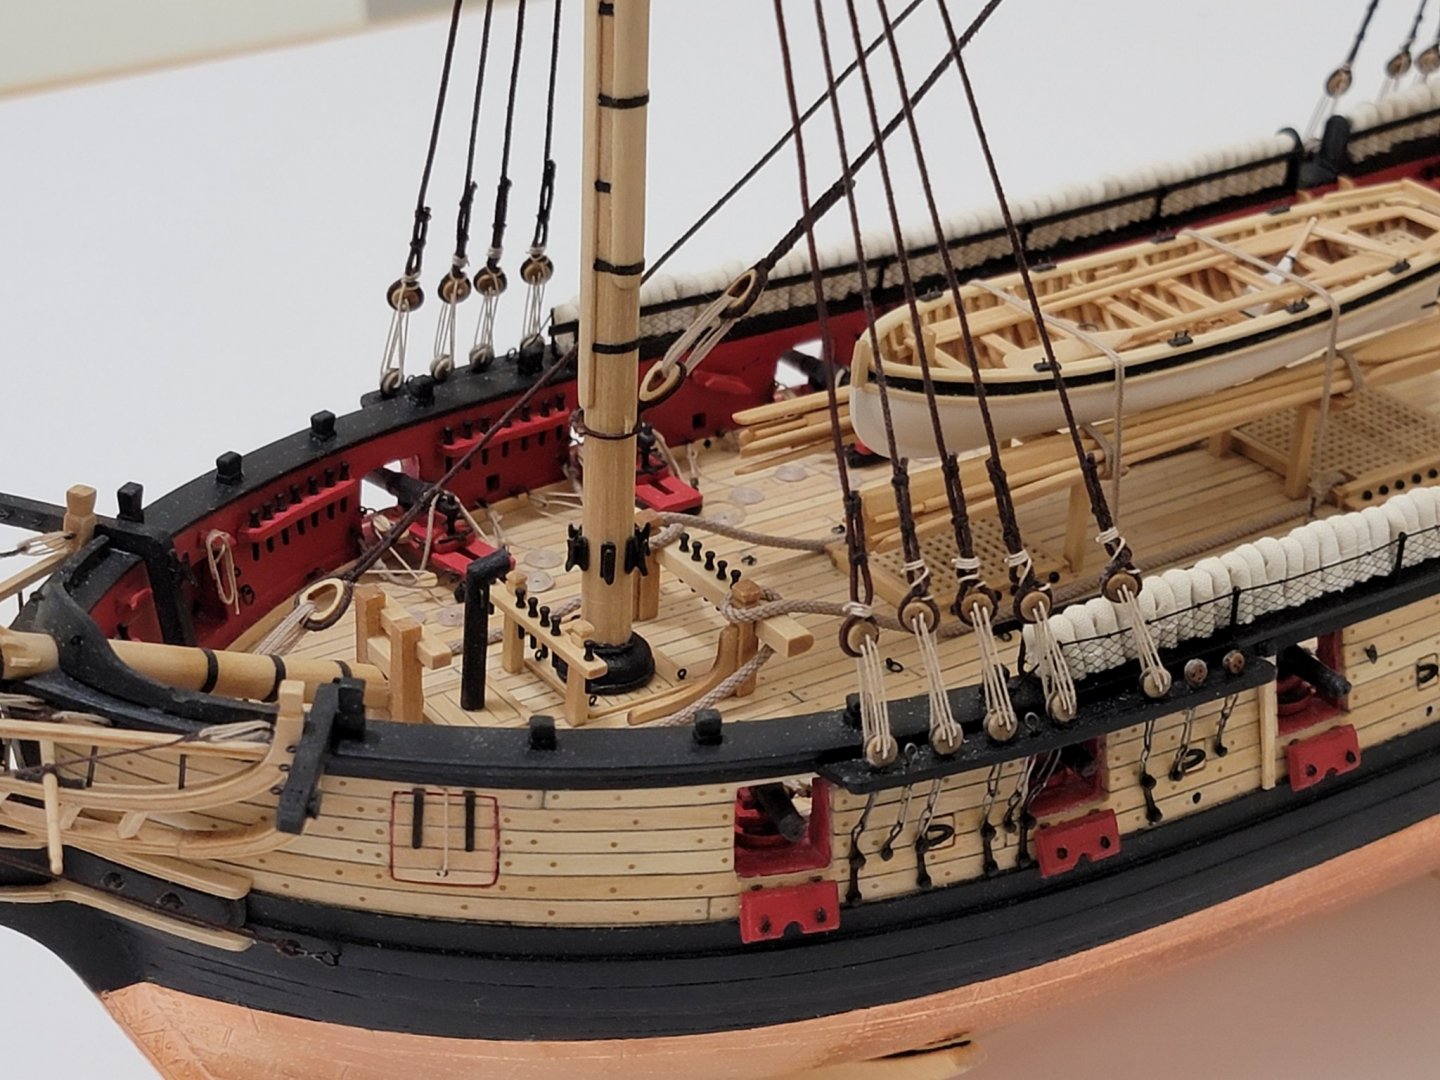
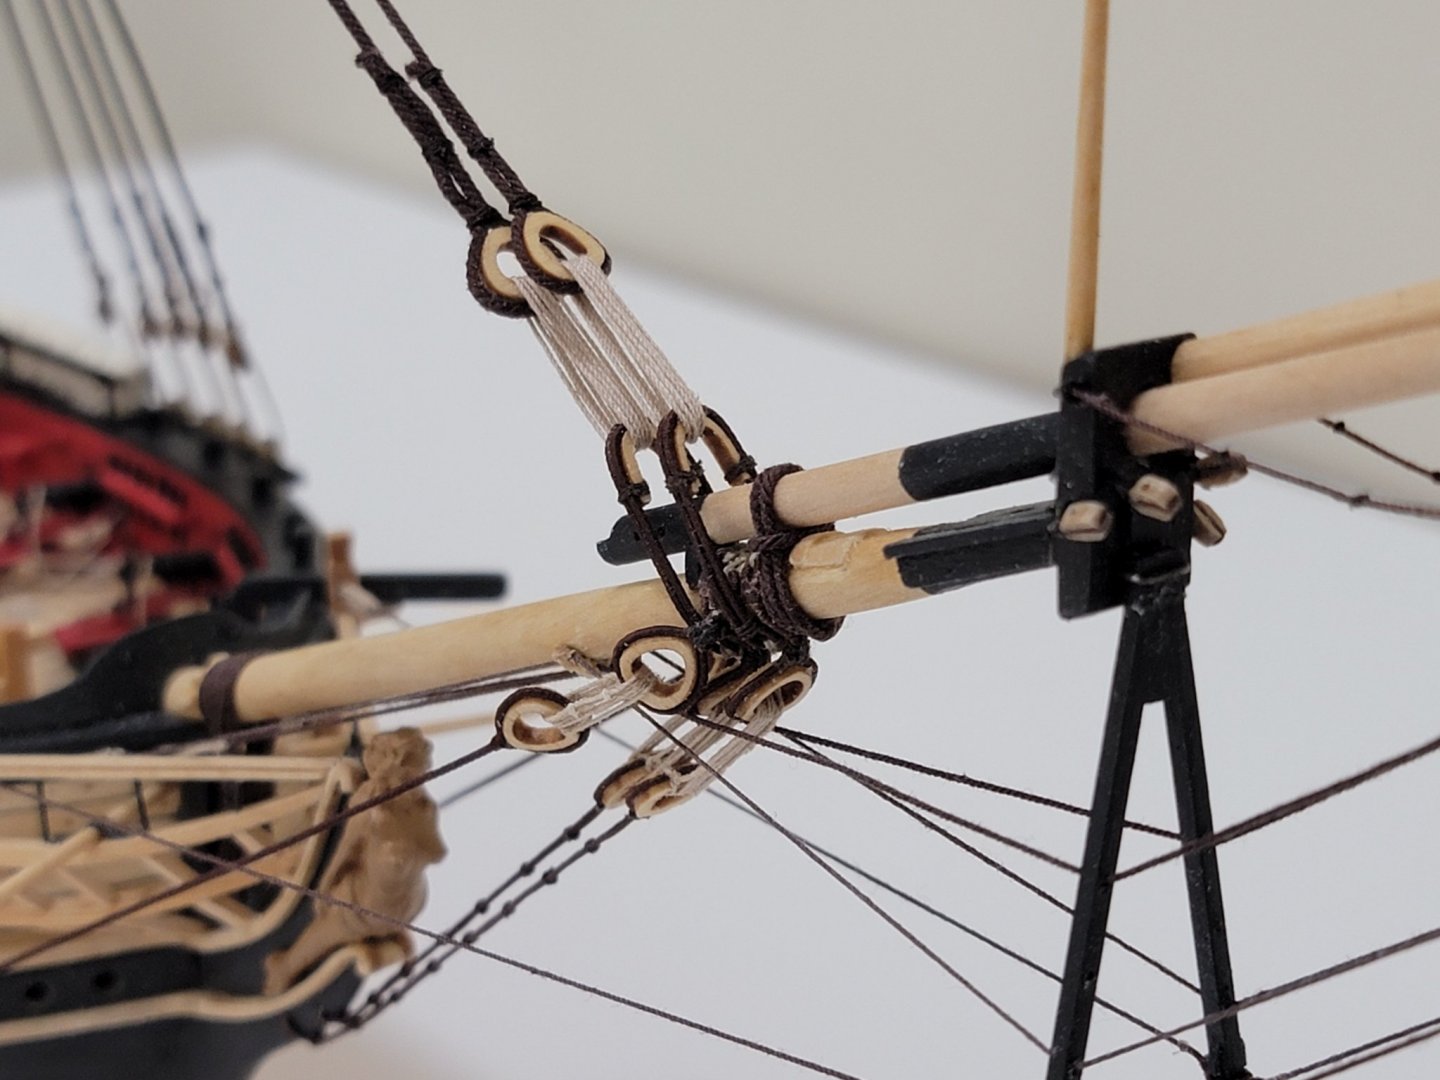
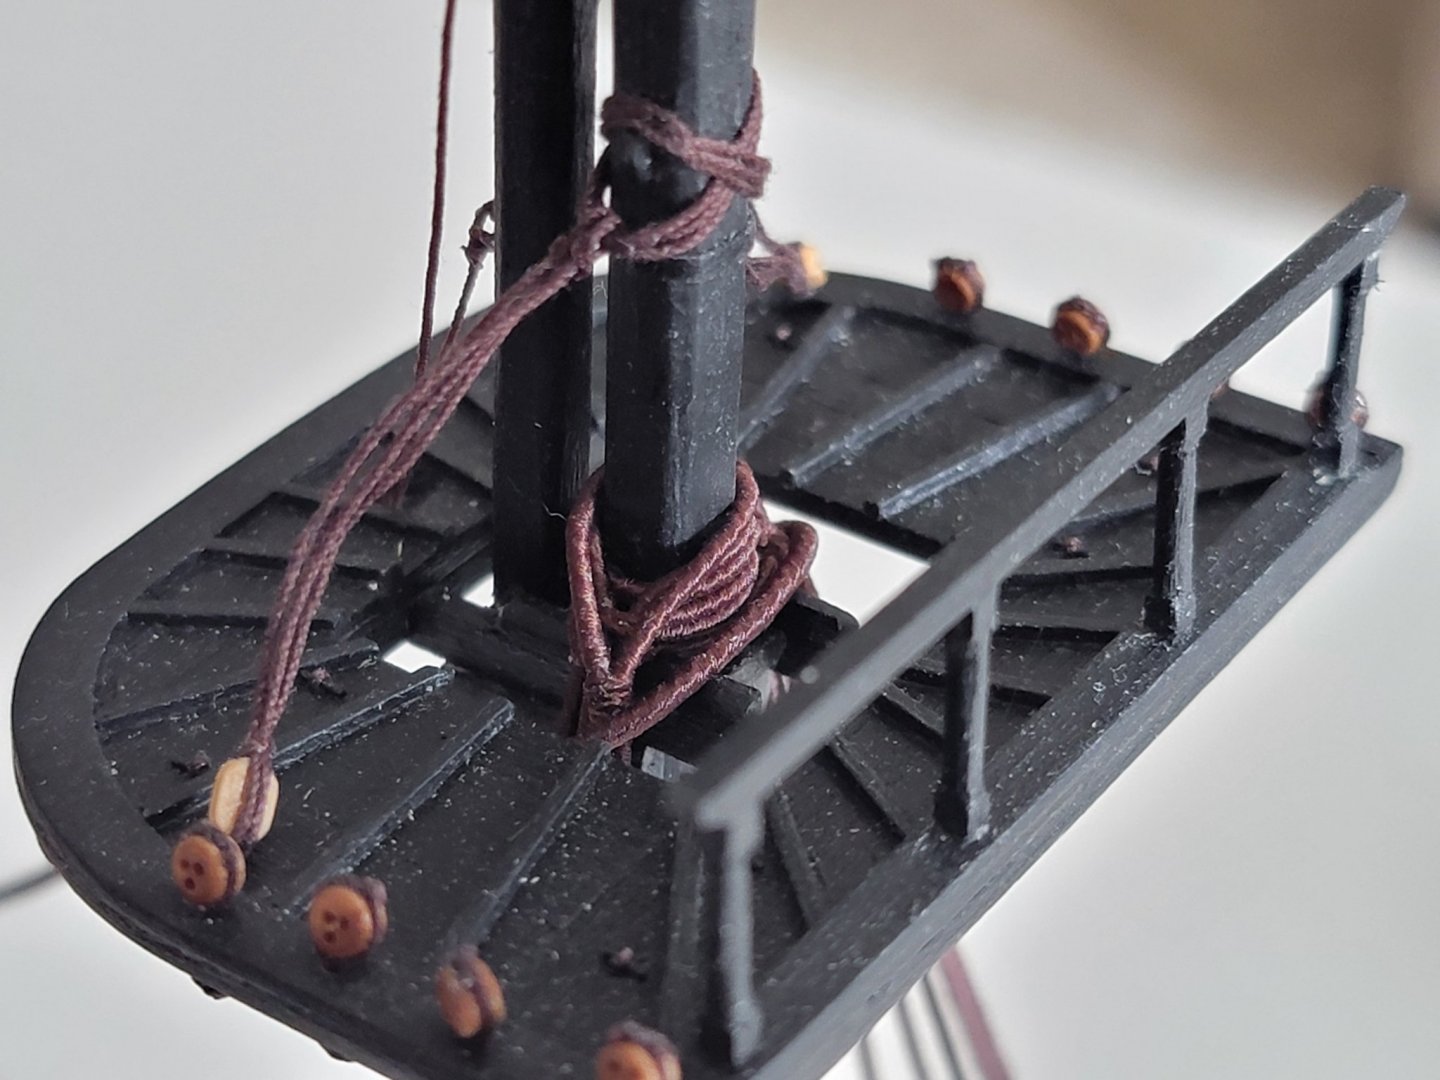
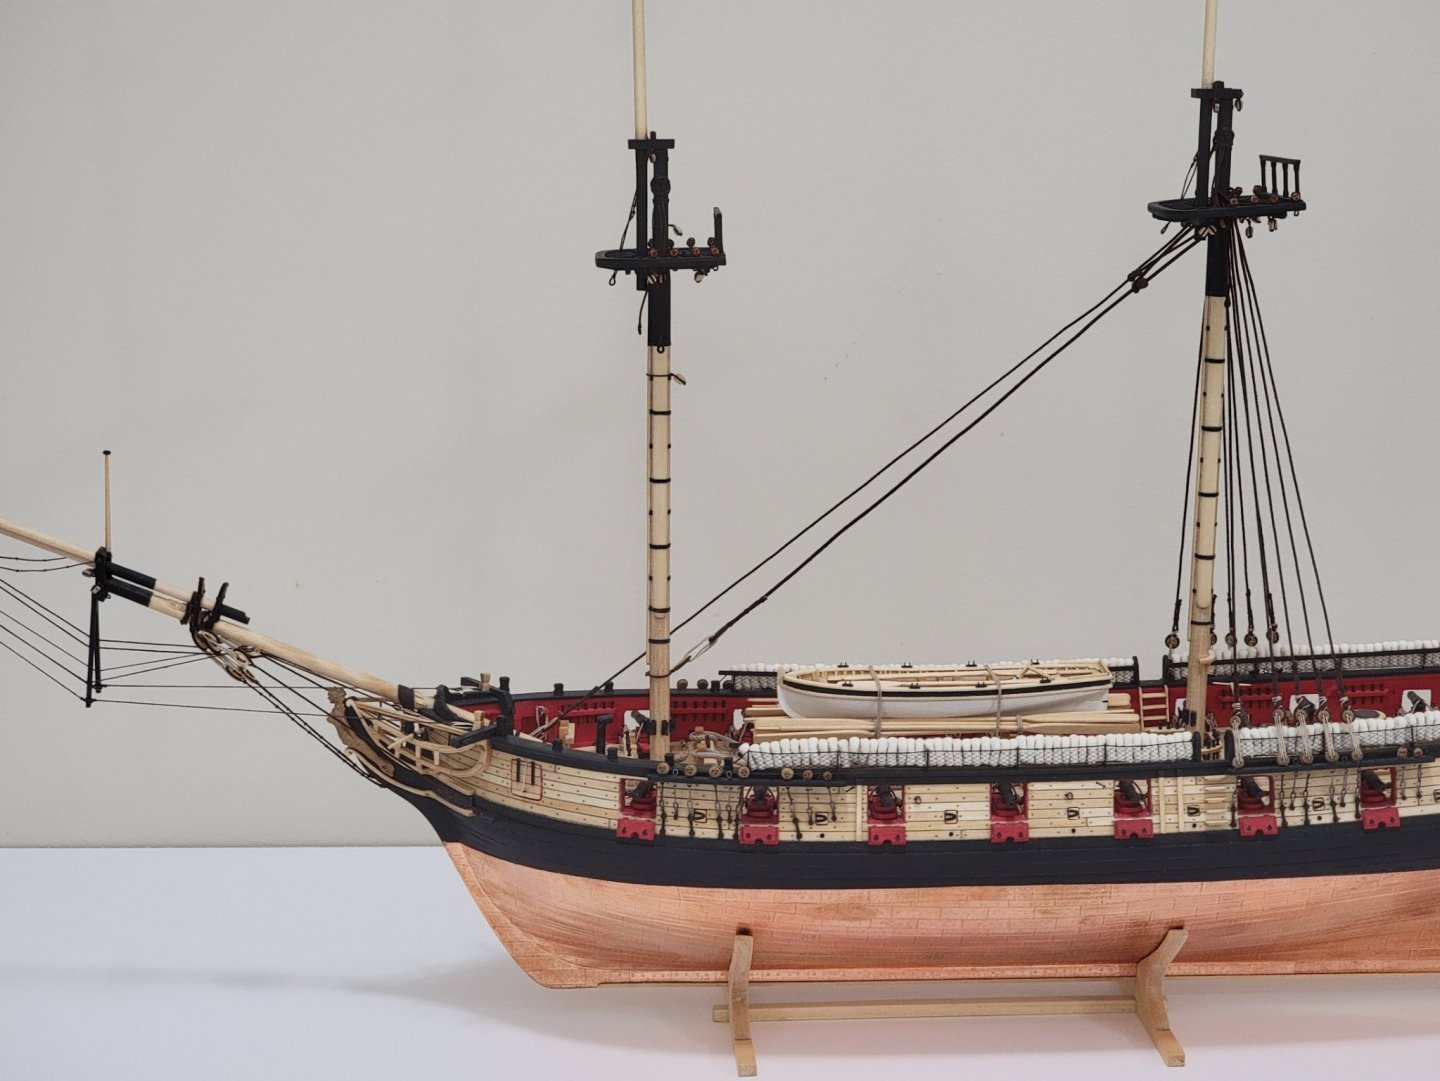
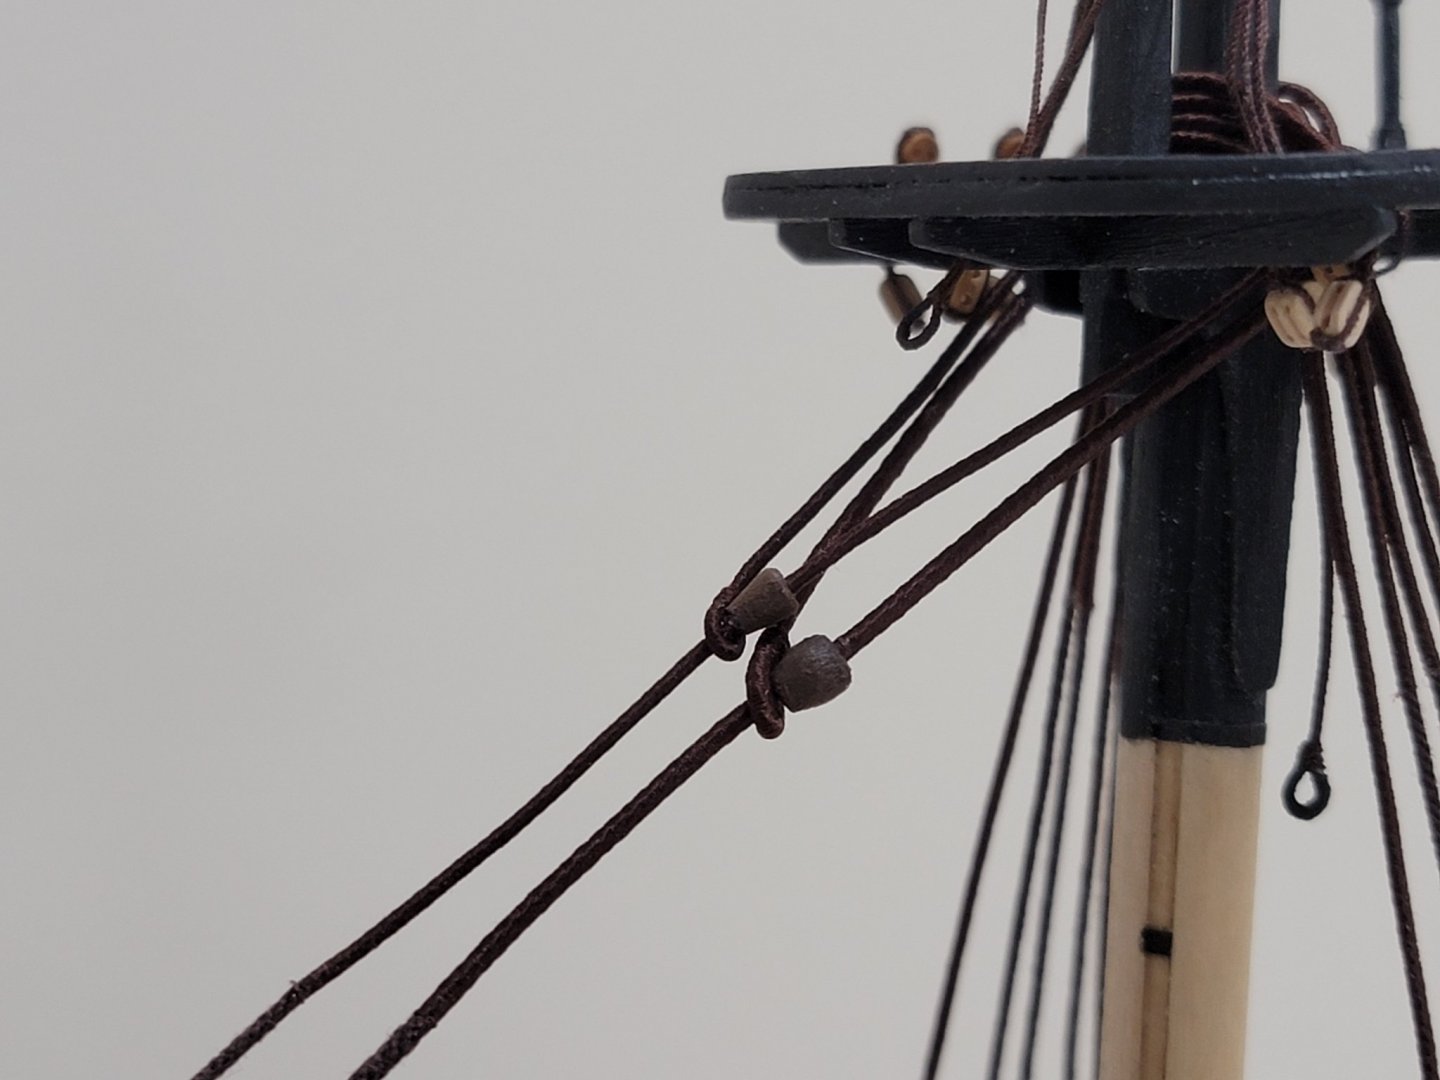
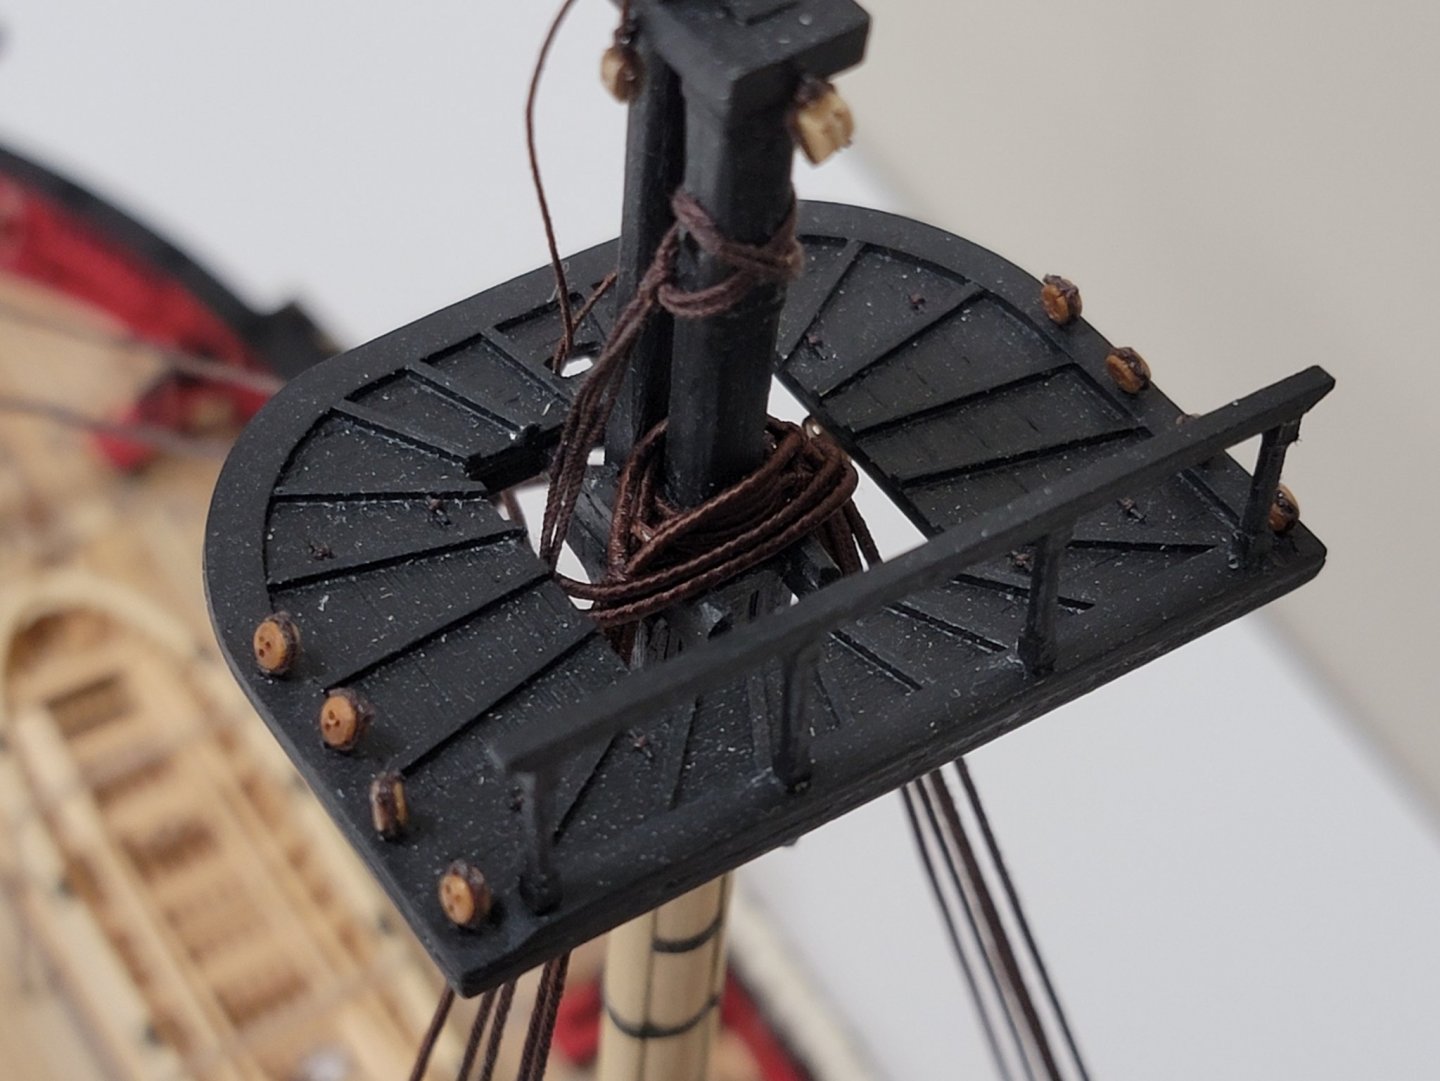
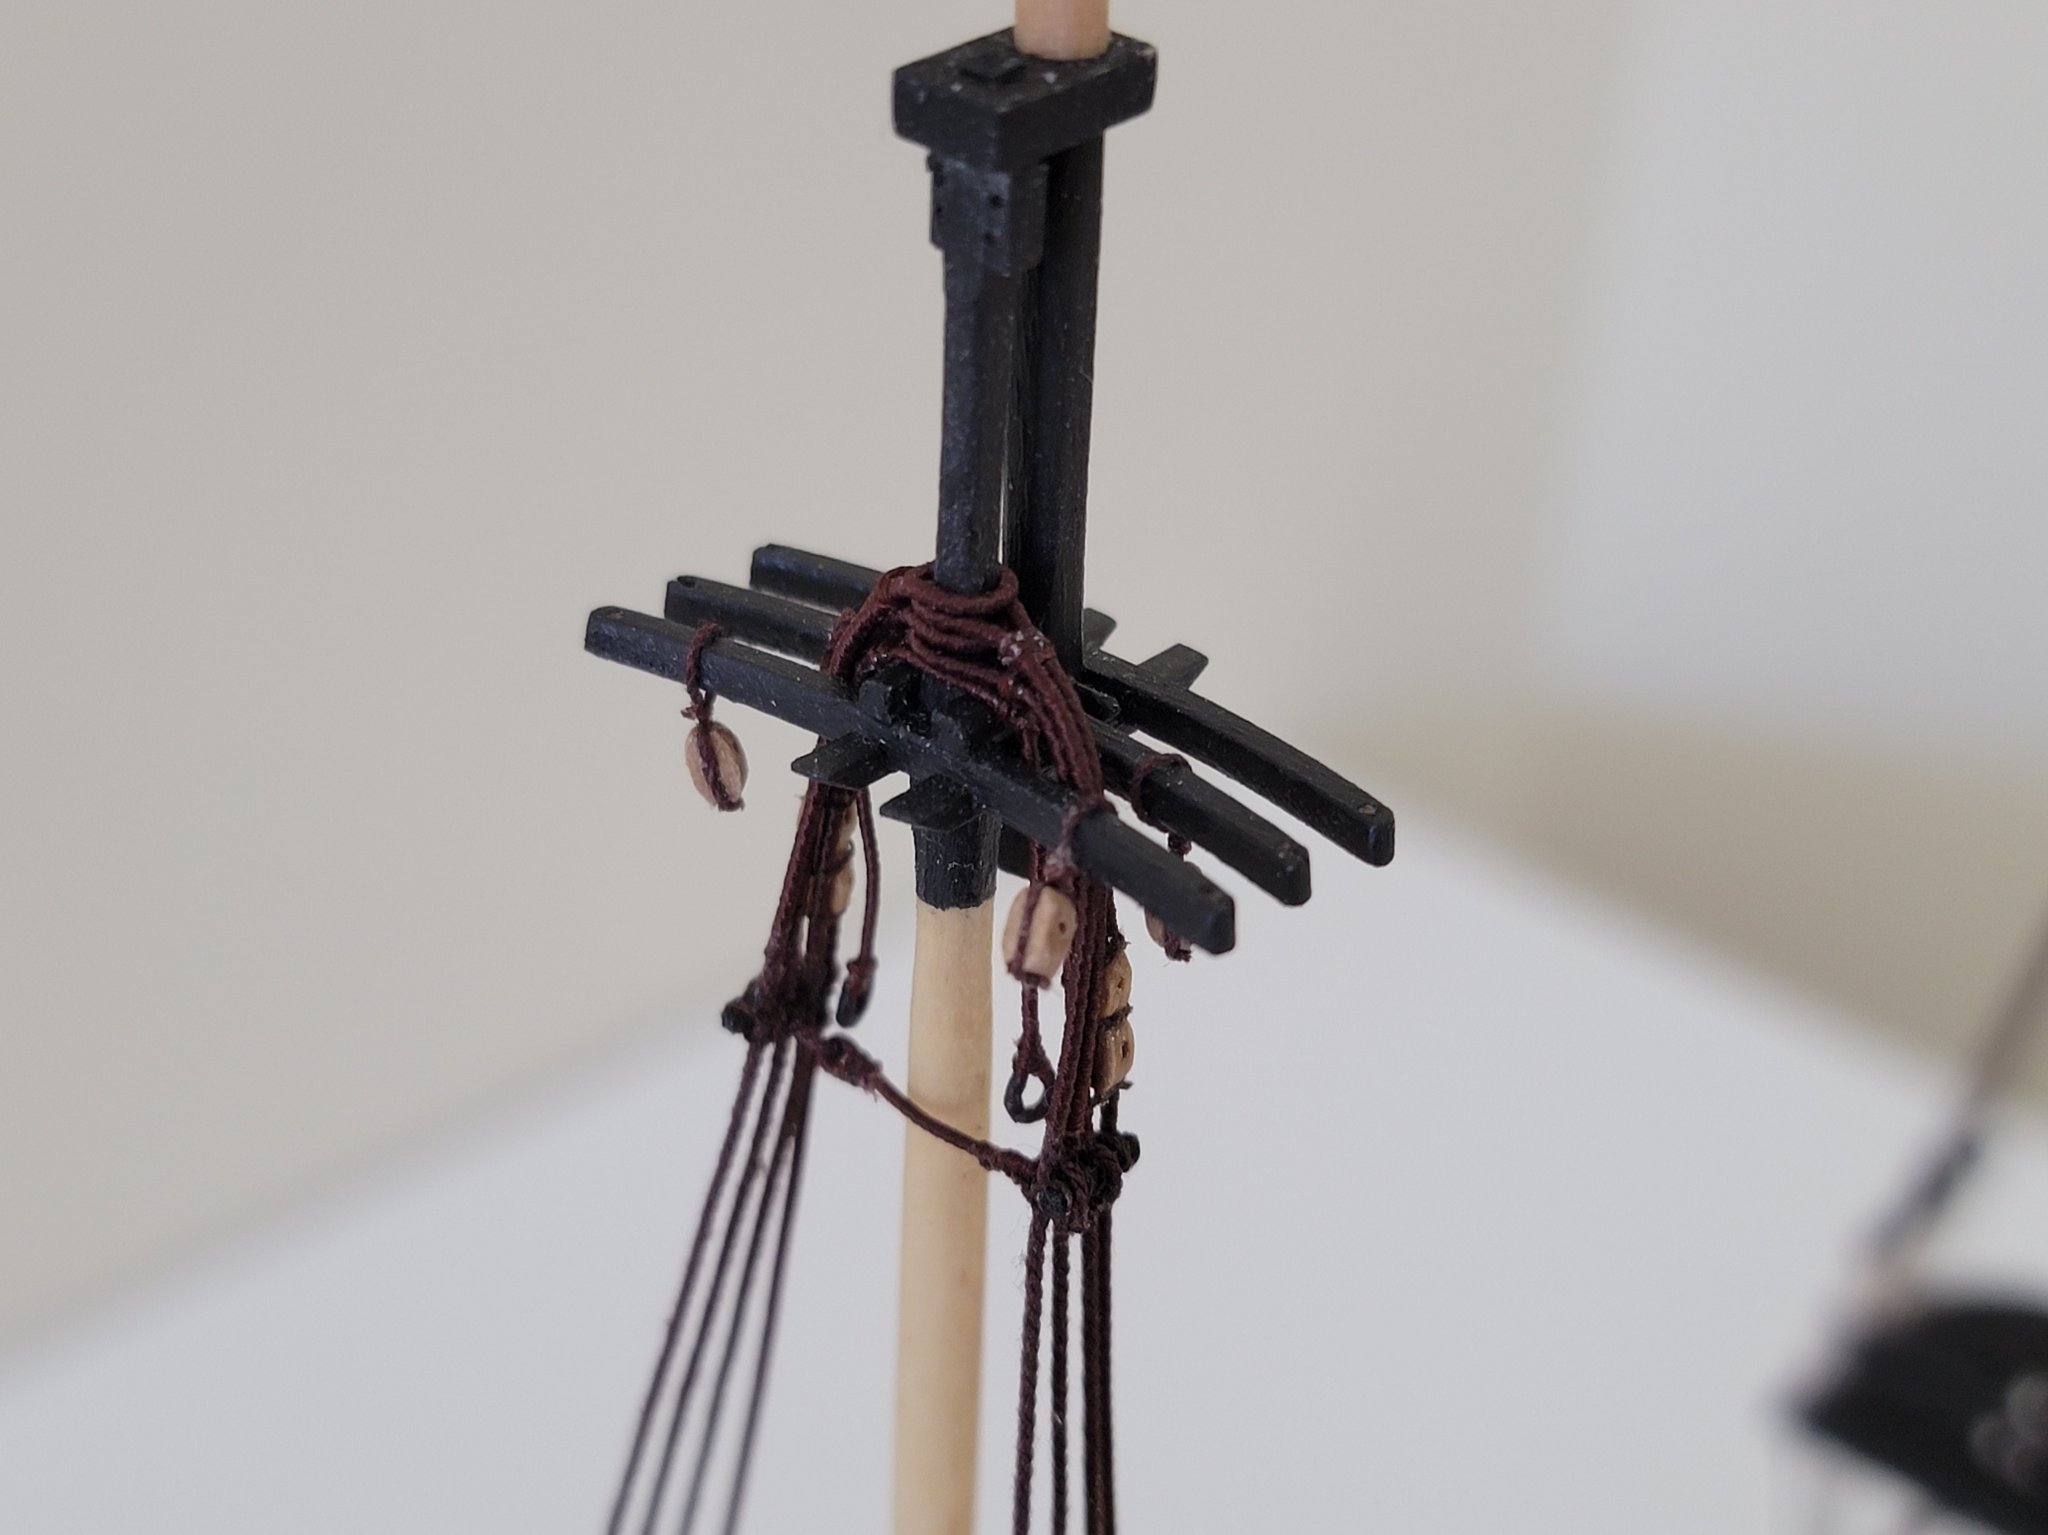
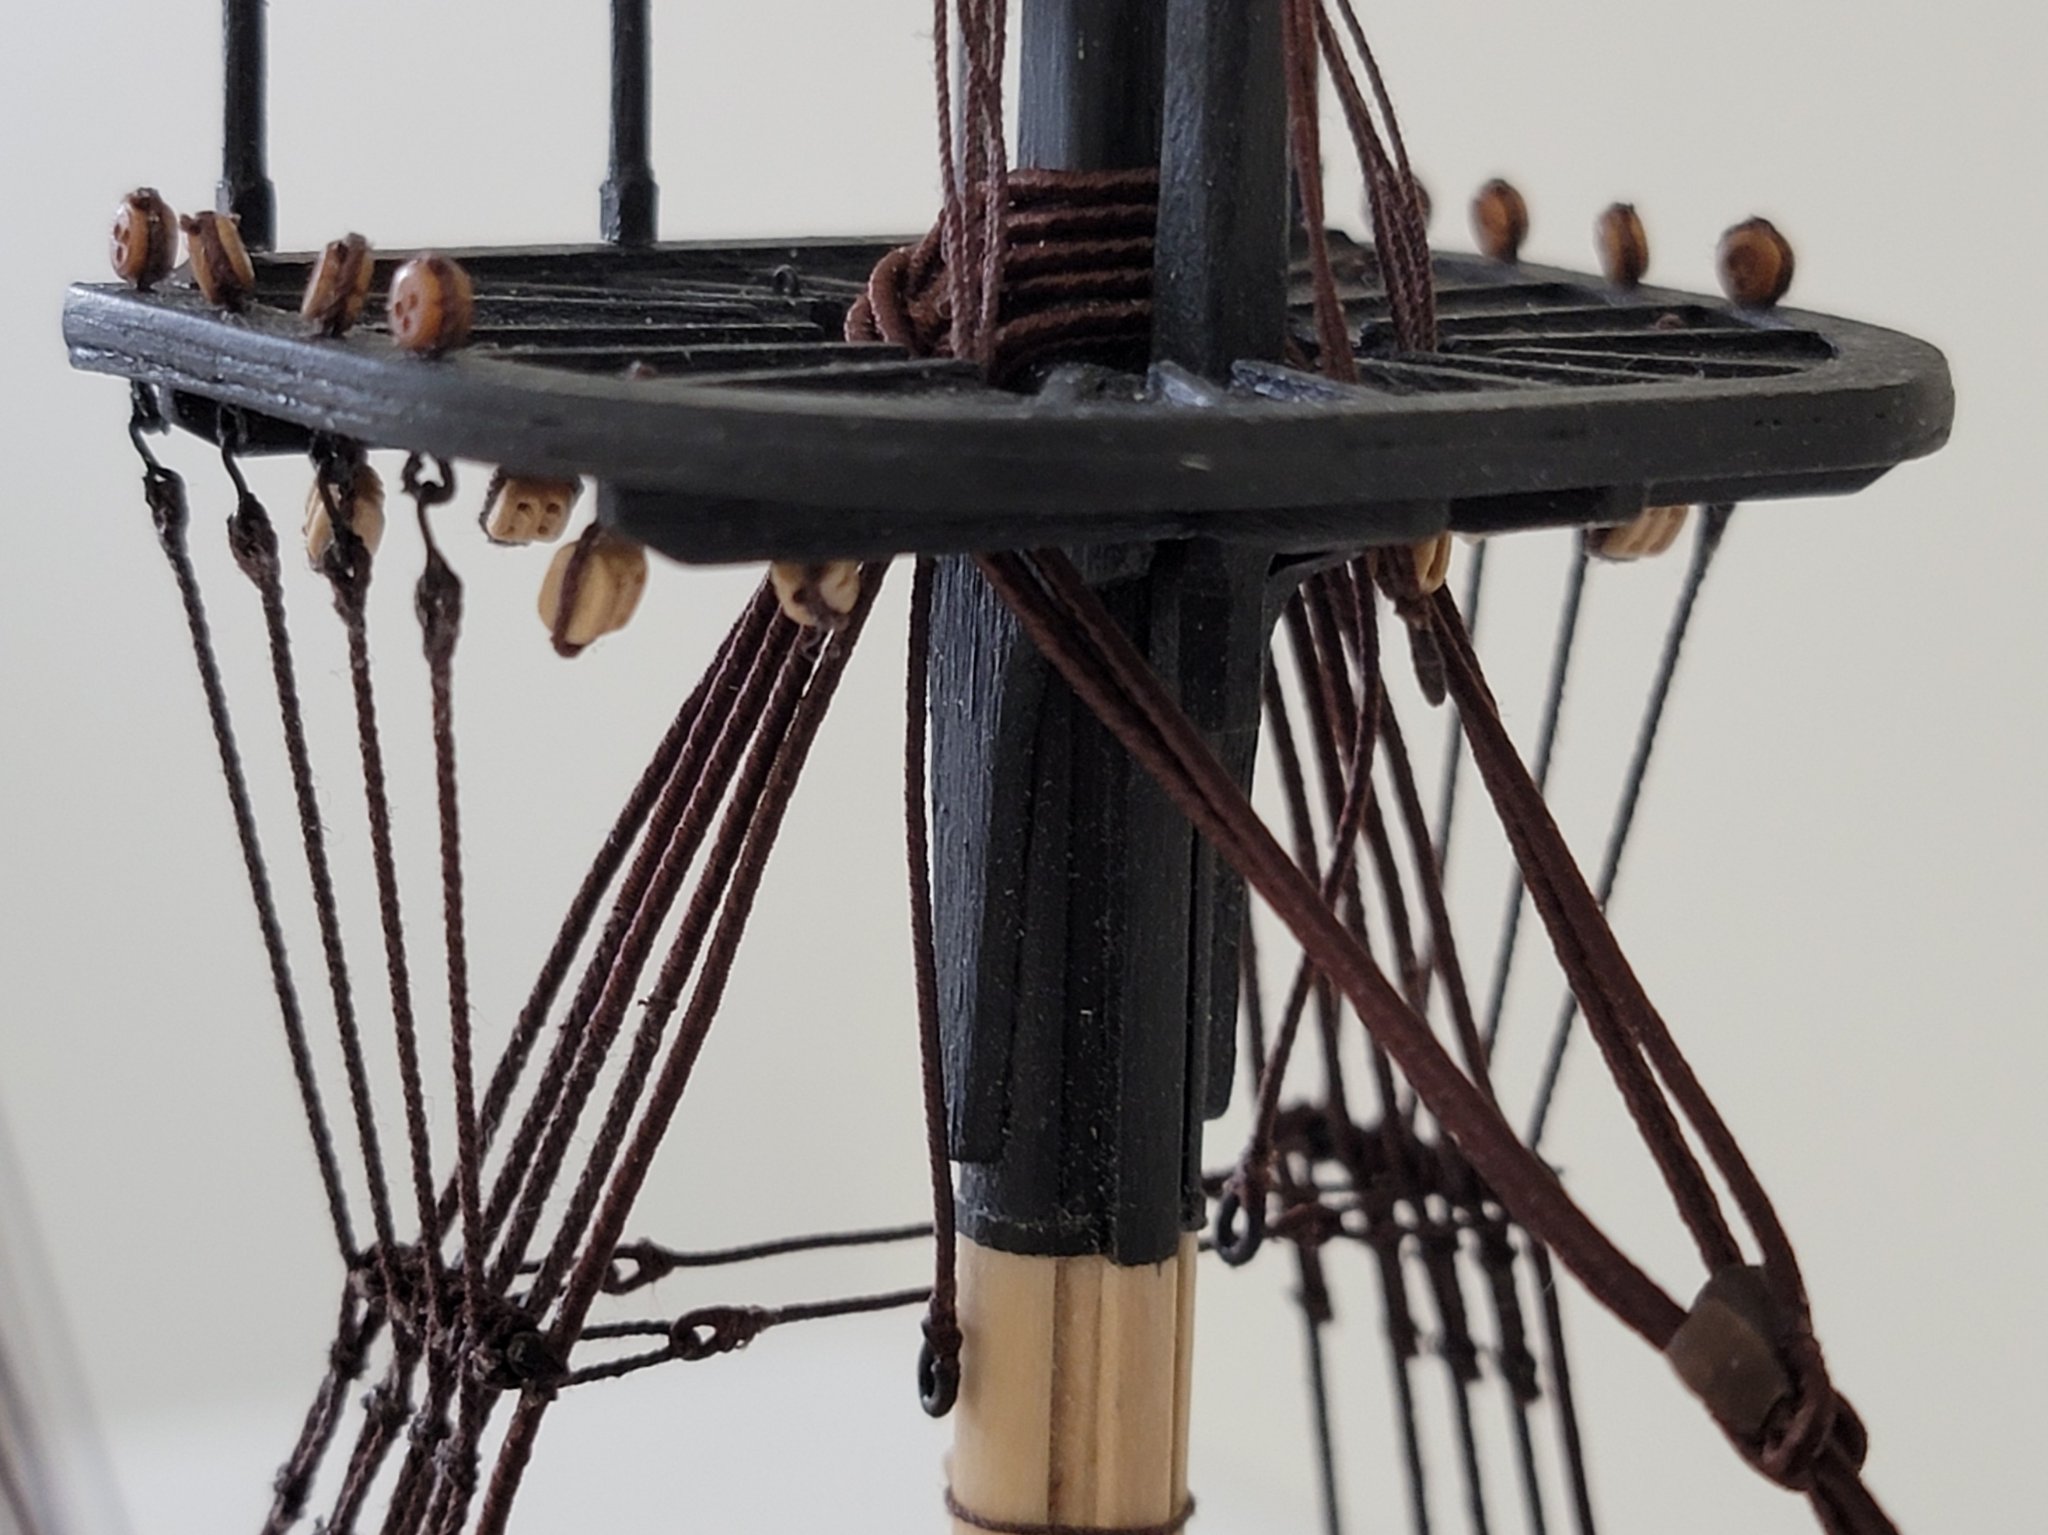
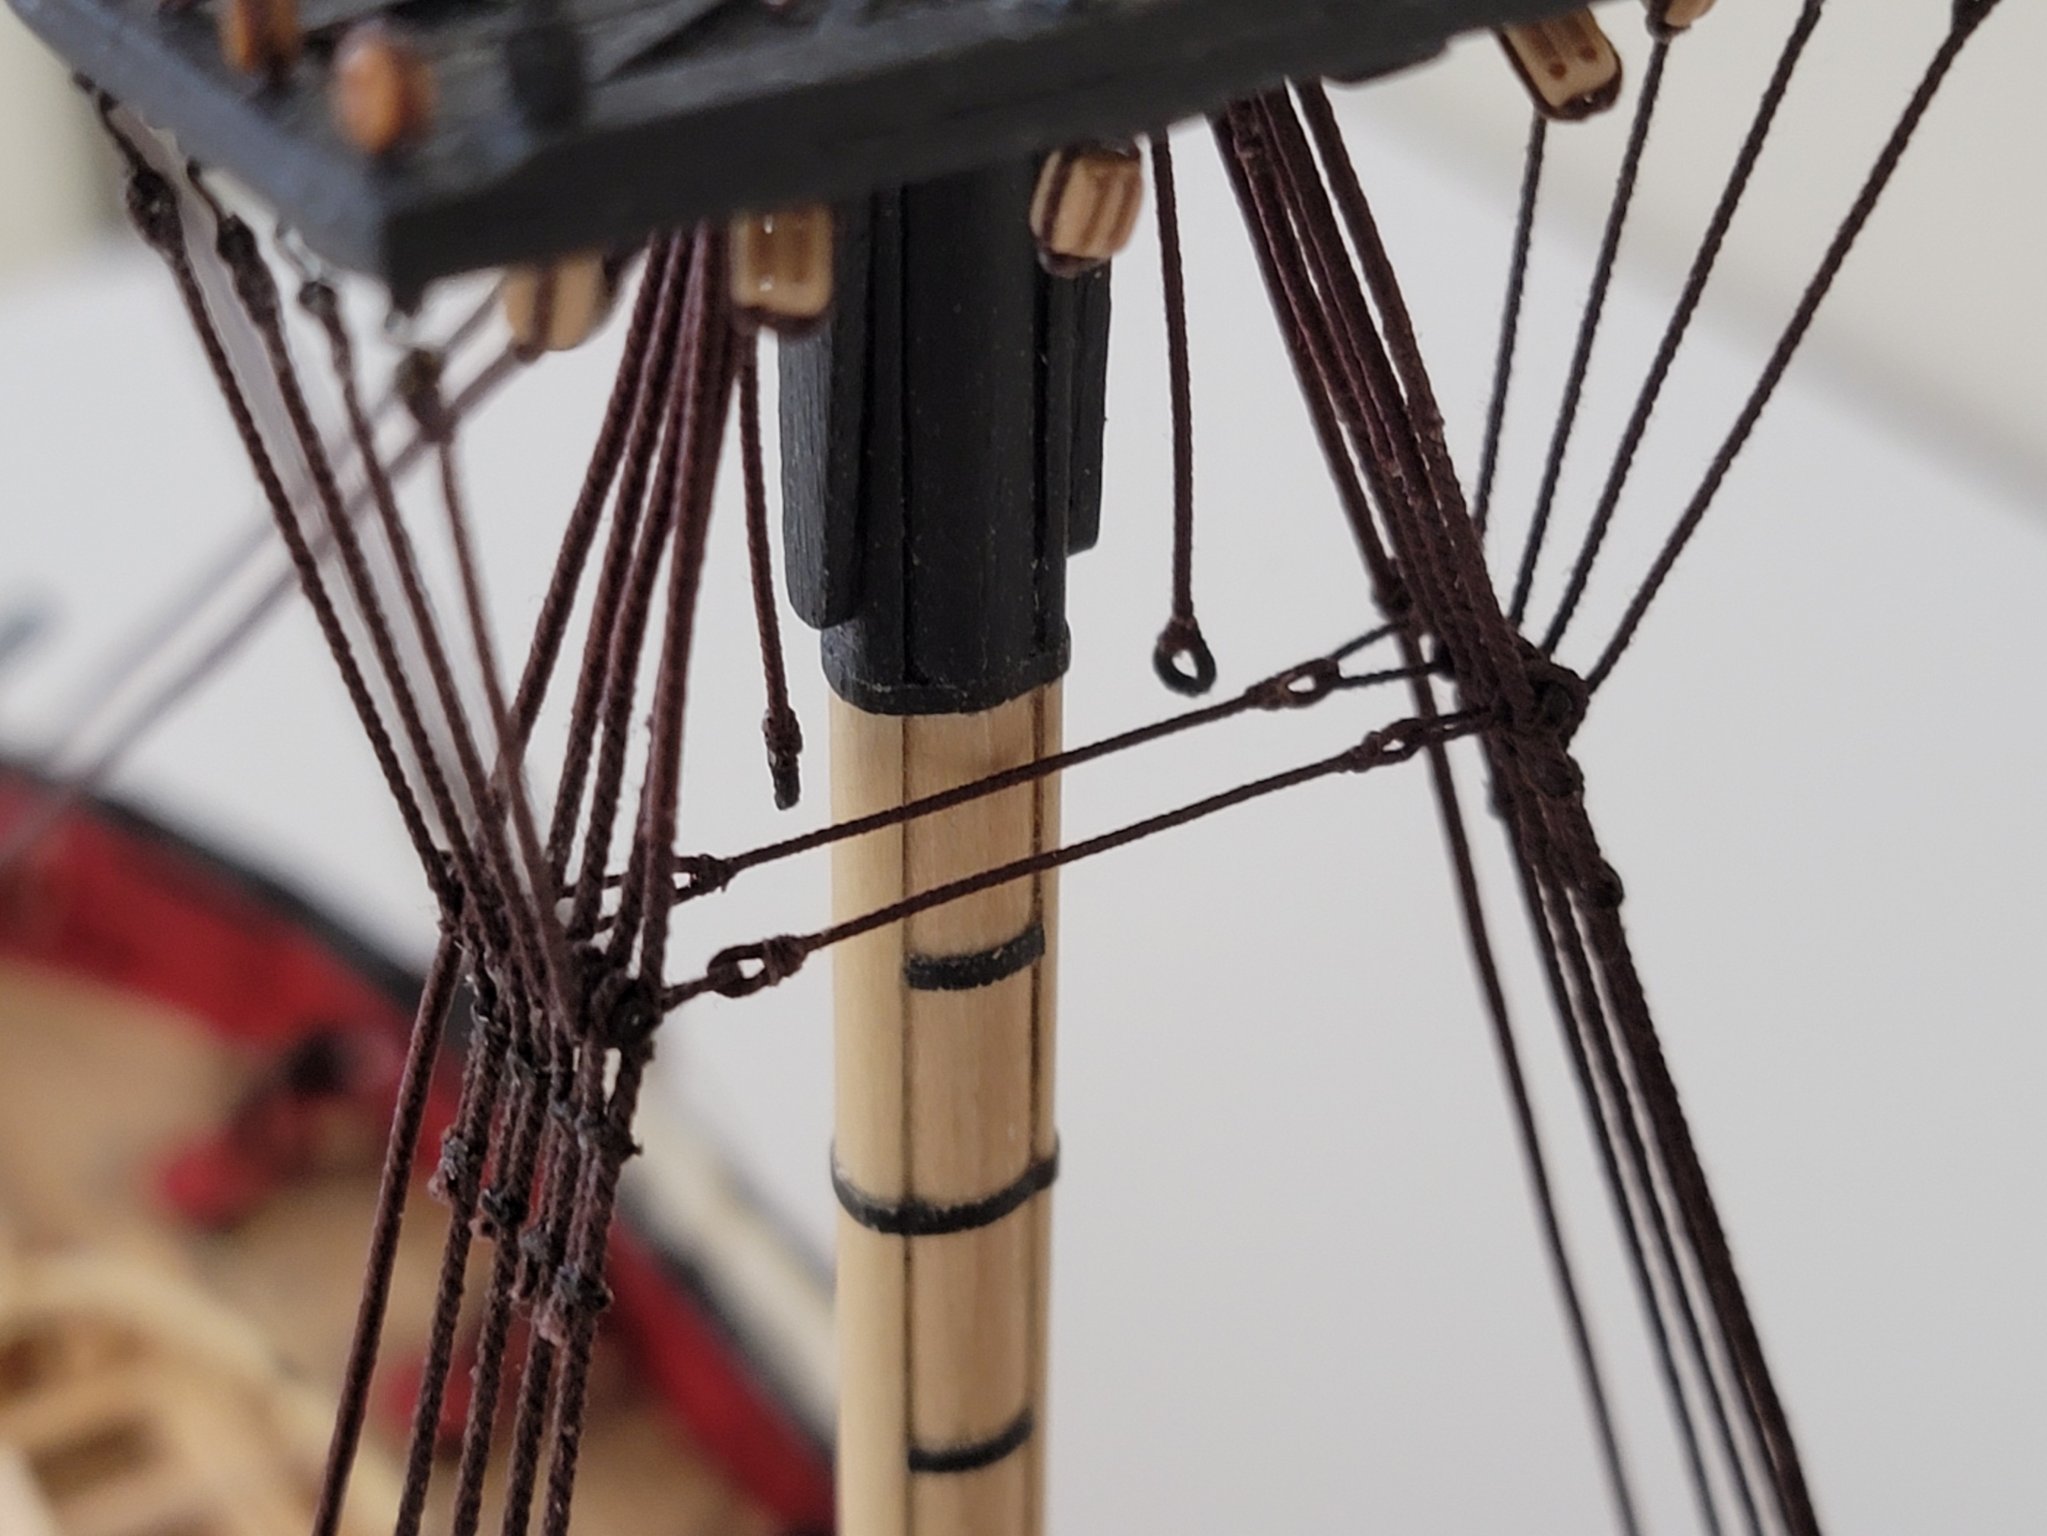
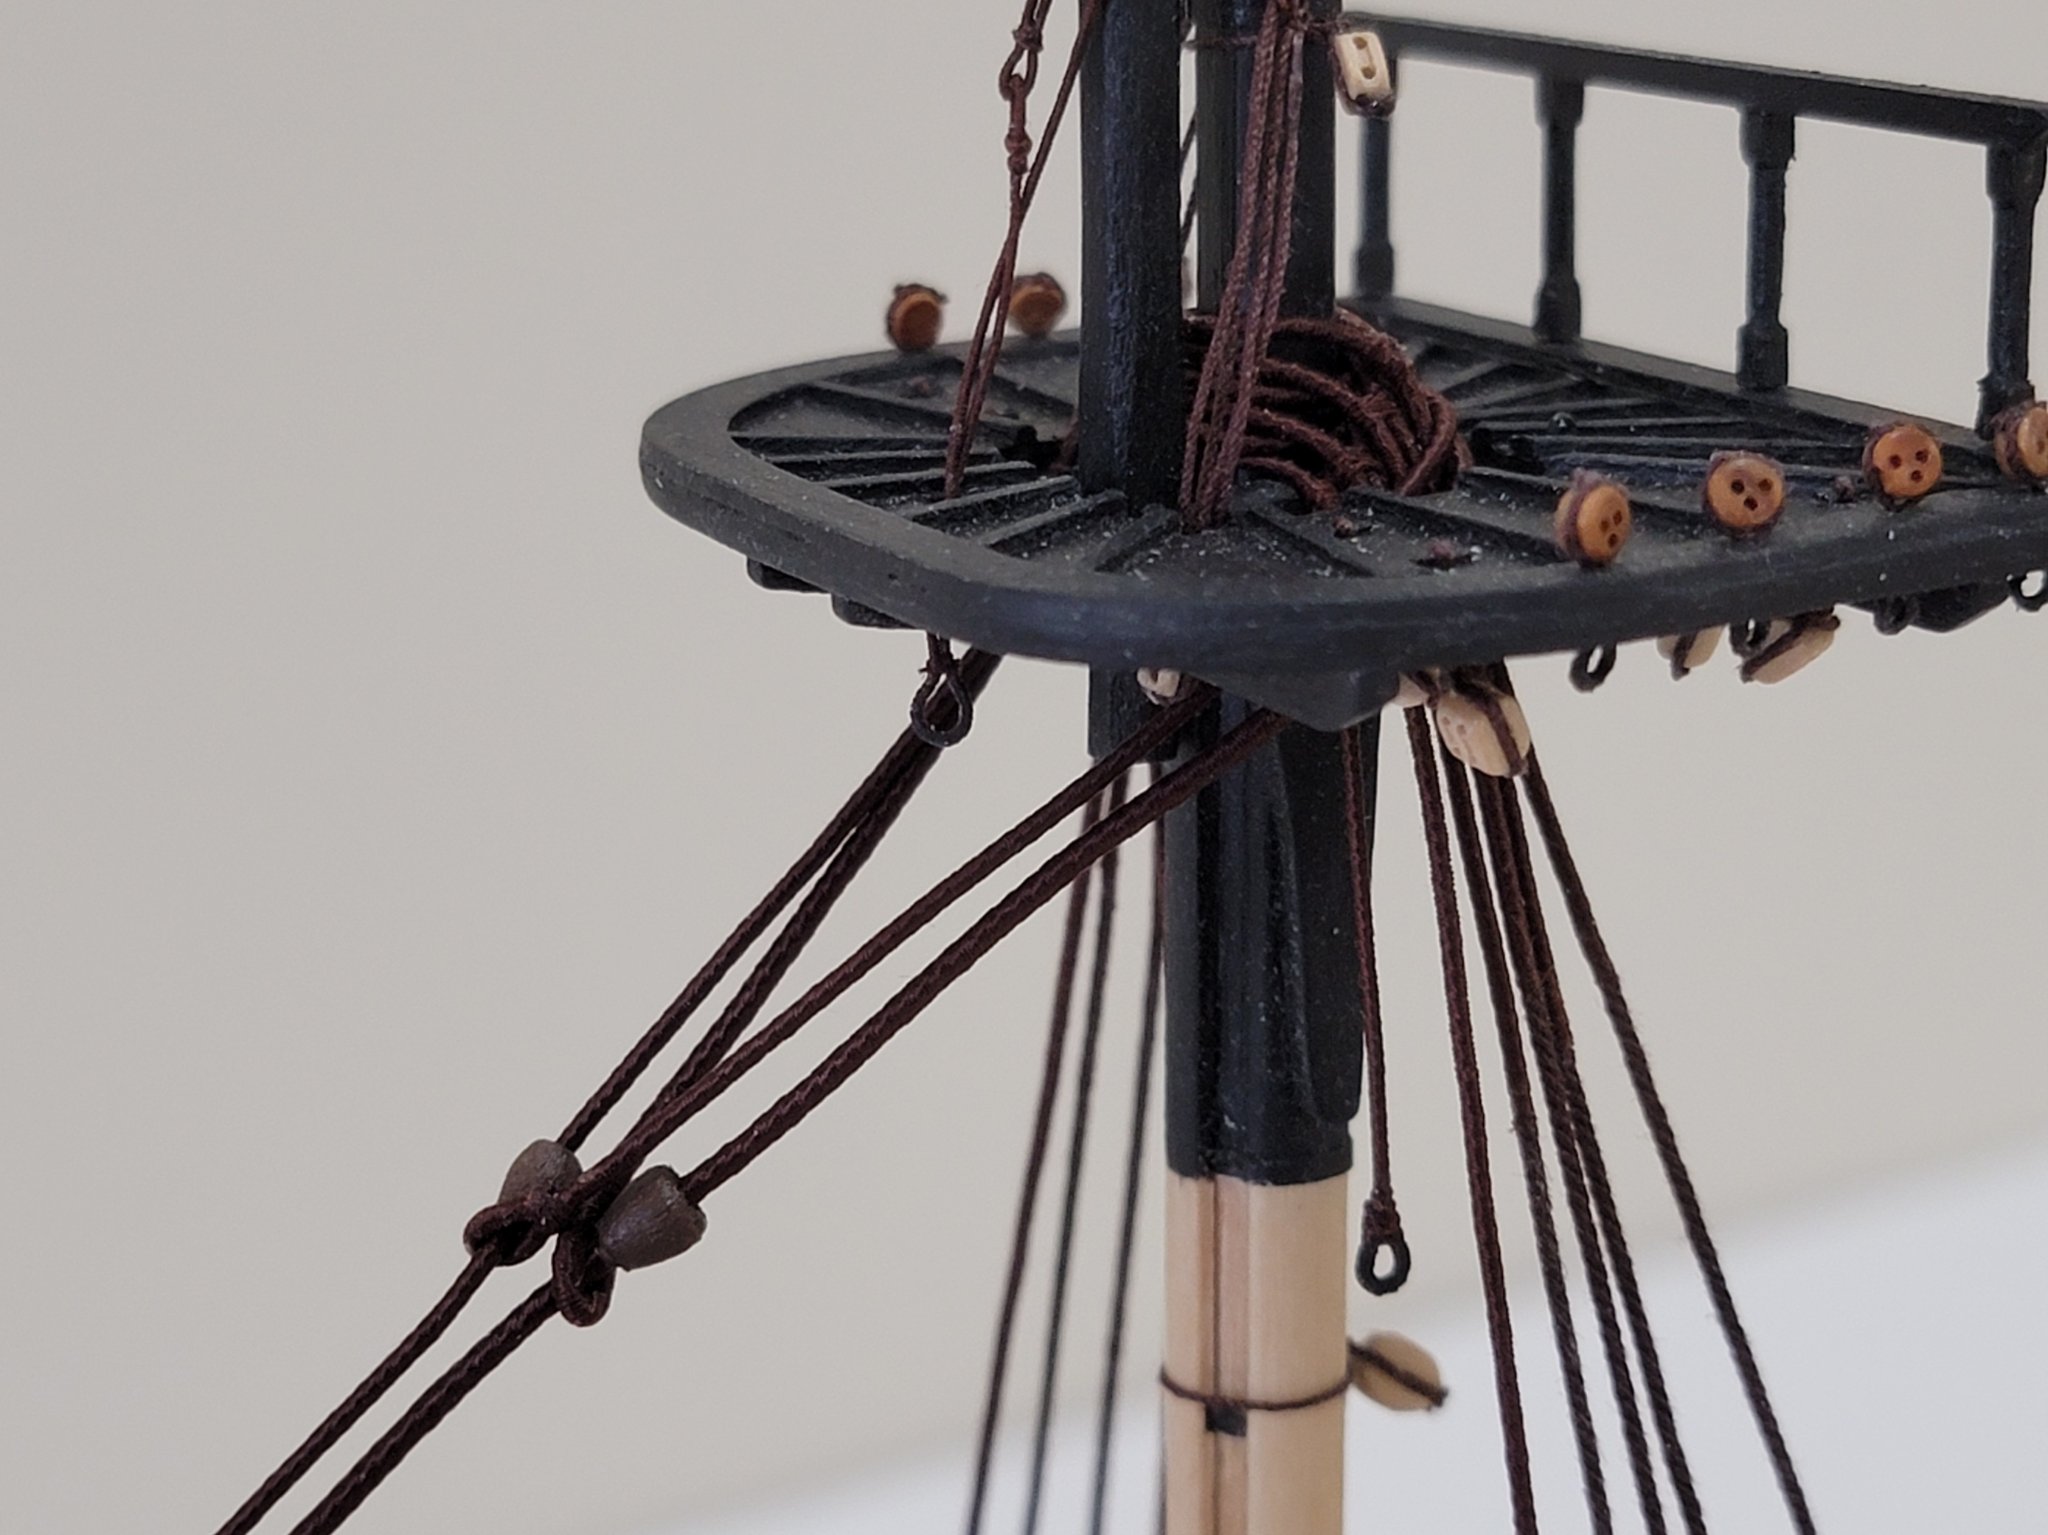
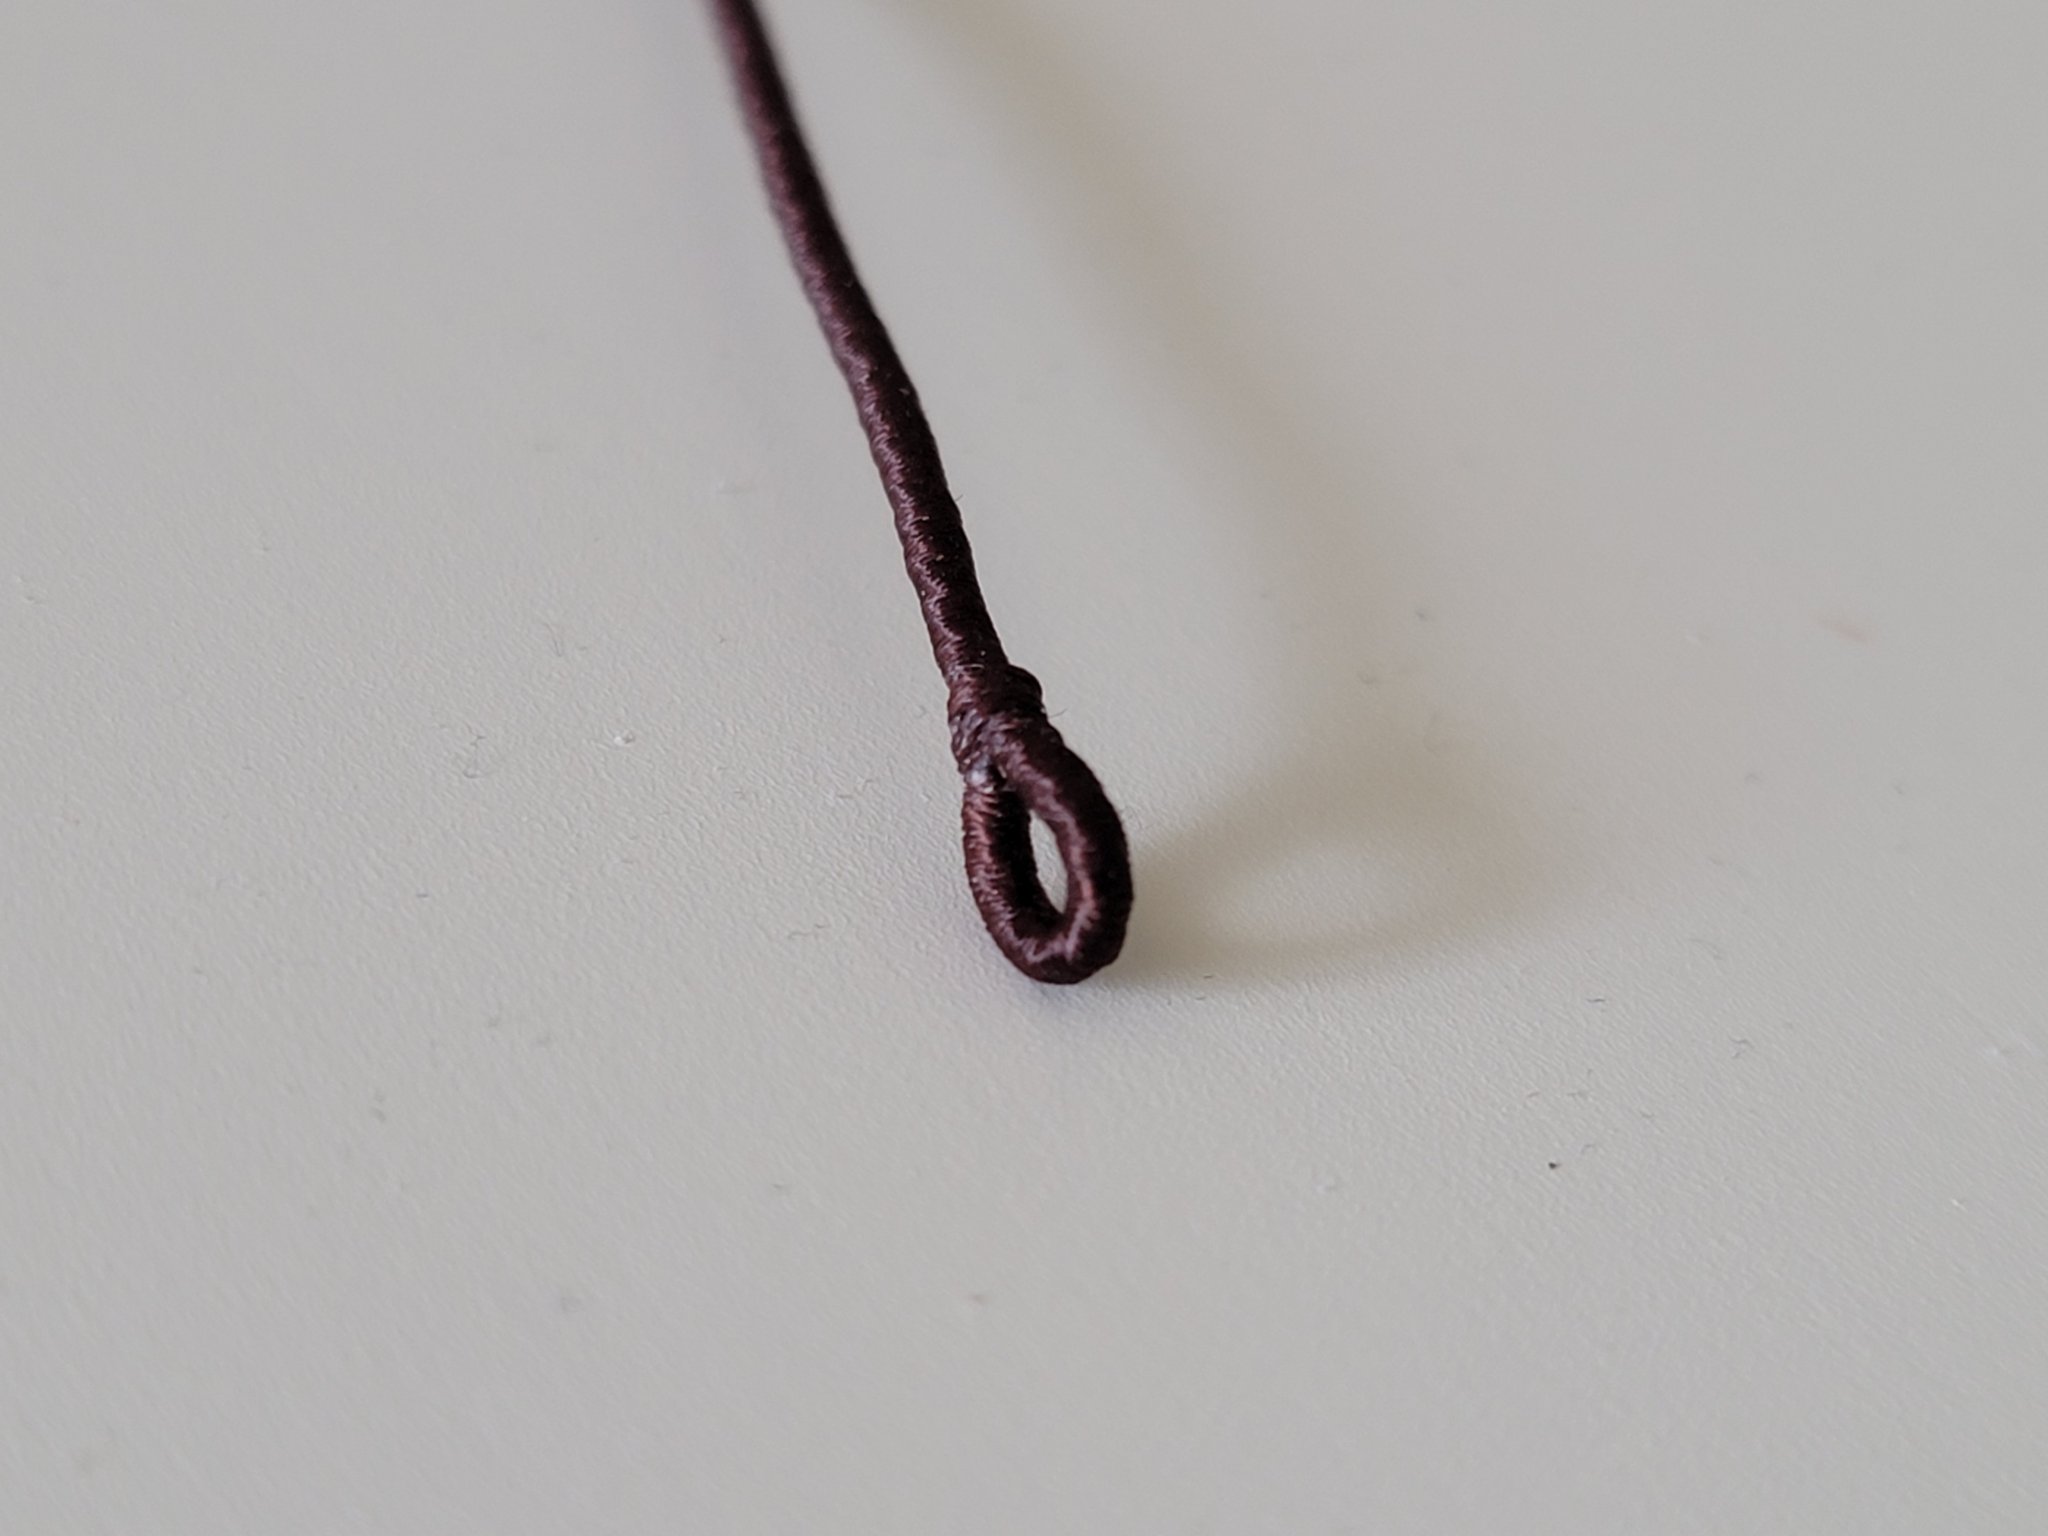
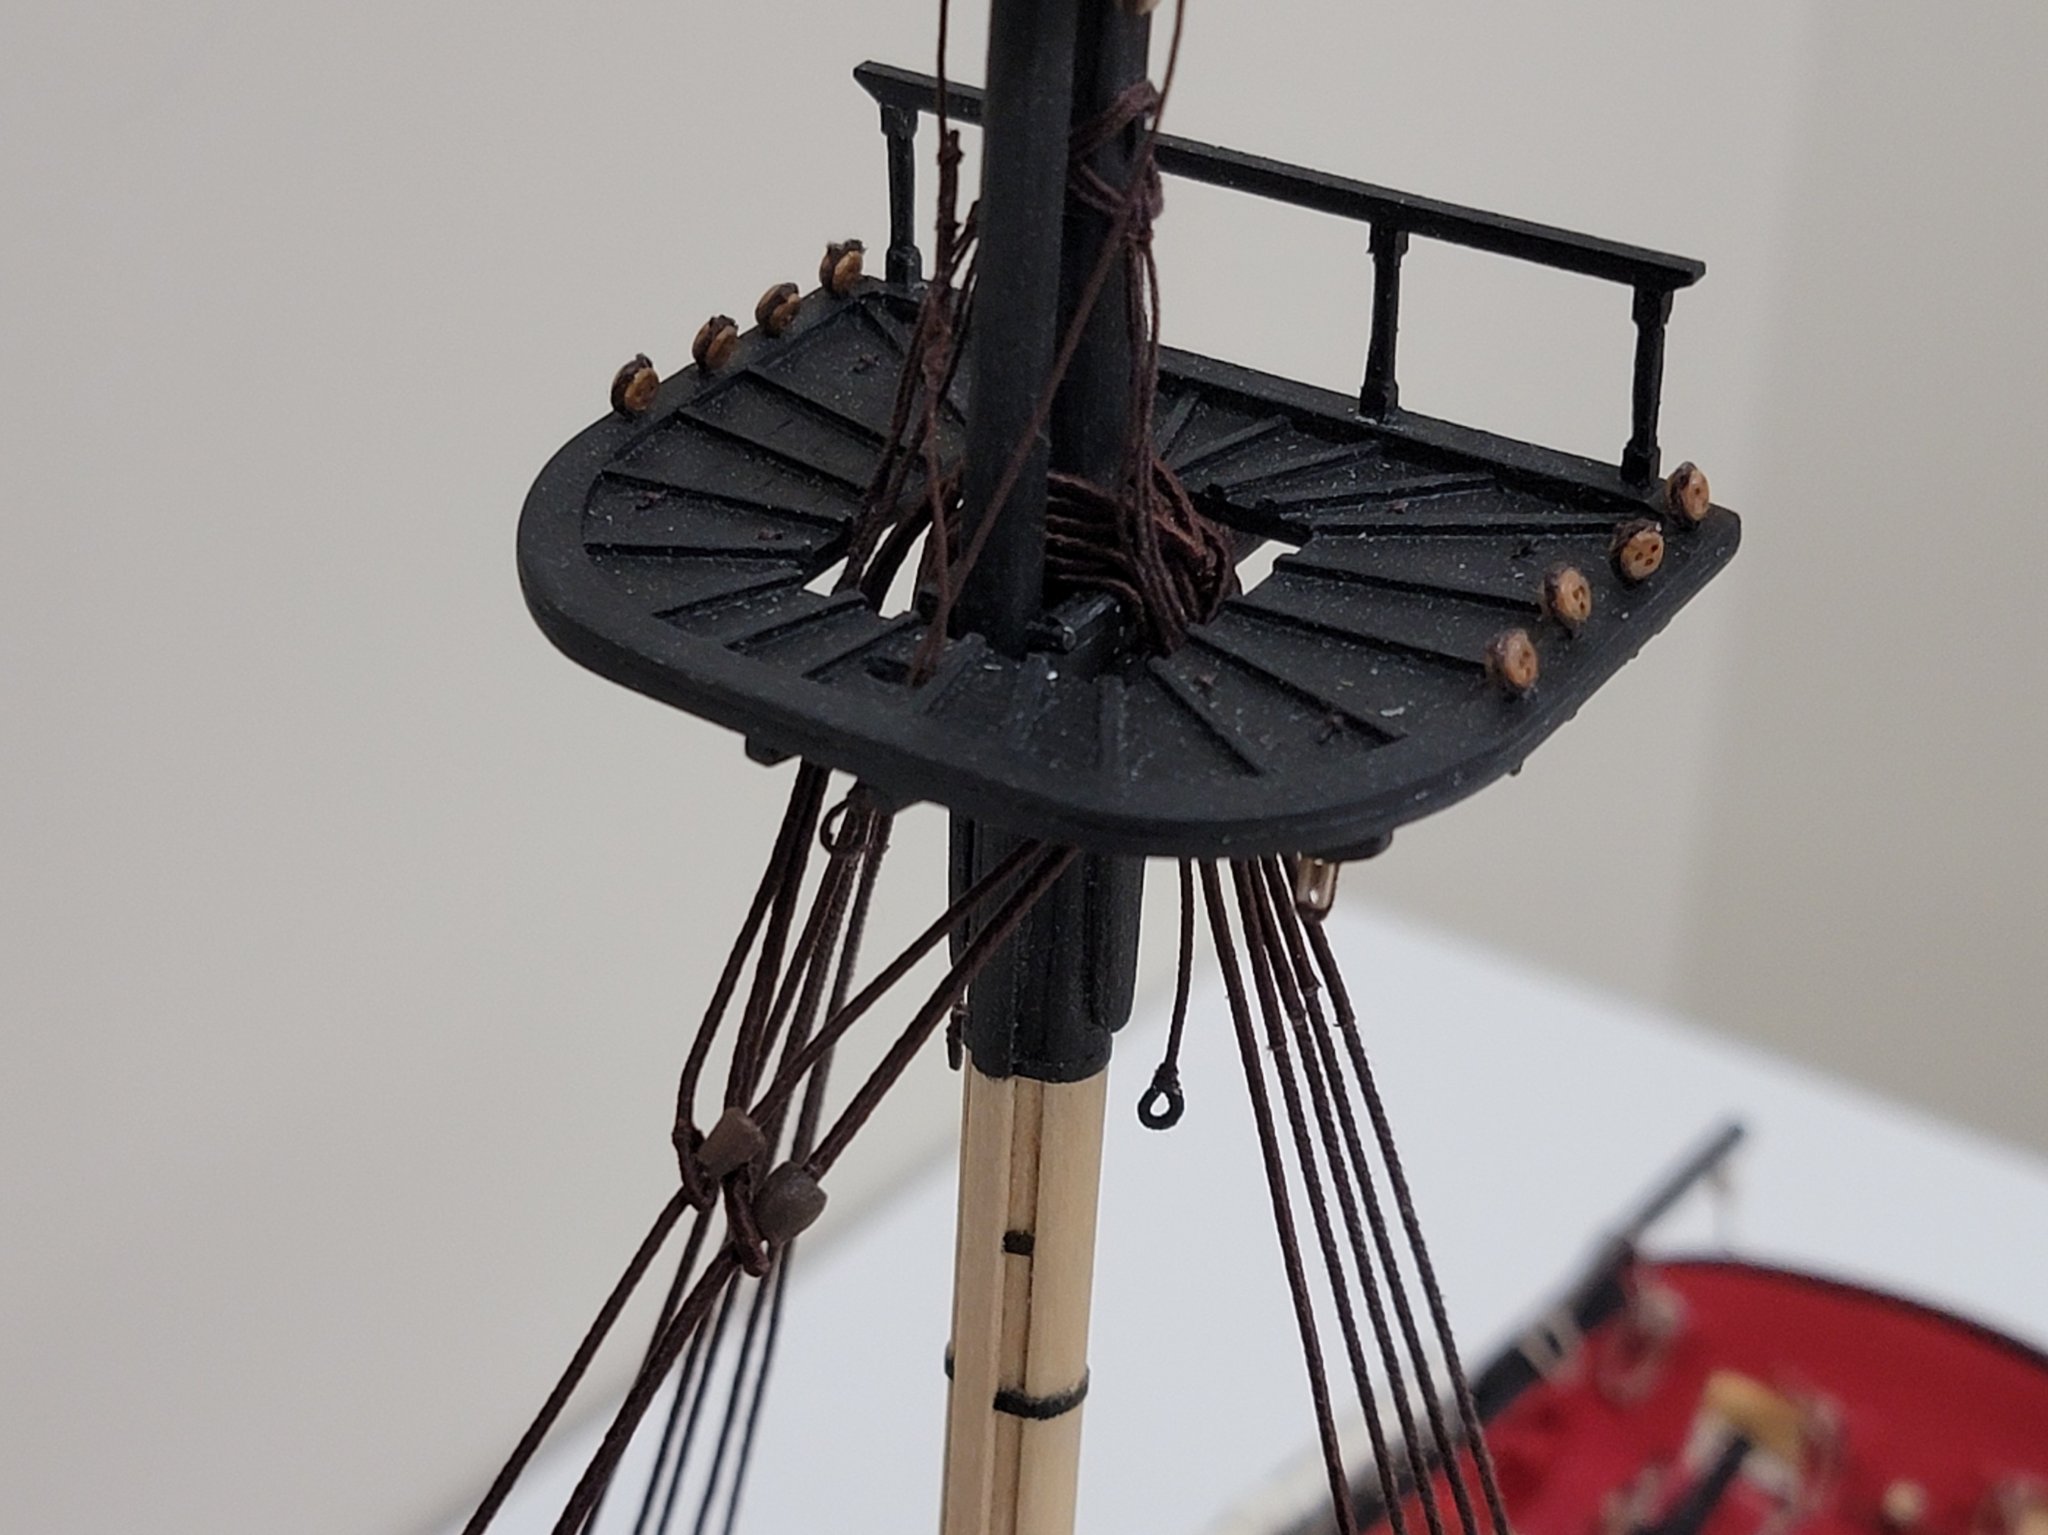
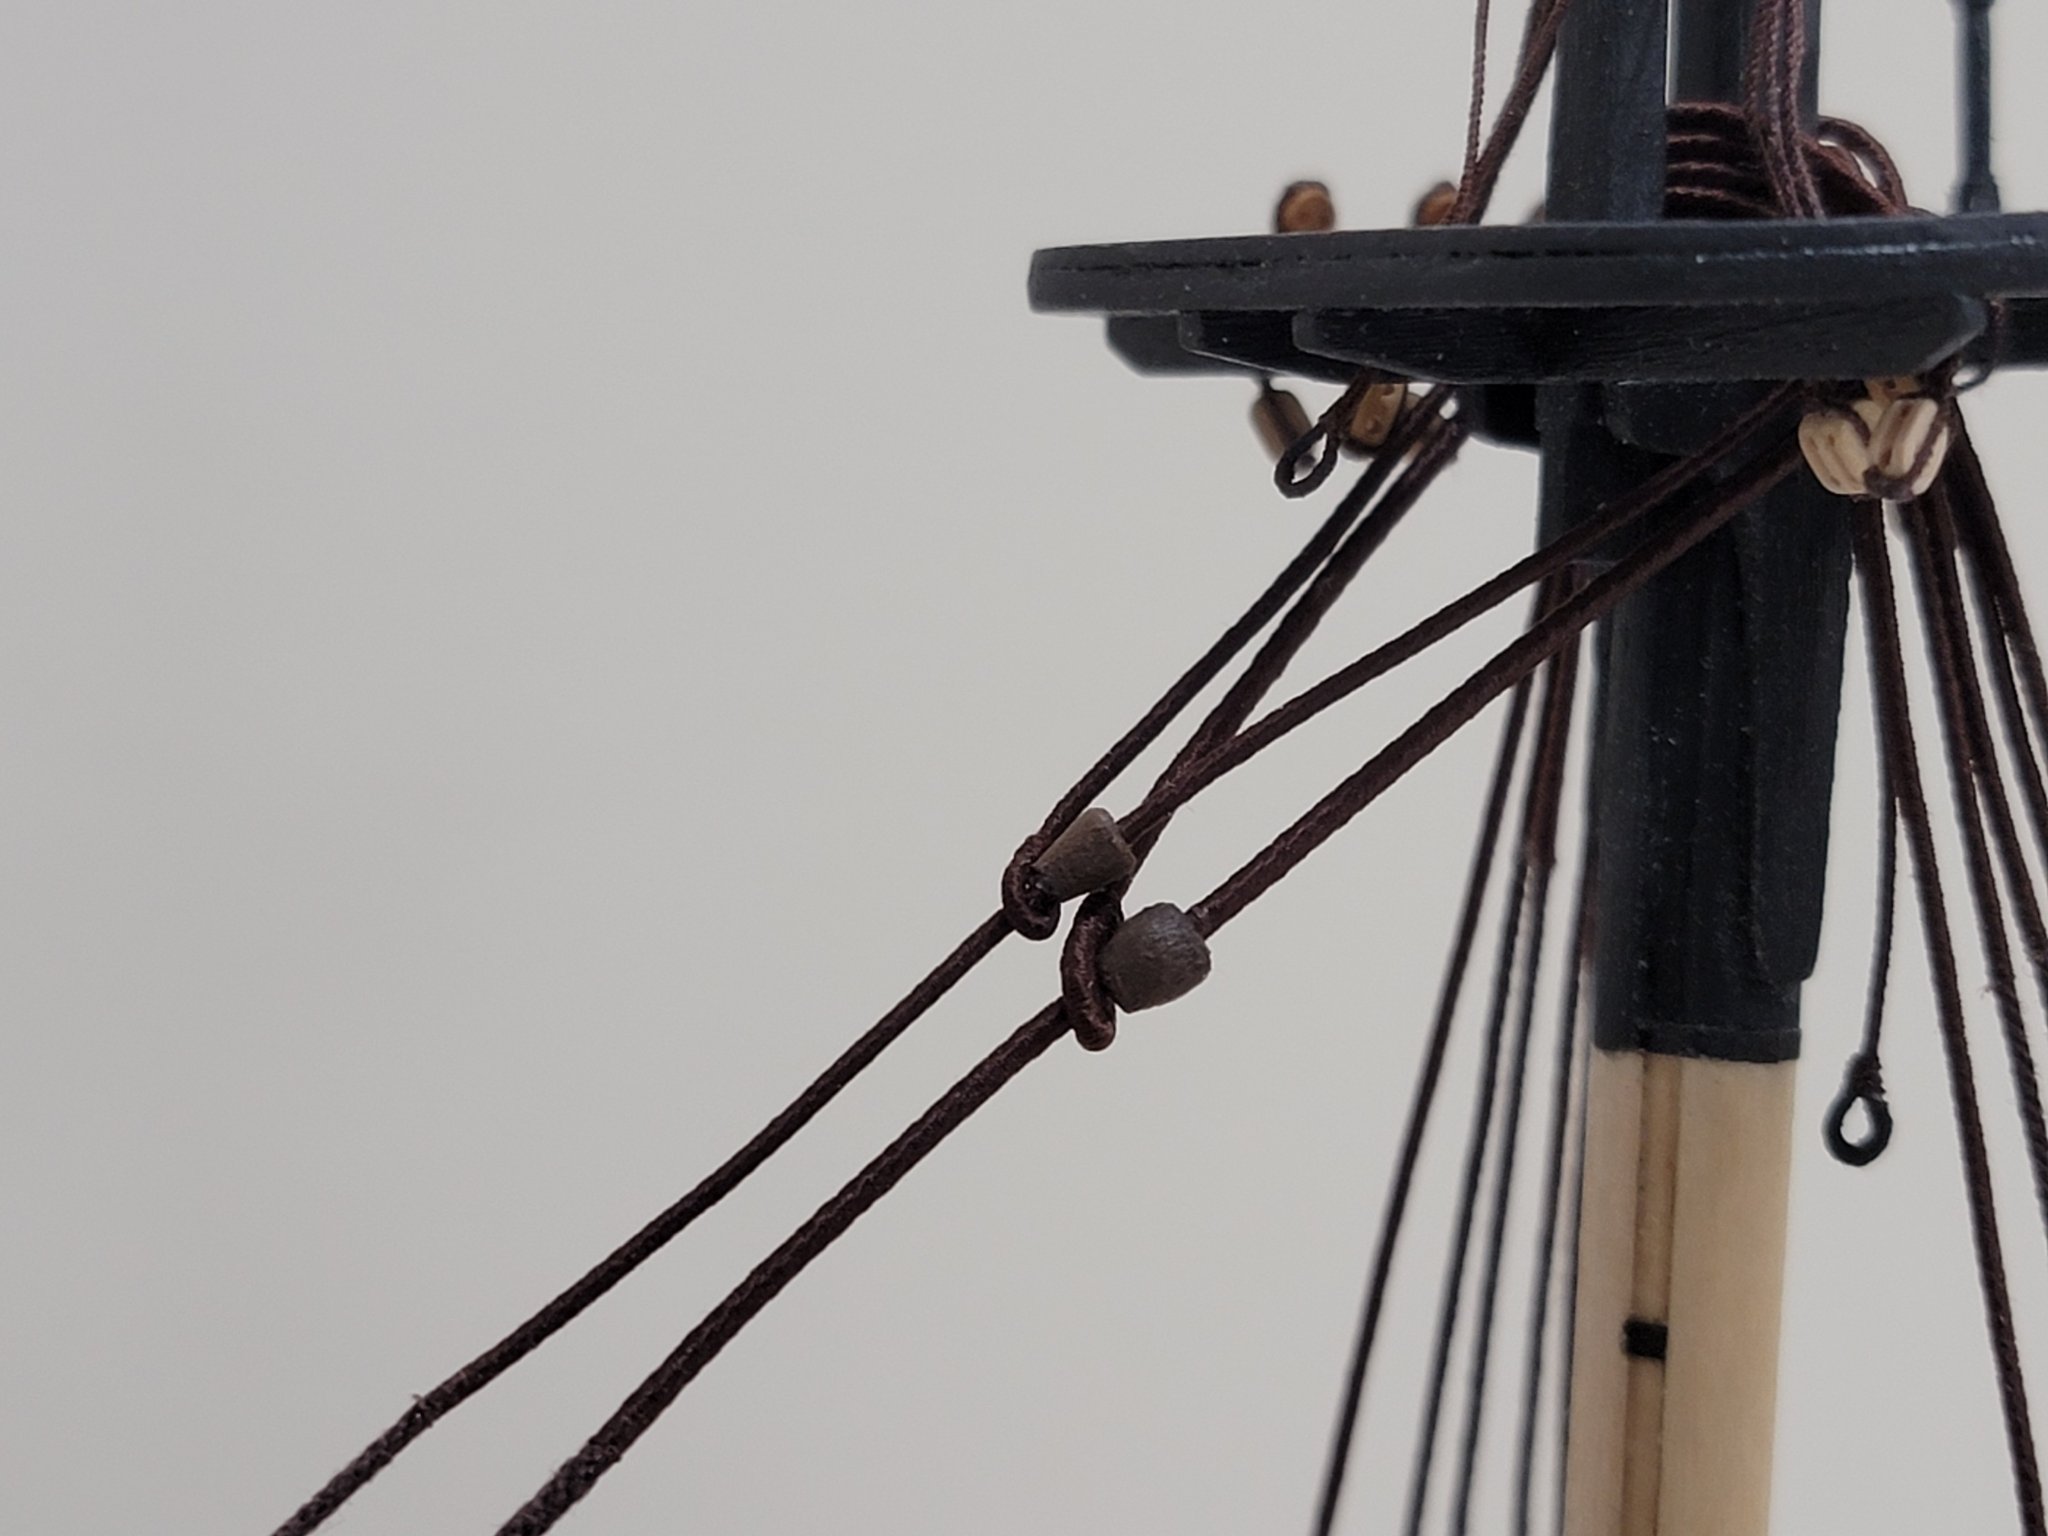
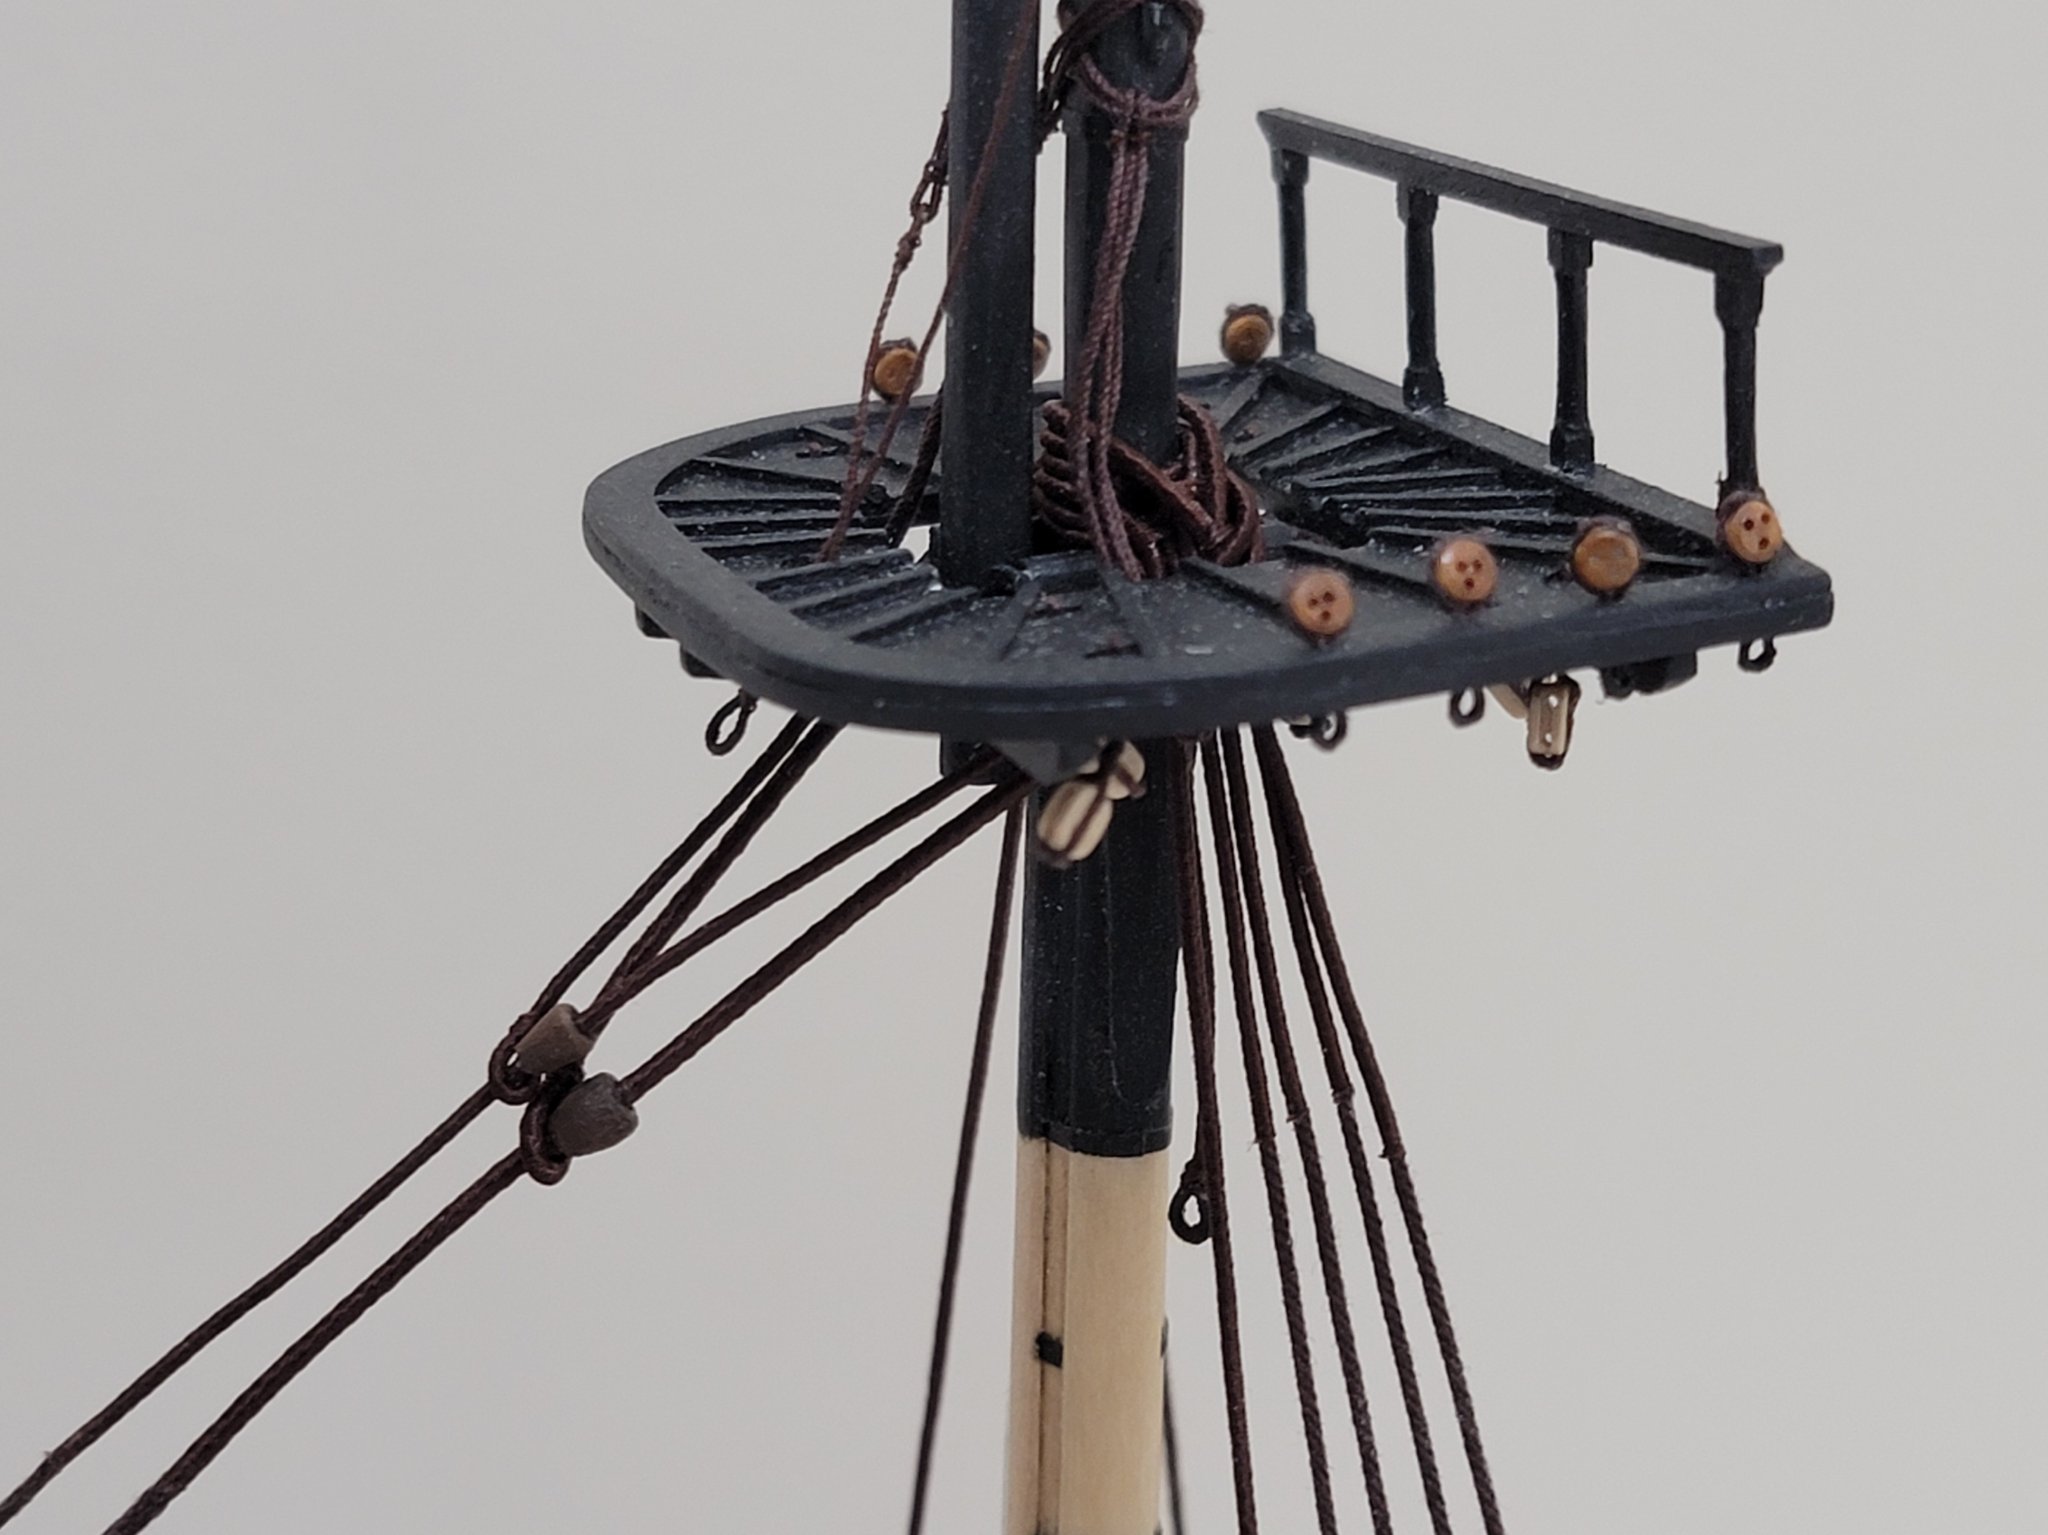
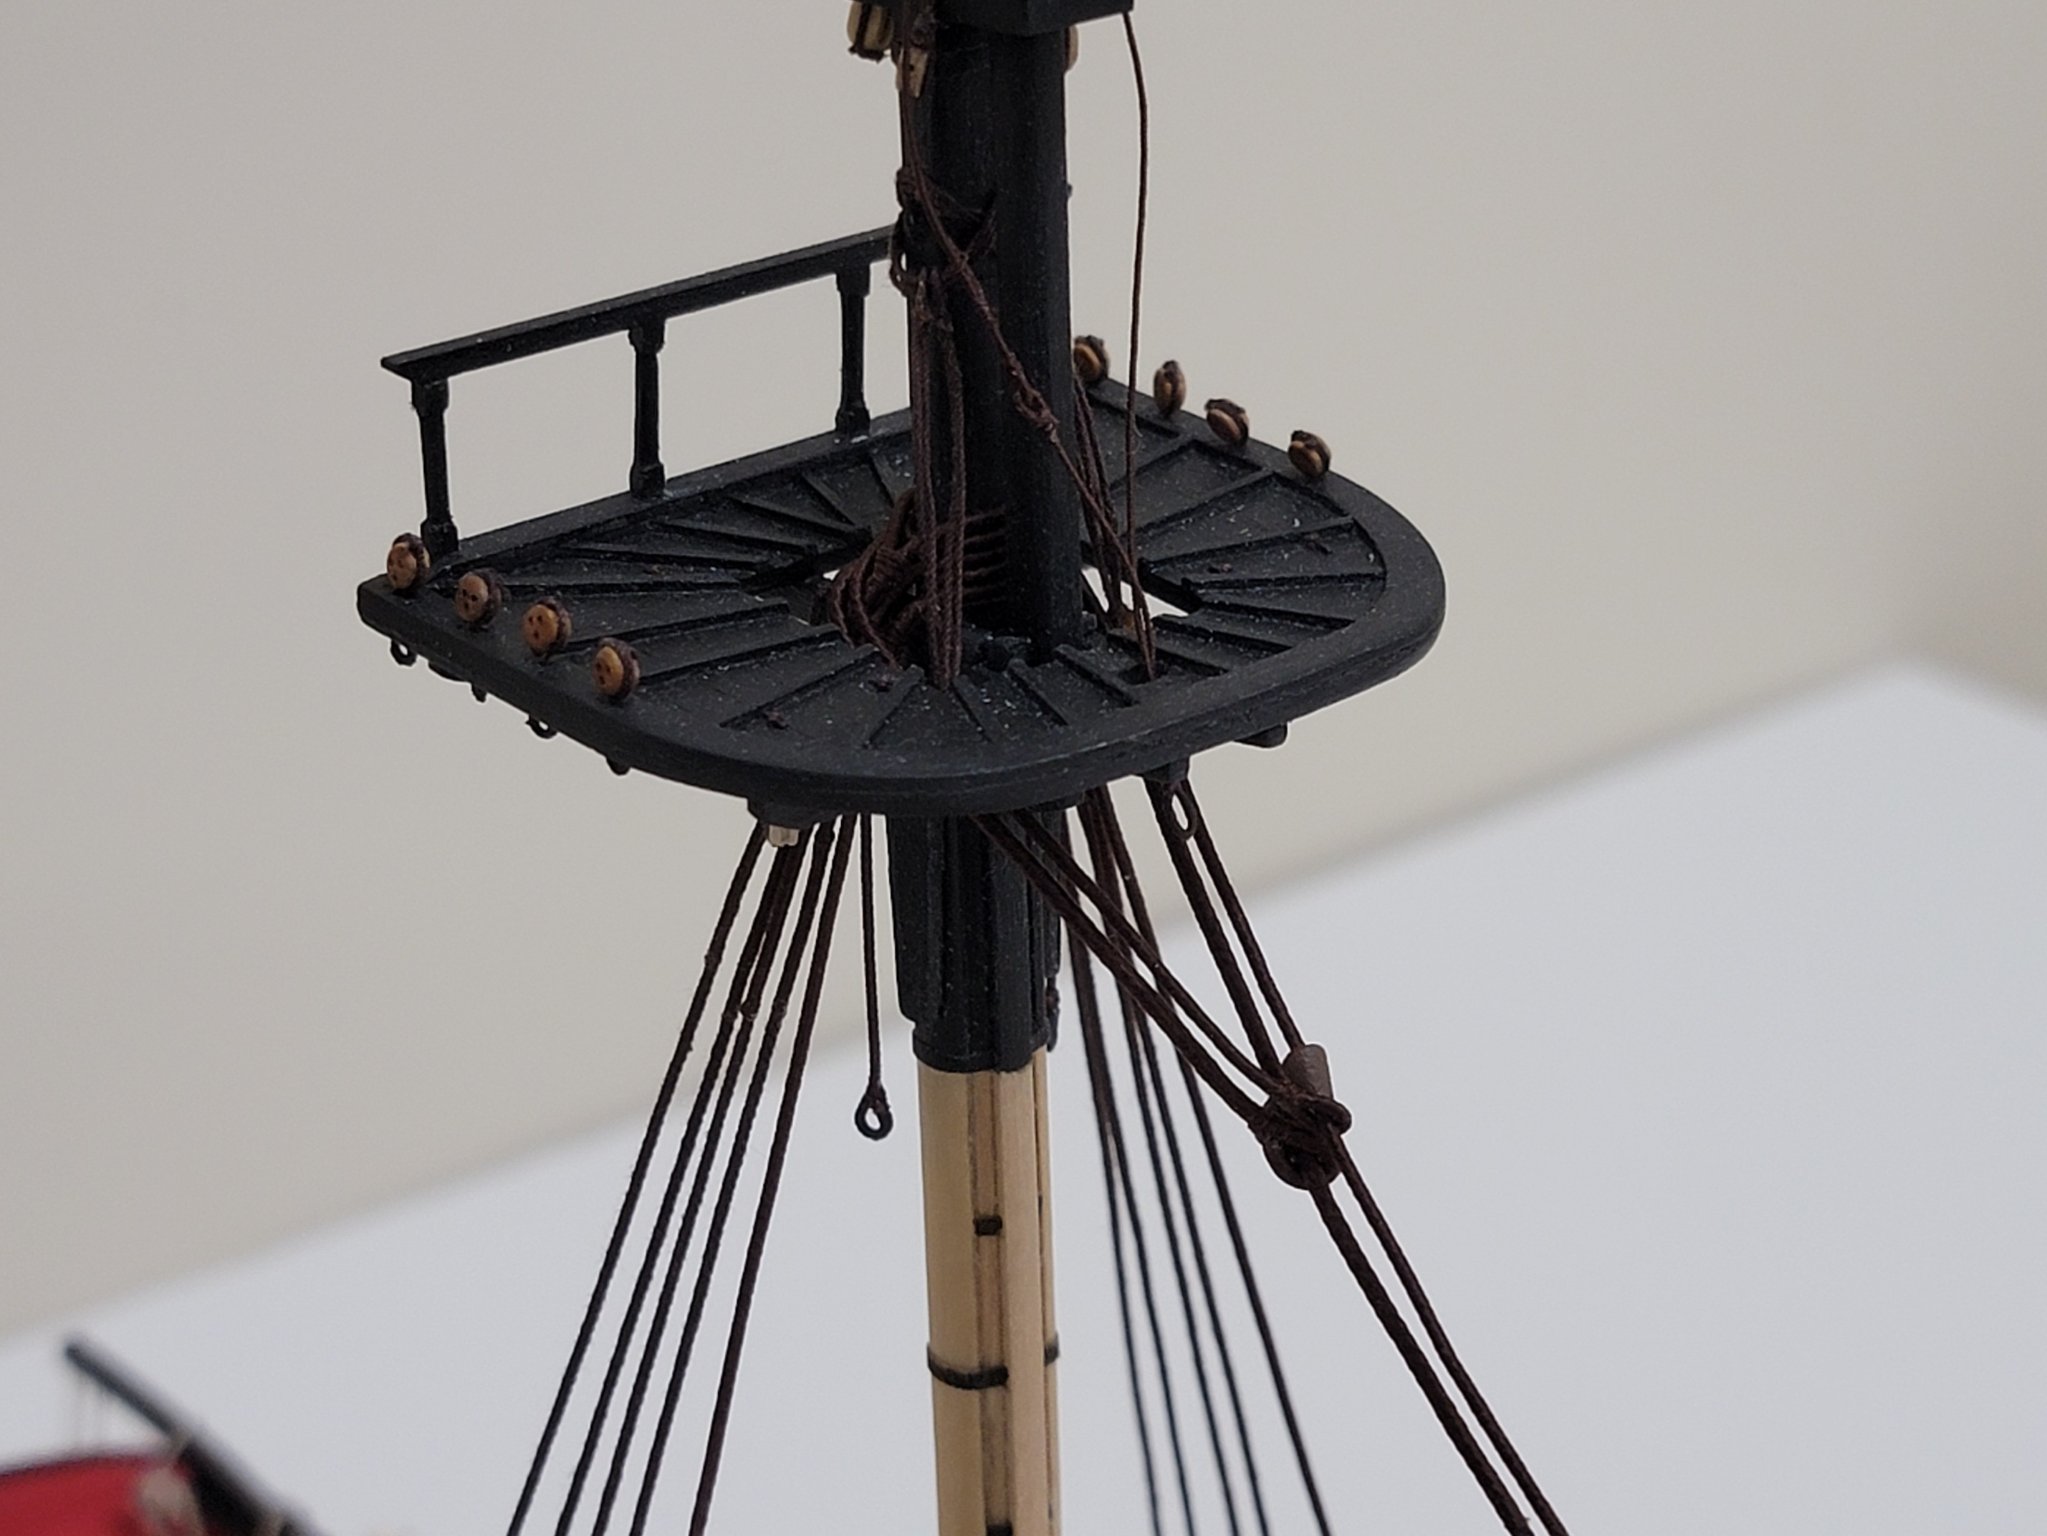
I finished with the sheer poles, futtock staves, futtock shrouds, and lower catharpins. For the staves and sheer poles I followed what Ed did in his YA build. I opted to go for the harder route for the catharpins where it was lashed in two parts of the shrouds. The first one was tricky then I got the hang of it. I first fully served them with an eye splice on each side, then tied them around the stave with a normal knot. There was a lot of adjustment needed to make sure it is centered and also tensioned properly. When cutting the thread the knot is barely visible.
Here are some pics!

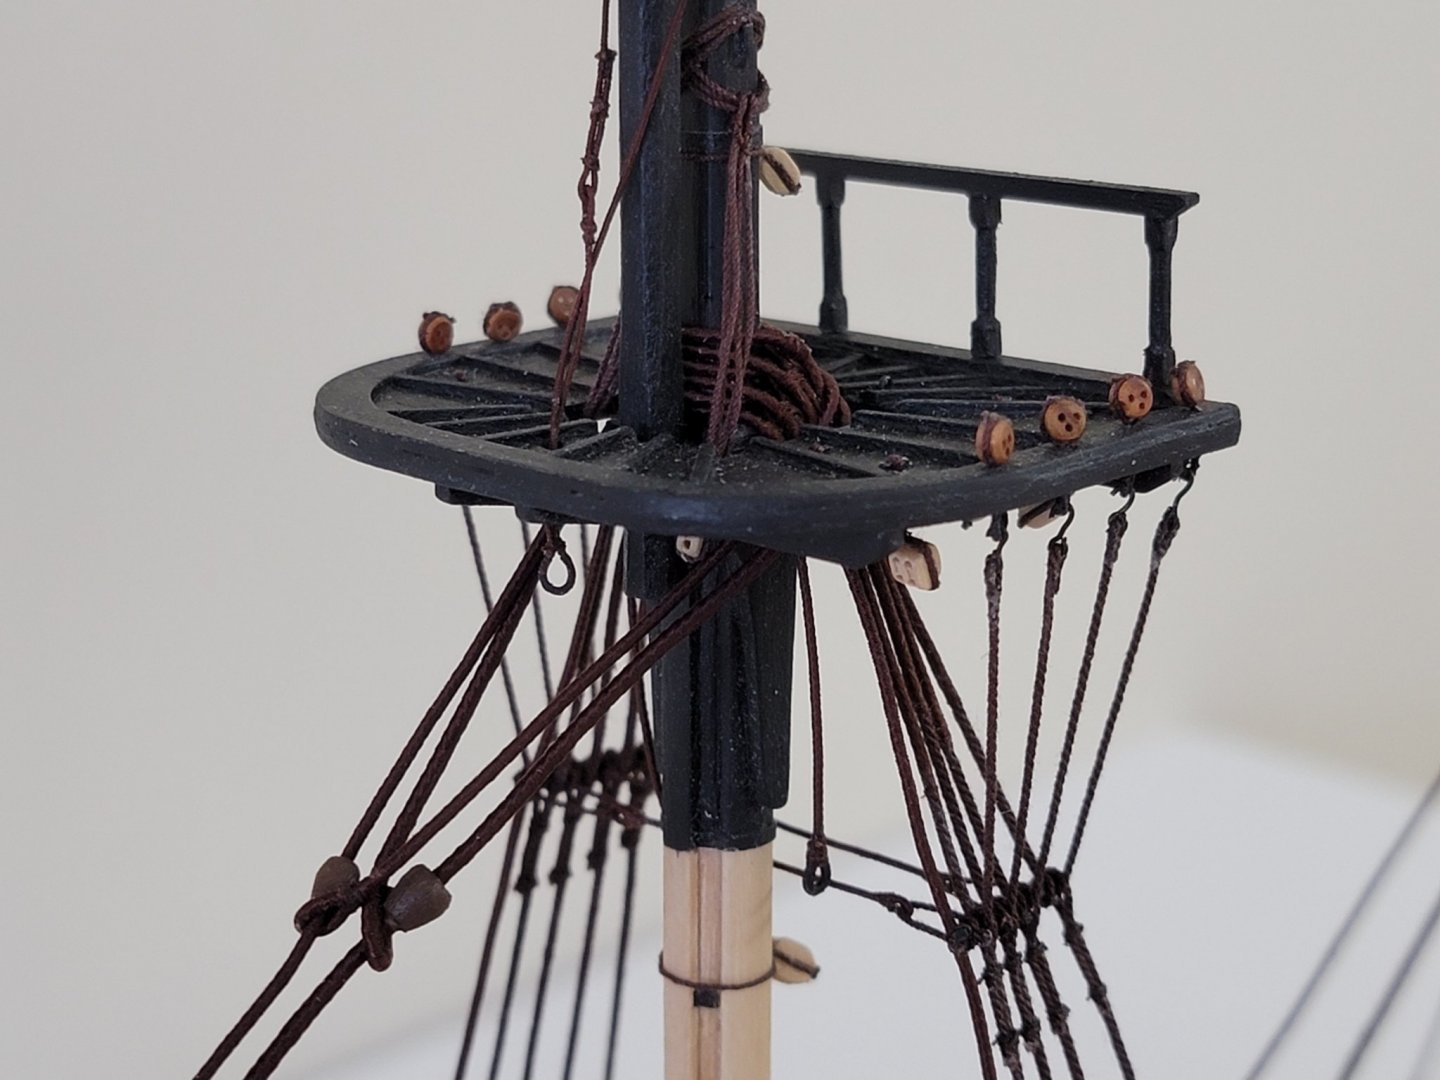


I am thinking of finishing up the fore and main top mast shrouds, so I can do the ratlines all at once. This is another item I am very nervous about...
- Overworked724, KurtH, Barbossa and 12 others
-
15
-
-
Very nice and clean! 🙂
-
40 minutes ago, Robert29 said:
Really nice work and the serving is fantastic. I am just about to start the serving on the shrouds and pendants on my current Victory build. It is the first time that I am doing any serving and I do not have the faintest idea what size of line to use. I appreciate if you can let me know what size of line you used for serving.
Robert
Thanks Robert! I am using 100wt sized thread for the serving. It almost looks as thin as hair. I bought mine from Red Rock Threads. The exact one I am using is linked below (color: dark brown #7029 to match the rope color):
https://redrockthreads.com/superior-thread/superior-microquilt.asp
-
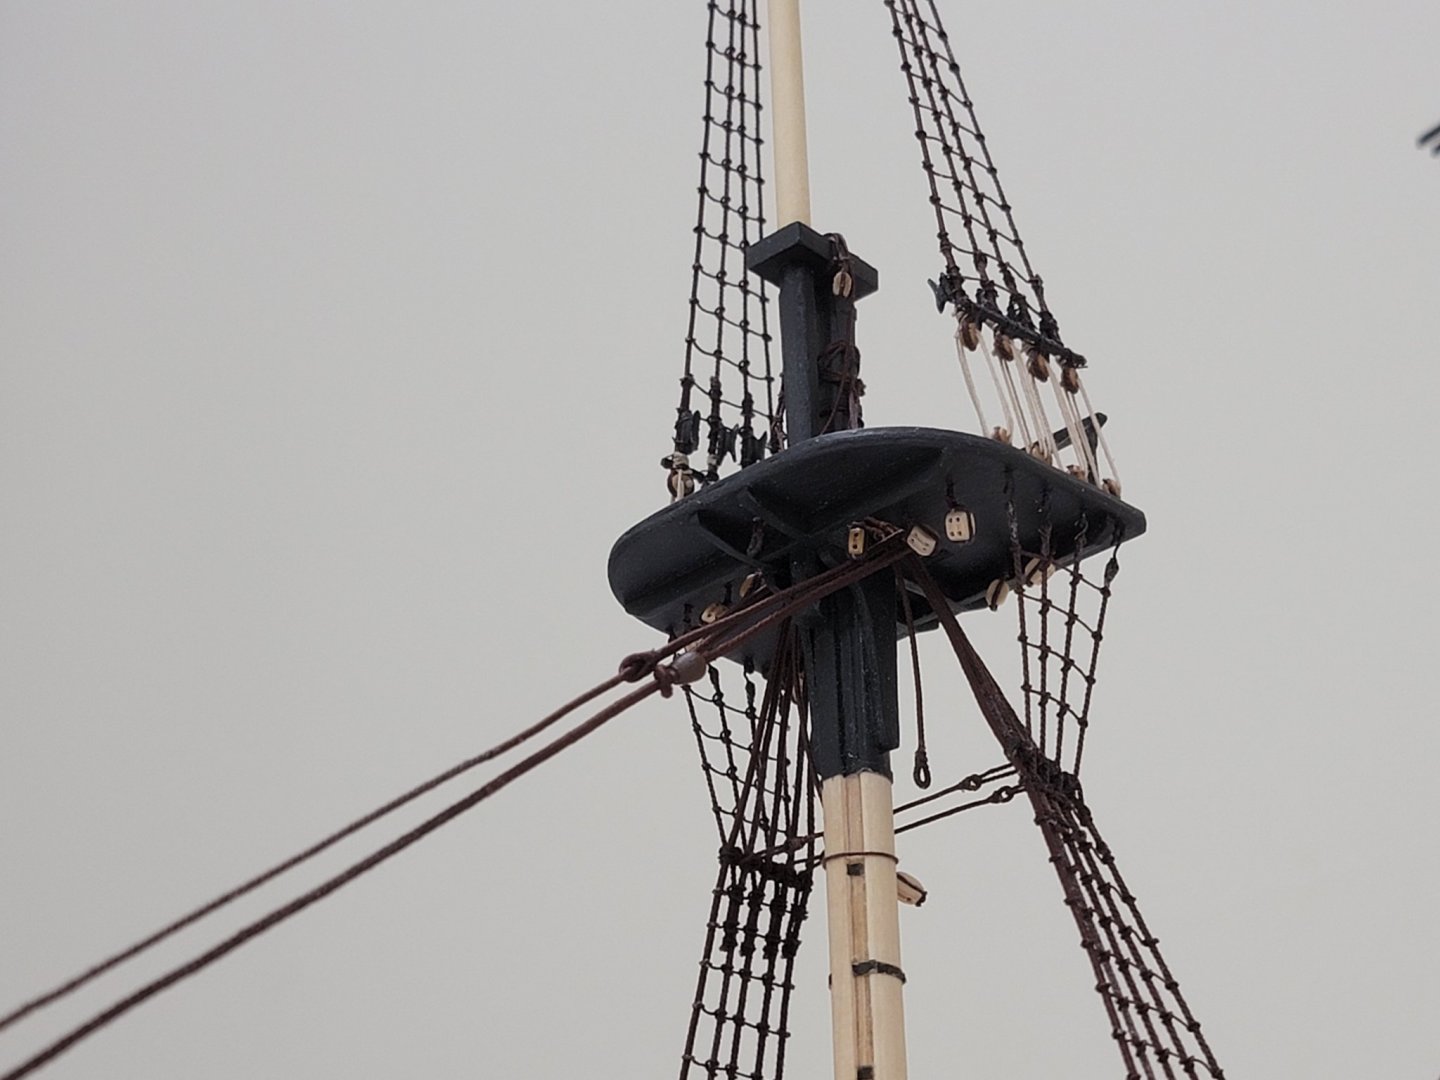
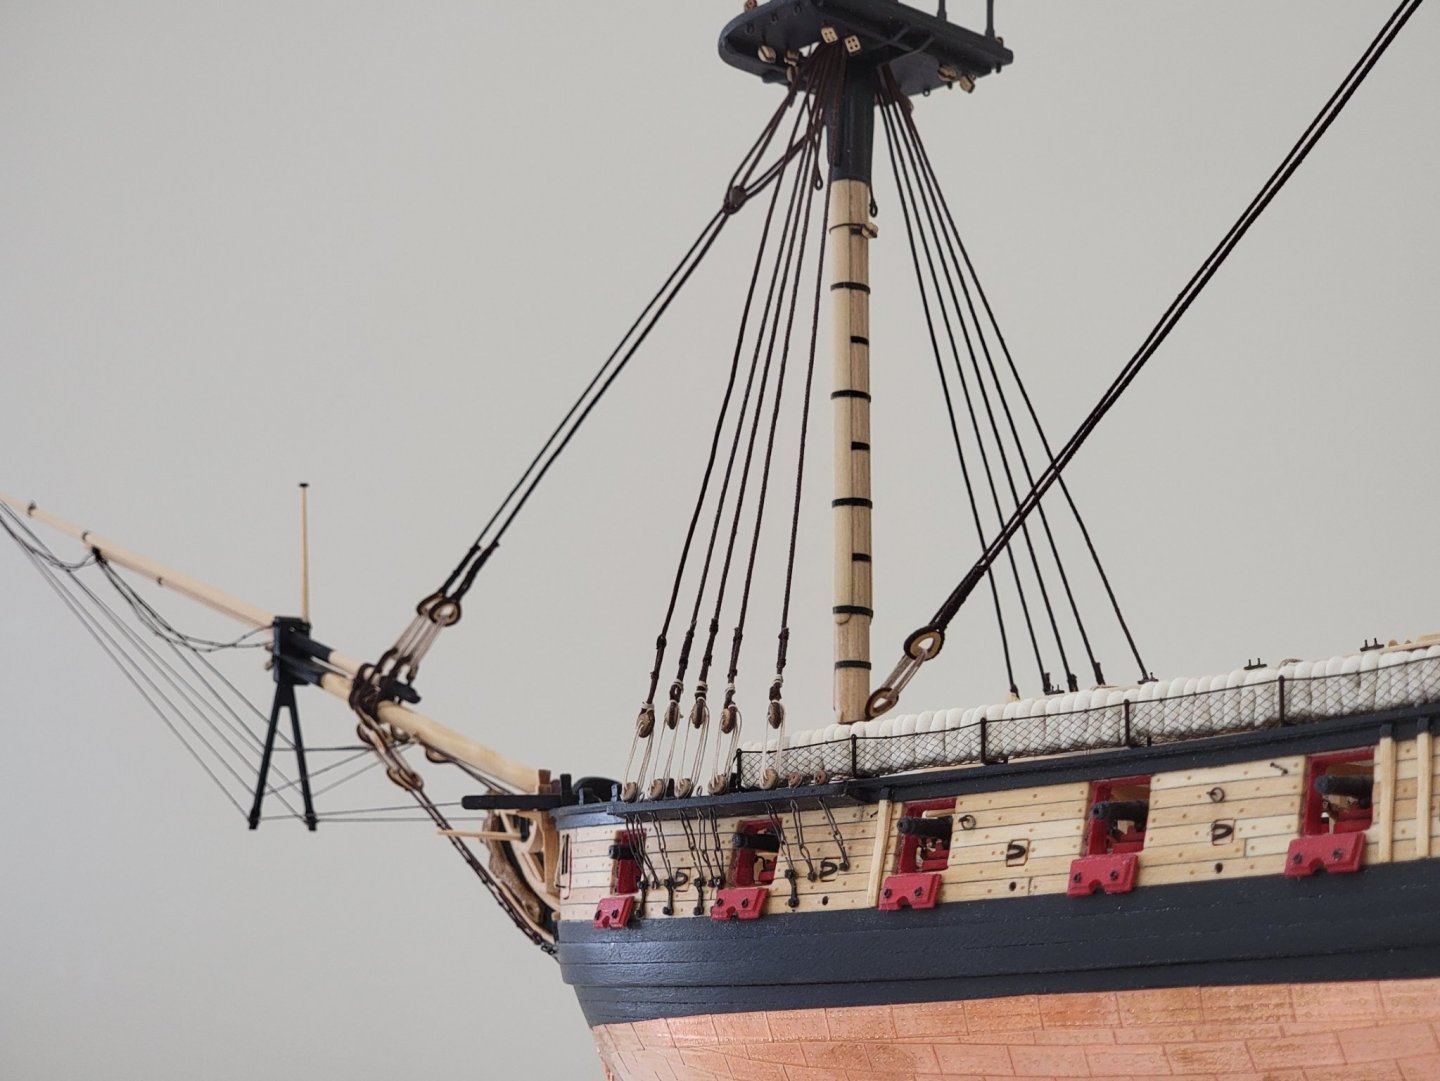
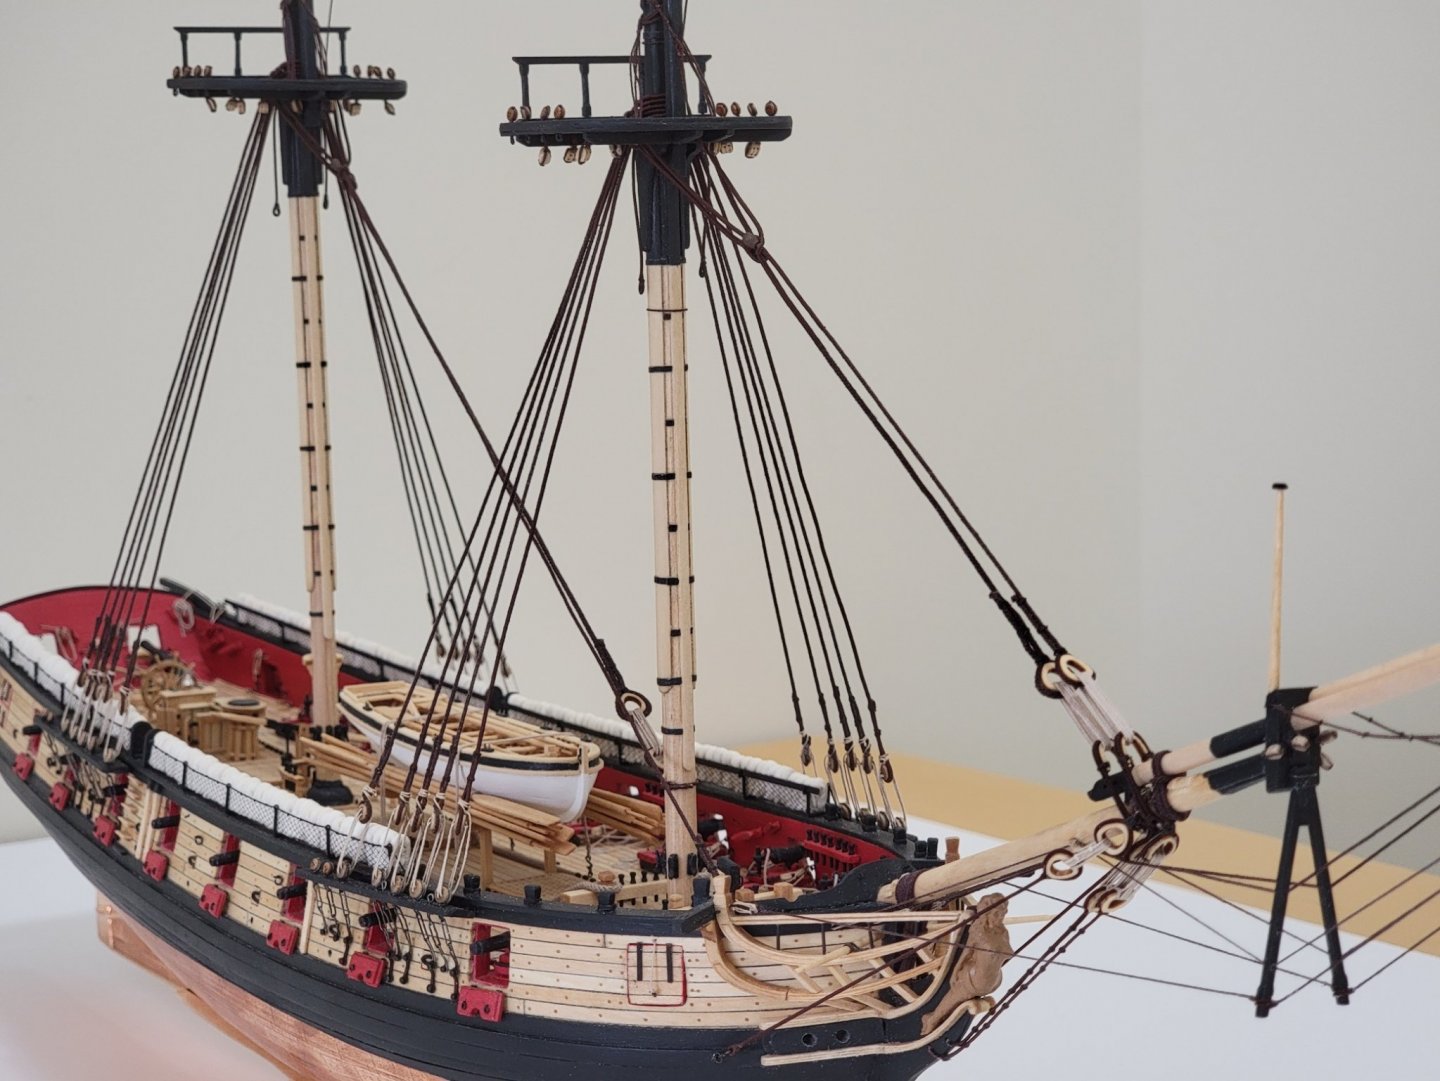
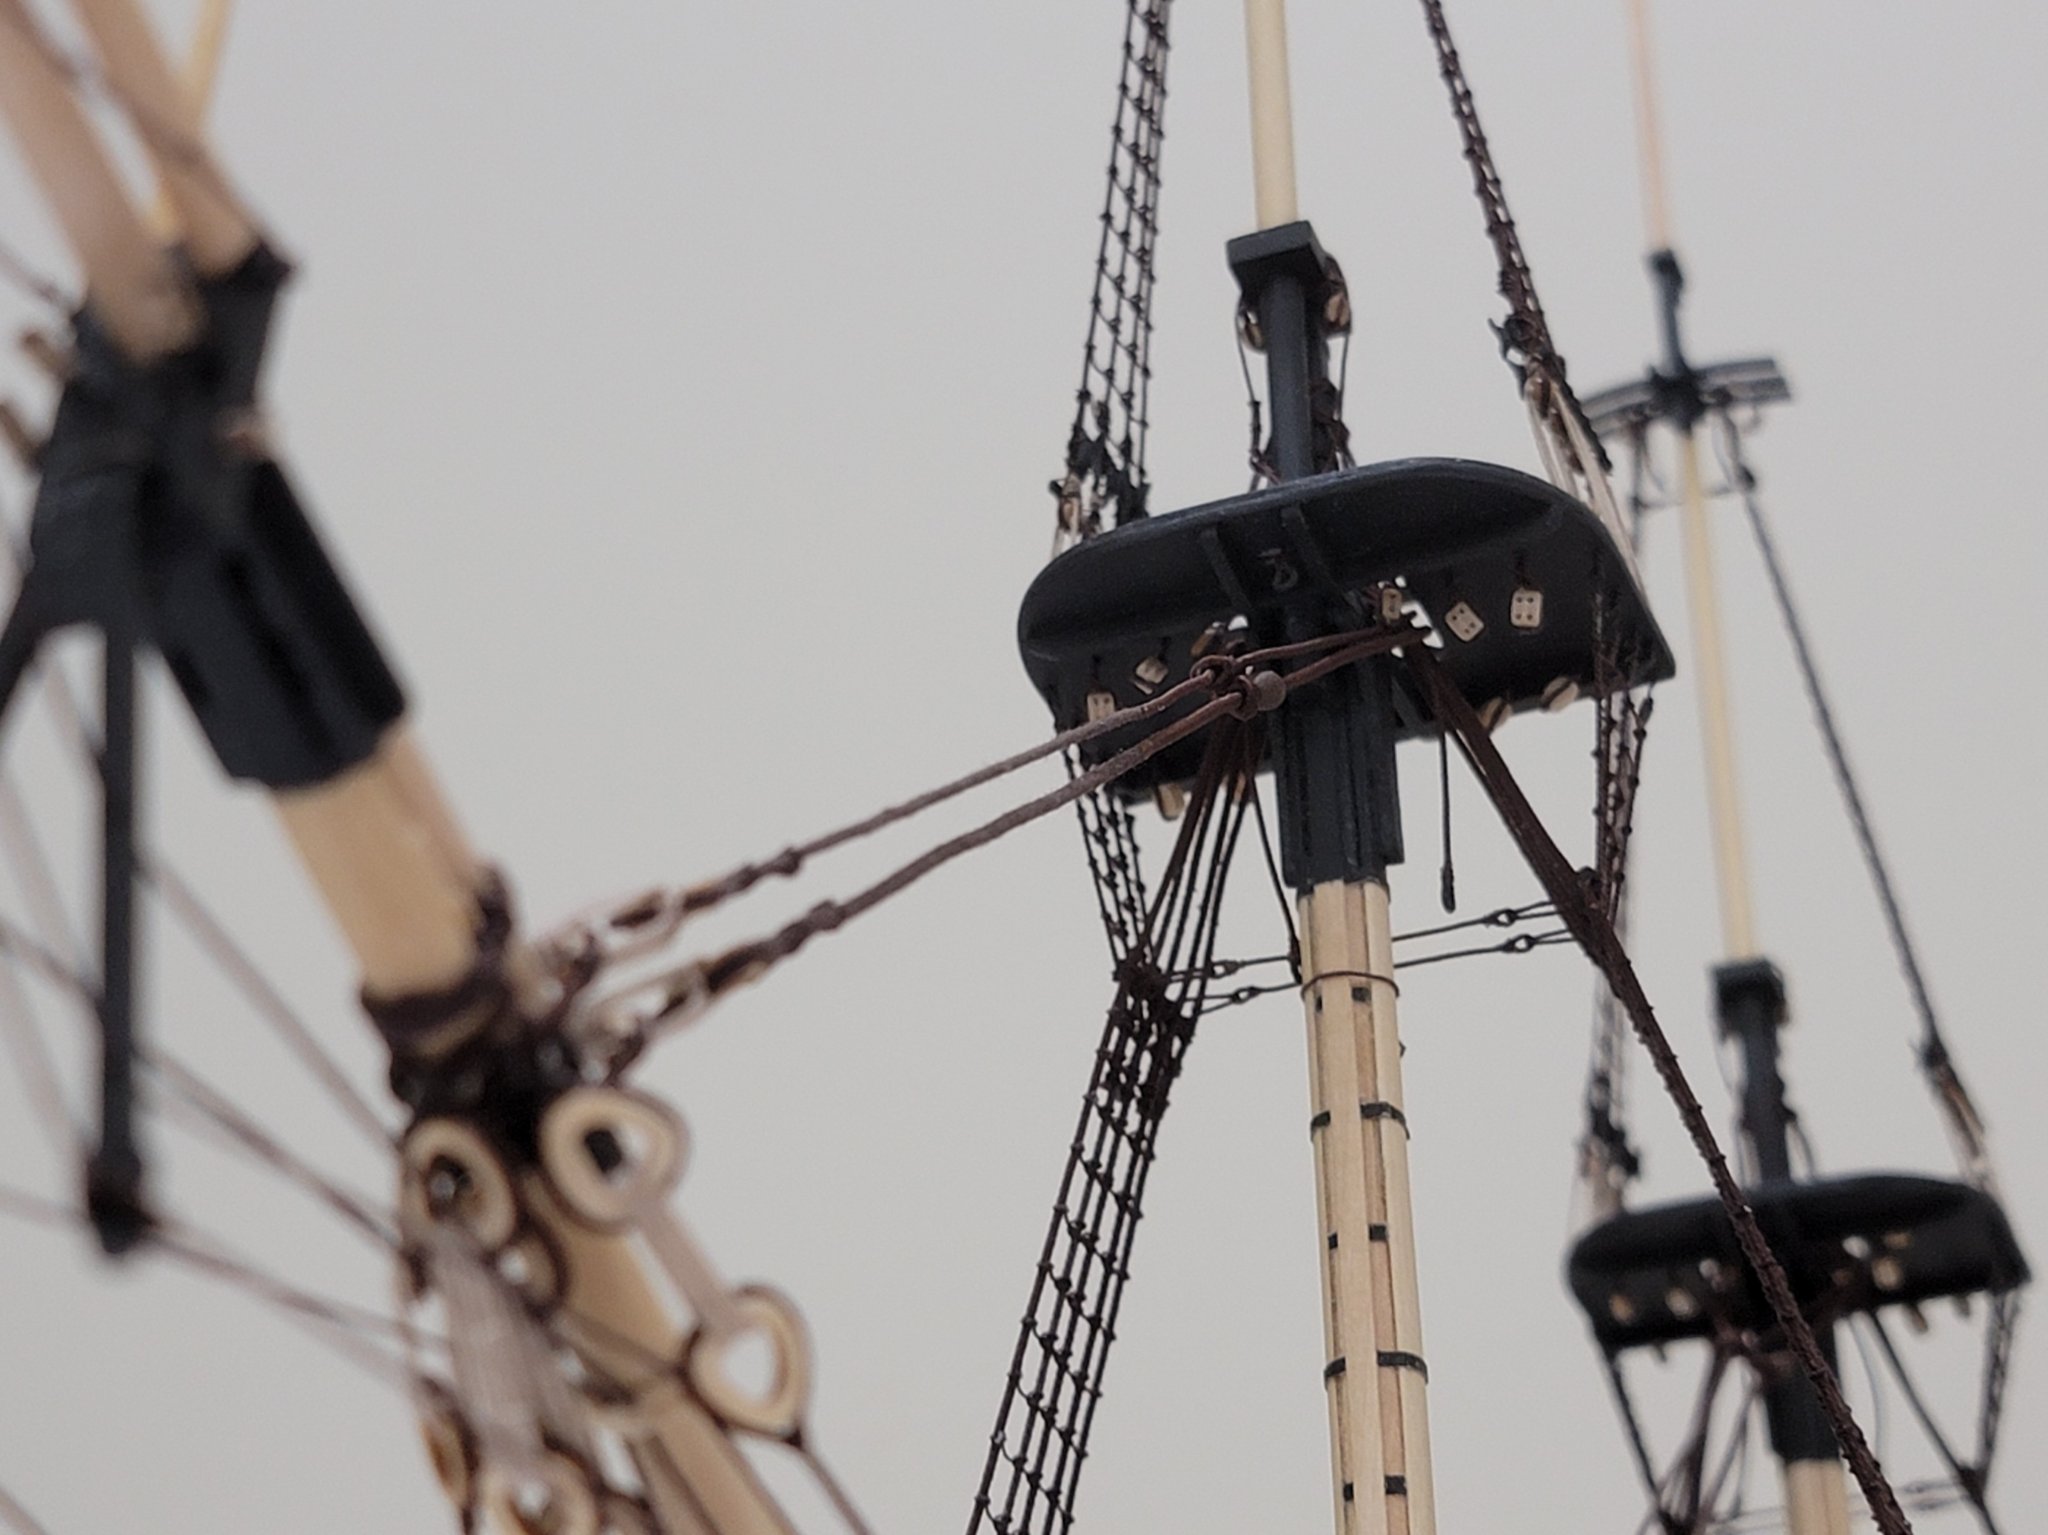
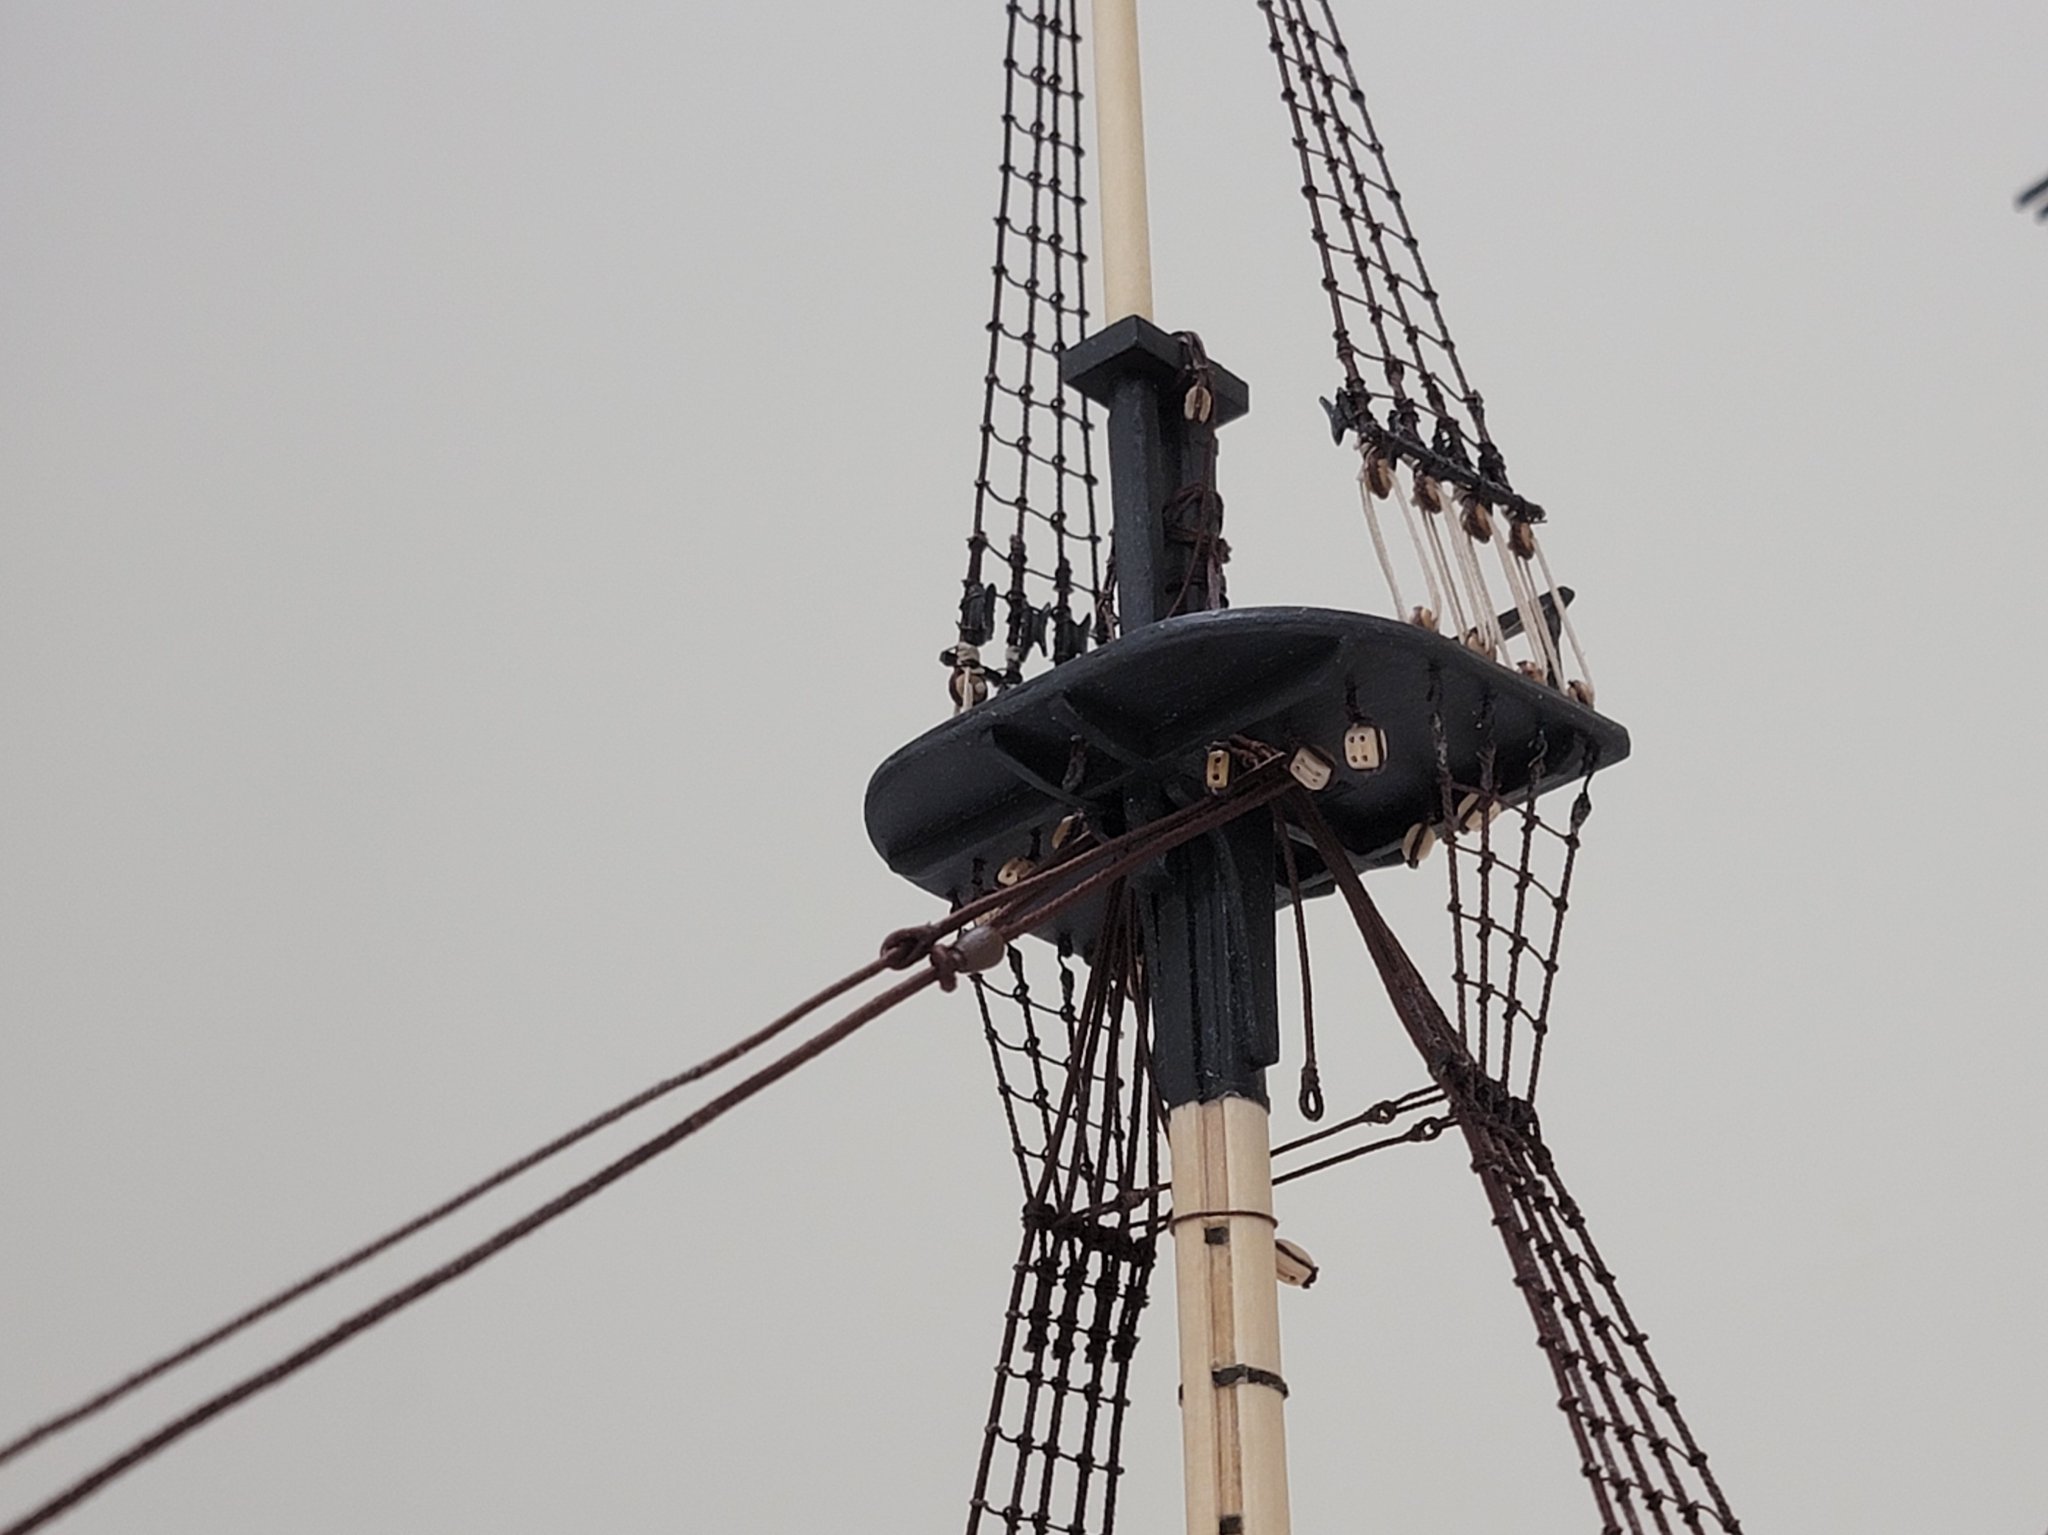
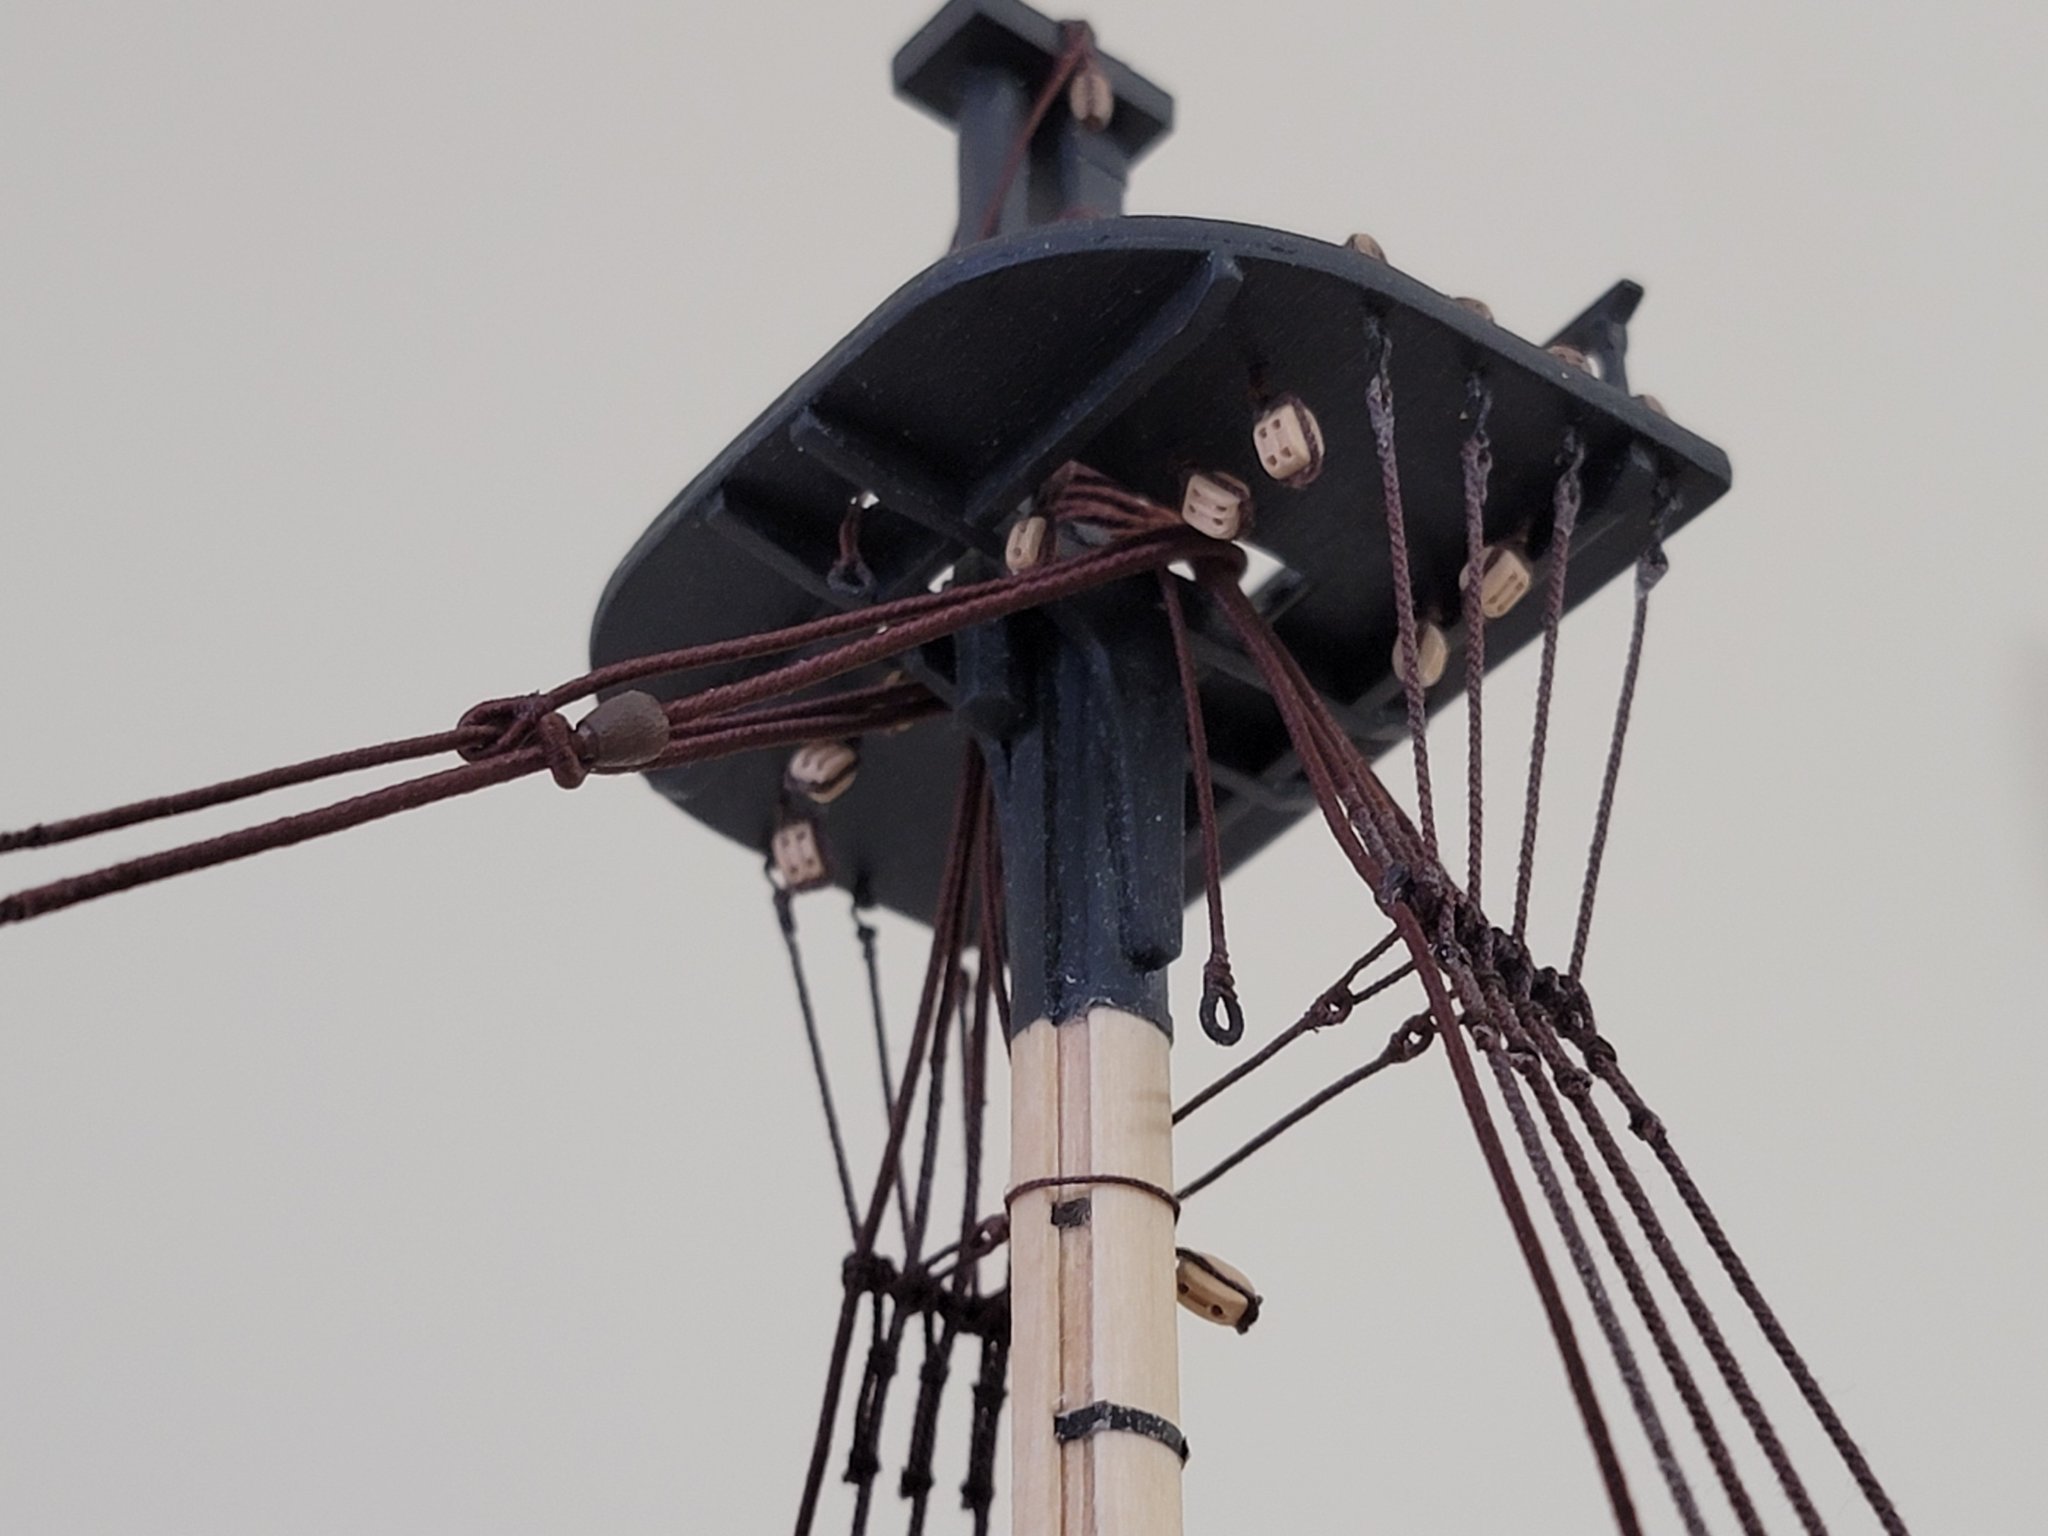
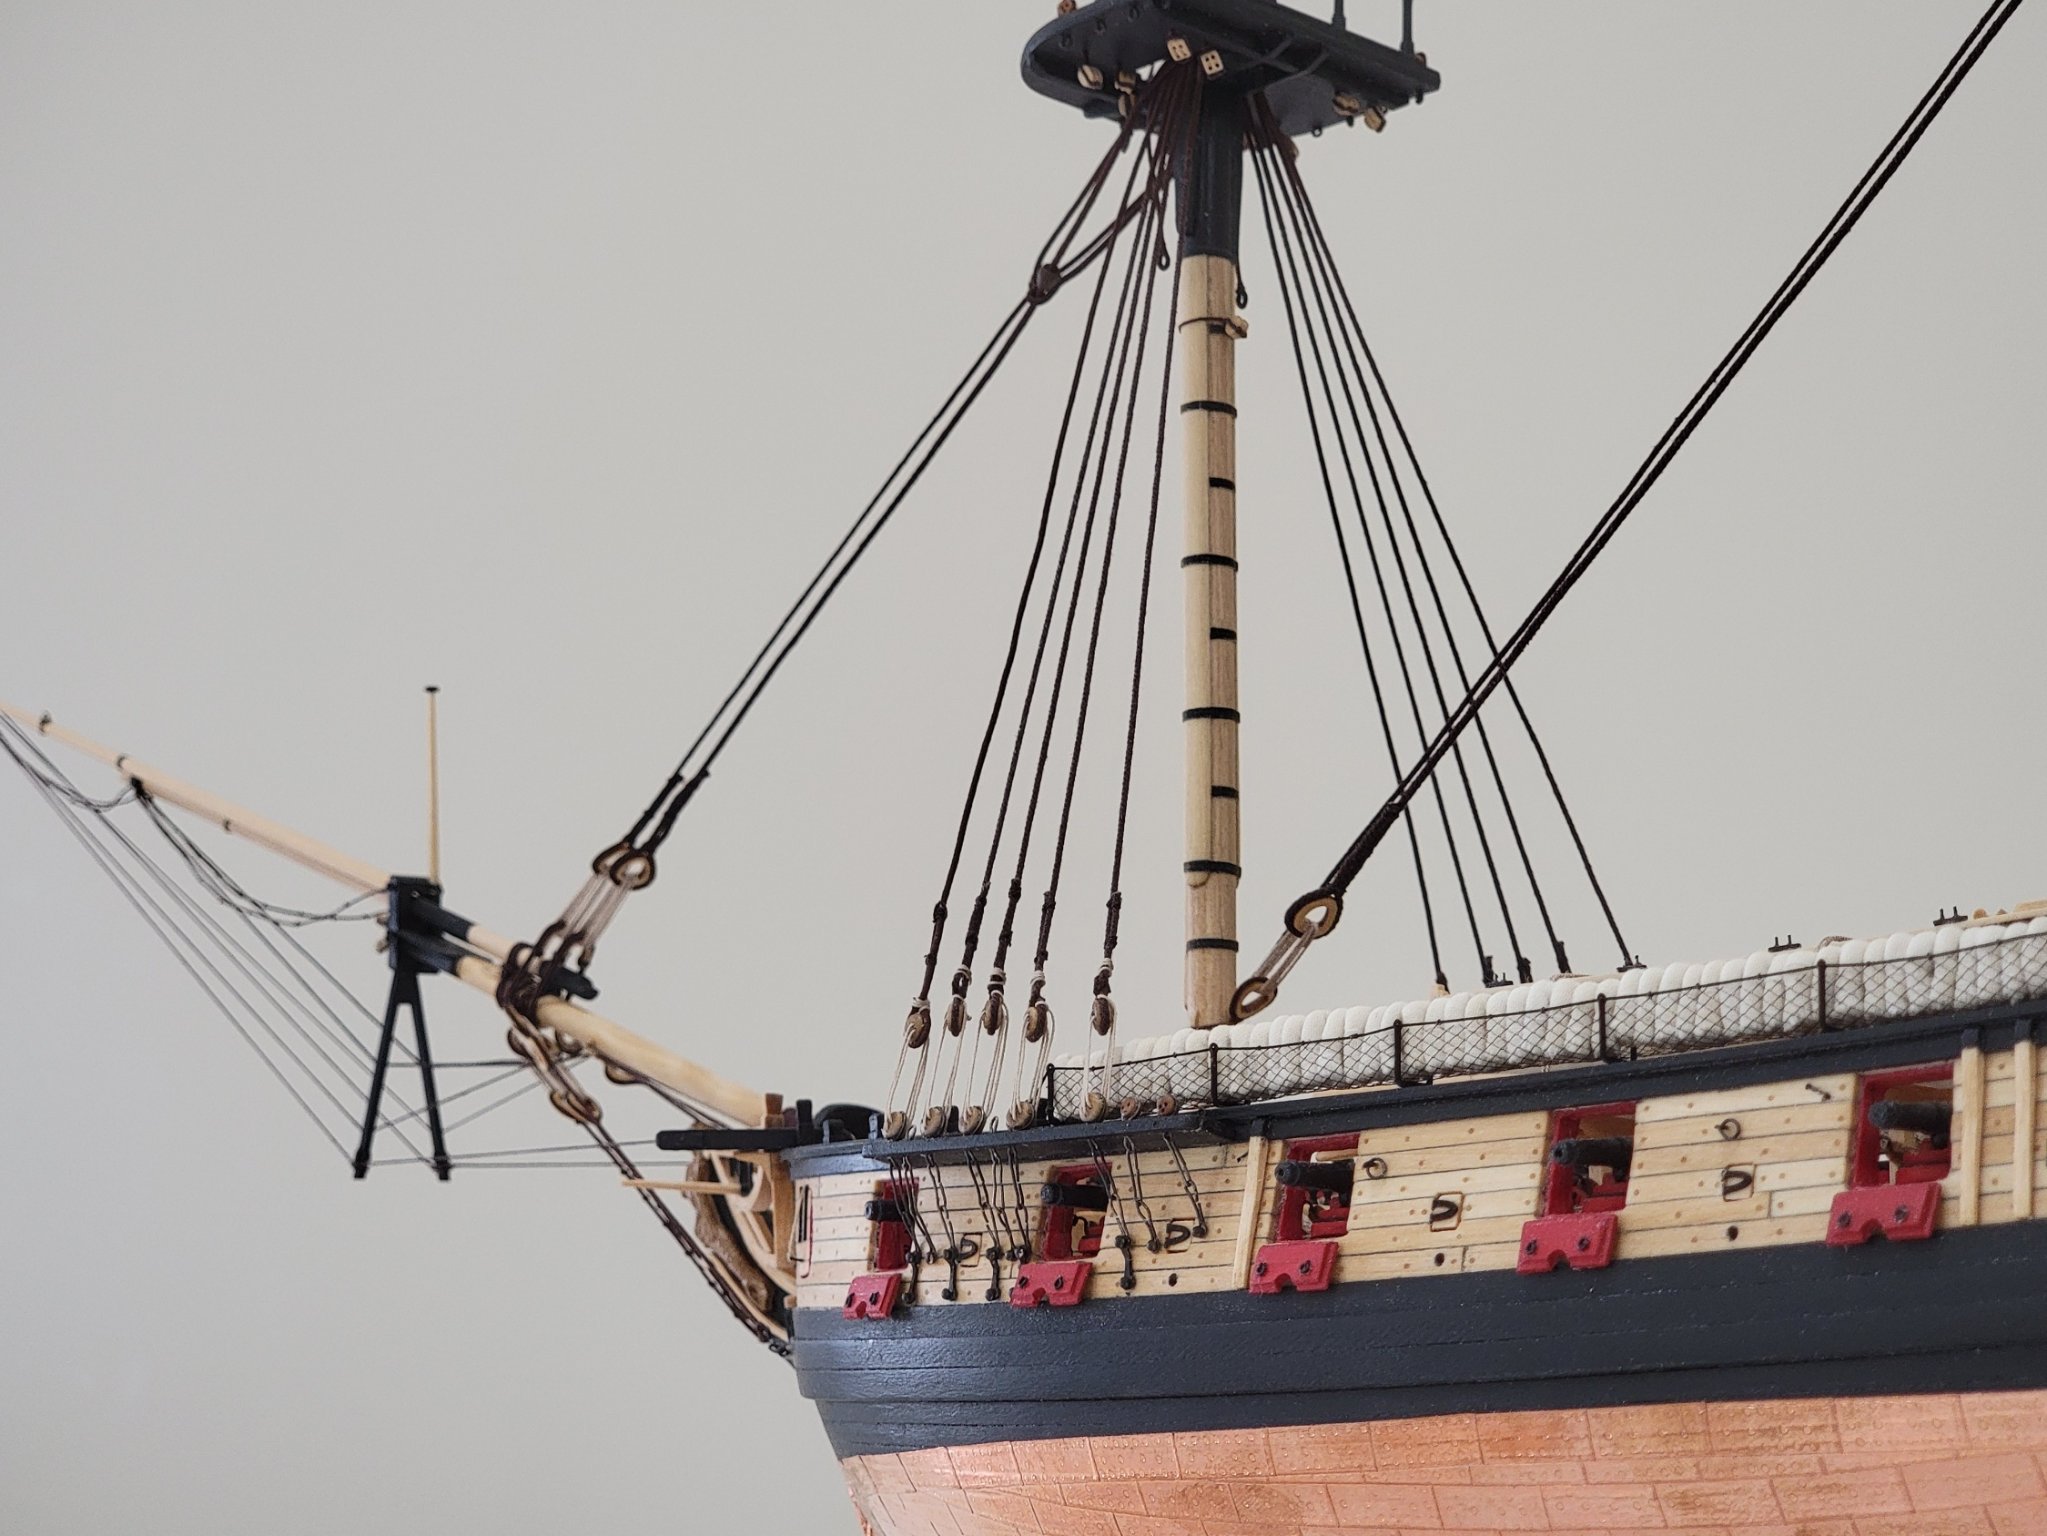
I finished repeating the process for the fore mast. The shrouds at the mast top came out better this time around i think because of all the practice I got.. 😄 I'll let the photos do the talking

-
Ohh I tried serving it without the glue, that may explain the harder time I had 😅. I'll for sure try it again next time
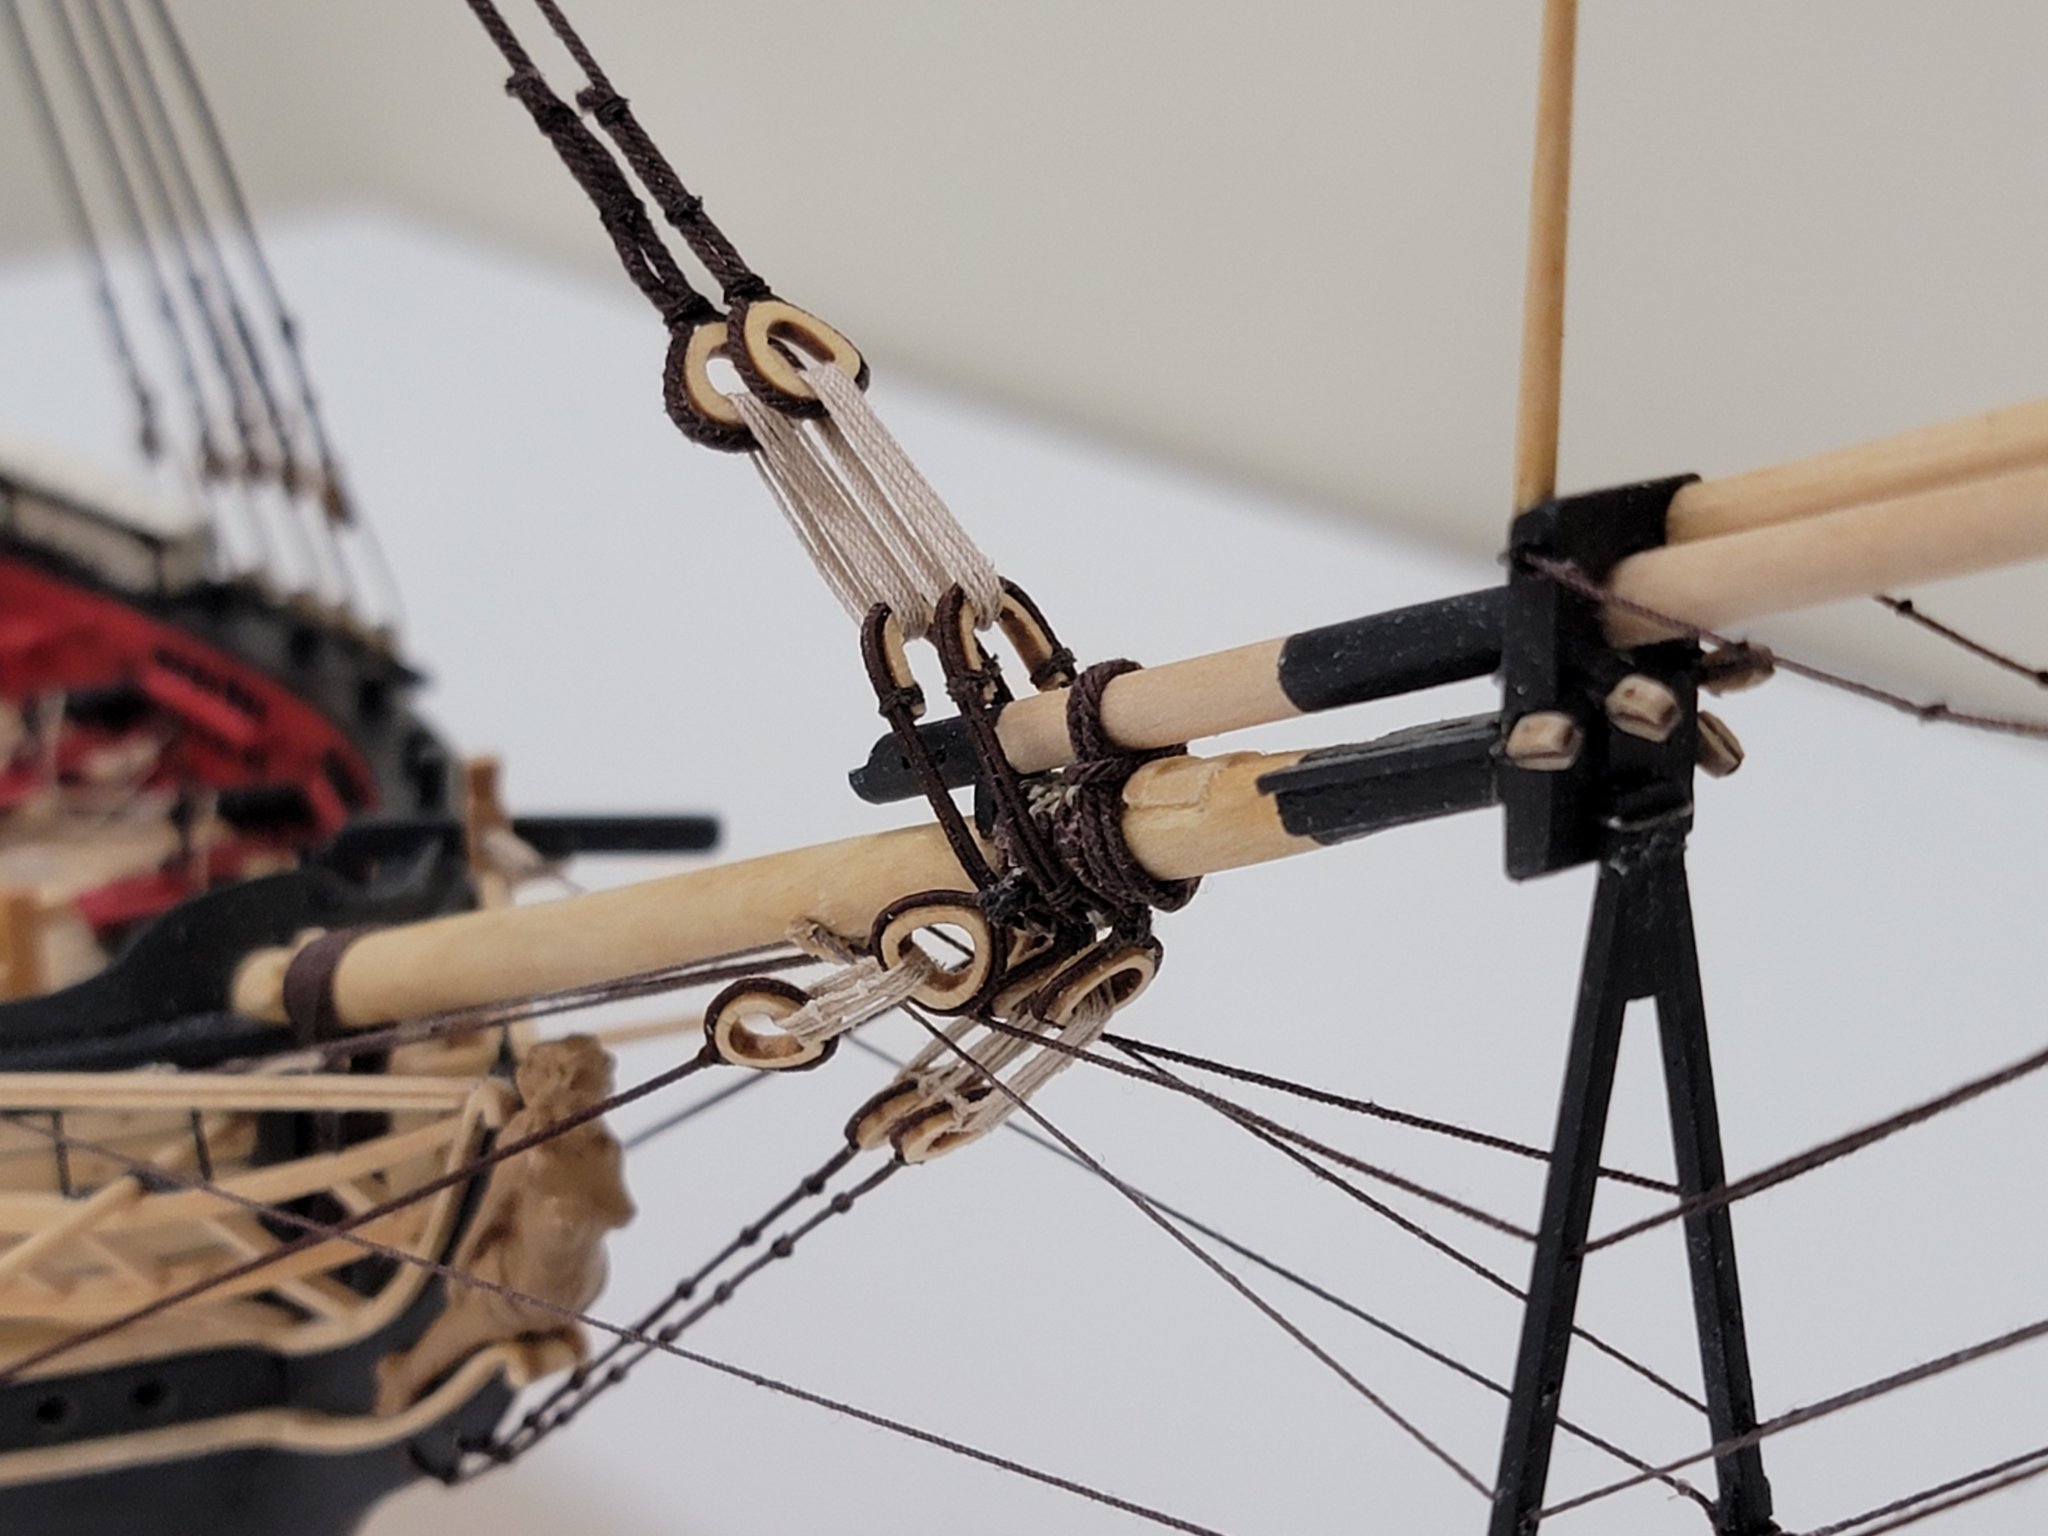
Anyhow, I did some small deconstruction work on the main preventer stay to change the position of the mouse:

Now I'll continue working on the foremast
-
13 hours ago, uncarina said:
Eye candy, every single one of these photos! Even though I don’t plan to model this ship I learn so much here. Thank you for sharing your work!
Cheers, Tom
Thanks Tom! I'm so glad my log can be useful. It just started out as a platform for me to ask questions and ask for feedback, but seeing that it helps others is really great!!
7 hours ago, egkb said:Dubz who was building the same vessel, gave me the idea (suggested I follow suit) to 'fake' the weave on the mouse by effectively 'serving' the mouse.. rather good outcome too.. Possibly worth a look if you think it is worth it..
BTW I seriously love what you are doing here.. that deck and those fittings make me drool whenever I see them (I regularly look back to your photos of them in awe! )
Eamonn
I was actually looking at your log to see how you managed the mouse. I tried to follow suit but found it difficult to serve it since it was at an angle and the thread kept slipping. I may try this out again for future models! And thanks for the encouraging words!! I also keep looking back at your Ballahoo. It's a very clean and crisp build 🙂
I also found out from Dubz that the preventer stay mouse should be on the other side (so that both the mice alternate on the mast), so will do some small deconstruction before carrying on with the fore mast rigging 😄
-
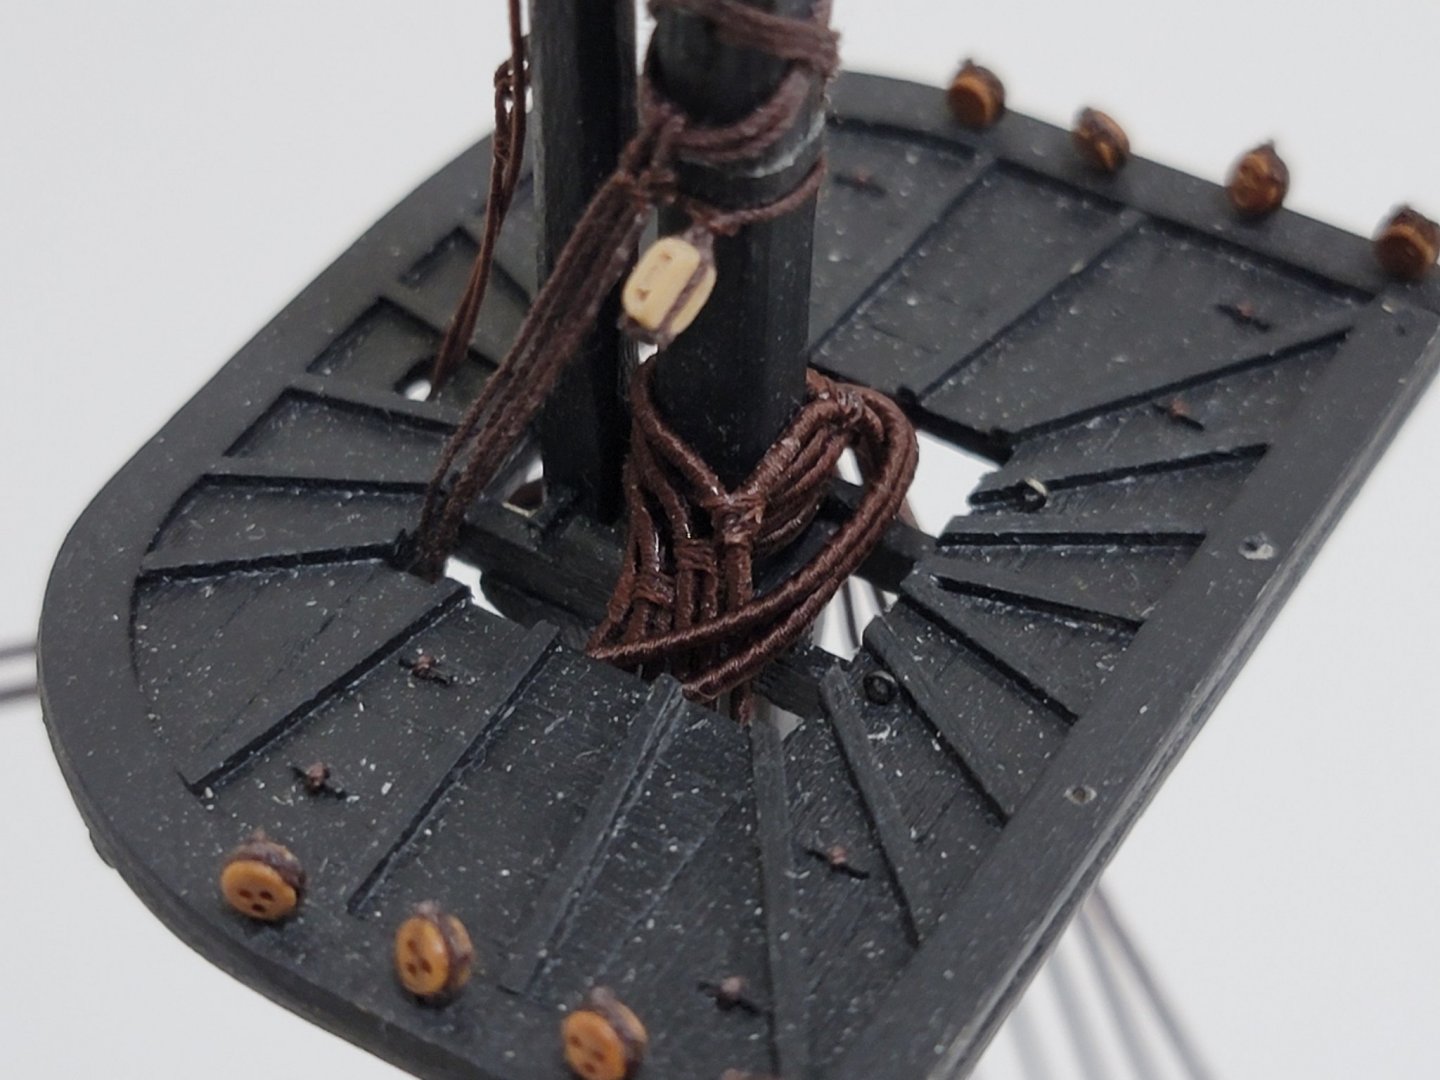
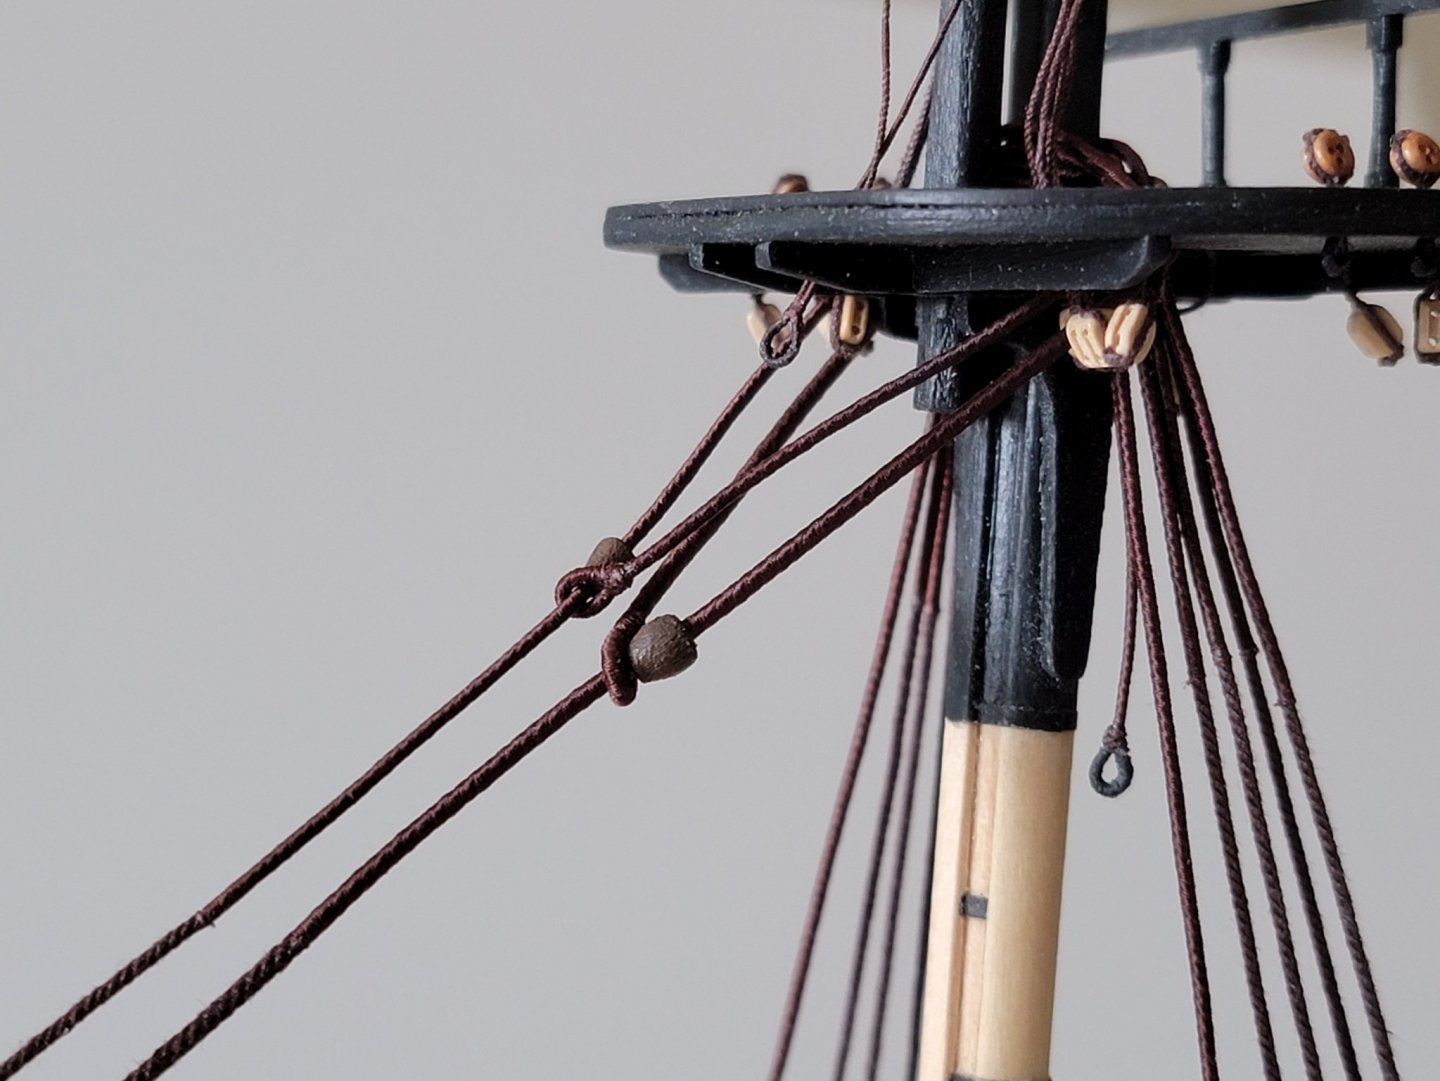
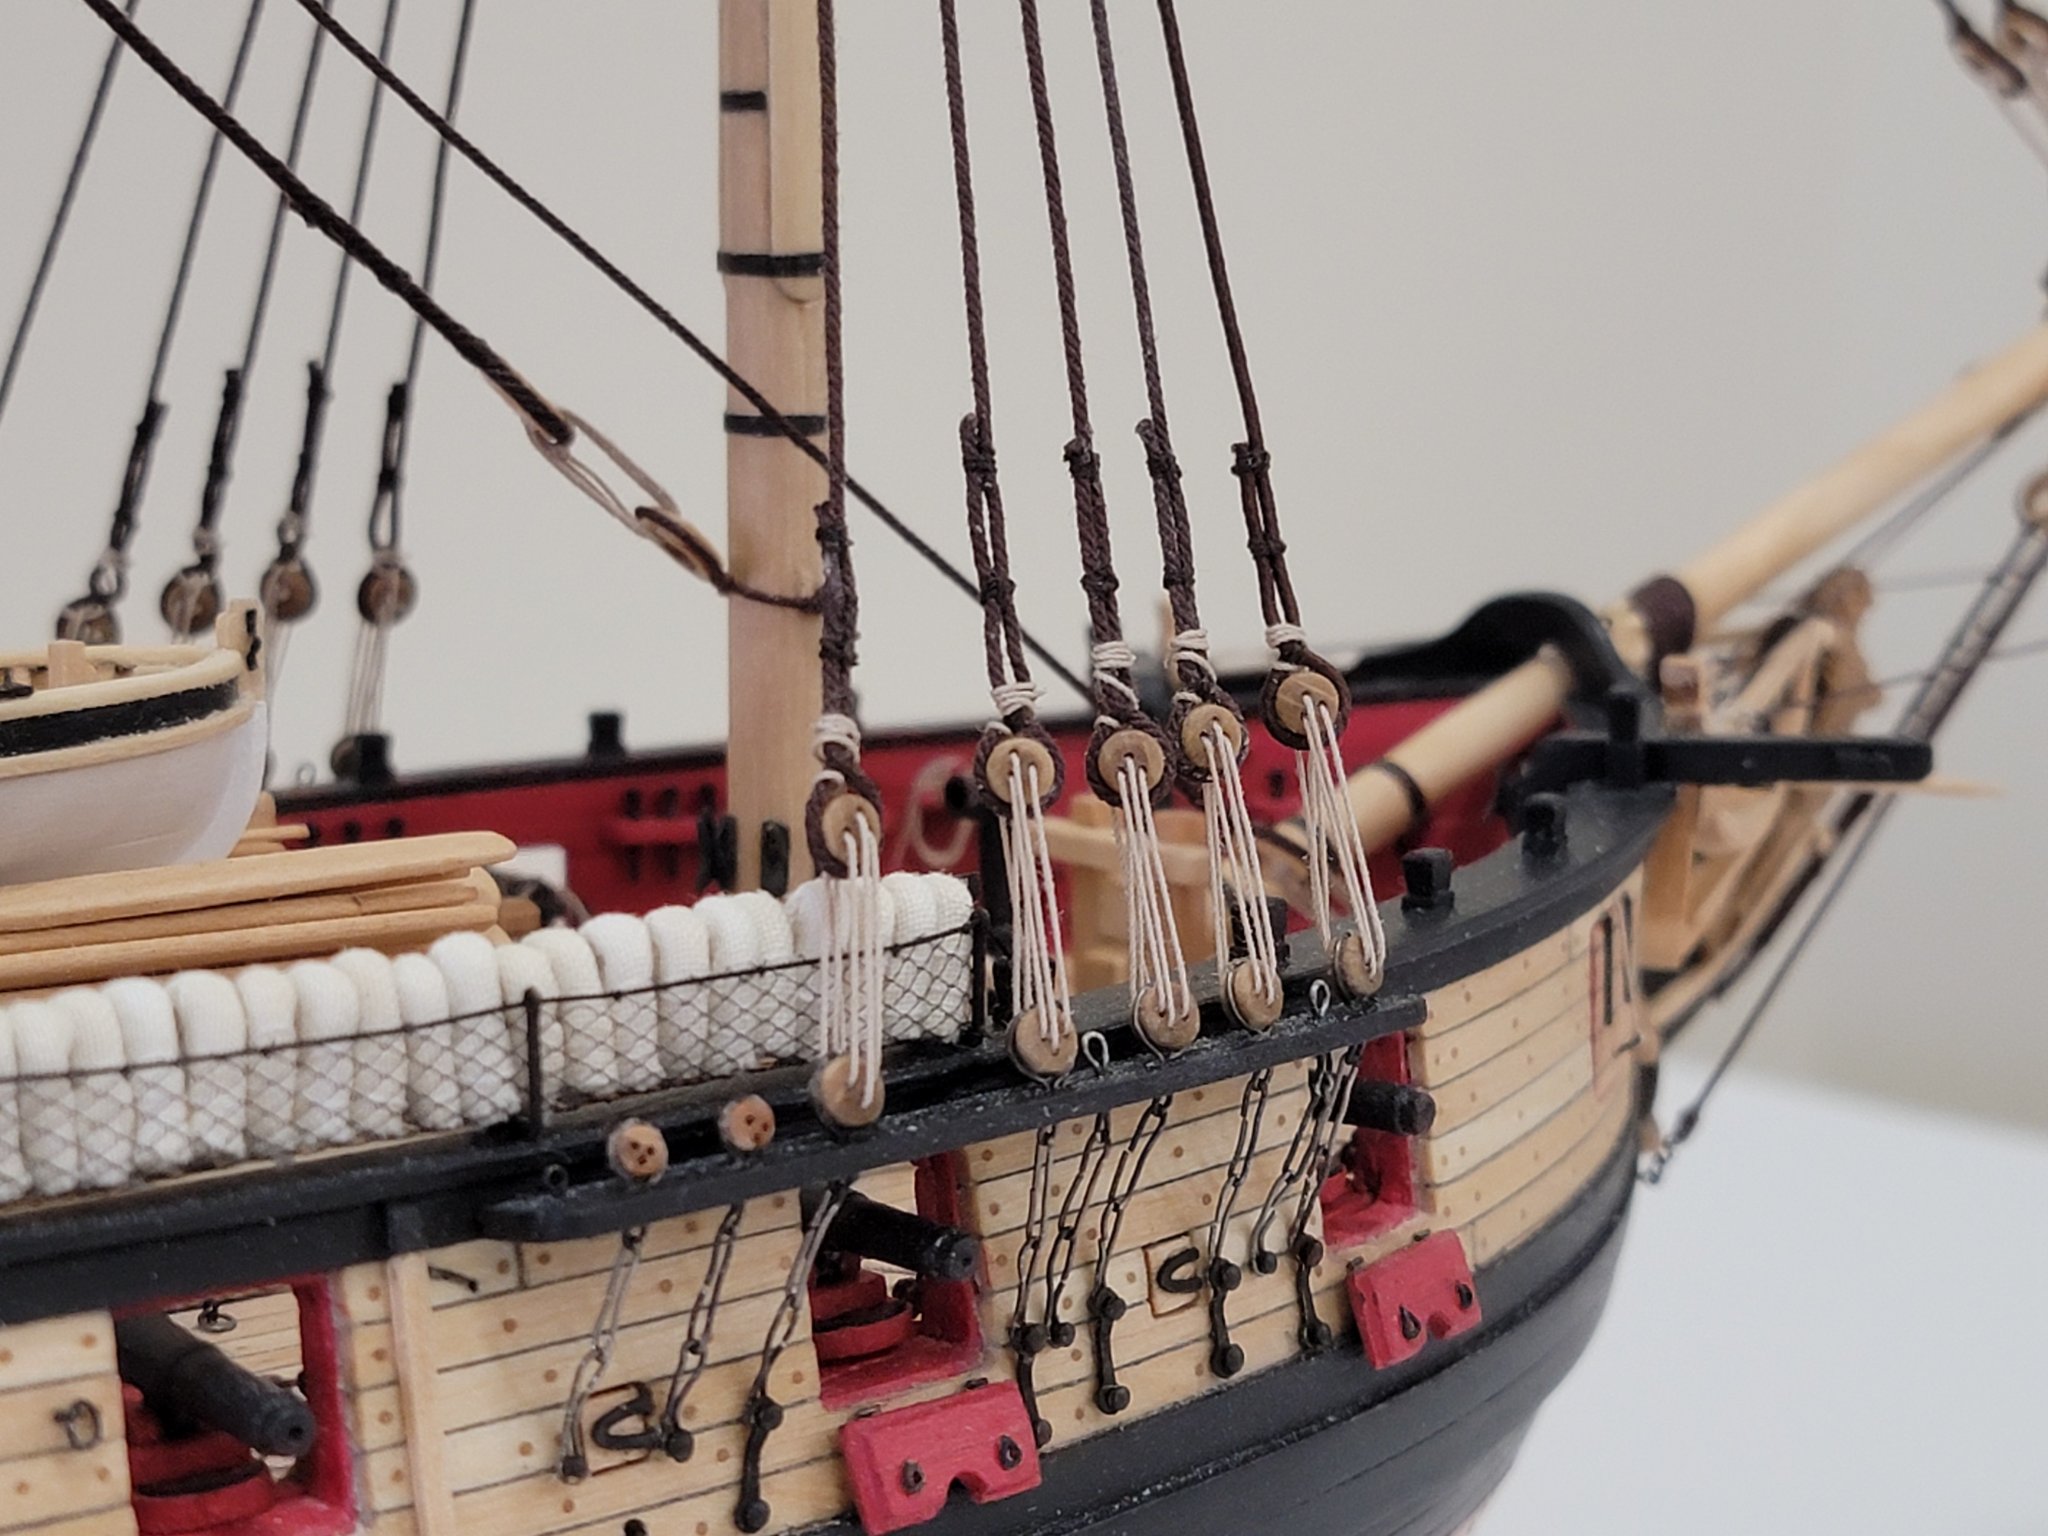
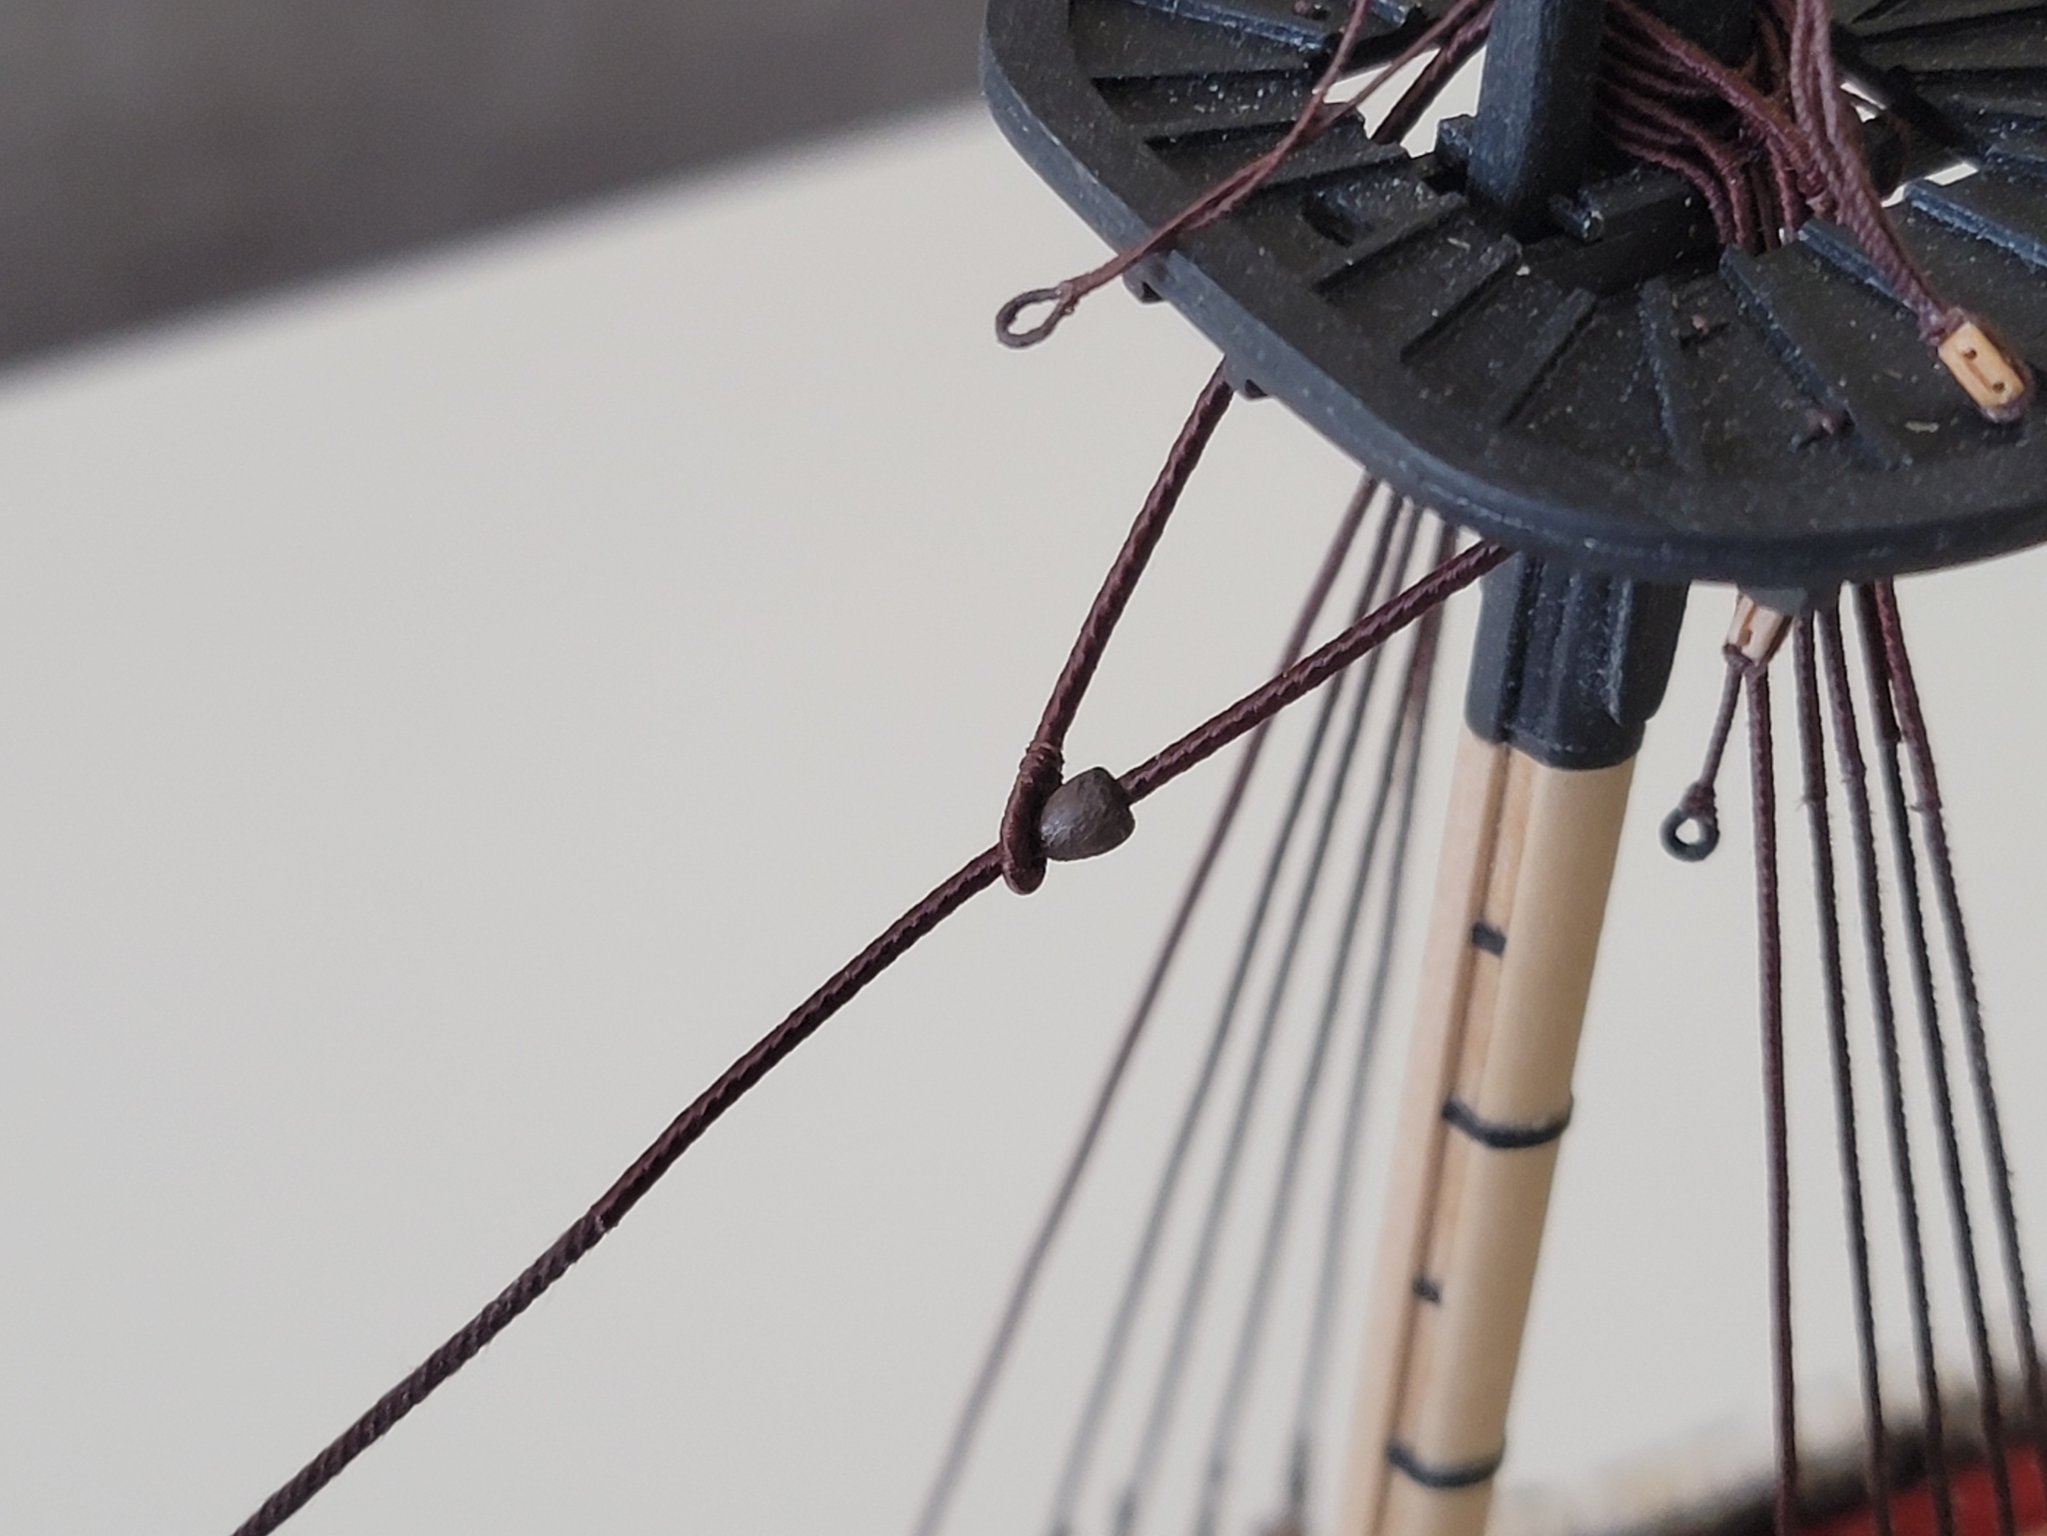
I finished working on the main stays! I opted a simple representation of the mouse by carving out some wood . The weave seemed very hard to do at this small scale. Also seemed like the weave wouldn't show at 1/64 scale. The process is shown in the photos below.
Next they were painted dark brown to match the thread color, and glued in position. An eyesplice was made on one end of the rope for it to thread through:


The preventer stay was made next, and everything is now lashed on the respective hearts. Here is what she looks like now 😄


Next are the fore mast lower shrouds and stays
- Peter Bloemendaal, uncarina, Gahm and 10 others
-
13
-
On 3/1/2021 at 4:40 PM, TimC said:
This entire build is inspiring. I’ll certainly be referencing your serving and rope work for my build. It will be my first time doing this type of detailed rope work as well. I can only hope to have results like yours
Tim
20 hours ago, niwotwill said:Fantastic progress 🙌 Really enjoyed the pictures. Now that I'm back I'll go back through the log and take a closer look. Loved the hammocks.
Stay well and stay safe
Will
 20 hours ago, HIPEXEC said:
Great build!
 6 minutes ago, desalgu said:
I can only echo others, fantastic! I sure wish I'd discovered these build logs a lot sooner. Your photos are great!
Very impressed with how you served shrouds around masts. Until this forum I wasn't sure what serving meant. Chuck called it seizing a line, but it looks all the same to me. What kind of thread did you use? It looks a lot thinner or finer than what I used, and it looks a lot better than what I did. The ones around masts are very realistic.
Your rope eyes are also excellent. I had a hard time with them, especially at first. In my case, I wrapped the pendant rope around the mast and seized it just like shrouds, and cut off the excess thread leaving pendant rope with eye. I did it this way not knowing any better, but it's a lot simpler than what you did.
I ordered the TFFM books. They are a bit expensive, but any reference or text book is expensive. Once again, thank you for suggesting them.
Question, where do you enter "current build", "completed build", and "on the shelf" information?
Thank you all for the great comments!! Really motivates me to do better 🙂
7 minutes ago, desalgu said:I can only echo others, fantastic! I sure wish I'd discovered these build logs a lot sooner. Your photos are great!
Very impressed with how you served shrouds around masts. Until this forum I wasn't sure what serving meant. Chuck called it seizing a line, but it looks all the same to me. What kind of thread did you use? It looks a lot thinner or finer than what I used, and it looks a lot better than what I did. The ones around masts are very realistic.
Your rope eyes are also excellent. I had a hard time with them, especially at first. In my case, I wrapped the pendant rope around the mast and seized it just like shrouds, and cut off the excess thread leaving pendant rope with eye. I did it this way not knowing any better, but it's a lot simpler than what you did.
I ordered the TFFM books. They are a bit expensive, but any reference or text book is expensive. Once again, thank you for suggesting them.
Question, where do you enter "current build", "completed build", and "on the shelf" information?
Thanks Desalgu! I just saw your finished Syren, she really is a beauty!
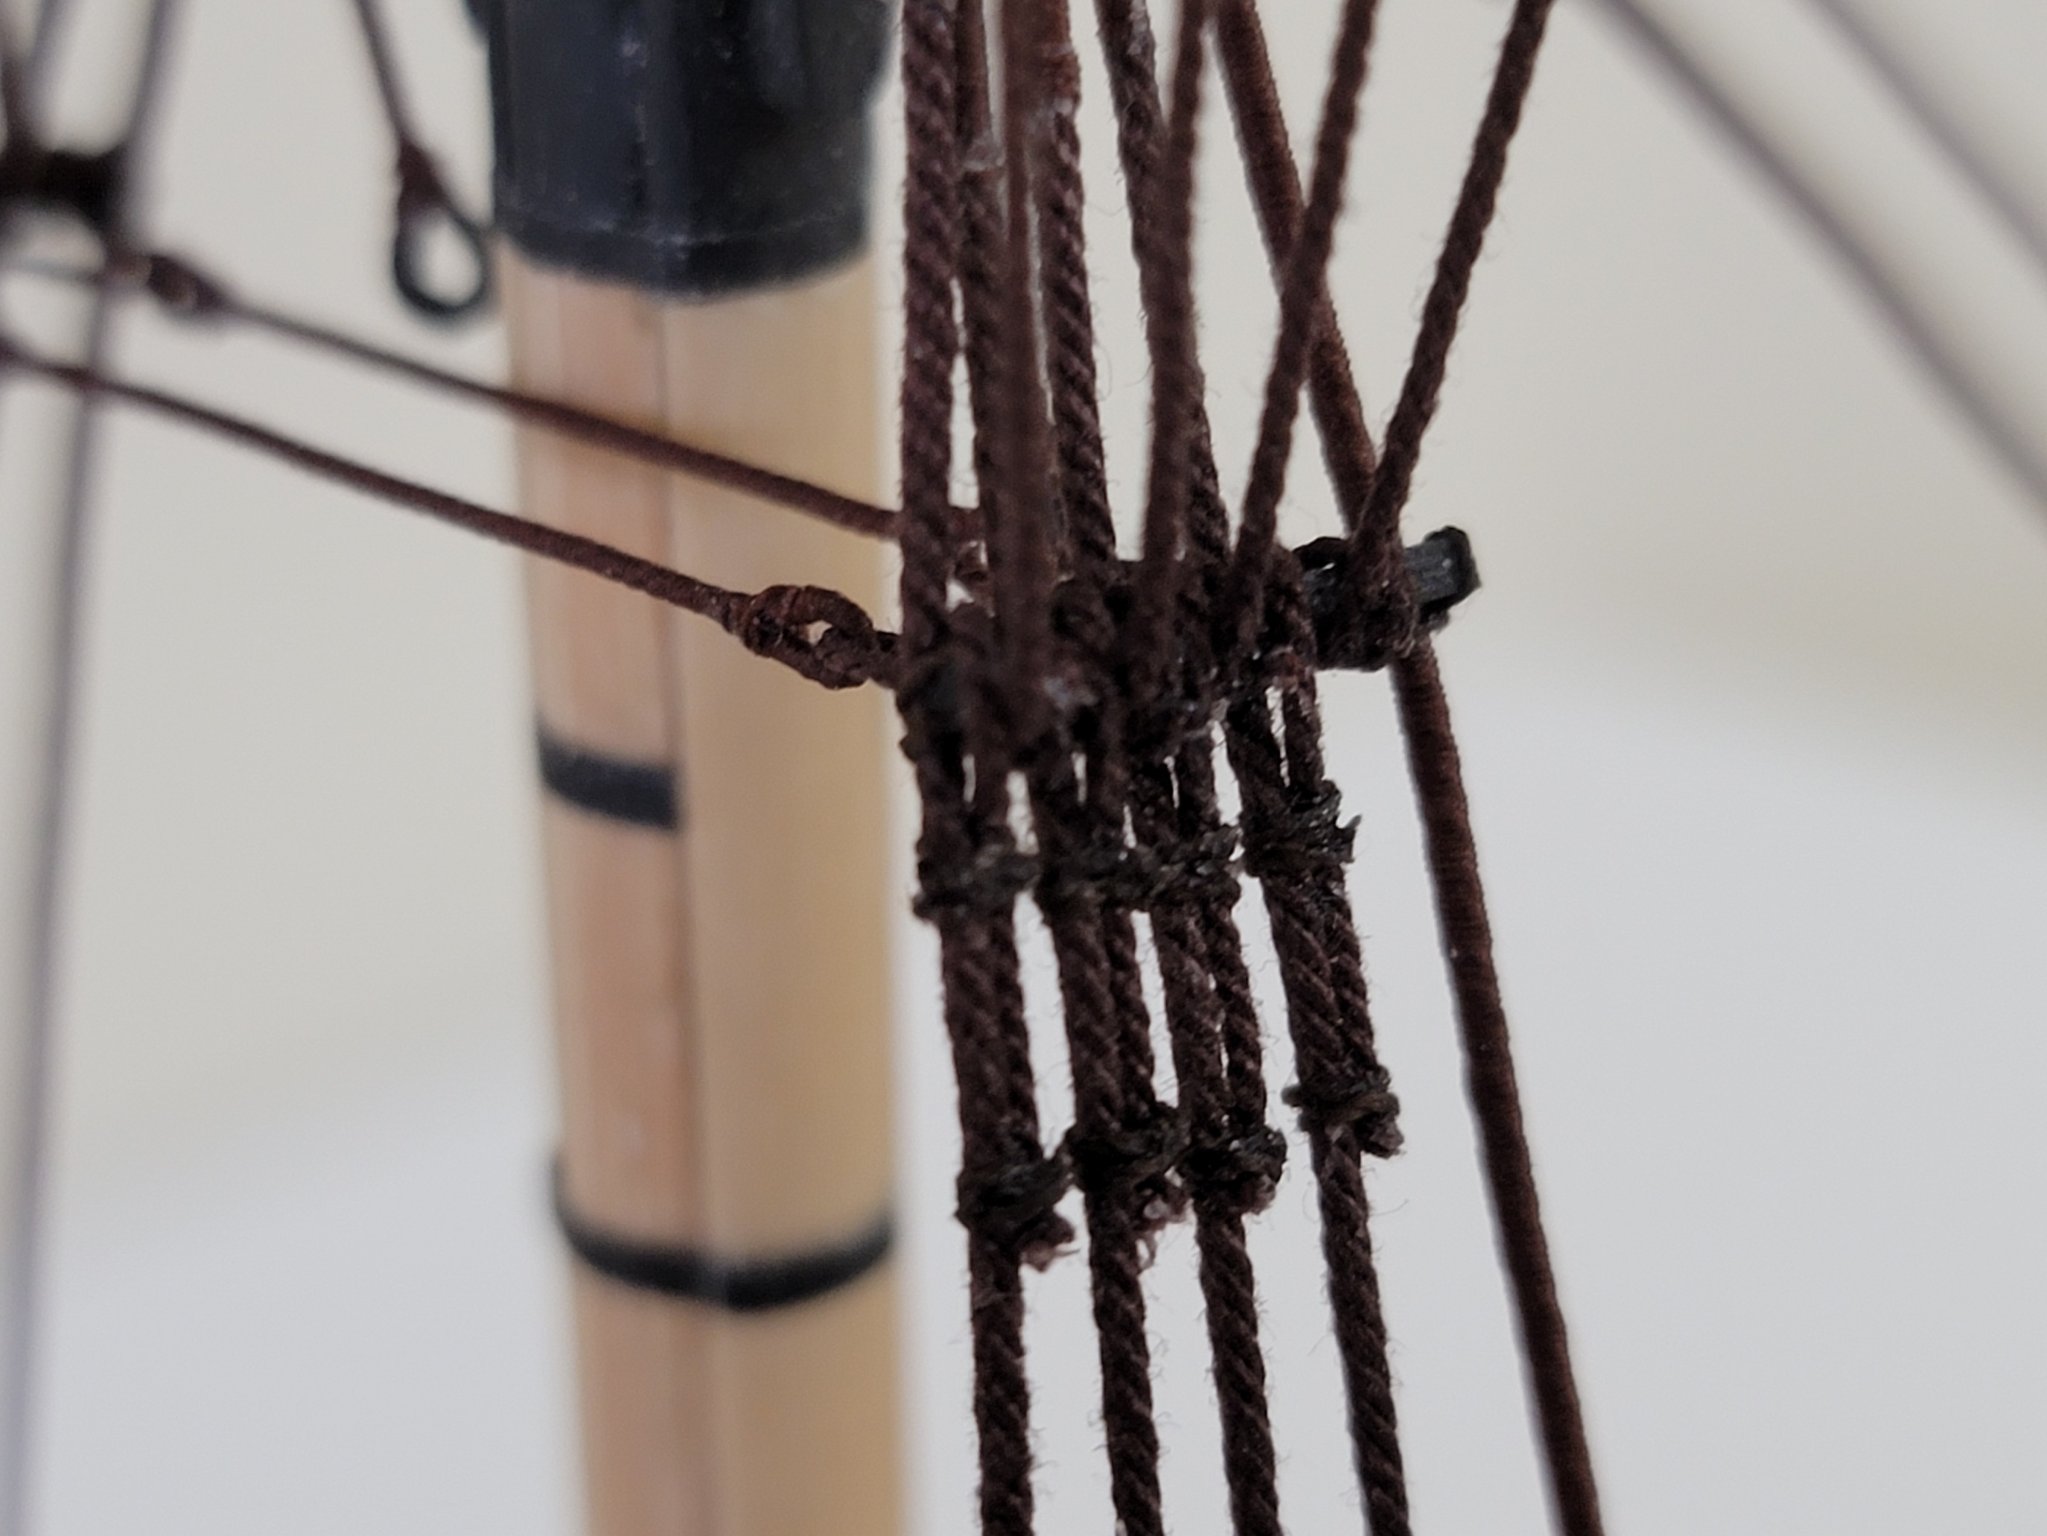
A few months ago I did not know what serving was either, until I found out they were used to prevent wear on the lines from rubbing on each other and from the sails rubbing on them. I am using "Superior MicroQuilter 100wt Polyester Thread" and the color is "Dark Brown #7029" to match the rope color. I purchased a couple spools from from Red Rock Threads. And to serve it I am using the Syren Serv-o-Matic machine, but there are a few other brands that make serving machines as well (e.g. Domanoff and Byrnes).
No worries! I have almost finished reading Vol 1 of the series, and have learnt so much already. I know I'll be using them a lot when I start to scratch build.
You can enter your signature by following the posts on this link:


US Brig Syren by WalrusGuy - FINISHED - Model Shipways - Scale 1:64 - Second wooden ship build
in - Kit build logs for subjects built from 1801 - 1850
Posted
Many thanks for the nice words Steven and Will. Thanks all for the likes as well! 🙂
I used 0.008in rope for the ratlines. I bought them from Chuck before he stopped selling his ropes, which were all prewaxed with beeswax. The clove hitches make the rope hang naturally. I used aliphatic resin wood glue diluted with water for the ends of the ratlines. Hope this answers your questions!