

.jpg.1f80adf1a9b14a937cfcf2ca6af0f0d4.jpg)
WalrusGuy
-
Posts
1,007 -
Joined
-
Last visited
Content Type
Profiles
Forums
Gallery
Events
Posts posted by WalrusGuy
-
-
20 hours ago, desalgu said:
Looks great! I can't get over how big it looks, which probably shows my inexperience.
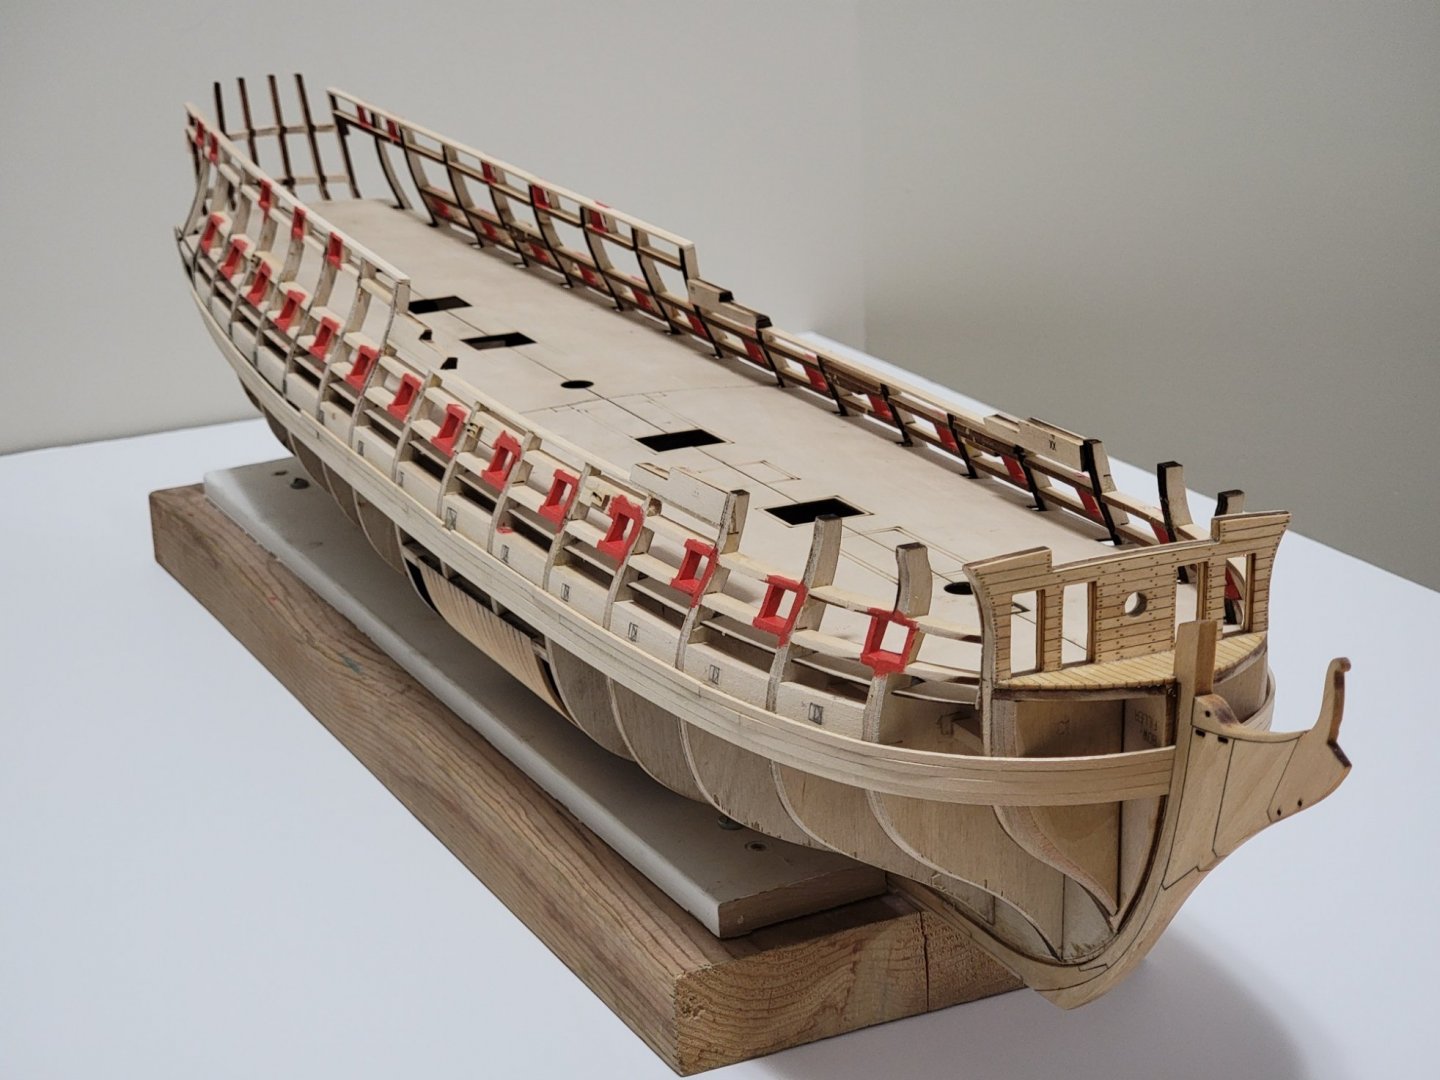
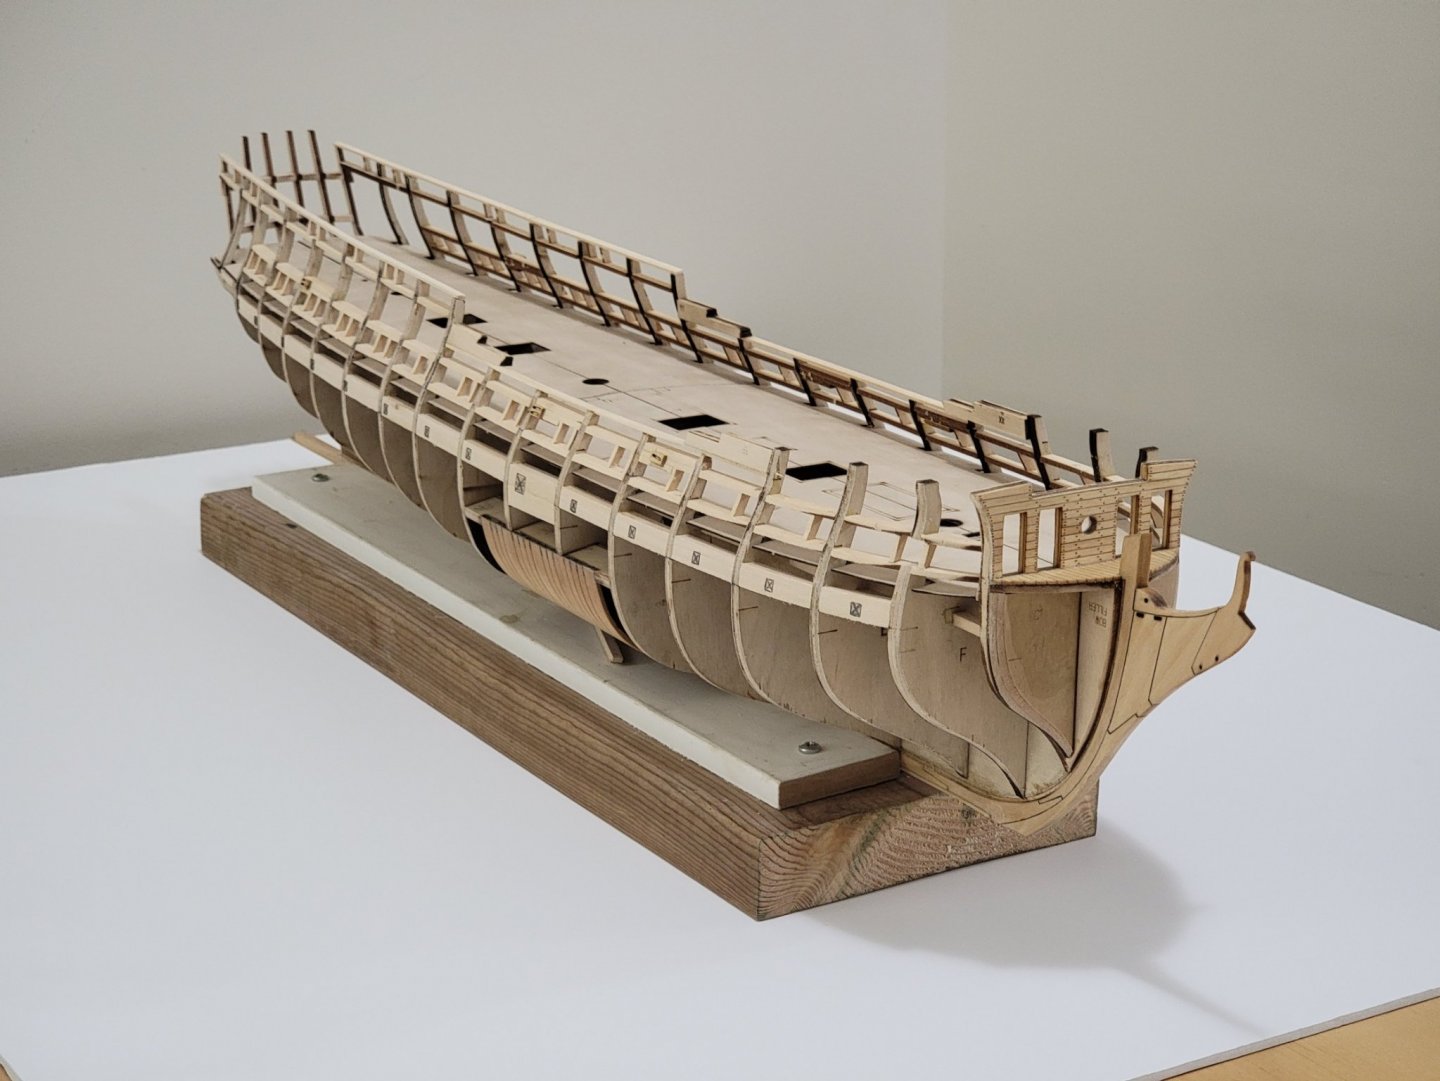
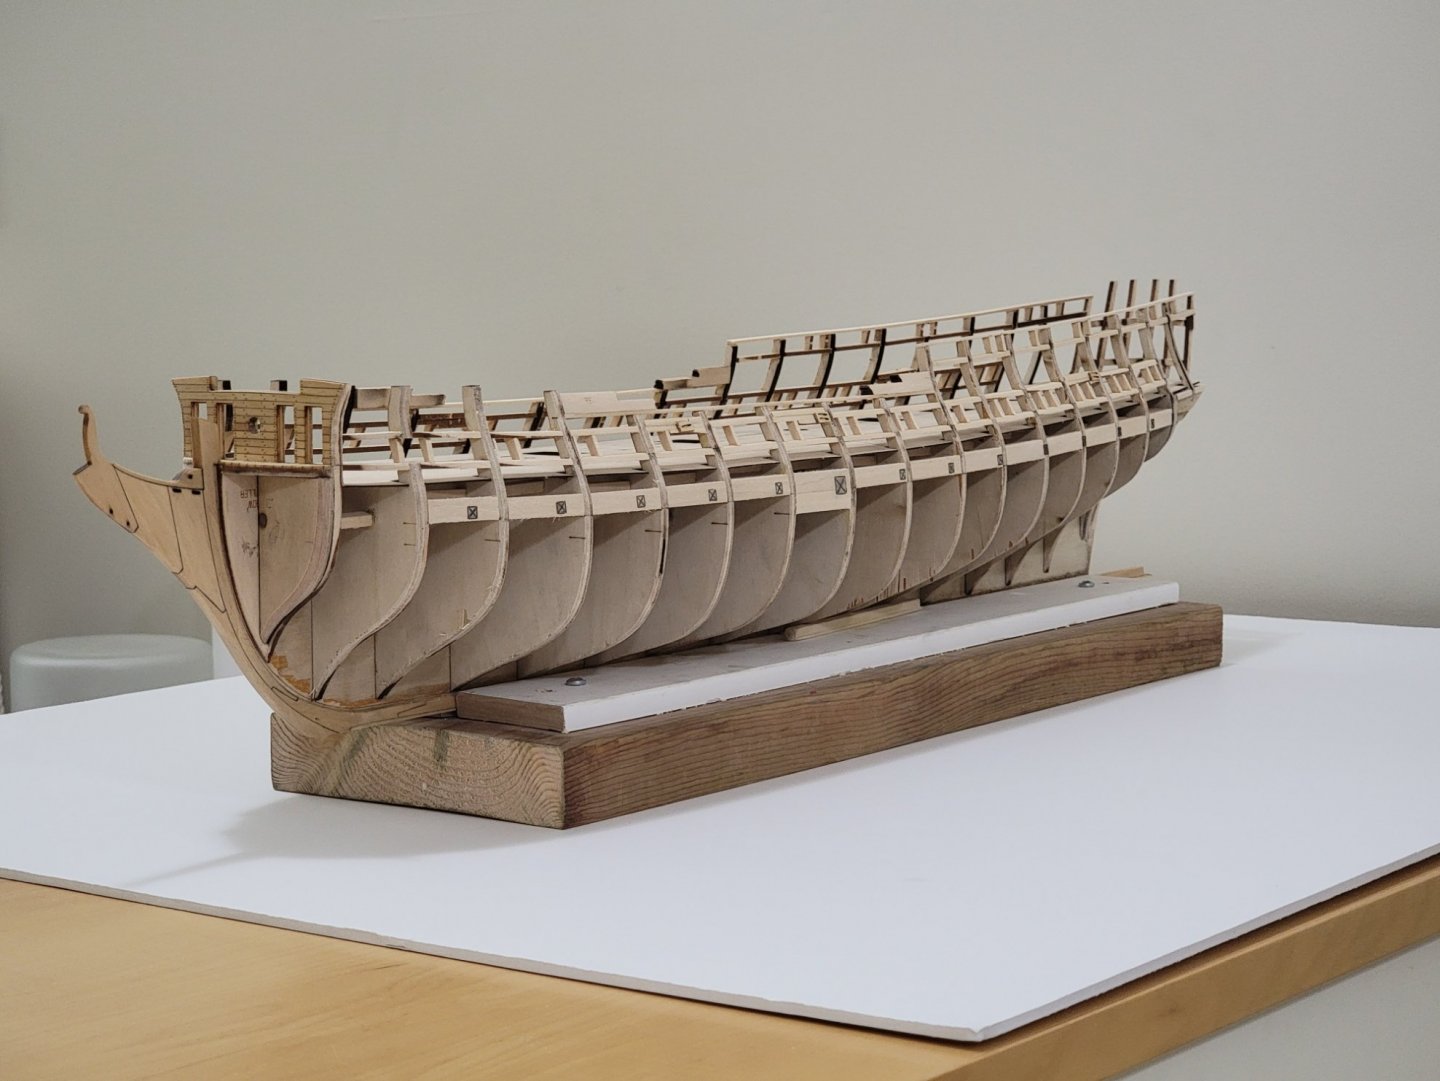
Thank you David. She is massive!! It's hard to tell from the photos because there's nothing to compare it to, but the length of the hull is about 35".
41 minutes ago, BenD said:This is going to be another masterpiece from you.
The photo's look really good. What lighting are you using in your photos? Soft box, LEDs, A bare bulb on a stick?
Thanks so much for the nice words, Ben! I just switch on all the lights around the house when taking the photos. And the white board beneath the ship also helps reflect the light.
-
3 hours ago, Tigersteve said:
Looks very neat. I like it!
Steve
Thanks Steve! 🙂
-
-
On 8/16/2021 at 4:55 PM, Wahka_est said:
Nice progress.
I finally chose plank length 12,5cm +\- depending on the location and tried to follow Chucks scheme.
Above the wales its ok to follow the drawing but below it get interesting as i didnt understand clearly the scheme that was supplied but eventually i got it to work.You are right-it takes time….a lot of time. And as it does not have 2nd planking you really cant make many mistakes. Only the ones that sanding would solve.
Lovely progress, hope to hear from you soon.
W
Thank you! I think I will also follow what you did. I am very nervous for planking below the wales!! The curves seem very complex and there is no hiding mistakes in the planking unless I plan to paint it white.
On 8/17/2021 at 11:00 AM, michael mott said:Looks like you are doing a great job on the planking, not rushing is the key to most model-work I have found.
Michael
Thank you for checking in, Michael! Going slow has helped me identify potential problem areas and gives me a chance to rectify before moving on.
On 8/17/2021 at 12:29 PM, BobG said:I just read over your build log and will be following along. I've always thought this is a great looking model.
Wonderful work so far and lots of progress in a short period of time!
Welcome Bob! I also love the way the Confederacy looks! The hull is so beautiful. And thank you for the nice words!
Also, thanks all for the likes and for checking in! 🙂
-
-
4 hours ago, igorcap said:
Decor set for USS Confederacy (1778). Now in the wood (pear). Scale 1/64
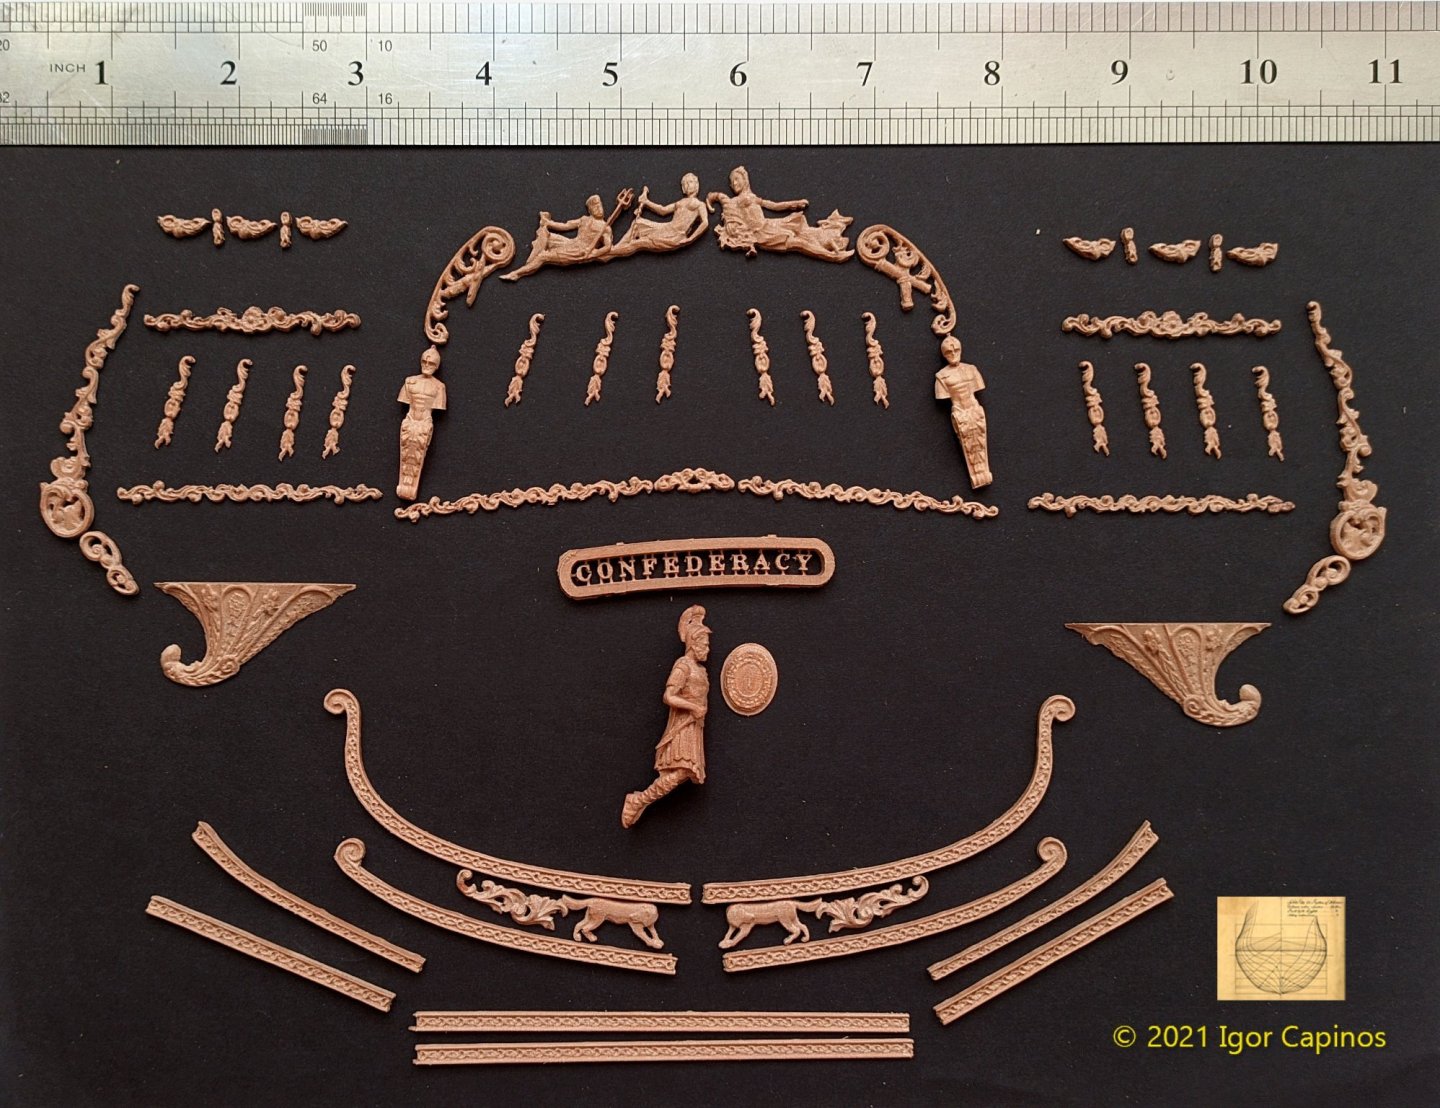
Looks amazing! Are you planning to sell these?
- mtaylor, Tigersteve and Archi
-
 3
3
-
Just a quick note, I realized the two 1/8" planks at the stern are too long. The plans didn't show where the butt joint would be, but I noticed the photos that there should be two separate planks here. Also, one of the mid section plank joints is not in the correct location. So will do some minor deconstruction before continuing on...
-
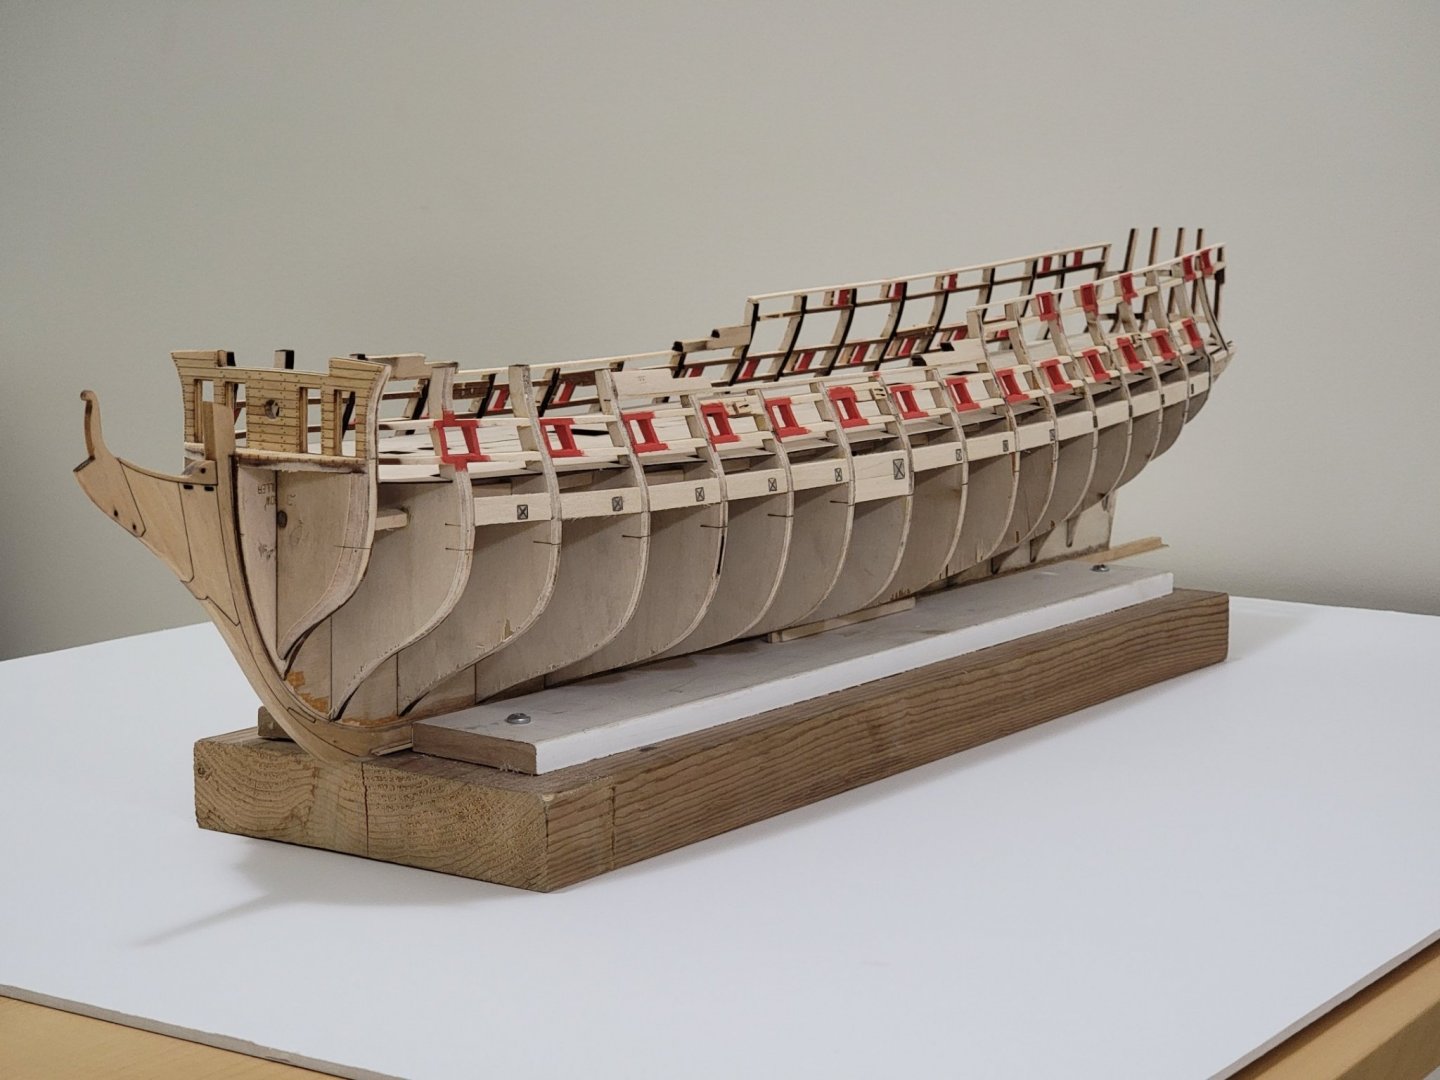
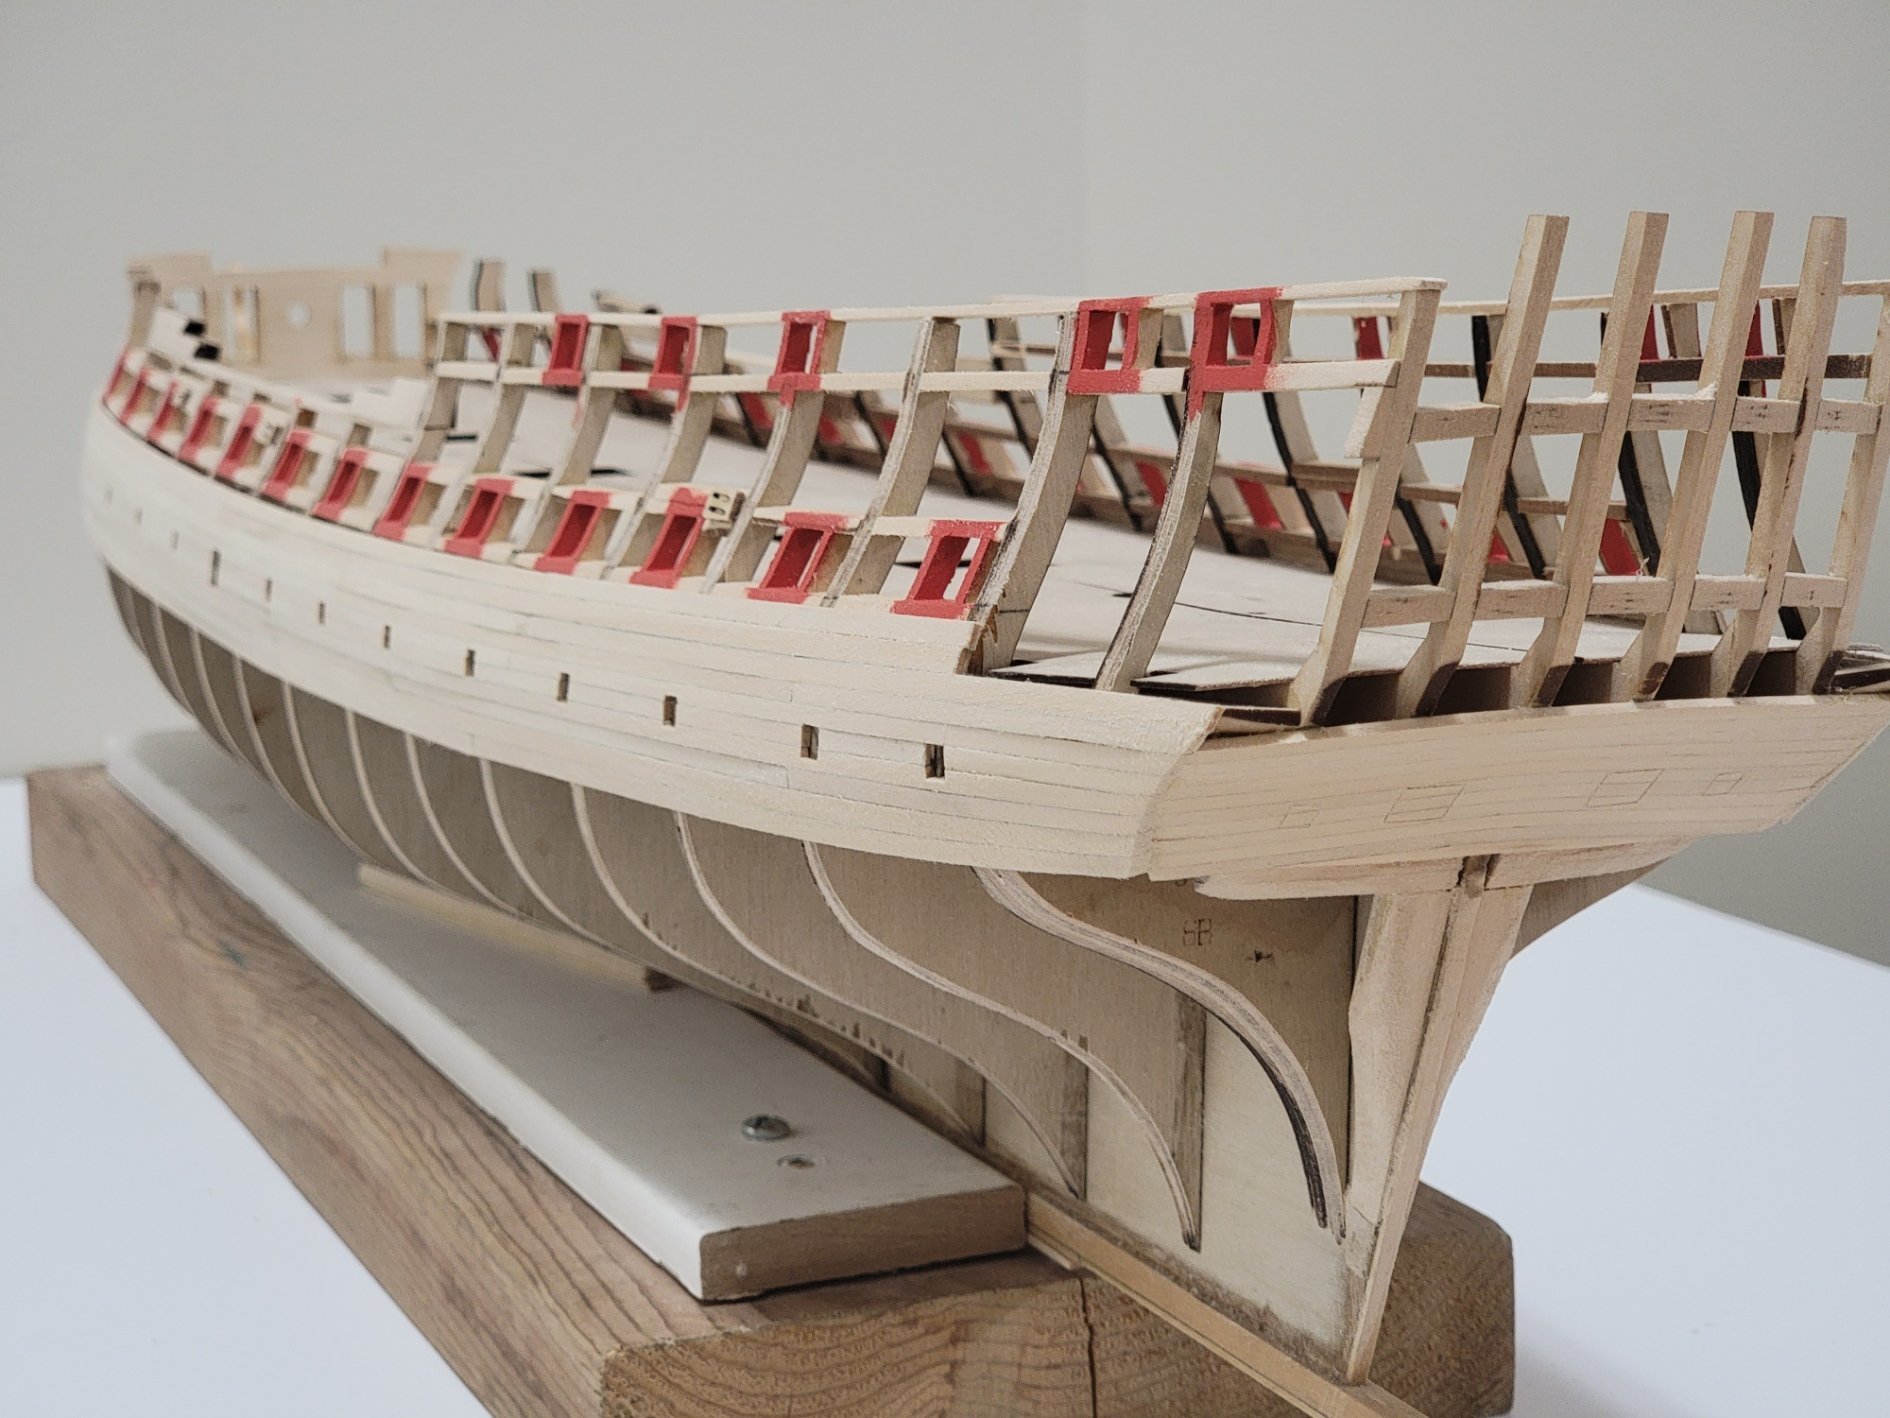
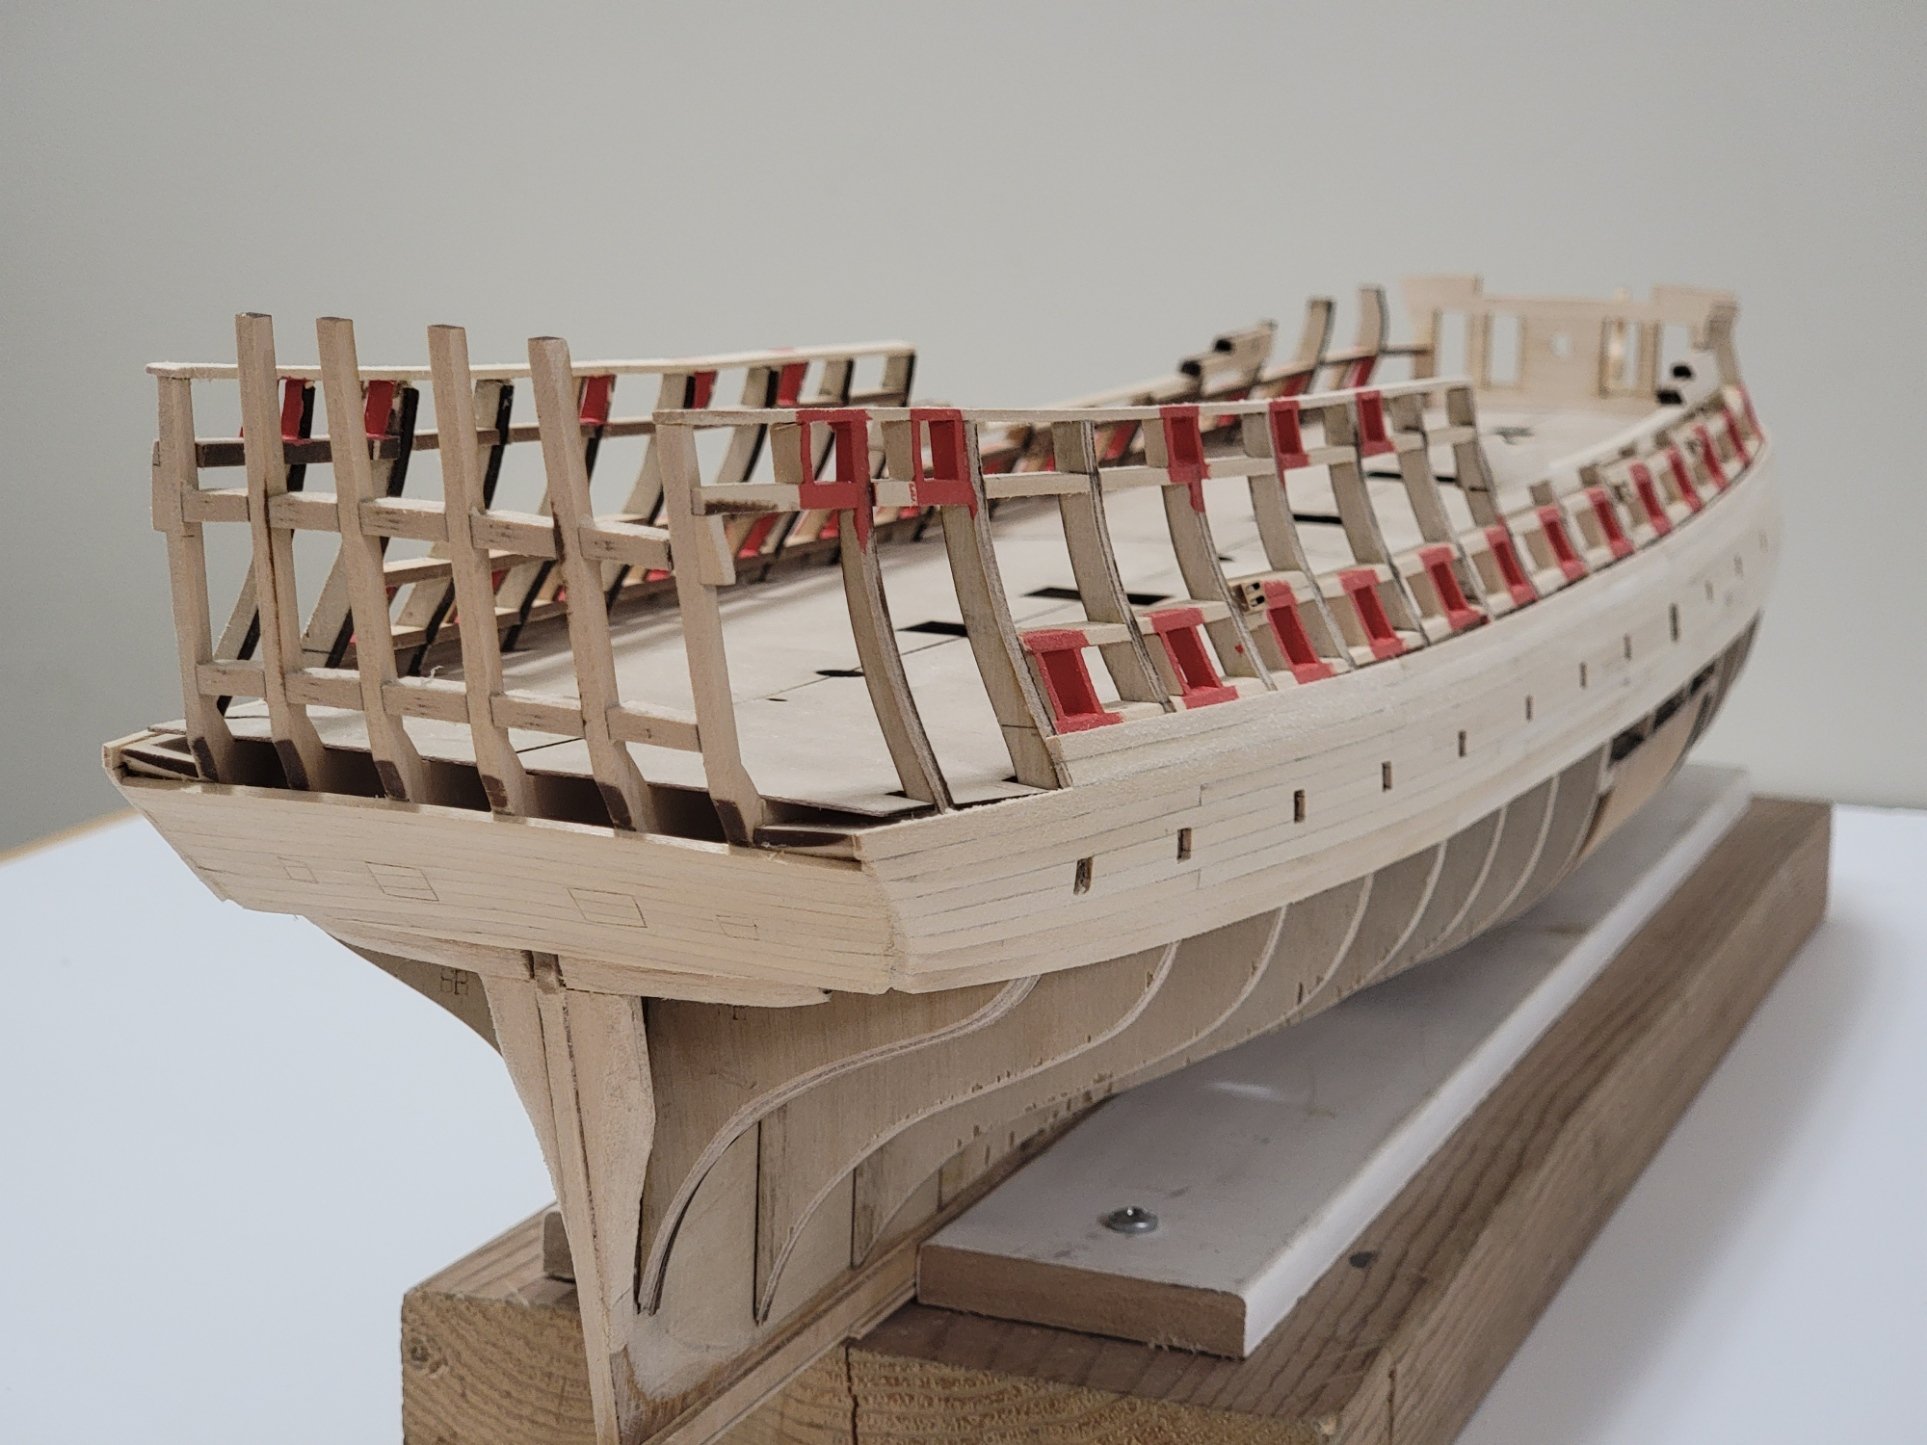
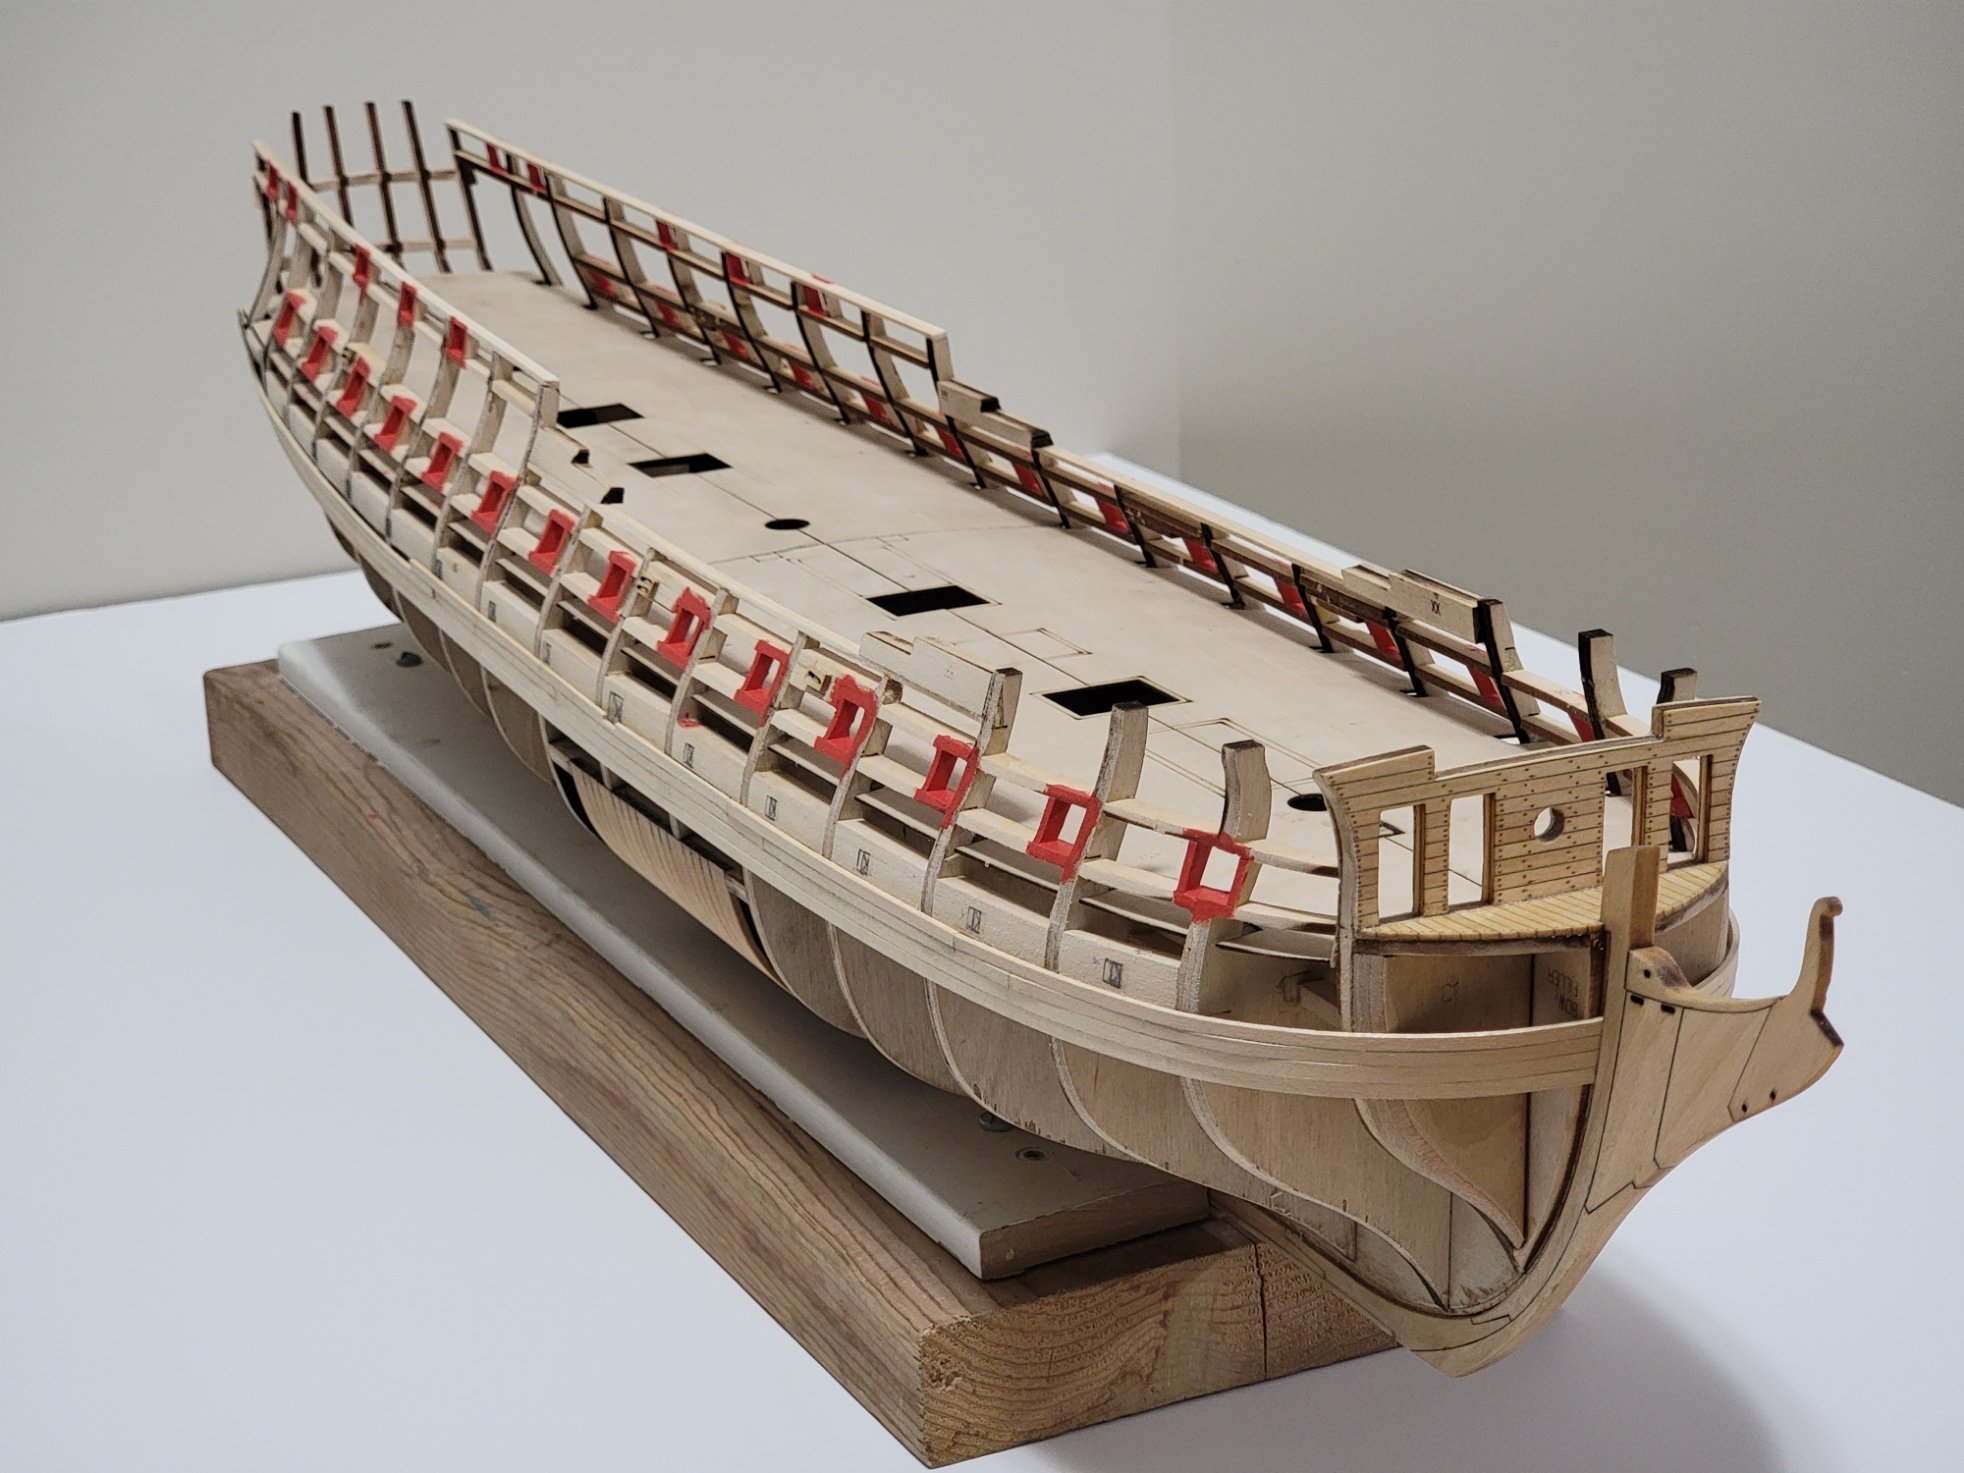
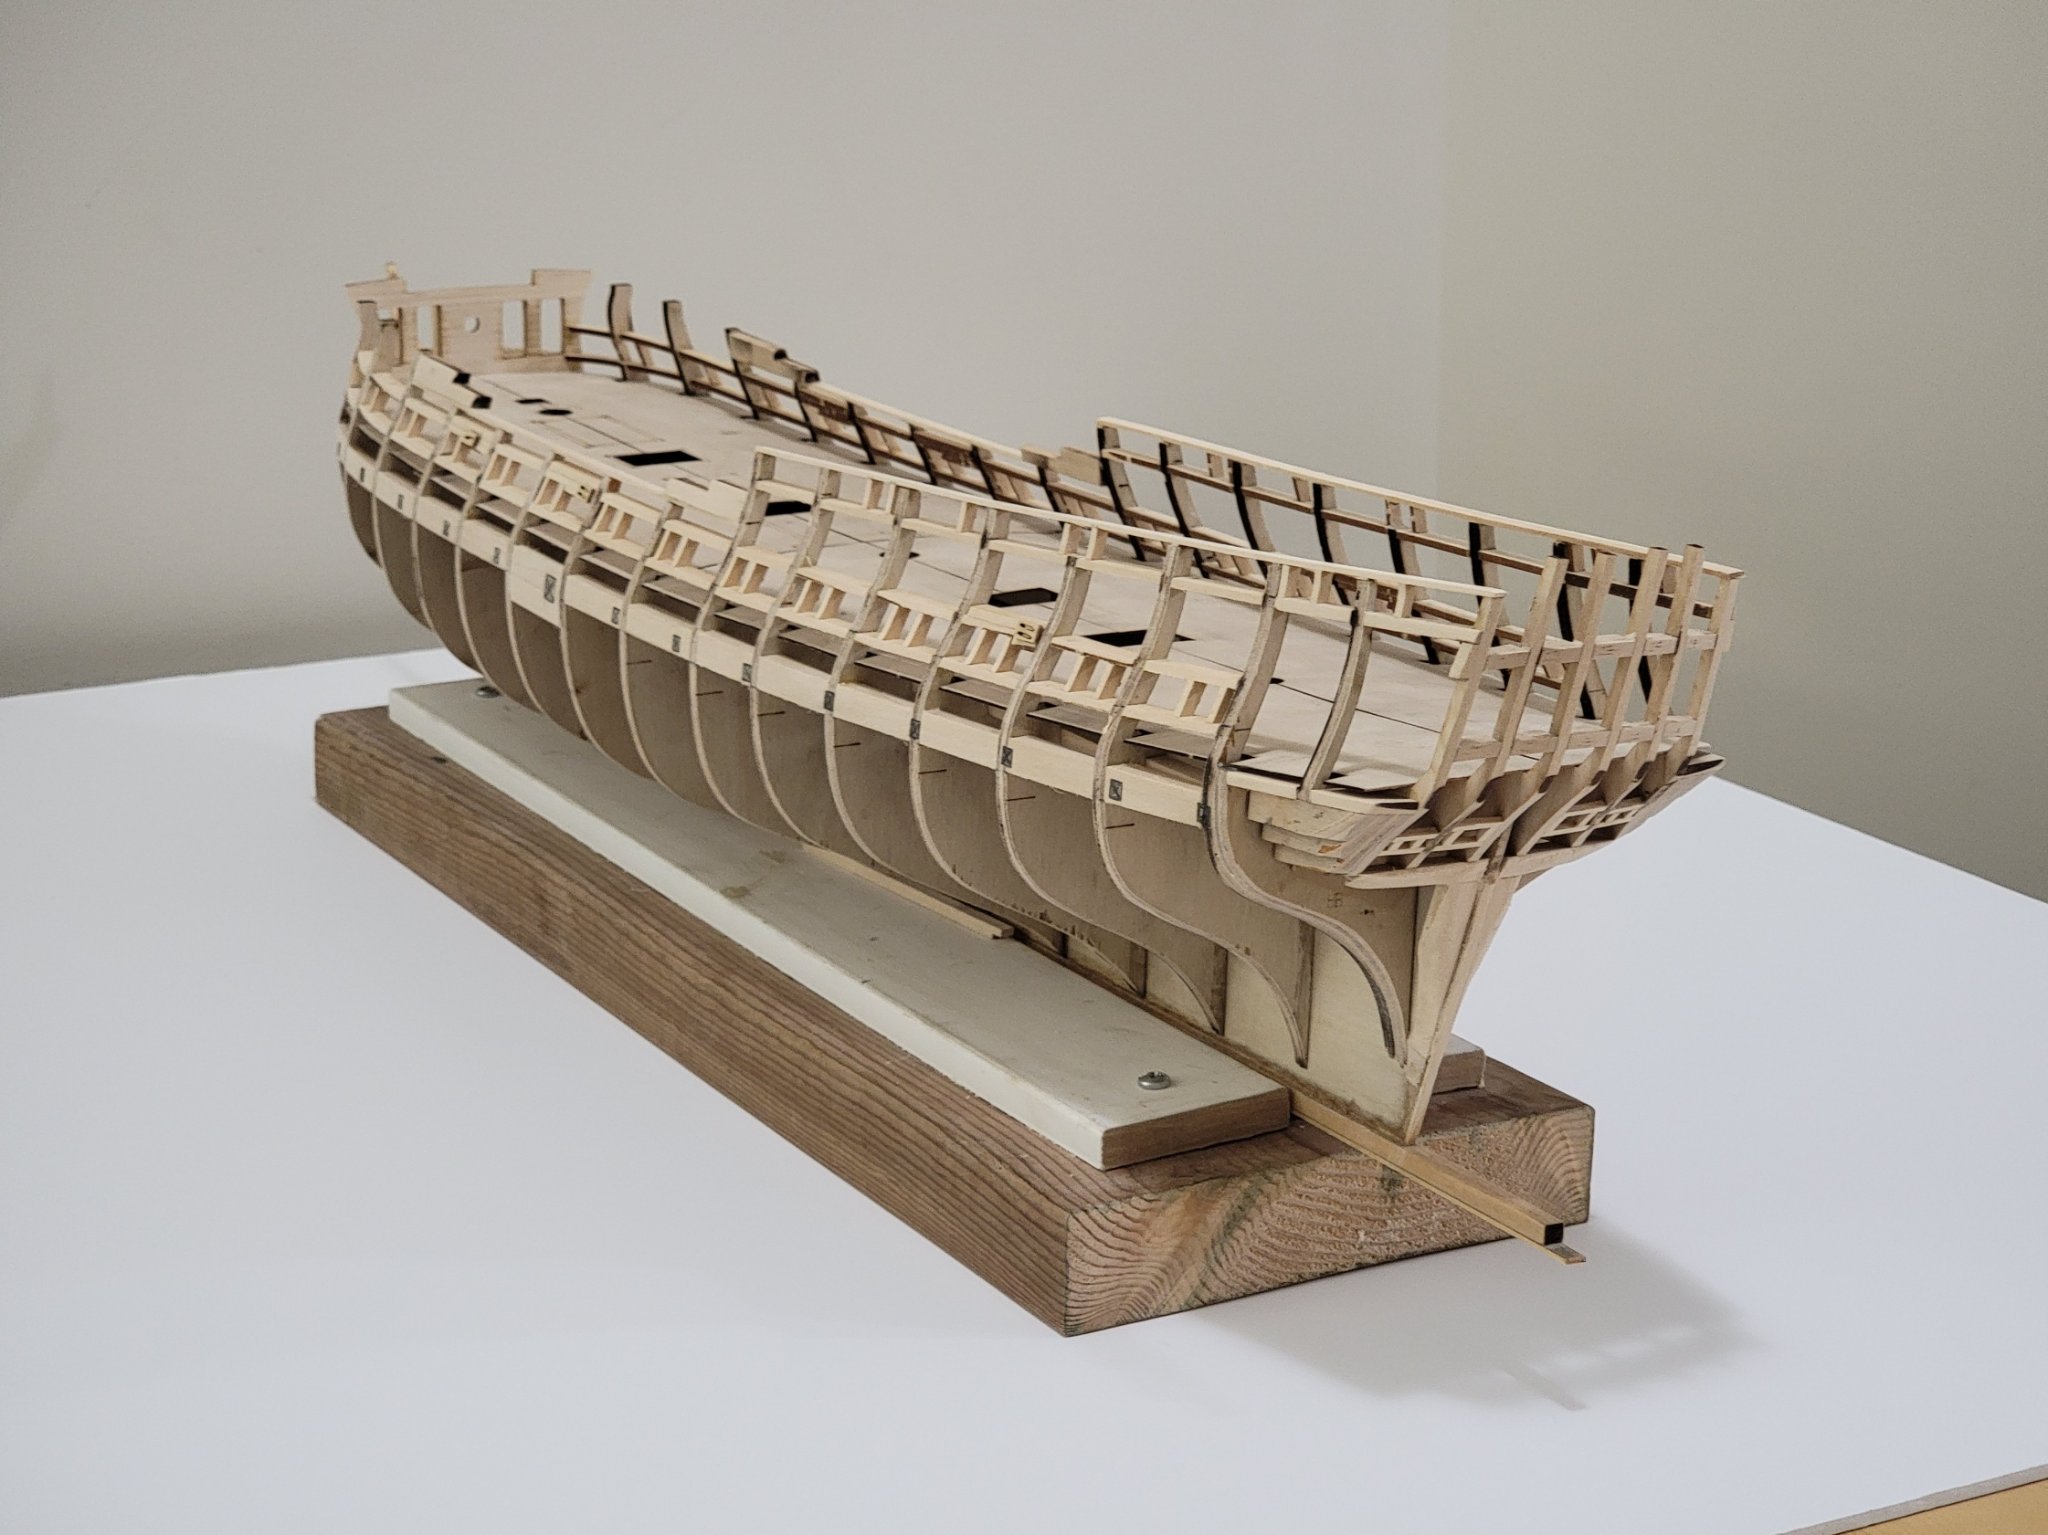
I started planking the ship. I can already tell, I'll be doing this for quite a while!!! 😅
I am enjoying the process though, and taking my time gluing each plank.
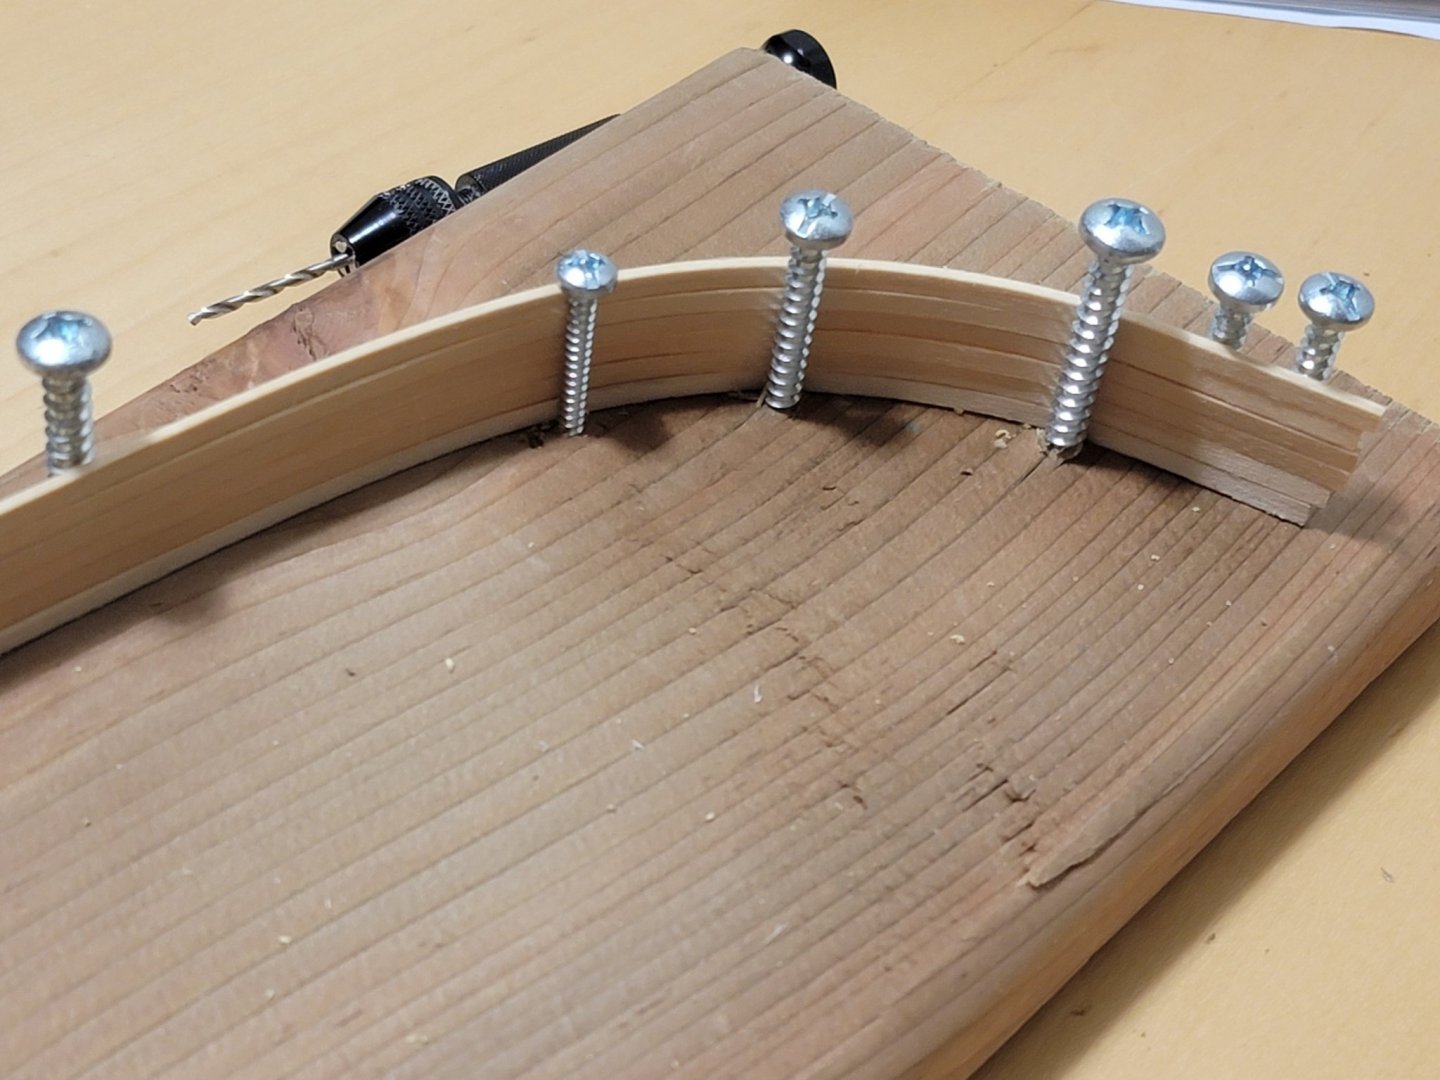
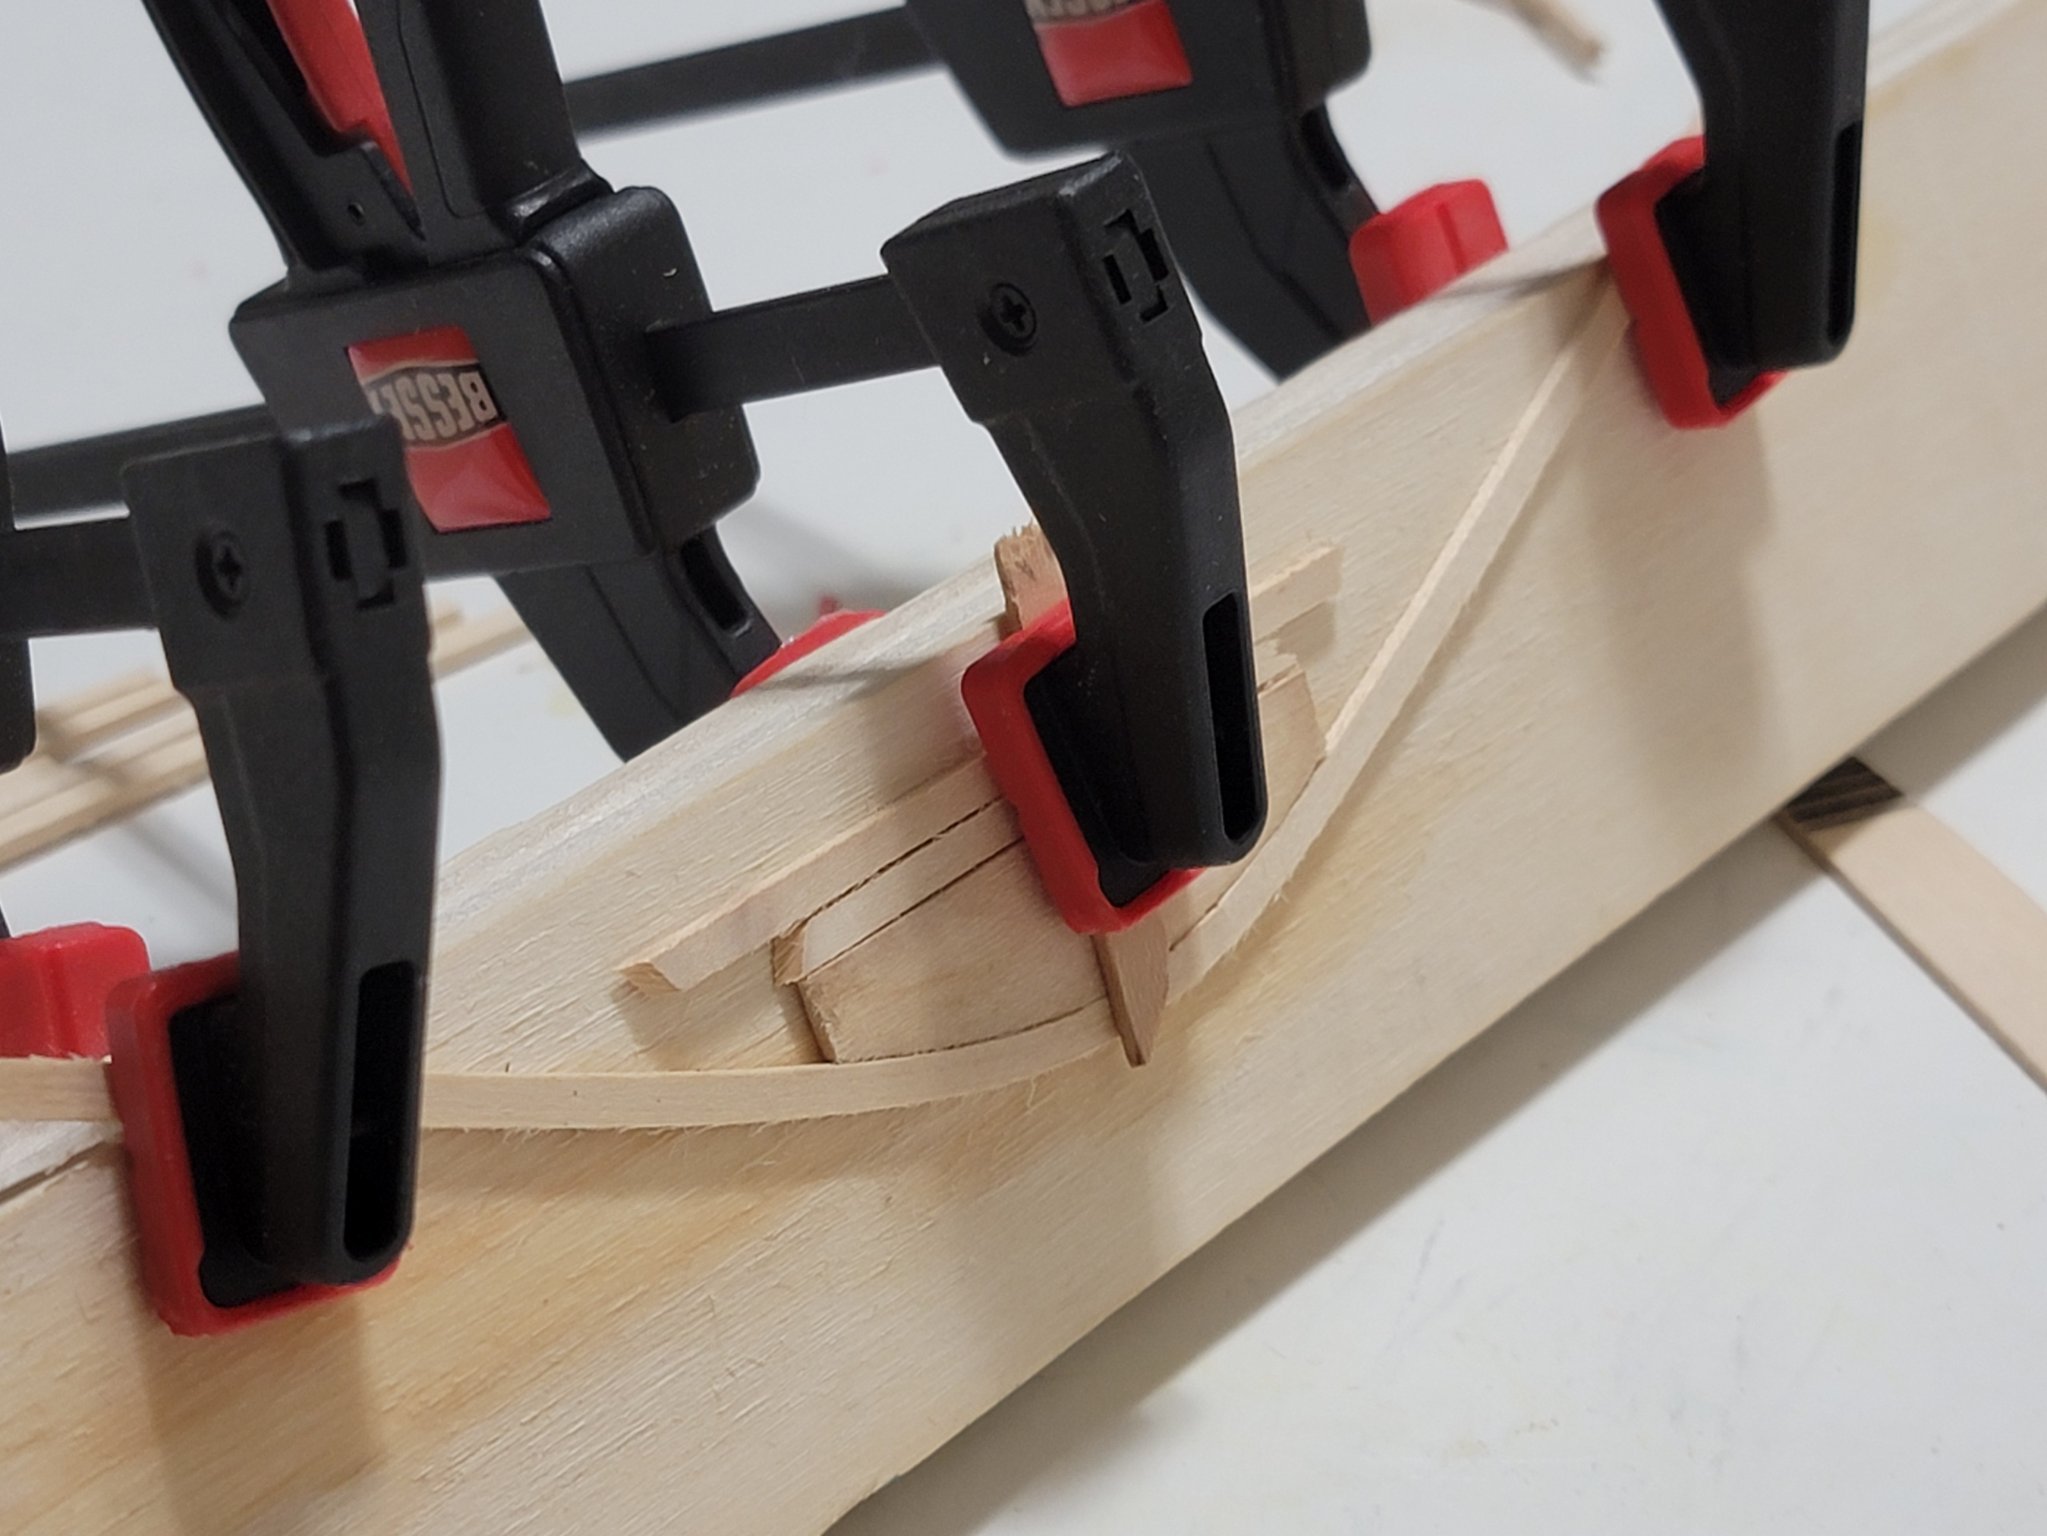
Here is the jig I used to bend the planks:
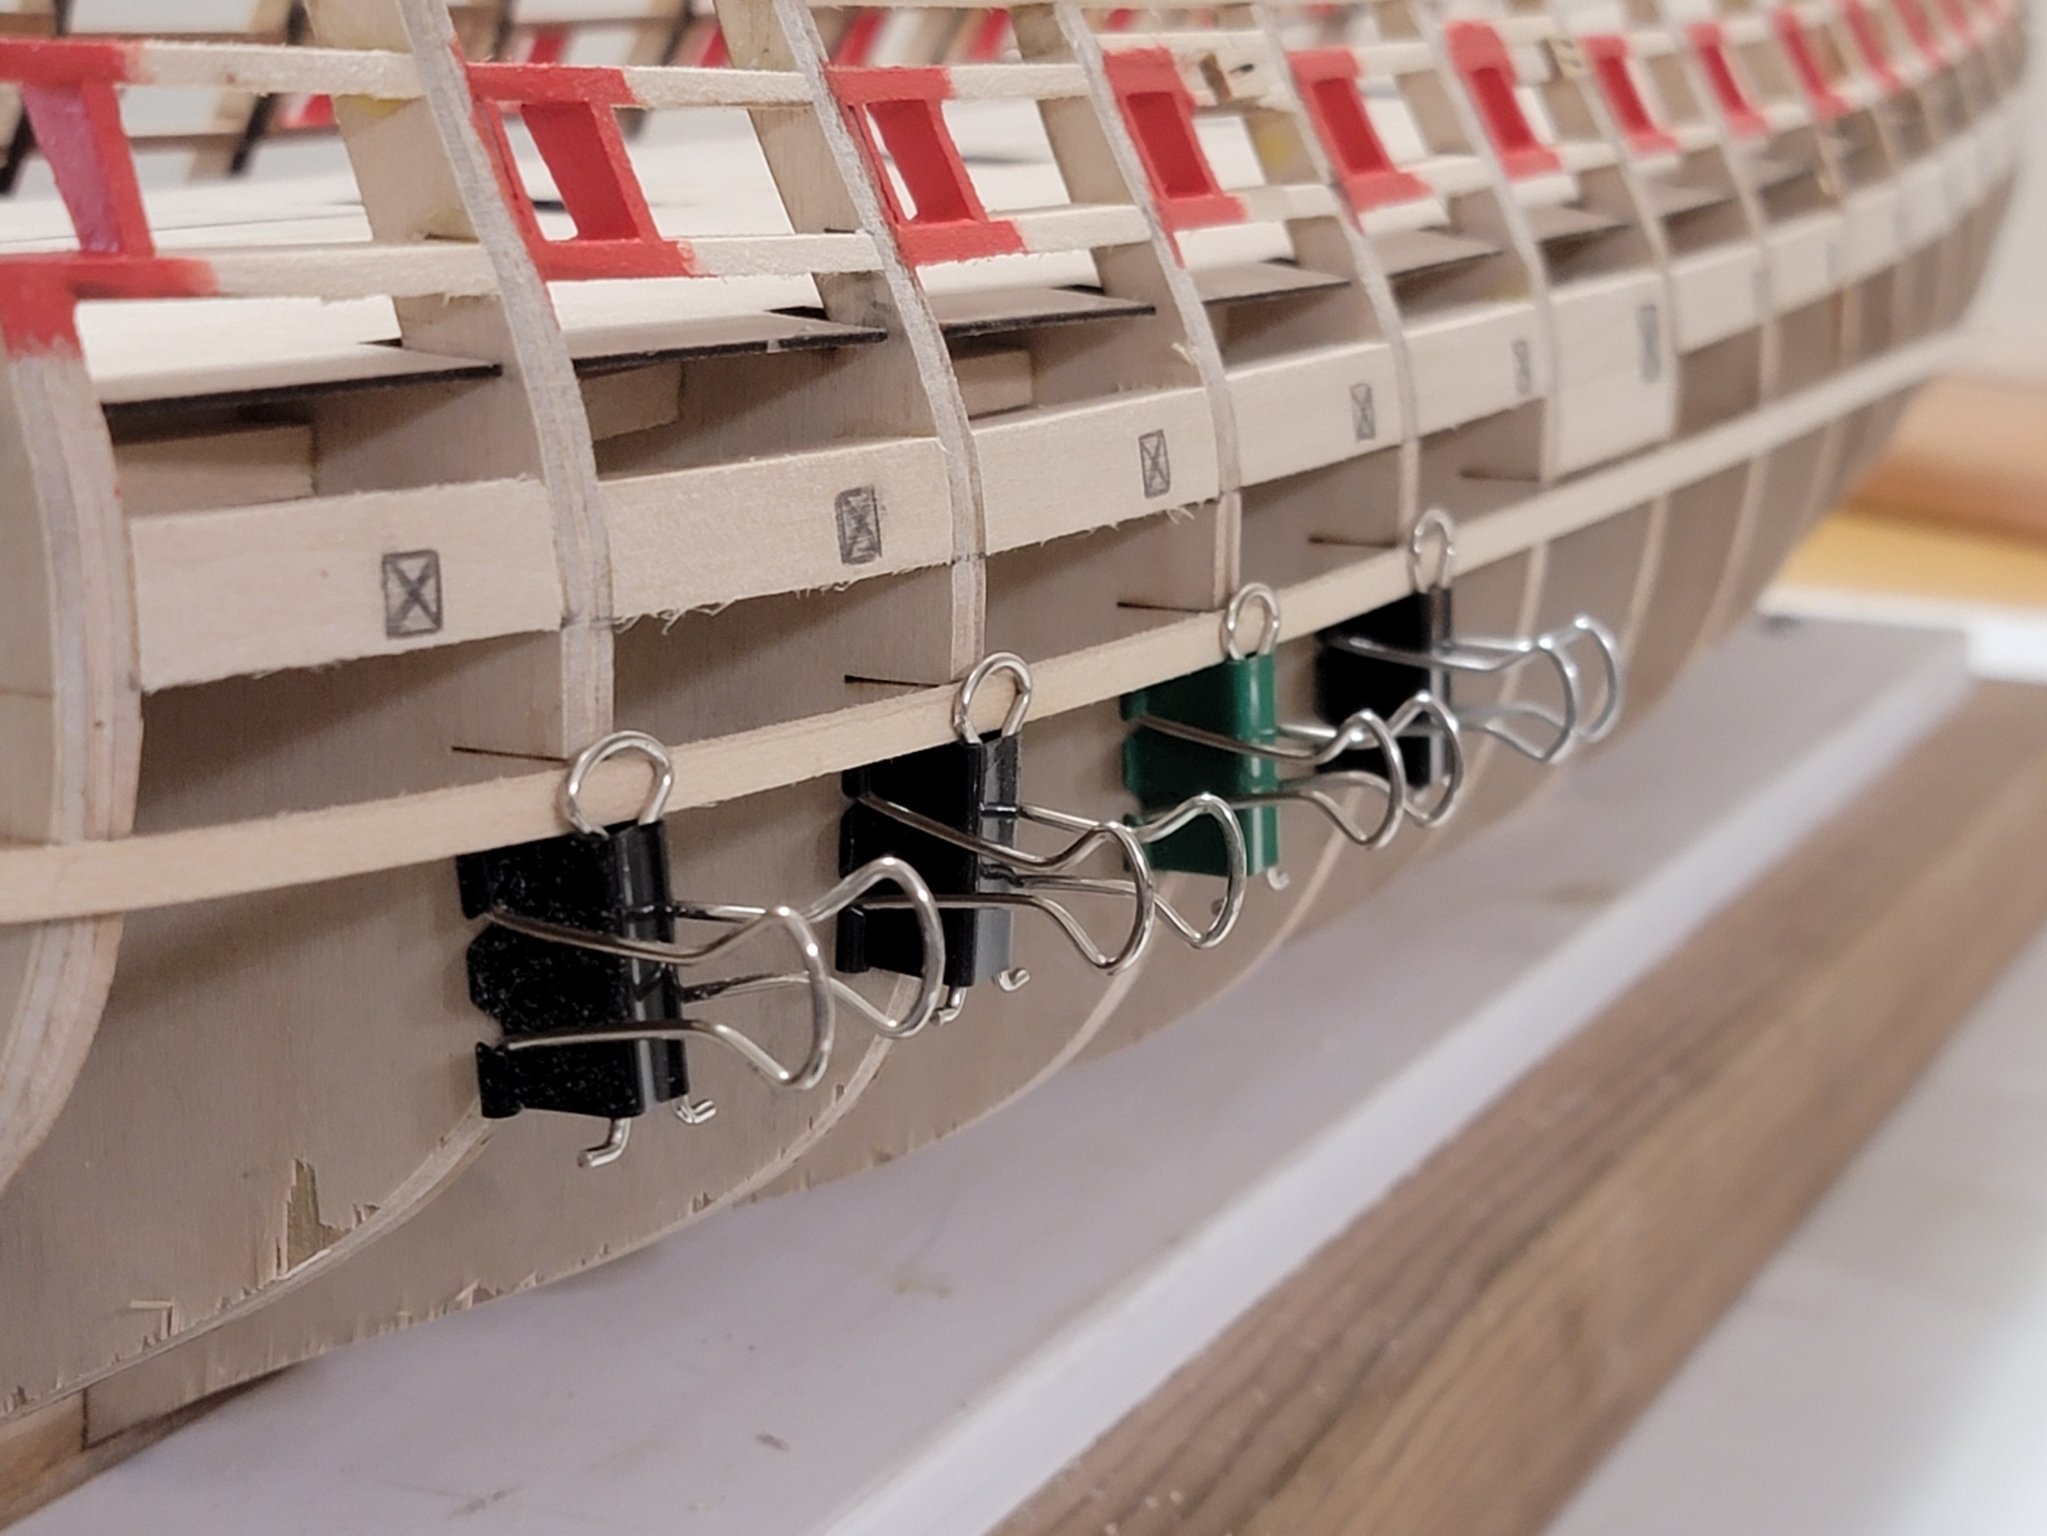
Then I started planking. The first two strips were held using these clips:

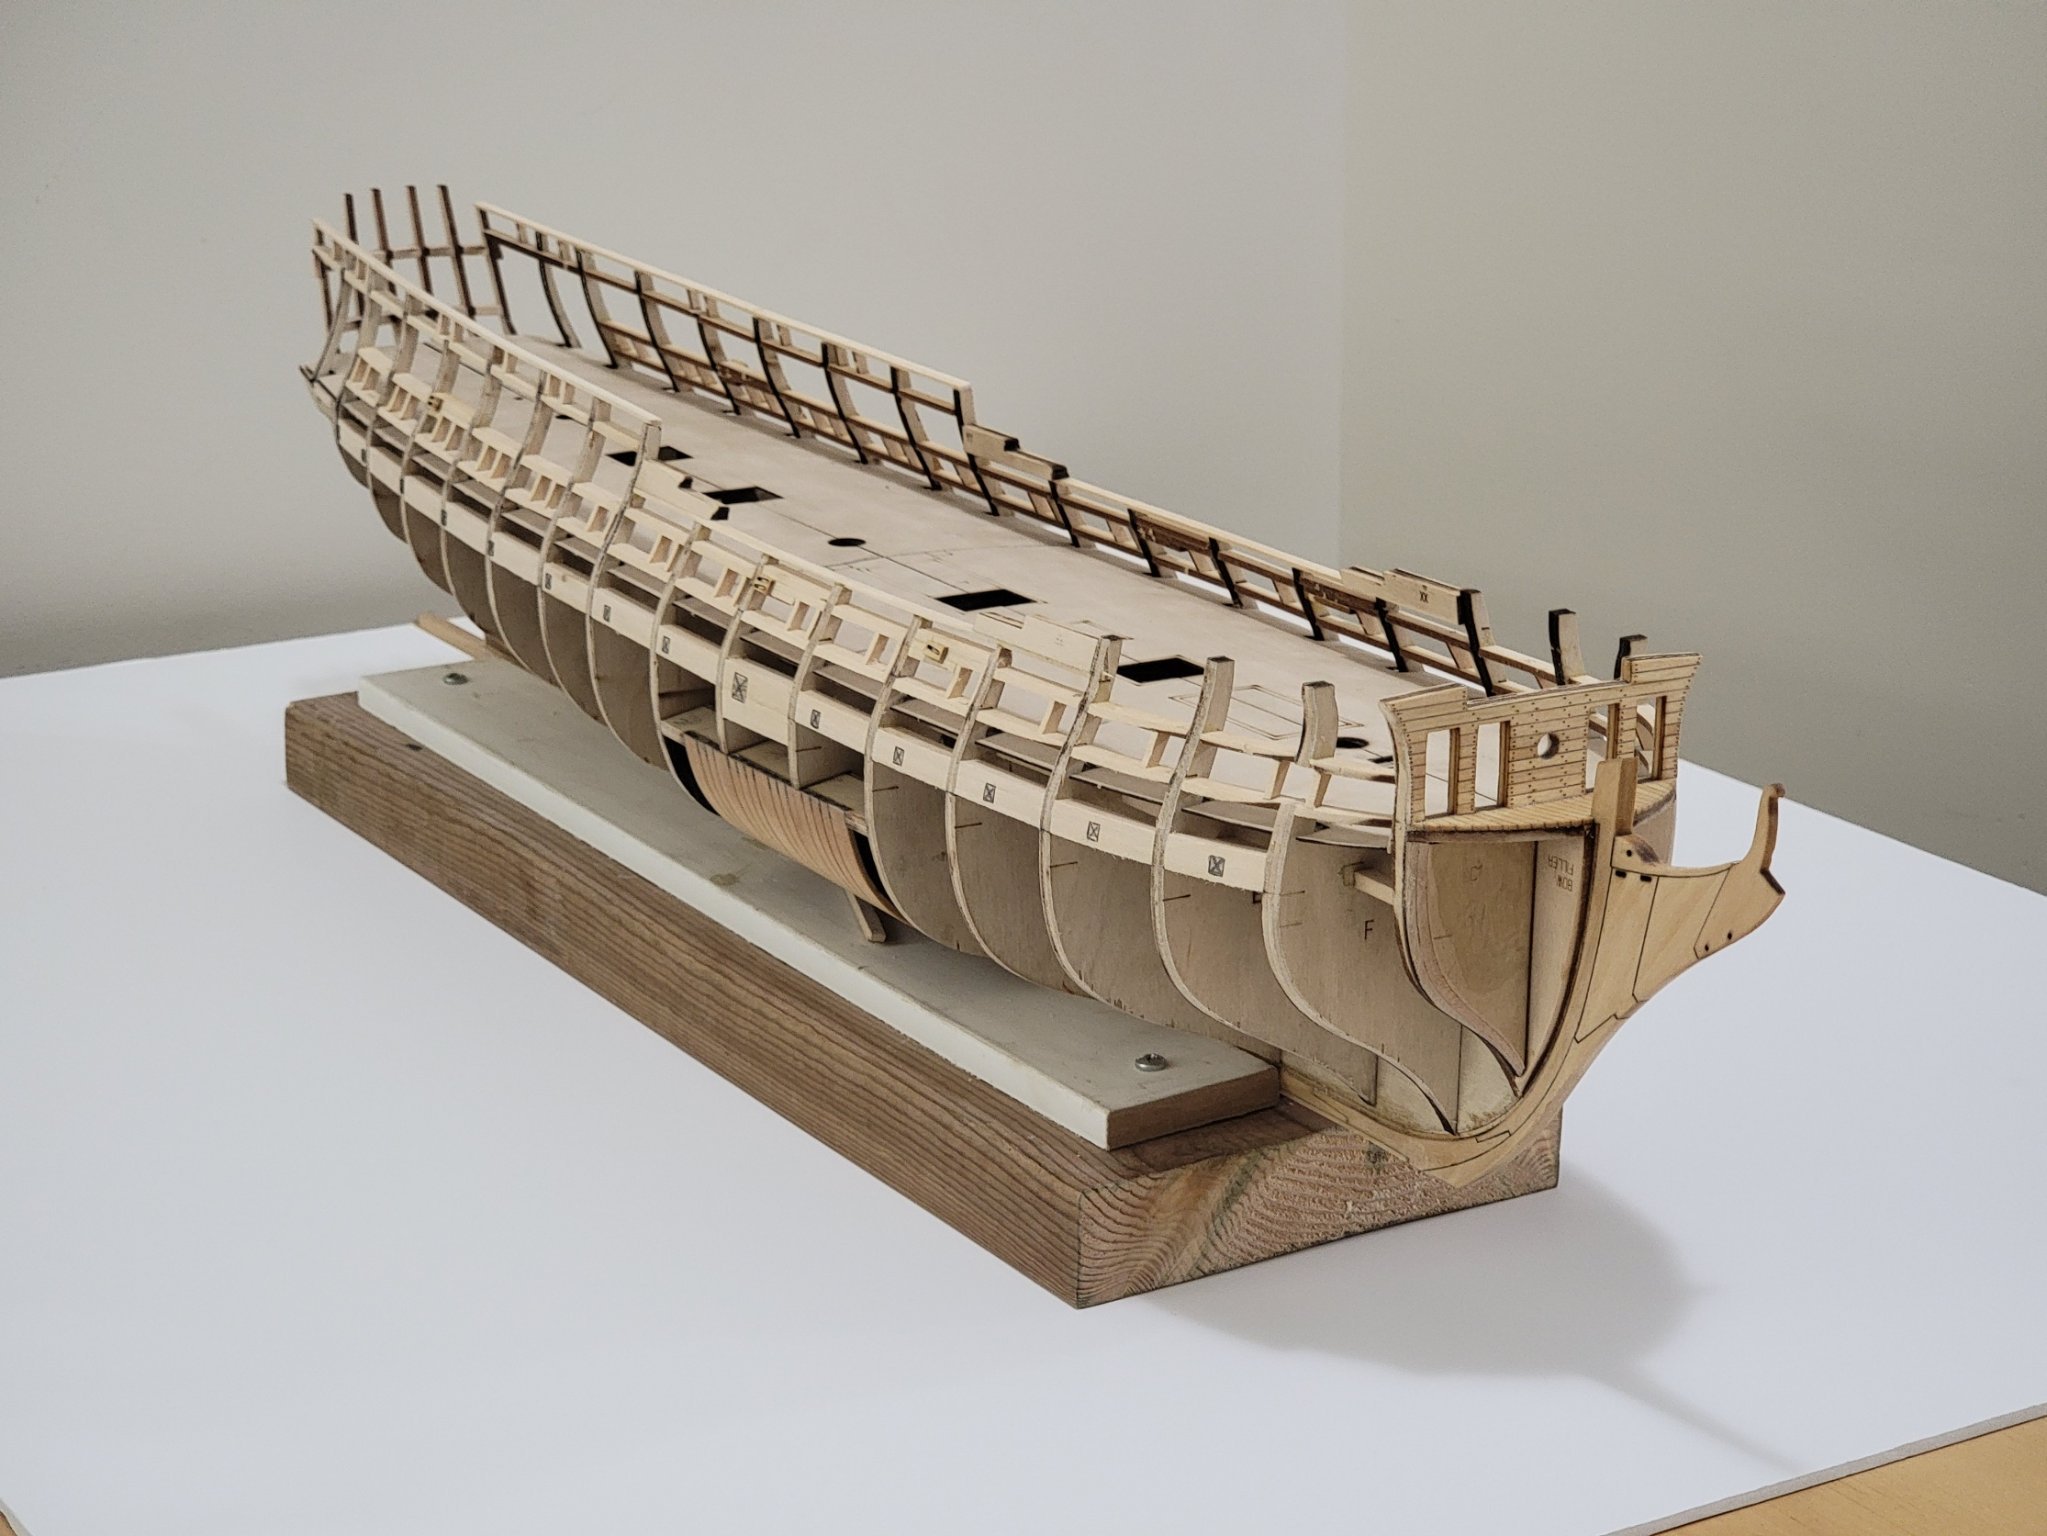
When reaching the stern, there were some tight corners which I had to manually hold for the glue to set. I put on a Netflix series and watched for 30 mins to help speed the process mentally 😁
While planking I noticed the starboard sweep ports were not positioned correctly, so I took out the template again and noticed a 0.5 cm difference! Good thing I was planking each side systematically to notice this. Also, the first two starboard sweep ports are positioned 2 mm above where they should be located. This will be an easy fix which I will resolve as I plank the 5th layer..
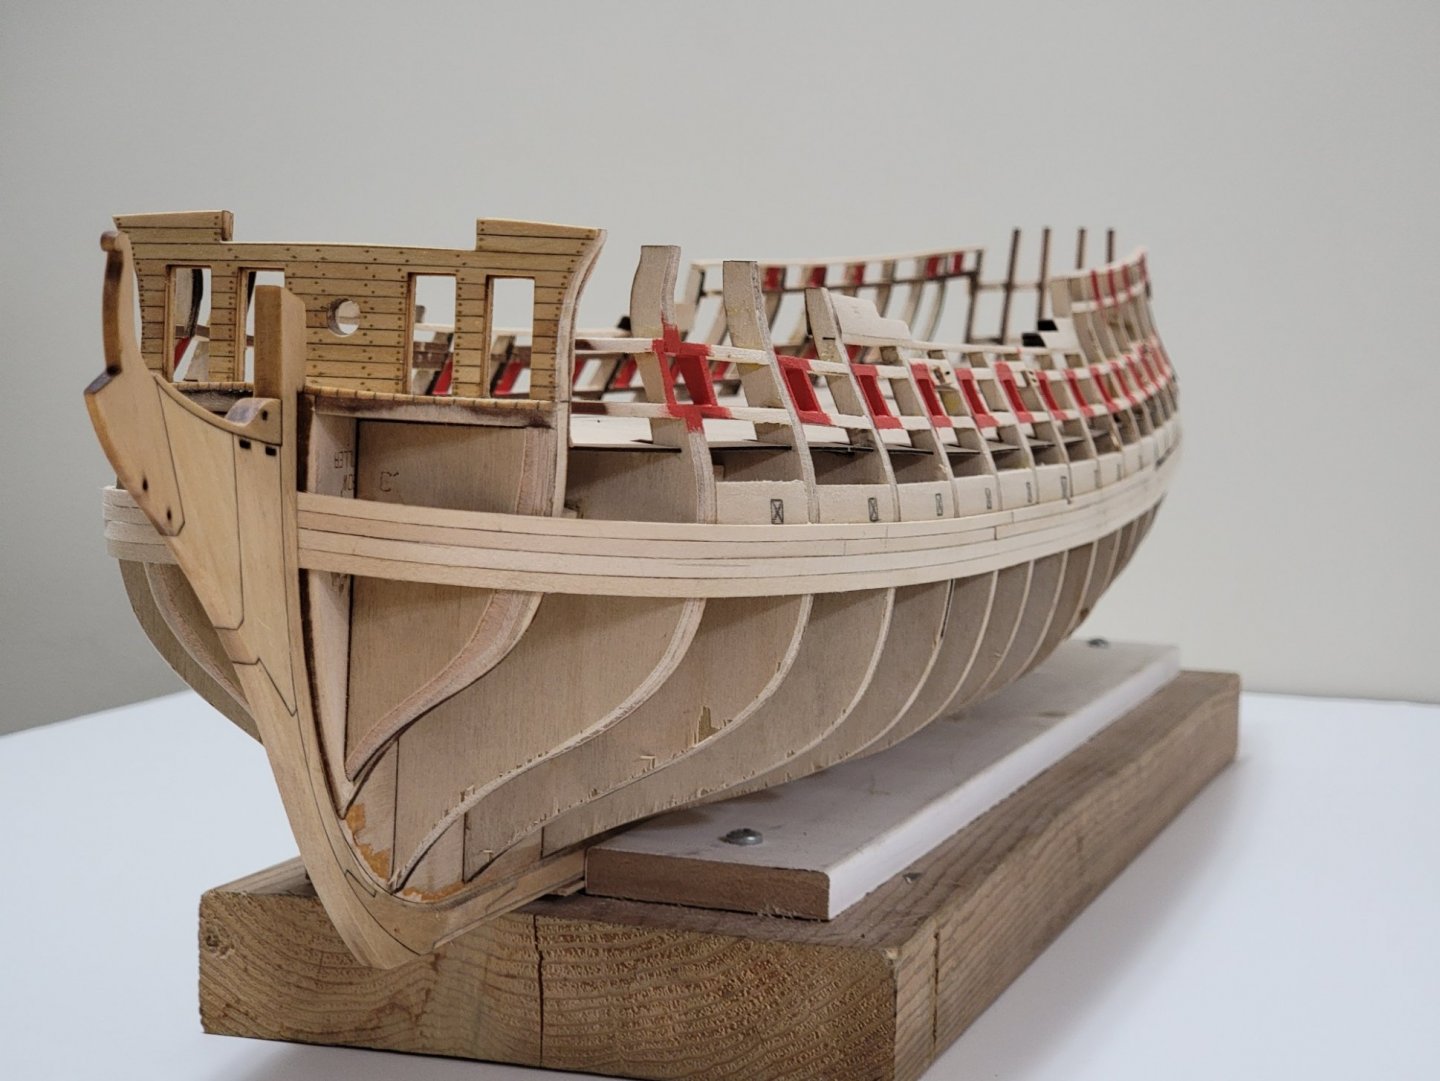
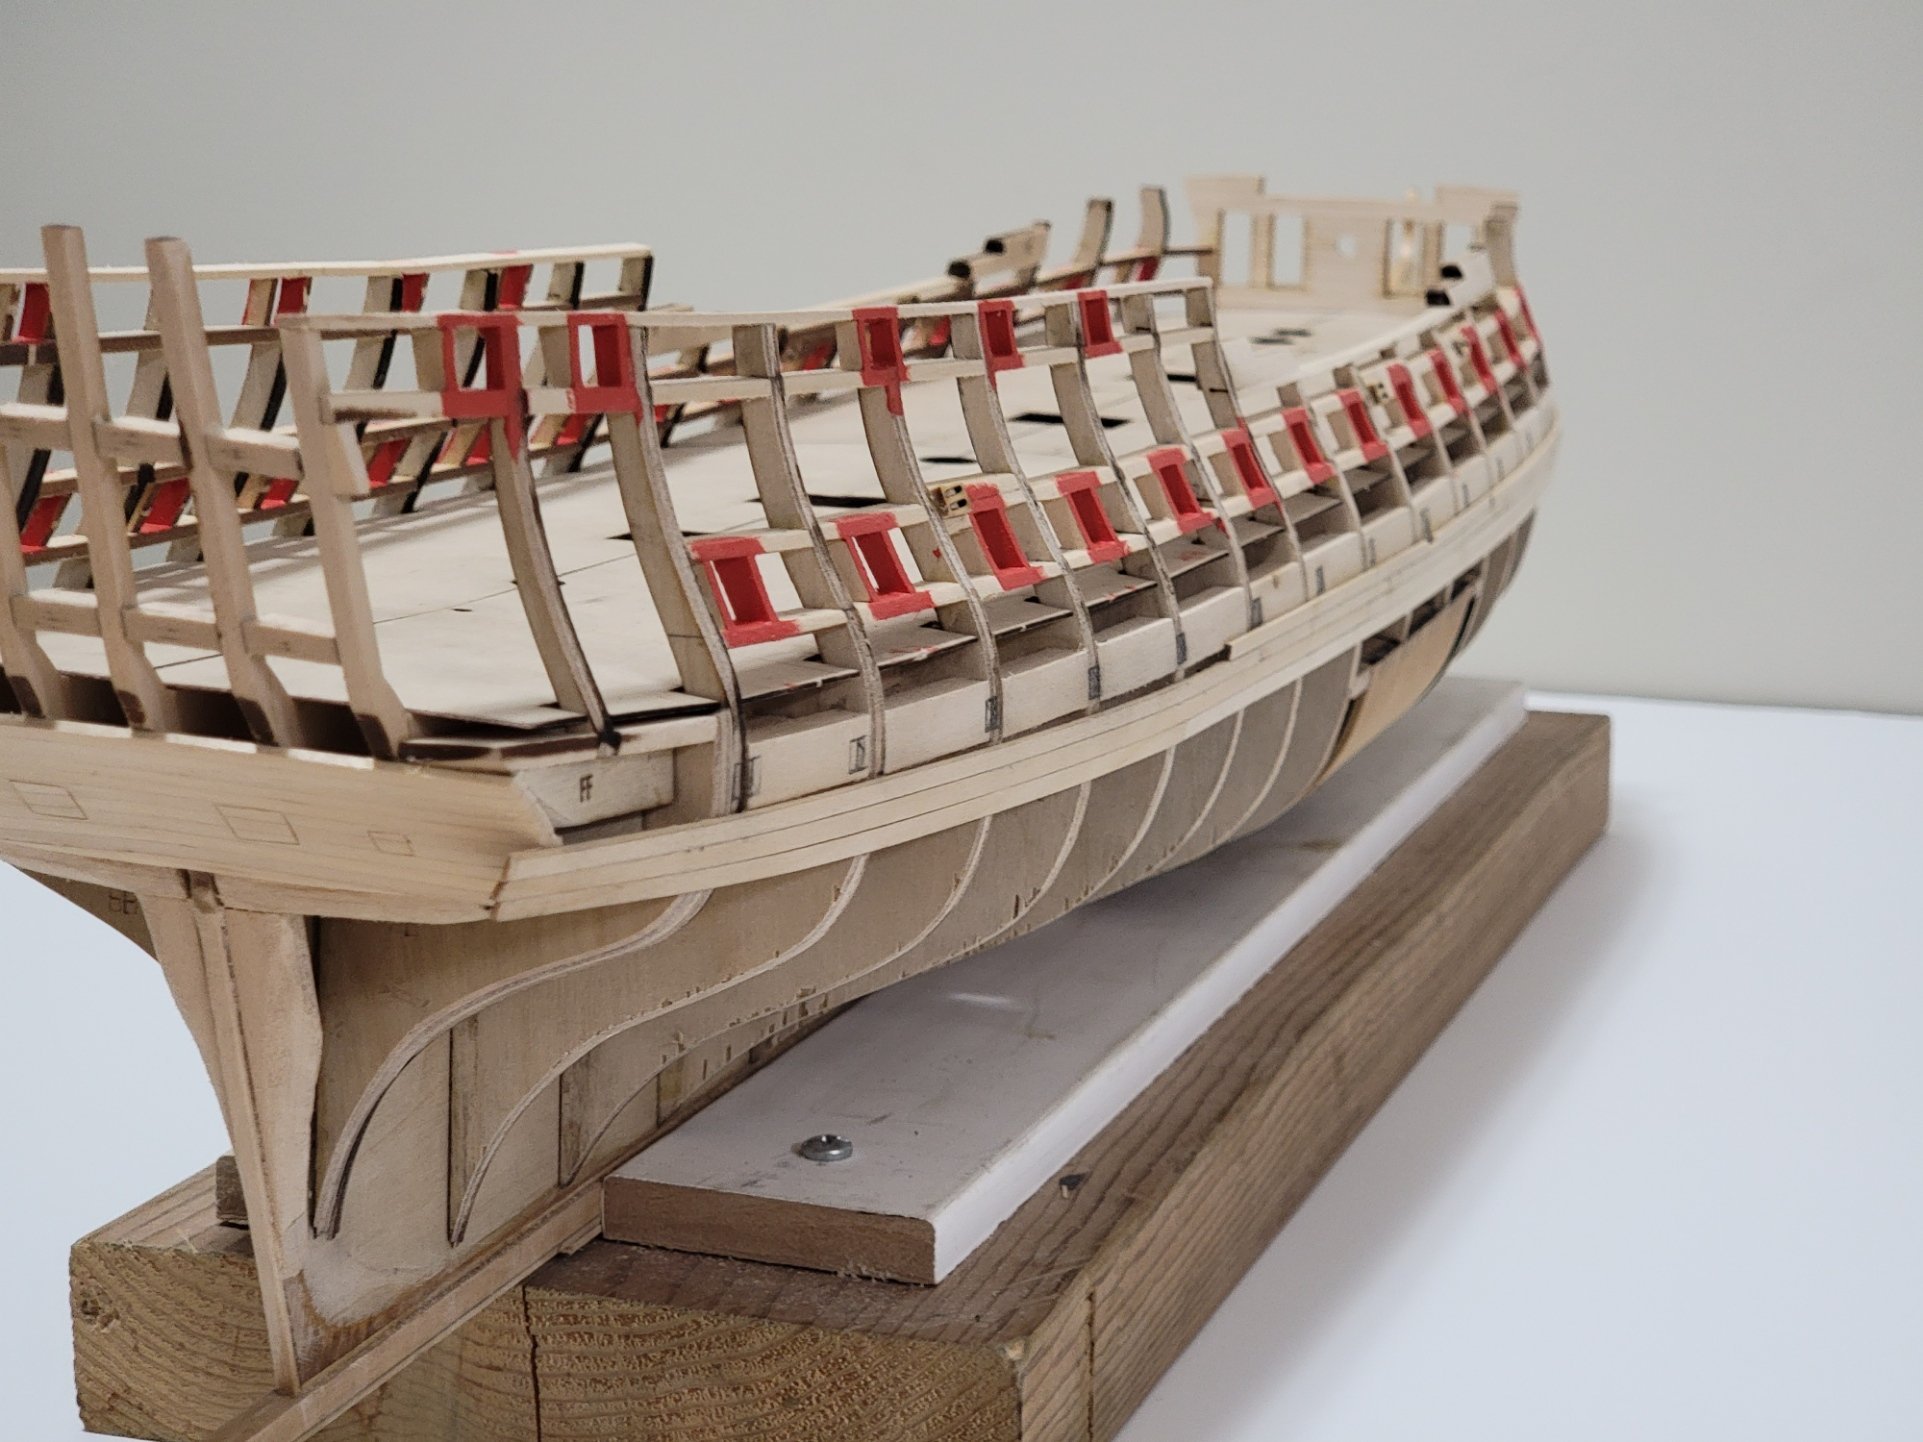
And here is where the ship is at currently; on the fourth layer of planks:

- JpR62, GrandpaPhil, Matt D and 17 others
-
20
-
On 8/13/2021 at 3:22 AM, captain_hook said:
Very nice. Are these the supplied woodstrips you are using? Is it basswood?
Thank you Andreas! Yes I am using the supplied basswood for this ship. Reason being, I have not tried using the nicer woods yet, and I want to practice using them on a smaller build first (so I don't make an expensive mistake!).
- Cathead and Edwardkenway
-
2
-
-
18 hours ago, Wahka_est said:
Hi,
I was thinking about this strip here:
I went through the instructions quickly, and I also think the dimensions of the strip were not mentioned. I am not too sure what it would be. Maybe @Chuck remembers? I guess it just a 1/8" x 1/16" like the other ones?
8 hours ago, desalgu said:Very nice work getting planking on gunports to align with planking on stern. I know that's not easy and takes a lot of time.
I see on the picture of finished model, gunports are closed, so it looks nice to have planks aligned. Made me wonder if builders of the real ships worried about things like this, or to save time and effort made gunports with whatever they had. Considering the decoration on the stern and the time that took to make, they probably had it all aligned.
This really is a step up in difficulty from Syren!
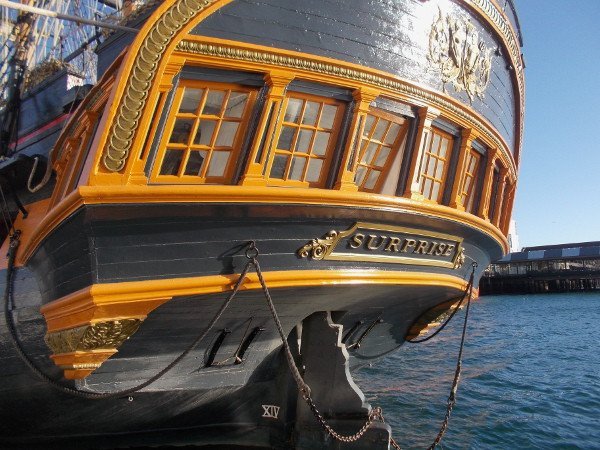
Thank you David! Yeaup it is a step up from the Syren. I am glad I didn't jump into this without some experience before!! I think the planks were also aligned in the real ship. Here is a photo of the HMS Surprise stern. The planks in the lids all look aligned:
 6 hours ago, abelson said:
Nice work. Progressing well. For the gun ports, did you use the pieces cut from the bent planks? Did you plank over the ports and then cut them out?
Thanks Steven! I cut the notched the planks out before gluing the strip. This way I could have a bit of a rabbet around the gun port. It was a bit tricky though since all the notches had to be aligned nicely without any being messed up. I had some extra bent planks from which I used the pieces for the lids. But in these small sections even a straightened out piece can do fine!
- desalgu, GrandpaPhil, Cathead and 3 others
-
6
-
-
3 hours ago, Wahka_est said:
You are doing a good job! Keep it up.
This build is quite difficult-i wish there would be more photos of the prototype build but i guess for development some stuff you just have to sort out yourself
")
Do you have info what size is the wood strip between lower counter and hull planks? I cant find that info in the manual-its seems that some info is missing.
Thank you Wahka! Working on the build for only a few hours a week helps avoiding mistakes as I force myself not to rush steps (well, so far at least!)
I am not too sure on which strip you are referring to.
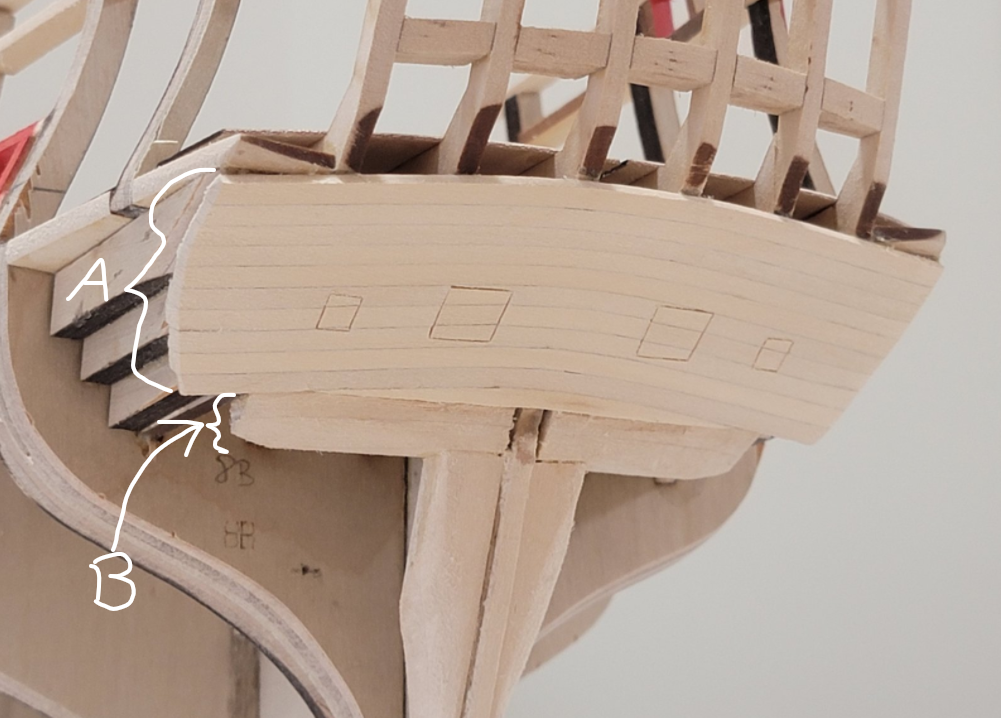
All the ones in the A section are 1/8" x 1/16" strips
The one in B is just a filler strip so that the hull planking has some surface to attach to, so the size doesn't really matter for this one (will be hidden once planked).
I hope this answers your question! 🙂
-
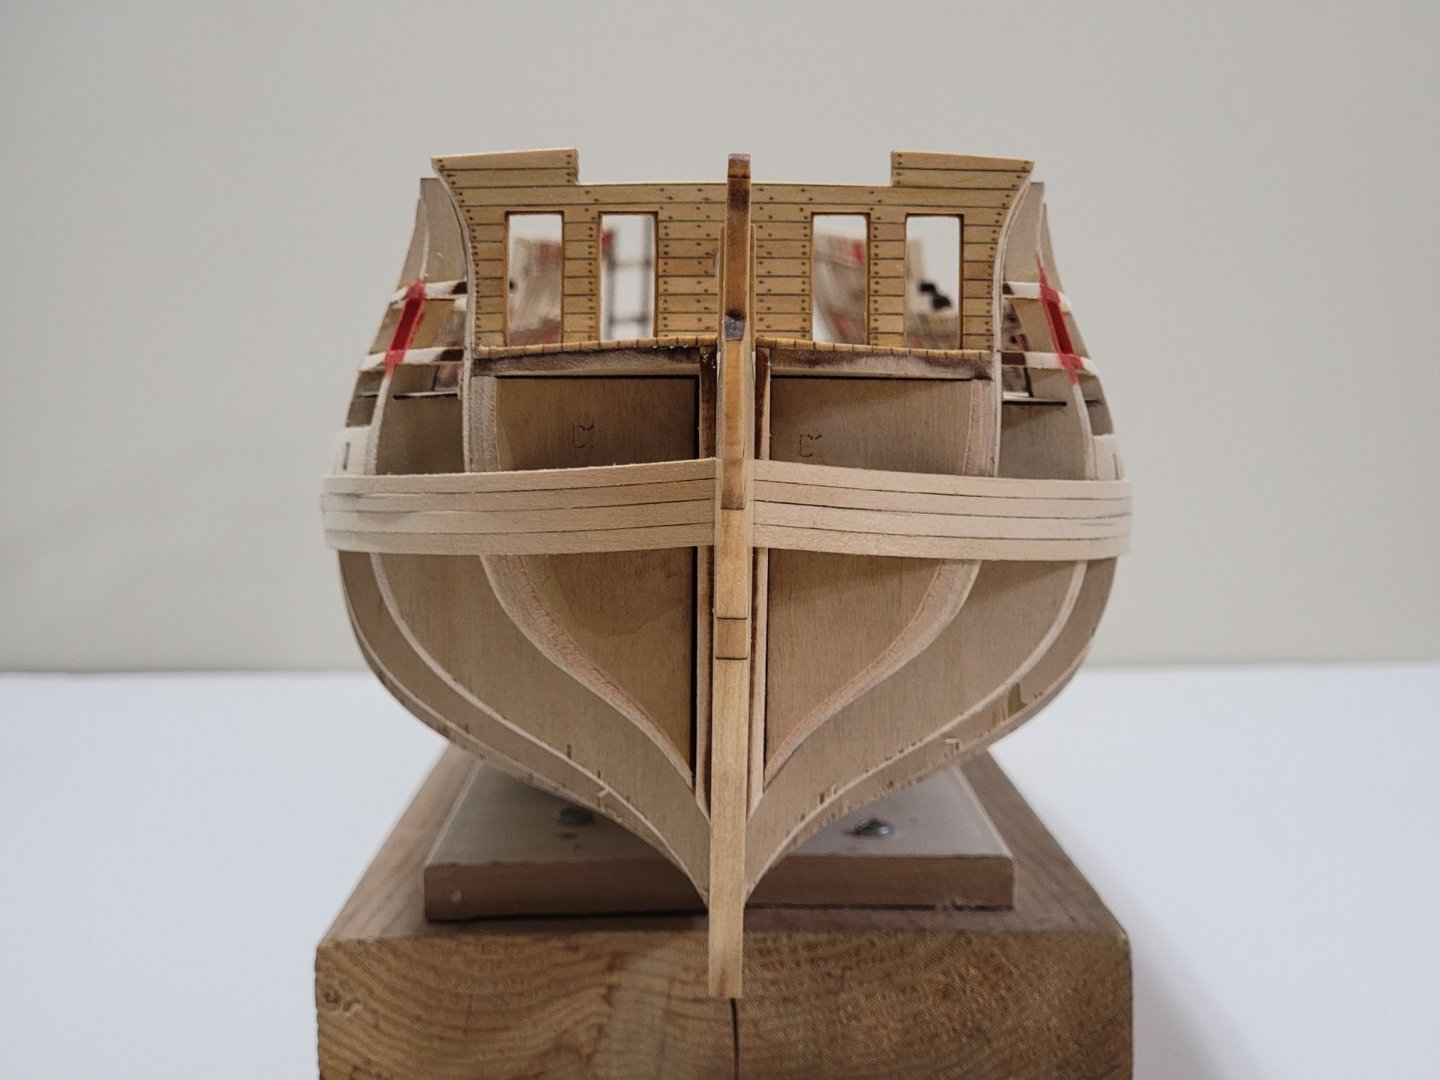
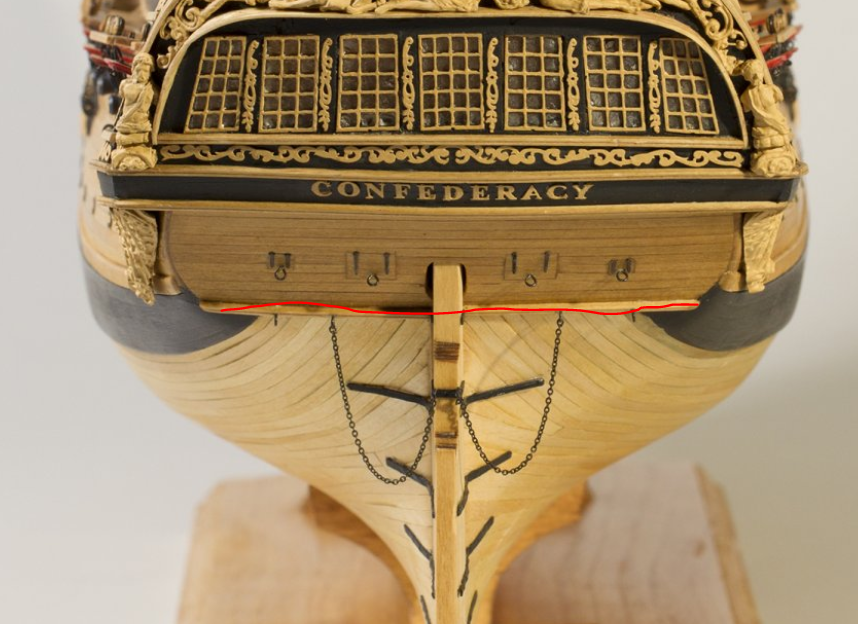
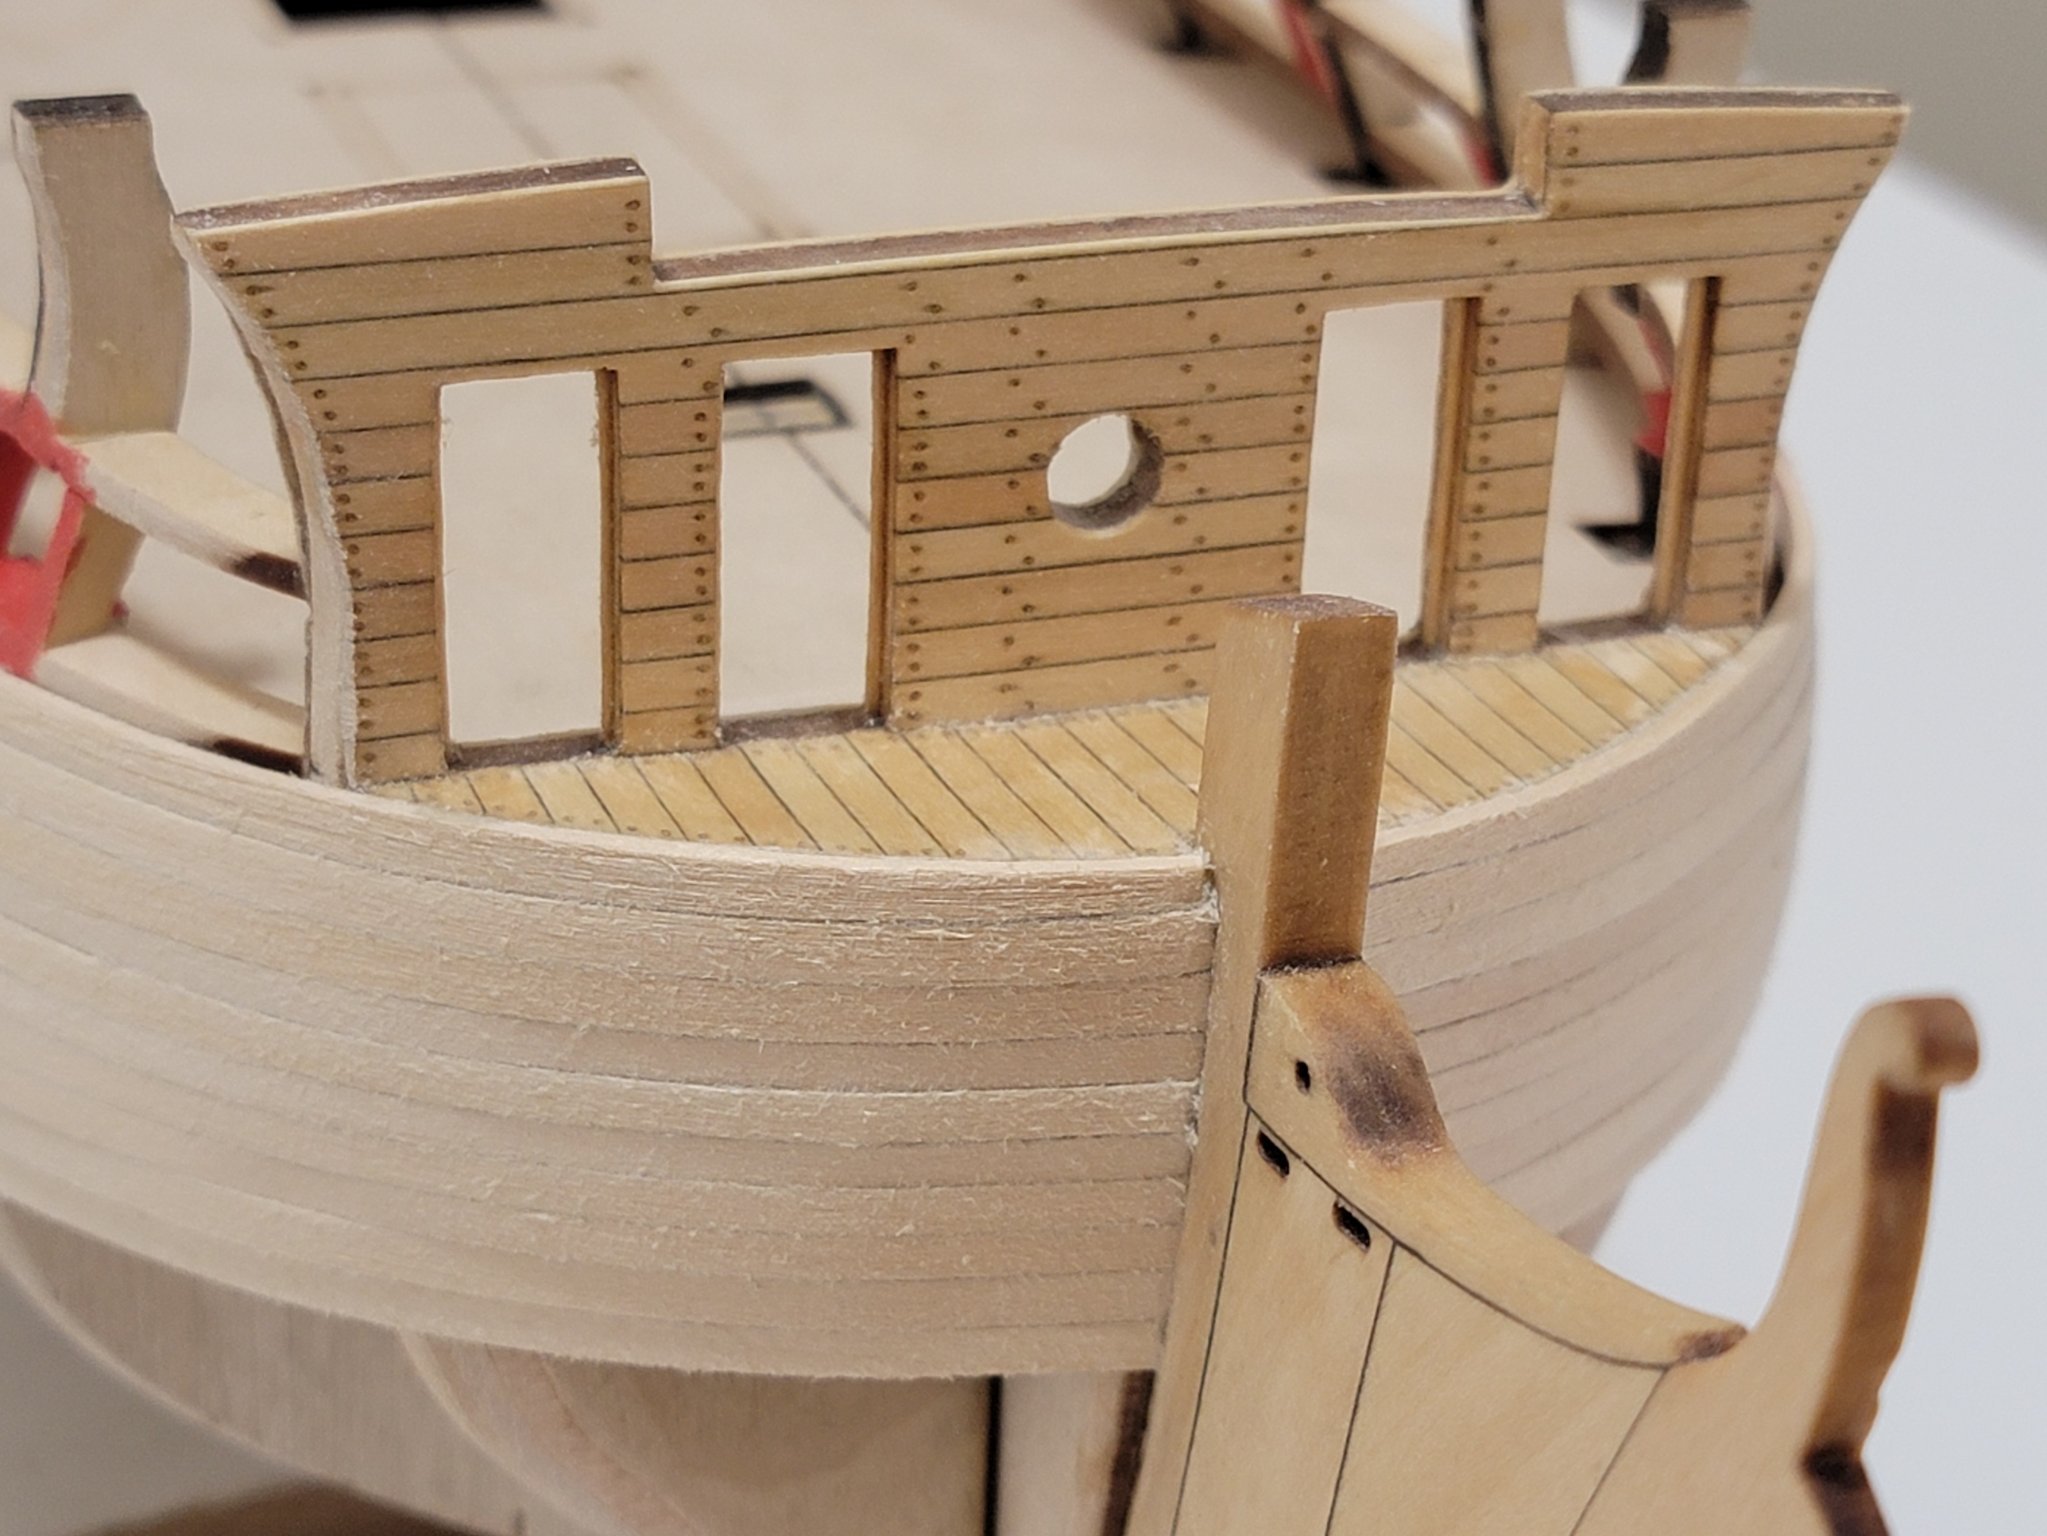
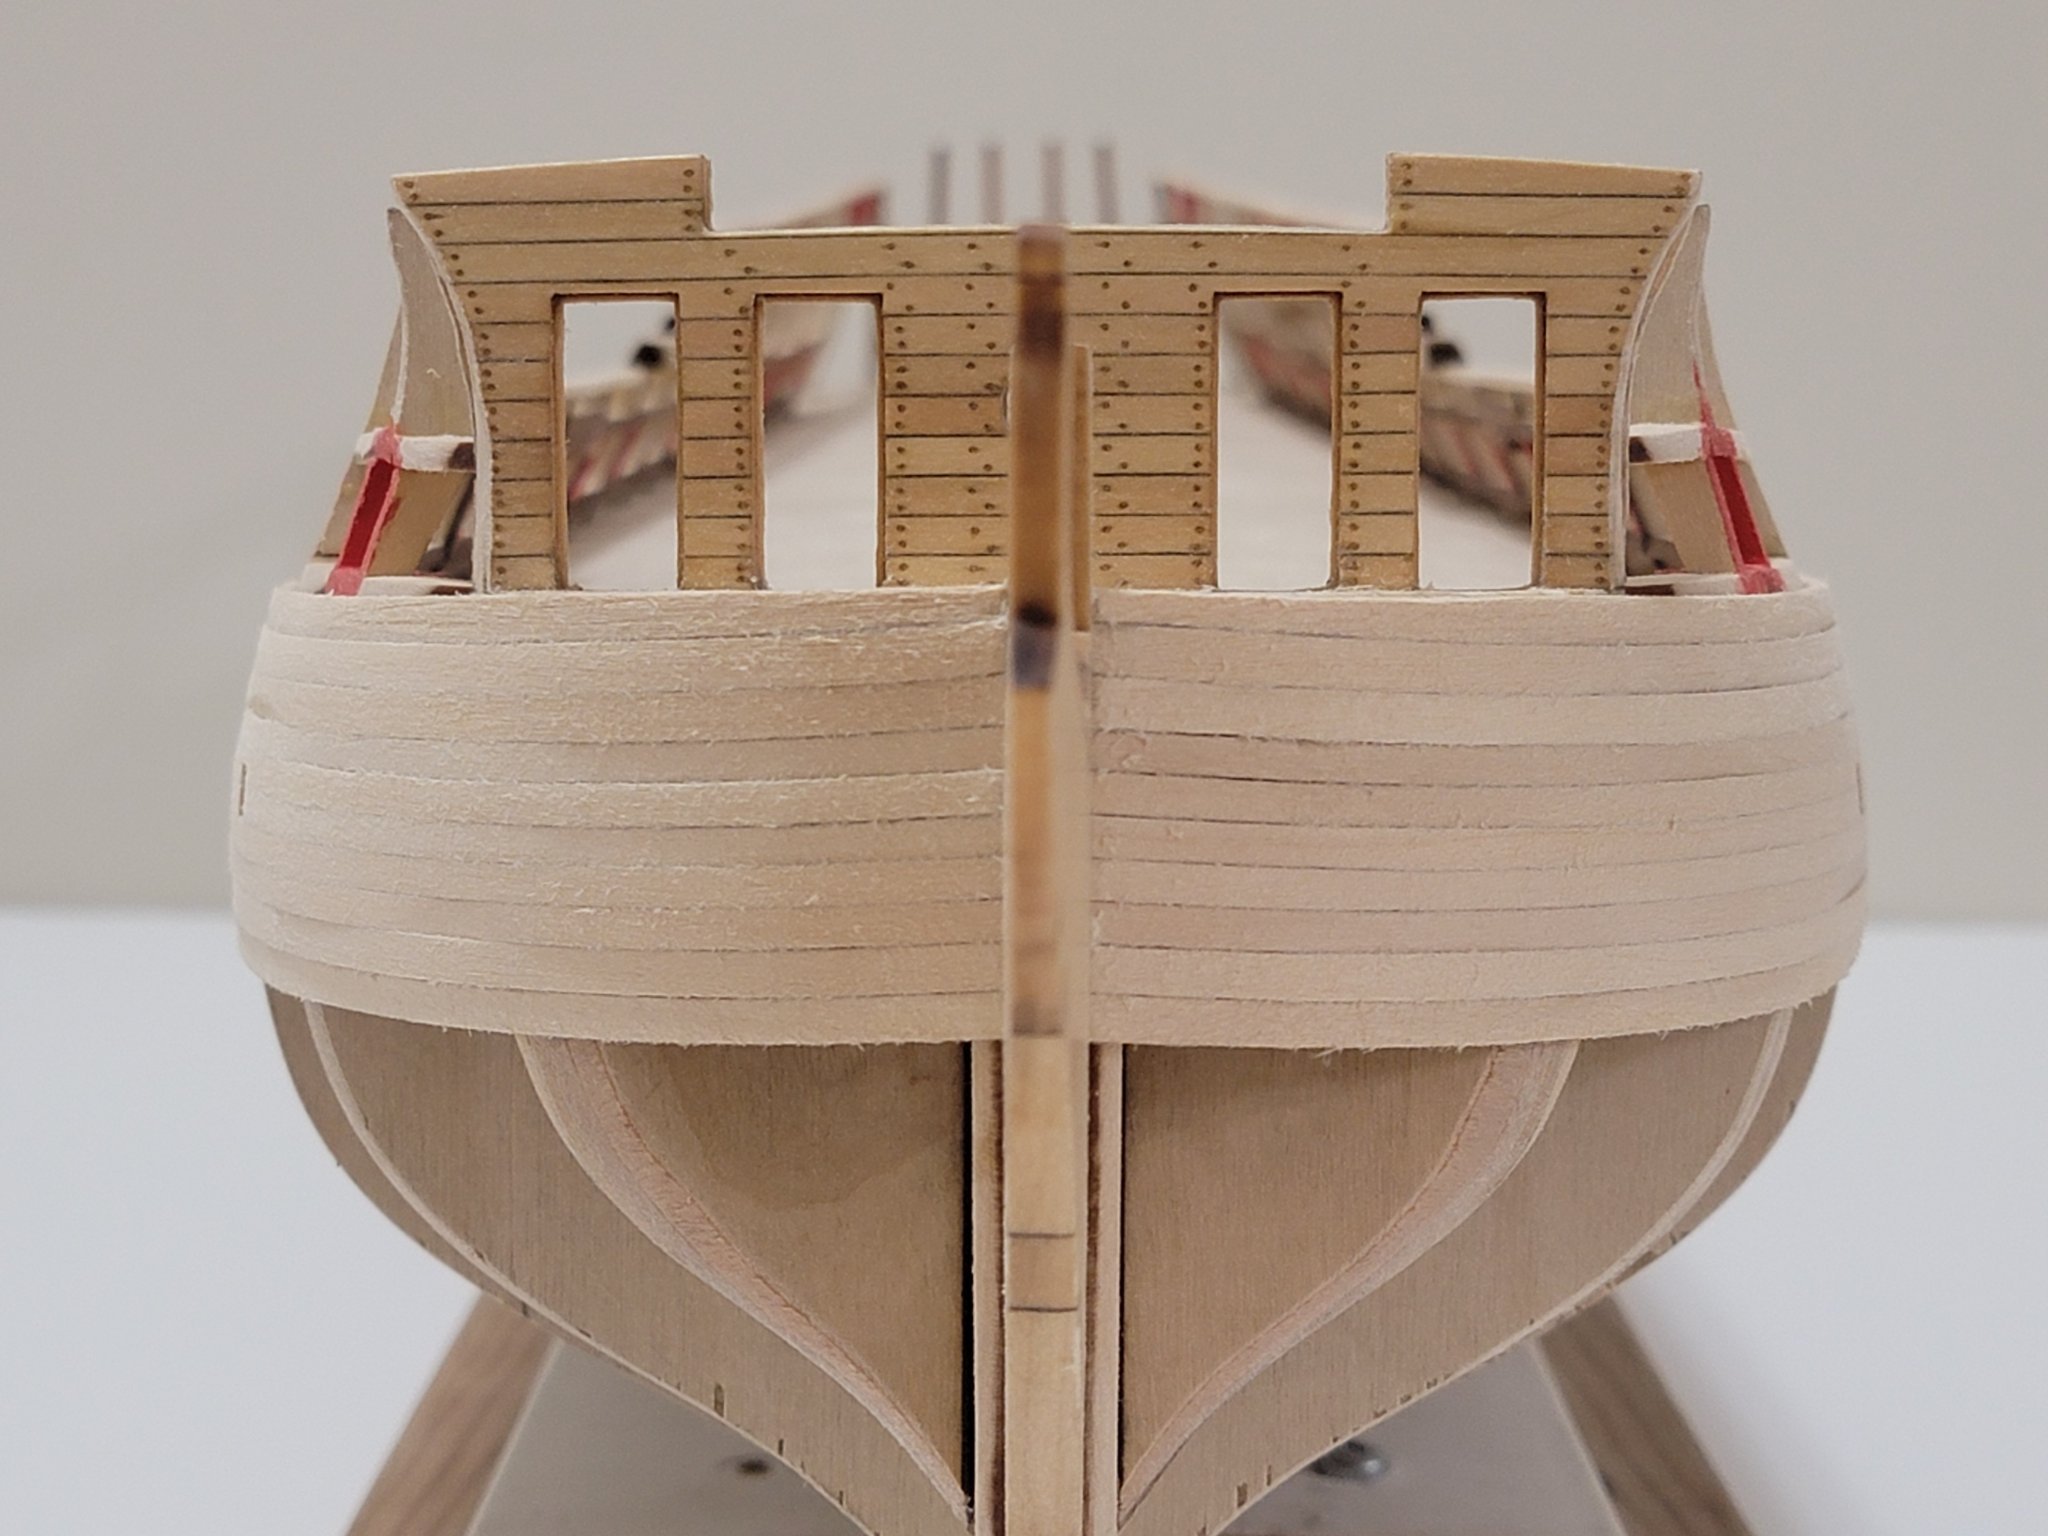
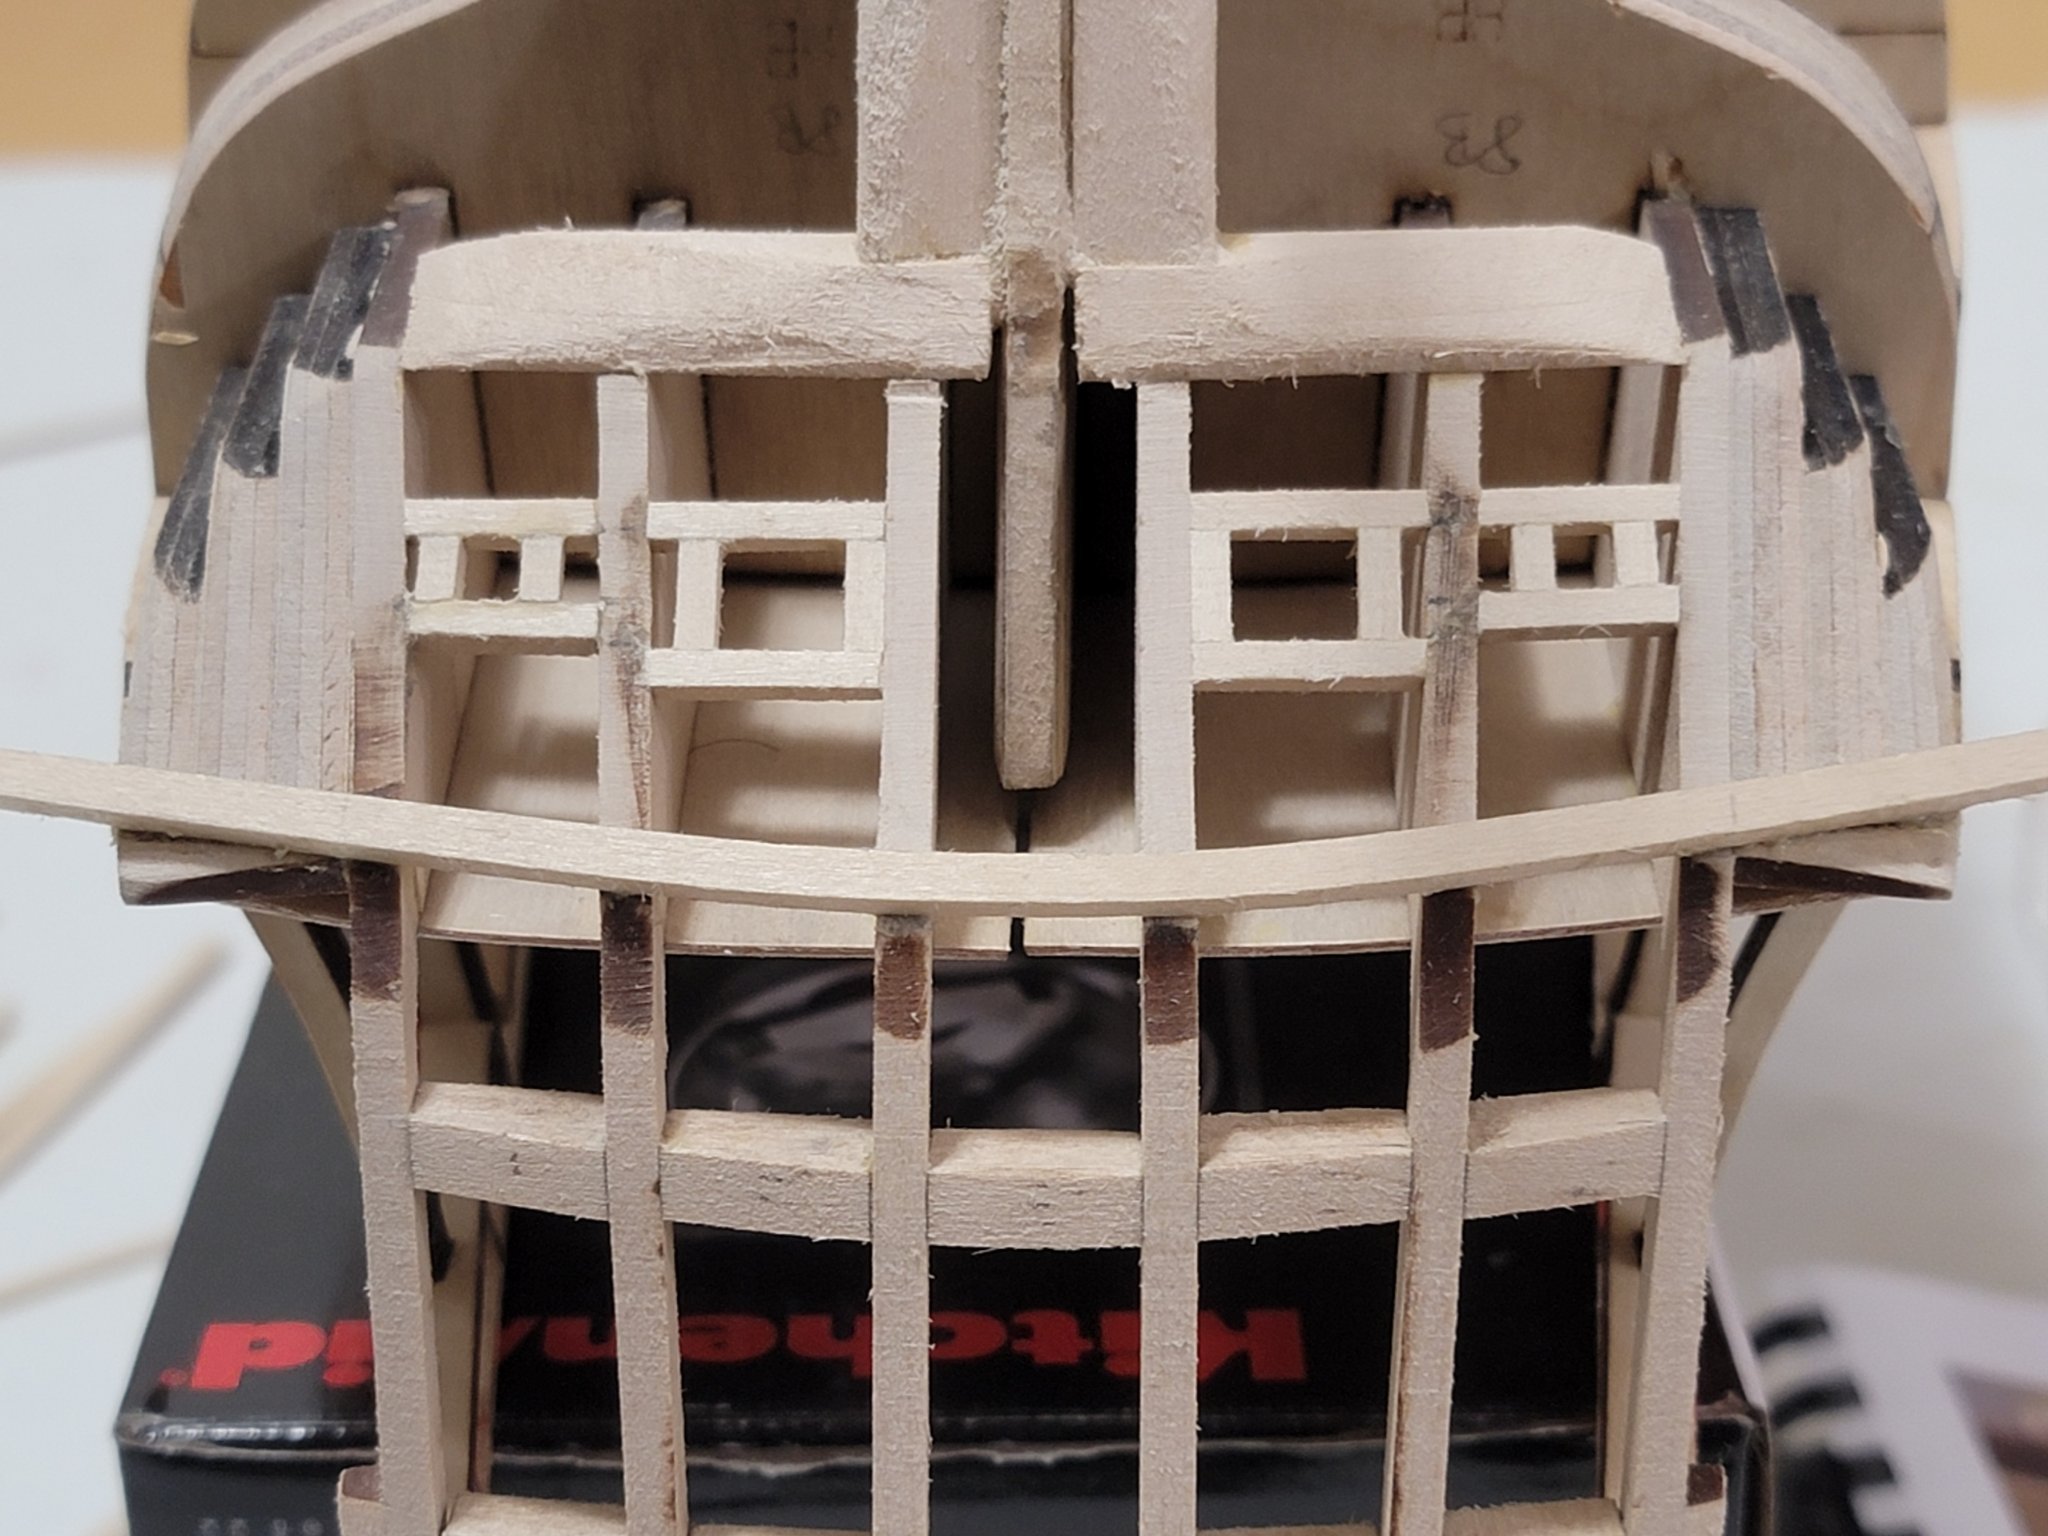
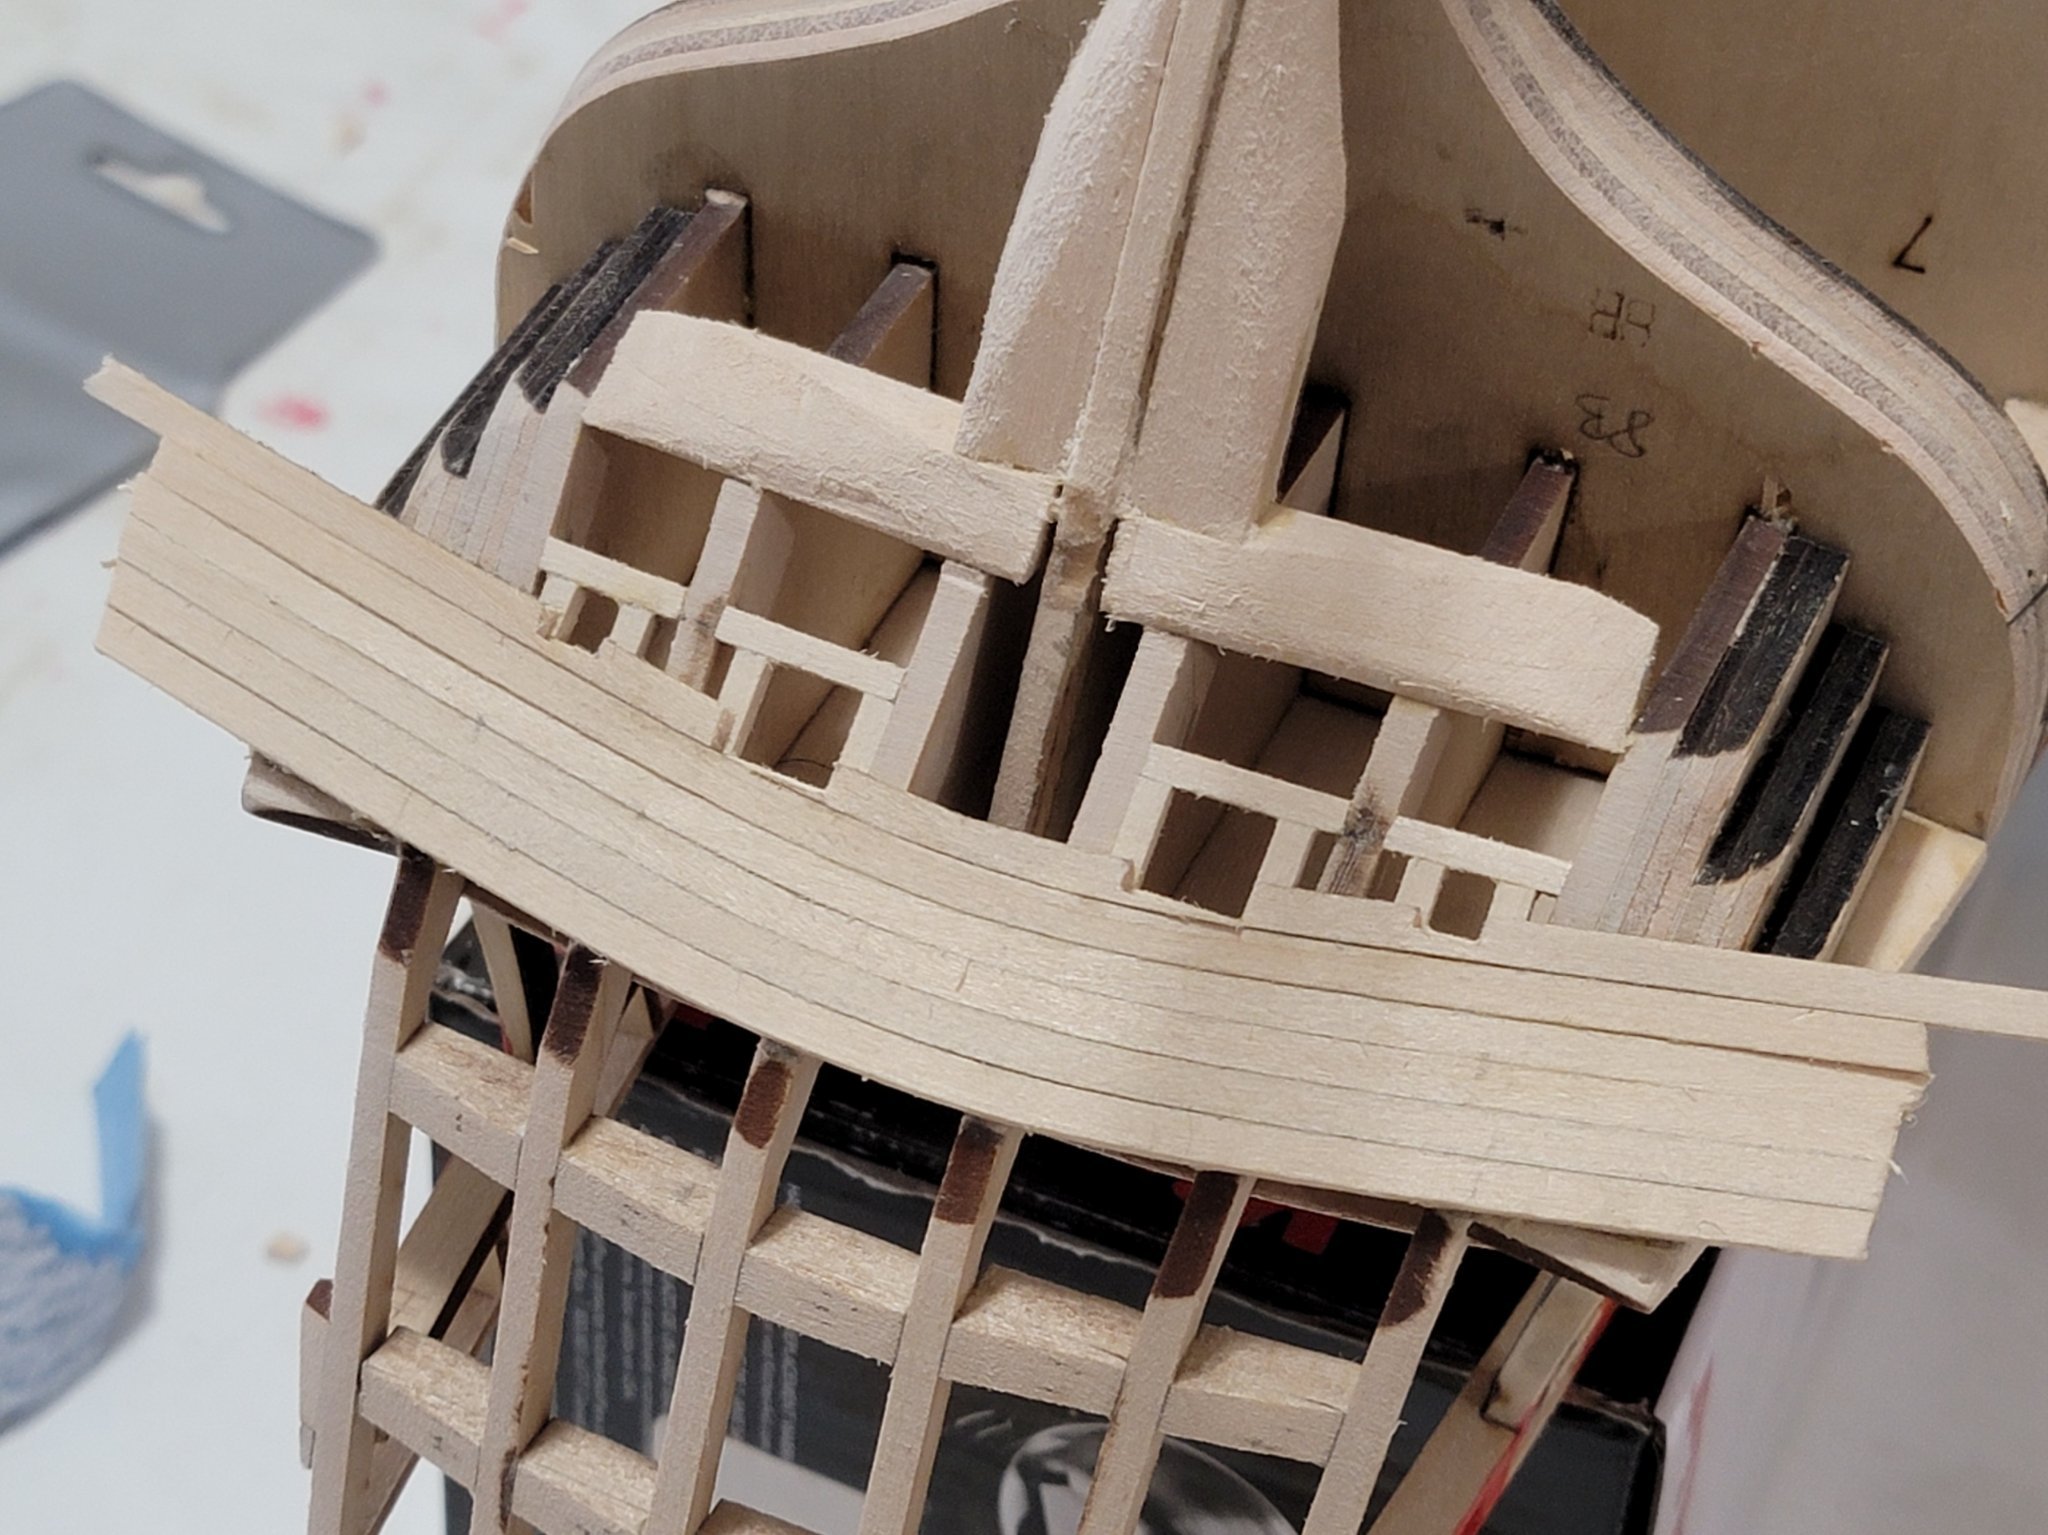
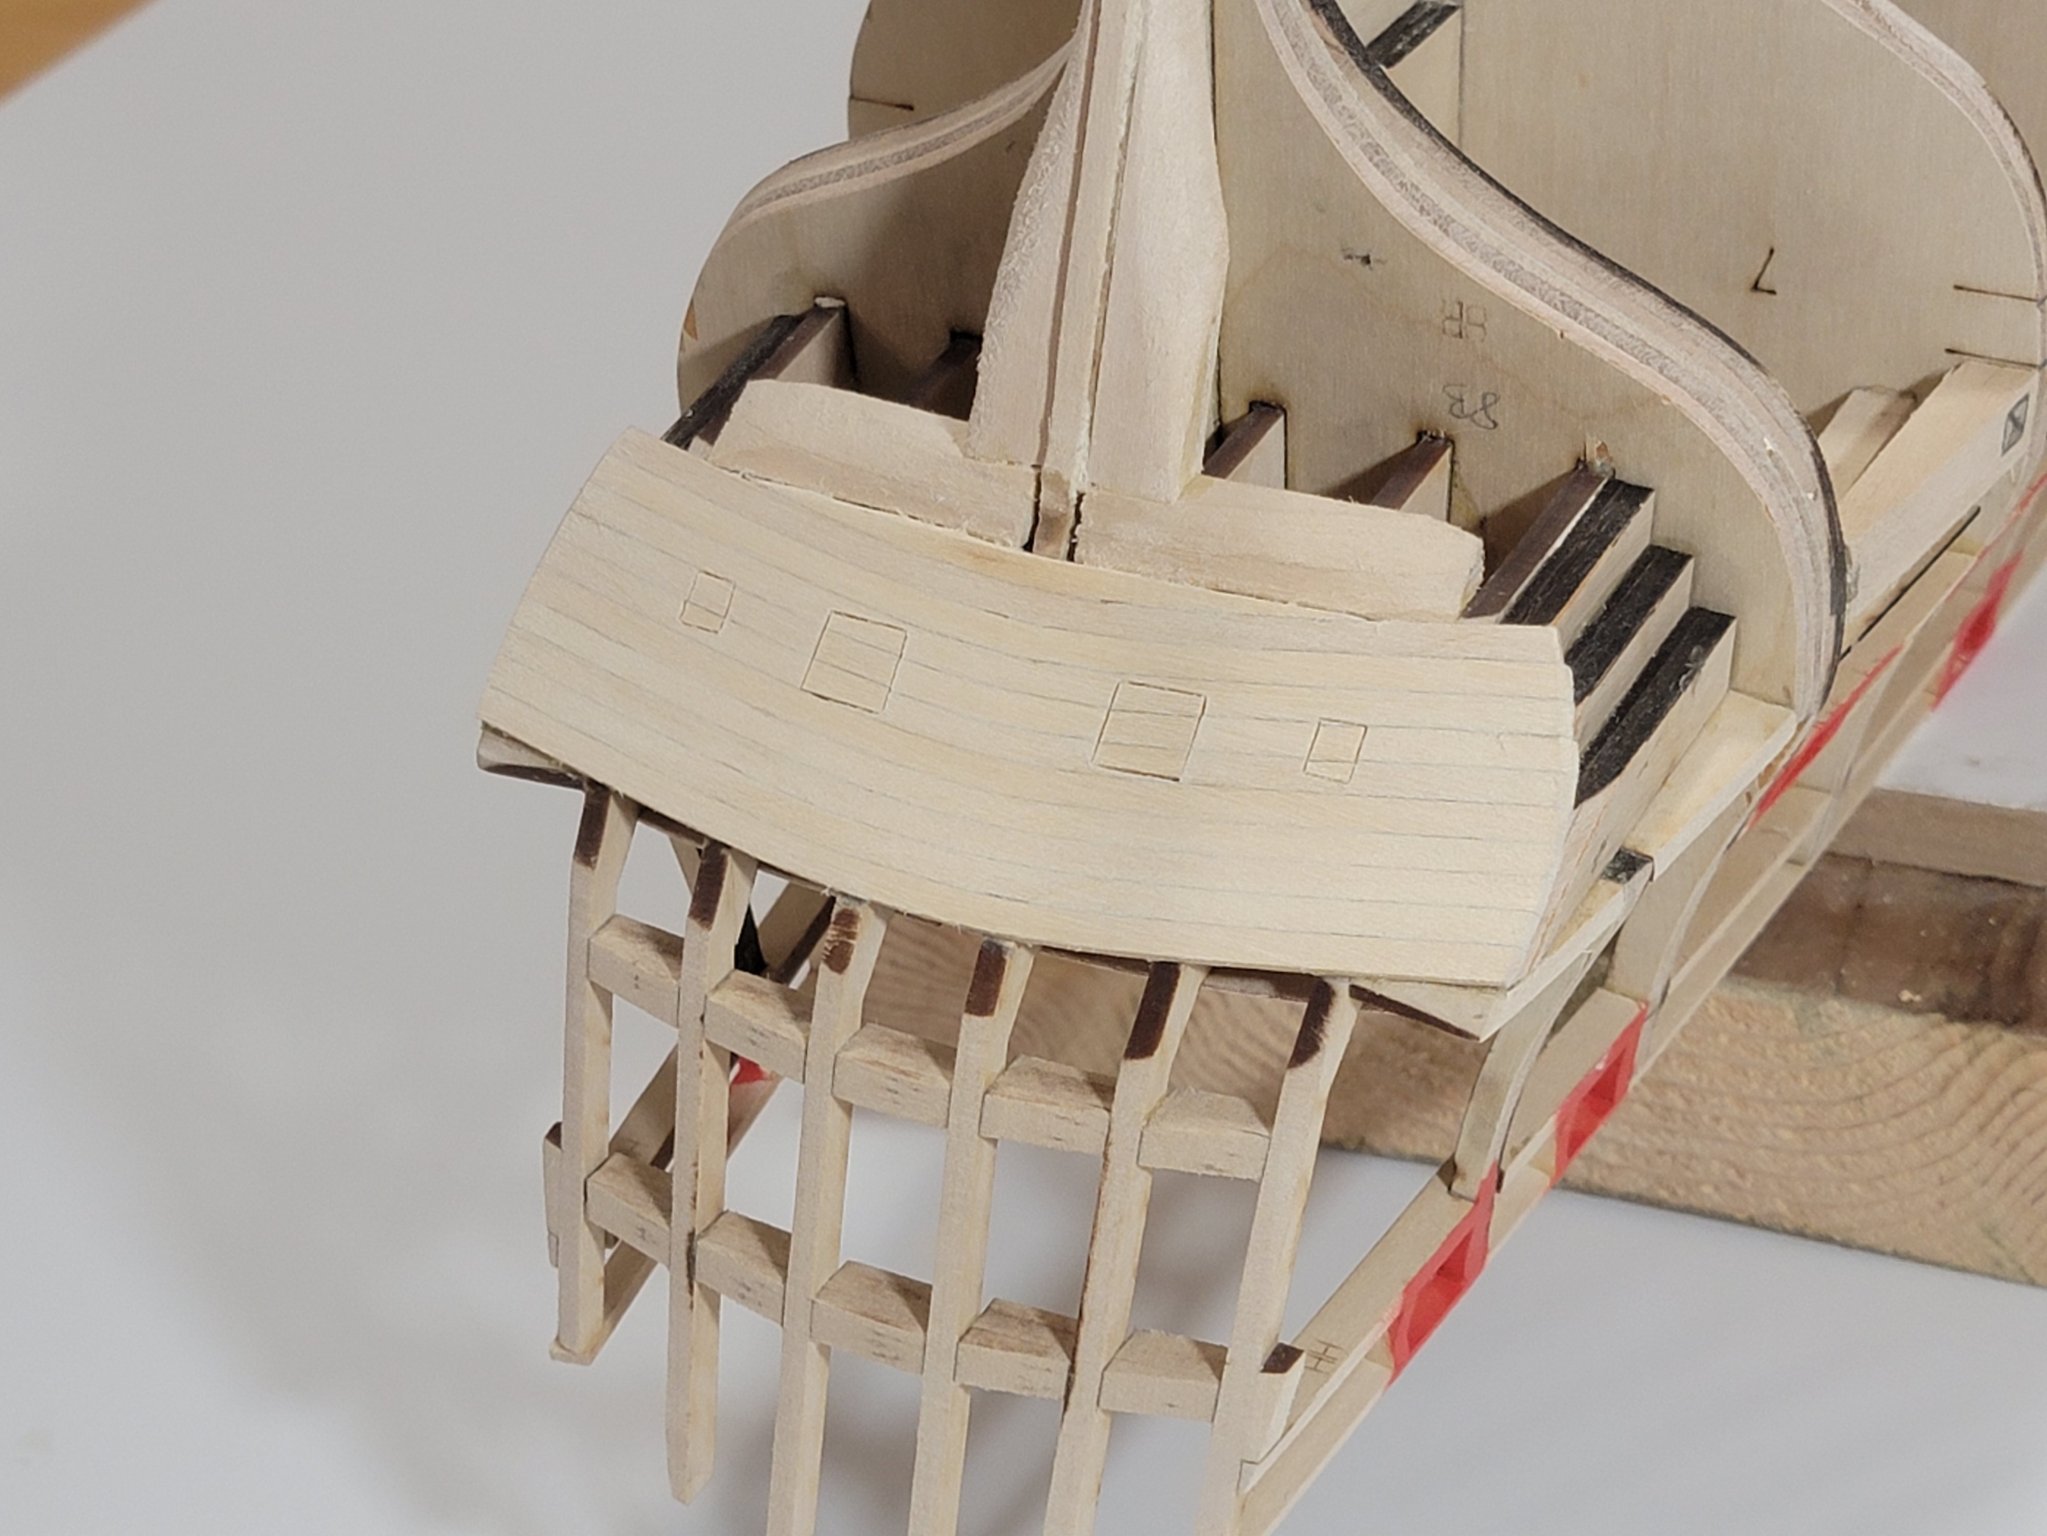
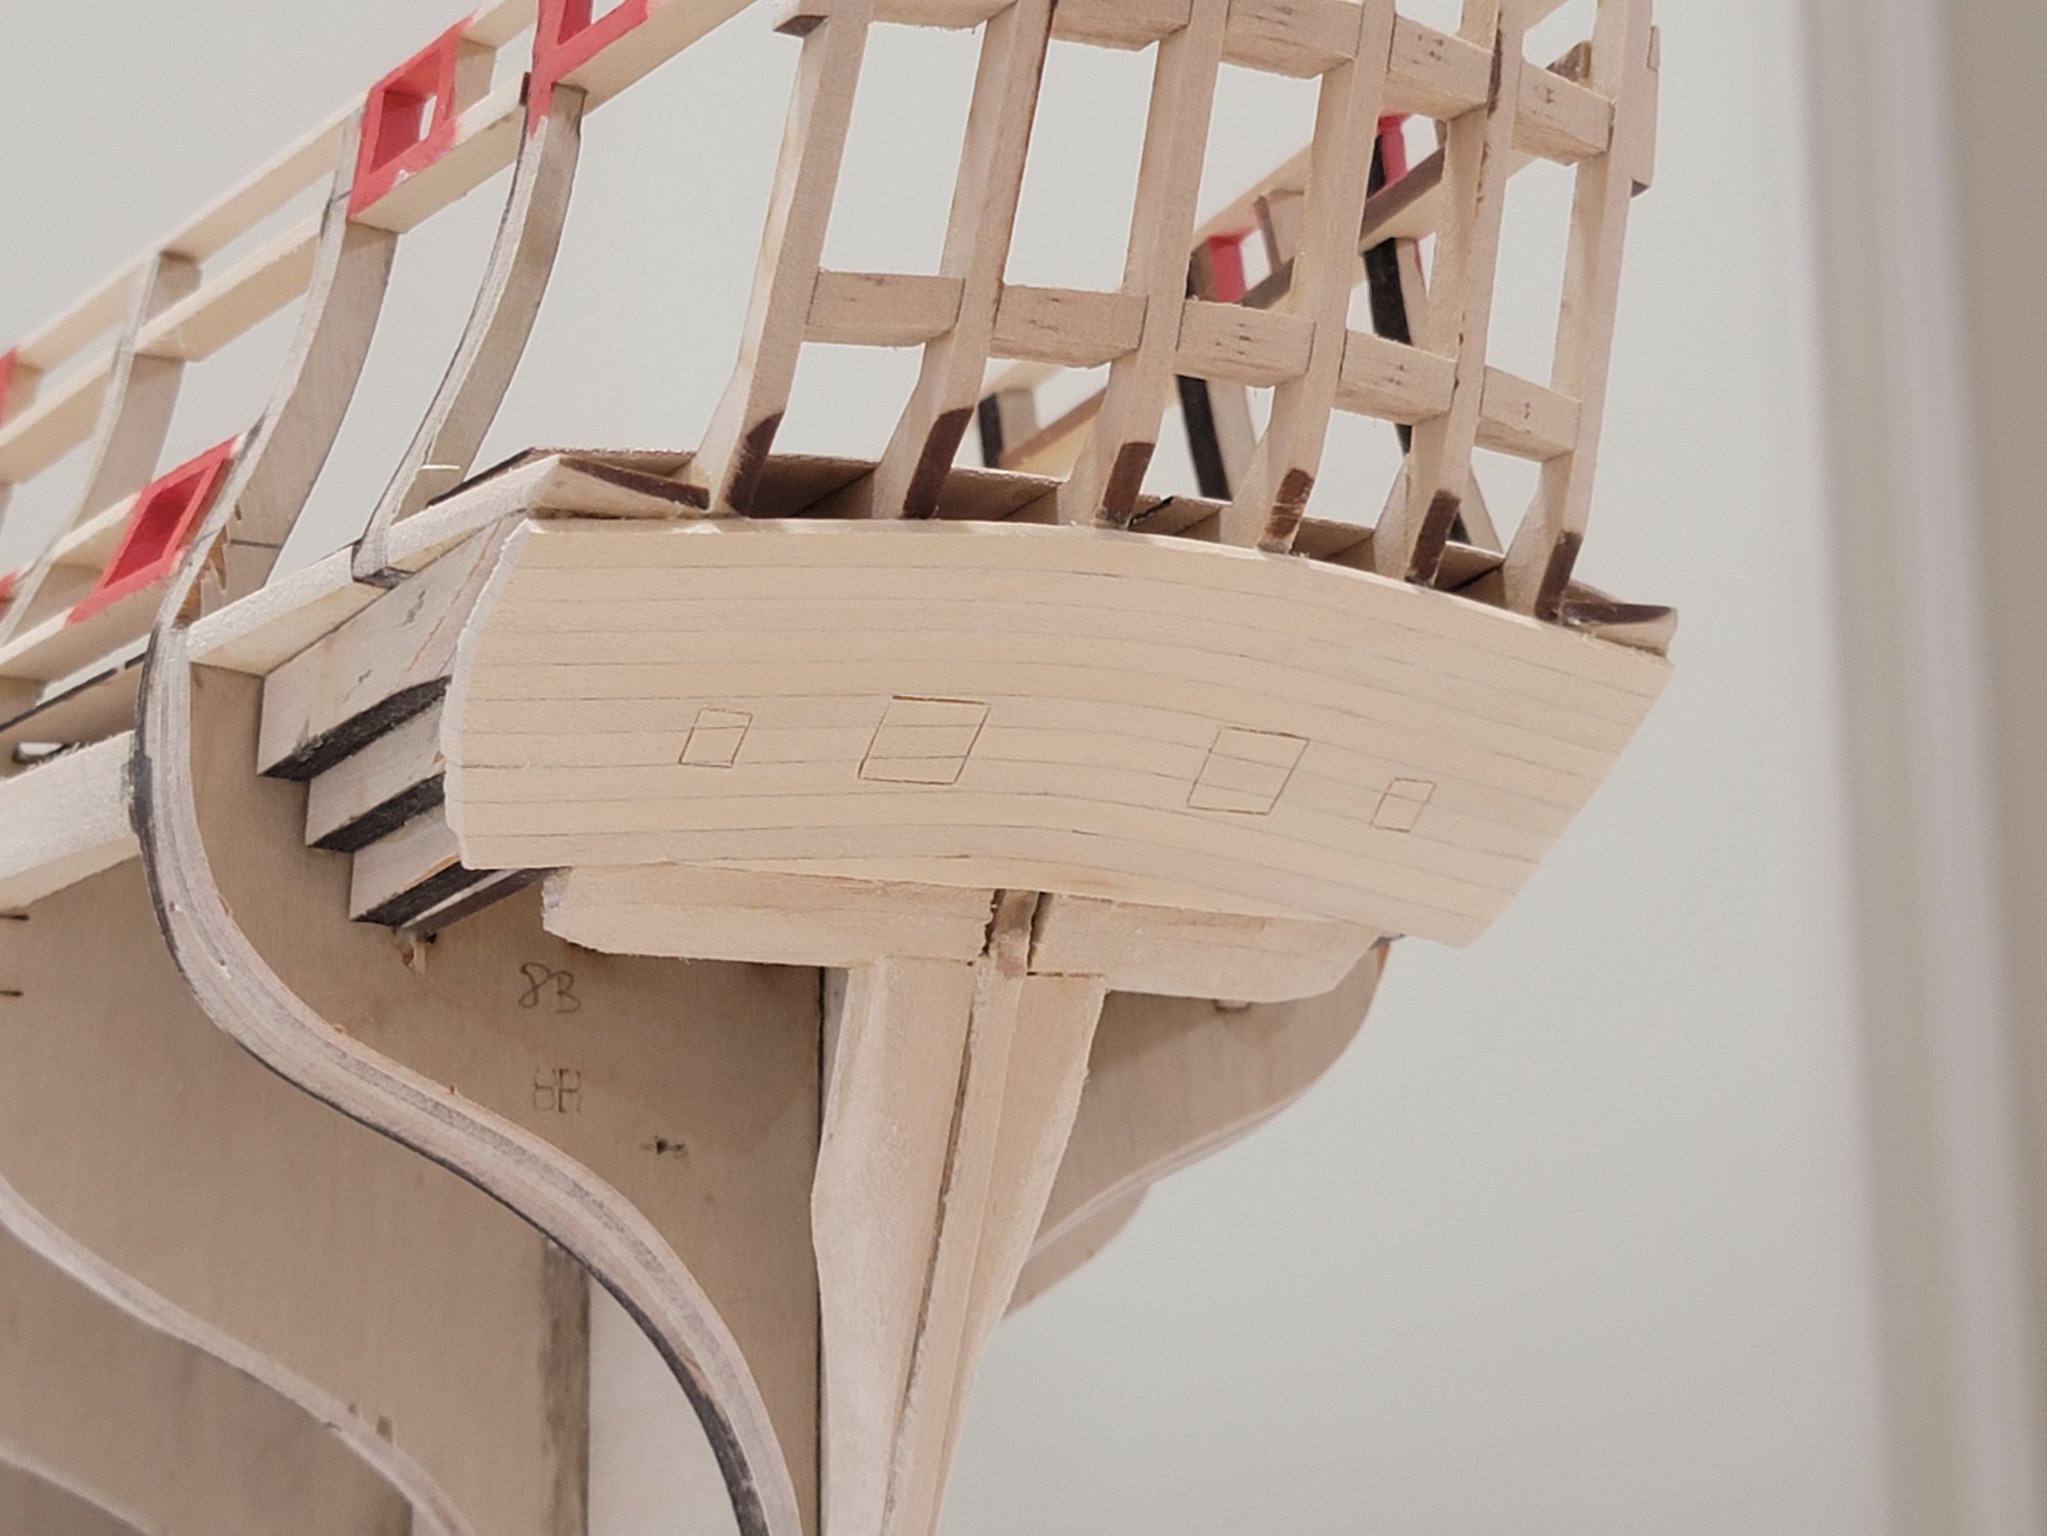
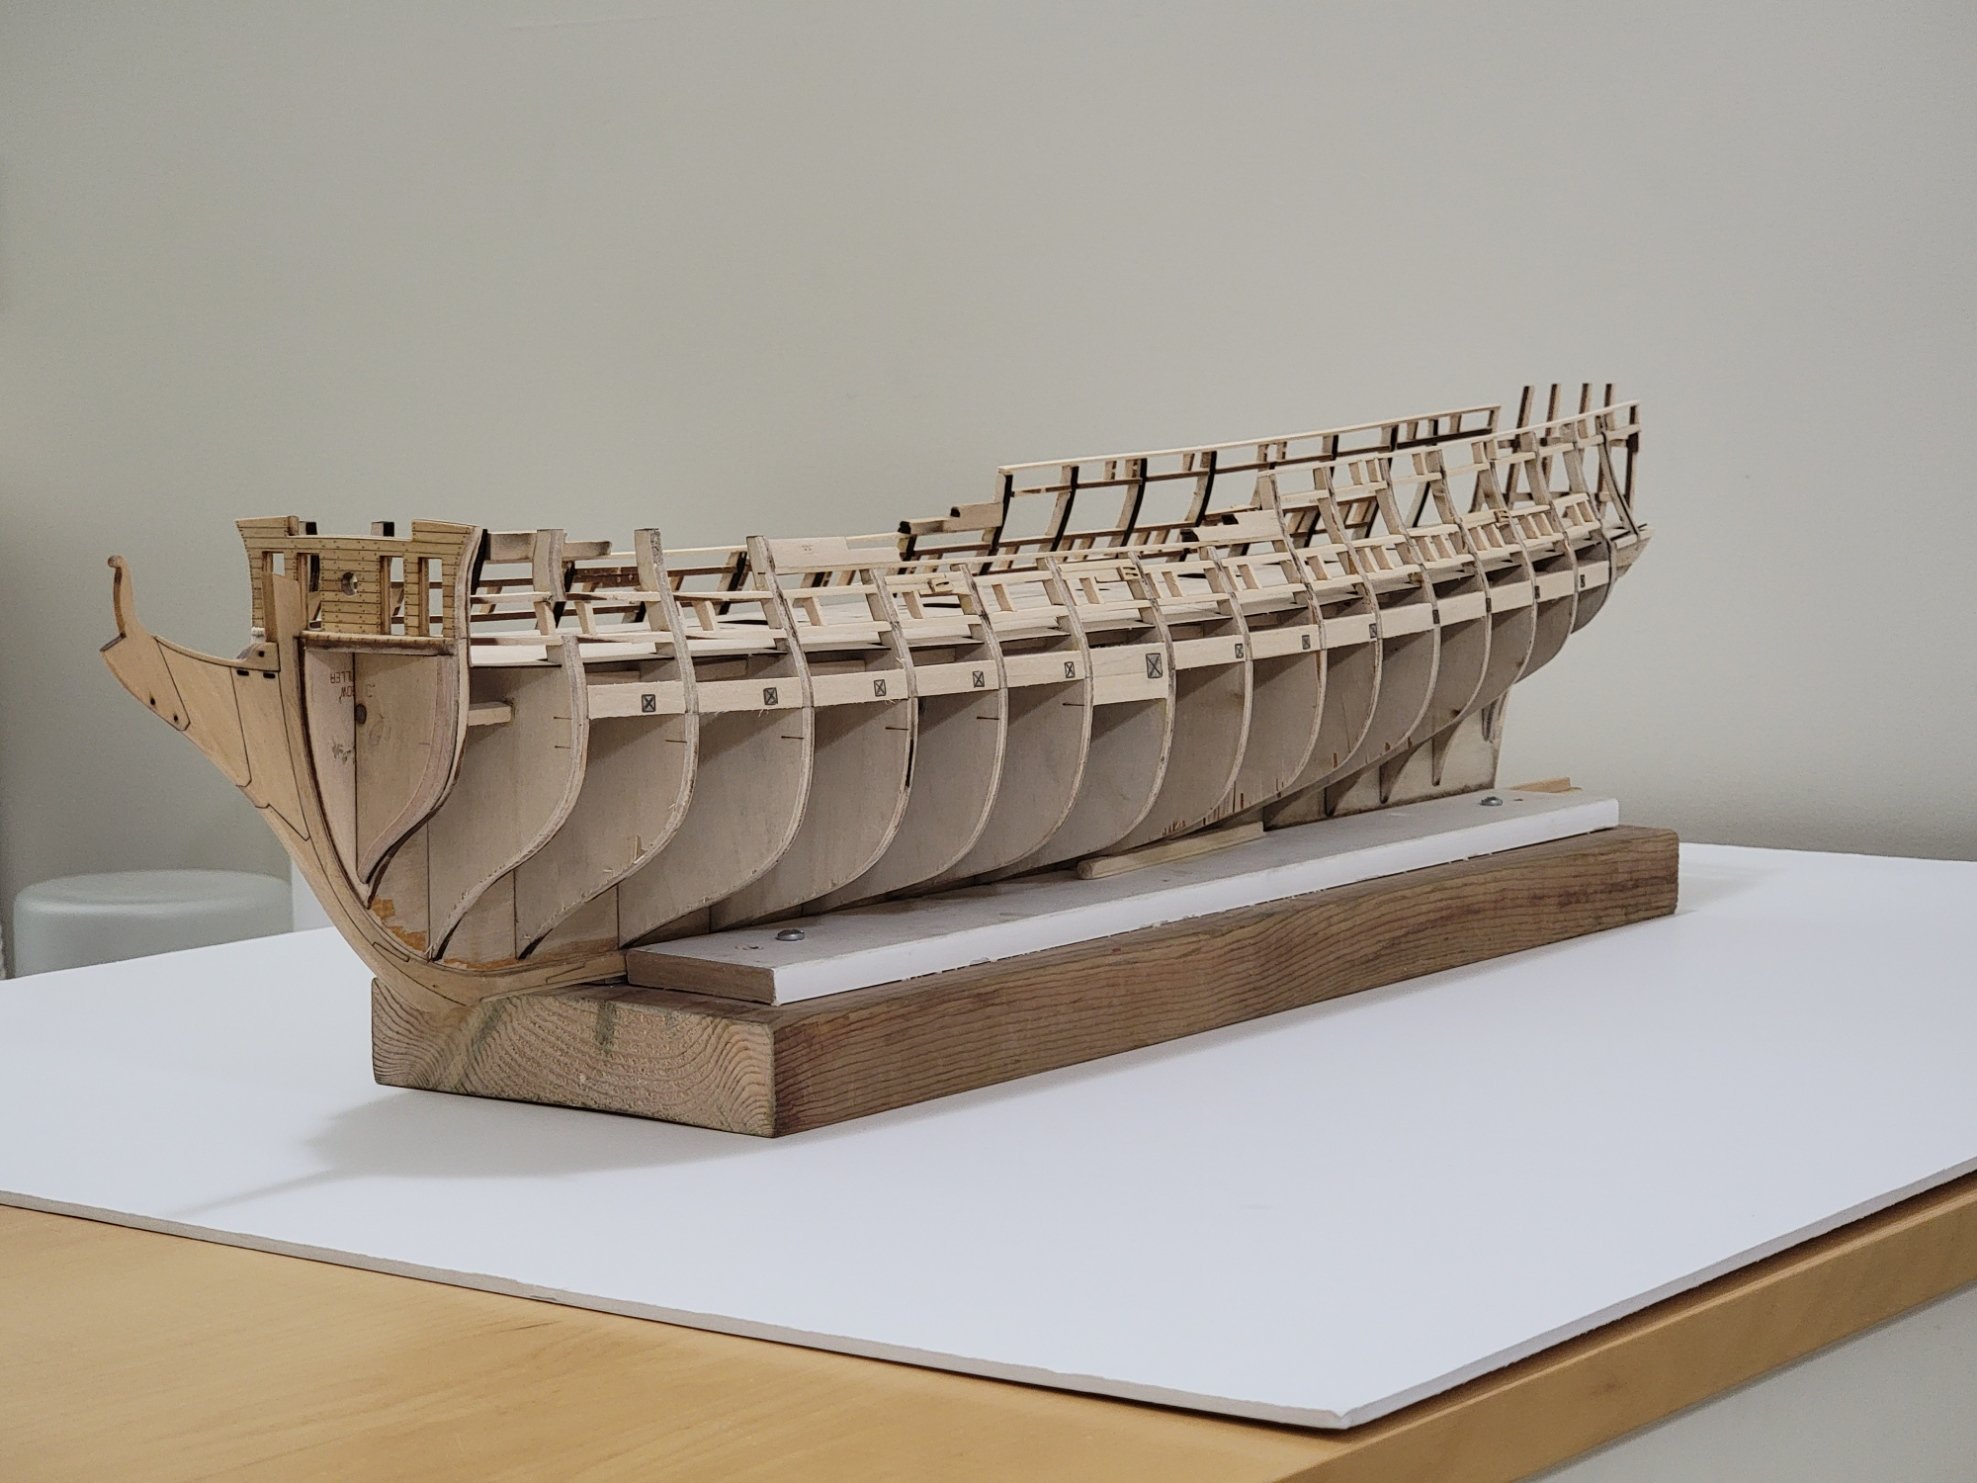
The lower counter of the stern is now planked! This was my first time trying edge-bending on planks (I had to bend to match the curves of the top of the frames). Here are some photos of the progress of this section:
Here, the red line shows where the edge of the plank should rest. The one I am holding here has no edge-bend.
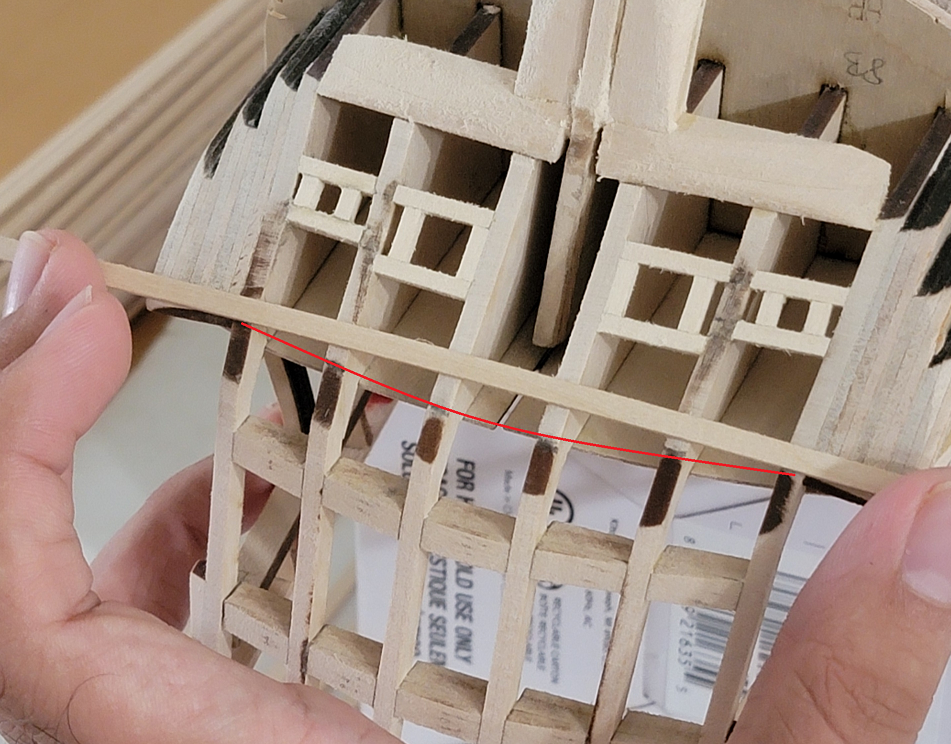
I used the ironing technique as shown by Chuck in his video.
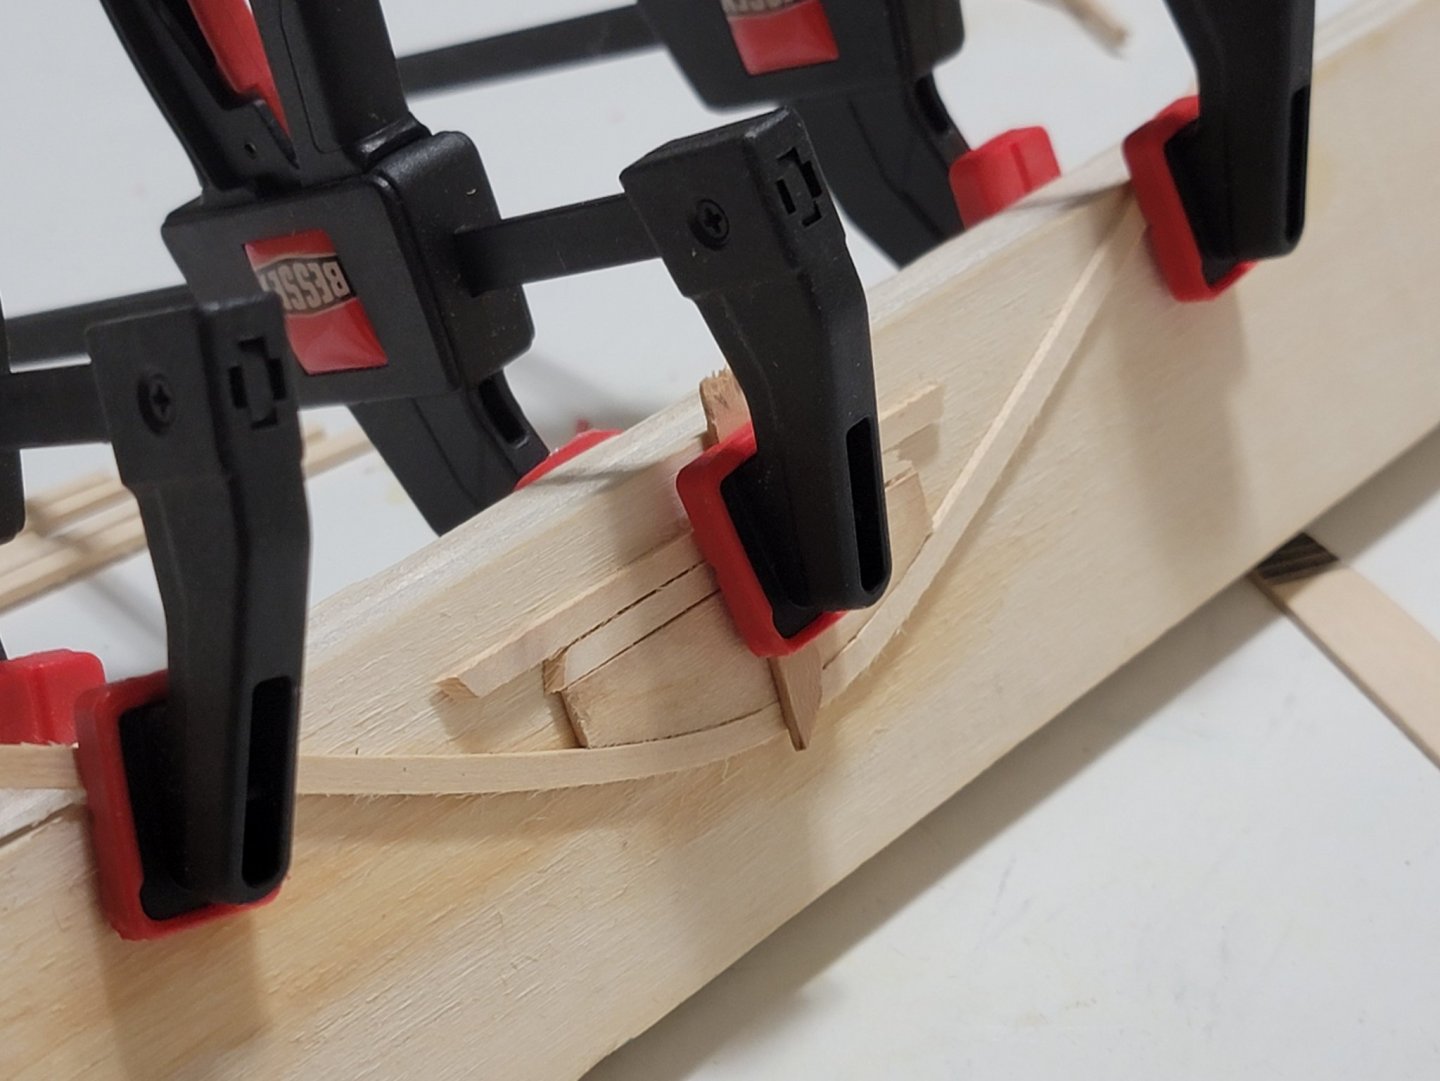
Here, I glued in some of the first planks:

Cutting the notches out was a bit tricky, but manageable:


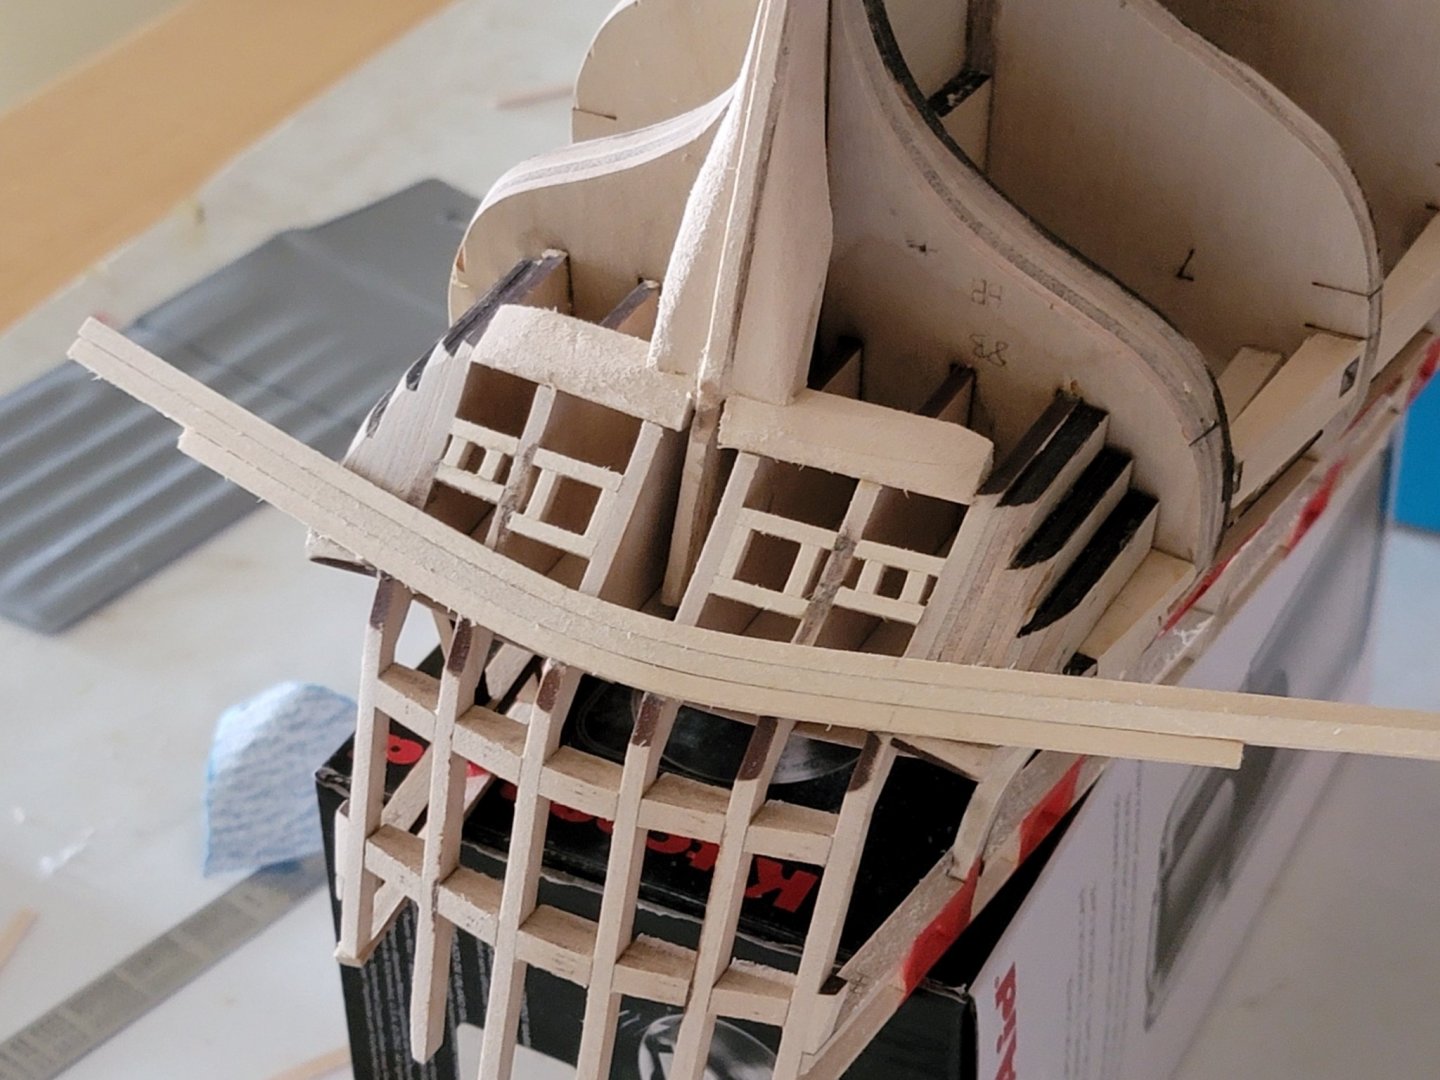
The excess planks on either side of the hull were trimmed and faired:


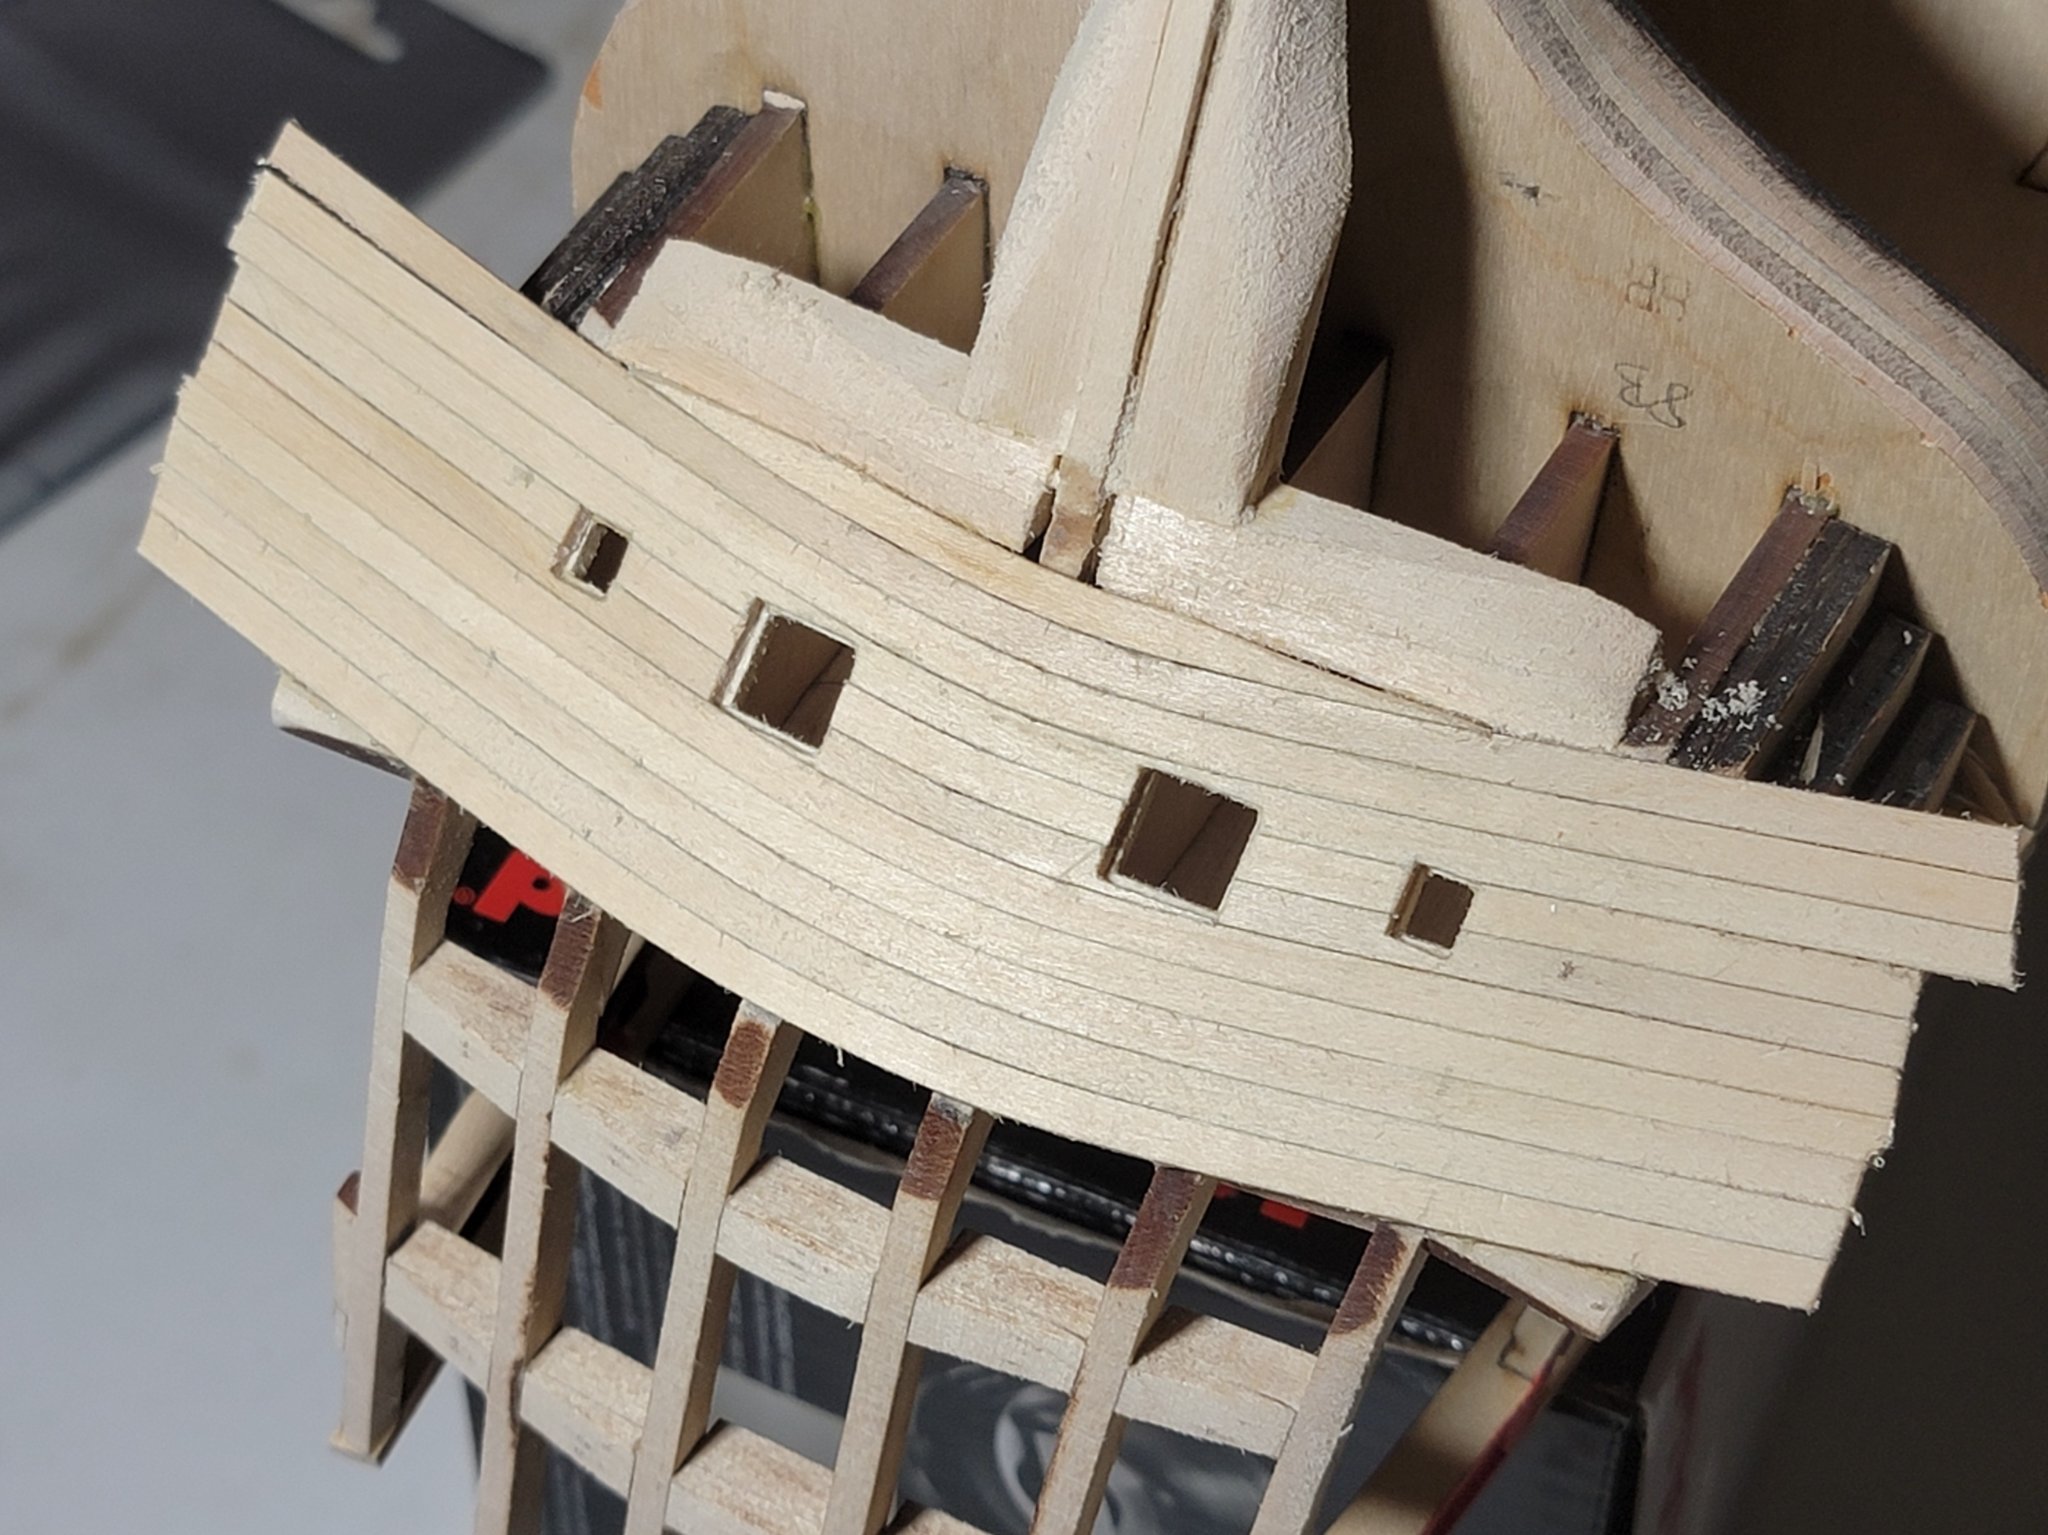
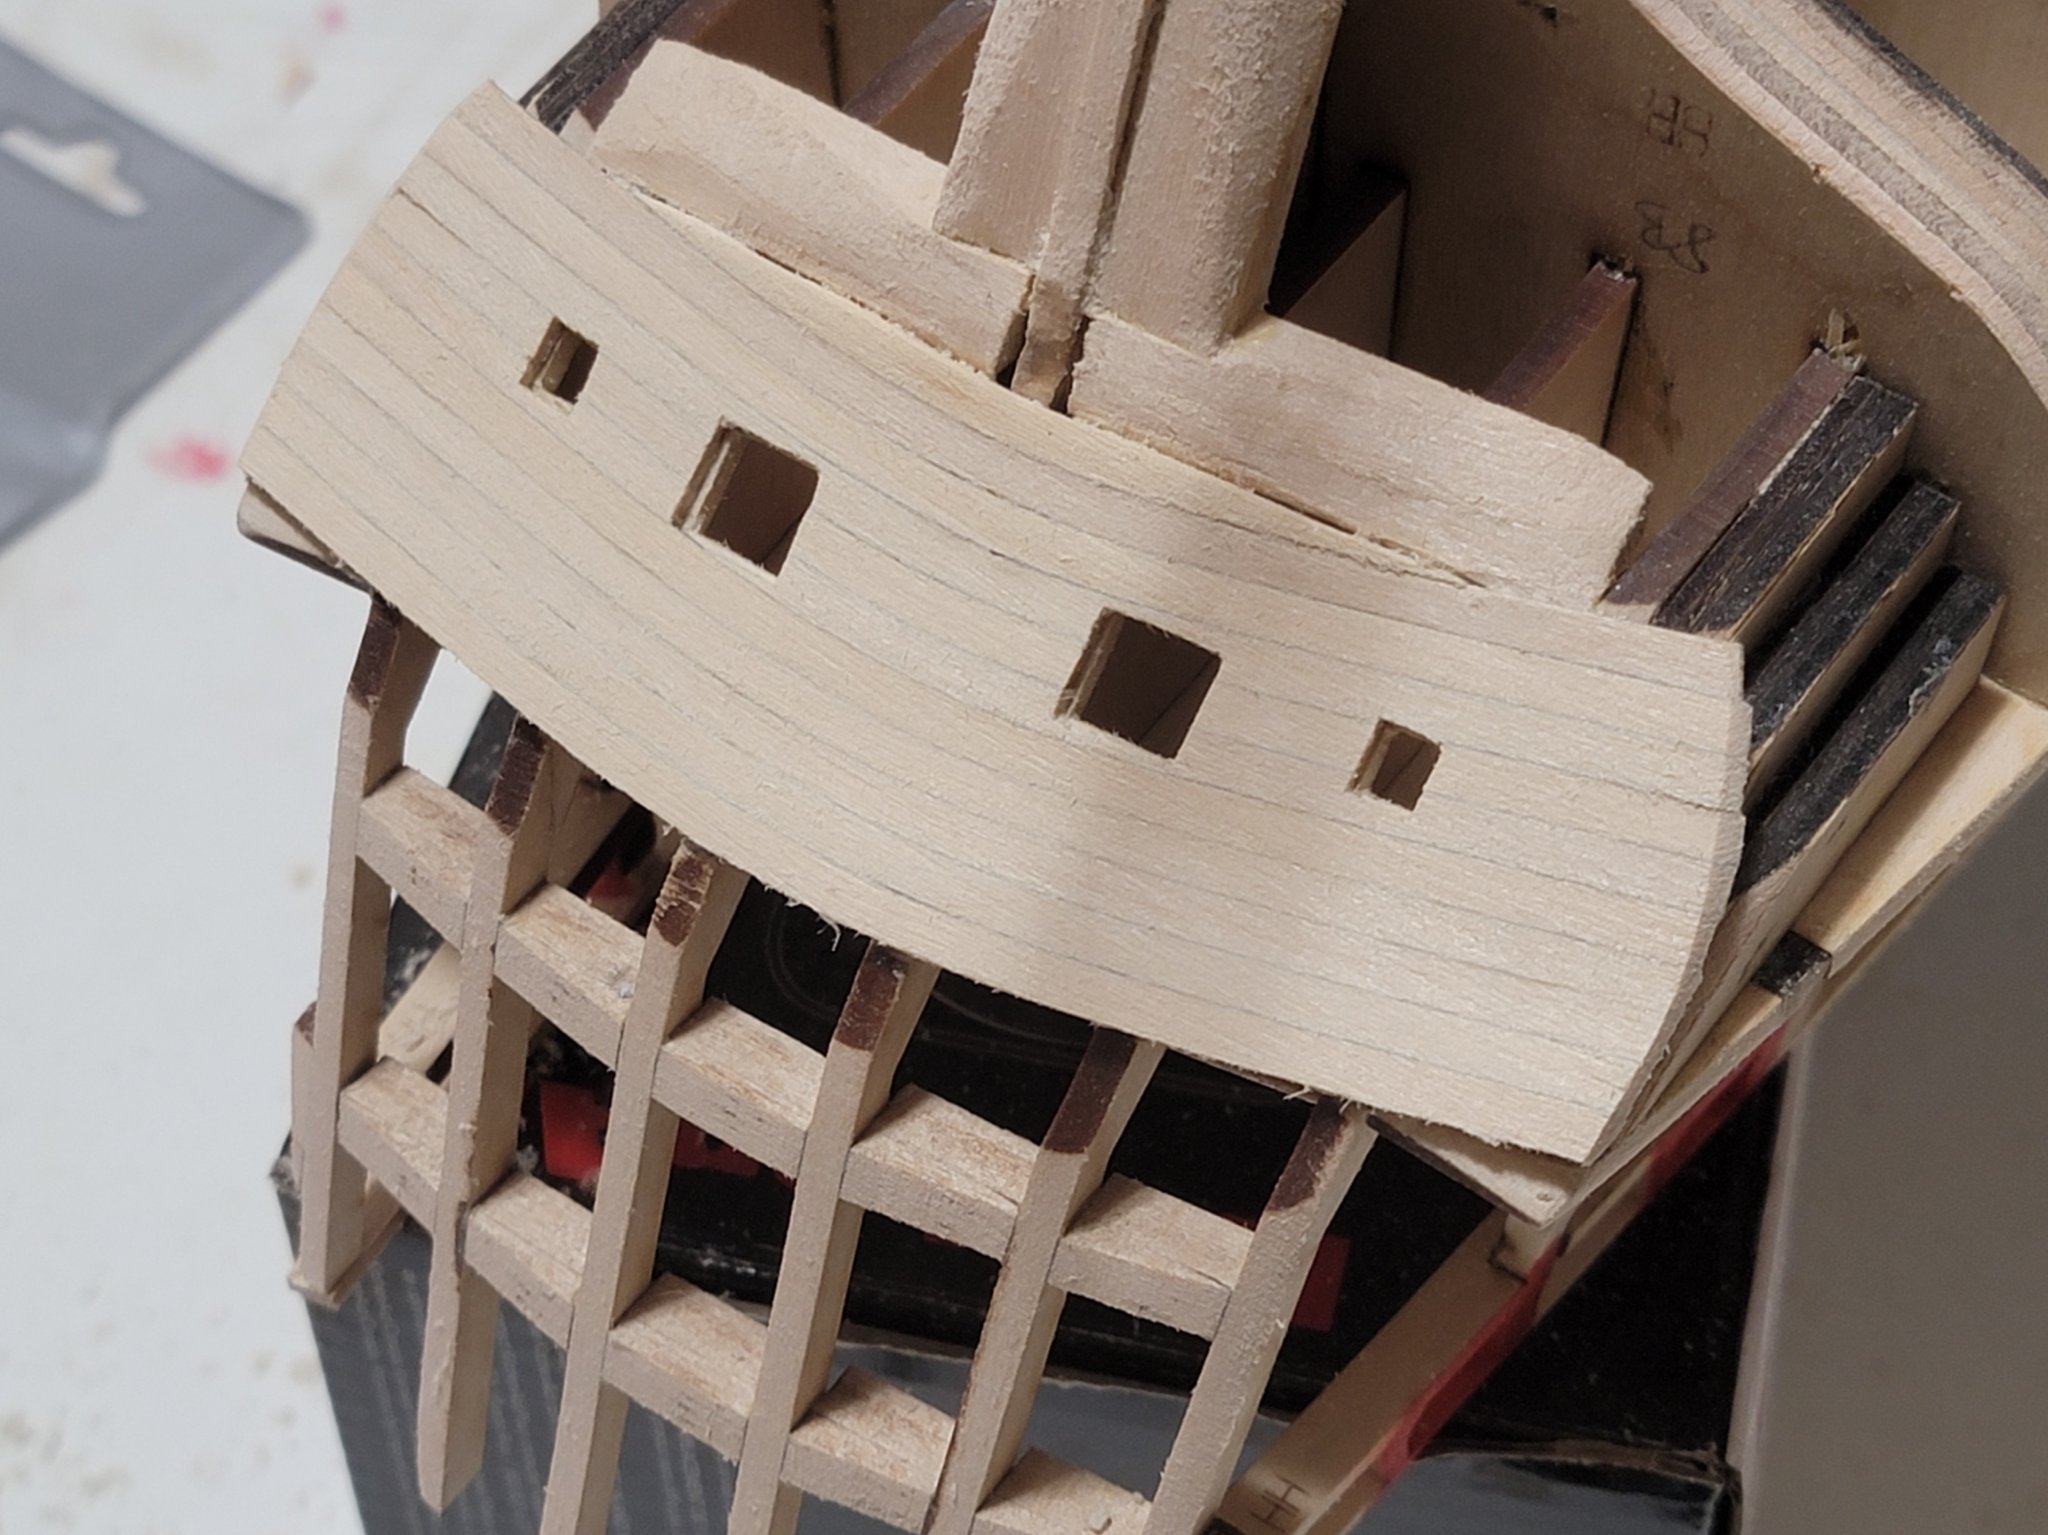
Then lastly, the gun ports were built. I had to align the planks to that of the lower counter. Another tricky procedure... After gluing them in place, the counter was sanded one more time. Here is how she stands currently:

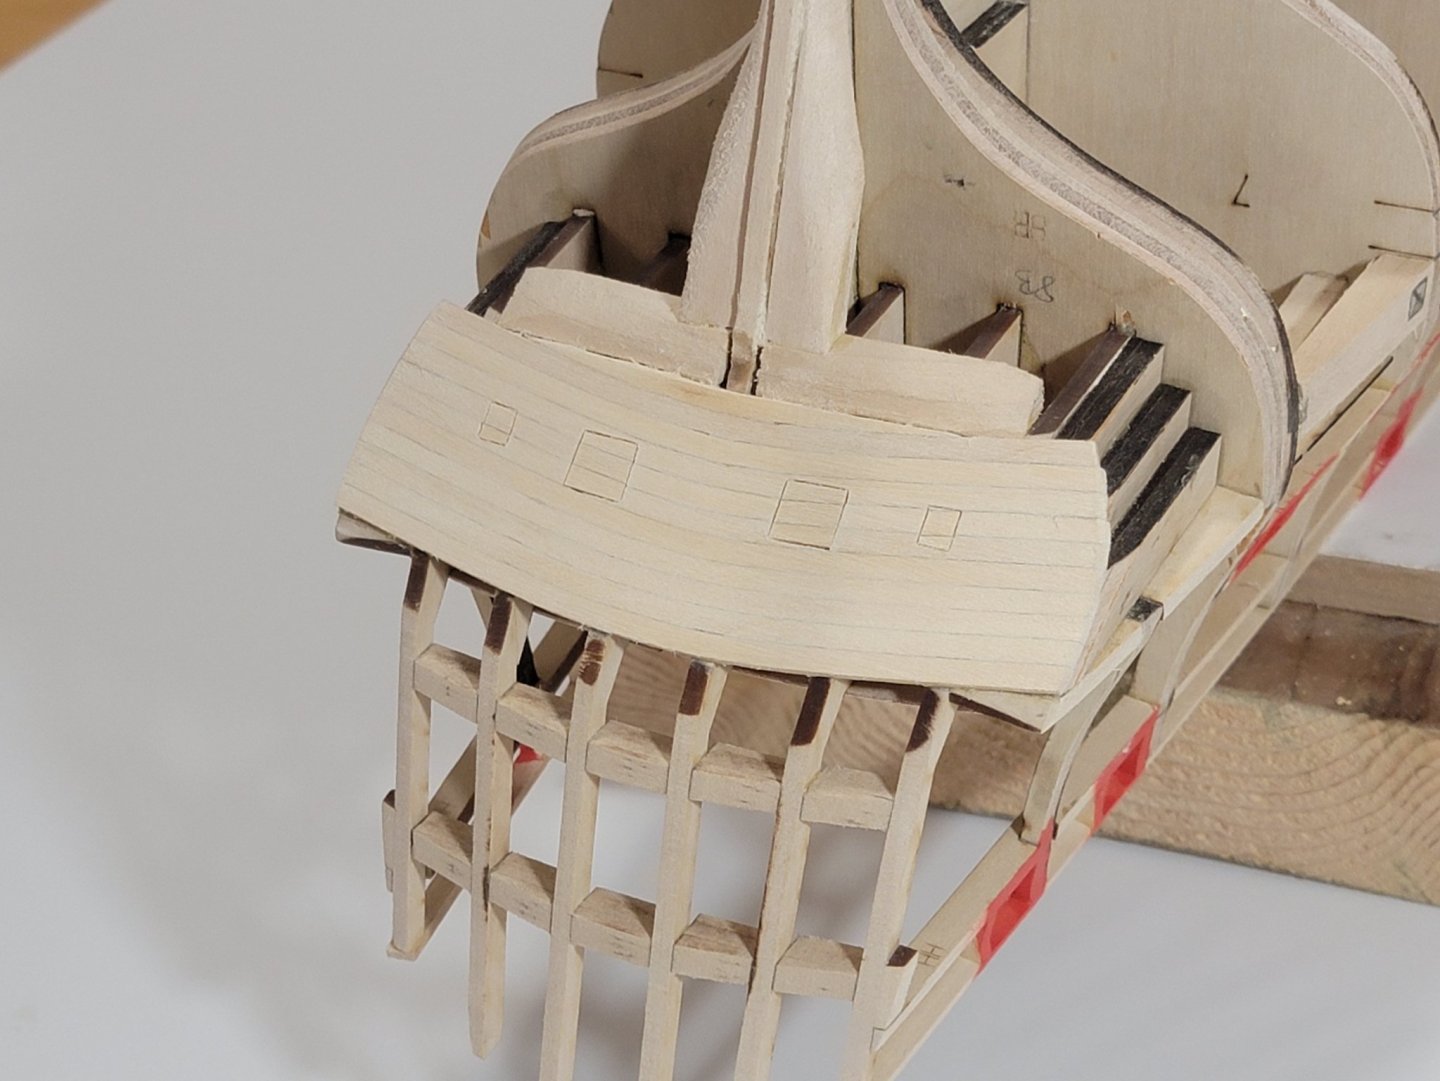


Btw, I am finding this build to be more difficult than I thought (more difficult than the Syren I'd say). Small mistakes can stack on one another and lots of new techniques are needed. But all these translate to new skills, and overcoming the challenges is quite enjoyable! 🙂
- BobG, GrandpaPhil, tommay1953 and 16 others
-
18
-
 1
1
-
The shape is looking really good!! I remember the upper and lower sections to be a bit trickier because of the rounded curves.
-
Hi Patrick, here is how I did my quarter galleries:
I made a sandwich structure and detailed each layer before gluing it all together. Your window frames look really good! If you don't mind me giving a suggestion, try making them a bit thinner to match that of the plans. I like the idea of the sculpy, I will keep a mental note in case I ever need to do something similar!
Wishing you a quick recovery!
- Gregory and Overworked724
-
2
-
Really nice planking!! She's coming up great! 😀
-
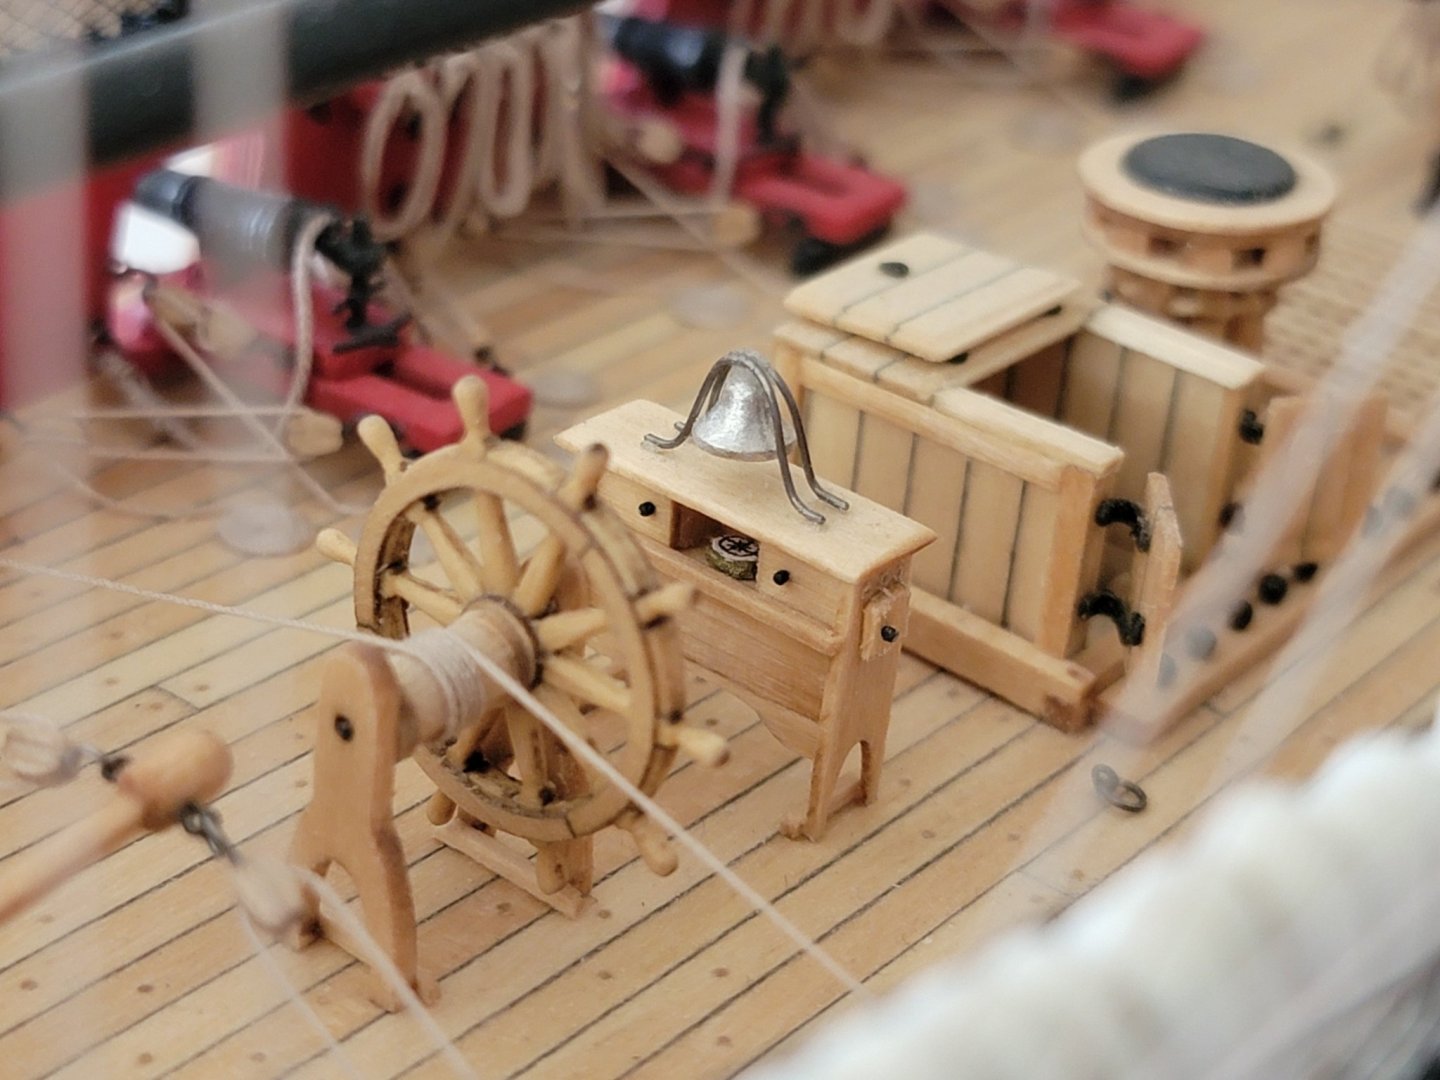
That's some gorgeous decking!!
-
18 hours ago, Nirvana said:
WalrusGuy, please don't be shy..... it's okay to reveal a true first name.....🙂
I just finished reading through your build log and I have to write (say) your ship is coming along beautifully.
I remember when I received my kit (waiting to be built) how heavy the box was.
Your build log will certainly help me.
Hi Nirvana, many thanks for the nice comment! My true first name is Harshil 🙂
Yeaup the box is heavy, I was also surprised by that! But I guess most of the weight comes from the many laser cut sheets.
- Matt D, Edwardkenway, mgatrost and 3 others
-
6
-
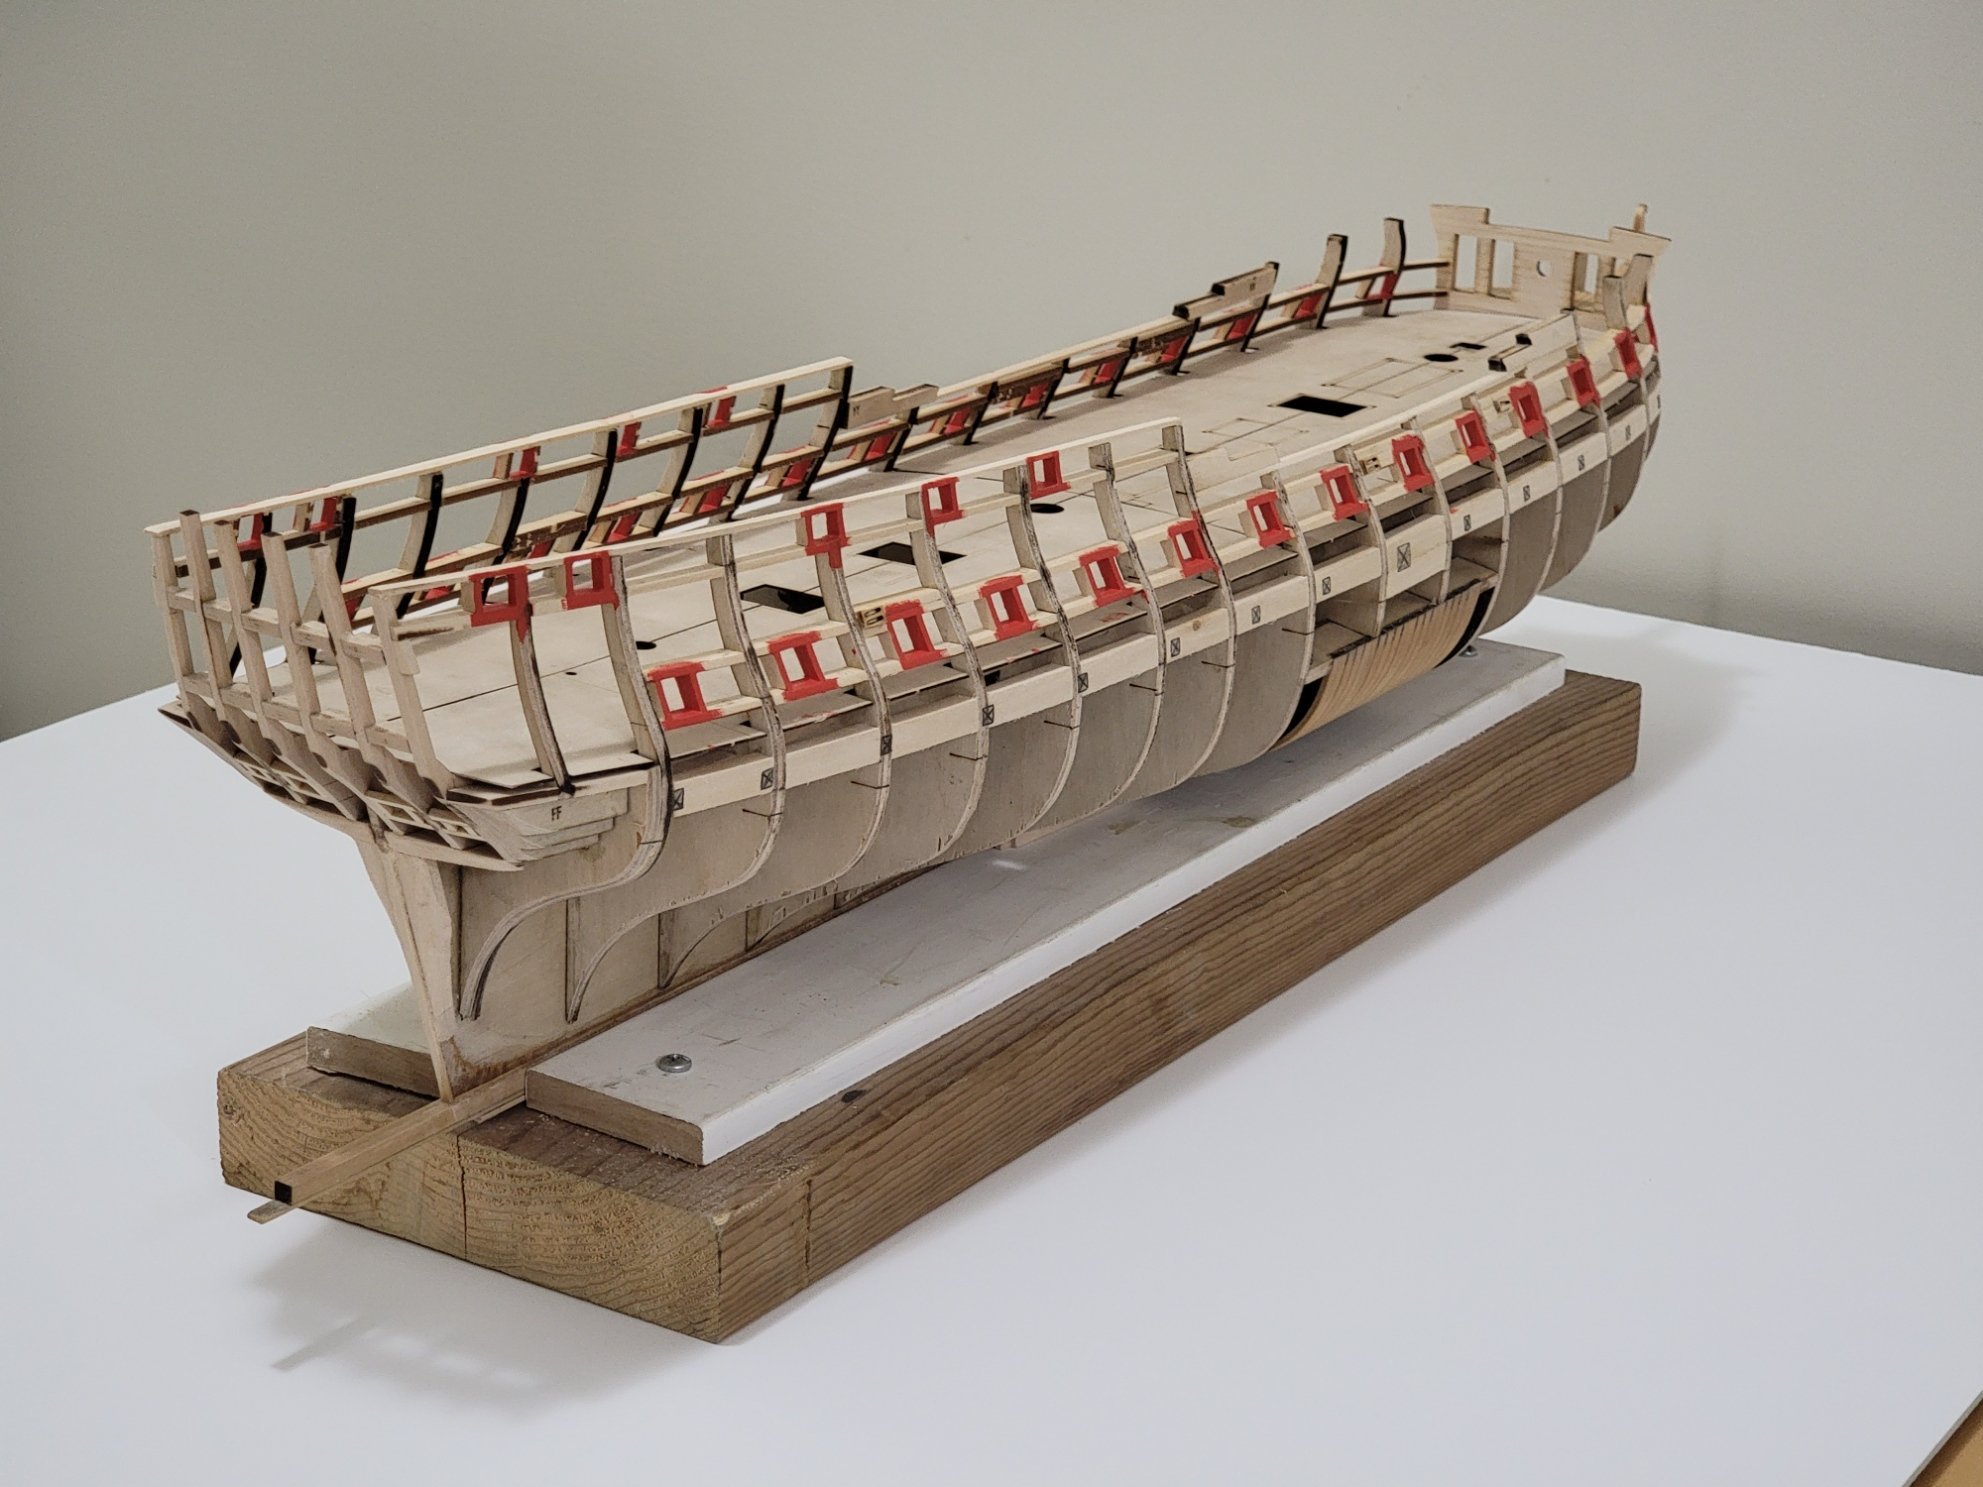
Just a quick update before the planking begins. I painted the gun ports and marked the locations for the top of the wales. The red provided by the kit is brighter than that of the Syren, and imo looks much nicer!


- coxswain, tommay1953, JpR62 and 16 others
-
19
-
7 hours ago, Gahm said:
Your framing looks really good! You are well under way for another beautiful model 👍
Thomas
Thanks so much for the nice words, Thomas!
-
Thanks all for the likes!!! 🙂
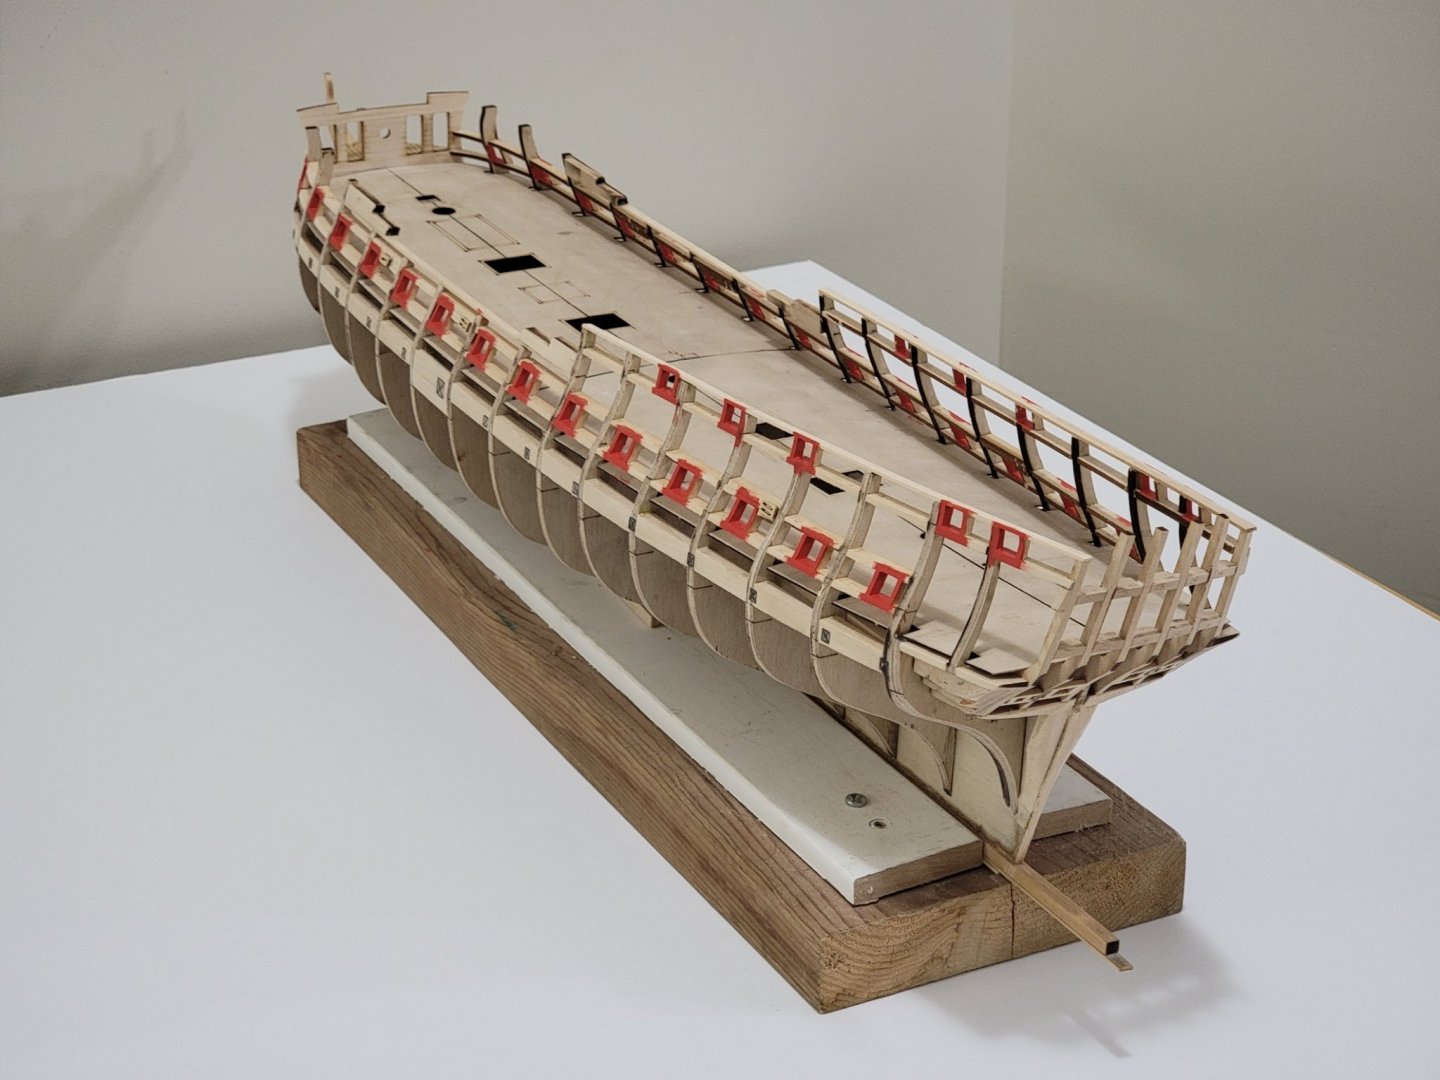
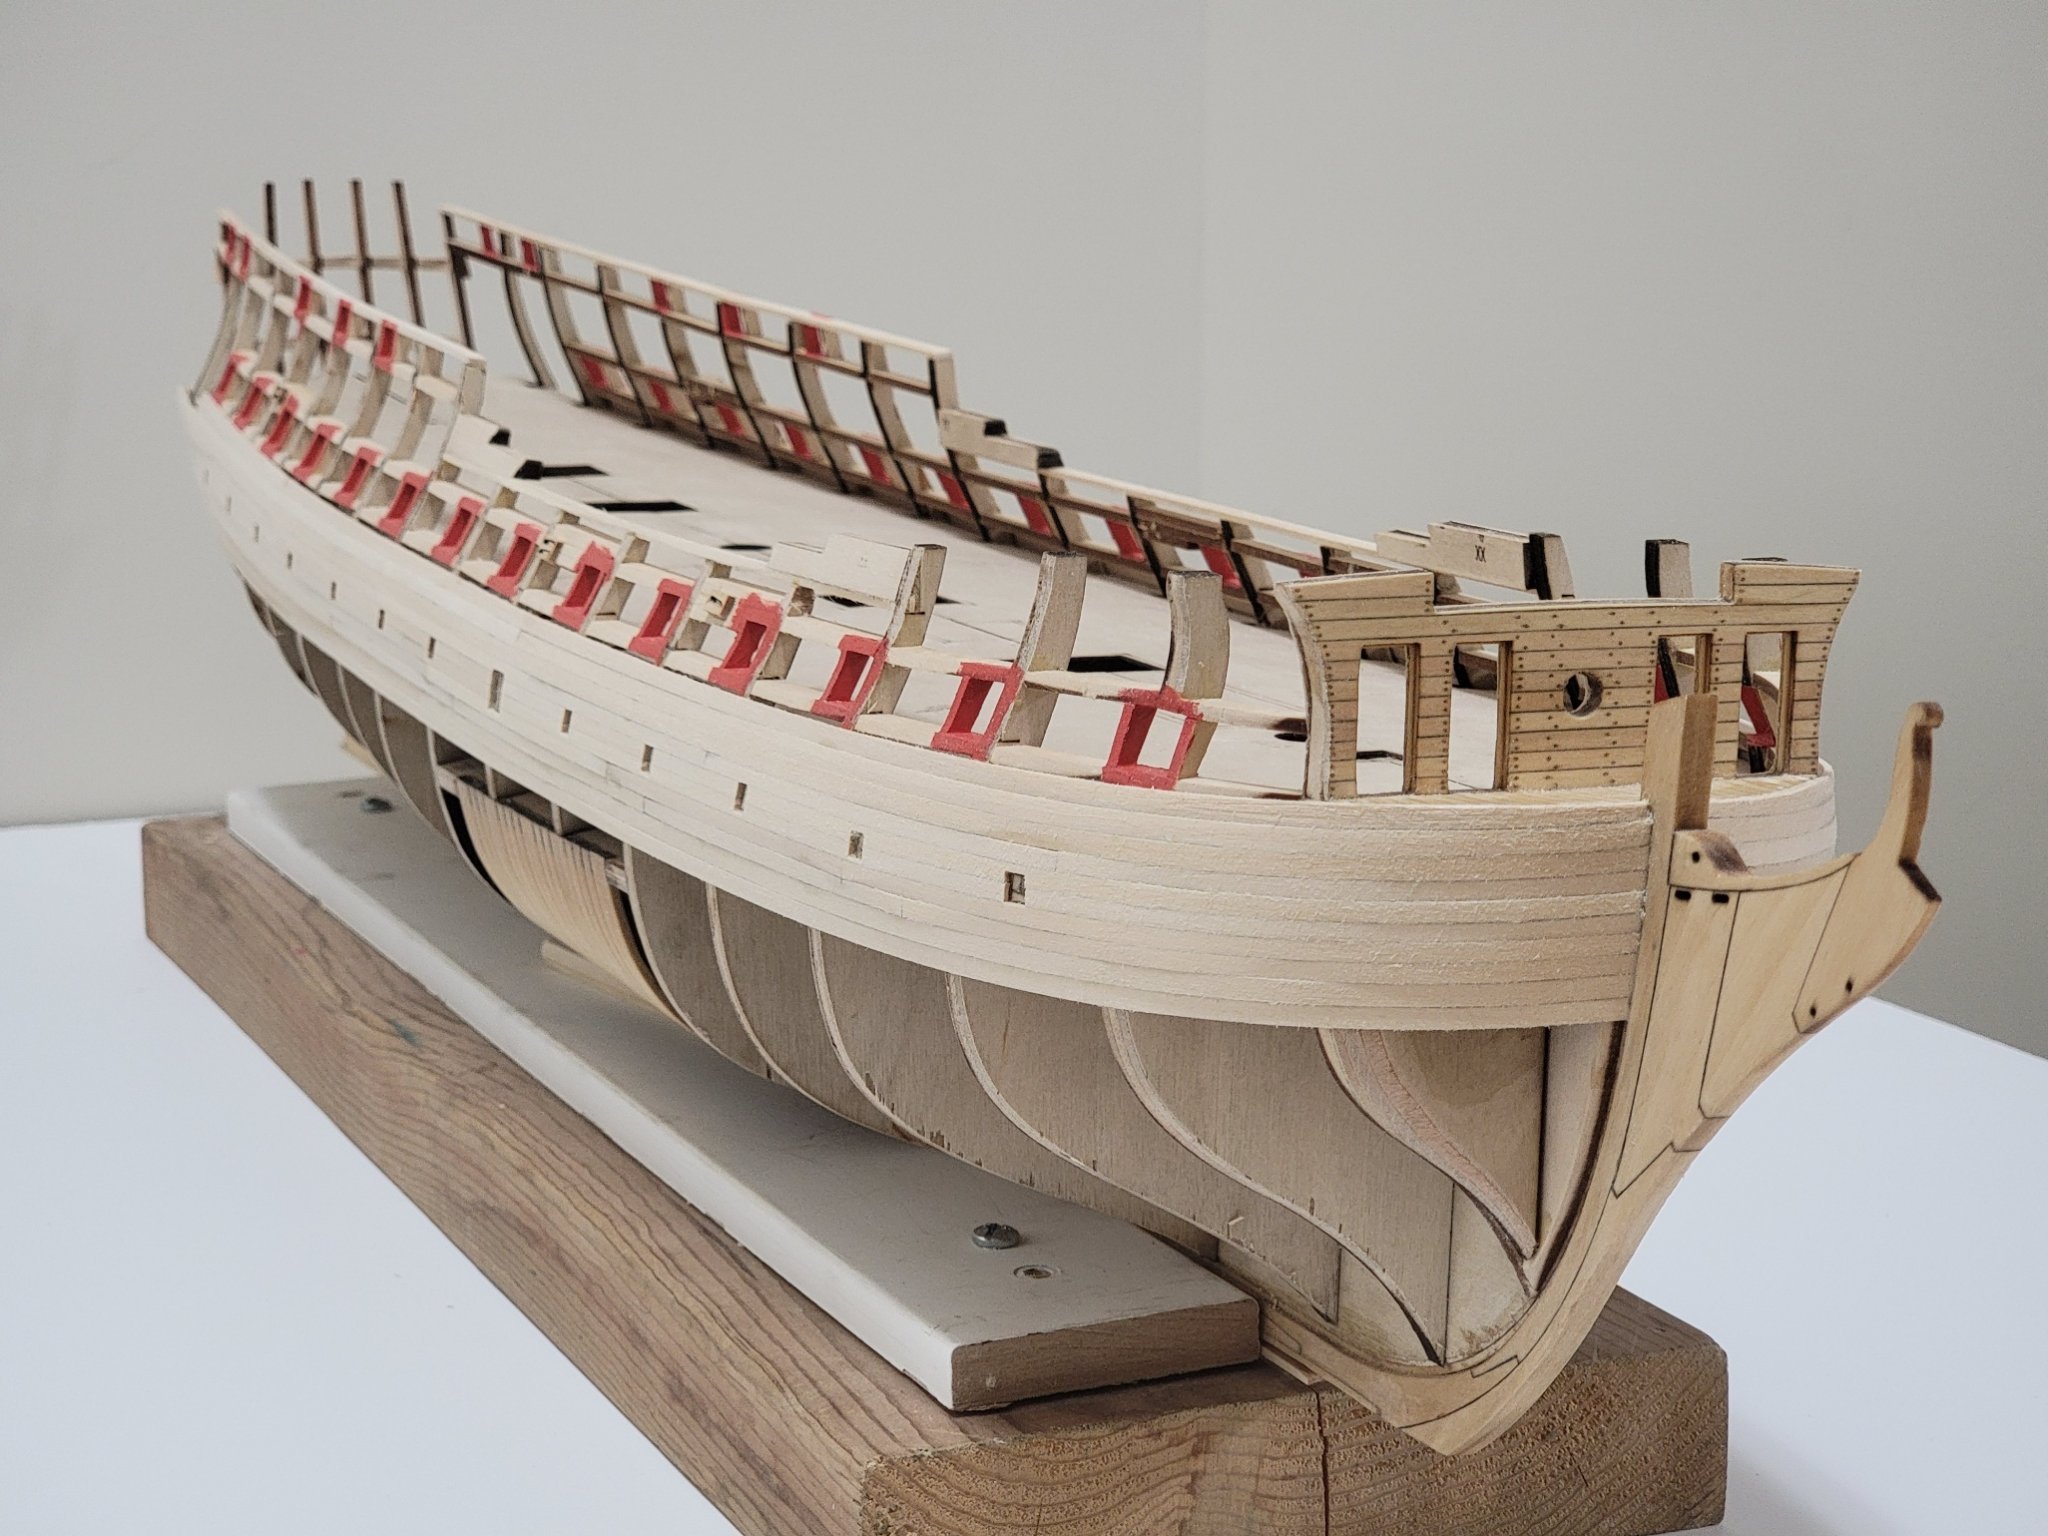
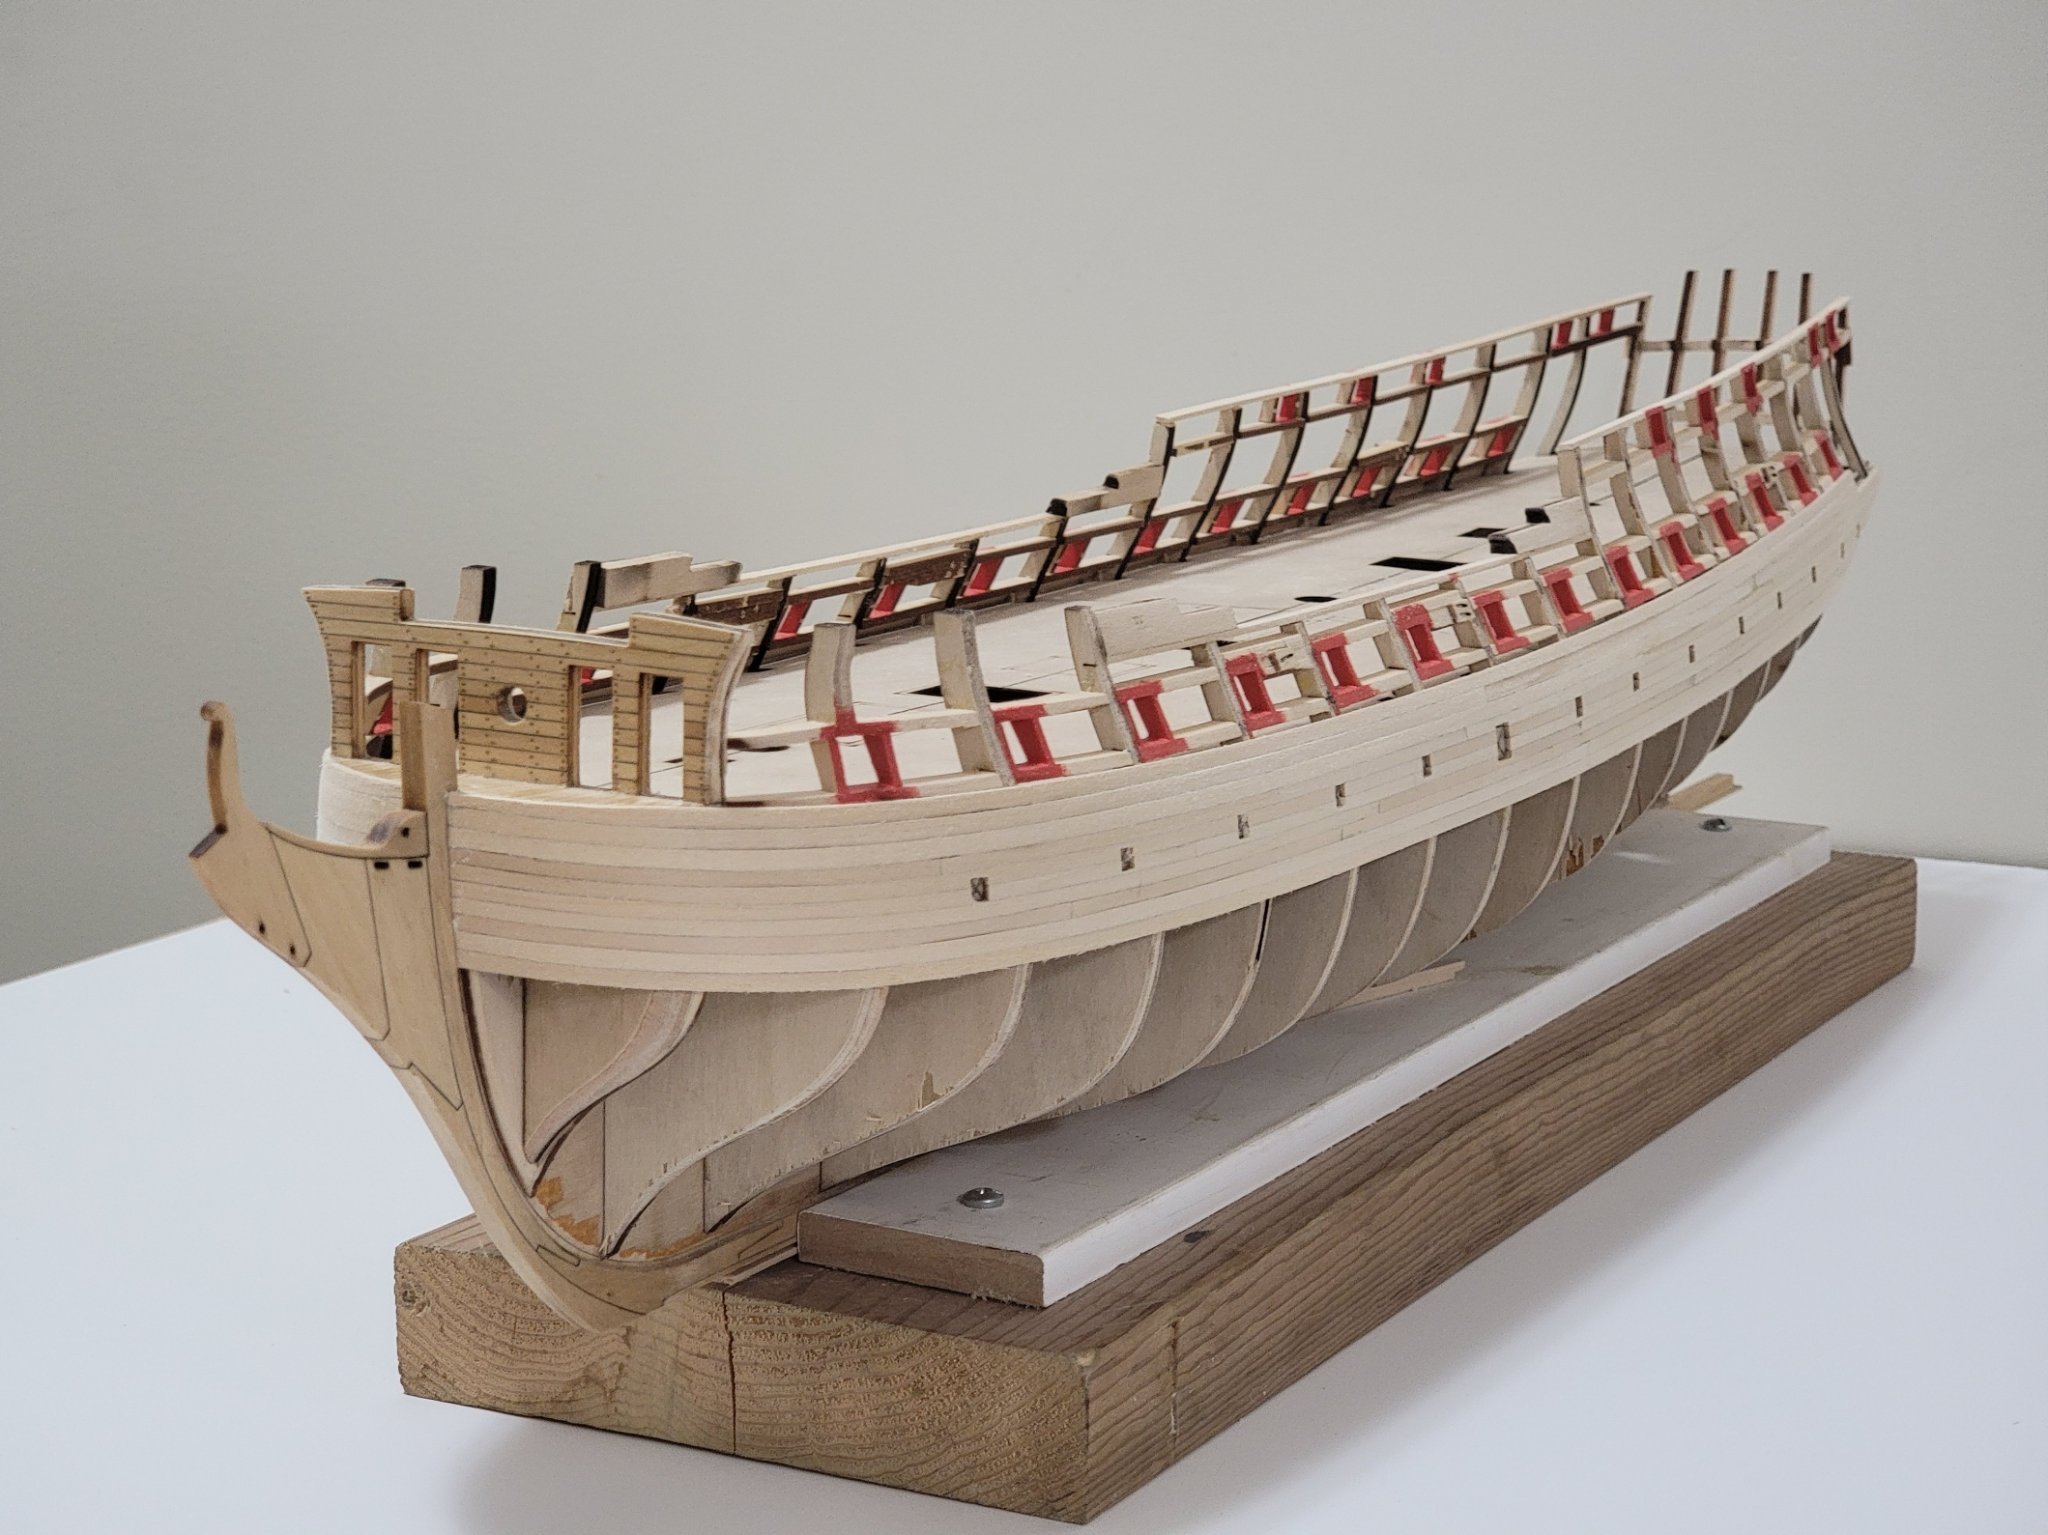
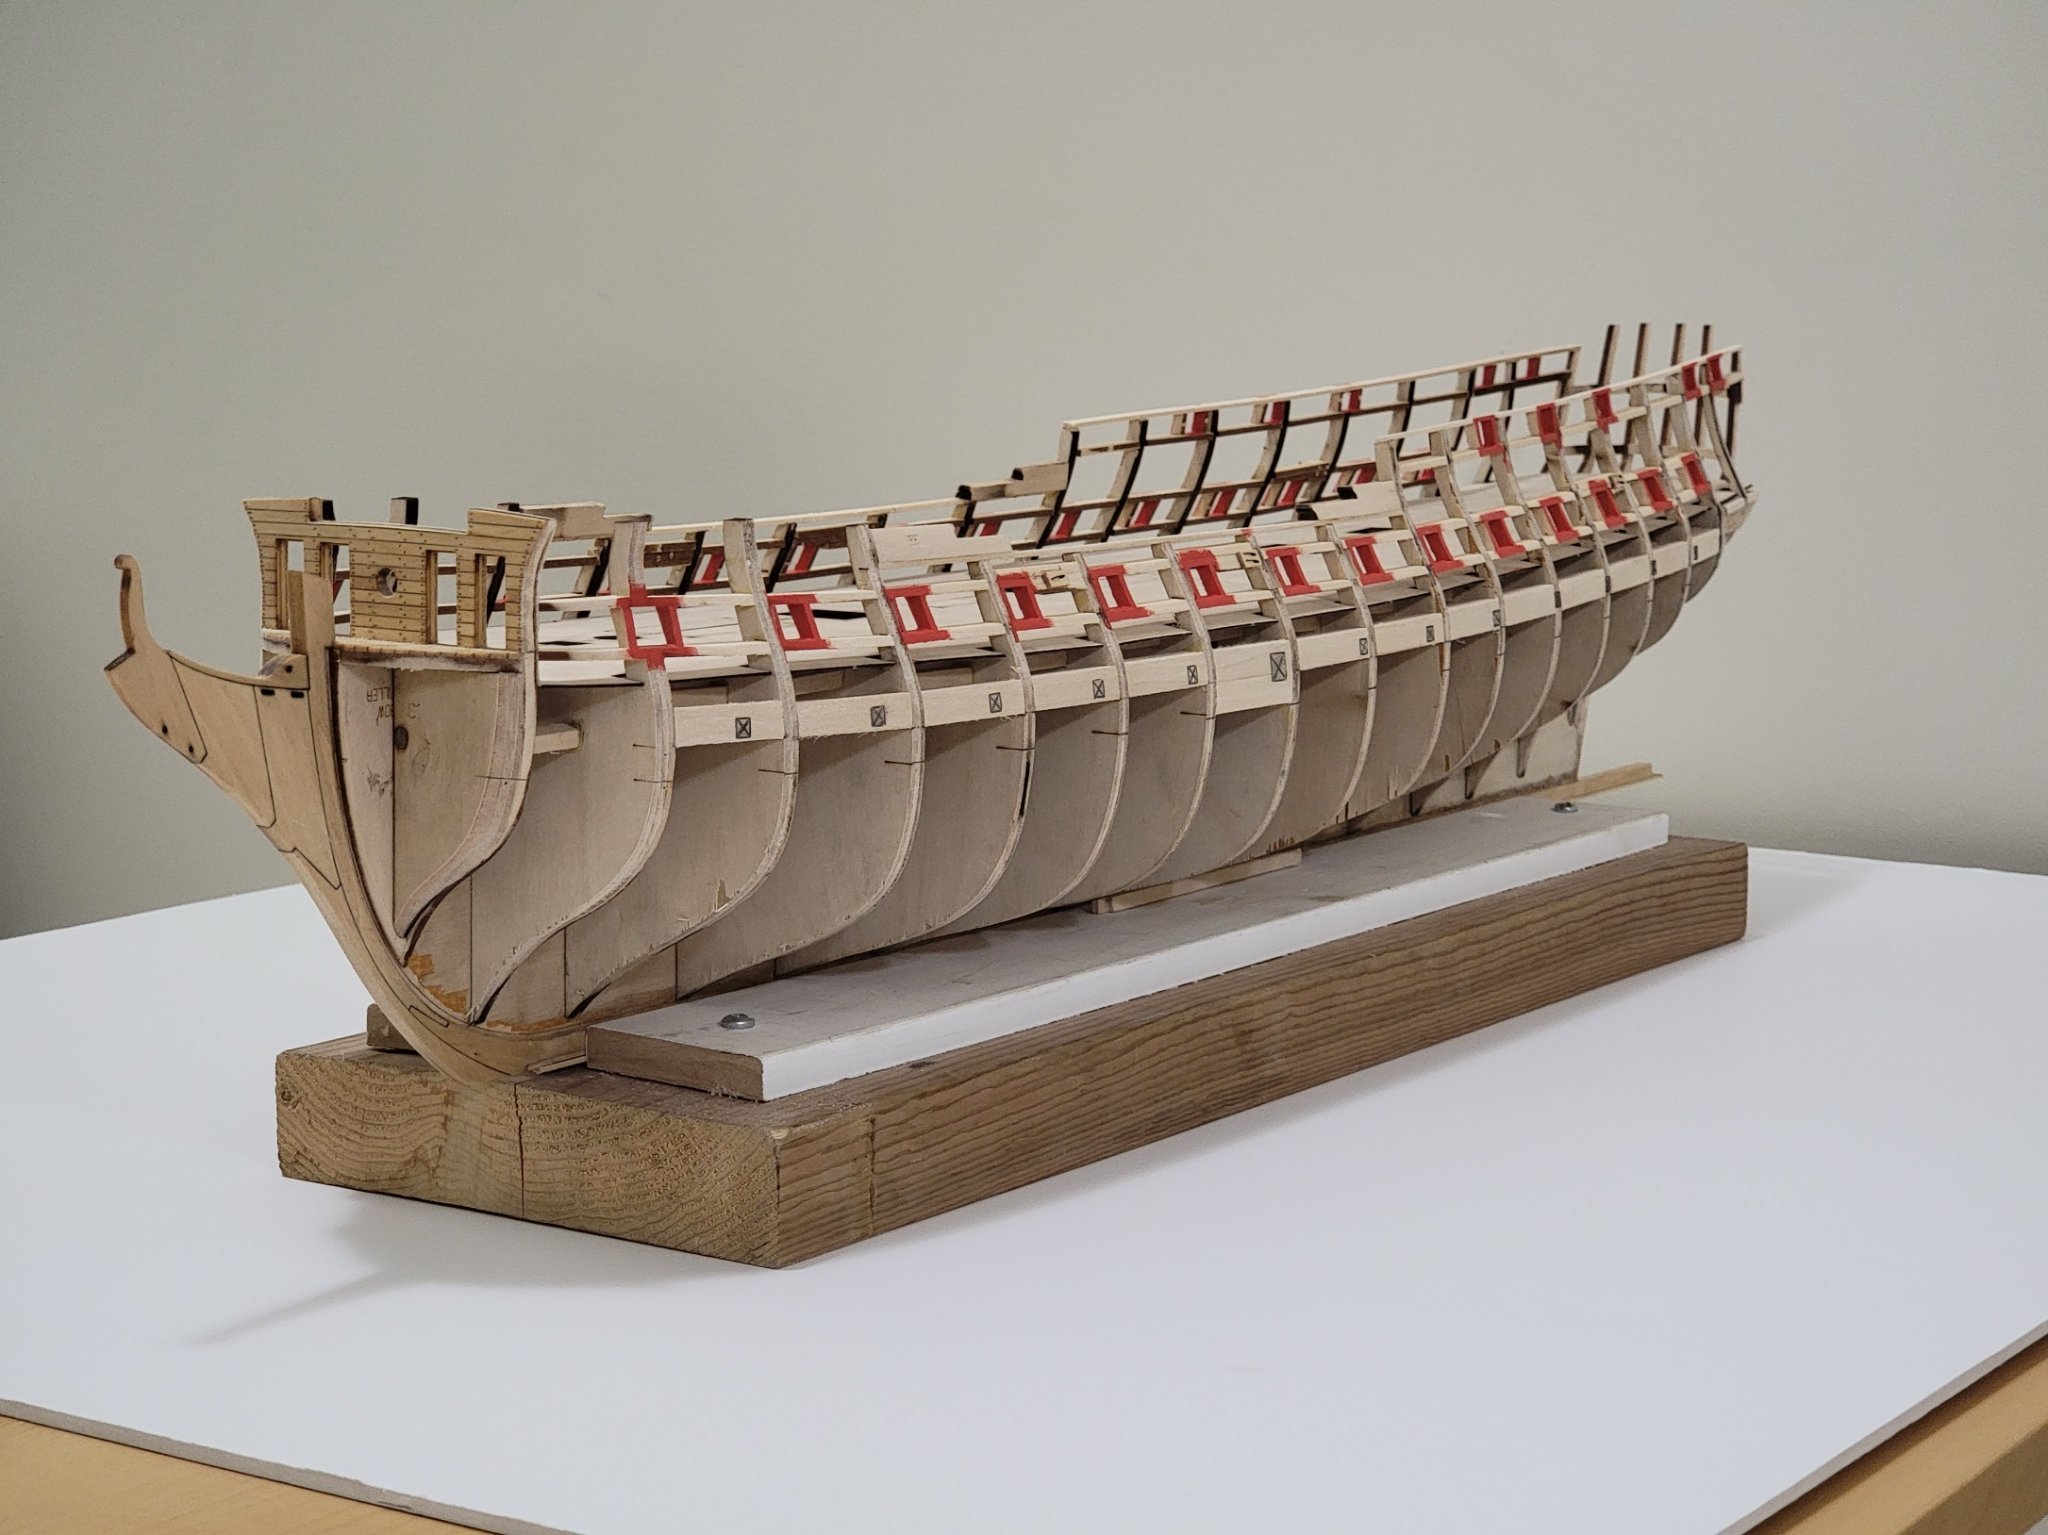
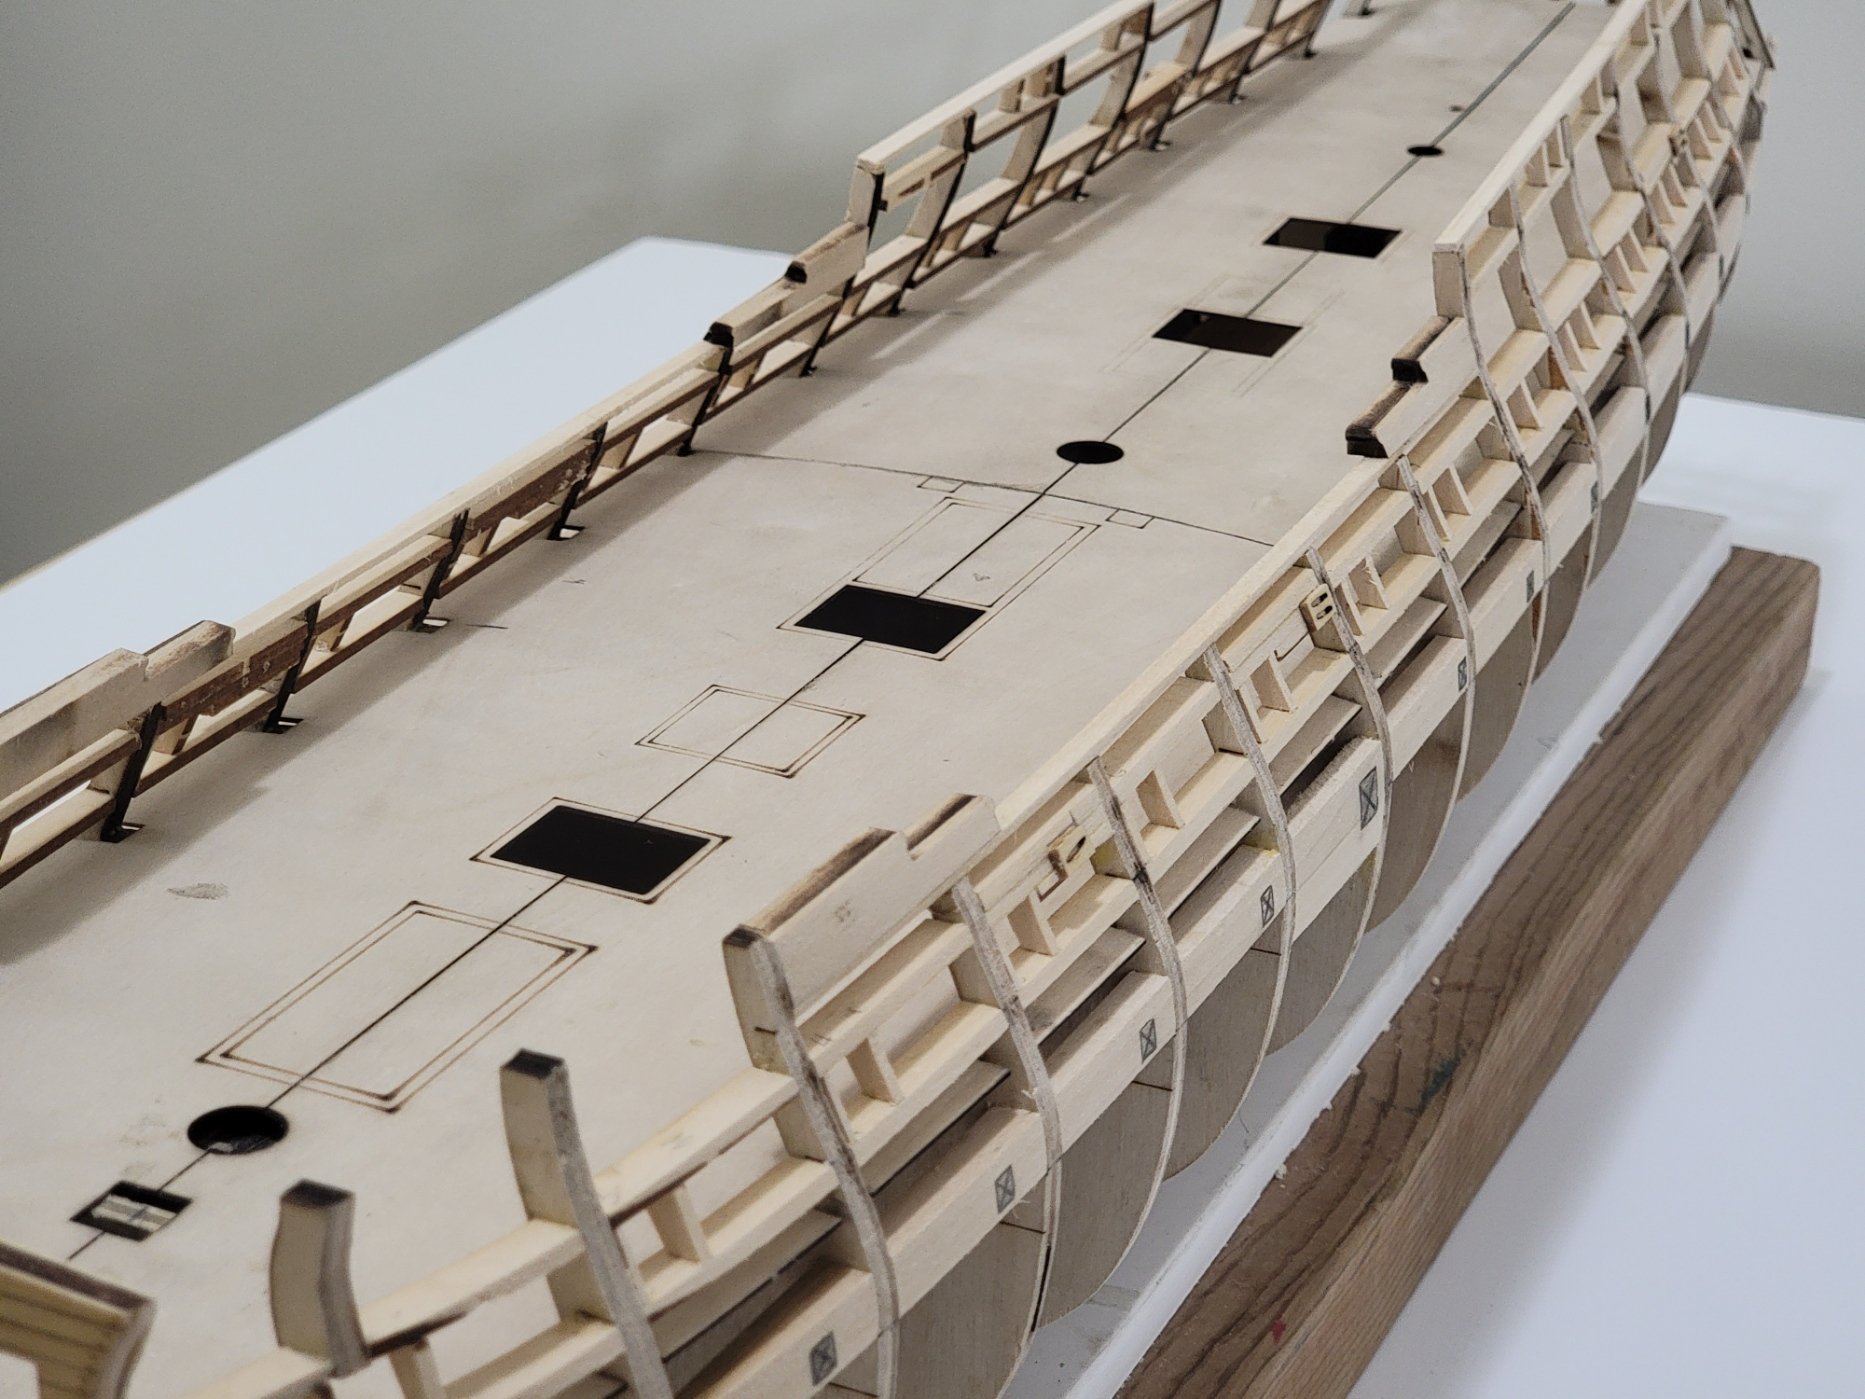
I finished up all the framing and skeleton work. Drilling the holes for the sheaves was a bit tricky, but I basically measured where the holes were supposed to be on both sides of the bulwark, then drilled from both sides till the holes combined.
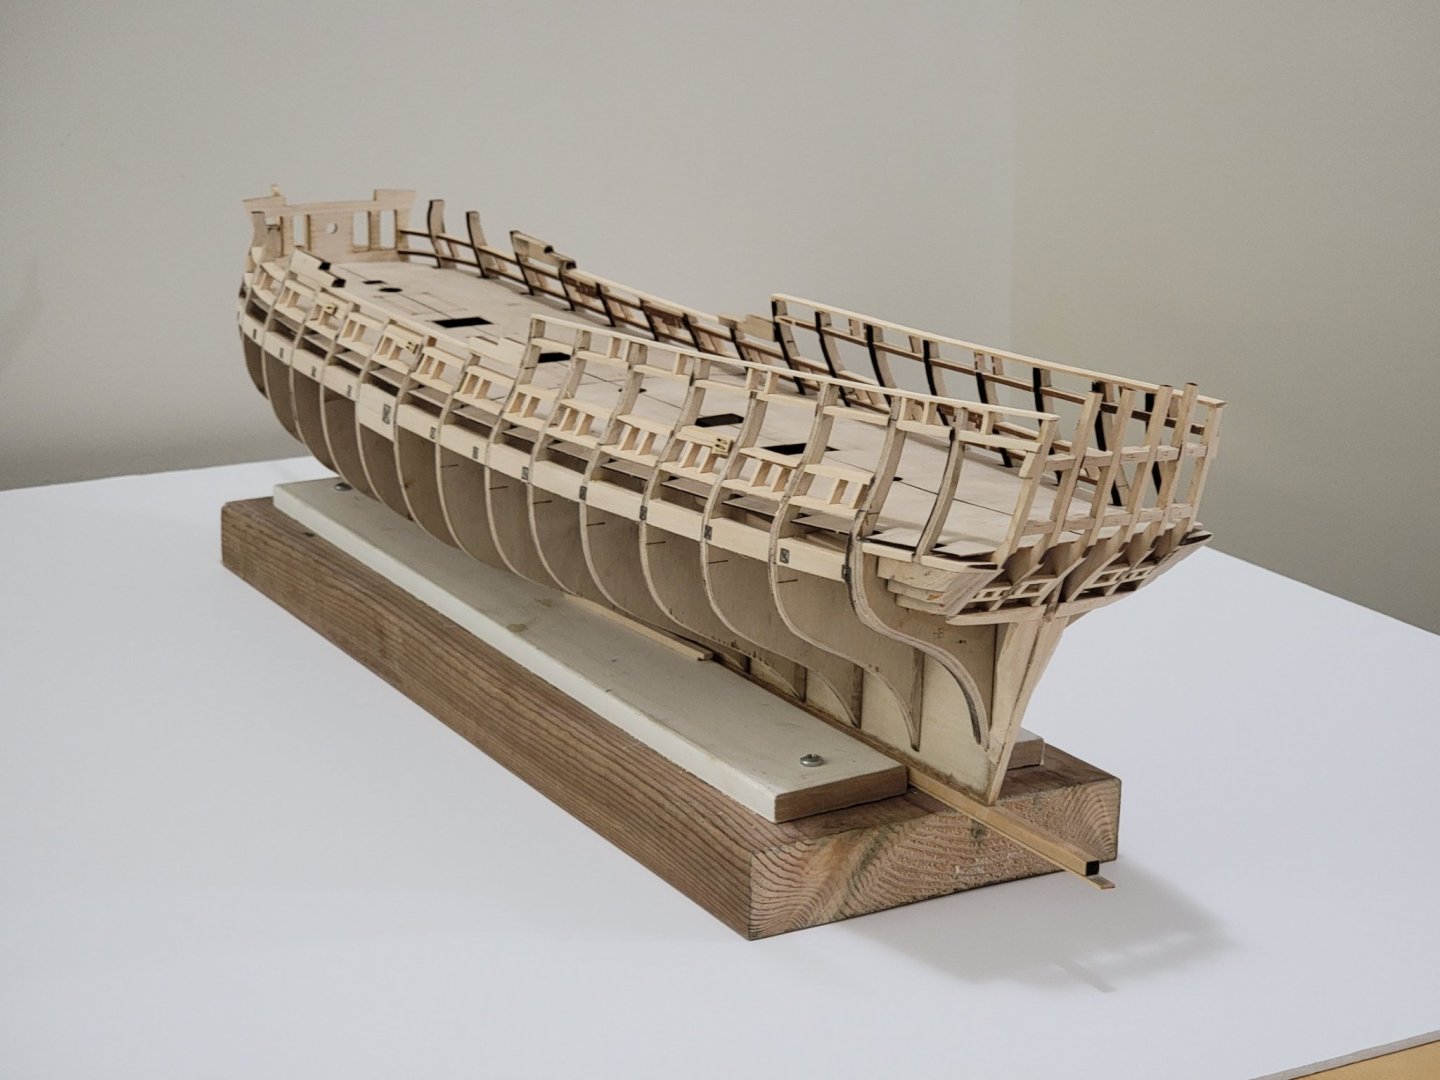
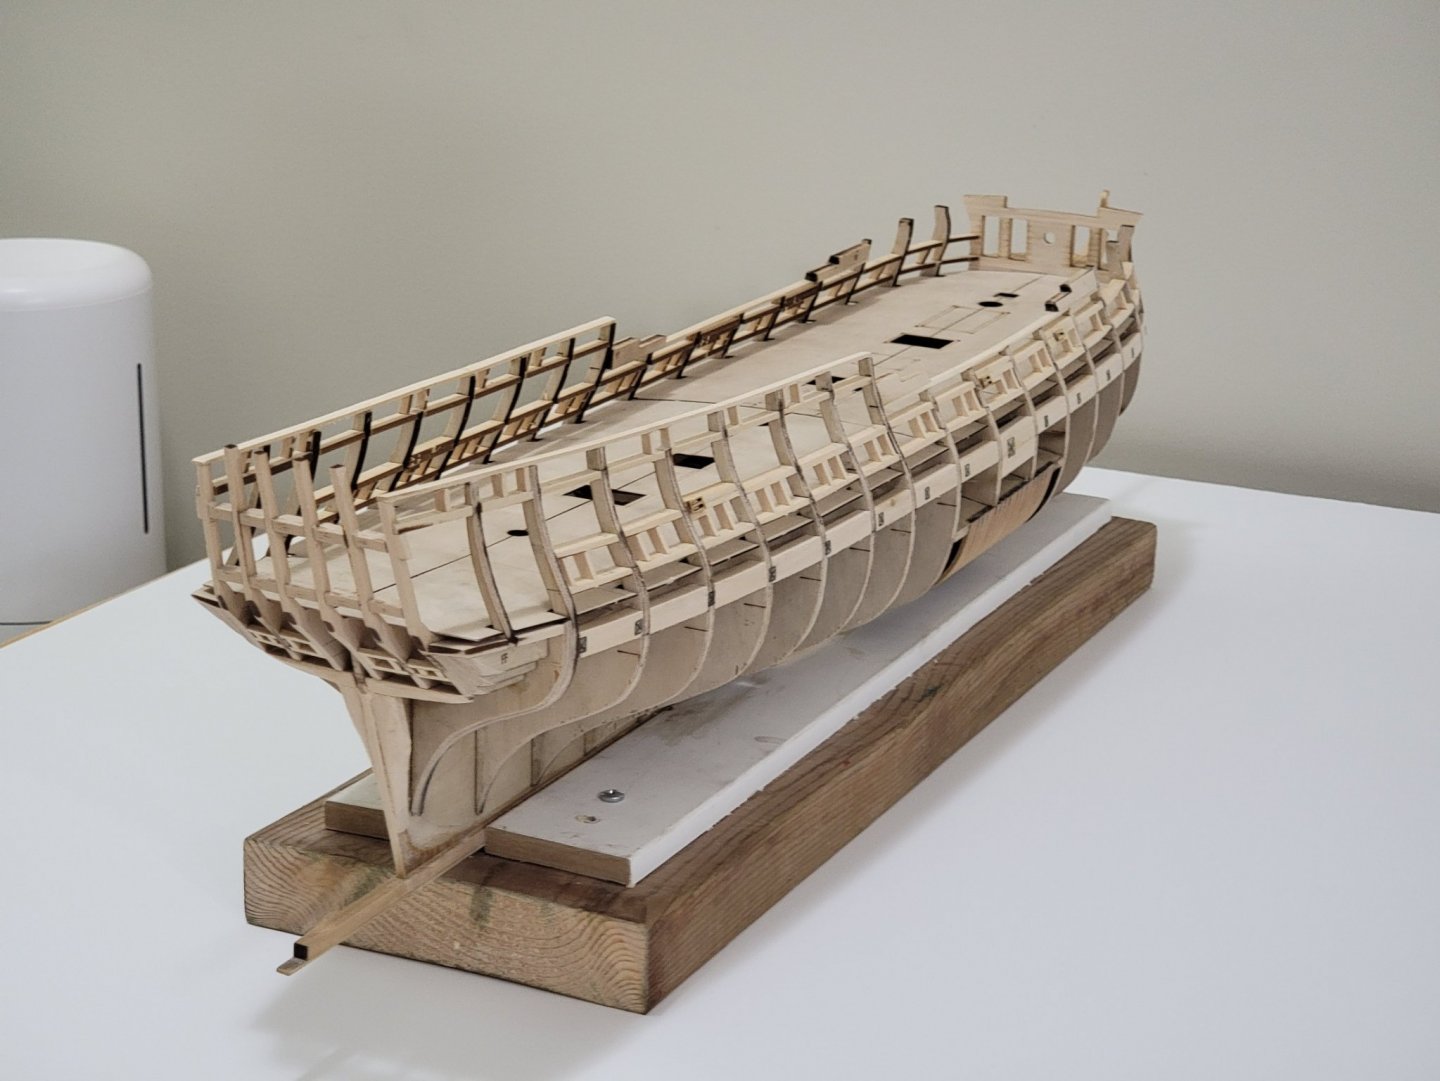
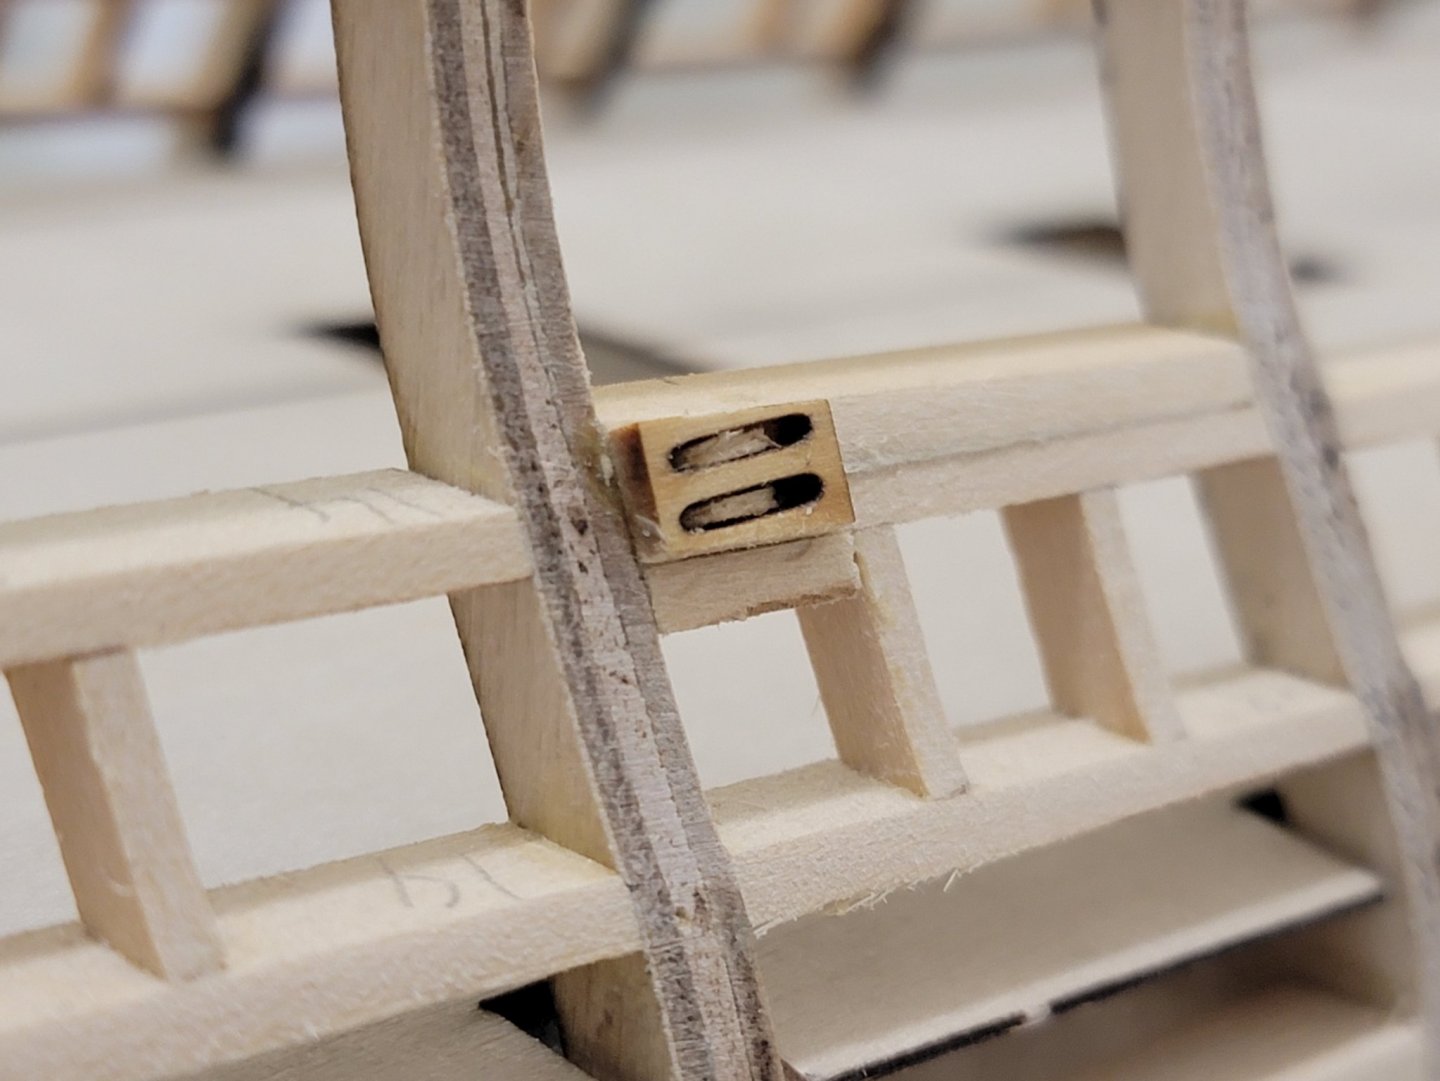

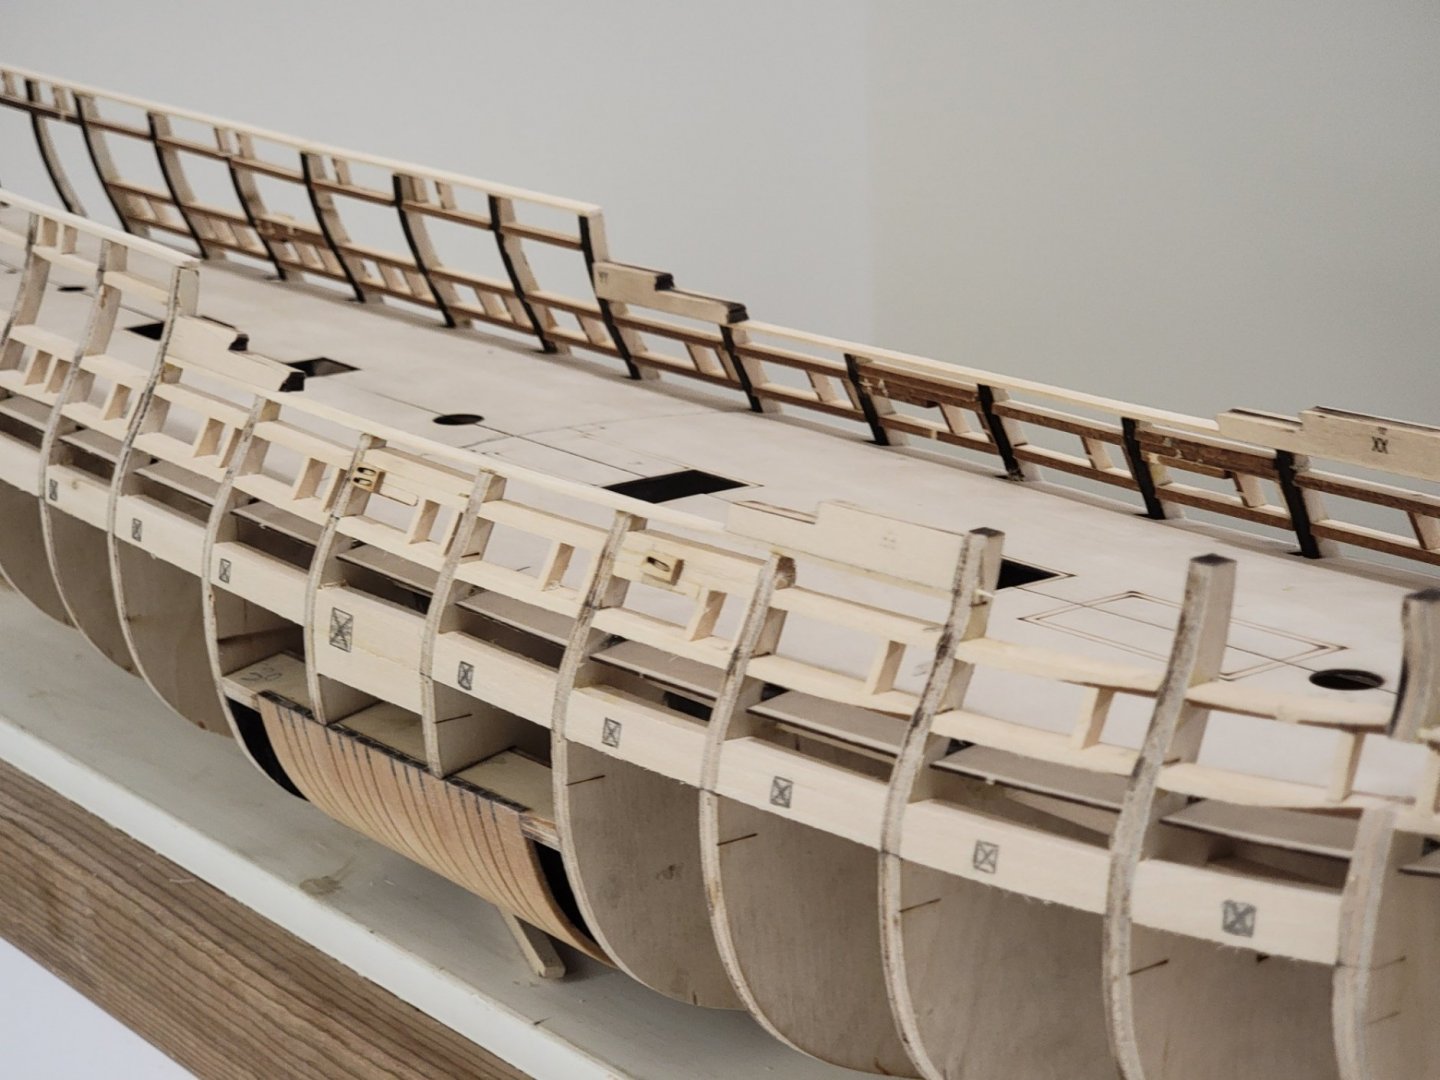
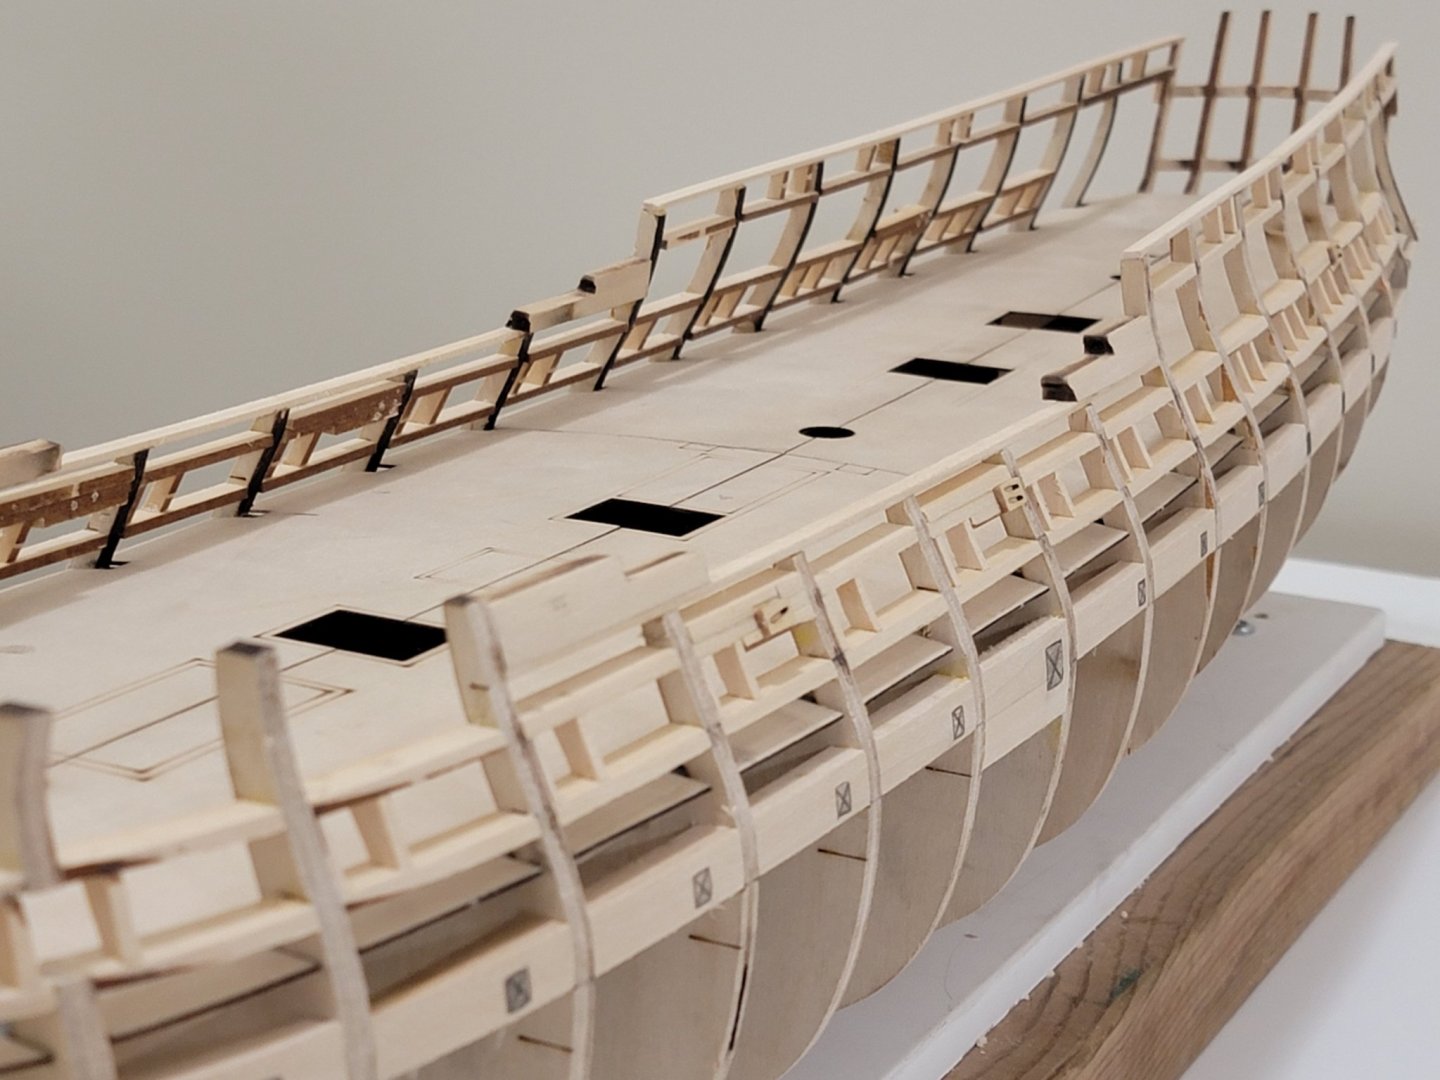
Next up I will fill in any gaps of the gun port framing, sand the insides smooth, then paint them red. Then, I can finally start planking! 😁
- Gahm, Wahka_est, Retired guy and 12 others
-
15
-
9 hours ago, Ryland Craze said:
Beautiful model. This is definitely an award winning model. Good luck in the contest.
7 hours ago, niwotwill said:I've said before how much I enjoy and use you photos as i build my Syren in fact I looked through them Thursday to see how you rigged the bowsprit fairlead to understand how I should build my bowsprit.
Great photos and much luck in the contest.
Thanks for the great words Ryland and Will!! And thanks all for the likes.
There are some amazing models being entered for the contest, so let's see what happens 🙂
Will, I'm glad my log could be useful. I just checked out your progress and it's looking fantastic!
- Cathead and Ryland Craze
-
2
-
Thought I'd share some of the pictures I submitted to the NRG photo contest. It was lots of fun taking photos of the ship!! I did not edit any of the photos, I just played around with the lighting and used the Samsung S21 ultra's camera.
Here are the photos of the various angles required for the contest:
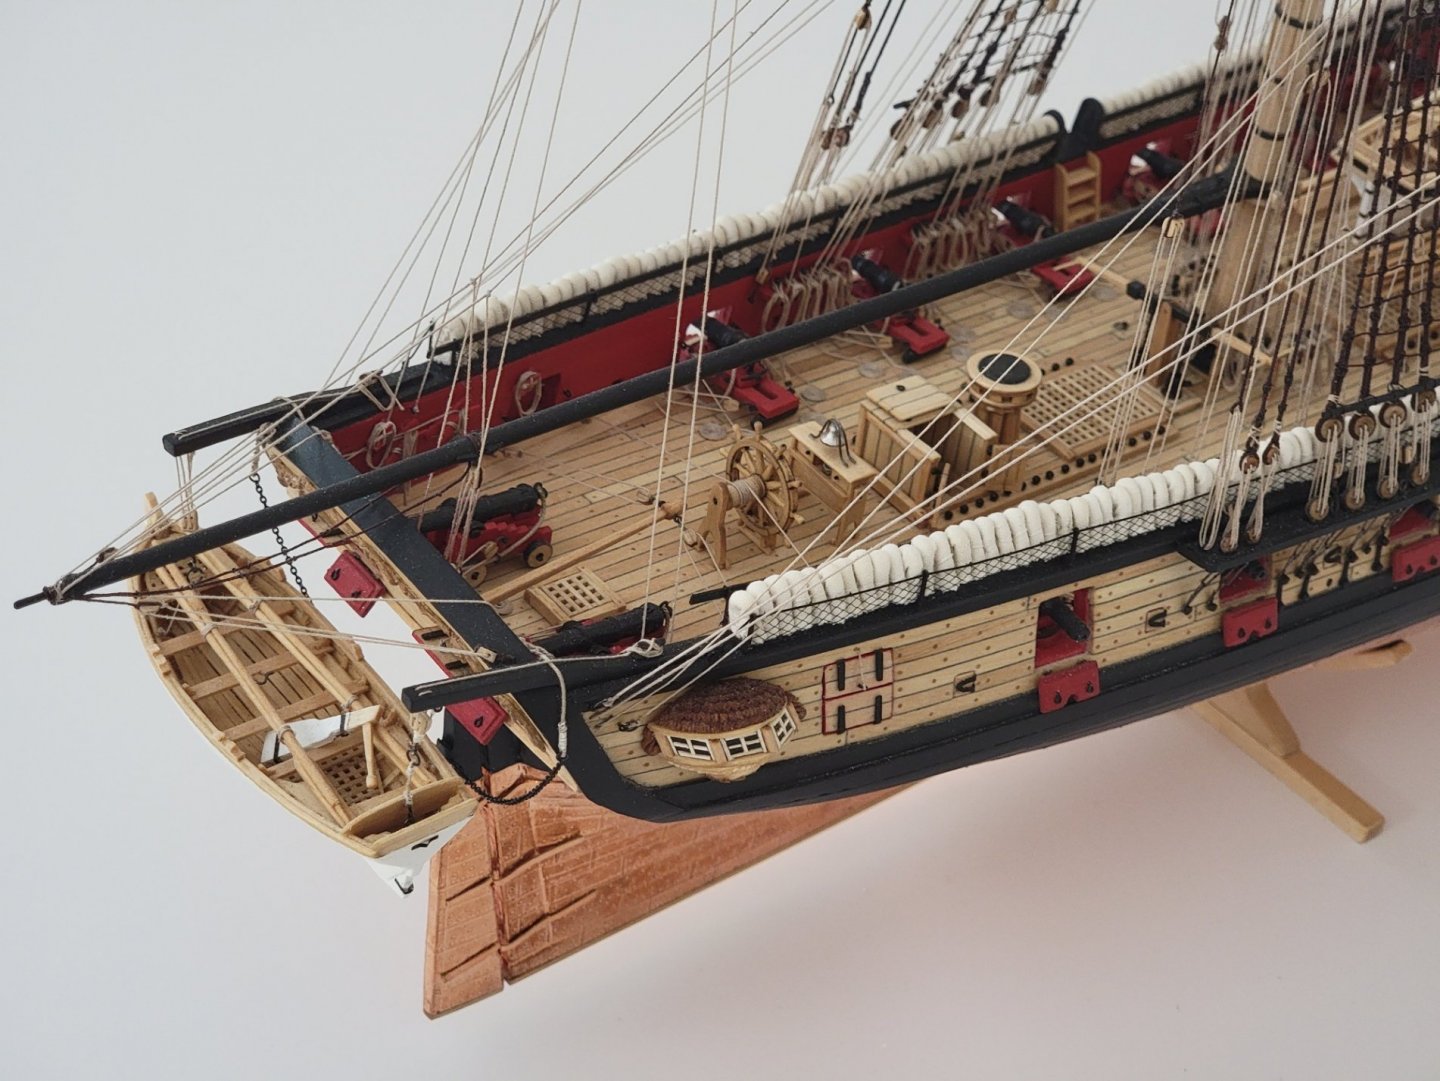


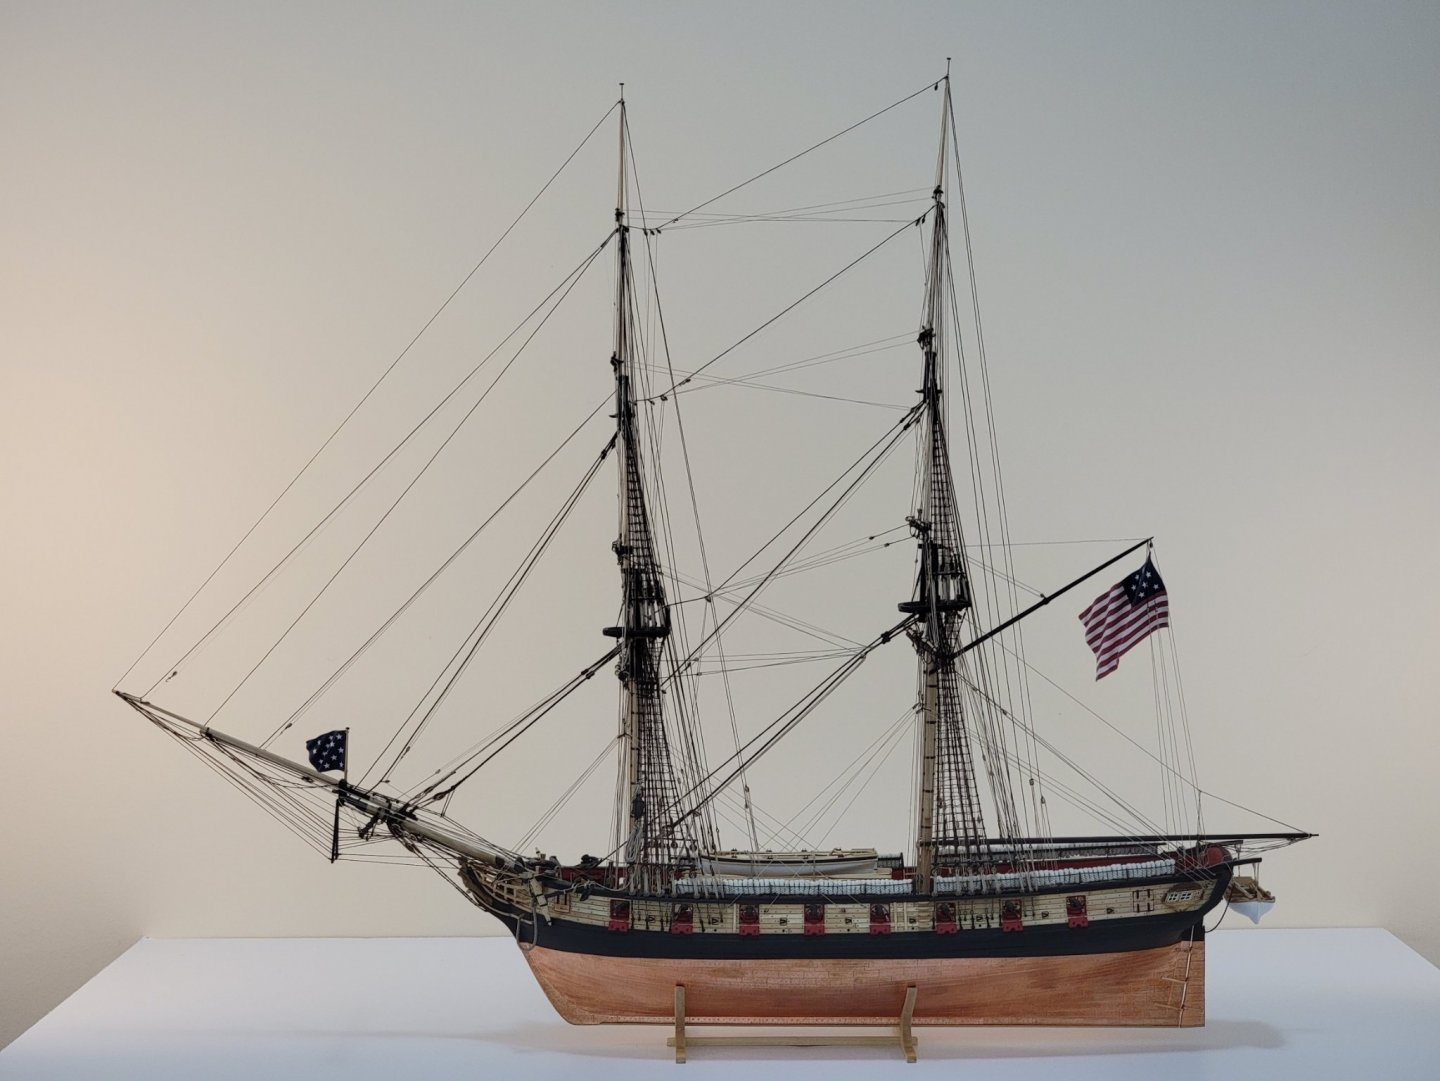
And here are the bonus photos I also submitted (I played around with the lighting a bit to make it look like it was in the water with sort of a sunset at the back 😁)


The ship currently rests above the fireplace. I have not built a display case of yet, but the spot it is resting now seems to be out of harms way and also minimum dust accumulation. If I see some dust starting to accumulate I will probably get one acrylic sheet and put it over the alcove. Those square paint swabs were placed to hide the horrendous white electrical cover plates. It is a lot less noticeable in person than in the photo, so I can live with it 😄.
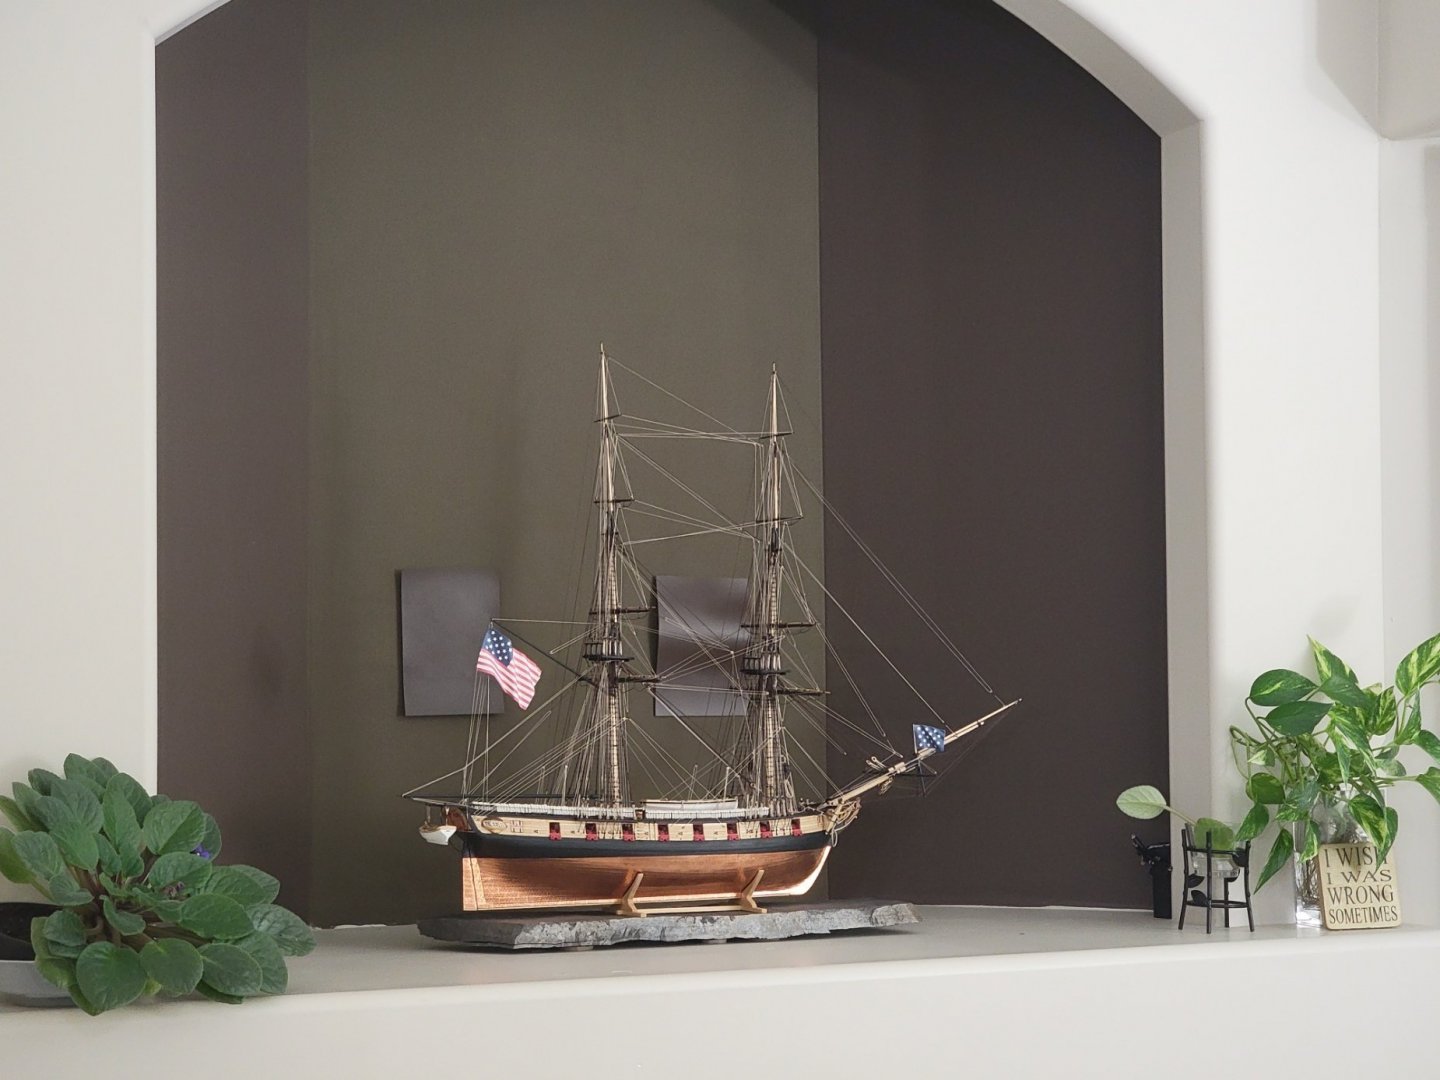
Looking at this ship again brings back so many memories... I will always remember her as the one that got me hooked in this awesome hobby!


Medway Longboat 1742 by Ryland Craze - FINISHED - Syren Ship Model Company - 1:24 Scale
in Medway Long Boat - 1742 - Public group project.
Posted
Amazing build, it's museum quality! Thank you for sharing your build log with us.