

.jpg.1f80adf1a9b14a937cfcf2ca6af0f0d4.jpg)
WalrusGuy
-
Posts
1,007 -
Joined
-
Last visited
Content Type
Profiles
Forums
Gallery
Events
Posts posted by WalrusGuy
-
-
Hi Robin, how's the ship coming along? We've missed your updates 🙂
-
15 hours ago, desalgu said:
This is really looking nice, beautiful work as always! You're making great progress, and I like the tree nails on the keel.
I guess I'm a little confused about what was inaccurate about the hull plans. Is it just the plans that aren't right, but the bulkheads are shaped correctly? Or did you have to modify shape of some of the bulkheads to get the "right" contours?
Thank you for your kind words, David!
I read some of the logs here and found there were some issues with the plans, some of which were pointed out in @flyer's build log.
For example, I saw that he modified the bow and stern areas.
I don't plan on going for something fully accurate since I could not find plans of the Pickle on RMG website. Instead, I have opted for more freedom in the build process and will be following some of the build logs here and the practicum for Chuck's Cheerful build. Just hoping it goes nice and smooth 😅
I also want to carefully single plank the hull as it will be nice practice for the future.
And from going through the plans I realized some of the rigging is simplified for a kit. So I'll study some rigging guidelines for schooners and will follow that instead.
12 hours ago, flyer said:Hi Walrus
Pickle is my favourite build. But I never really liked the look of the 'out of the box' builds. The sources of the kit's planes seemed doubtful to me and I took an RMG plan of an Adonis class schooner as main reference. The result still pleases me very much and has a prominent place in my house.
Regards
Peter
Hi Peter,
I read through your log when I was researching on this ship and was deciding if I wanted to follow your footsteps. But I did not feel very confident in making the big changes as I may get stuck in the process. I'll still be following your log for your nice ideas. Your ship with the sails looks amazing btw! 🙂
-
9 minutes ago, Chuck said:
I have collected them over the years and also know where to find them and yes many I have taken myself. But there is a treasure trove closer than you might think. Just look in our gallery. The gallery of "contemporary" models is an absolute treasure. Many of these photos are taken right from there. I wish that folks would use that resource more and post more in there. Every chance you get to see a contemporary model...just pick one or two and take about 50 photos of each. Get close up detail shots of everything. Then post them in the gallery. No other forum in the world has such a valuable source of wealth.
Take some time and go through some of them.....some I took but others have contributed a great deal. If you are close to any museum...help add more.
For example....check out one of my favorite albums in the gallery.
Wow!! Thanks Chuck! I had no idea there is a section for only contemporary models here on MSW. I'll spend a bit of time looking through all of them. Unfortunately there are no naval museums where I live, but I will be sure to add some pictures if I visit one sometime.
- KentM, FrankWouts and Matt D
-
 3
3
-
59 minutes ago, Chuck said:
And a bunch more photos of other headrail porn.....really soak it up and enjoy.
If I may ask, where do you get all these photos? I looked at some models in the RMG site but the photos were not as good as the ones you posted here. Or did you take these photos yourself?
- FrankWouts and KentM
-
2
-
The rigging is coming out very nice! 🙂
-
-
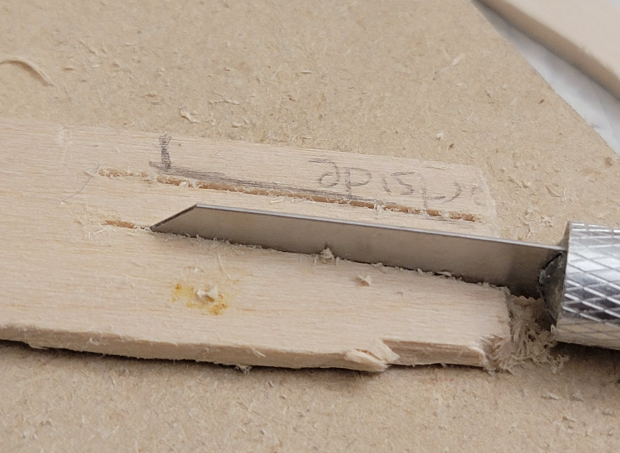
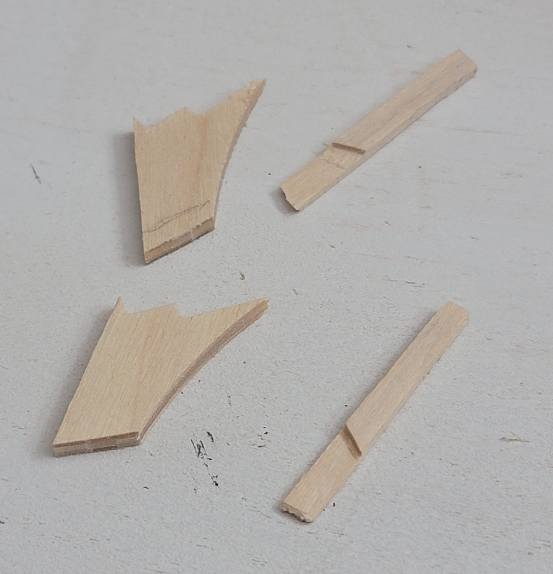
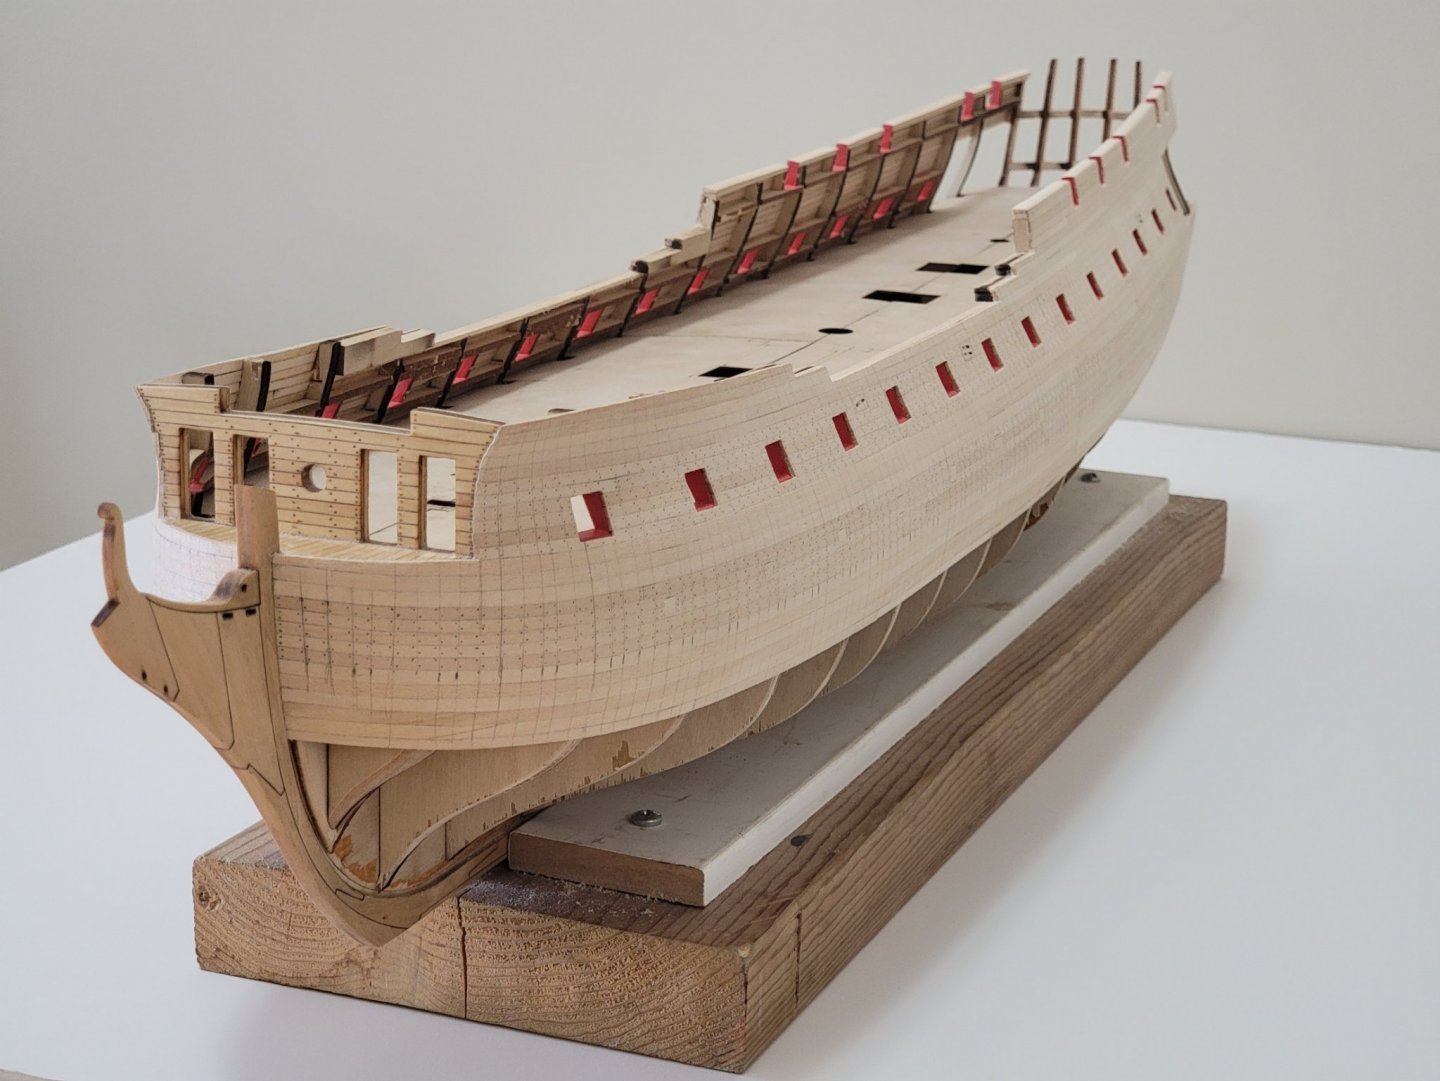
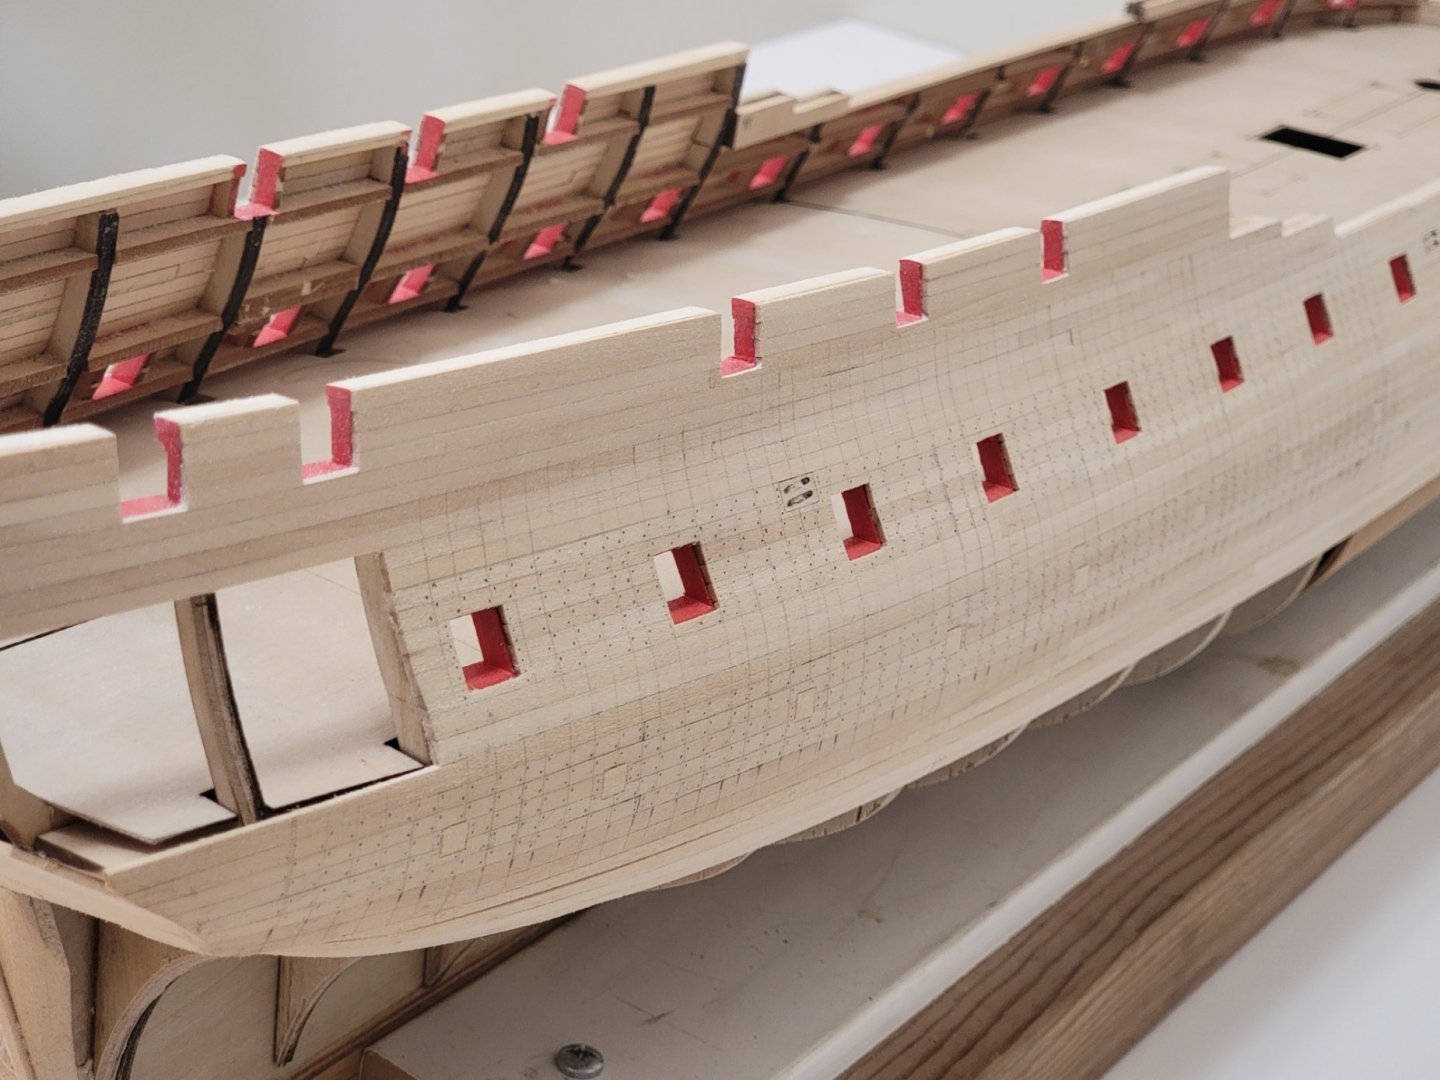
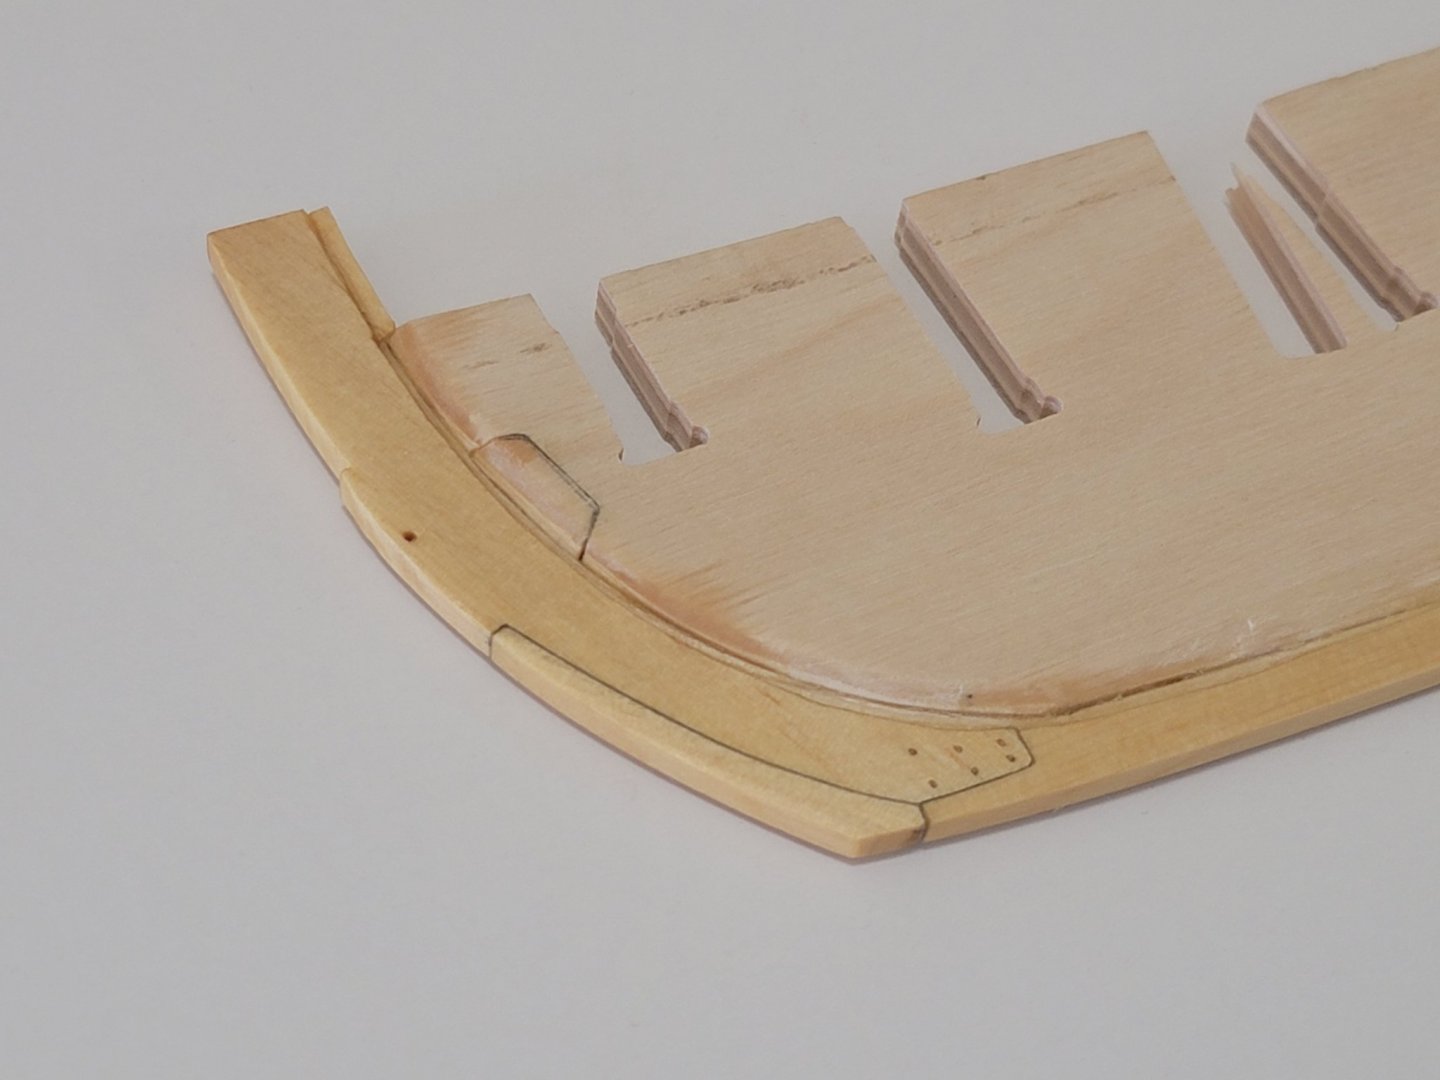
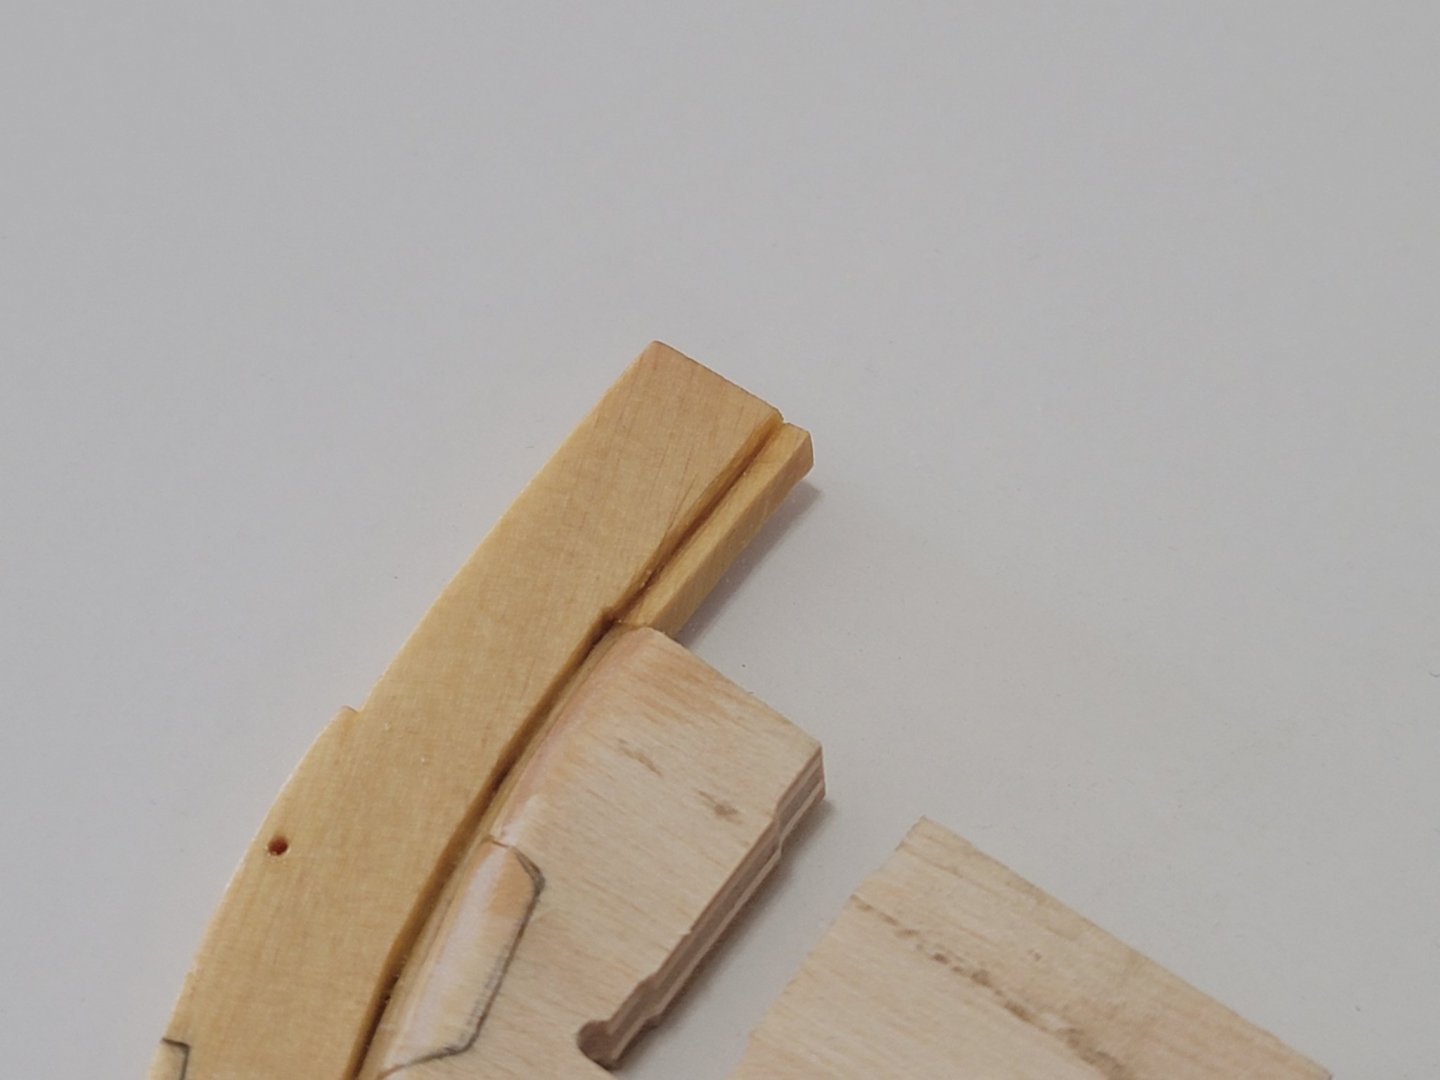
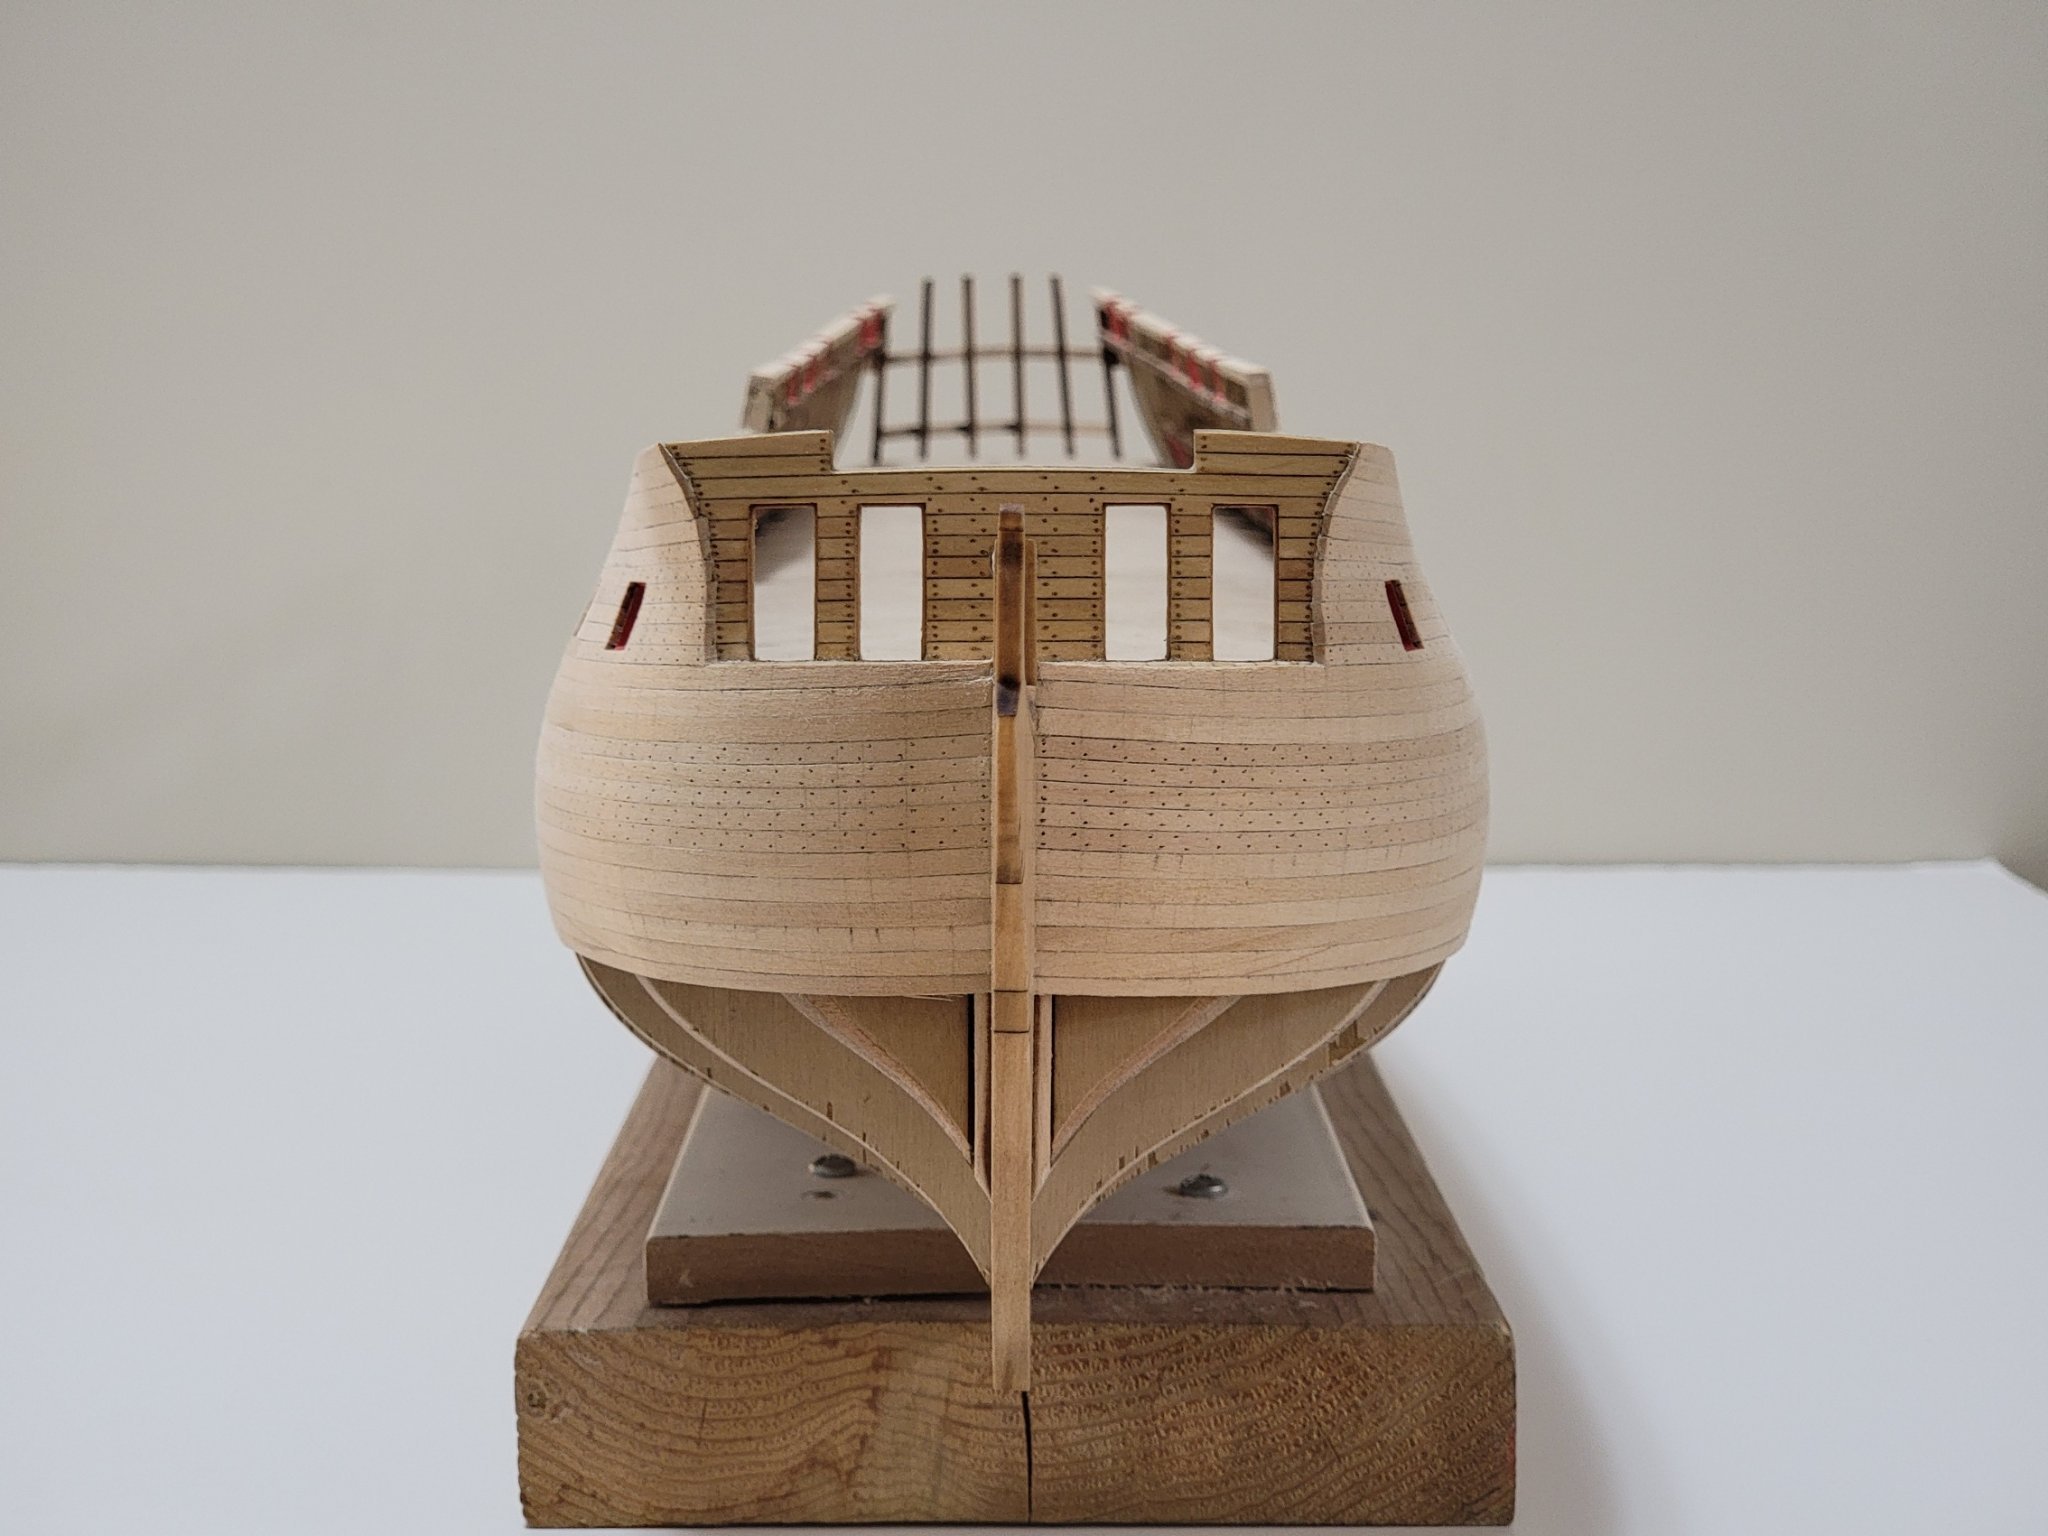
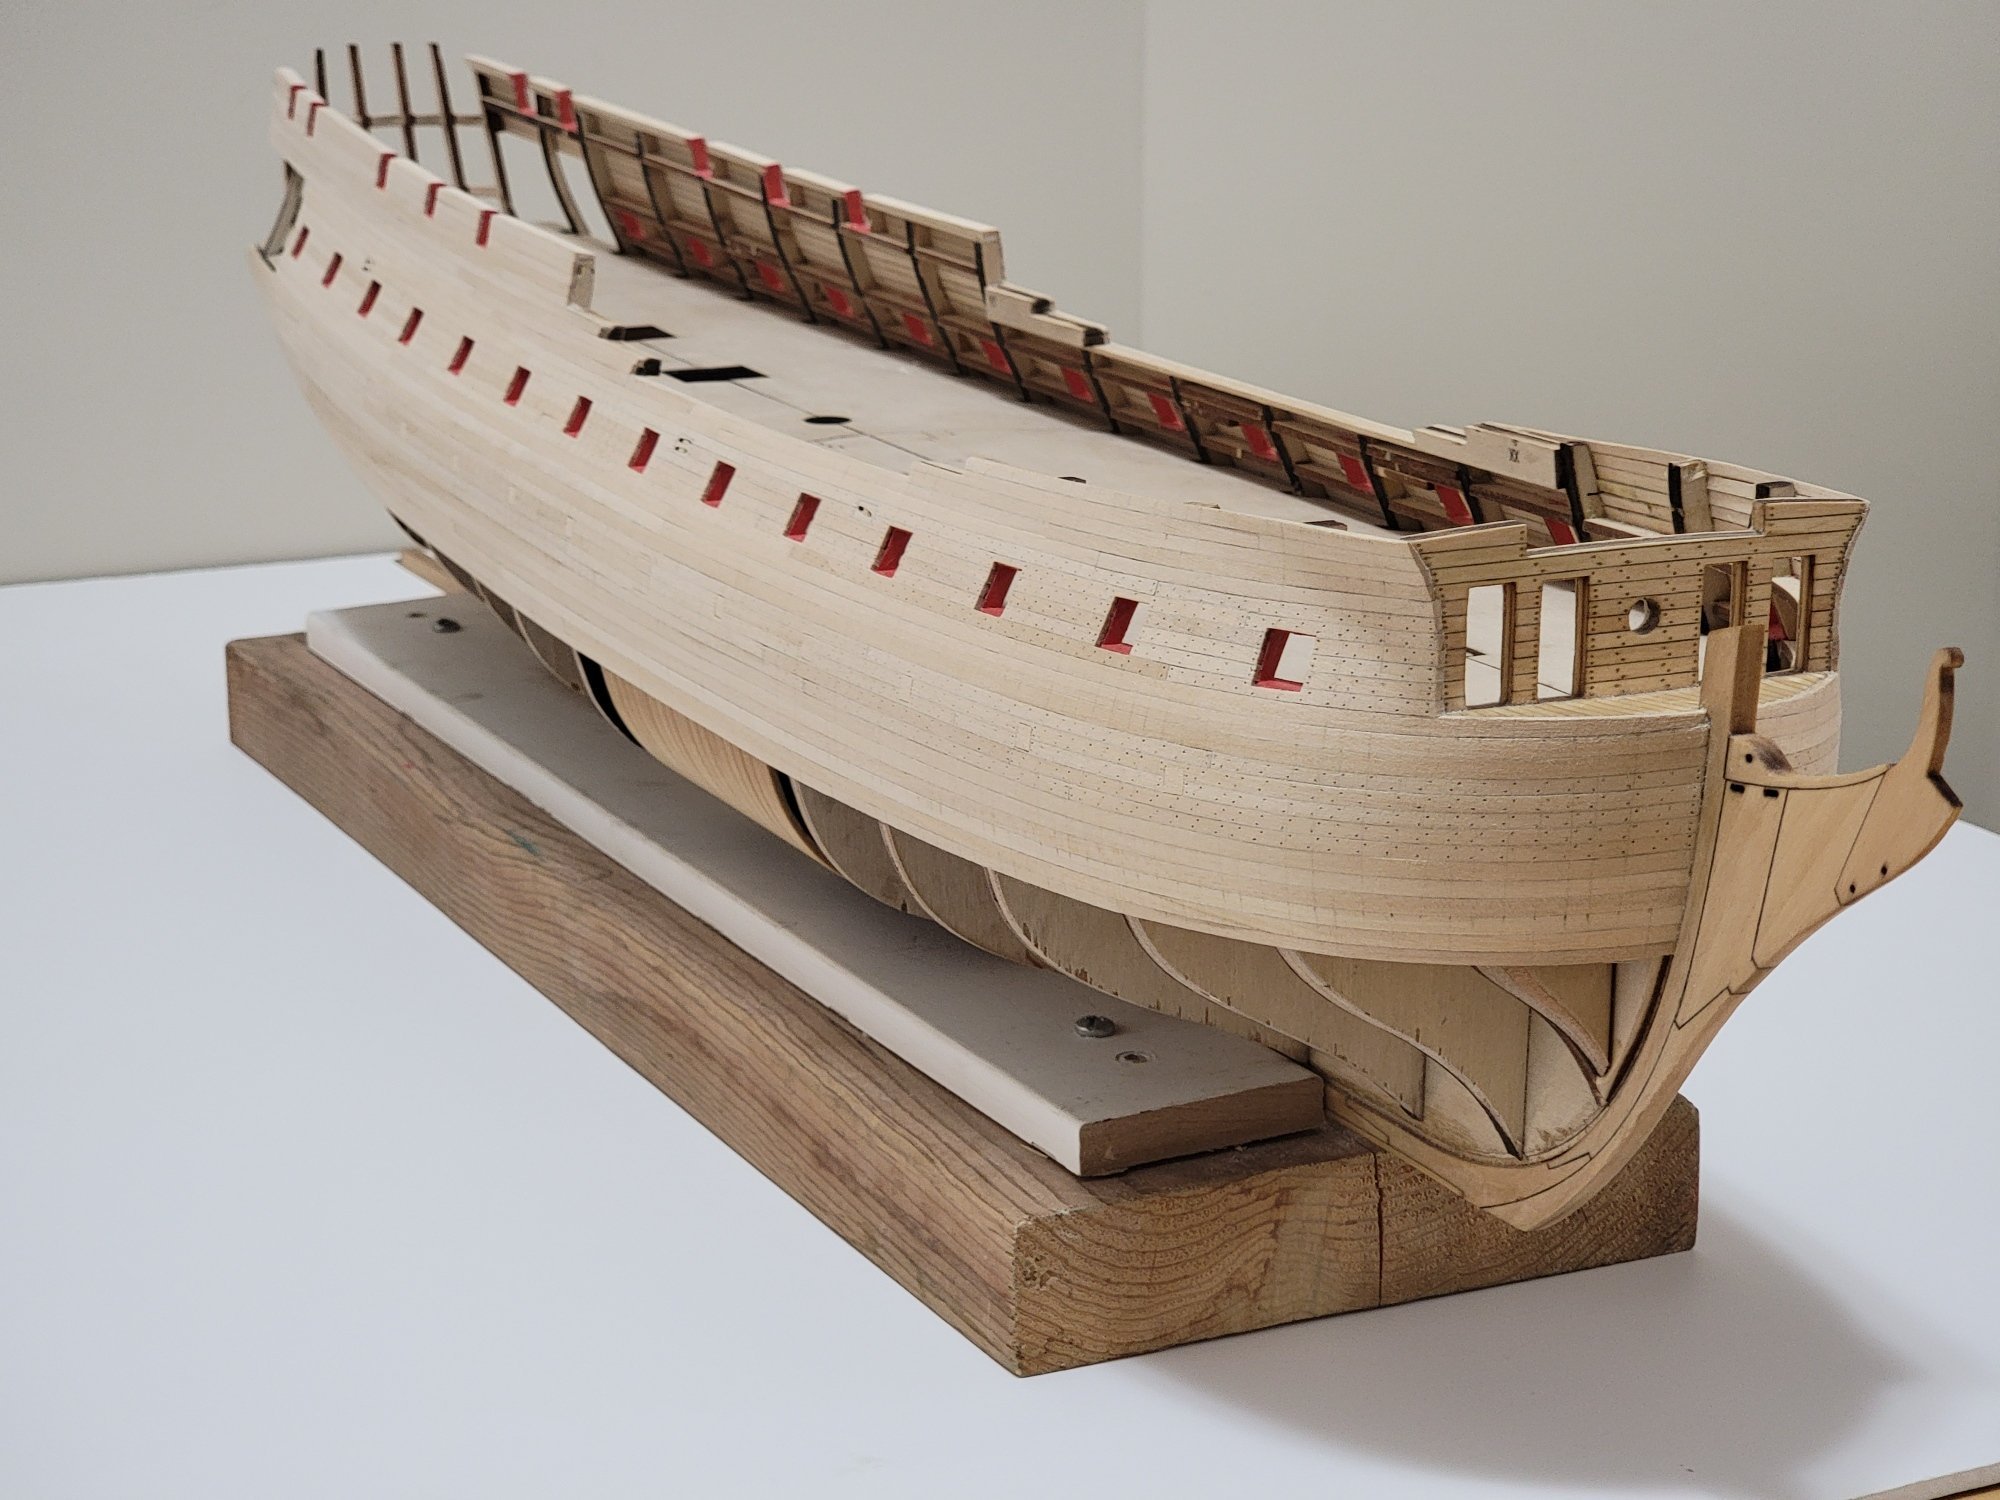
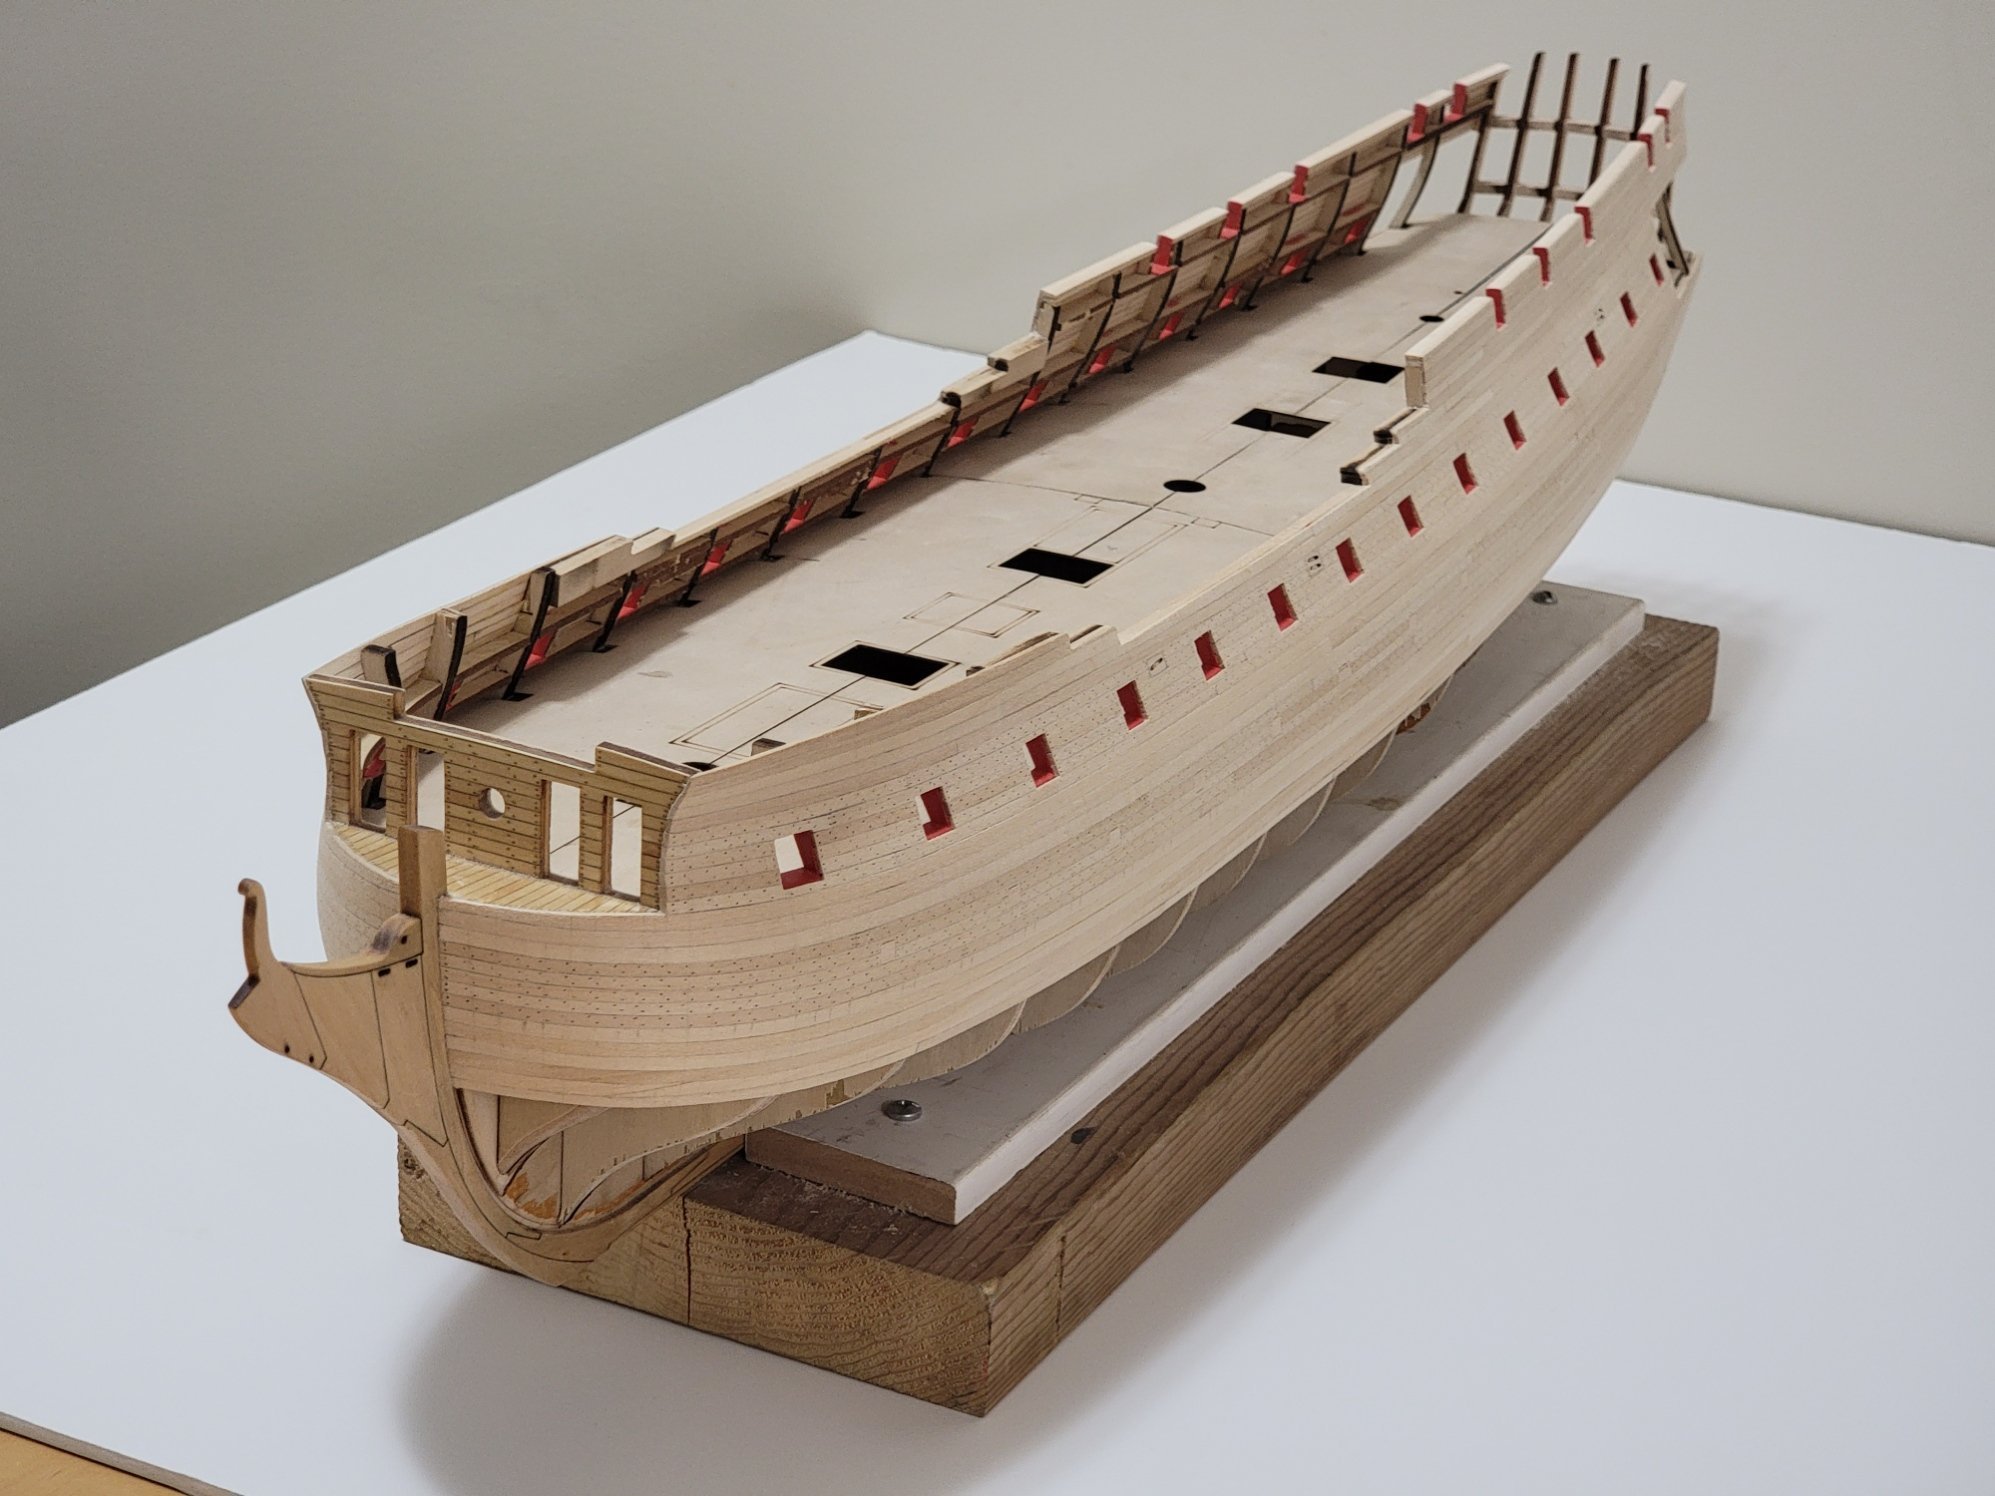
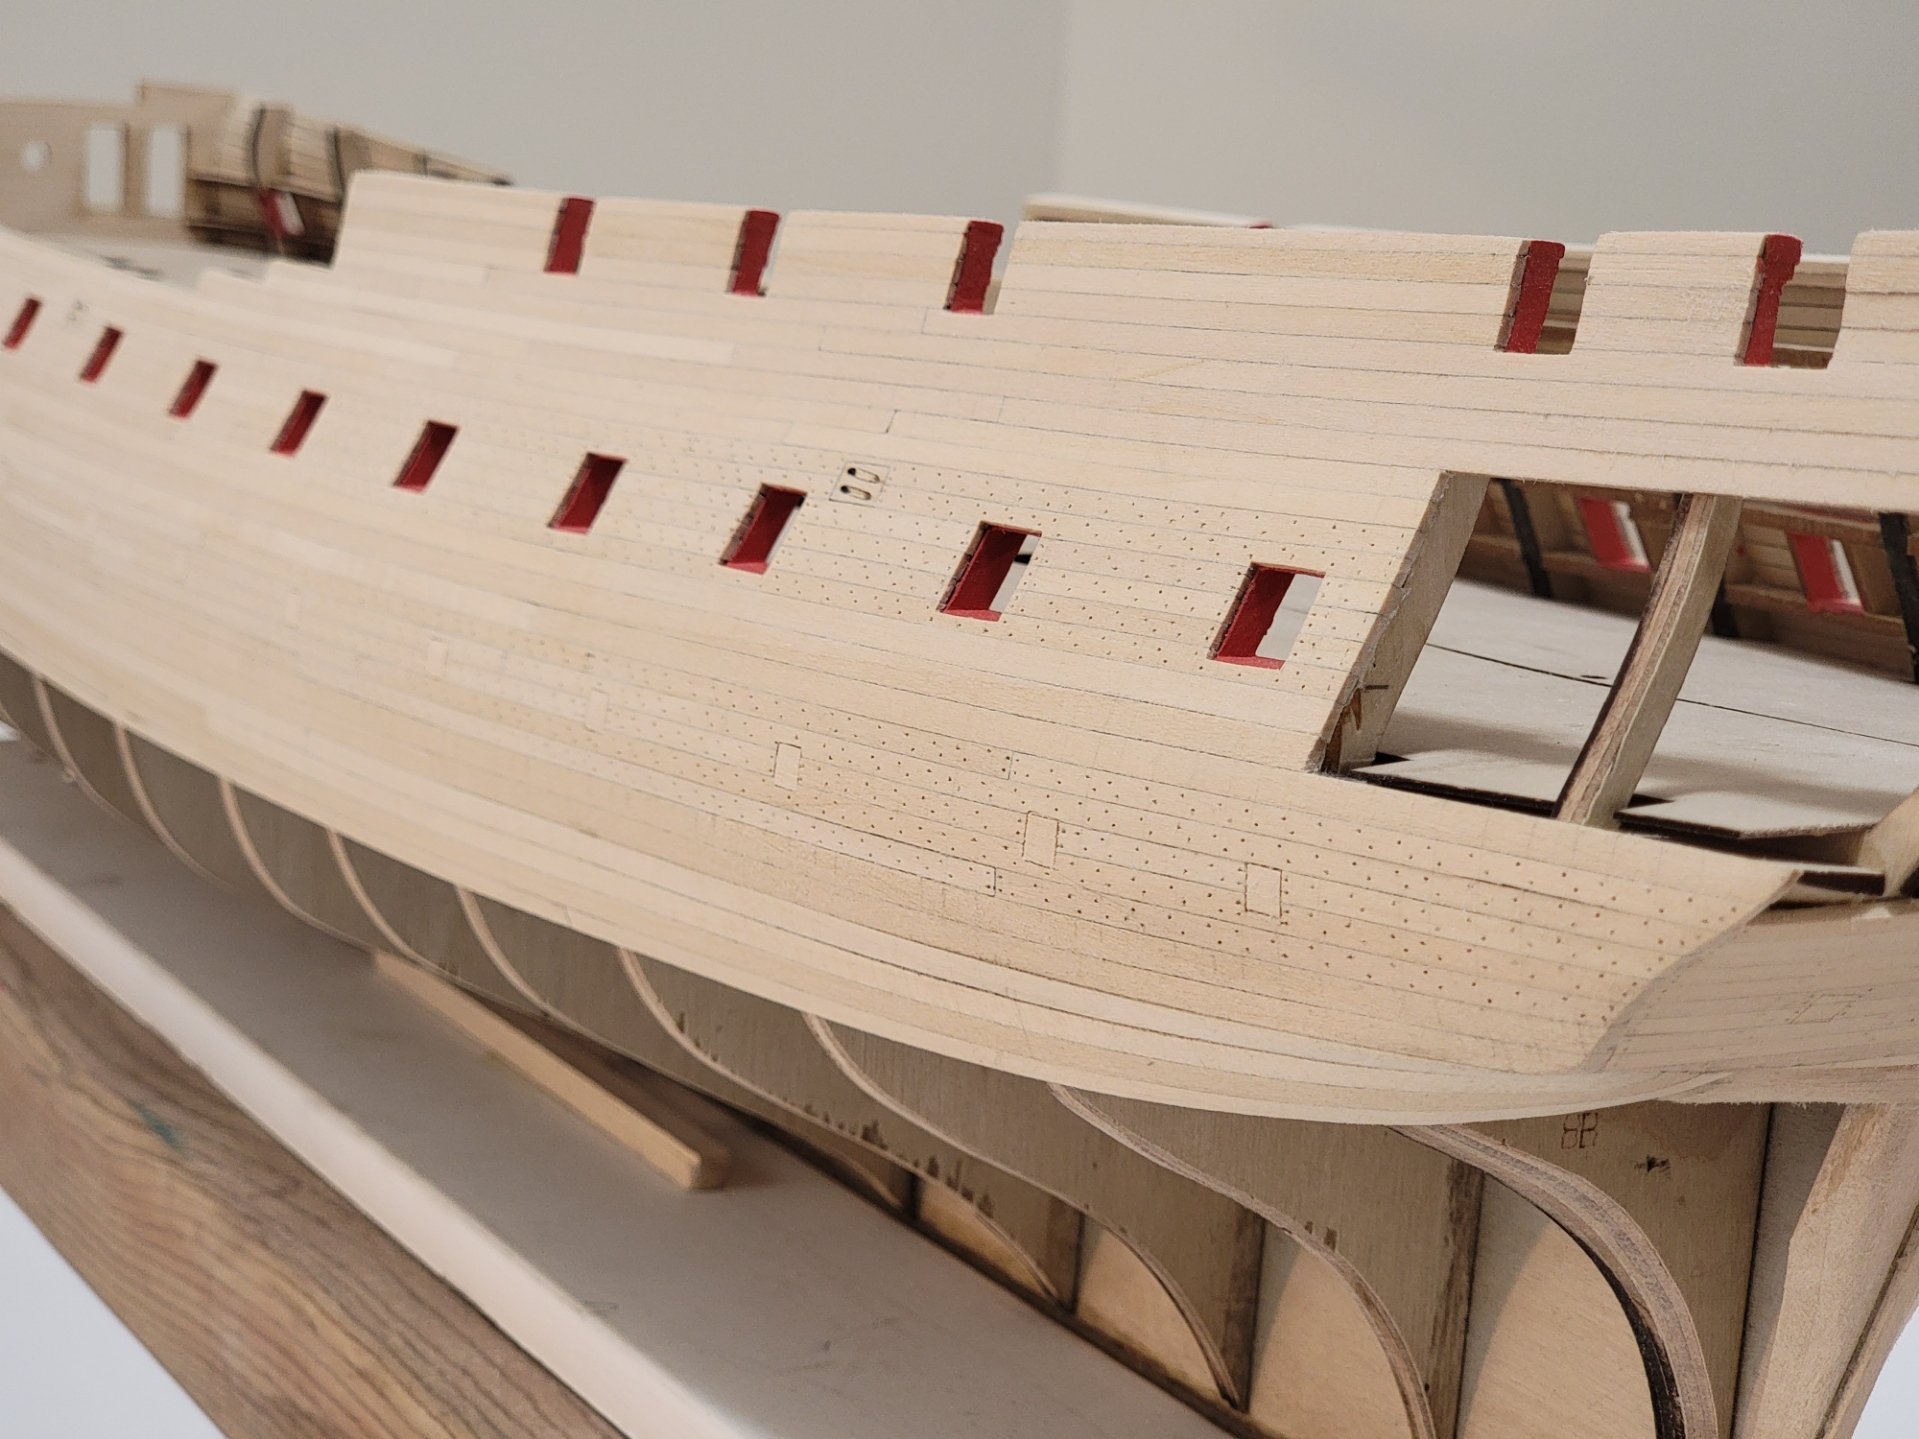
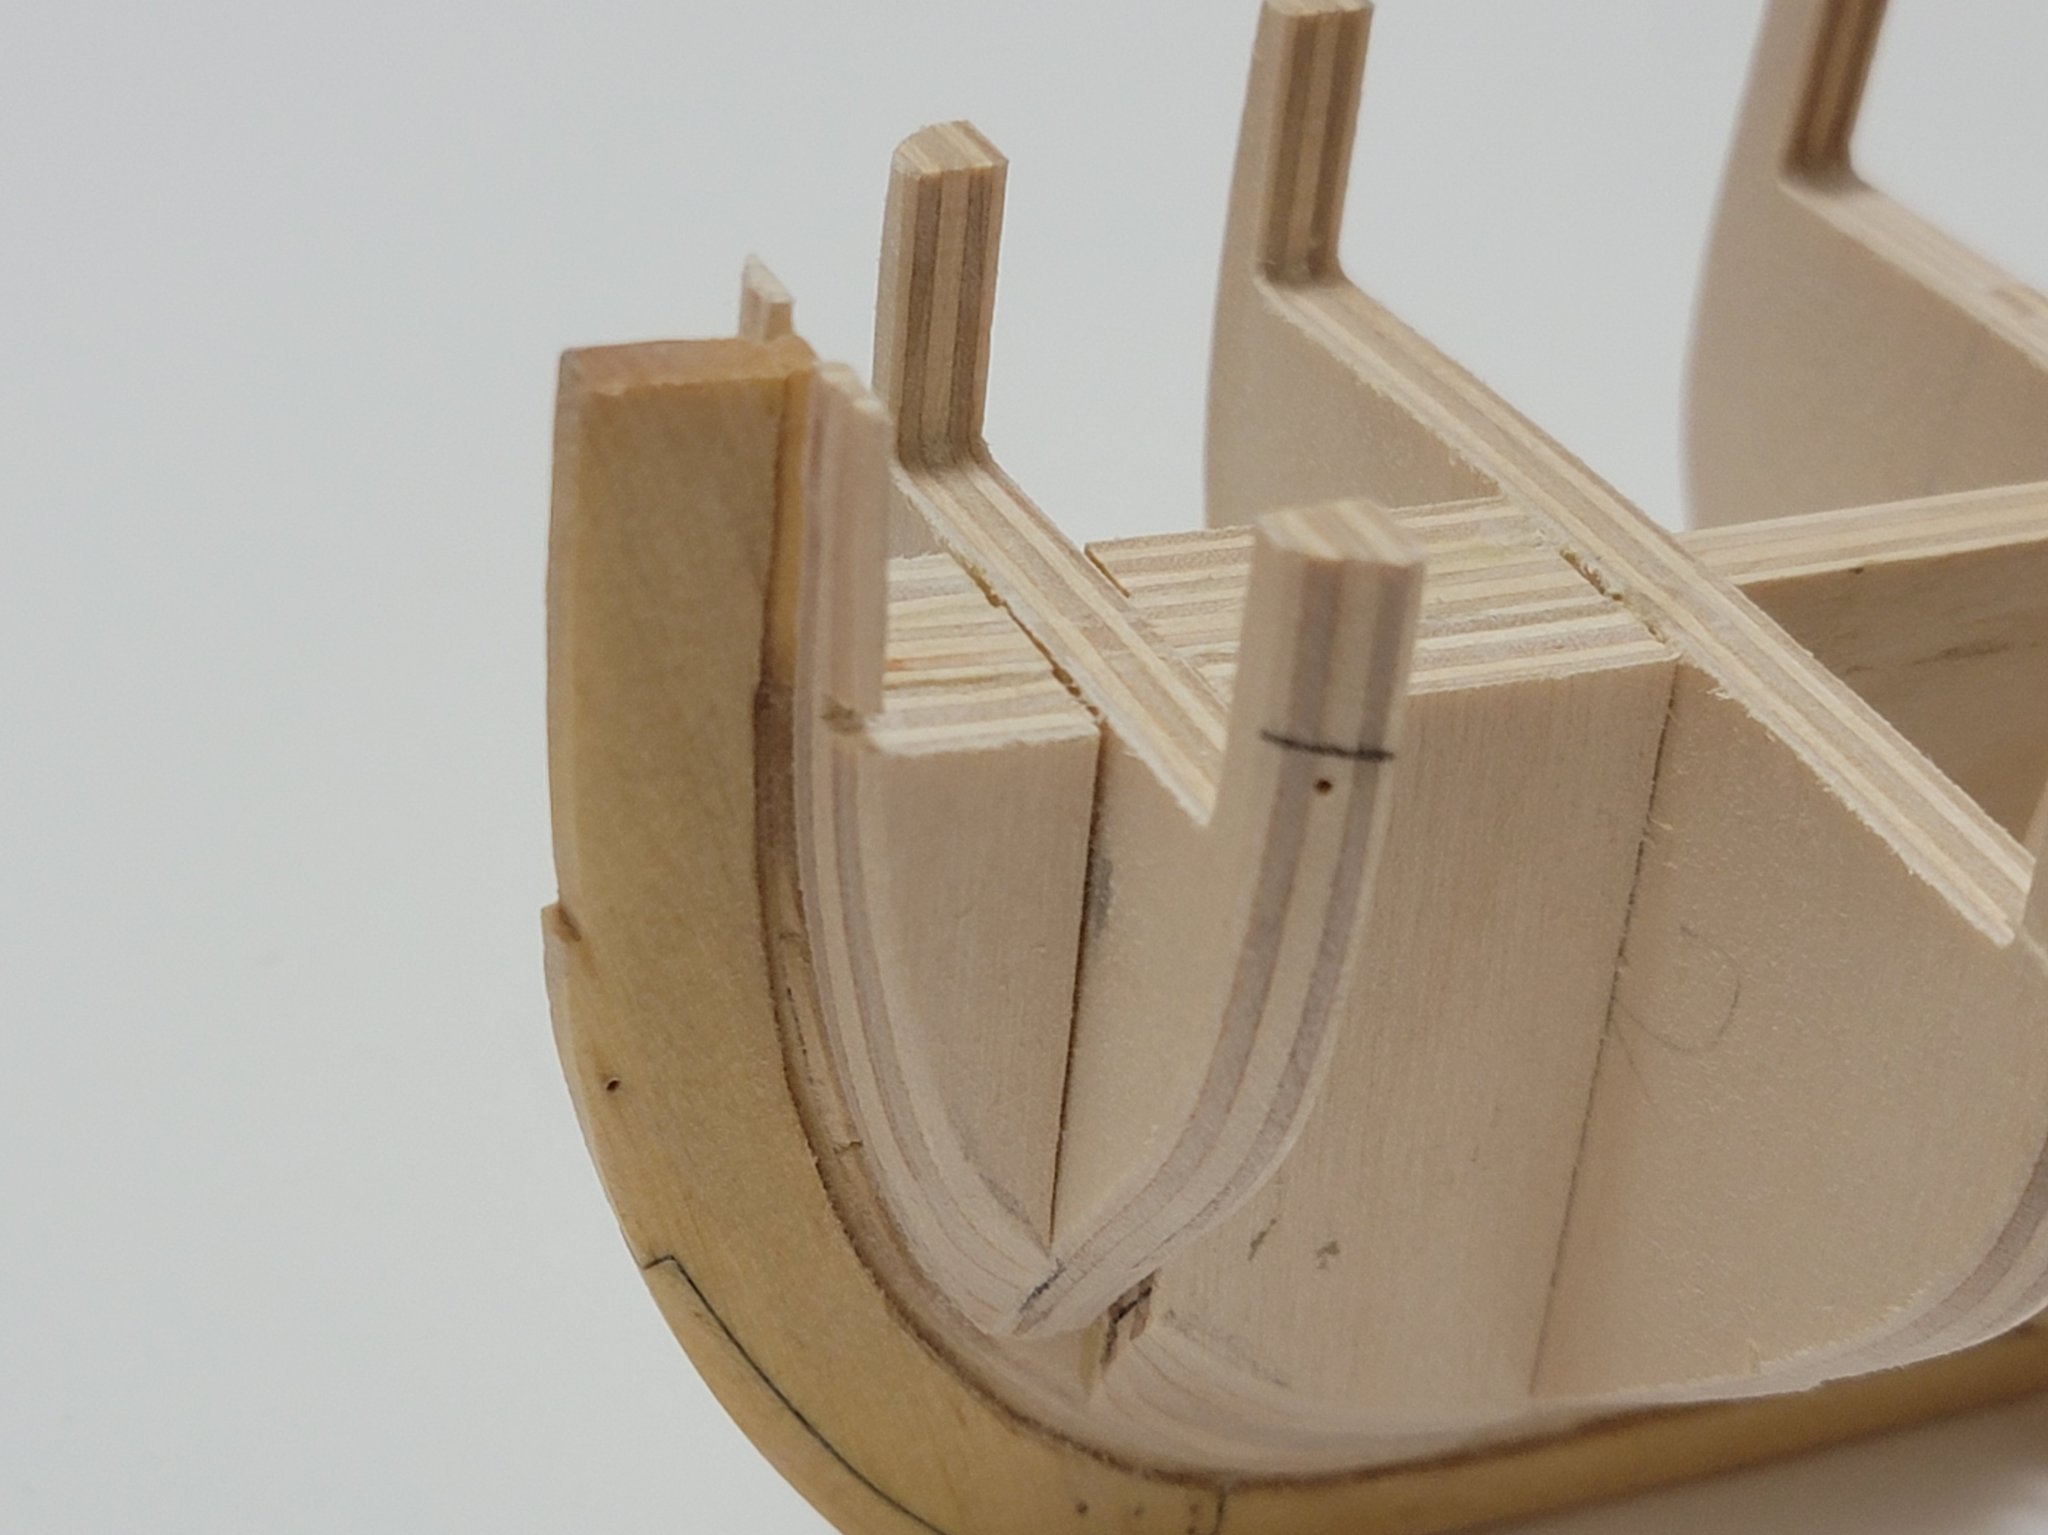
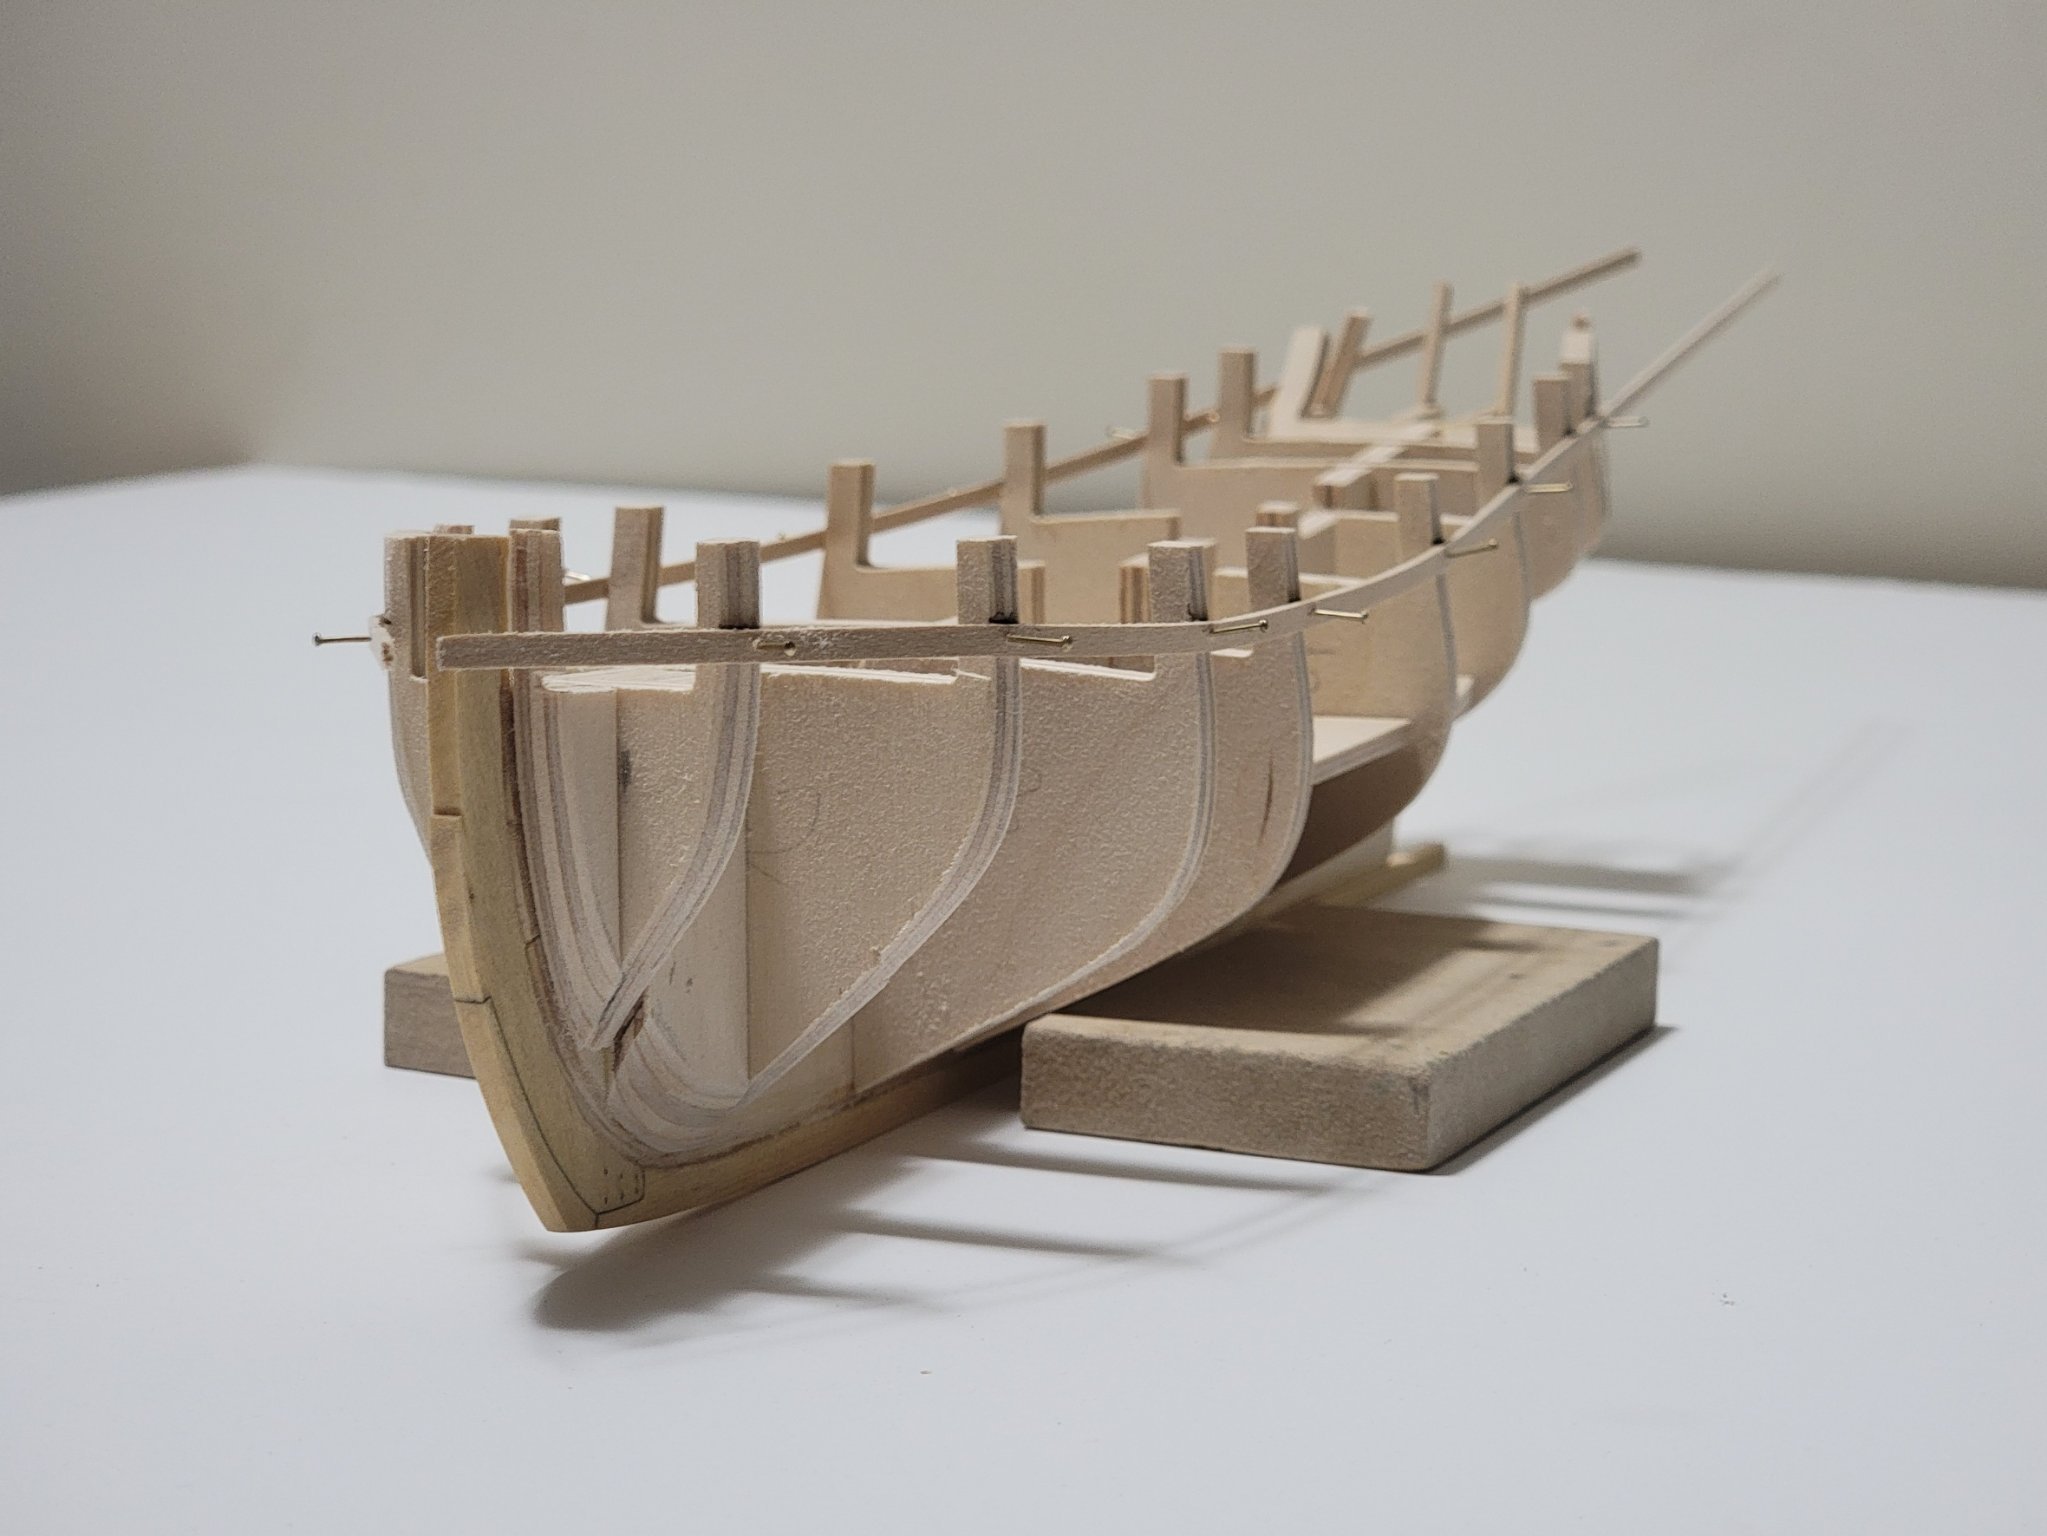
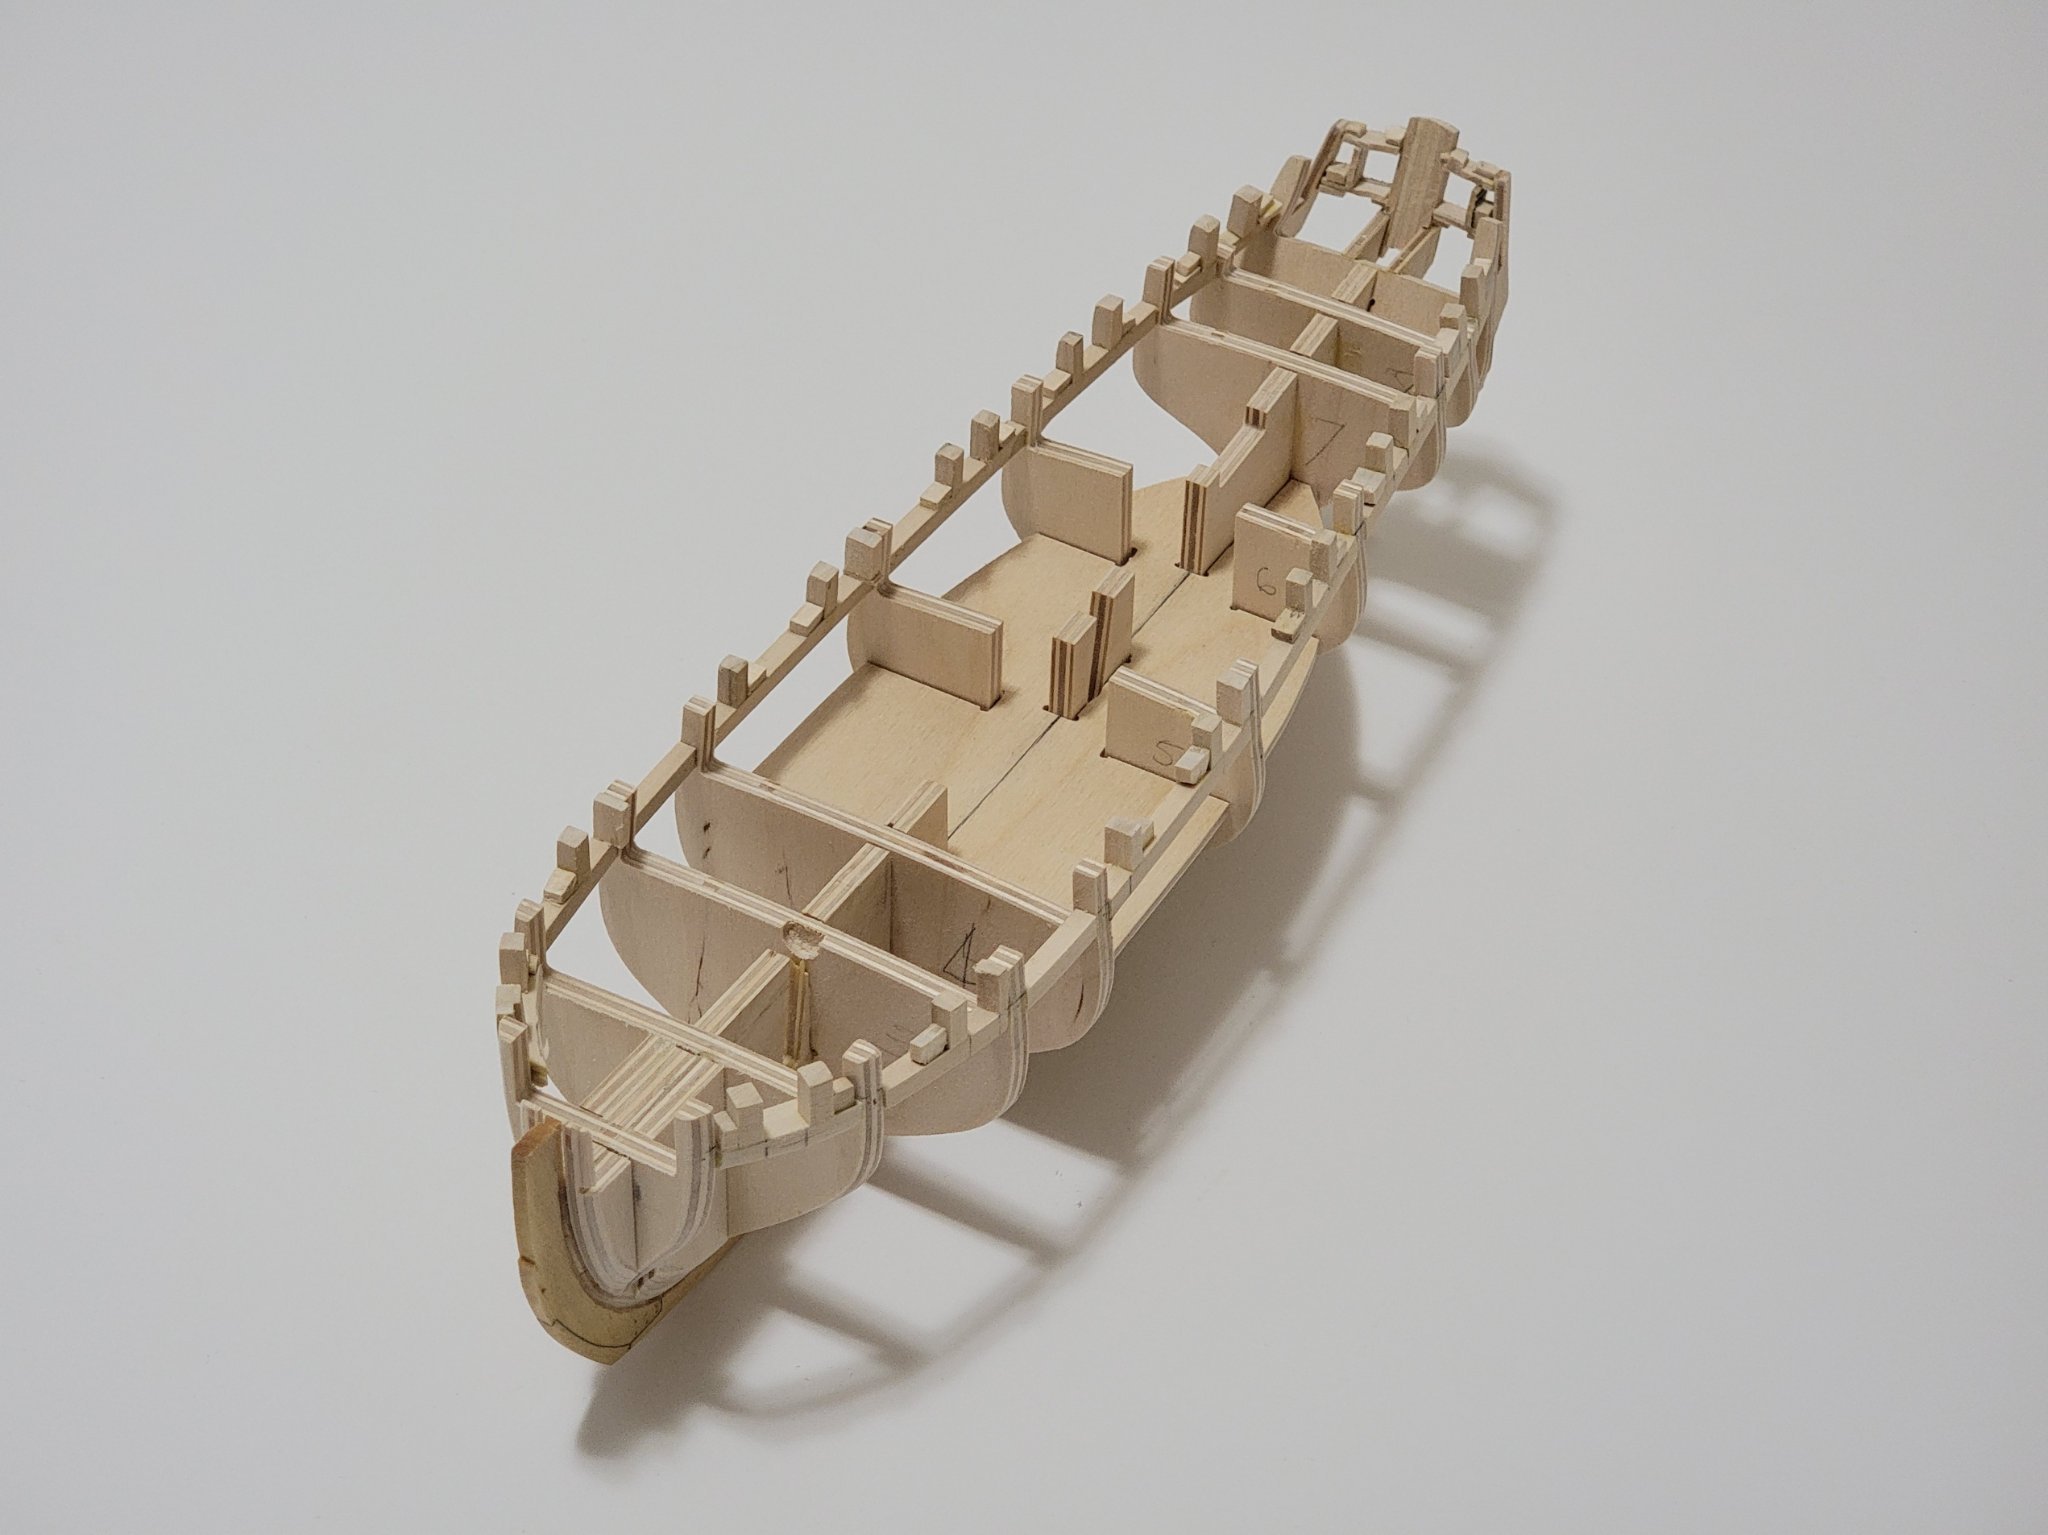
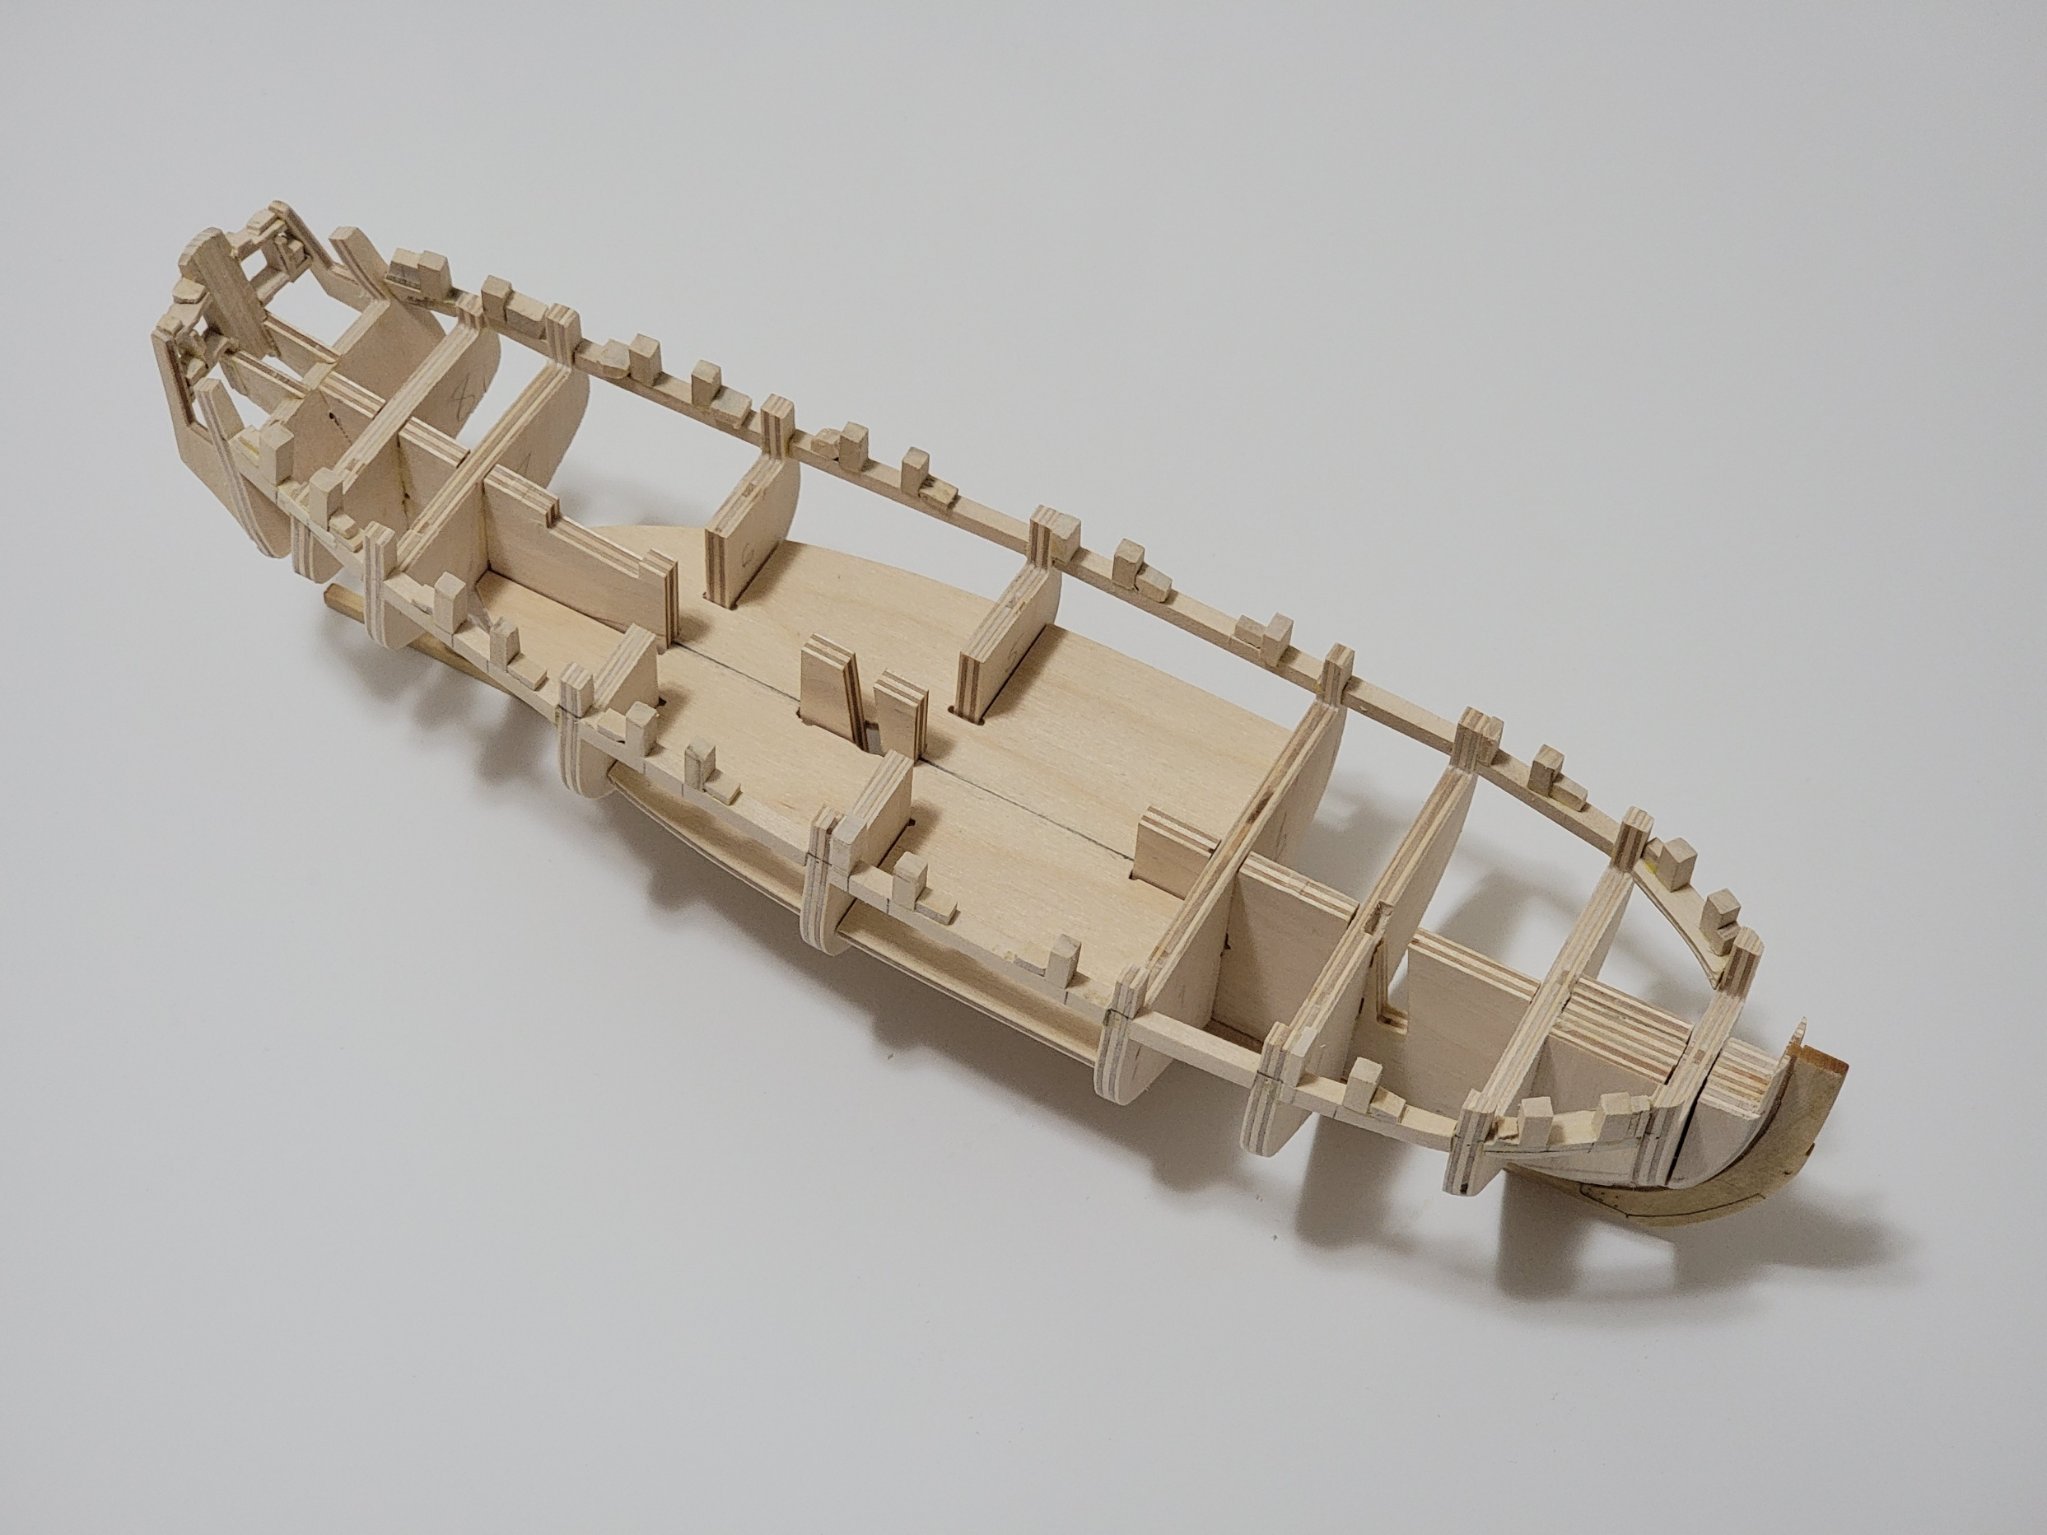
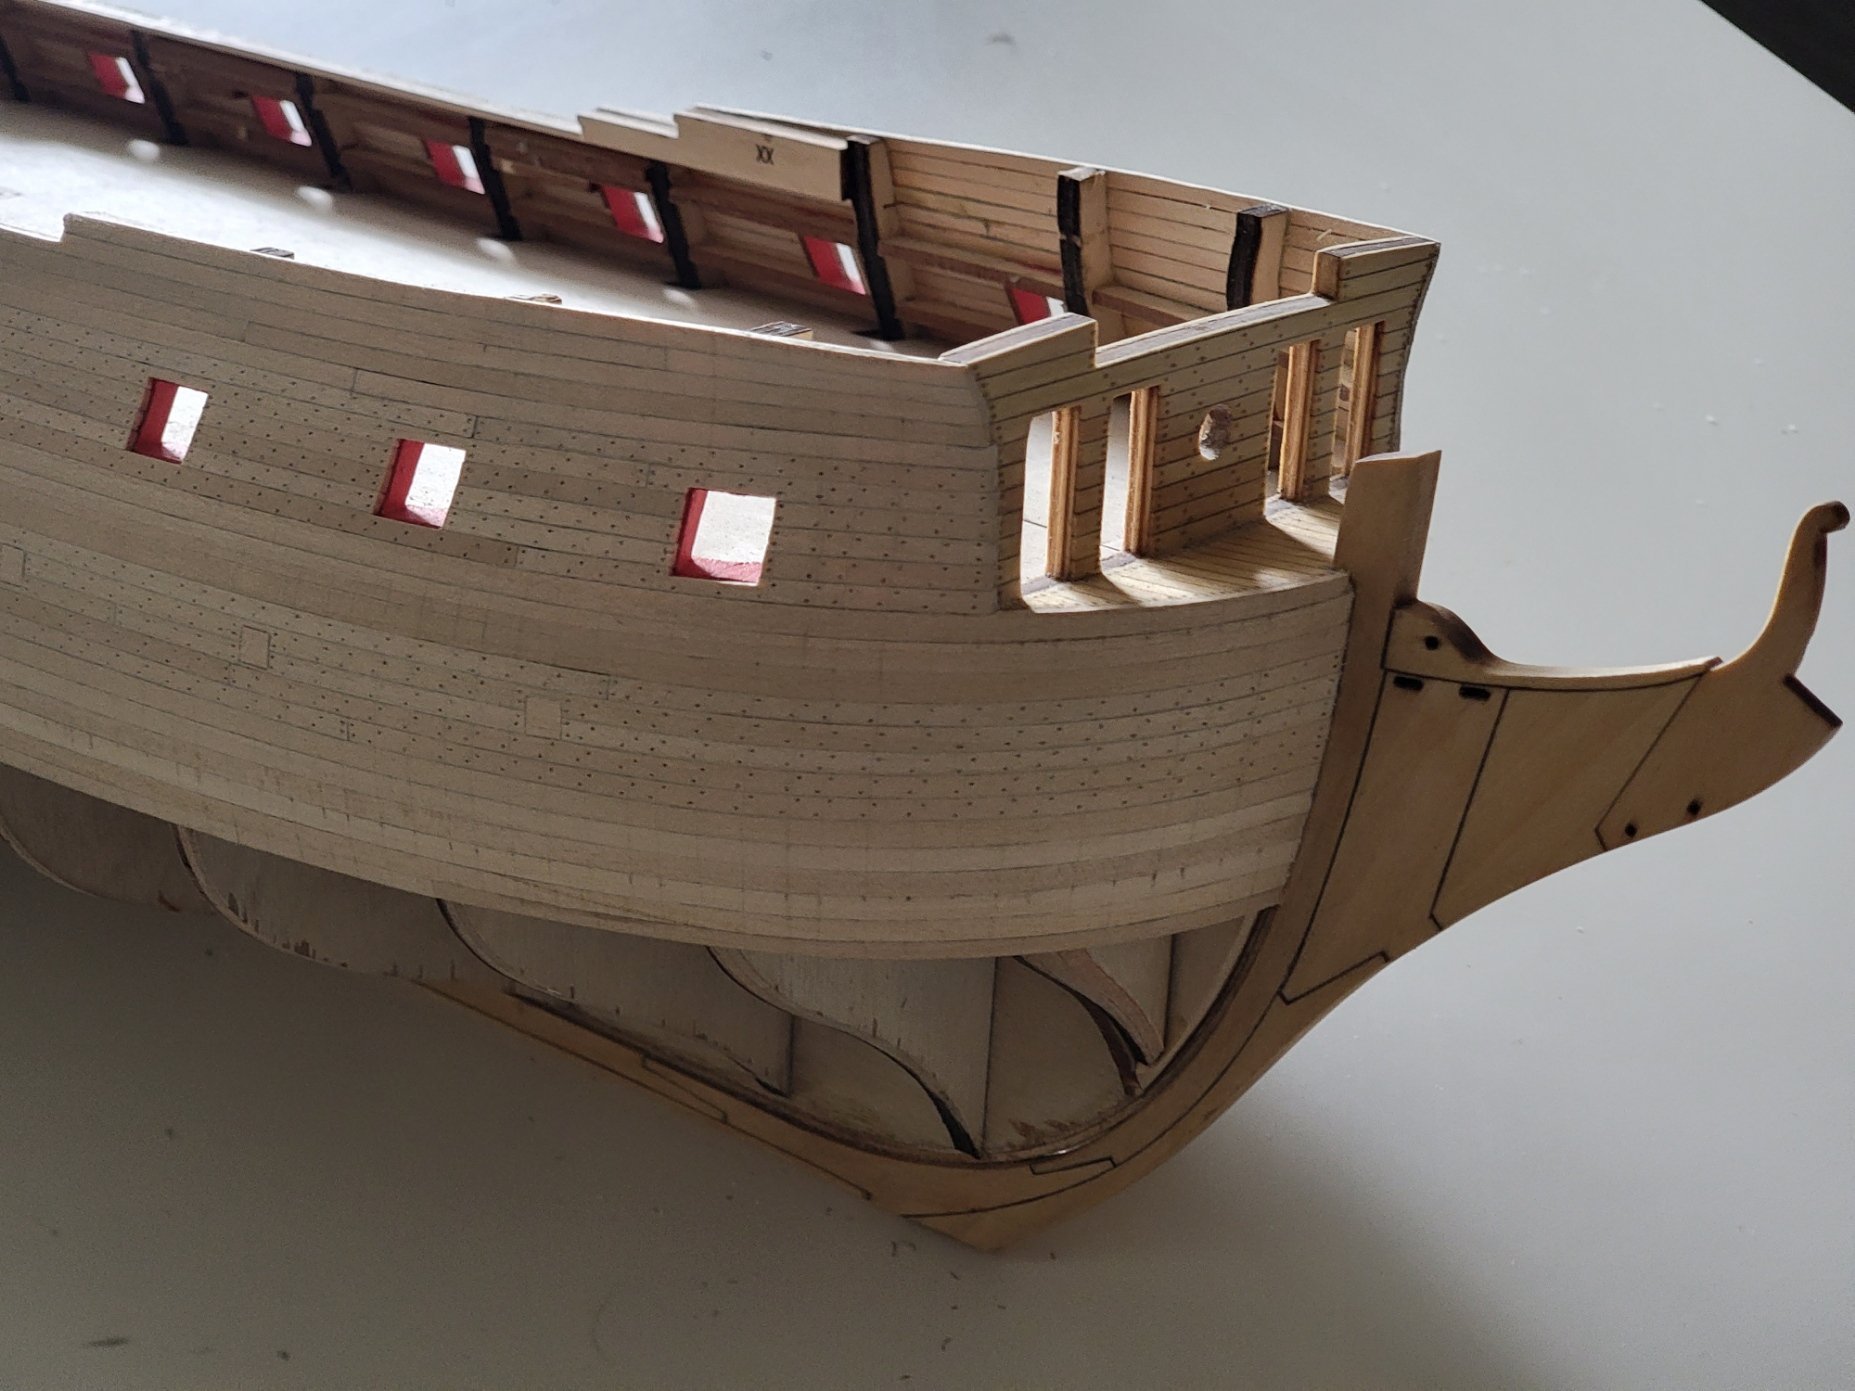
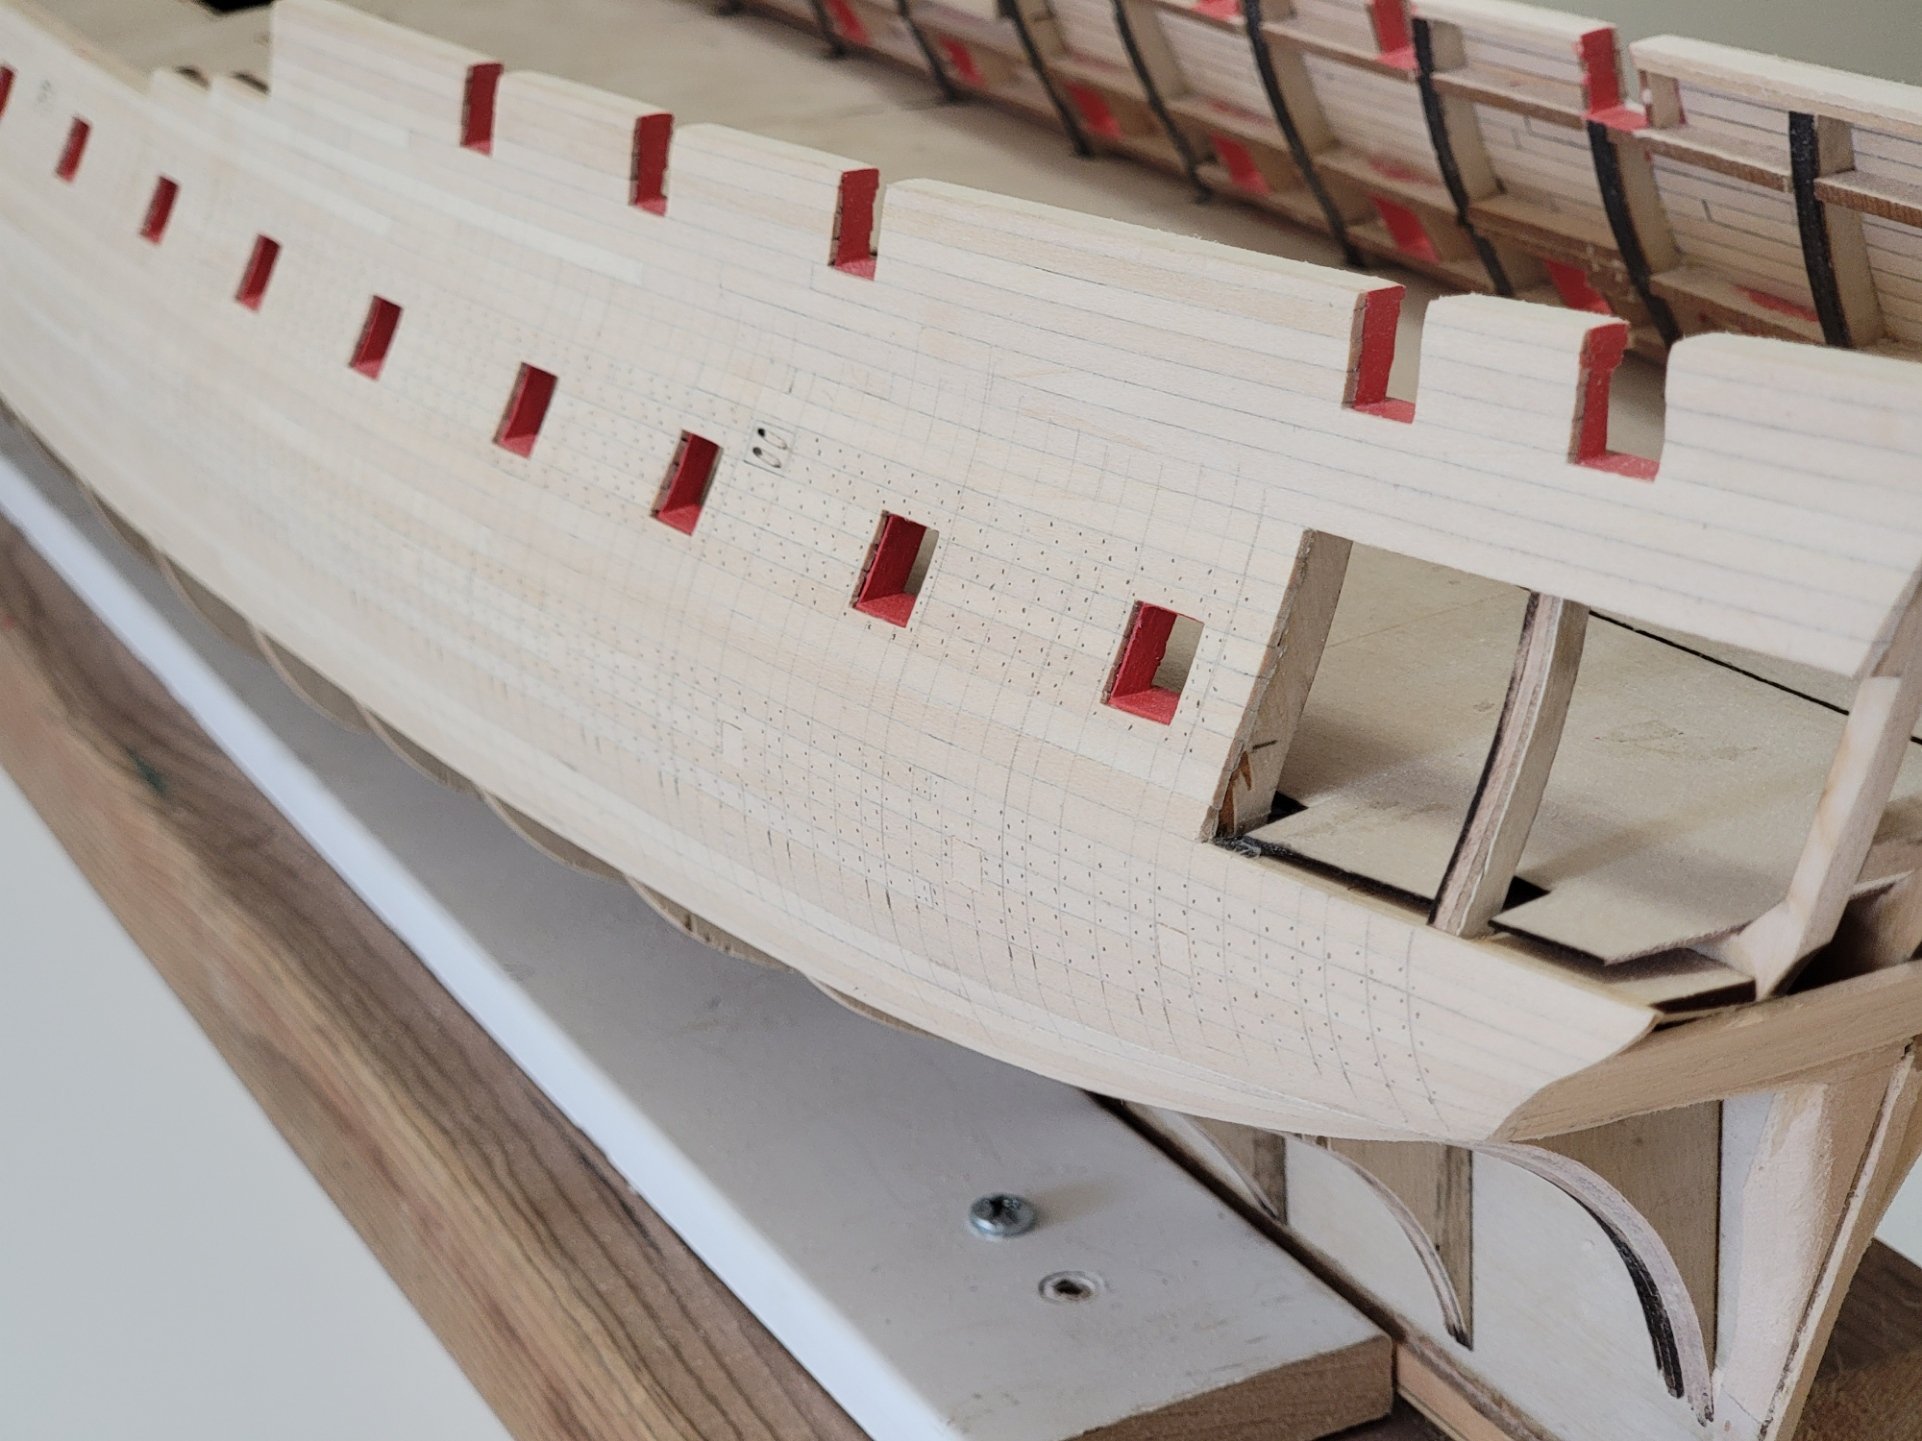
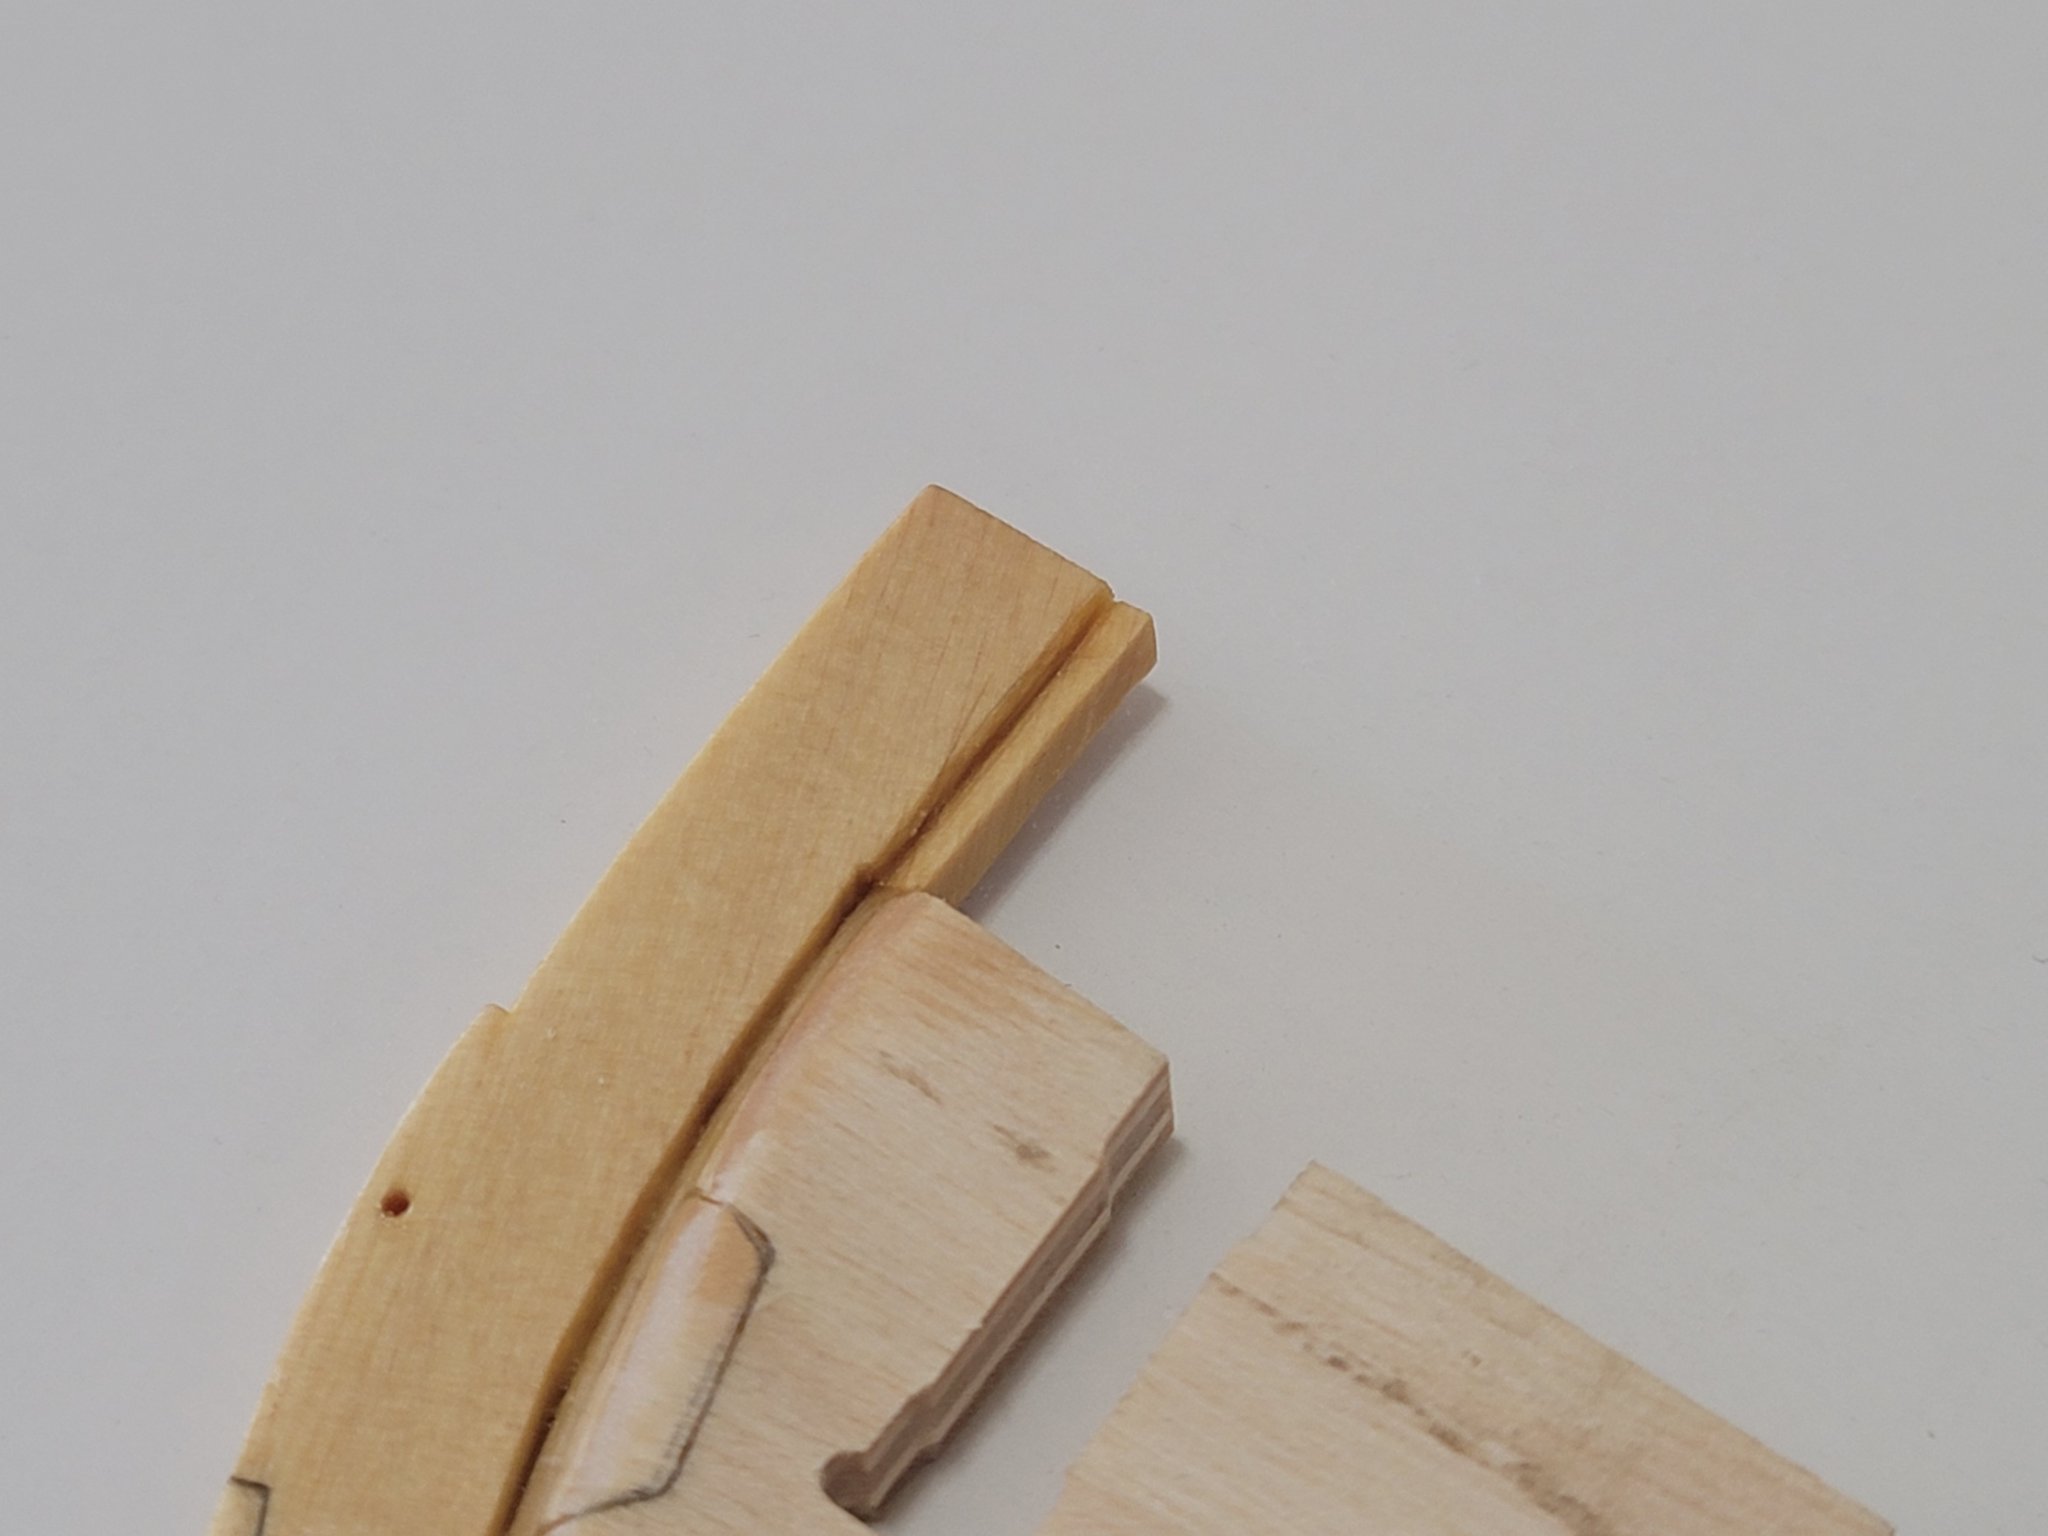
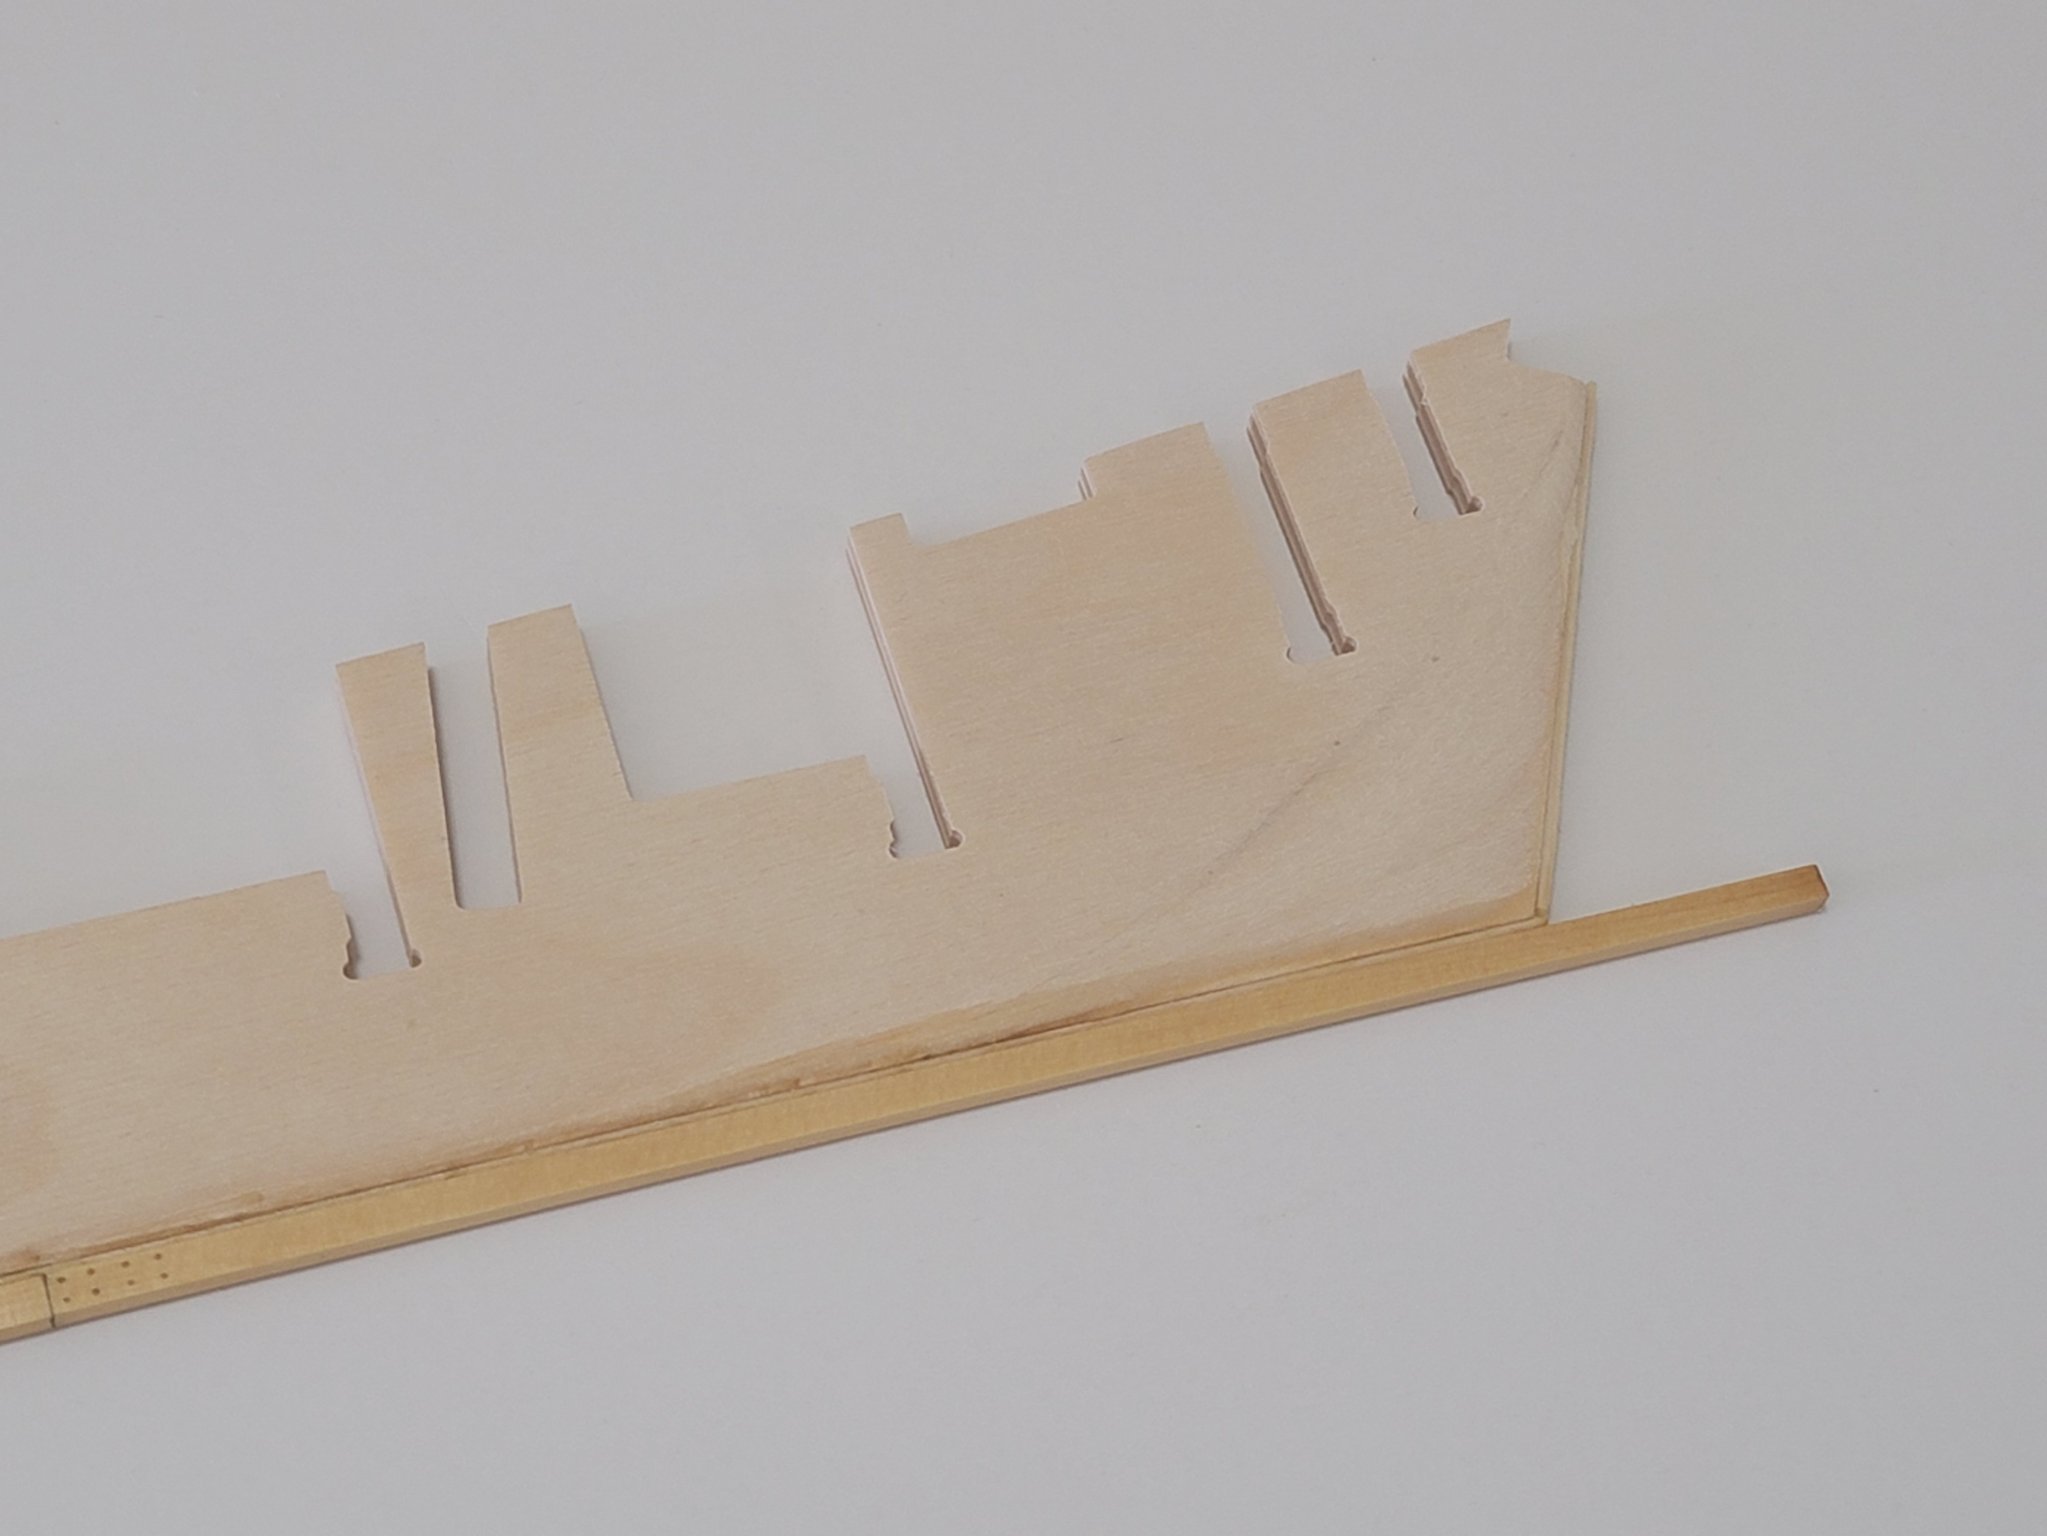
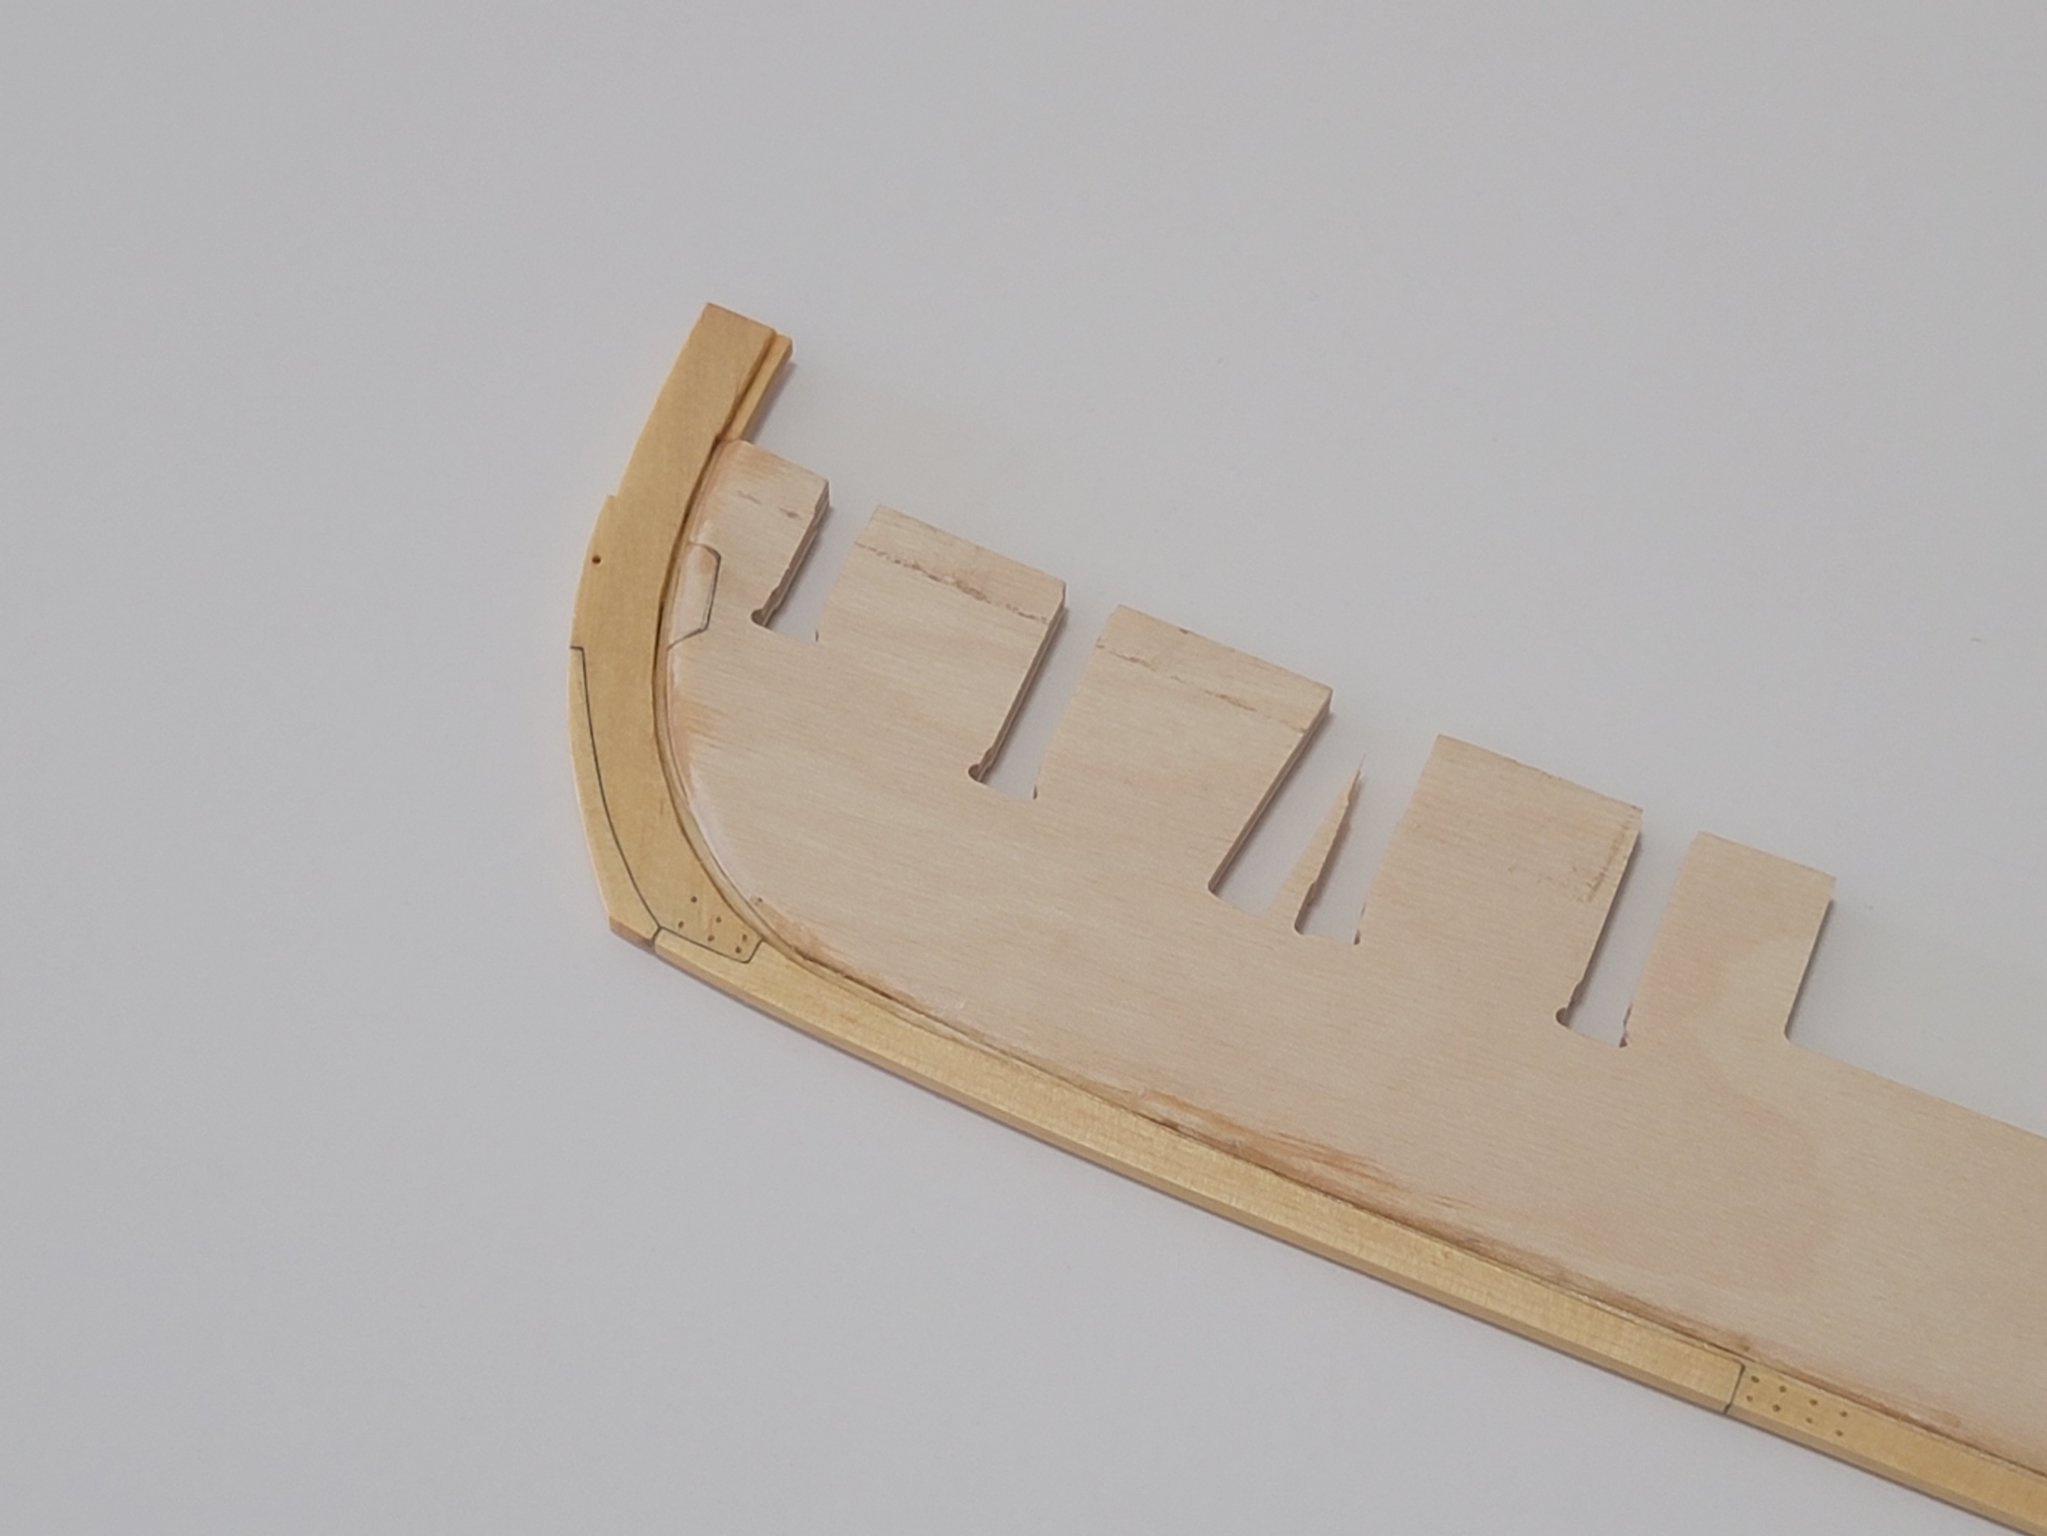
Lots of progress since my last post! I glued in all the bulkheads and finished framing all the gun ports and uprights. I had to modify some of the kit's parts for me to accommodate the framing (incl. the stern and bow areas as shown here):


For the stern gun port uprights, I used some scrap wood and glued to the bottom piece:
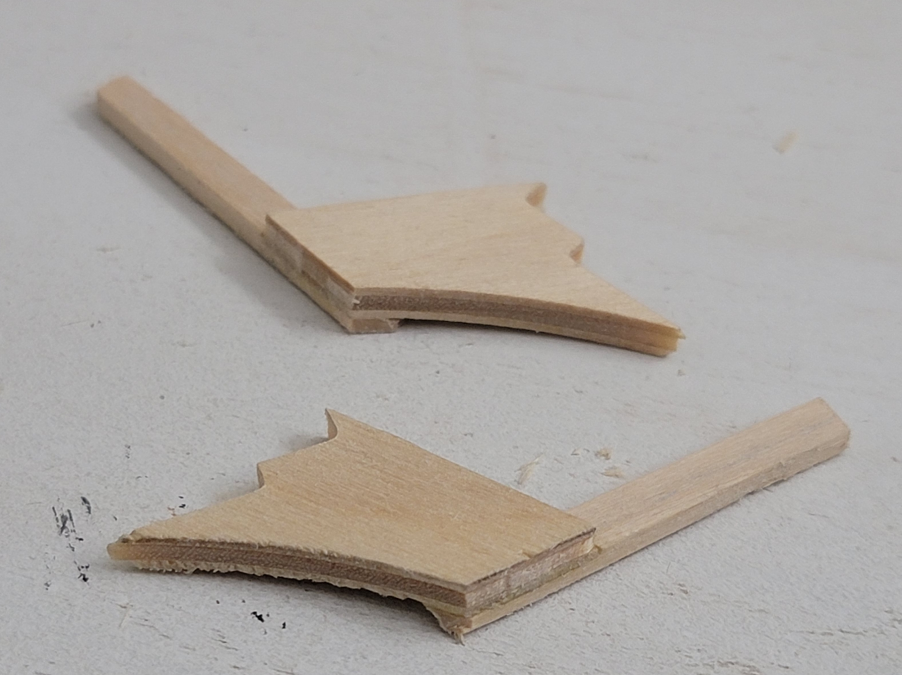
I forgot to take a picture of them glued (since I messed up their placement a few times and had to unglue), but here is where they are installed:

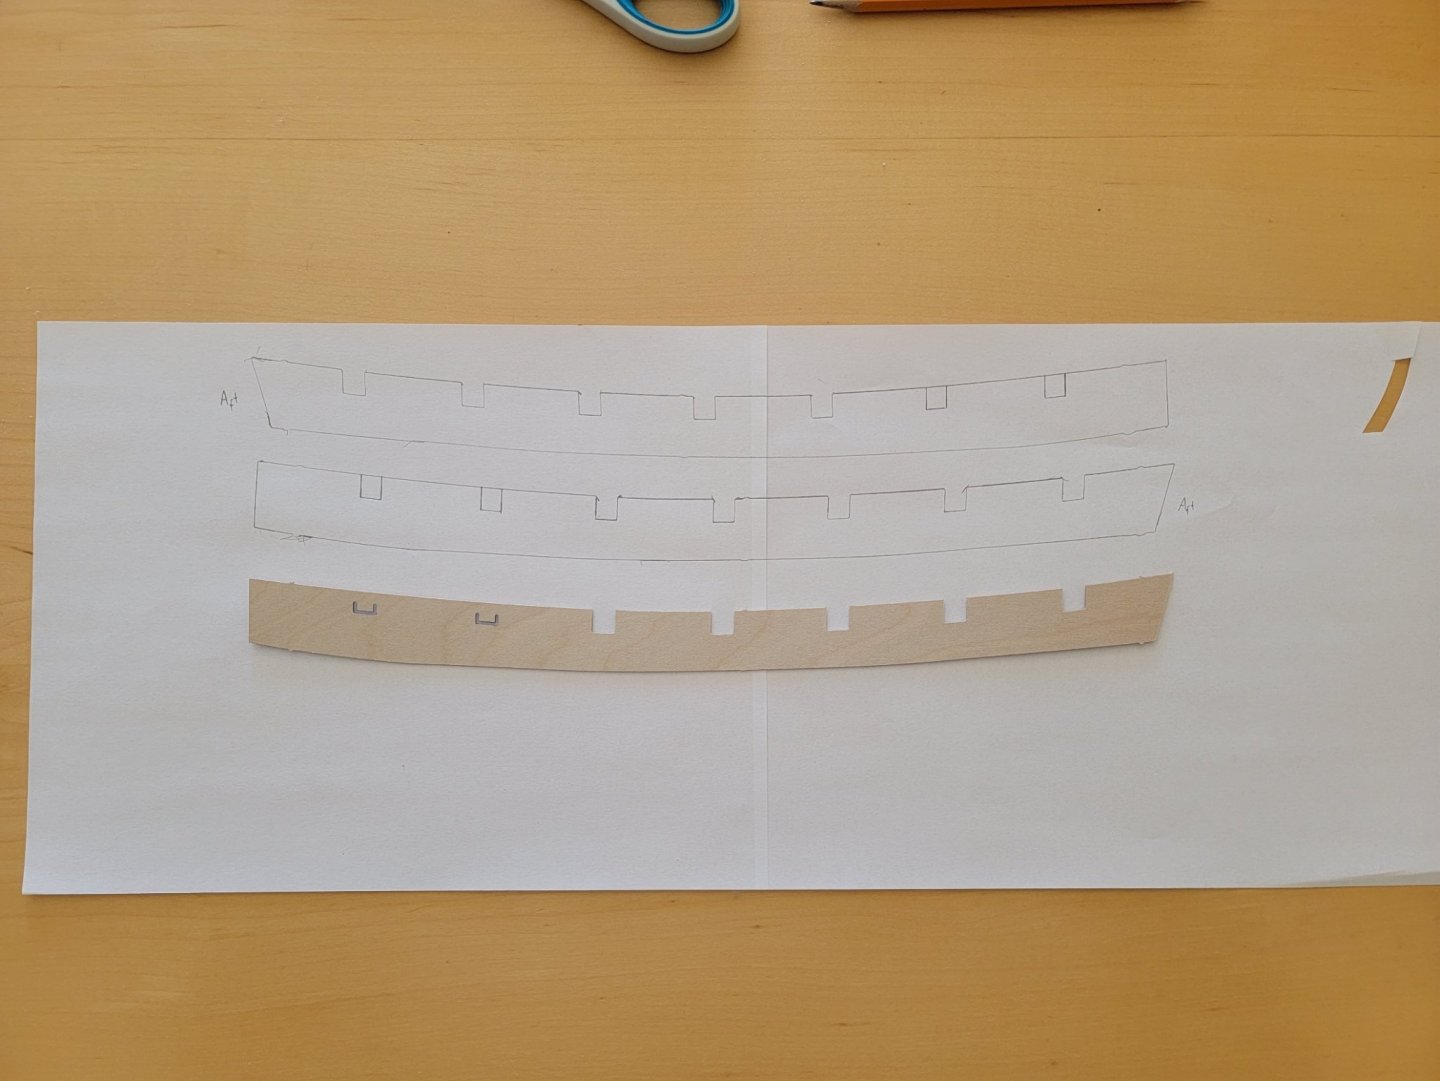
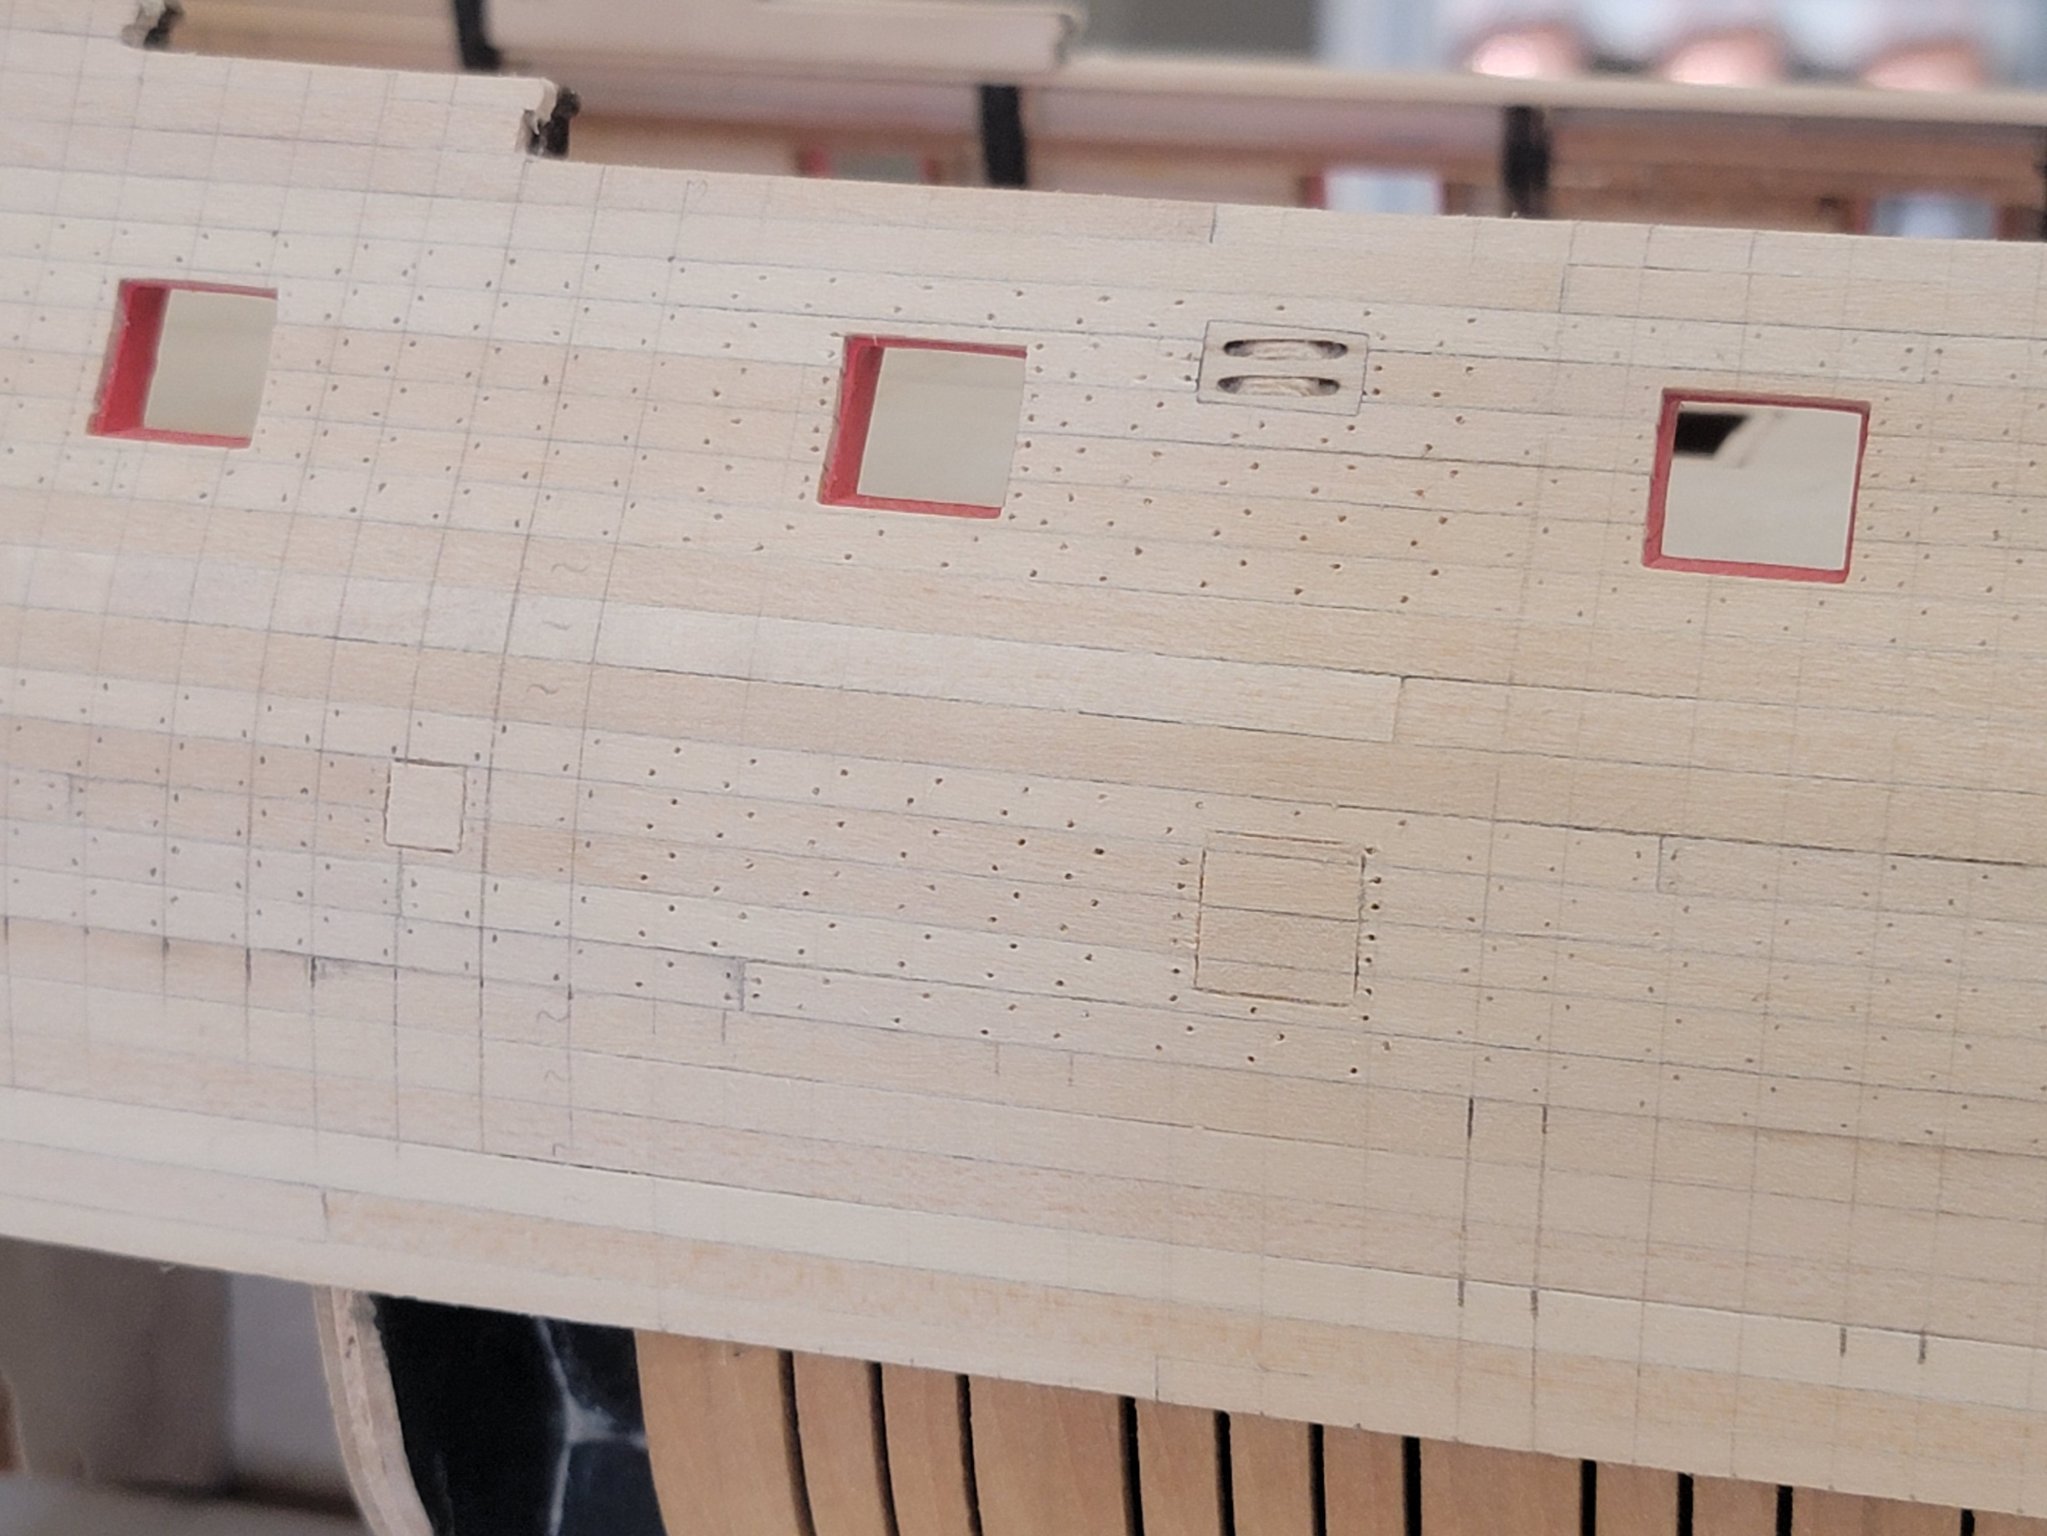
Next, I used a batten to locate the gun port sills:


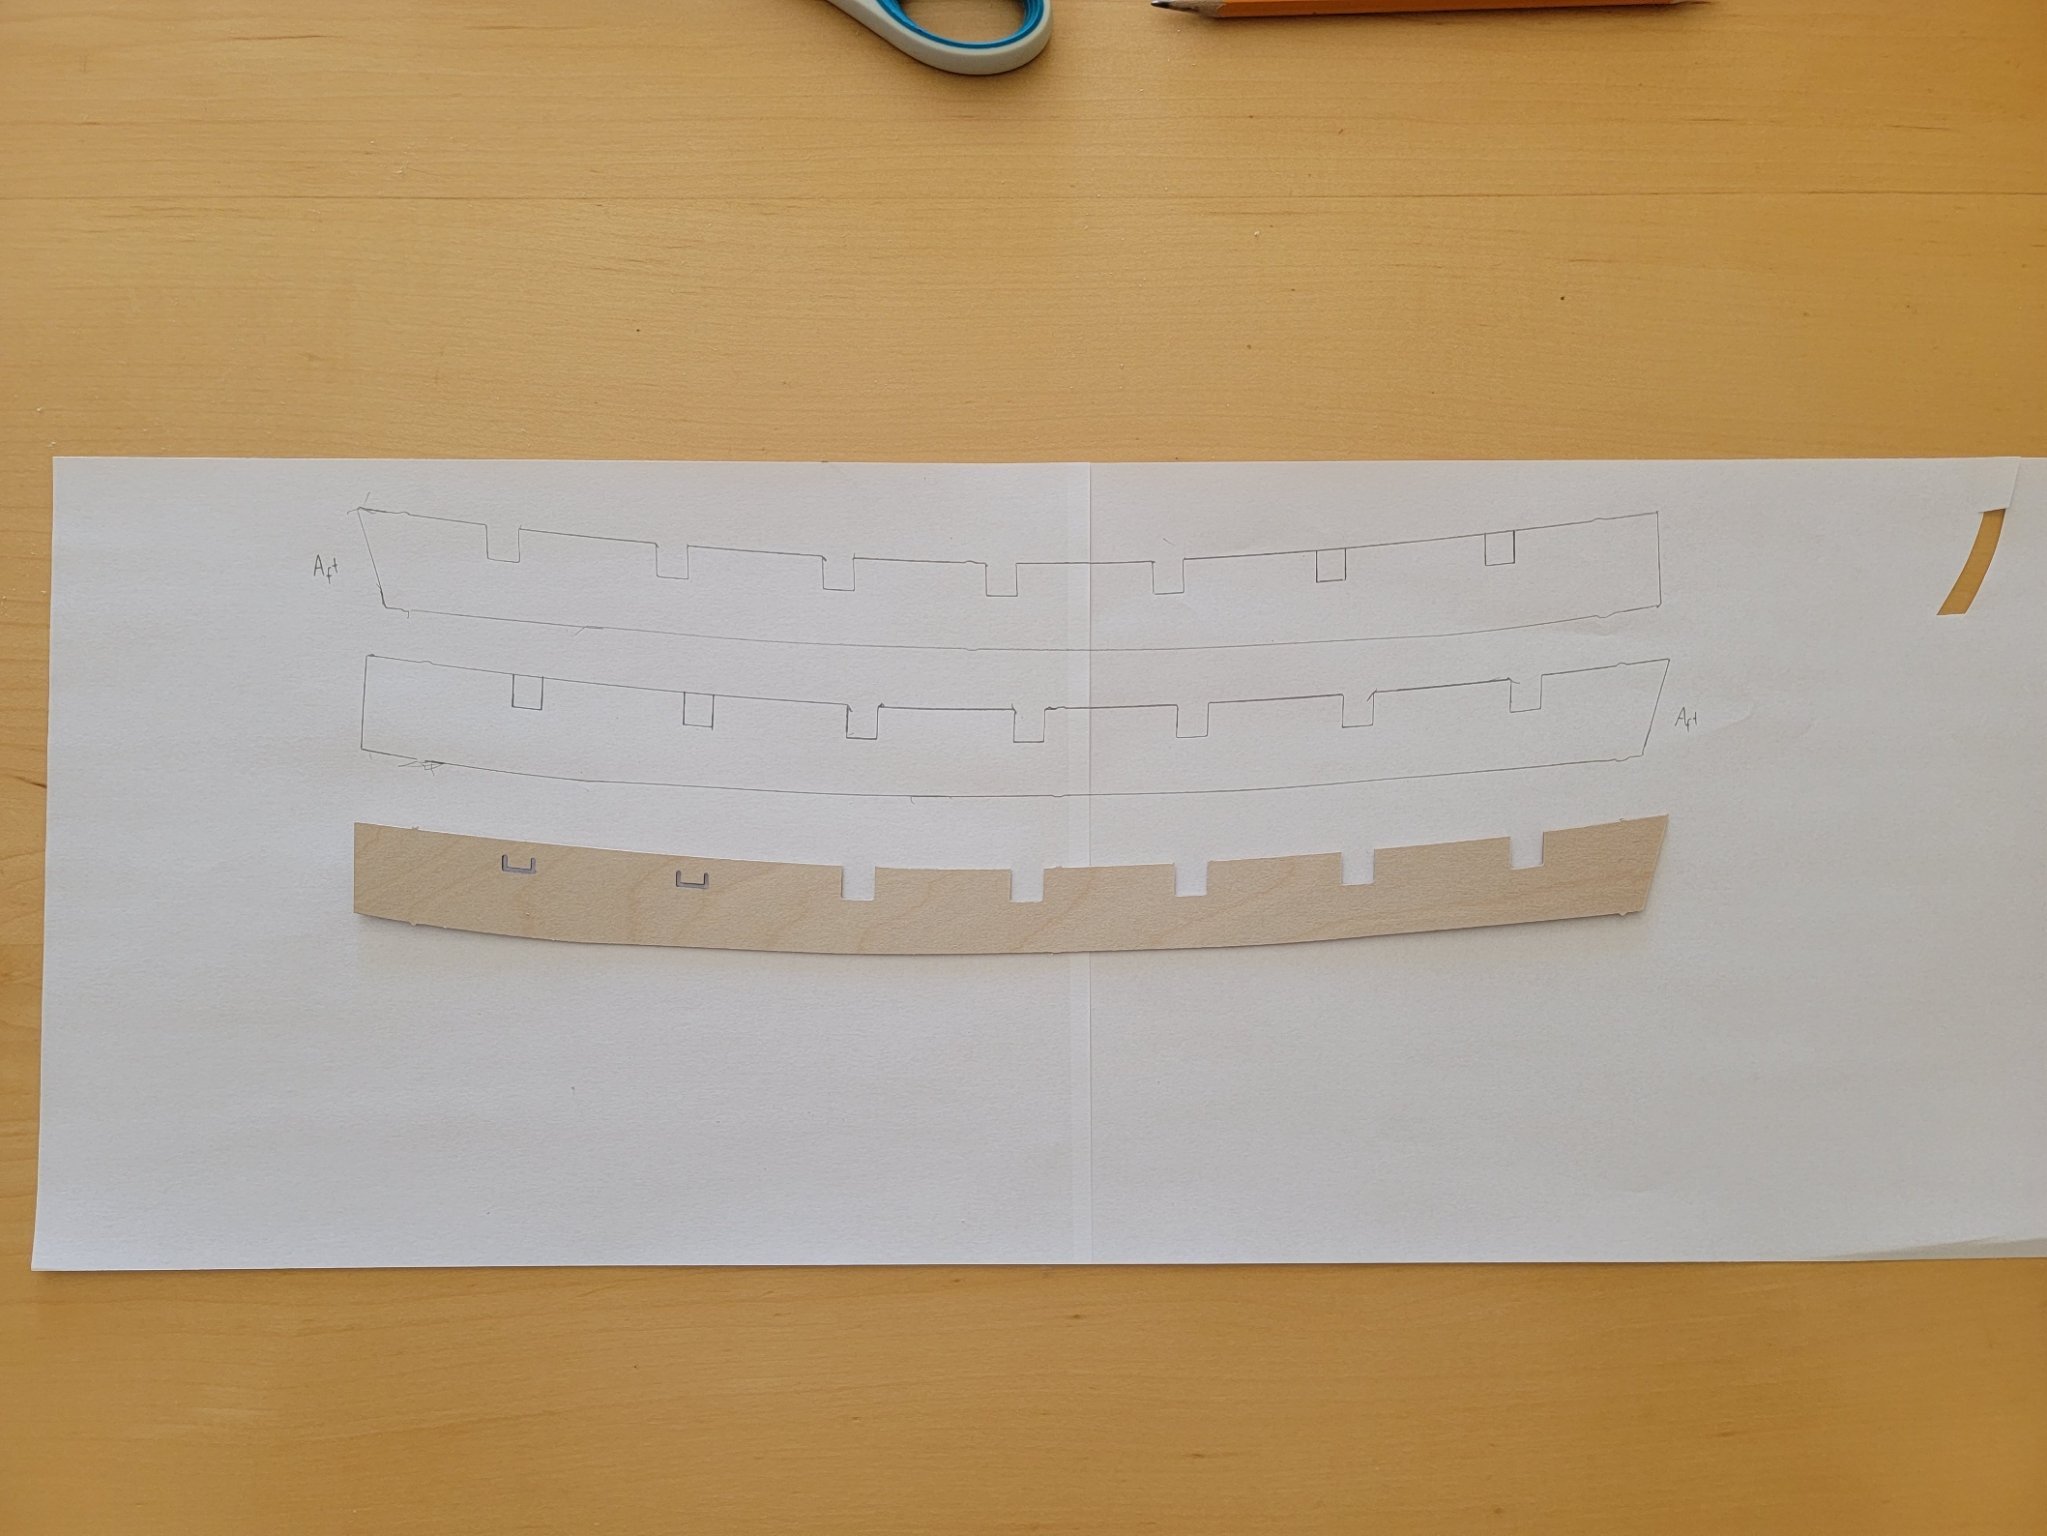
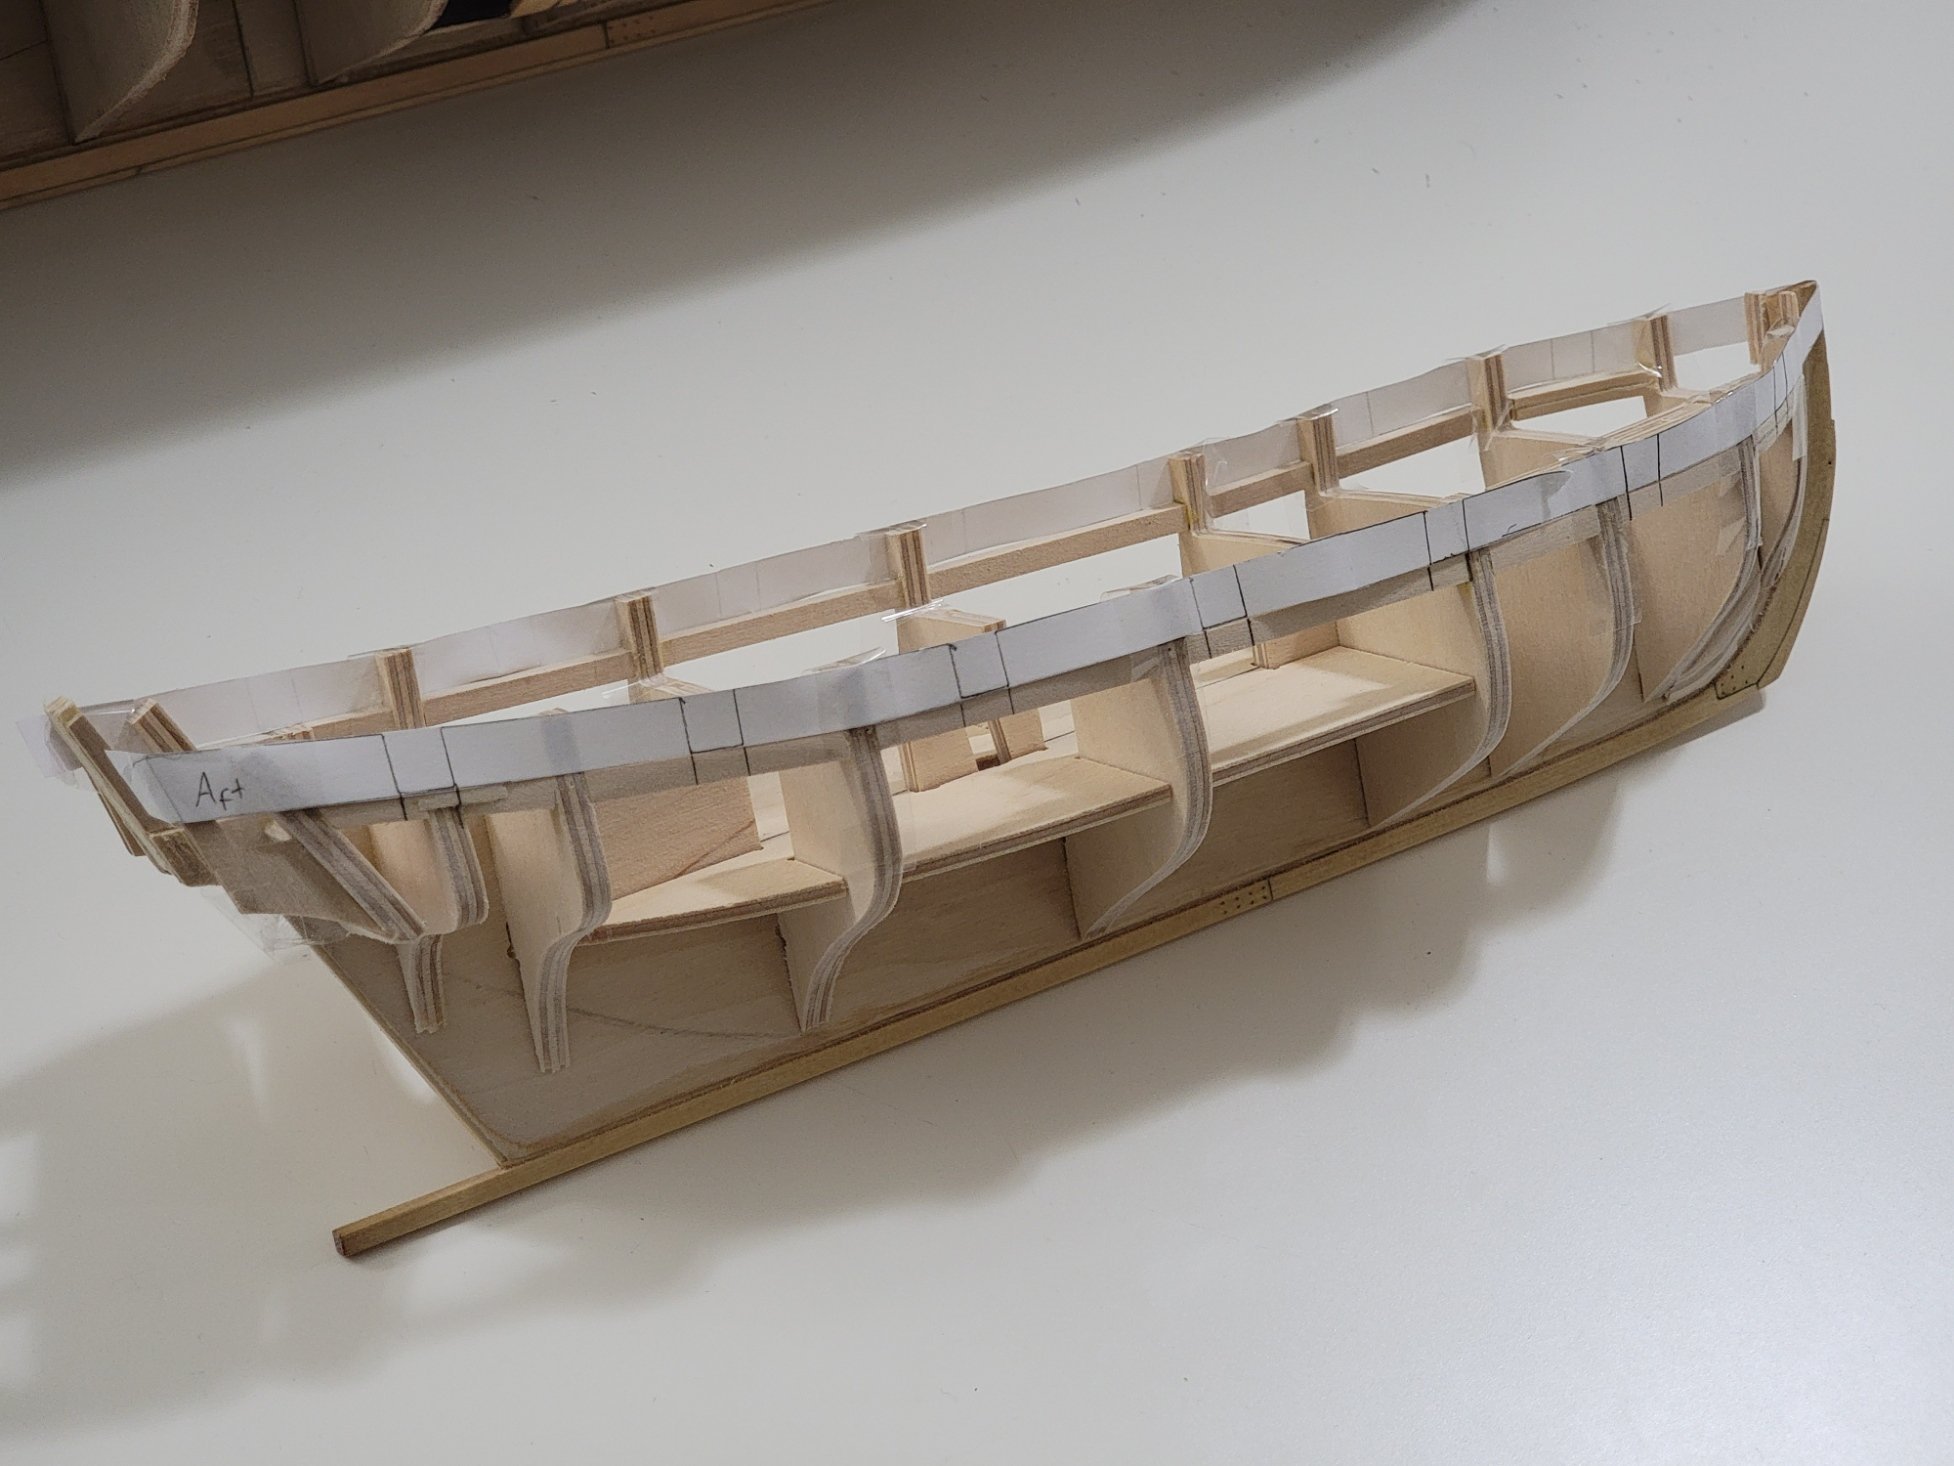
Then, the sills were glued in and the upright locations were marked. This was done by transferring the locations from the laser cut sheet onto a paper then to the hull:
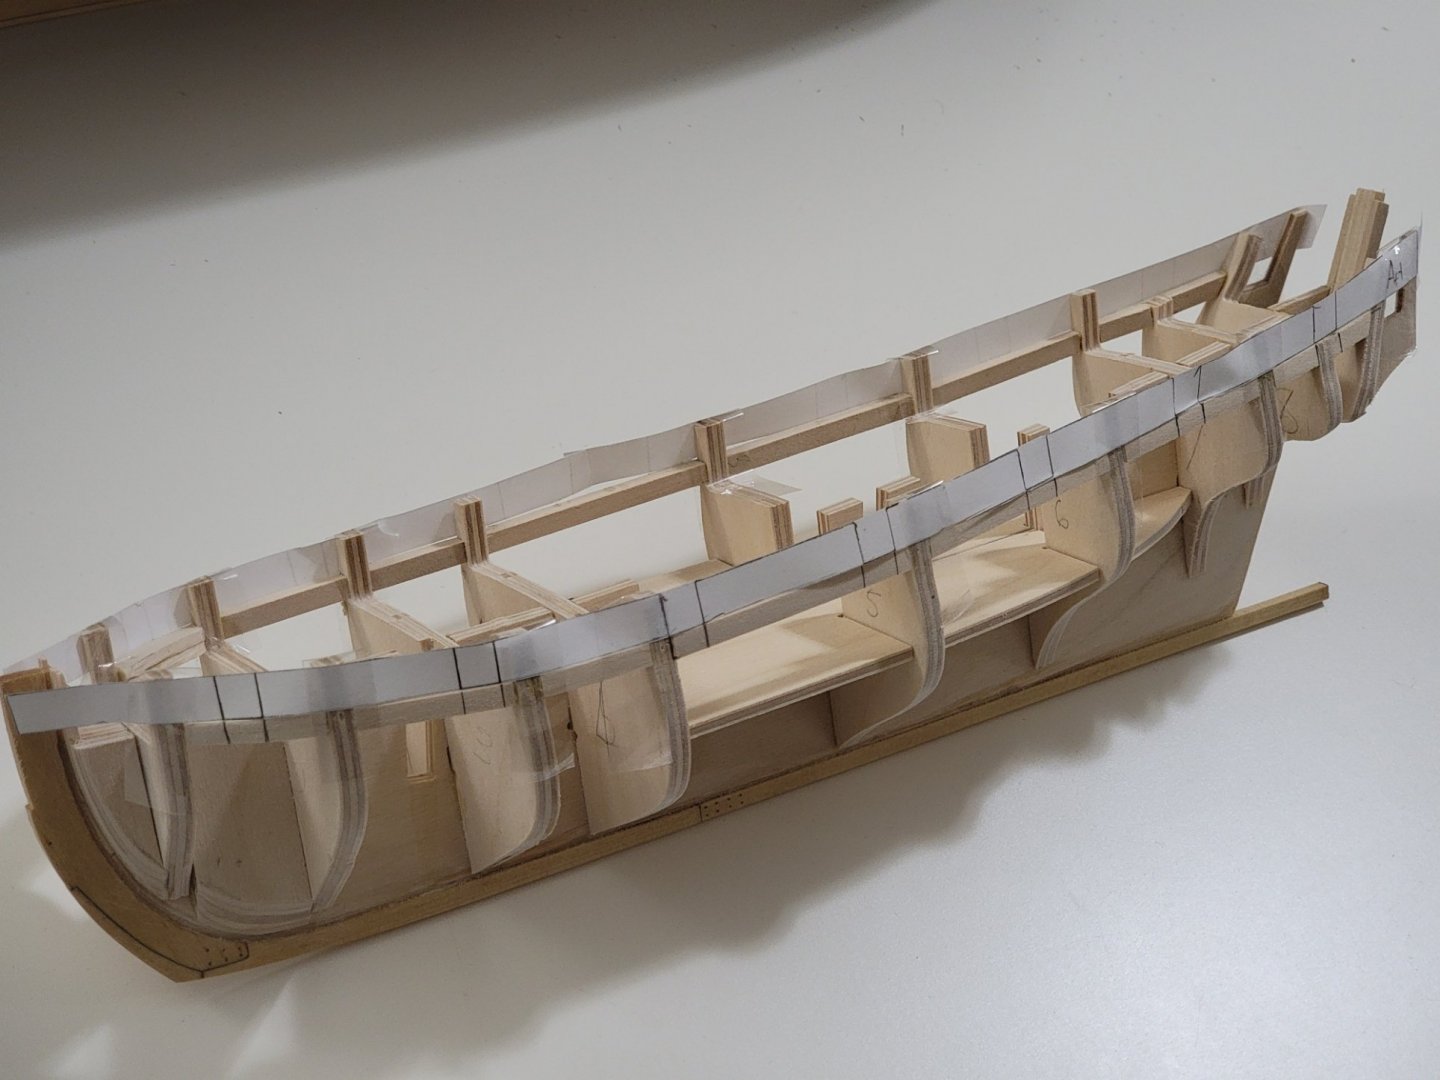

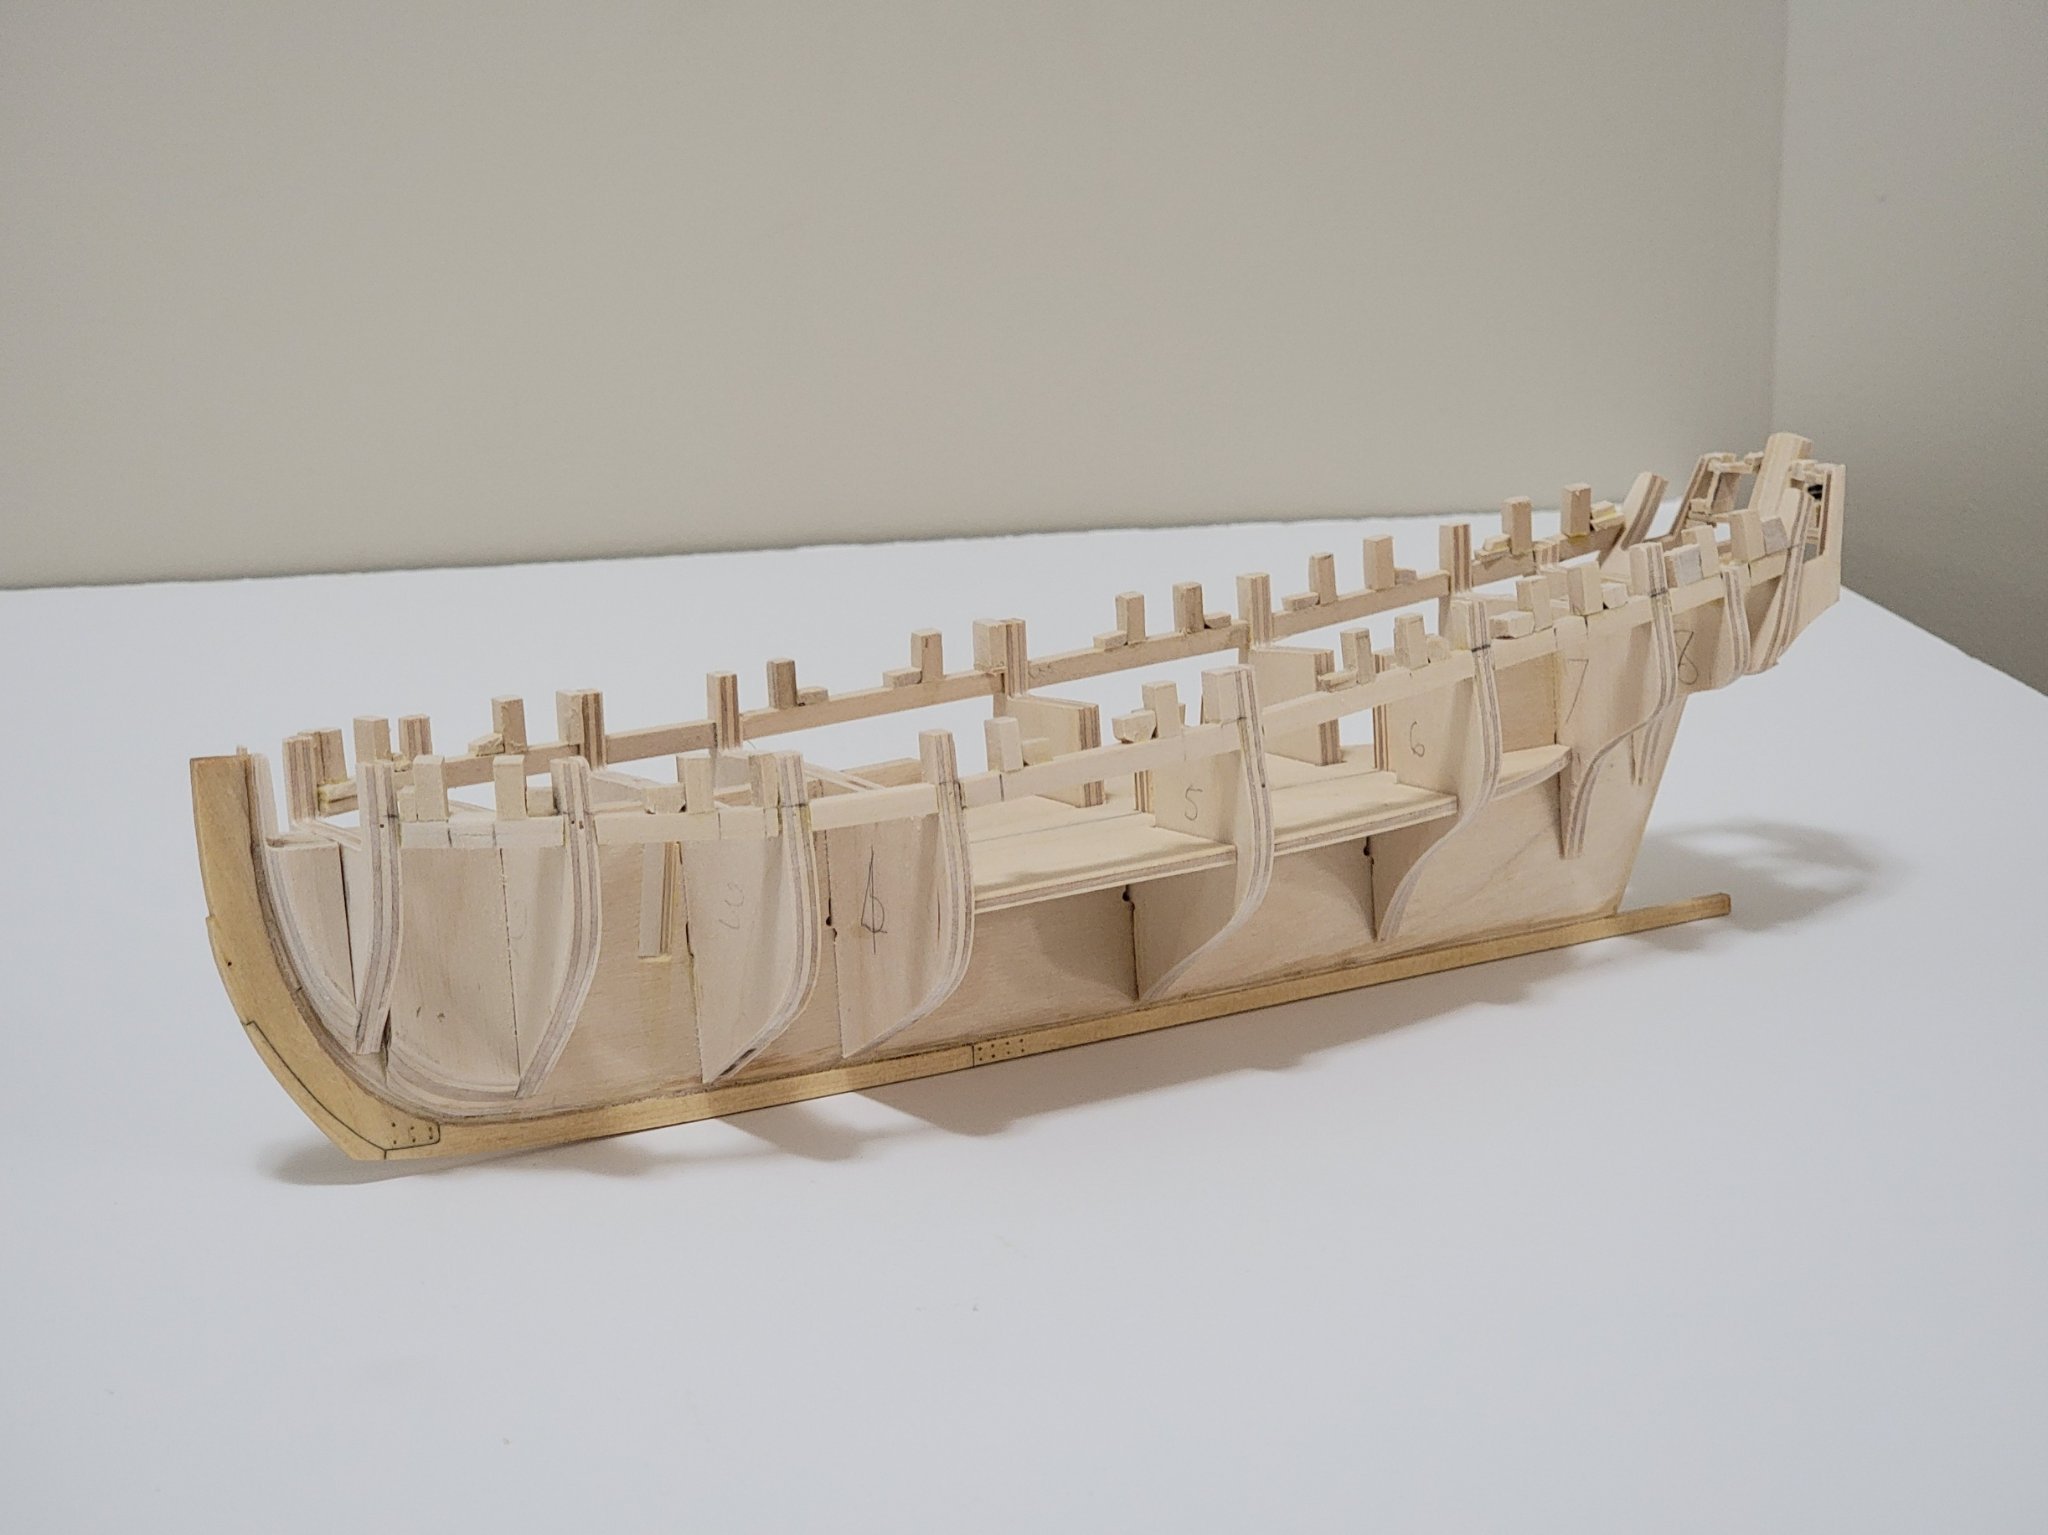
Then, I glued in the uprights. Scrap pieces of wood were glued on the sides of the upright to provide some more support. Not the prettiest thing but it works 😉

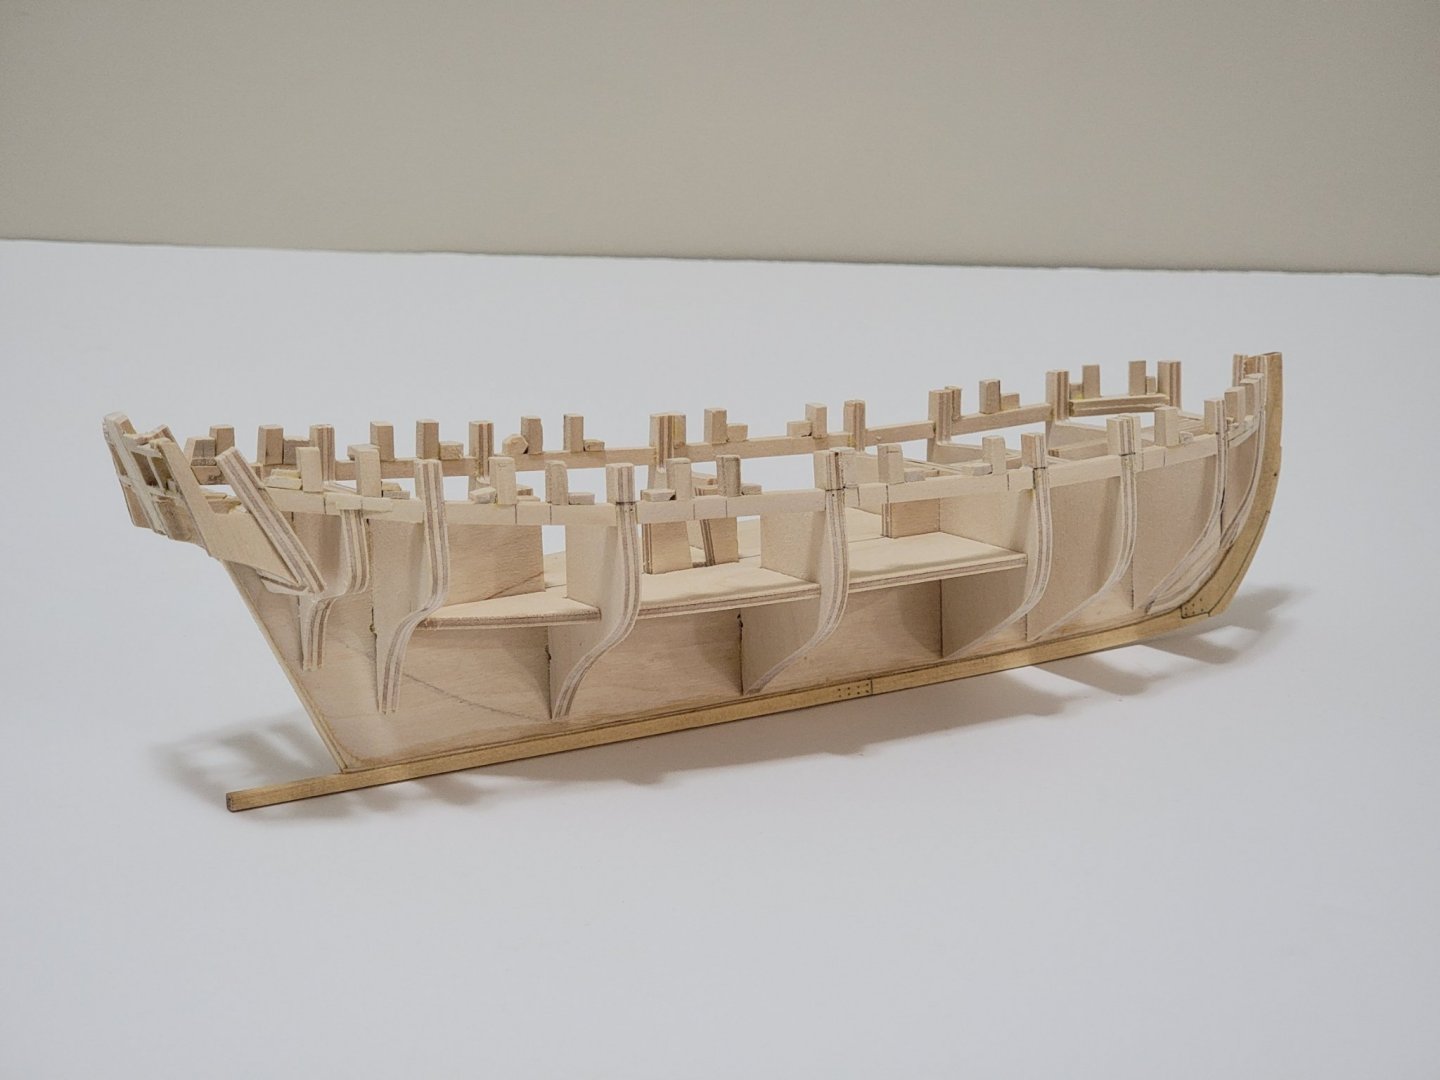


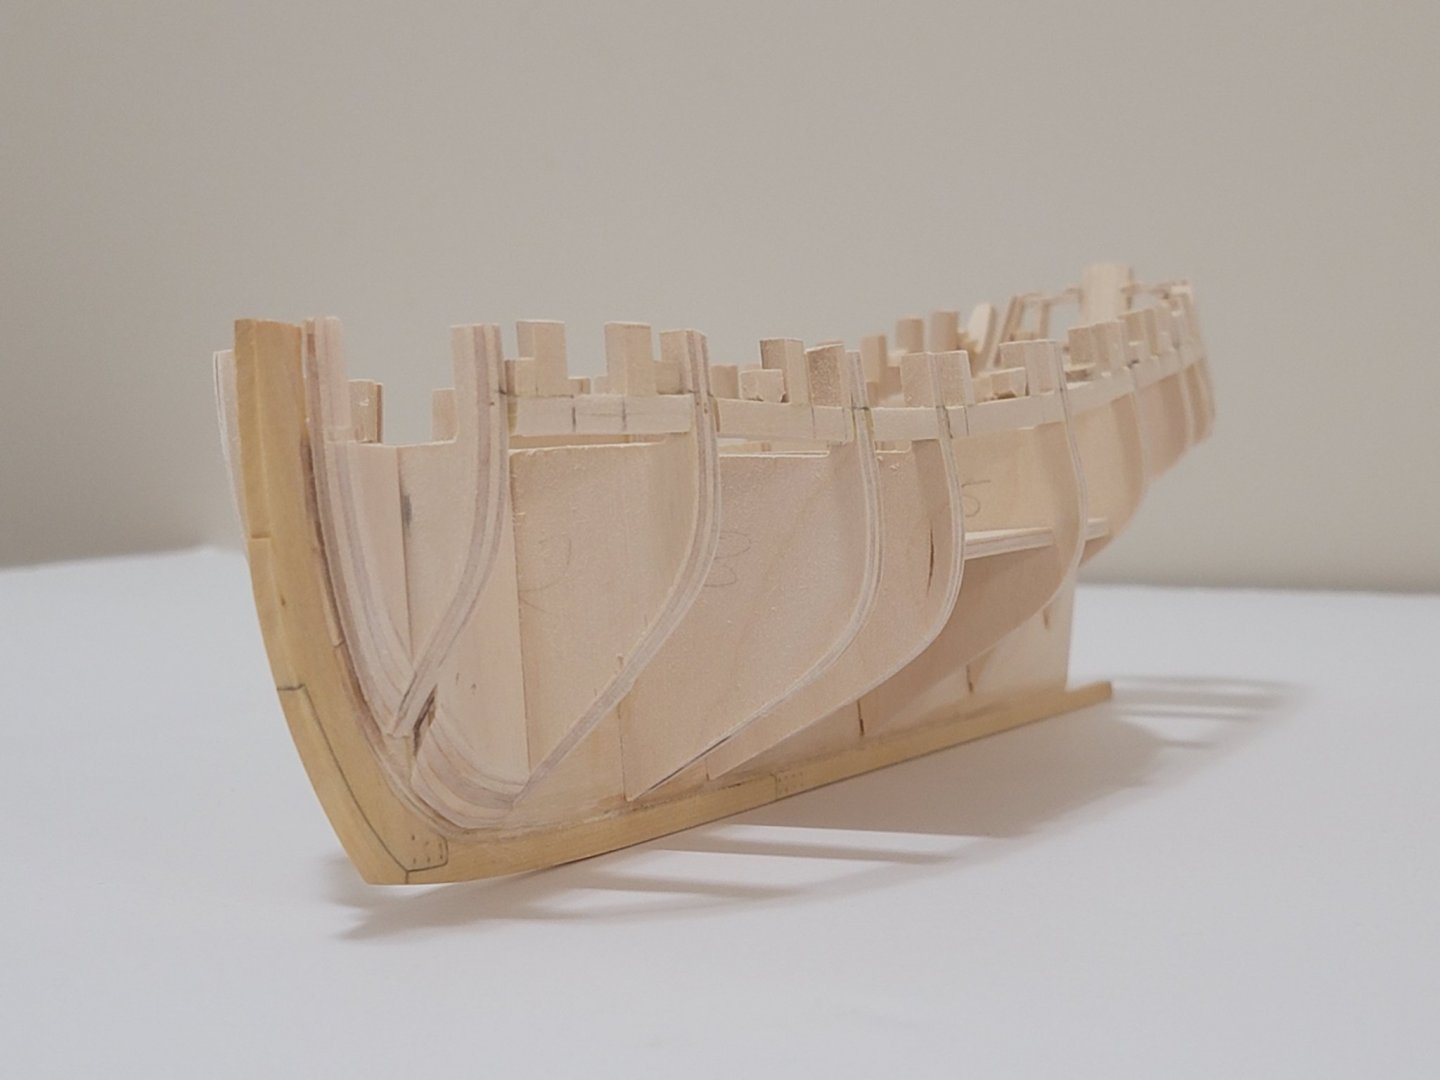

Next I will begin decking the lower deck and paint the gun ports
-
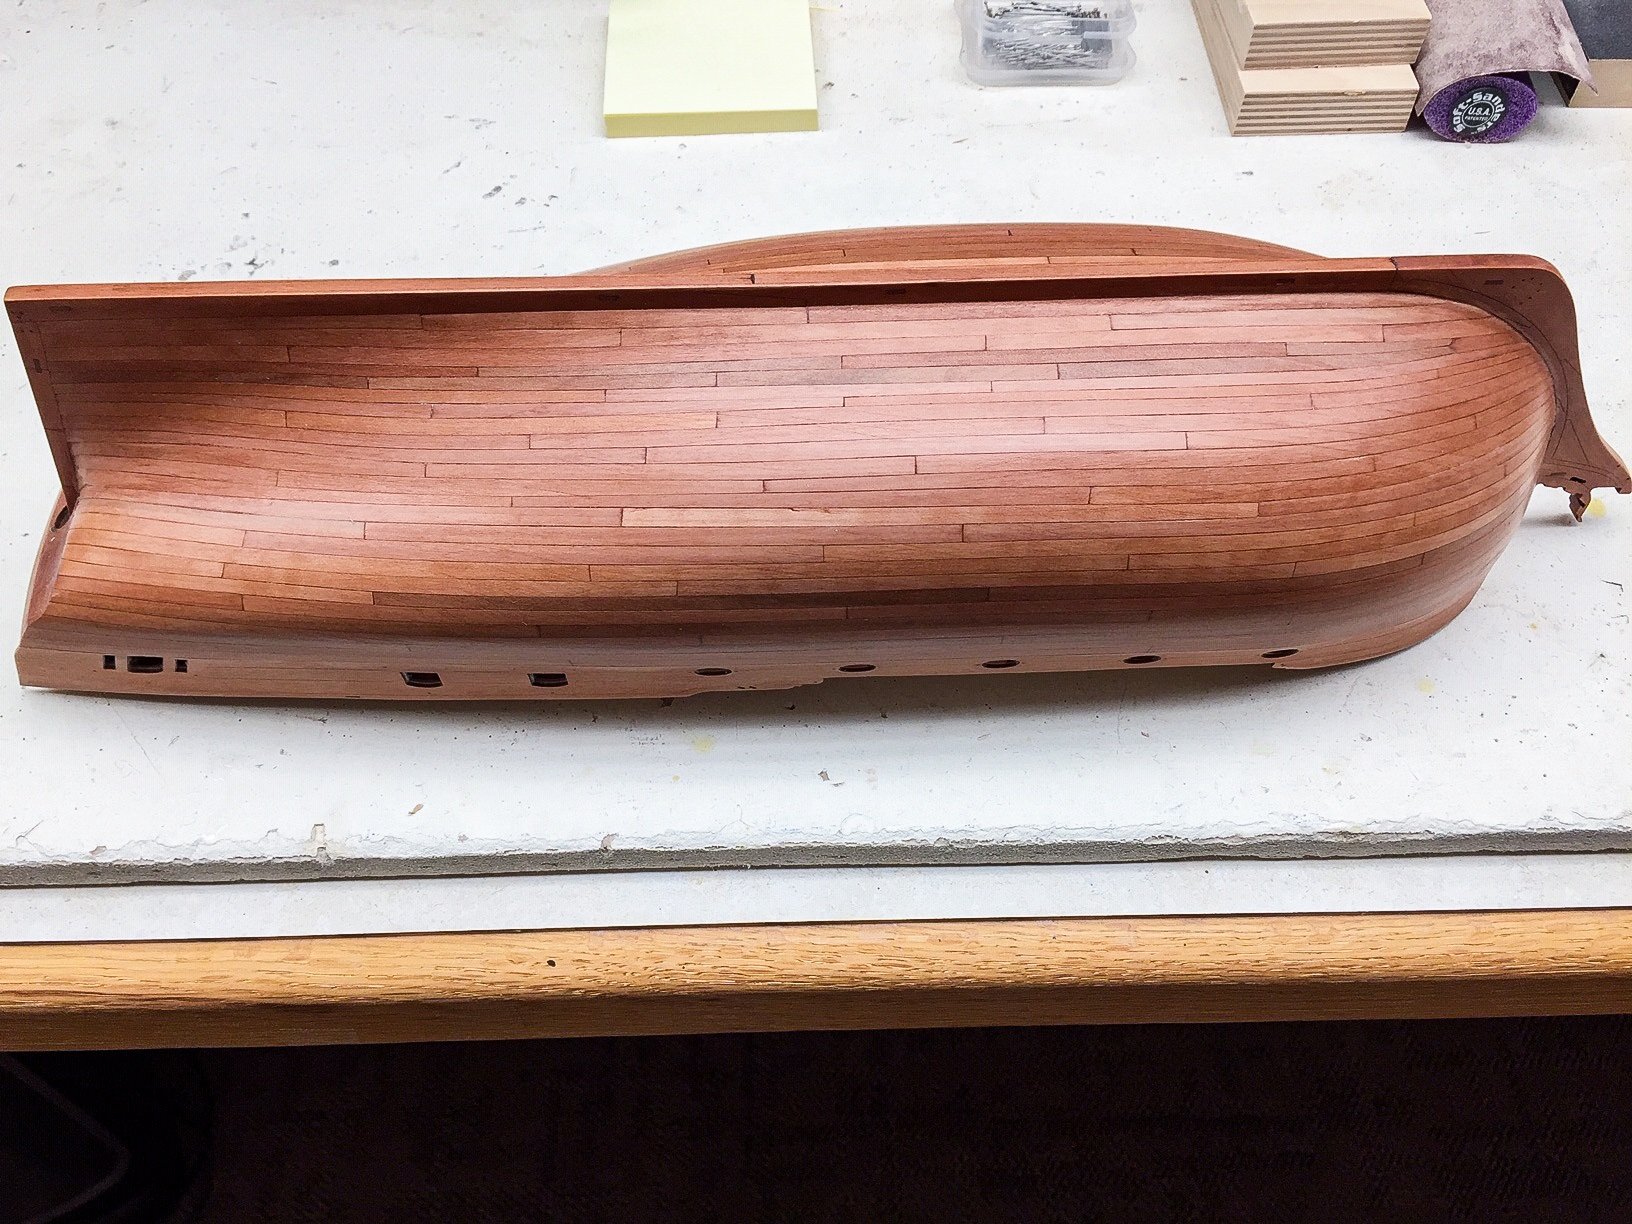
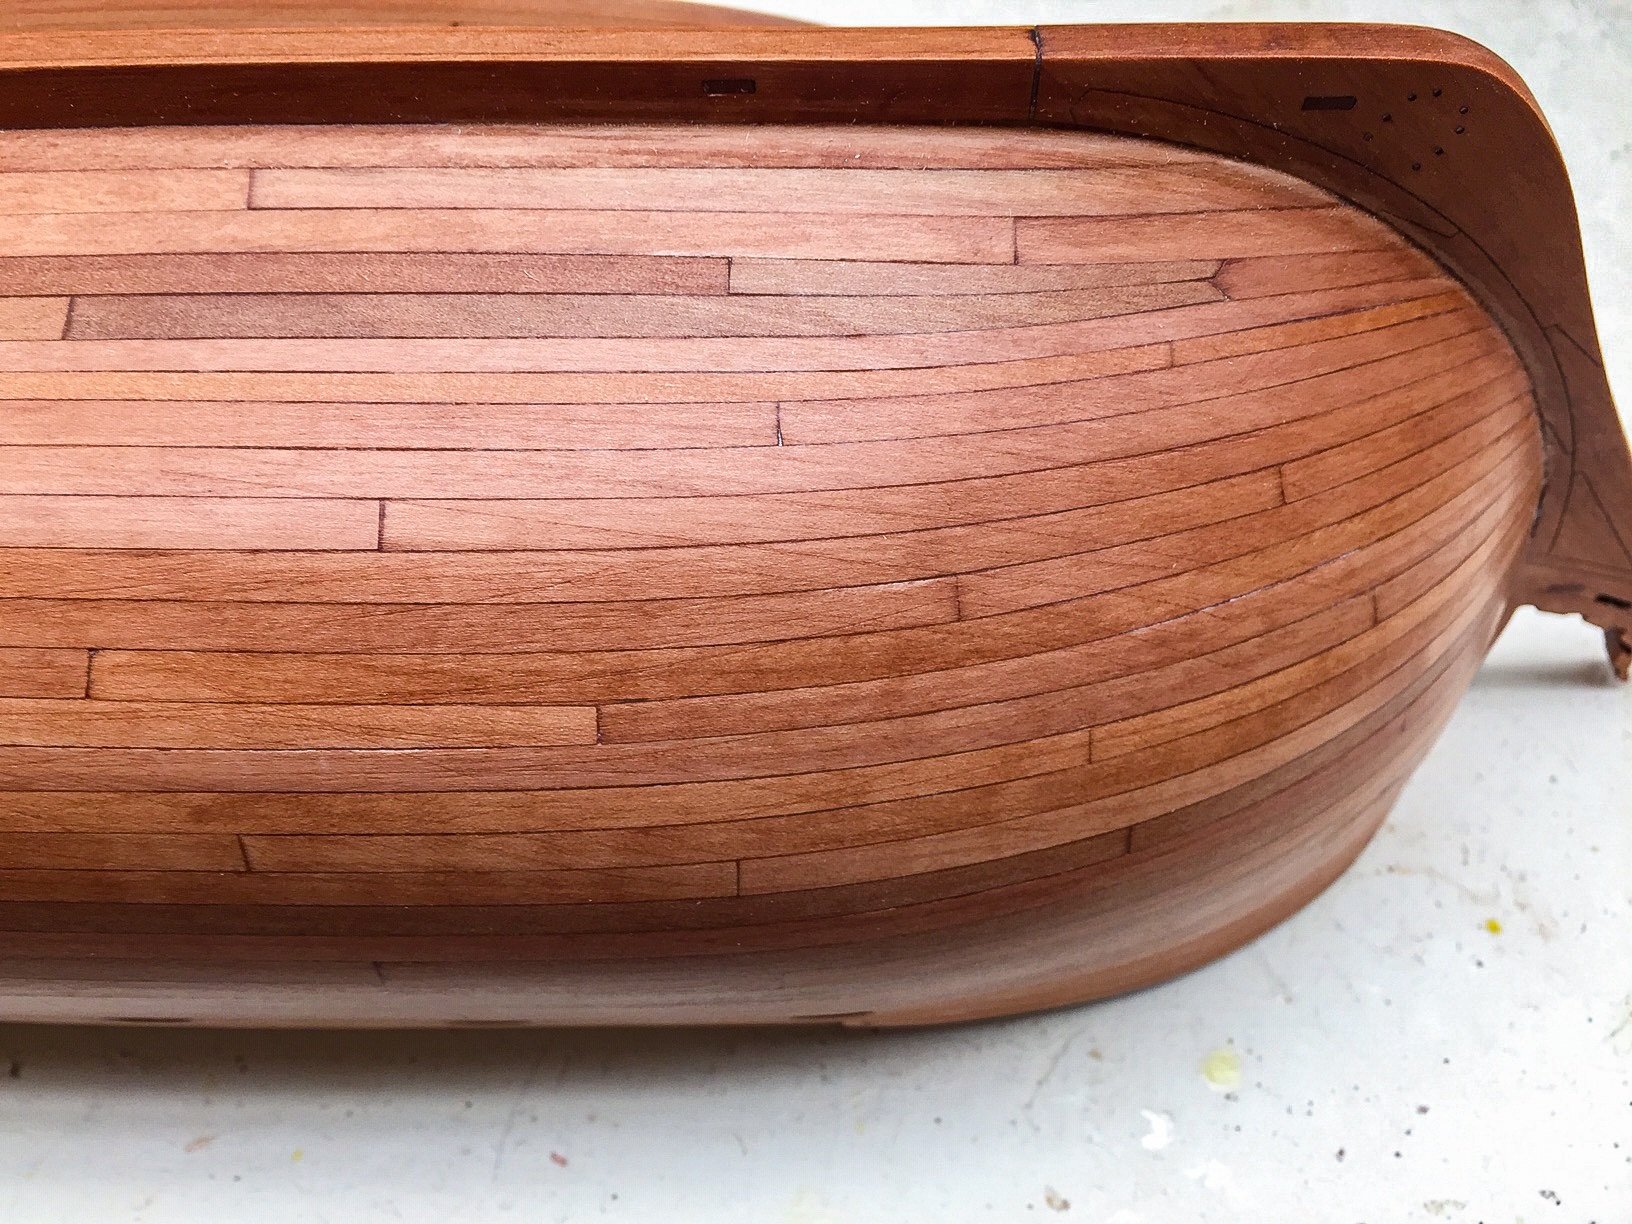
43 minutes ago, desalgu said:
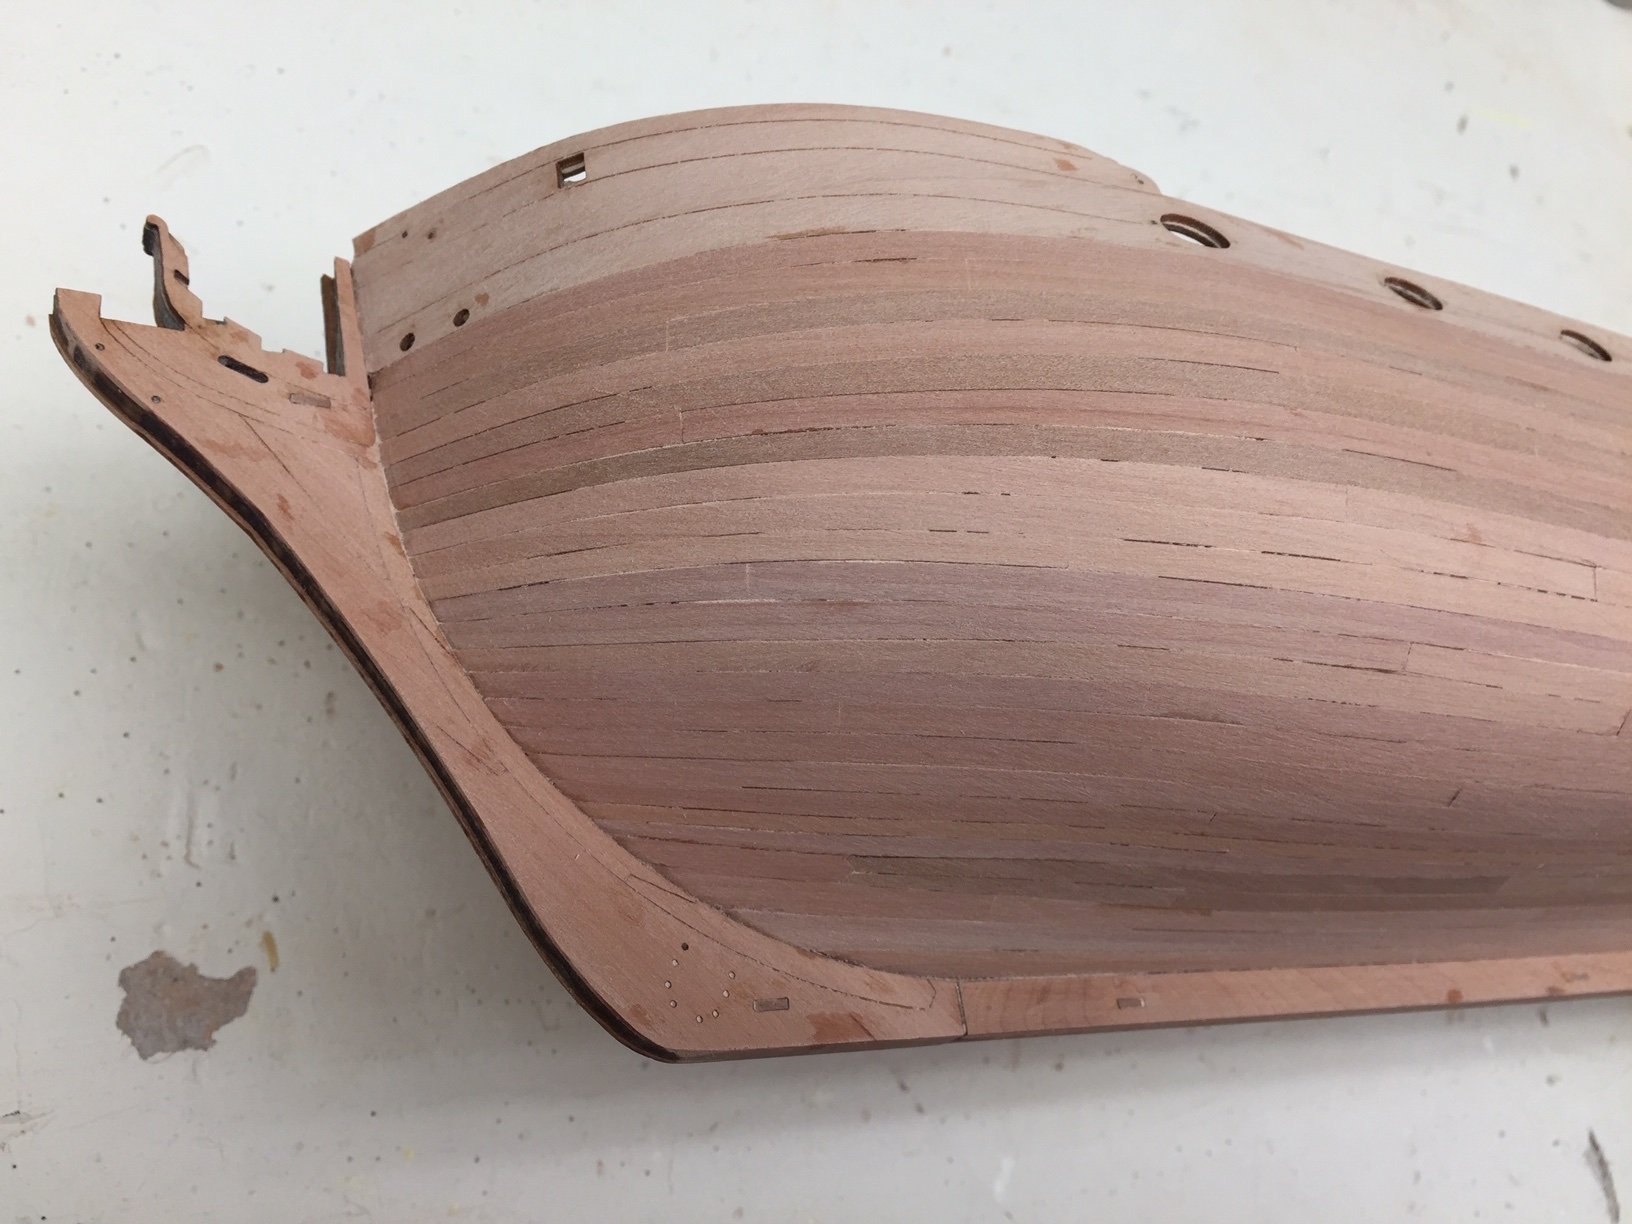
Since I've been thinking I'd not paint the hull below waterline white, I wanted to see how it would look stain and with coat of wipe-on poly. I used a "golden pecan" stain which is not dark. From tests it's not much different than using wipe-on poly without stain.
Here's some pictures:


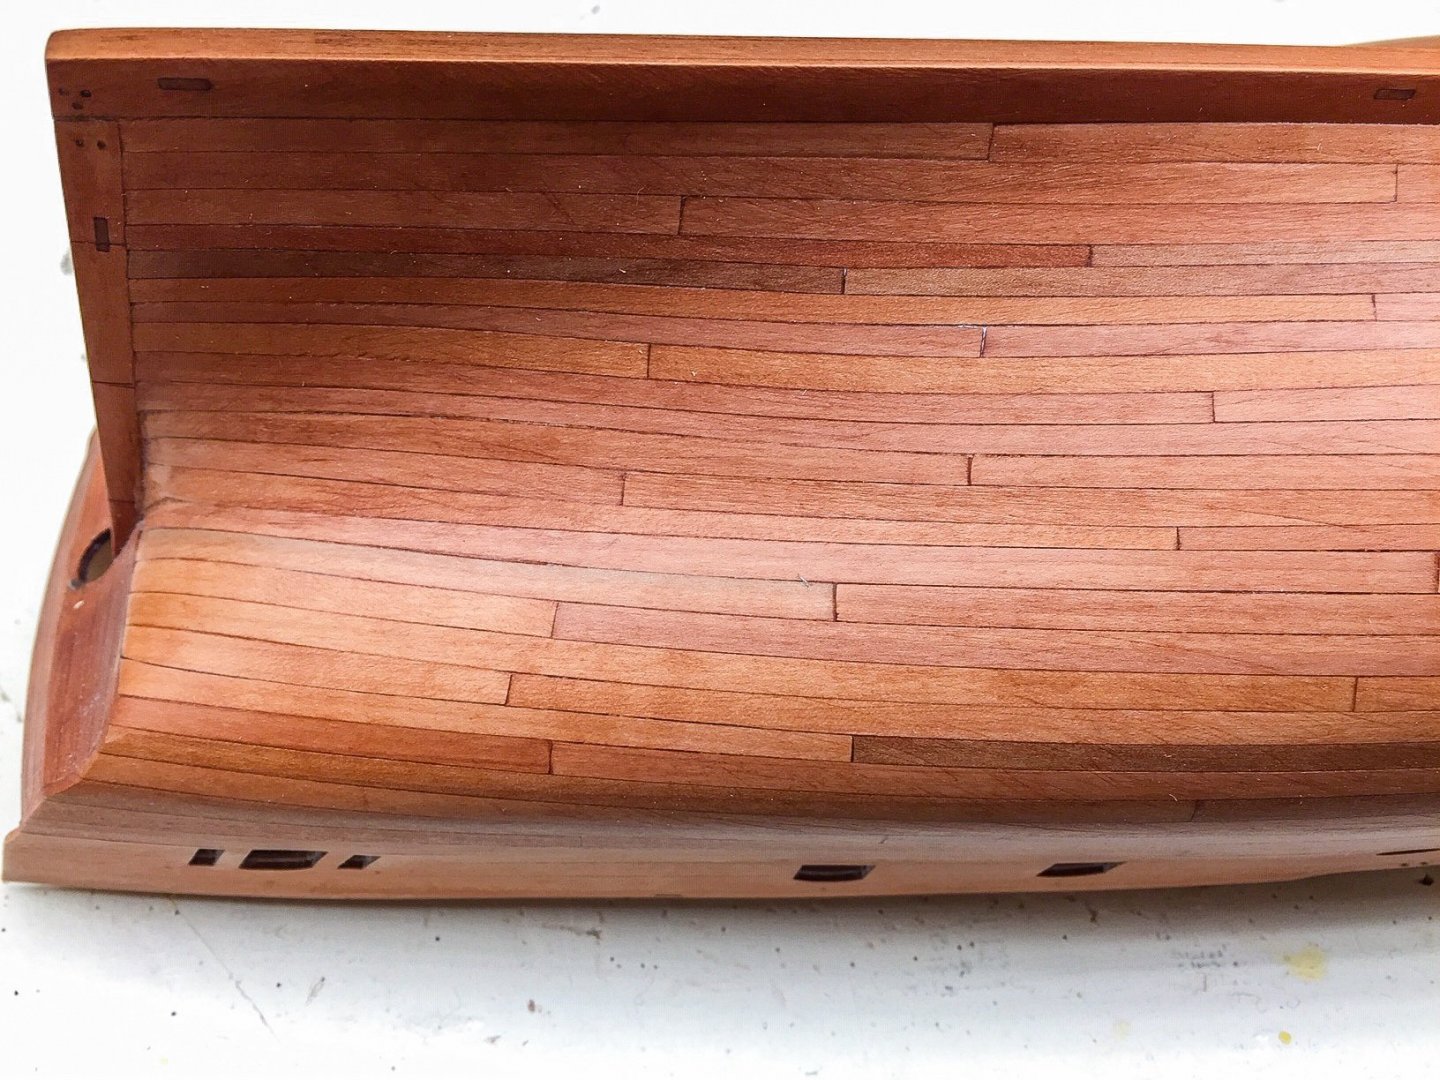
The finish makes the wood come alive, it looks really really great!
-
On 10/22/2021 at 2:31 PM, No Idea said:
That is such nice work and in scale too........Your patience and skill is to be admired as thats a lot of treenails and it looks simply awesome!
On 10/23/2021 at 11:37 PM, datadiscovery said:Letting just the little end of the bit stick out is a great idea. Wish I'd thought of it. Hope you don't mind if I steal it from you when I start my treenailing.
Pete
Thank you for the nice comments! And I don't mind at all 😁
51 minutes ago, allanyed said:I have never been thrilled with the look of treenails at scales smaller than 1:48, but after seeing your work, I am reconsidering this as my current project is 1:64. Sorry if I missed it if you already mentioned it, but what material are you using for the treenails? I cannot think of any wood that goes through the smallest holes in the Byrnes plate without problems other than bamboo, at least based on my own experience.
Allan
Yes I'm using bamboo, but I've seen that some brands of bamboo skewers don't have a nice finish (they have more of dots or speckles when sanded smooth). You can see this in Mike's post here:
From his post he also drew boxwood till the 2nd hole on the drawplate.
So I tried a couple brands of bamboo skewers before settling on the no name brand from SuperStore
I go all the way through to the second smallest hole on the drawplate. This is the only size that fits nice with the smallest drill bit I have (0.3 mm). The smallest one is too loose and the 3rd smallest is too tight.
-
Very nice planking! Are you edge bending wood strips at the bow?
-
The treenails look really good and neat. Looking forward to more progress pics 😀
- Old Collingwood, Kevin, EJ_L and 2 others
-
5
-
So beautiful and precise work! How did you blacken the guns evenly? They look really good! 🙂
- Justin P., mtaylor and Edwardkenway
-
2
-
 1
1
-
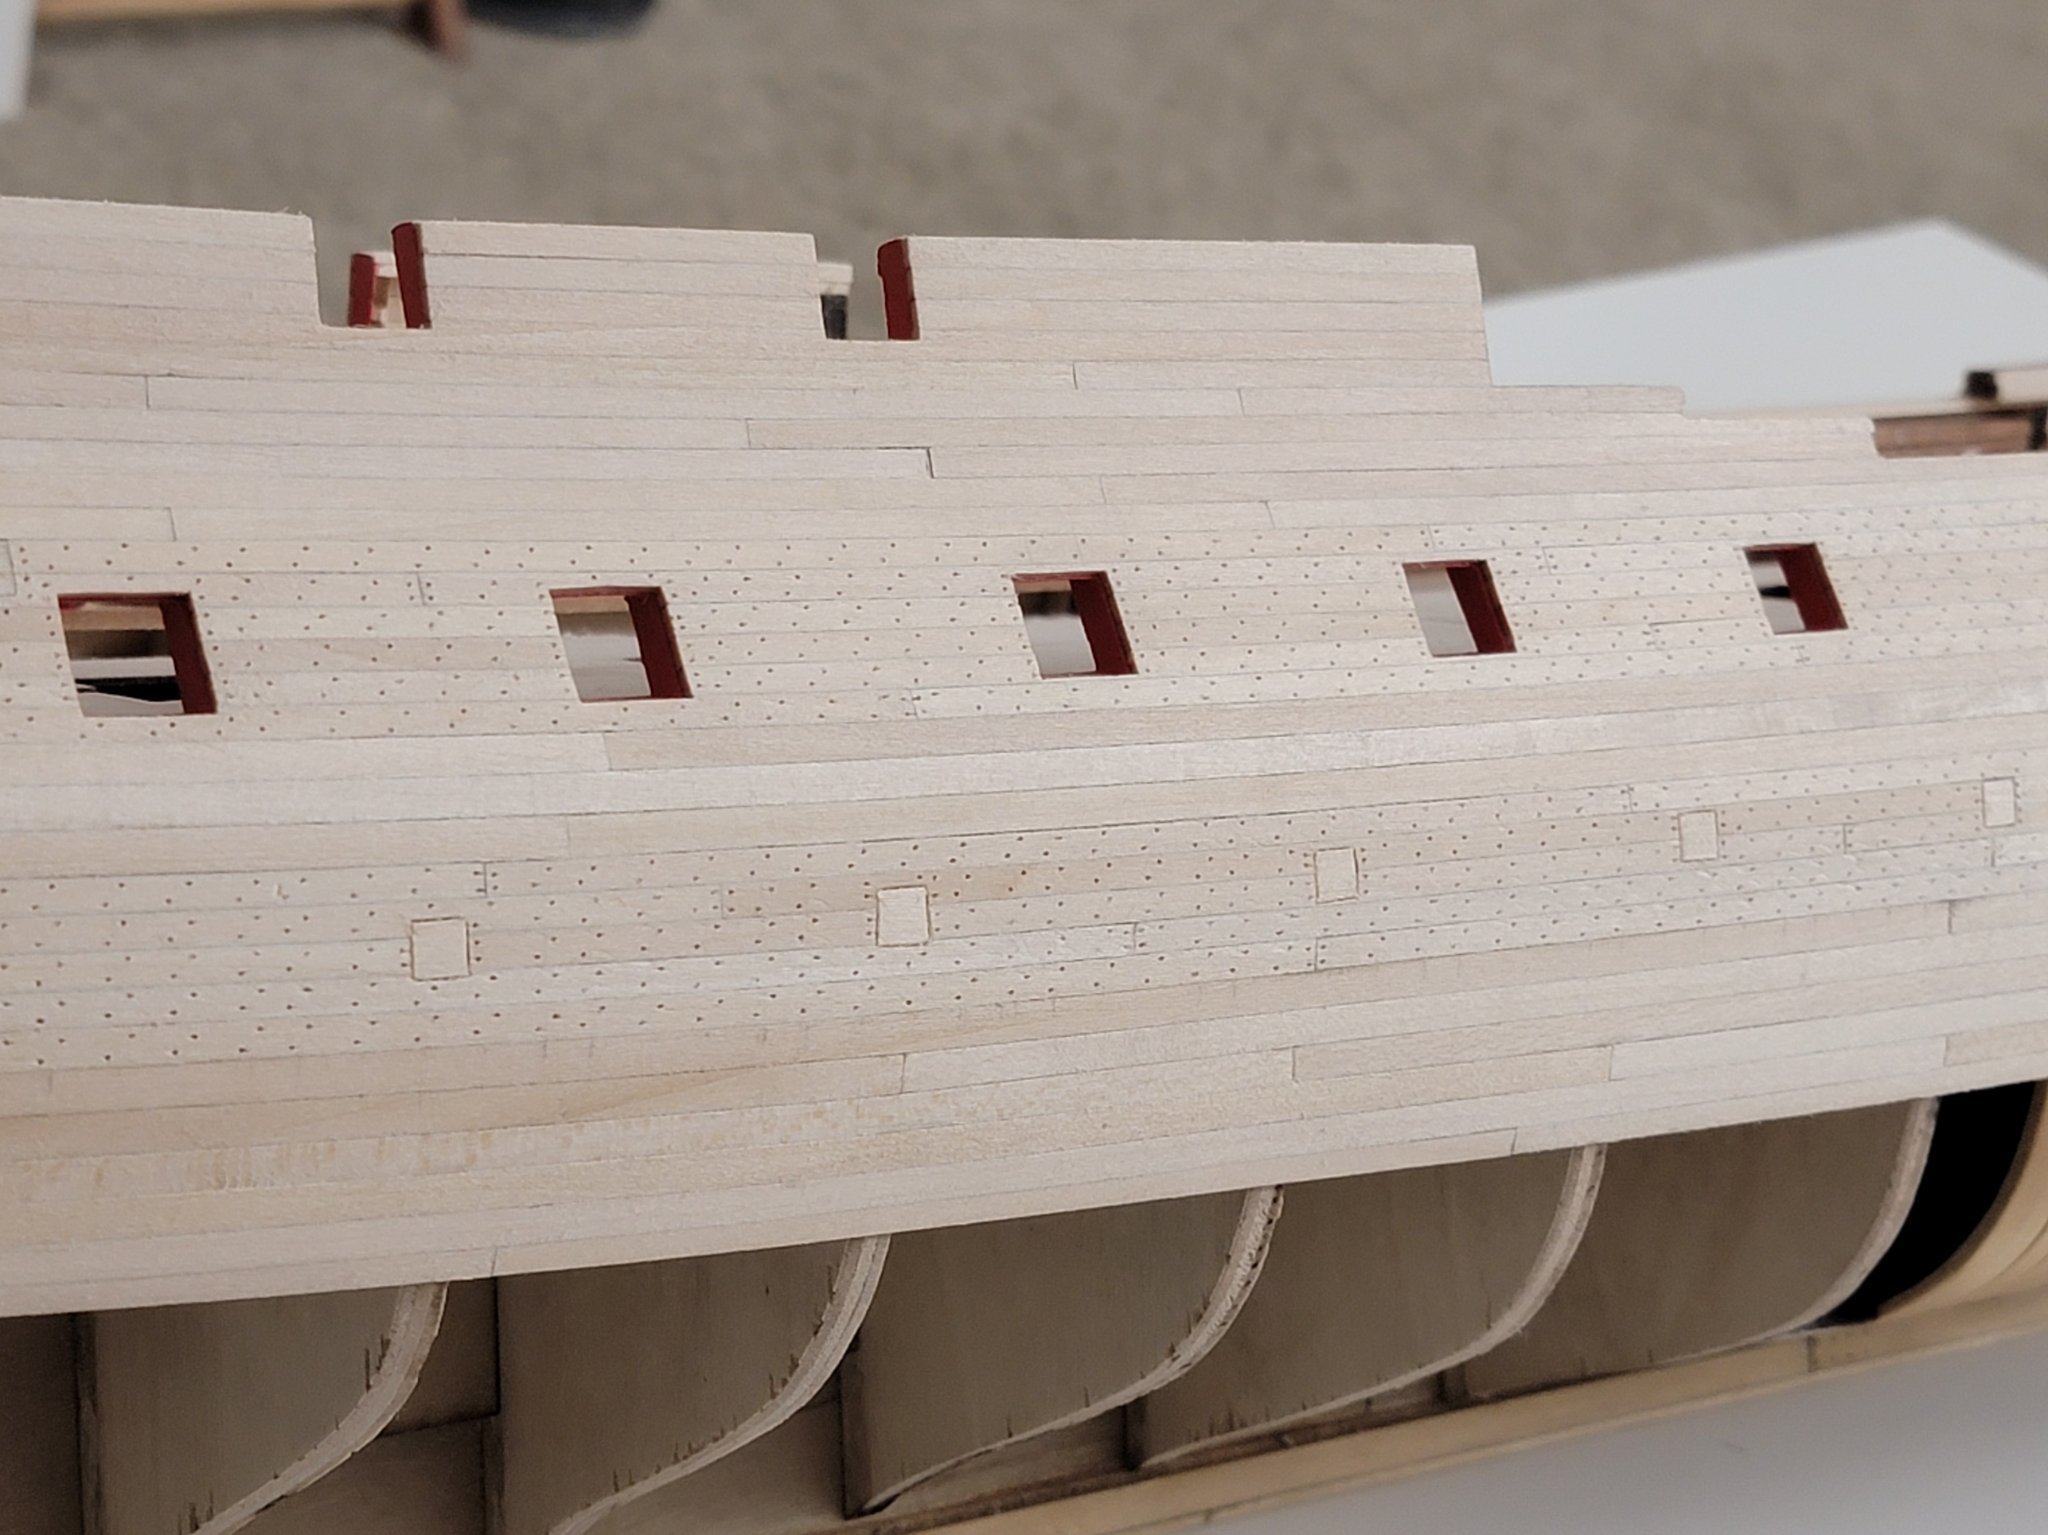
Finished drilling all the holes on the starboard side! So I am halfway now 😀


- Matt D, Retired guy, CaptMorgan and 14 others
-
15
-
 2
2
-
10 hours ago, datadiscovery said:
Been watching your build for a while. What a treat! You're doing beautiful work. I admire your skill and perseverance. How deep are you drilling those treenail holes? Pete
Hi Pete, thanks so much for the nice words! Really appreciate it 🙂
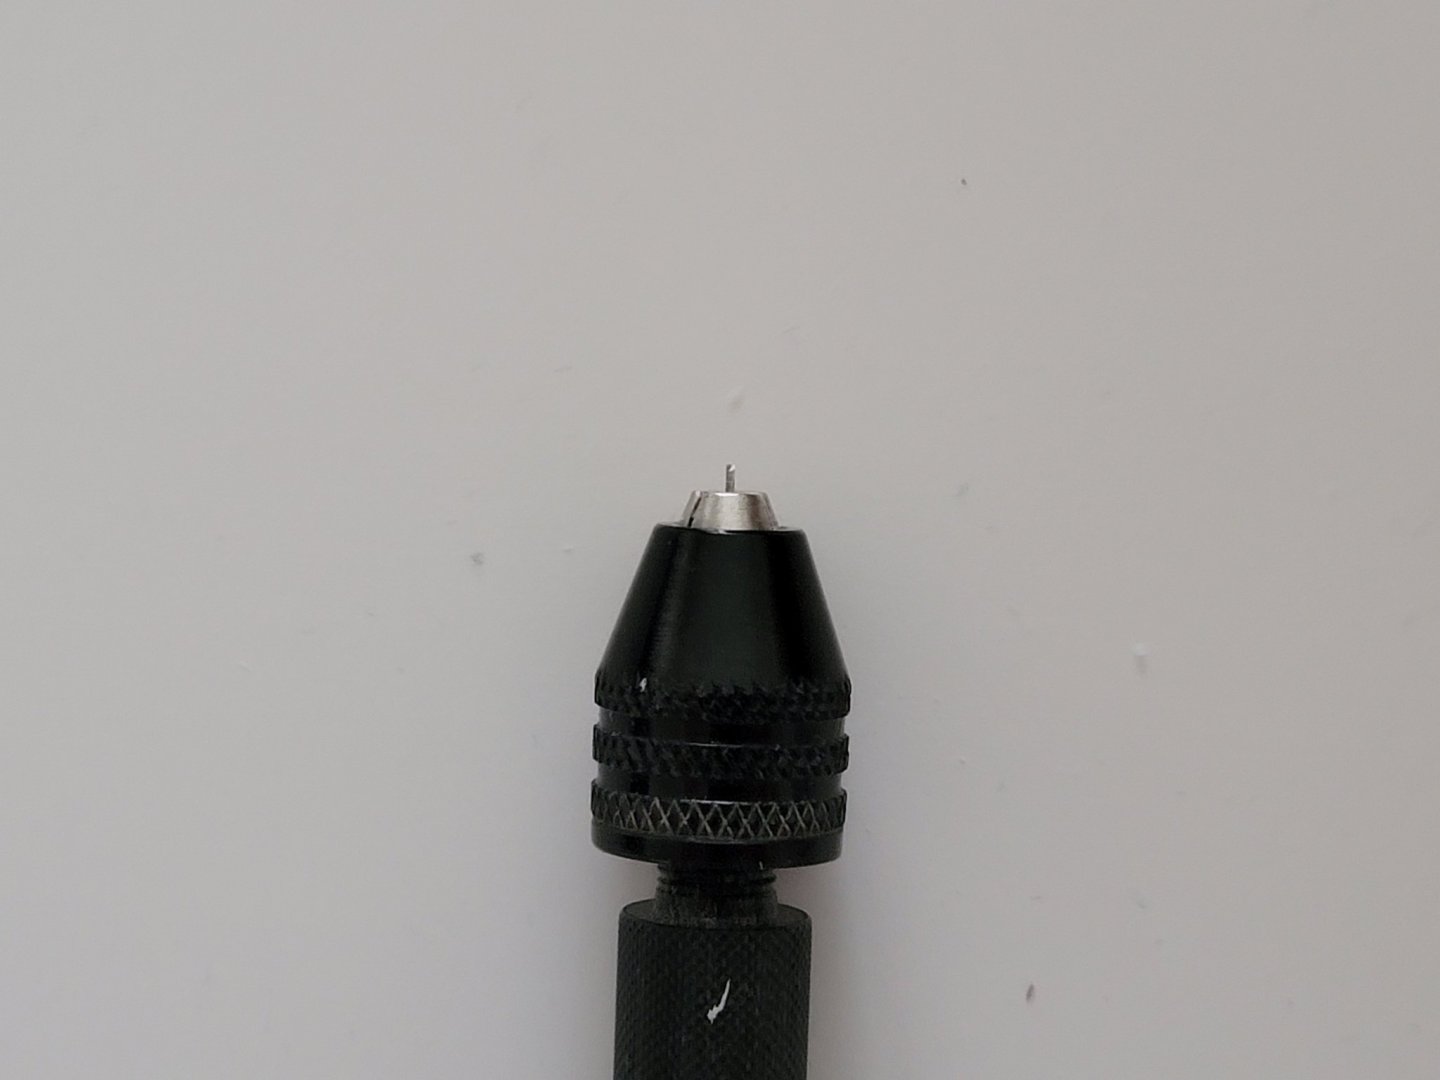
I am drilling them about half way through the planks (so about 1/32" deep give or take).
I have placed the drill bit like this so that the chuck can act as a stopper:
- Edwardkenway, abelson, Cathead and 2 others
-
5
-
23 hours ago, BobG said:
Looks fantastic! Treenailing is one of the most tedious and boring steps in model ship building but worth it in the end. Nice job!
Thank you Bob!
-
-
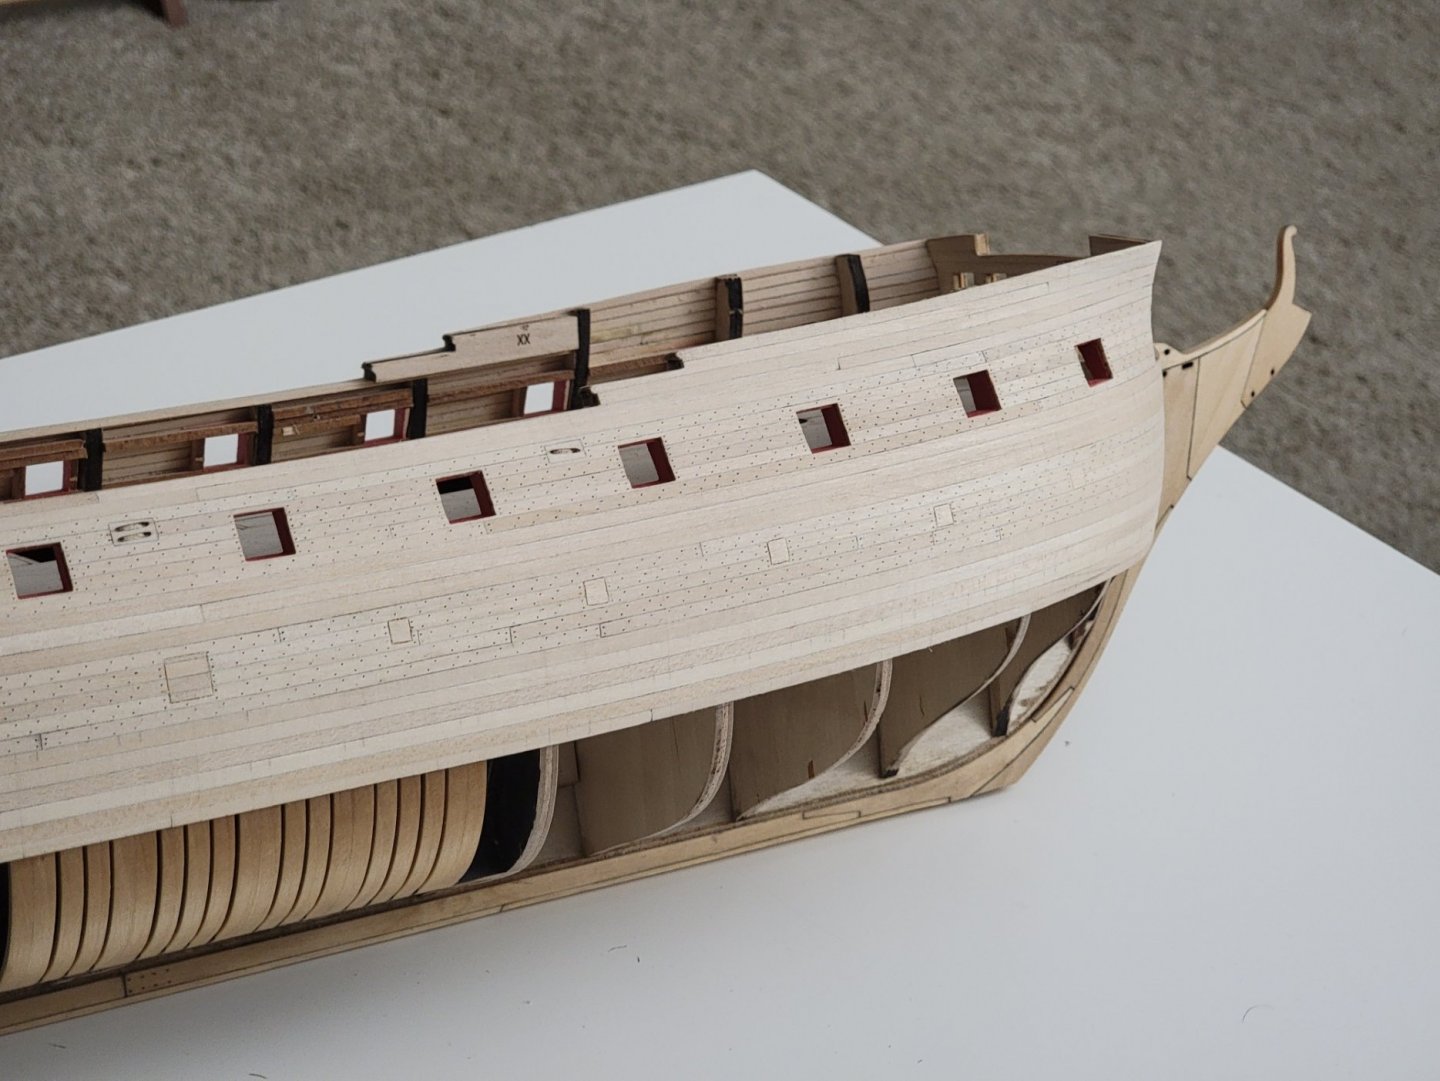
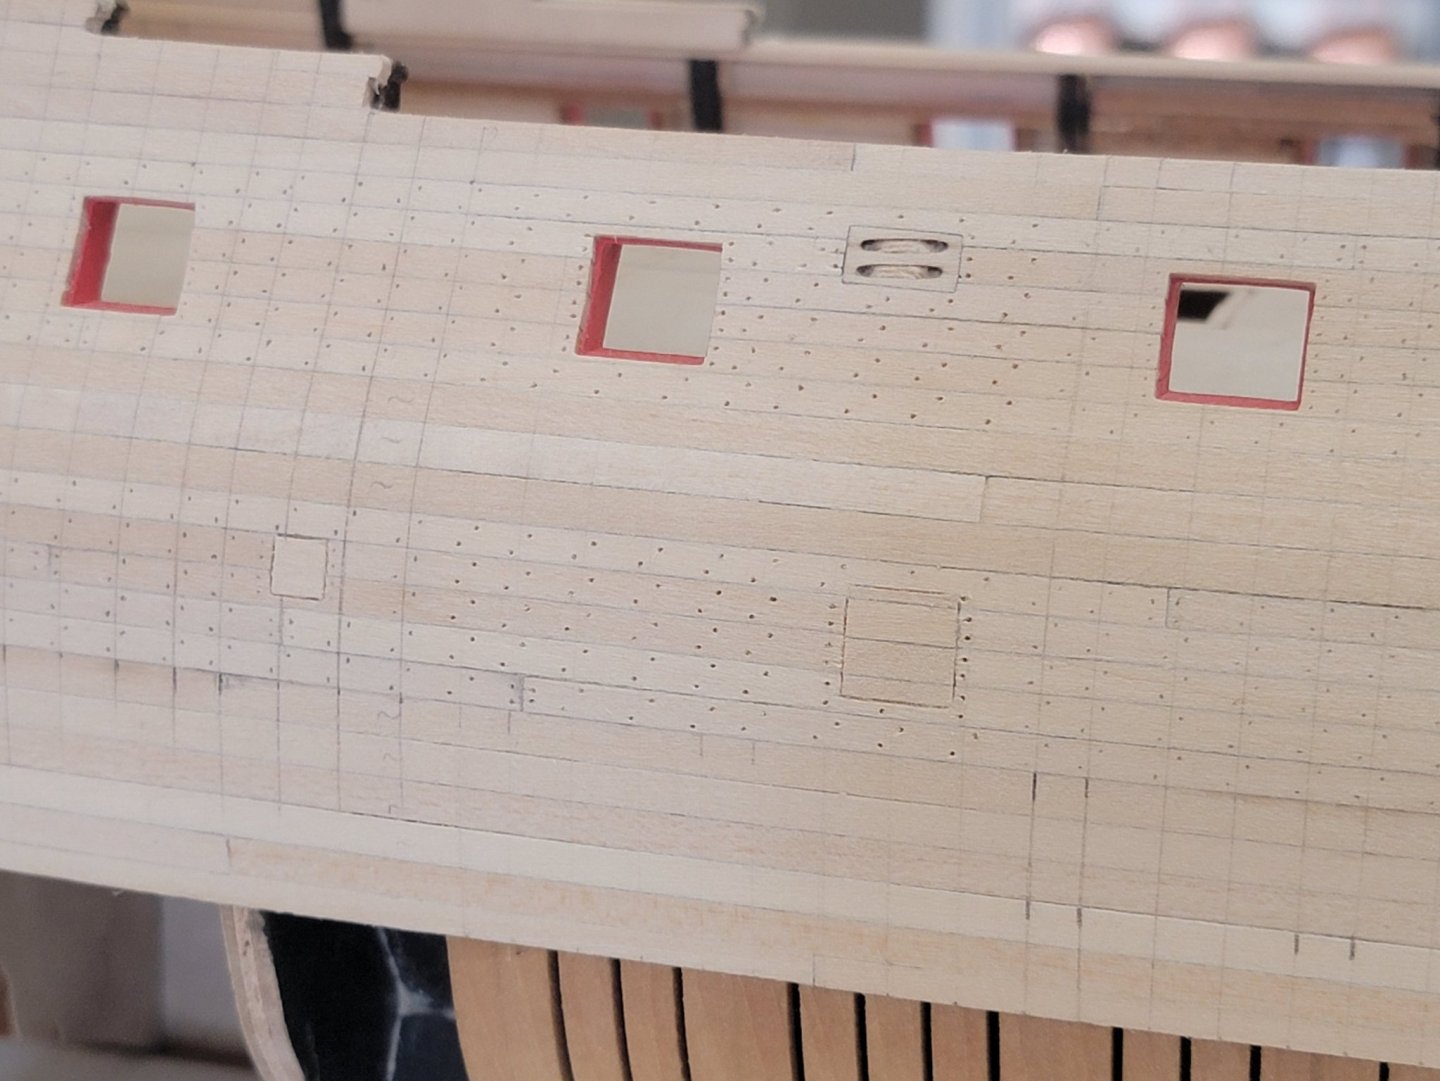
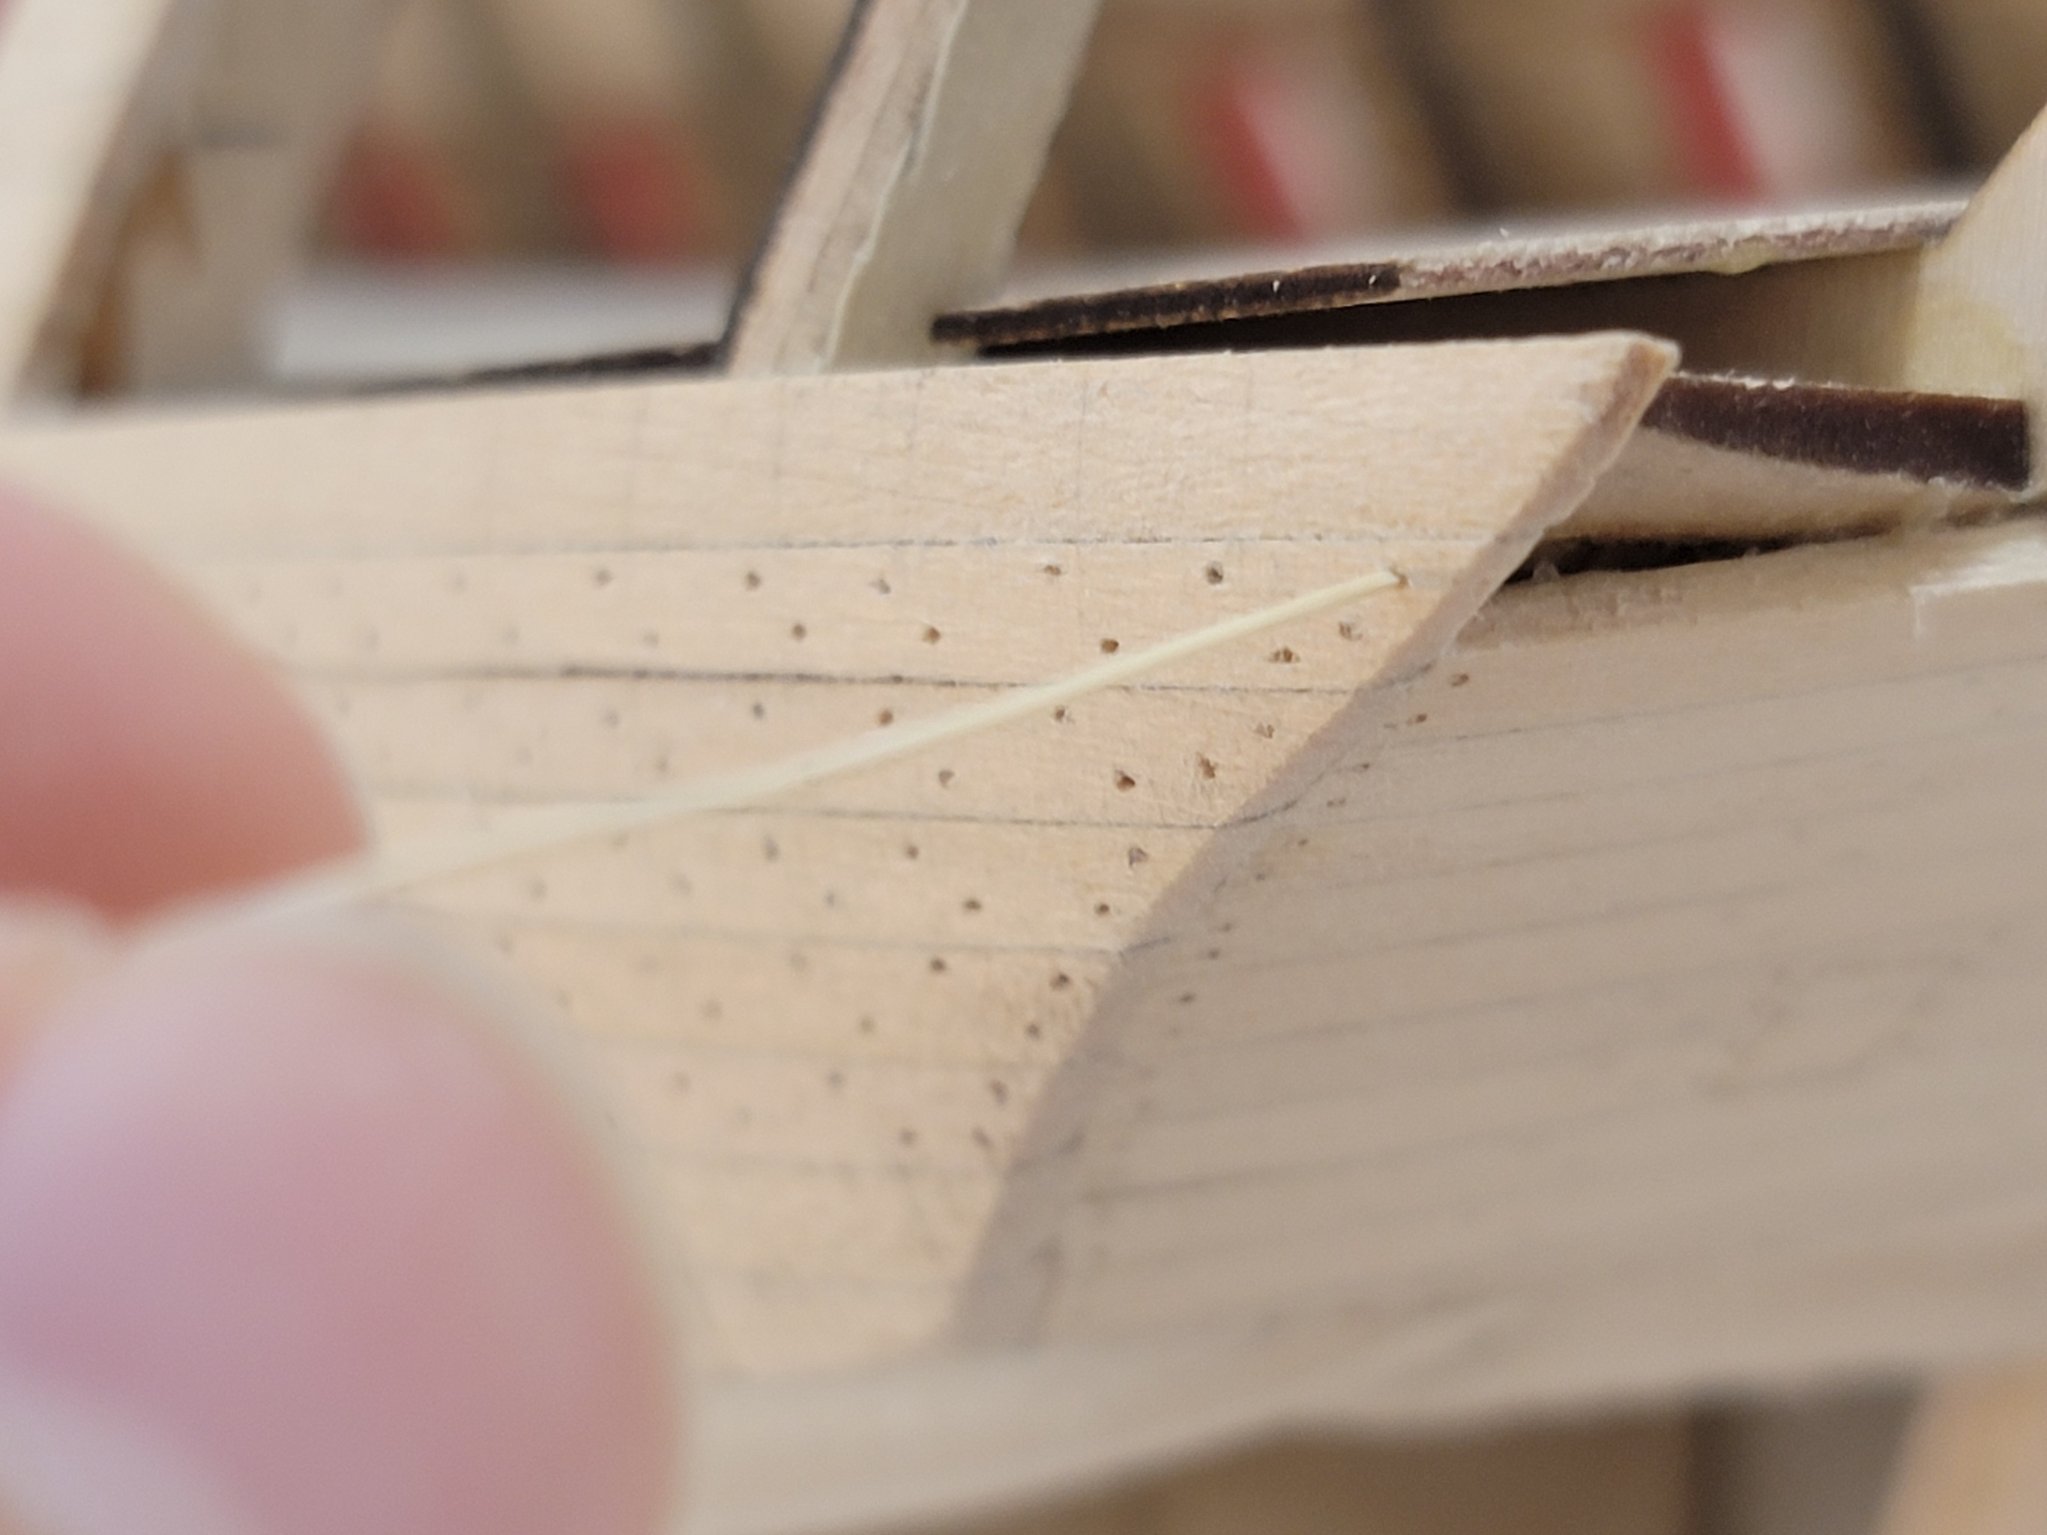
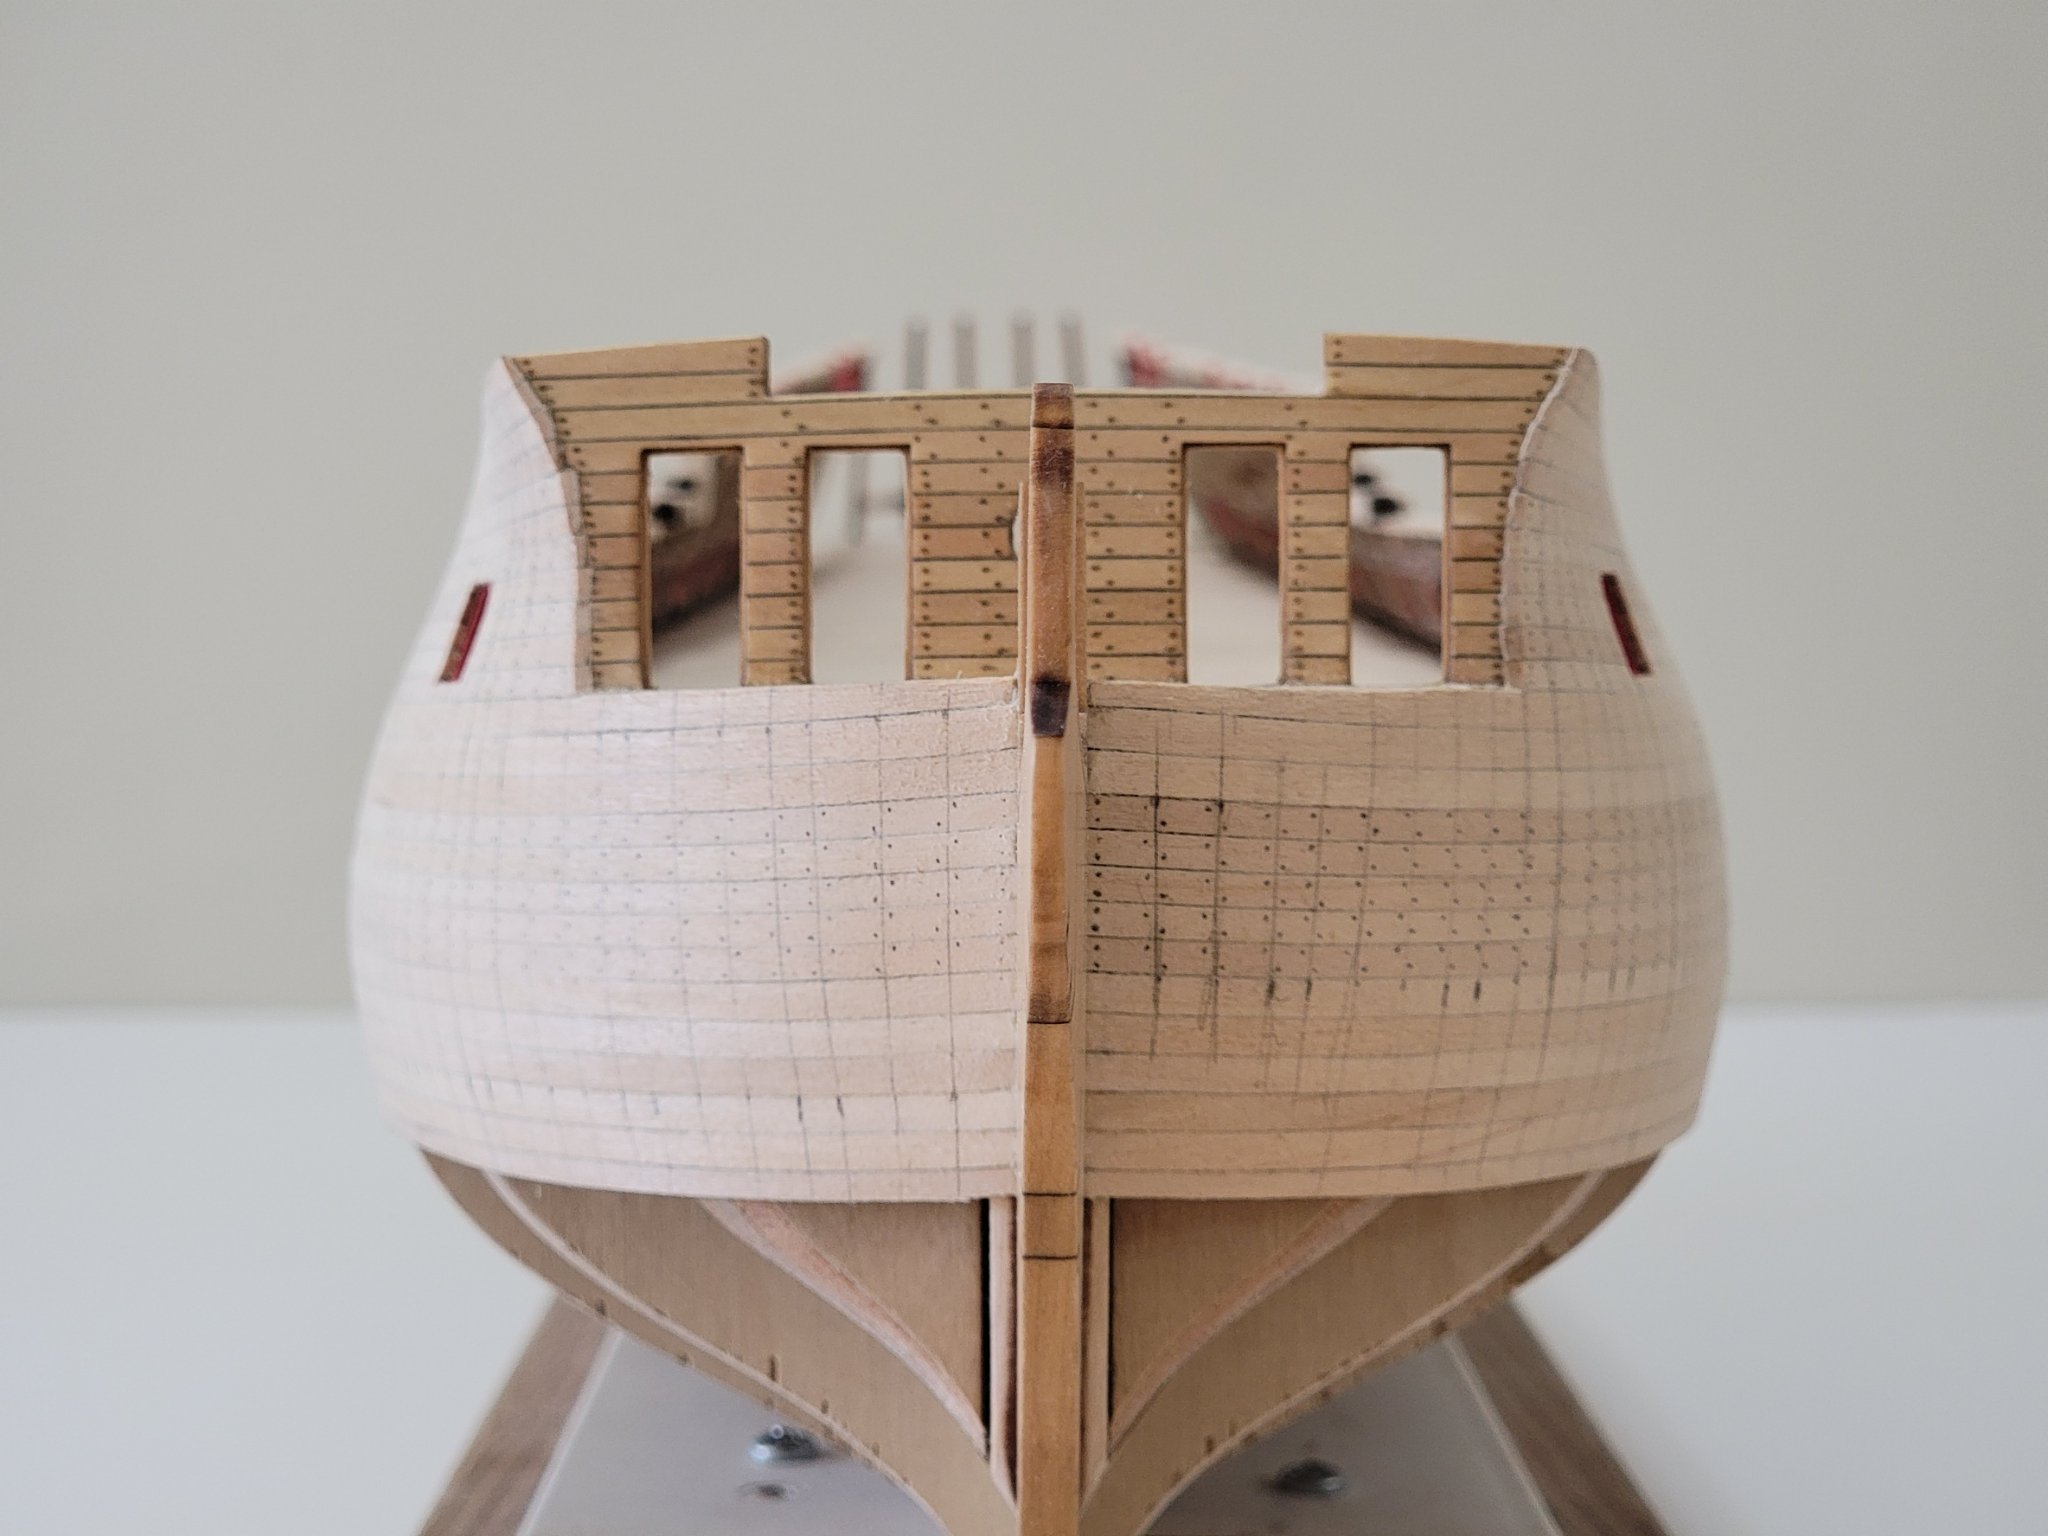
Finally finished marking out the treenails on the other side of the hull. Here are some pictures before some major hole drilling!


And I started drilling a small section. I found it easier to drill the holes with the model on my lap while sitting on a sofa rather than on the workbench
-
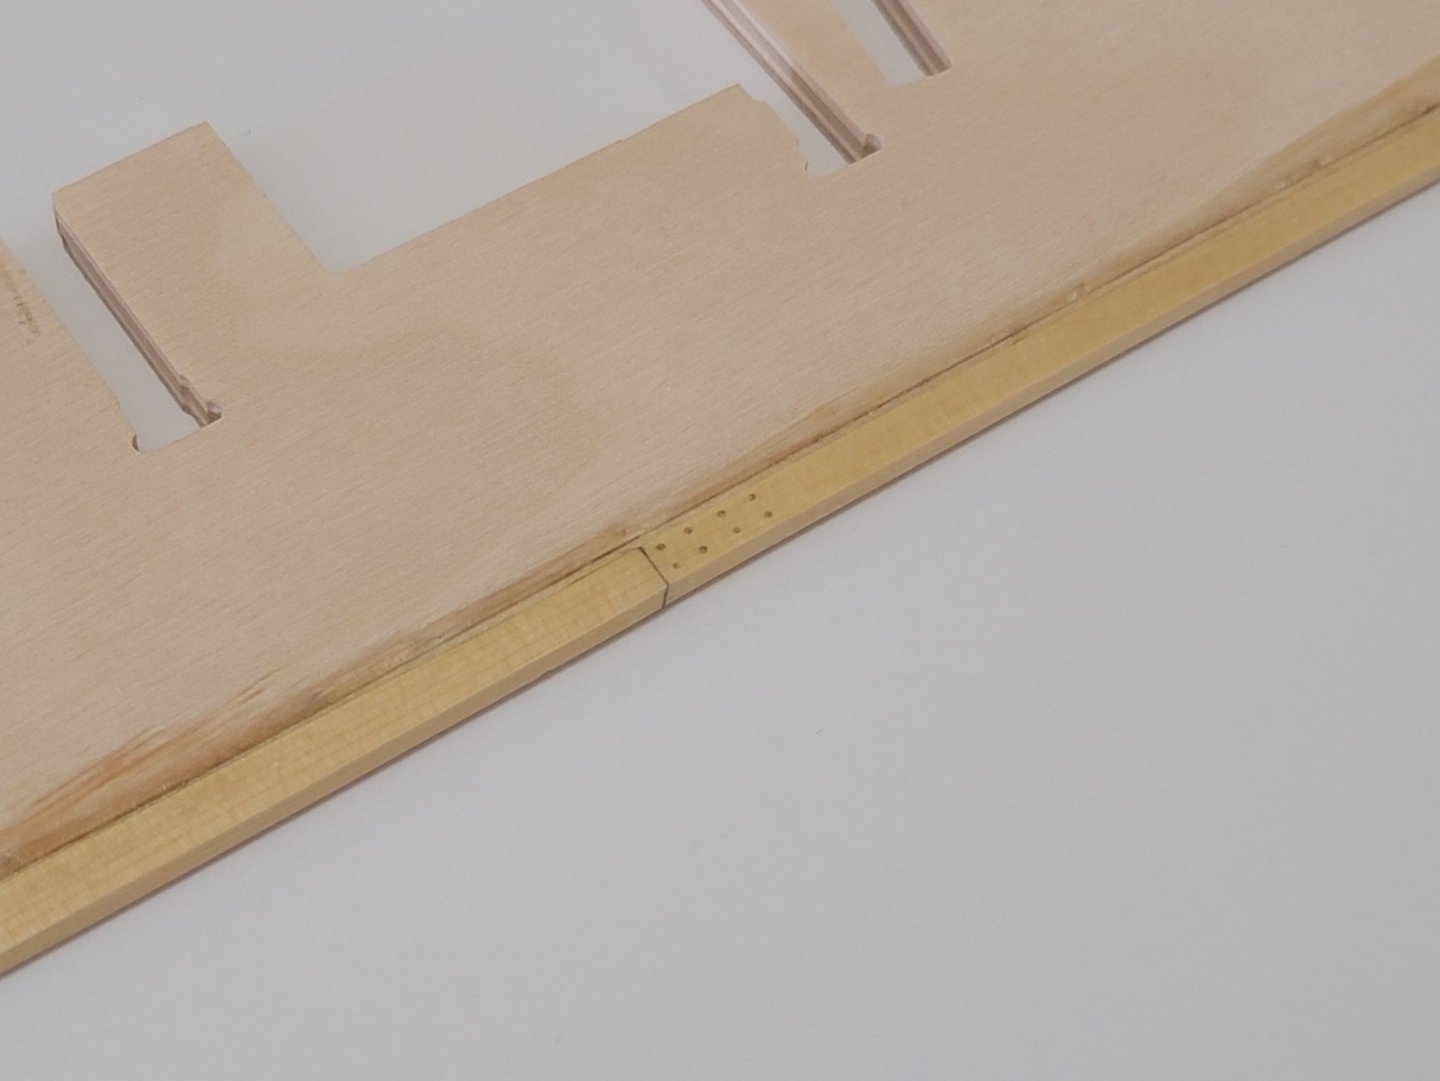
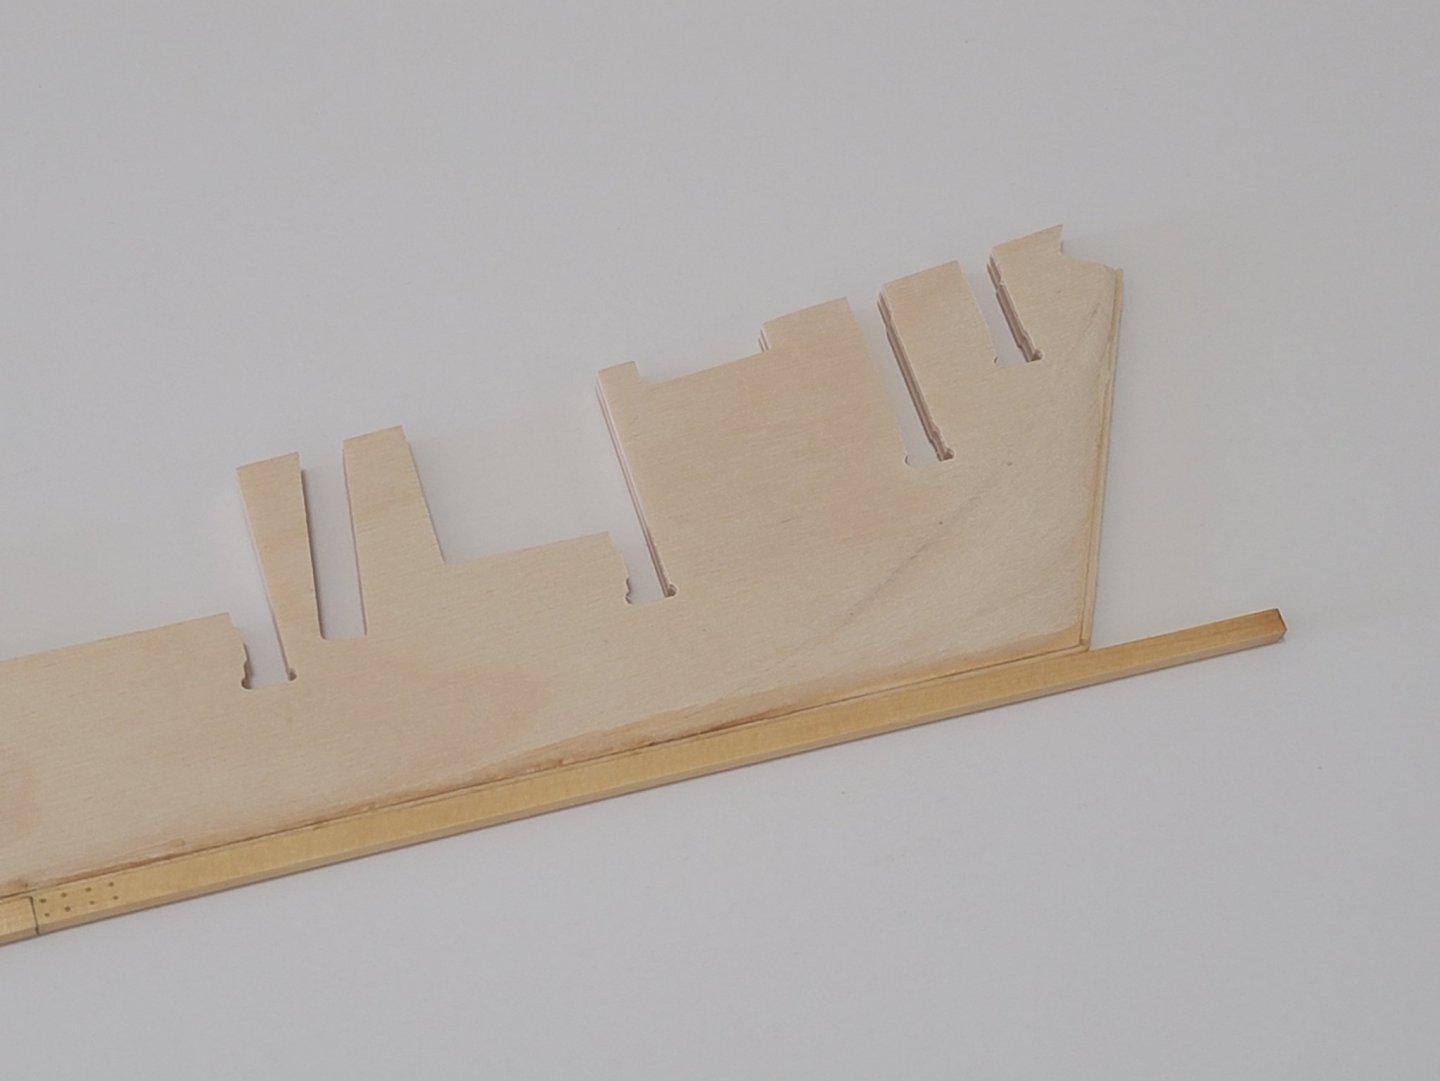
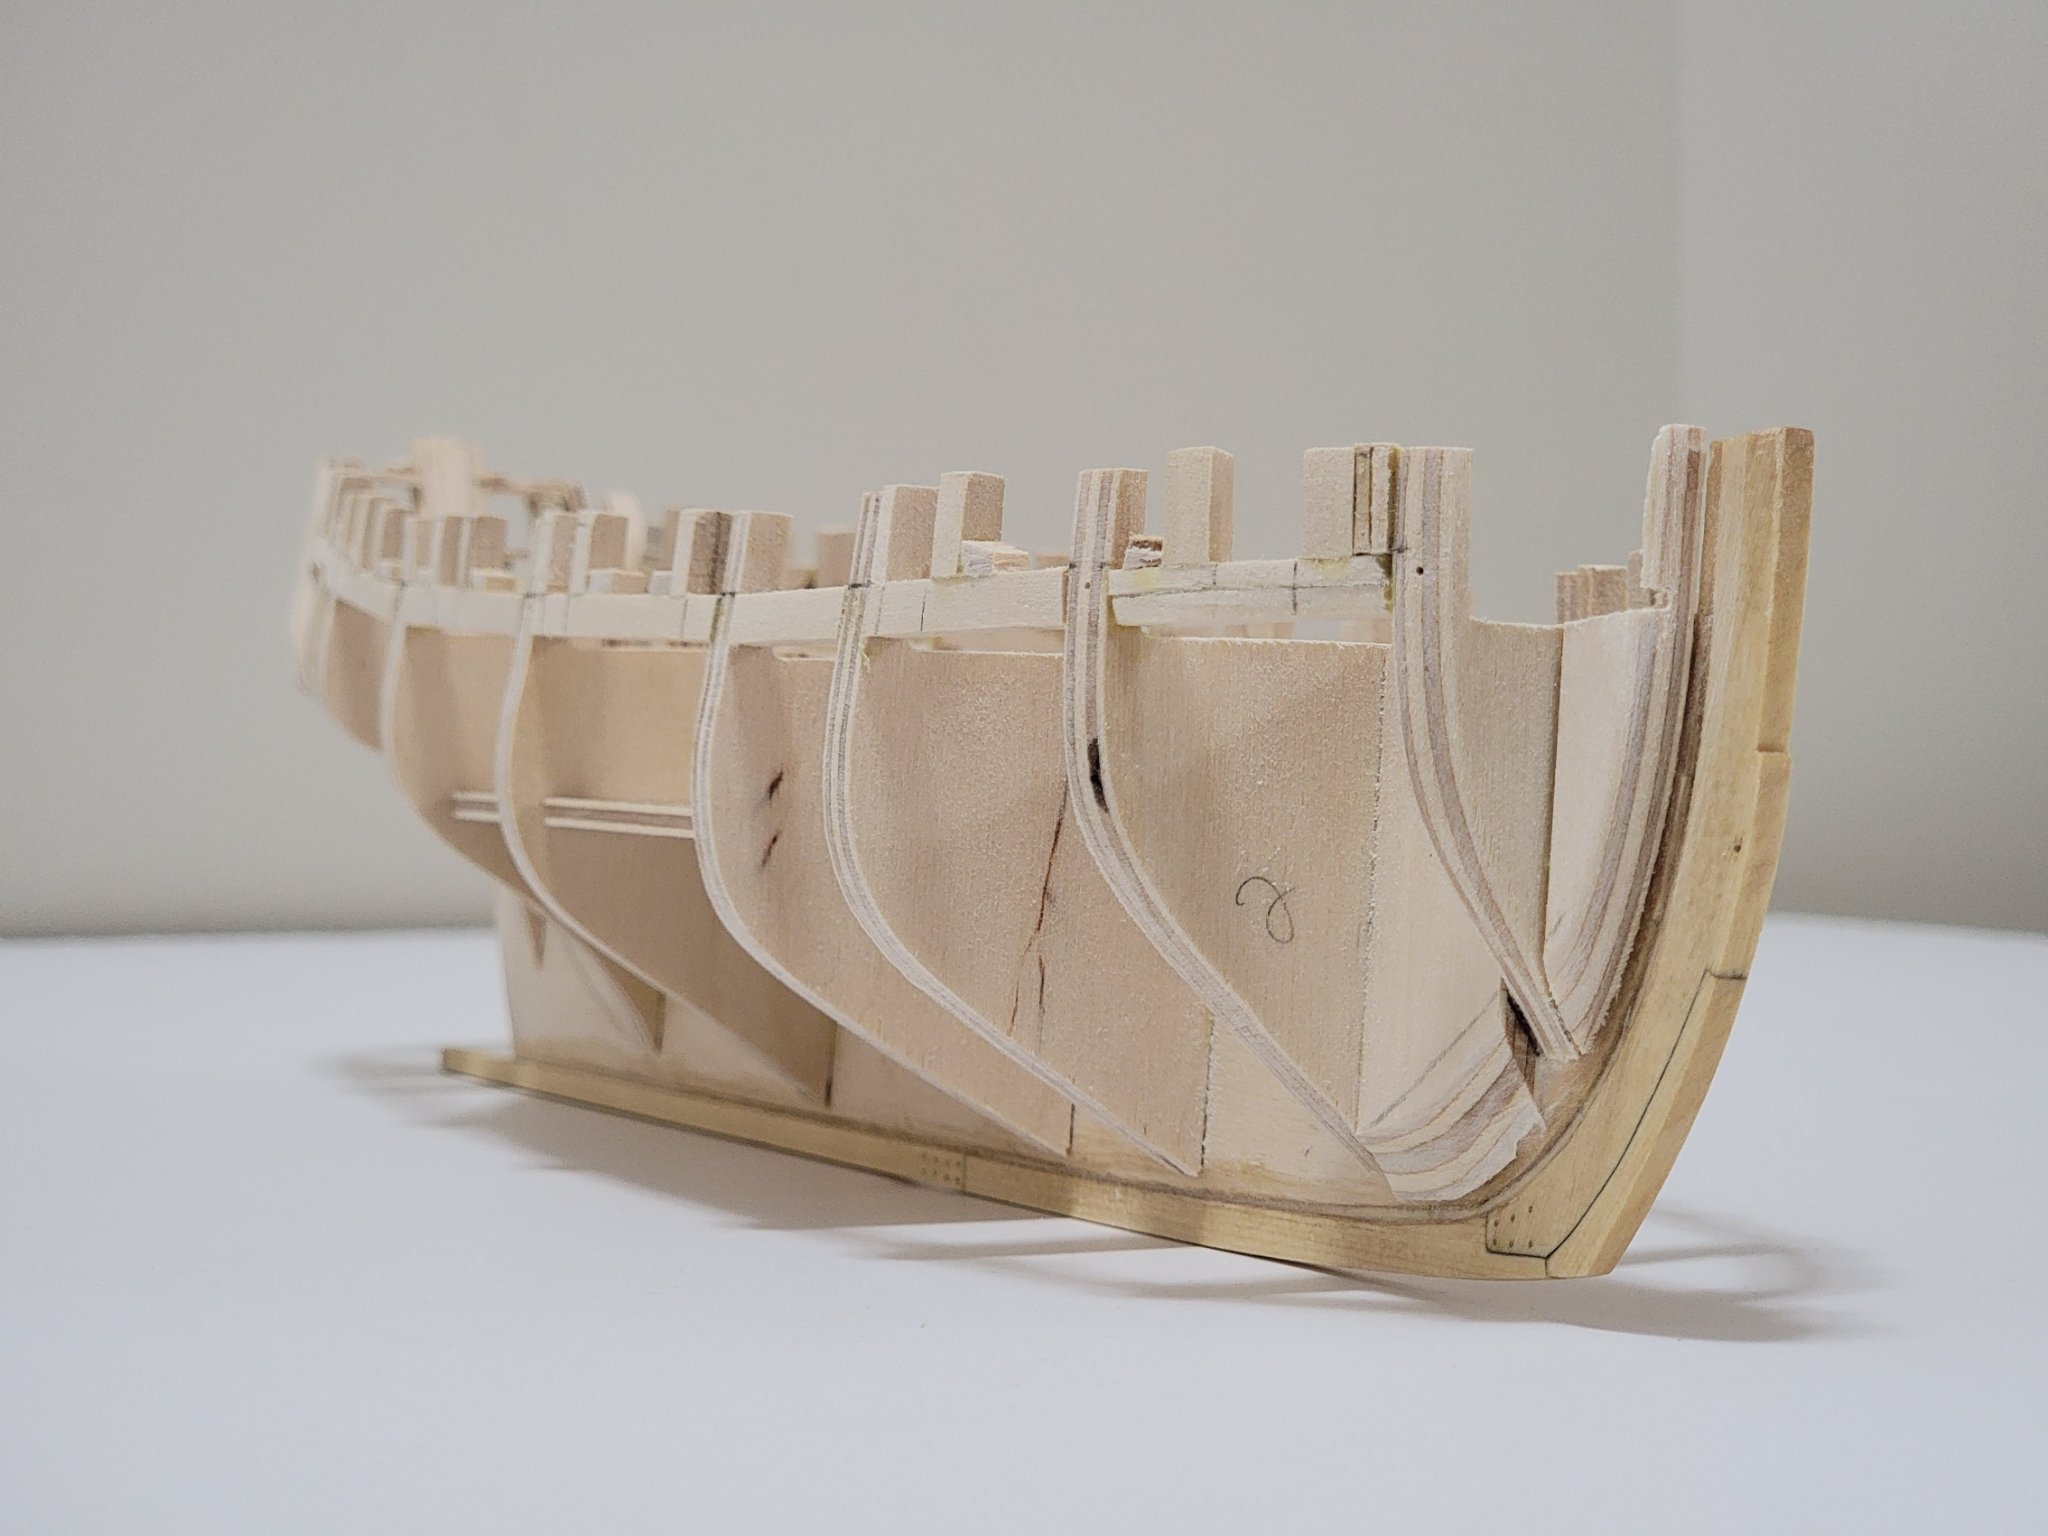
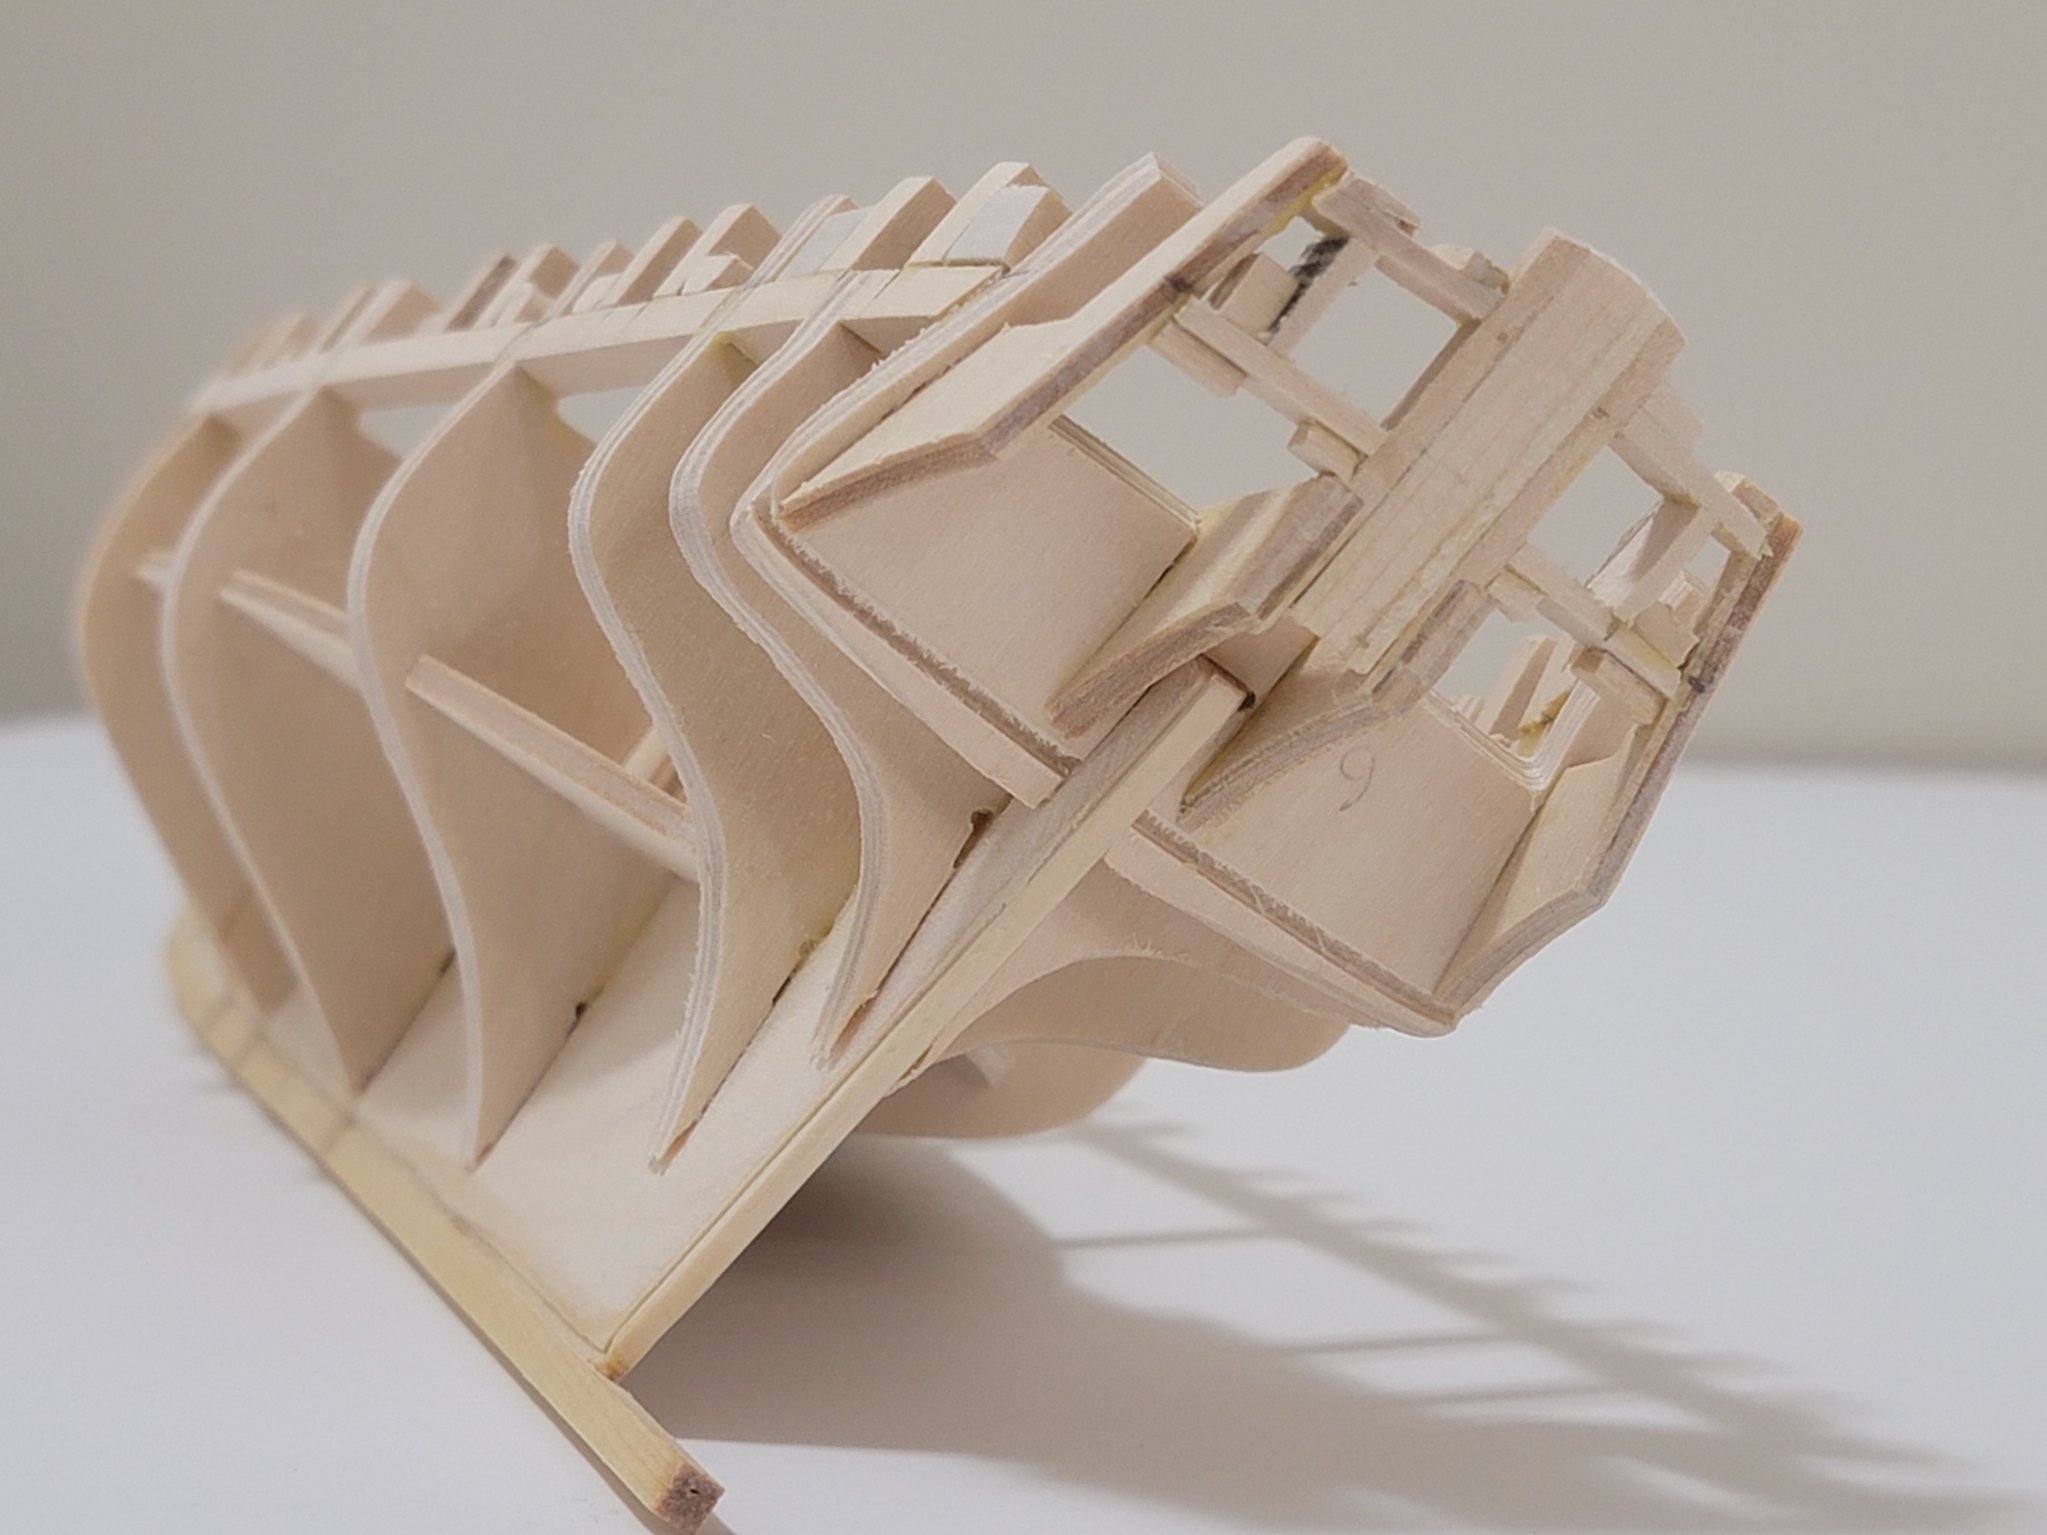
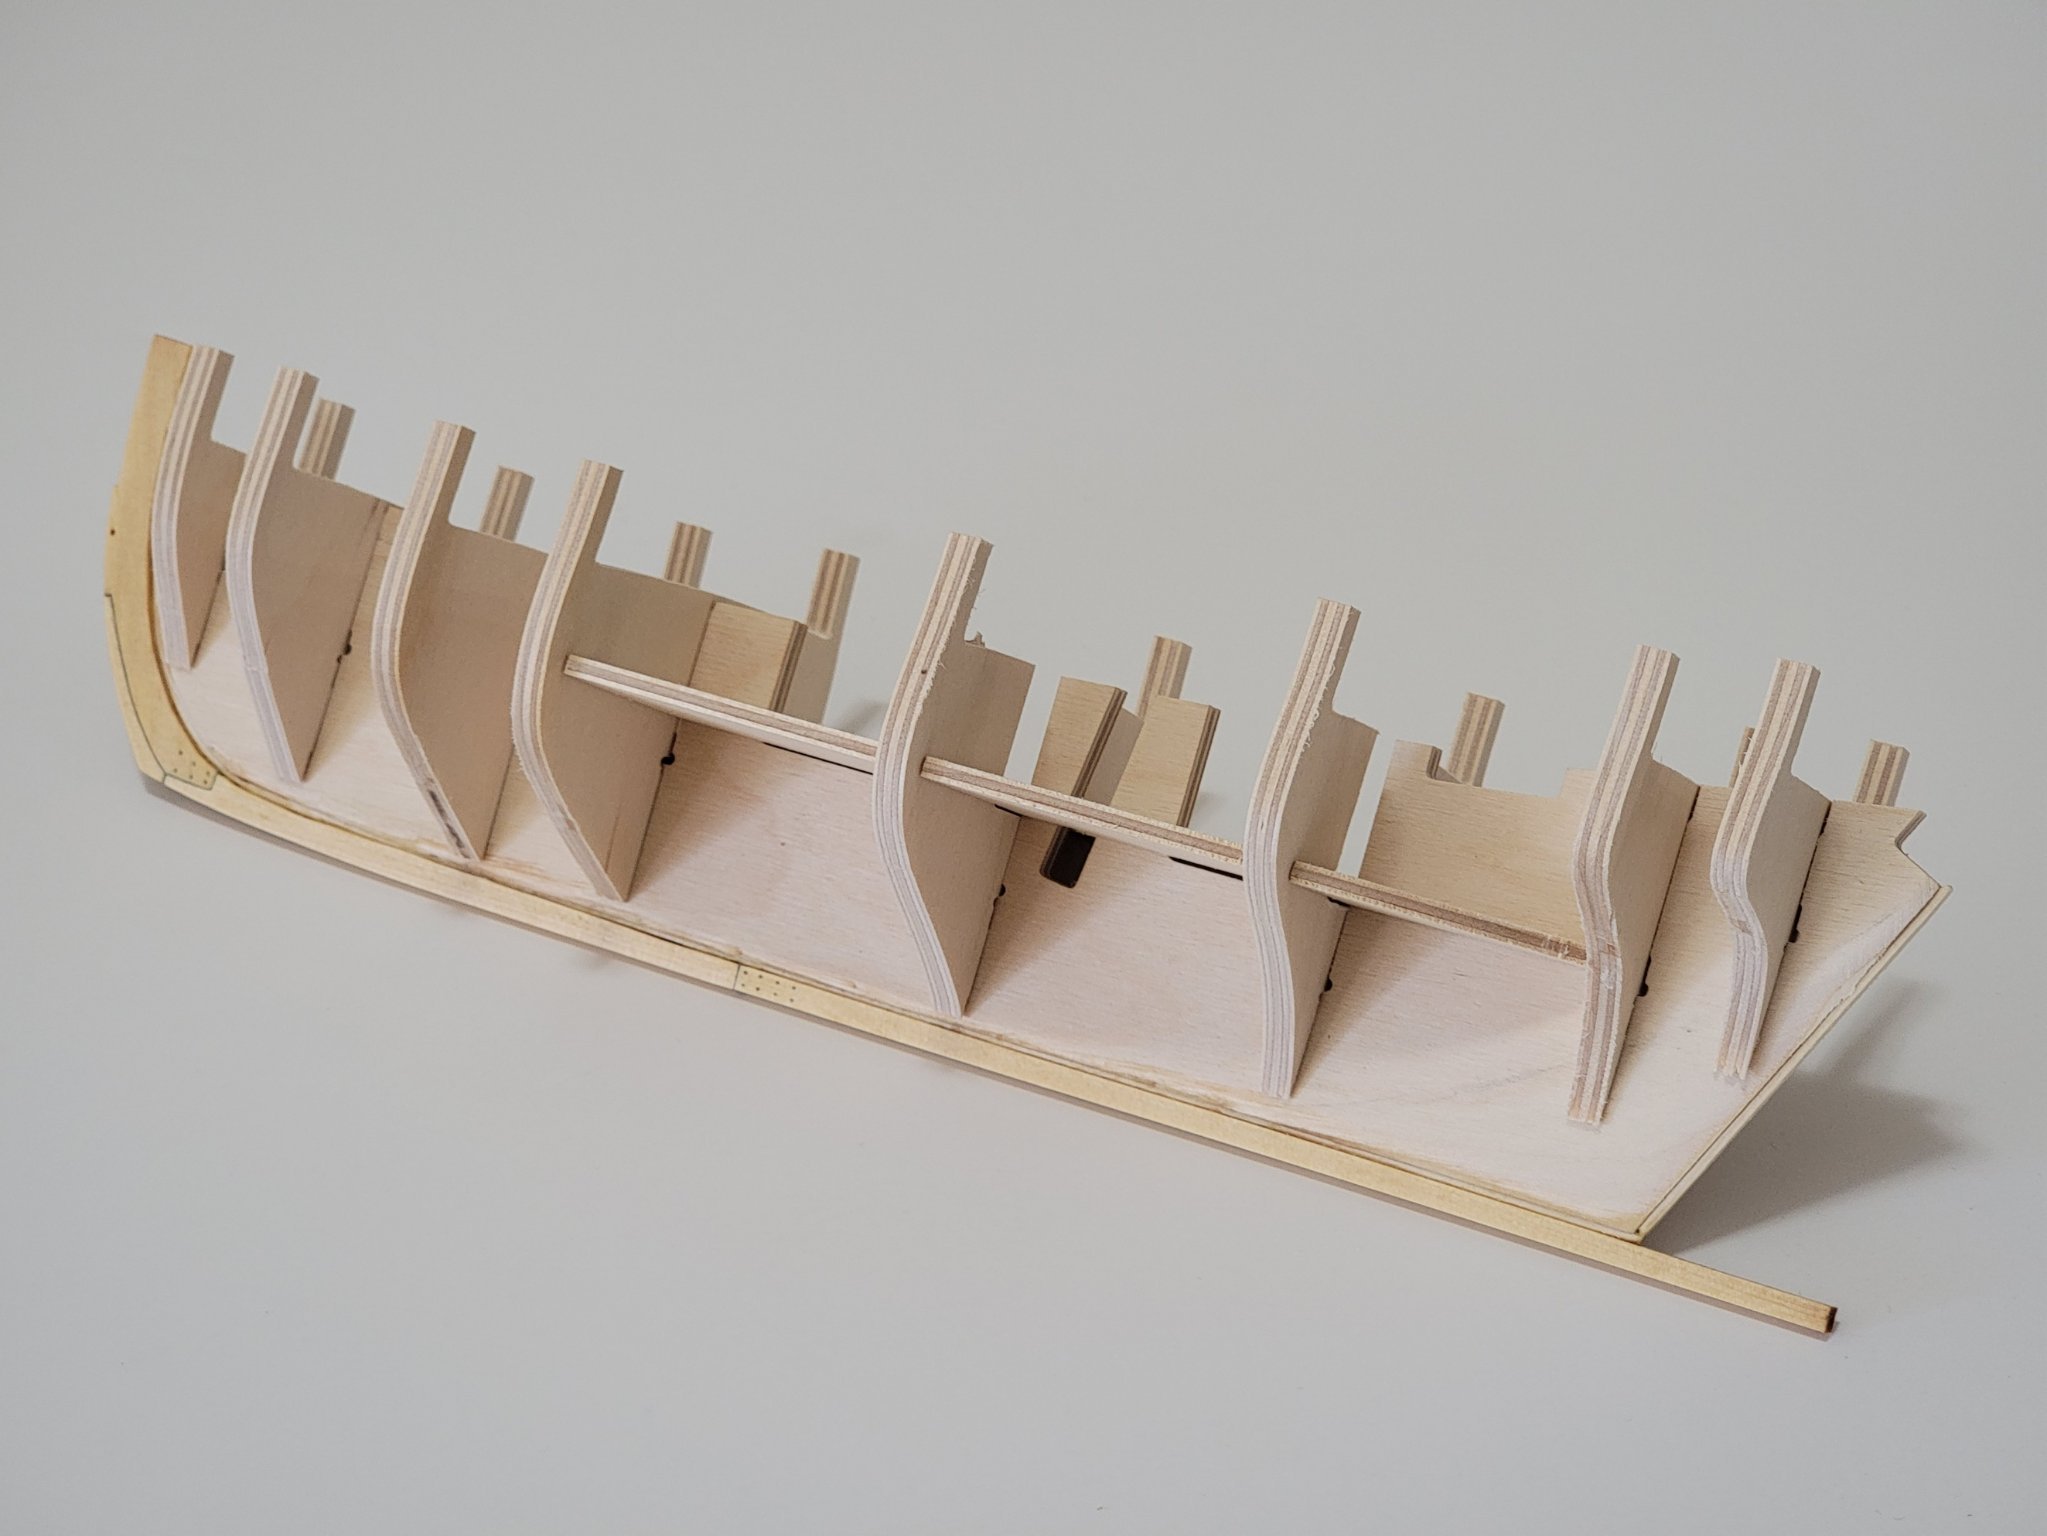
I finished treenailing (using drawn bamboo through a drawplate) and gluing the keel/stem onto the bulkhead former. Before gluing these in, I prebent and glued a strip of pine on the former as this will help in tucking in the planking onto the stem. I also created a small rabbet onto the stem to serve the same purpose. I then applied tung oil onto the keel and stem. I may try using wipe-on poly for the planking and decking for a bit of contrast, but let's see how it goes as I progress through with the build. So far I am liking how the wood looks with the oil.
Here are some pics showing this:


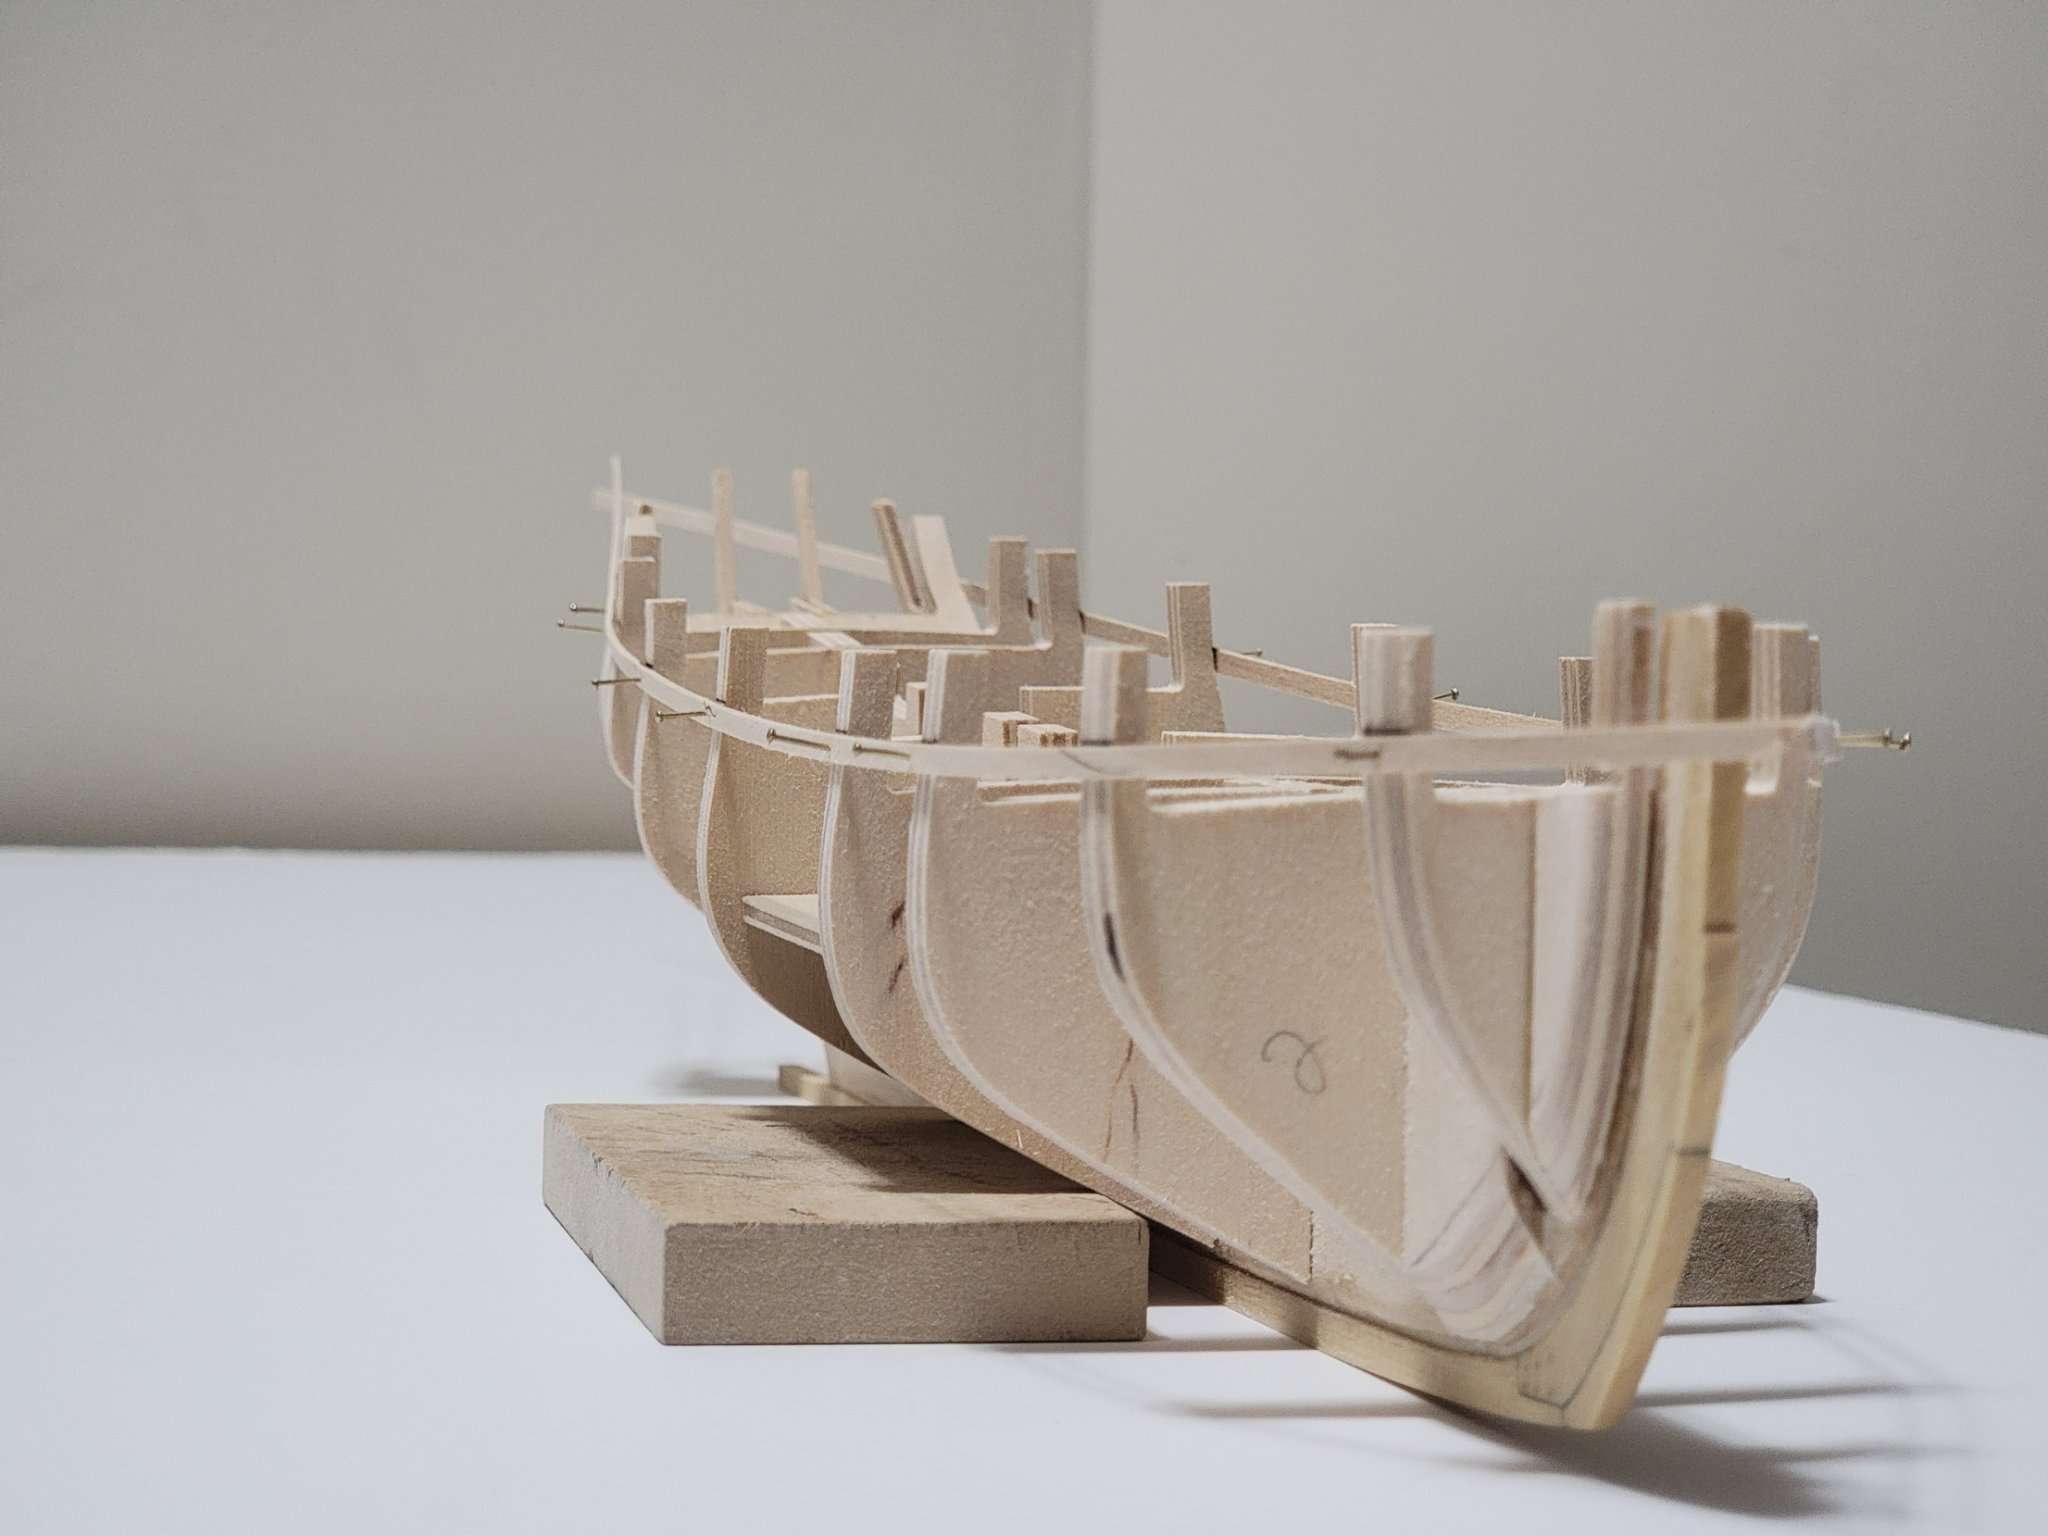
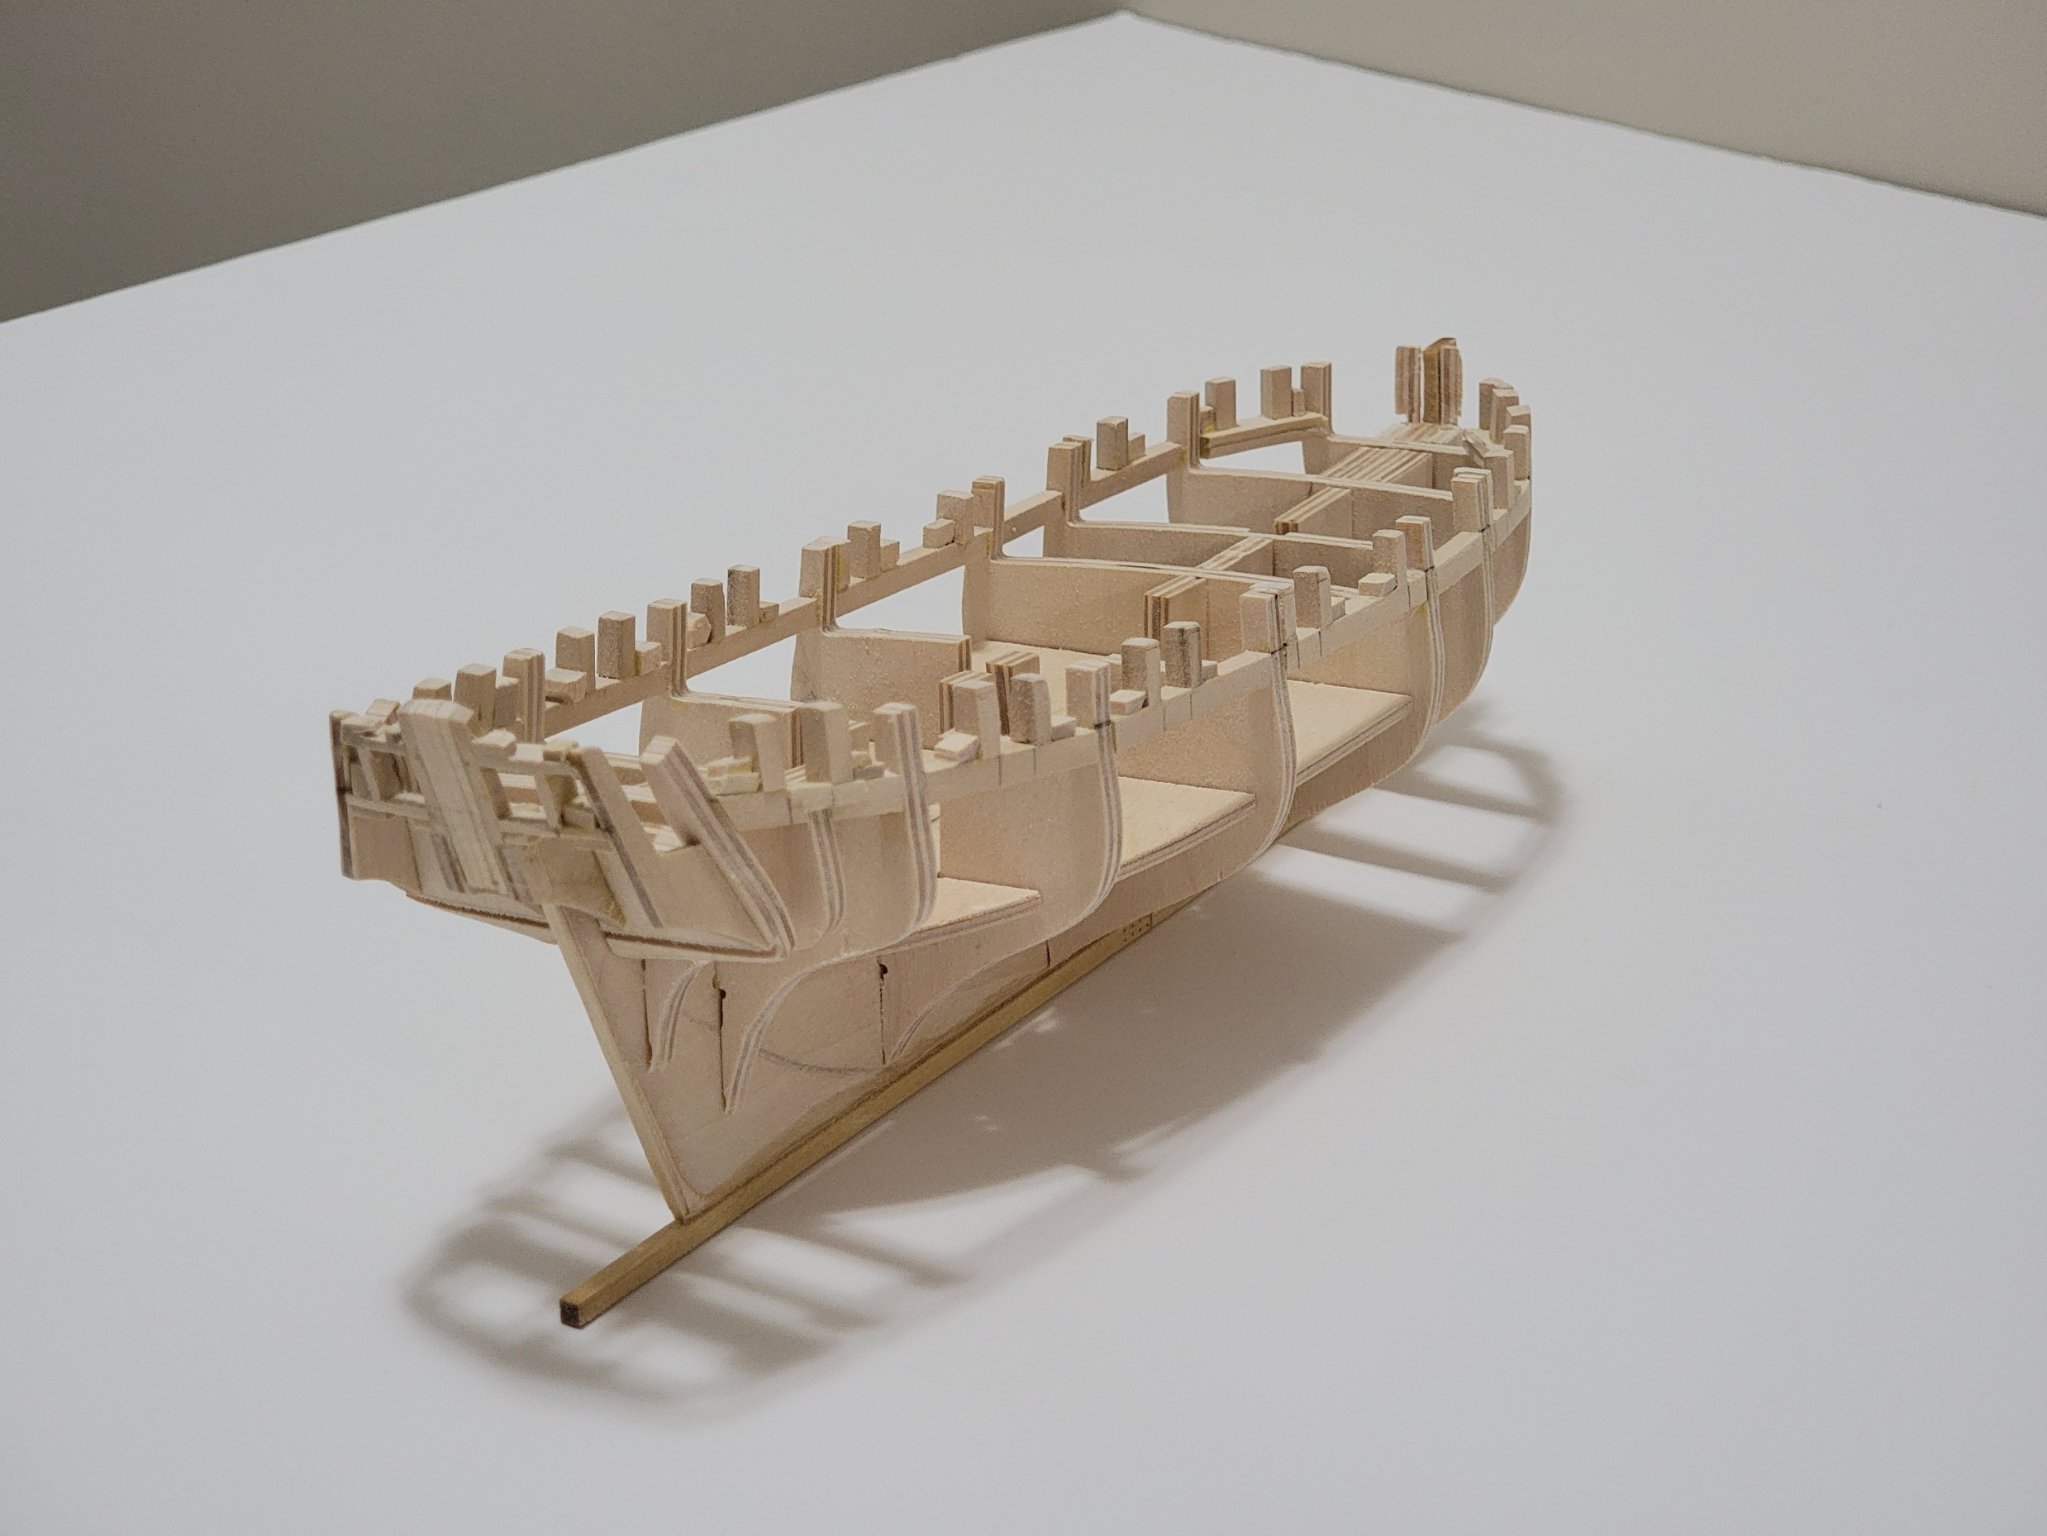
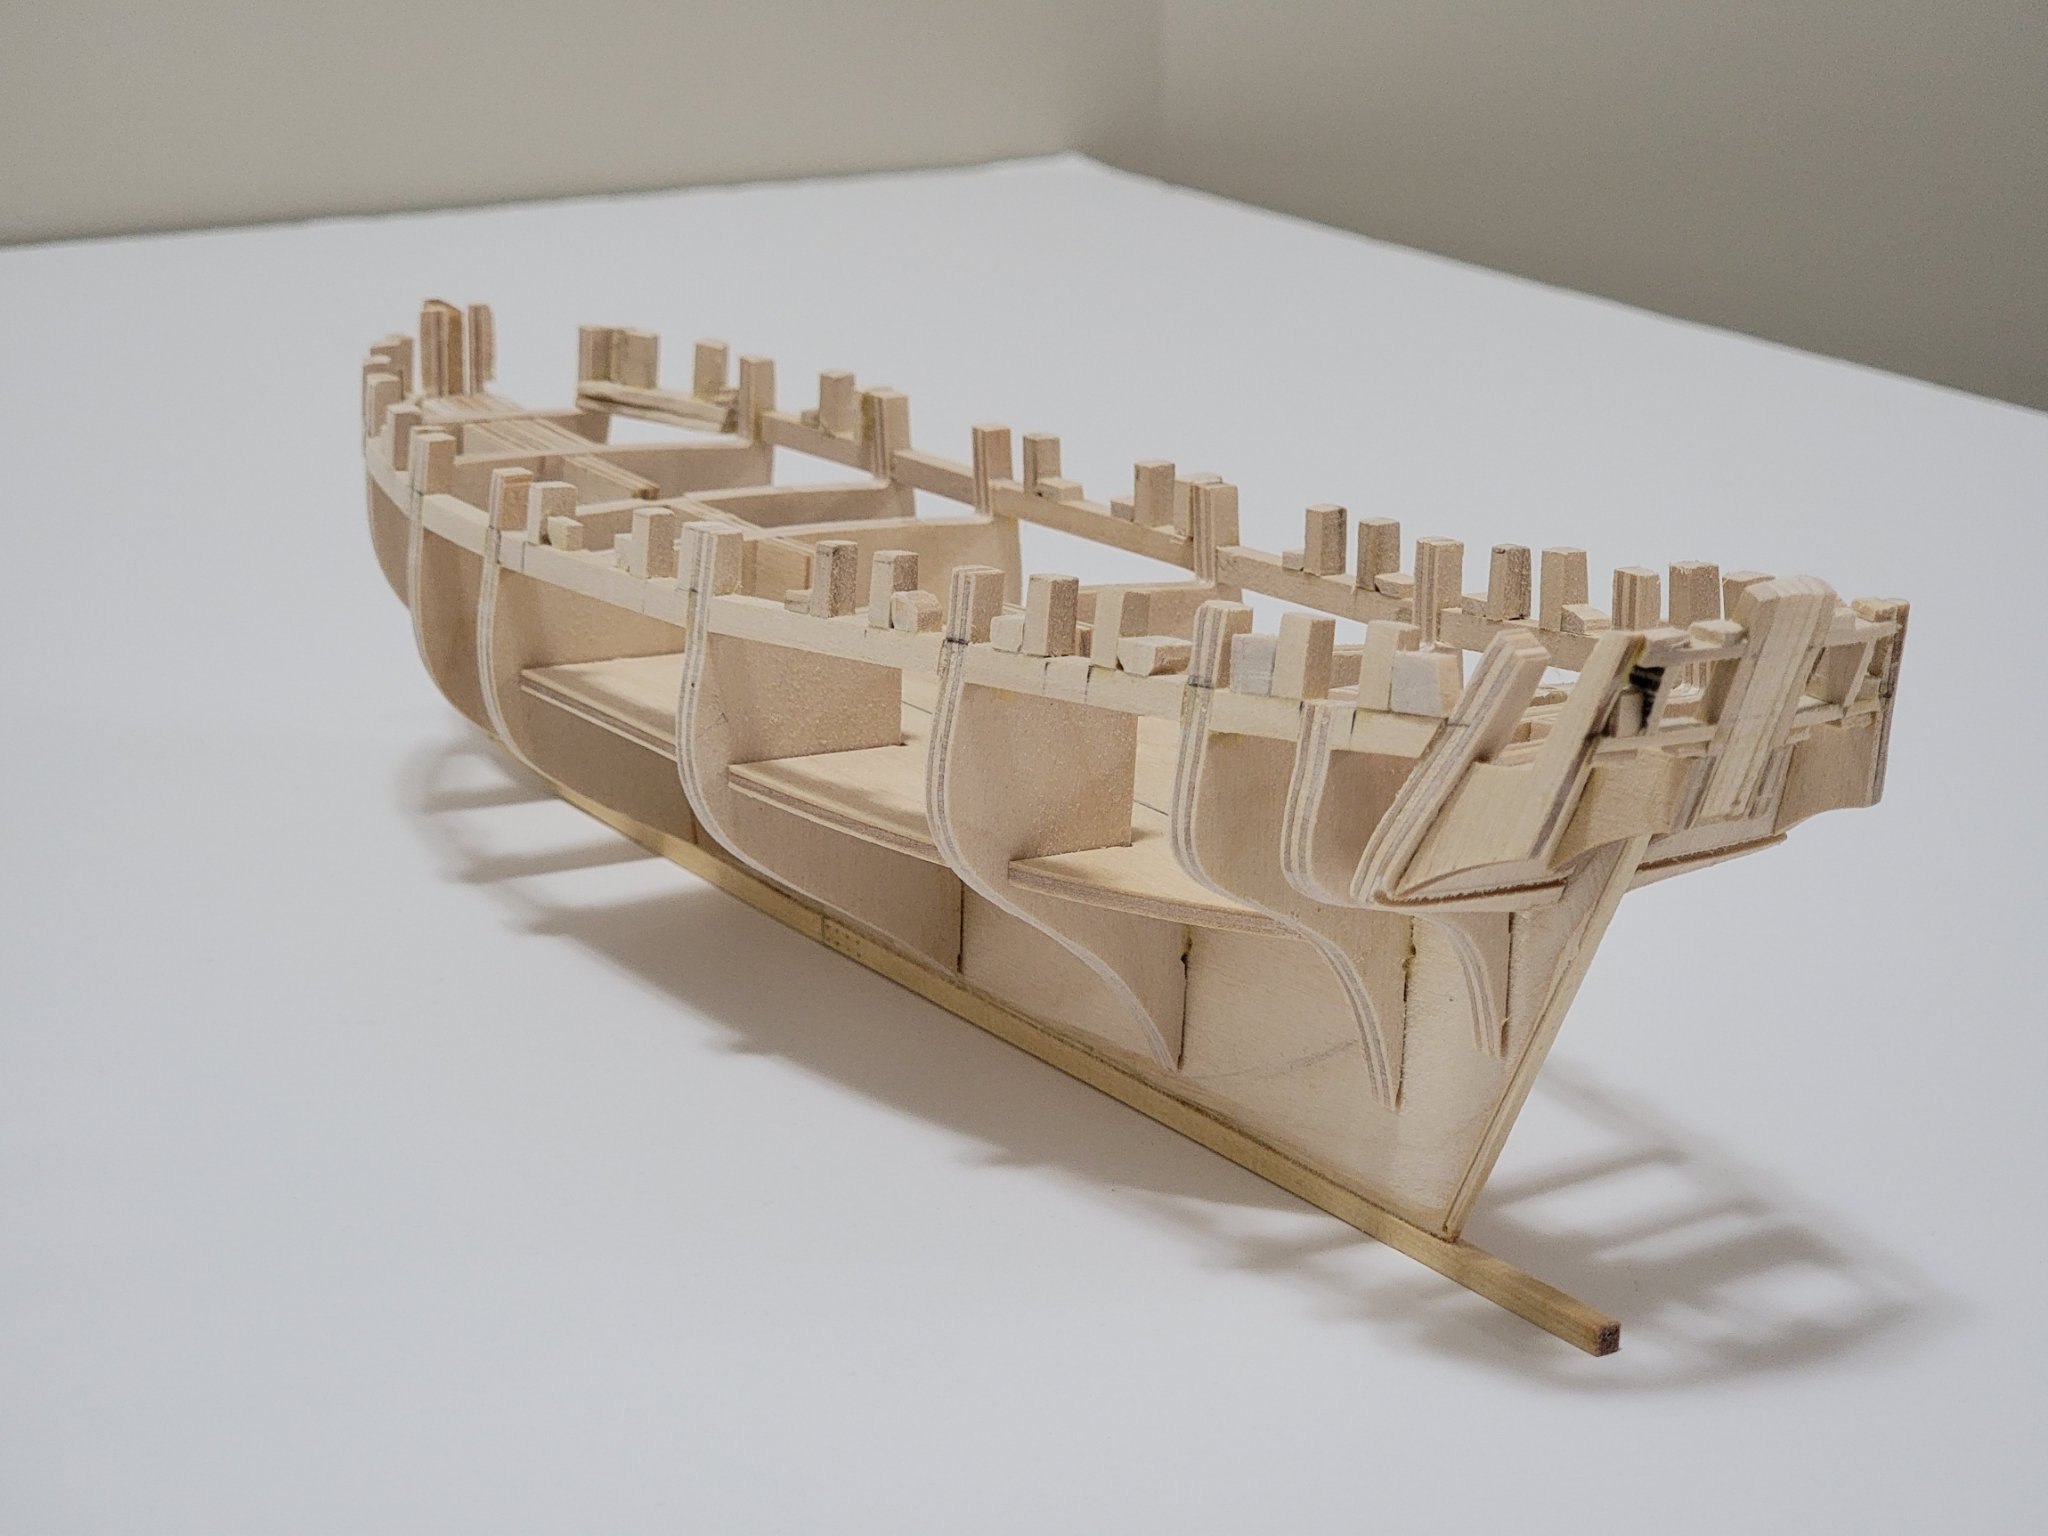
And here are some pictures with the bulkheads dry-fitted:

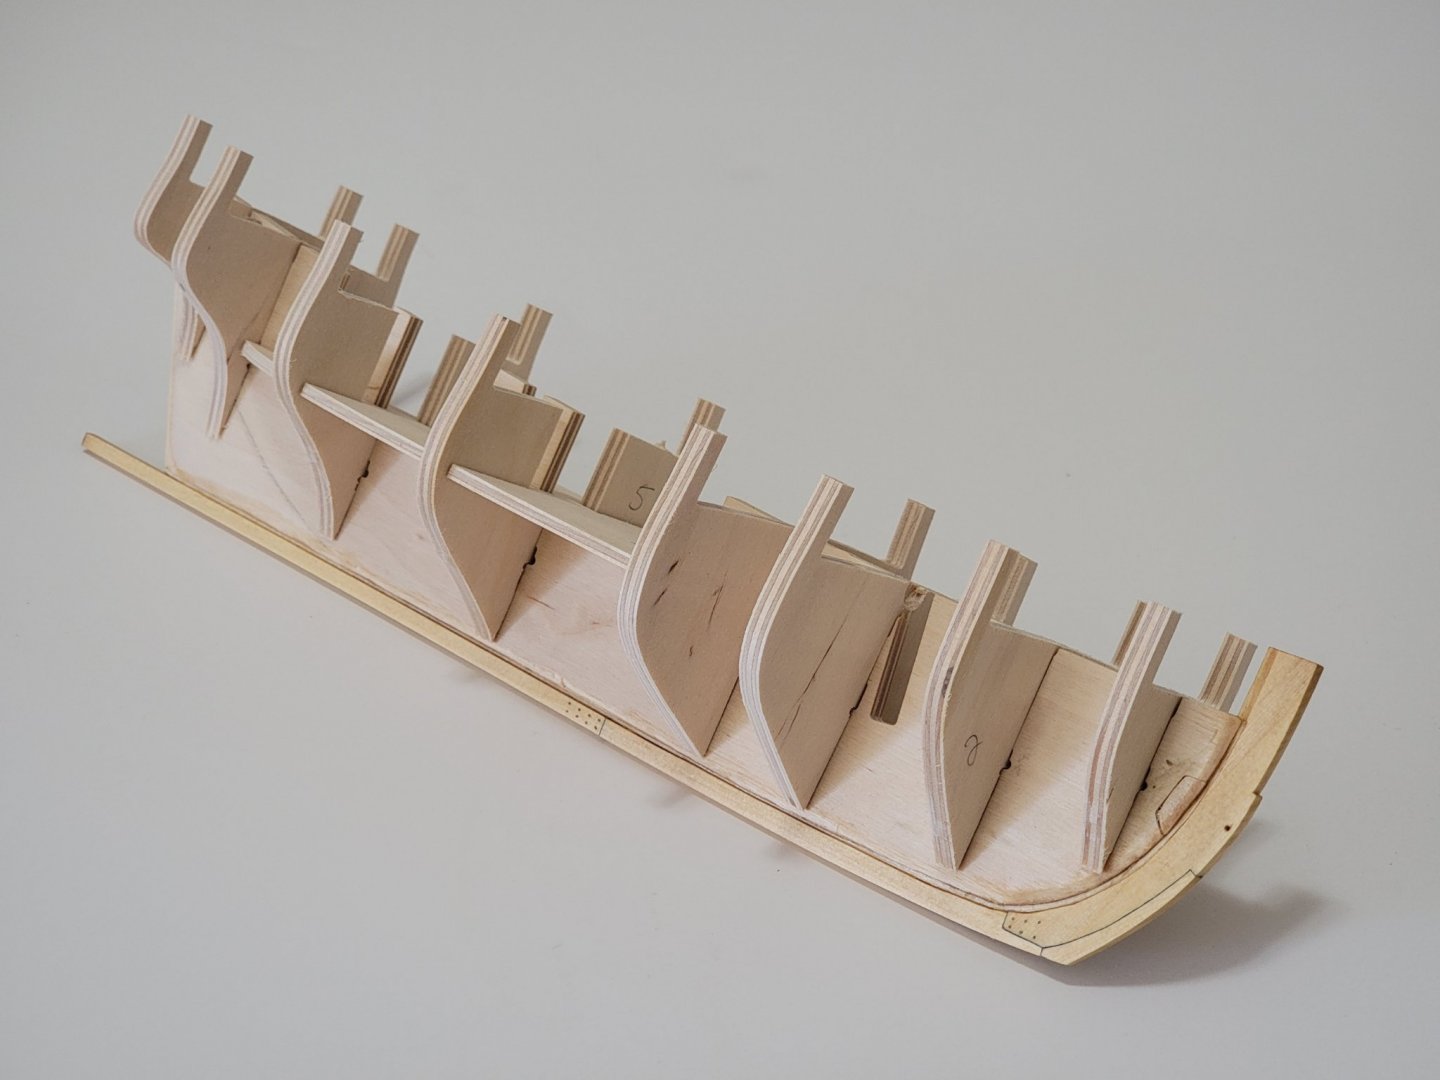
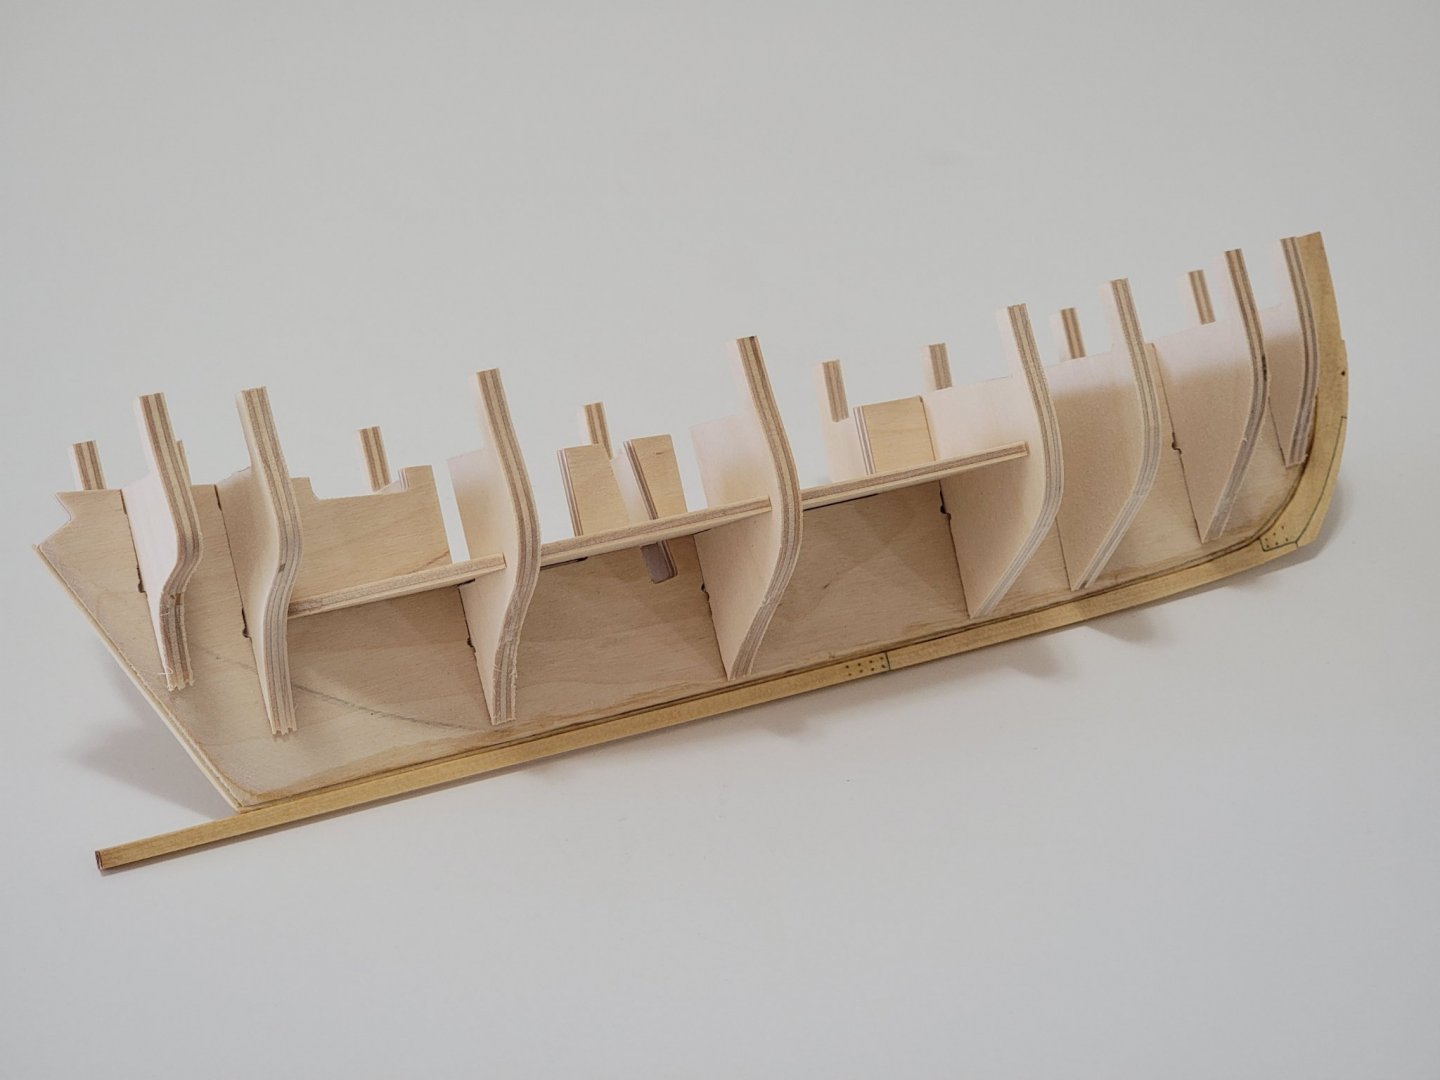
I'll next start gluing in the bulkheads, begin decking the lower deck area, then will start framing the gun ports
-
-
Wow!!!! The planking looks amazing! Your work is really inspiring. I may also hire you to plank my Confederacy 😁
-
4 hours ago, Chuck said:
Nice start. Great plan to dump that hull sheet. You wont get a true hull shape with it. Carefully planking a single layer will give you much better results.
Thanks Chuck! I hope it goes smoothly. I'll be using your Cheerful practicum a lot for this project.
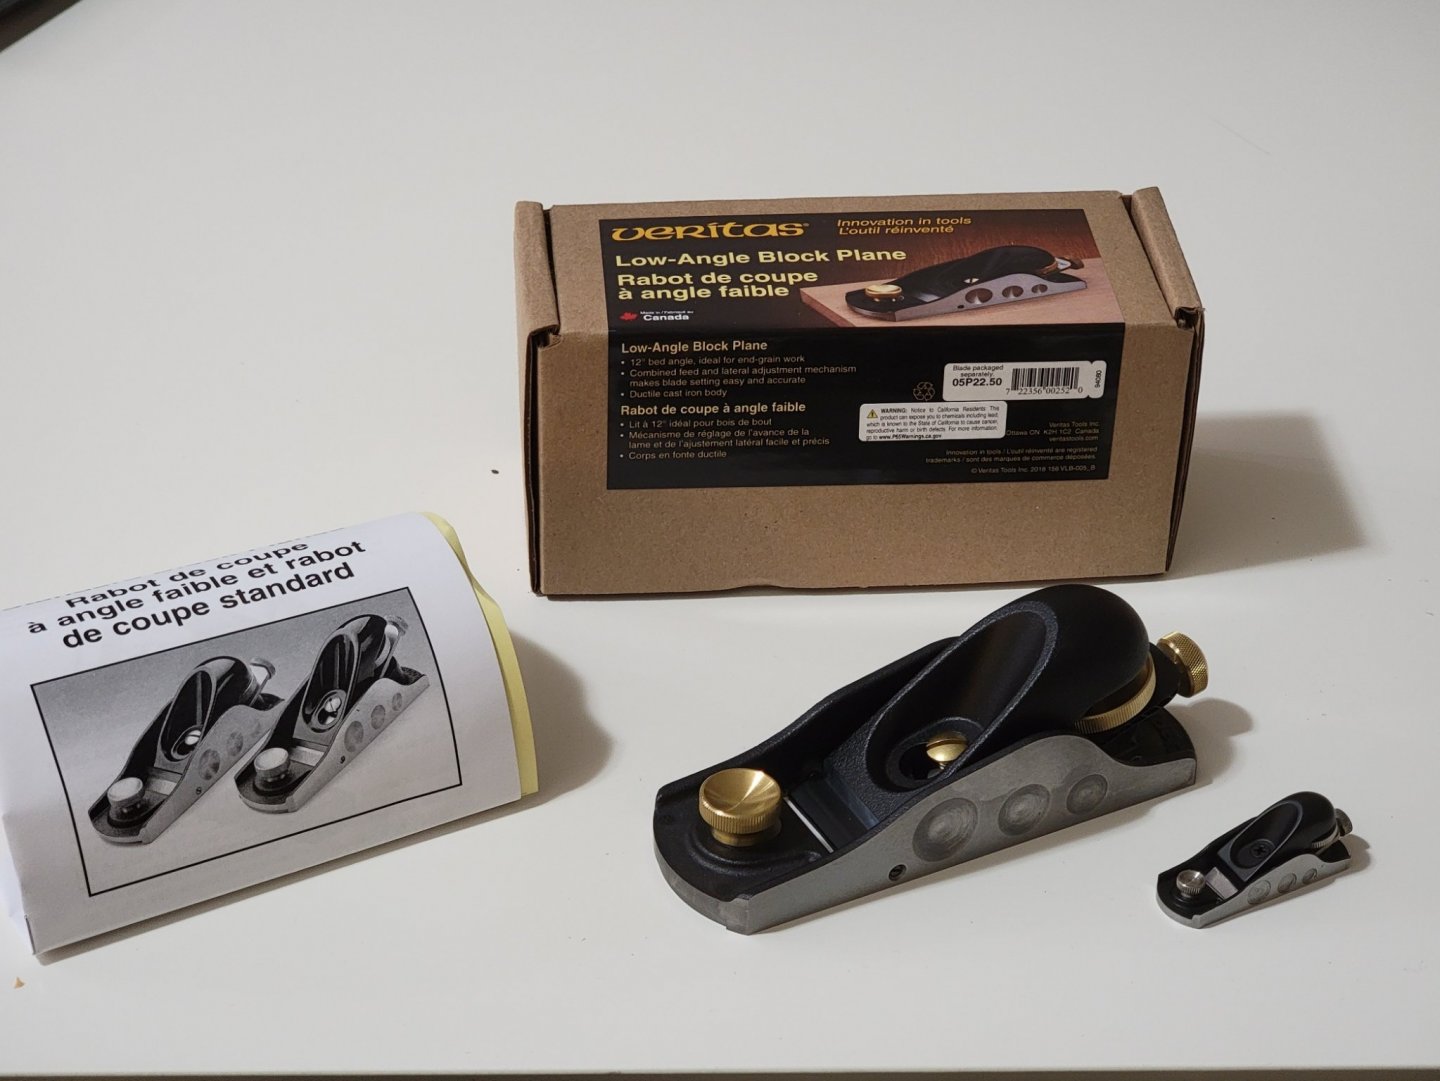
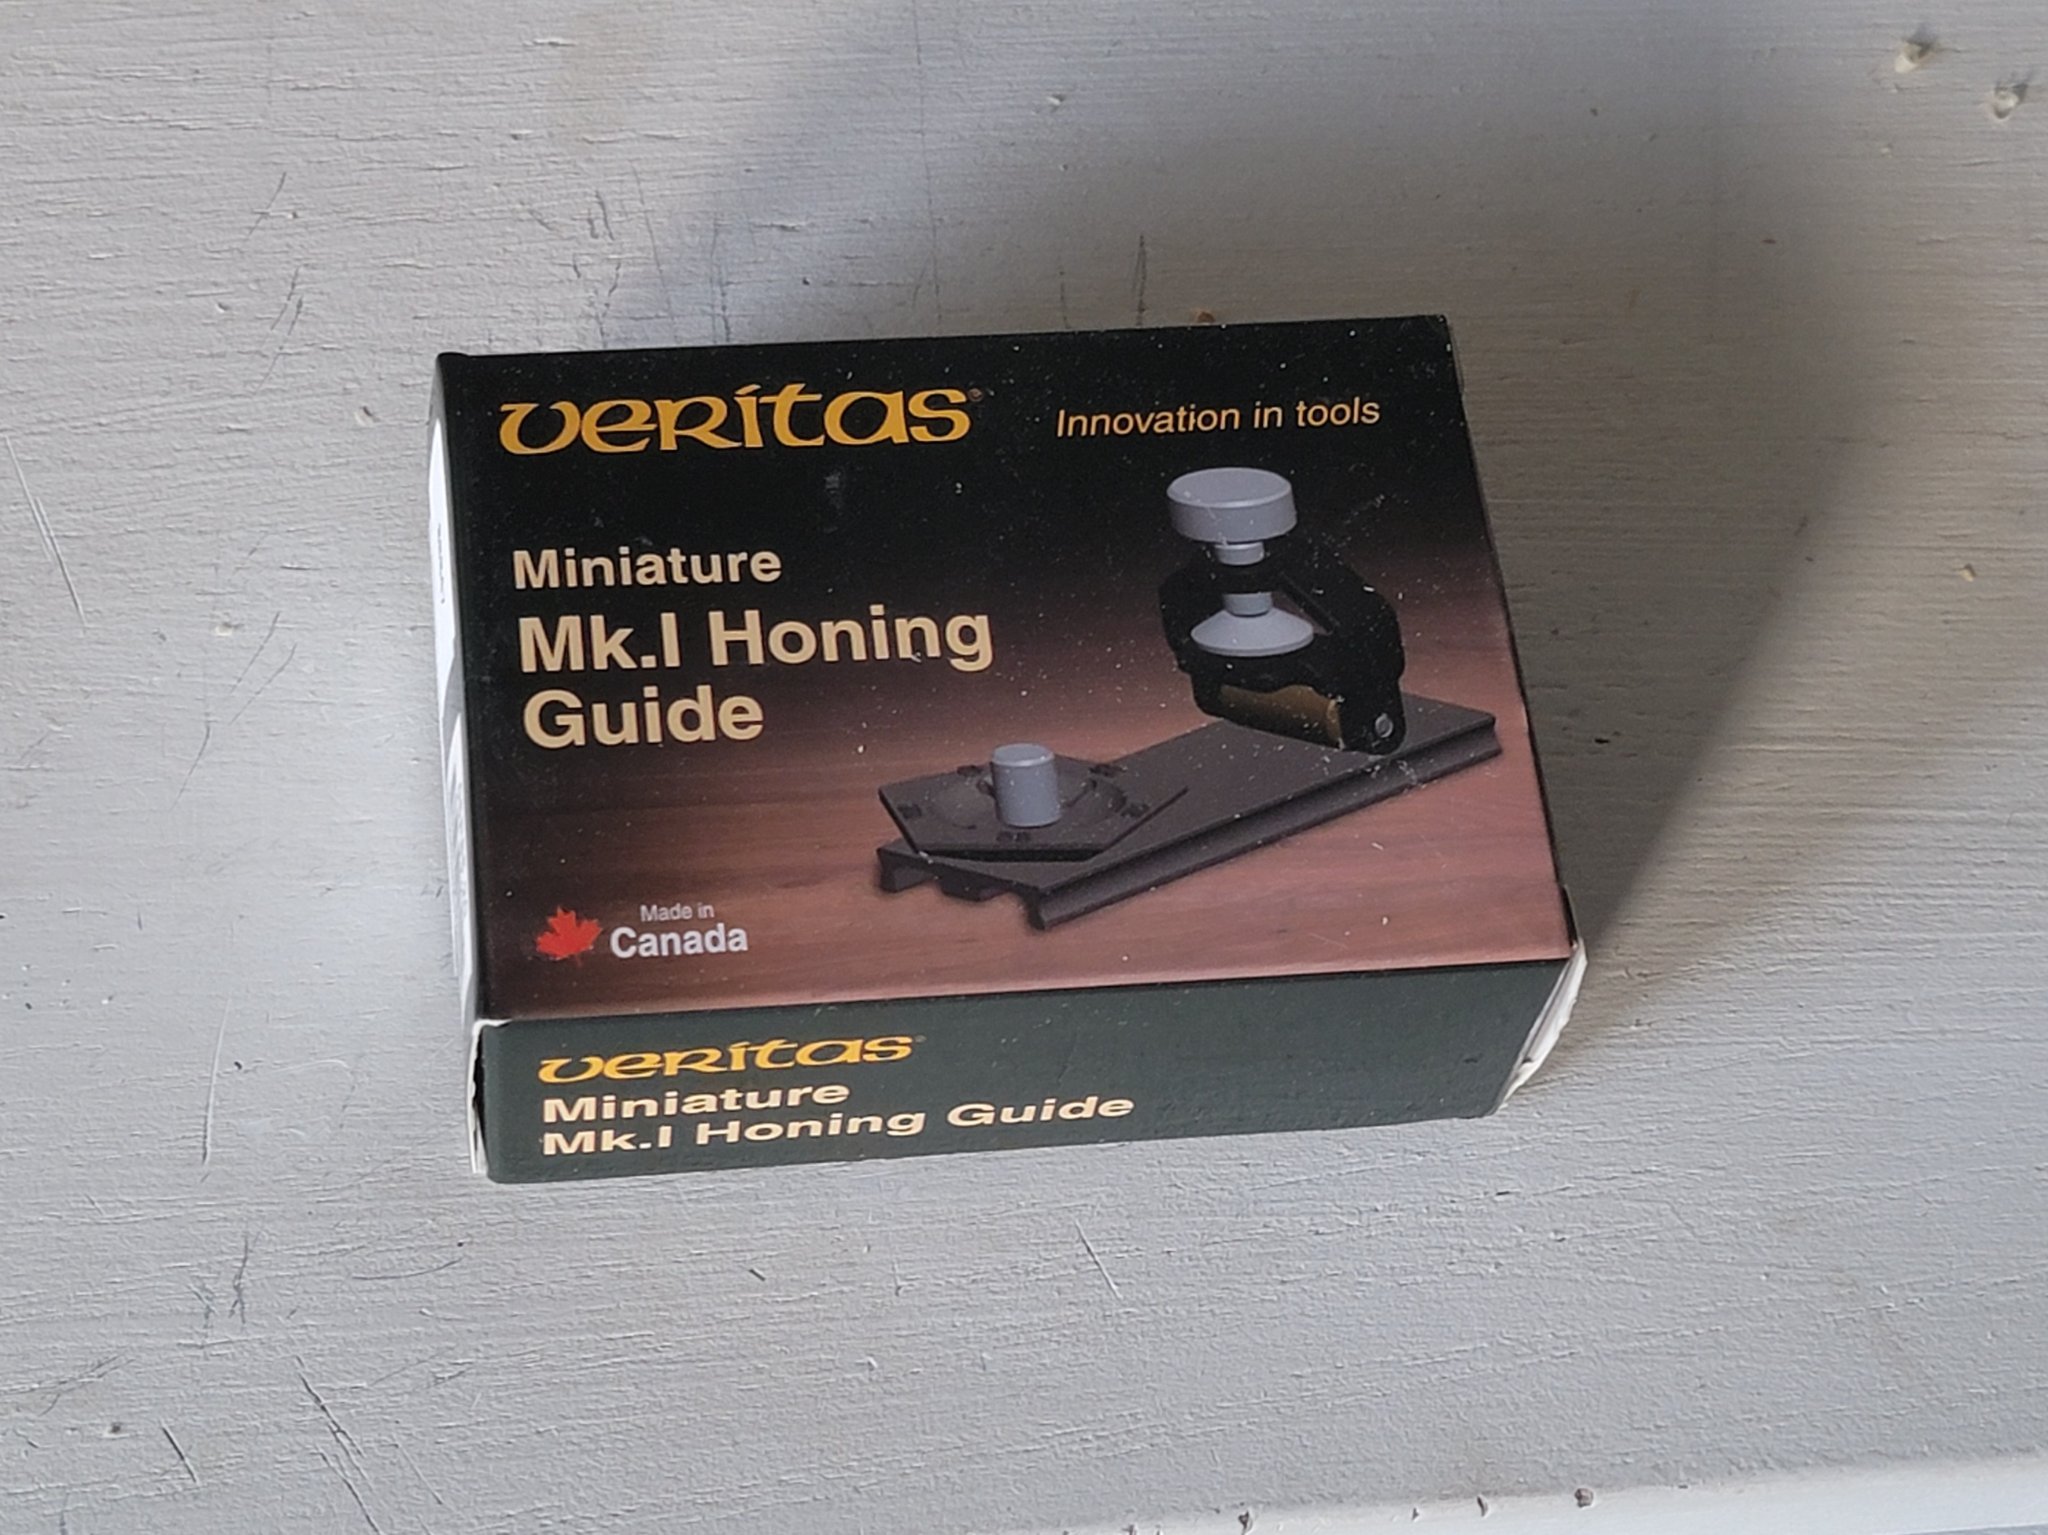
3 hours ago, Justin P. said:Nice! That plane jig looks great, is that the Veritas? I love that plane, I use it all the time. Ive never tried a jig though, now my mind is racing! Ill follow along if you dont mind.
Thank you Justin. Yes it is! It's the low angle plane from Lee Valley. I also bought his smaller brother 😁
-
-
I love all the details going into this model! Just curious, how did you make the buoys? They look very realistic
-
2 minutes ago, Nirvana said:
How many tree nails are there?
Too afraid too even begin counting!!!
- BobG and Edwardkenway
-
 2
2


USF Confederacy by Brucealanevans - FINISHED - Model Shipways - 1:64
in - Kit build logs for subjects built from 1751 - 1800
Posted
I'm so sorry to hear that, Bruce. Taking a break will help. I'm very far off the head rail chapter but I know that's a very tricky part of the build. I struggled with that for the Syren build.
Enjoy your time with the Cobra!