


Mirabell61
-
Posts
7,341 -
Joined
-
Last visited
Content Type
Profiles
Forums
Gallery
Events
Posts posted by Mirabell61
-
-
Thanks Slava,
yes, I`ve read that somewhere before, think its in combination with RC models on a pond or lake....
Nils
- mmdd, mtaylor and popeye the sailor
-
 3
3
-
excellent work Gary,
the wheelhouse planking has a nice wheathered touch...
Nils
- mtaylor, Keith Black and FriedClams
-
3
-
-
Thank you very much Pete, Geert and Eberhard,
your answers and input are very much appreciated....
Pete,
model locomotives and marine craft in G scale often have details that can be adopted of another..
I went looking for polysterol screw head imitates (your pic...) but could`nt find them in the web net, do you kindly perhaps have a source (link) ?
Geert,
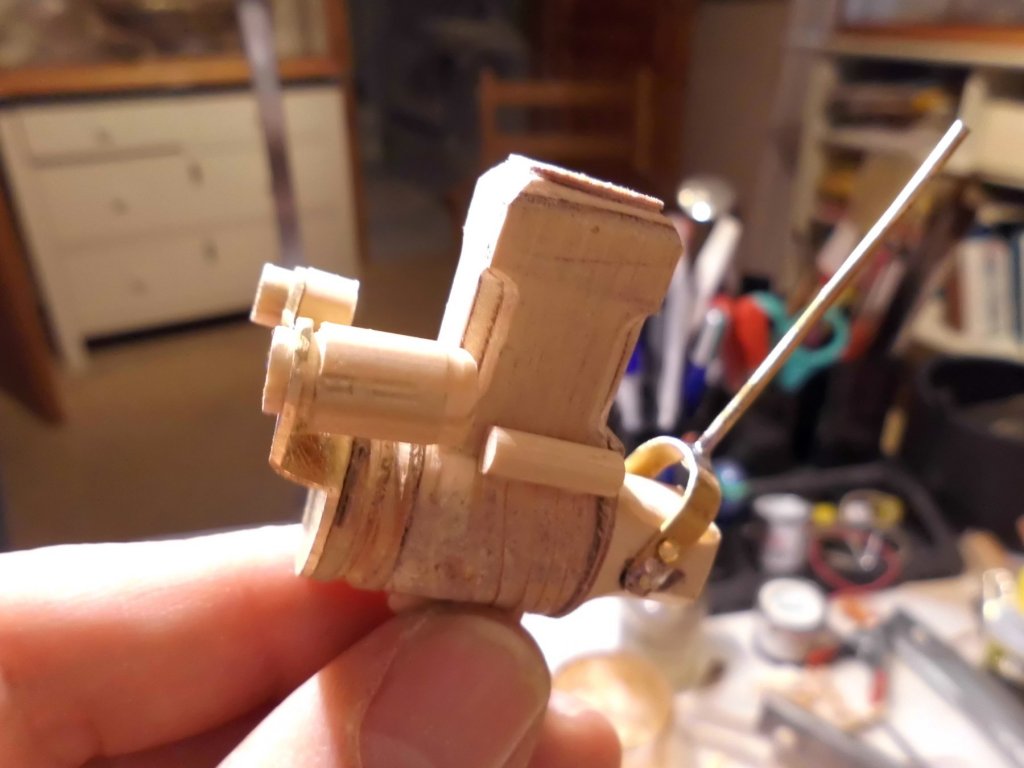
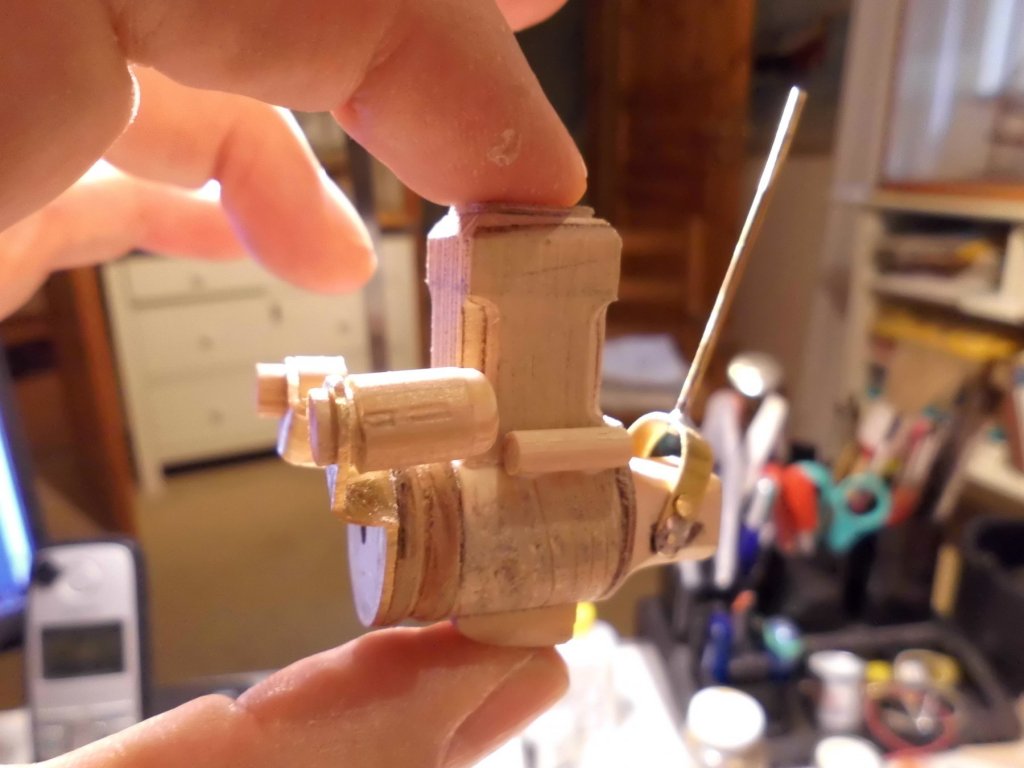
As I could only model the engine from Photos I found on the web, this was my best effort to produce something alike in scale 1:24, am pleased you like it
Eberhard,
I remember , when doing the bolts with dome nuts, that connect the blades to the hubs ((KWdG model) I worked a bit like you described in your "pre lathe days".
Instead of nails as base material I used quite small hexogon brass bar.
Many thanks for your kind input here...
Nils
-
Many thanks Slava, and for looking in,
have`nt heard from you quite some time now, nice to know that you`re watching this build.....
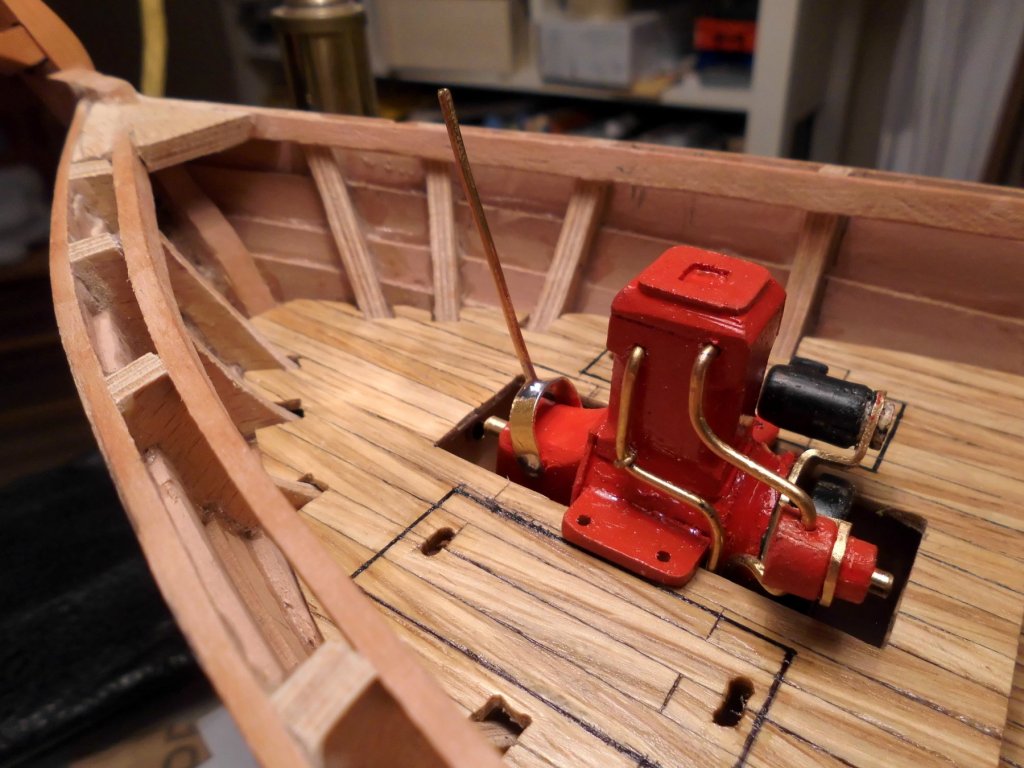
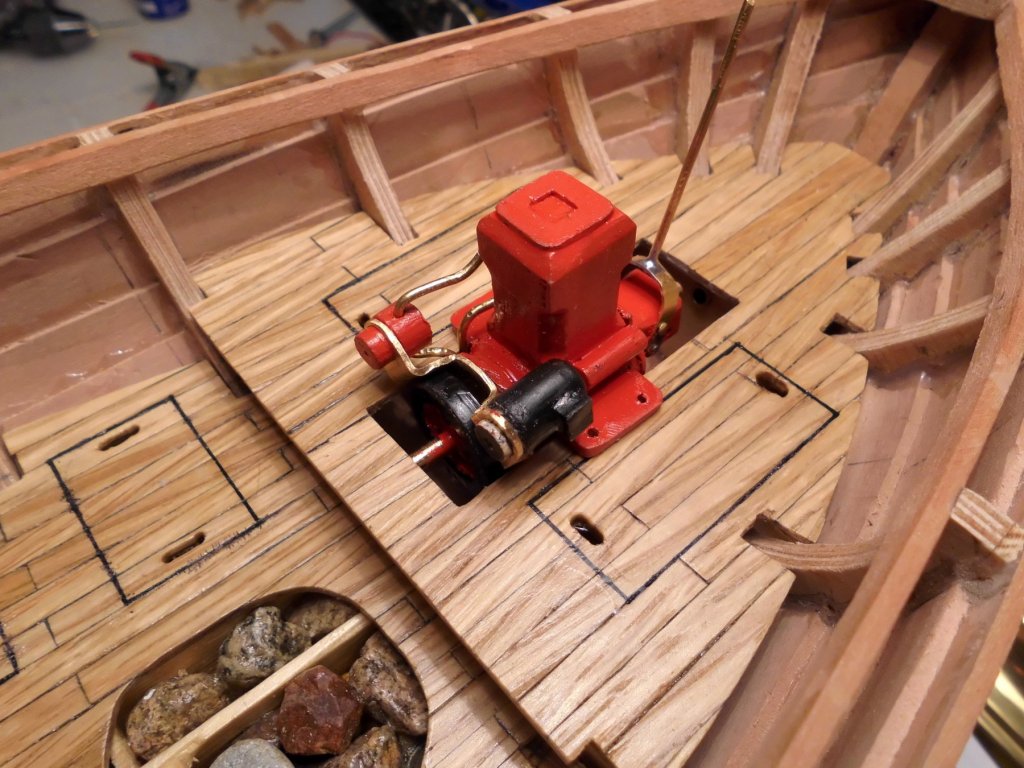
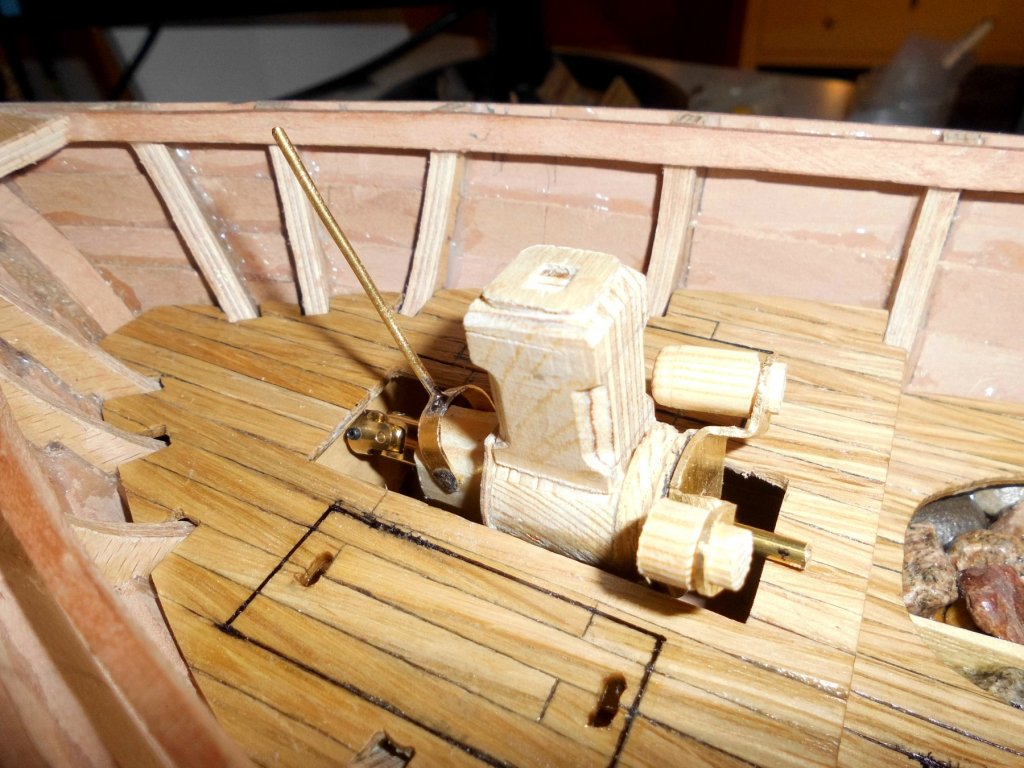
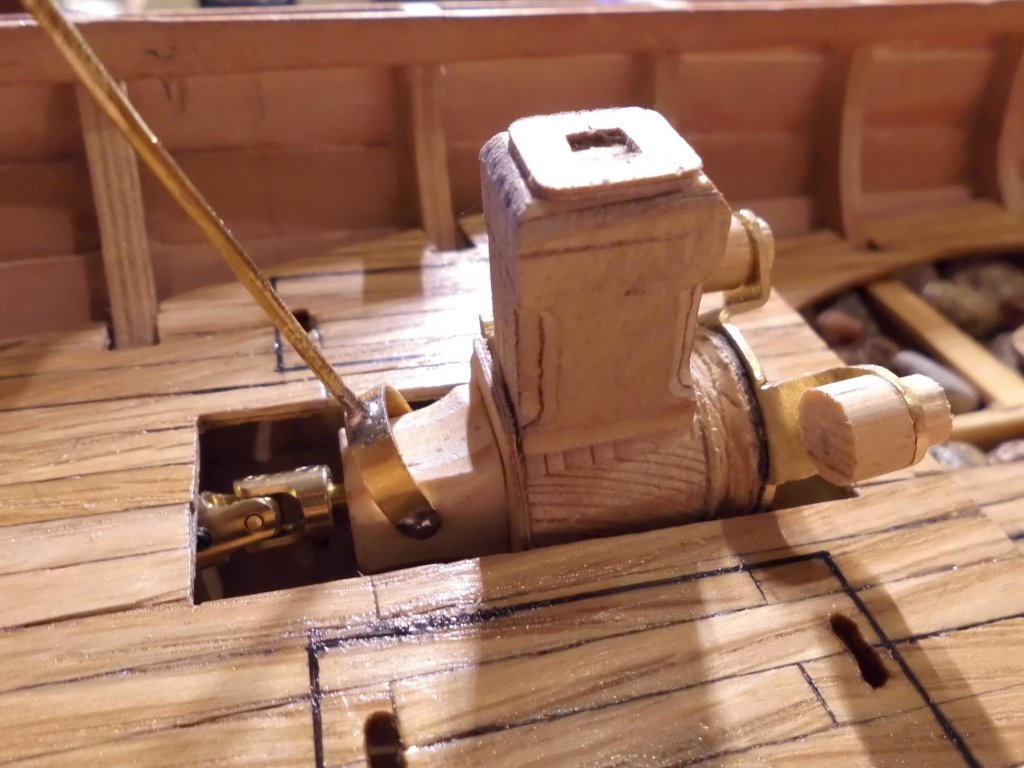
I`m still working on the engine, installed generator, water cooling pump and tubing and fly-wheel, more to come the next days...
Cheers,
Nils

- FriedClams, davyboy, ESF and 17 others
-
20
-
thank you very much Peter for your appreciative words,
I`m pleased you like the engine...
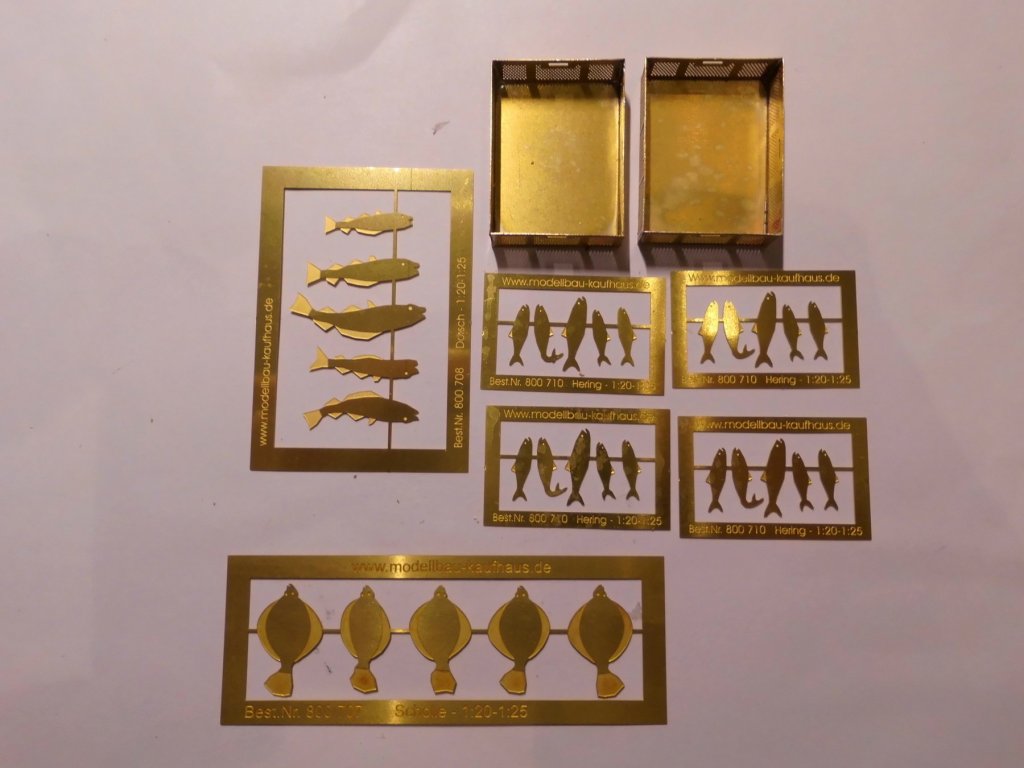
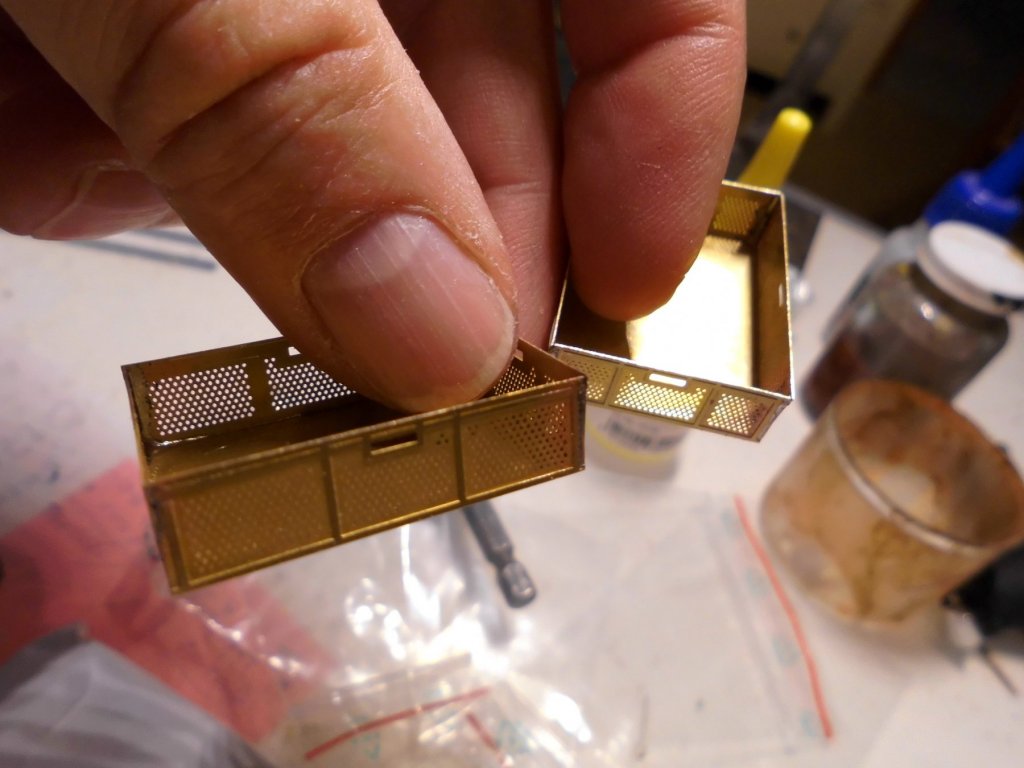
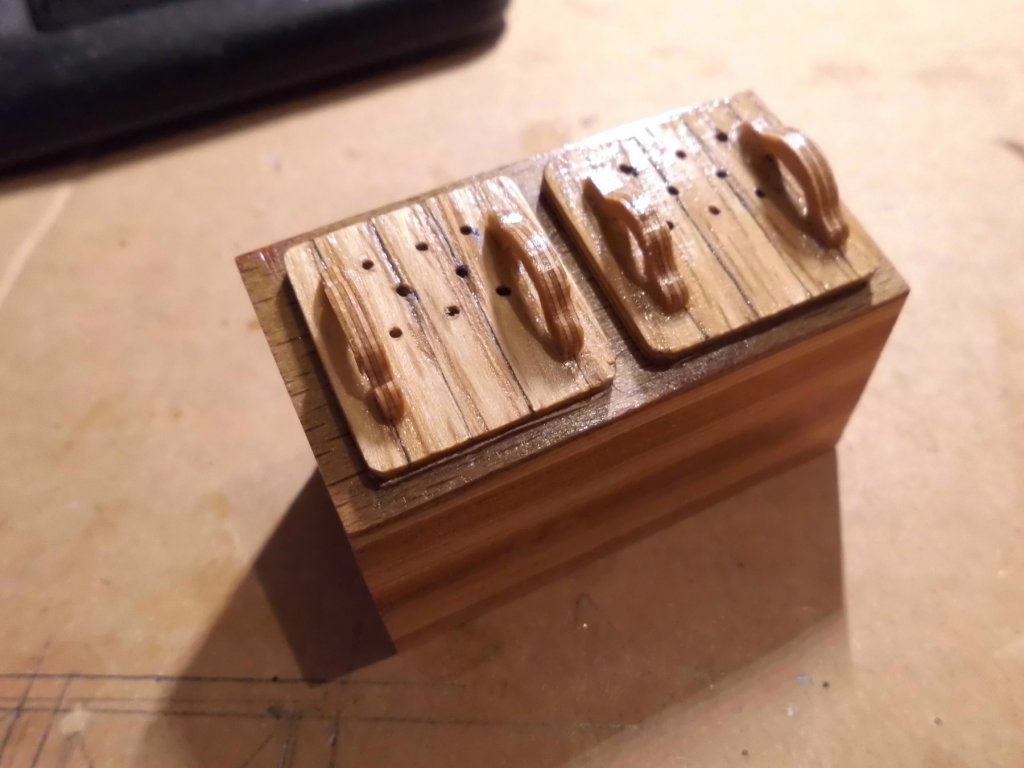
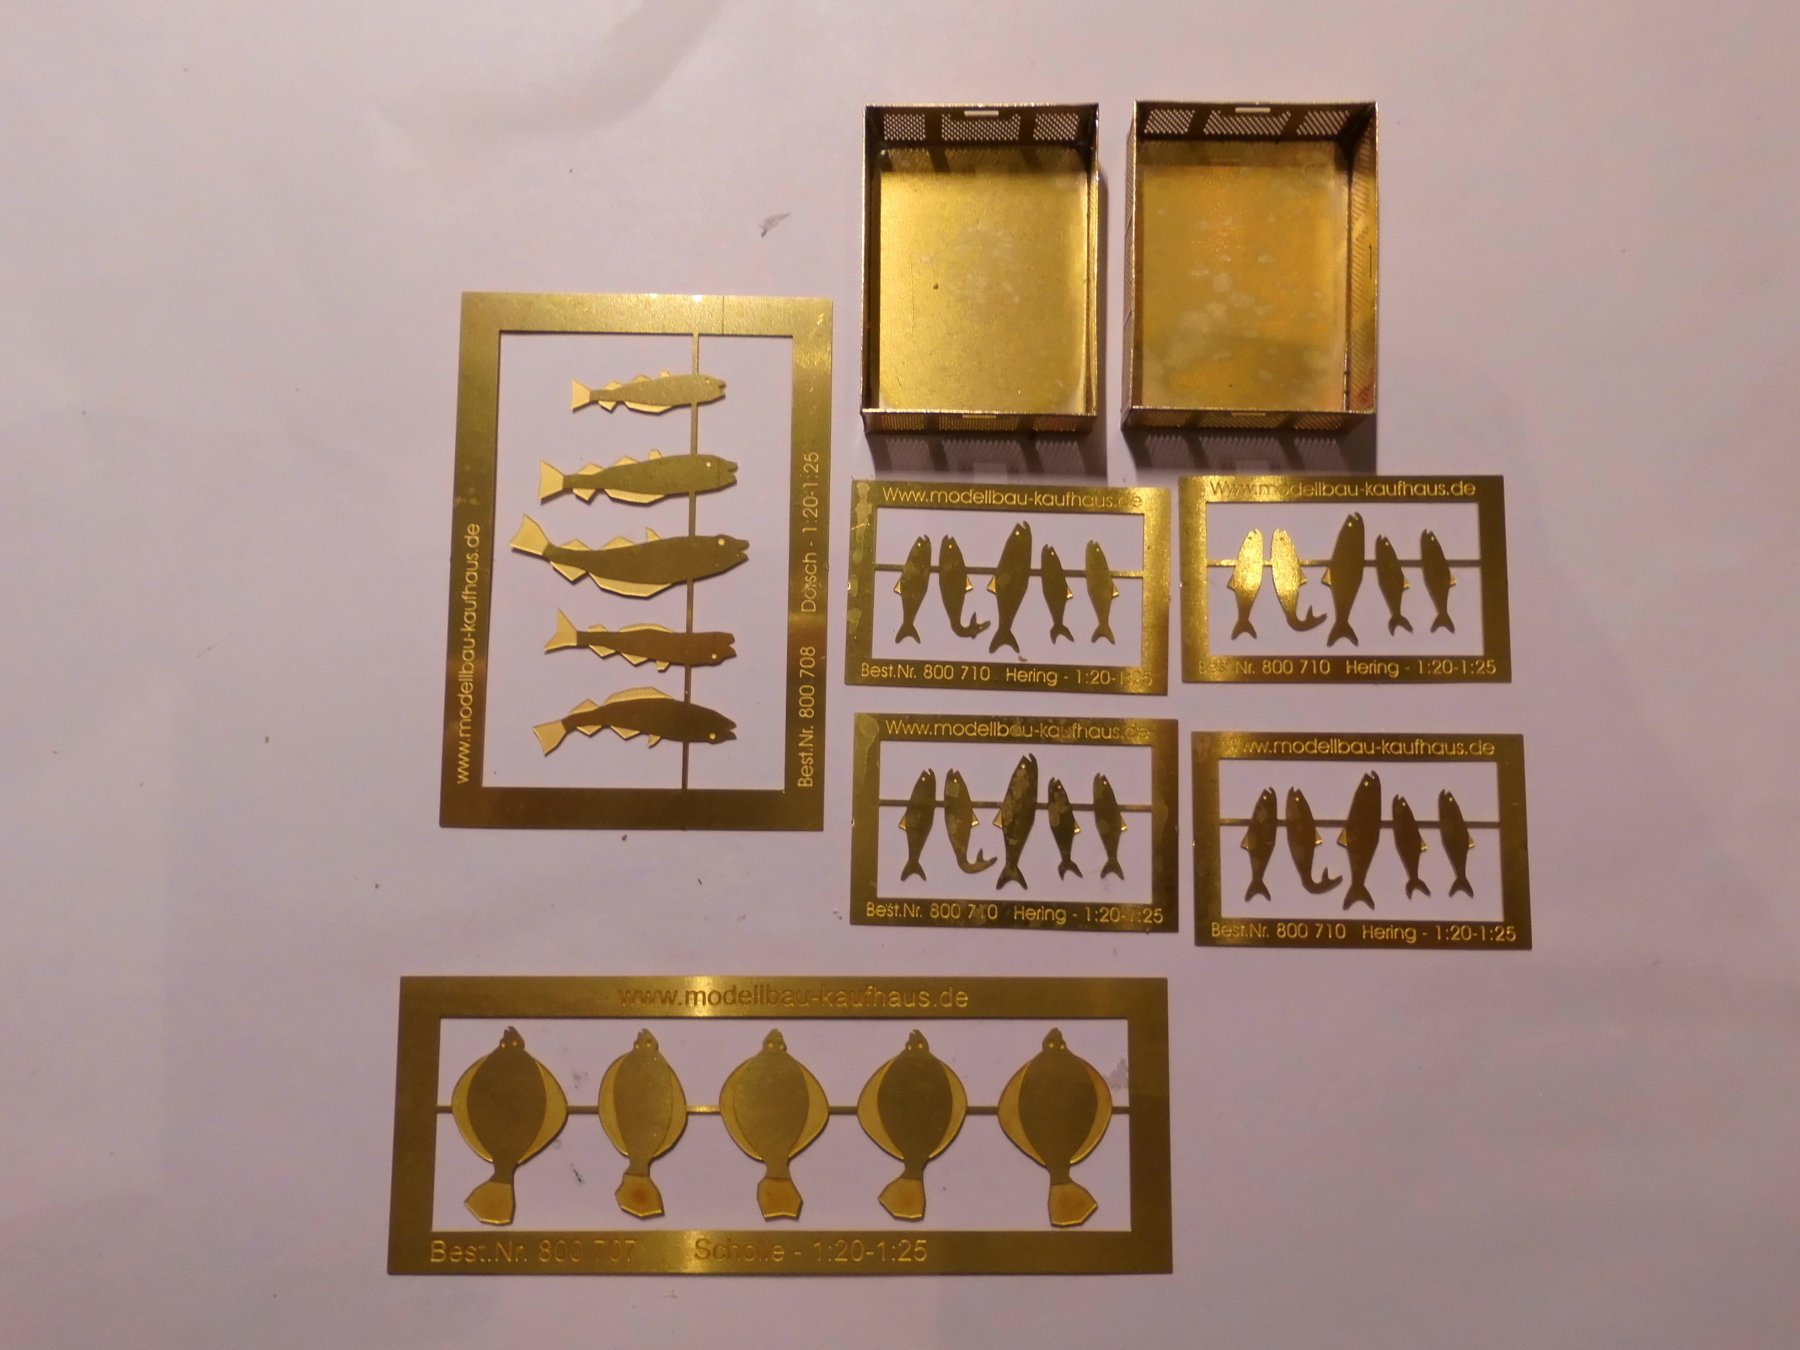
Yesterday I received some brass etched fish for the catch together in scale 1:25, with two fish box kits (sides get folded and soldered together). For the fish there needs to be some uppadding, which will favorably will be done "Fimo clay" that can be baken for curing, before the fishes get painted. I decided also to produce some eels in appropriate scale made completely from Fimo clay. Trust that all together this will enhance the working boat character, when done...
Nils
- Martin W, Keith Black, G.L. and 15 others
-
18
-
Thank you very much for your nice comment Mark,
the small parts of the engine are taking more time than I thought....., I wanted to do the dome nuts for the cylinderhead from small brass hexagonal brass bar but it looks like I lost the remaining bit I still had.
In the meantime the housing was painted and I`m working on the cooling tubing with connection to the water pump. Generator and its terminal box are also painted, need to do a bit of wiring, and I`m looking for a suitable mini V-belt or two, perhaps the thin sealing "O-ring" for wrist watch glasses can do for this. I`ll have to see the jewelery shop in town if he has some old ones in his scrap box...
Will post some more pics when I have all things together
Nils
- FriedClams, mtaylor, Martin W and 3 others
-
6
-
Hi Peter,
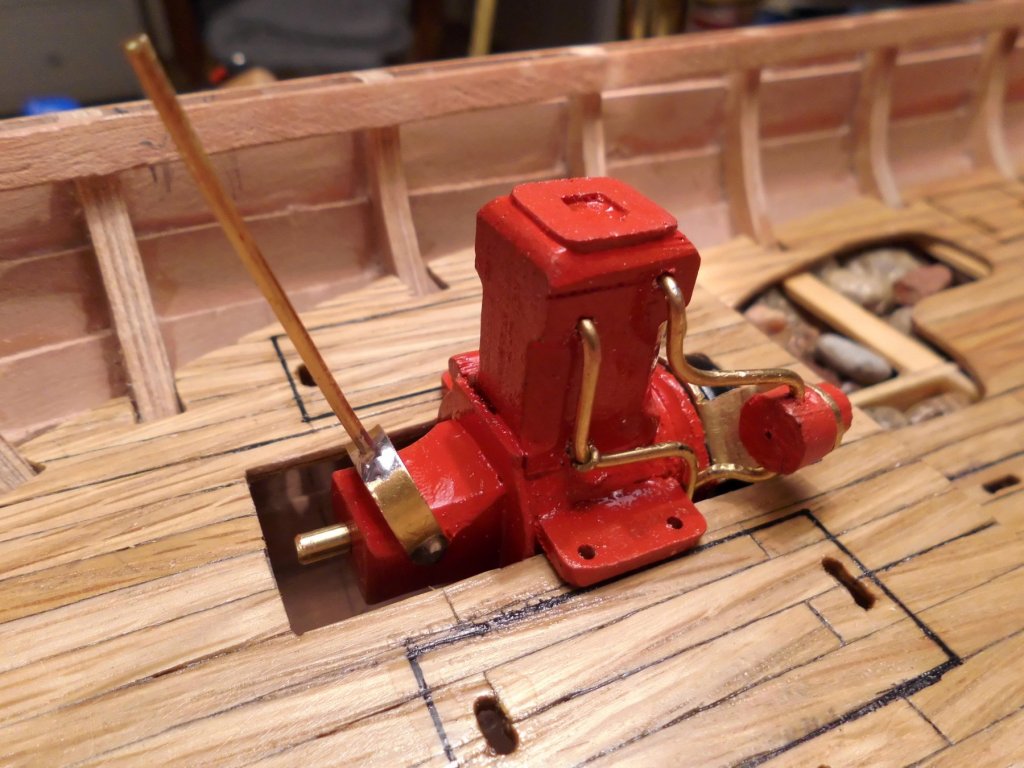
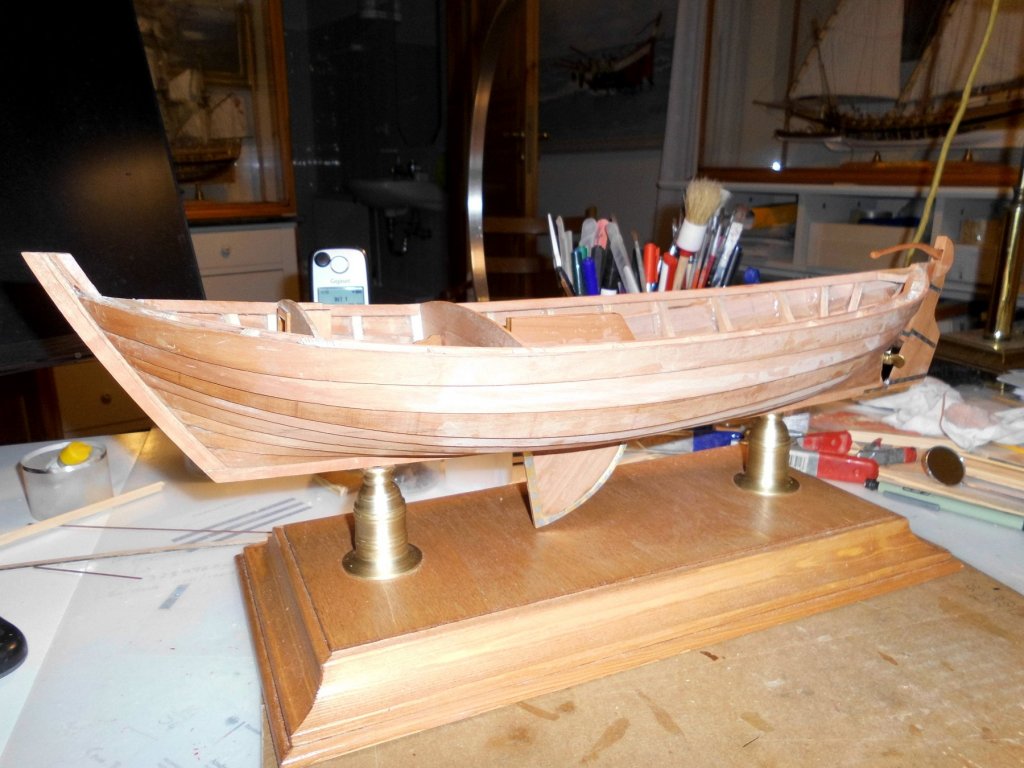
thanks for looking in. No, its by far not the completed model, engine, cabin, deck, the whole rigging and sails and may others are still to be done. I gues its about 50 % done to date.
The pics are showing the raw motor in build, painting, wiring, tube connections etc. transmission per V-belts and flywheel still to be done.....
Also thanks to all that clicked on "Likes"
Nils
- flyer, Dubz, popeye the sailor and 12 others
-
15
-
-
-
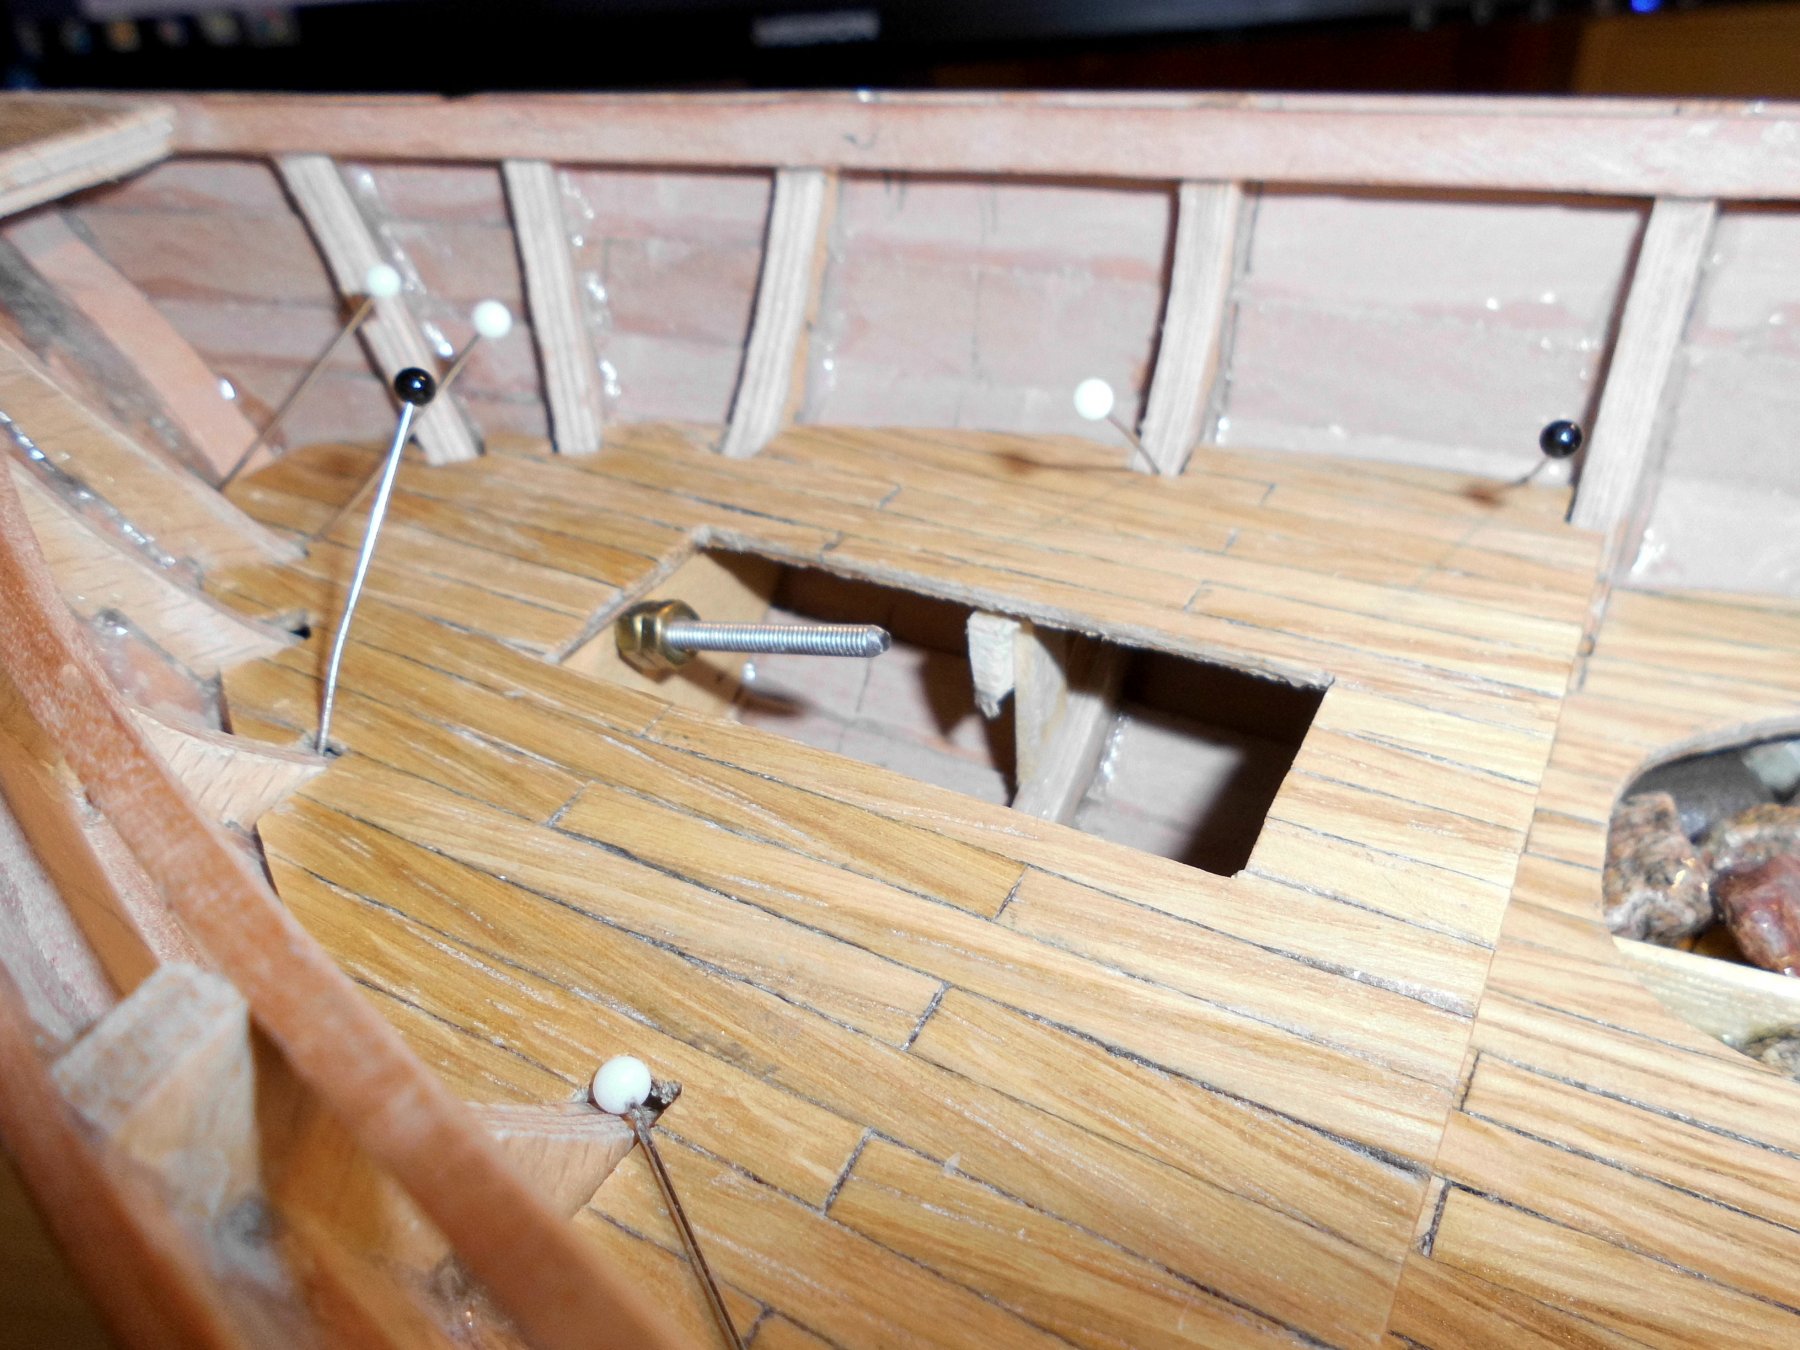
Feedback for Eberhard and John,
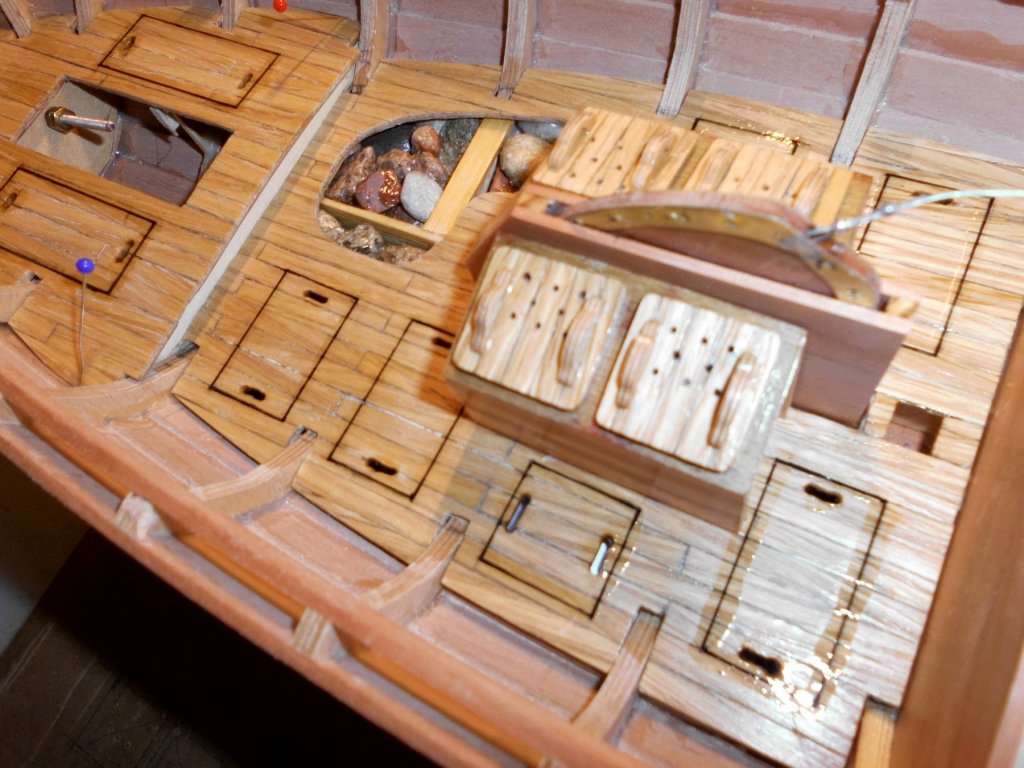
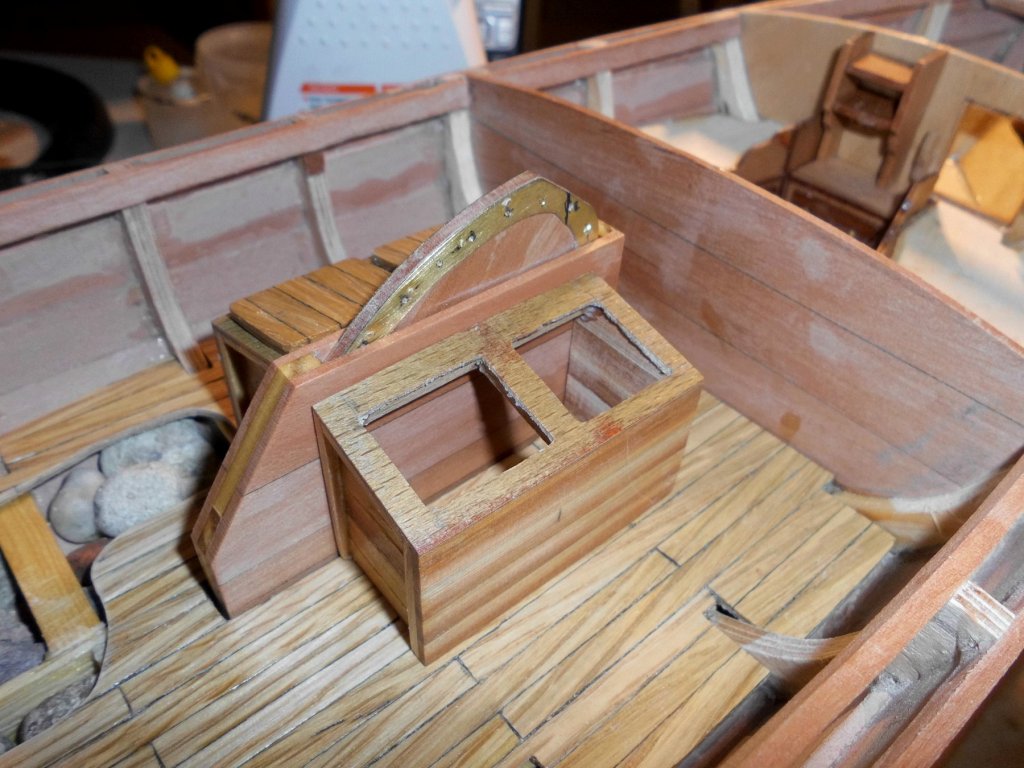
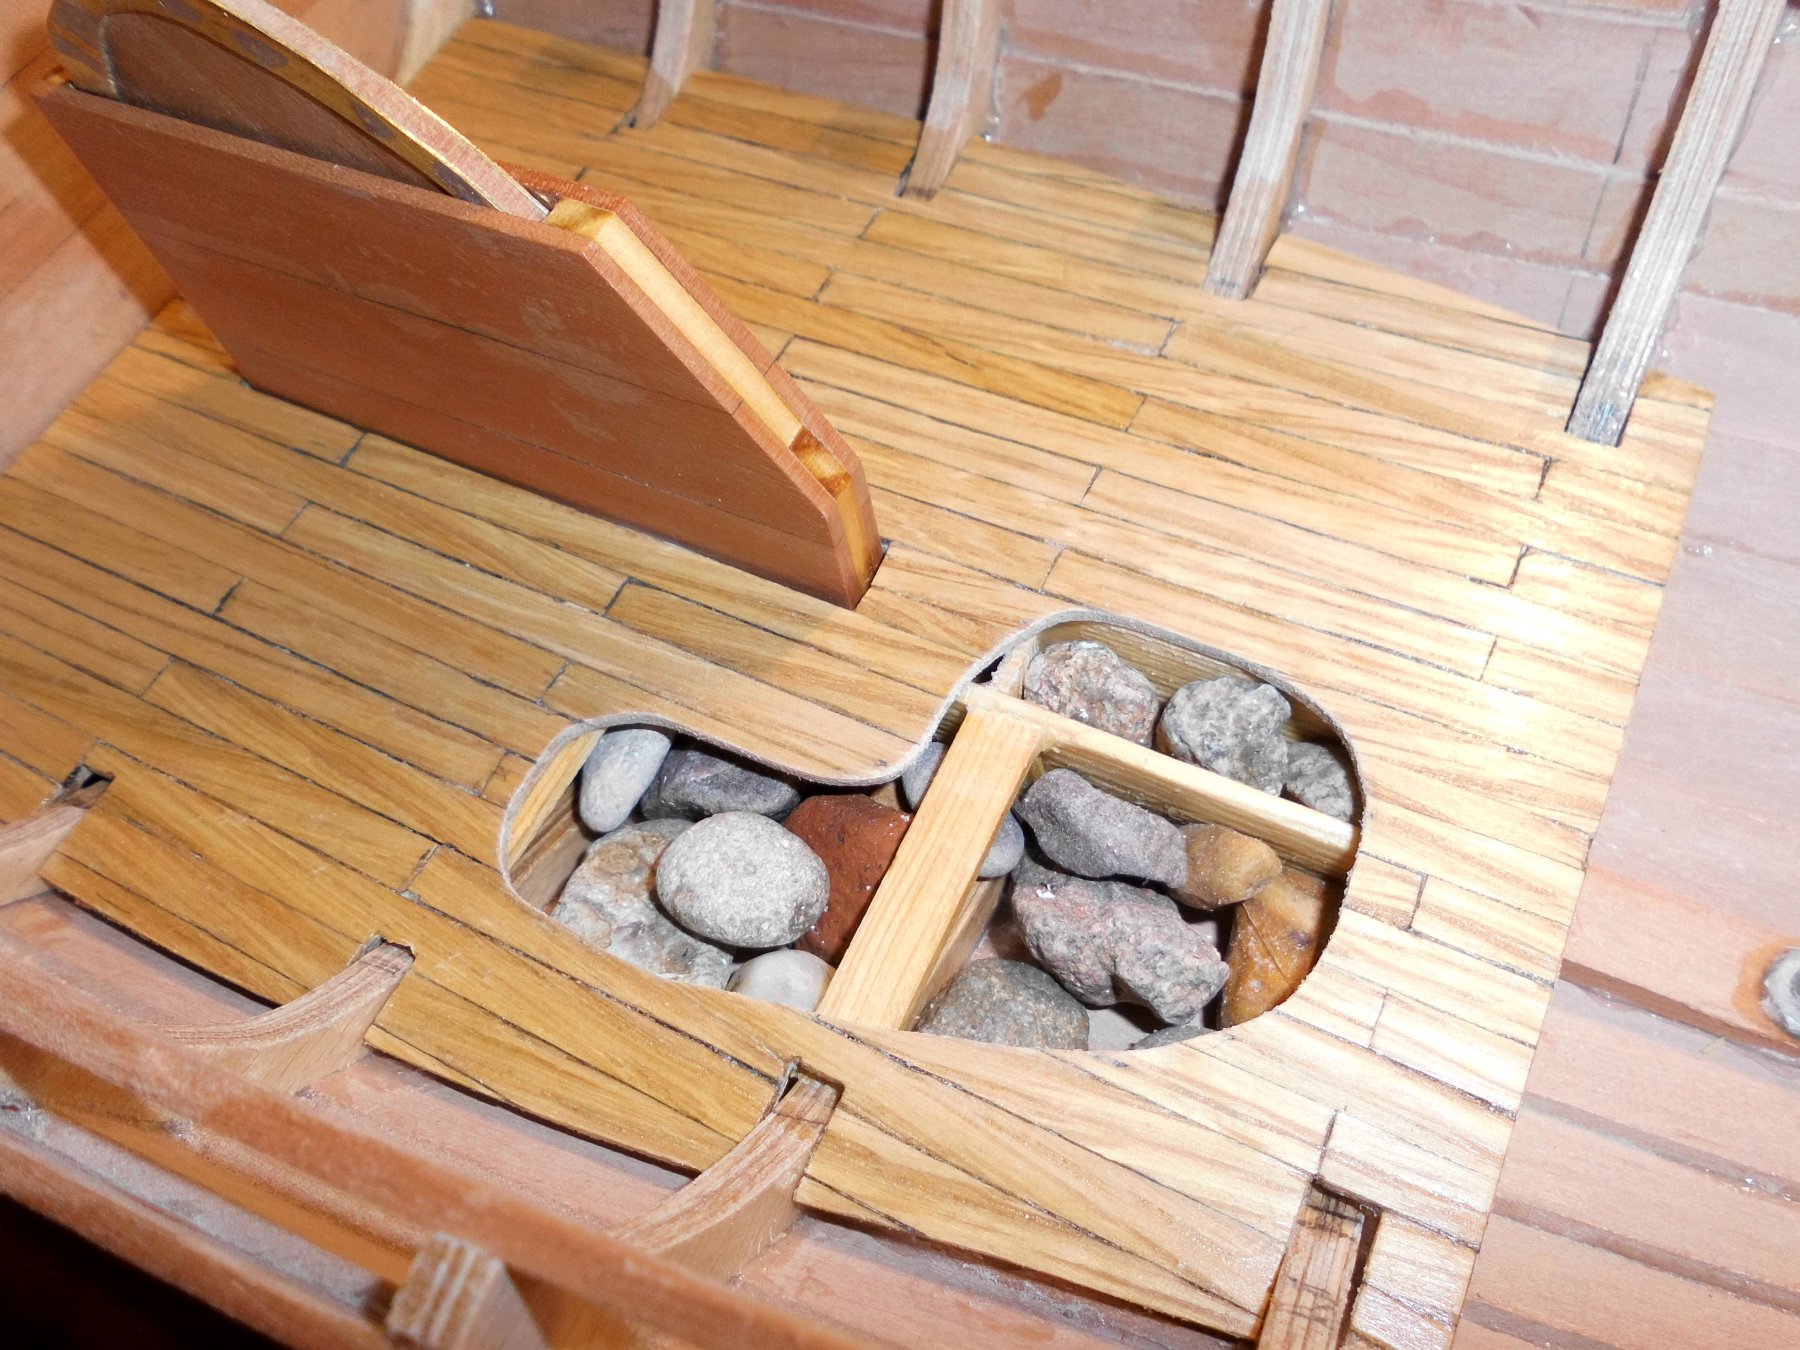
this is the result for the bilge access lifting plates, (as already mentioned it is a compromise though, providing 8 hatches )
The black lines are preserved by a layer of Humbrol Enamel clear varnisch. I will varnish the complete floor area, when the first layer over the lines is cured out....
Nils
- Keith Black, G.L., oneslim and 13 others
-
16
-
Many thanks for looking in John,
I`m pleased the boat is liked....
Nils
-
Wow,
very impressing and accurate work Hong Bing
")
Nils
-
You`re probably right Eberhard,
thanks for your comment.....
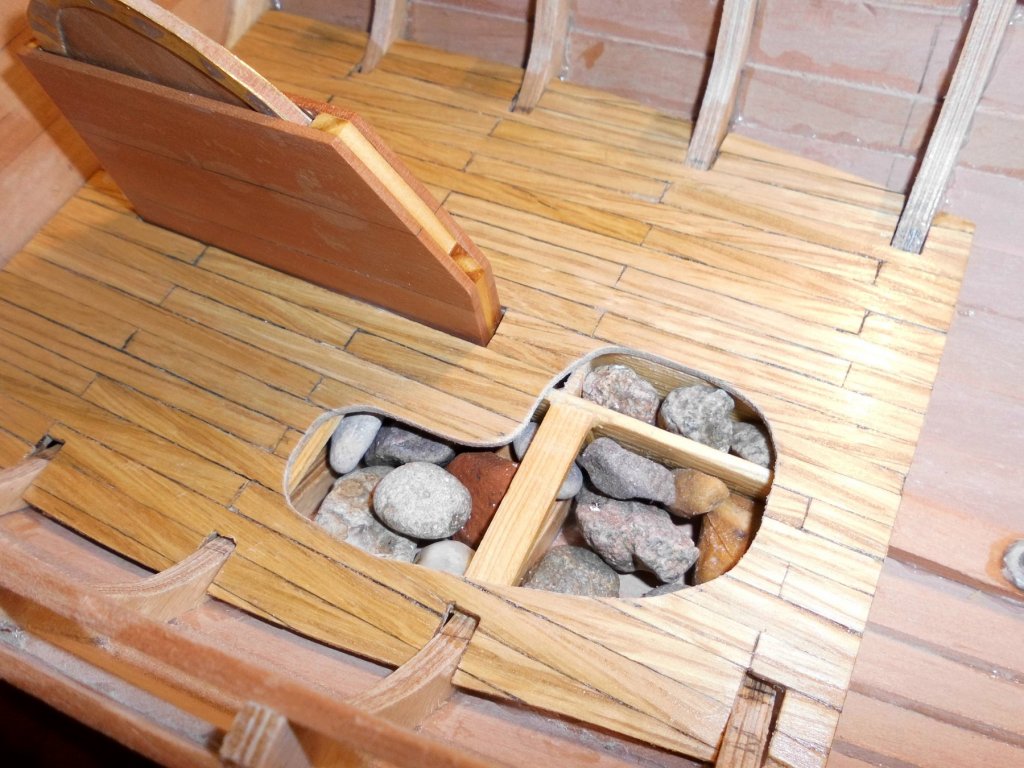
I`ve taken that in consideration myself, alone for having access to the ballast-stones, but waved it again (would be to cramped floor optic, and a compromise shall be made now and then....
Perhaps I shall draw outlines of the floor-access hatches with waterproof black ink at a later time. Need to do a few tests on how to keep the ink lines sealed and clear , found an Edding product that seams to work well...
Nils
- G.L., Sea Hoss, Keith Black and 3 others
-
6
-
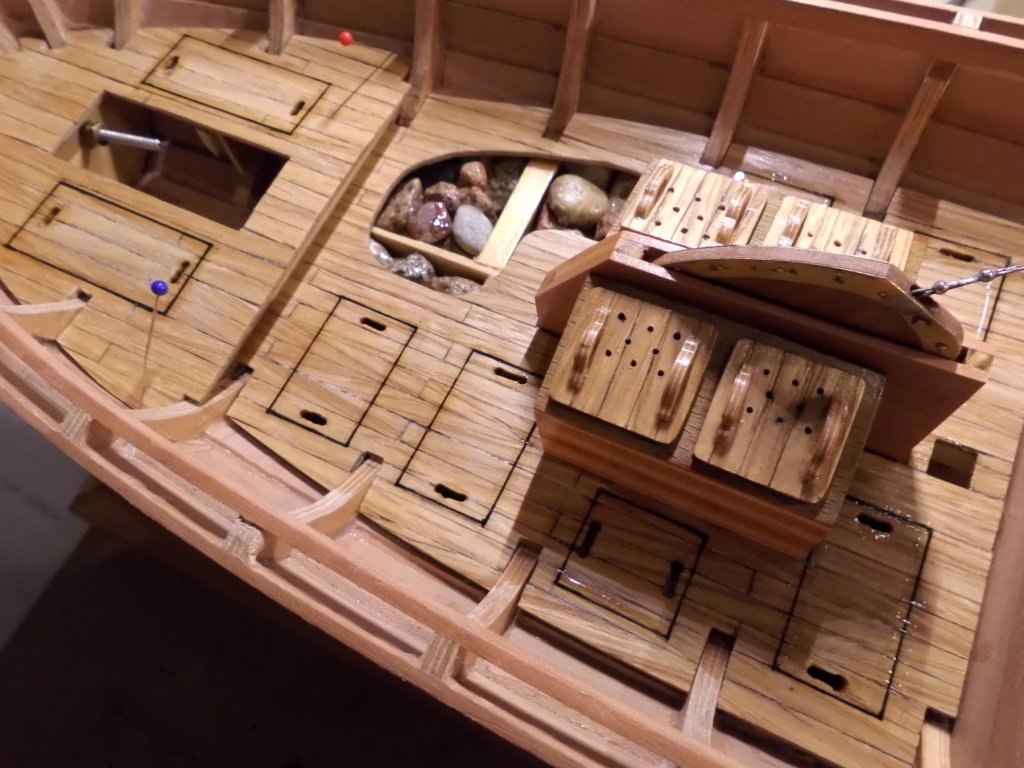
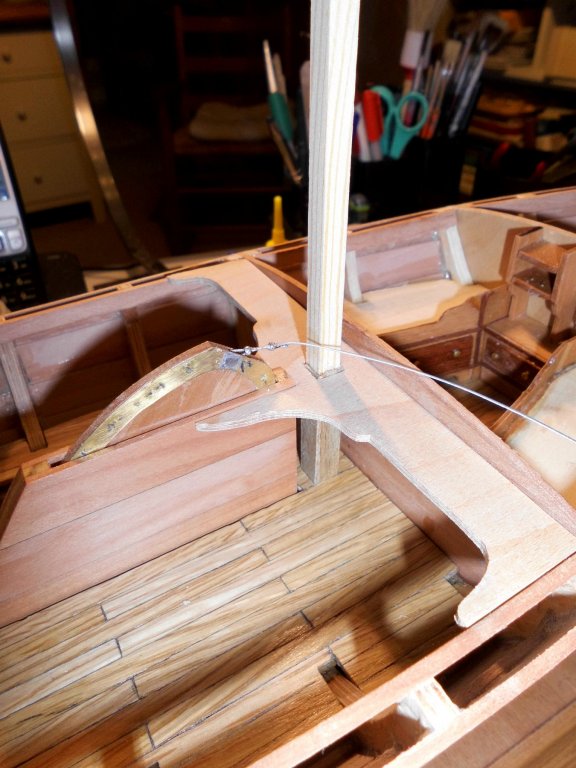
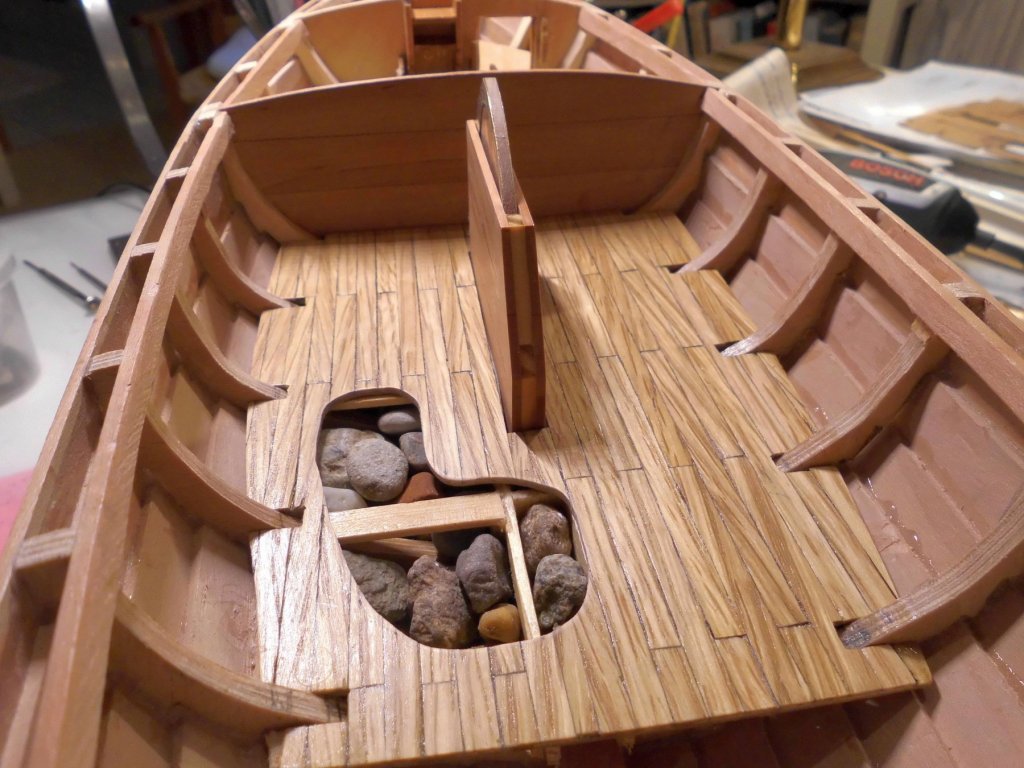
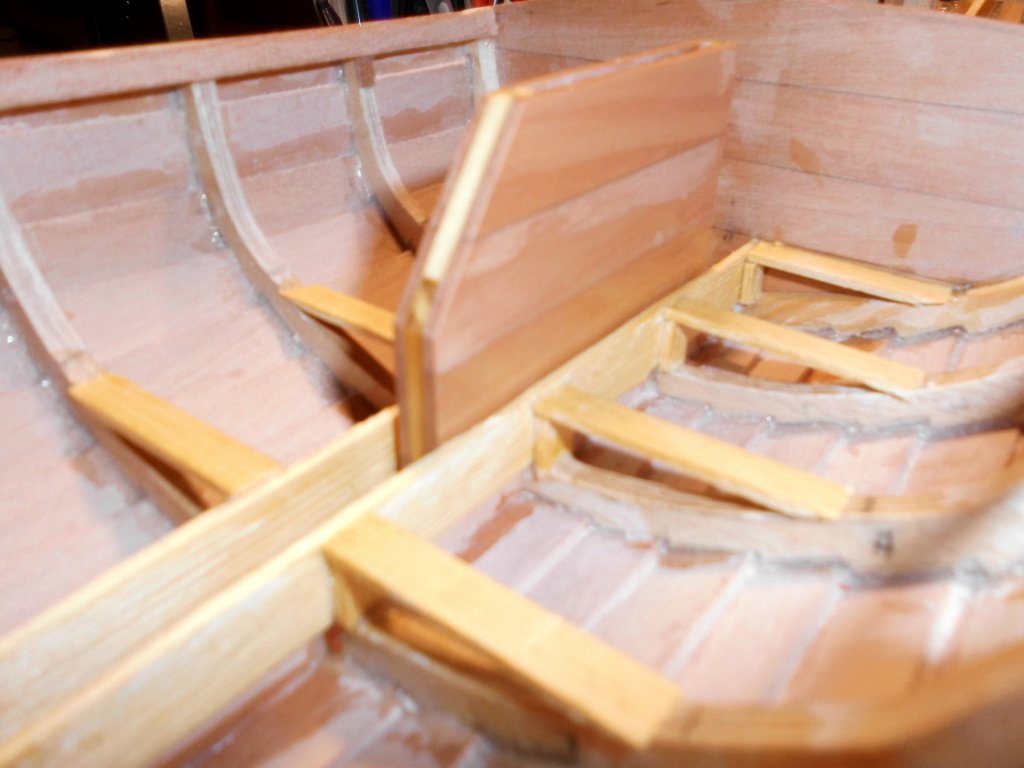
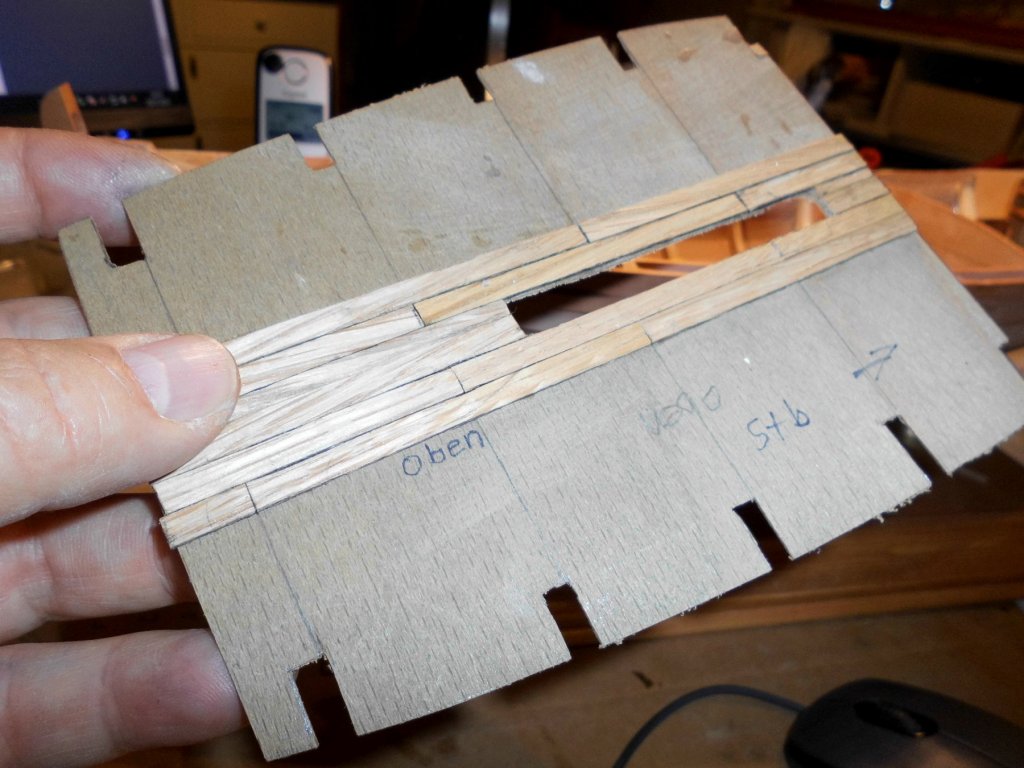
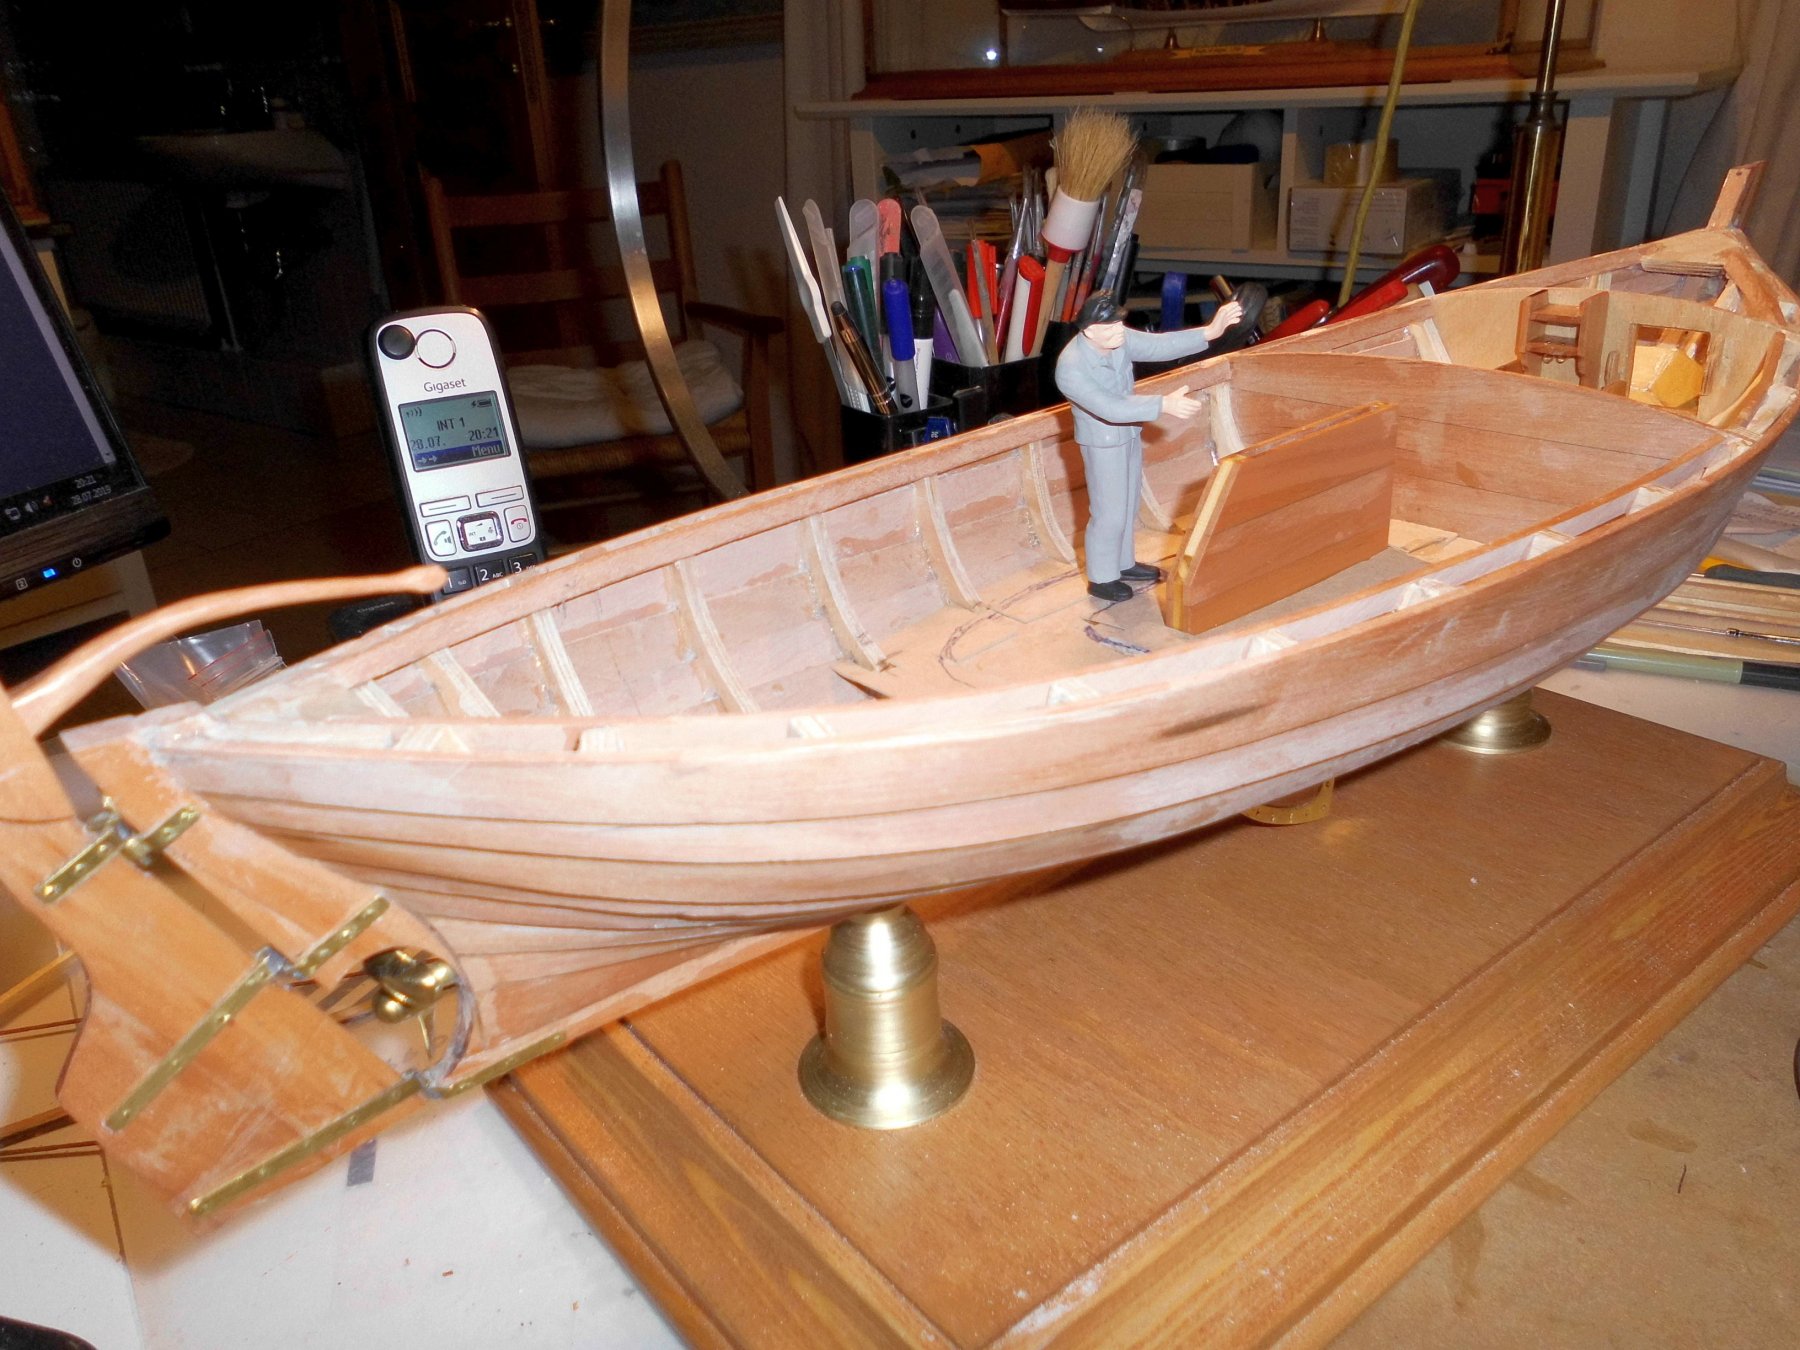
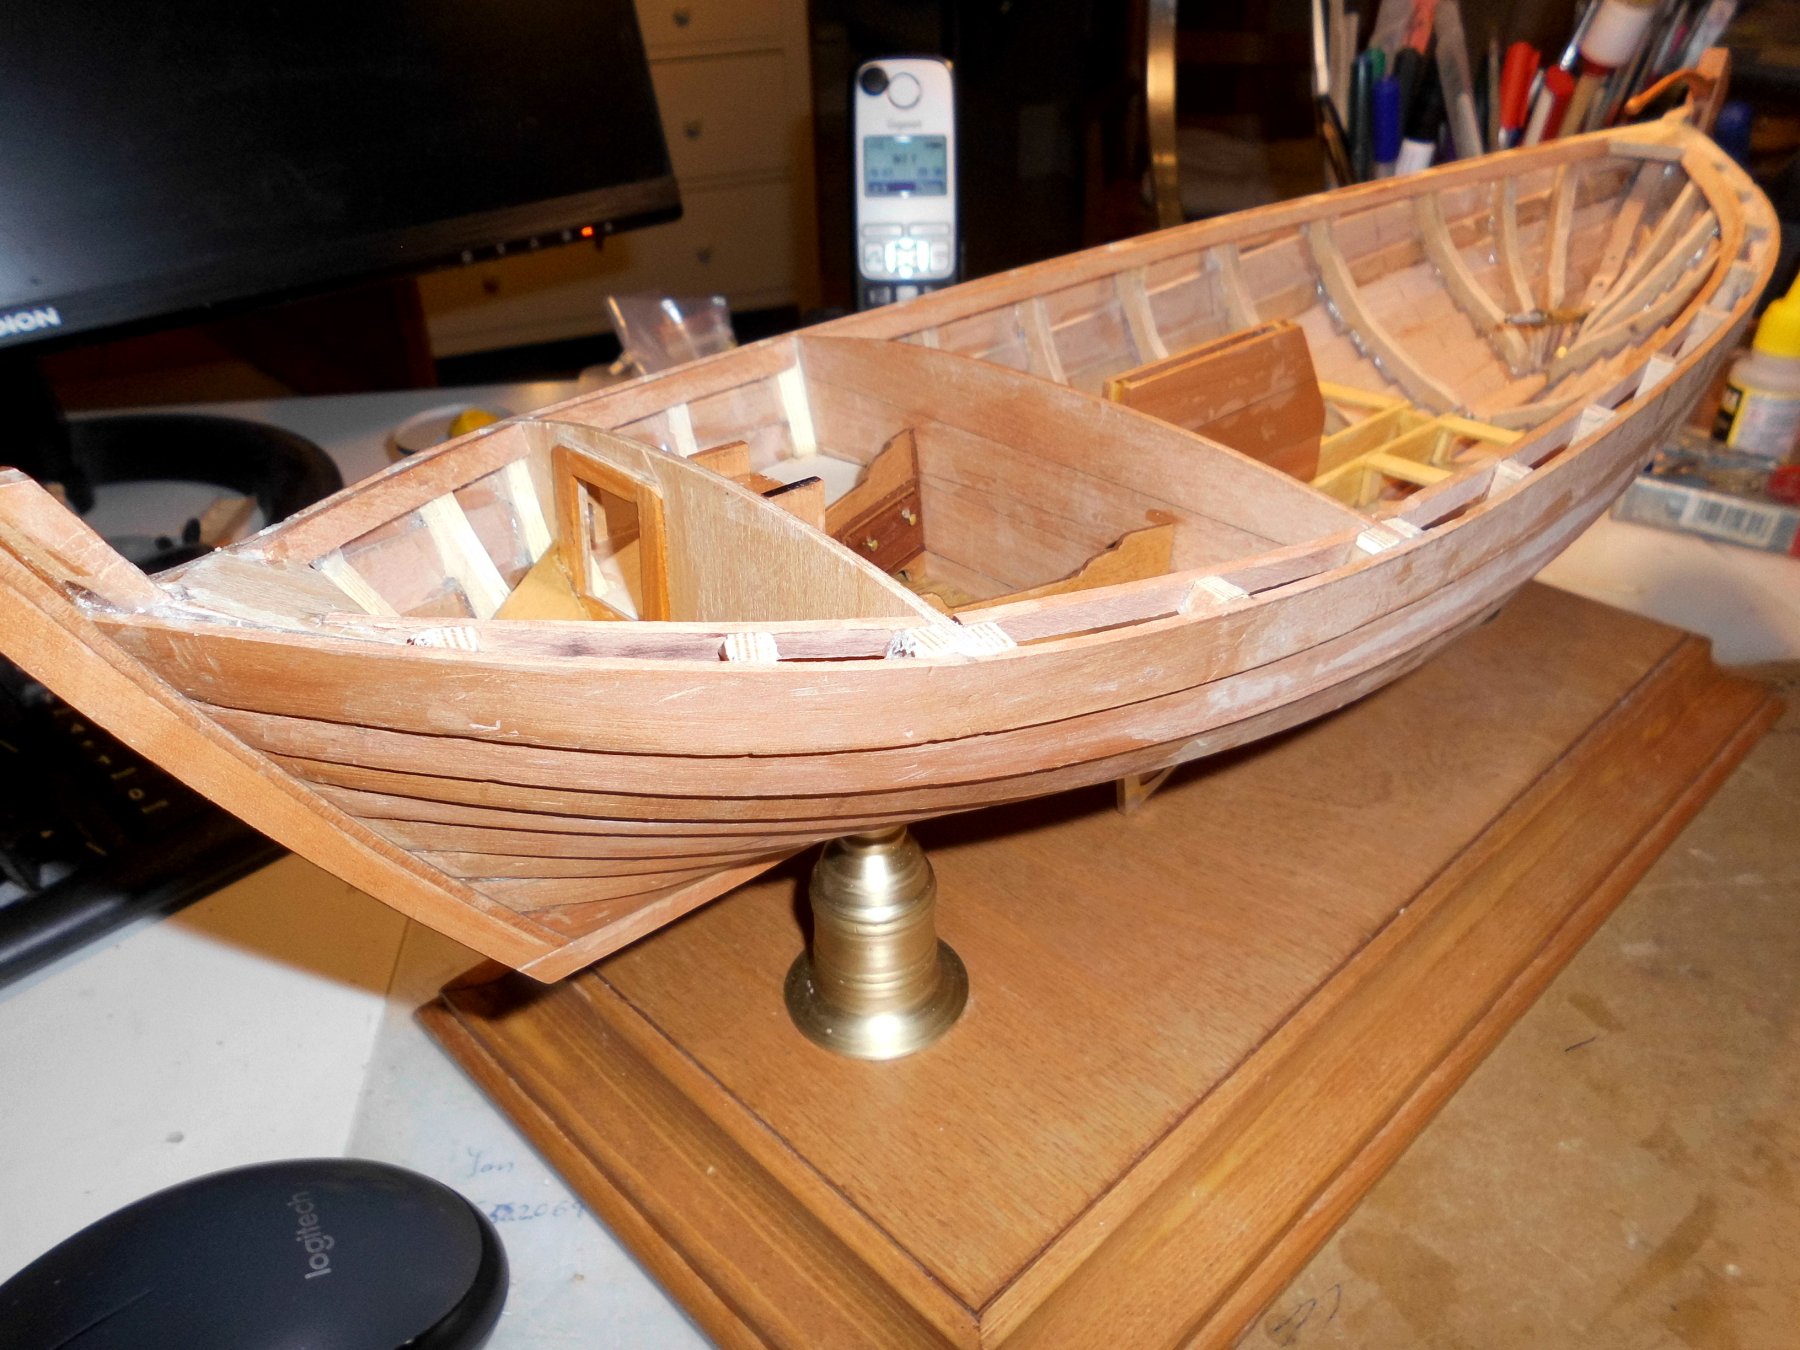
status of build :
fastening a steel strop to the centerboard, a structure board for passing main mast through and stiffening out centerboard. Aft section floor with outcut for motor well.
The main mast is a dummy in lack of 8 x 8 mm square bar for checking the alignment of the mast sockets
Nils
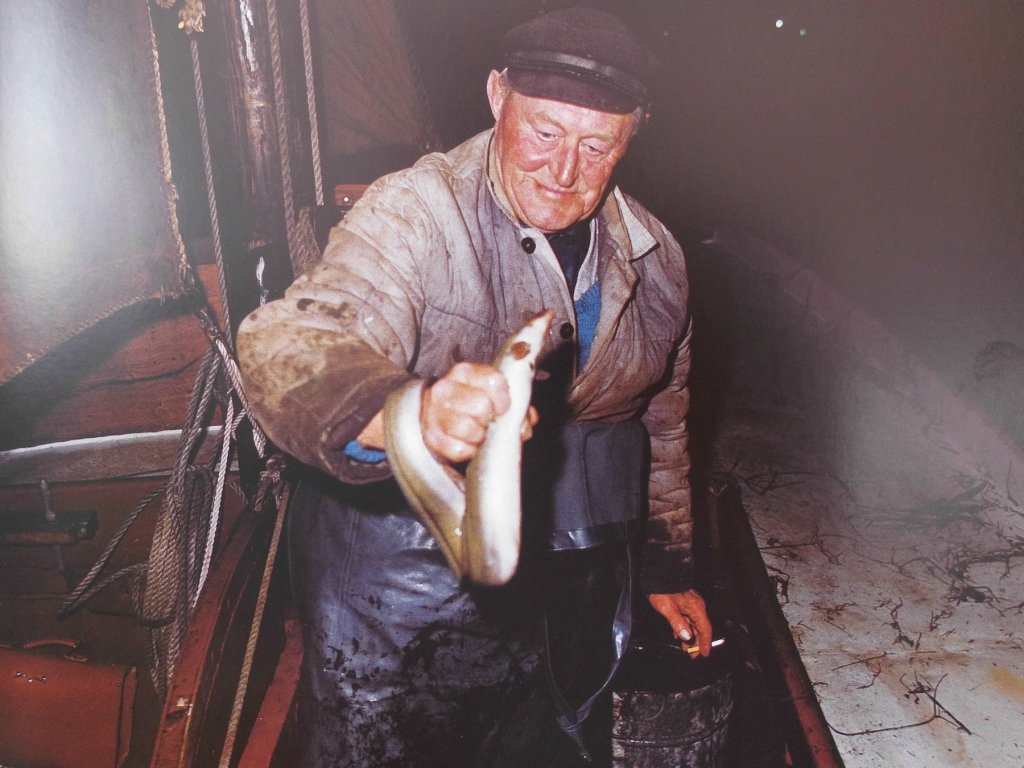
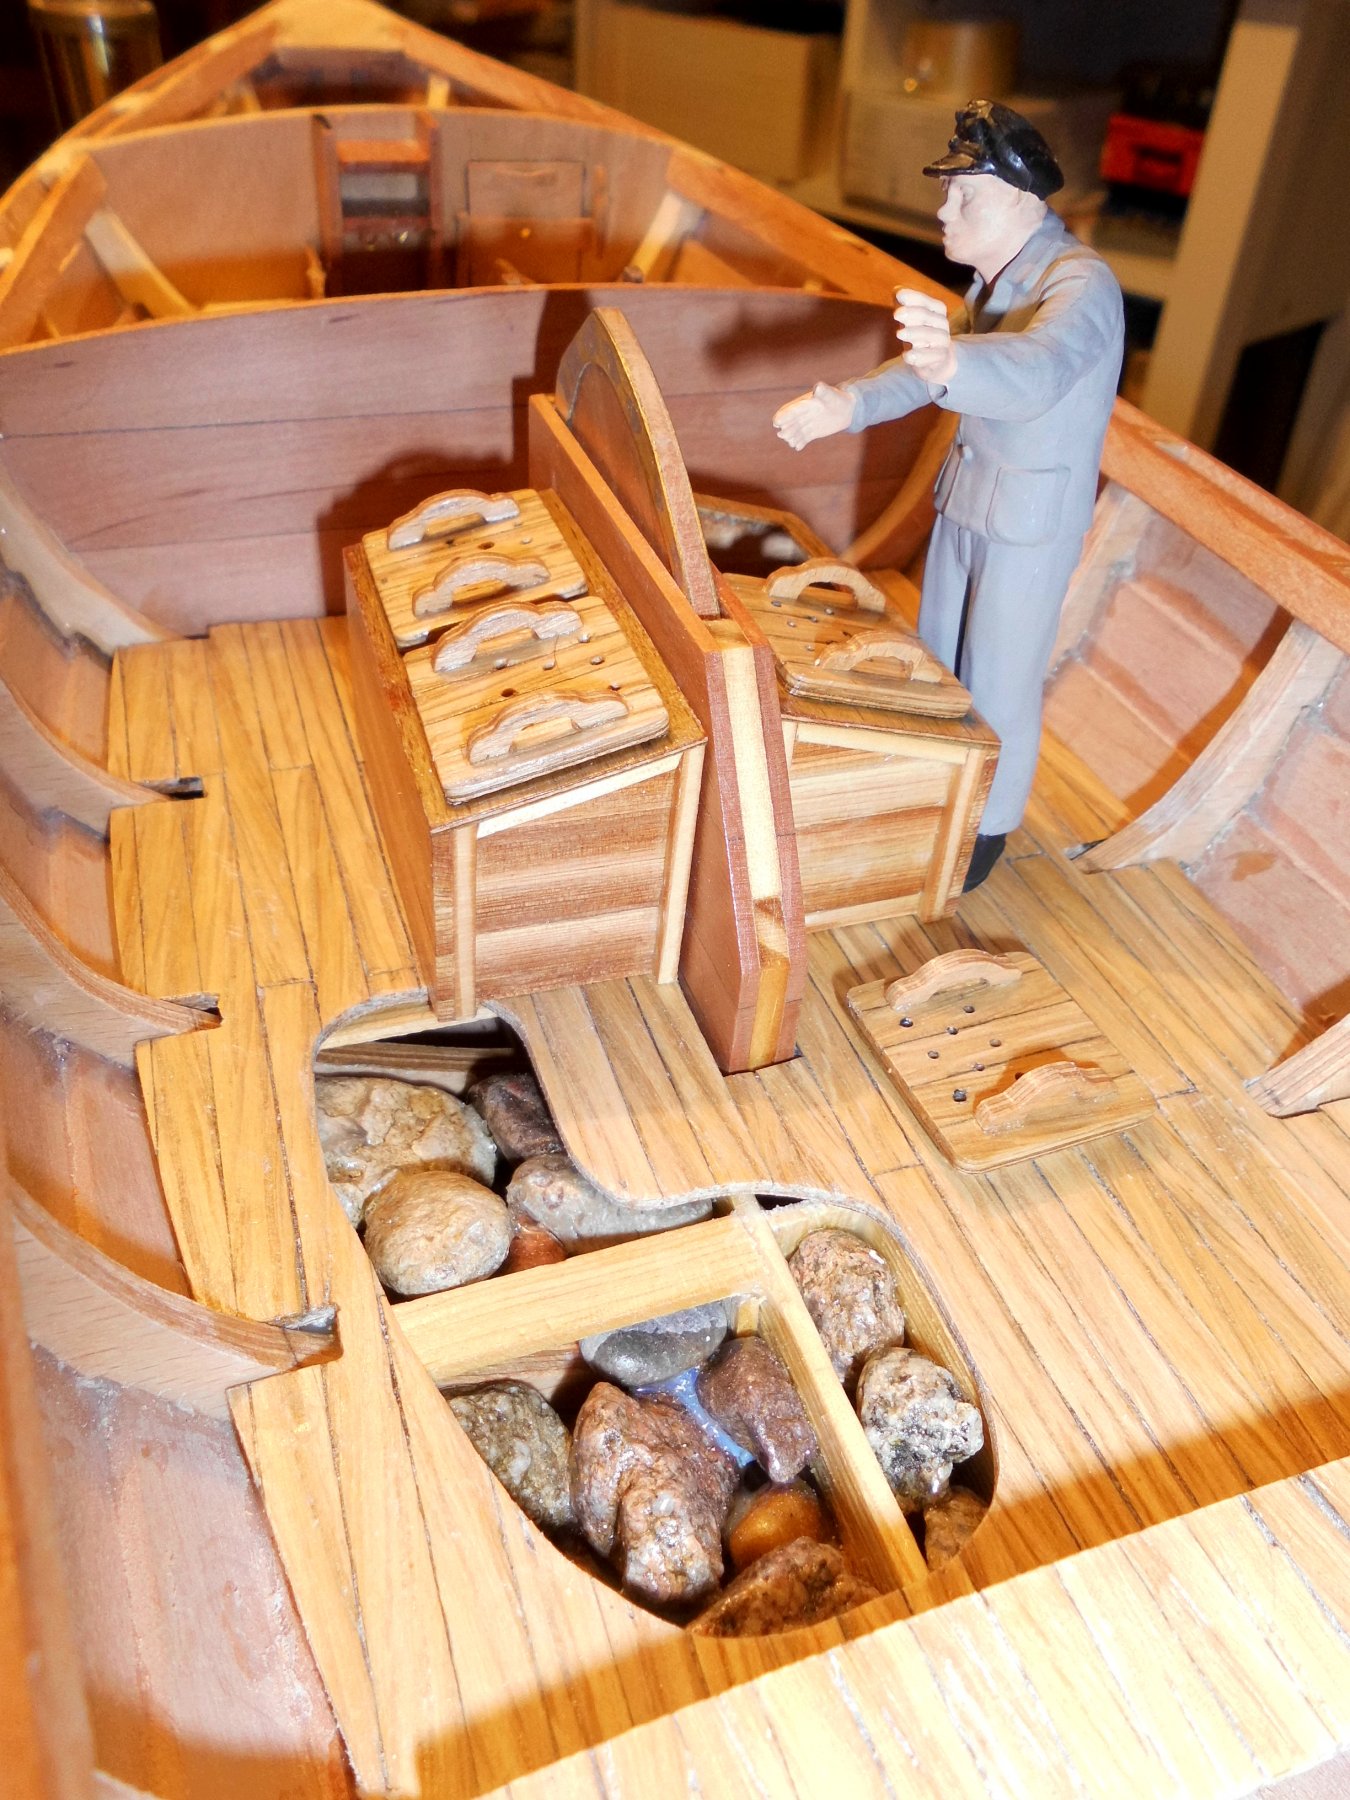
These two pics are out of my own book "Zeesboote" by Hermann Winkler, it shows the hard work even at night (note the petroleum lamp), to check out what the catch has brought
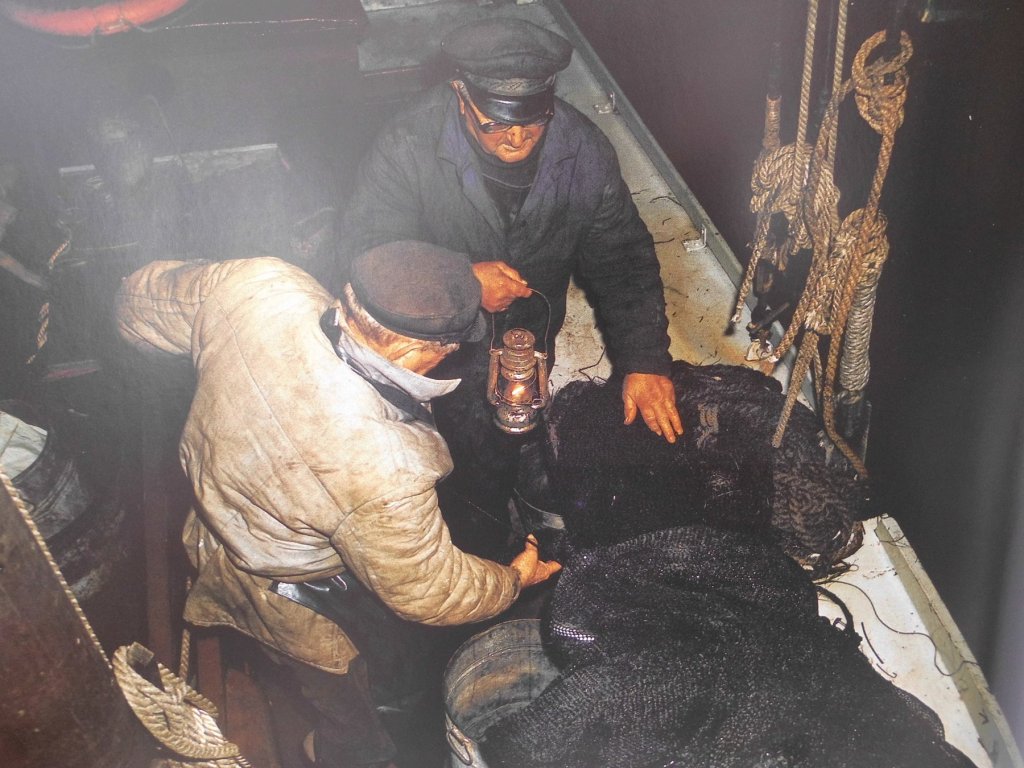
the Zeese-netting will be dumped into the buckets below
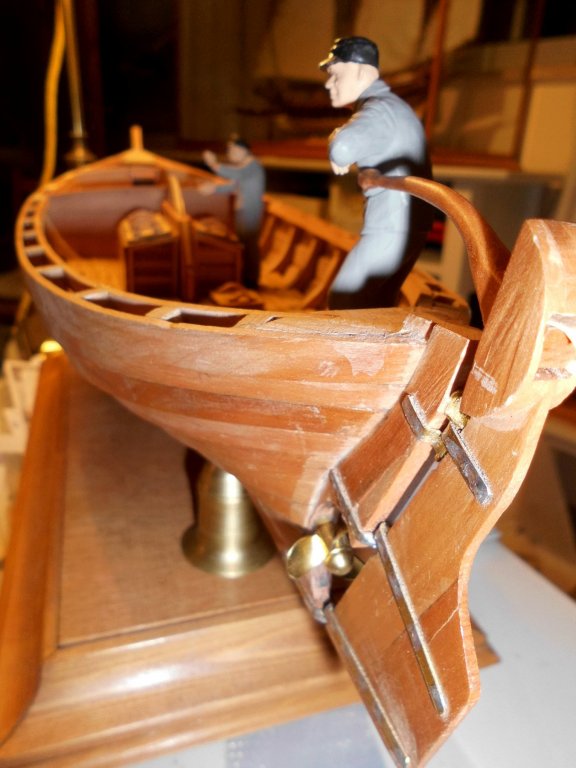


I found that the steel galvanised strop is nor flexible enough for the centerboard pulley tackle, will change to adequate rope zise


the prop shaft will be shortened to allow length of motor and coupling
.jpg.a6c3721c2afa044f13648f0f16a9662c.jpg)
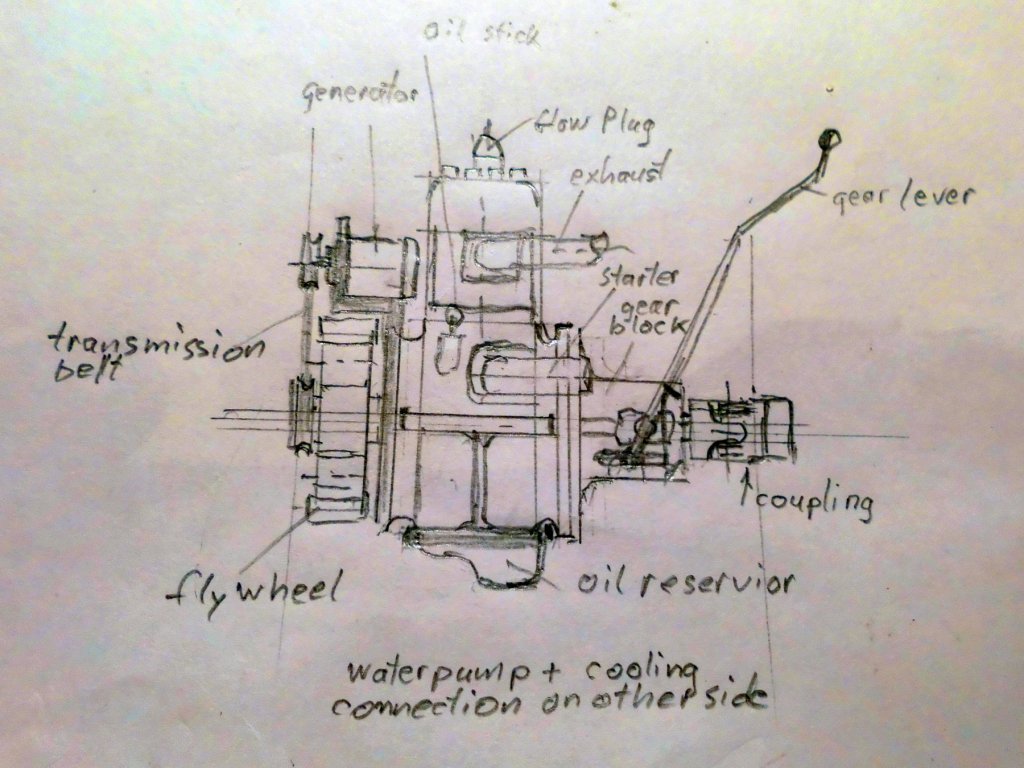
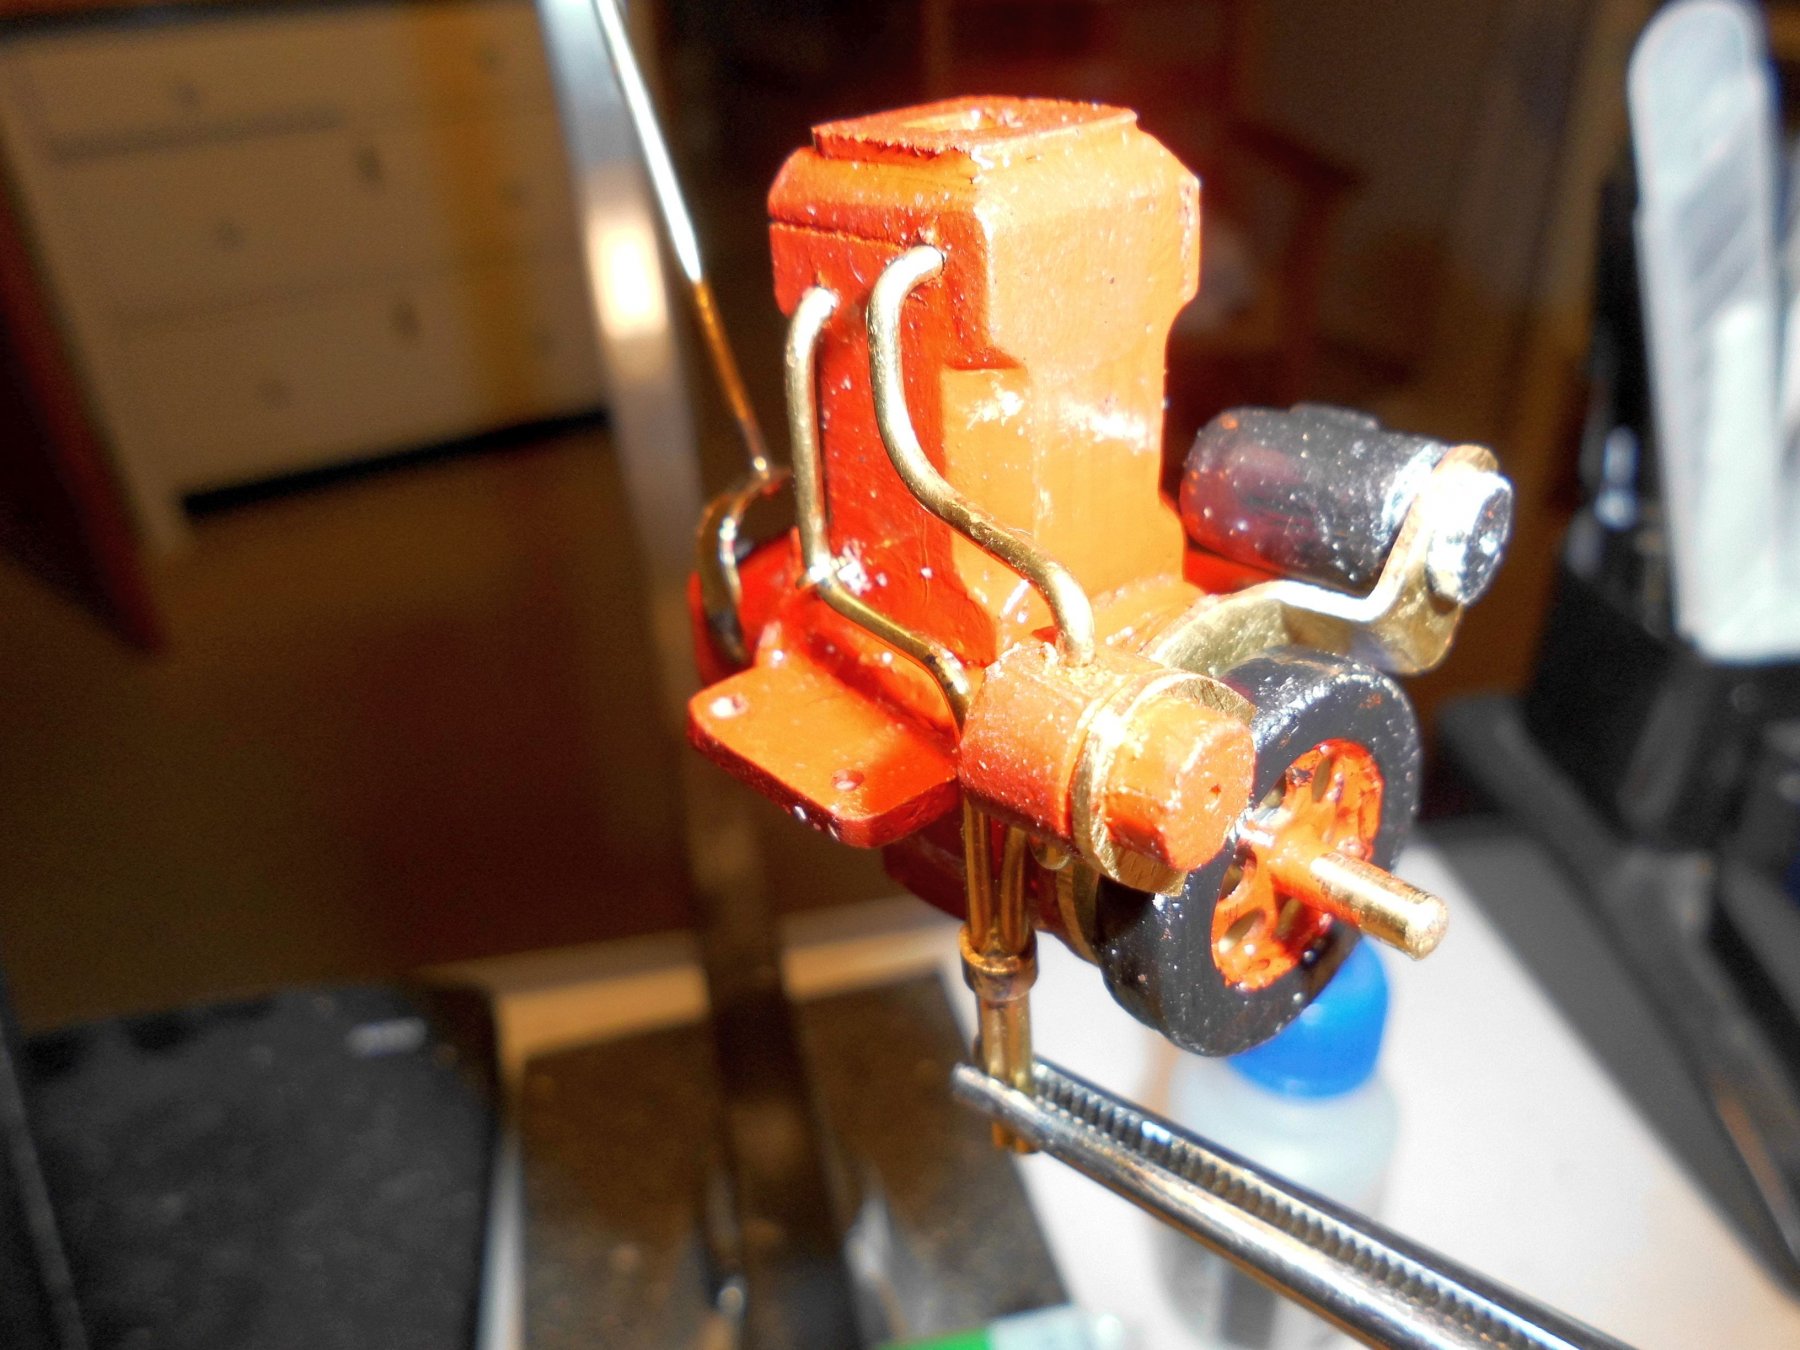
the motor will look somehow like this sample, one cylinder glow head for gas oil fuel, water cooling, complete with gearbox
-
-
Aaaah ! Super built cutter Peta
one of my favorites
Nils
-
-
many thanks Michel and Geert,
and also thanks to all the "likes"..
Michel,
I`m not sure what size the ballast-rocks have, but I`m sure that smaller pebbles would stray around in the under floor sections in rough waters. I would appreciate any pics for examle, if anyone has...
Geert,
yes, the water filled boxes contained live fish, I just made some ventilation airholes into each lid to provide sufficient oxygen...
Nils
- rafine, hexnut, Beef Wellington and 14 others
-
17
-
Status update:
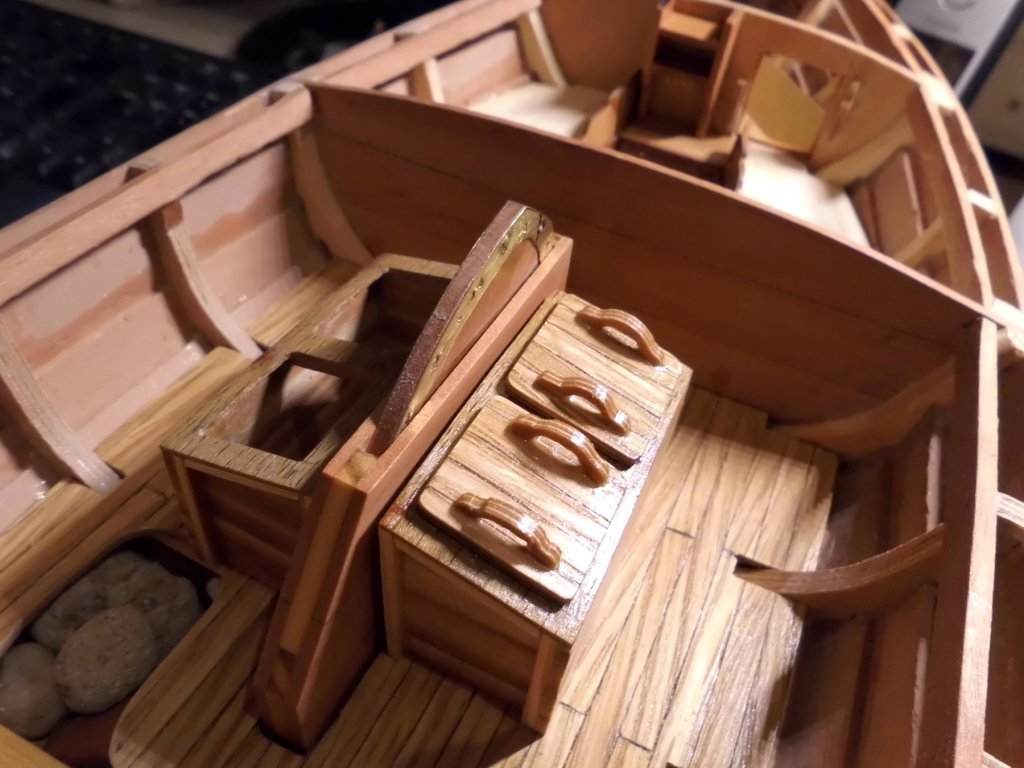
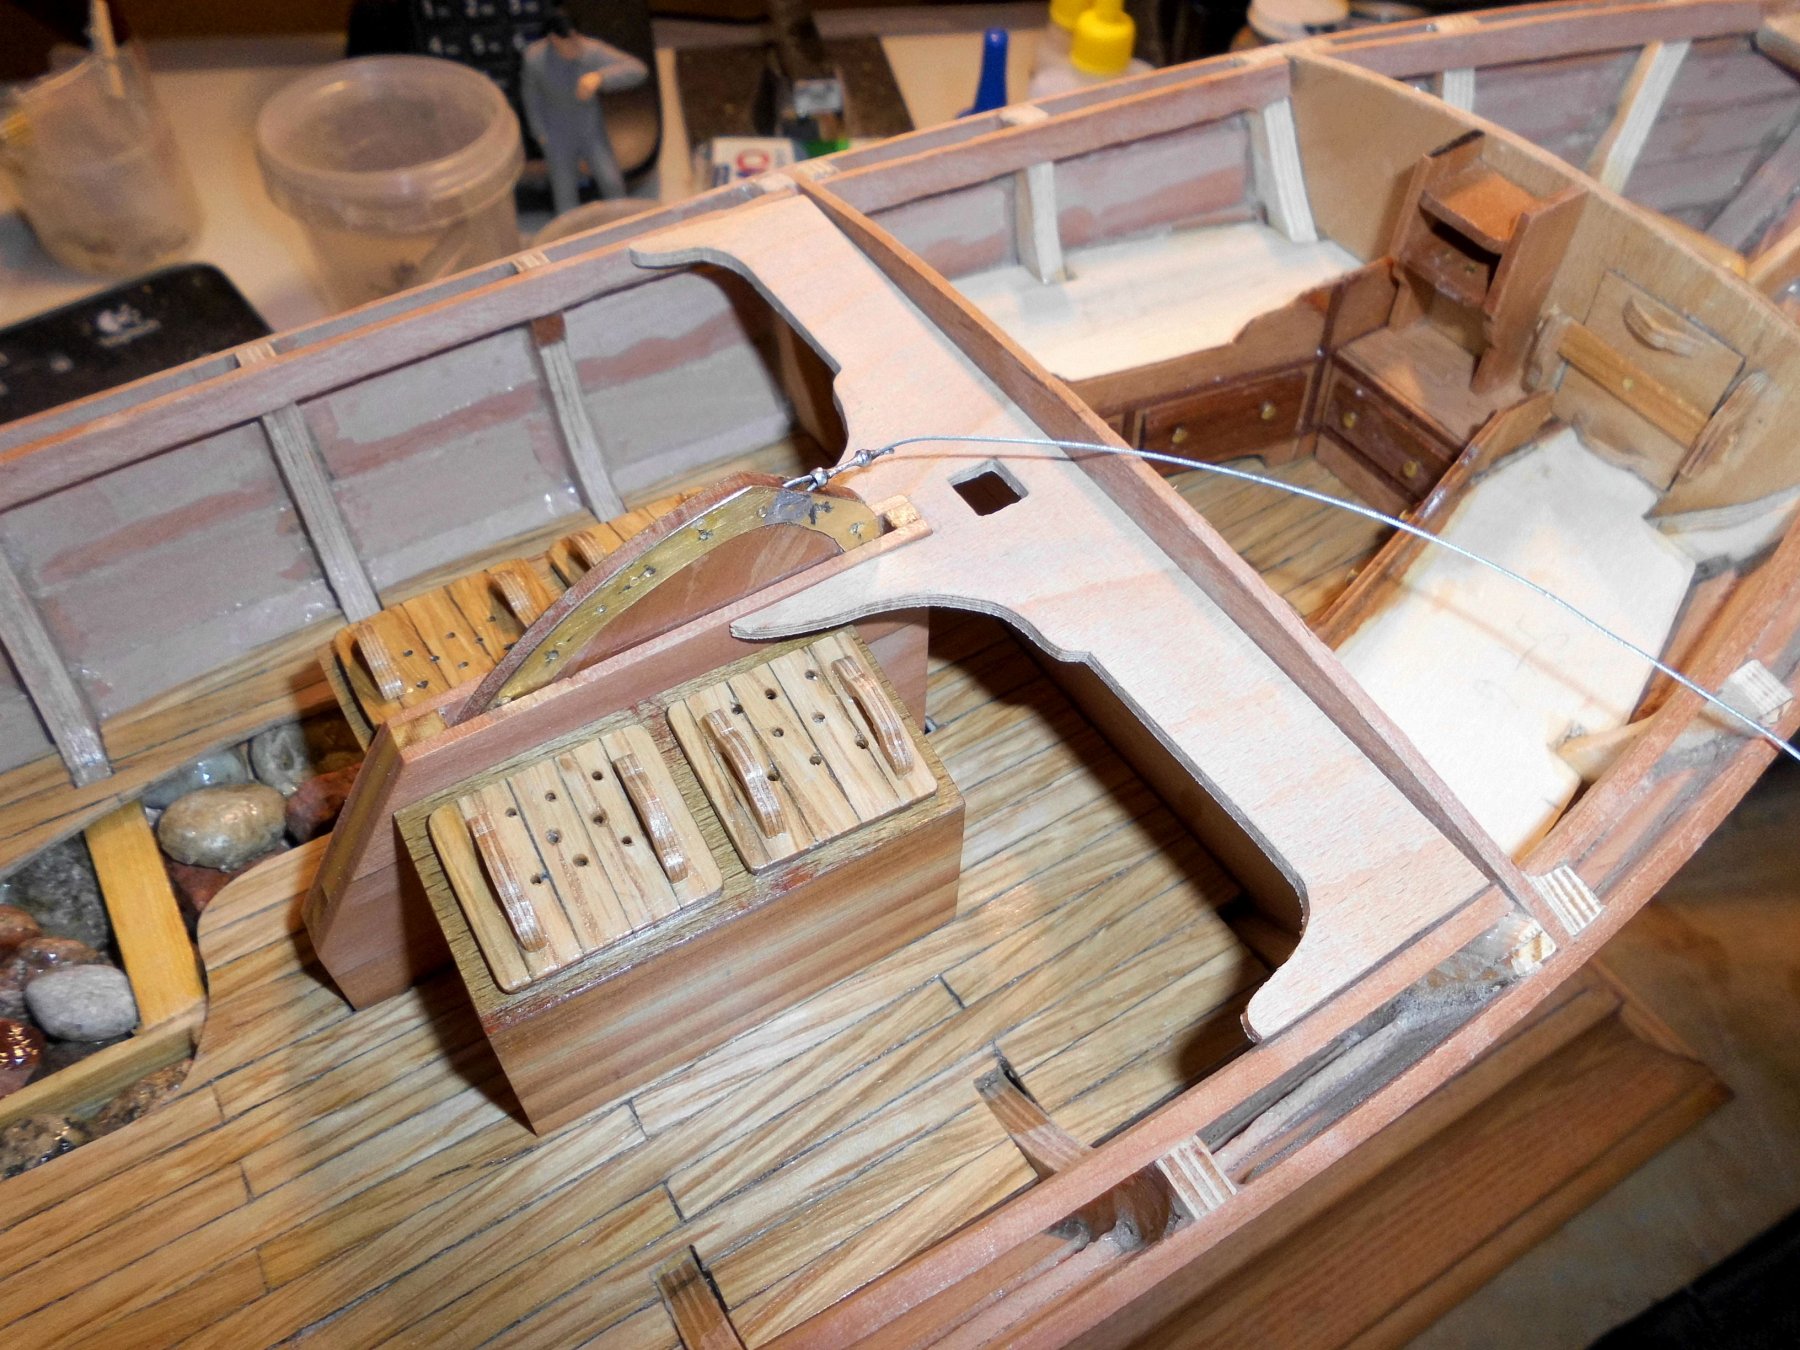
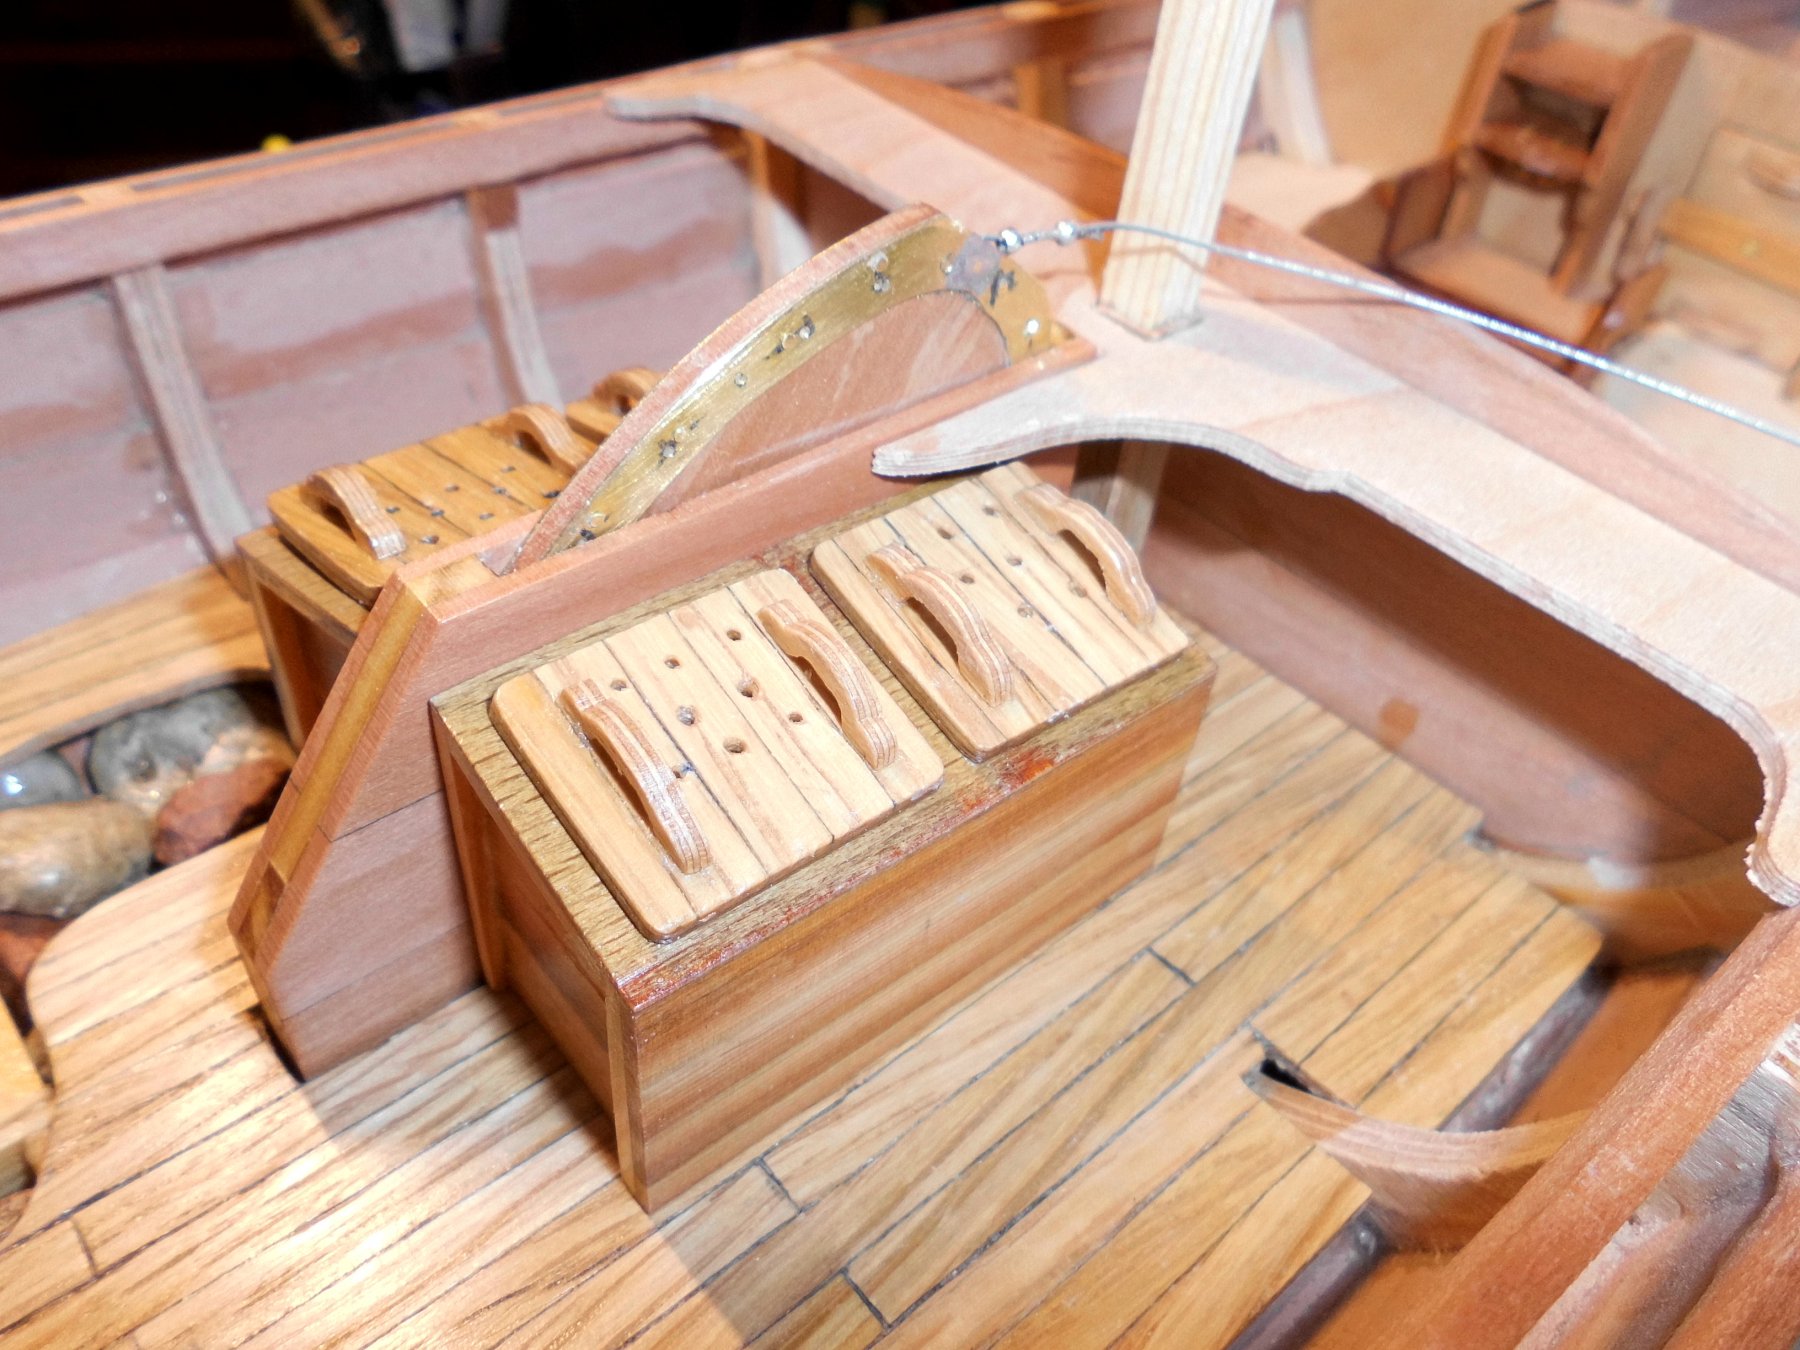
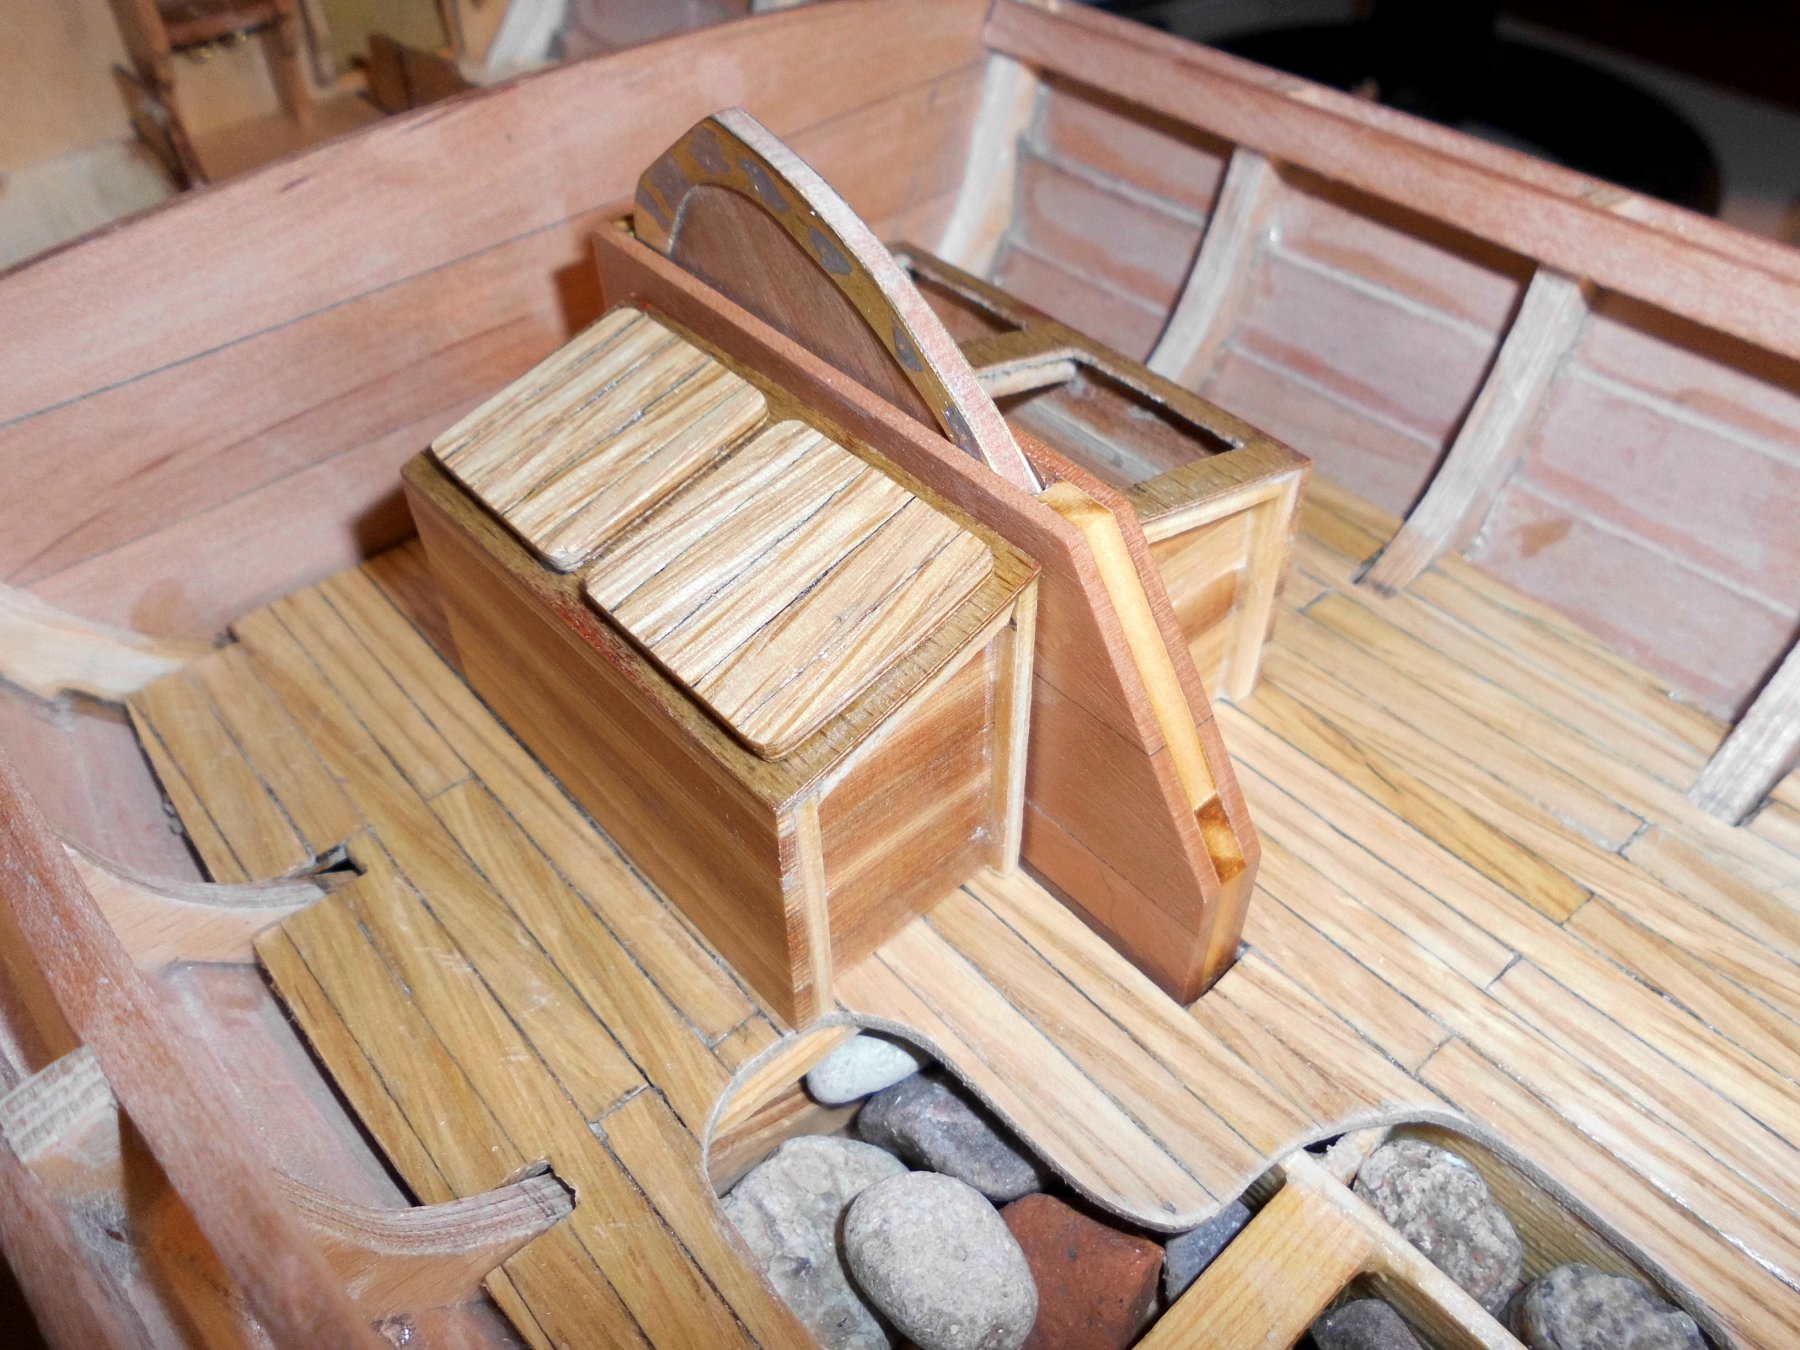
the fish containment boxes to both sides of the centerboard, and with two removeable lids each, have plenty of room to take up the catch...
Nils


-
-
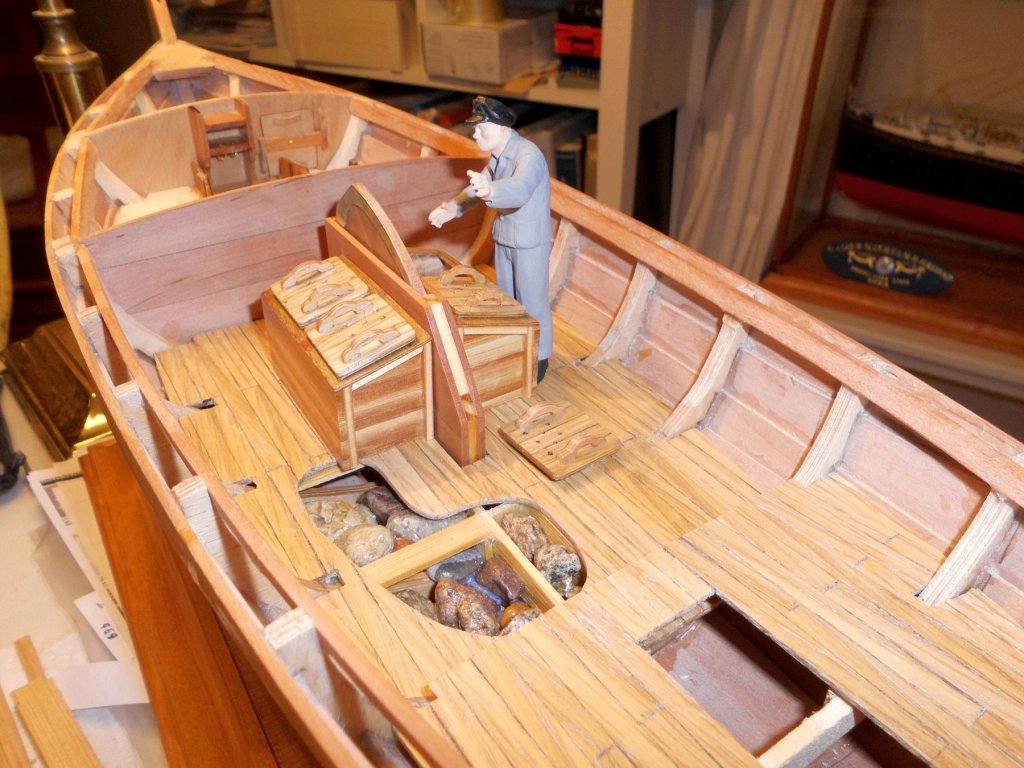
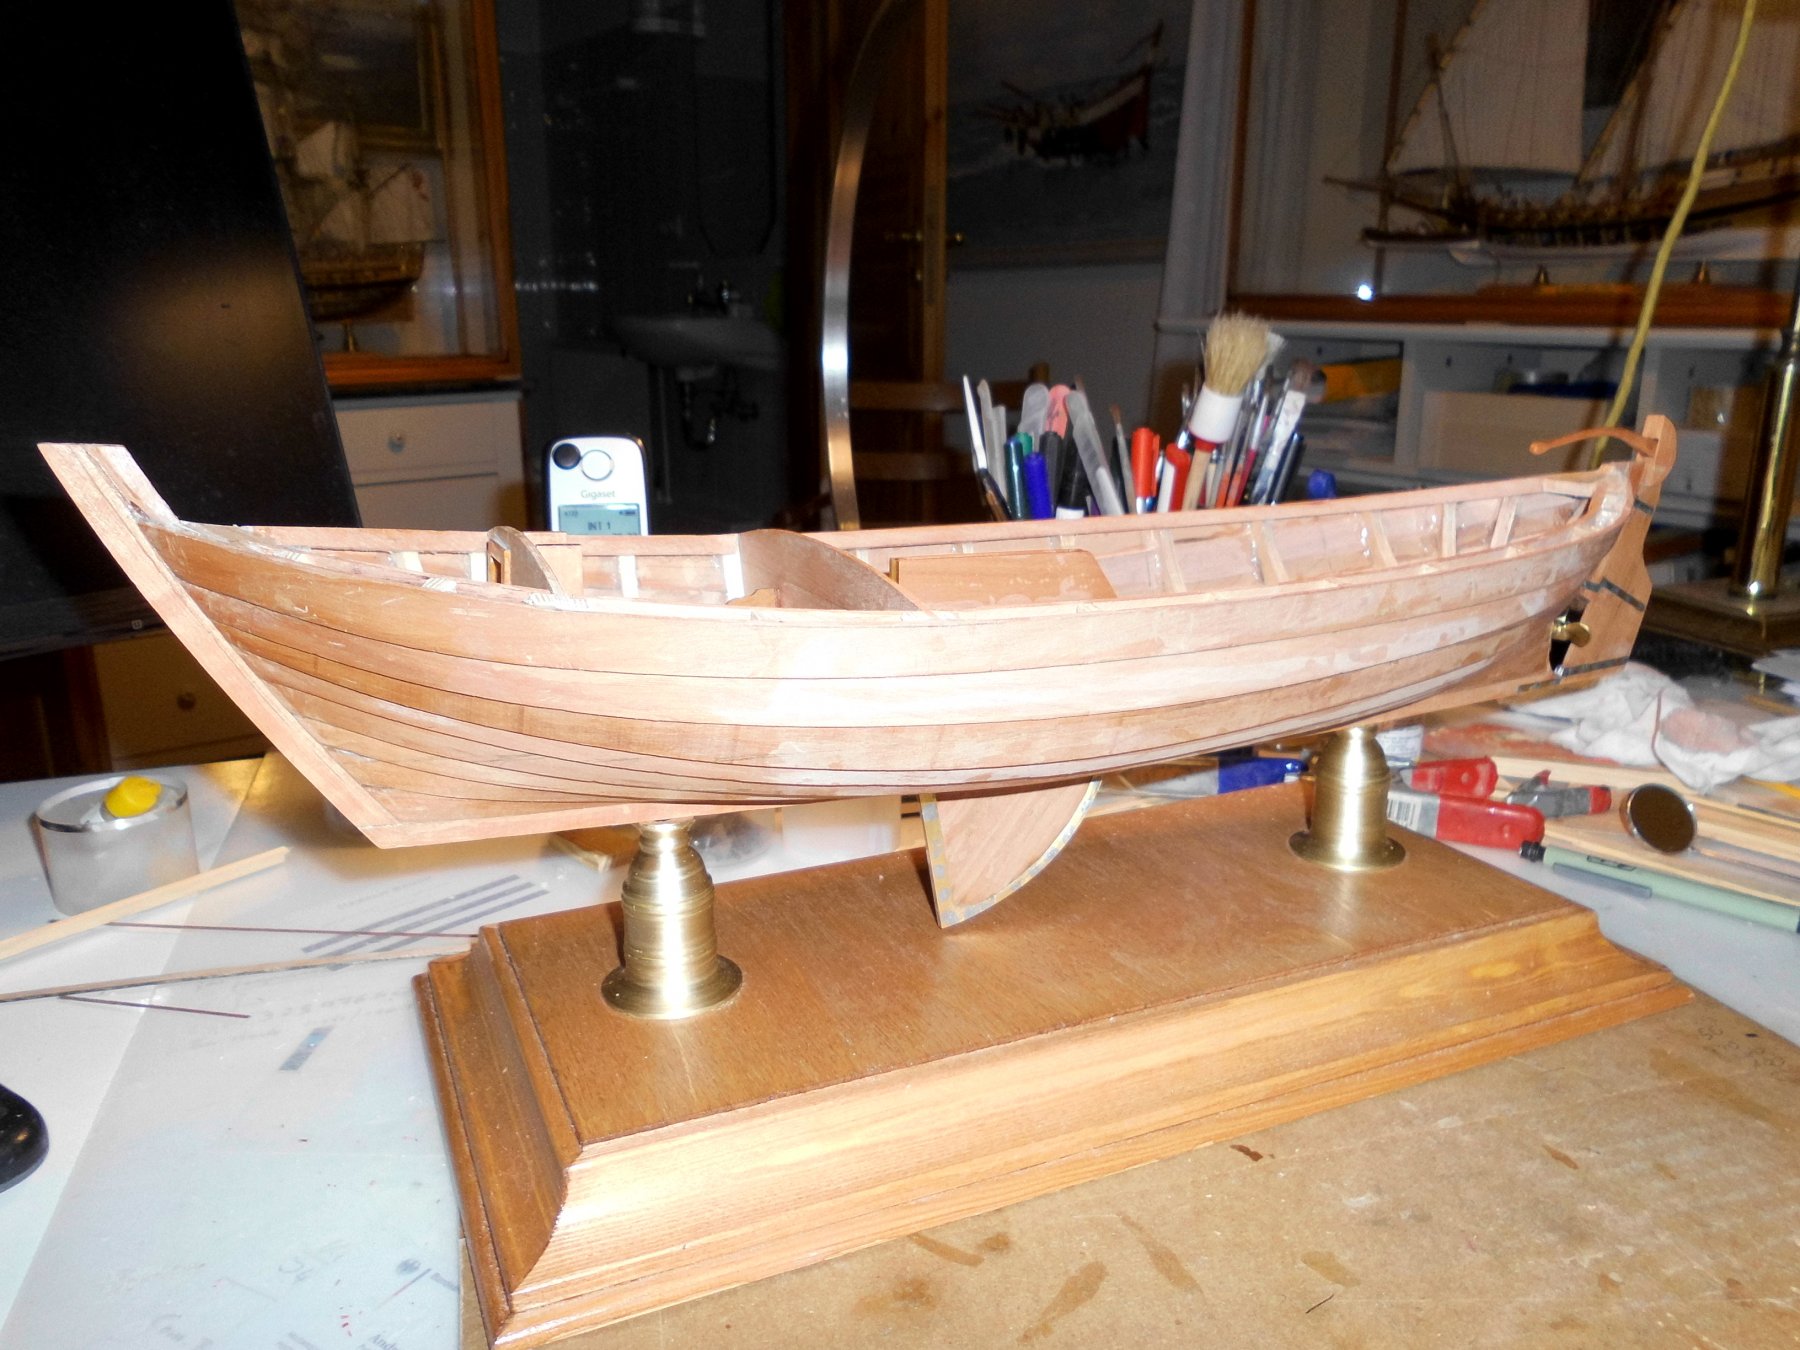
Update:
cockpit floor, ballast, outcut....
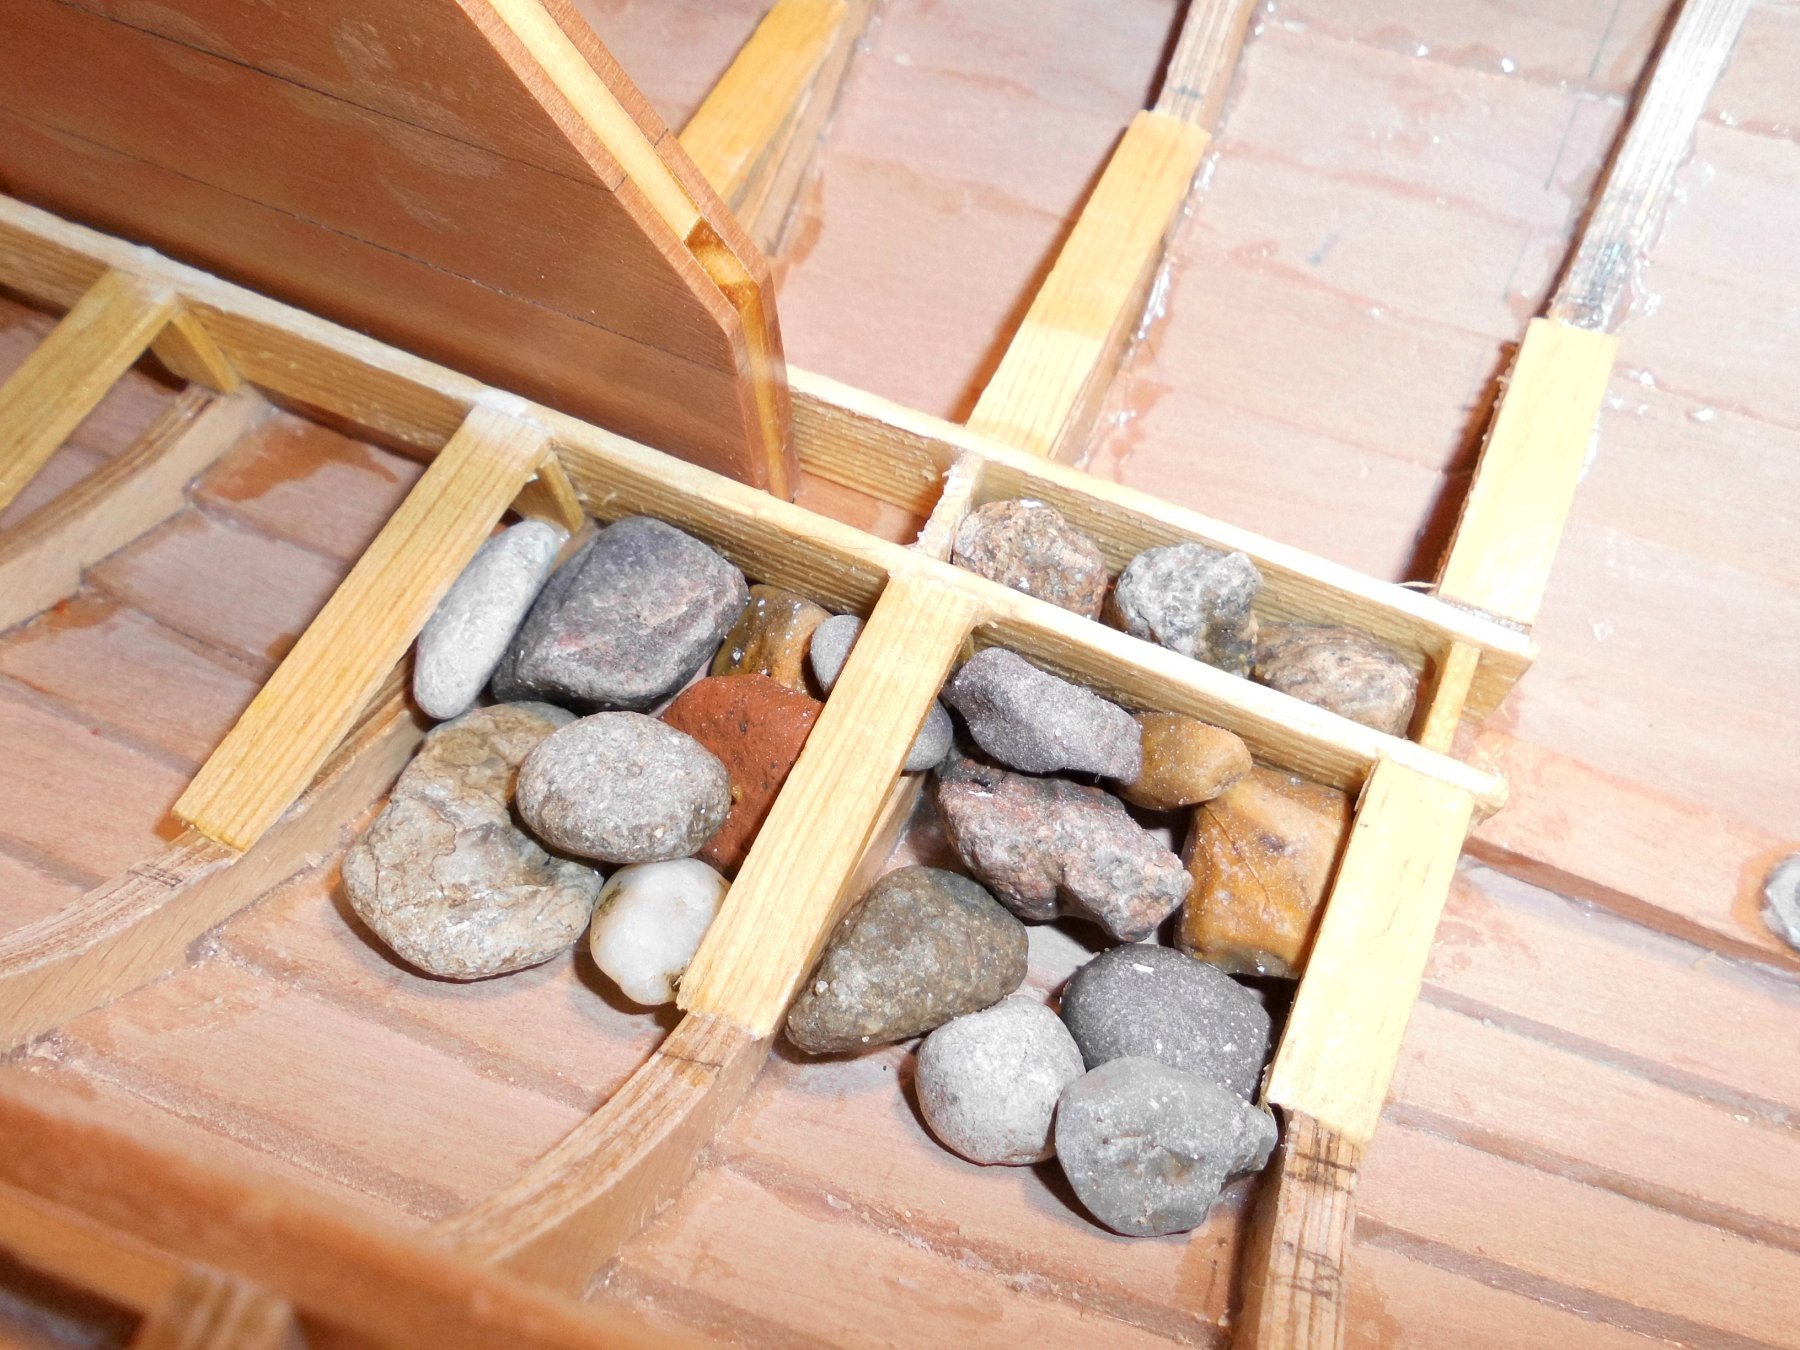
when walking the dog this morning, I was gathering these small "rocks" for use as natural ballast, well hidden beneath the floor planking
Nils
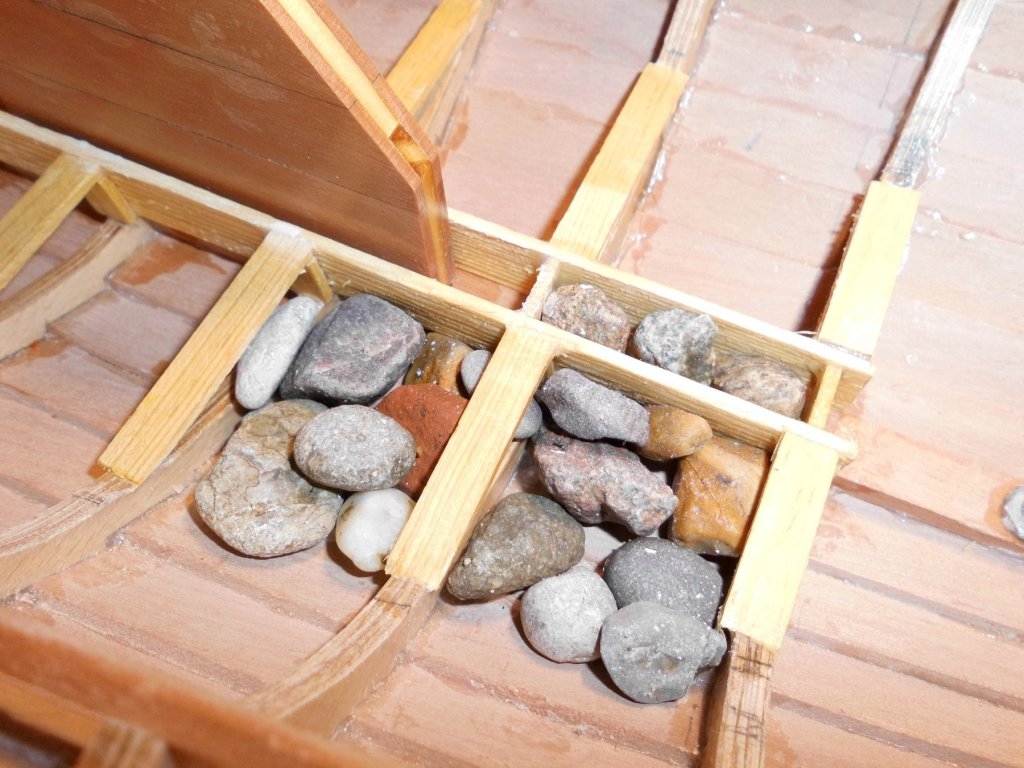
the ballast stones here will only be placed in these underfloor cells that remain visible through the floor outcut
- Keith Black, Siggi52, mtaylor and 15 others
-
18
-
Merci, thank you very much Michel,
and for looking in on my build log, I`m pleased you like it
Nils
-
many thanks for looking in Peter and for your nice comment,
yes you`re right, comfort on the Zeesboot is going against zero. The model is more of the heritage type around turn of the century, after the two world wars, when these were pure working boats. The motorisation is a compromise already. I`m sure that many of the modernized, overhauled and new fitted out boats turned into more or less small pleasure craft, also with extended deckhousings partialy covering the former work-cockpit ares for the benefit of more leasure and space on board.... Here the standing hight is only given under the roof of the front deck house
Update:
Starting the floor of the working area.....
Nils
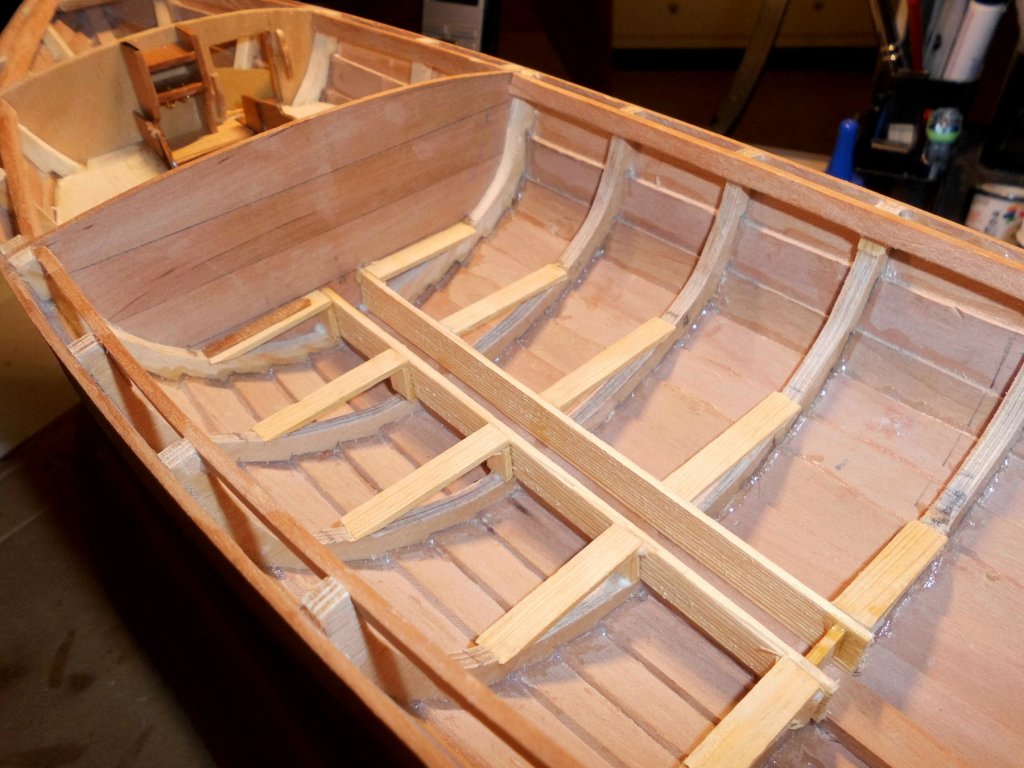
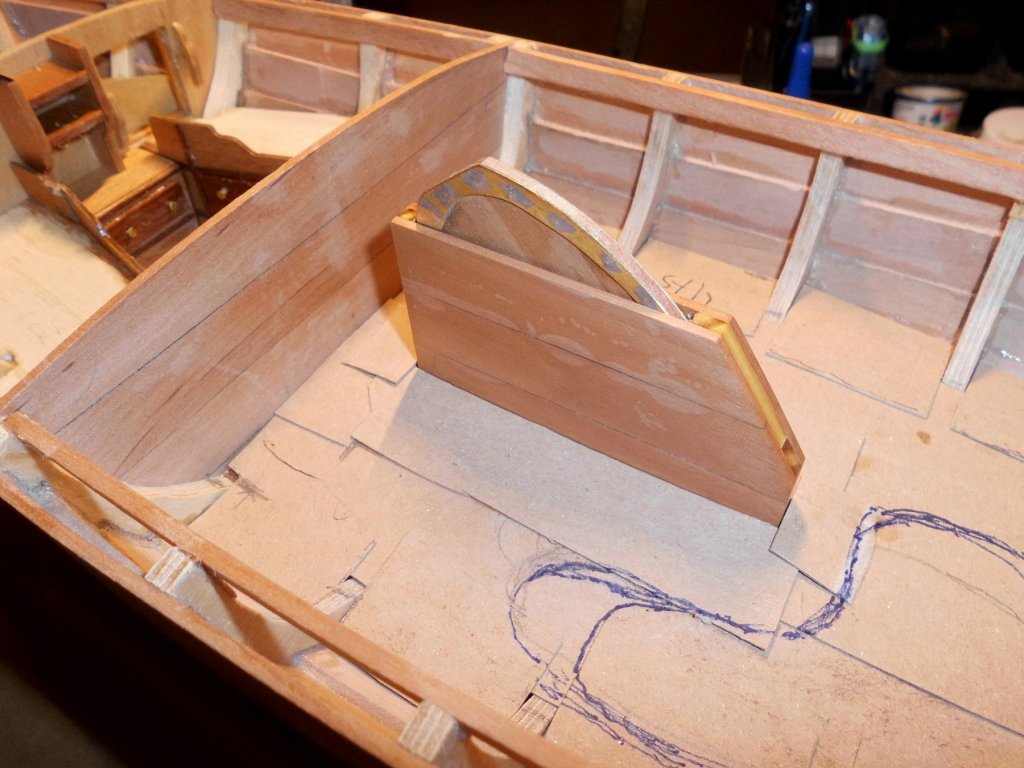
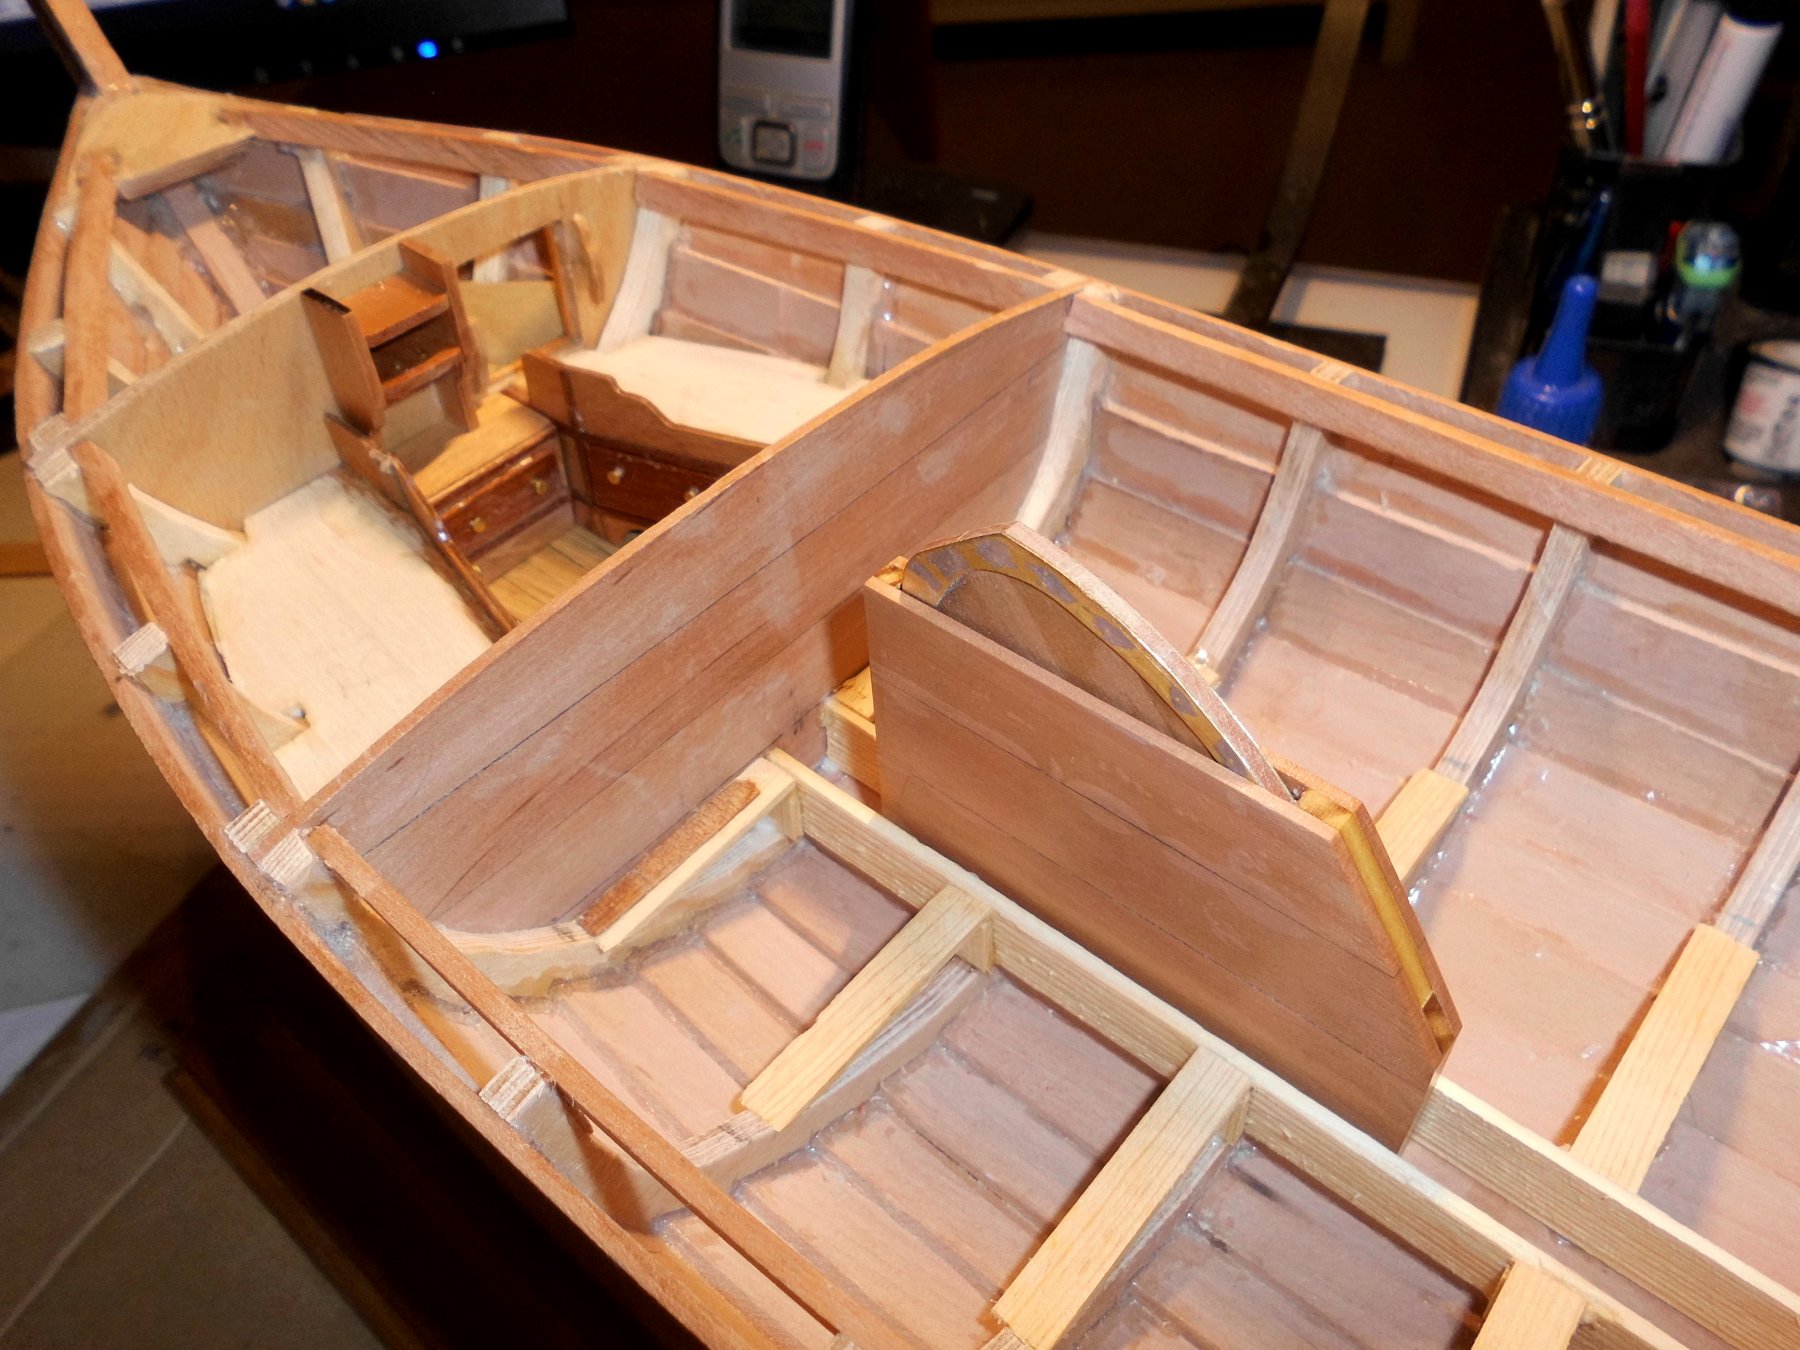
this is the cockpit floor structure
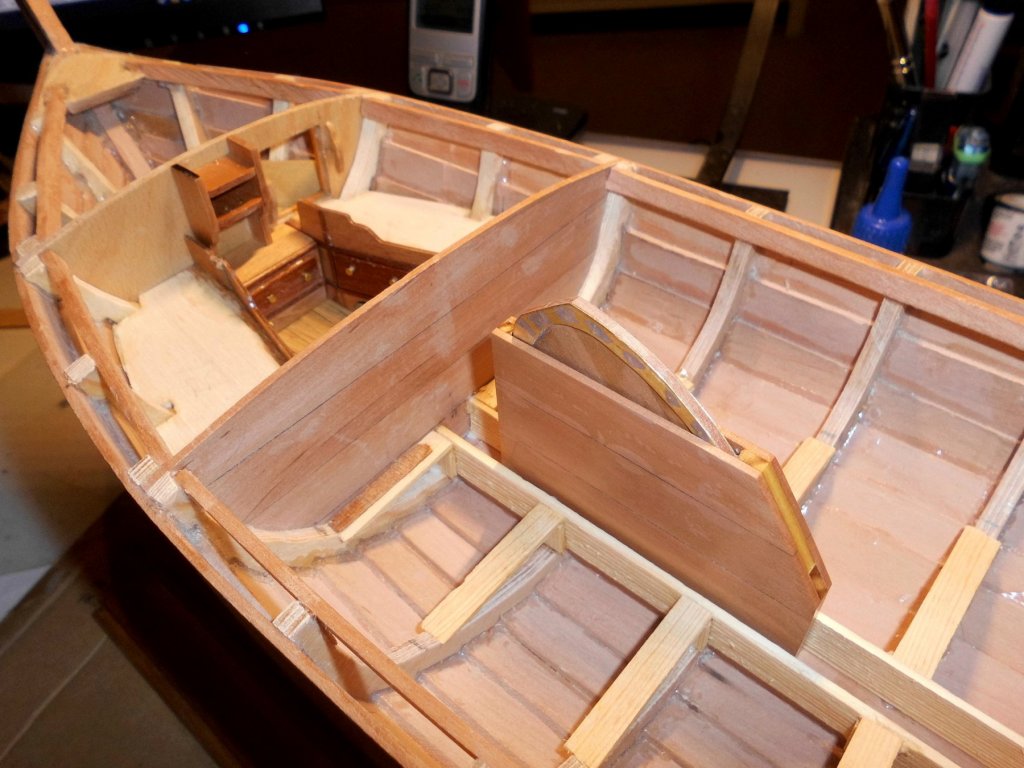
the centerboard fits in, through the floor...
I`m intending to outcut the floor afterwards, in order to give sight to ballast stones and pebbles that go between the floor structure spaces

the fisher is standing next to the centerboard casing, where there will be on both sides a water containing locker for live fish, directly from the catch
he shall maybe be holding a reasonable eel in his hands, before it goes to the locker....

the cocpit floor is done with a thin layer of 0,8 mm ply, planked with 1 x 5 mm stips of oak with pencil caulked edges. The outcut for the centerboard case is being integrated


Zeesboot by Mirabell61 - FINISHED - scale 1:24 - wooden fishing vessel c. 1876 - small
in - Build logs for subjects built 1851 - 1900
Posted
Hi Mark,
many thanks for that link, I`ll check it out...
Nils