HOLIDAY DONATION DRIVE - SUPPORT MSW - DO YOUR PART TO KEEP THIS GREAT FORUM GOING! (Only 72 donations so far out of 49,000 members - Can we at least get 100? C'mon guys!)
×

Vladimir_Wairoa
-
Posts
1,566 -
Joined
-
Last visited
Content Type
Profiles
Forums
Gallery
Events
Everything posted by Vladimir_Wairoa
-
 my thought as well stuglo. seing your bottomline "arsenal" i am gonna jupn on it straight. thanks.
- 200 replies
-
- 1
-

-
- cutty sark
- clipper
- (and 1 more)
-
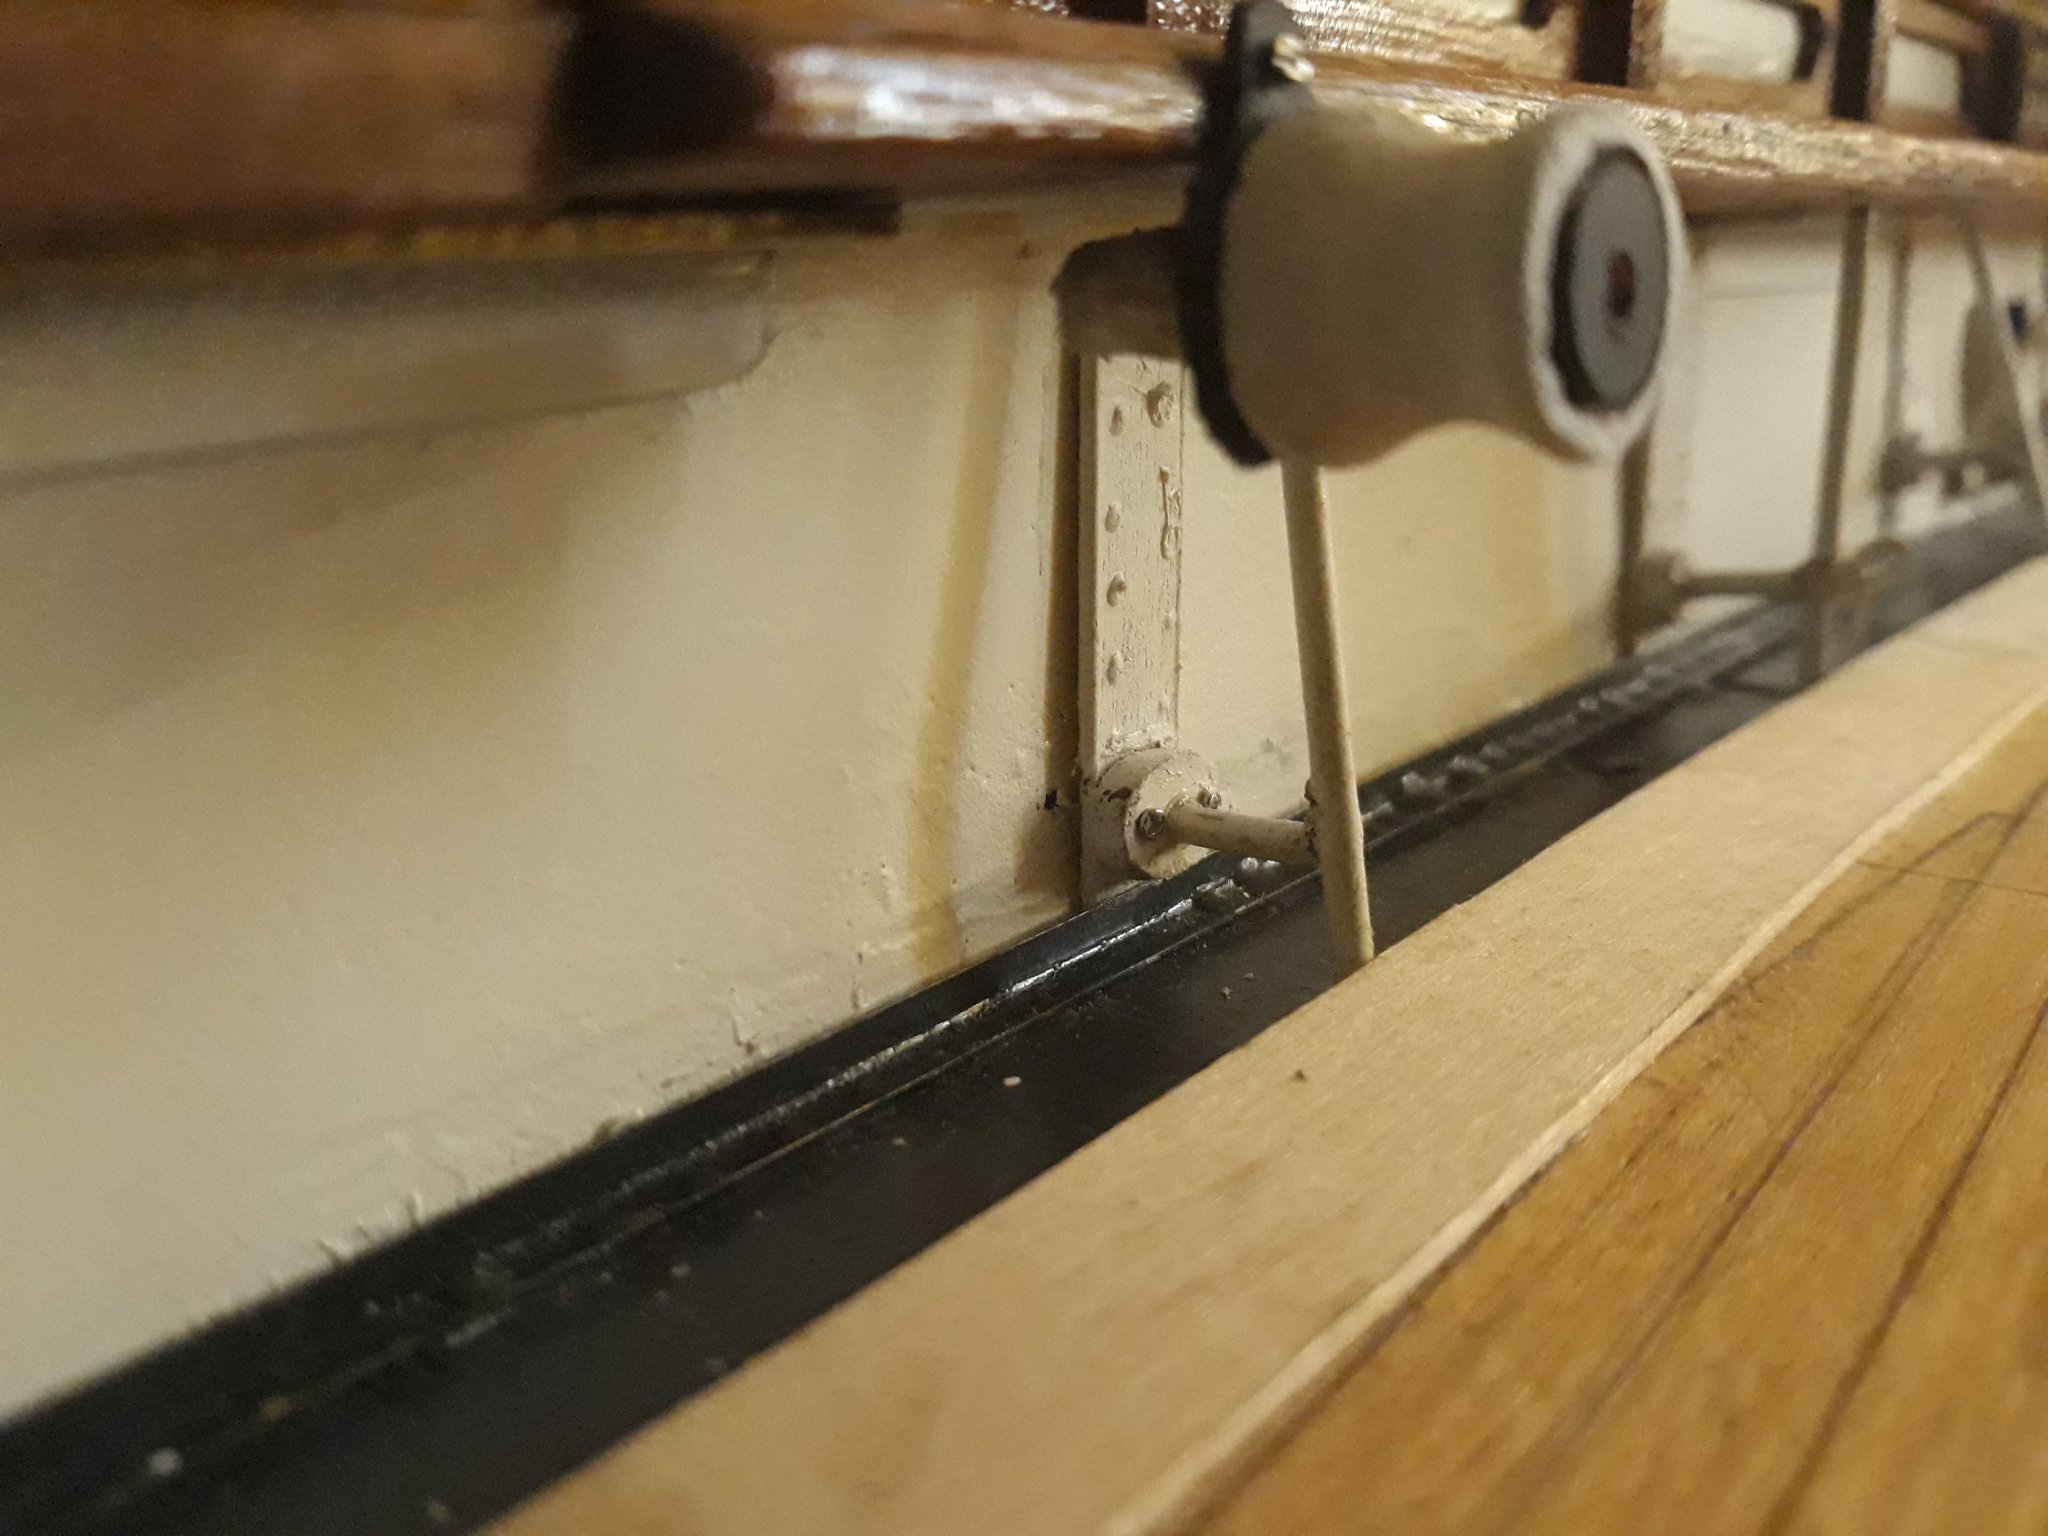
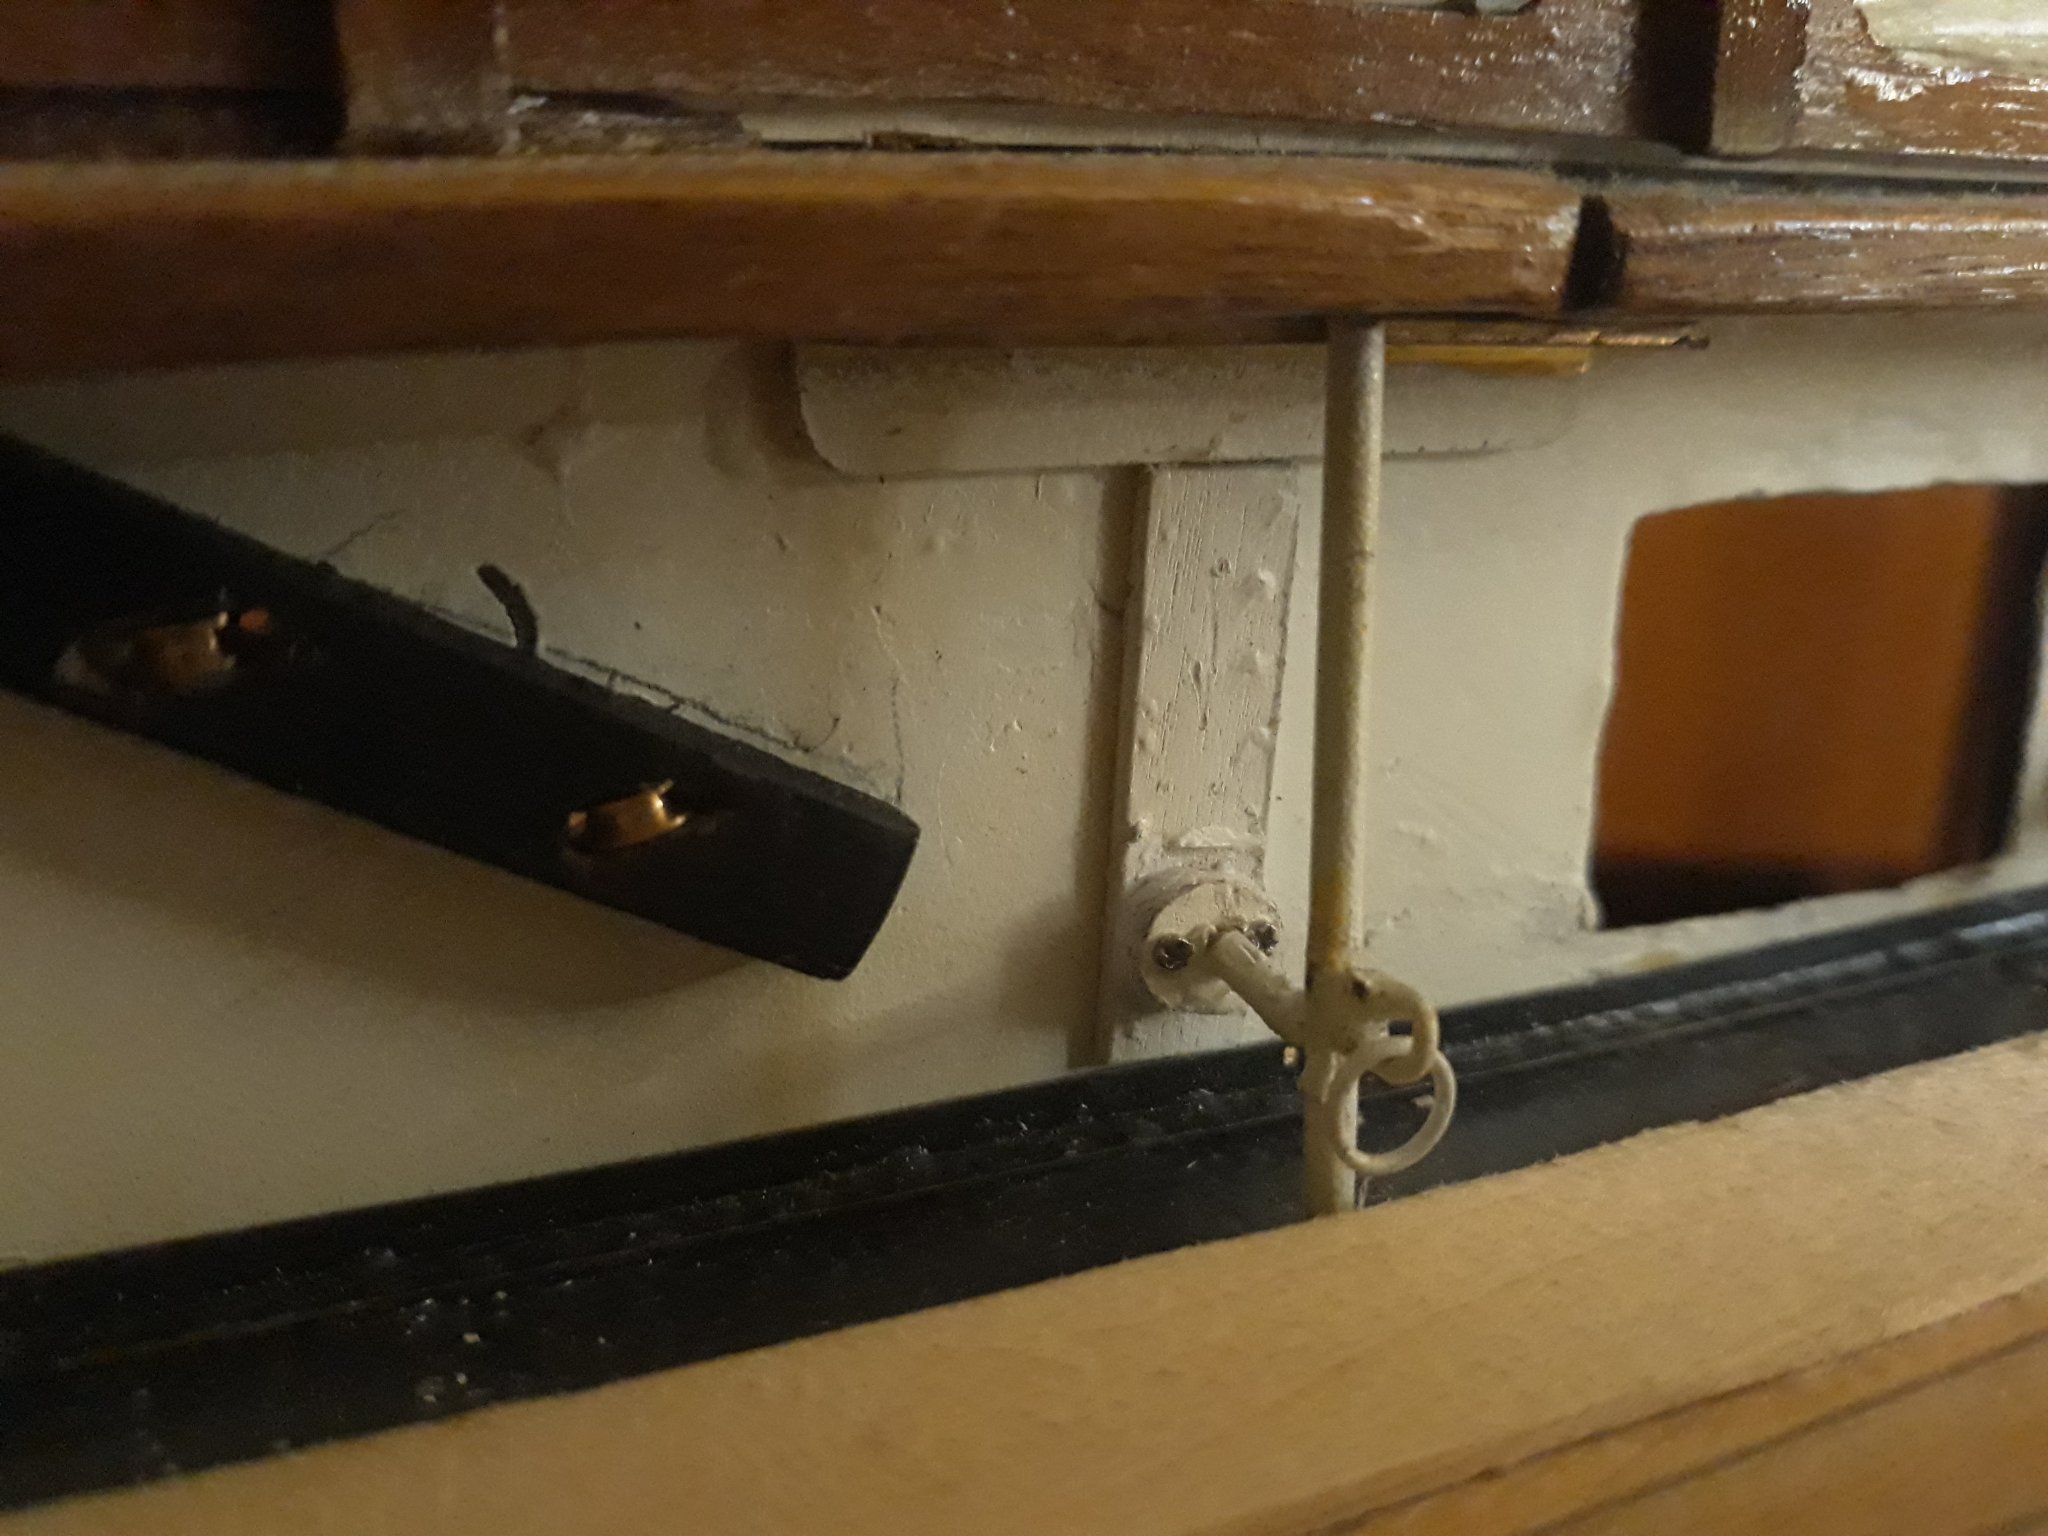
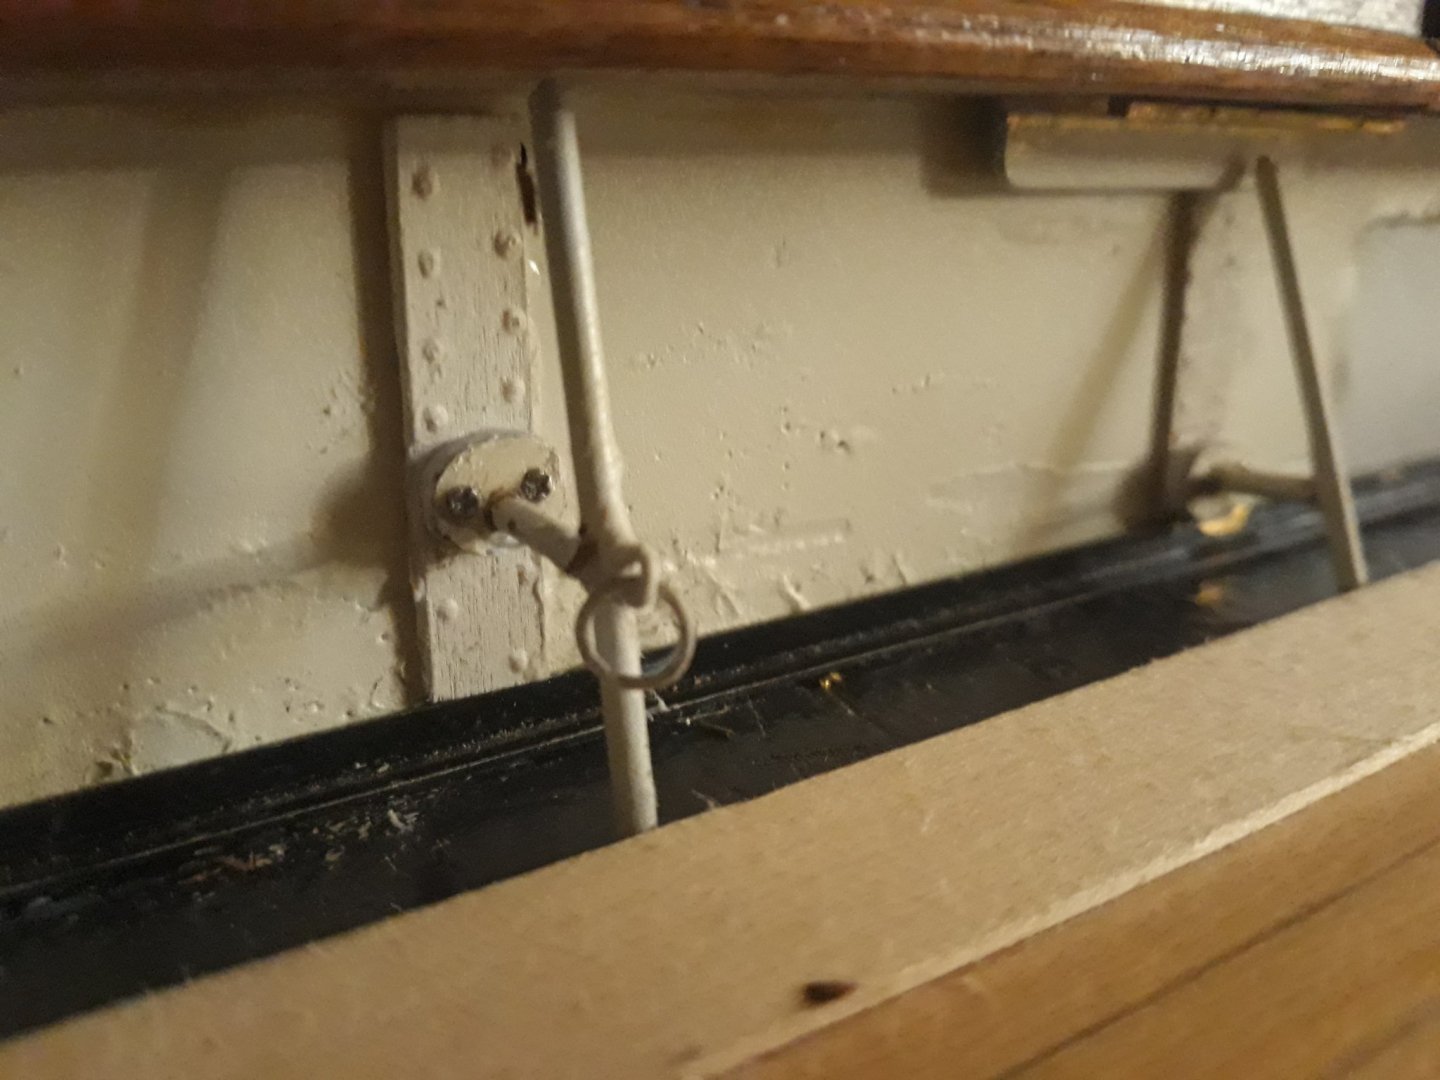
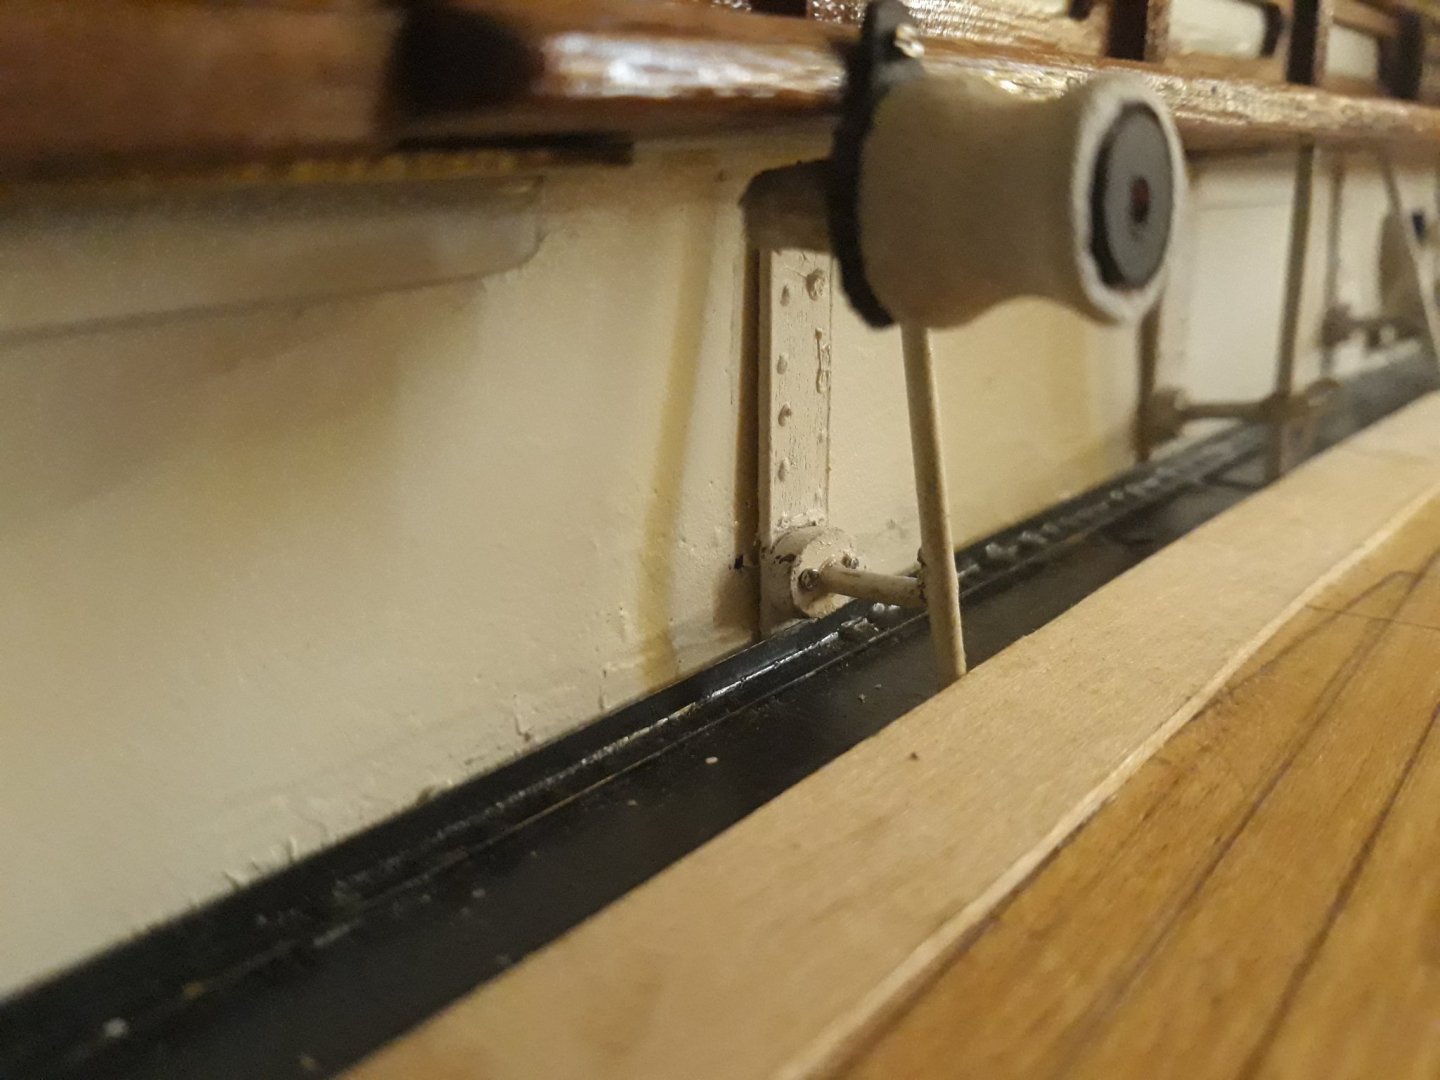
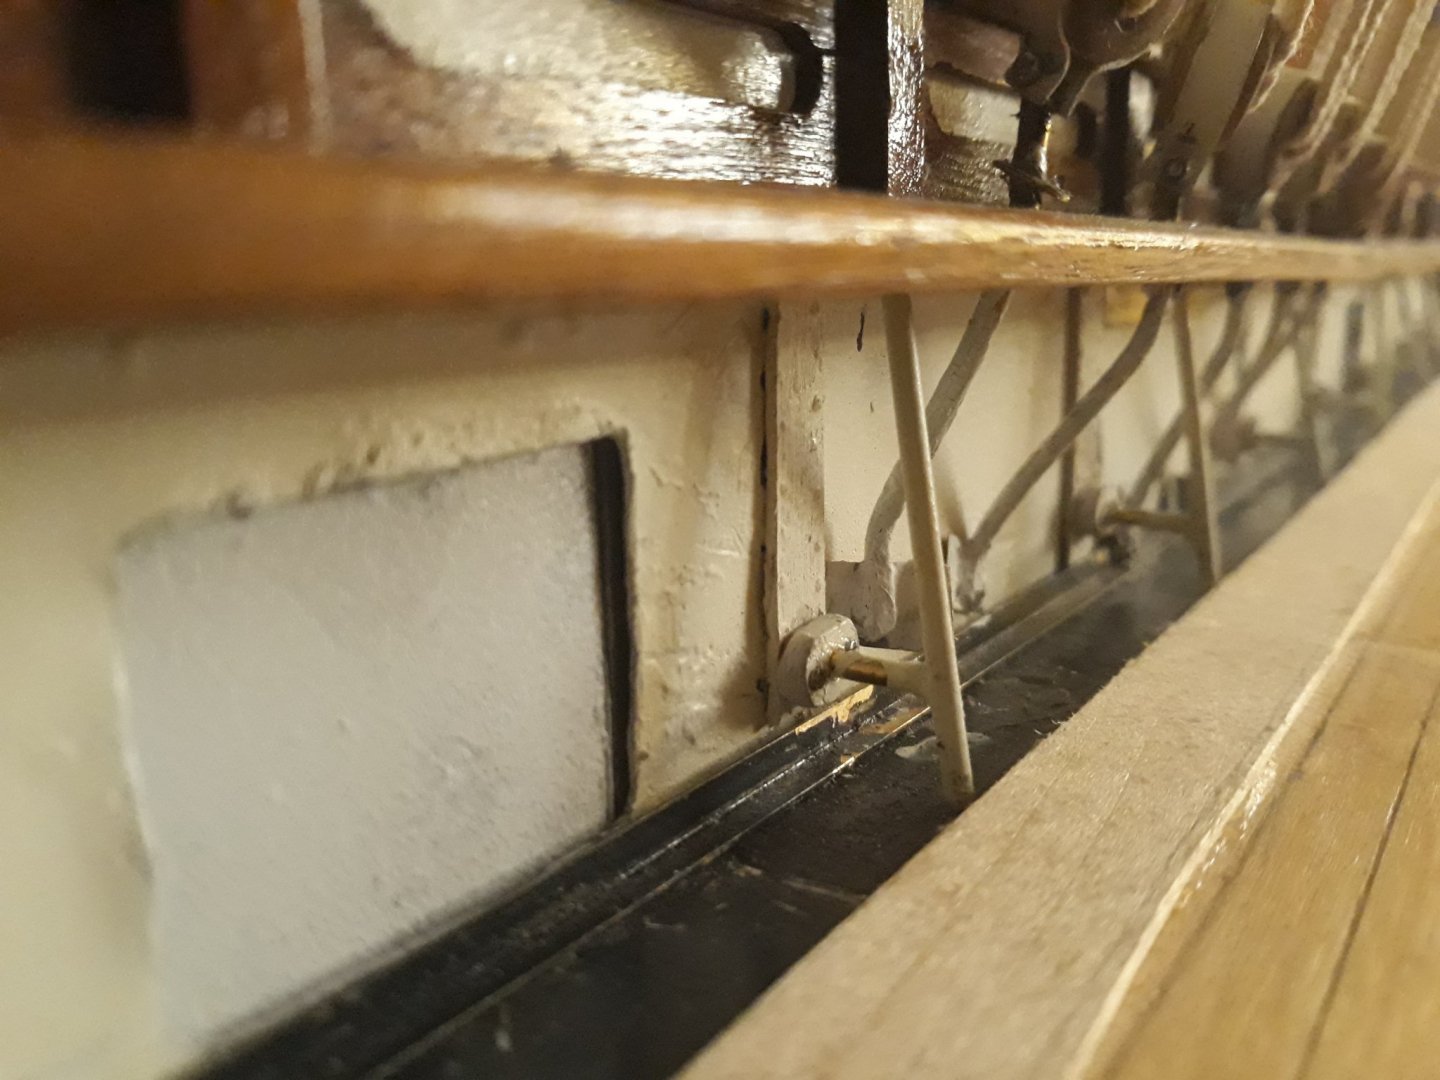
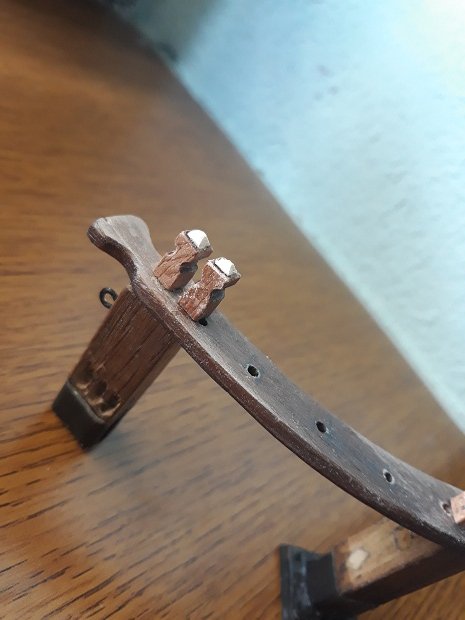
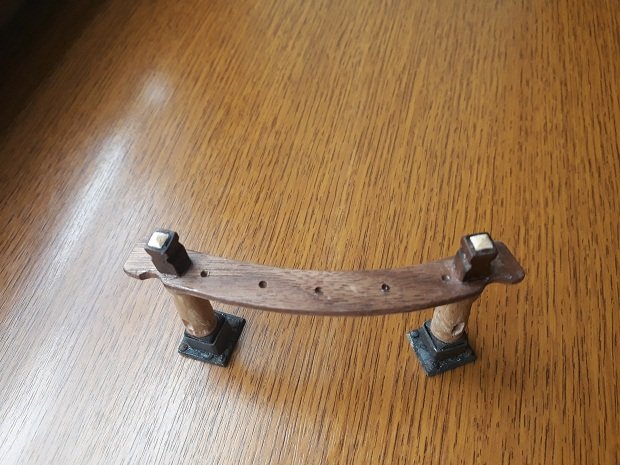
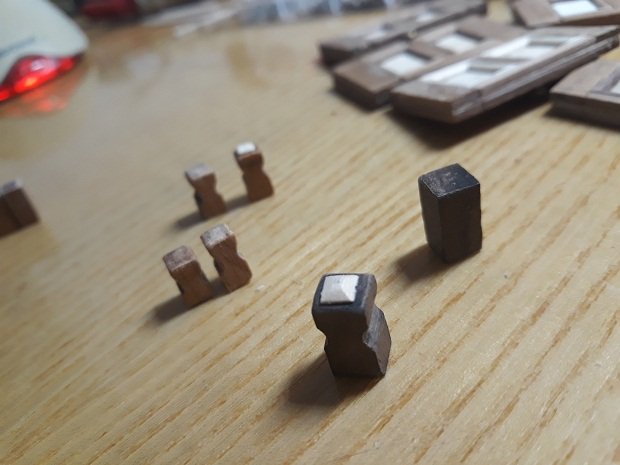
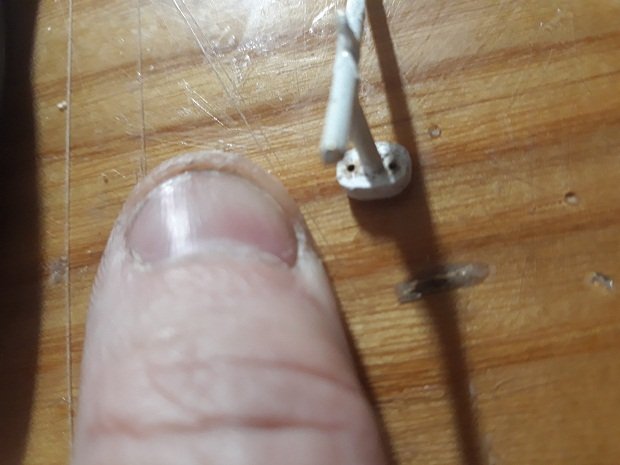
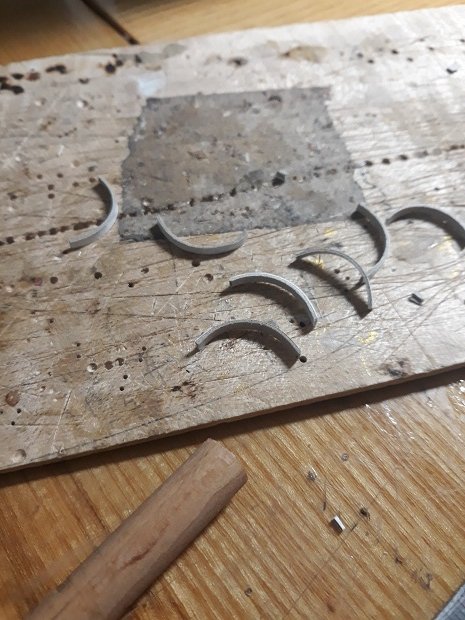
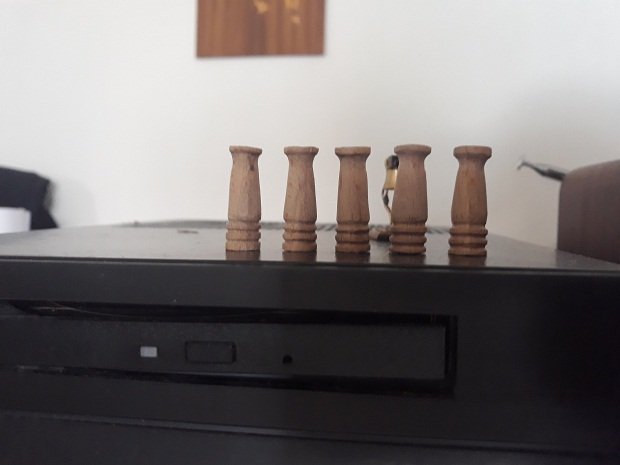
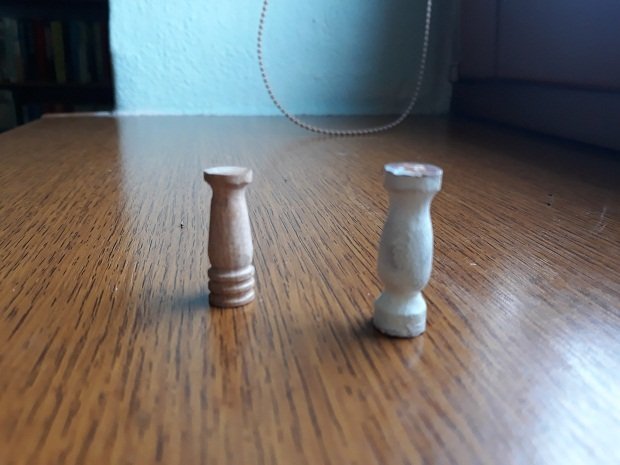
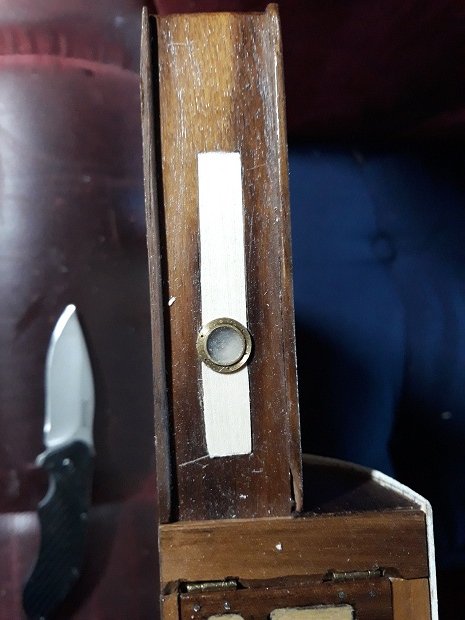
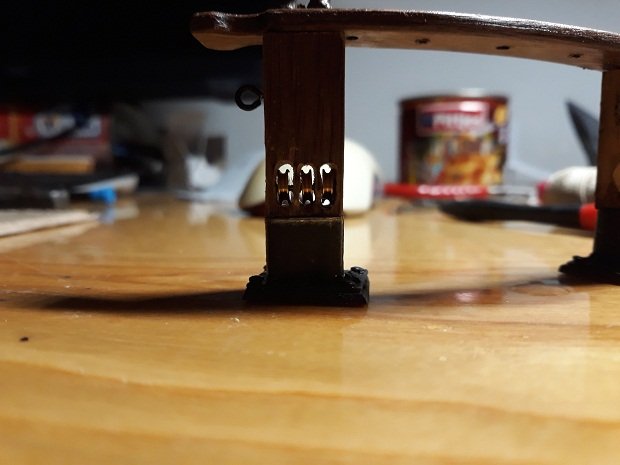
I just finished repairing bulwark stanchions attaching bit to proper oval not square shape. - I had to remove every 48 !, - cleaned off glue gently remove, - sand off sharp edges to form oval shape, -drill two holes thru them and thin strip simulatning iron plate ,-screw screws - paint every each - mark with number and ....repeat this 48 times. 4 evenings - Then glue them up to bulwark under new pkanksheer. Am i really idiot doing twice the same. Better than soldering them but i swear, i will never ever make another composite vessel. No *** way. Please wooden wooden bulwarks. I wanted to cry. Im now satisfied with them even they are not in middle of the stanchion but more in bottom. Nothing for purists i guess this is how lousy i am with measuring etc. Shame.

- 200 replies
-
- 6
-
-
- cutty sark
- clipper
- (and 1 more)
-
Jamie , thanks for comment but pleaaase i think really otherwise. i reworked almost everything for the reason i was just hurrying up and worked lousy . i now have to admit i probably took a big bigger task i was up to though and i would make her better next time but...i suppose that is how everyone thinks . learning on mistakes... what fascinates me about ship modeling from scratch and to some extent also for bought is that same ship would not look same yet correct and beautiful because everyone is different... ... i am learnig as everyone though.manythanks for lovely comment and have a nice day.
- 200 replies
-
- 1
-
-
- cutty sark
- clipper
- (and 1 more)
-
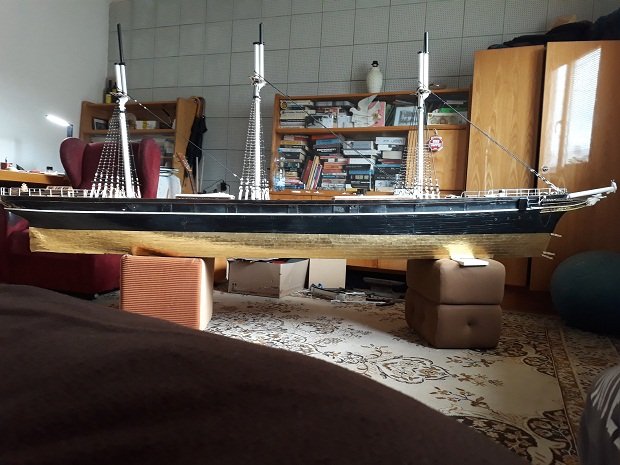
some pople were wondering how big really she is.... well....i am quite about 2 and a half meters with hands up ...and still not quite a lot enough

- 200 replies
-
- 7
-
-
- cutty sark
- clipper
- (and 1 more)
-
I made coffee today and pleased myself thru your GR log Rob. late to party but congratulation indeed. what a look uder sails. I am doing big ship by neasurement but queen of all queens and sizes is here. i enjoyed watching your true style and your sure unmistakeable approach. its also educational treat . specially deck cabins it looks to me like some clay engraving after not wood...very interesting. Vlad.
- 1,208 replies
-
- 1
-
-
- great republic
- clipper
- (and 1 more)
-
impressive cabins Rob!
-
Rob , what you are doing for McKays legacy is mafnificent! puts to shame entire Boston sleeping population when they let Glory to get burned instead of preserving her . howgh
-
Cutty Sark by NenadM
Vladimir_Wairoa replied to NenadM's topic in - Build logs for subjects built 1851 - 1900
impressive with arrow Nenad in such small scale. your focus on tiny details is wow. Vlad- 4,152 replies
-
- 5
-
-
- cutty sark
- tehnodidakta
- (and 1 more)
-
From what i can tell her line look sharp and curved as should. very well done.
-
she is Lovely Peter. this majestic rigged view is what i miss most on my cutty though.
-
I like how you treated colors on deck planks Bill. Really nice progress on this lovely but yet unforgiving vessel. revell did many things good on this model. . looking fwd ahead. Vlad
-
Nice sternpost Keith ( place for propelled screw ) after modification terror went . reminds me i have 1/48 terror left unfinished somewhere in the dark room ...:) ice breakers or whatever they are called are finely done. respect. looking fwd ahead. Vlad . ps. looks like dingy next to victory :))
-
Very nice lines. Vlad
-
good day Jamie, neat and lovely work on cutty competitor. horizontal sailing look is eyecatching . Vlad
- 41 replies
-
- 3
-
-
- thermopylae
- scientific models
- (and 3 more)
-
Hat off sir i keep going to watch nd learn here just fabulous ! thank you for sharing it Vlad.
-
Brilliant work and outcome Derek, thanks for showing , Vlad
- 77 replies
-
- 2
-
-
- model shipways
- pinnace
- (and 1 more)
-
Hi from15 nm west of Hamburg / Northern Germany
Vladimir_Wairoa replied to Oboship's topic in New member Introductions
Welcome to msw Uwe. Vlad -
good day Rob, woudl you mind me trying to ask some questions about glory - plan? im still hesitating about building flying fish as that was built countless times i would like to something significant as not overbuilt. as finished Michael Mjeldes book i have at least emotional connection with such meaningfull boat ( at least for Donald McKay and for sake such important vessel was burnt to the ground i would love to raise her beauty up again )... i have myself plenty of informations and all rigging stuff from book and omportant some reall good close photography from ship itself and drawing covered. yet i struggle with hull shape though meaning i amhaving perfect plan of flying fish but how would i use it for glory body is a mystery to me at the moment. im not sure if some body shape outline with curves even exist of glory which would be sufficient enough so I would have basically all imoortant information about ship perfectly covered. i did not find it in Michael book infortunately. thank you and all best Vladimir
-
Hey Vaddoc, how is your yacht going? impressive though. you wont believe this. i was just today thinking abou upgrading that rail with proper casettes as well as scale allowes me to. just cutting wood. more to come thanks for stopping by.
- 200 replies
-
- 2
-
-
- cutty sark
- clipper
- (and 1 more)
-
Thank you Nenad. I call that your dedication and focus on details in your scale as well.
- 200 replies
-
- 1
-
-
- cutty sark
- clipper
- (and 1 more)
-
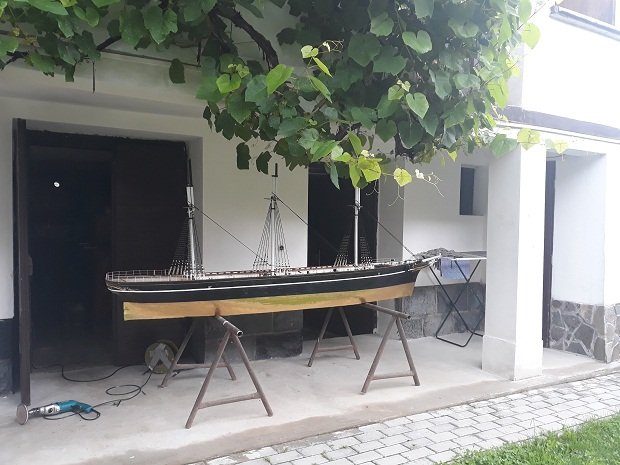
Thank you for compliment Mark, it means a lot to me, youve been welcoming me here in this really friendly forum and watching / supporting her from start, for which i am really thankfull you know there were few moments i led her to almost to ashes with my two important mistakes with her curves... thankfully i repaired im really glad she she is heading to blossoming direction hopefully now... yes she is as big as could be. o have now plenty of time to improve here and there whatever comes up to my mind. i would put her under main sails but i will not as she cannot be longer so bowsprit is all i can do and this is her definite size. good luck to your projects. Vlad.
- 200 replies
-
- 1
-
-
- cutty sark
- clipper
- (and 1 more)
-
Mark thank you indeed for nice words, im glad varnished look pays off as even i think white looked a bit more cleaner and polished than colour im ok with that anyway. my family already stated firmly that they feel all sorry for me as they watched rise of ship for about two years now and around 1300 hours...i laugh... after one horrifying day when i had oversprayed toiled i had to scrape down all white mess...well now only laying a plank by plank deck remains - im looking forward to it even a bit nervous :)) fingers crossed. many thanks !
- 200 replies
-
- 1
-
-
- cutty sark
- clipper
- (and 1 more)
-
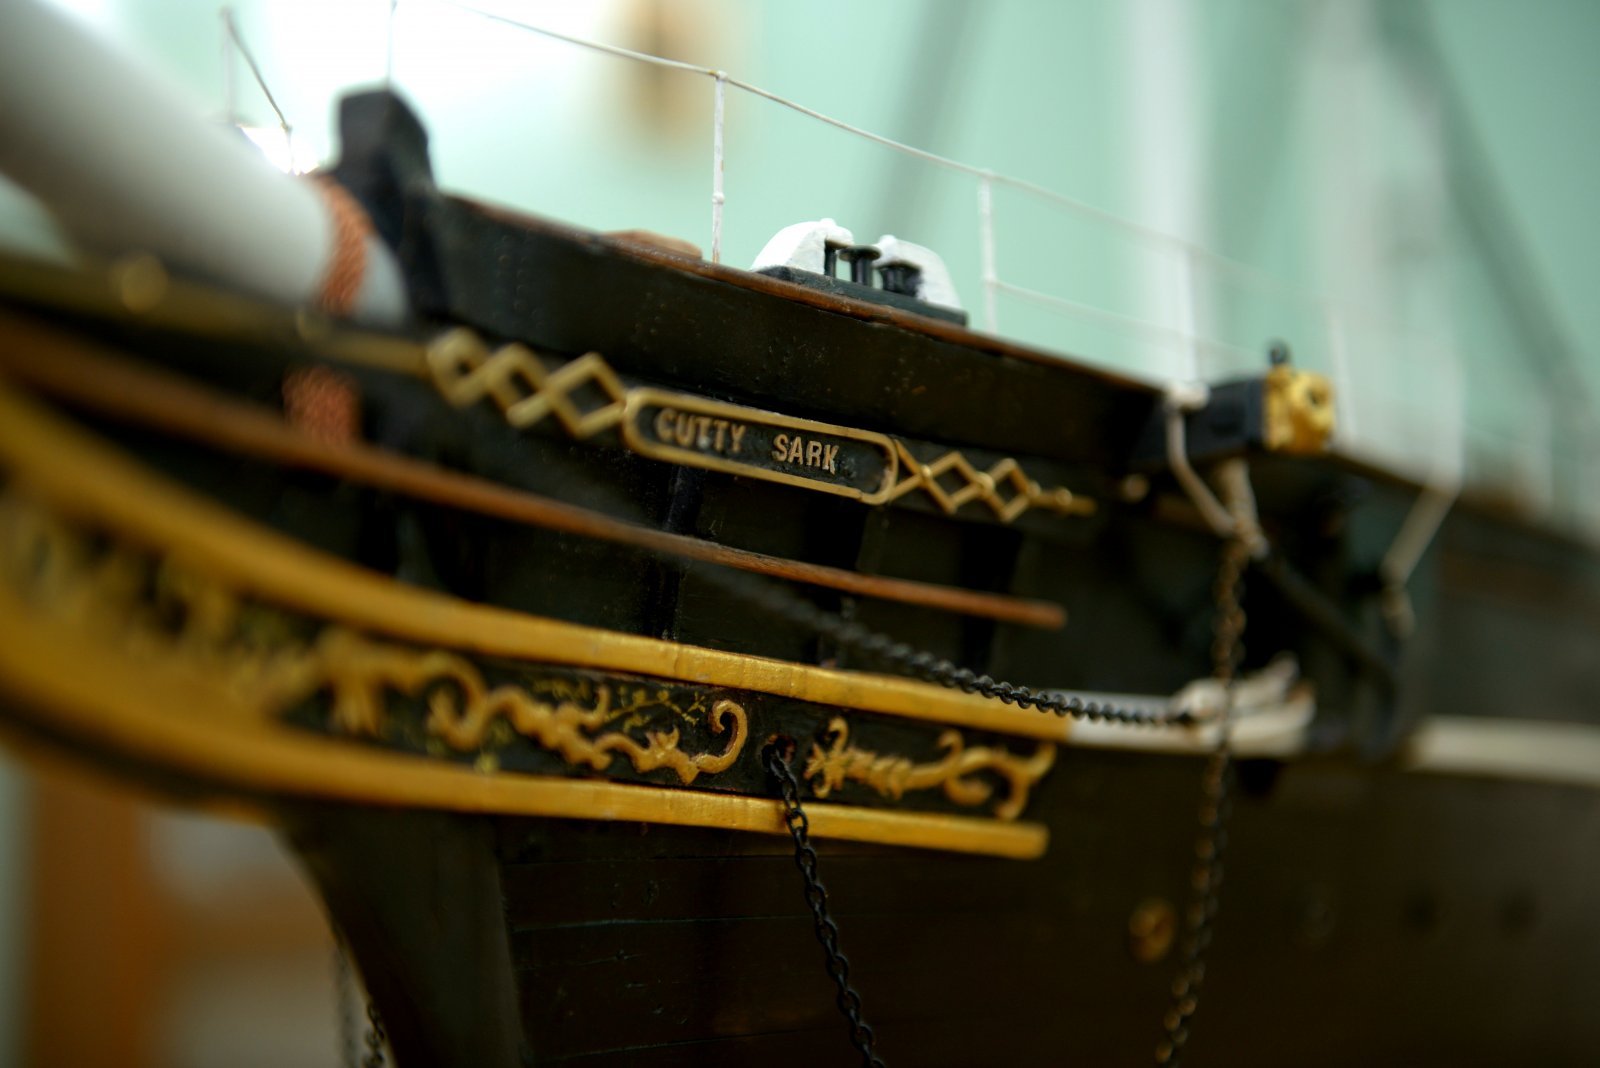
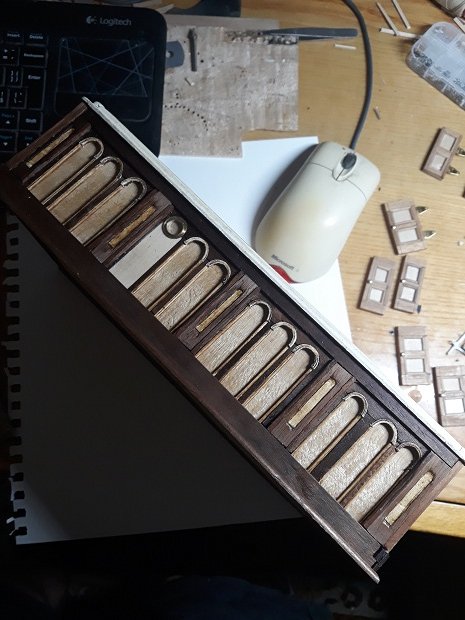
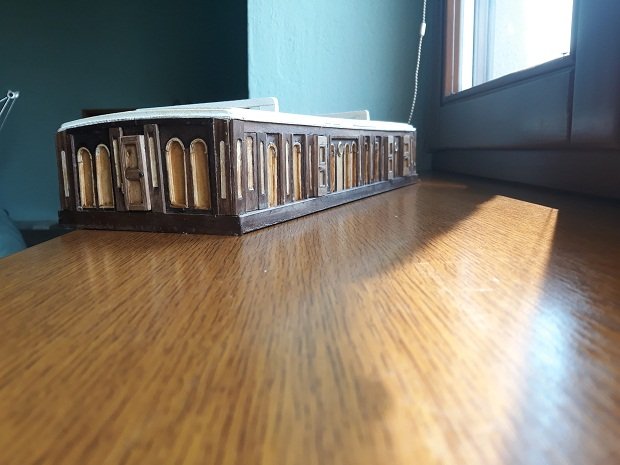
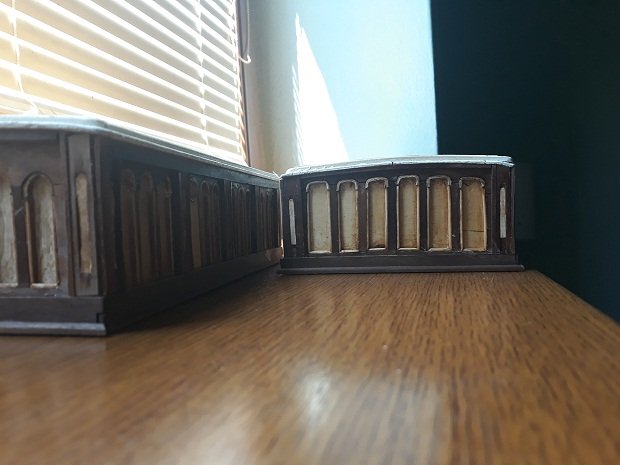
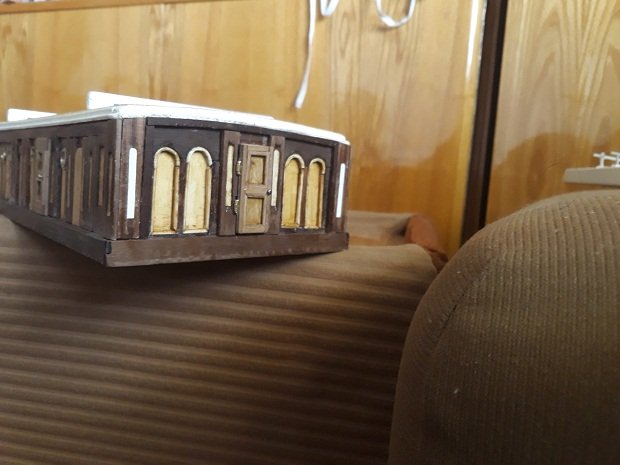
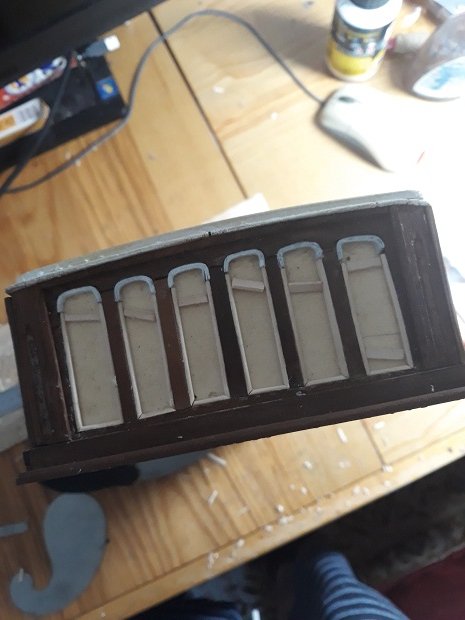
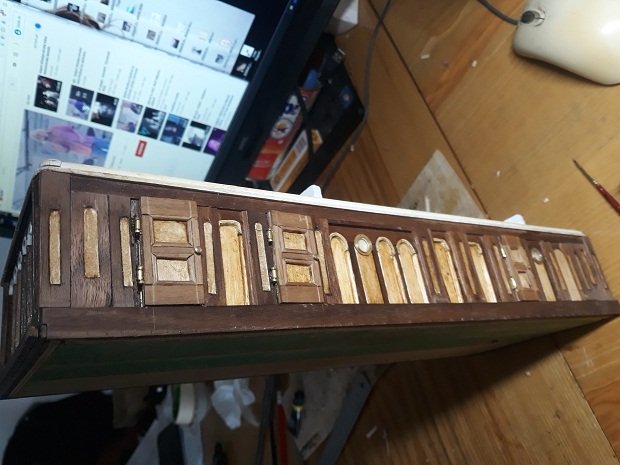
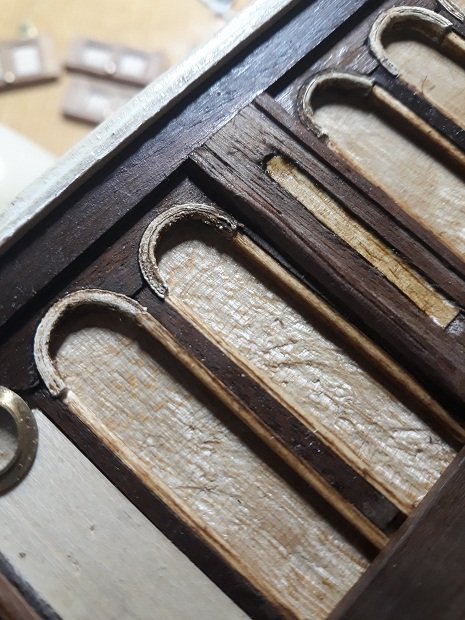
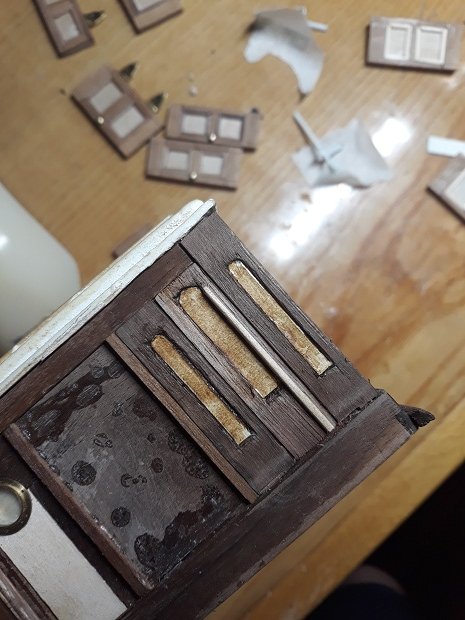
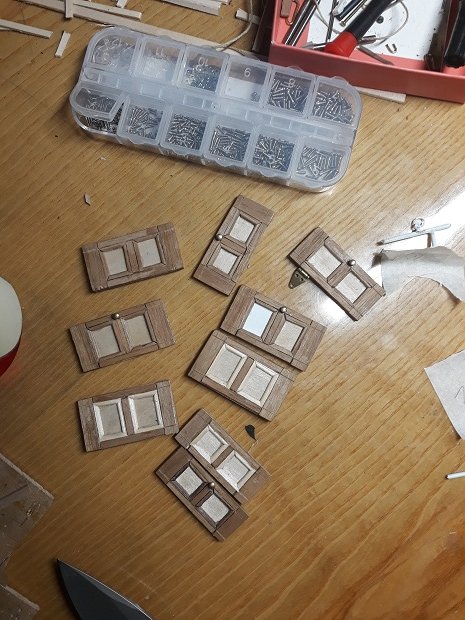
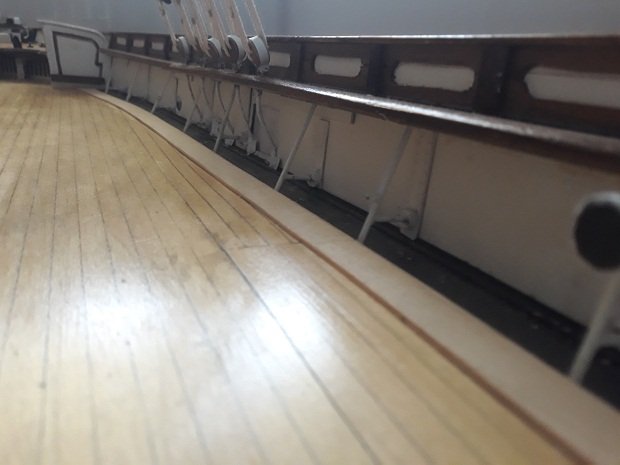
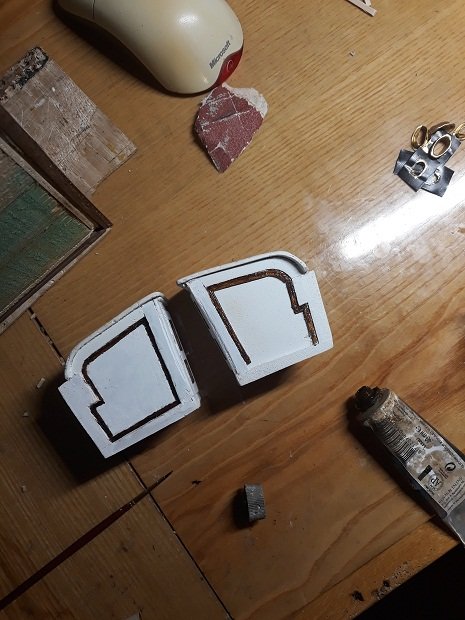
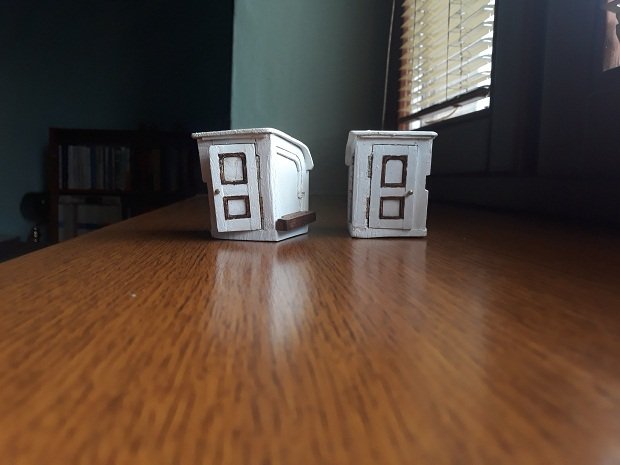
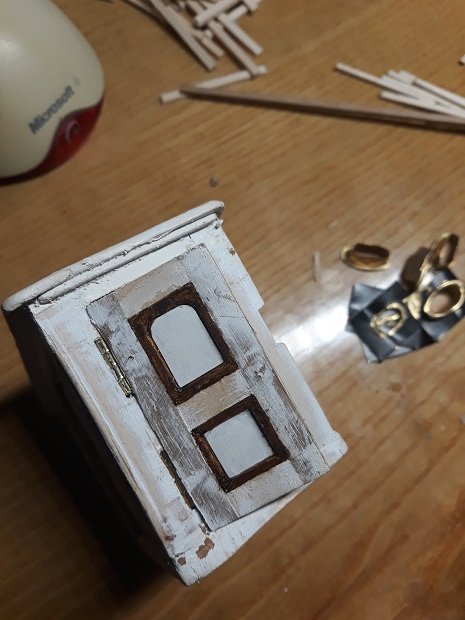
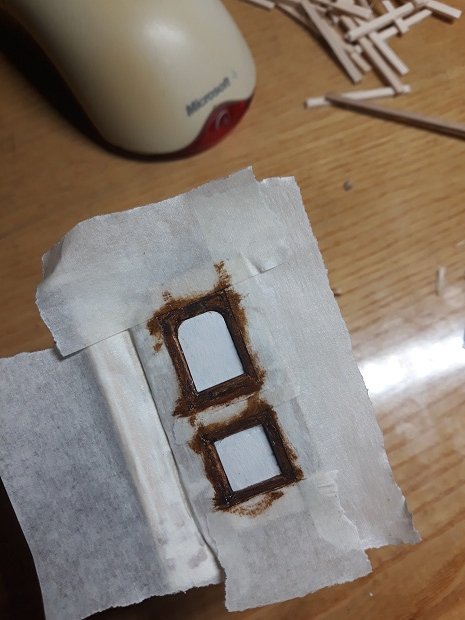
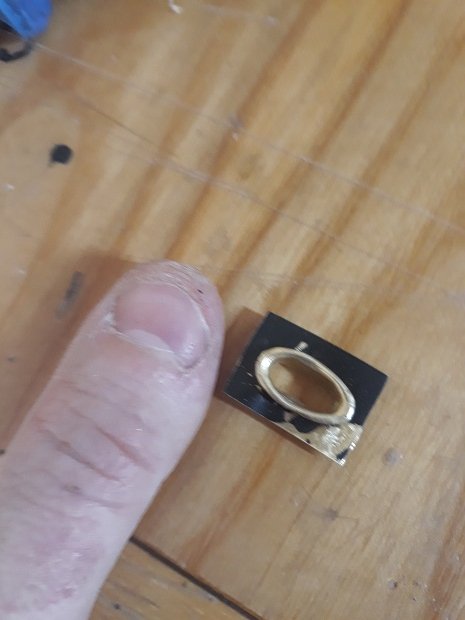
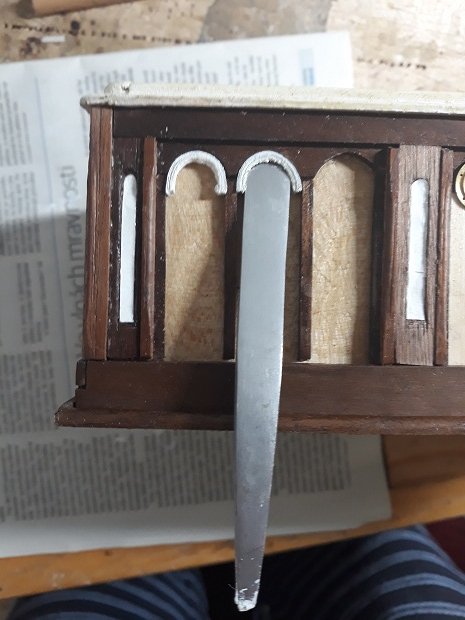
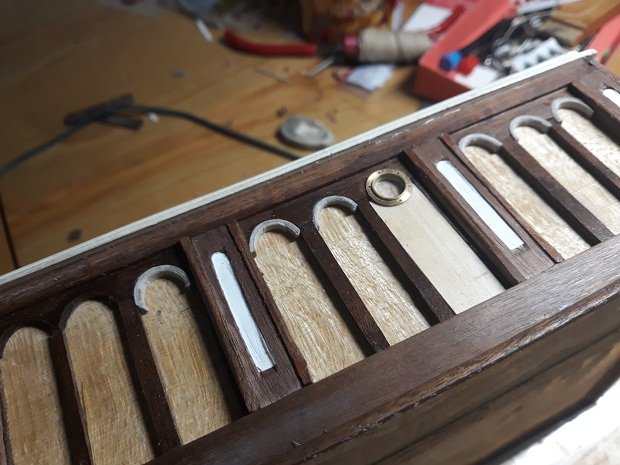
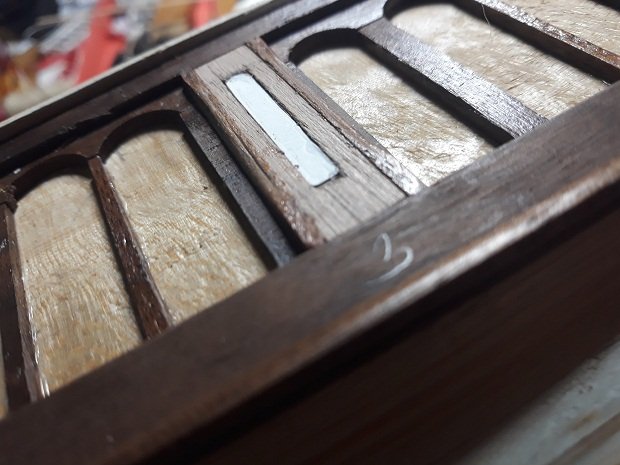
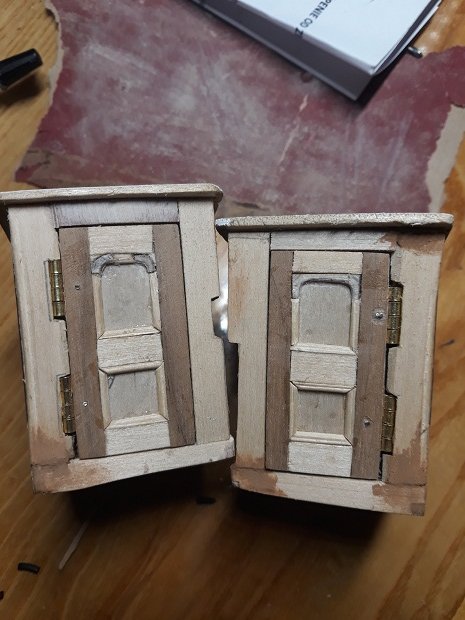
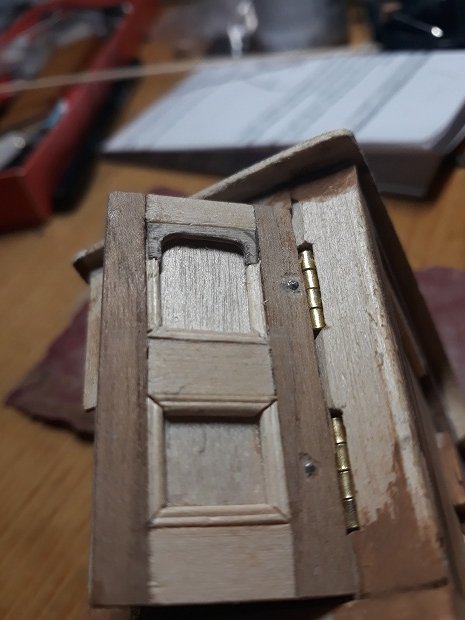
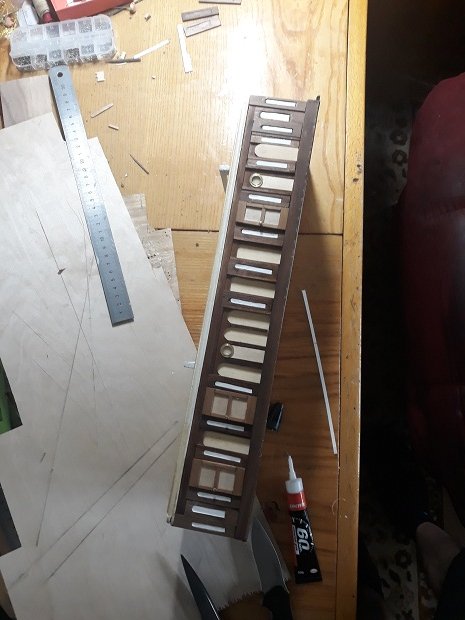
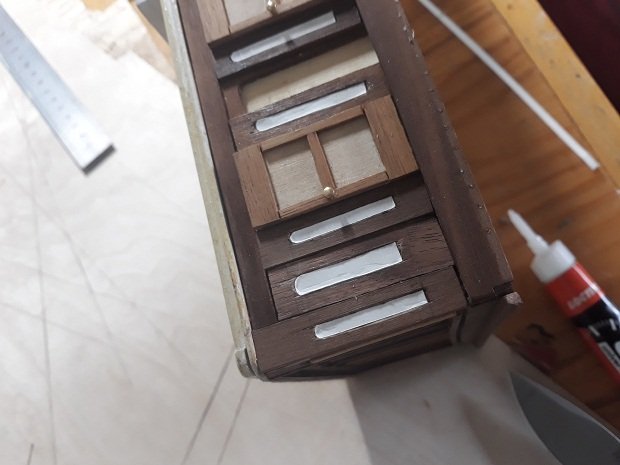
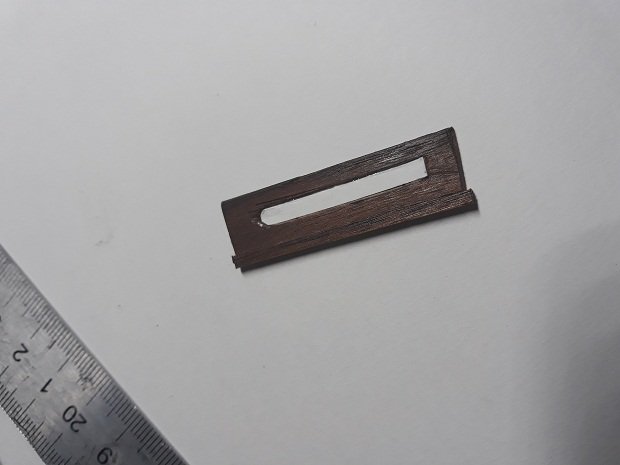
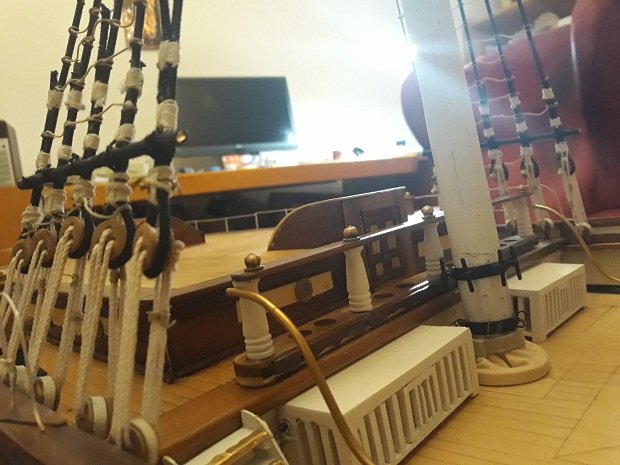
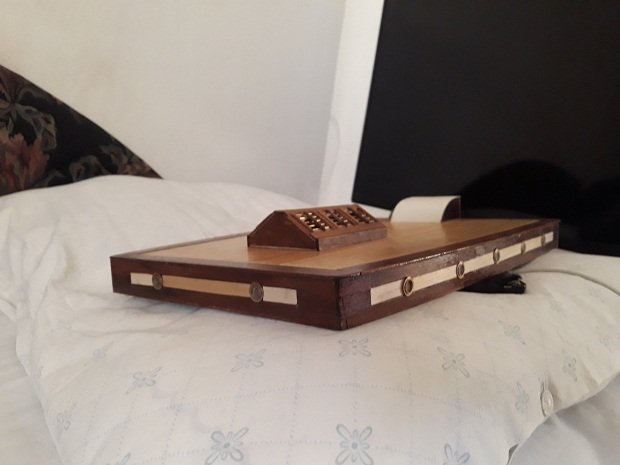
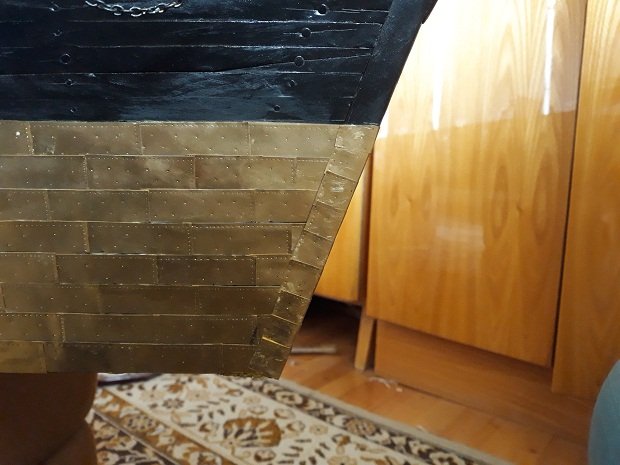
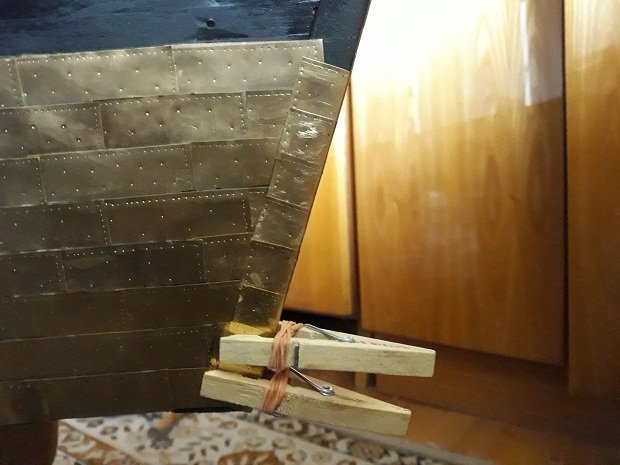
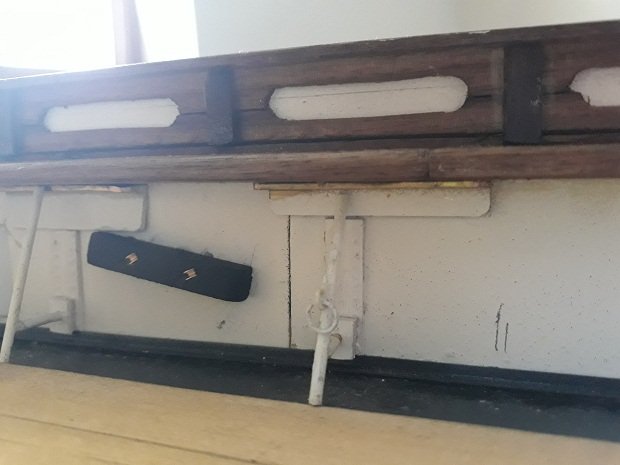
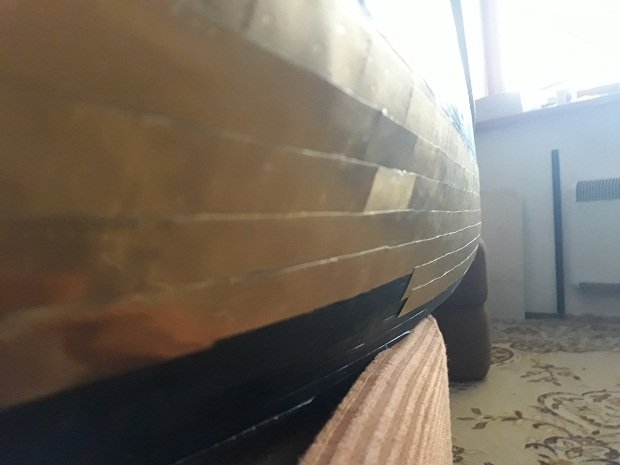
Good day clipper lovers, who seen my previous posts already knows the unpredictable way I work. As obvious, a lot is going on within cutty in shipyard, today I will try to post by pics explaining themselves how I did what I did. you might know I work rather on brisk inspiration of ideas than on systematic approach, /i rarely know what will finish look like, and trying various method - even using wood instead of metal if possible as easier to wirk with- call it cheat whatever :)) . unfortunately This approach leads to many further repairs even scraping down a hlaf of work already done if I found a new or better way how to make it better , nicer more realistic etc...long time work ...speaking of disadvantages of this approach. I call it reverse alchemy....for Vaddoc im adding one photo as mammoth out of room . :)) left shipyard room for a tiny bit of time so only shortly, her goes - coppering finished ! i will leave one side without it. - maybe strange i dont know yet. :)) one day i started to focus on details and though what I could do more realisticaly with my limited hand tools...as this scale was picked for detail, bow and stern decoration not for sails.thought about details more , and tried tedious mouldings with beveling corners of pieces, updated cabins thorougly, and redone small verticall ballustrades...collored cabins finally... to the varnished look not white... even I hesitated. I left toilets white but left cabins varnished,. what do you think ? I would feel sorry to paint maple veneer and I varnished mouldings with tranparent asphaltum oil color diluted thorougly - it is undistinguishable from mapple veneer now... made door casettes in doors, fife rails upgrade, new proper mooring pipes, and i reworked bulwark stanchions properly, got idea of rounding them and screwing to the plate...thats how it is supposed to be. square wass bad. too bad. even not in centre of stanchion call it feature :)) installed sheaves .... detailing _ leaning towards more realistic approach started with my struggle and swearing and regret that I have only hand tools , specially working on wooden stanchions ...I updated them 3 times and only now i am satisfied. i finally found a way how to shape them with dremel in hands...fun. what else. well...you can see new sheer plank over temporary deck...as i wrote around january i can do proper planking later. this rises deck higher above water "cemented" gray canal how it should be. is there anyone who planked after rigging is up_ i bet noone. oh well i reworked toilets completely, adding proper base and proper doors inlayed, an added vertical wood collumns to poop deck. Oh and I updated poop deck to extend "white " line properly towards end of cabins and left them squared as should be not round. well i can see i am building this vessel twice. :)..thank you everyone hoping you like the news. . Planking deck will be really the final part. I even swear. I am already standing on deck of flying fish in my mind. ..


- 200 replies
-
- 9
-
-
- cutty sark
- clipper
- (and 1 more)