


AnobiumPunctatum
-
Posts
1,233 -
Joined
-
Last visited
Content Type
Profiles
Forums
Gallery
Events
Posts posted by AnobiumPunctatum
-
-
The planks at the bottom of the hull are krawel planked. So I think it is a good idea, to add some real frames to your shell.
-
With the plans from Werner Lahm, you have the best source you can find for the Bremer cog. I Will follow your build with great interest.
The plans are also the basis for the replica's in Germany.
I've published a pert of the foto's I did from the original ship at Modellmarine.de.
- mtaylor and Chuck Seiler
-
 2
2
-
Tom,
For the fore and main mast you have to cut out the frames. Especially for the for mast is nothing more than necessary. For the main mast I will add an extra piece of wood. For the mizzenmast it's not necessary. It get the correct poistion form the main- and quarterdeck.
-
Mike, that's the same technic I use. The black color is mostly the laser char. I only egalize the small edges where two parts fits together and a third part has to be glued. With this stick it is really easy to sand the outer edge, which is not visible in the foto.
- Stuntflyer and wyz
-
2
-
-
I told that I like to have the option to rig my model. For this I measured carefully the positions of the masts and cut them out of the false keel (1).
The second thing was to cut small cut outs for 2 nuts (2), because I like the small stands which allow to show the lines of the underwater hull without interrupting. For this kind of presentation it's a good idea to screw the model on the stand. The distance to the lower edge isn't equal, because the waterline isn't parallel to the keel.
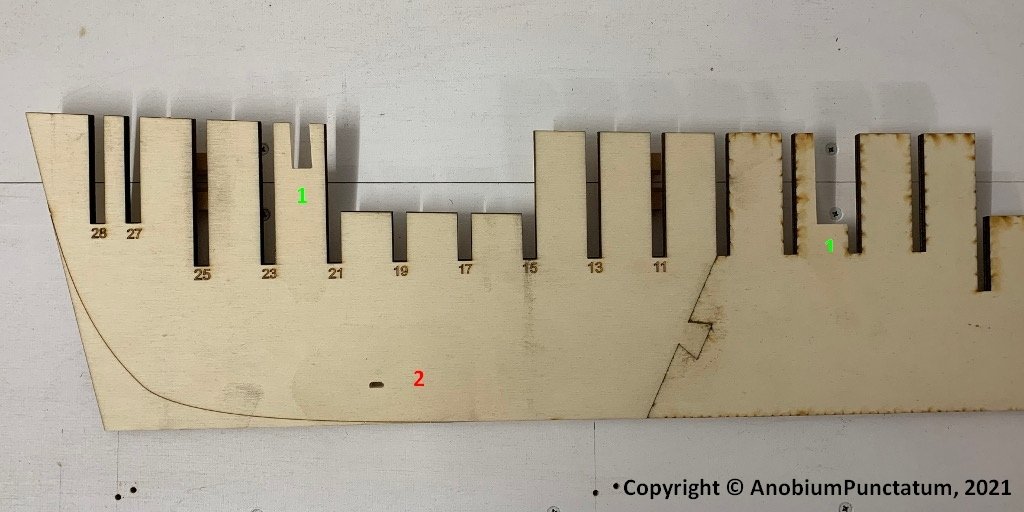
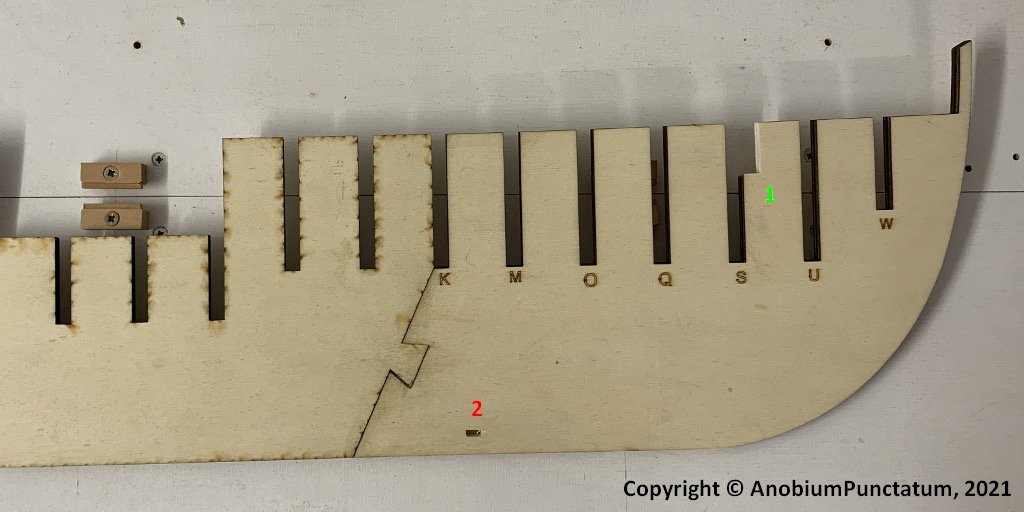
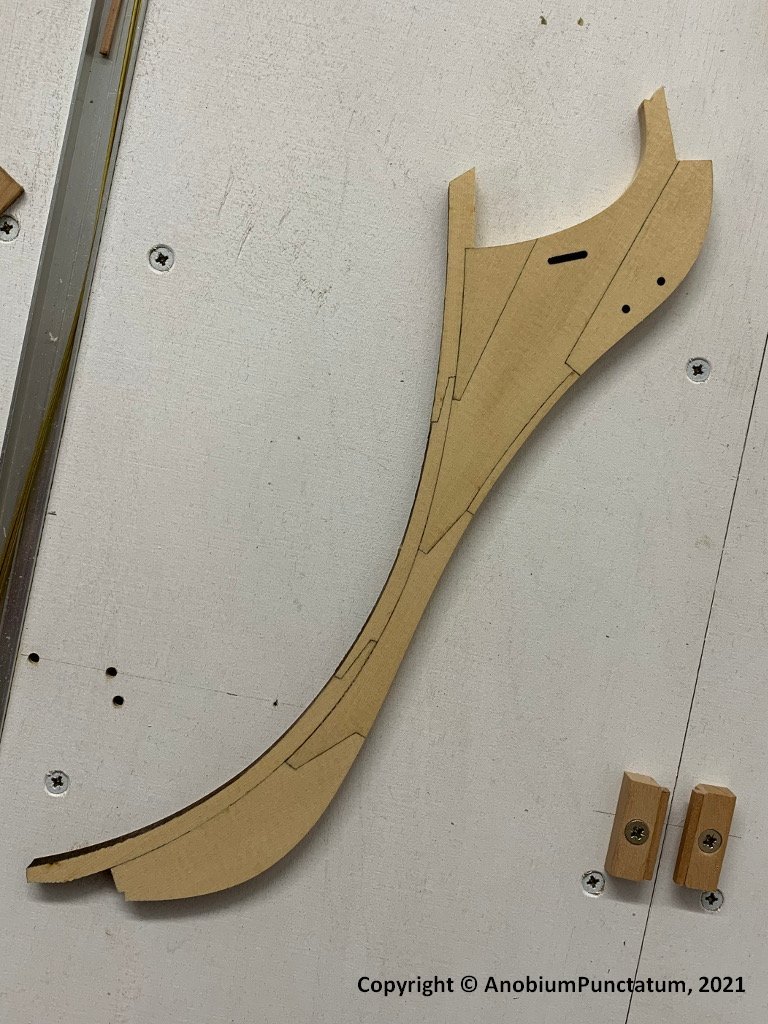
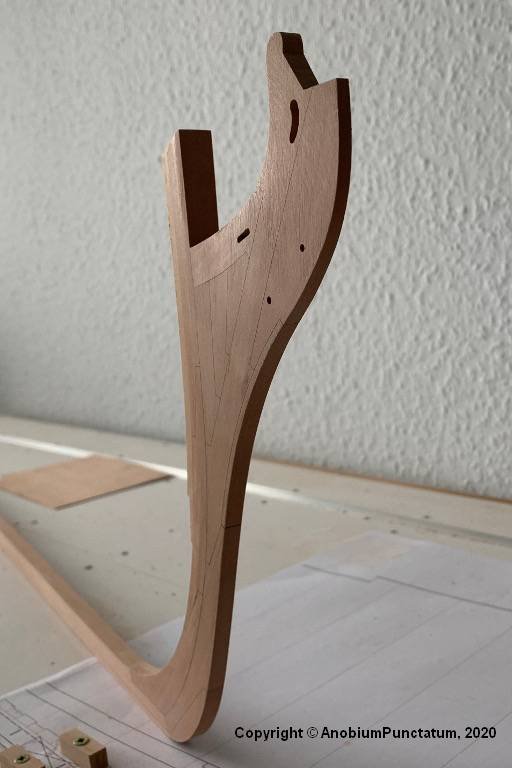
Further I glued the parts of the stem an the knee of the head together.
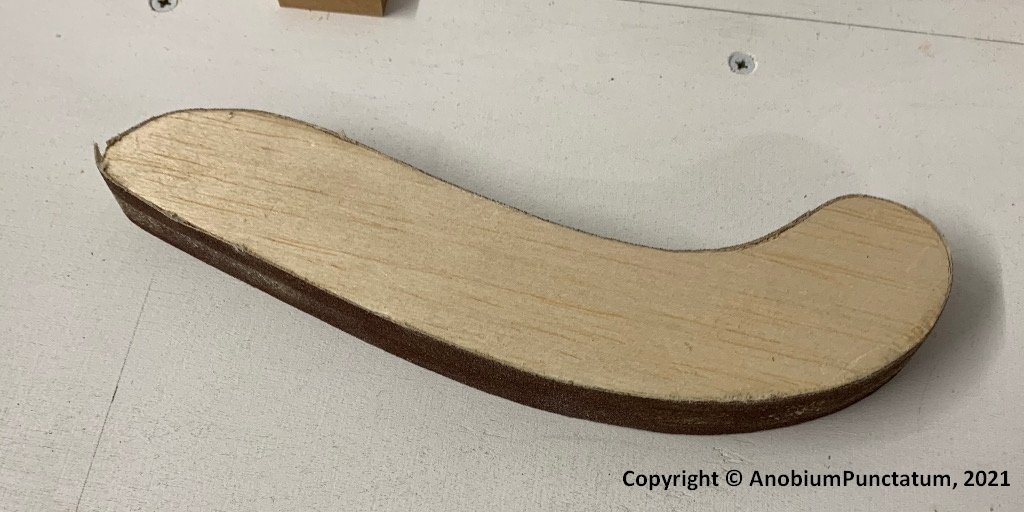
For sanding the edges and removing the laser char I sawed a small sanding block out of balsa wood.
-
14 hours ago, jfhealey said:
3.If I were to build W3 - and I am seriously thinking about it – I would not only double plank it as I did W1 but also line it out (as Ben/Trussben has done). It looks like a lot of work but I am sure it is worth it.
If you build a third version with your own cut bulheads I wouldn't recommend a second planking. For this you have to divide the thicknes of your planks. The thicker planks are looking much better than veneer. I recommend filling the area between the bukheads with basswood, similar to the narrow strips for the piece ports. After sanding you can fill all smaller mistakes to get a nice hull shape.
-
Your model is looking really beautyful.
-
On 1/31/2021 at 7:41 PM, Beckmann said:
Sorry Chuck, but what means scupper? I can't find it in my dictionary.
Scuppers in German means "Speigatten"
- FrankWouts, KenW and Beckmann
-
3
-
-
If you like to copper HMS Winchelsea, I am quite sure that you have to follow the appearence of the Minerva model, this means that you have to change the design from Chuck. Chucks design shows the ship before the large repair. During this repair from 03/1780 until 04/1782 the ship was coppered.
I like to rig my model, because I love the appearance of a "fully" rigged frigate. But until I reach this stage I have a lot to do and much more to learn.
- Ryland Craze, JpR62, Rustyj and 2 others
-
5
-
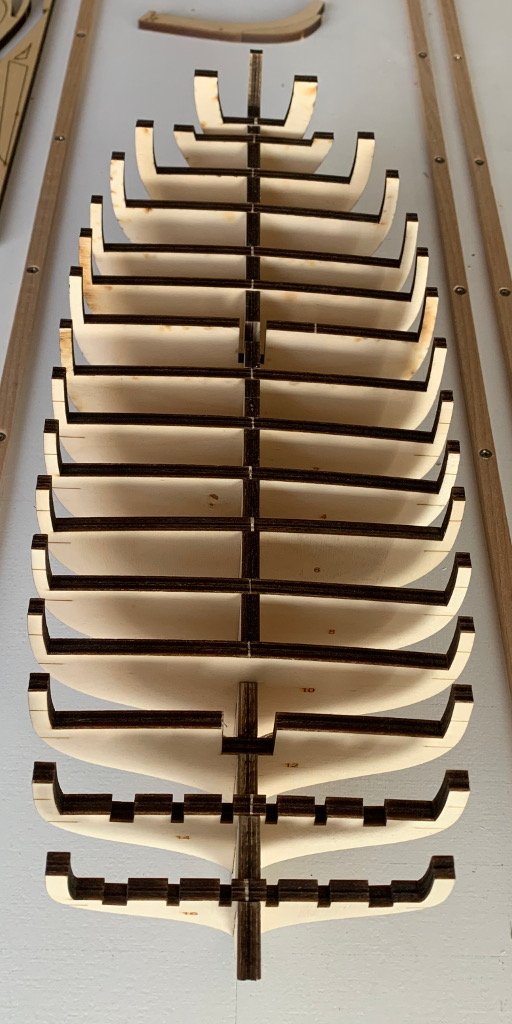
Next step was to form the rabbet. I used therefor a scrap piece from the false keel.
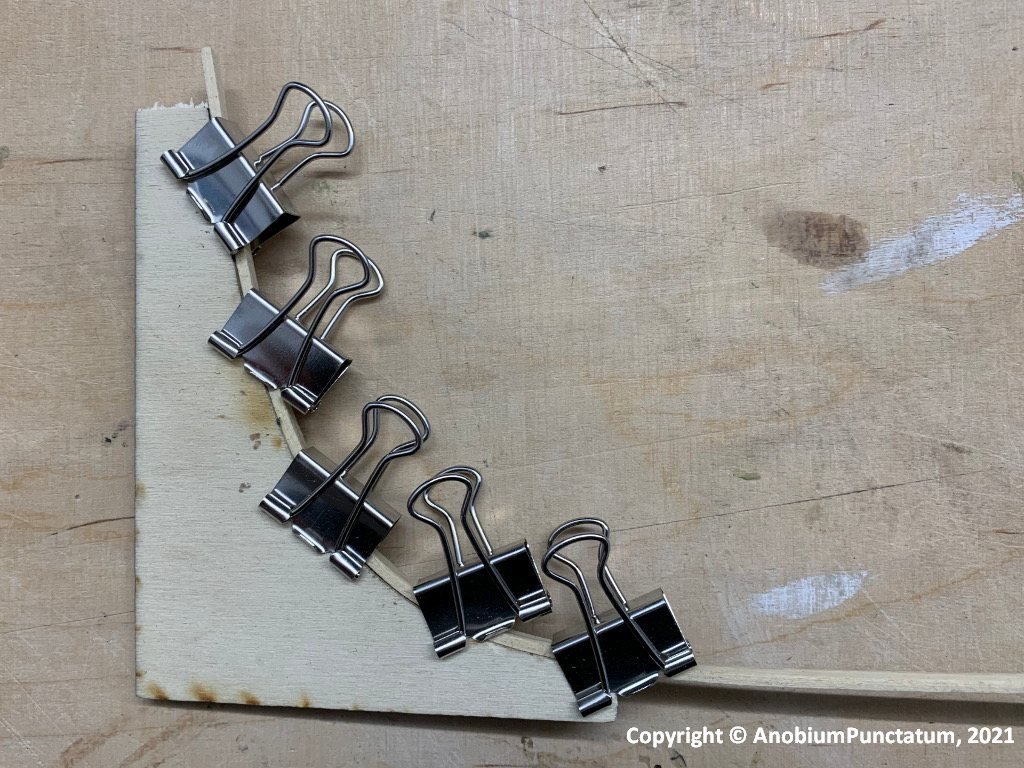
After drying, the spooning was glued to the false keel. During the drying process the paper clips proved their worth.
I sanded the taper the stem with sandpaper. Finally, the stem and keel were glued to the ensemble.
As you can see in the photos, the shape of the taper is not perfect, but the planking will cover that later.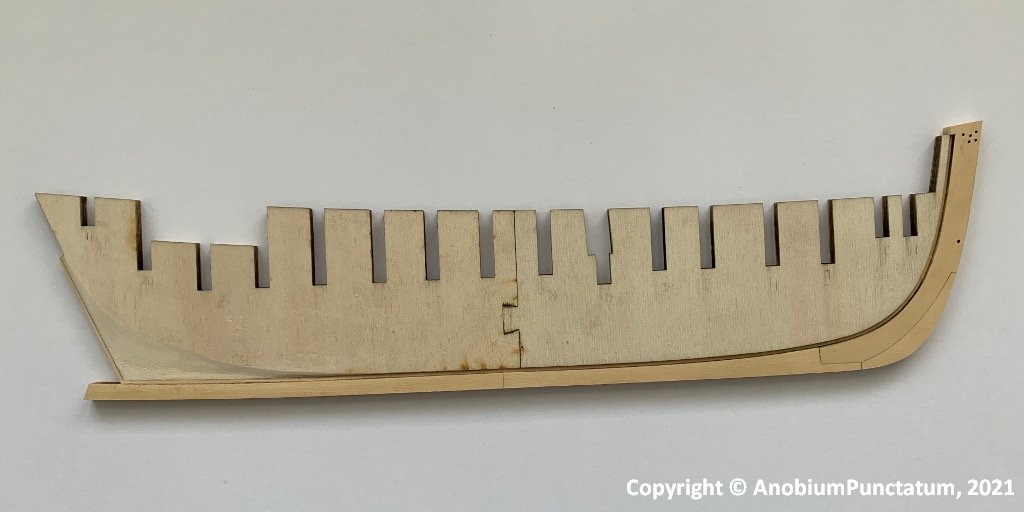
- Chuck, EricWilliamMarshall, Matt D and 4 others
-
7
-
Ron,
have you checked the width of the planks? I had by my Triton cross-section years ago a culmulative error and at the end one plank less installed. Perhaps are your planks to small.
I would plank the upper part of the hull with the same technic Chuck describes for the lower part.
- FrankWouts, wyz and Ron Burns
-
3
-
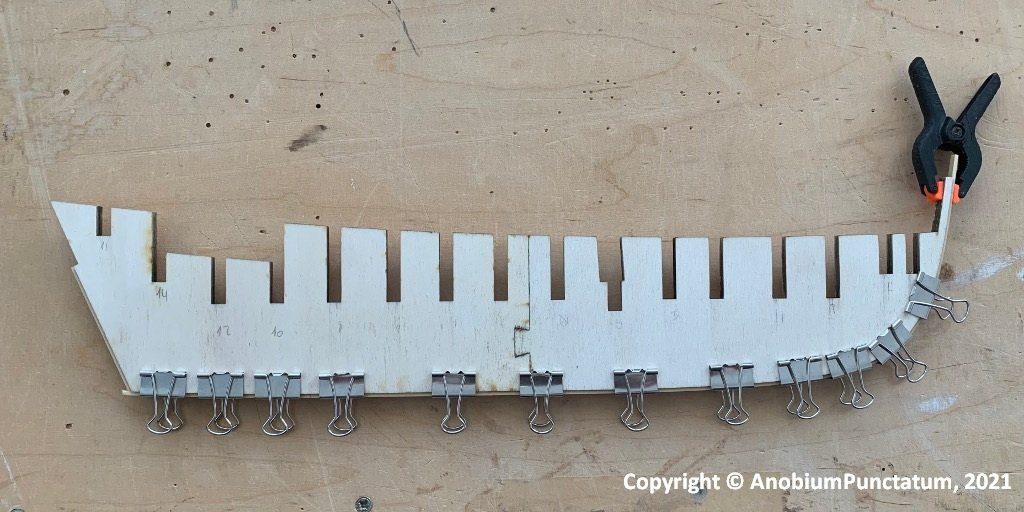
In 2016 I bought Chuck's Starting set from a fellow modeler who became a father. I glued the false keel together and then packed everything in a big box. While preparing the Winchelsea build, the box fell into my hands and I decided to build both models more or less in parallel. I can practise all the building steps on the much smaller Cheerful model before I do them on the Winchelsea.
Since the false keel I built at that time was no longer usable and I want to build the model from Yellow Cedar, I asked Chuck for spare parts. These arrived on Saturday morning with a small delivery of wood. Many thanks for the first class service, @Chuck .
I will build the model according to the instructions and with the help of the mini-kits. I have only one change planned - I want to copper the underwater hull.
The slipway is a bit big for the small cutter, but as I still had it, it was reactivated.
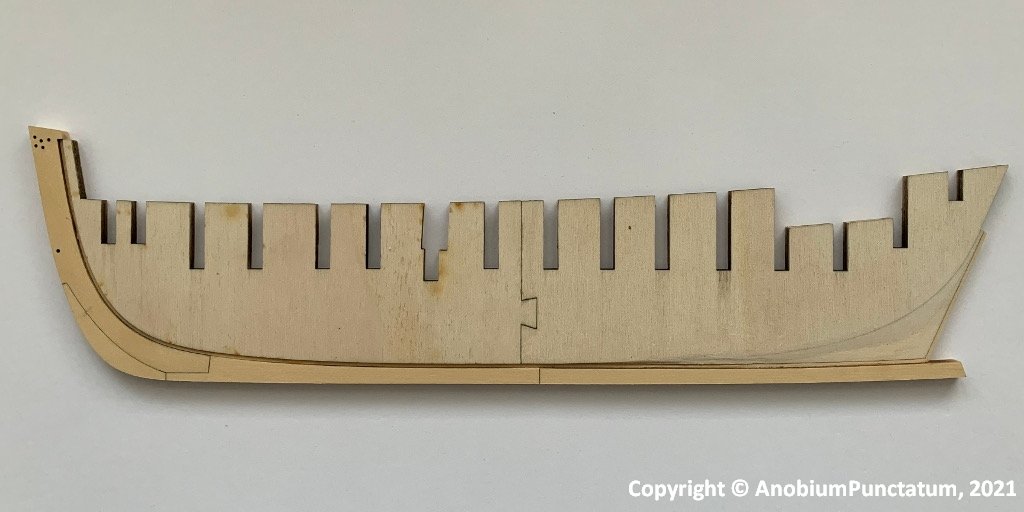
On Saturday evening I glued the false keel together and let it dry overnight. The frames could only be pushed into the recesses with difficulty - the thickness of plywood is always subject to slight fluctuations. I made a small sanding stick out of 180-grit sandpaper and a suitable strip. Then go over the lasered edges two or three times on each side and the frames fit perfectly (the frames are not glued in now).
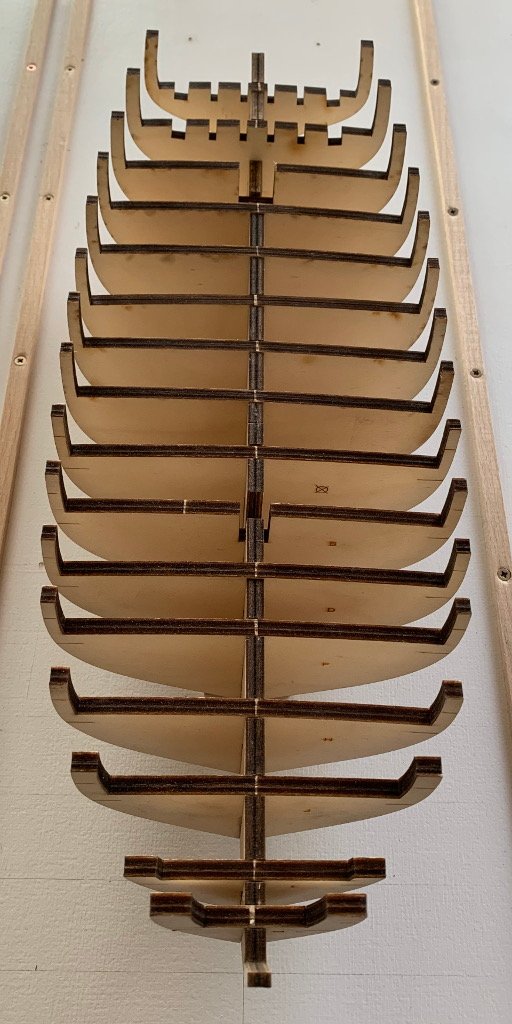
Finally, the stem was assembled.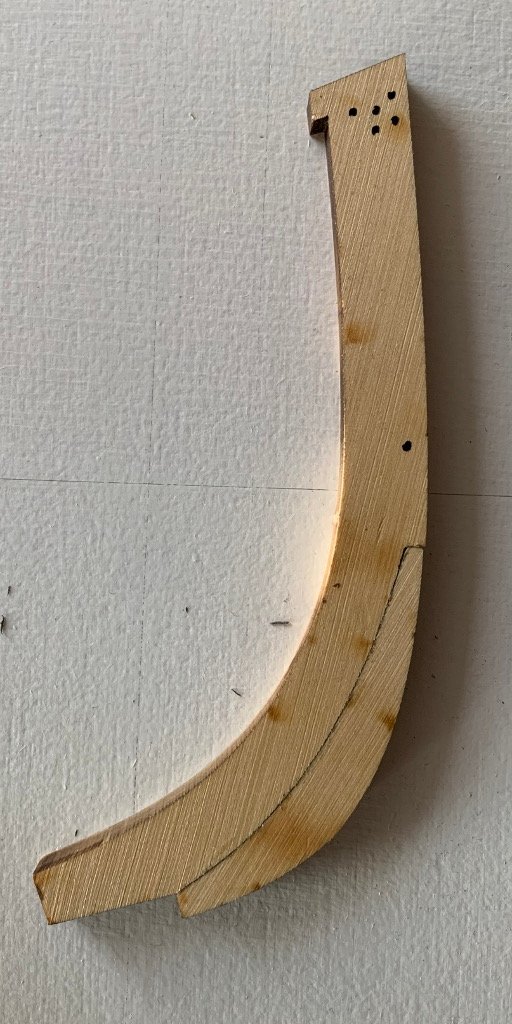
- mtaylor, bruce d, Ryland Craze and 12 others
-
15
-
No, I think that you haven't put enough material at the top away. Sorry, my English is ot so good. Perhaps the picture better illustrates what I am trying to describe.
- Matt D, FrankWouts, Ron Burns and 1 other
-
4
-
Congratulaition for reaching this milestone.
Have a look at the top of your knee of the head. I think, that you havve to rind there some material.
-
Sorry, to hear Tom. I hope you will feel better shortly. Perhaps is the Augsburger method an alternativ, if you want a more stable fundament. I think it's a shame that you have to put your project back to square one. But I think it's a good decision, not to stop modelling.
- wyz and FrankWouts
-
2
-
No. The frames are 3mm birch plywood with 5 layers and the filling is poplar plywood.
- wyz and FrankWouts
-
2
-
I will follow yur log with great interest. I am waiting on some replacement parts and the Cheerful timber set from Chuck to start with this beautyful little model. I like your idea to show the room, but if you don't make a cut out of the deck I think that you will not see much. The room is really dark.
- JpR62, FriedClams and mtaylor
-
3
-
I think your hull will looks like as an model which is build following the "Augsburger method". The guy which has introduced this in our German forum comes from this nice city nearby munich. I used it as I made my reconstruction of HM Sloop Fly, 1776 to control my design.
-
-
In English:
James Lees: The masting and rigging of English Ships of War, 1625-1860
David Antscherl: Rigging a sixth rate sloop of 1767-1870, which is very detailed. I haven't checked if it is useful for rigging a third rate
In German:
Klaus Schrage Rundhölzer Tauwerk und Segel
I recommend the this book, because it contains a lot of useful detail drawings.
The last two are my favorites for rigging English ships
- mtaylor and GrandpaPhil
-
2
-
-
Really really wonderful. There are so many details and technics, which I also can later use for my Triton project.
I have one question. The historical model show that the upper part of the knee of the head was painted blue. Is it your personal choice to paint this black or is there another reason?
- KentM, FrankWouts and Jorge Diaz O
-
3

HMS Winchelsea 1764 by tenderfoot
in Member Build logs for the HMS Winchelsea
Posted · Edited by AnobiumPunctatum
What you see, comes mostly from the laser. It doesn't cut perpendicular to the wood. After a little bit of sanding the outside is looking fine.
This is the stem of my model build with the parts, Chuck provides.