BANYAN
-
Posts
5,966 -
Joined
-
Last visited
Content Type
Profiles
Forums
Gallery
Events
Everything posted by BANYAN
-
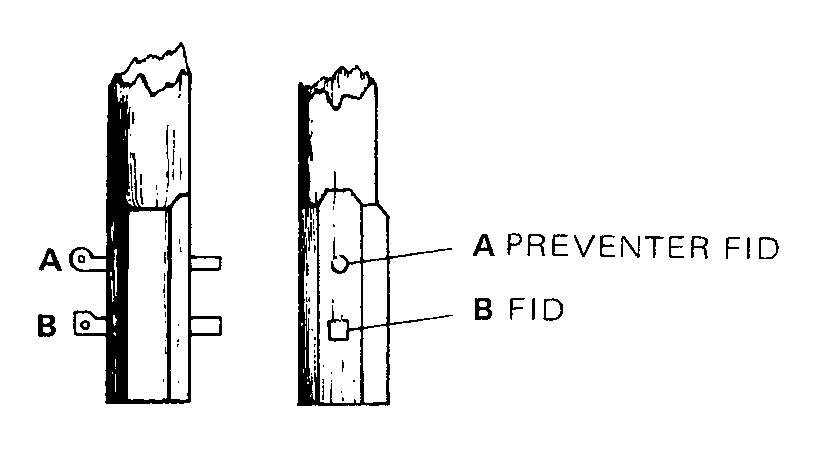
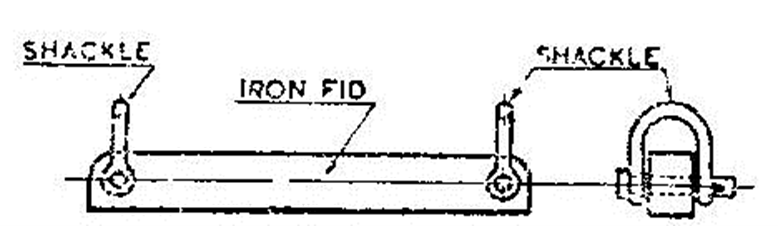
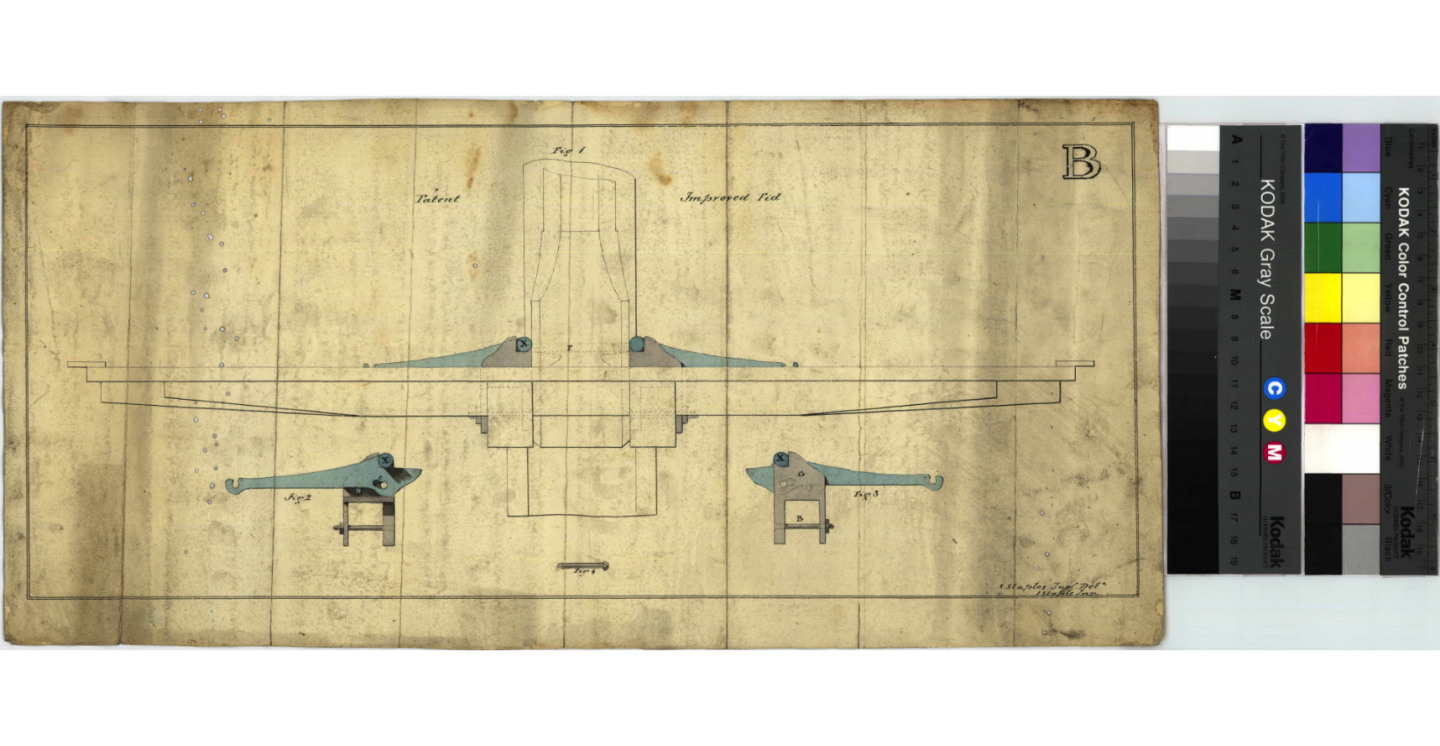
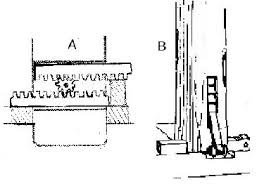
Grant, this an era in which a lot of things were happening. The type of fid may have been one of several designs and possibly influenced whether the tops were iron or wood. Also, by this time preventer fids were also in vogue, these were iron round rod put in about 8" or so above the fid - see attached set-up from Lees page 7. I have also attached another commonly used one in Clippers of this era from Underhill, Masting and Rigging the Clipper and ..., Plate 6. Another from the Rigsarkivet Plan C460b, and a line drawings for a patent jacking fid (cannot remember the source). The fid arrangement provided by Alan is another option for topmast fids. Sorry to confuse you further, but as you see there were a lot of options in this period. My suggestion is that if a reasonably simply rigged vessel, use a simplified fid arrangement unless you can find better or more specific info. cheers Pat
-
 Take a bow Rob, very nice work (and moving along with some speed). cheers Pat
- 3,560 replies
-
- 1
-

-
- clipper
- hull model
- (and 2 more)
-
NAIAD 1797 by Bitao - 1:60
BANYAN replied to Bitao's topic in - Build logs for subjects built 1751 - 1800
Impressive! Love the tooling. cheers Pat -
As John has said Tim, a clever and what could prove a very useful tool - I can certainly see the value in removing that external step of having to use the calculator. I currently generate a look-up table at the scale I am working, but 5 times out of 10 the scale is not posted where I am currently working. How do you see the input of the scale? A set of preprogramed buttons, or input via an external source? cheers Pat
-
These were specified in the Contract for the building of HMCSS Victoria (1855) - so in use by then - Wefalck has probably nailed the possible date range. cheers Pat
-
Hope your issues are addressed soon Michael, wait lists are a real pain (I hope not literally for you). cheers Pat
-
You're a fast worker Rob, you will have caught me up soon and I am 5 years in Your model is looking great, very elegant and nicely finished. cheers Pat
- 3,560 replies
-
- 2
-
-
- clipper
- hull model
- (and 2 more)
-
I have seen that before Eberhard, but it still amazes me to see the very effective sails you produced for your Botter. cheers Pat
-
HMCSS Victoria 1855 by BANYAN - 1:72
BANYAN replied to BANYAN's topic in - Build logs for subjects built 1851 - 1900
Hi druxey, not at all While wire would be more authentic, I think cotton will serve just as well if I can get the right colour and lay. I'm just being a little stubborn in trying for additional authenticity. cheers Pat- 1,021 replies
-
- 2
-
-
- gun dispatch vessel
- victoria
- (and 2 more)
-
NAIAD 1797 by Bitao - 1:60
BANYAN replied to Bitao's topic in - Build logs for subjects built 1751 - 1800
Another great model. As the others have said, if not happy, repeat! As with your other builds, your joinery is so clean and crisp. I will enjoy following along with this one as well. cheers Pat -
HMCSS Victoria 1855 by BANYAN - 1:72
BANYAN replied to BANYAN's topic in - Build logs for subjects built 1851 - 1900
Hi Keith, thanks for your continued interest and input - it helps keep me honest and ensure i fully examine all possible options. From the limited experimentation so far, I have found you can pre-stretch it, but it is very difficult to keep it straight while working it. The real issue I am finding though, is to keep enough tension on it to make it look right, puts toom much strain on the very small (at 1:72) parts I have manufactured, especially the Rigmaiden lanyards. I will continue to experiment in the hope I can make it work, but I think I am almost resigned to using cotton. cheers Pat- 1,021 replies
-
- 5
-
-
- gun dispatch vessel
- victoria
- (and 2 more)
-
Rob, this is very impressive. I am sitting back and monitoring/watching as there is not much I can contribute to this fabulous build - you guys seem to be all over the research and you are doing a fine job with the model. cheers Pat
- 3,560 replies
-
- 2
-
-
- clipper
- hull model
- (and 2 more)
-
HMCSS Victoria 1855 by BANYAN - 1:72
BANYAN replied to BANYAN's topic in - Build logs for subjects built 1851 - 1900
Thanks for the further input folks, some considerations to ponder further. Keith - polyester stretches too much. Long staple cotton is good (doesn't stretch and is strong) and yes, I have to accept it is a little more porous and therefore prone to rot easier. I am thinking of using 'tatting' cotton (lacework) as it tends to have a longer lay to better simulate wire. From what I have read so far, back then some wires were wormed, oiled then parcelled and painted with white lead paint (but only one author suggests that). I know from my day in the Navy, we tended to leave wire rope open/uncovered as much as possible but kept them well oiled (boiled linseed) - this allowed us to inspect them a lot easier. Other authors, such as Underhill, suggests that wirerope used with stays and standing rigging, apart from the eye, the main run was left open, but from about 2-3 feet above the lead block/hole, and then the remainder to where they were secured, were wormed and served (NOT parcelled) and well oiled (linseed oil). I must admit, when burning the clear protective coating from the control wire I have, leaves a very authentic oiled look - I just wish it didn't require the amount of tension it needs to look/sit right. cheers, and appreciate the suggestions. Pat- 1,021 replies
-
- 5
-
-
- gun dispatch vessel
- victoria
- (and 2 more)
-
Looking good Greg. What glue do you use to hold down those large strips of brass? cheers Pat
-
You are finding some very nice photos there Greg. cheers Pat
- 1,090 replies
-
- 5
-
-
- showcase models
- vendetta
- (and 2 more)
-
HMCSS Victoria 1855 by BANYAN - 1:72
BANYAN replied to BANYAN's topic in - Build logs for subjects built 1851 - 1900
Thanks John and druxey, appreciate the input; I am leaning more and more towards grey cotton. cheers Pat- 1,021 replies
-
- 1
-
-
- gun dispatch vessel
- victoria
- (and 2 more)
-
HMCSS Victoria 1855 by BANYAN - 1:72
BANYAN replied to BANYAN's topic in - Build logs for subjects built 1851 - 1900
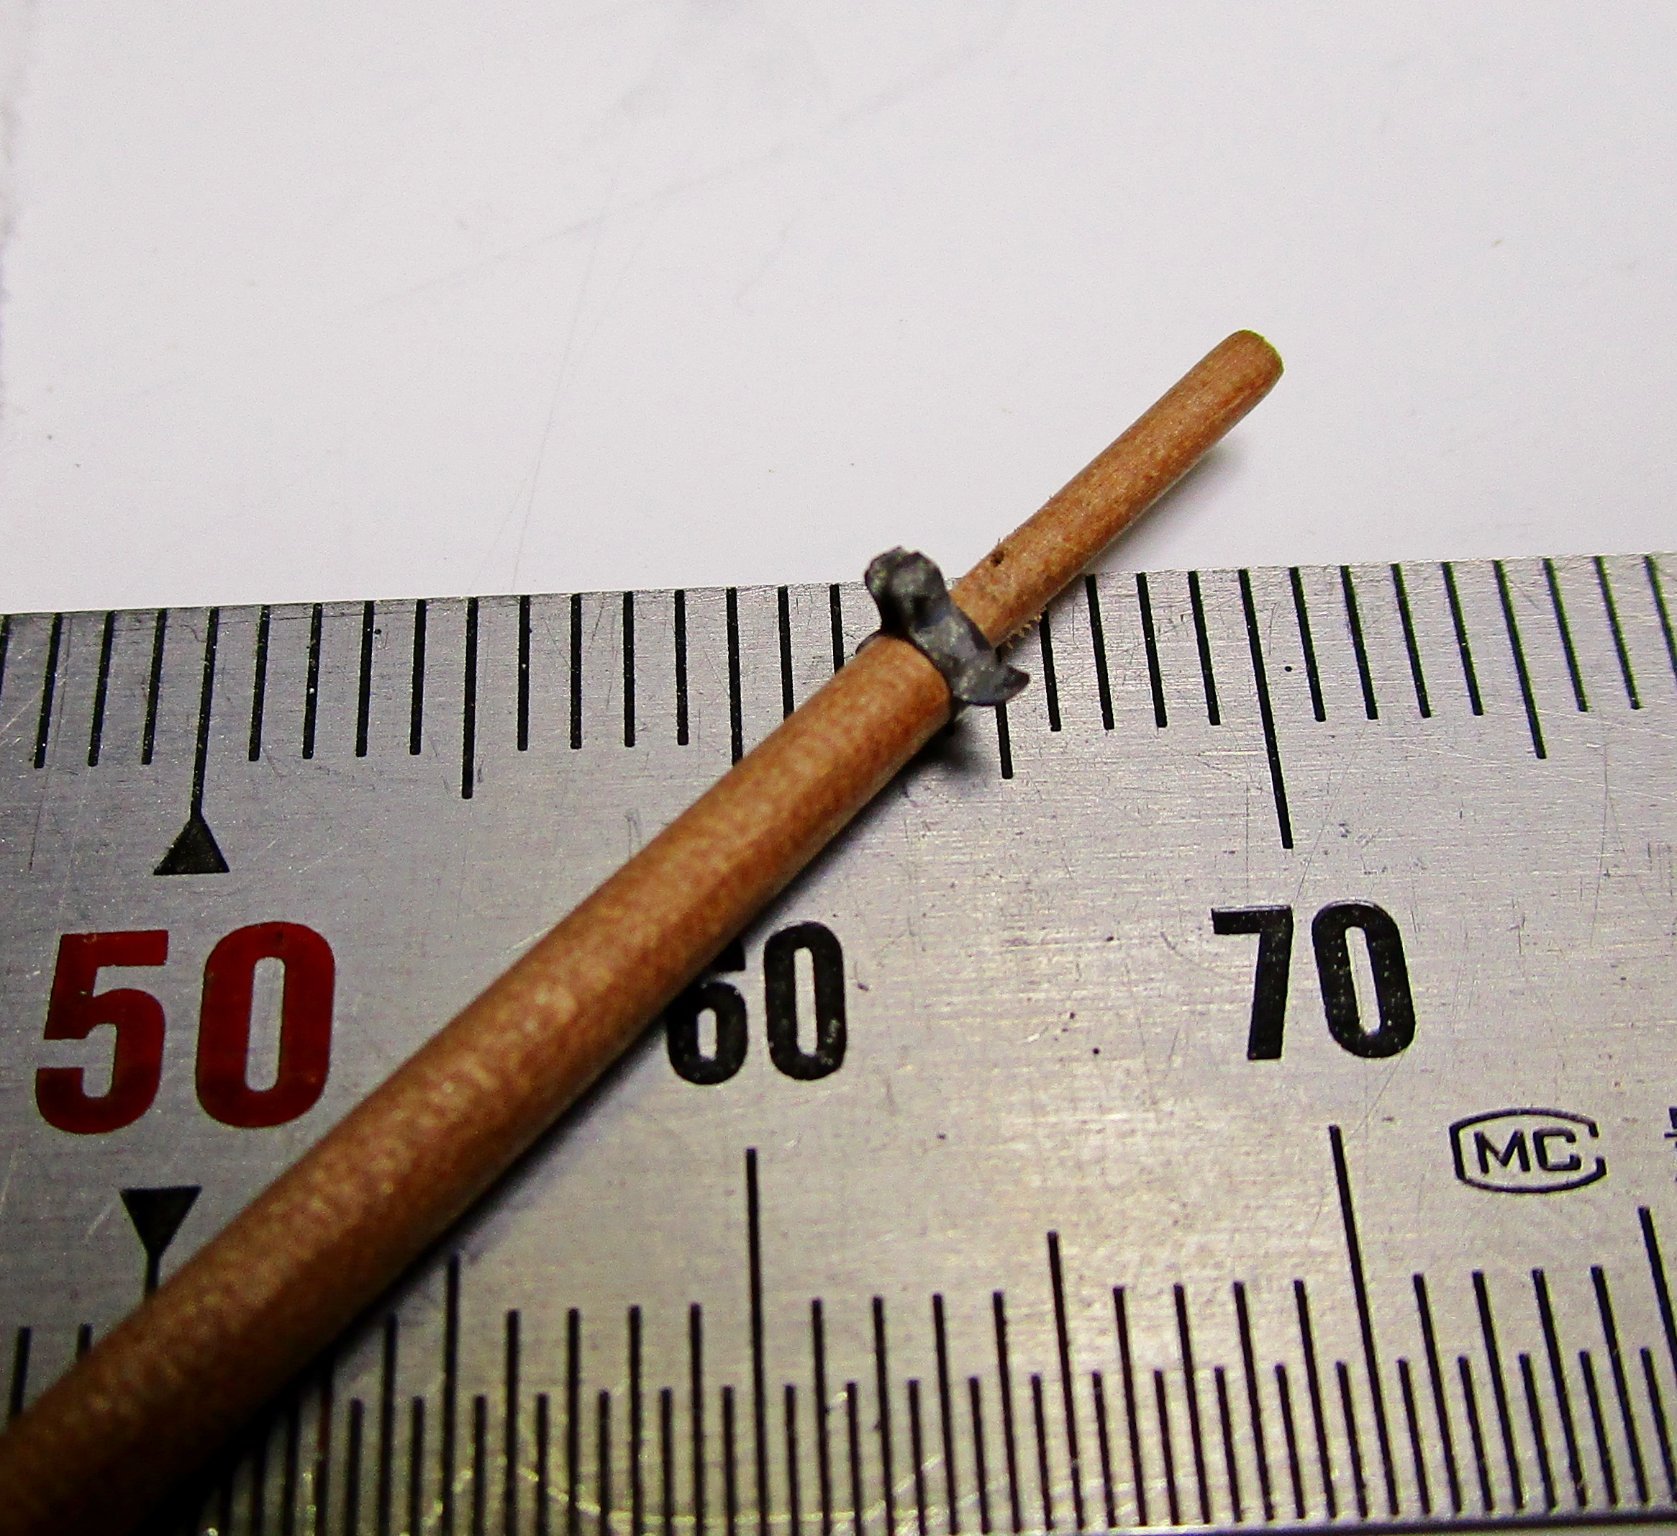
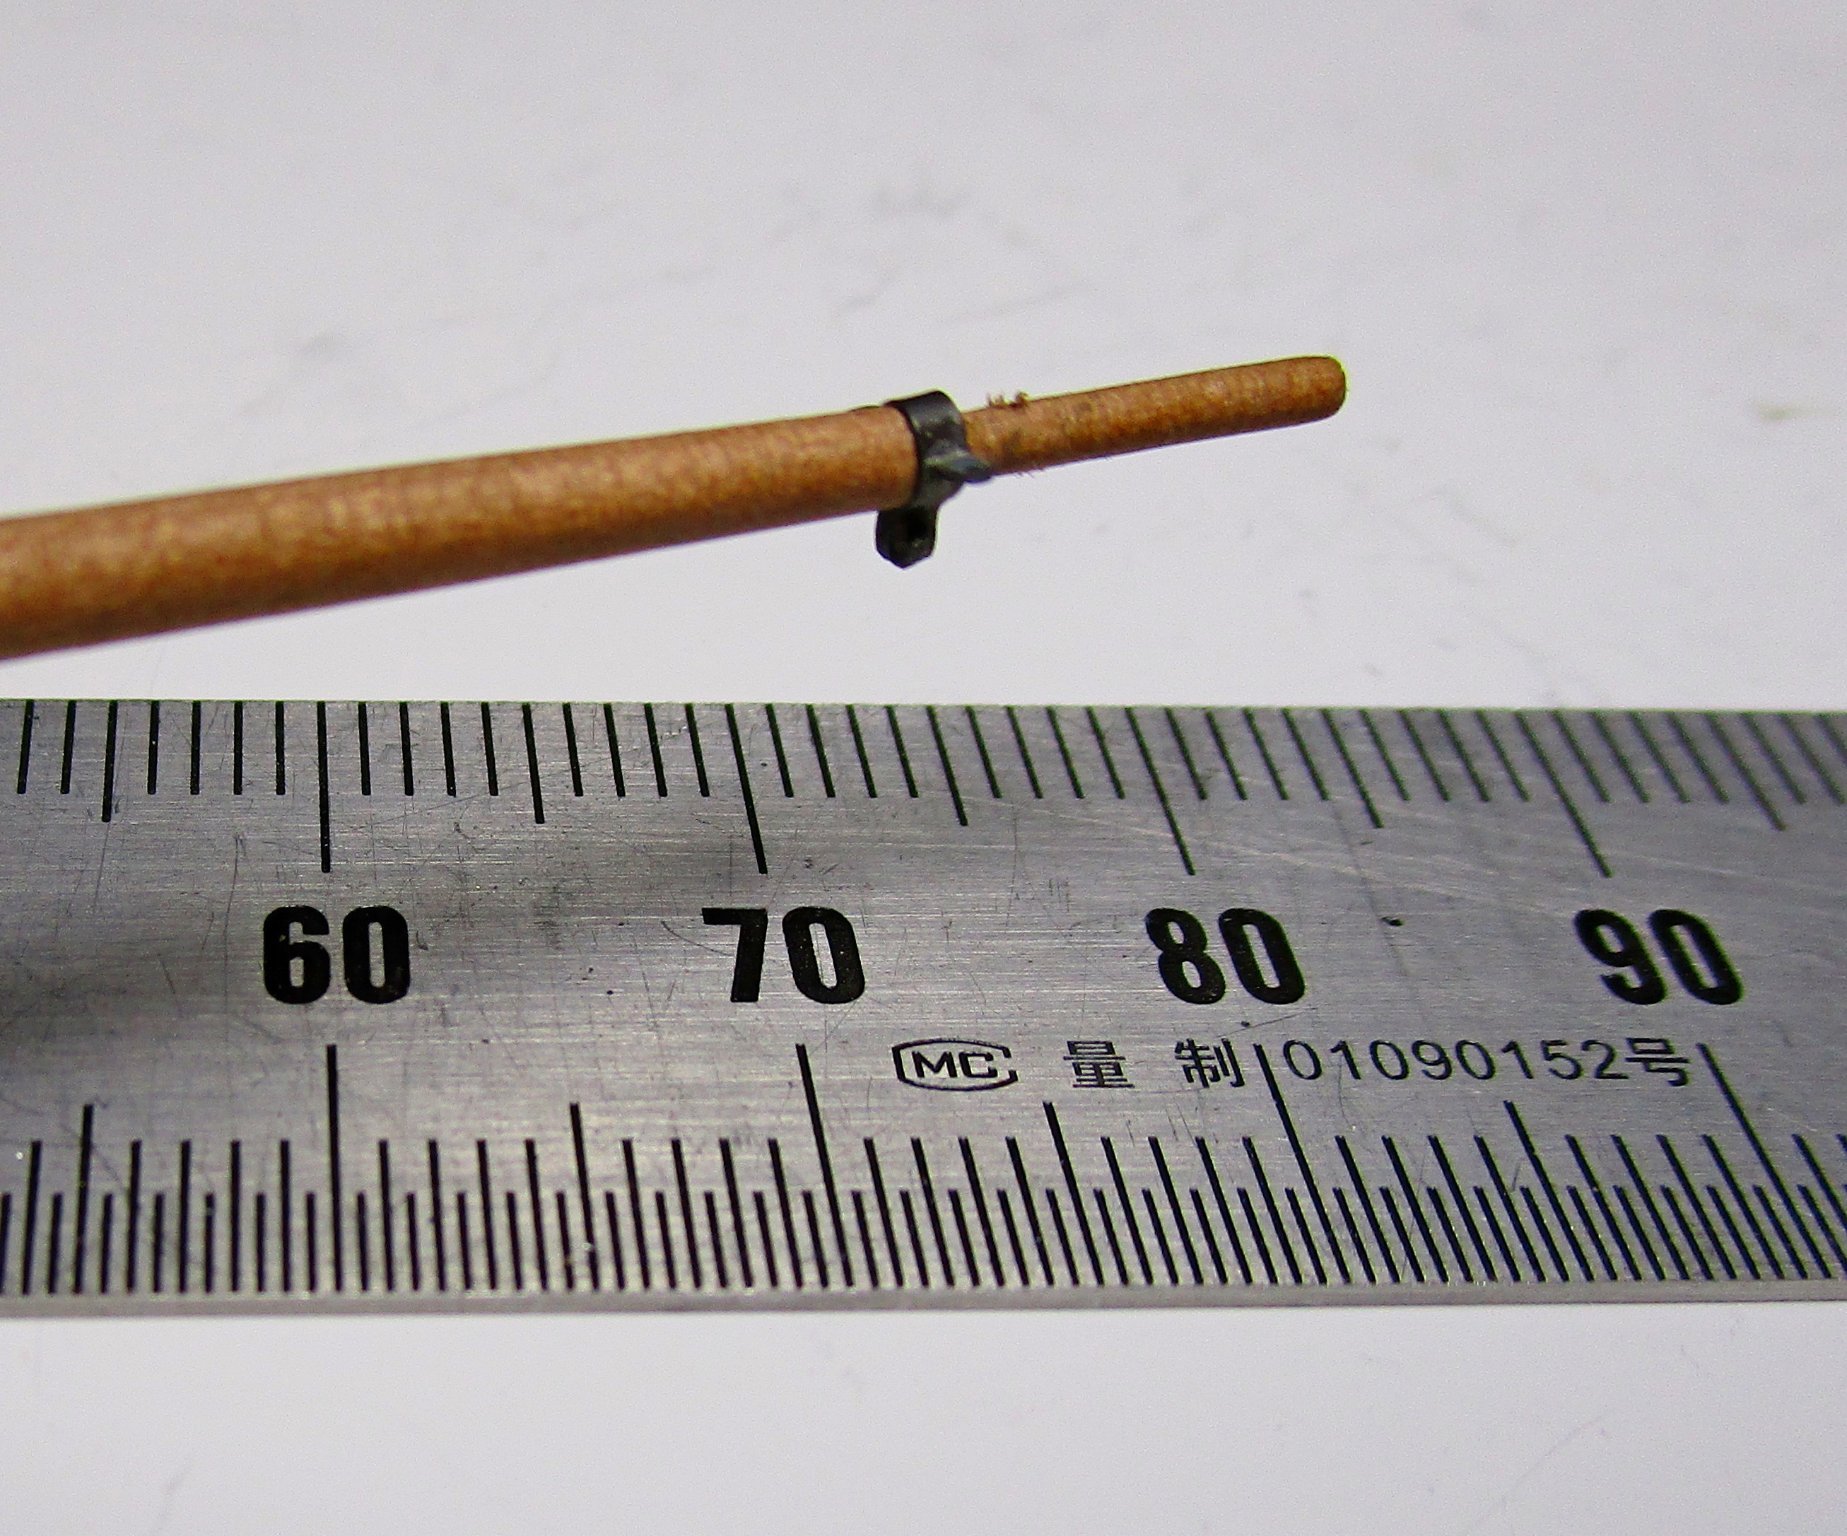
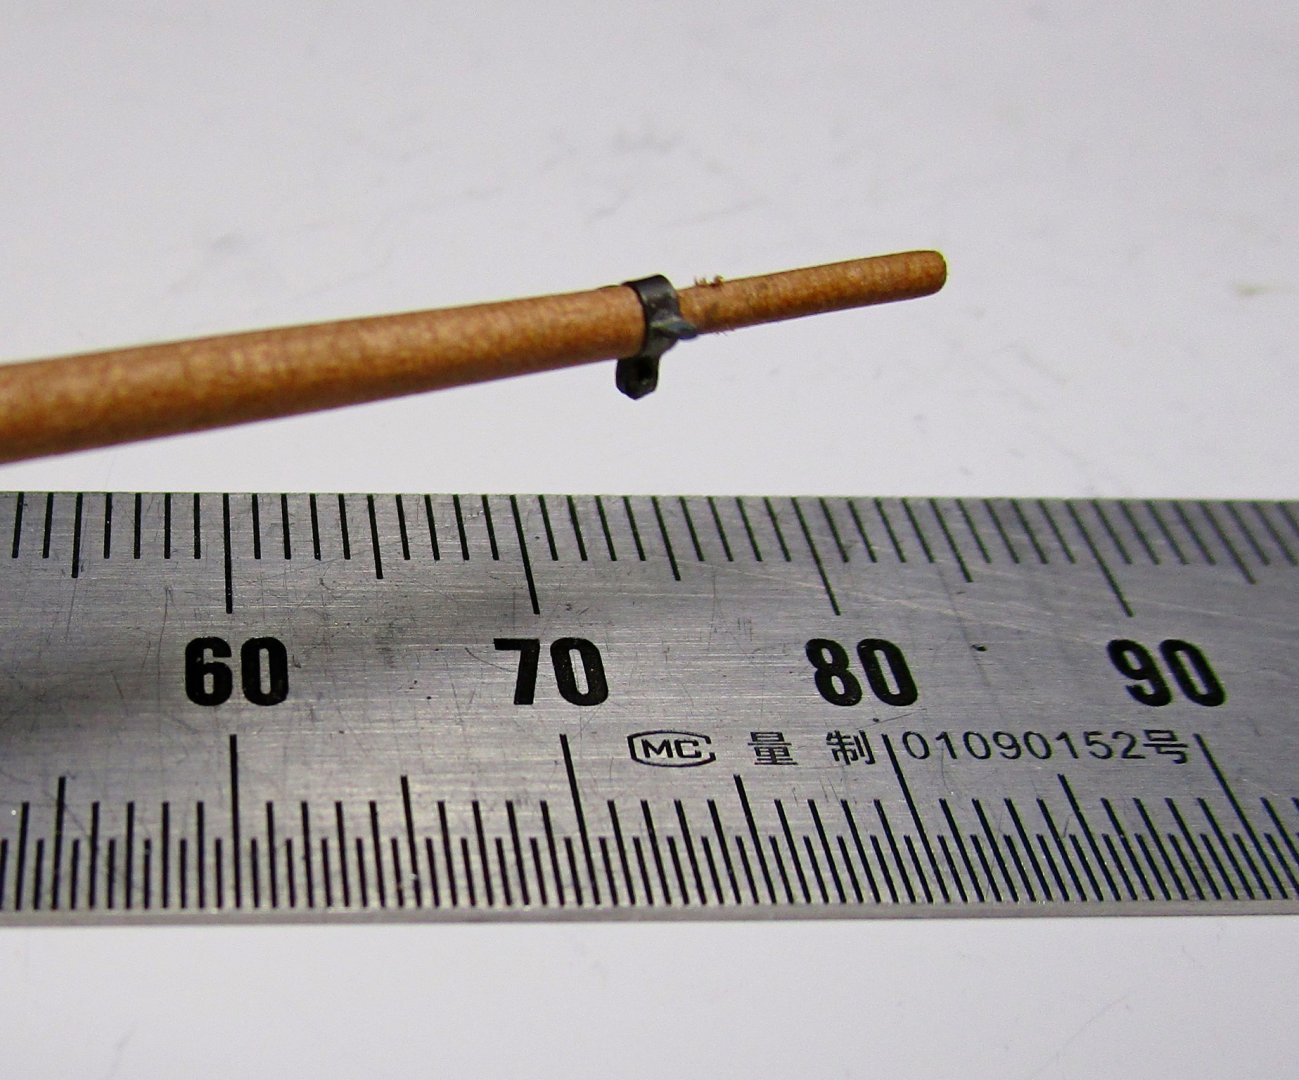
Thanks for all the kind remarks and encouragements guys; much appreciated. Steven, as commented by Eberhard, wood is a little difficult at this dimension - the letterbox panels are only 0.15mm thick. Wood, no matter how densely grained simply snaps when try to slot and stack them like this - believe me, I tried. Tony and John, you guys are tough taskmasters I have tried experimenting but yet to identify a way to do this successfully. Using fabric results in overly large and tattered (frayed edges). I am thinking a similar style to the hammocks may work in using a pvc rod core and perhaps silkspan or tissue, then paint. I am now being put in a corner (no more prevarication) where I HAVE to make a decision on whether to risk thin wire for the wirerope, or use silver coloured cotton. My concern is twofold with the wire, firstly it kinks easily and requires some tension on it to keep it looking straight and true. Secondly, by applying pressure to the wire, I am very concerned some of the very small parts (such as the Rigmaiden lanyard eyes) will not withstand the tension imparted on them. BUT, as I said, I need to make this decision soon as I have only one further task to complete before I can start on the rigging - creating templates for PE to form the parts of the iron hounds and trestletrees. Here is the start of the jibboom - the outer spiderband which is only 2mm ID. The sharp eyed may note the double lug on the bottom which is formed to accept a long link between them. I am using a jig a friend of mine suggested/deigned for me. It is made of aluminium to stop the solder sticking. I didn't take photos while this one was made (experimenting) but will show the process etc when I do the next one. Still a bit of cleaning up of the hole in the neck of the jibboom where I drilled the hole for the Royal Stay cheers Pat
- 1,021 replies
-
- 9
-
-
- gun dispatch vessel
- victoria
- (and 2 more)
-
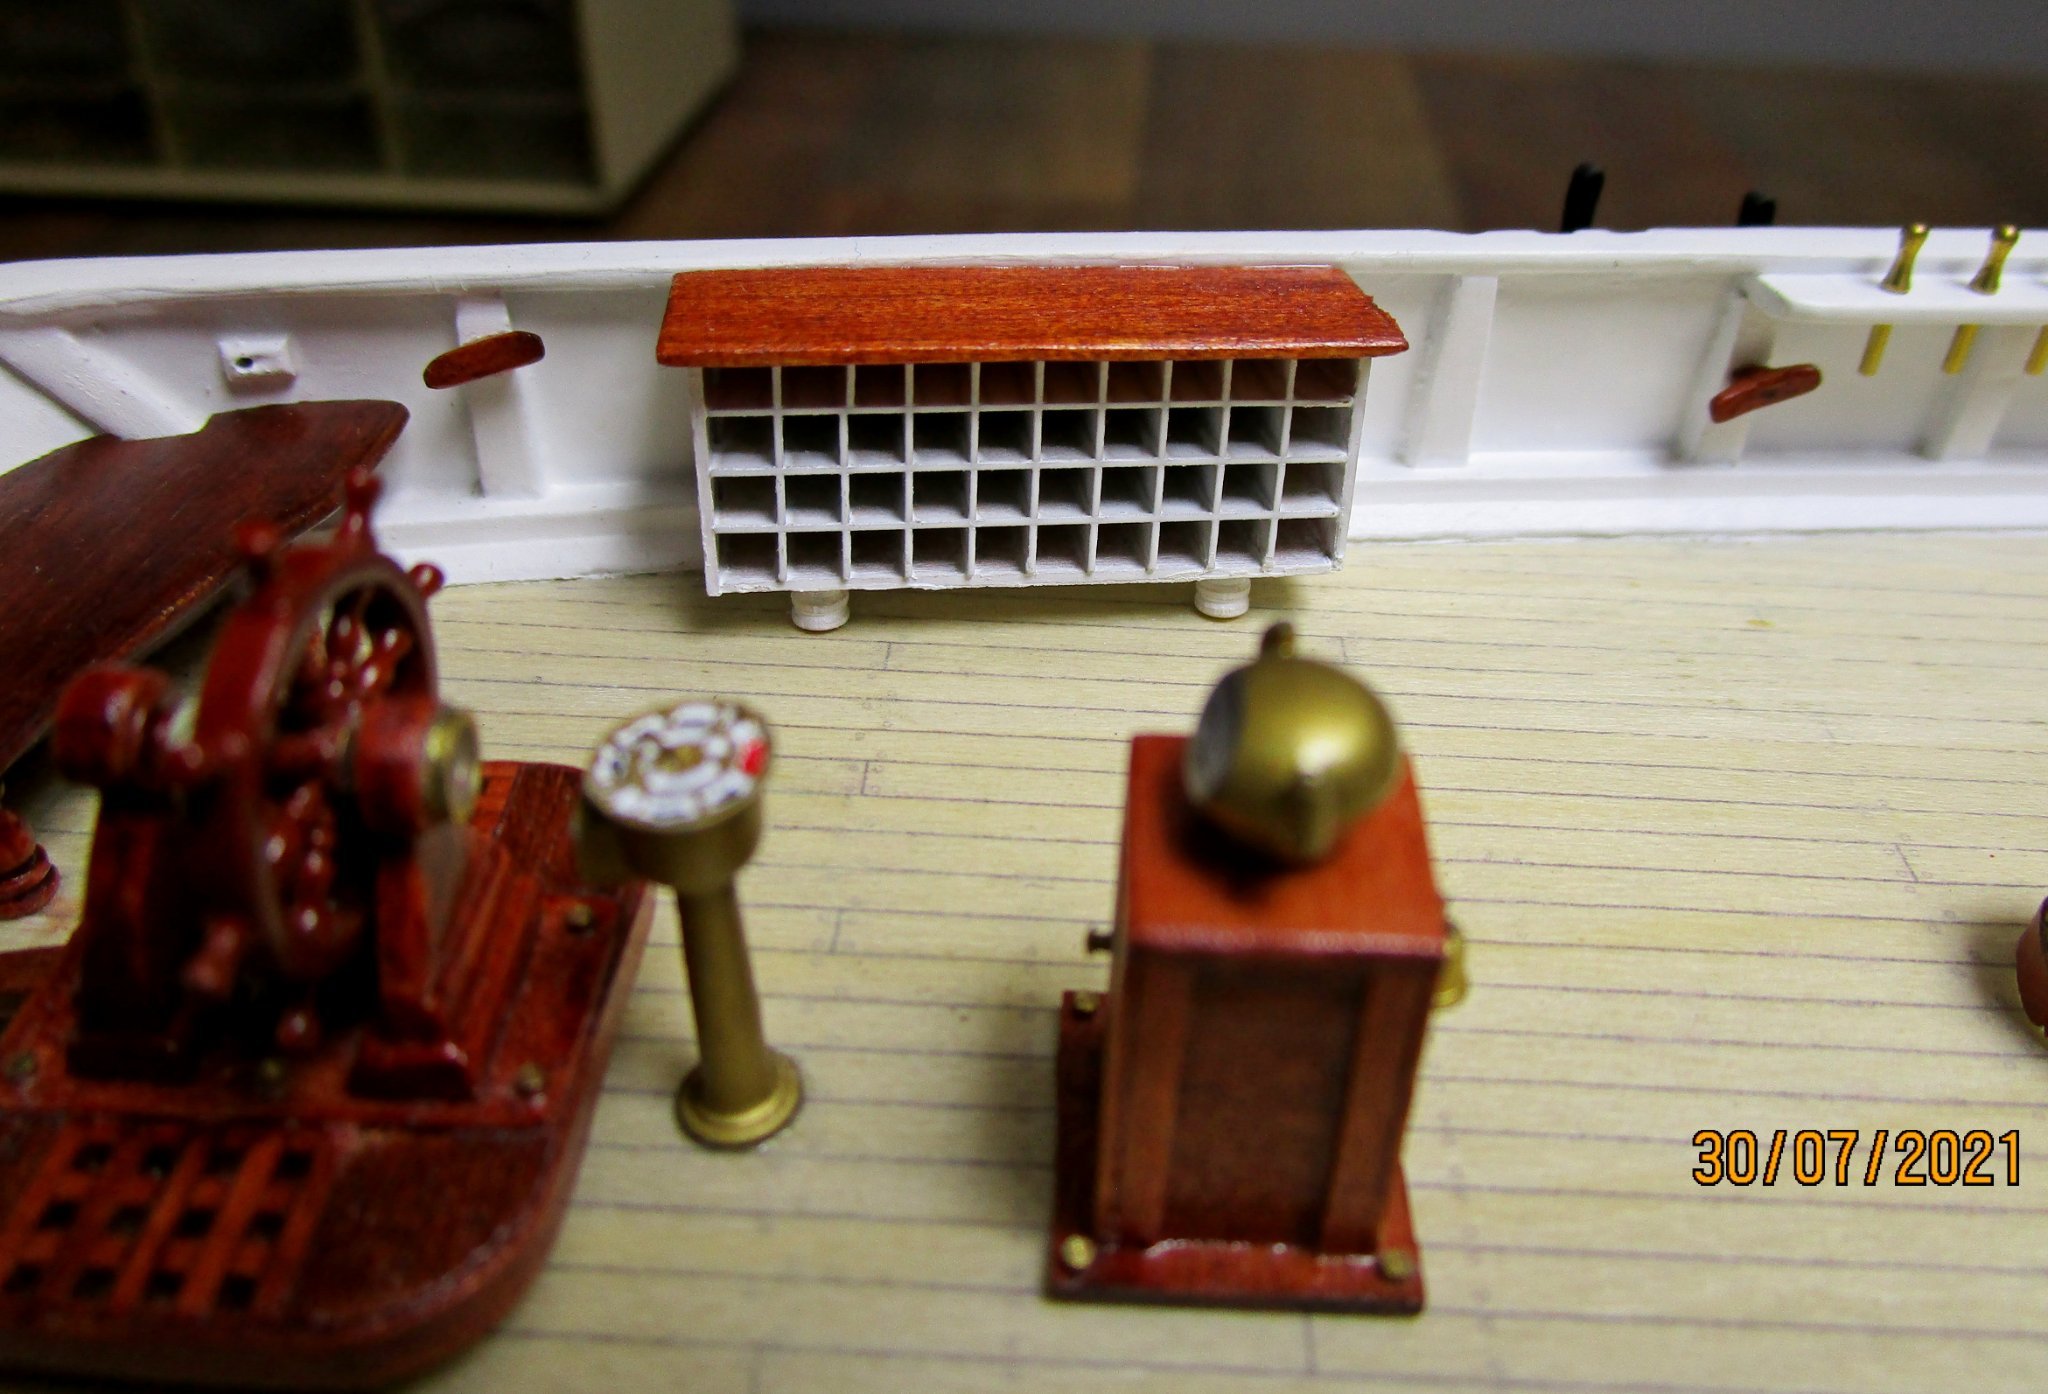
HMCSS Victoria 1855 by BANYAN - 1:72
BANYAN replied to BANYAN's topic in - Build logs for subjects built 1851 - 1900
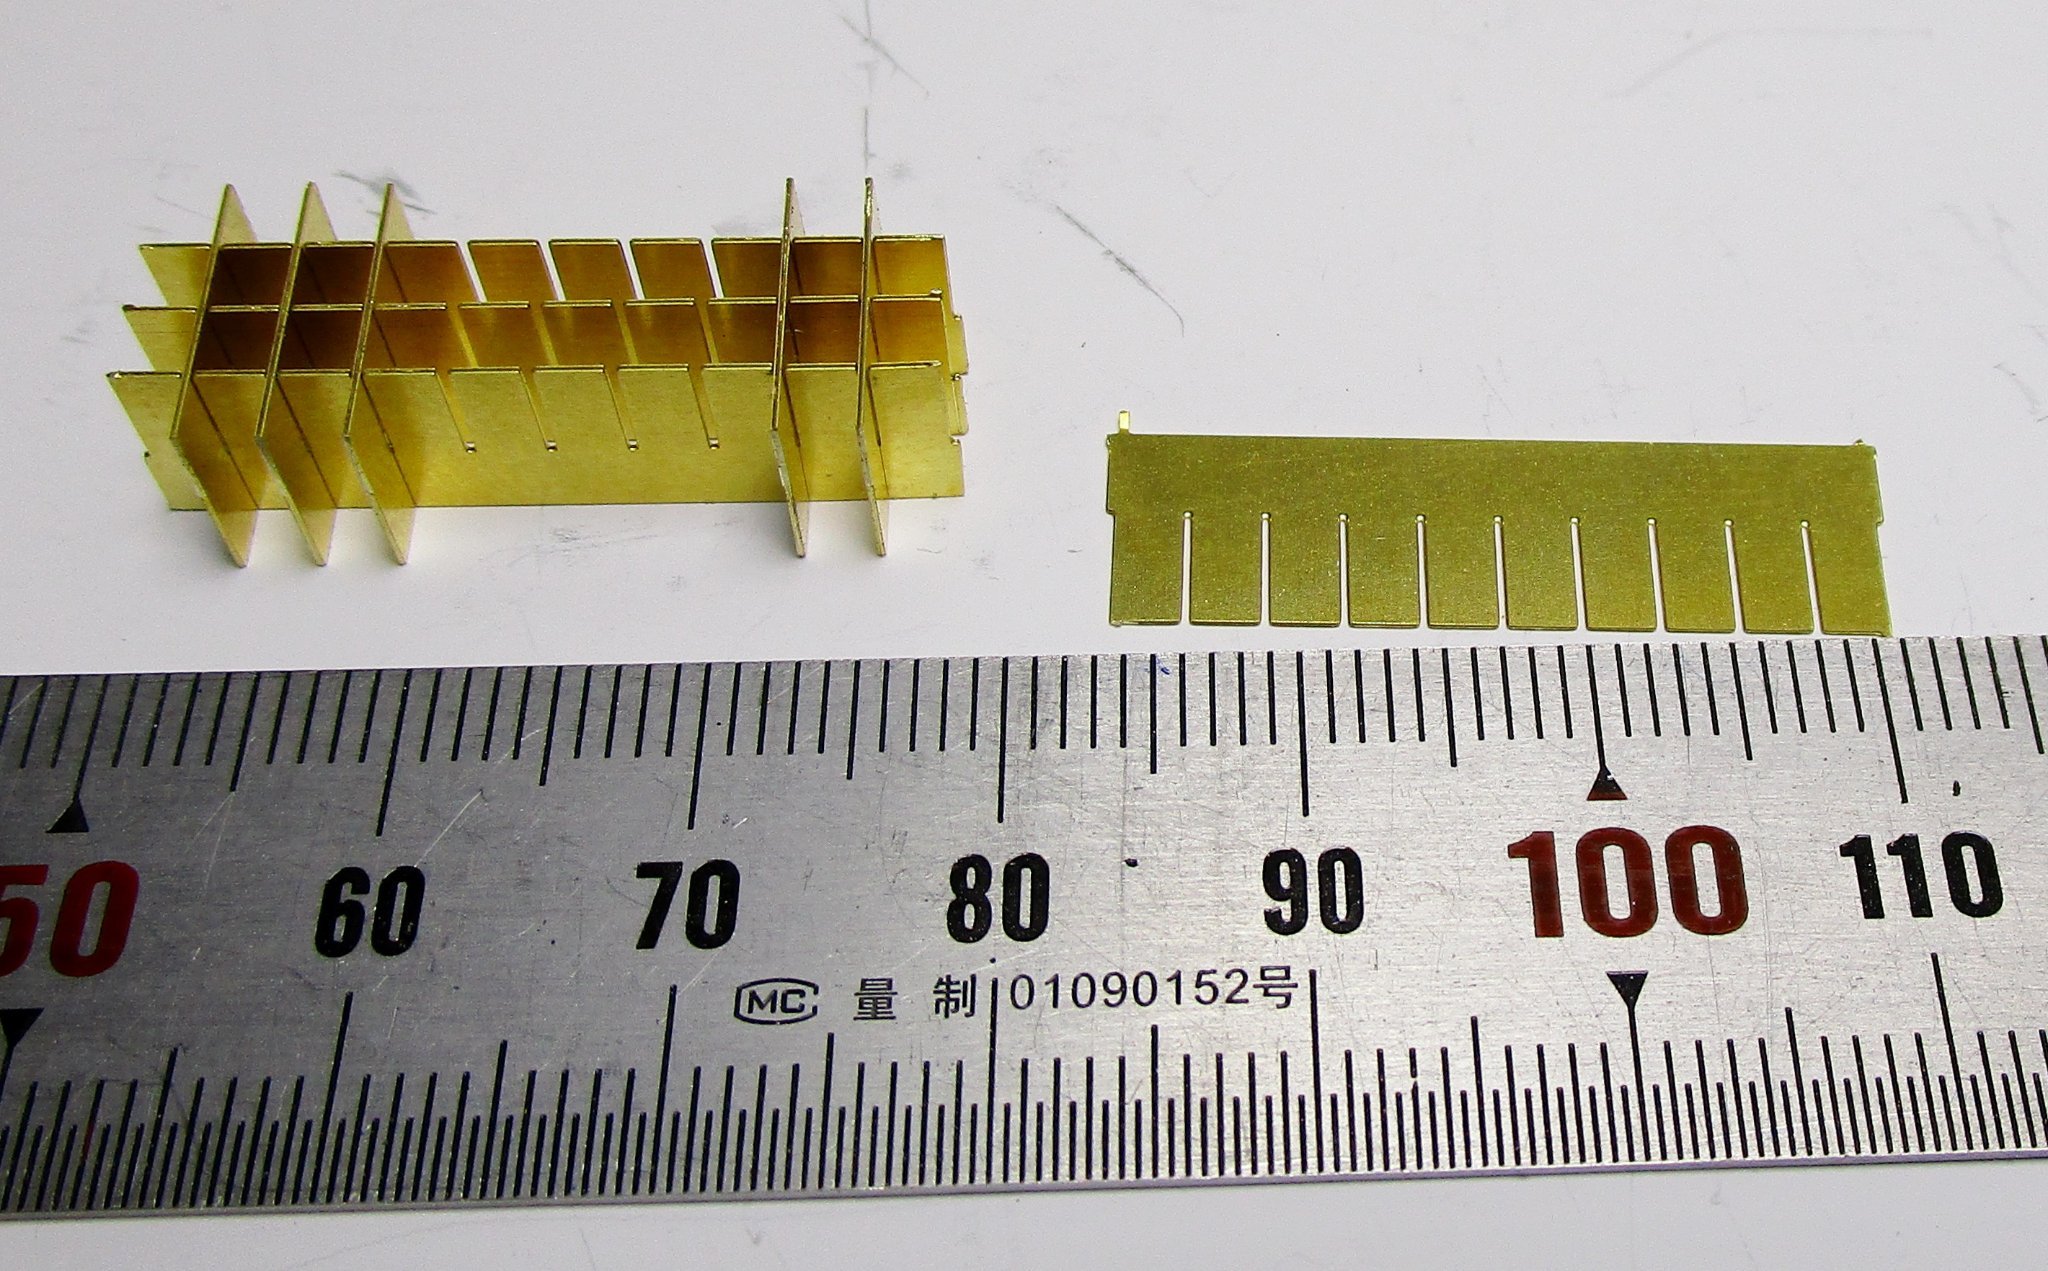
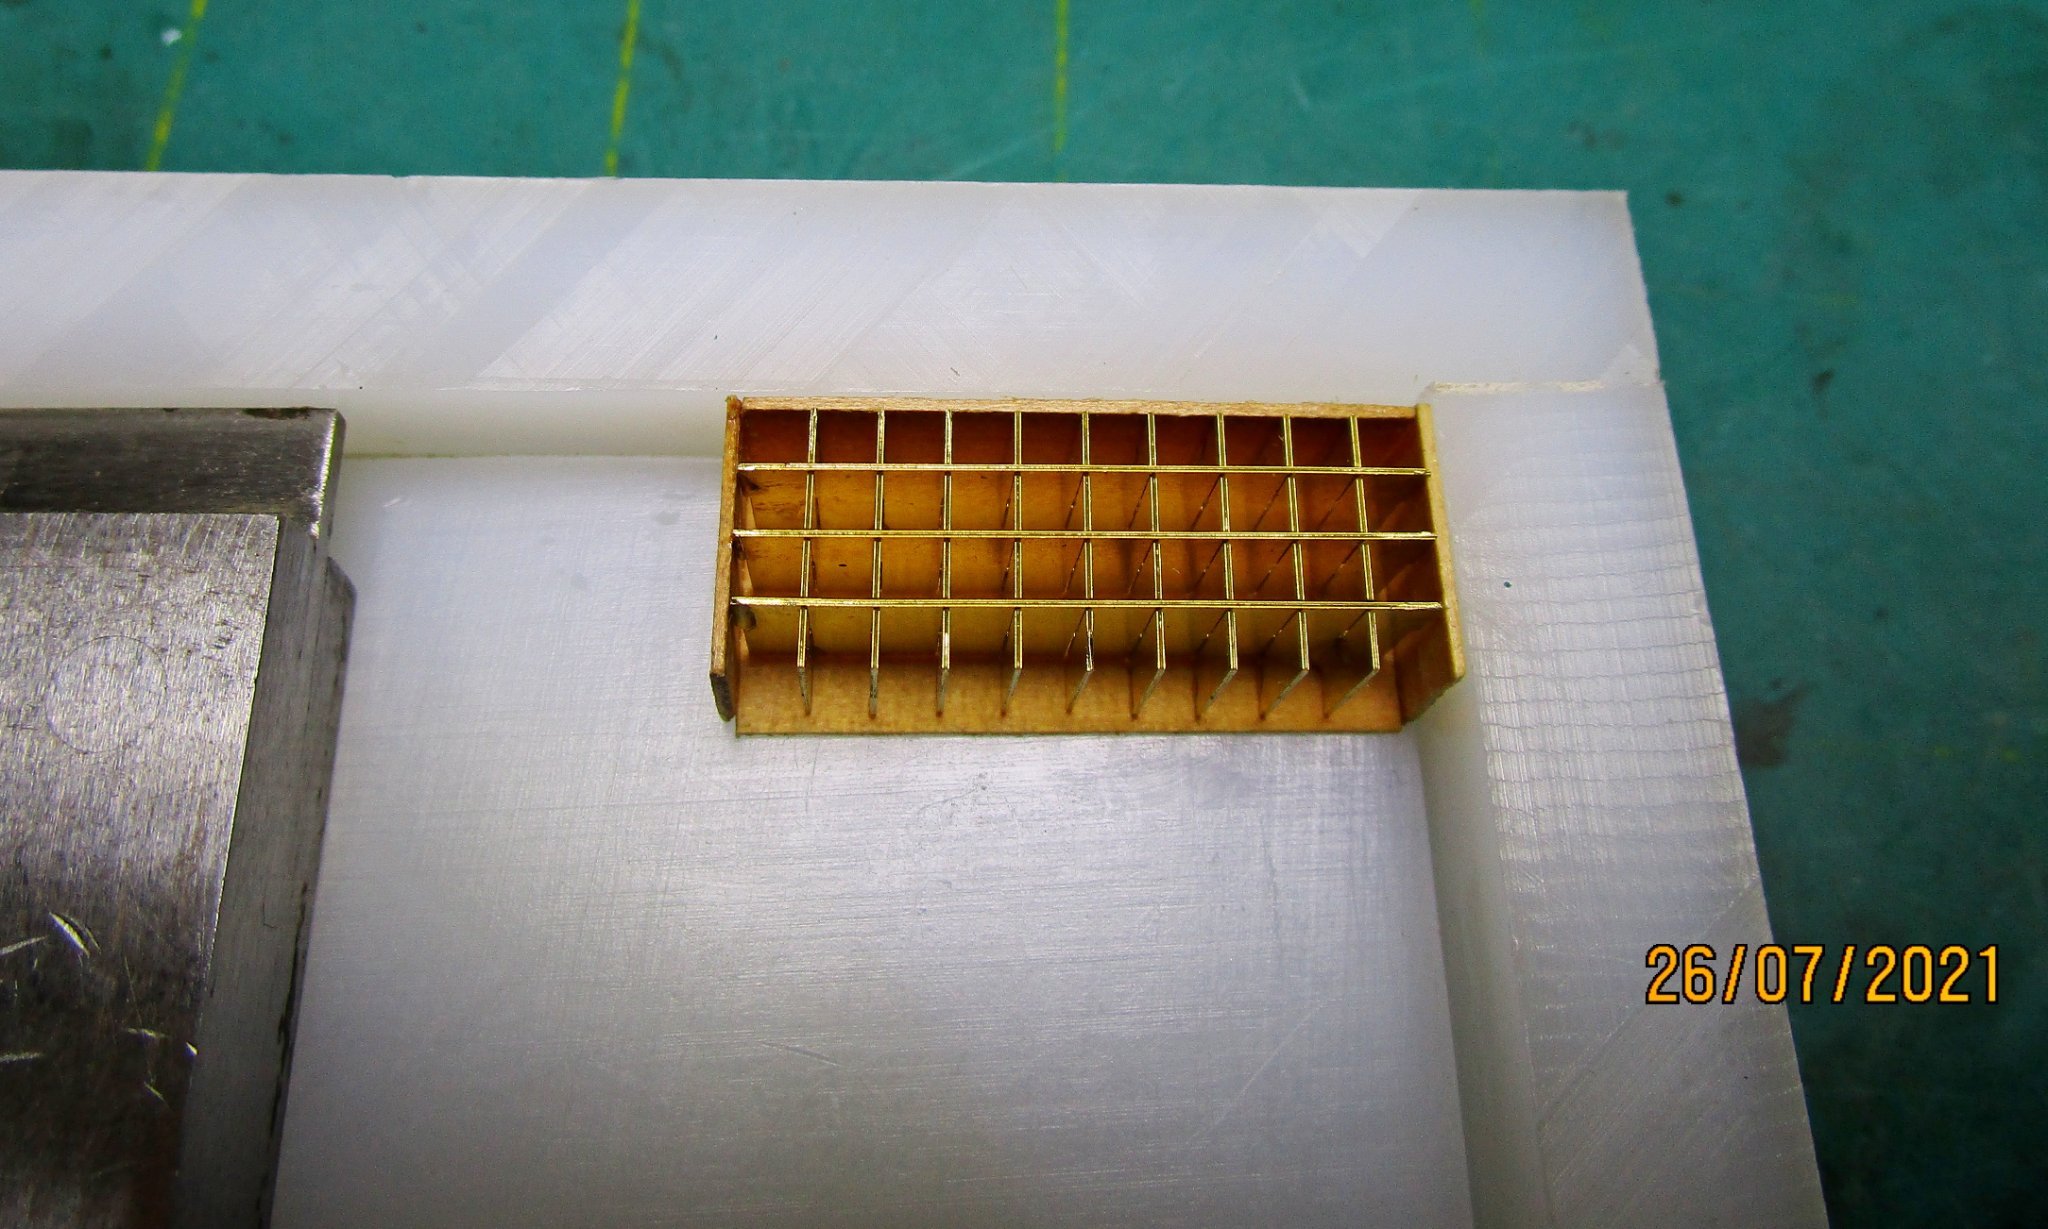
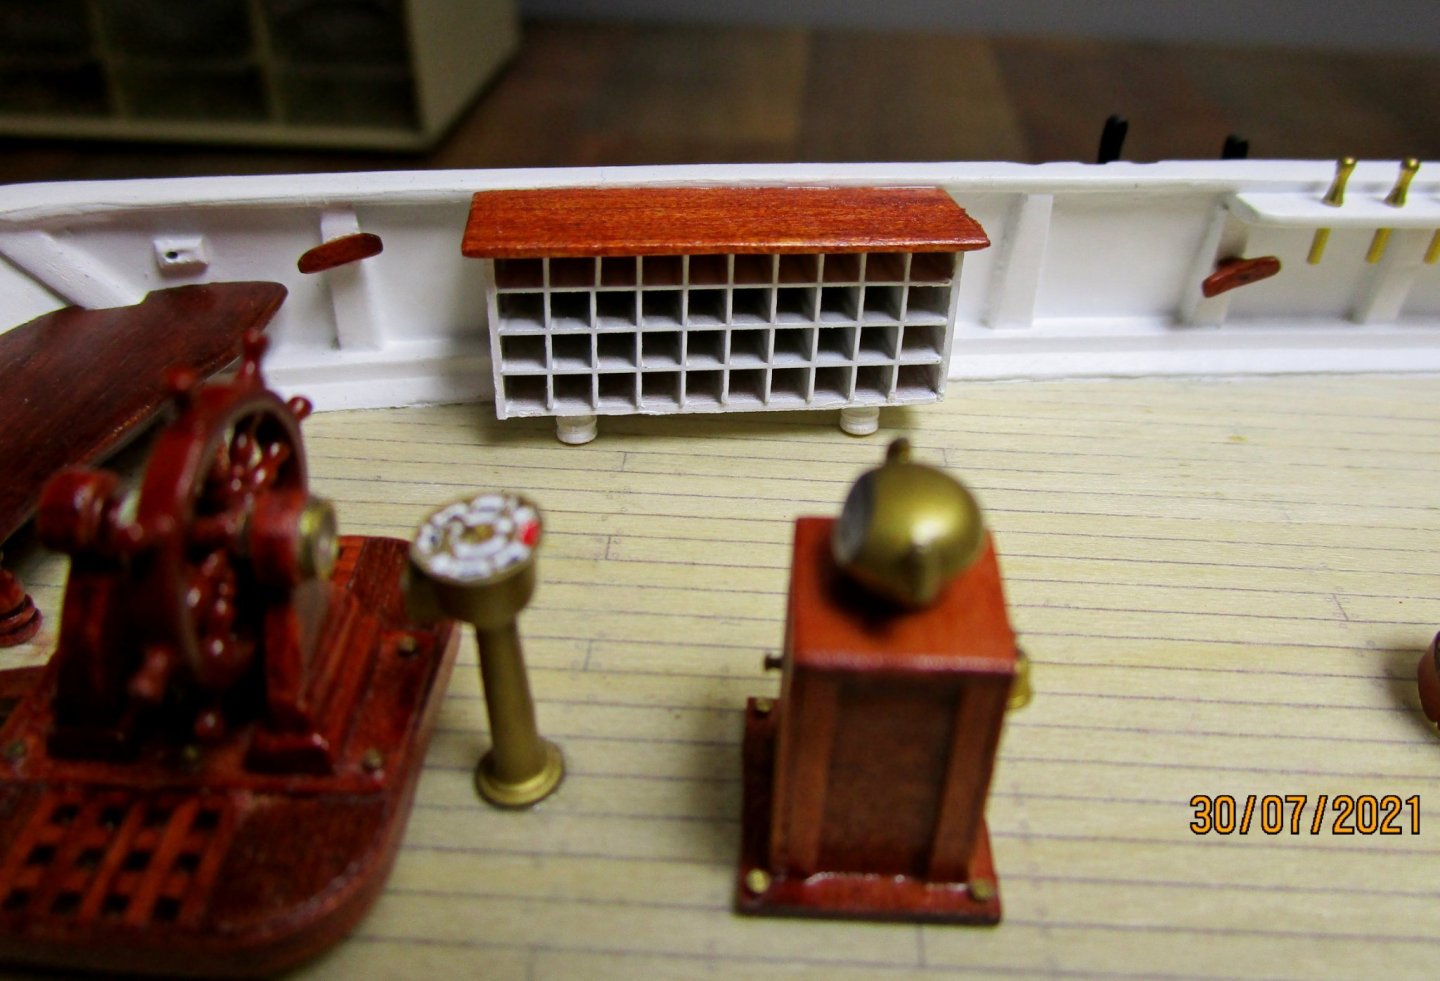
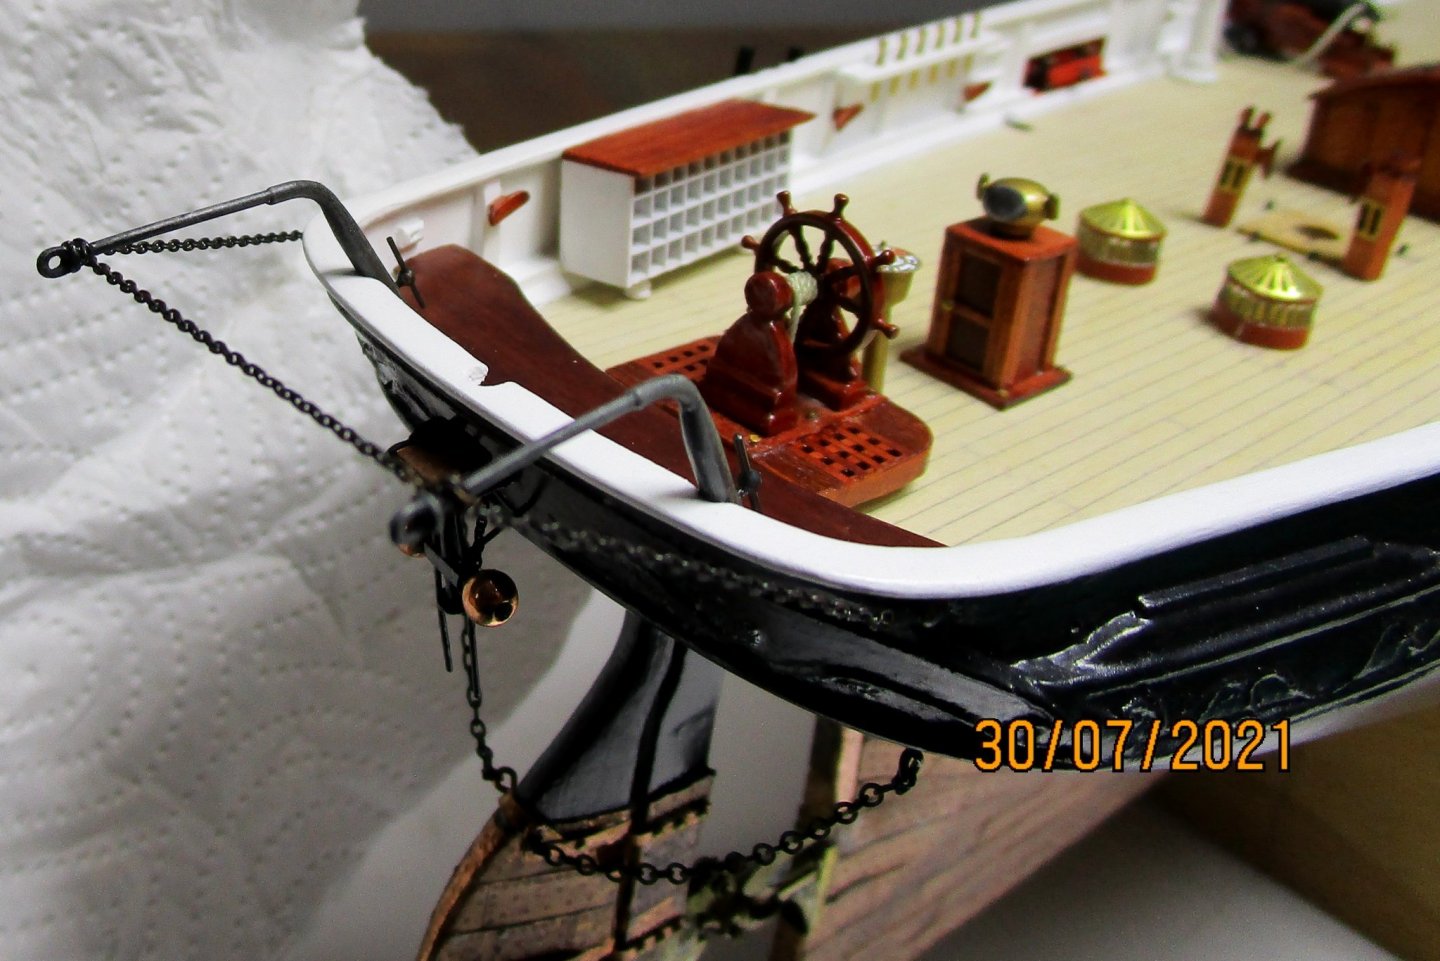
Hi again folks. I have continued to make some slow progress, and even a start on some of the spars as shown in the following. First up was the inclusion of a flag locker. This is not shown on the sheer drawing or in any photo/lithograph but will have been essential. The 'pidgeon holes' were made up from interlocking brass PE (from Scale Warships). I then framed it with thin (.8mm ) wood. While the top looks high, please note the bulwarks were only 2' 9" high. I formed the top as a sort of chart table. I am also considering making up a similar locker on the other side to stow the patent log (Massey style towed harpoon log), navigation equipment, signal lamps etc. Not sure about that yet. I also noted (not visible to naked eye but stands out in photo) I need to clean up the bottom edge of the locker. I then added the stern davits I had previously made up. I have also now put the bowsprit, with its cap and rigging in place. there are two small cheek blocks used rather than 'bees' in this era. The chain gammoning is in place and I have used a copper 'scotsman' to protect the boom from the chain. Although the Specification called for the bowsprit shrouds (guys) to be fitted to 'iron knees in the knee of the head' I have run these as they appear in the photograph. I have used iron knees hardly discernible against the black hull, and their location above and abaft the hawsehole conforms with the general practice of the time and provides the necessary spread either side to properly 'guy' the bowsprit. The Martingale is also in place, along with cap horns for the manropes which will be added later. The rigging screws are scratch built from 1.2mm brass tubes with a small brass eye soldered into each end. cheers Pat


- 1,021 replies
-
- 15
-
-

-

-
- gun dispatch vessel
- victoria
- (and 2 more)
-
That looks really good Rob, and you work so quickly with the plating. That would take me a couple of weeks. cheers Pat
- 3,560 replies
-
- 1
-
-
- clipper
- hull model
- (and 2 more)
-
Hi Steven, for fly tying threads do a quick search online as there are a couple of decent fly fishing sites online that are quite helpful once you call. I cannot remember the name but there is one guy based just out of Geelong that may be handy enough? cheers Pat
- 740 replies
-
- 2
-
-
- Tudor
- restoration
- (and 4 more)
-
Nice work Greg, Noting how 'flimsy' these parts can be, you have done very well to avoid any distortions in the inner parts of each frame. The completed (so far) set looks impressive. cheers Pat
-
Looks nice in-situ Mark, NO make that very nice. The 'Oberon' submarine trophy raises all sorts of imagination - underwater yacht racing? - yacht that shipped the most water? or are you 'Neutral Bay based? cheers Pat
-
I like it Brian, not so 'in-your-face' as bright red. It is closer to a darker wood colour and provides good definition. cheers Pat
-
Henry (you or the staffy? Nice work, you are getting some really nice definition on these deadeyes, especially the 2mm ones.. cheers Pat
- 740 replies
-
- 3
-
-
- Tudor
- restoration
- (and 4 more)