


Knocklouder
-
Posts
2,512 -
Joined
-
Last visited
Content Type
Profiles
Forums
Gallery
Events
Posts posted by Knocklouder
-
-
Hi Tony, the Amati Santa Maria was my first build, and had the time of my life building it. I would cut the tops off the bulkheads, like @robert952showed ,the ones that need to be cut on the main deck, then fit the sub deck. Then plank it. I planked the upper poop deck first the realized it didn't fit so I had to do some fixing. So in my opinion , I would glue in the sub deck, cut up your planks to length , long one short ones and do a two butt pattern . Hope this helps
 .
.
Bob M.
-
Very nicely done , great work. Make sure you put that beauty in a display case
Bob M.
- brunnels, RossR and Keith Black
-
 2
2
-
 1
1
-
-
Great job on painting the figures Keith. I just finished painting my first two figures for my Drakkar, look in my Mayflower log post #189, bottom of the post left hand corner. All thought they are Vikings for my Drakkar @Gabek has showen me how to use Army Speed paint. All the figures in the case were painted by him, he showed me how one afternoon, it took all of 15 minutes to explain how, I found them easy-to-use. Dont know if Army Speed Paint would be better than what you are doing now cause what you are doing now looks amazing. Just thought speed paint maybe better, I found it easy to use on my builds, might be worth the look.
Bob M.
-
Very nice picture in, at a glance, I can almost see myself in the reflection off the hull. Now you got me all reved up tu do my Scientific Bluenose, your hulls are just fabulous, but like you say all models are fun, and I am having lots of fun with my KOM, and looking at your ships, Spray on my Man!!
Bob M.
-
My condolences for your loss, very sorry for your loss.
Your ship looks like your off to a great start,,checking in from time to time to see it all come together, Good luck on your journey.
Bob M.
- Patrick Haw and Ryland Craze
-
2
-
Wow Kevin has Appolo ever gotten large,beautiful marking on him. And all puppies look good. Odin Minimoo will be a great addition to the home. All the best my friend.
Bob M.
- Old Collingwood, mtaylor and Canute
-
3
-
Got back from Humboldt Saskatchewan great wedding, Good time was had by all.
Today it was back at'er, lined off the main deck, and drew out the herringbone for the second deck. Then started to plank, first I had to blacken the edges then start cutting.

I marked the nail holes, filled them with plastic wood , sanded then stained it with thin grey stain, followed by two coats of shellac .
I also gave the hull a coat of amber shellac to darken it just a bit. Then I had to plank some more.
") .
.

Going to start planking the rooms tomorrow , need to study the door plan a bit, I believe that I am going to change the corner molding to walnut, instead of the kit wood, only because I got lots lol. So now I will be planking for the next few days and buildig the doors, while listening to the Doors, lol 😆
It is so much fun being in the ship yard, there are not enough hours in a day, it's to bad we got to sleep lol. Later my friend's.
Thanks for looking.
Bob M.
-
From one steam ship builder to another, good luck on your journey, going to follow along because your so talented.
Bob M.
- GrandpaPhil, Keith Black, Glen McGuire and 2 others
-
4
-
1
-
 Garry, this is the place to be, good luck on your journey, have as much fun as you can.
Bob M.
- mtaylor, Keith Black and Gary Watson
-
3
-

This is the place to be, all the help and info you will ever need is right here. Have as much fun as you can enjoy your journey.
Bob M.
- Scottish Guy, Lohengrin, mtaylor and 1 other
-
4
-
-
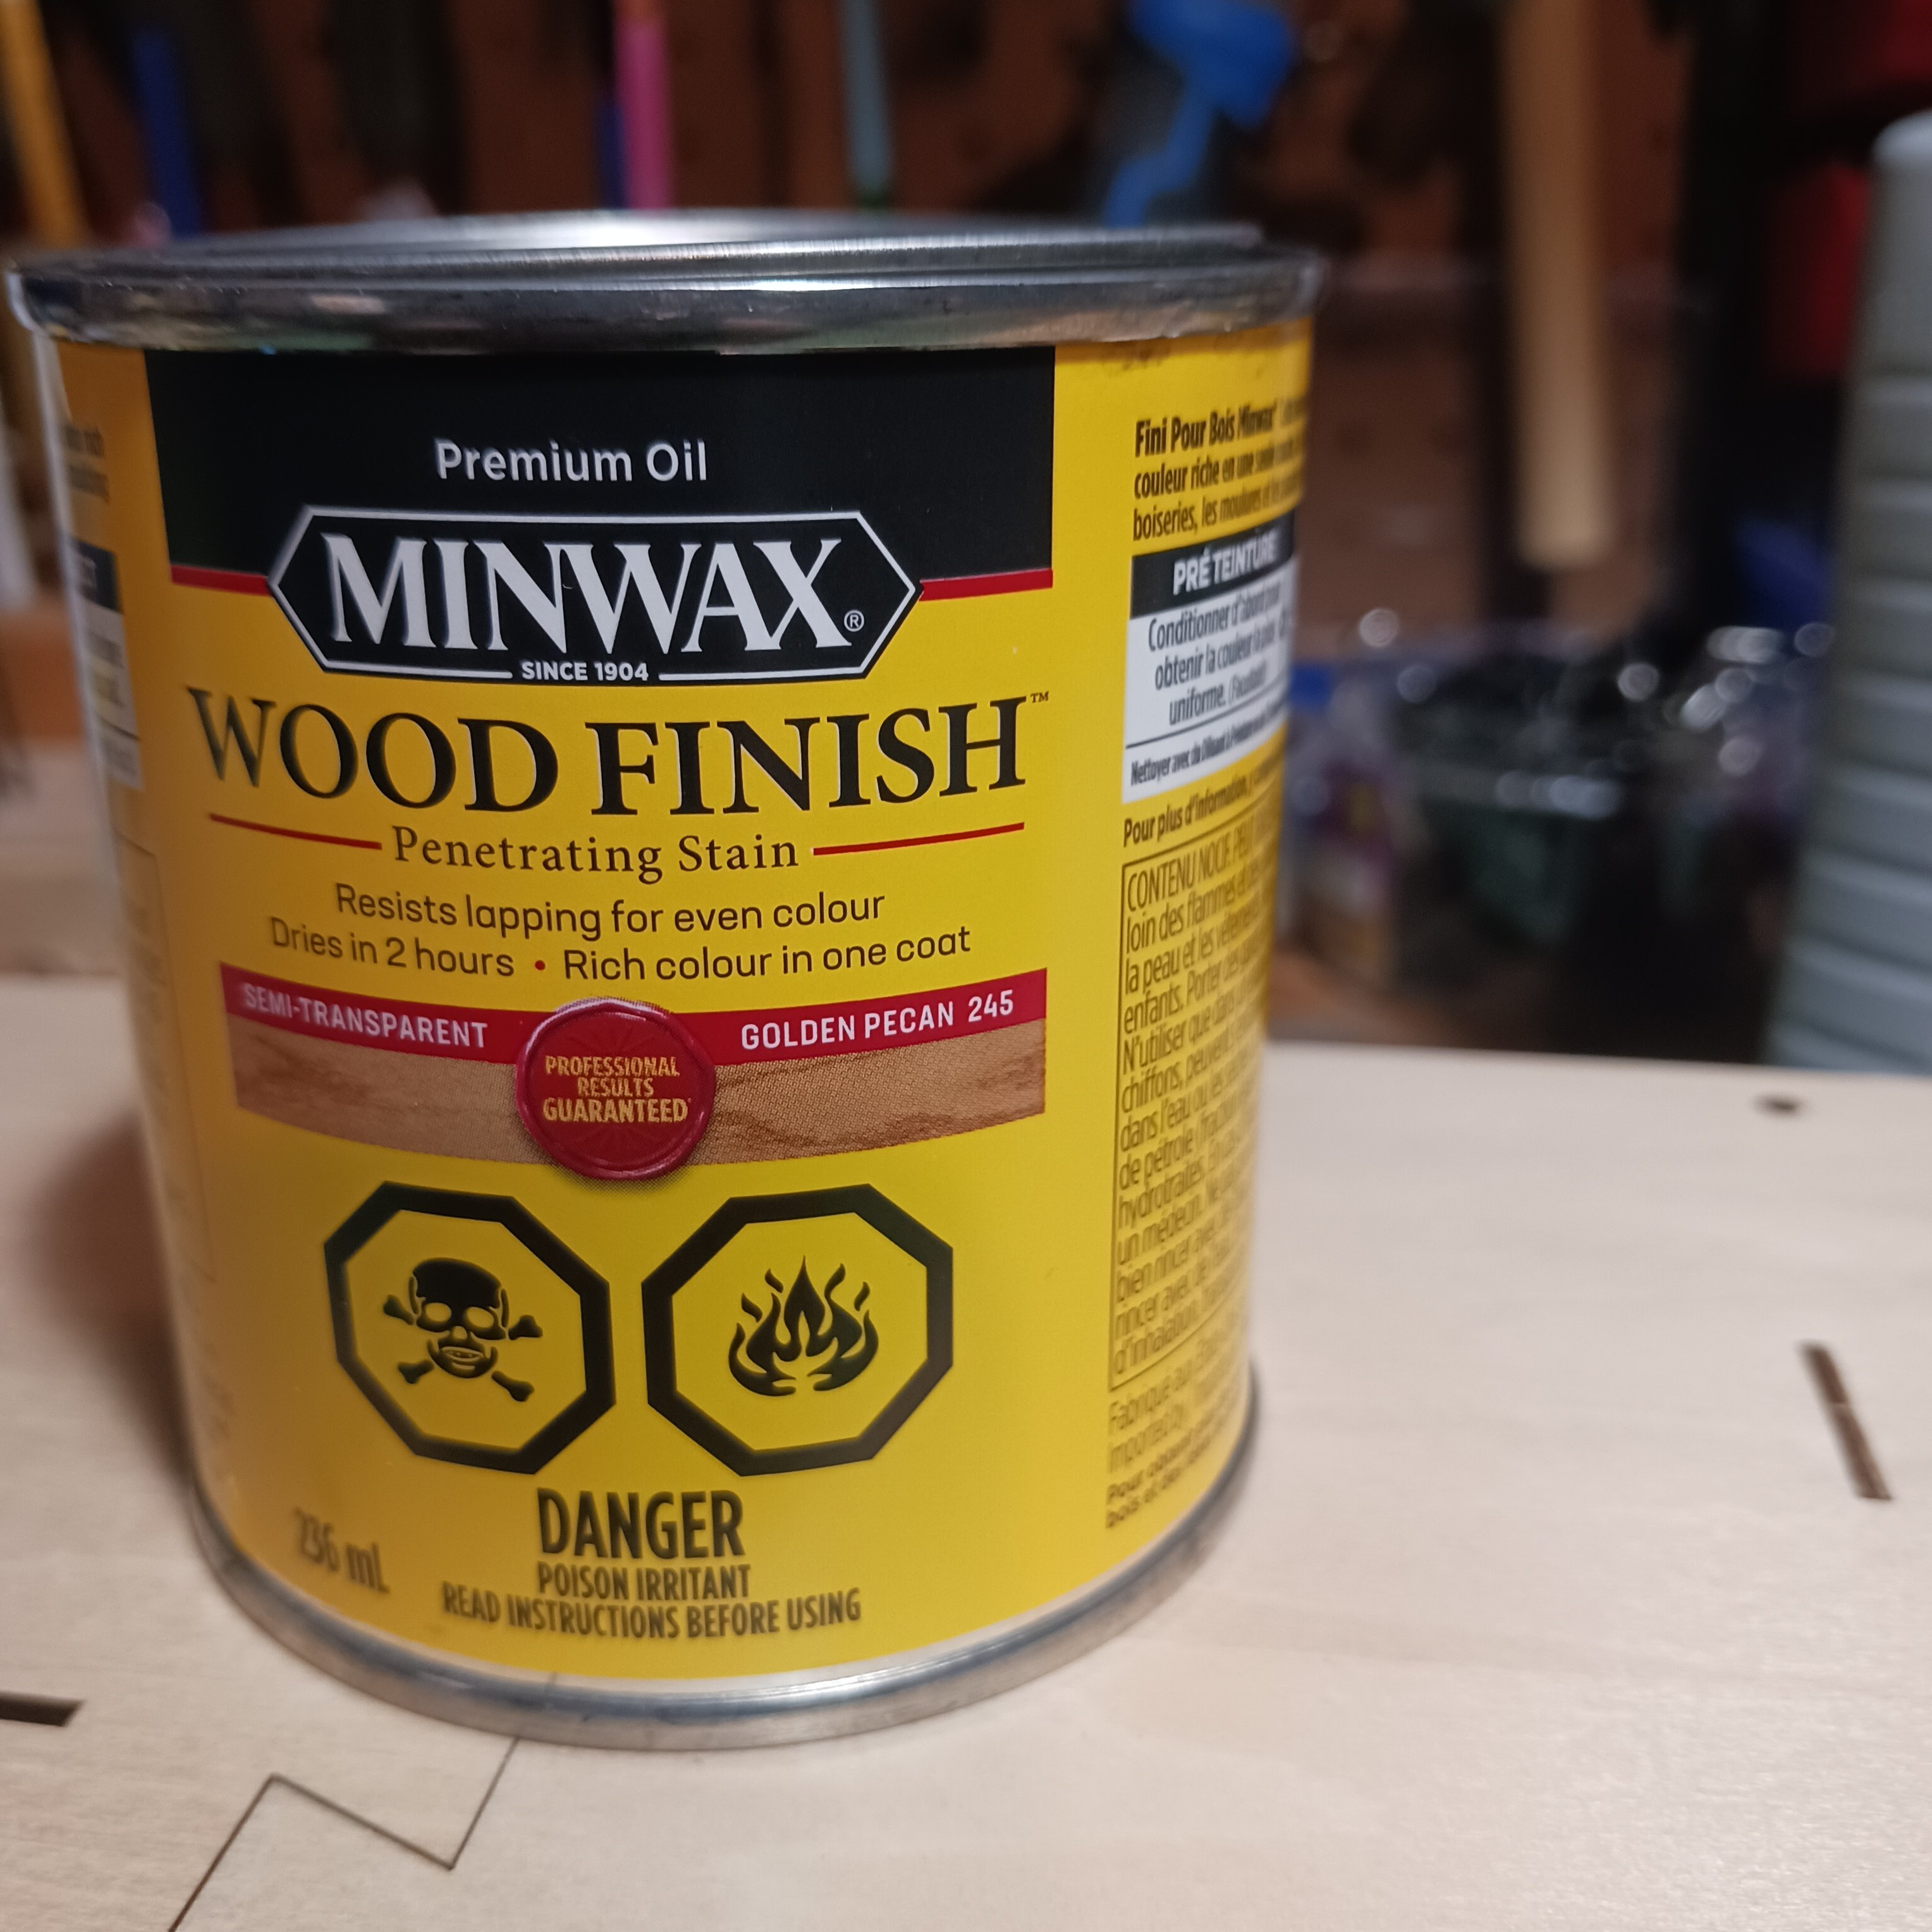
Thanks Keith, I have stain the hull it looks good. To me 😁
So far it seem every thing lines up, all the slots are in the right place so far. So Artesania Latina has fixed that problem .


I decided to go as far as the second deck, it all fits, a bit of sanding , good to go.
Stained the hull Golden Pecan, after staining it I added the tin to my ever growing collection.

It looks a little browner than the box but I am going with this .
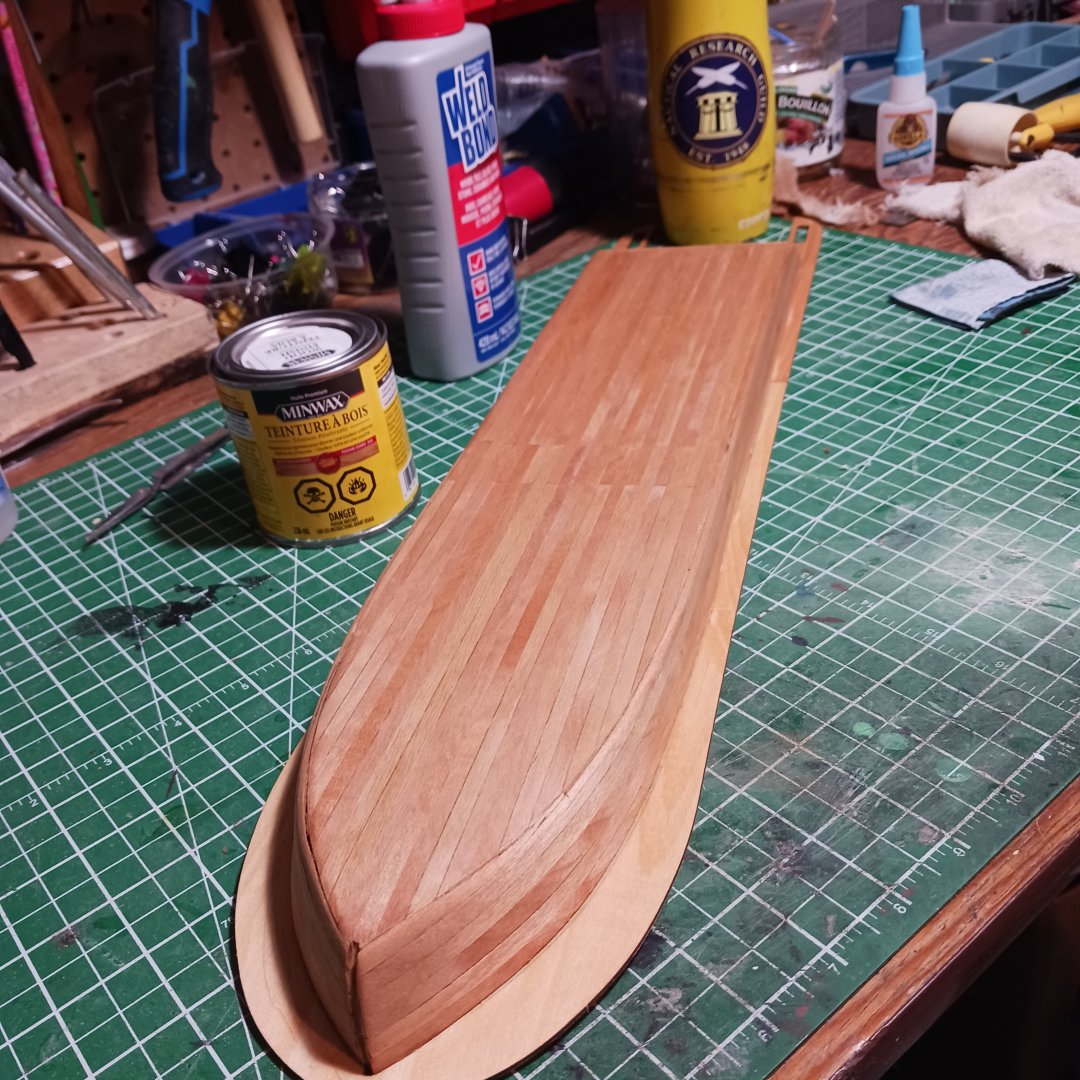

So a bit of sealer Shellac, on to start planking and planking lol.
Yes I check the staircases they are sprial, can't wait for that.
The First Mate would like to start her garden, and we are off to a wedding in Saskatchewan, for a week trip so progress will slow. But I have told her that my Glue is going to be by its best use before date, I can't stop. Lol. She said buy a new one on the way to the wedding.
The more I think about what it will look like, the more this kit is becoming enjoyable to do, I know the kit will look as good as the builder can make it. So far pleased with the kit.
Later my friend's, I be lurking but not building lol 😂 🤣
Bob M.

- Bryan Woods, GrandpaPhil, aaronc and 7 others
-
10
-
Dave I think line 10 and 27 are for controlling the yardarm. And 13 and 34 are for the bow lines. My Mayflower is rigged different, but the lines your talking about are tied on to the top of the block, on the mast then run to block at the yardarm and back though the one on the mast then down to a cleat on the mast. The same for the Bowlines. You did nice work on the mast tops , looking forward to seeing it finished.
Hope that make sense. As far as how much to leave , we all rig different, I like to leave lots hanging over the side with clips to hold them till I am ready to tie everything of.
Man I hope that's right lol
Bob M
-
-
Things are happening, lol. I have been moving things around in the shipyard and found out today I put the computer in the wrong place. This I found out when I spun around in my chair and over she went. On the floor and in peices.
 . A call to tec support and we were back, Two hours later yep over she gos again, this time the monitor wire now shorts out and I need a new one.. The kid says do you really need one. YES the plans for The King of the Mississippi are only available on line and the First Mate wont let me print the instructions lol.
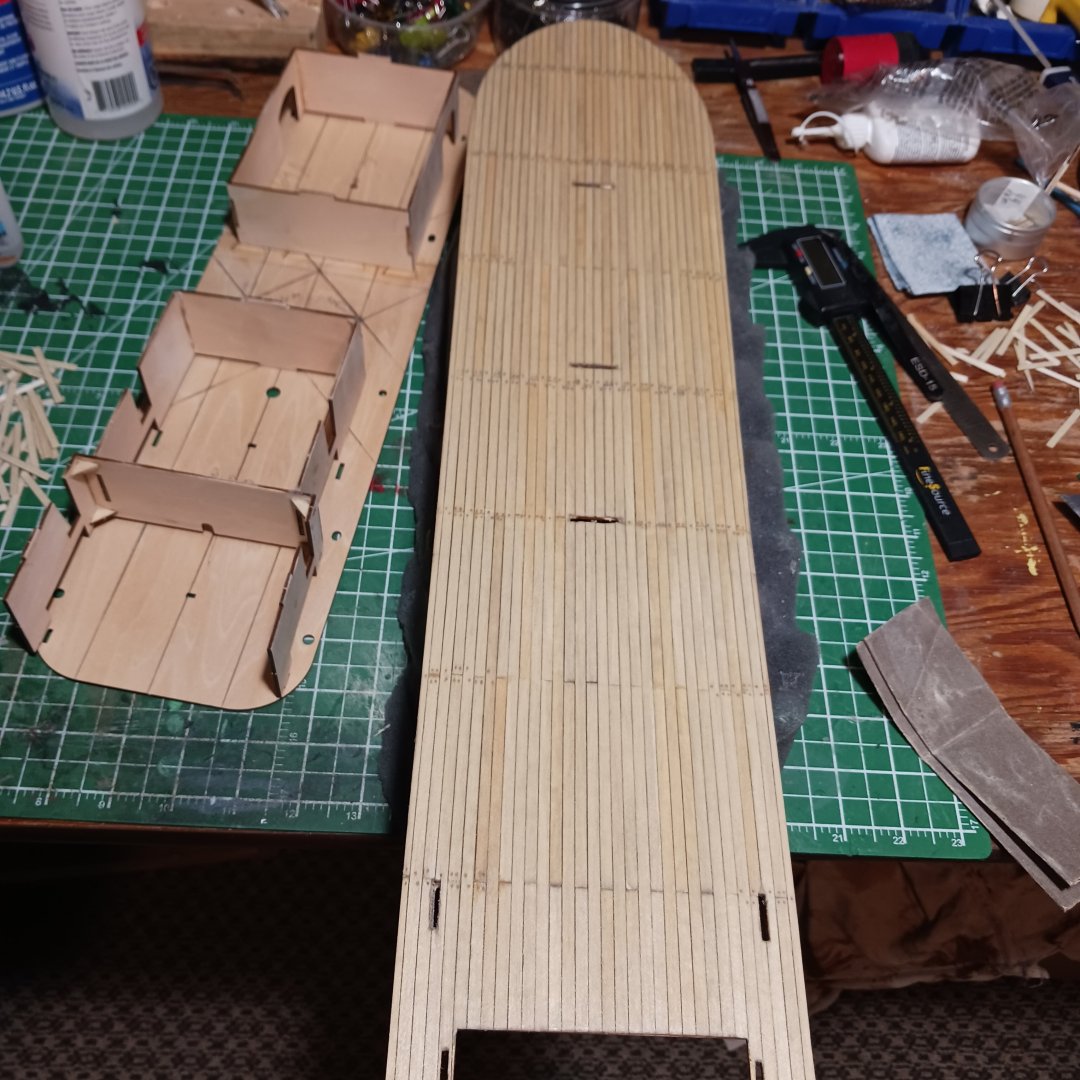
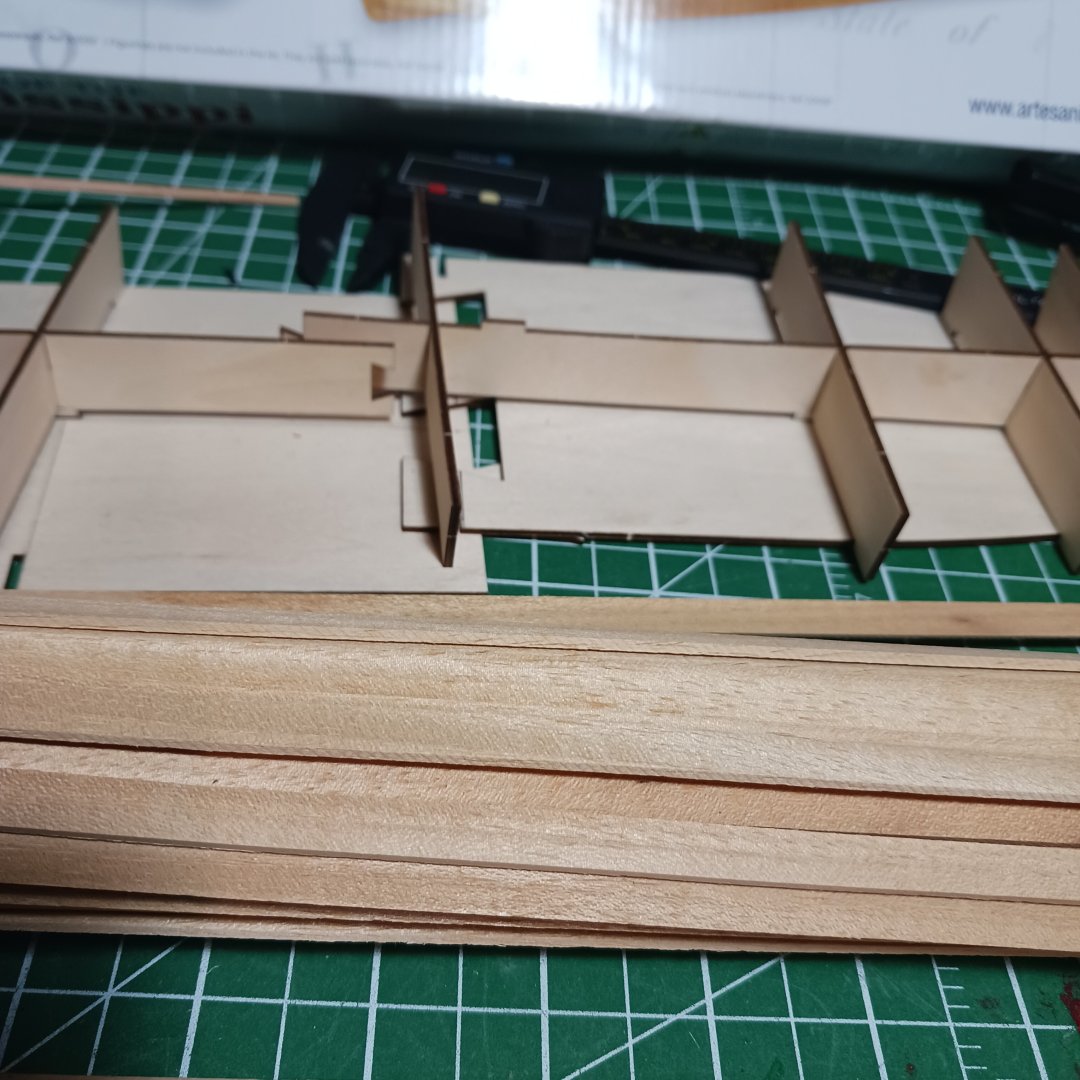
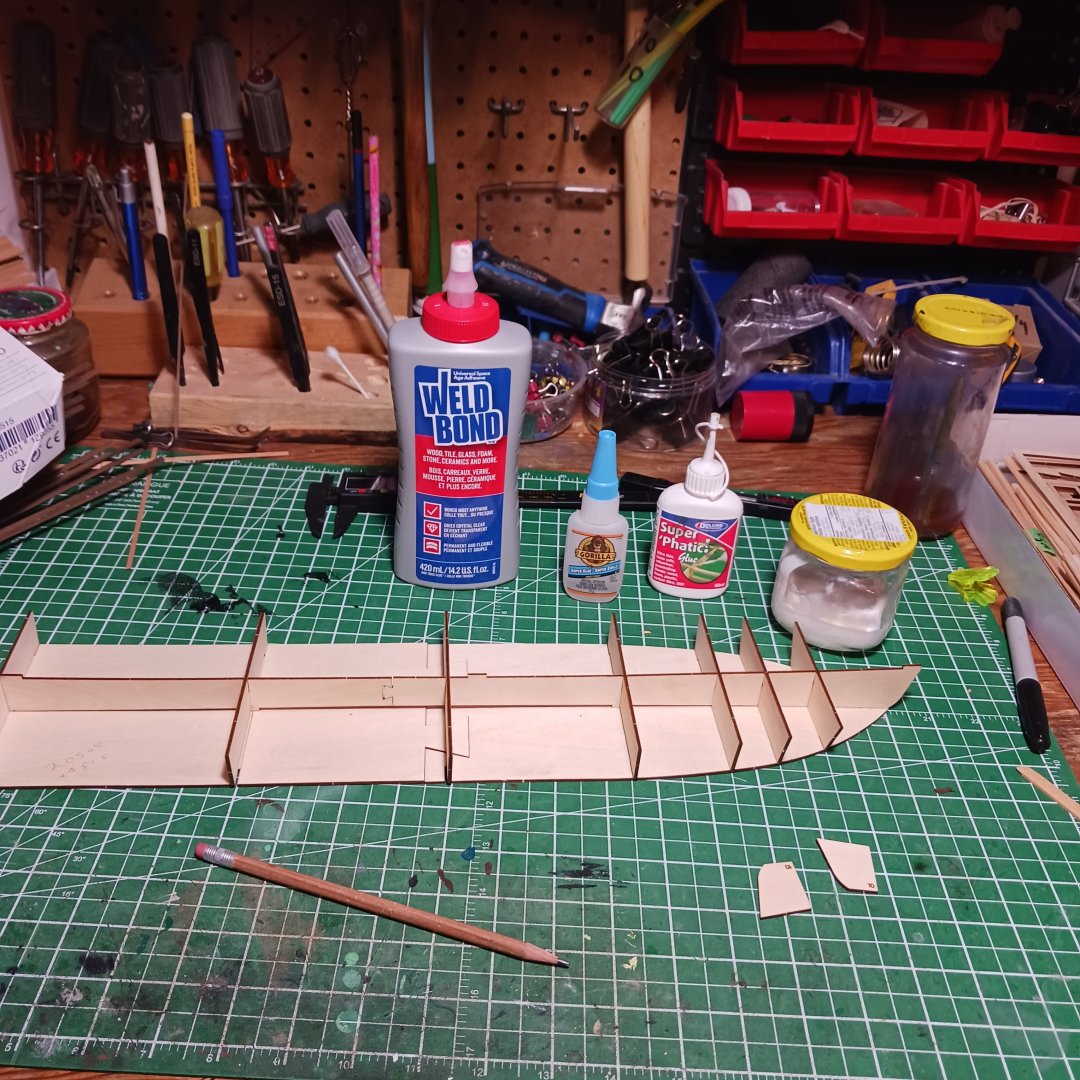
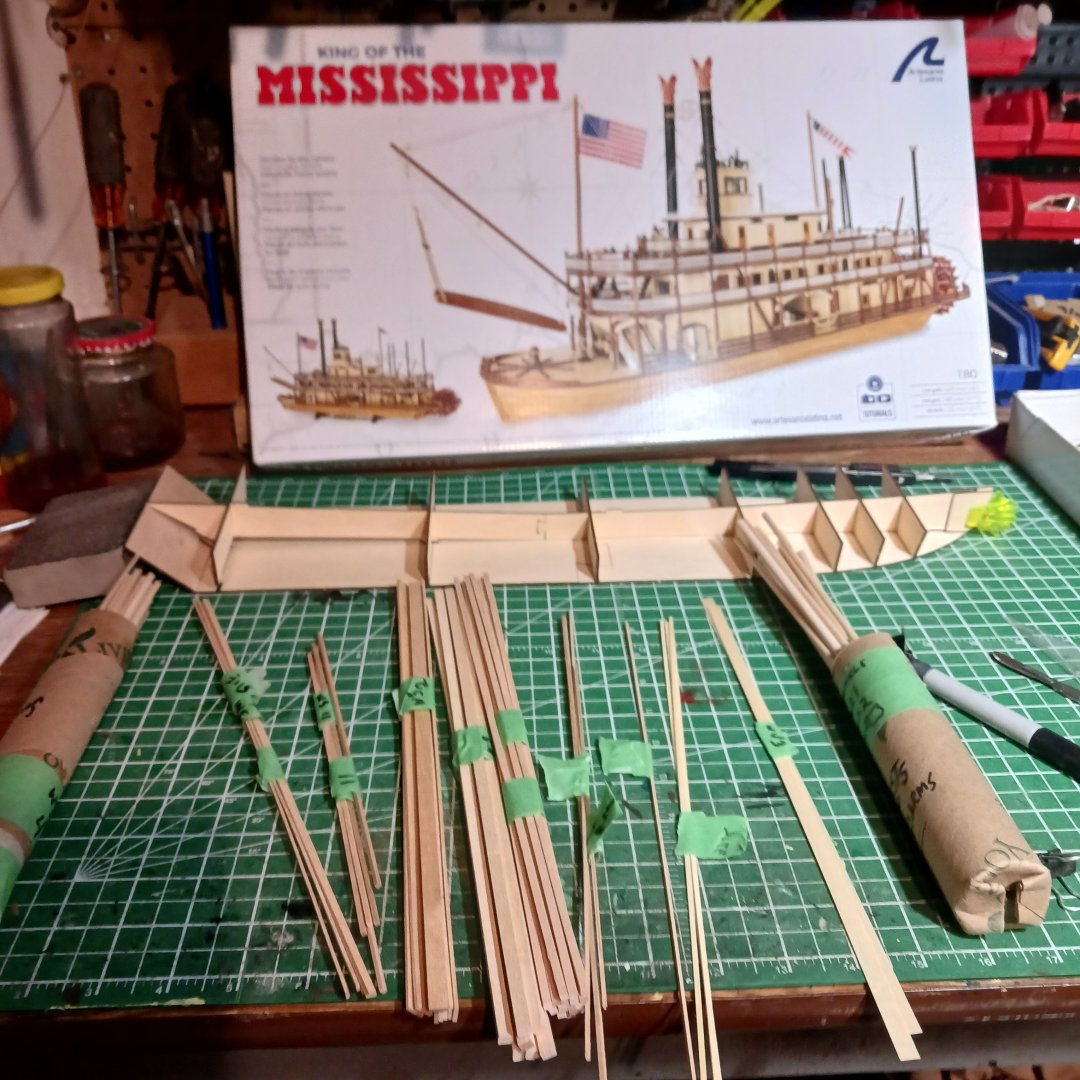
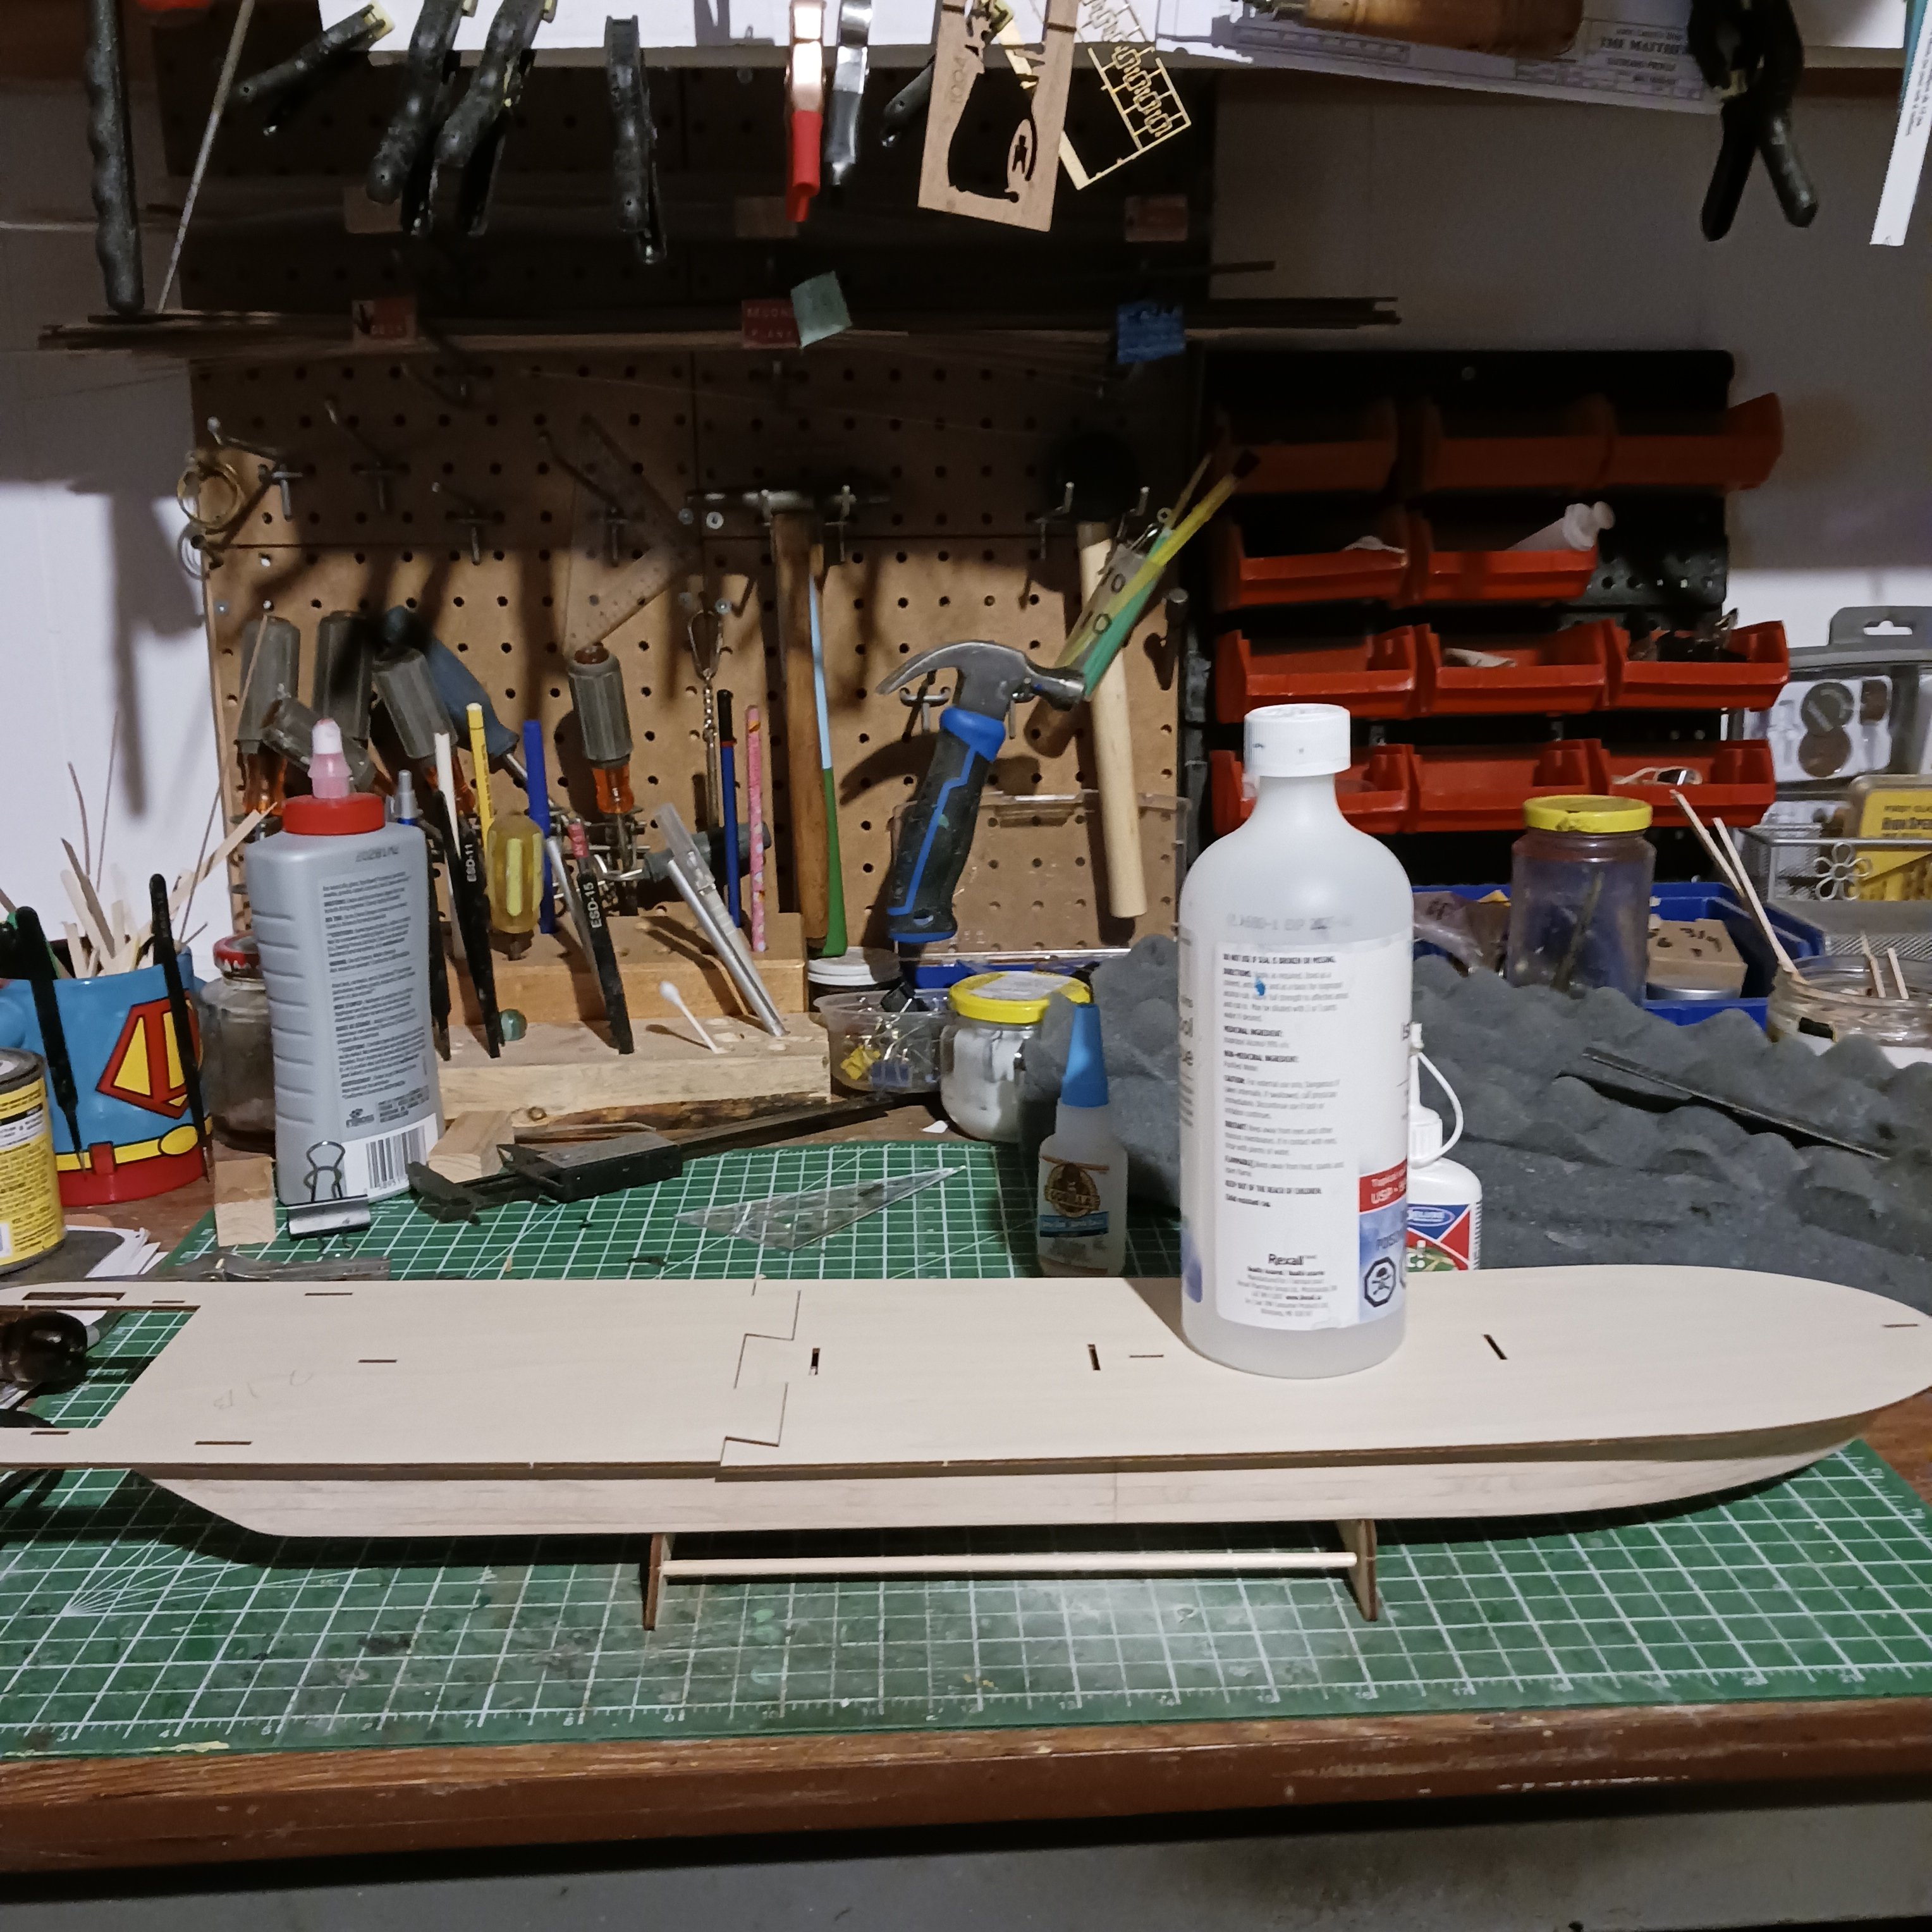
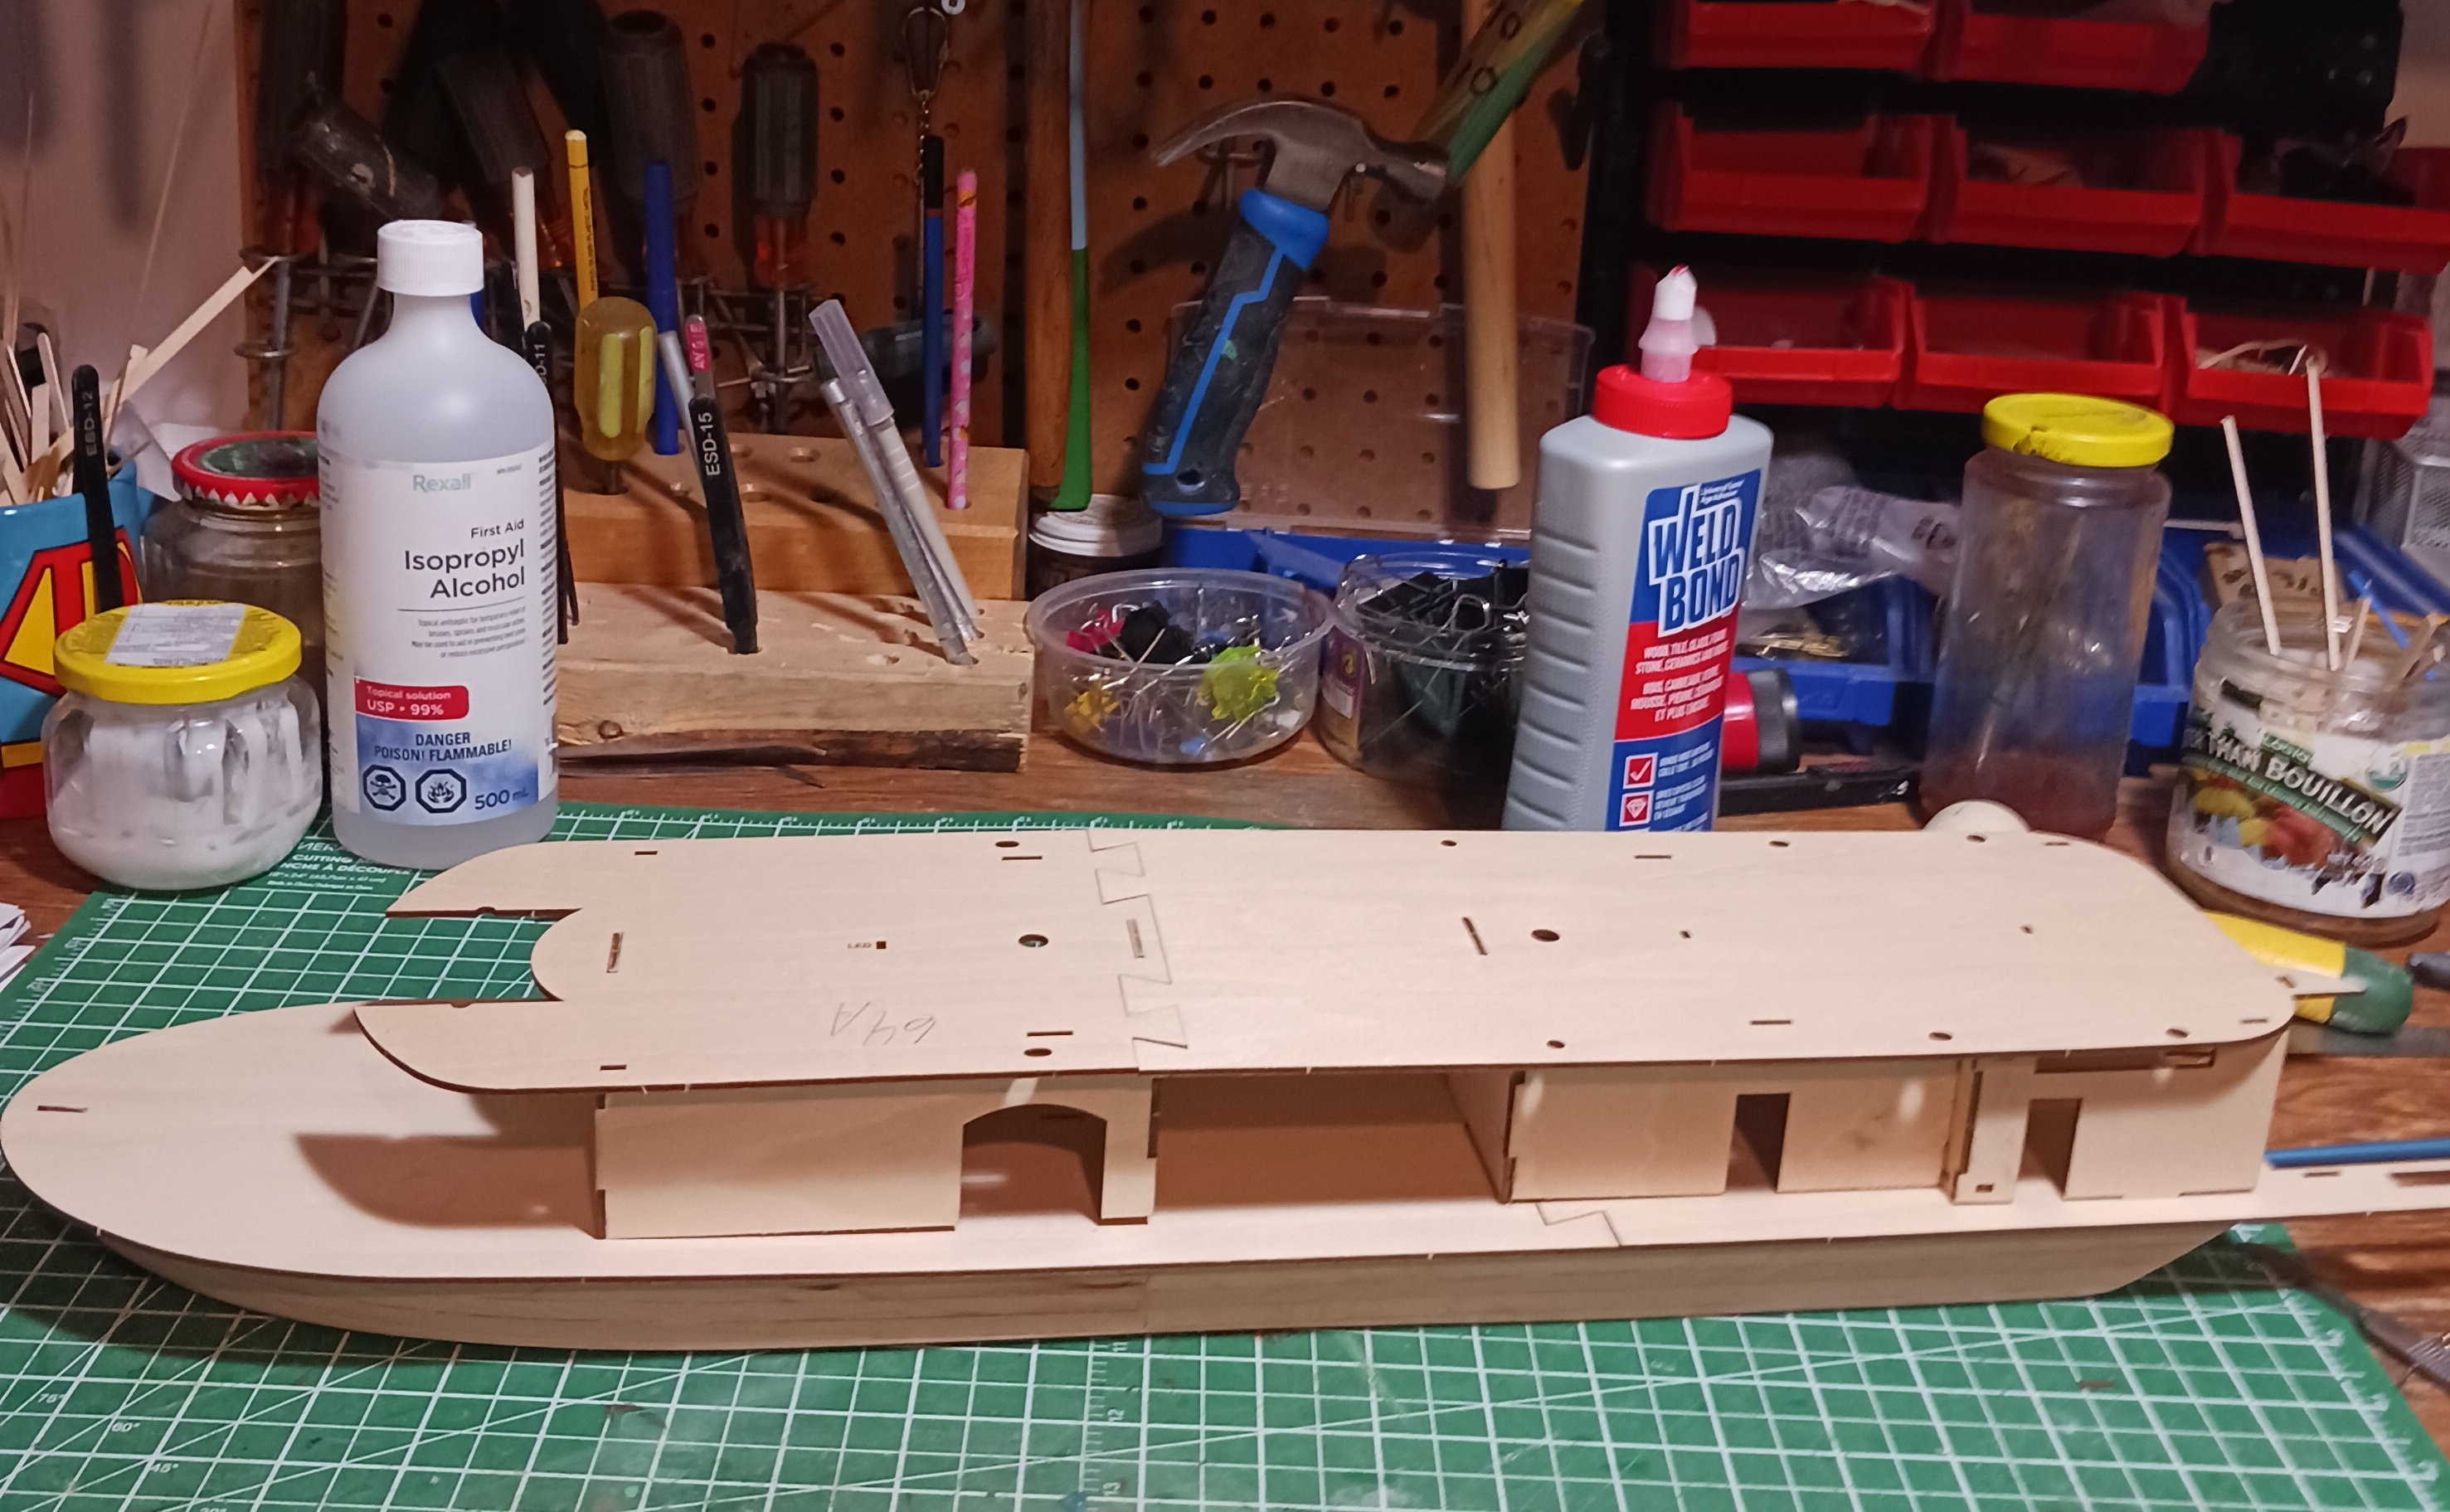
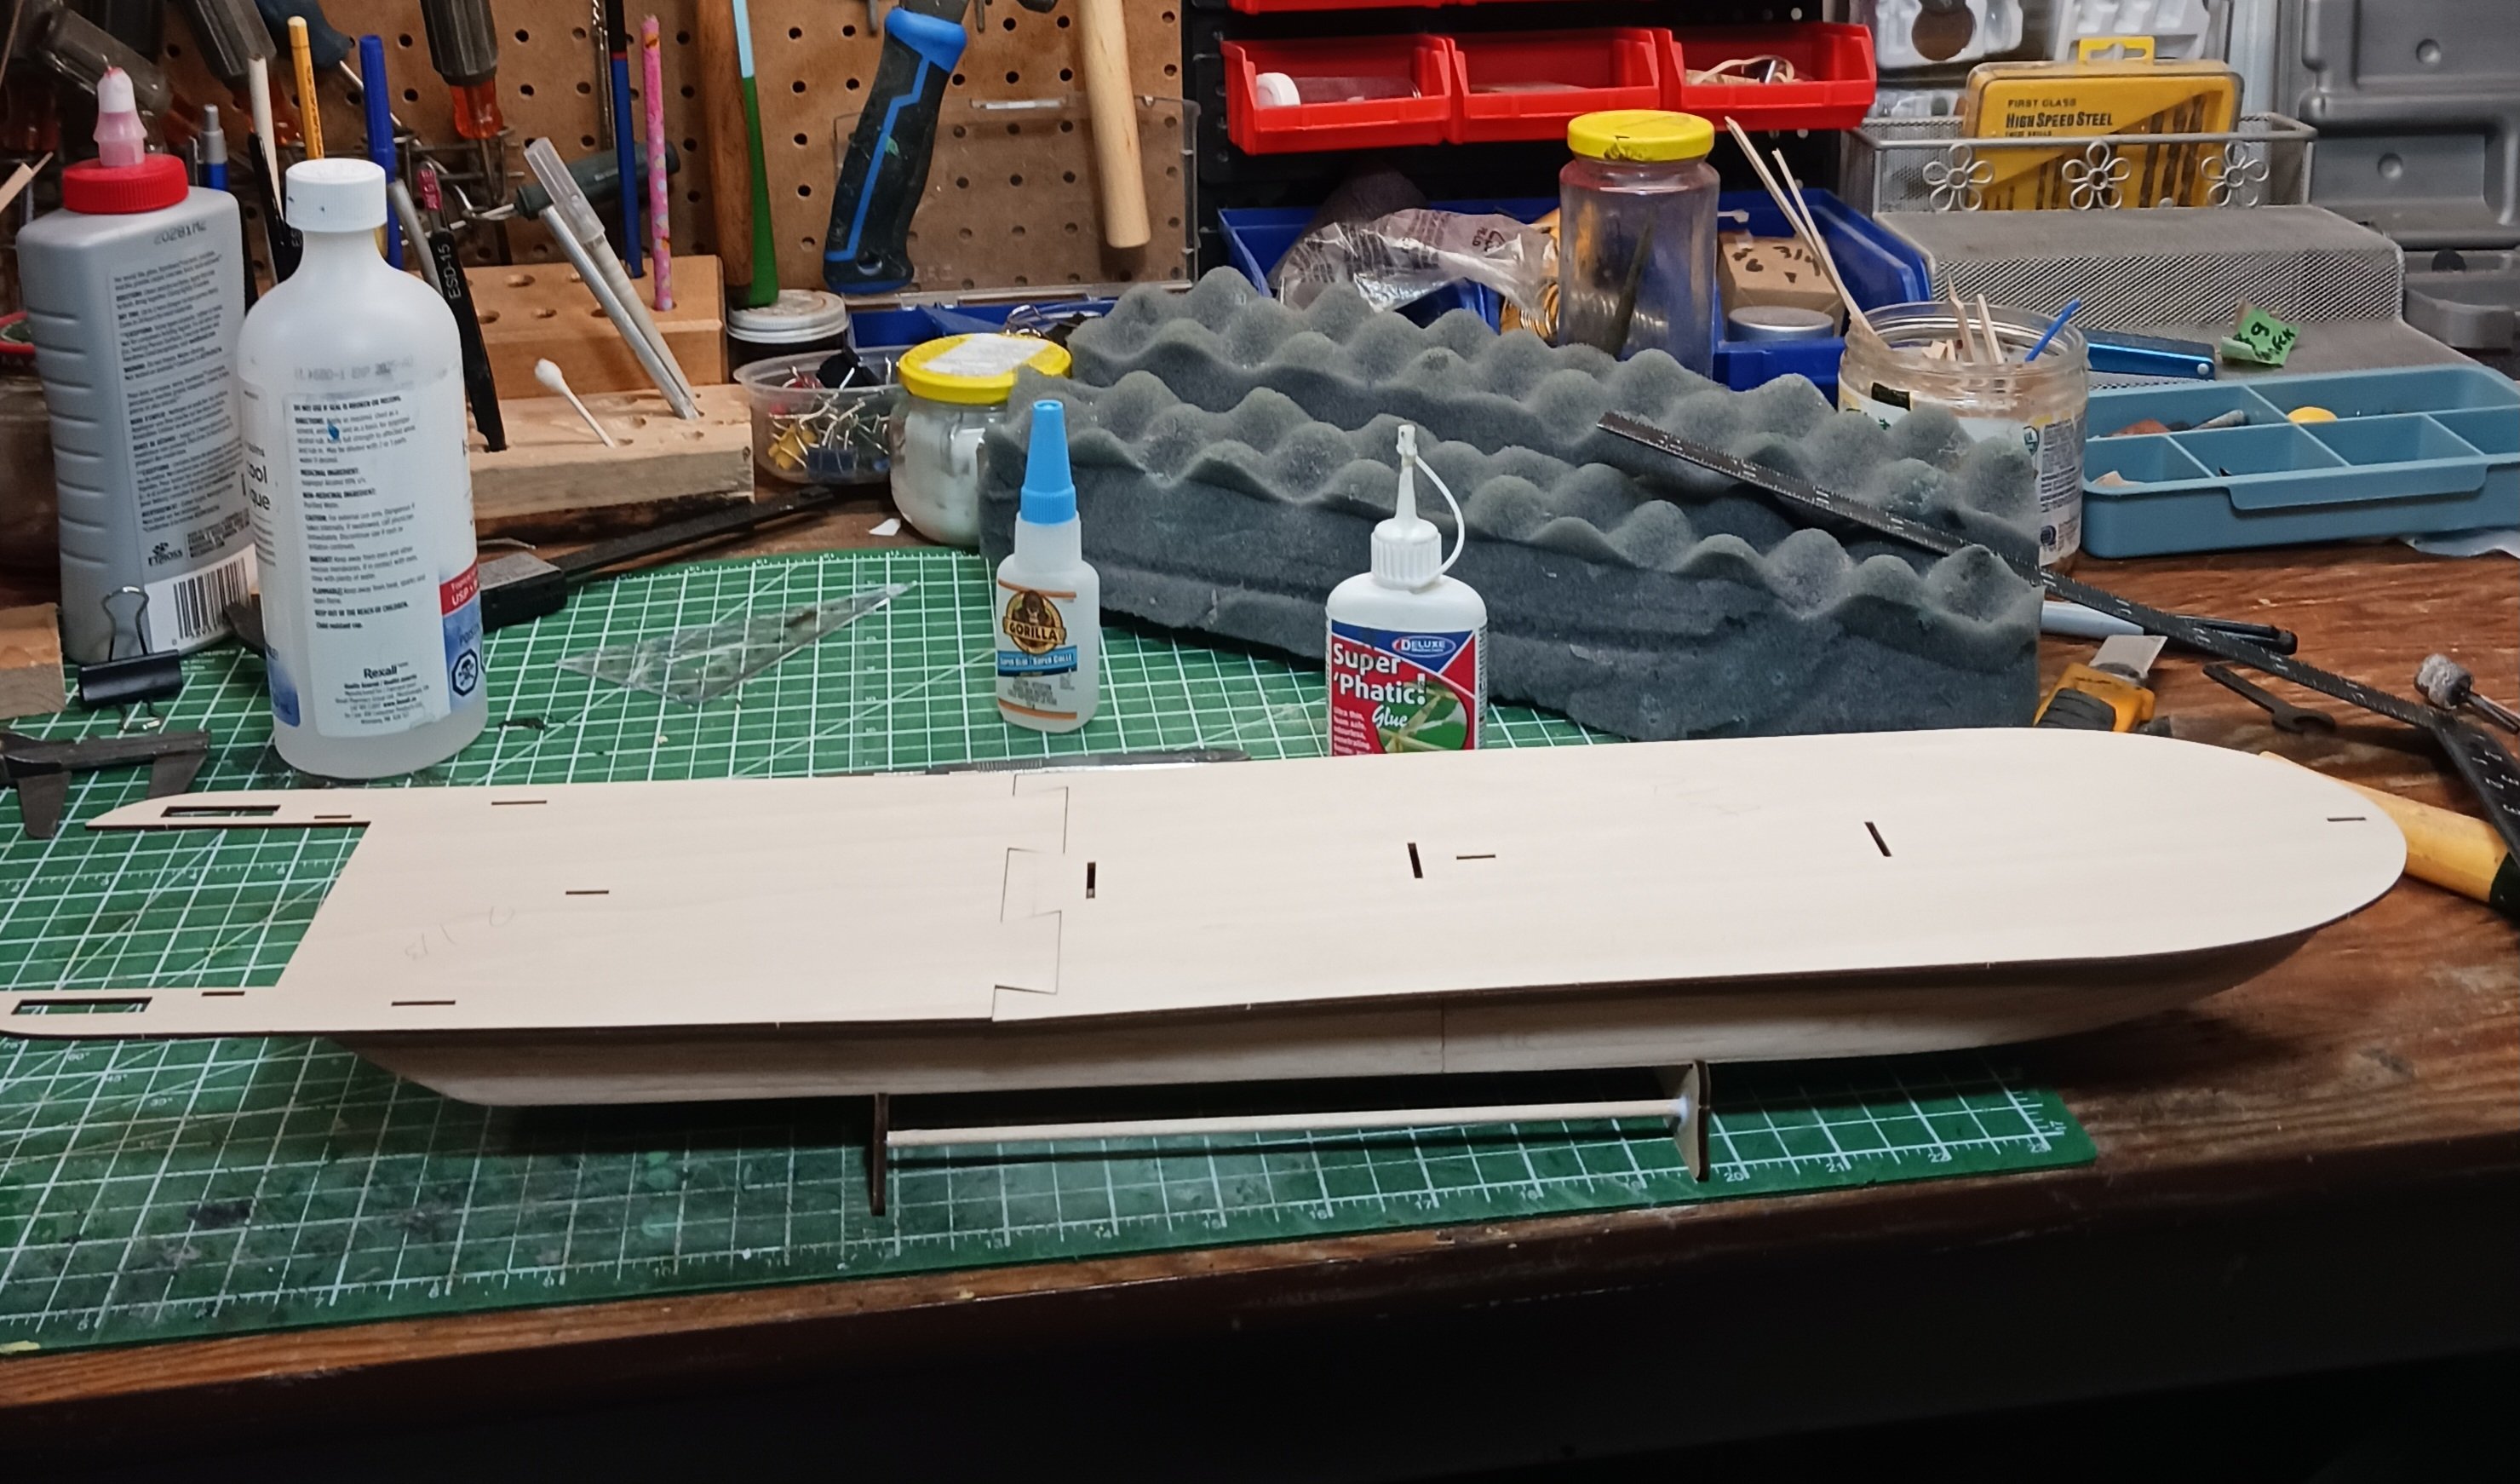
So glueing is coming along nicely.


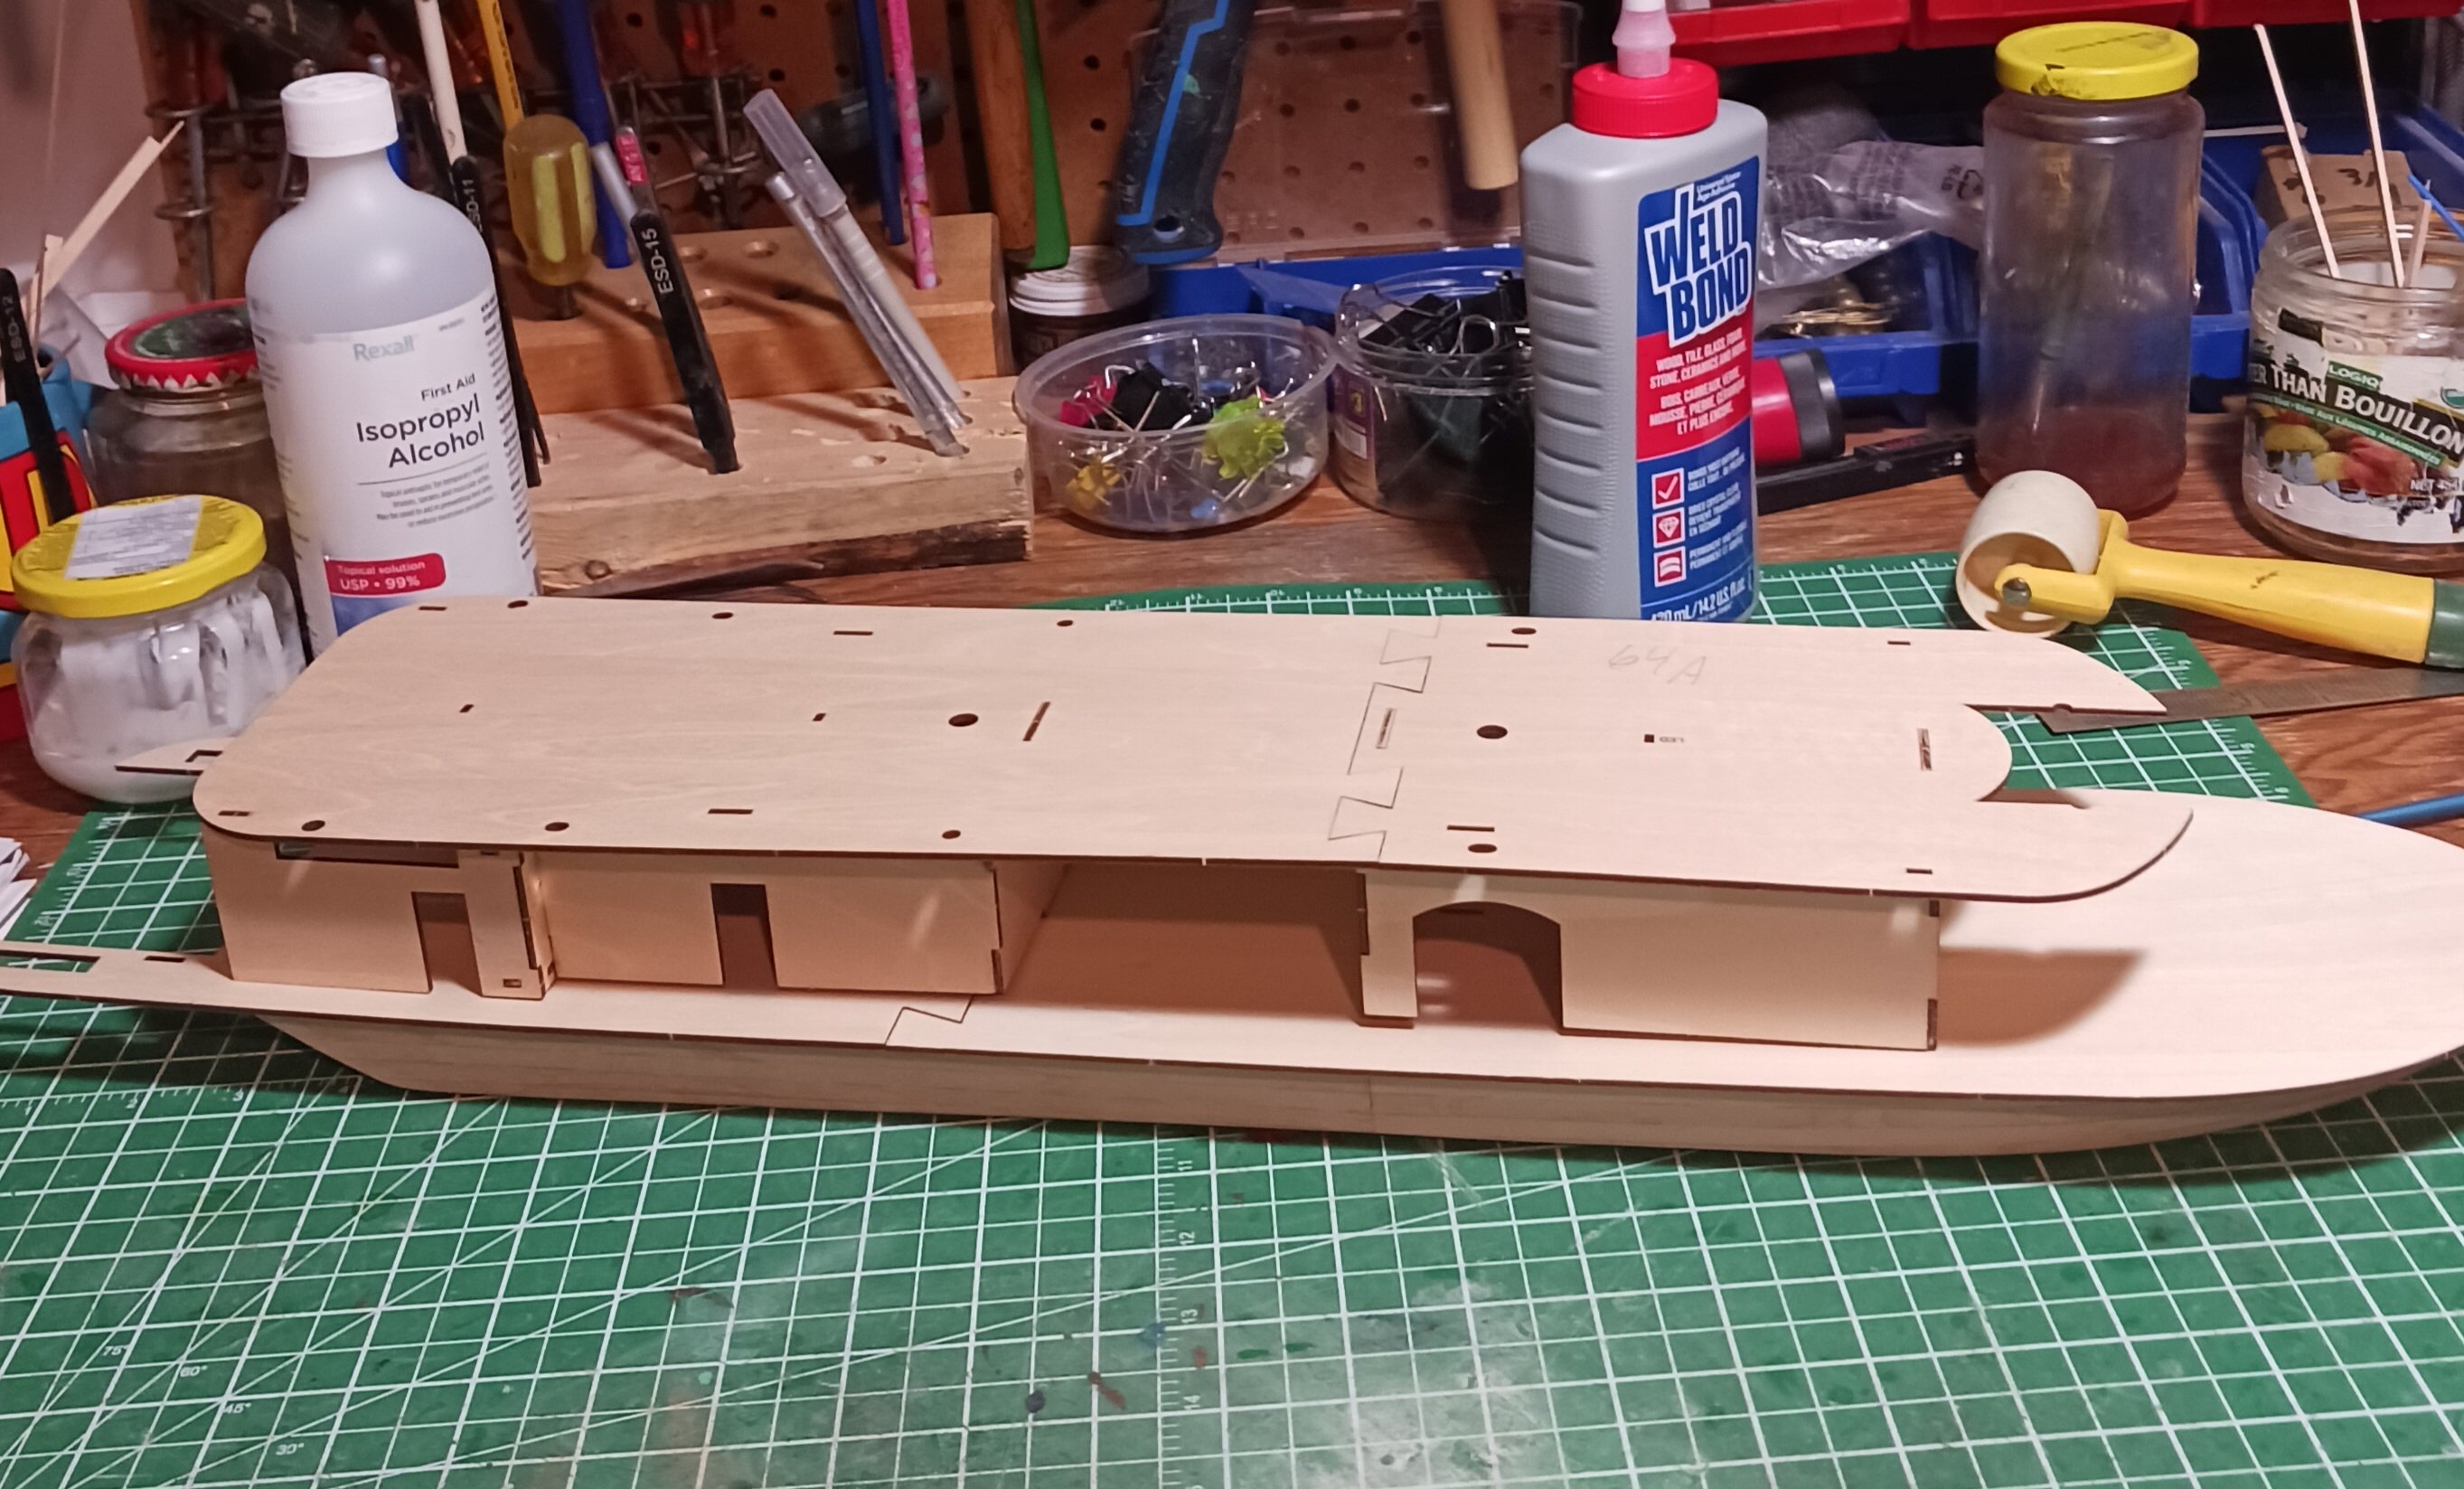
Once I started glueing and formulating what I want this boat to look like started to studying the logs, parts are not the same. My boat , got planked on the sides , other's have a peice put on then the planking gos on . Some logs have dark hulls other's light stain.
I have discovered a few things that I will just have to decide which way to go, but over all, I think with all the logs and help I am getting here it going to be built.
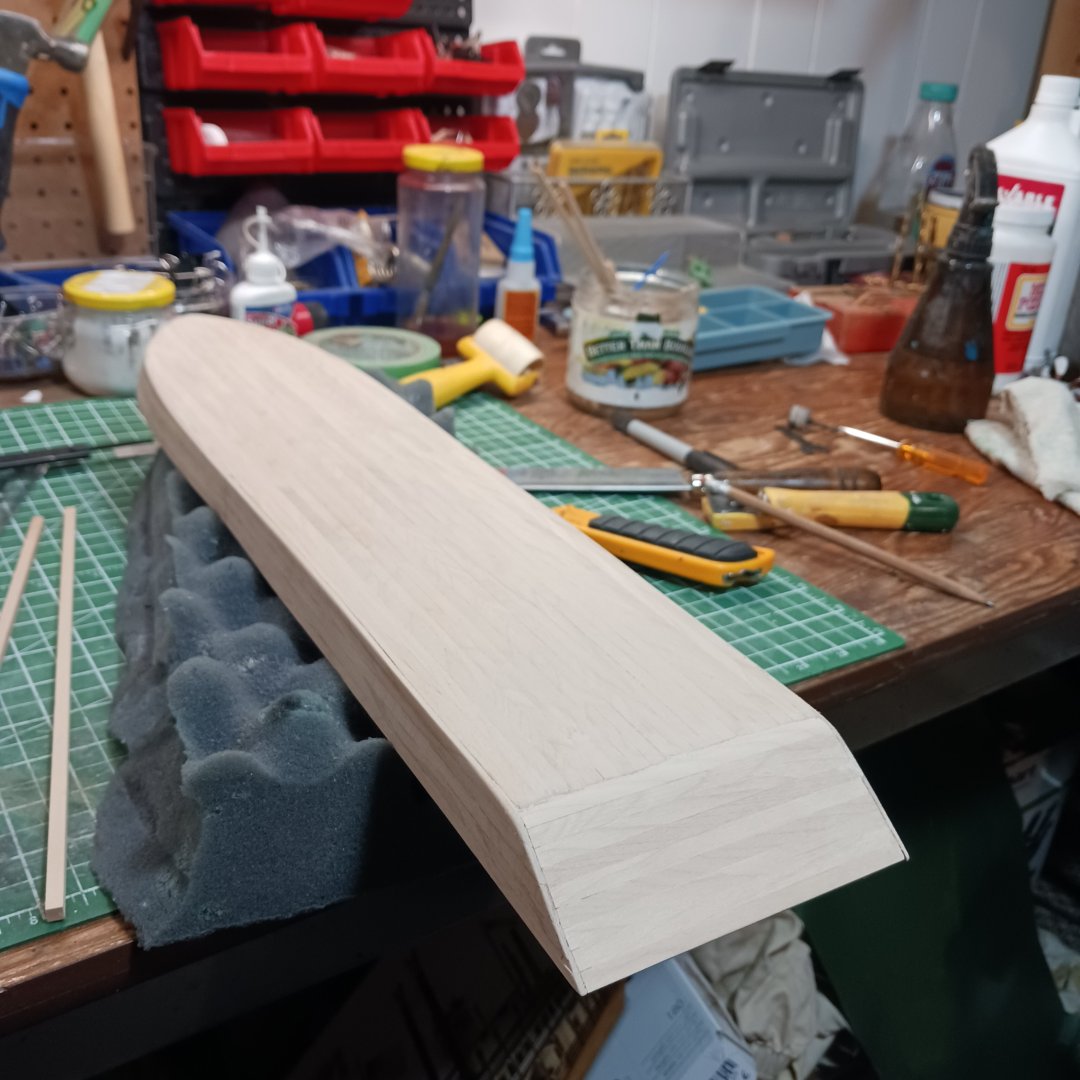

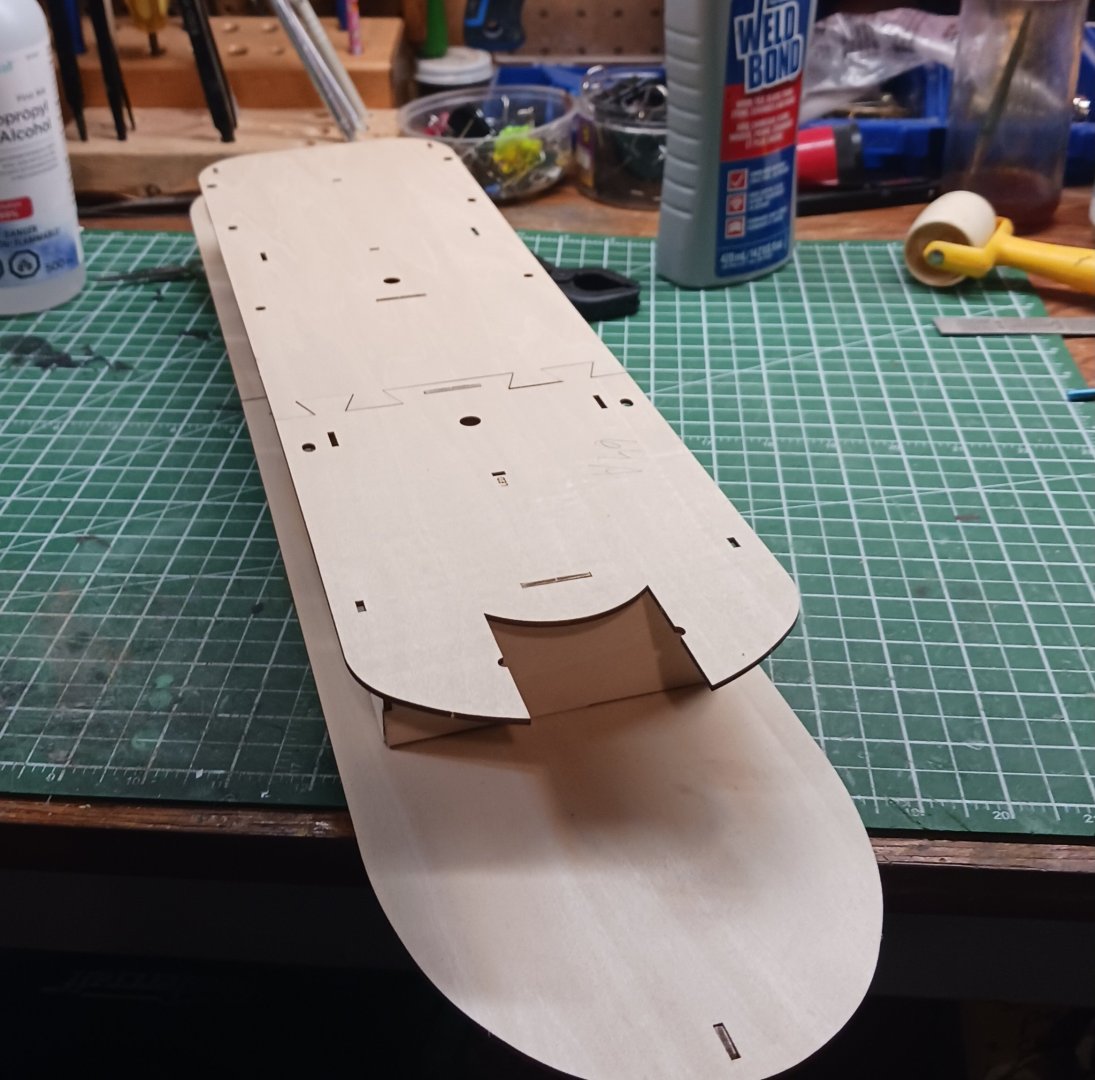
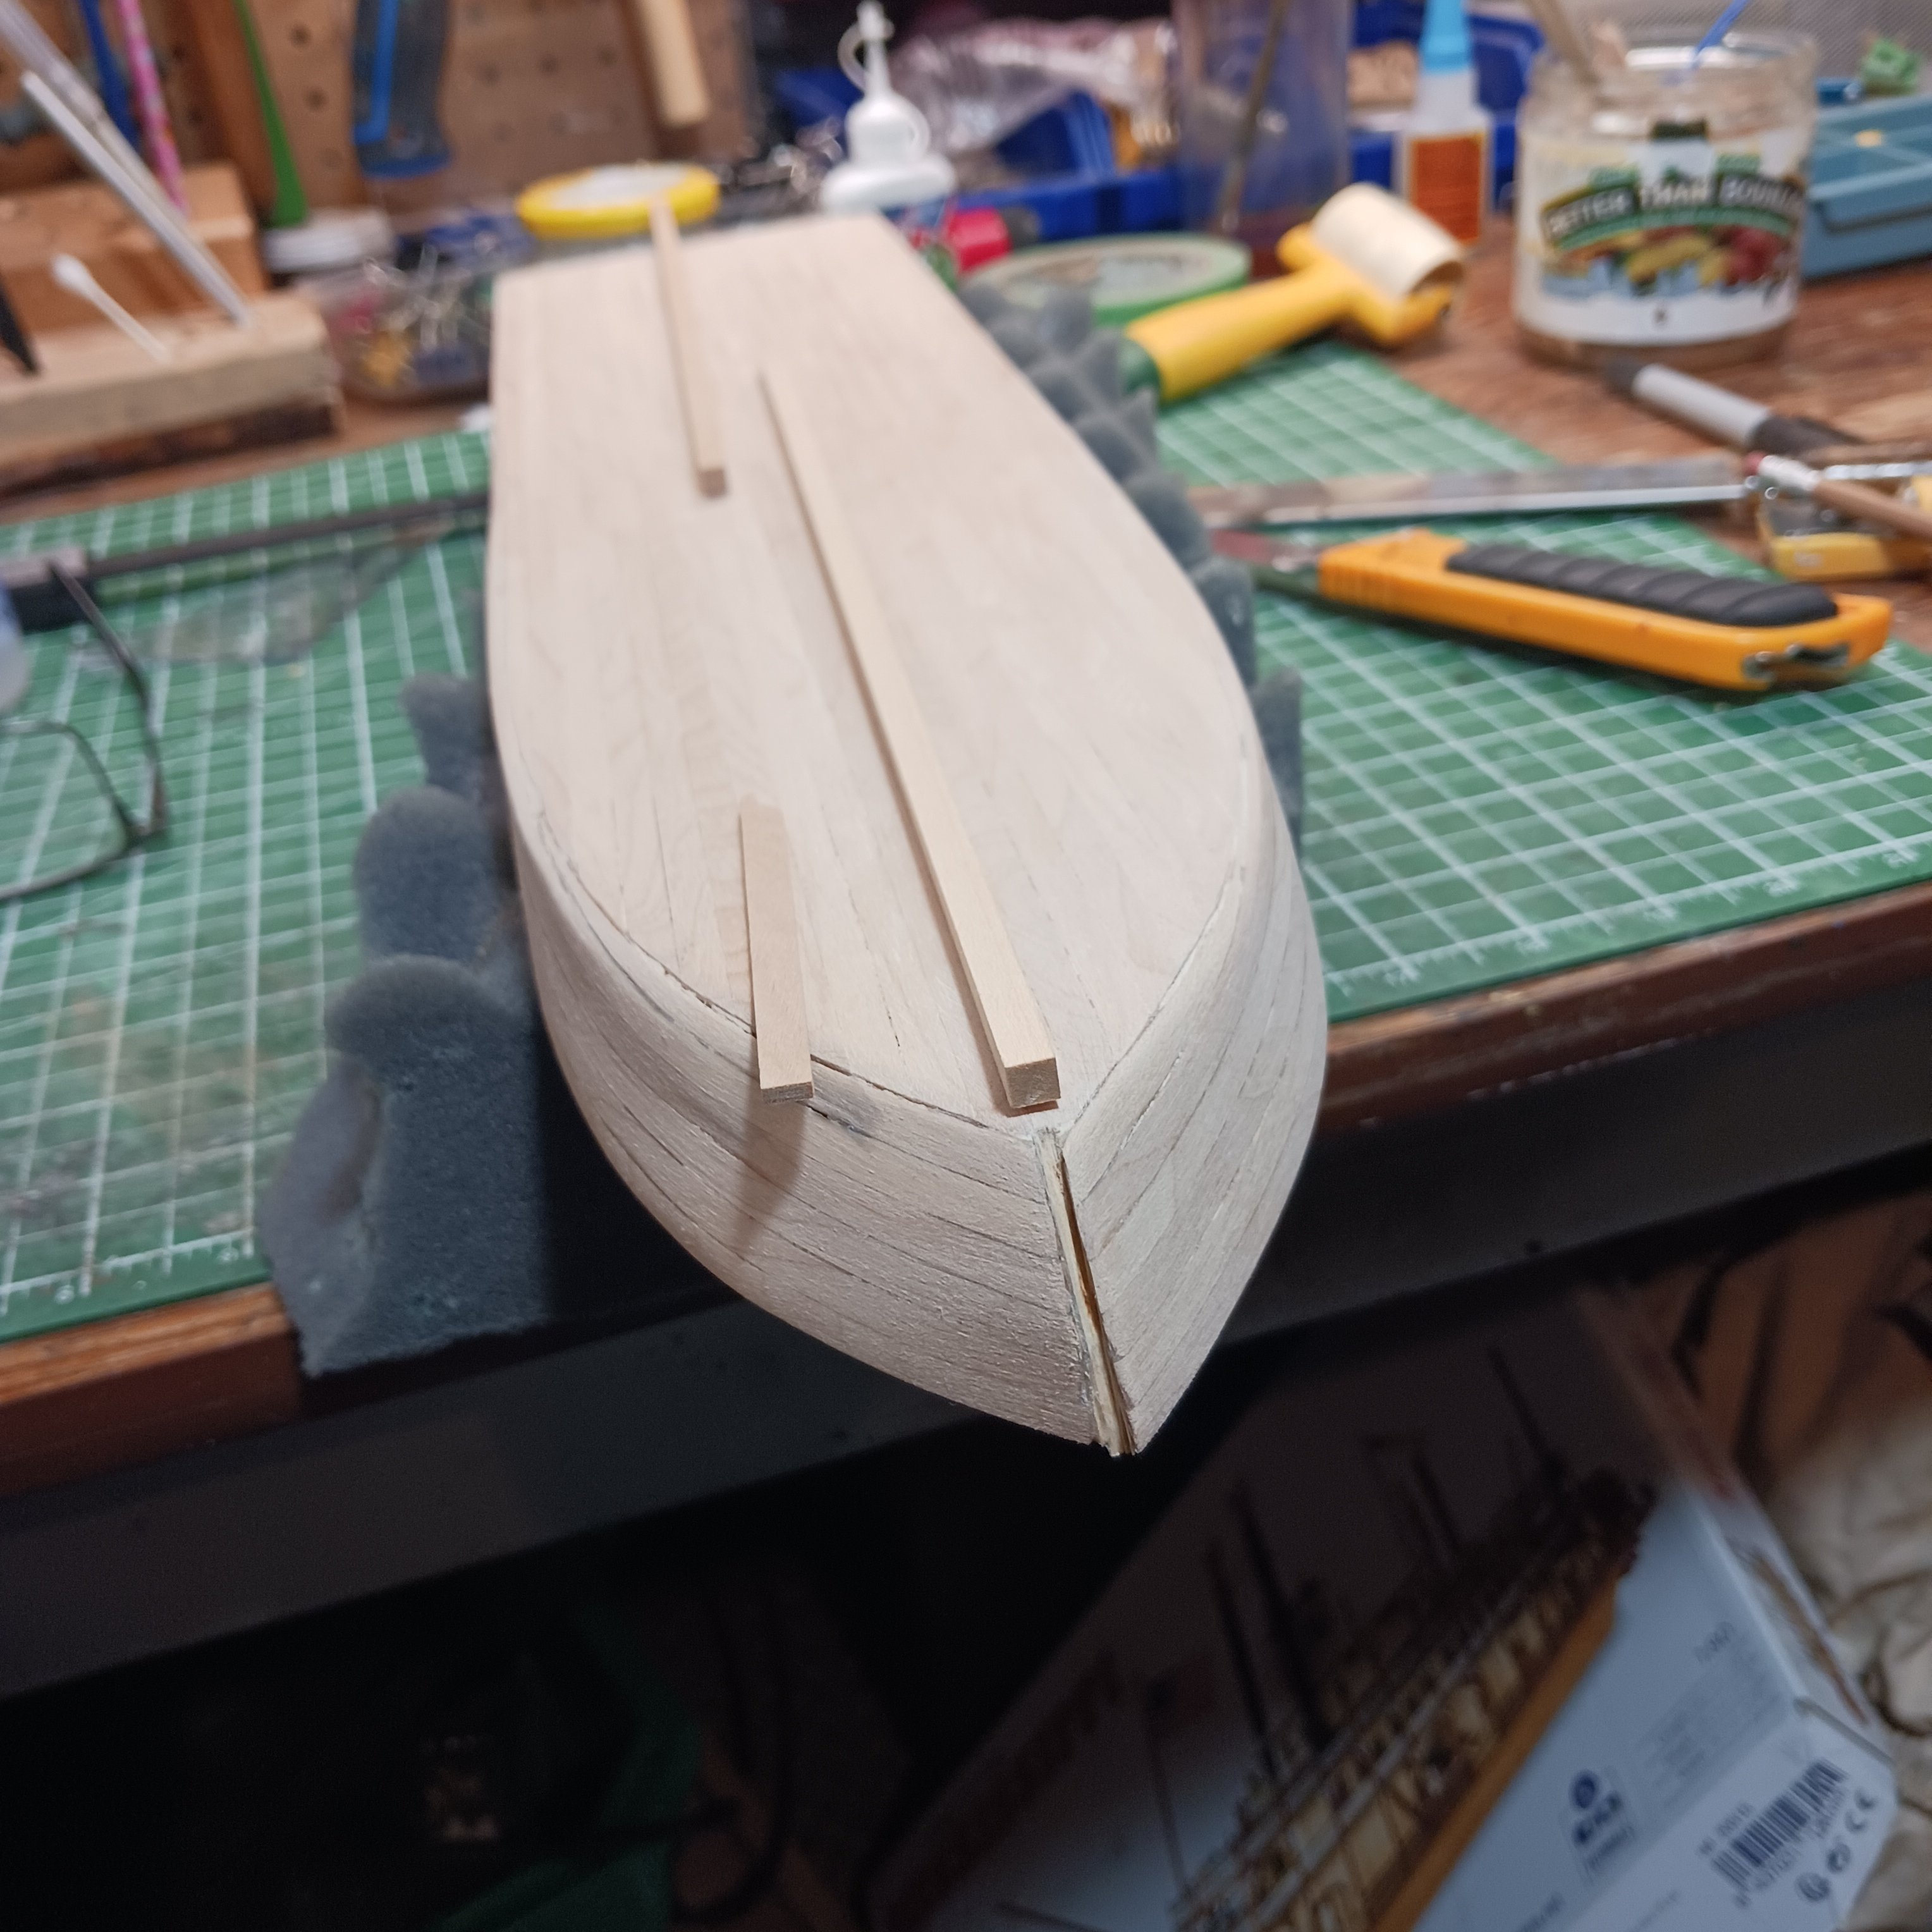
As you see here I used the kit supplied wood. I did start planking it with walnut, I had the back done, moving on to the sides I realized that I was going to have to make a lot of small strips and that's was not going to work. Quickly I removed the walnut, and measured the mahogany and same thing. But low and behold the kit supplied wood fit just like the picture does.

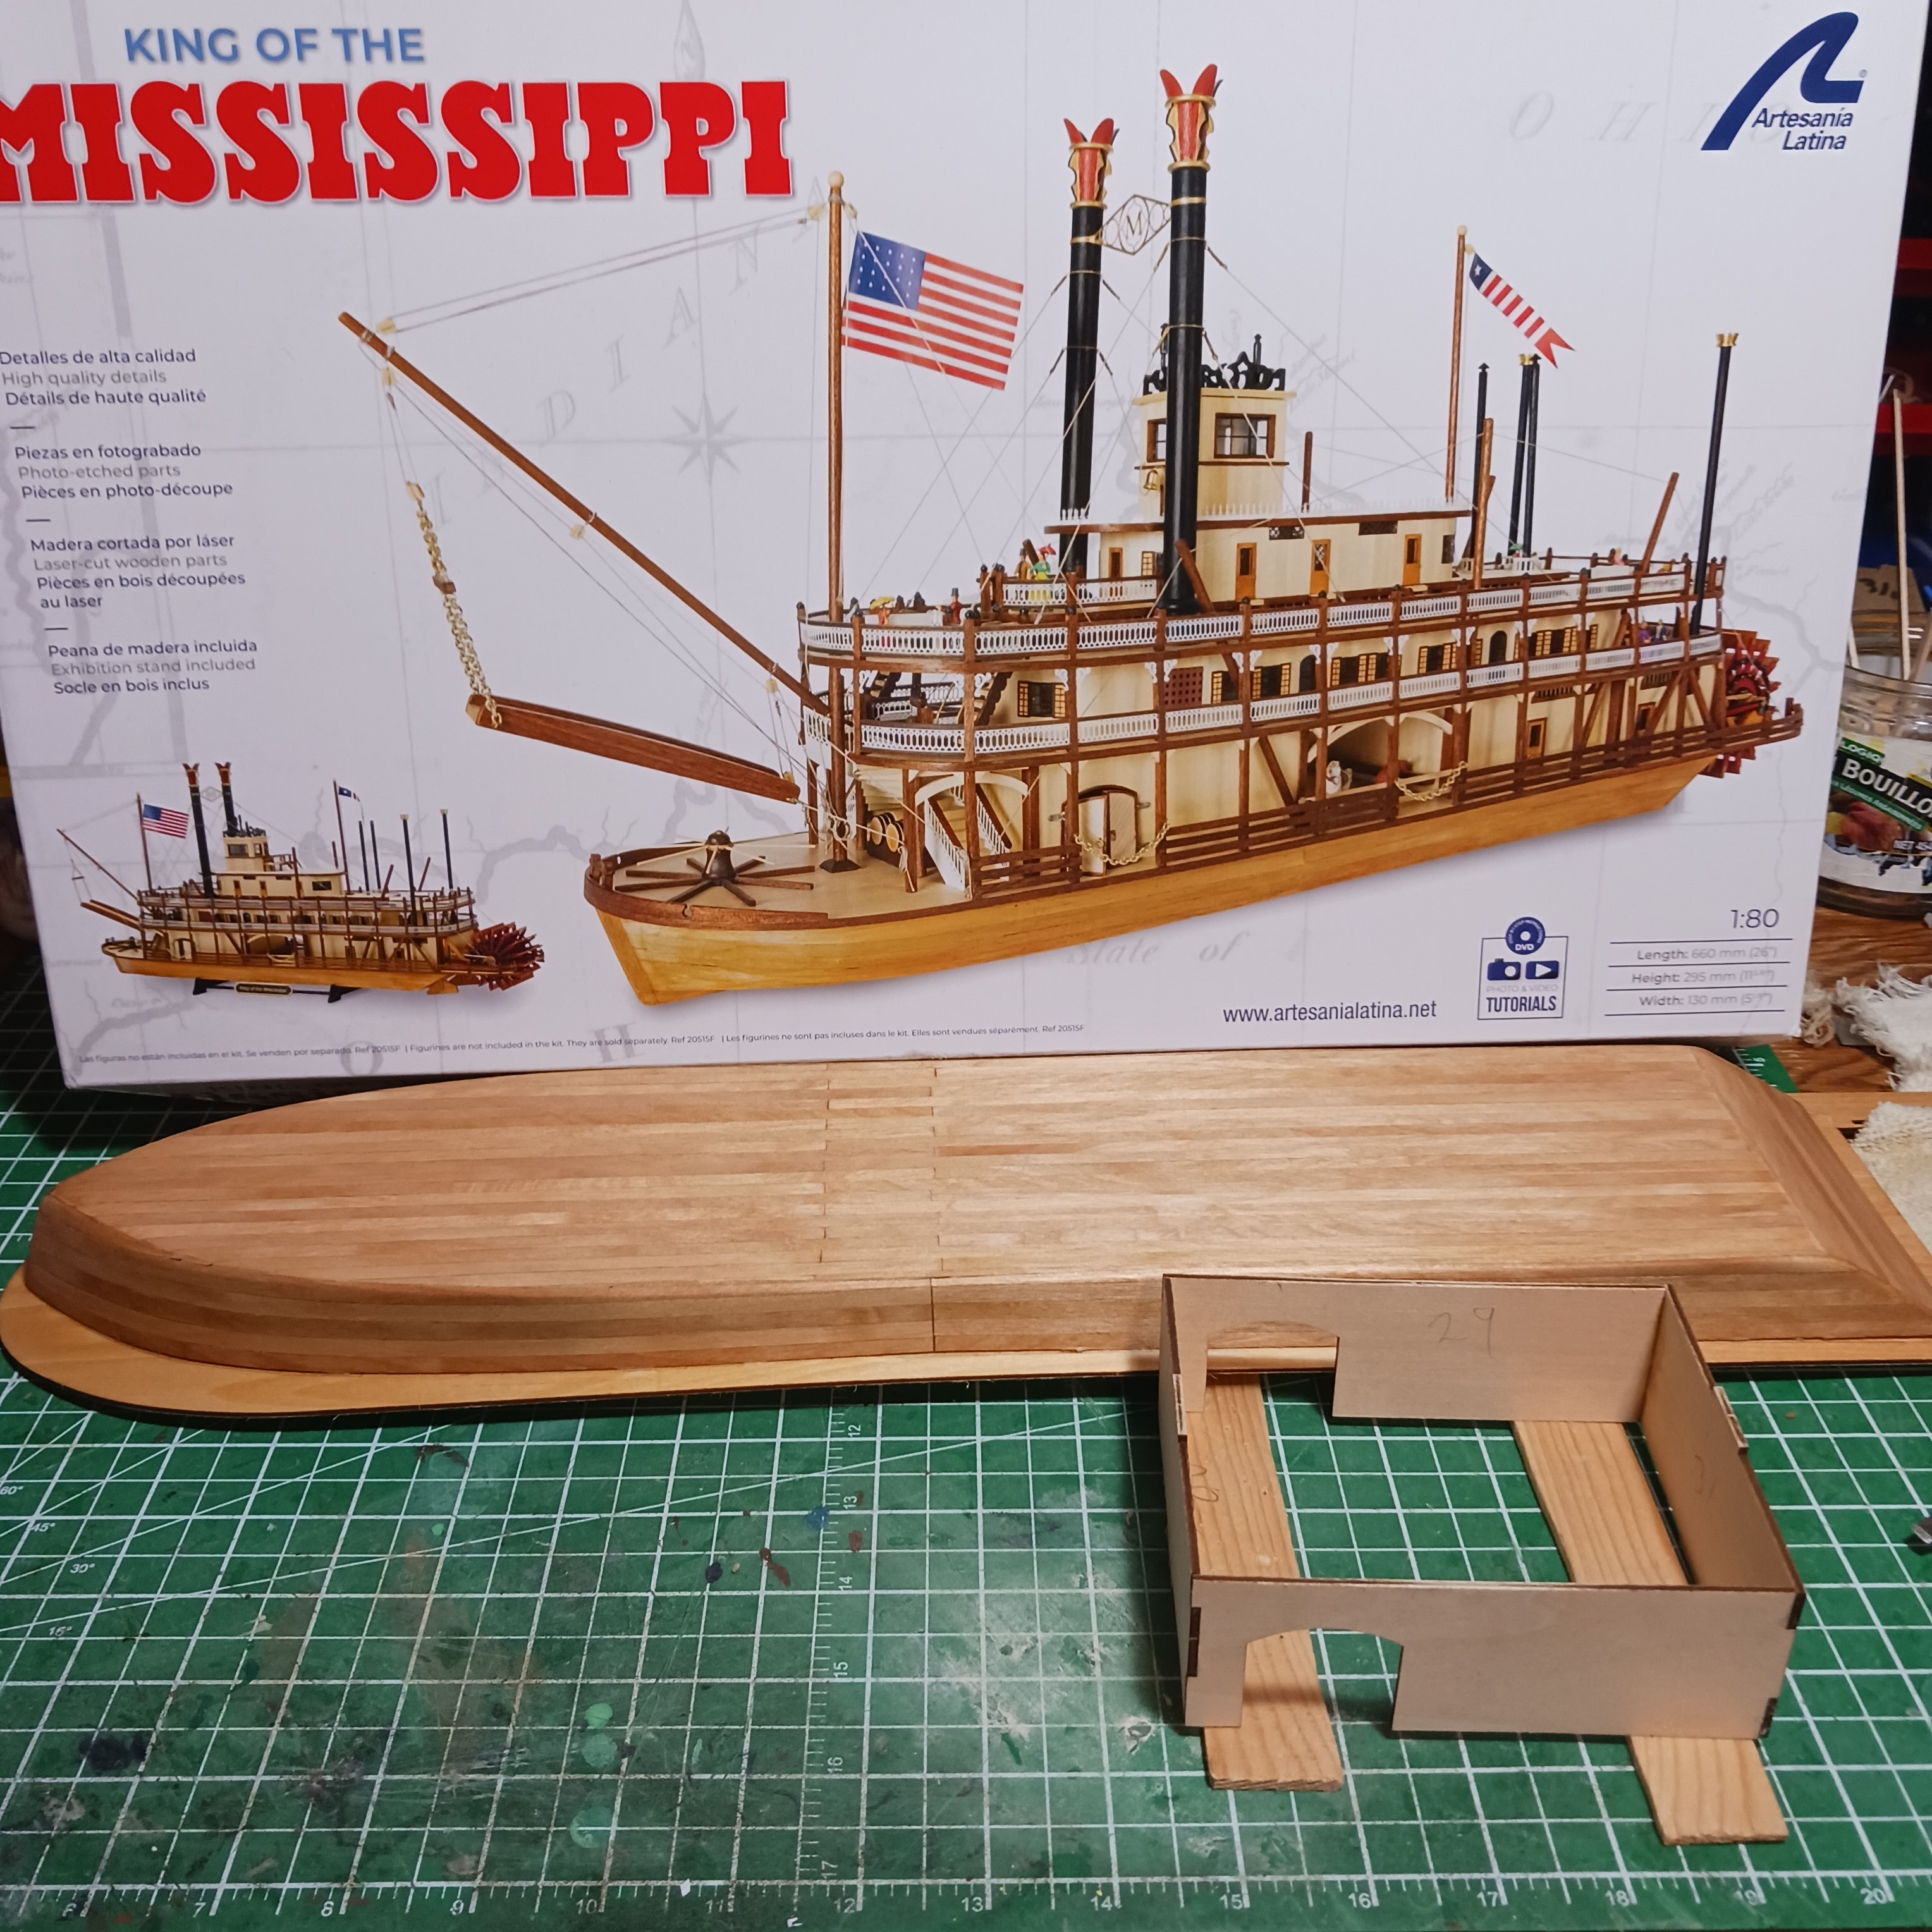
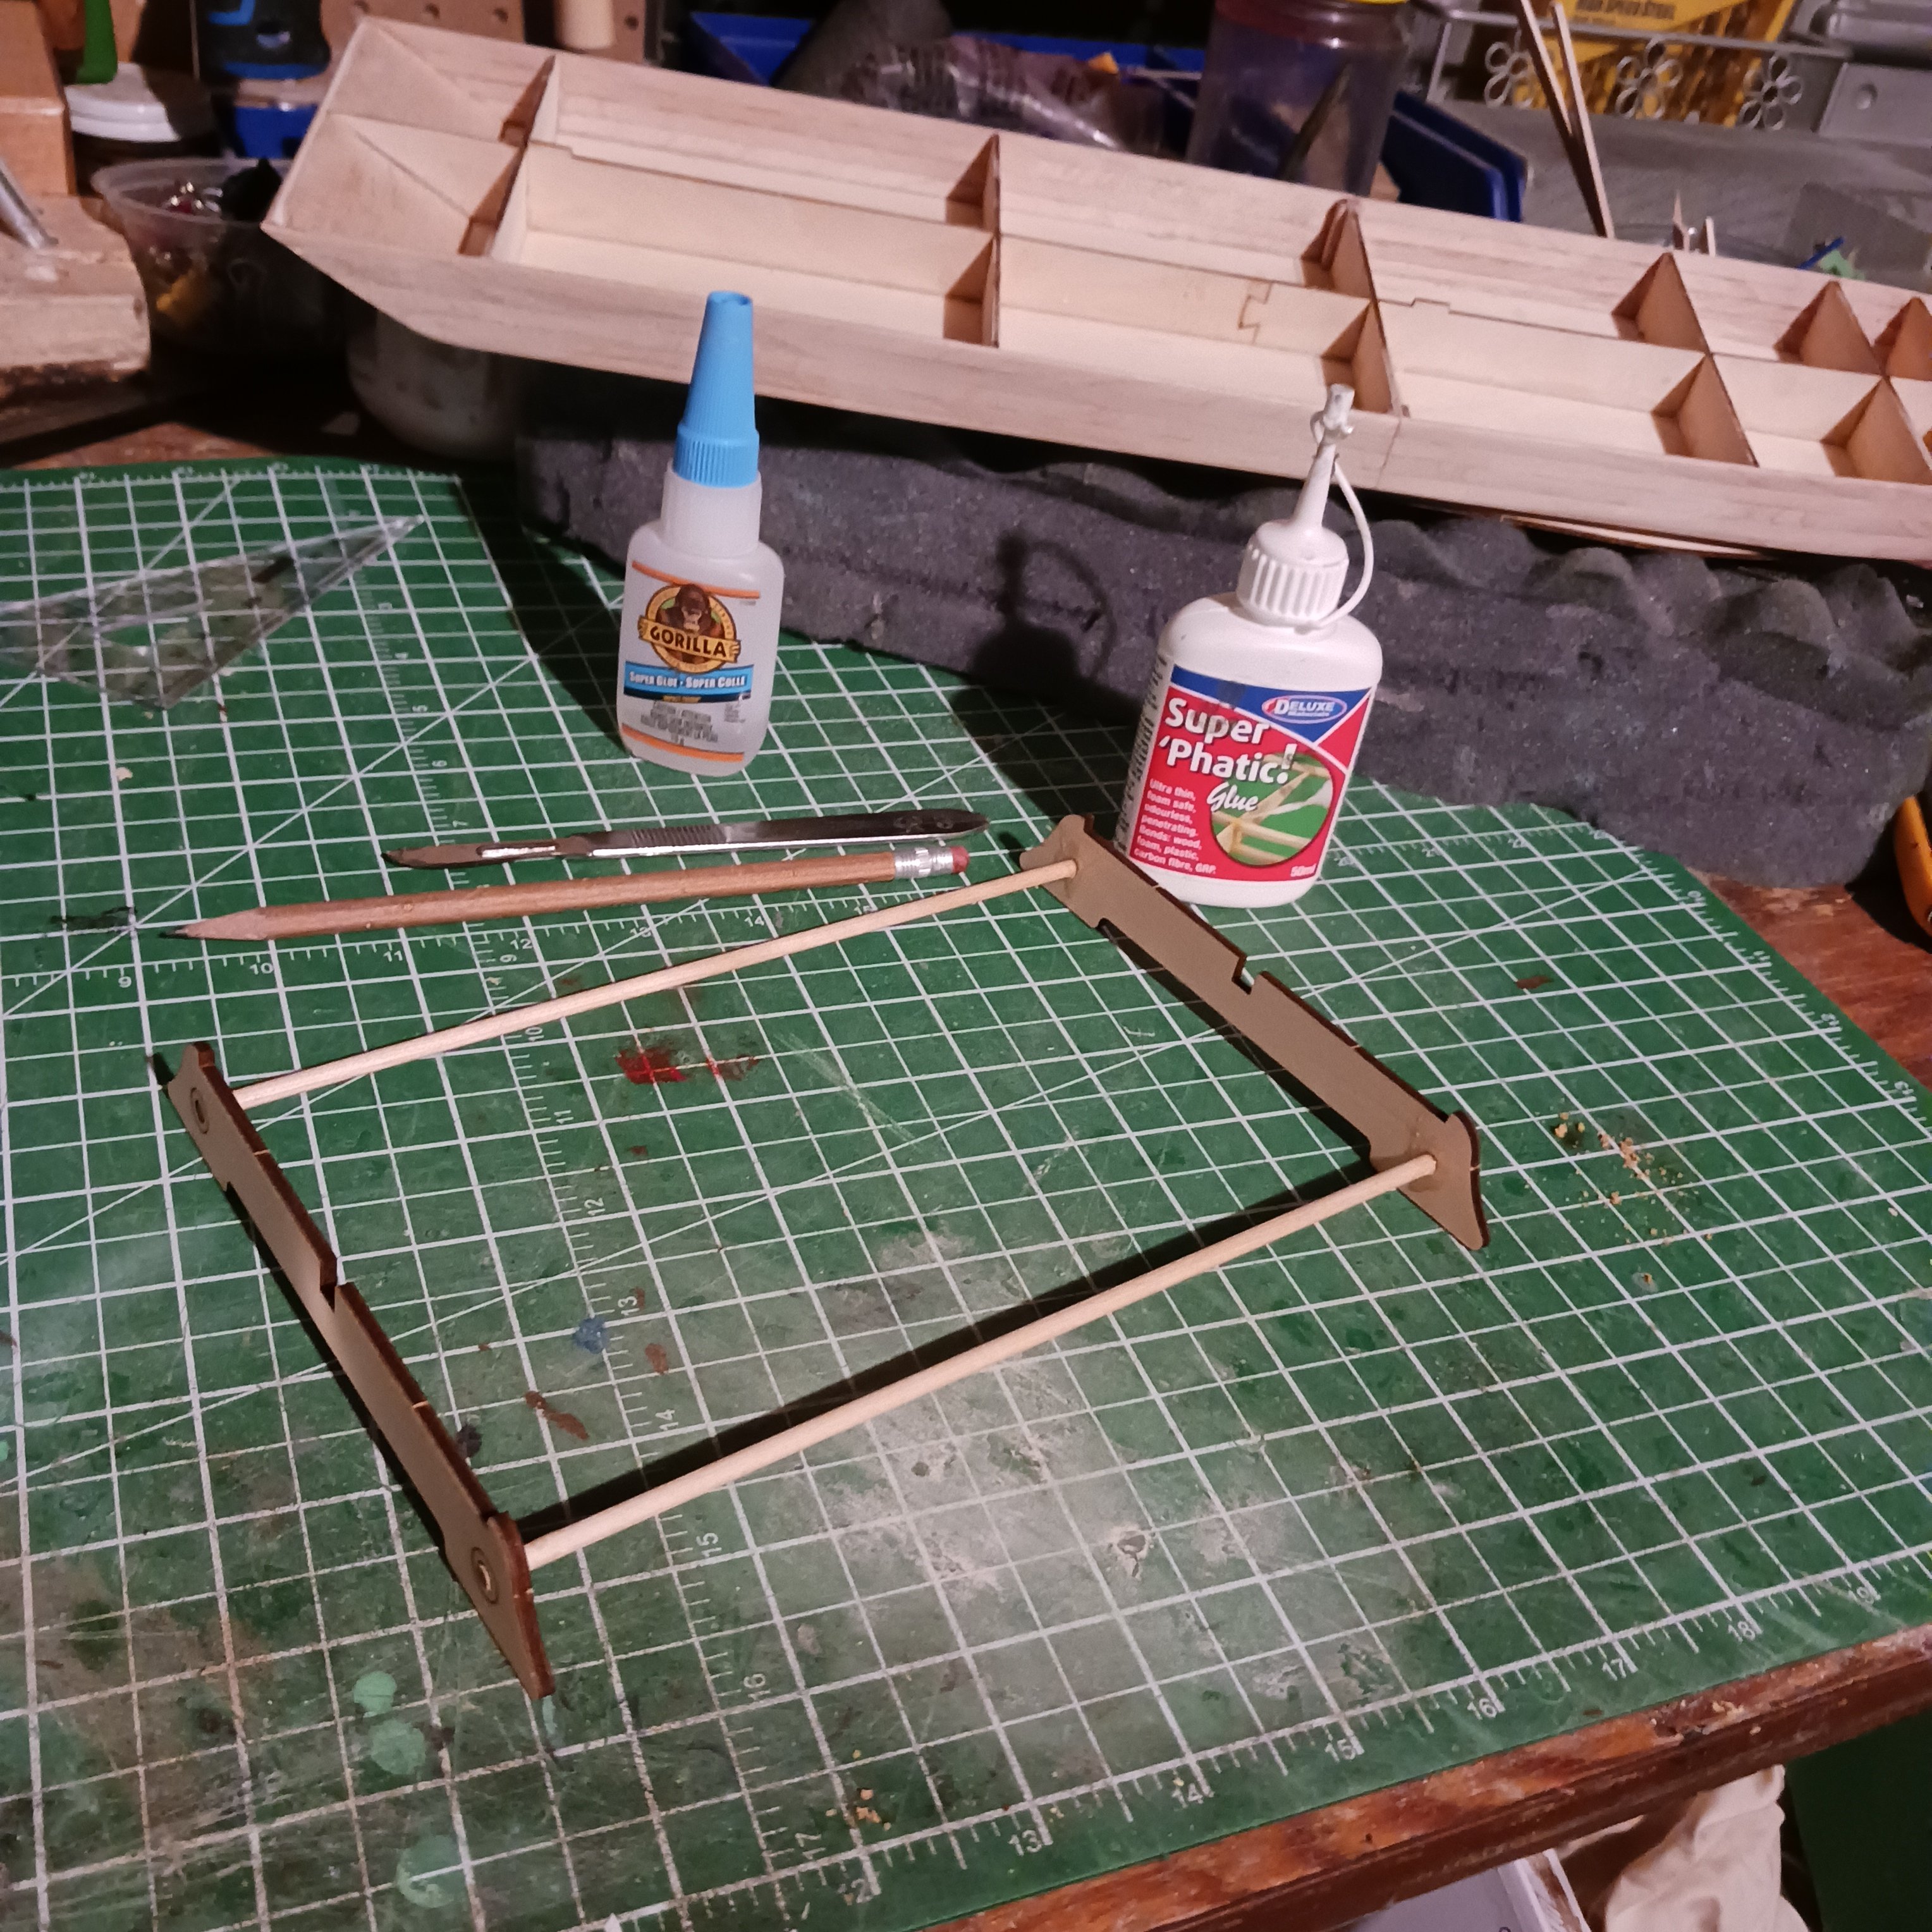
I made the stand for the boat , and will use it more or less for a building stand.
Pretty sure it will be on a river diorama, after all its a river boat.


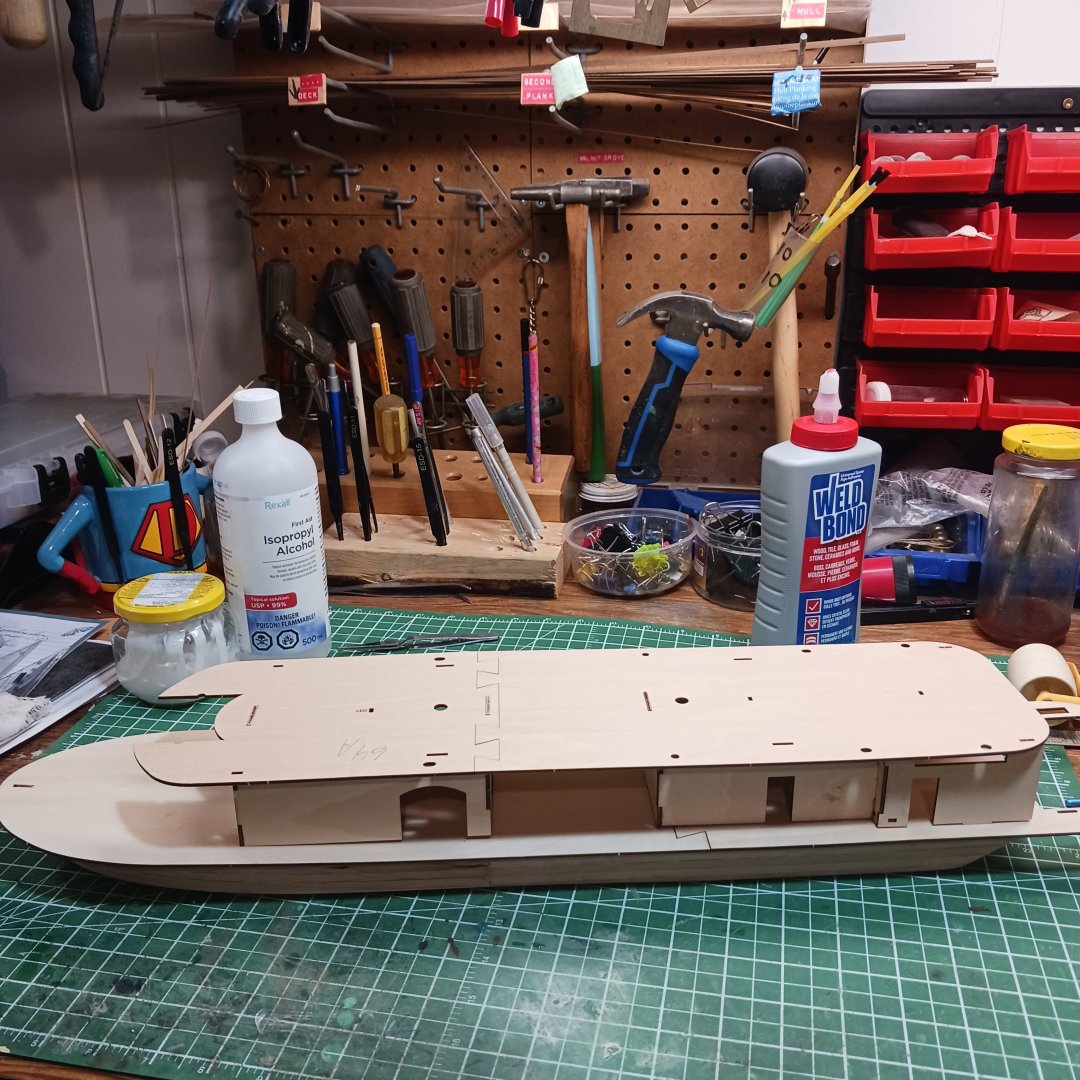
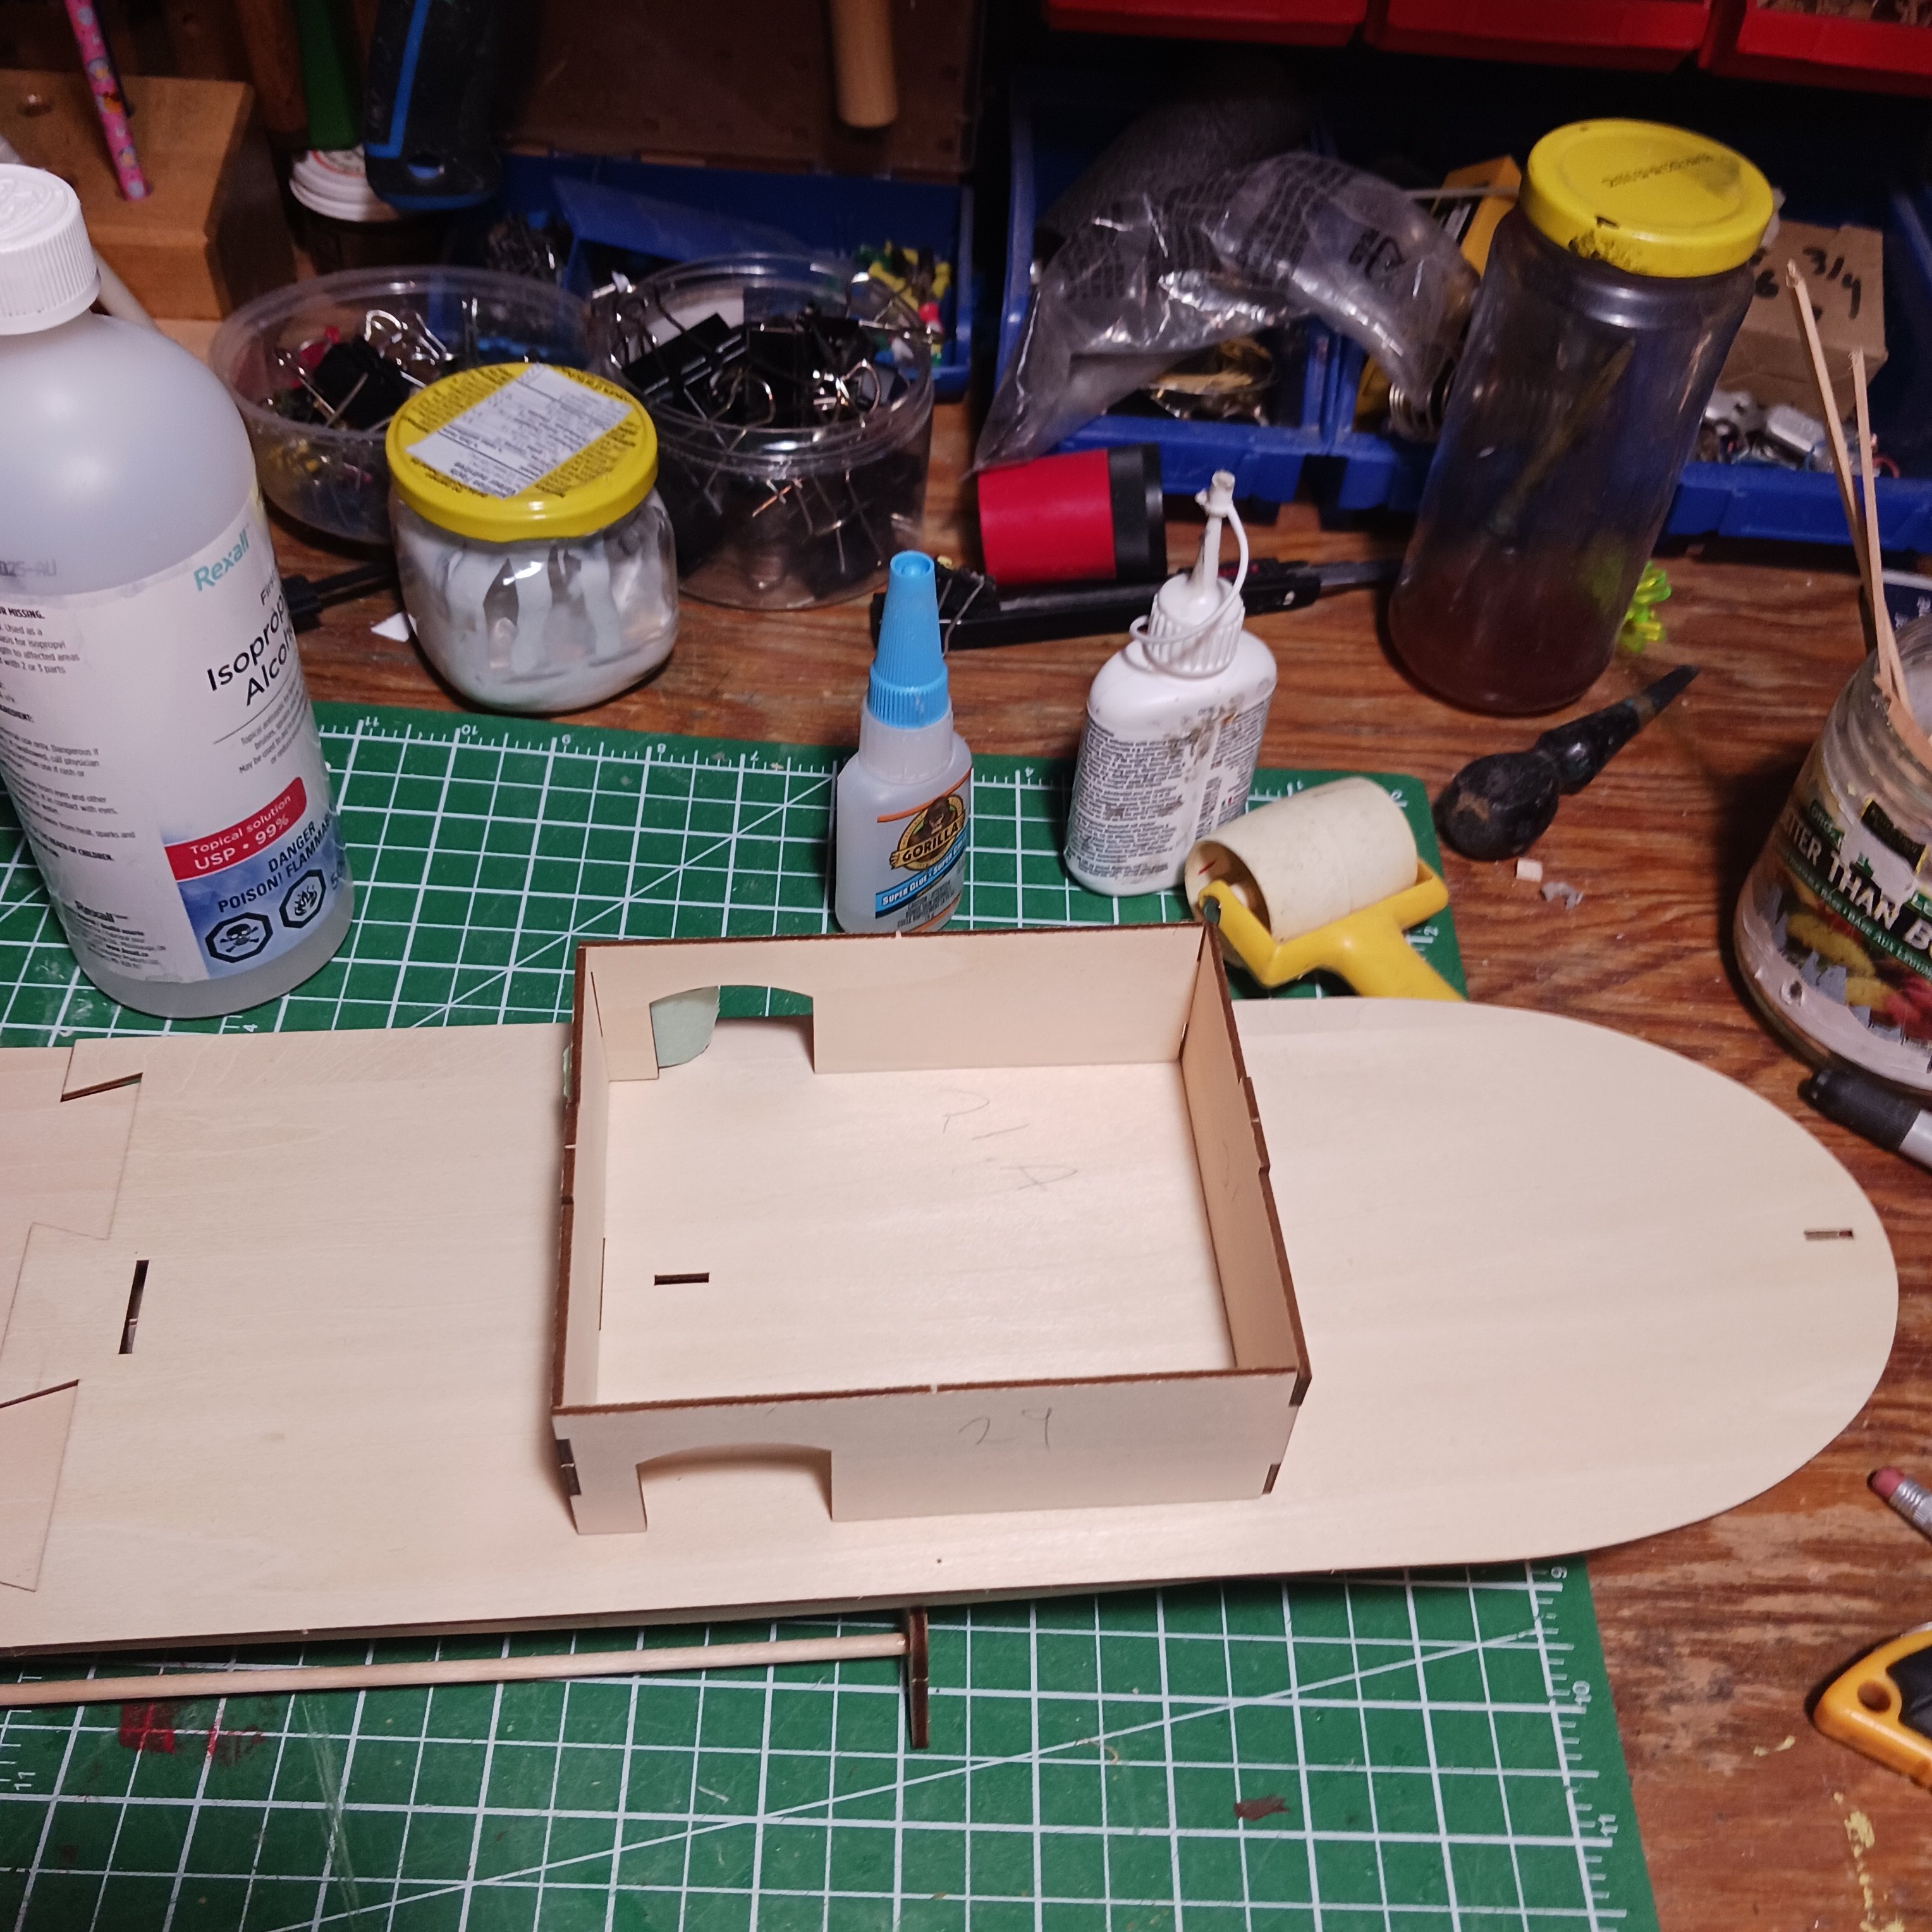
Moving on to more glueing the deck is up next. I am going to put the stables together, to see if I have to move the slots or has A L fixed that , we will see. Lol.
I also have to check to see if my boat has sprail staircases or straight, I haven't looked that far into the box yet 😅.
So this build will be my interpretation of the plans that I have, I can't wait to start glueing the siding on, and then more glueing of the next deck, I am starting to miss ratlines . But I am Grinning 😀.
There is lots I don't understand, but sorting it out. Lots to do before that.
Thanks for looking.
Bob M
- mtaylor, aaronc, Ryland Craze and 7 others
-
10
-
@Bob Fraser thank you so much. These will help. The older kits have a reference # 20505 and the newer ones have #20515..
Last night I found 20515, so far I only see a few changes, one is they plank the side of the boat , not just one piece #12.
My apologies for my little rant about the instructions, I just had to look harder for them, but between what Bob has sent me and what I have found, this will be a fun build.. 😄
I want to slow this build down if I can, the Drakkar Viking boat and the diorama took only 21 days. After studying the plans and finding the part list, and I also found 10 videos on this build by Artesania Latina, all 10 have no words just someone building it.
I have started looking at logs here at MSW, I can see by alot of them that this will become a fun good looking model when I am done I hope.

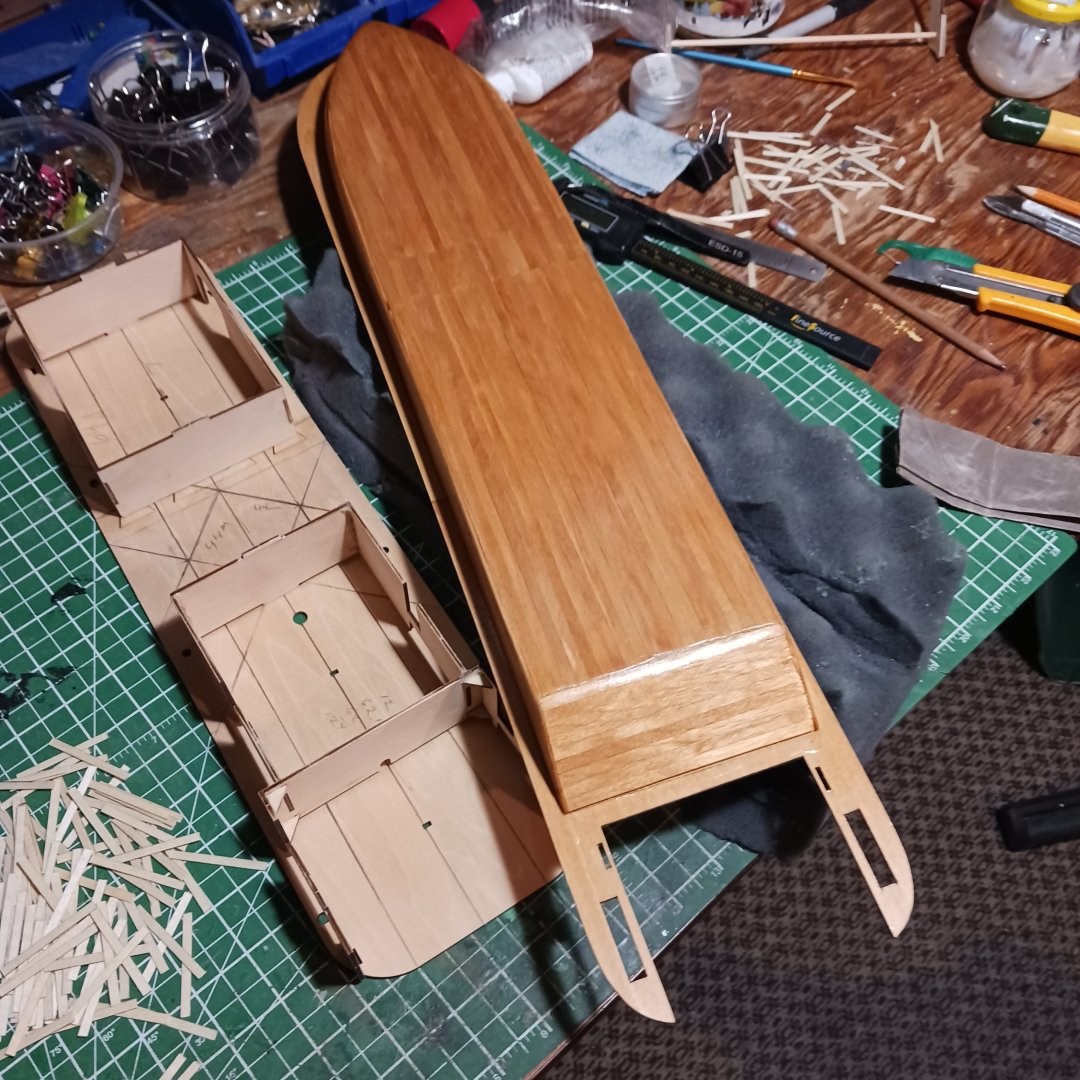
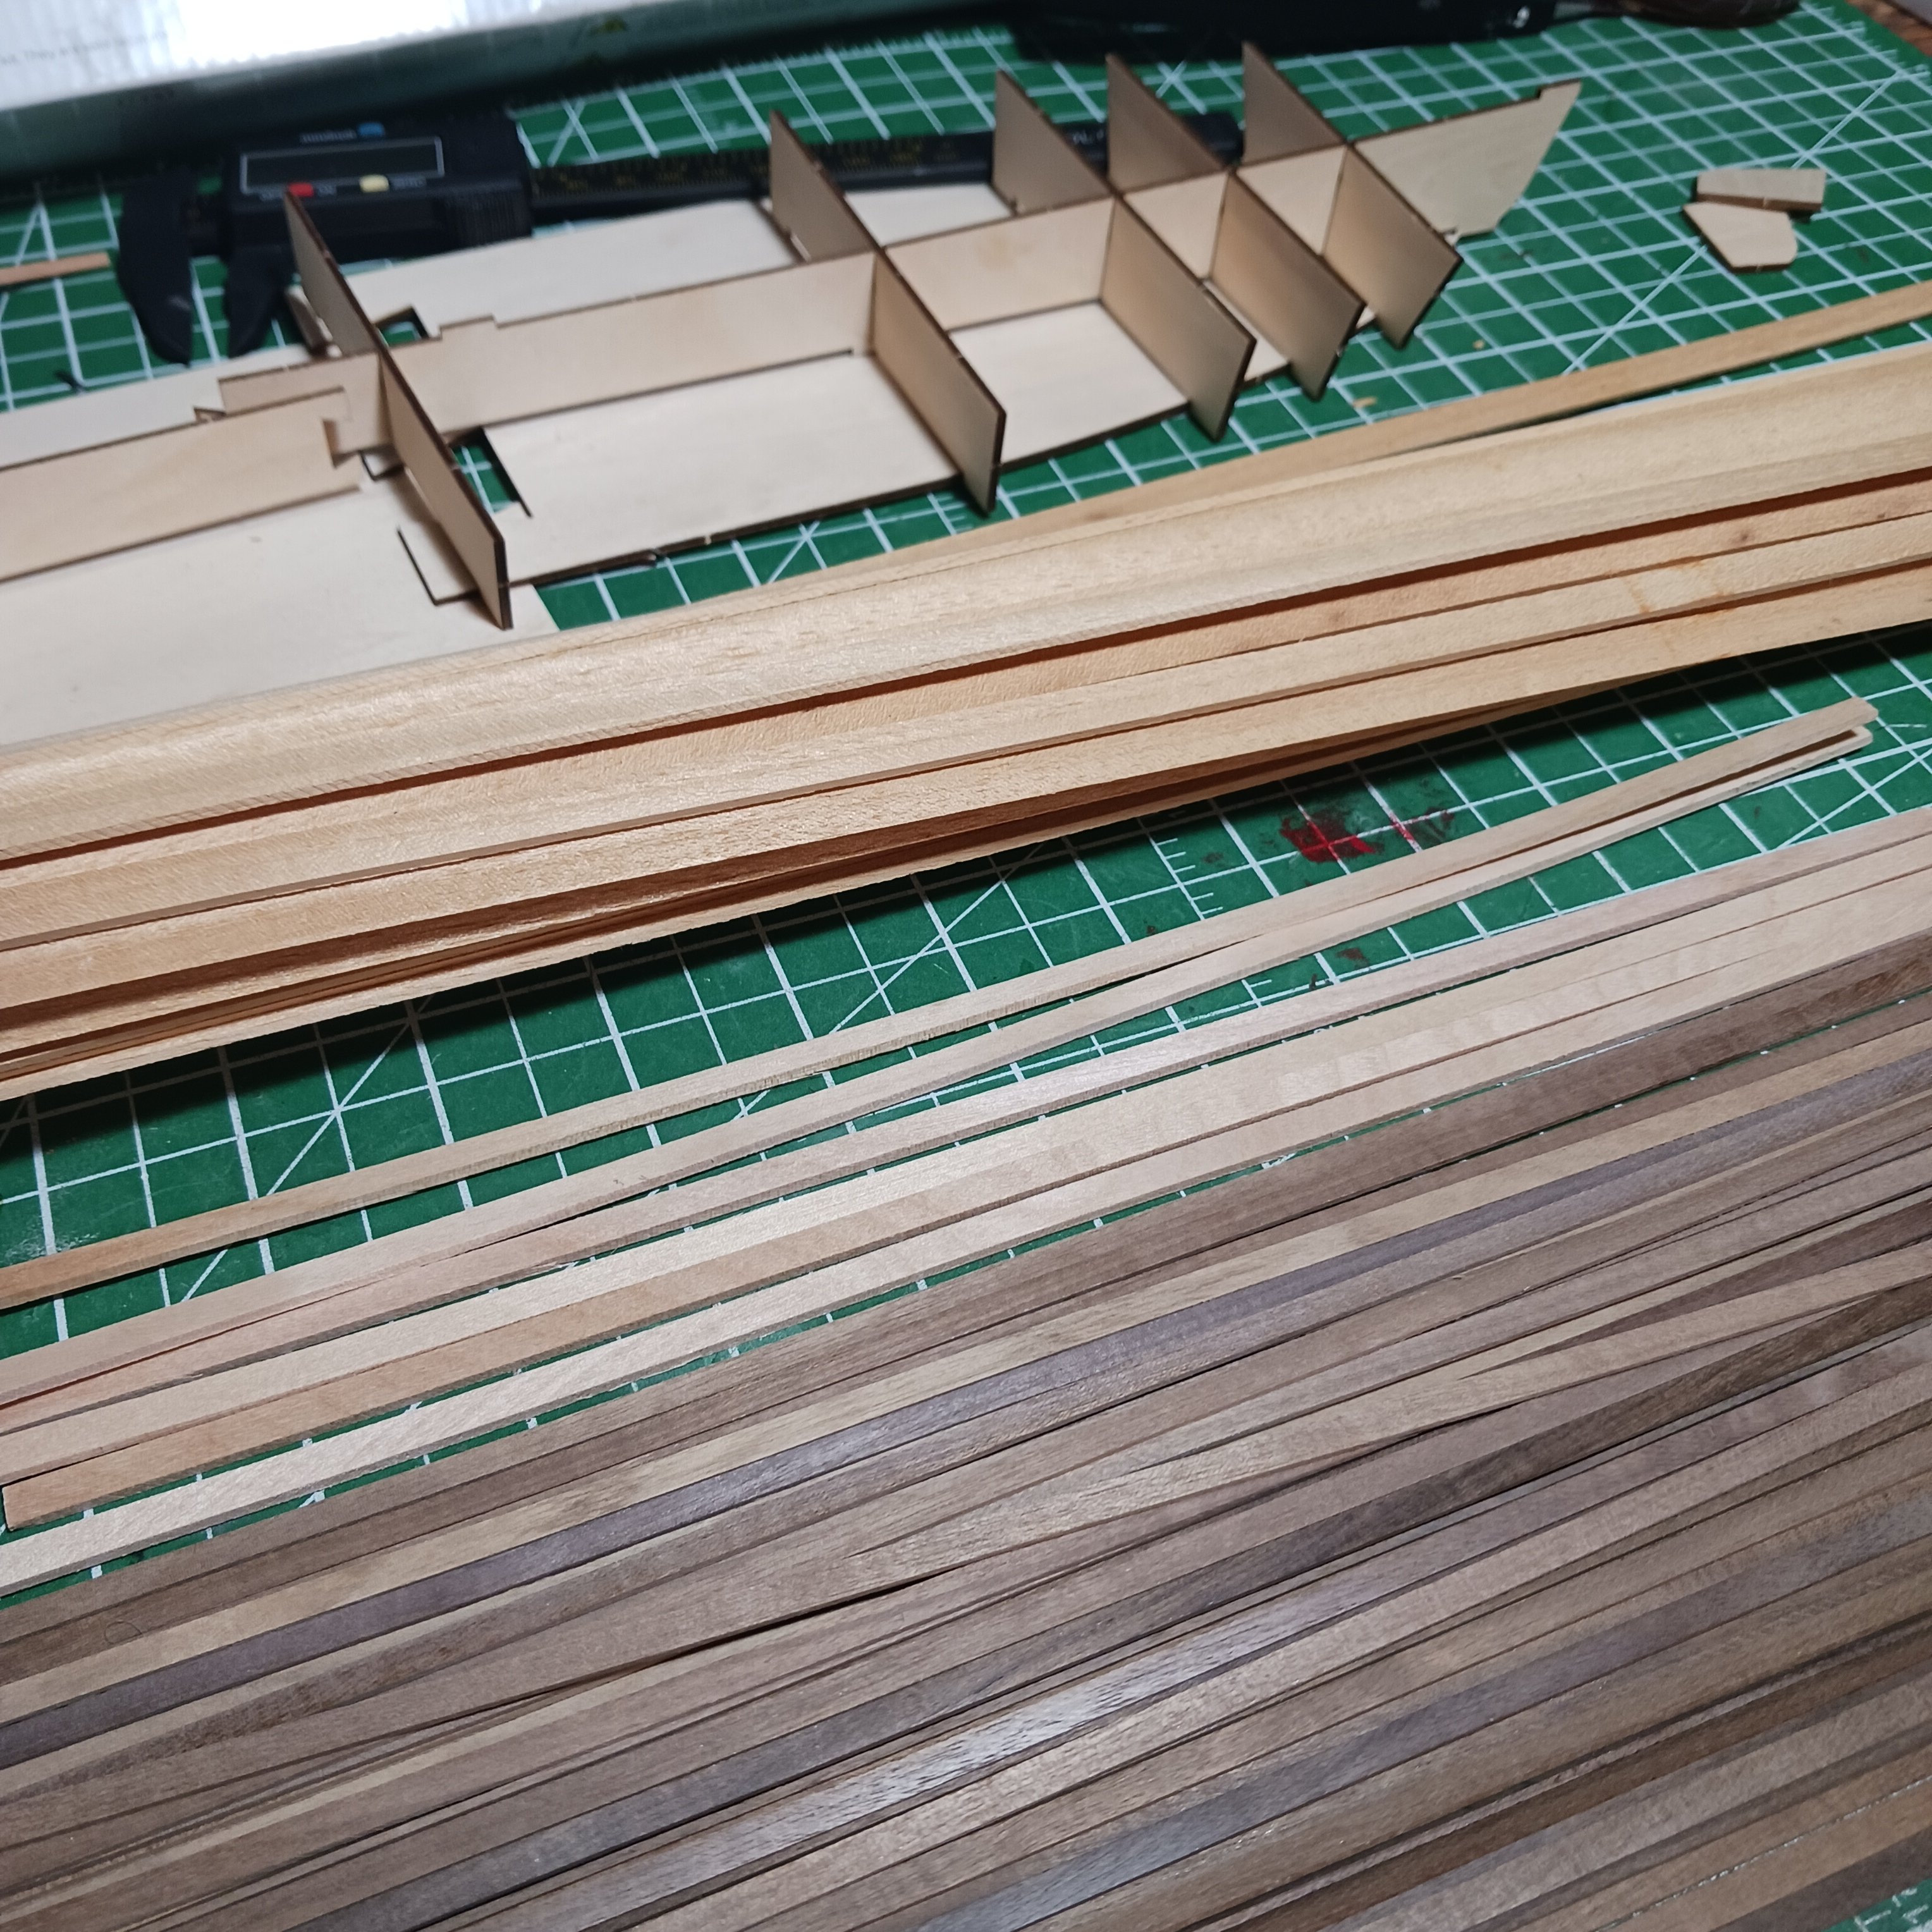
Above I have walnut on the bottom, mahogany pile is on the top, and kit supplied wood in the middle.
My thought are to use the mahogany for the bottom, walnut for the sides and trim work later. And use the kit wood for the
floor decking. I cant see using walnut were you wont see it.lol.
So with all the enthusiasm I can mustard 😋, I am about to start glueing.
Thanks for being patient with me lol. I hope to make it look just like the picture on the box.

So with out any more hesation, let's start glueing.
 Bob M.
- Keith Black, mtaylor, Bryan Woods and 5 others
-
8
-
-

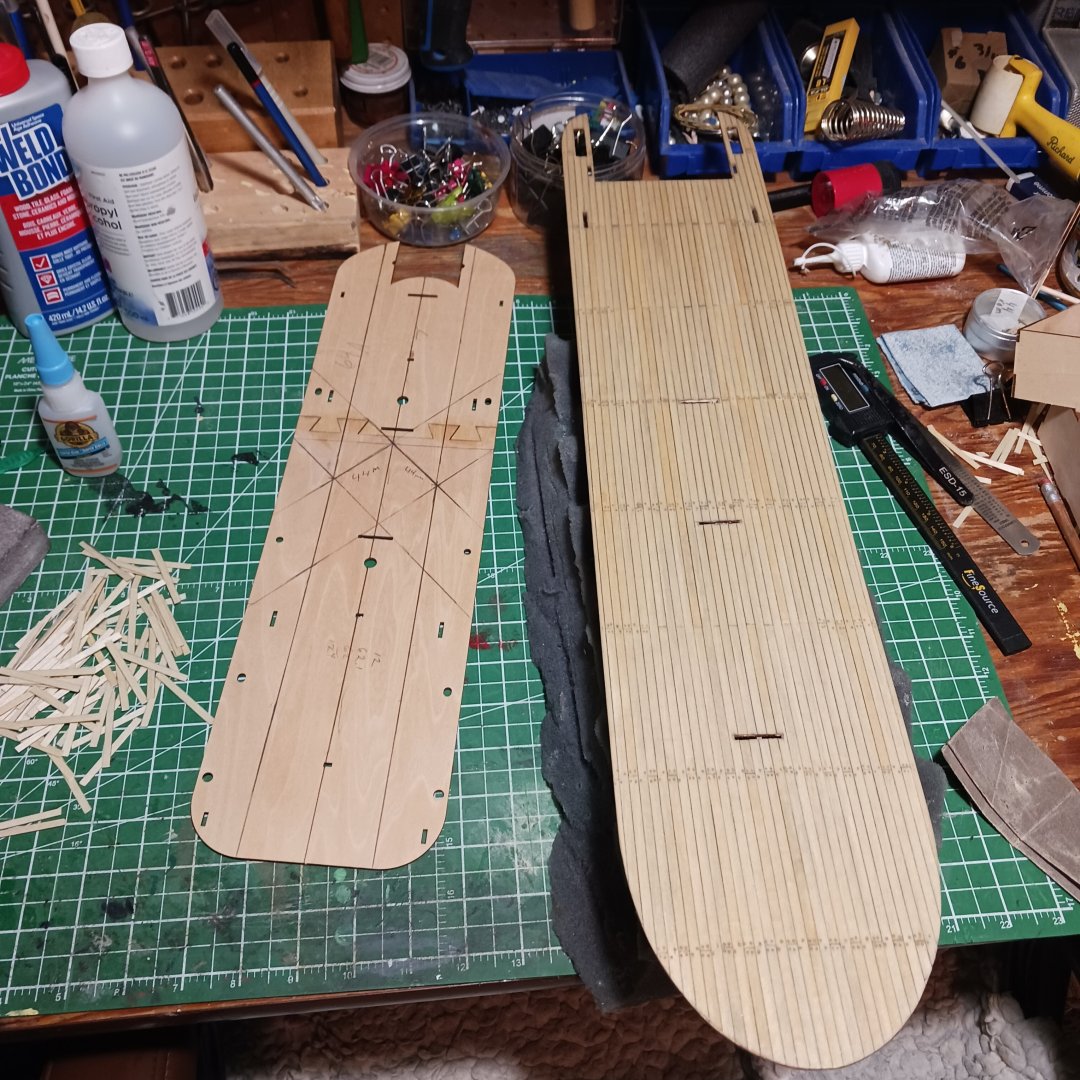
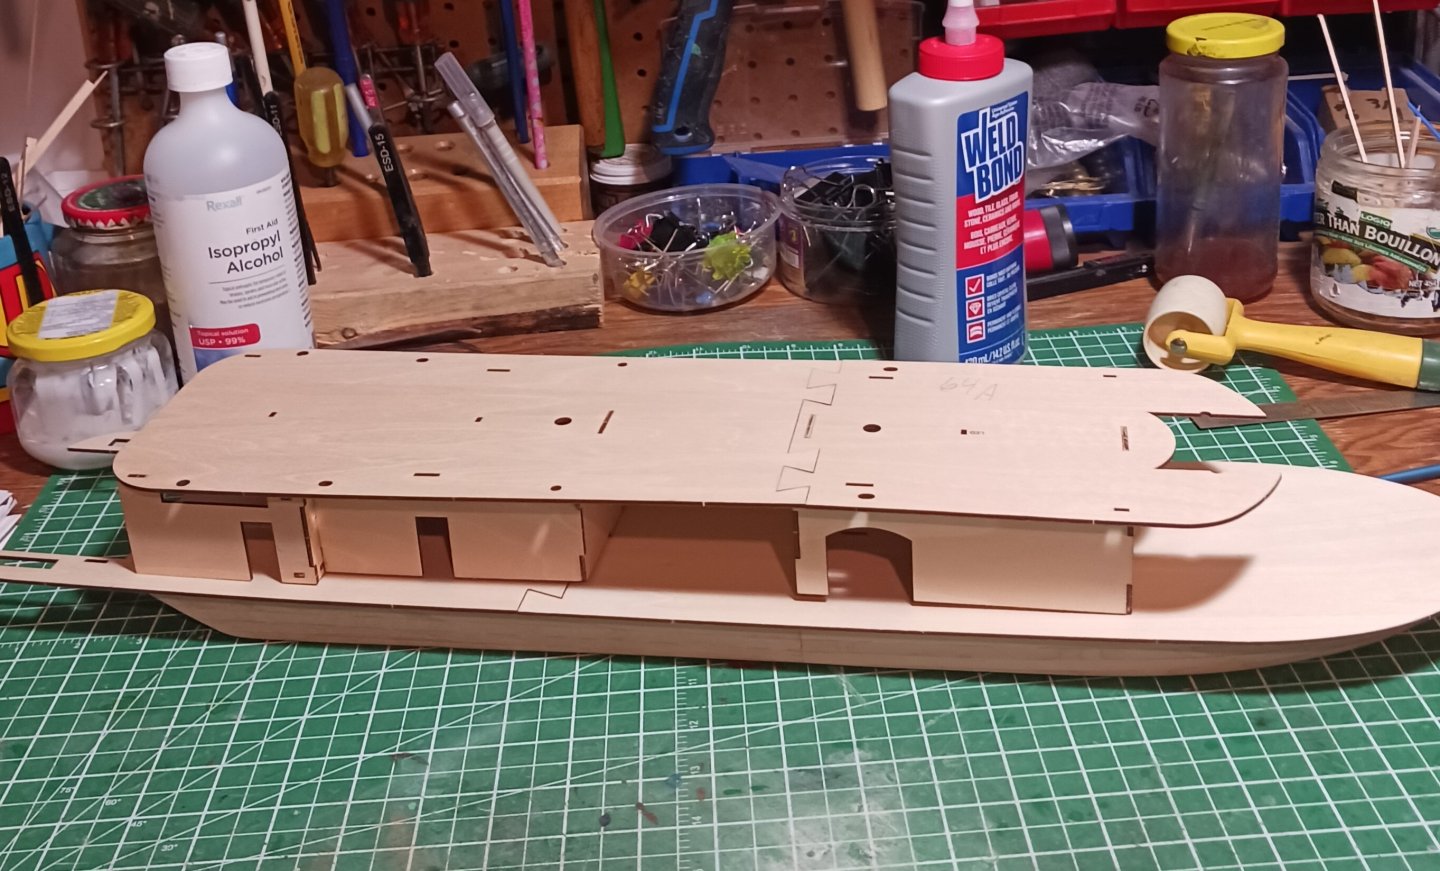
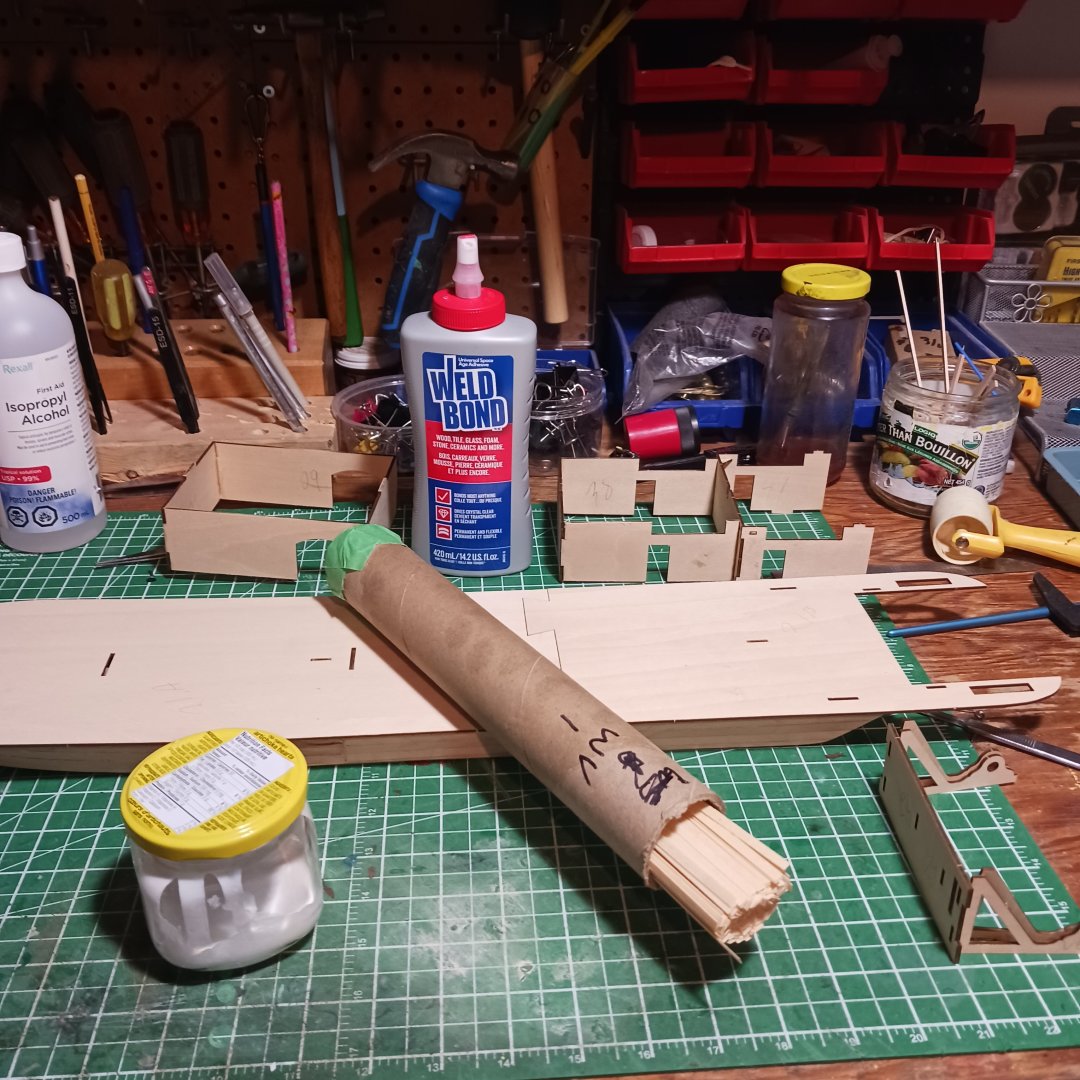
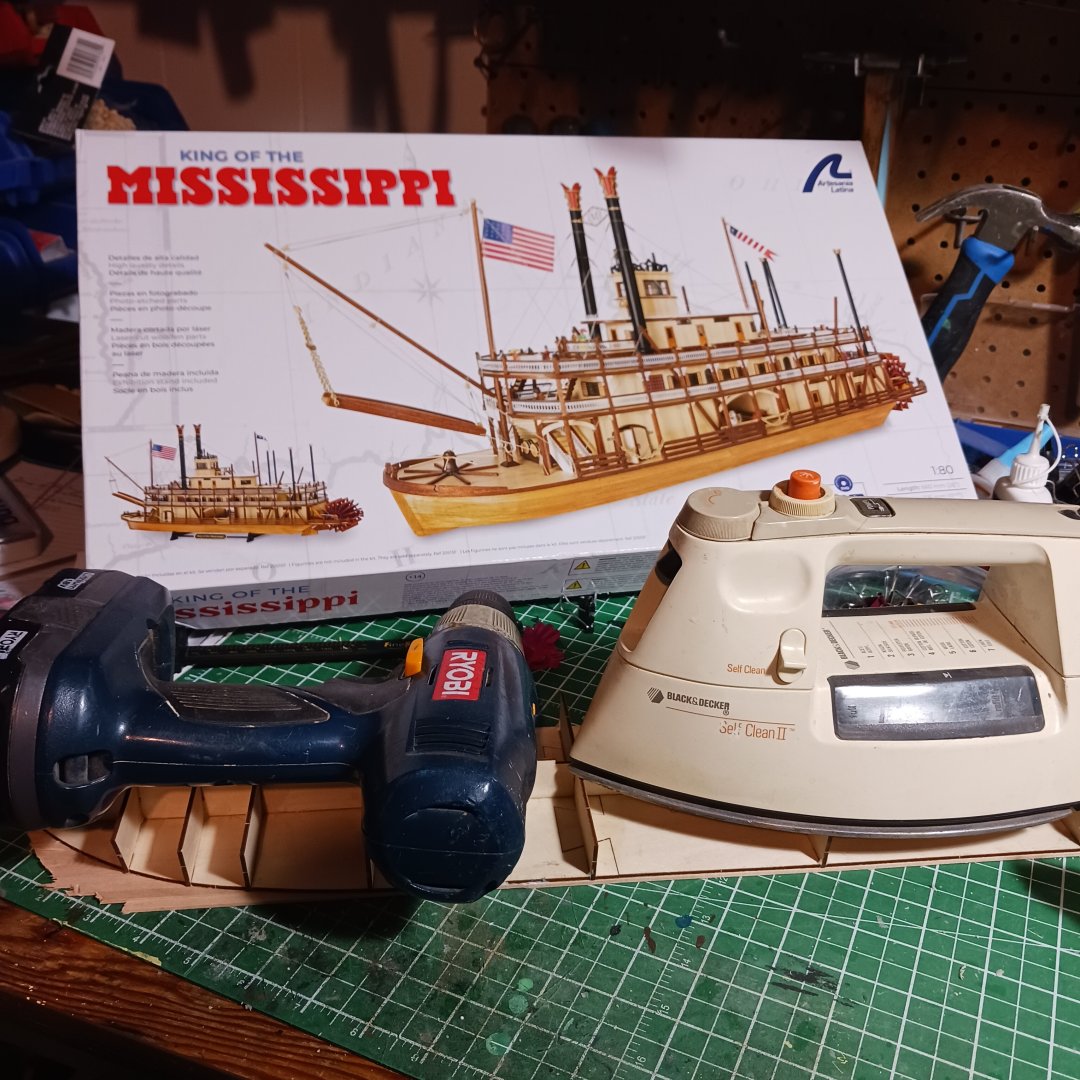
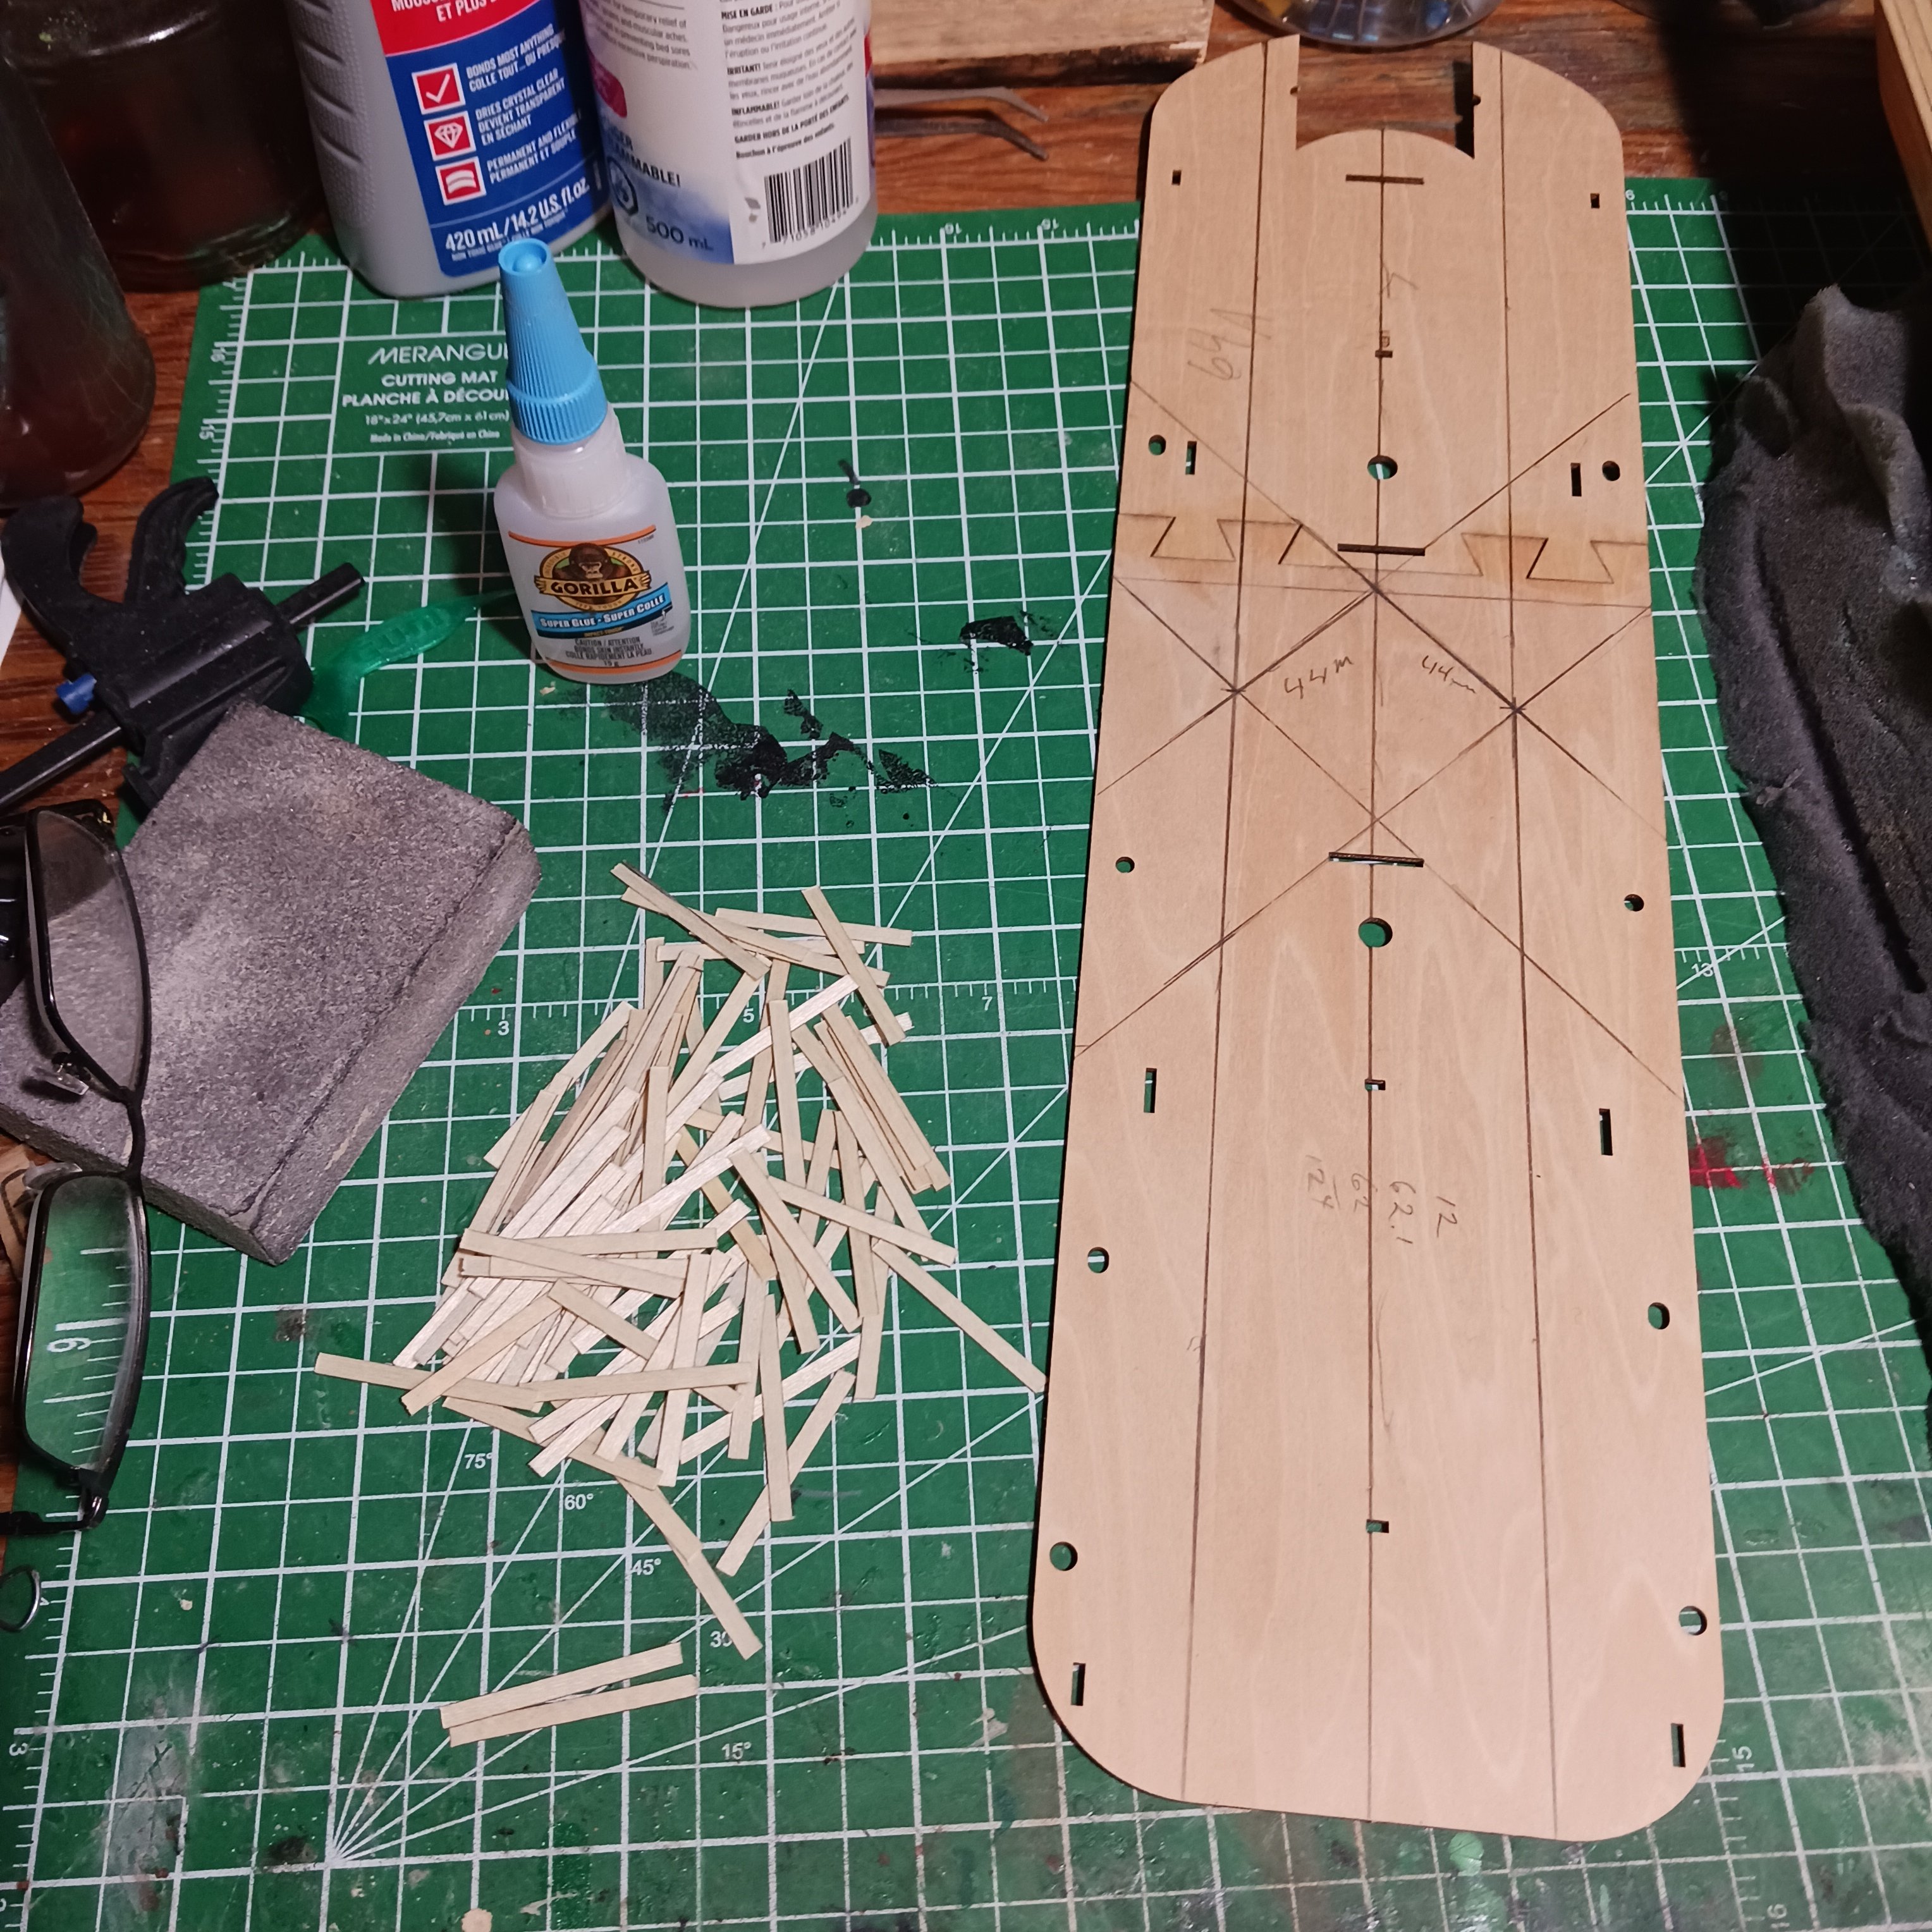
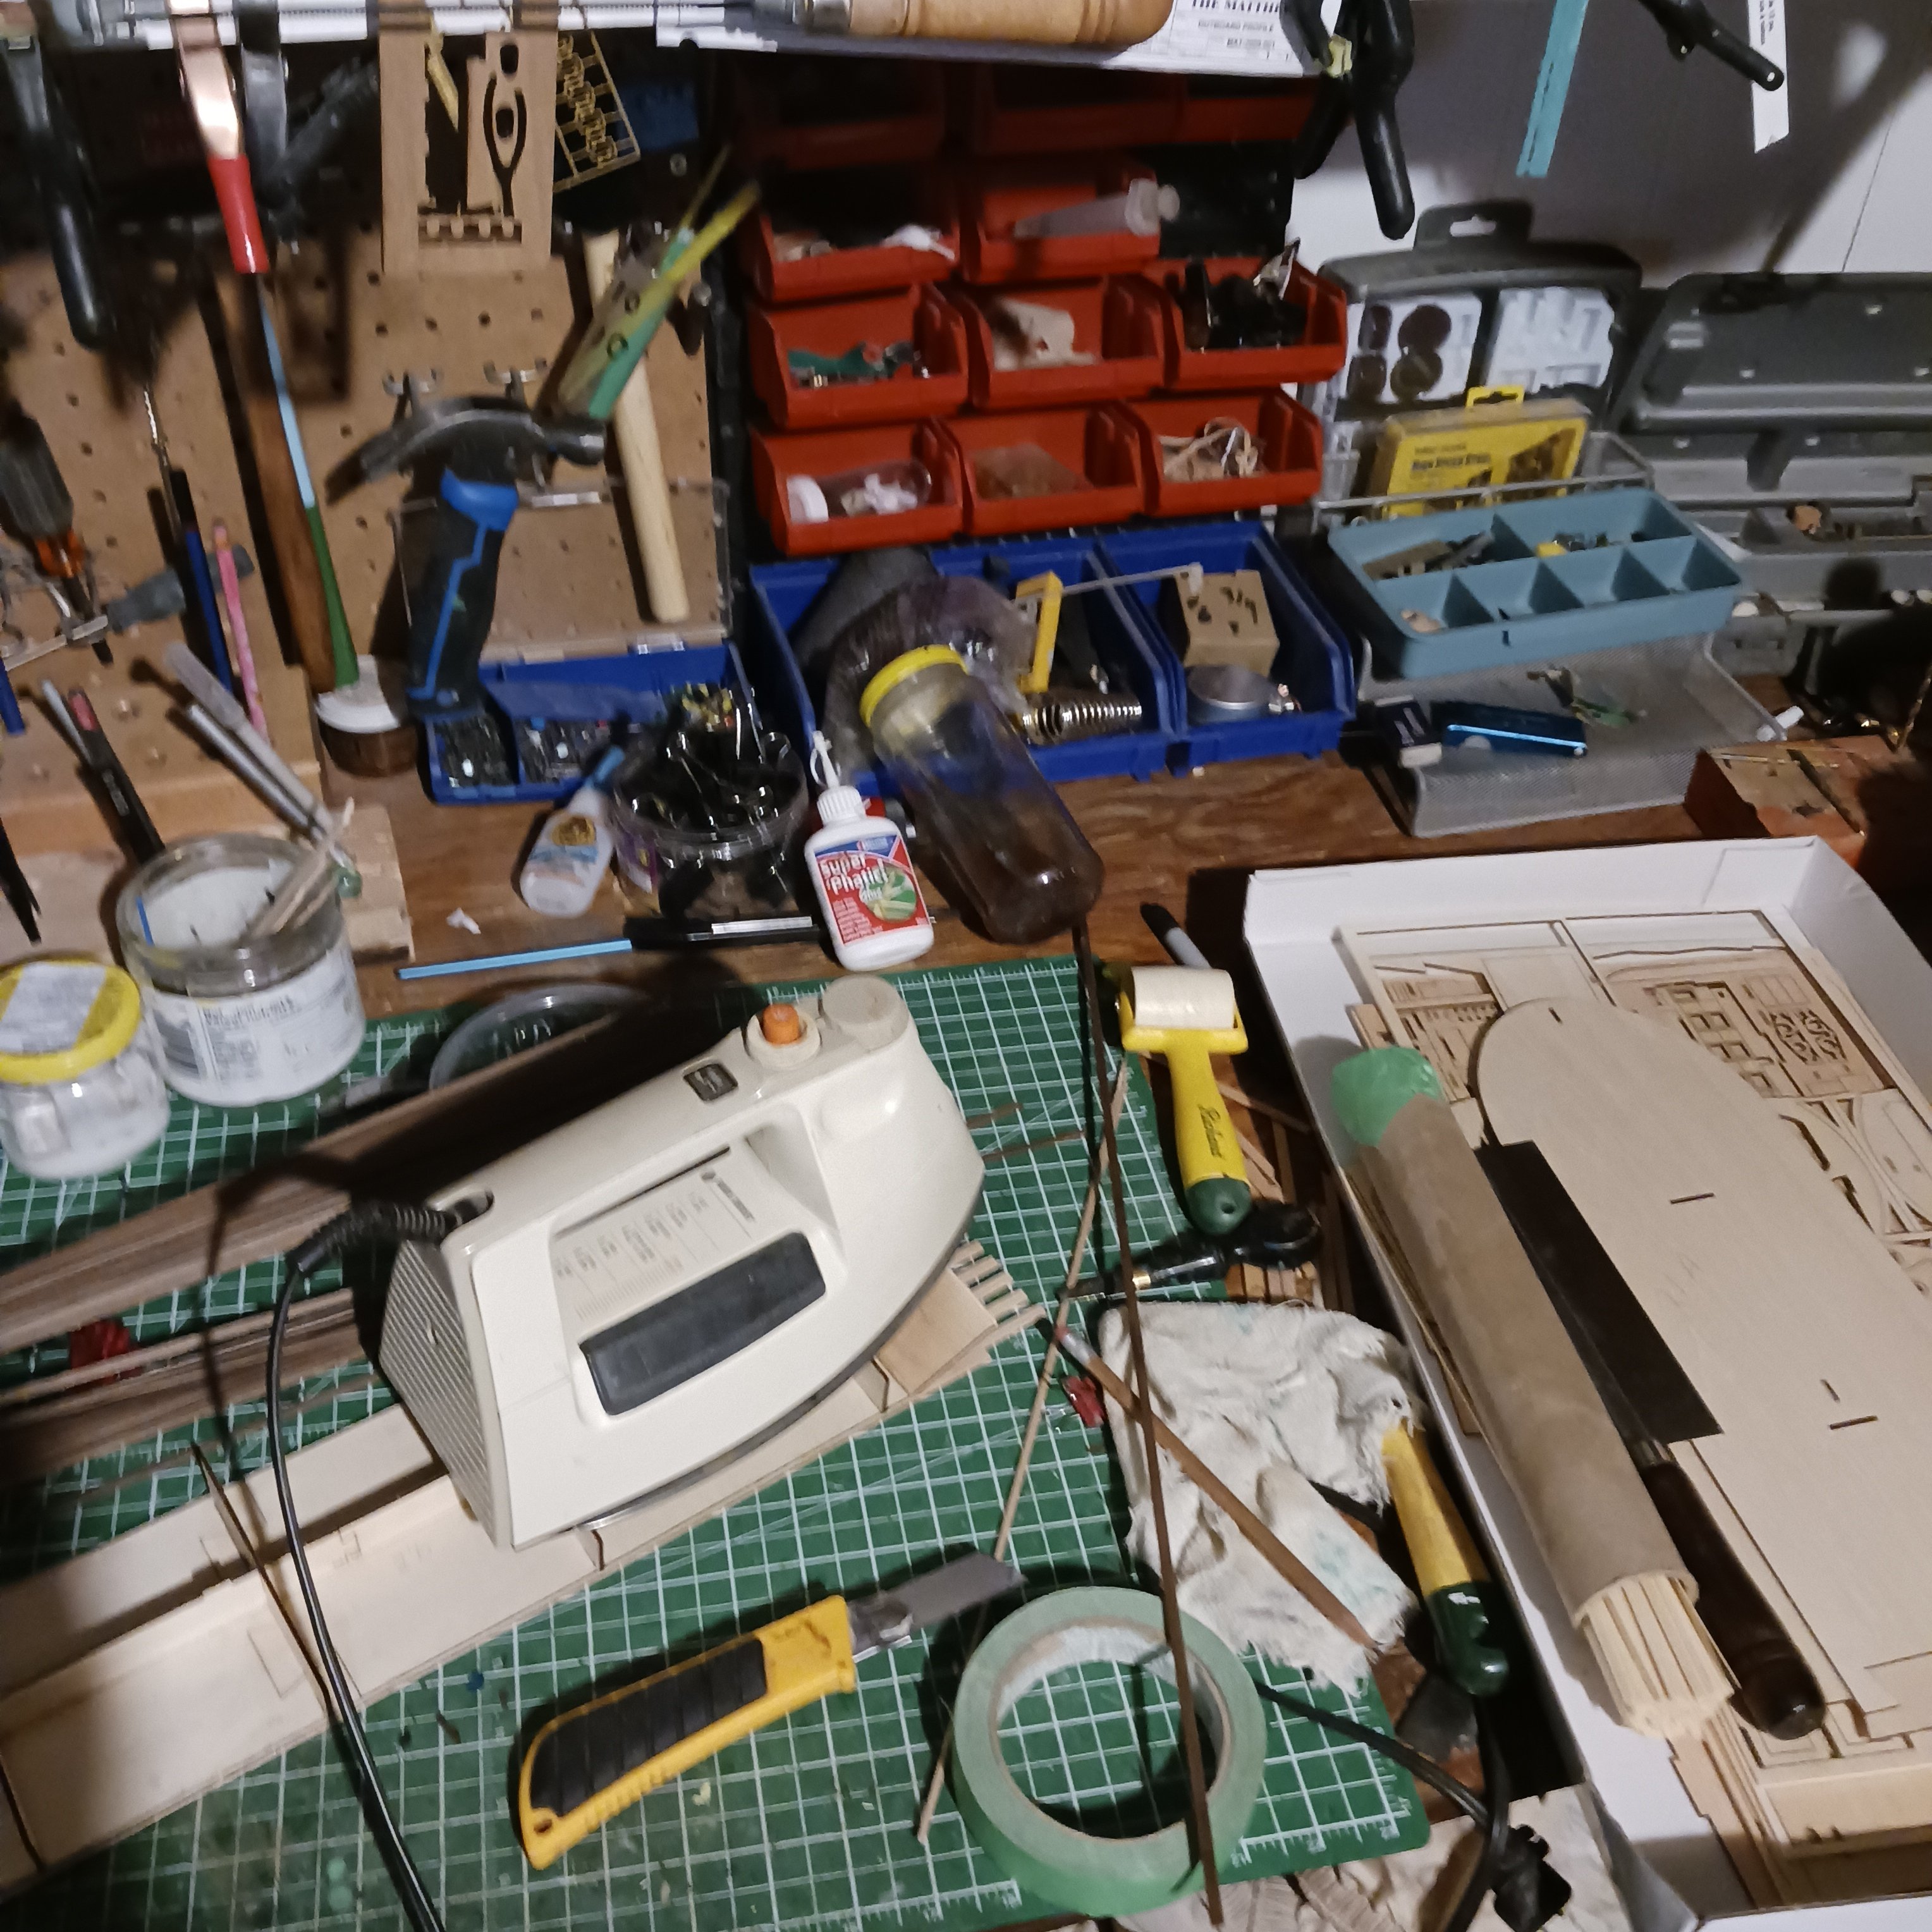
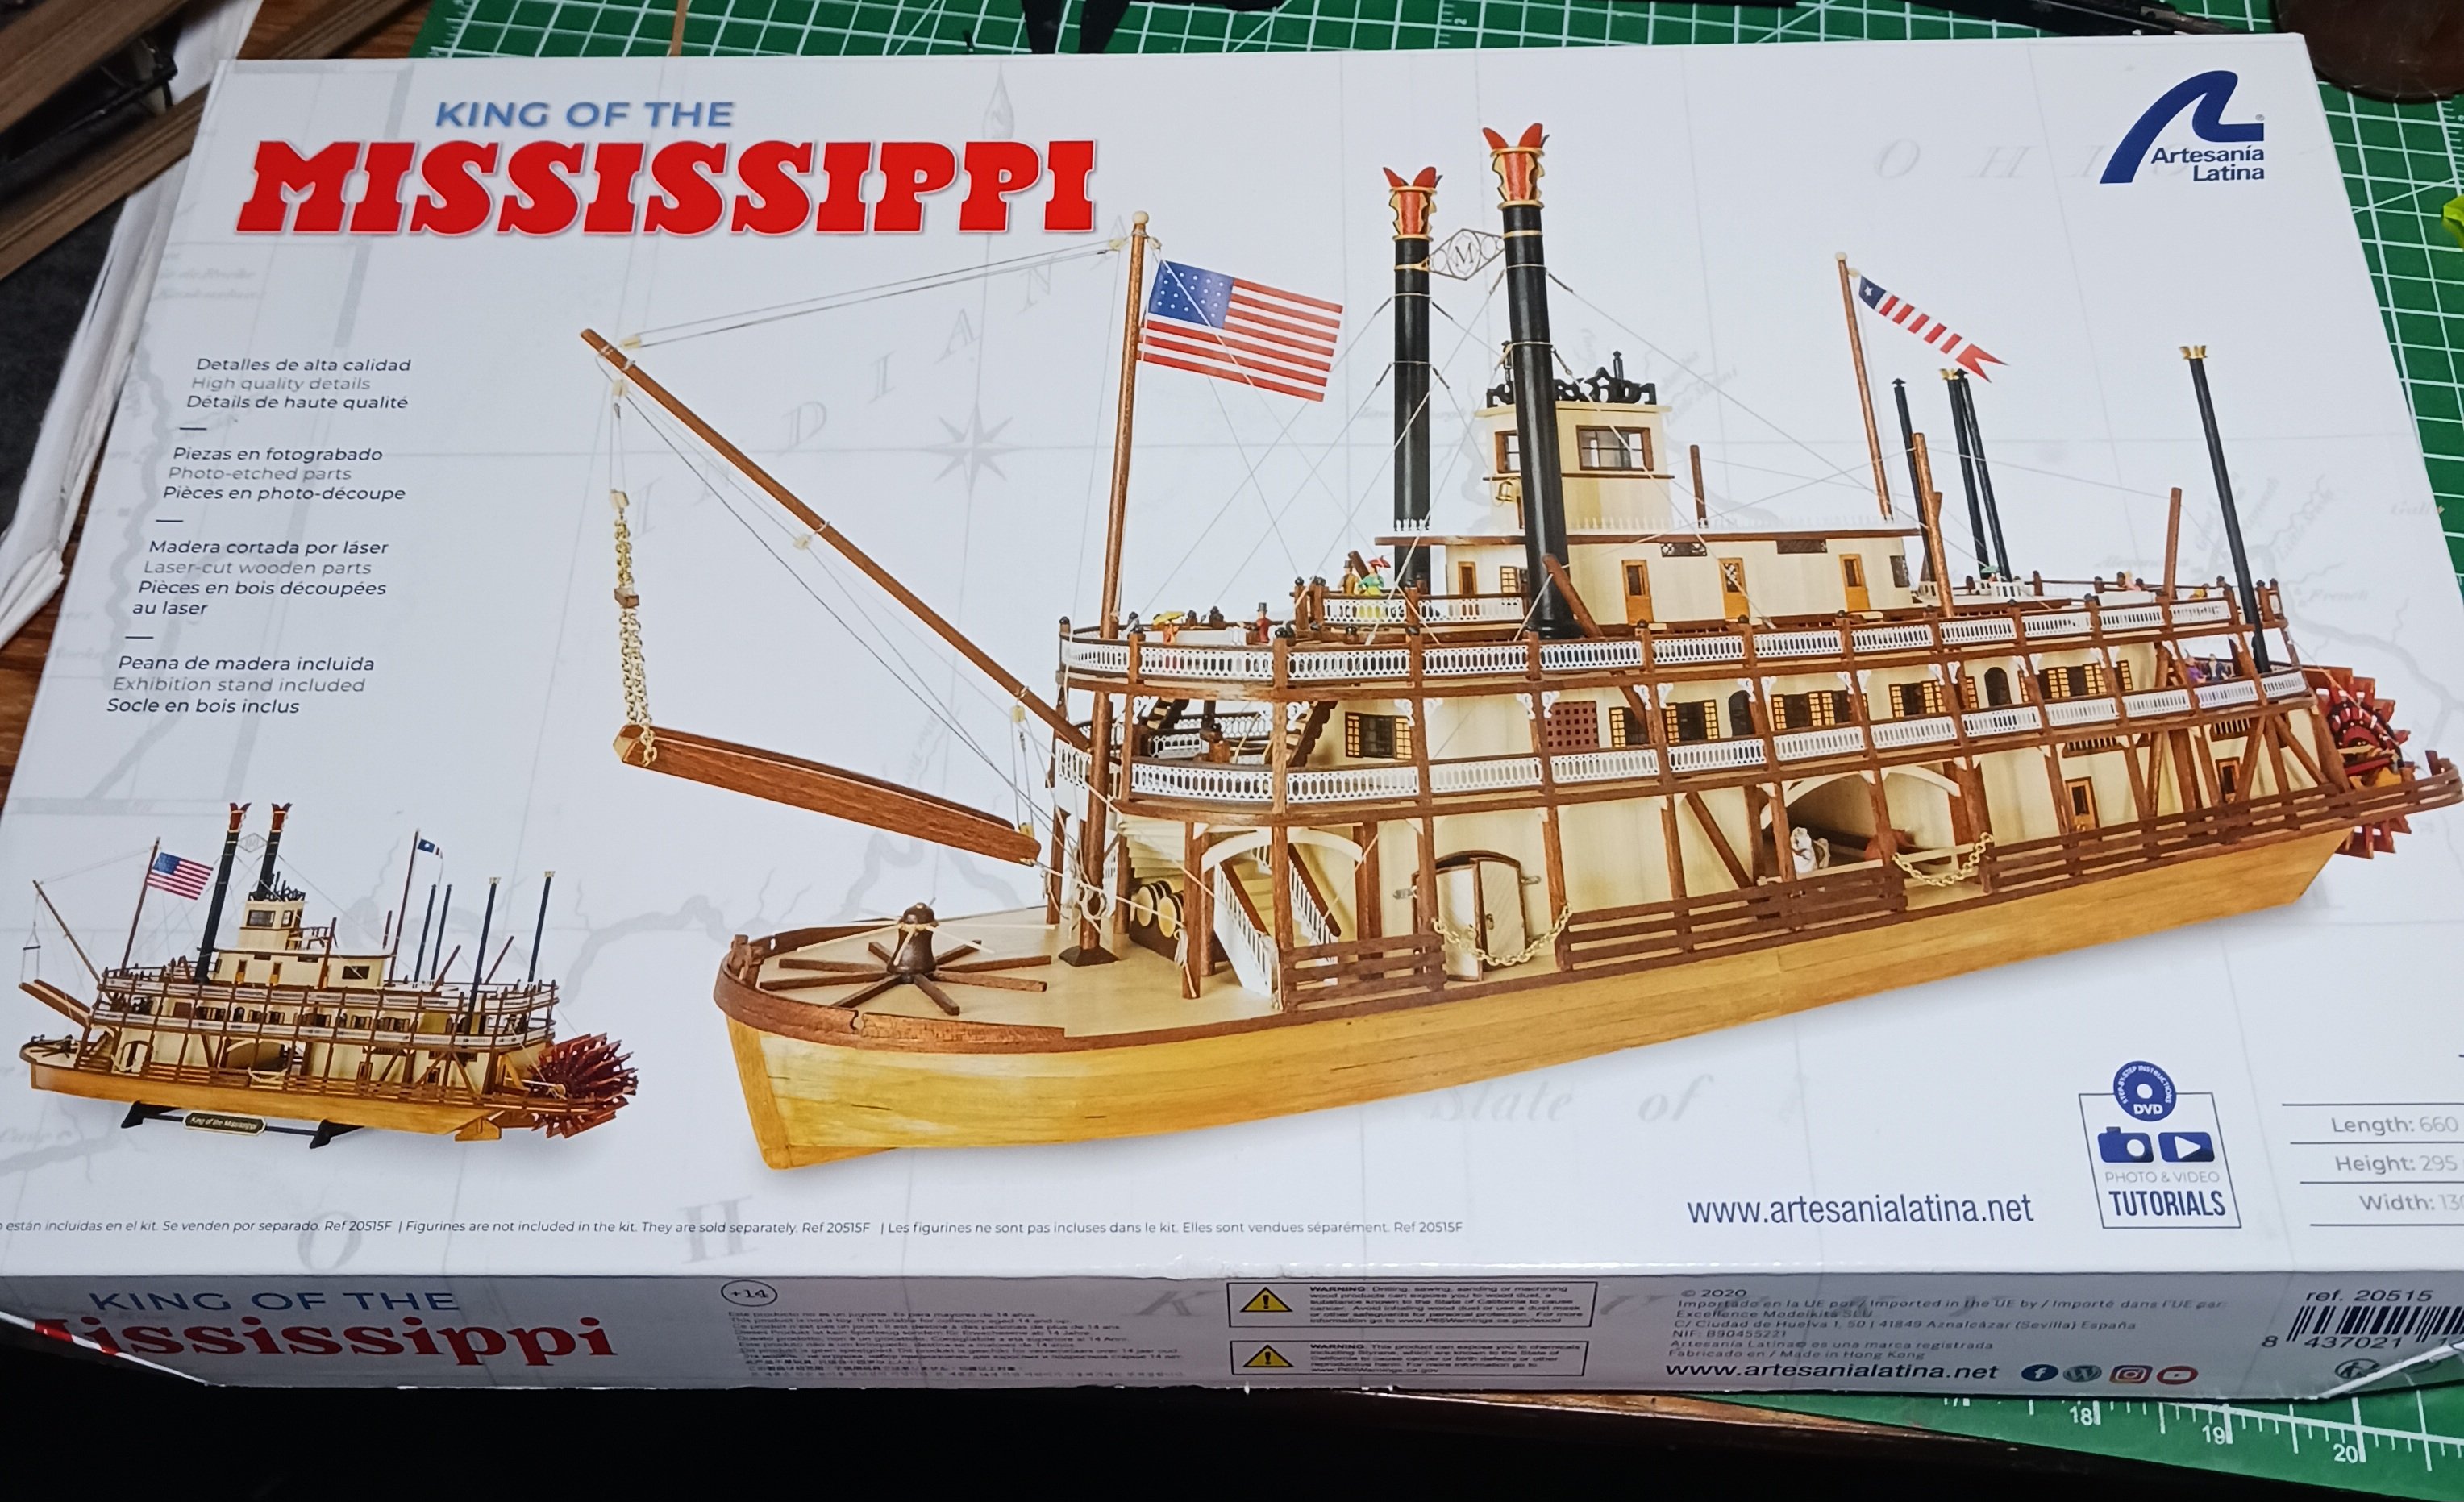
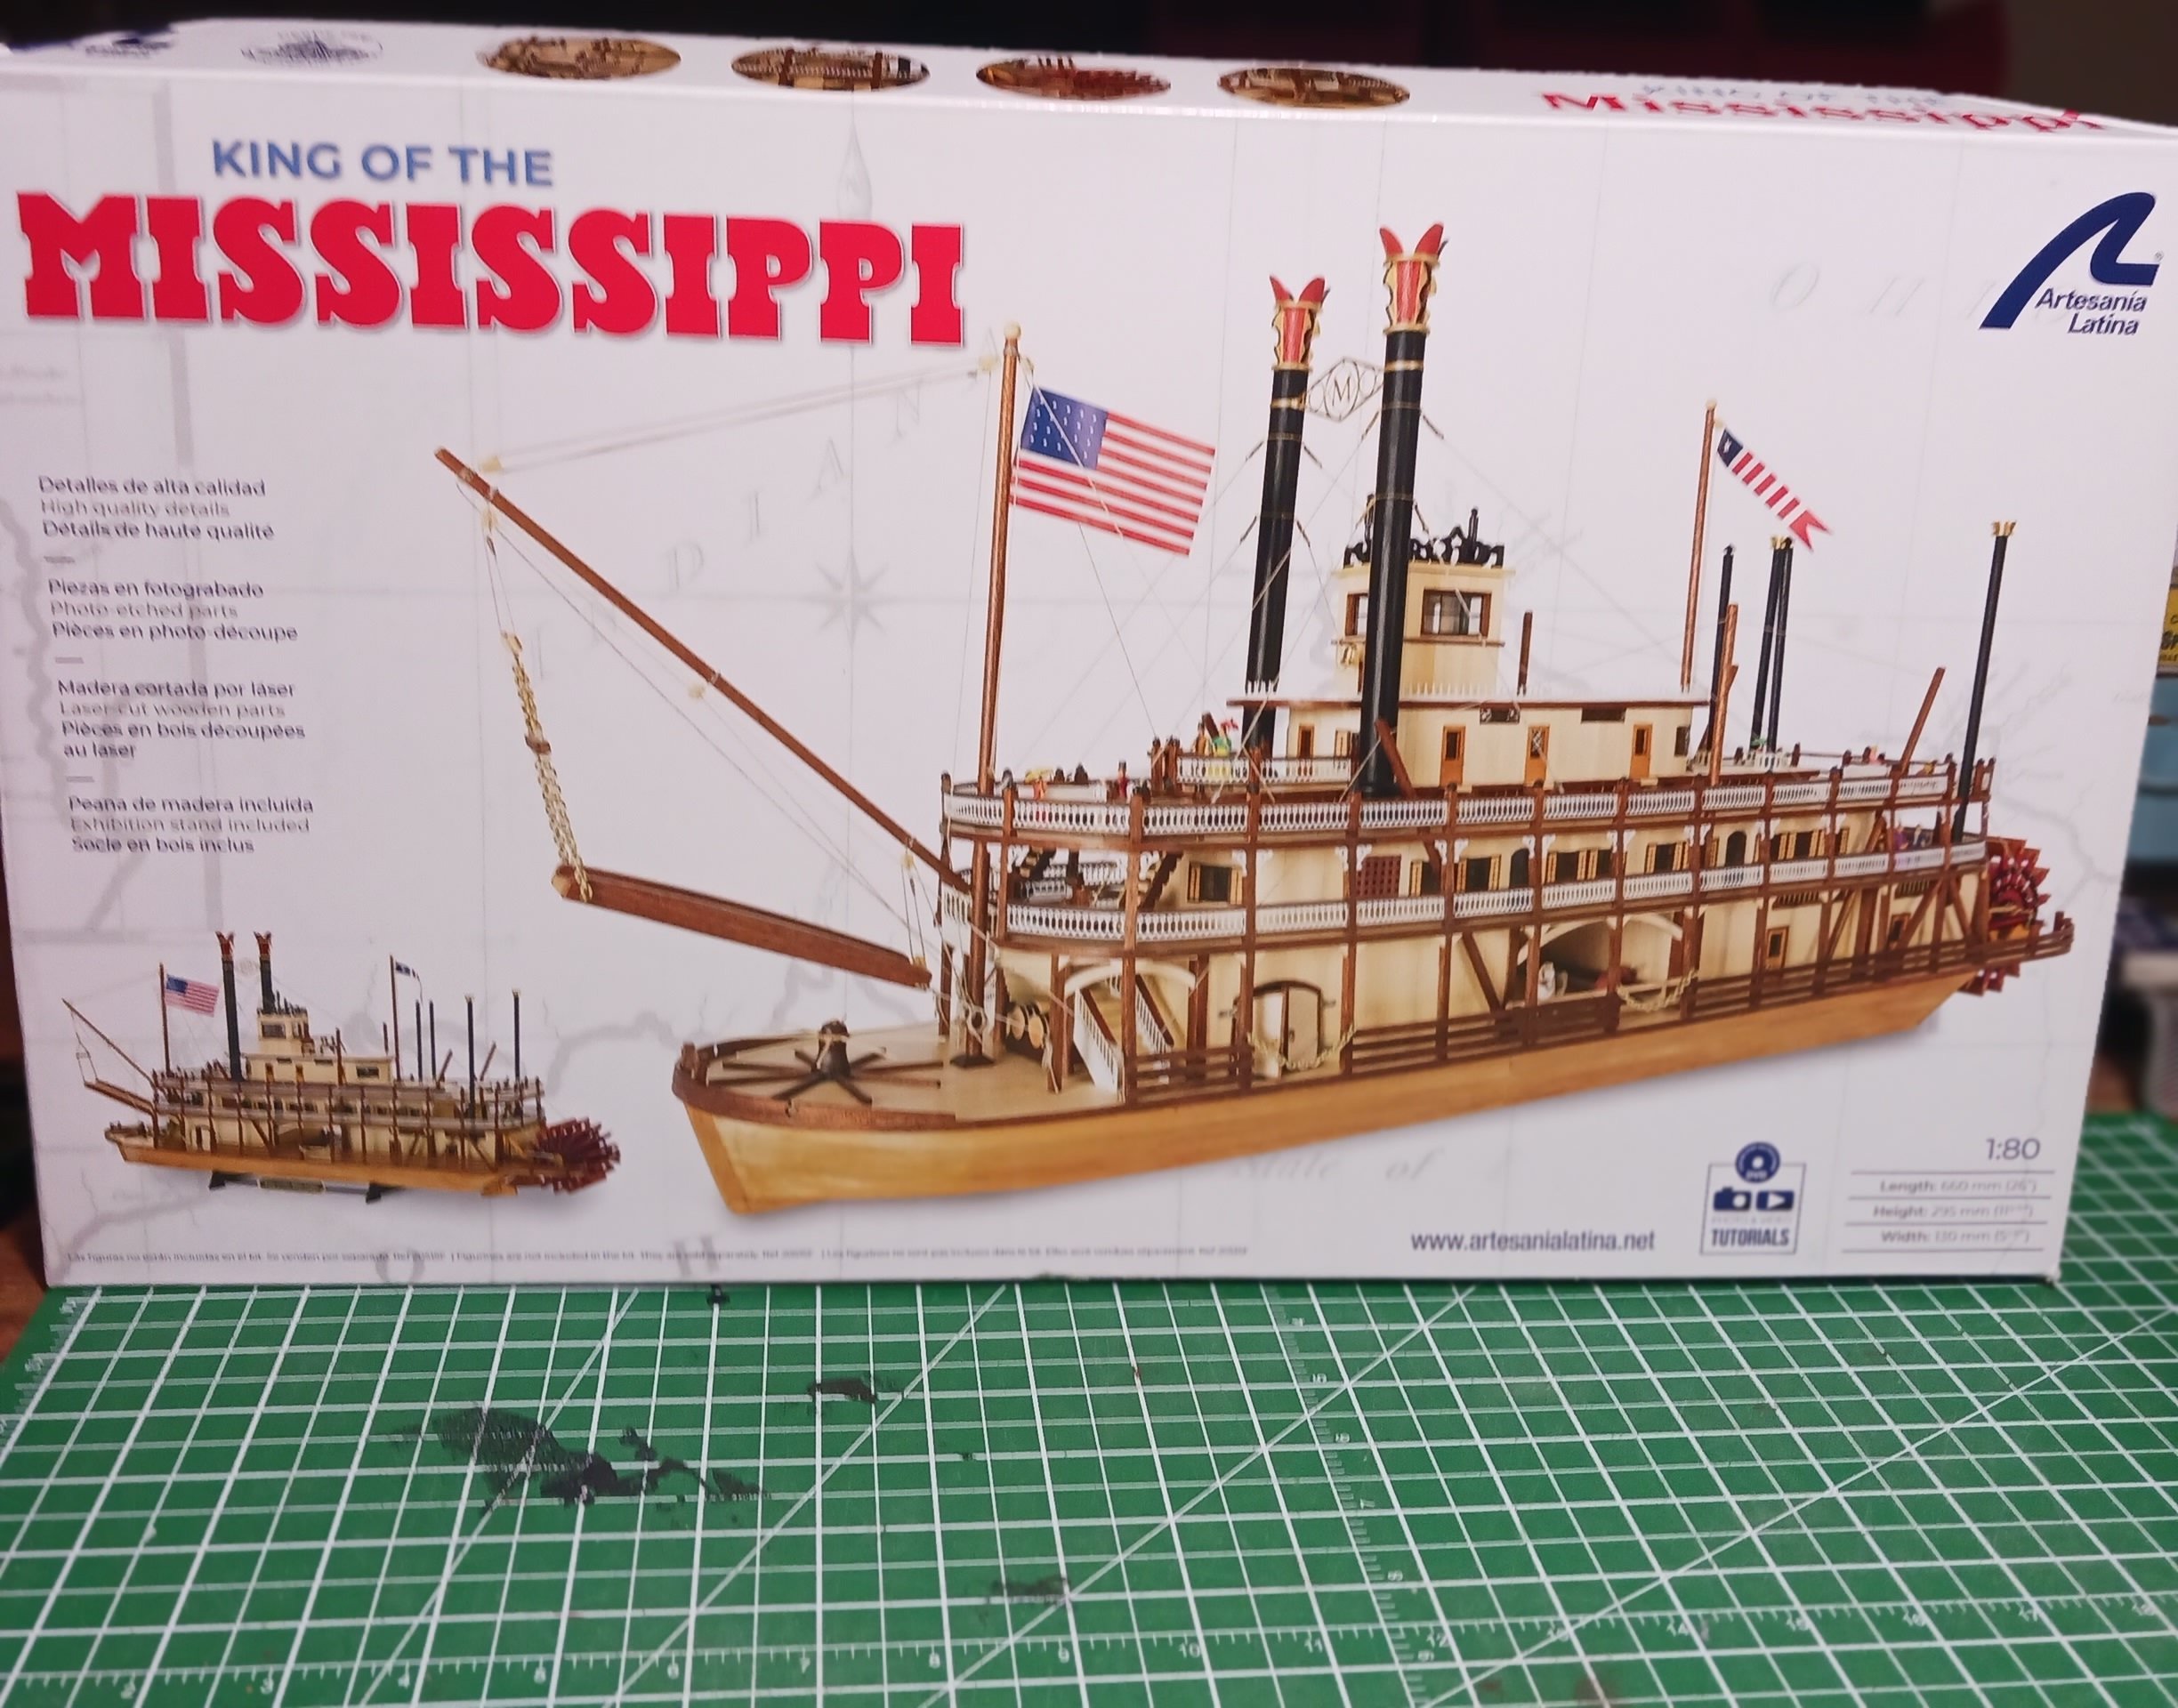
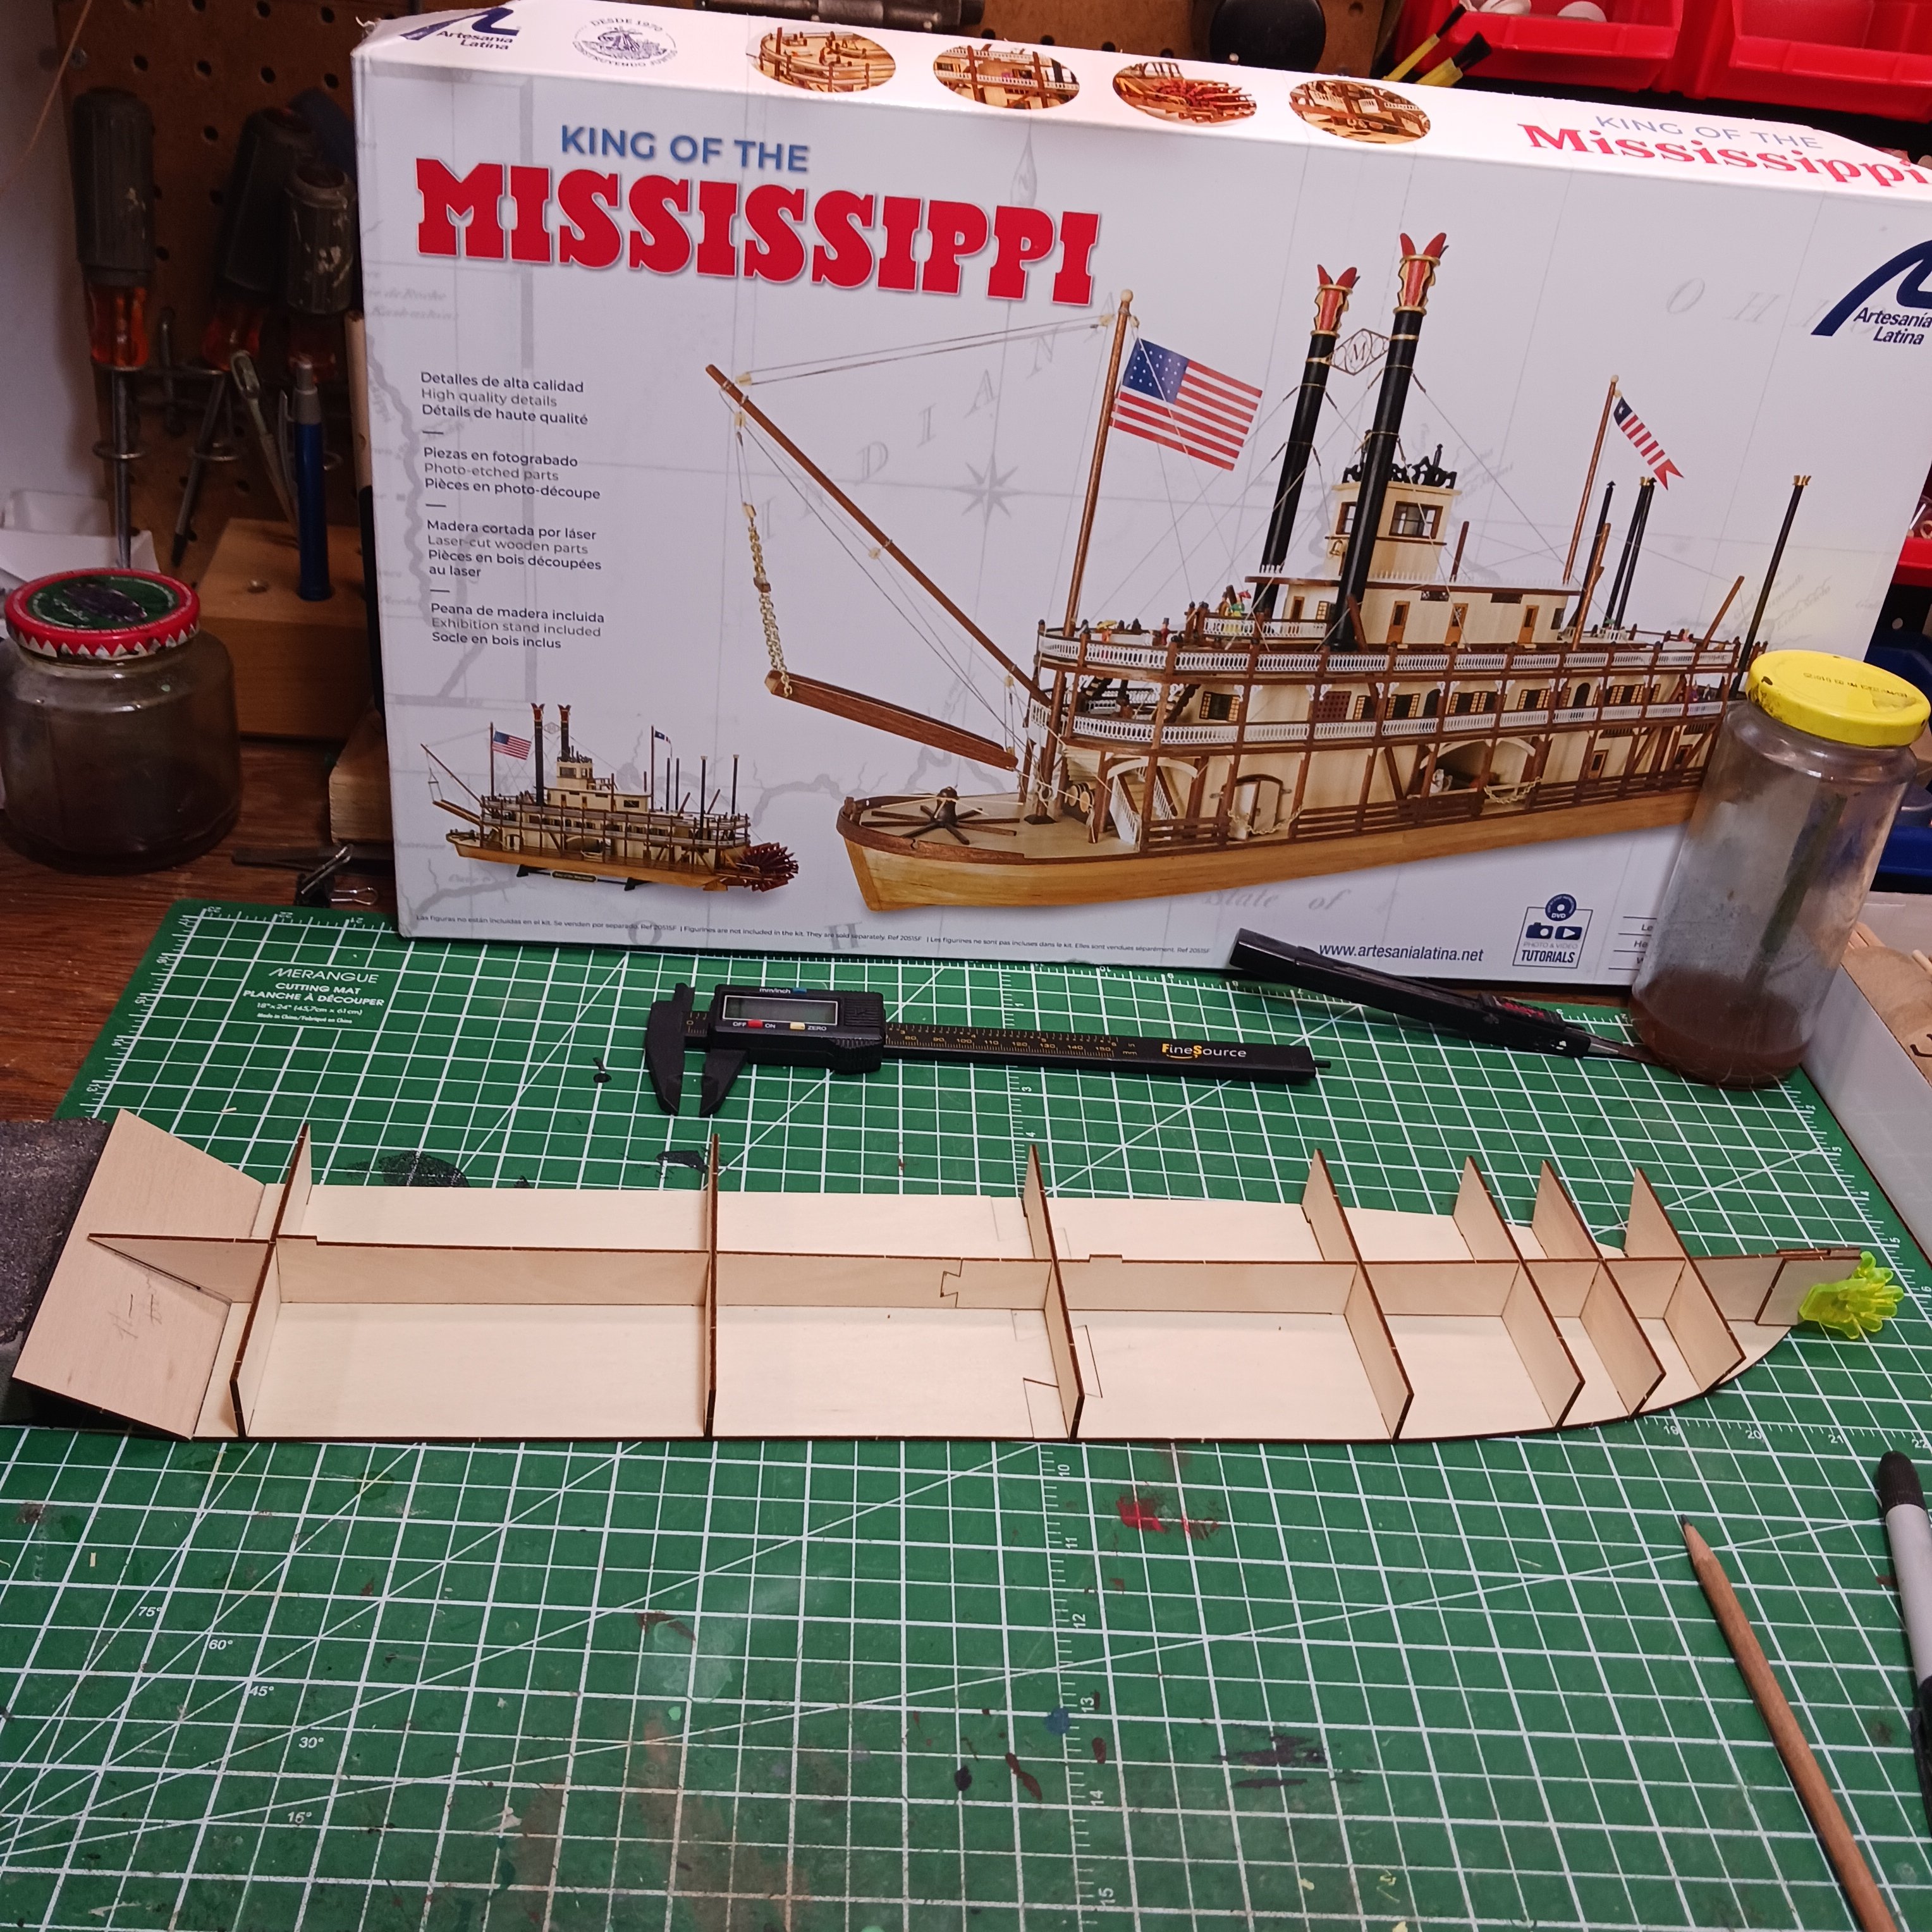
Last night May 24,2024 I open the box of my latest build. The king of the Mississippi by Artesania Latina. I was hoping that the instructions were better than the last several ships that I have done. But in fact, they are worse 😕. You only get a CD to install on your computer. It does show you how but with no part numbers, and three bundles of wood, you have to figure out what size and separate them all.
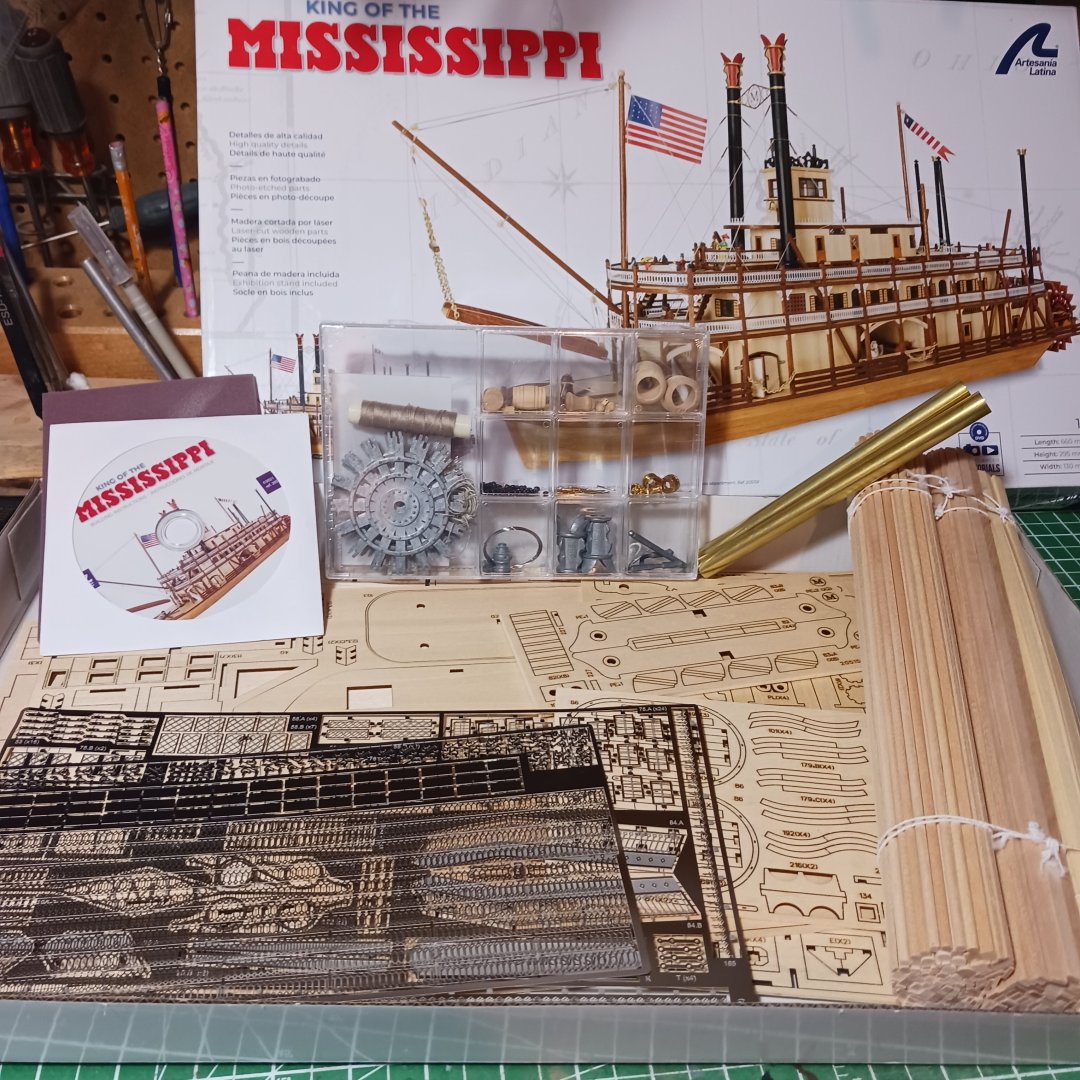
The C D comes with a paper that says there are mistakes on it. And you have to go download the correct way. Plus no part numbers makes it hard to follow along.
.thumb.jpg.285aab2af9461fde5633cc620416d162.jpg) I found this diagram for the wood planks. It helps. I almost put it all back in the box and said I am selling this and buying a Dutchess of Kensington by Cris Watton of Vanguard Models. I just have to finish this one and I can buy it lol.
I found this diagram for the wood planks. It helps. I almost put it all back in the box and said I am selling this and buying a Dutchess of Kensington by Cris Watton of Vanguard Models. I just have to finish this one and I can buy it lol.
If it was not for the fact that I will get lots of help here on MSW, all the King of the Mississippi logs here show how it is done. So I decided ,I want a river boat to add to my collection and I am up for the challenge.
But if anyone wants to send me some info on part numbers, I will gladly appreciate it. Even the instructions as well.
And for my first change to the plan , I have lots of walnut planking left from previous builds that I am going to plank the bottom with that because no one will see it but it will look nice. Then I will have enough planks for sure.

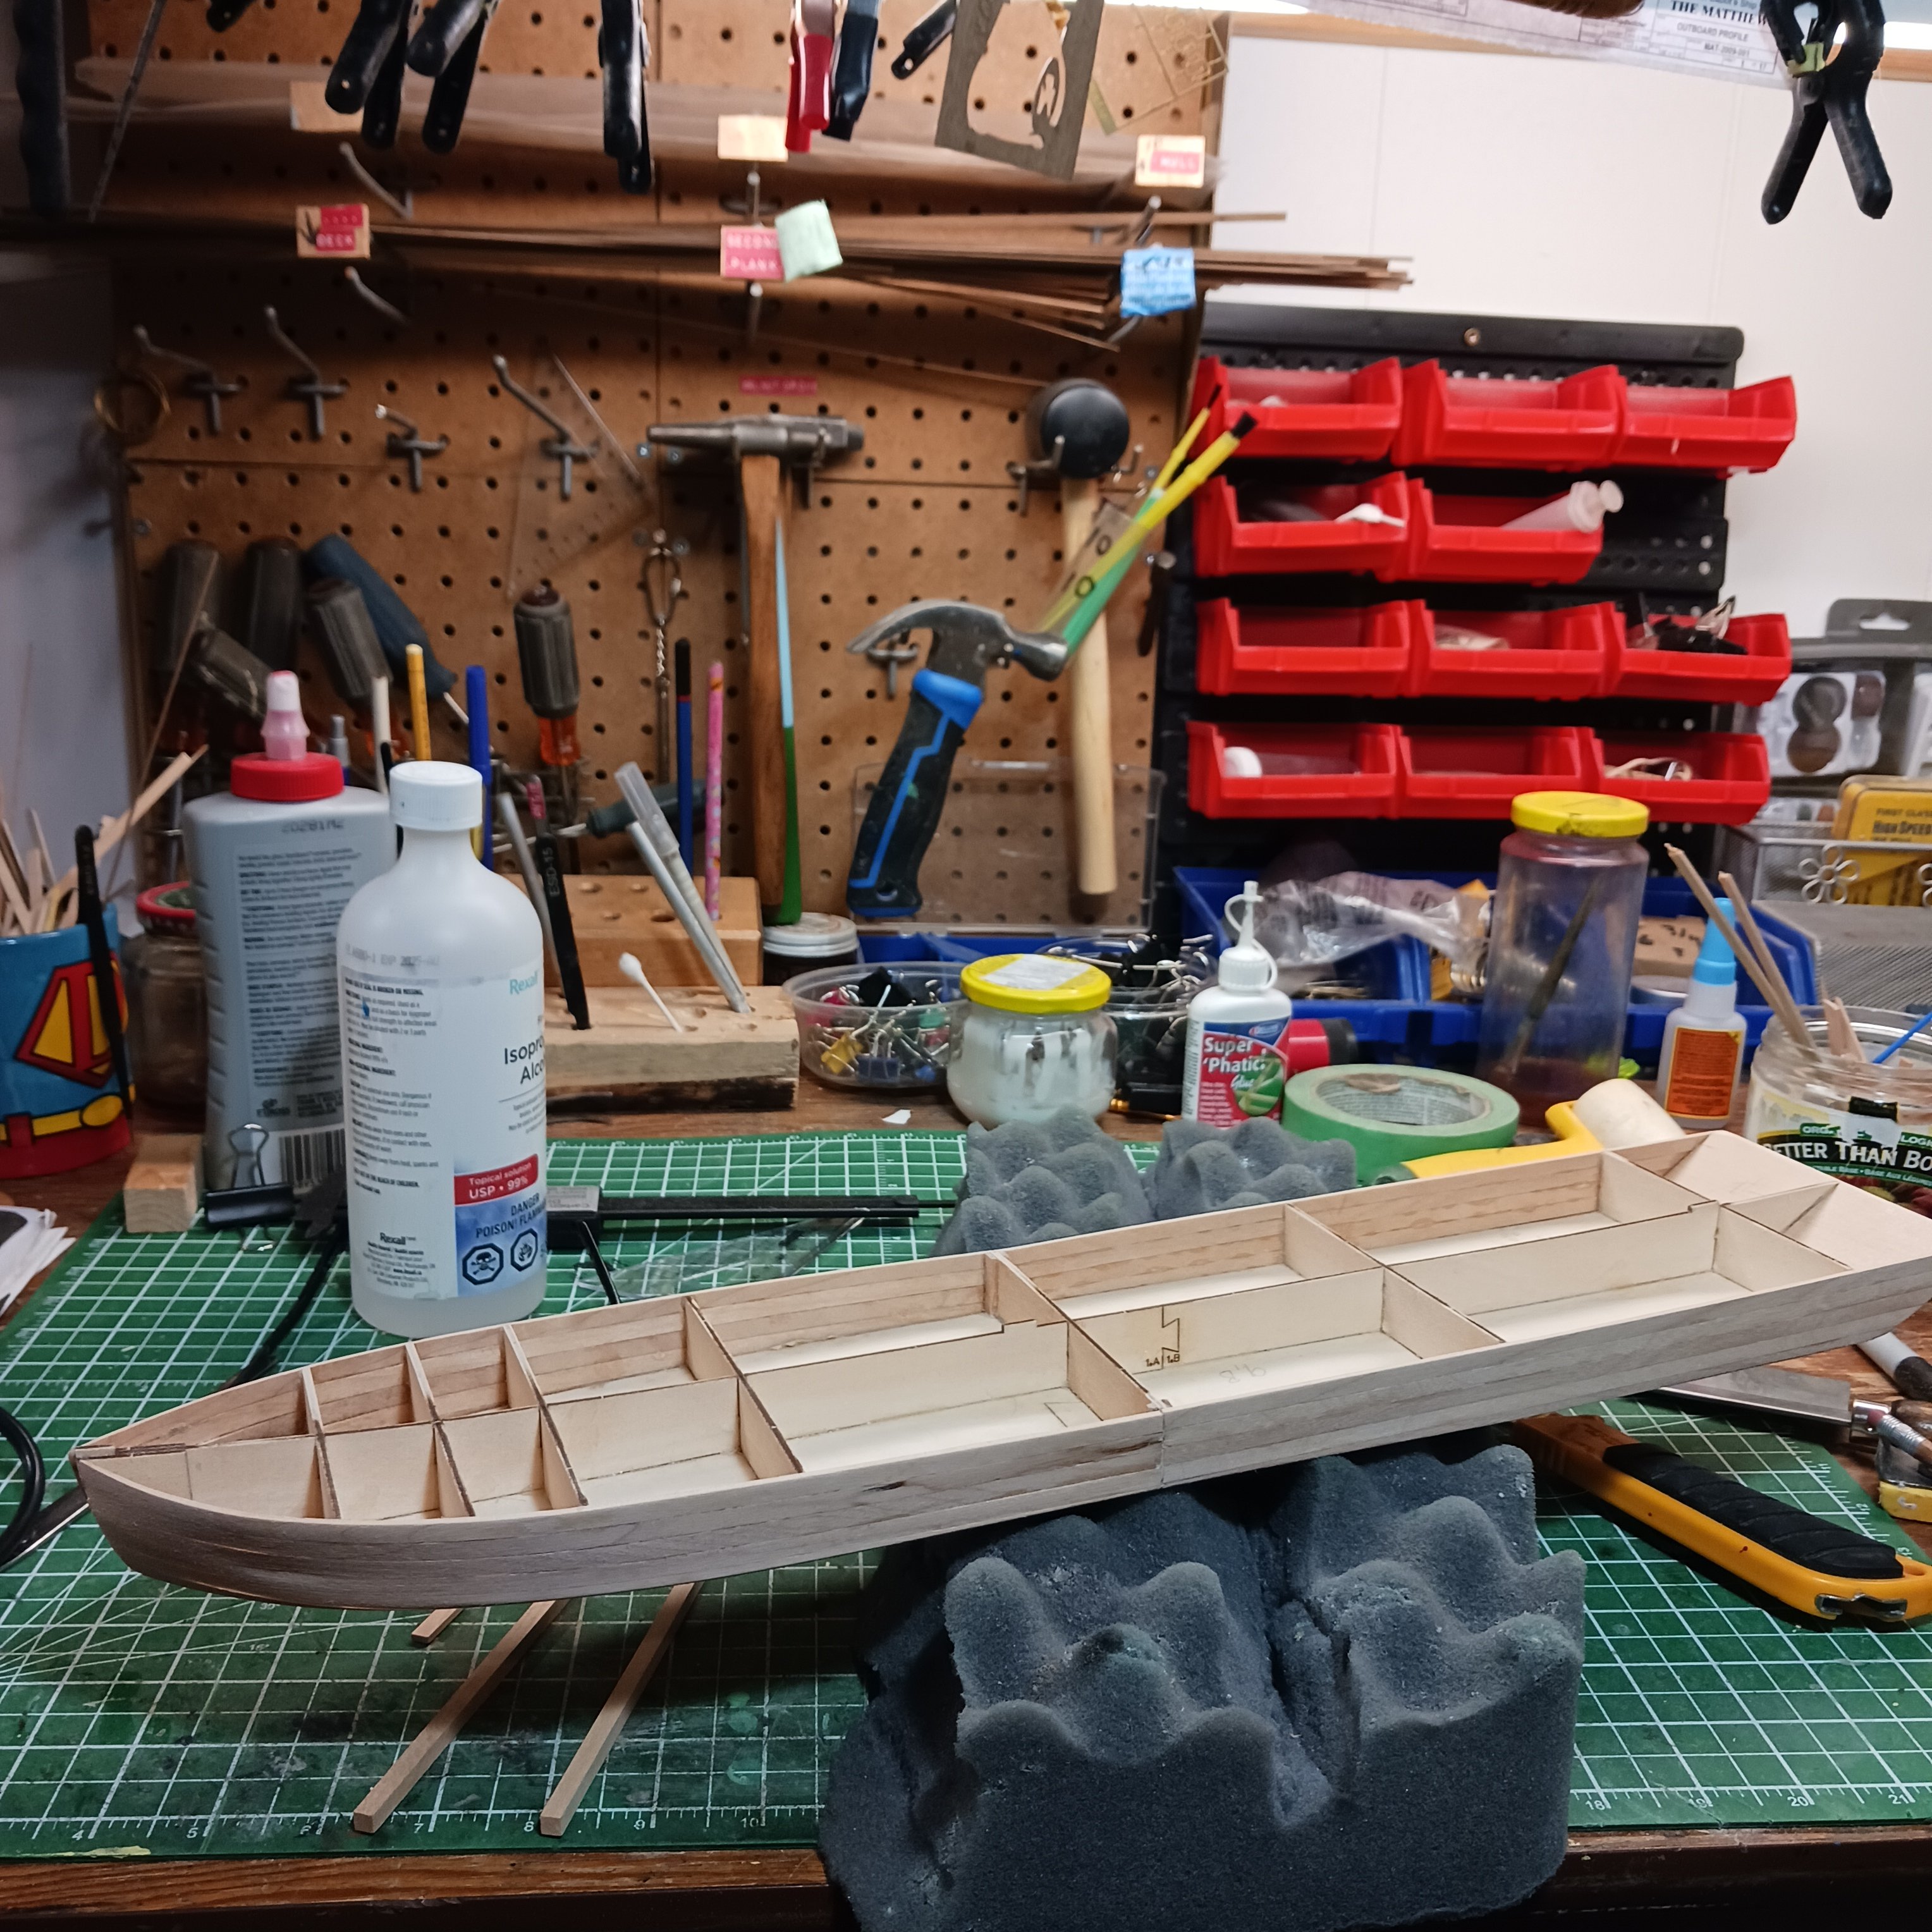
So now it is time to start glueing the hull together. I will square up all the bulkheads and flip it over and start the planking.
Tally Ho on to my next build, wish me luck, I am going to need it on this one. Lol 😆.
Bob M.
- John Ruy, Bob Fraser, Keith Black and 8 others
-
11
-
-
-
Last night the First Mate and I discusse weather to display it with the oars stoed or on the water. We decided that if I don't have any crew rowing the boat, we should stoe them,it looks better. A few members agreed that they would look better with oarsmen. So I will look into getting them later. So I am going to mark this finished, but with the option to revisit later to tinker with it.

This is were she will sit for most part, I may move it around a bit.
Thank you all for your thoughts and advice on what I should do.
Thank you MSW/NRG, helping me learn how to build ships.
Thank you for all members who followed along and encouraged me along the way.
Thank you everyone. I just love modeling,
time to start another model today. lol
See you on the next build. Your very great full shipmate Knocklouder.
Bob M.
- Keith Black, Louie da fly, Thukydides and 5 others
-
7
-
 1
1
-
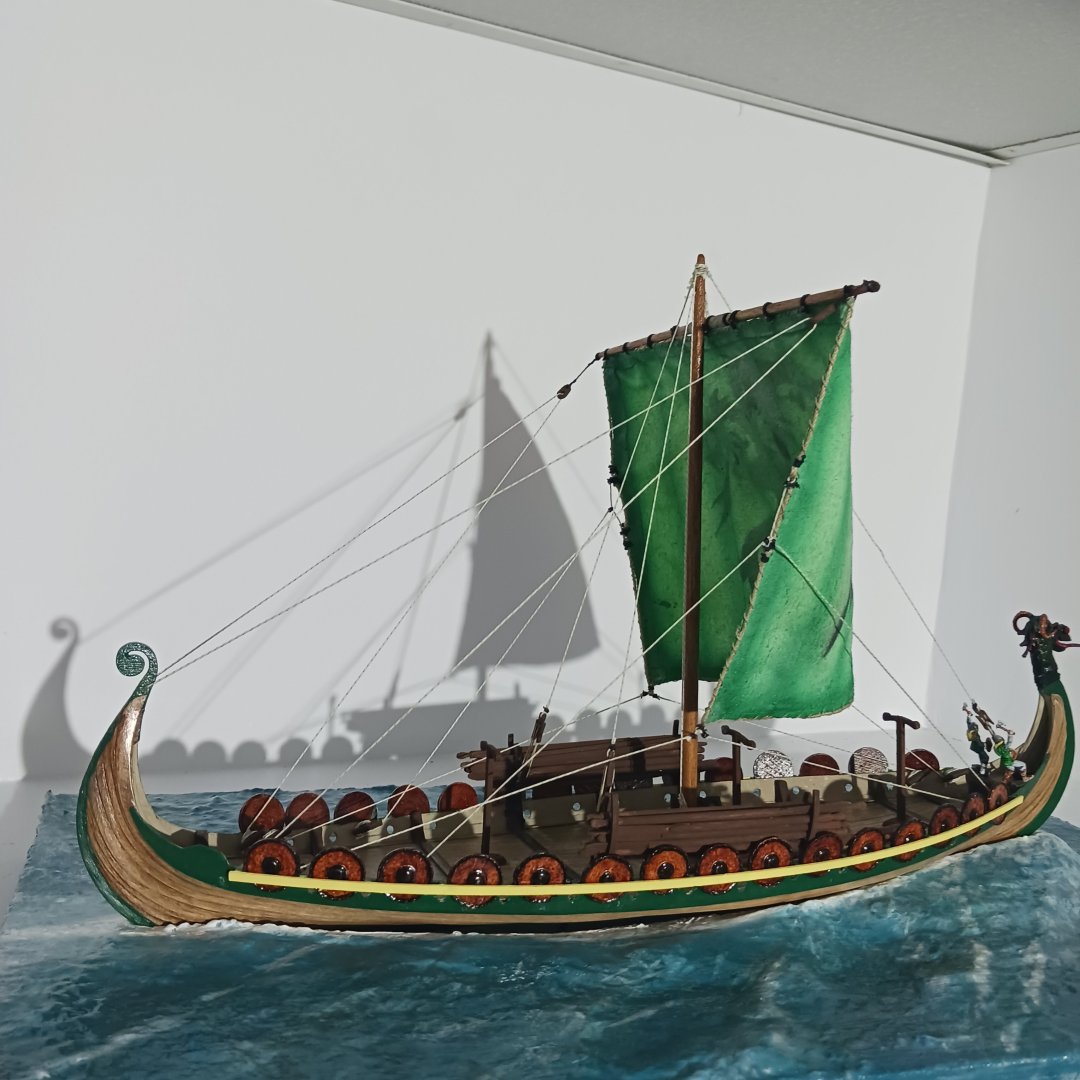
This journey is almost over, just a few things left to do, but not sure of which way I like to display it. With oars stoed or in the water. So most likely just going to let it sit for awhile then come back and add some extra stuff.

I may just paint the background , some sky, birds, fish jumping 😀 penguins maybe.

I have to wait a bit to completely finish, but it only touch ups and a bit of paint, so almost finished. Finished enough for me to cleanup the shipyard and start another model.
Thanks for looking. Hope it was fun, I had a blast. Looking forward to The King of the Mississippi River Boat, looks like a lot of tinkering, neanderthals love to tinker lol
Bob M.
-


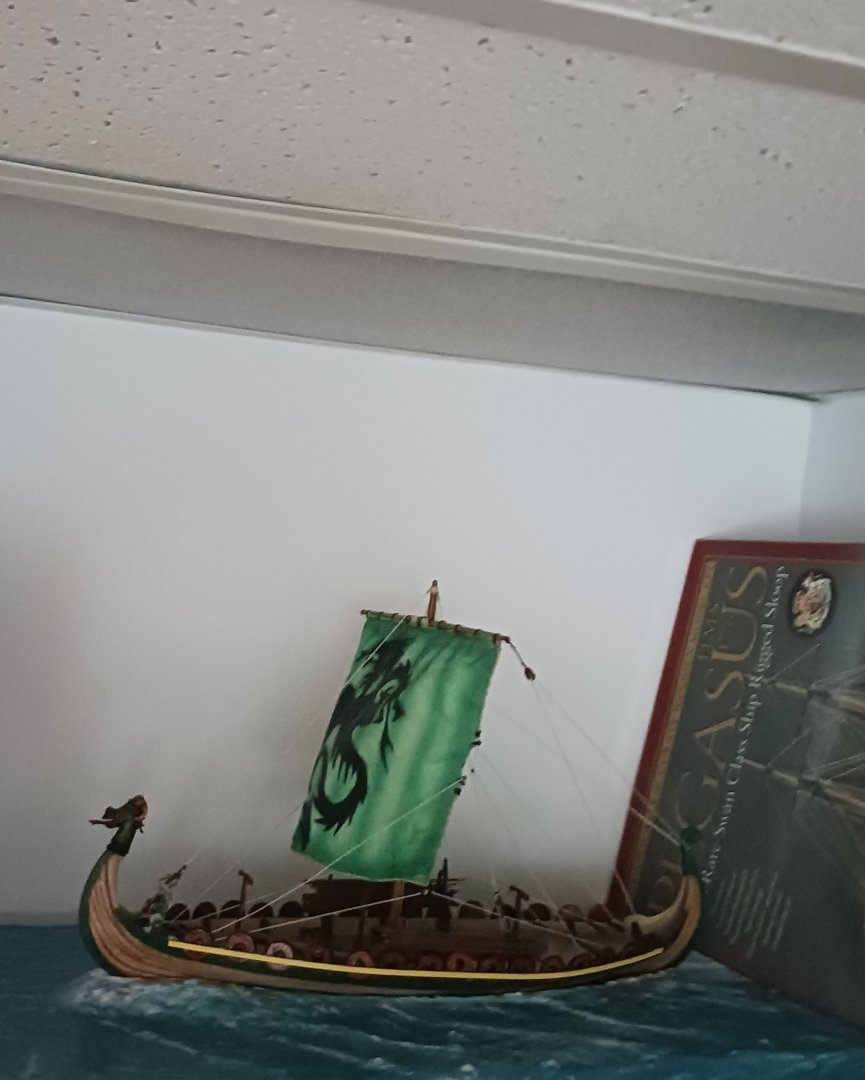
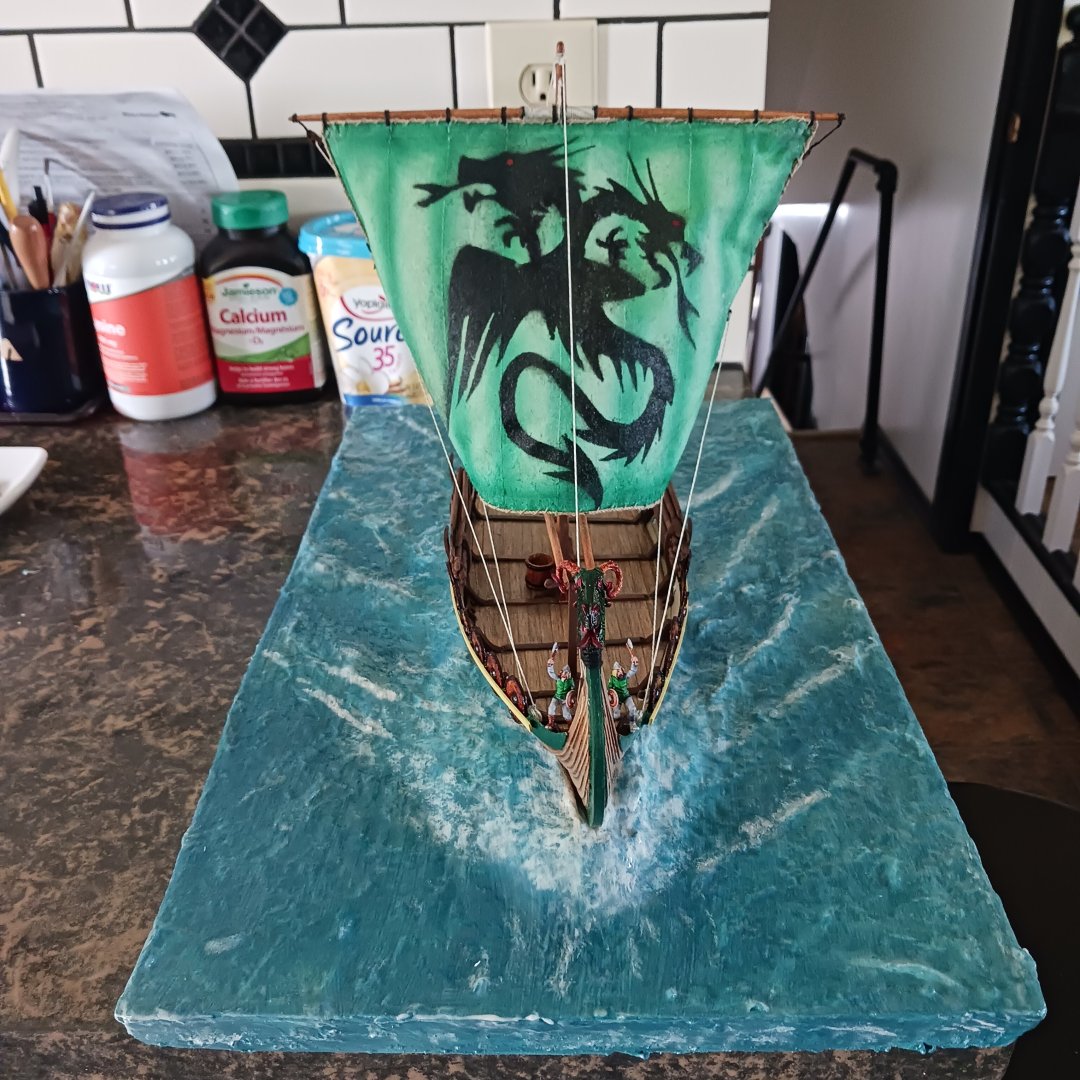
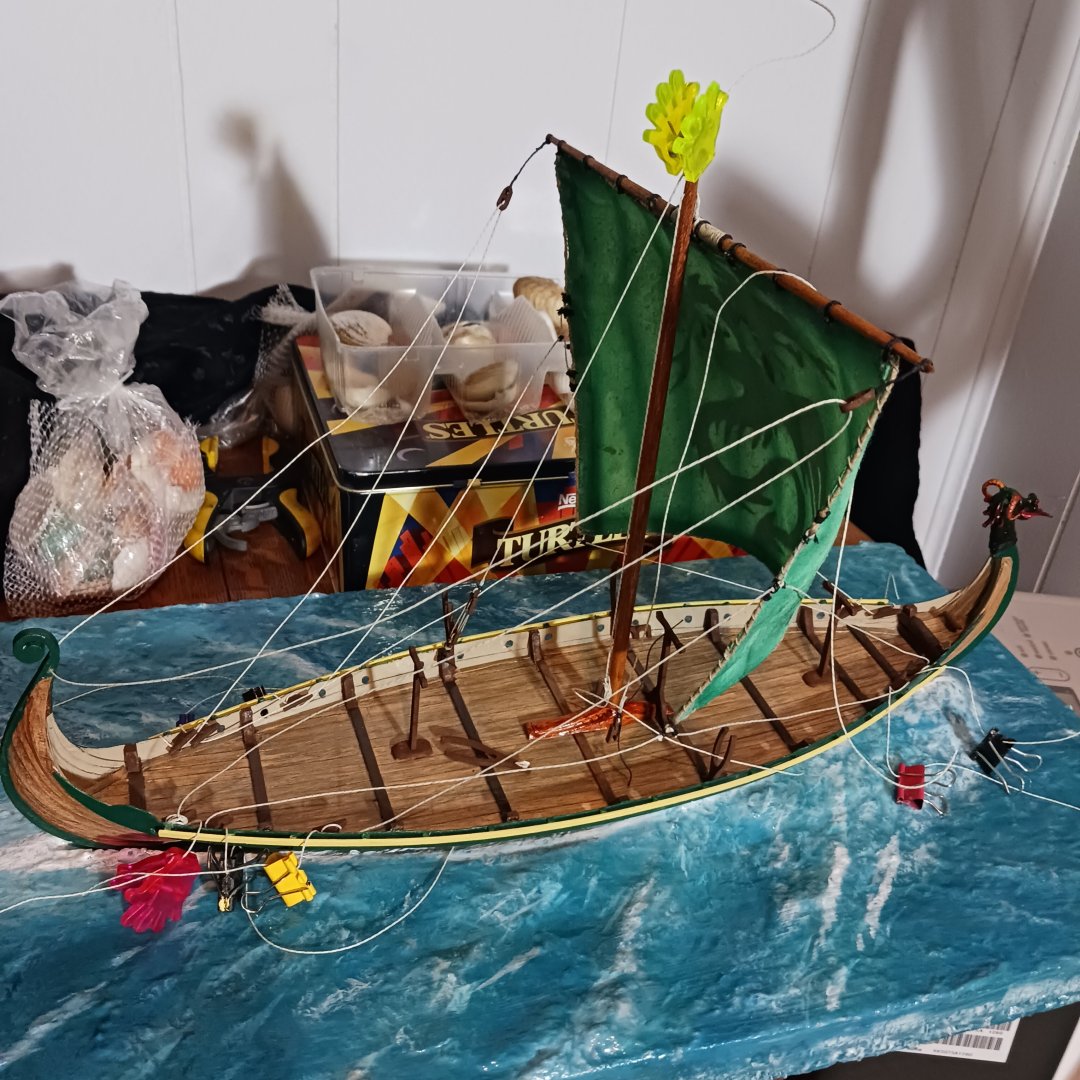
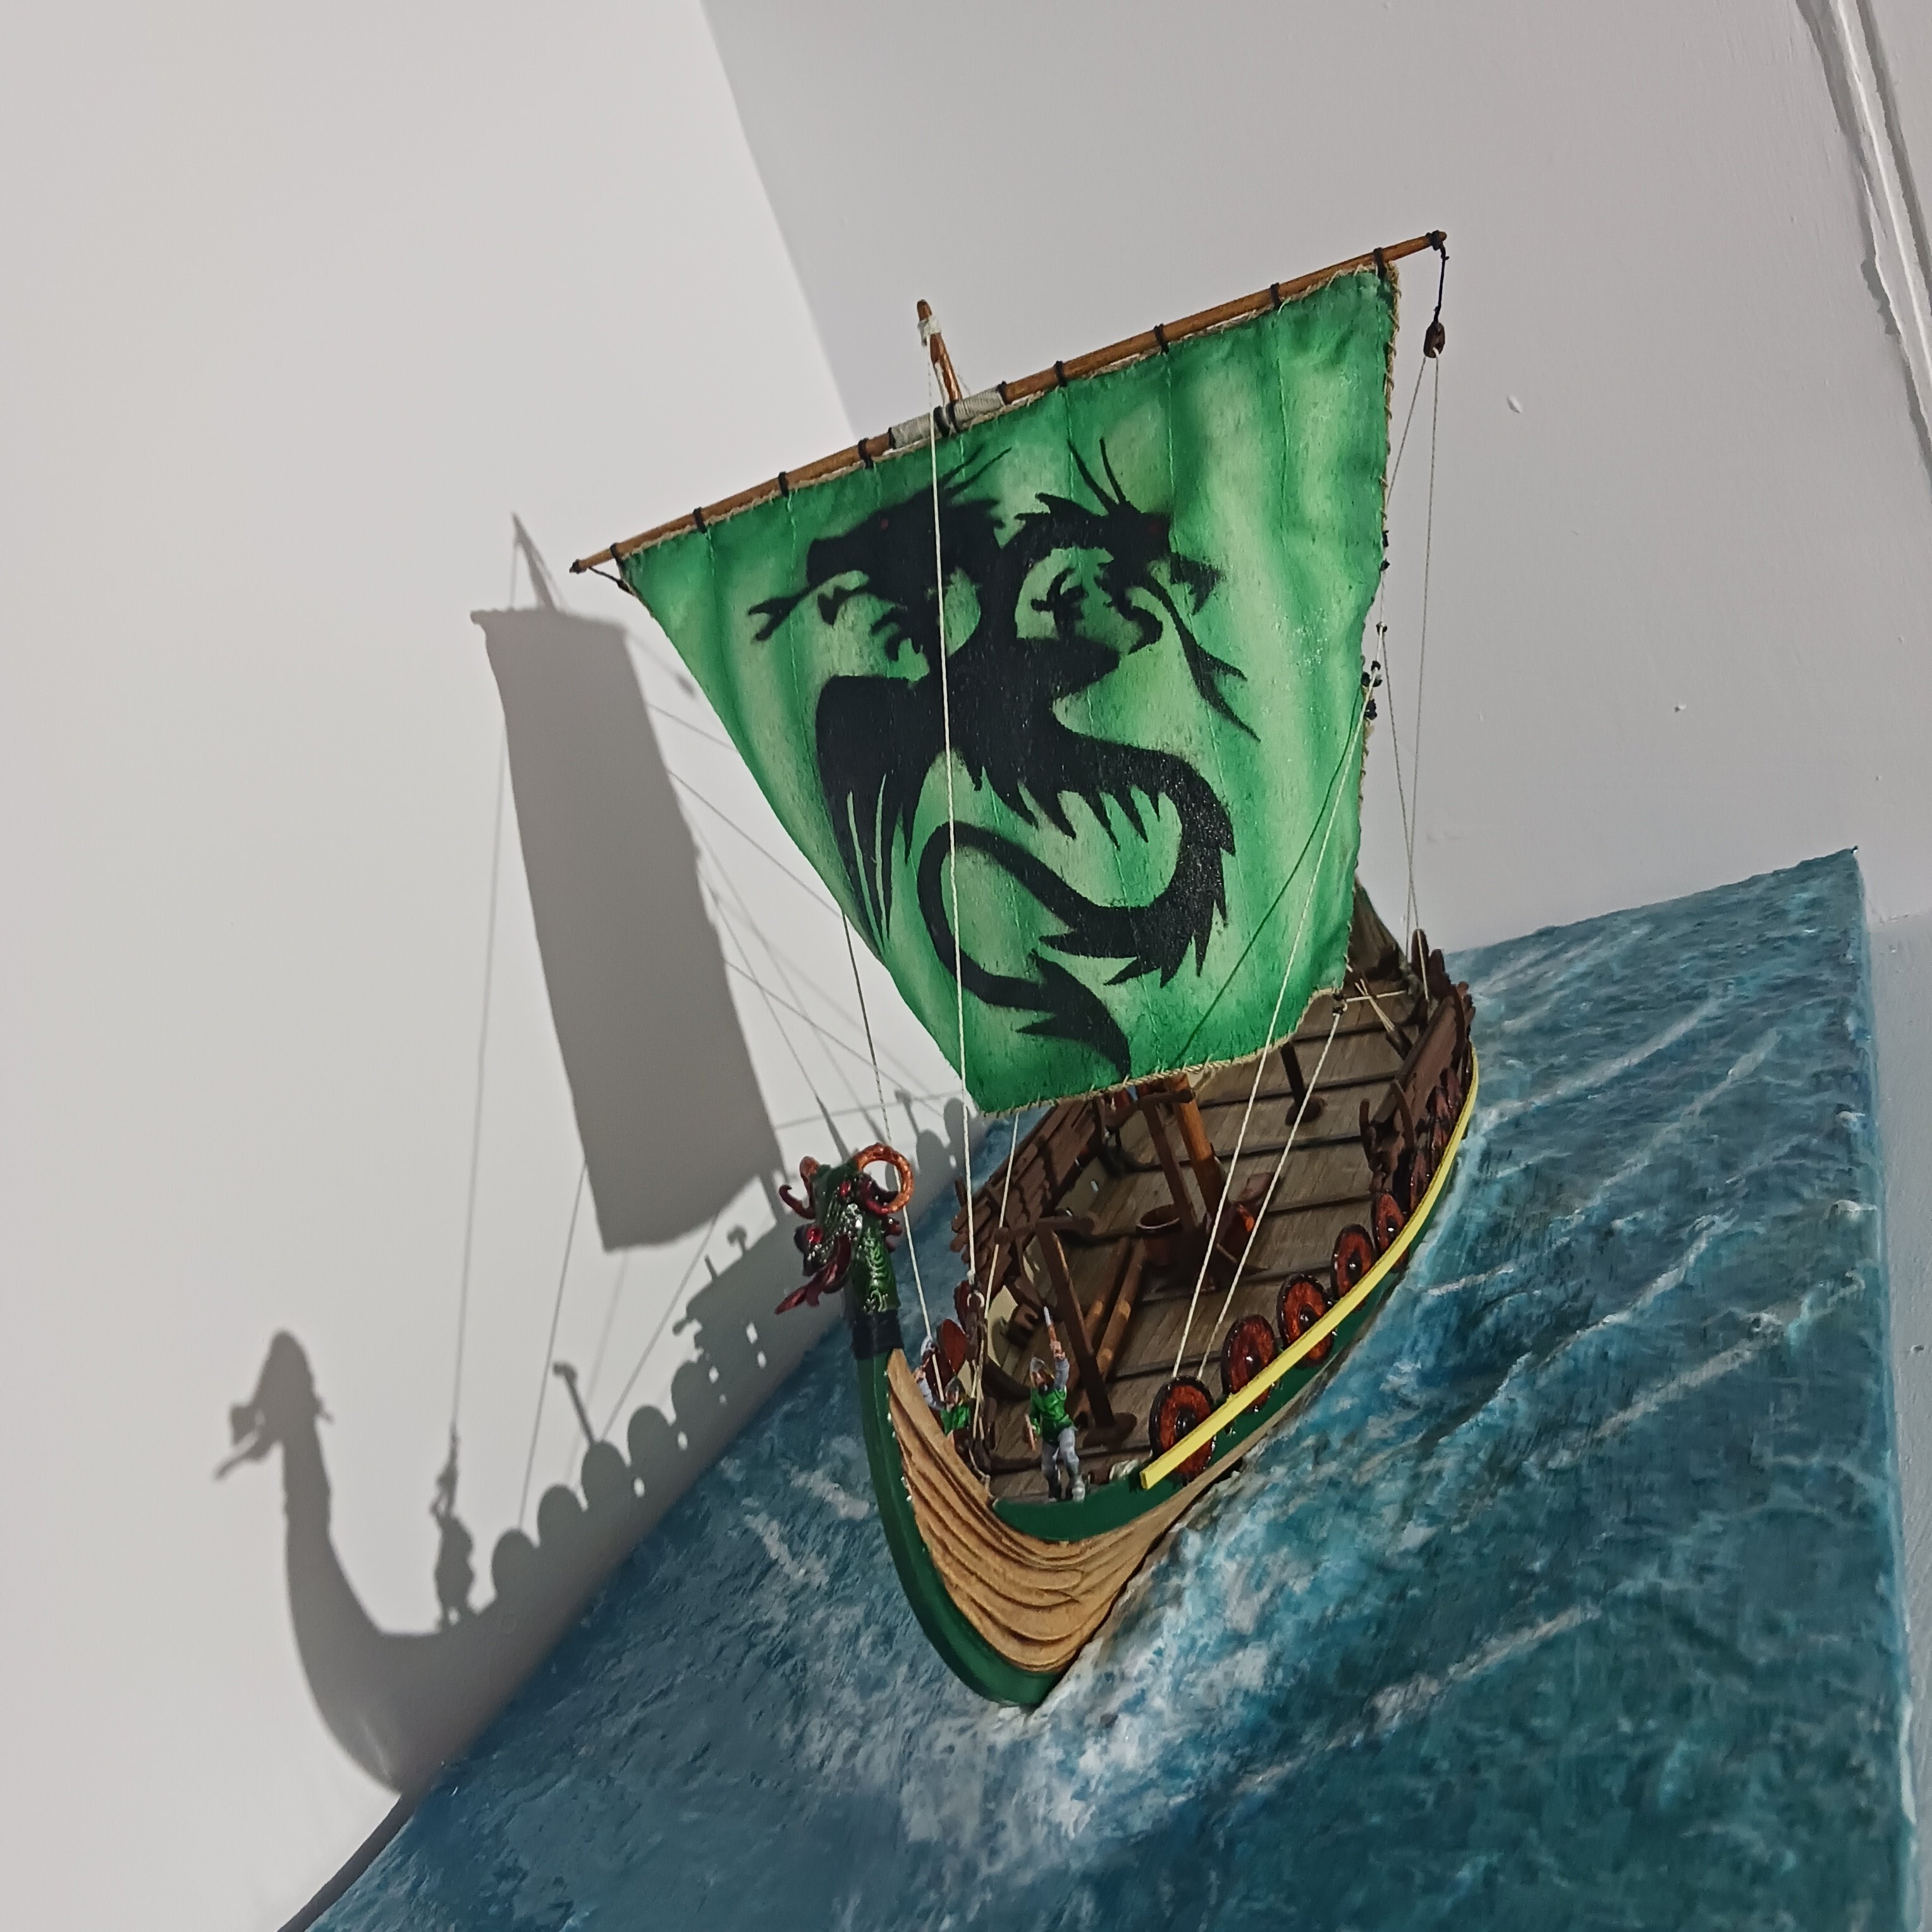
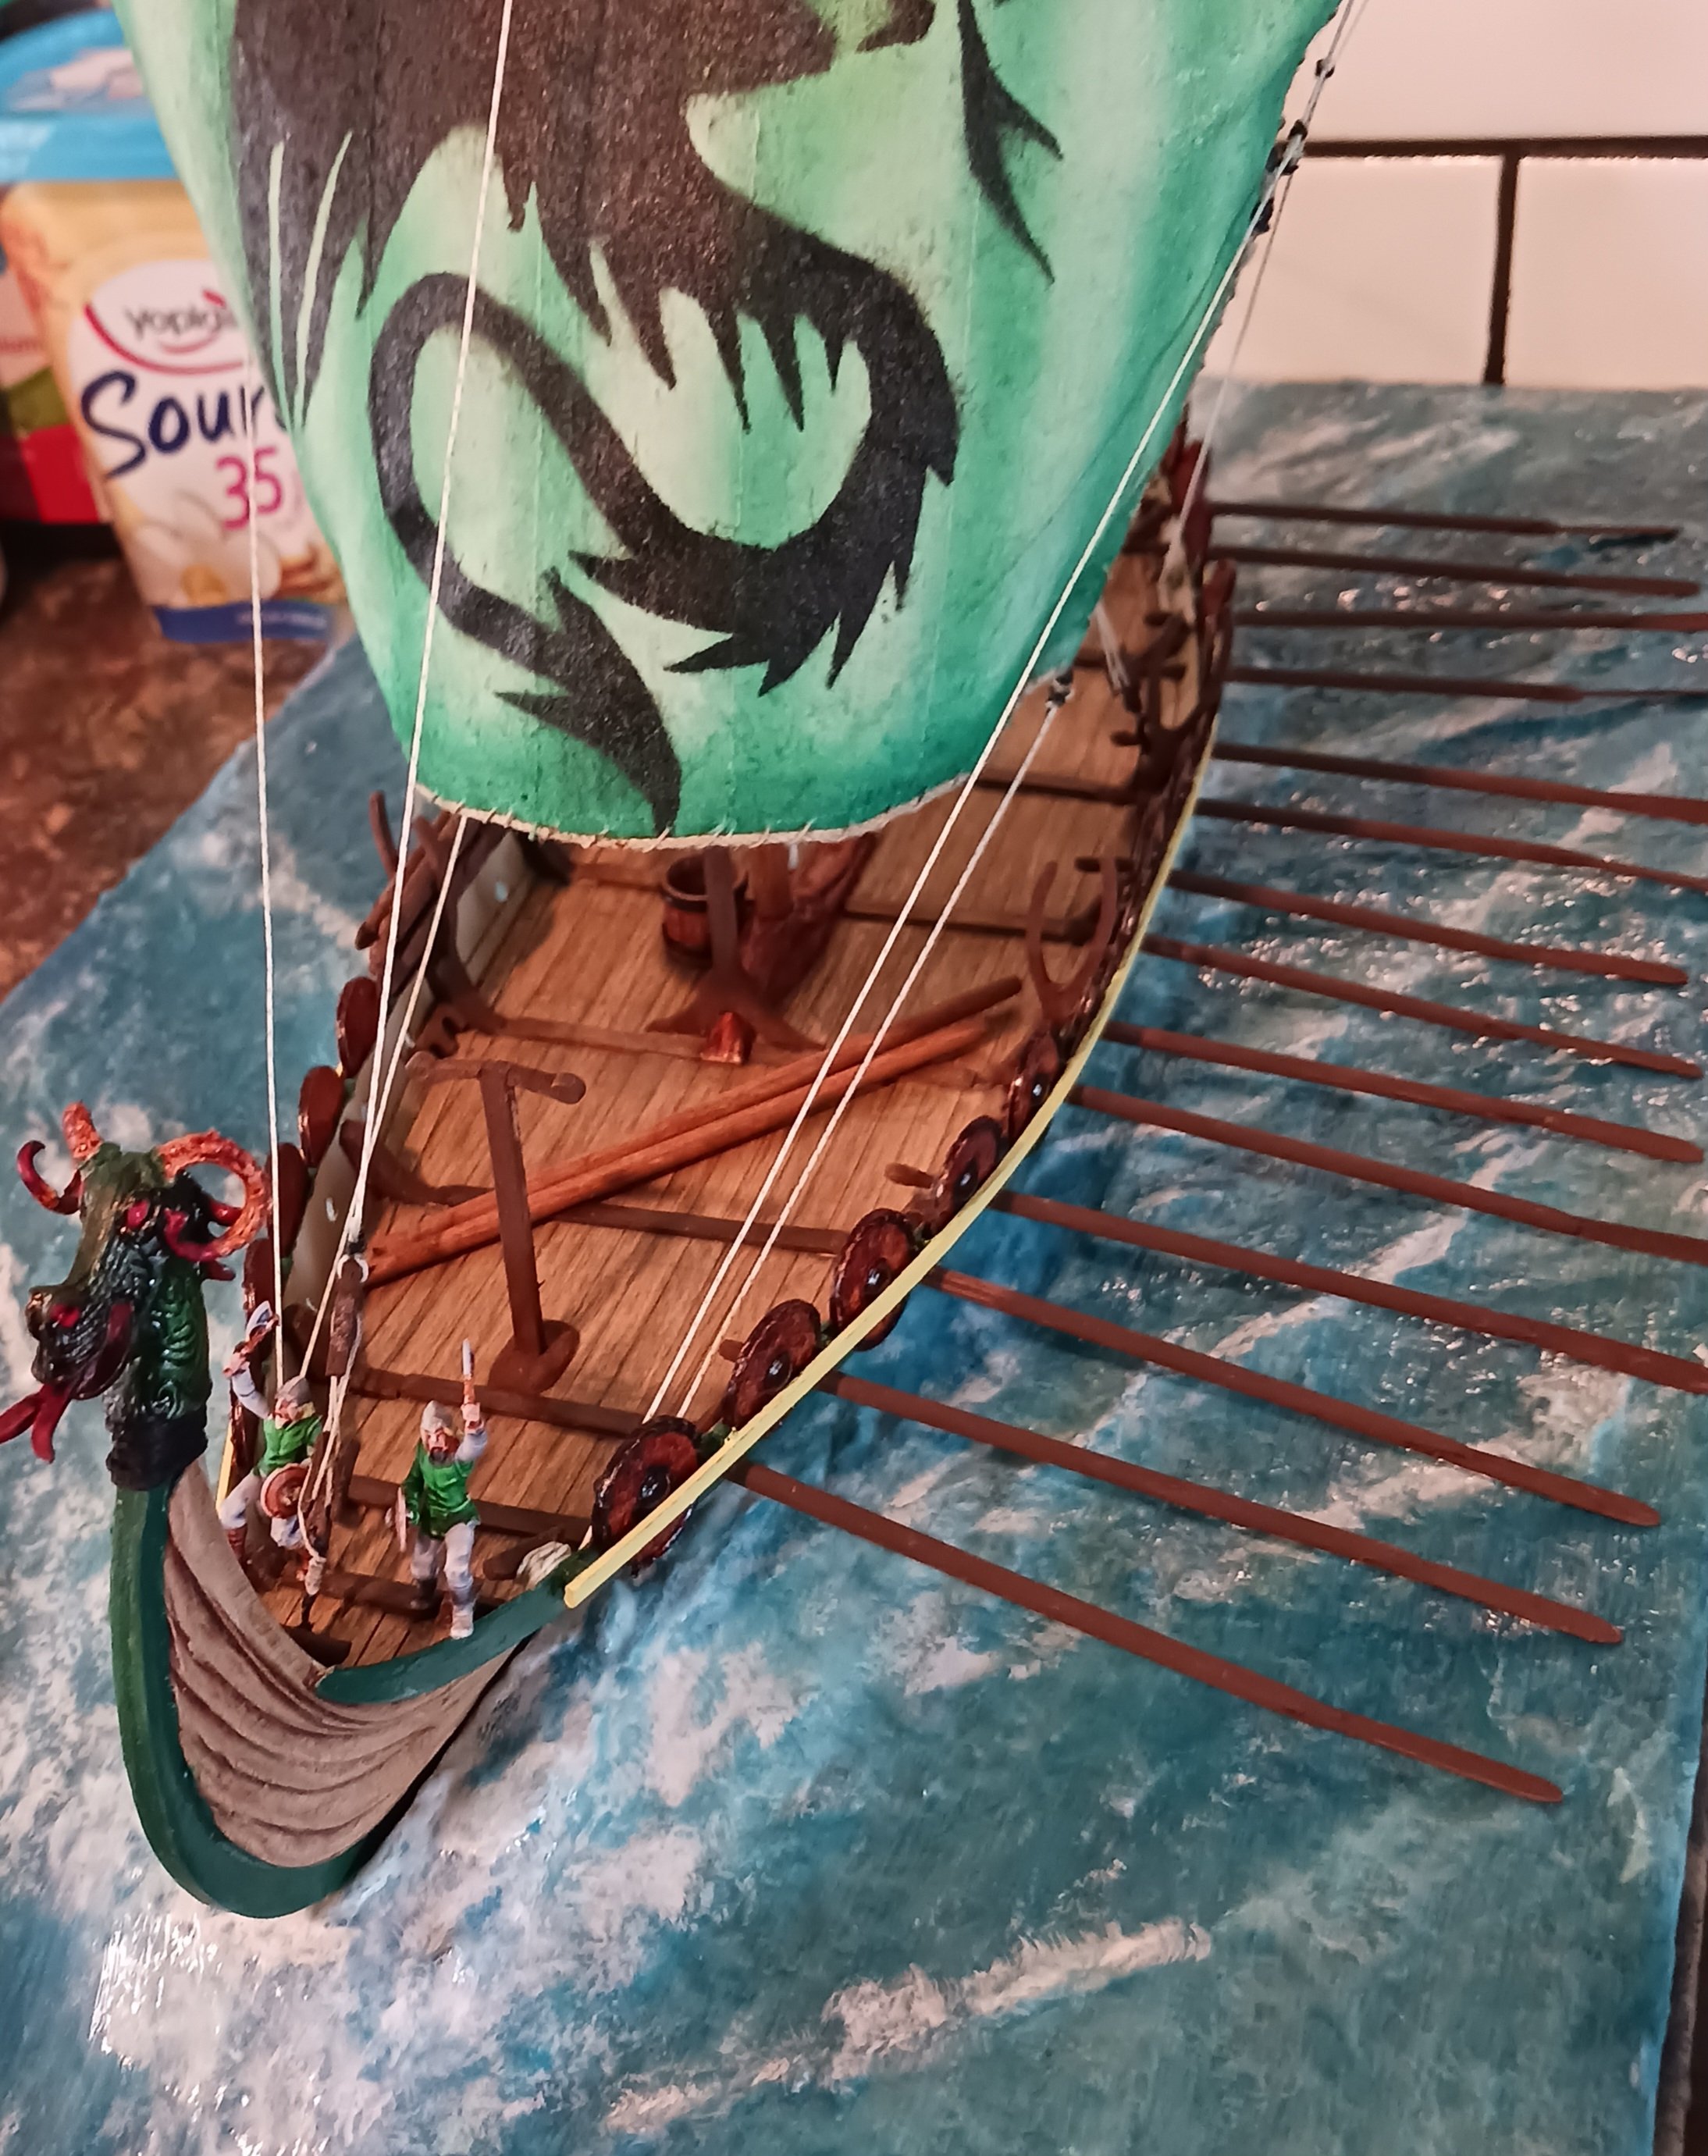
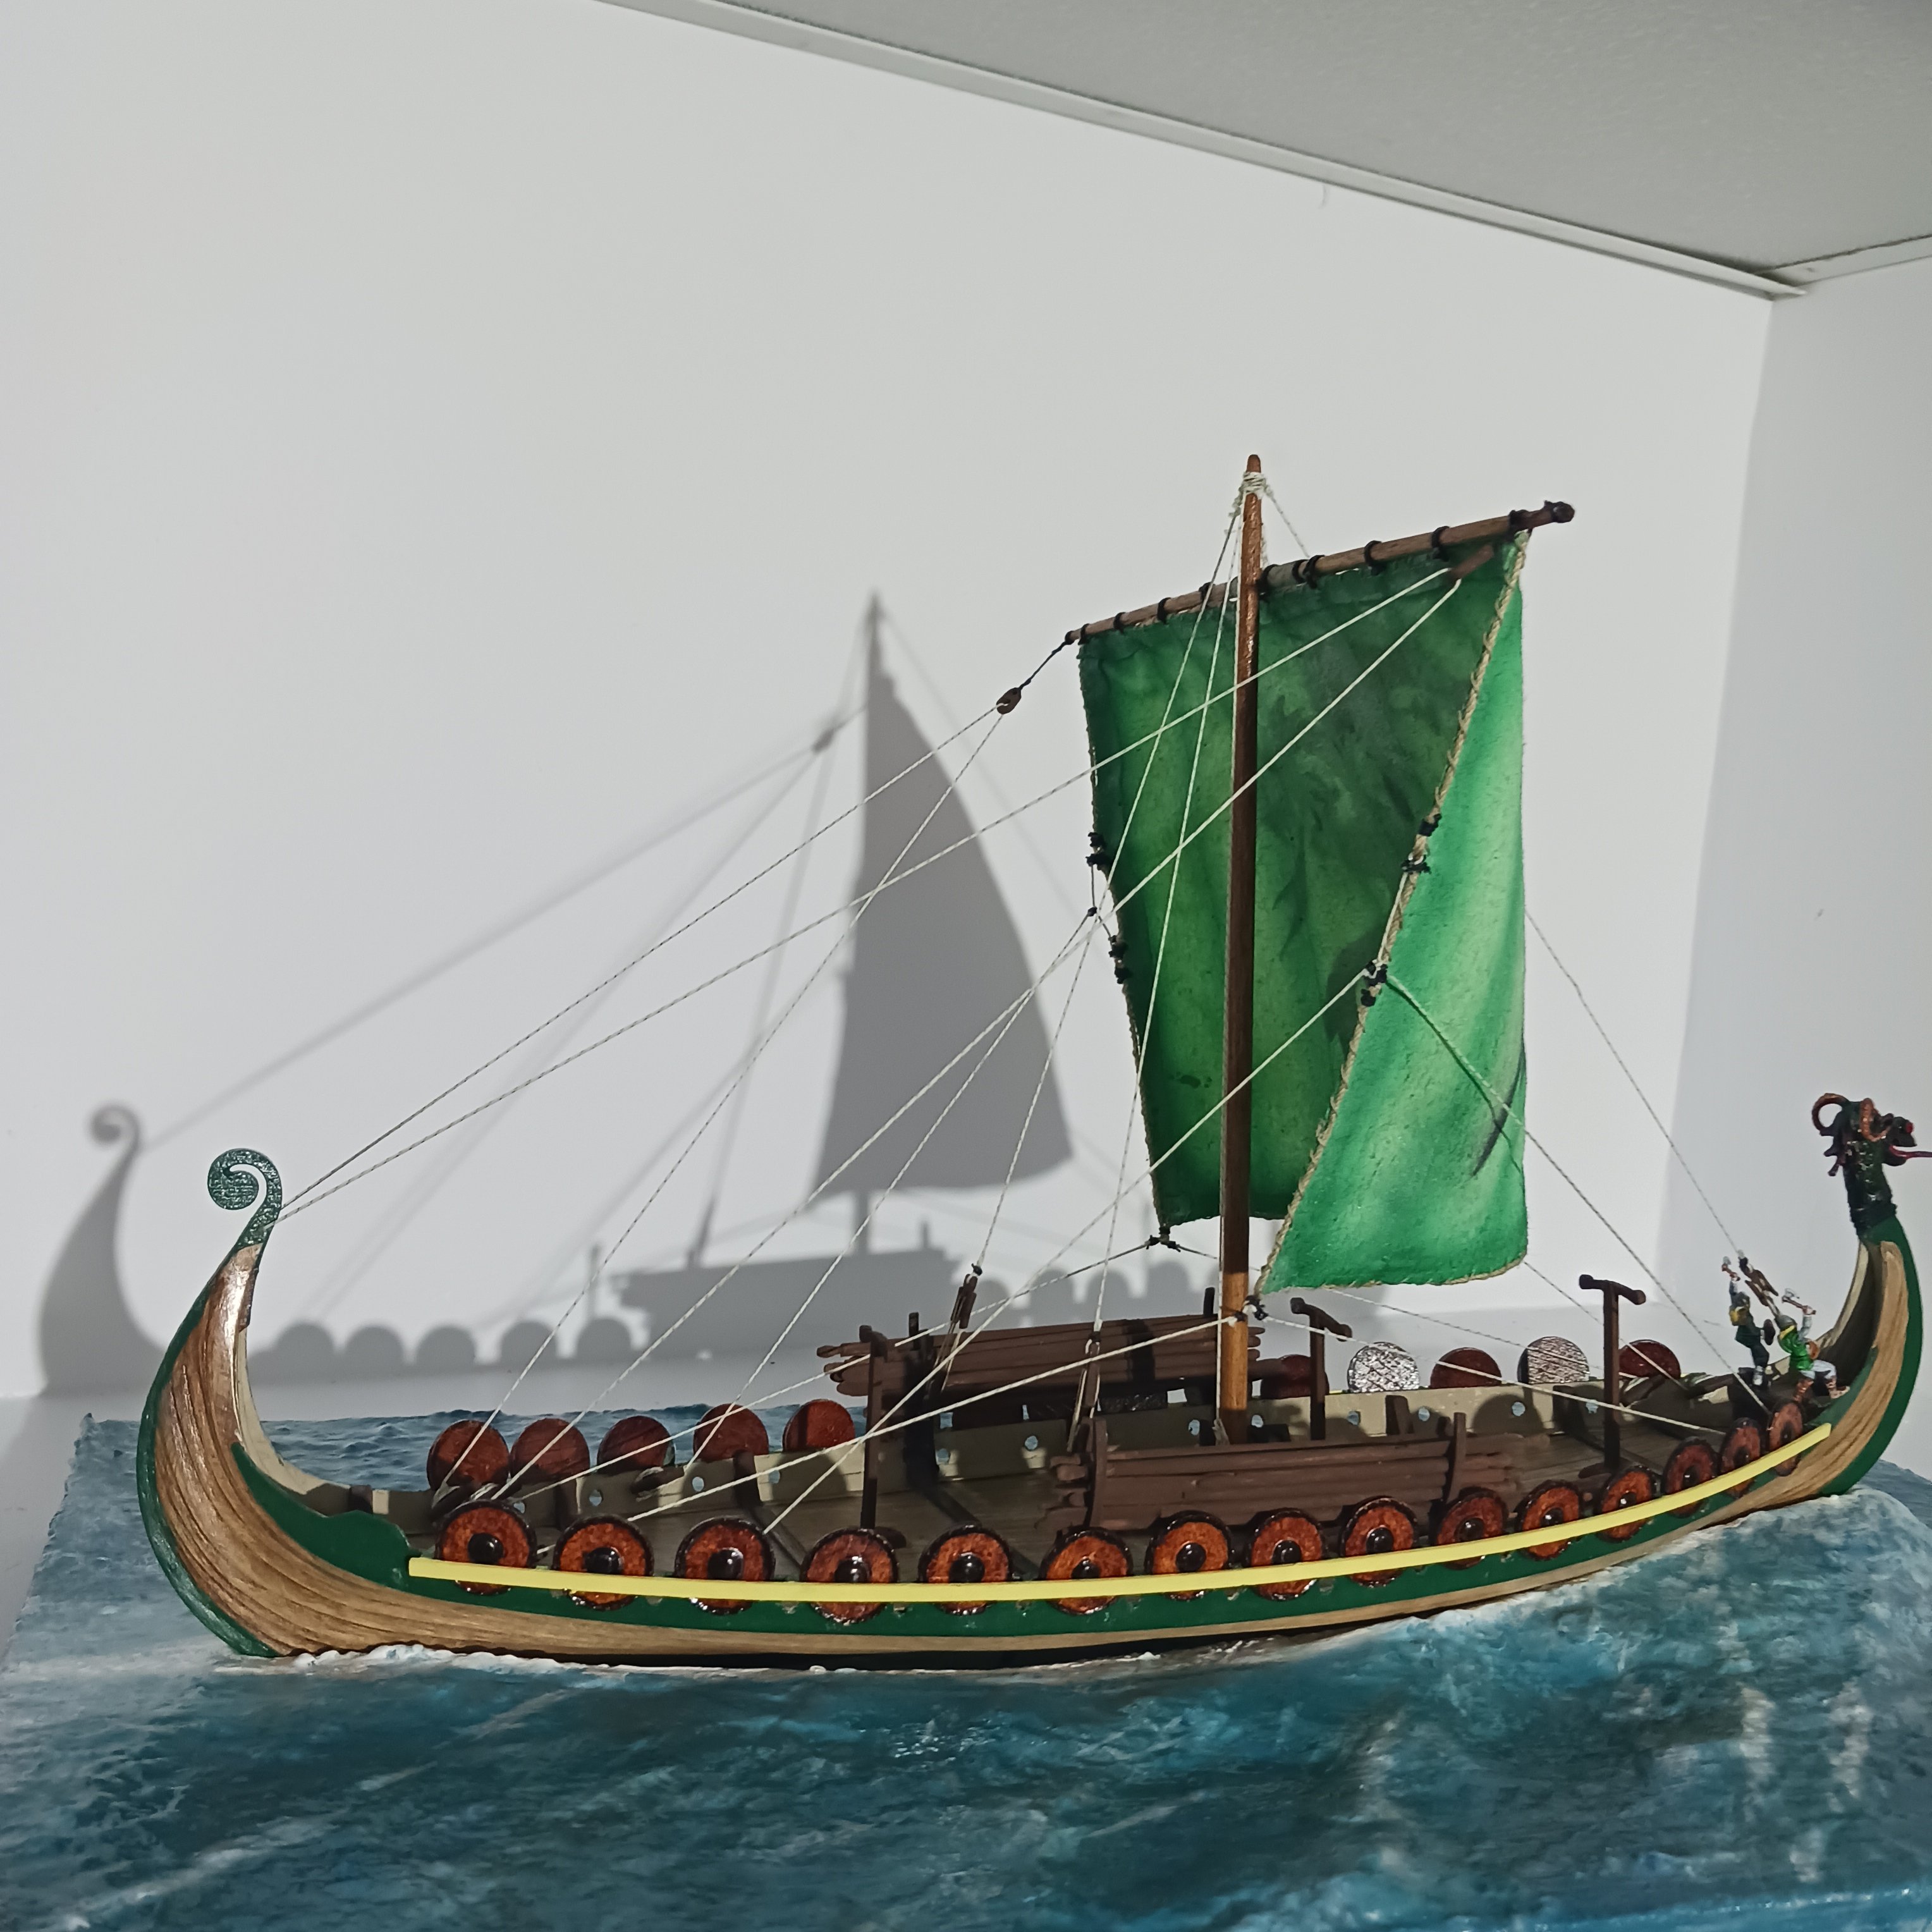
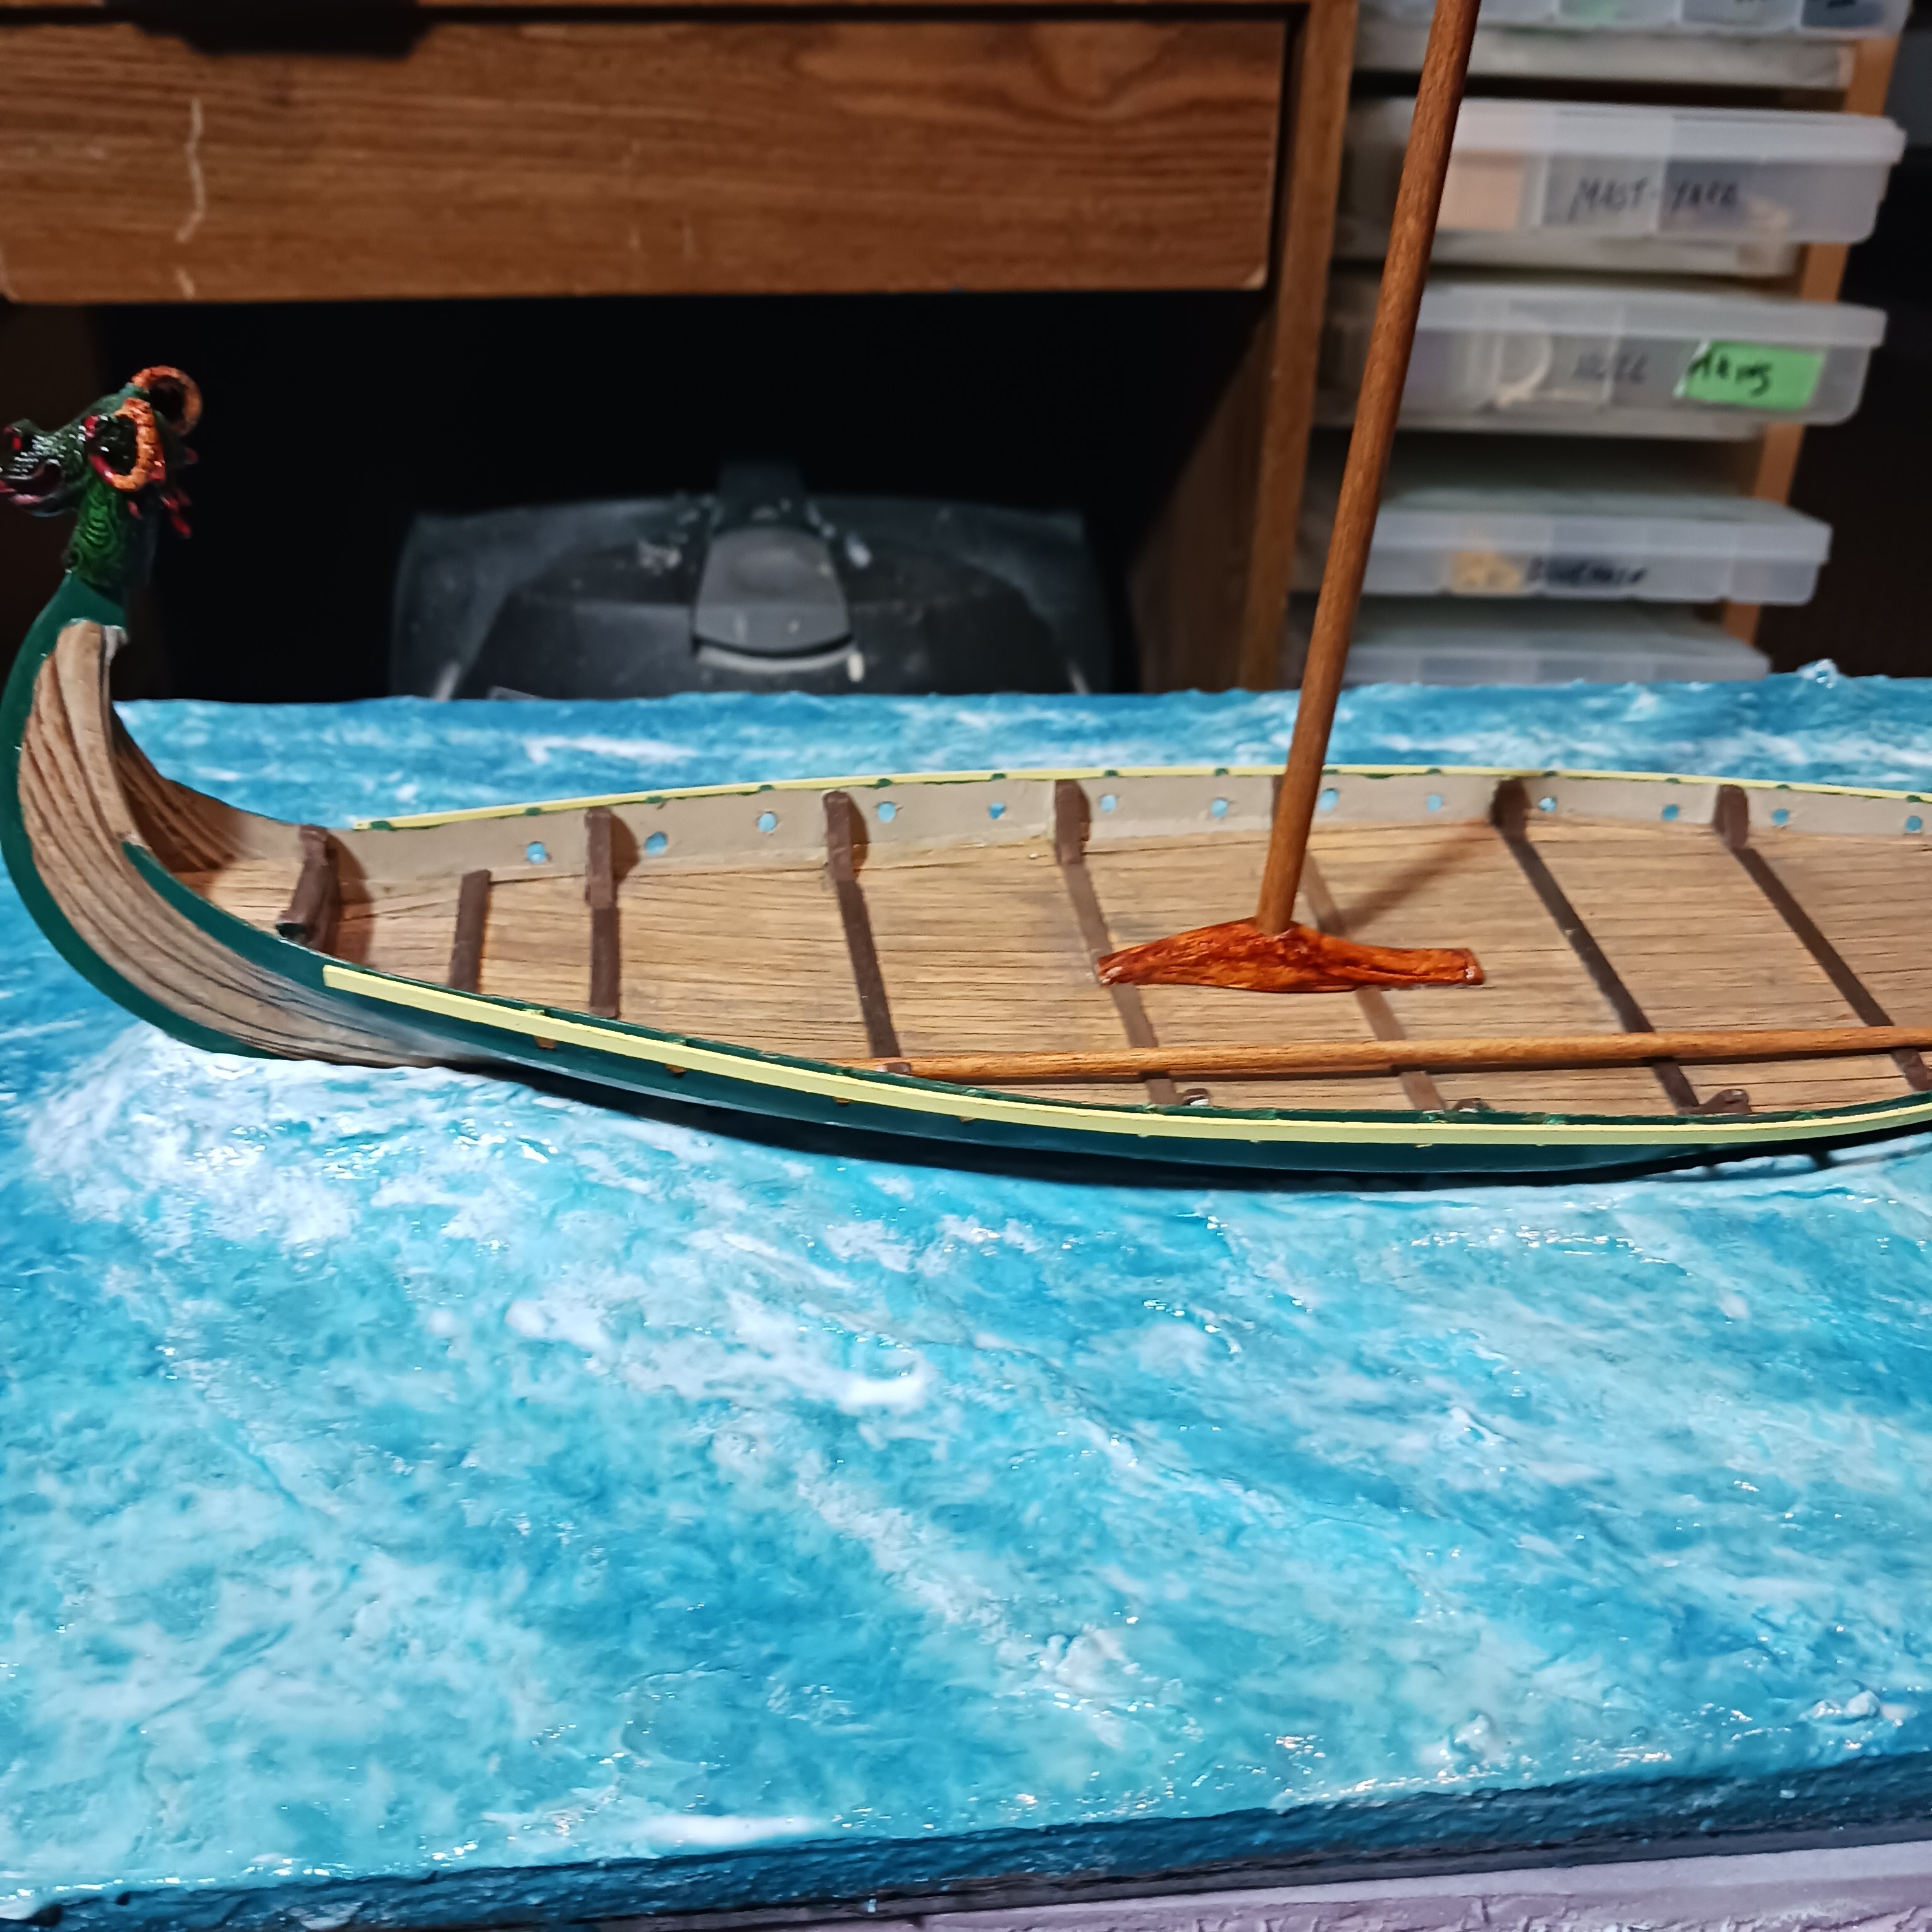
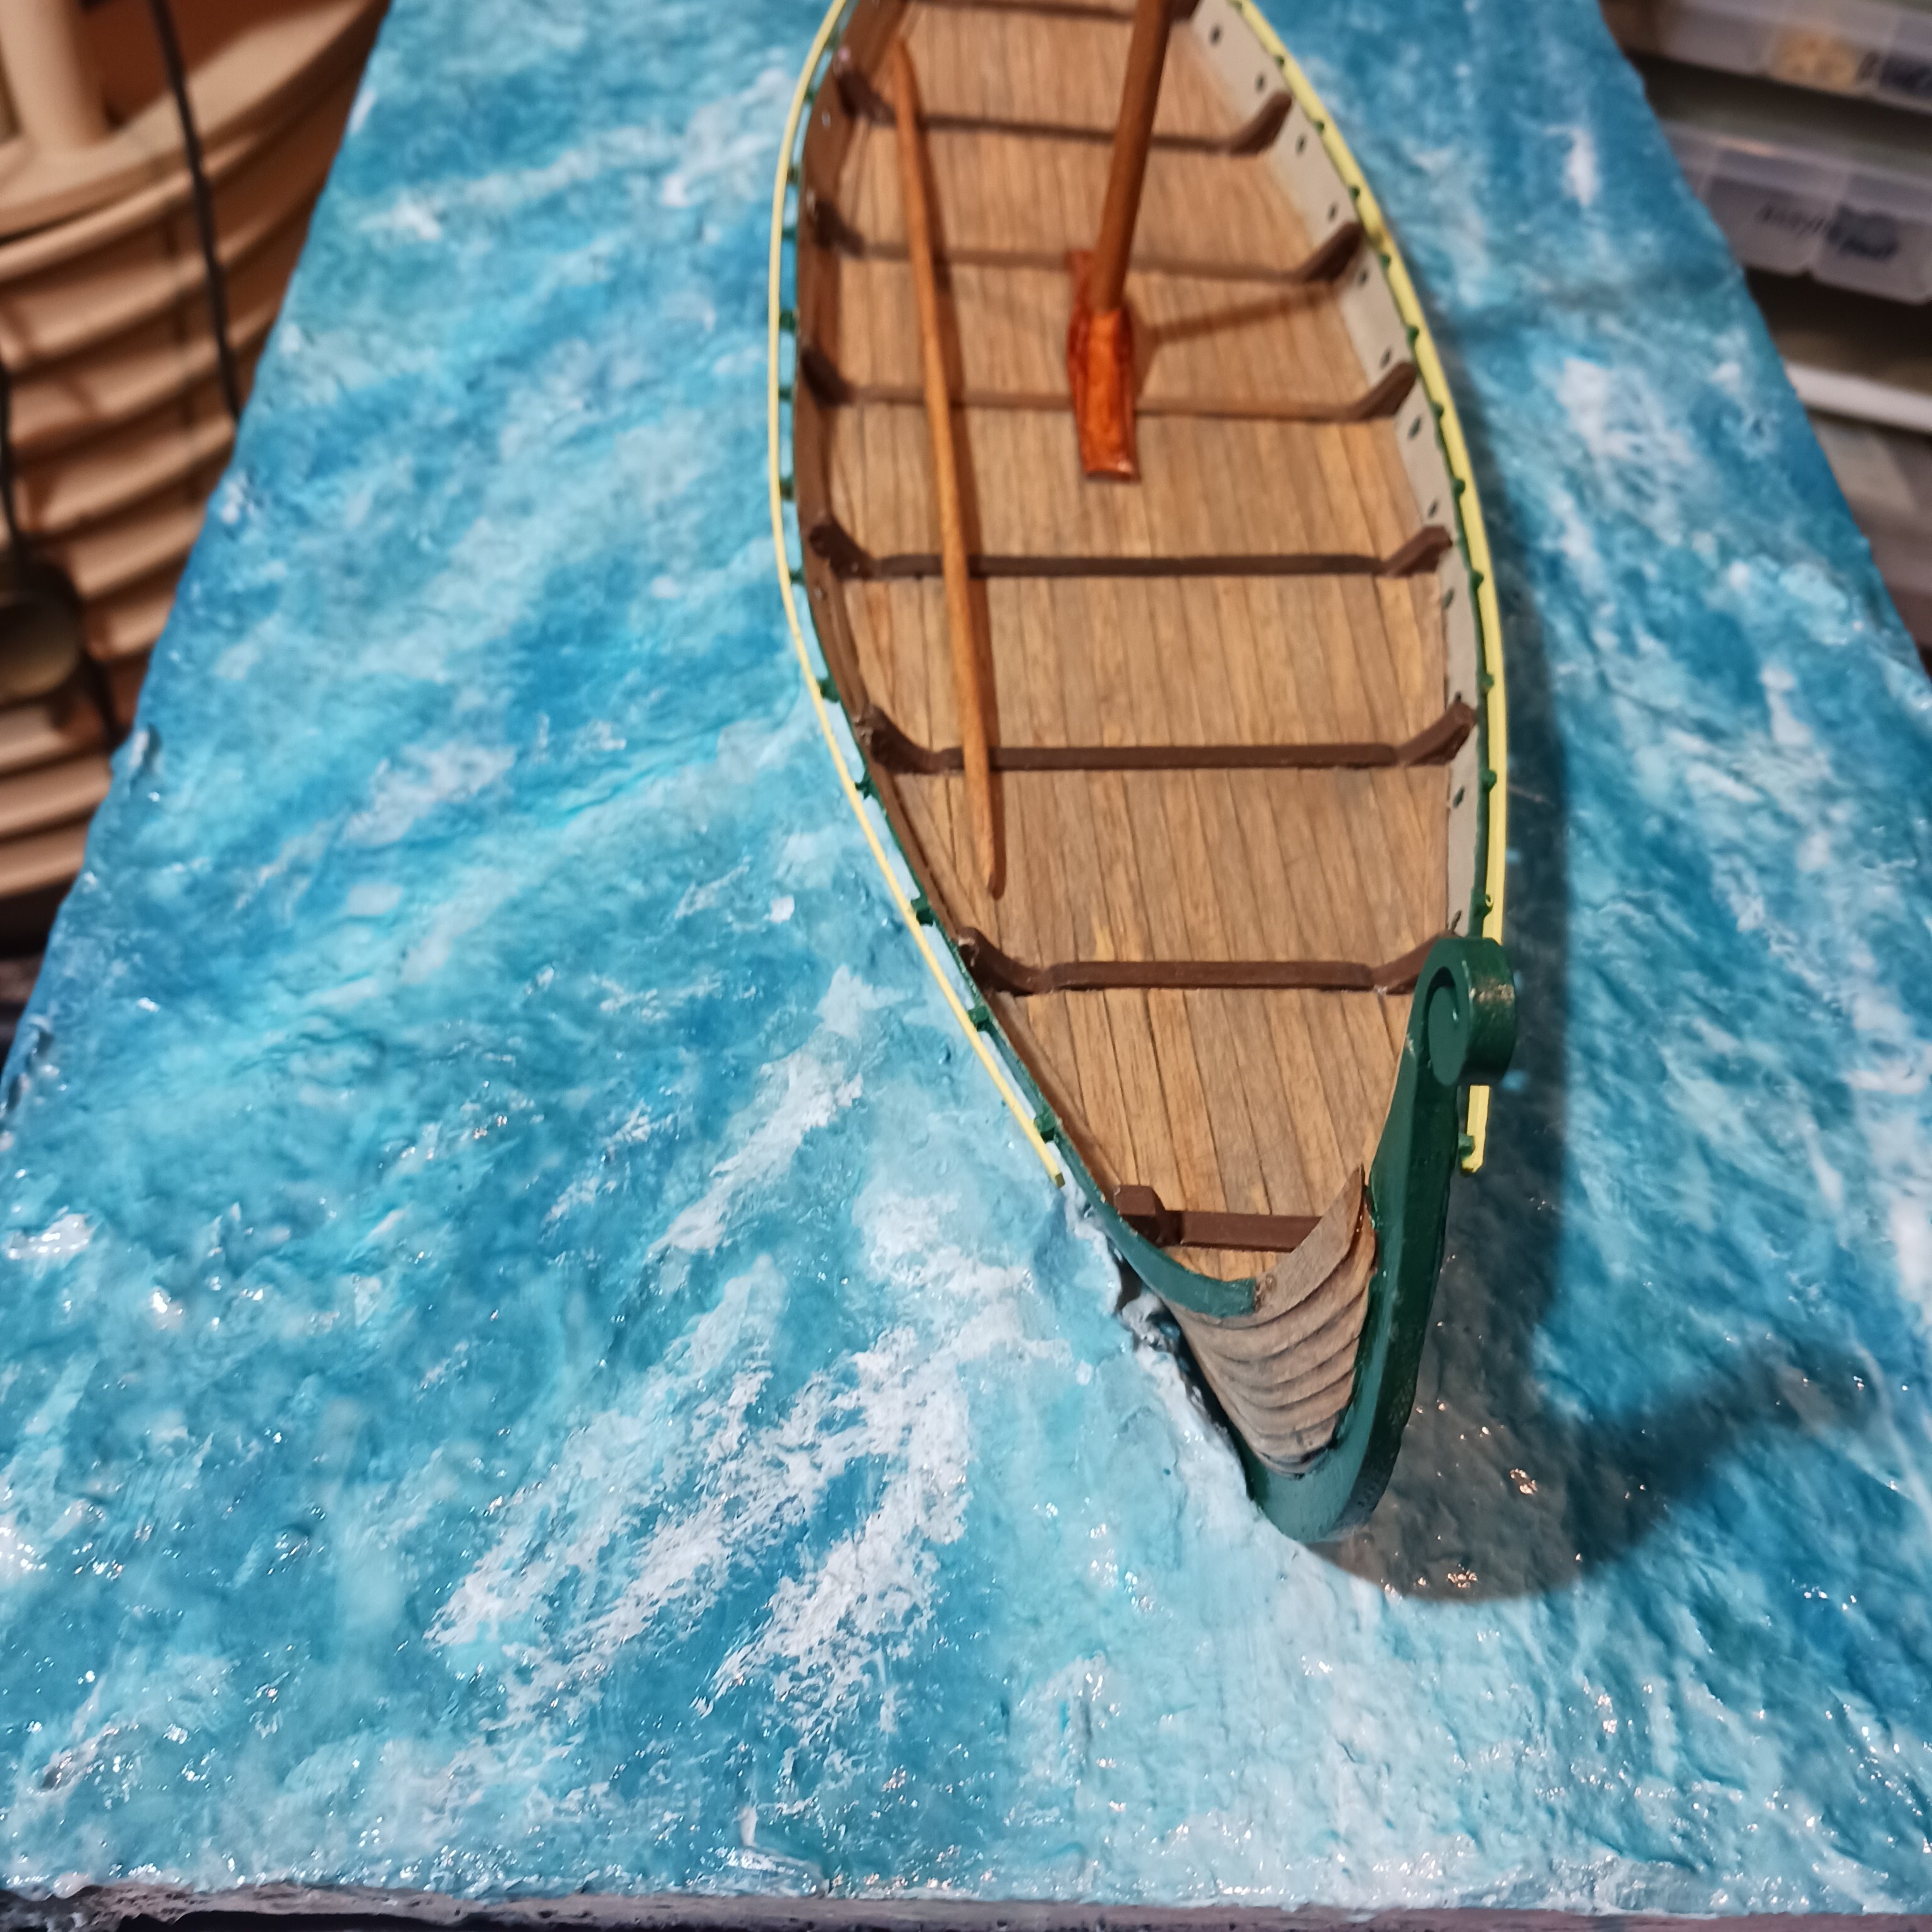
Adding highlights and a bit of color, but happy with my first attempt at water.
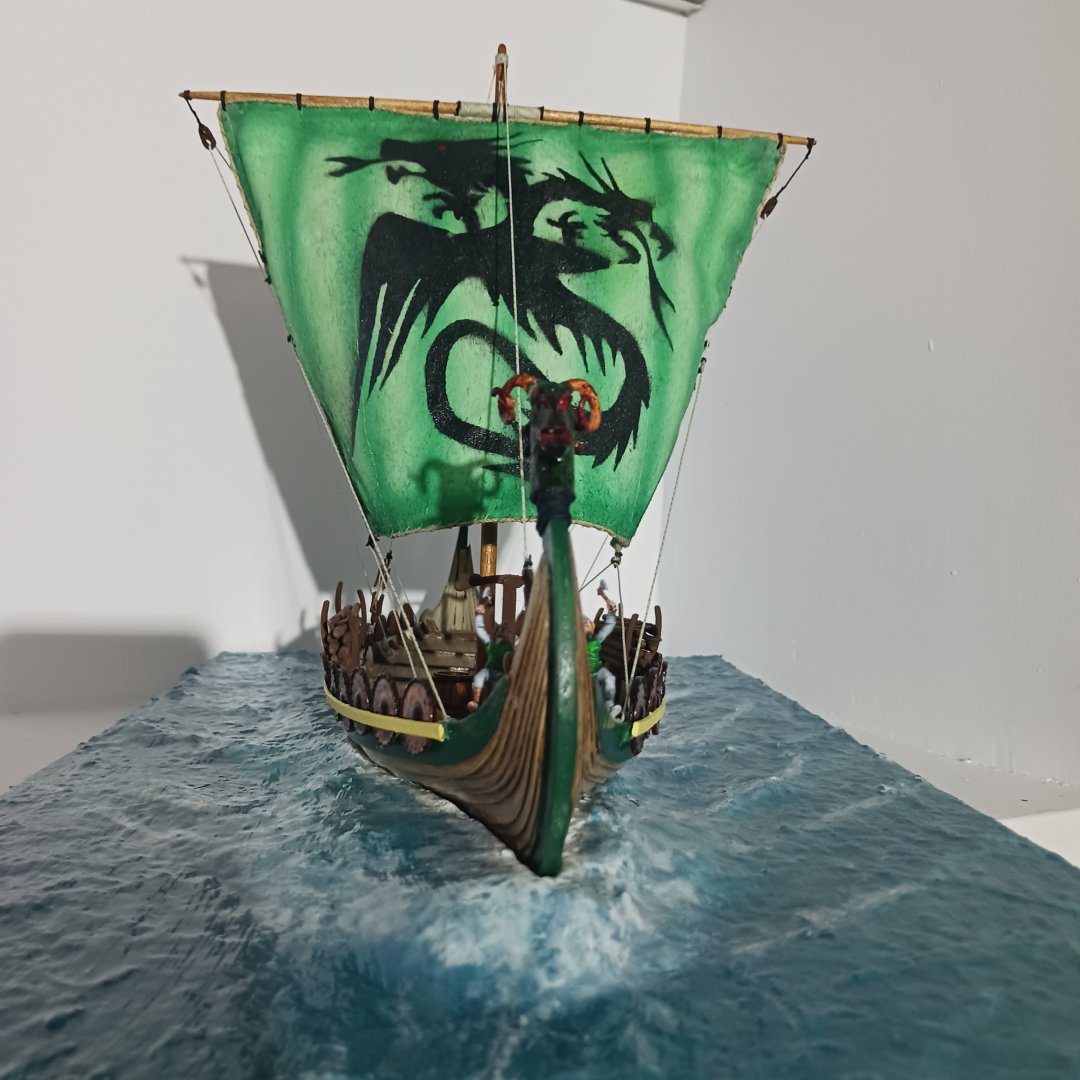
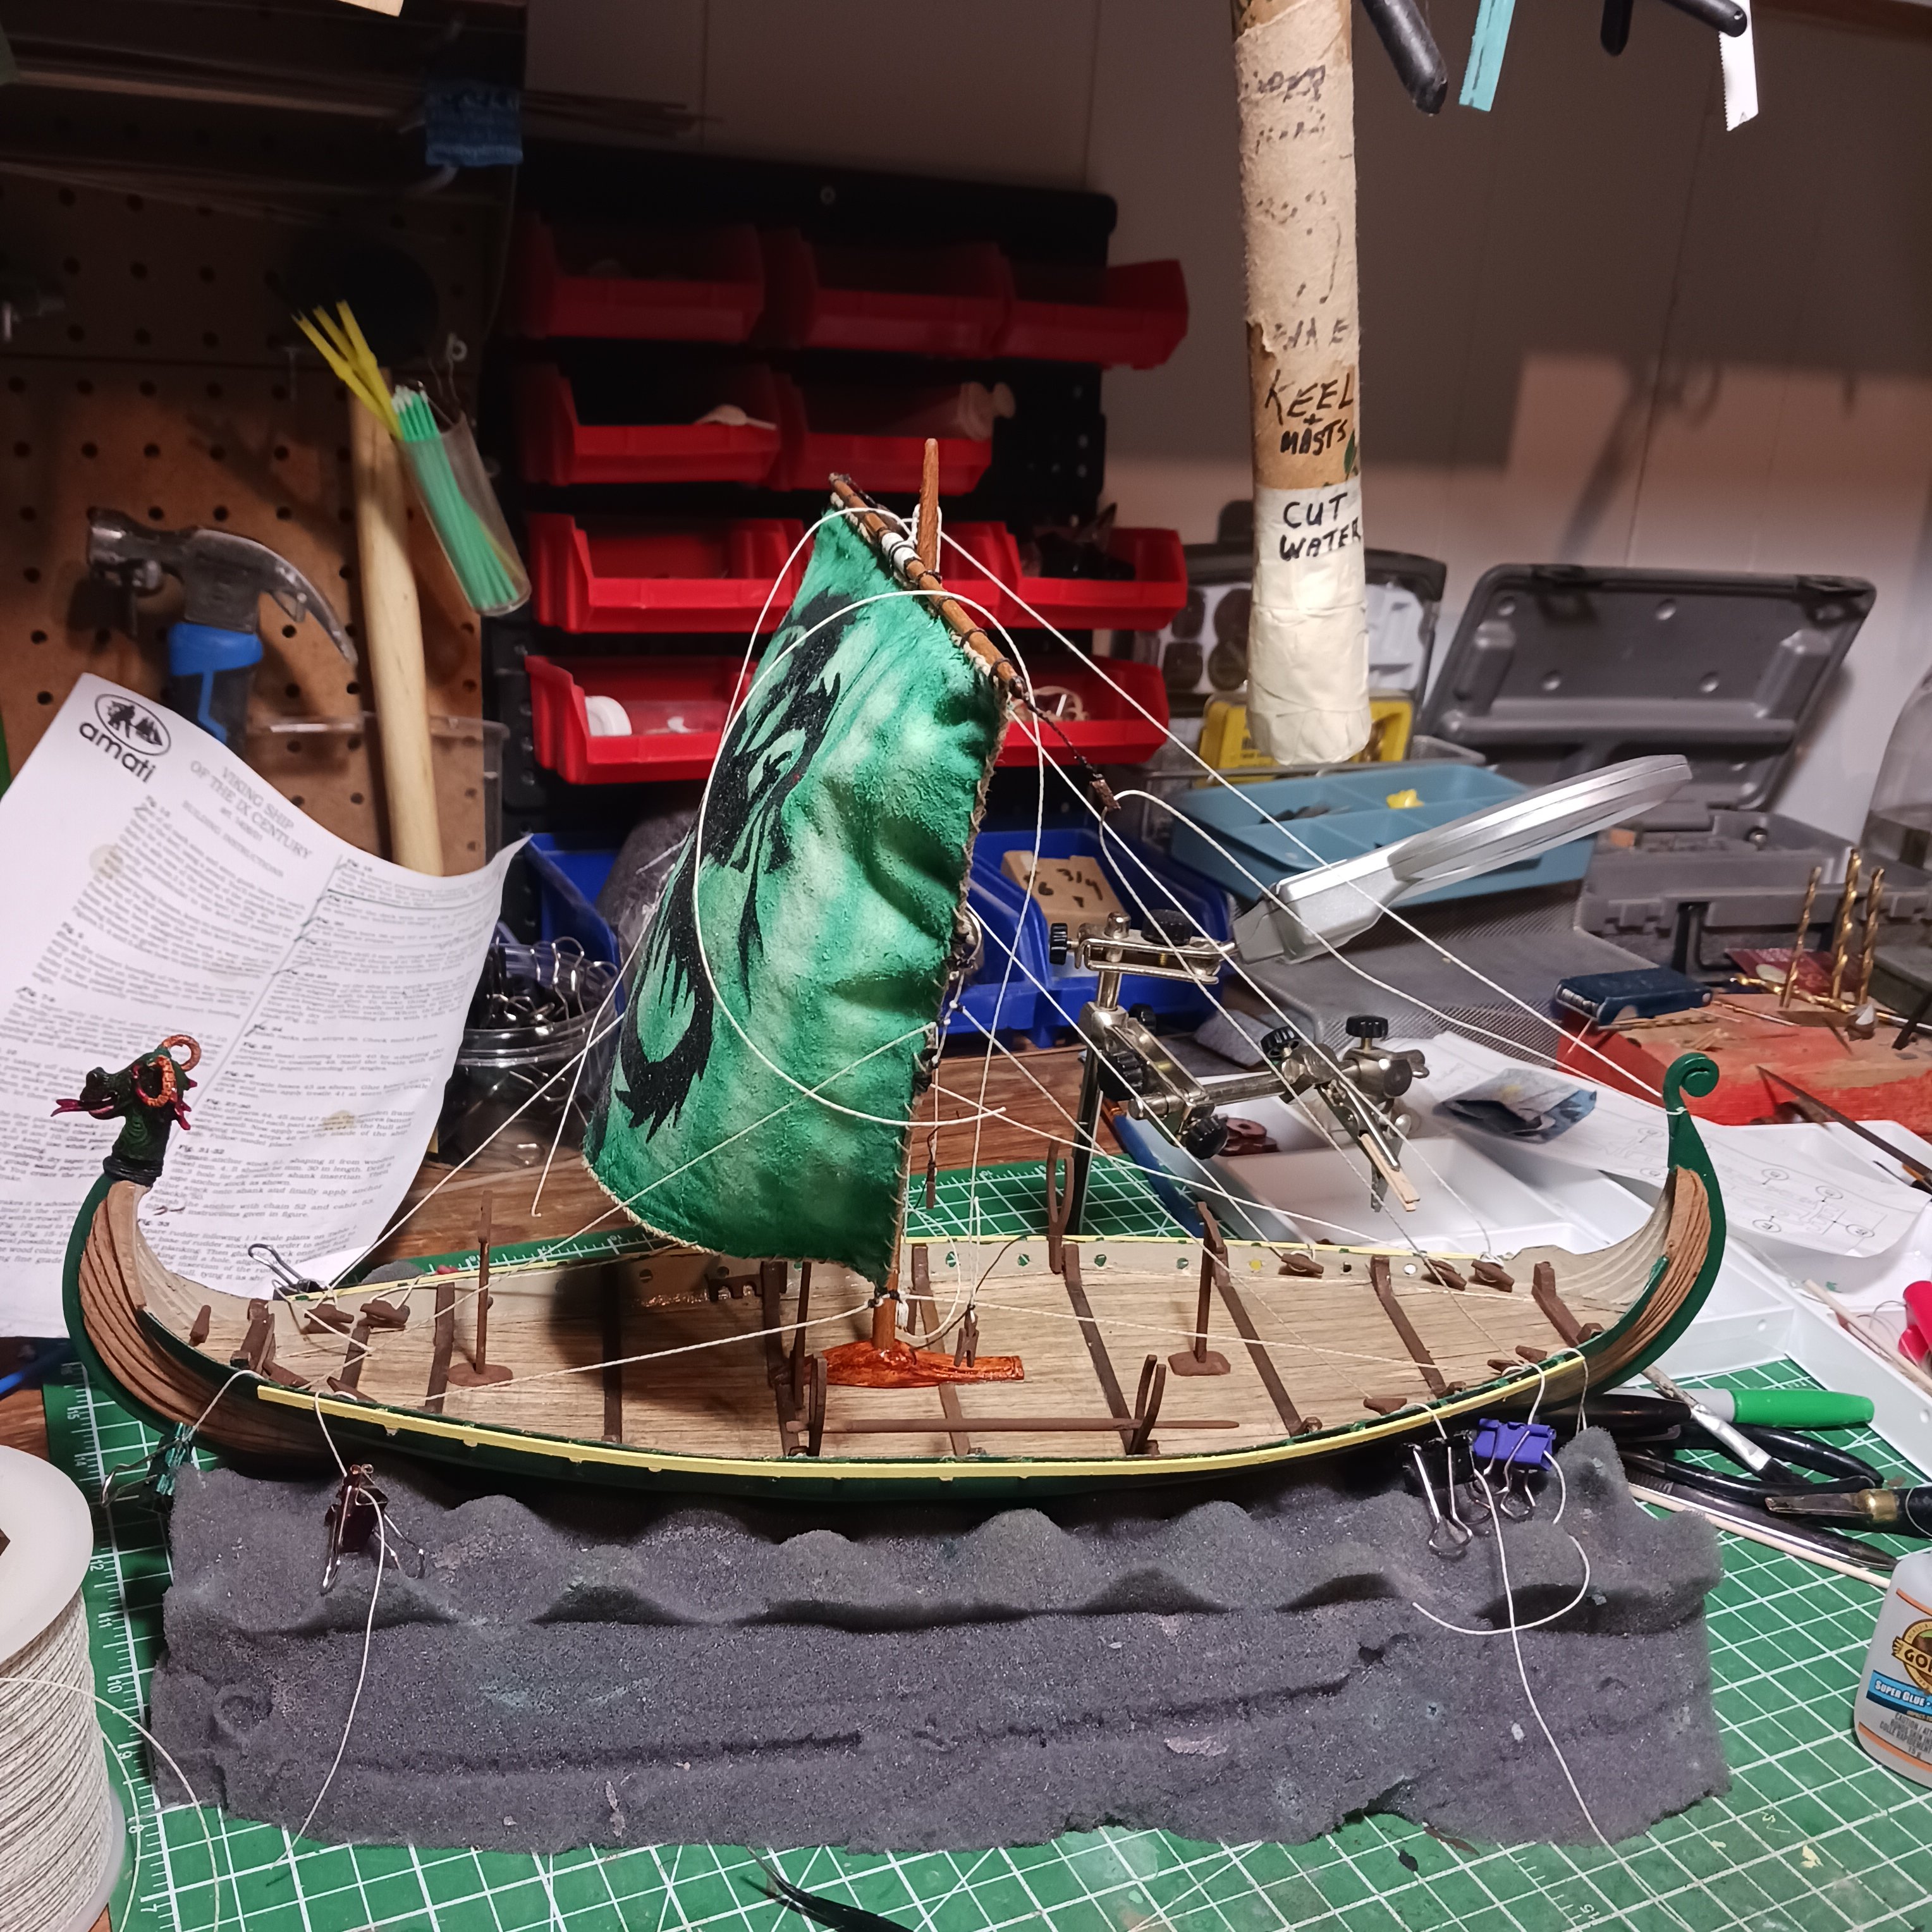
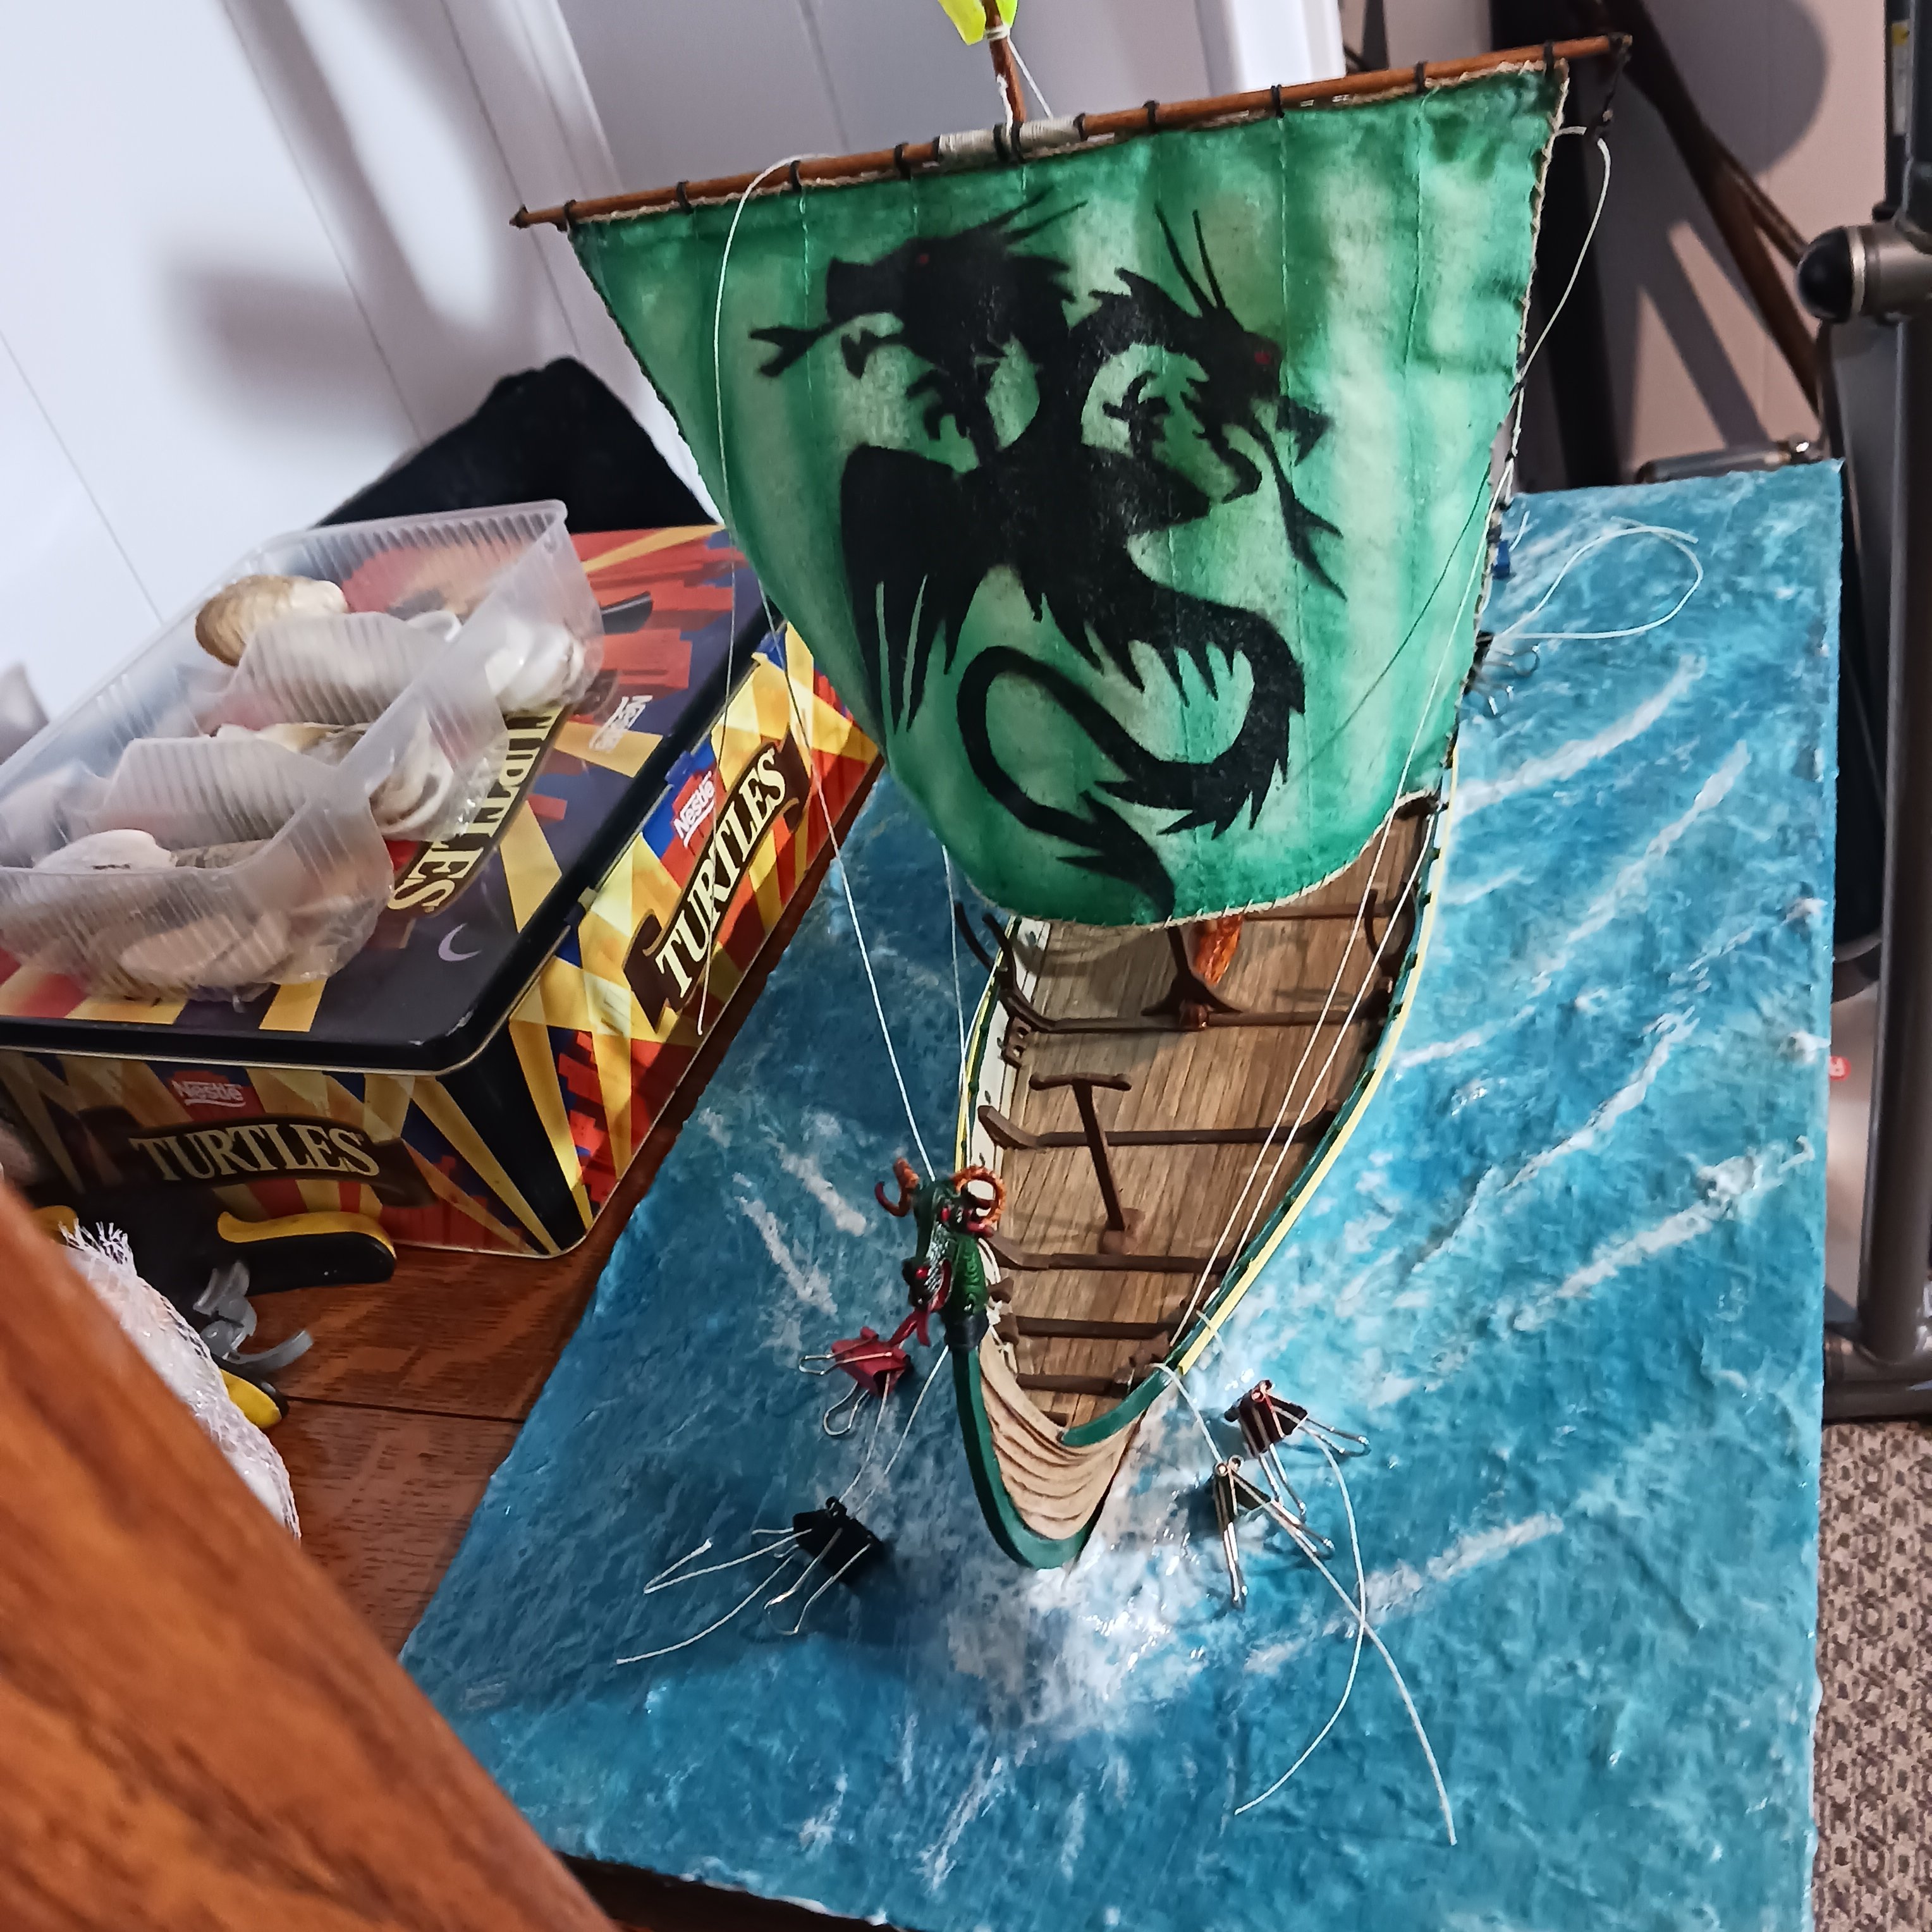
The rigging is done, just have to tie up the loose ends, all the seizing is done. I have two stays left to tie,one rear and the forward one. Then just a little foam, and place it in the case, till I get some figures for it.
It has been a fun adventure ☺️, I really enjoyed this kit. Everything fit nice and was not to hard to follow along with a few logs and all the info here. I must say the only drawback is the instructions, they were not clear on a number of things. The color and size of ropes is up to the builder. The instructions only say rope. Totally confused about the oars but they will be in the rack so no big deal.

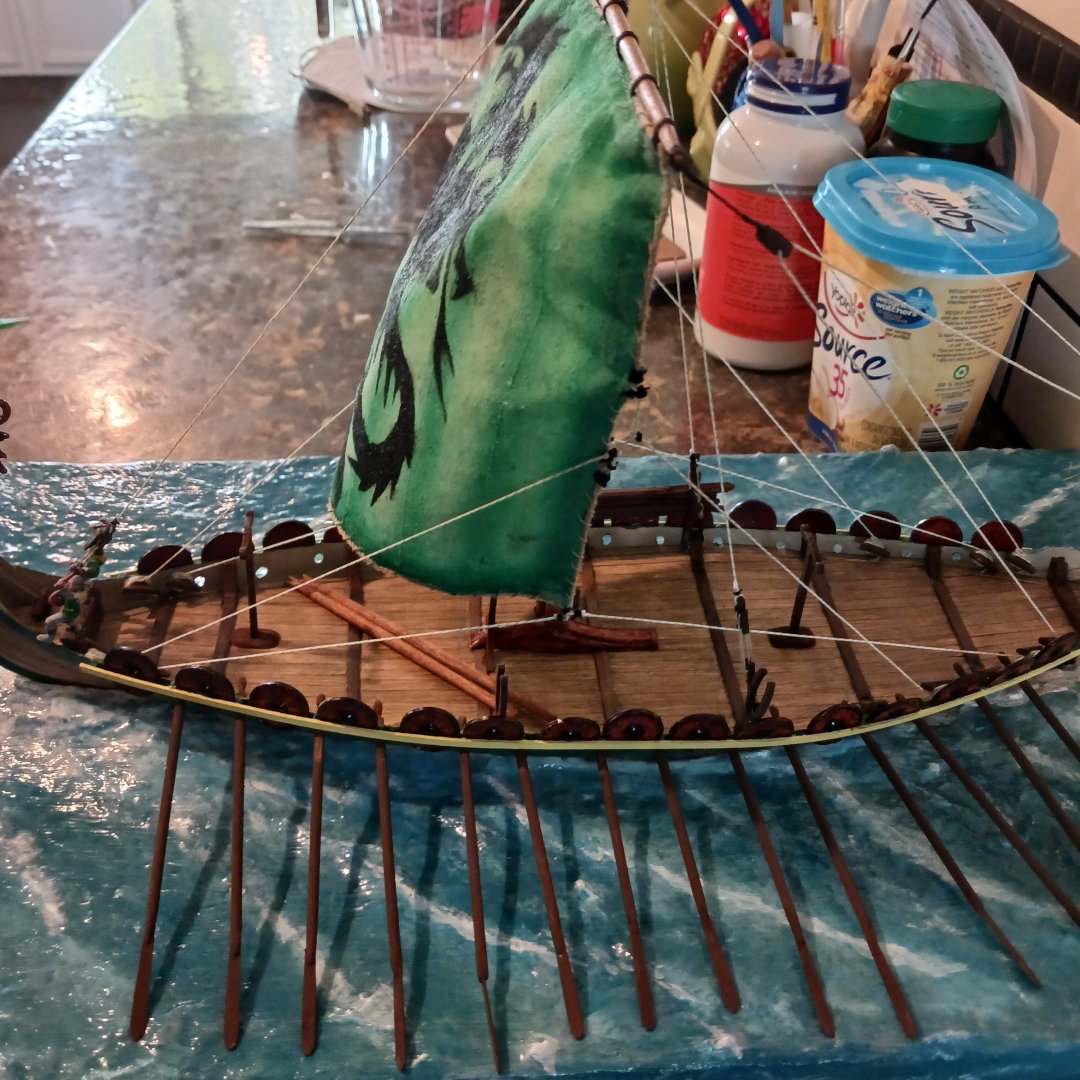
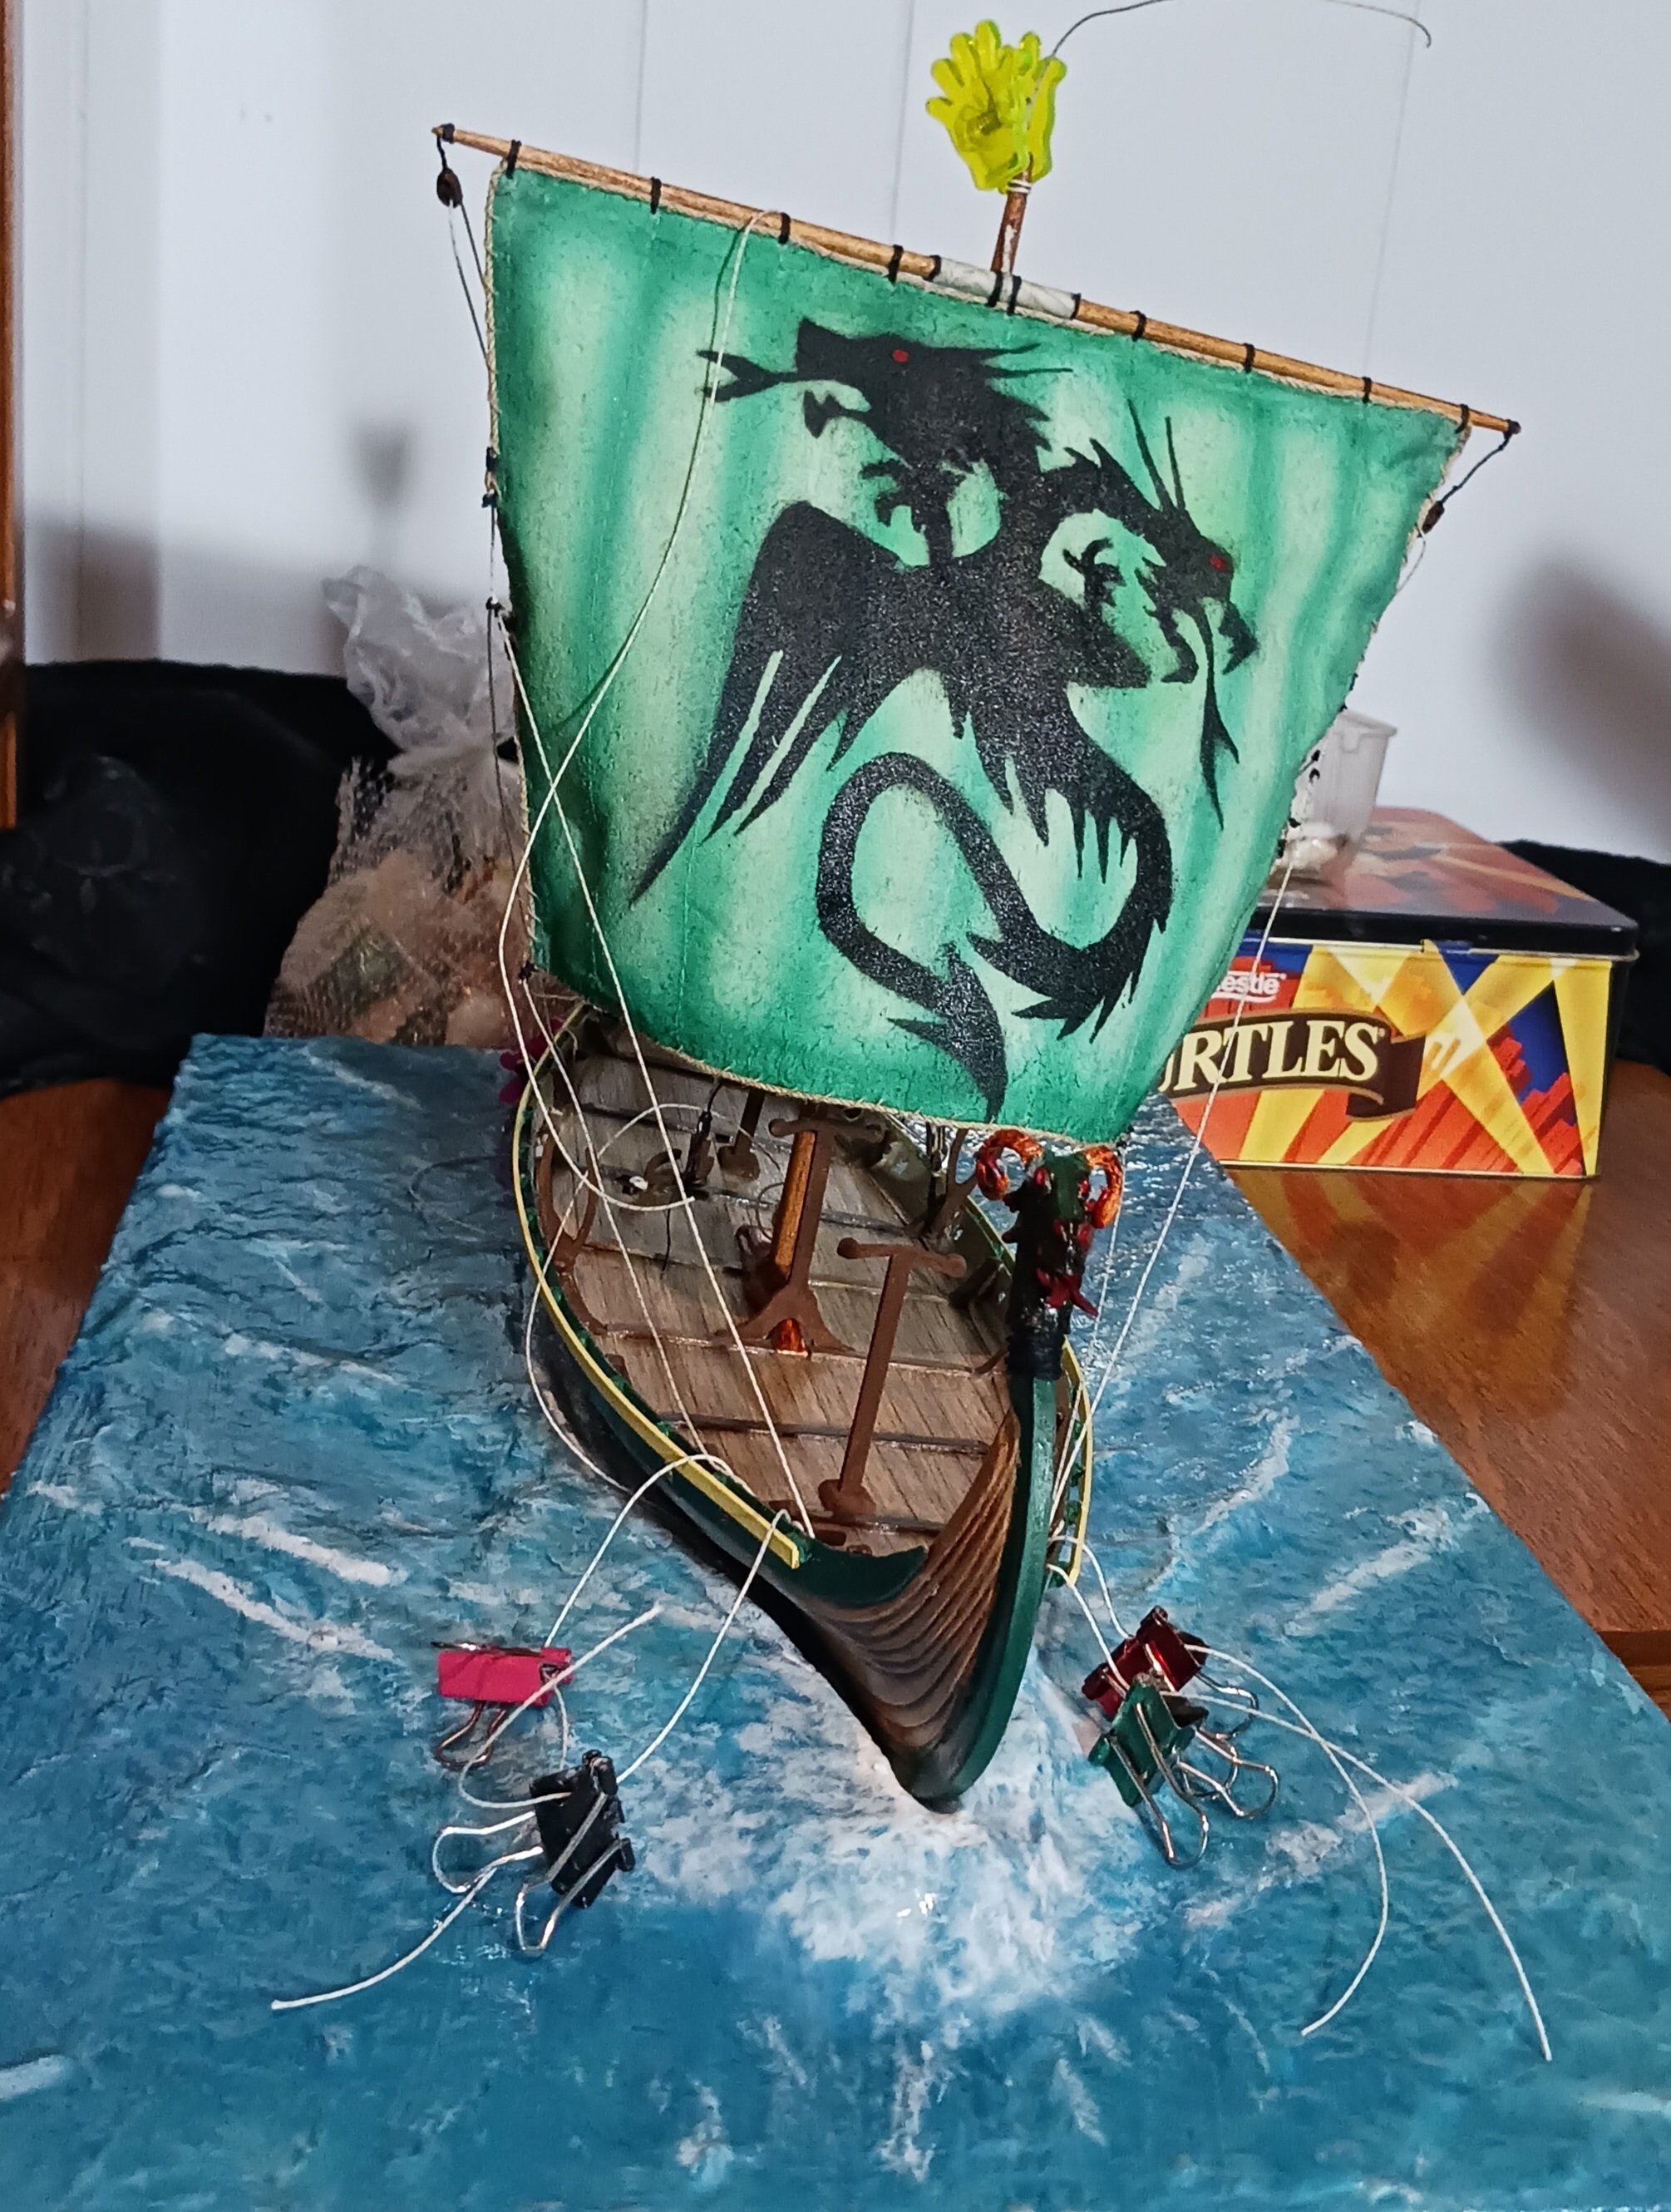
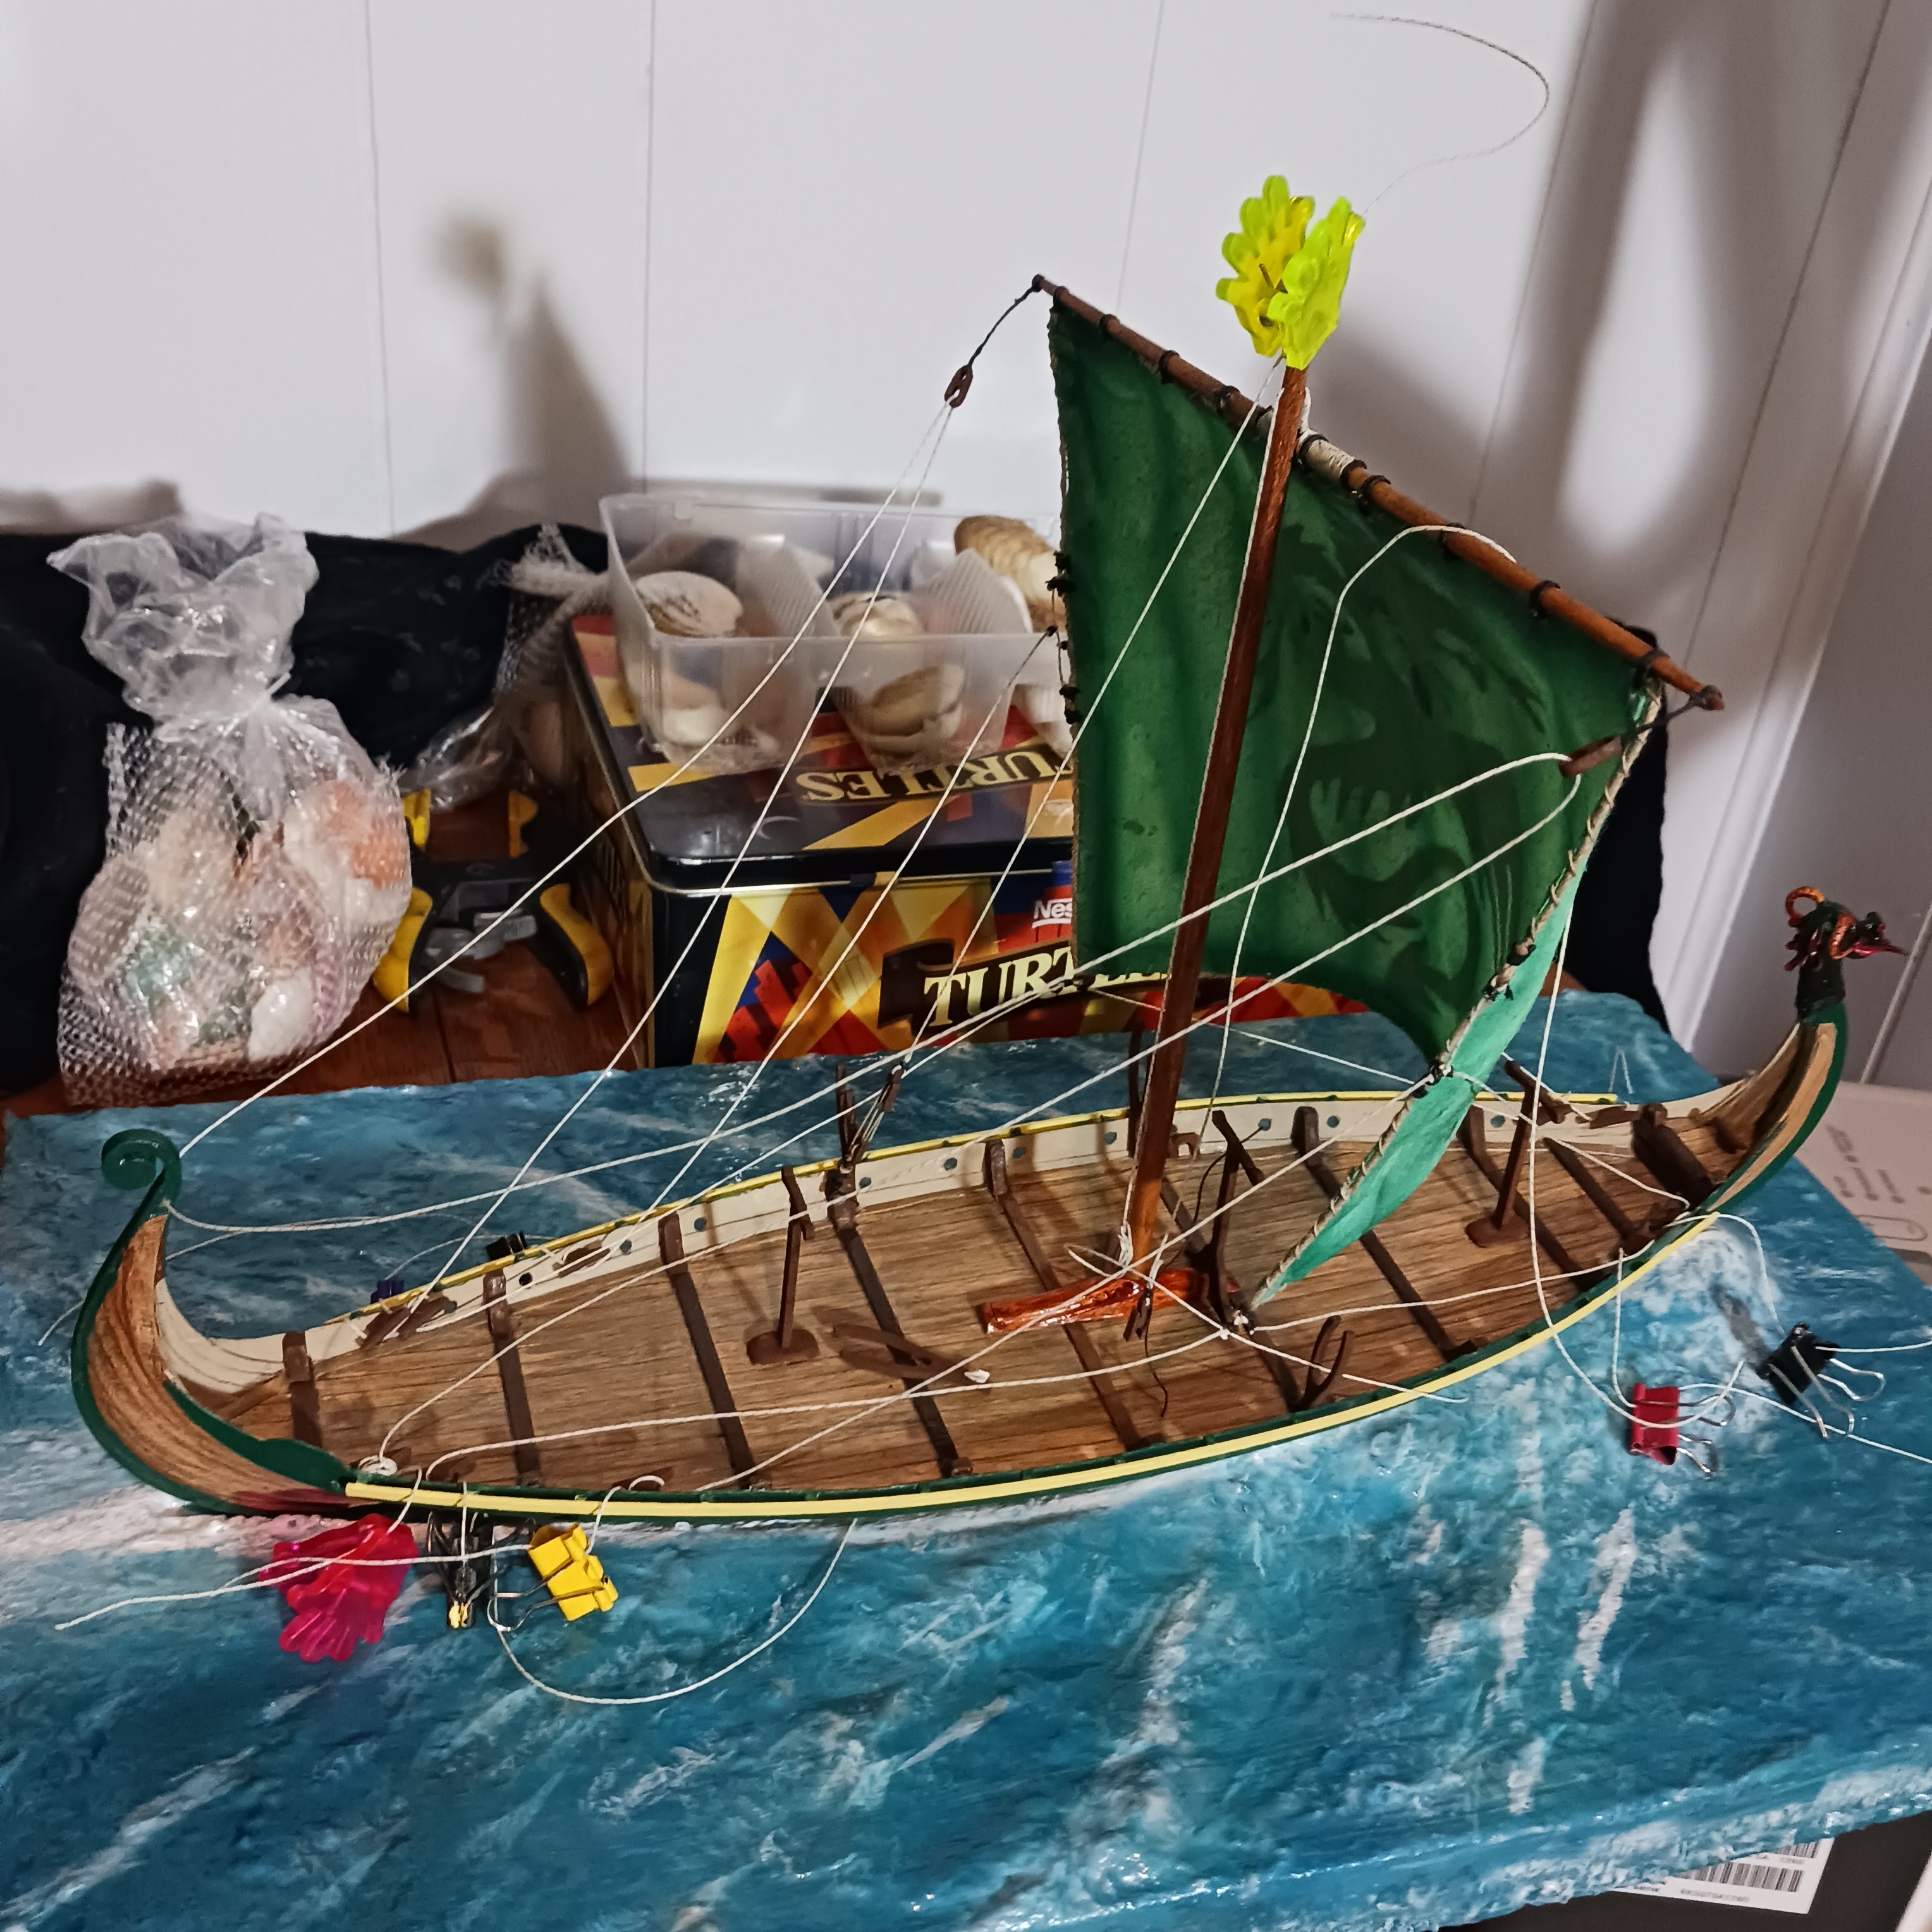
I added the wind today, with GAC 400, I like this stuff, just brush on a good coat on both sides then blow dry with hairdryer, for about 10 minutes, on warm heat High wind. Thanks @mrcc for this tip, I just love the way it made the sail look. 😊

Pretty good wind.


I am getting pretty excited about finishing up this ship . I made water , and my first clinker build, that was supposed to be that way lol.
A few little things to do and off to the case it goes .
Thanks for looking and following along, with the story, the twins are up to something, they are asking questions about Kraken Rum for sale by the keg.

Pretty much going to look like this, which I am extremely grateful for the opportunity to try make it look like this. But it is not in the case yet so the look could change lol.
Bob M.
- Glen McGuire, Keith Black, mtaylor and 8 others
-
6
-
5


.jpg.8c403b6de8338d2ea35b6d498680e593.jpg)


Banshee II by Glen McGuire - FINISHED - 1/700 - BOTTLE
in - Build logs for subjects built 1851 - 1900
Posted
I am always amazed at the idea's you come up with. They are so fitting, this one is no exception. It's going to be another awesome display, good luck on your journey, the Texas background is very cool,
Bob M.