


yvesvidal
-
Posts
3,100 -
Joined
-
Last visited
Content Type
Profiles
Forums
Gallery
Events
Posts posted by yvesvidal
-
-
Rob, thank you for listing all the colors and types of paint you are using. This will be very helpful for future builders of this model.
Yves
- mtaylor, Ryland Craze, DocRob and 4 others
-
 7
7
-
1 hour ago, AON said:
Please, if you can, explain your developed technique to install the gunports quicker.
Allan, nothing revolutionary here... Just assembly lines, a la Henry Ford. I will give more details and pictures once I get to the other side.
Yves
- AJohnson, jpalmer1970, AON and 1 other
-
4
-
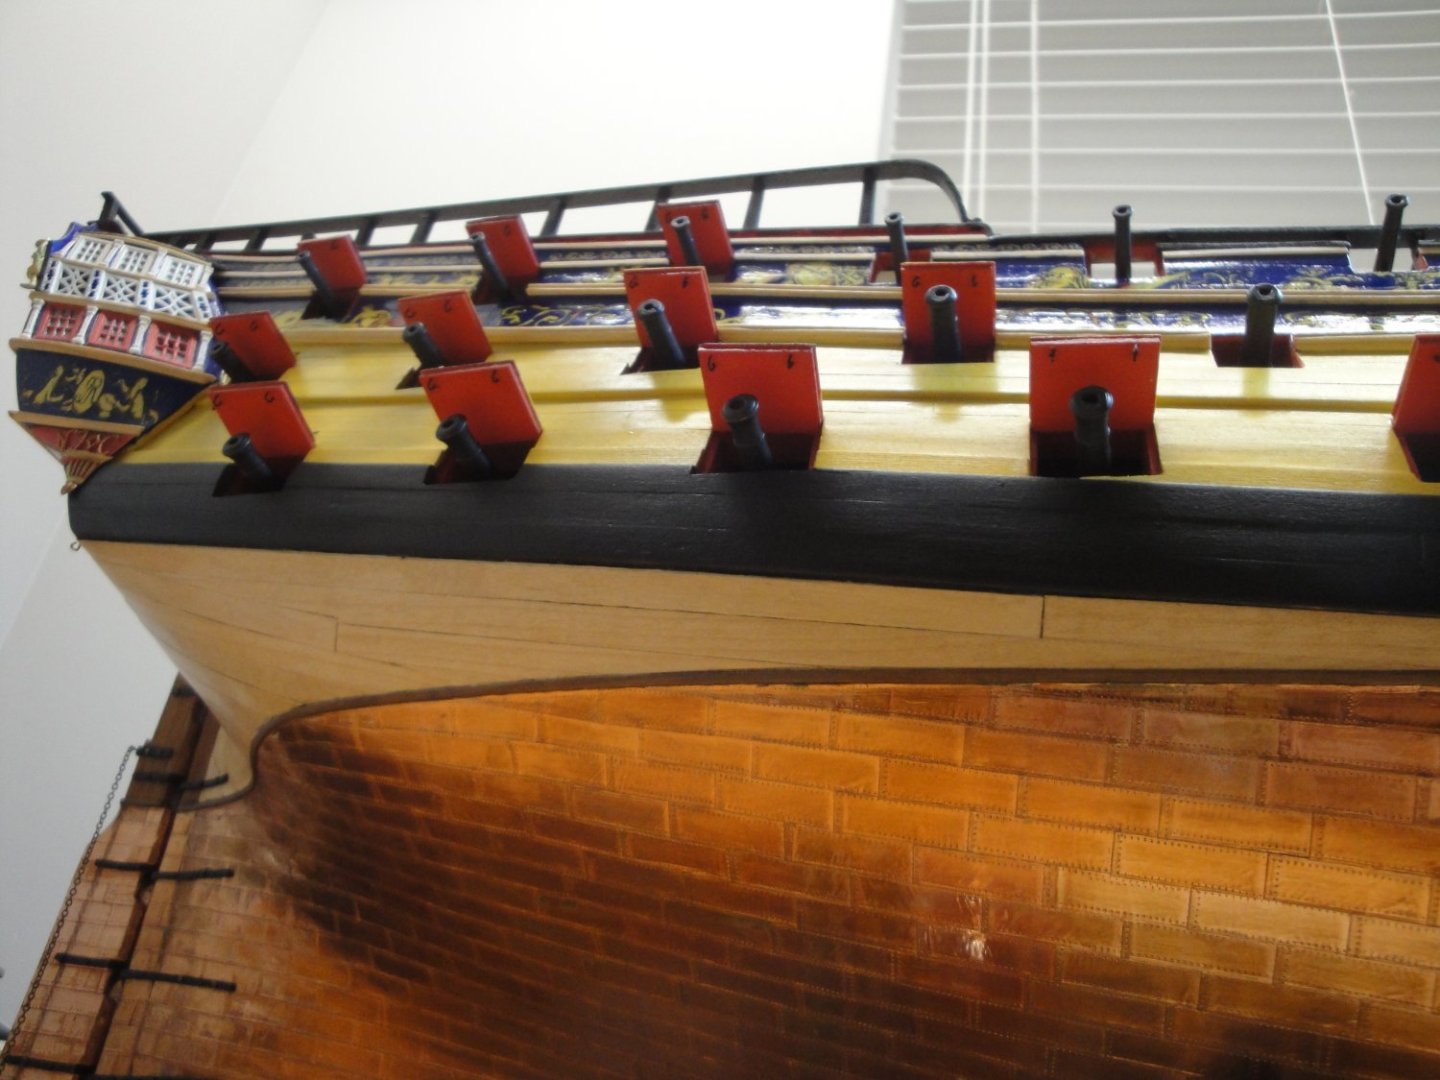
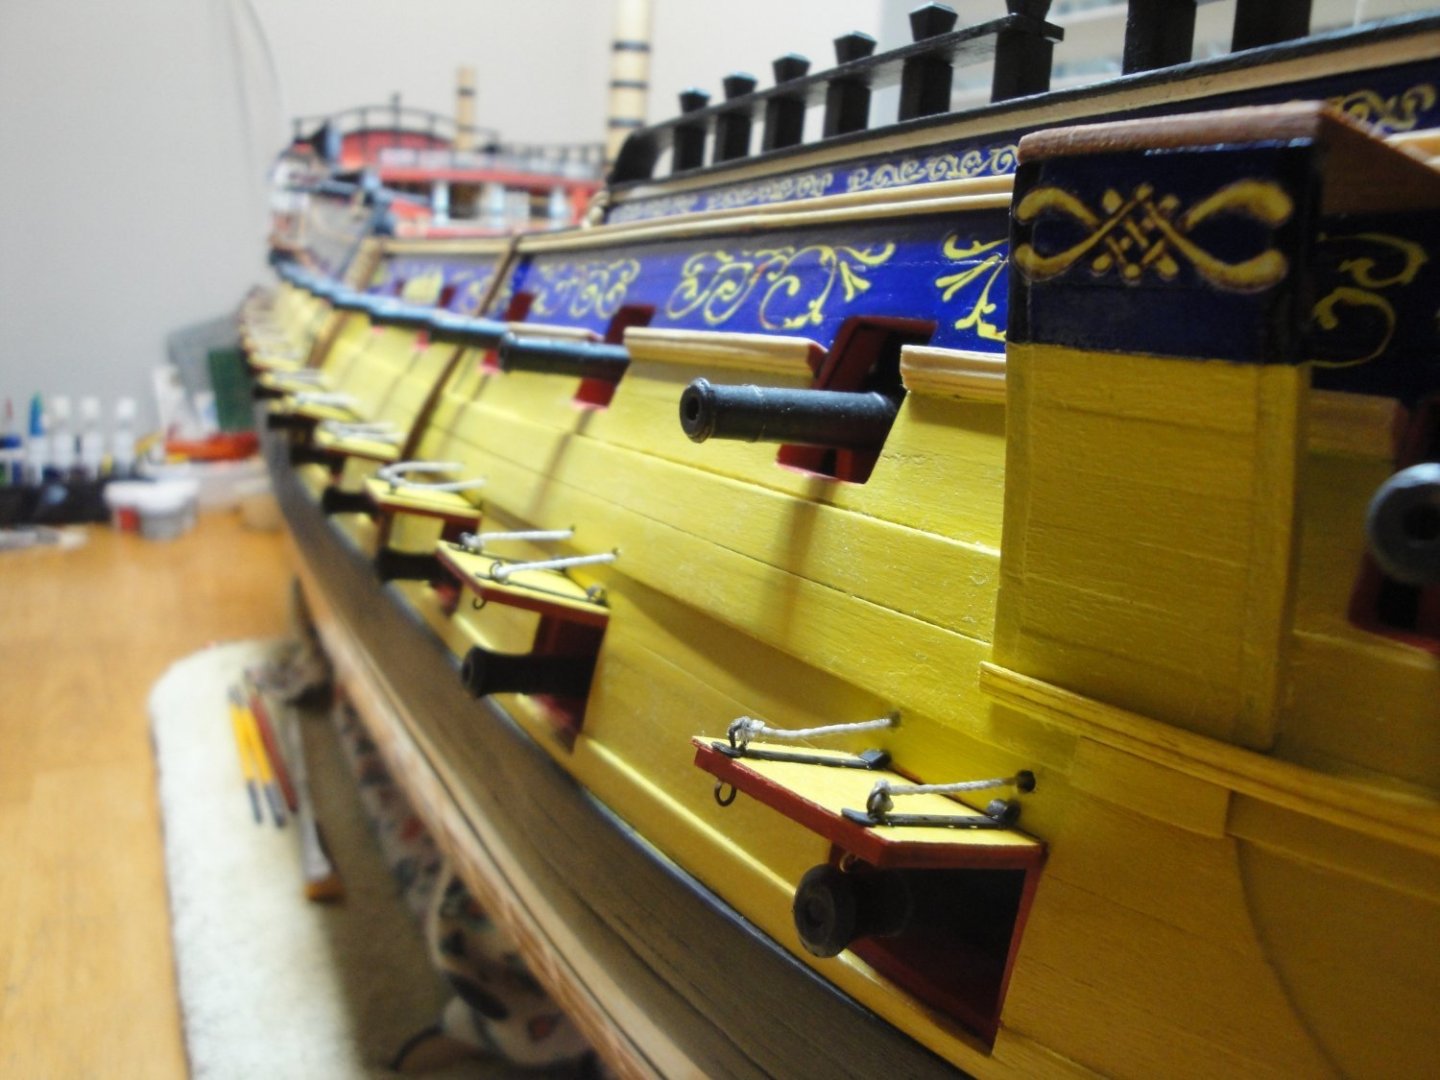
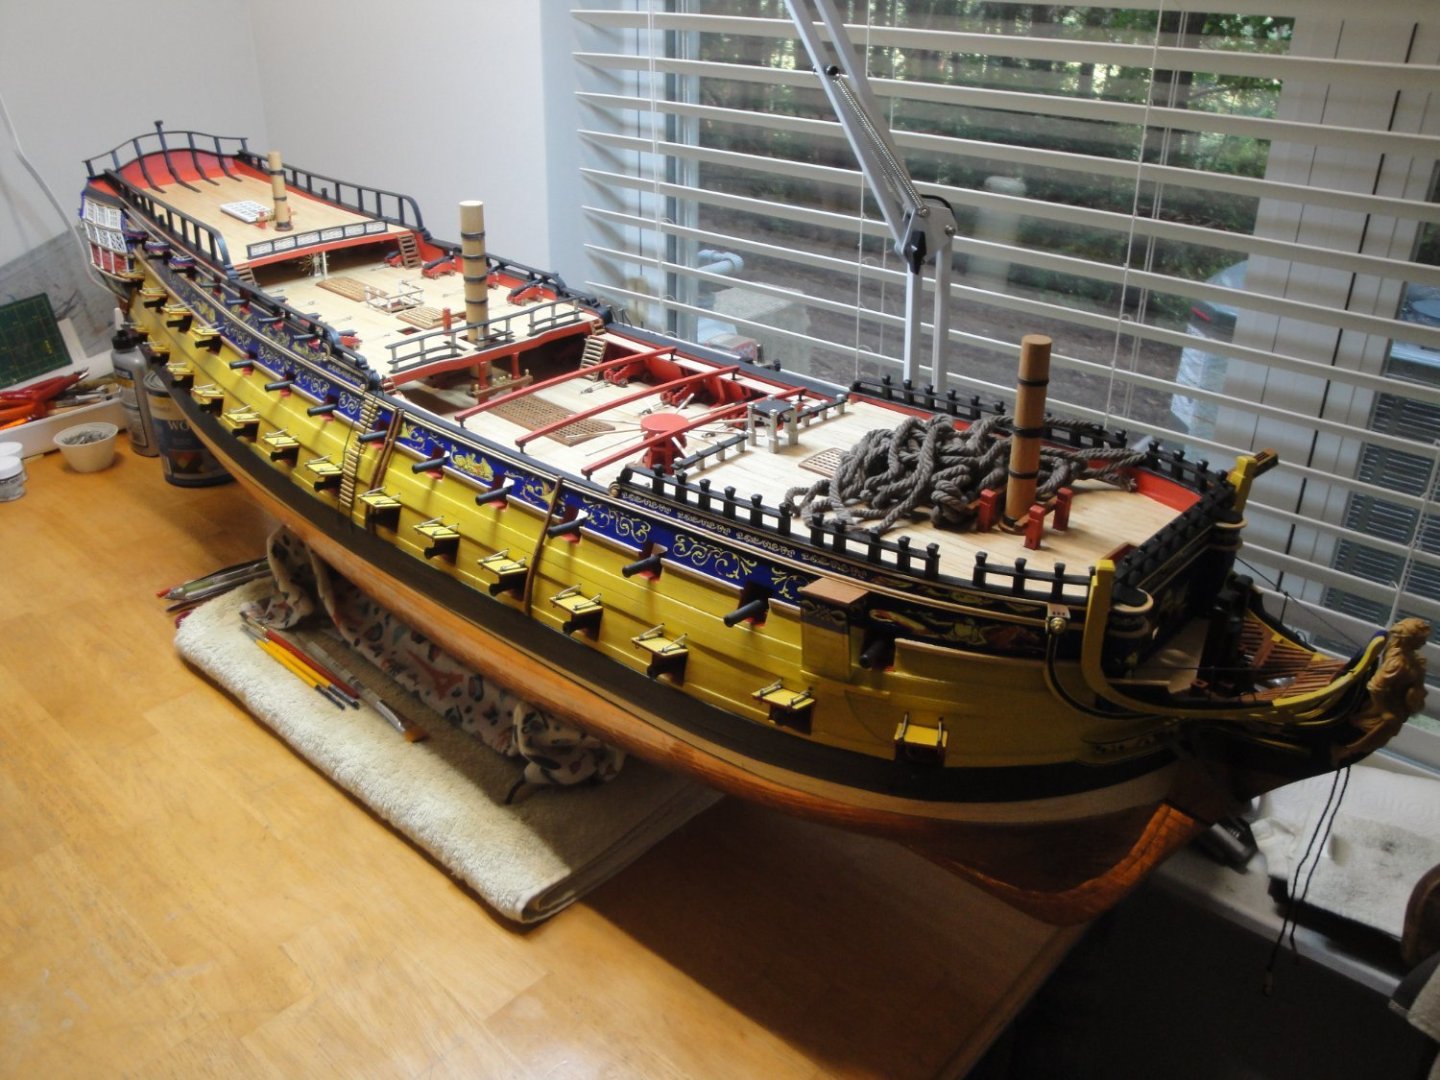
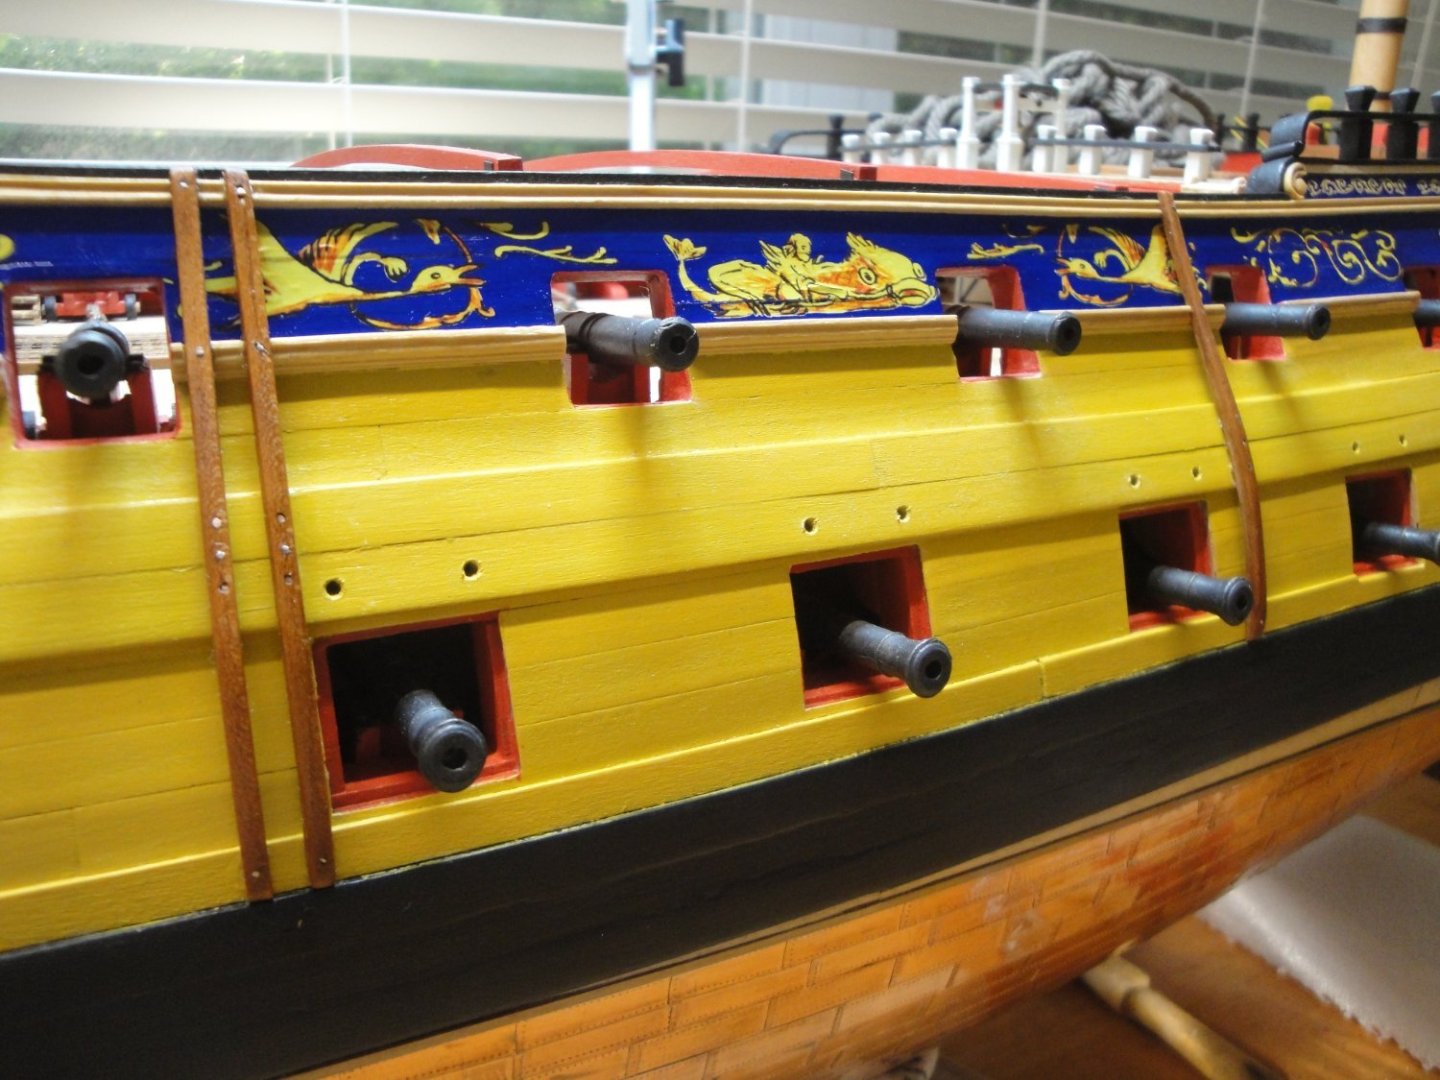
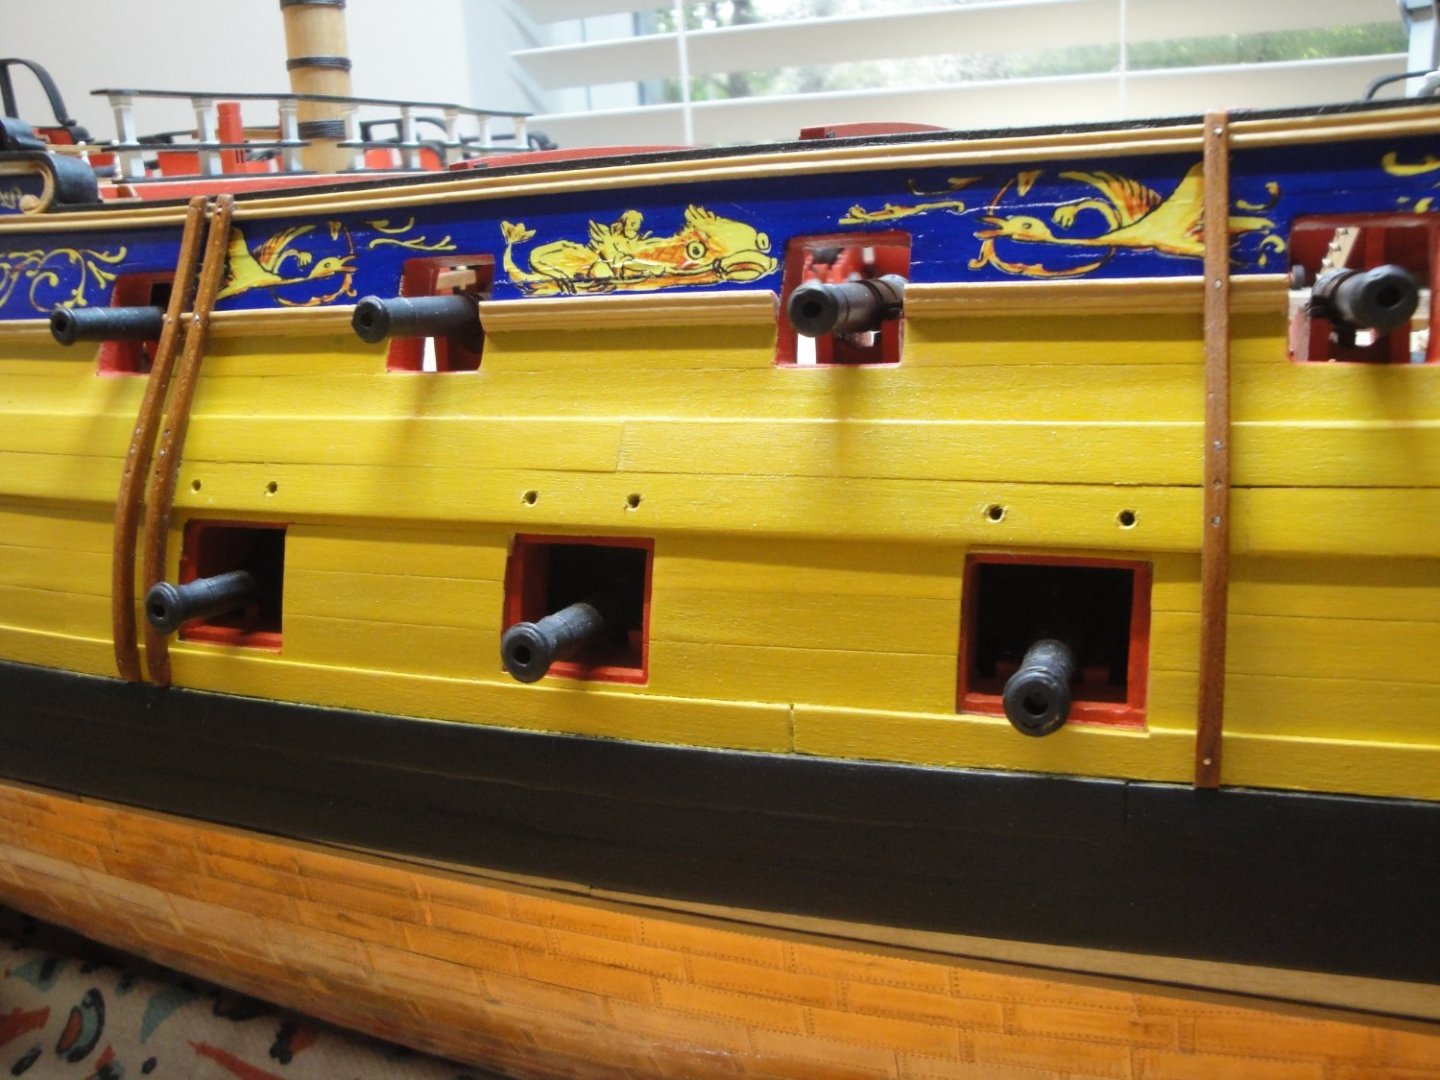
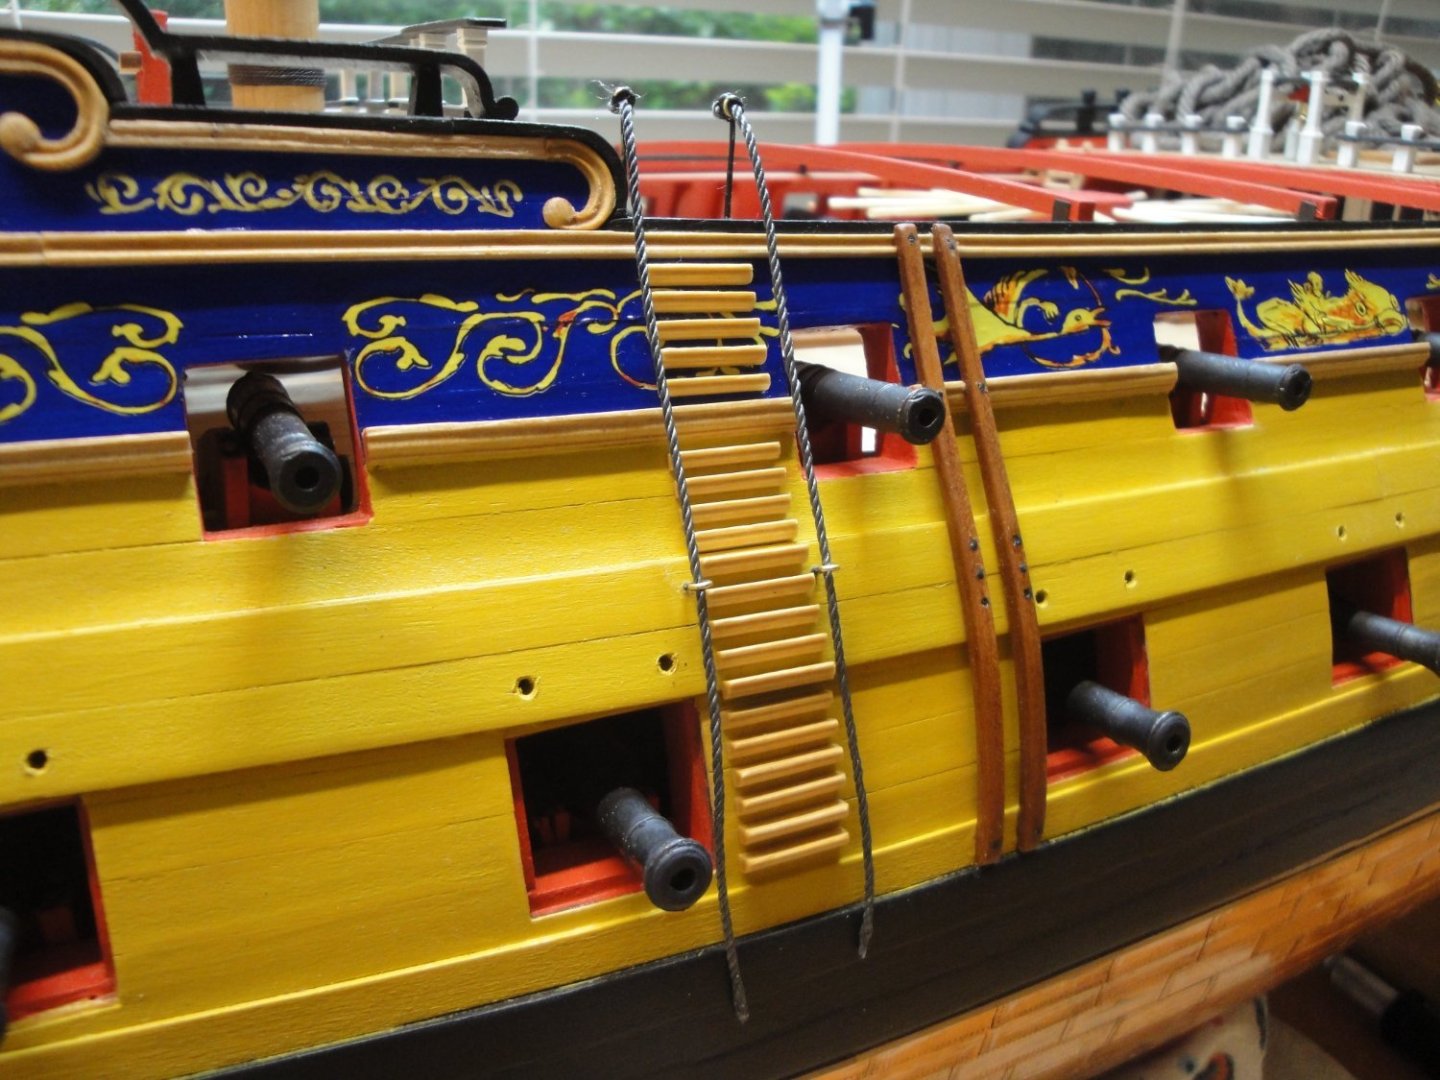
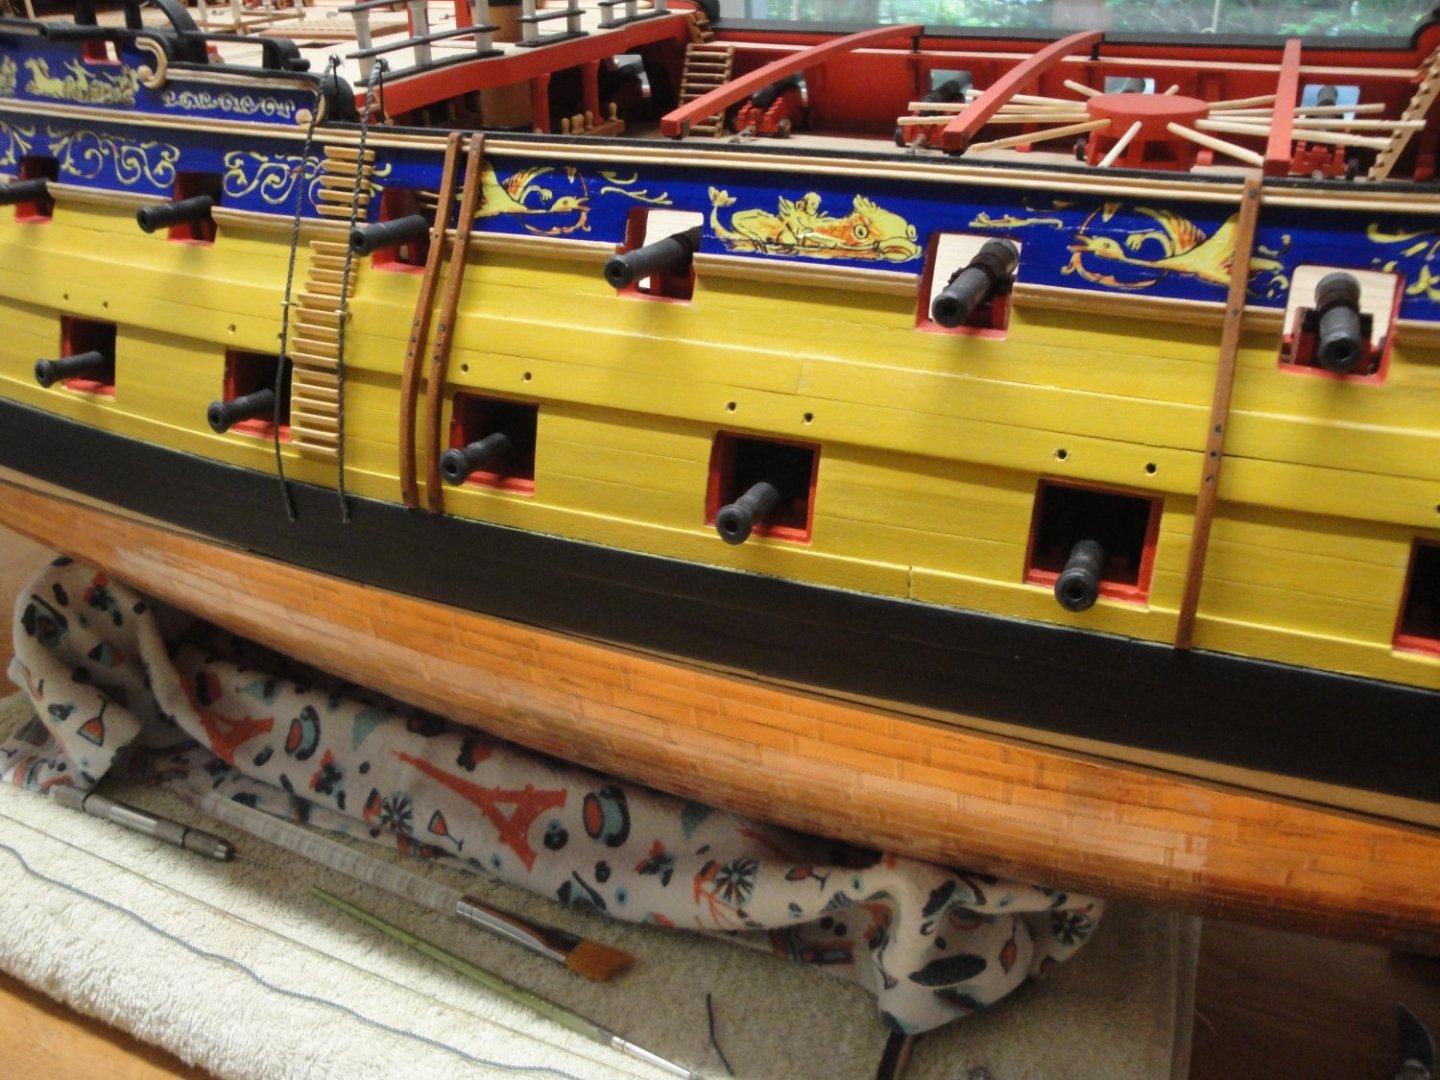
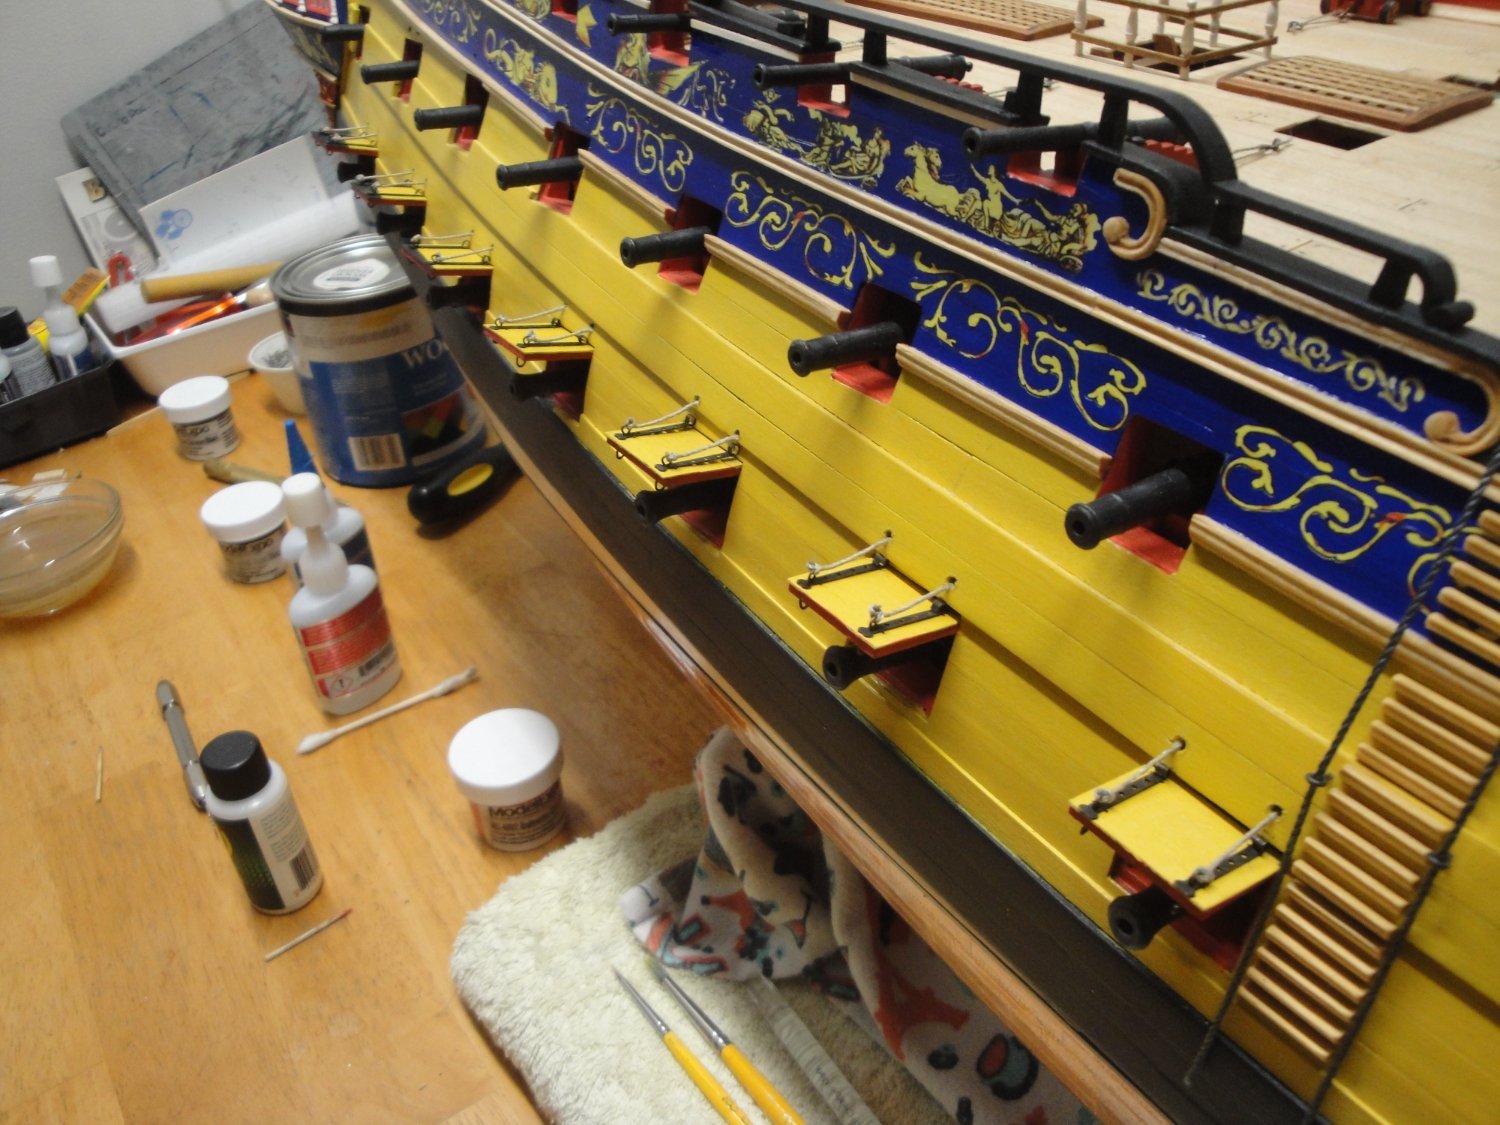
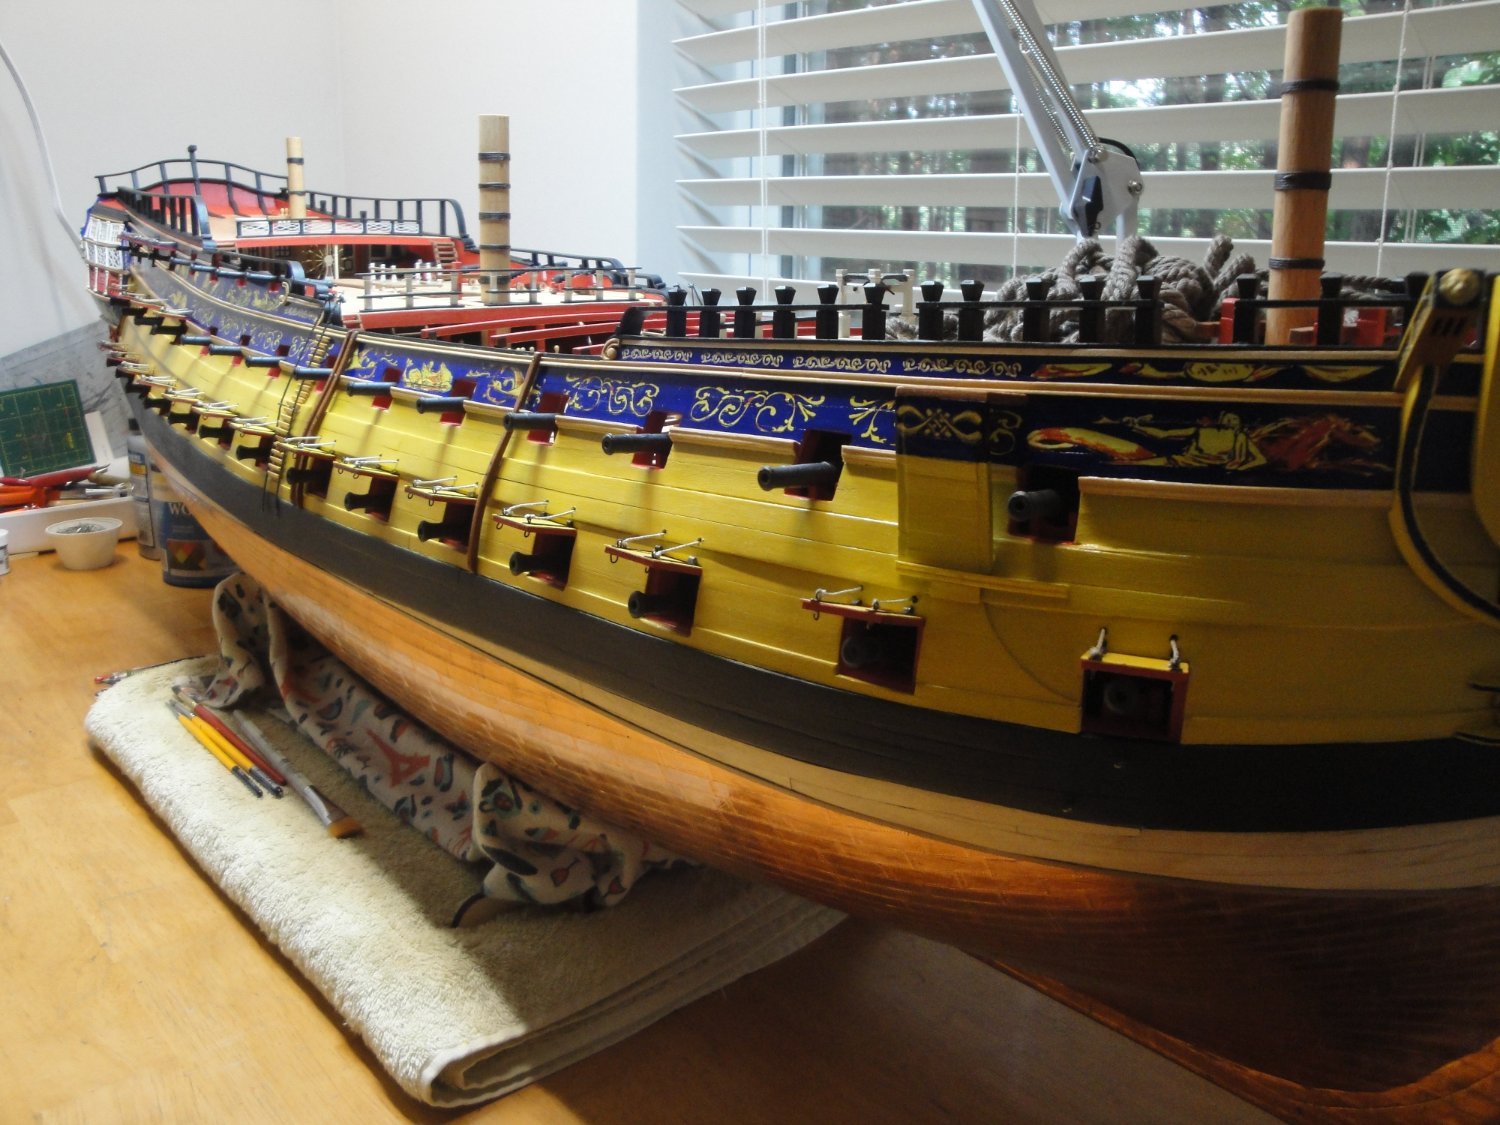
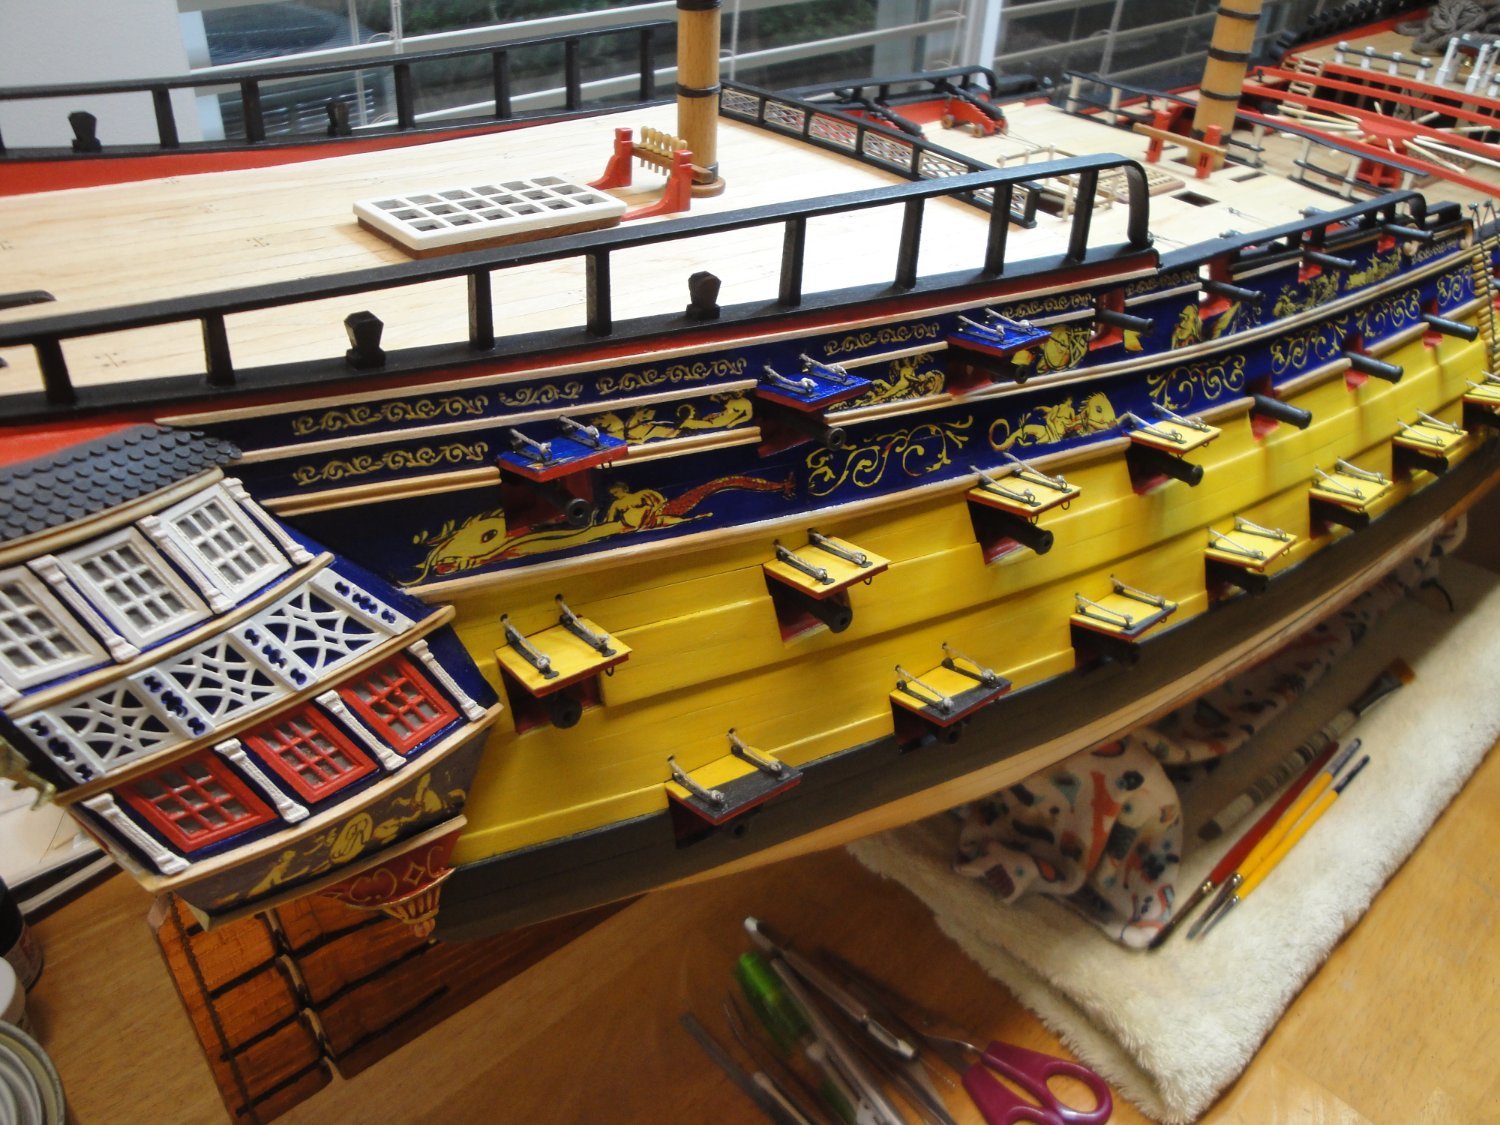
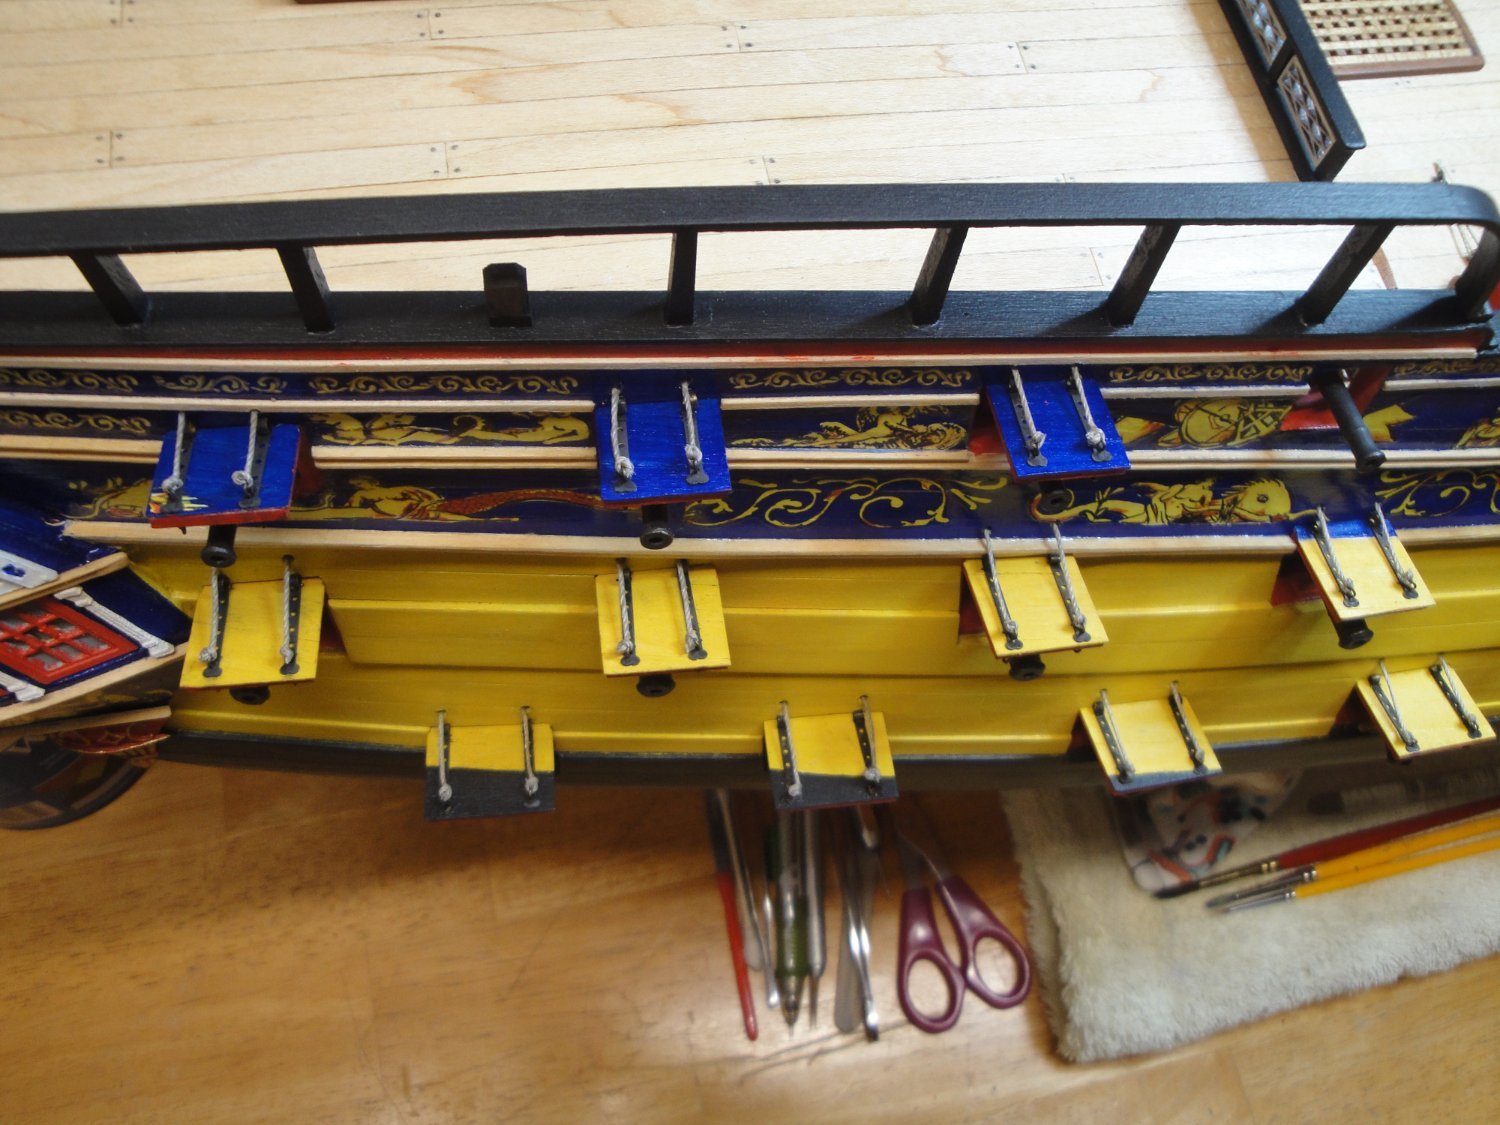
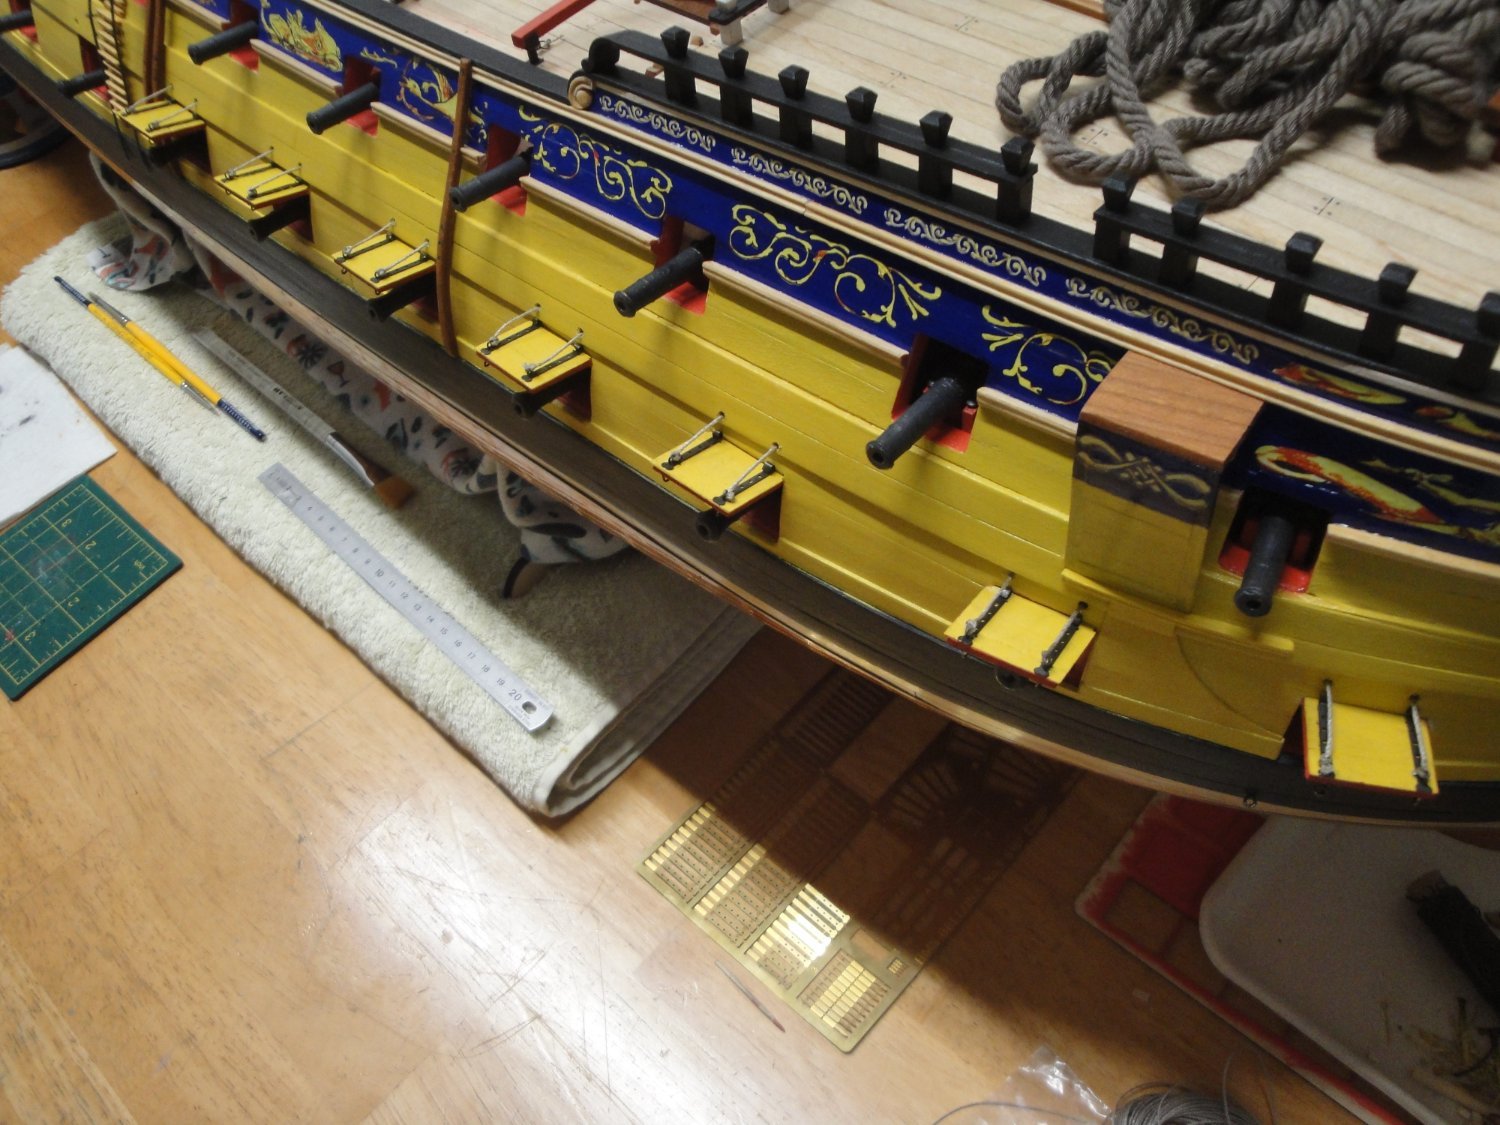
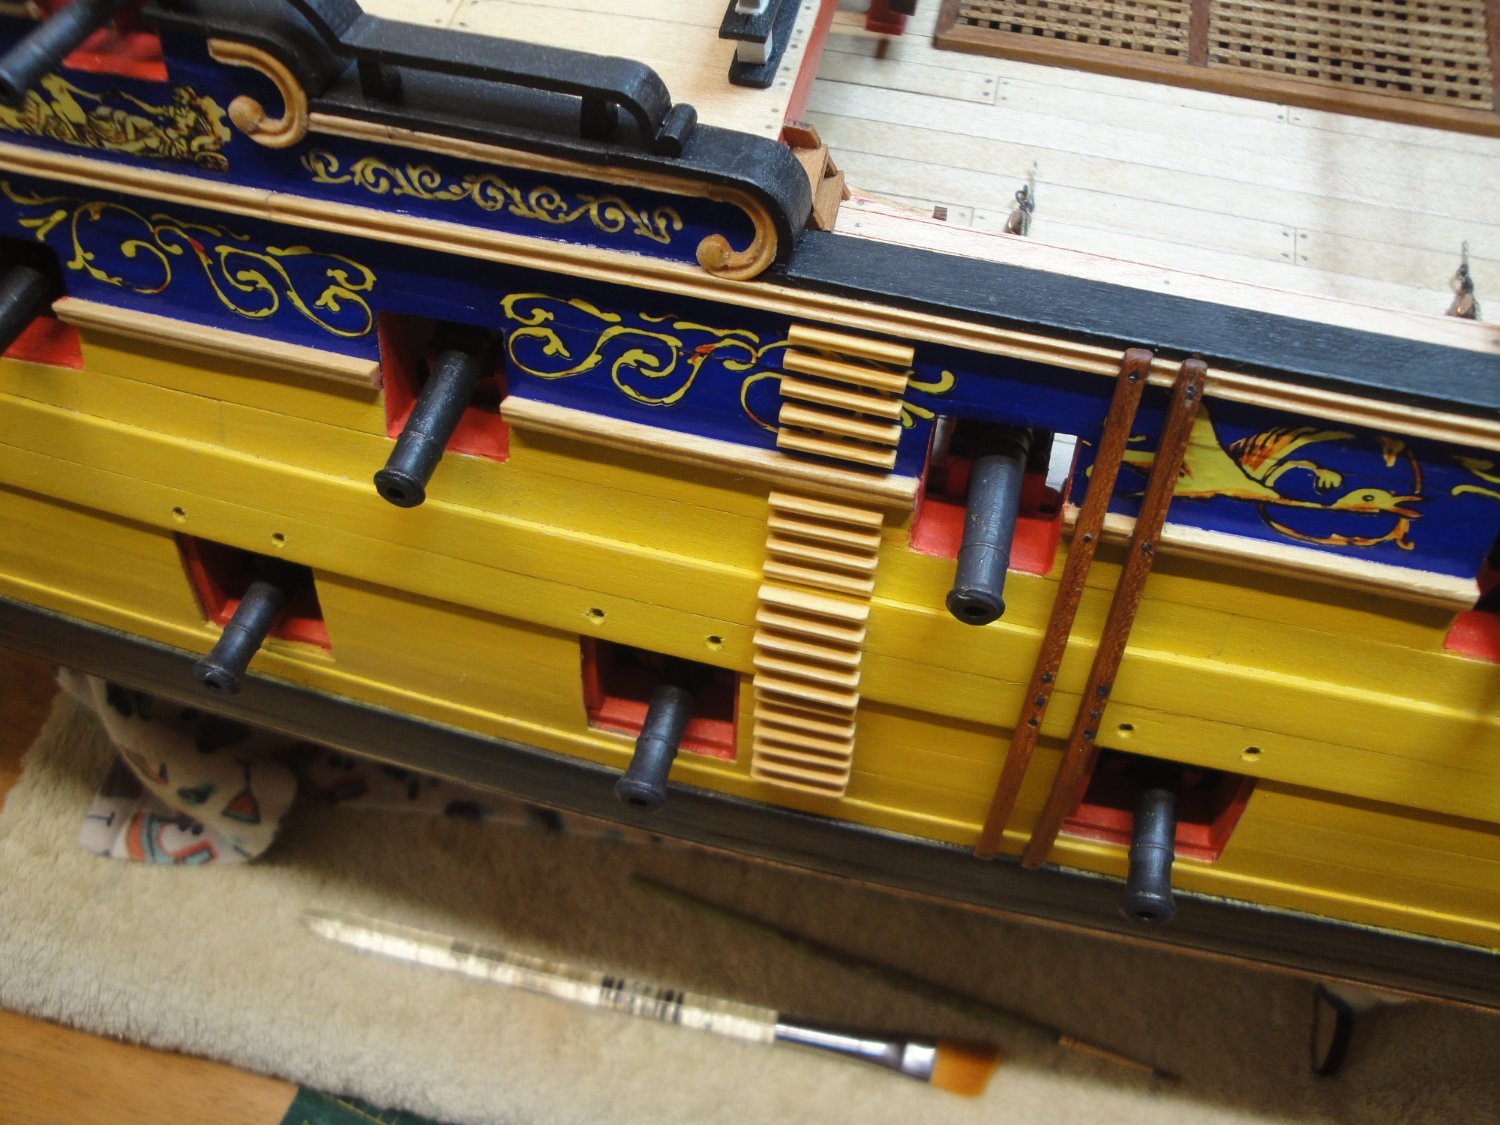
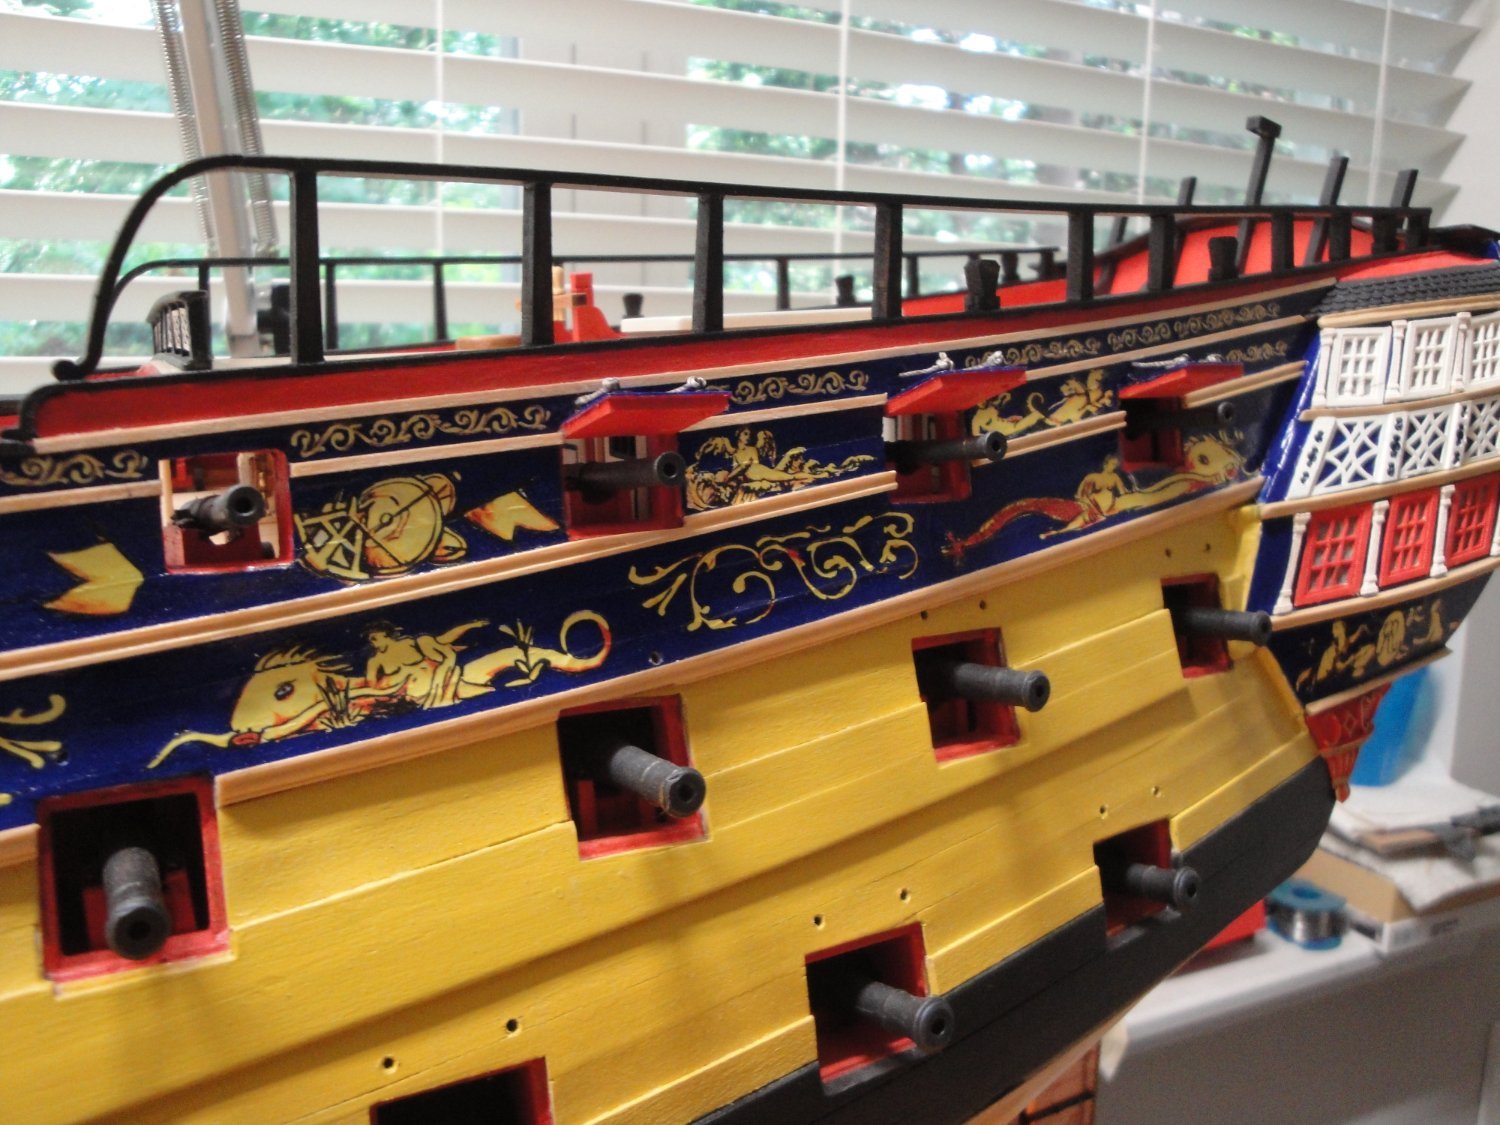
Progress on the gun port lids: Second quarter of the vessel, completed !!! I am starting to develop a technique to go a little bit faster and install these in an easier way.

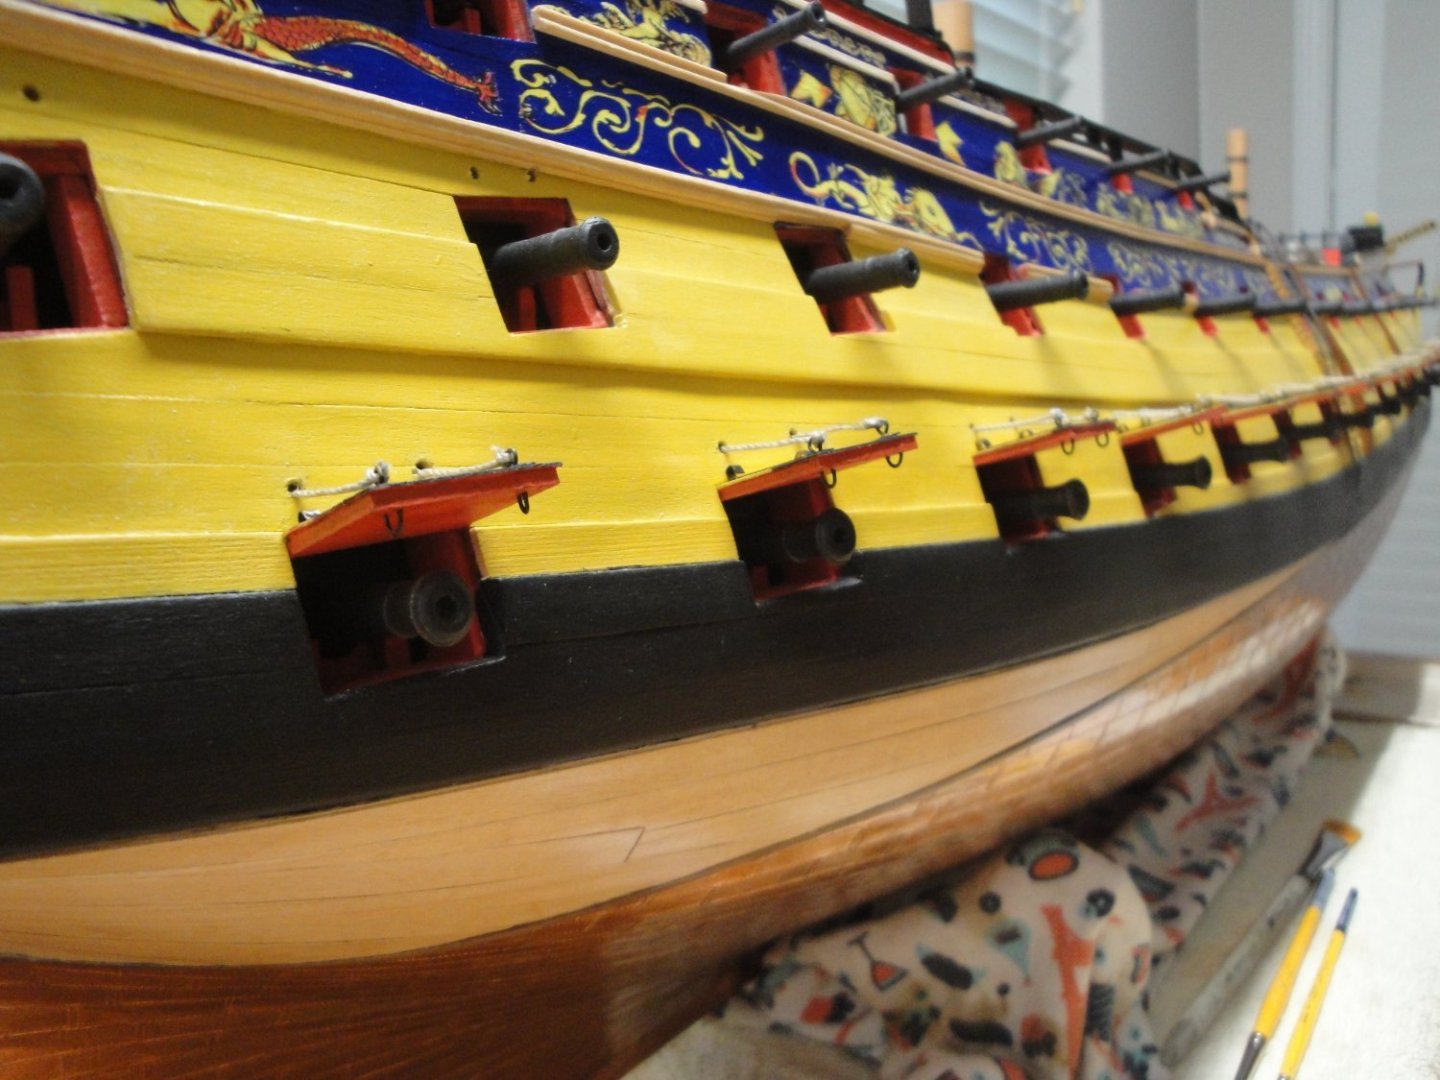
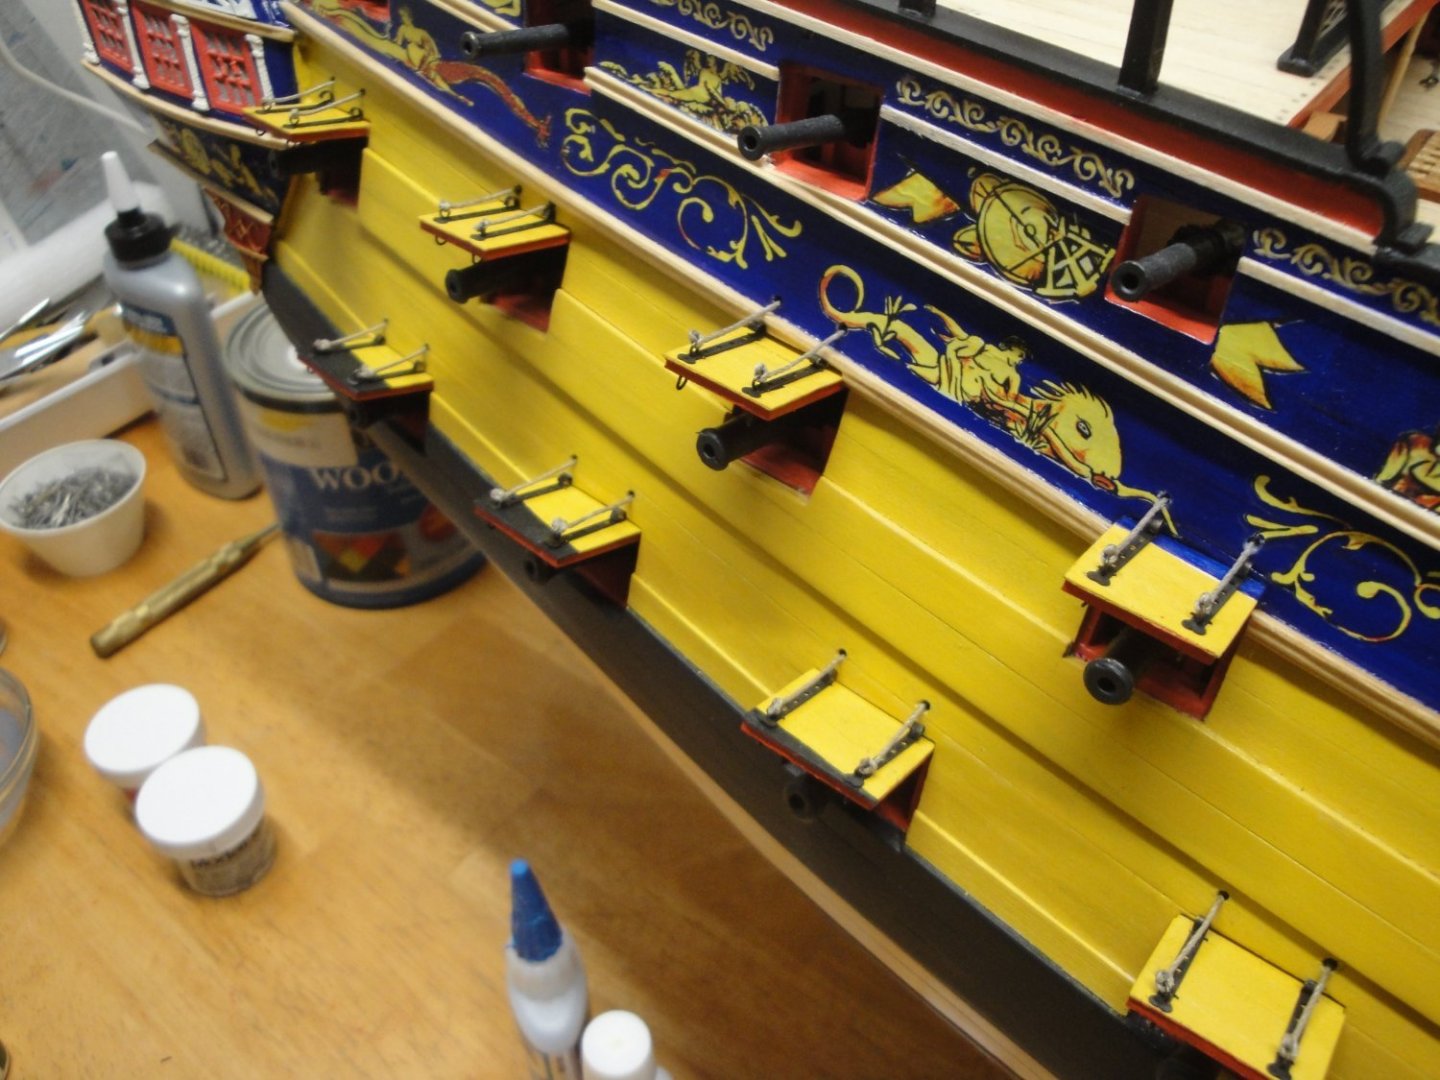
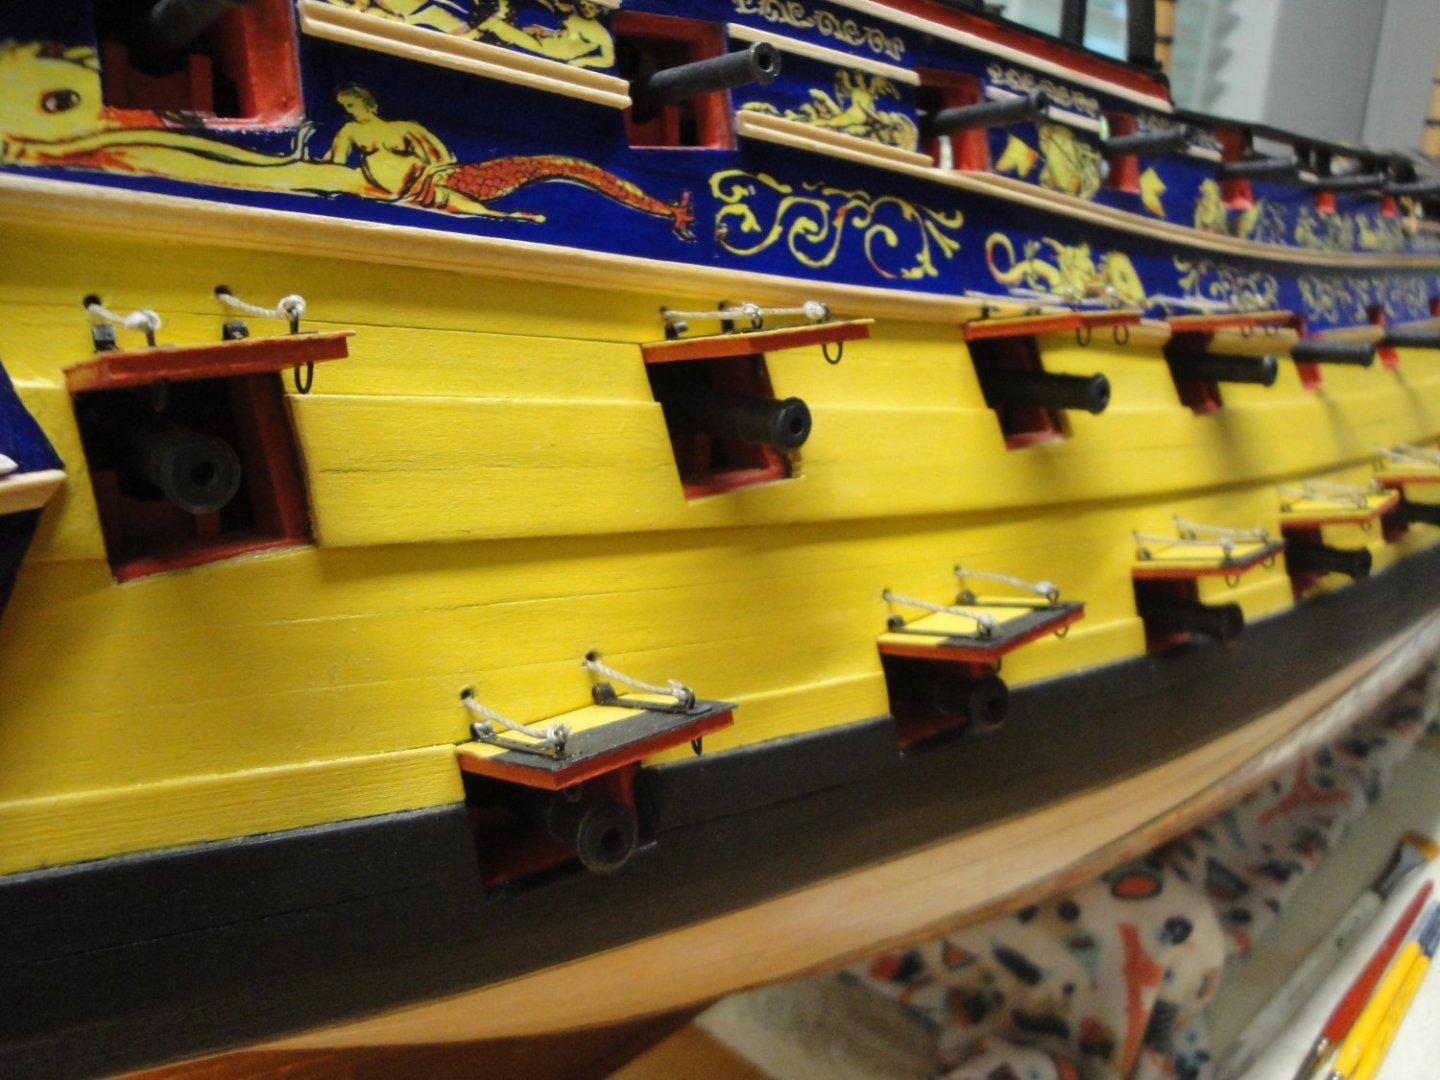
This side is now completely finished, as far as gun port lids go.... Still plenty of things to do....

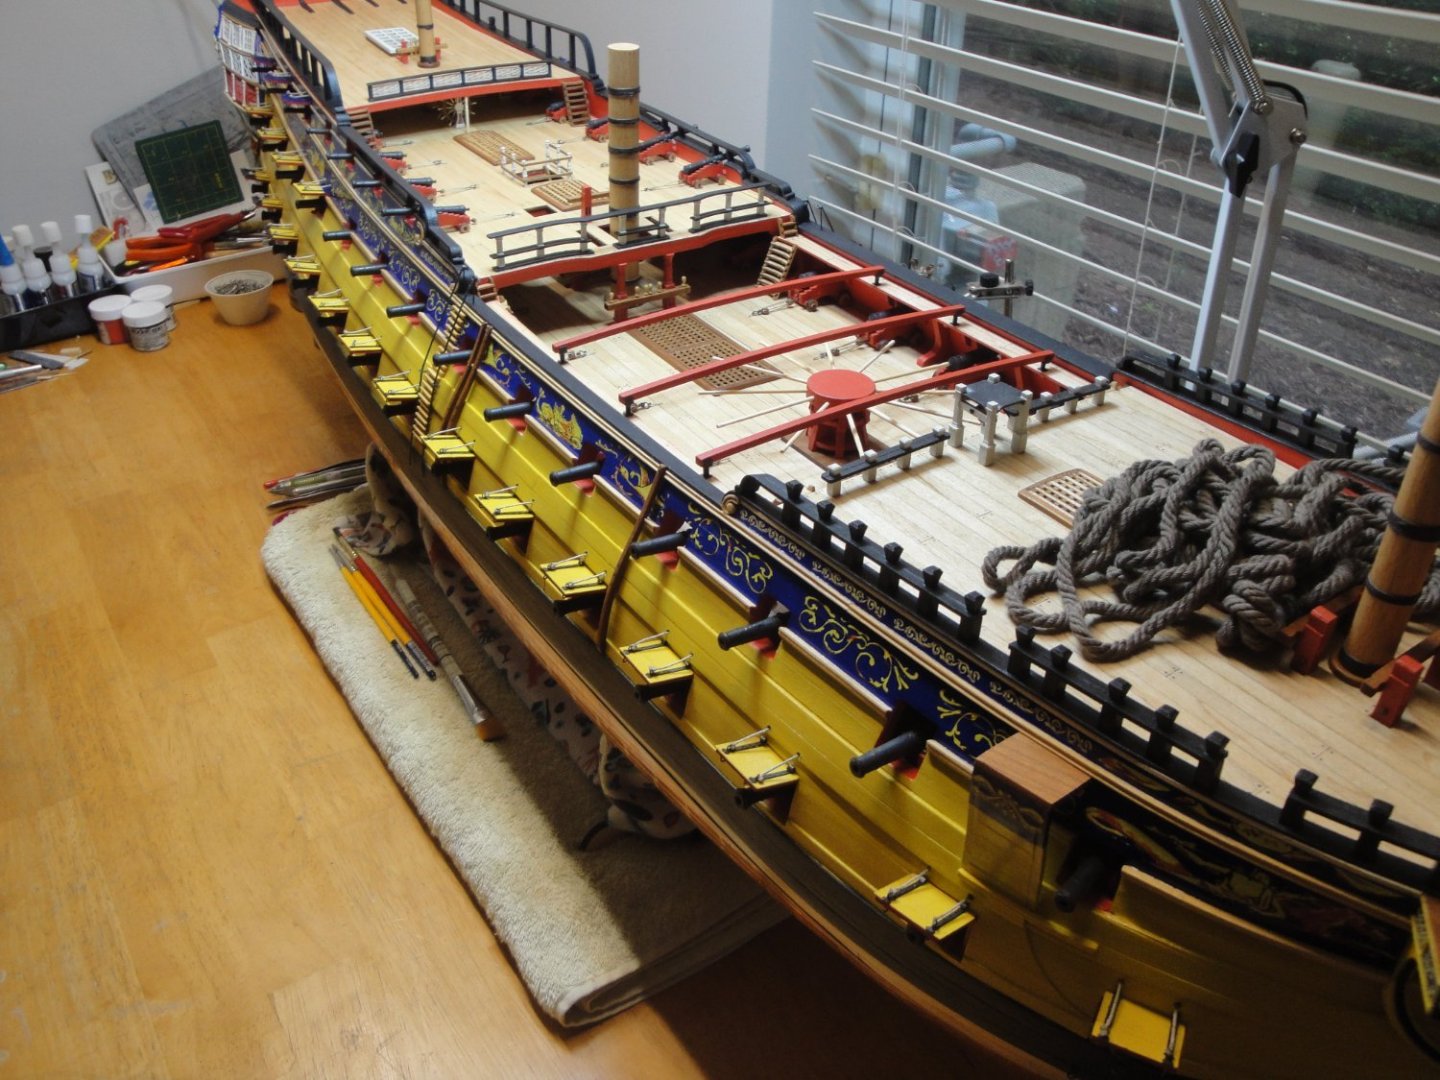


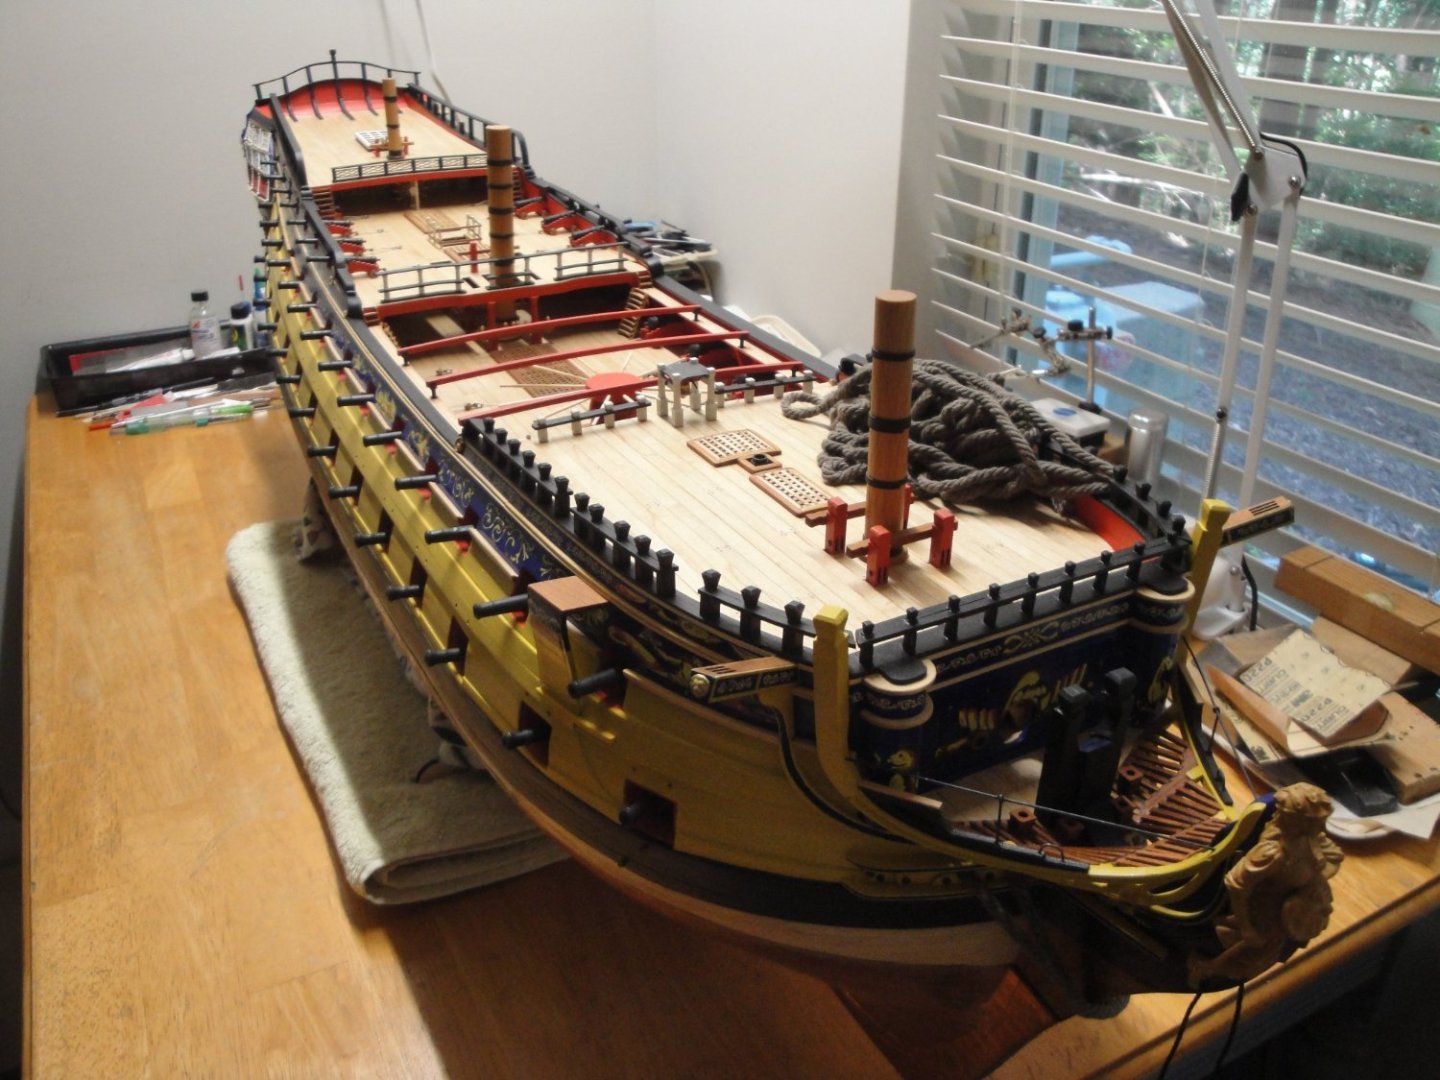
Overall view of the beast...
I will be travelling to Europe for an extended period of time and thus, it may be a while before the next update.
Yves
-
-
Rob,
Don't forget to tell us what you are using exactly, for paints. Acrylic, Lacquer, brushed, sprayed, brand and references. Thanks
Yves
- Egilman, Canute, Ryland Craze and 5 others
-
8
-
-
Oh Yeah. I have been thinking about getting that kit. I will be watching your "great" progress with a lot of interest.
Yves
- mtaylor, Egilman, Old Collingwood and 4 others
-
7
-
That helicopter is a fantastic improvement over the model provided in the kit. It looks really sharp.
- Nunnehi (Don) and BobG
-
2
-
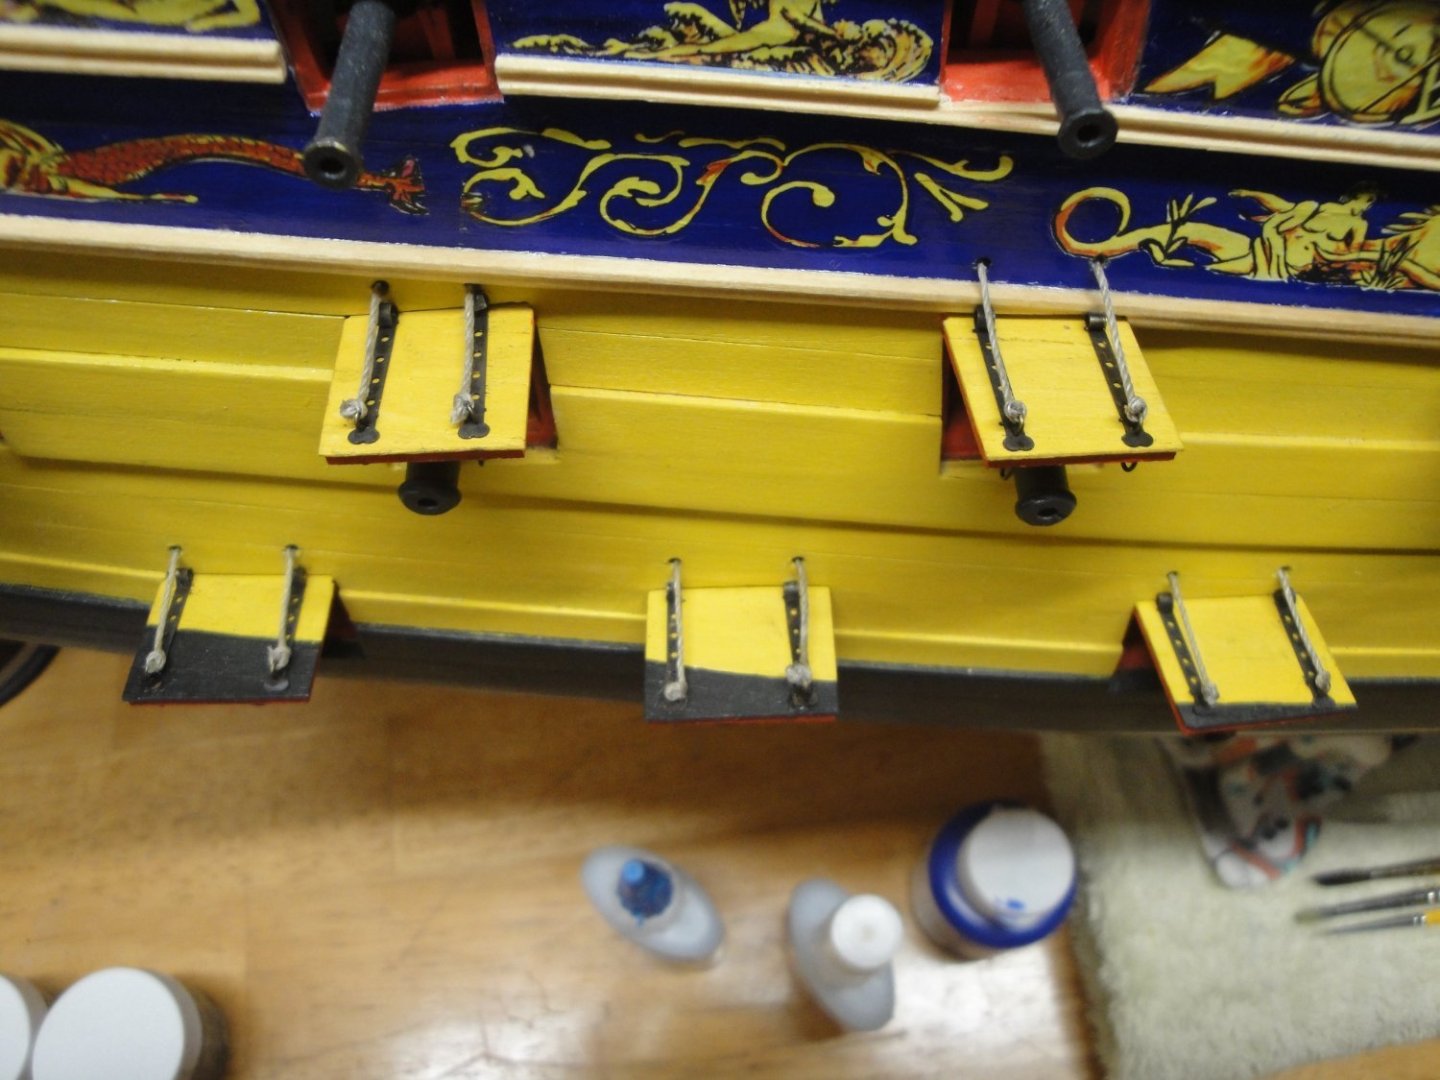
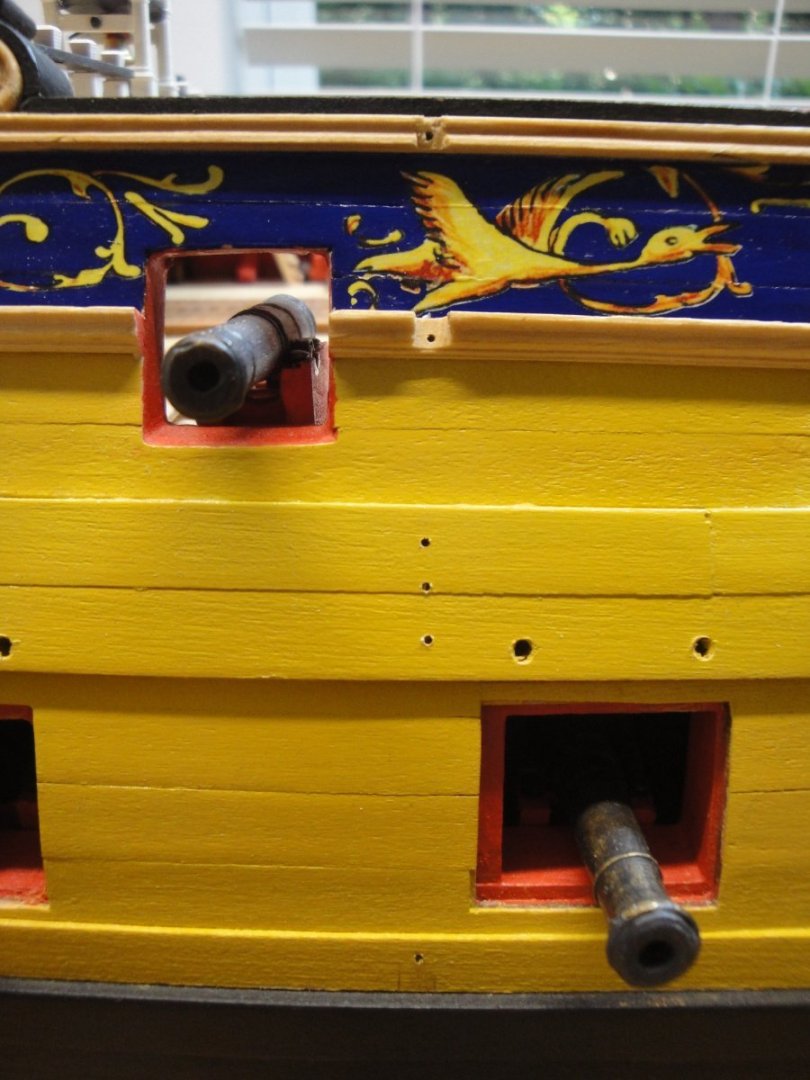
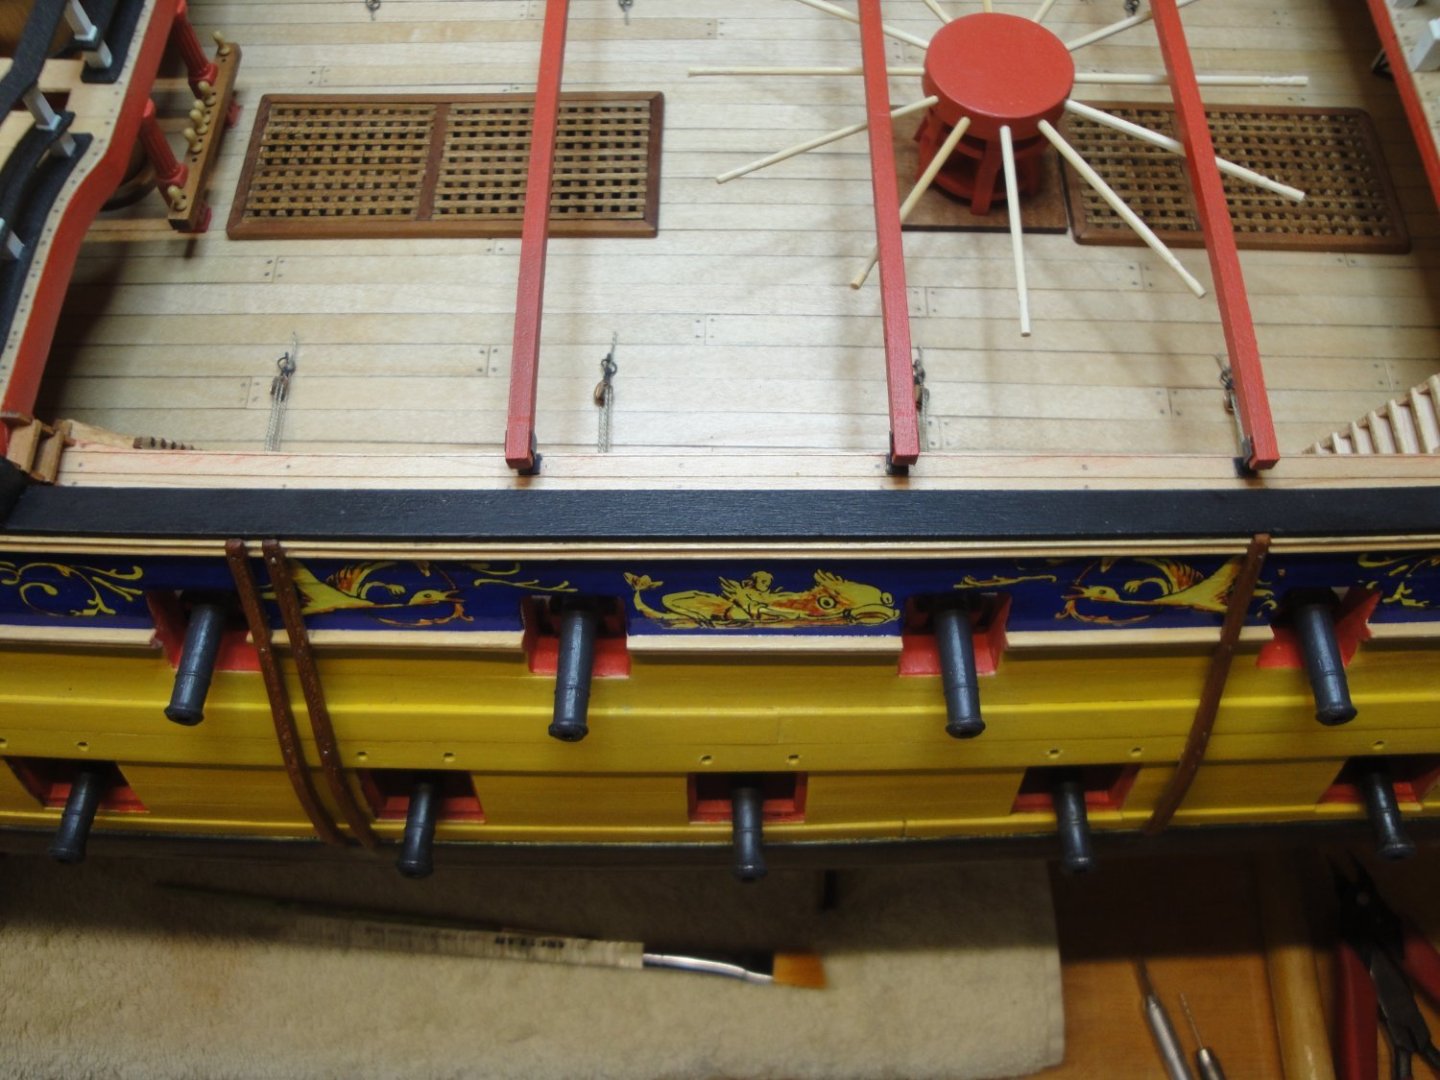
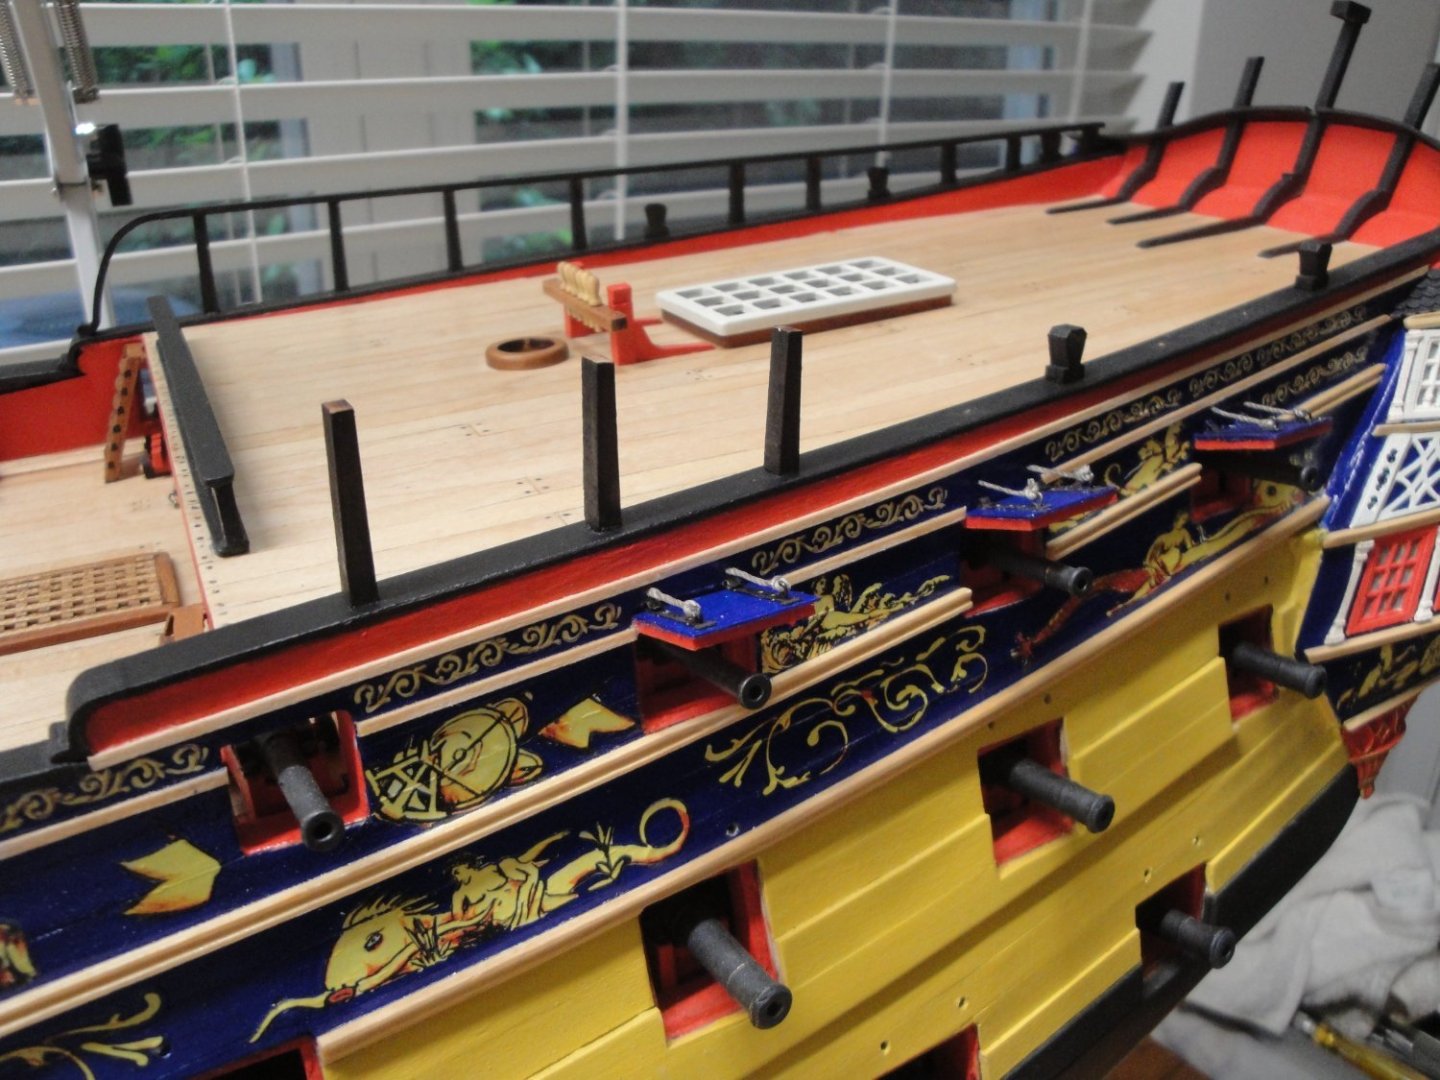
I started the tedious phase of building and installing the gun port lids. One quarter of the vessel, at a time....
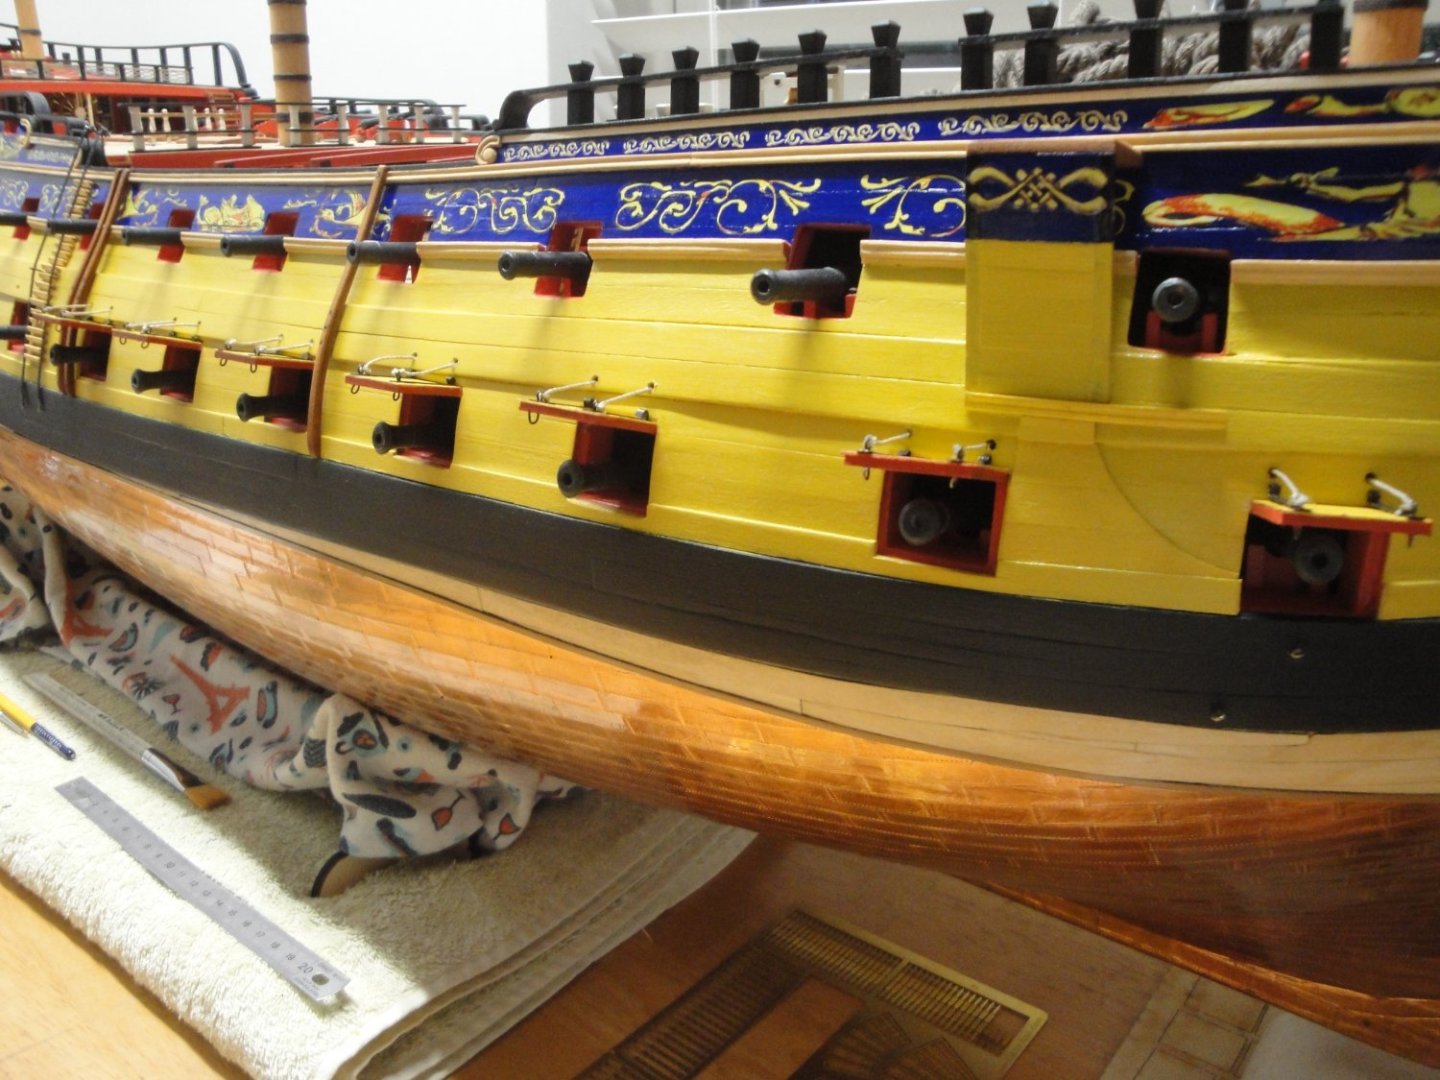

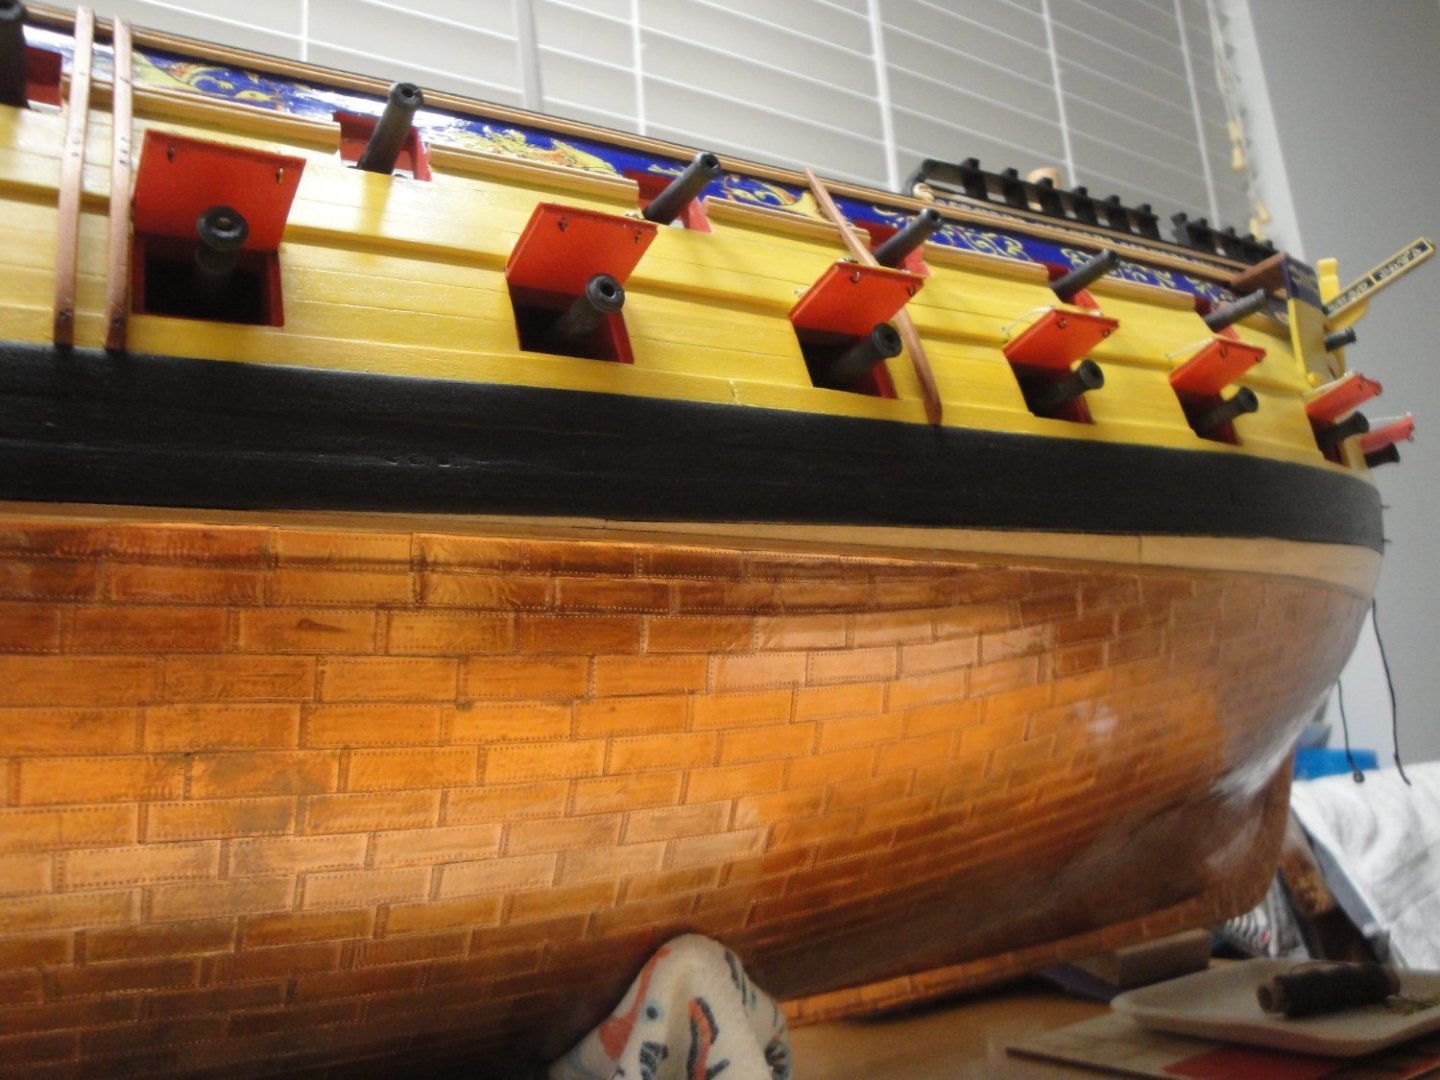
CAF Models provides enough PE parts to make them movable and fully hinged. On my model, I have simplified the articulations and glued the lids into the ports. Just a couple of dozens to go.....
Yves
-
-
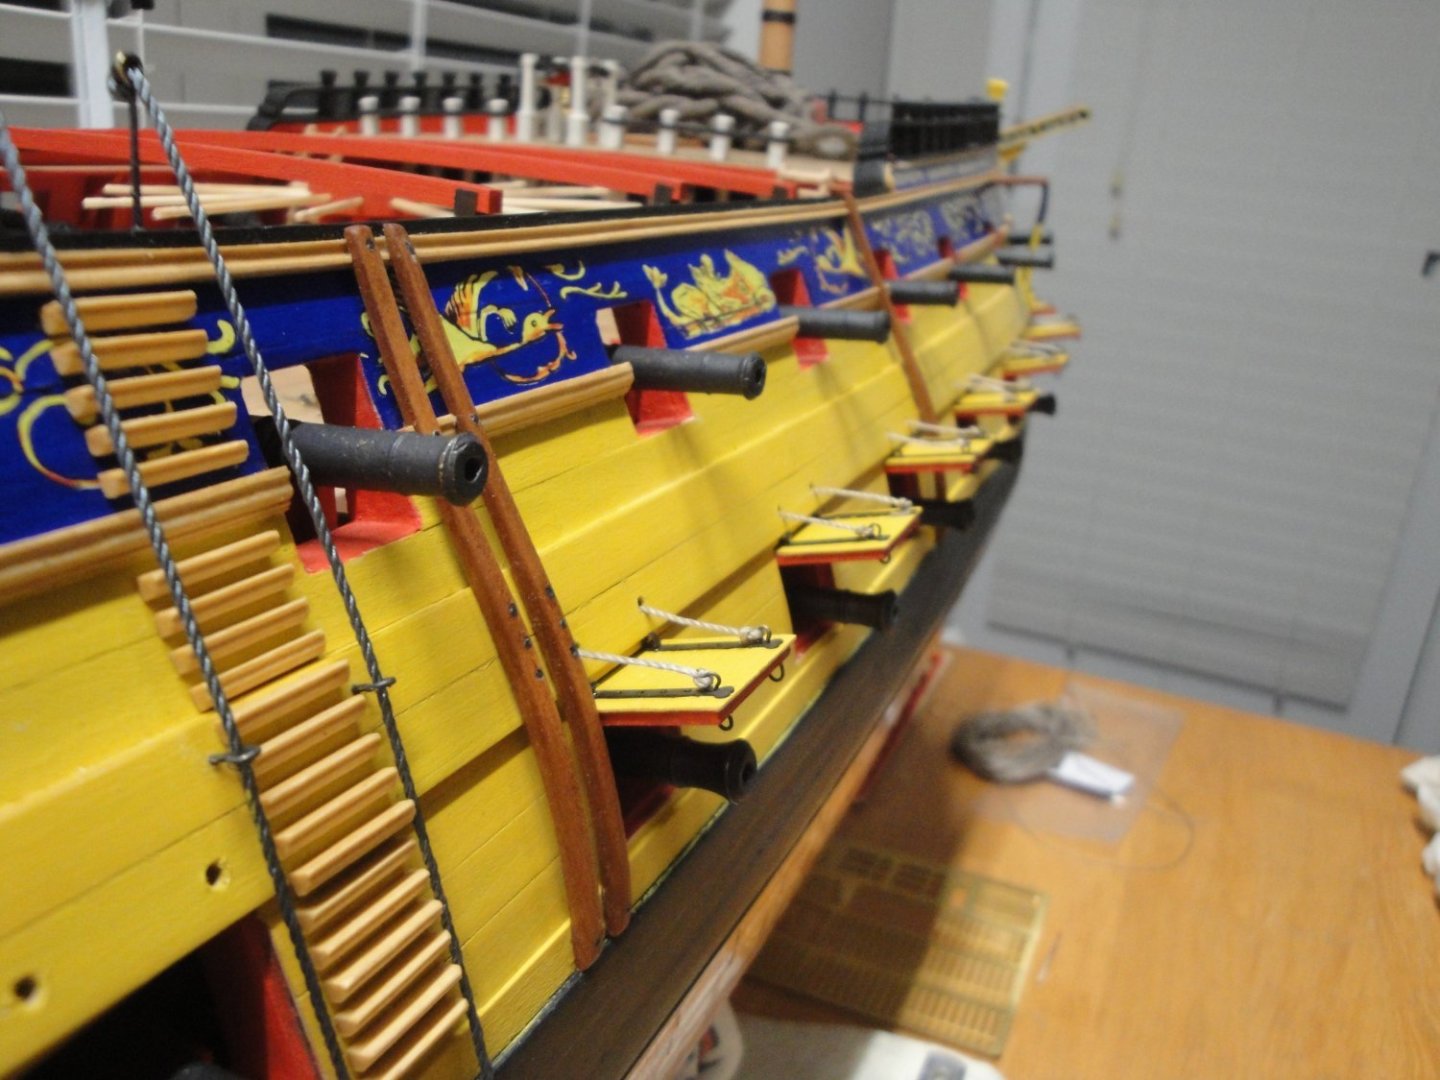
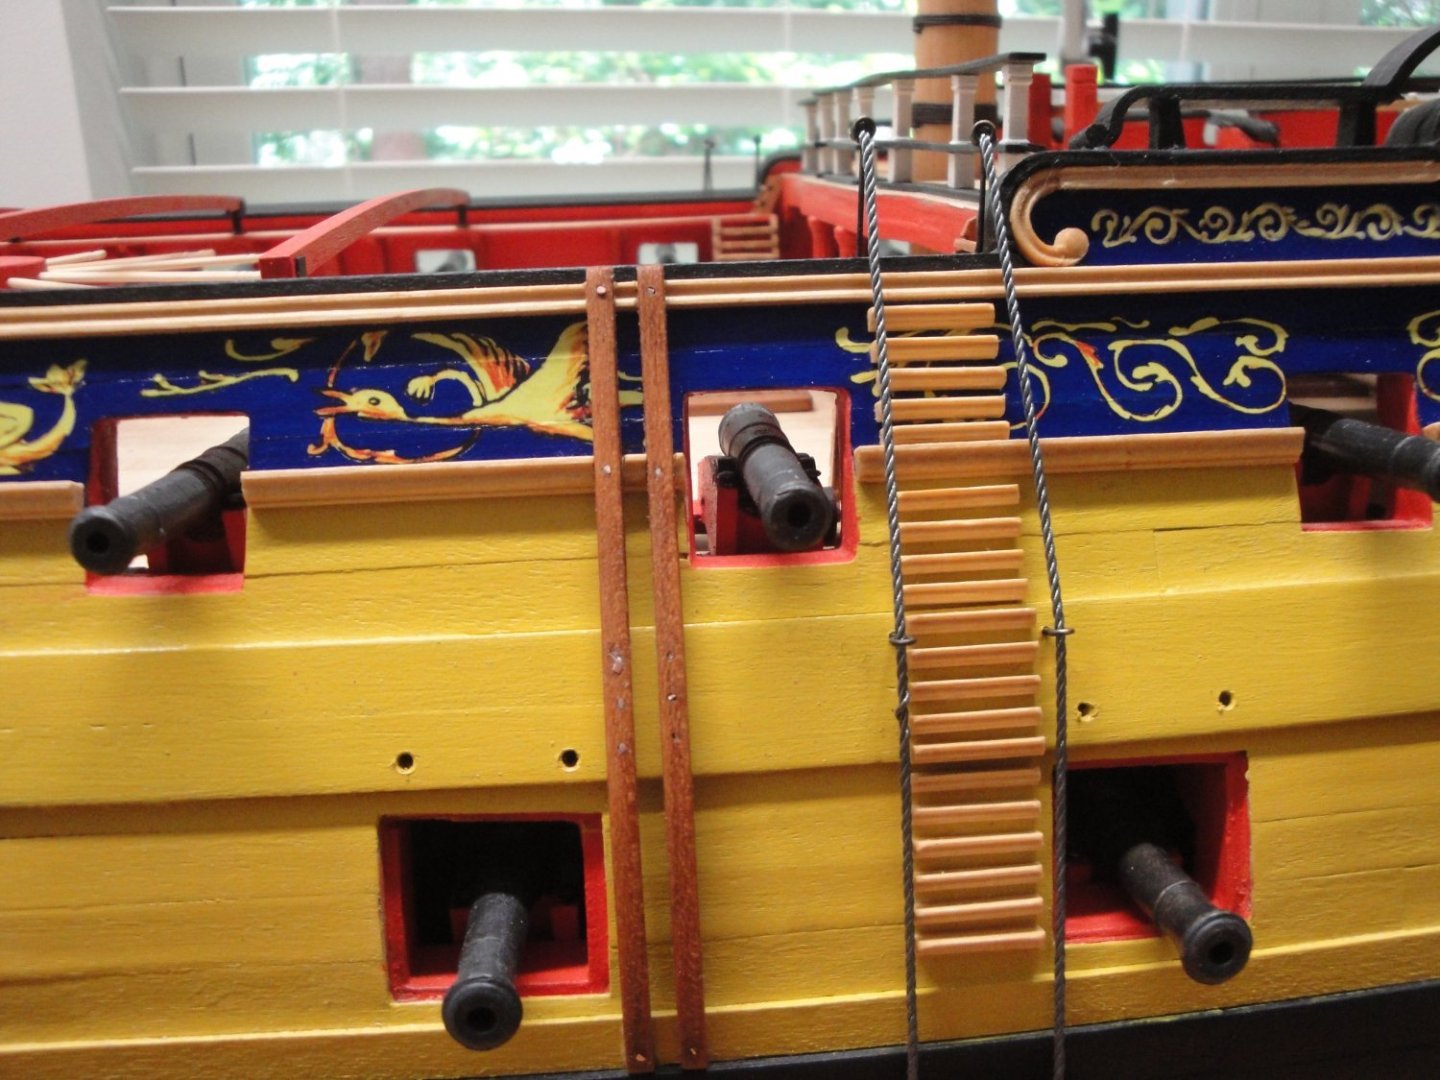
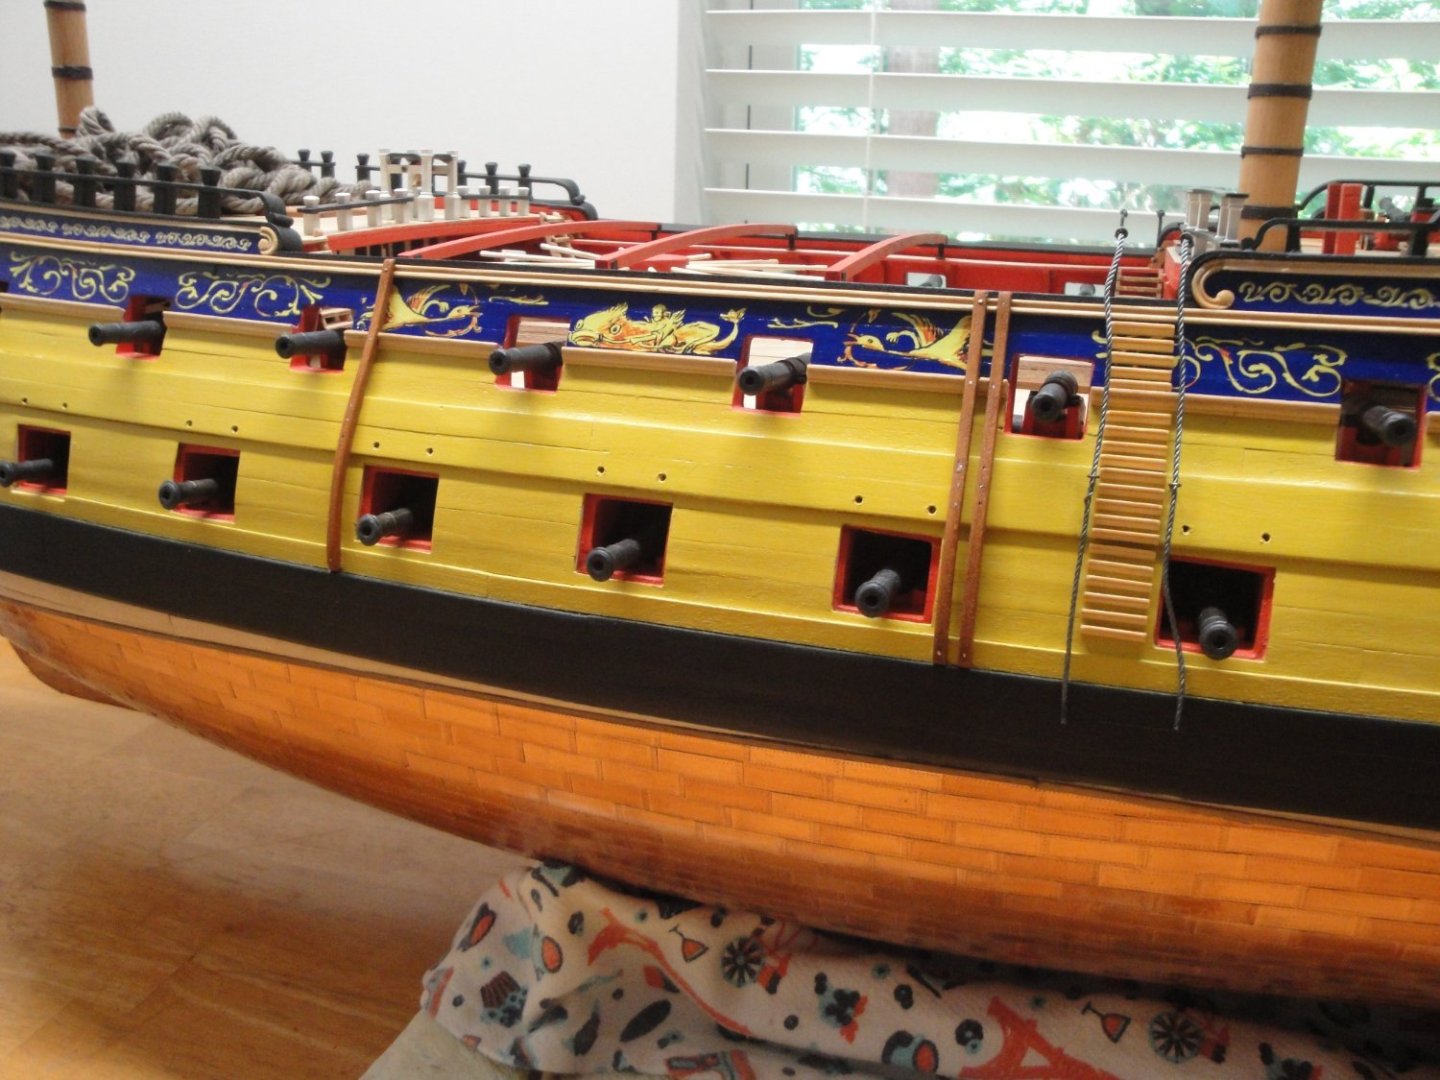
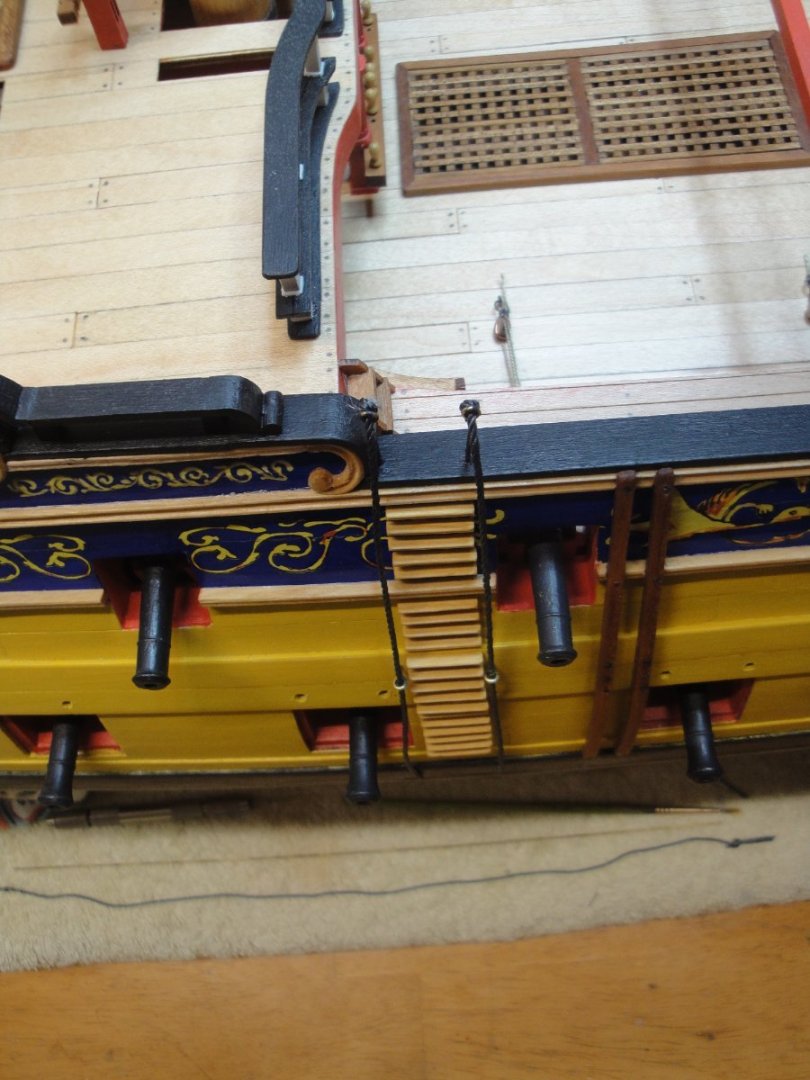
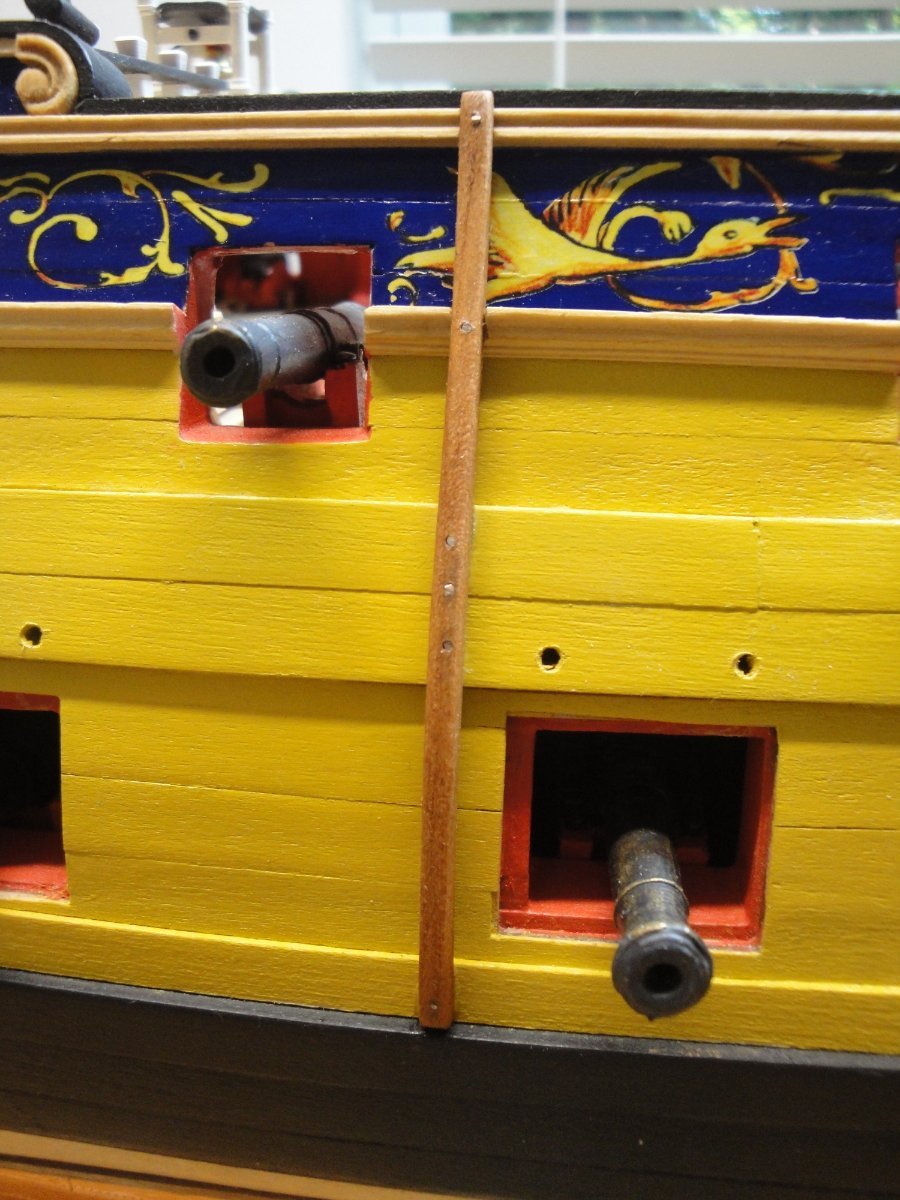
A few more information to describe the way the skid beams are built:
After placing carefully the beams, six holes are drilled in it. Then these holes are reported on the hull and drilled with 0.8 mm bit. Note the careful carving of the rails with a Dremel equipped with a disk.
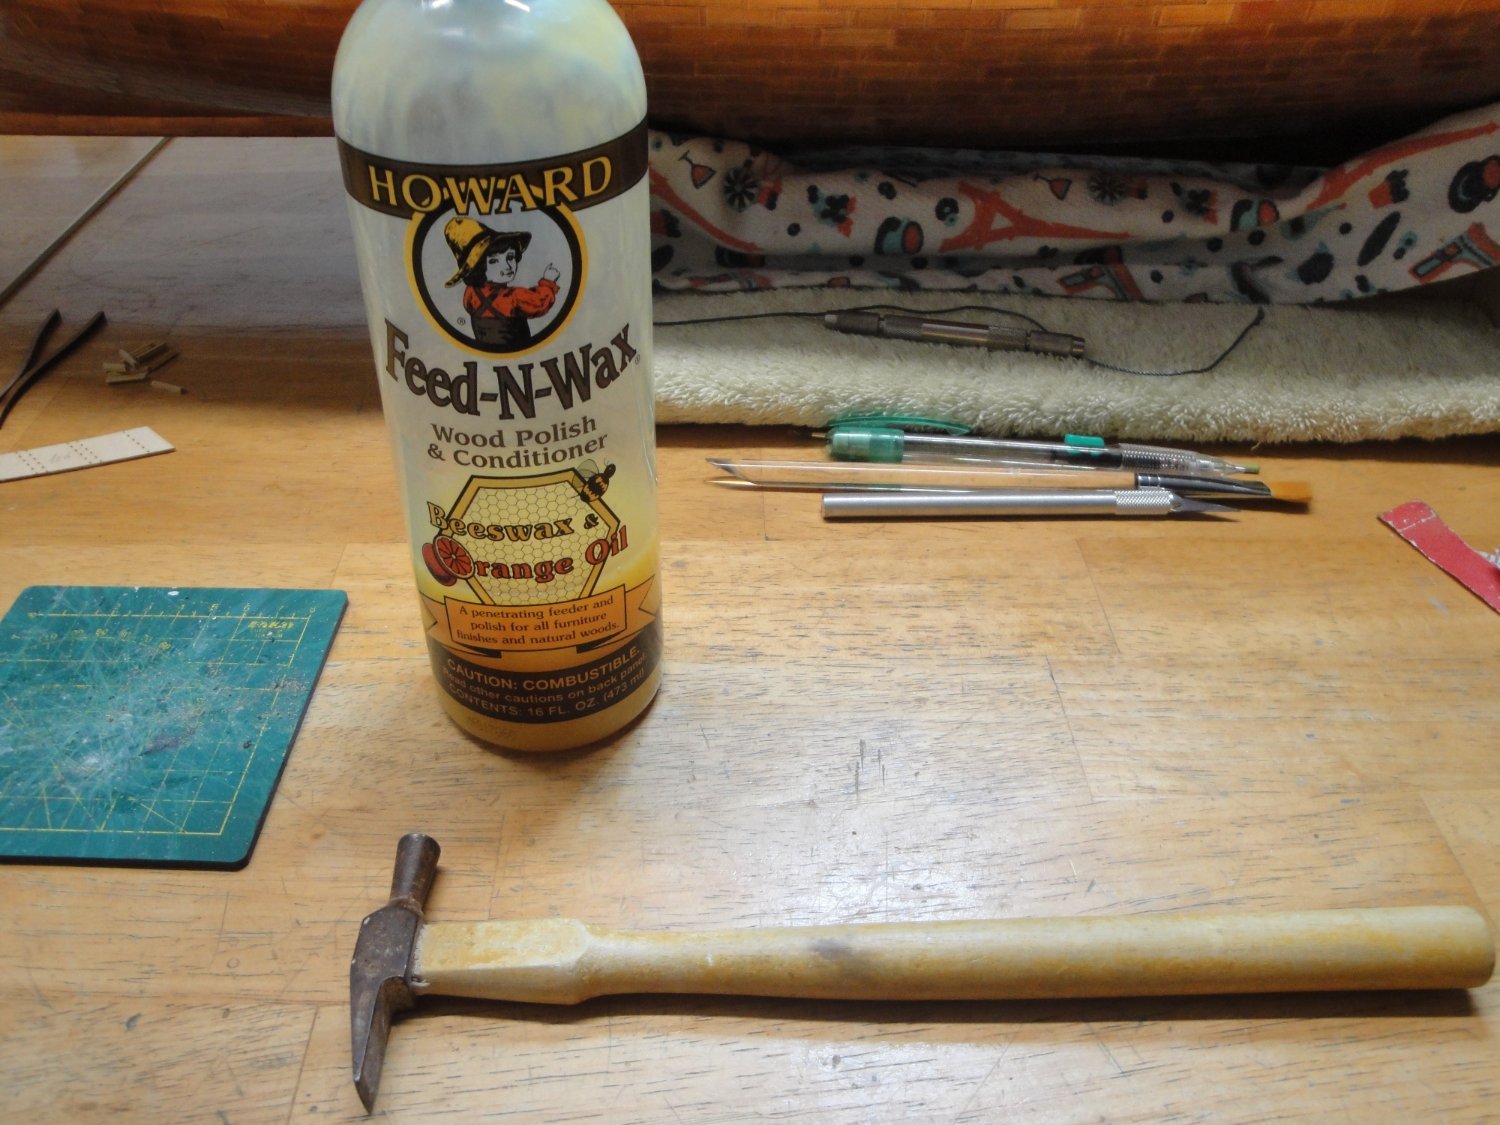
The beam is finely sanded and its external surface is rounded. It is then "oiled" with Howard Feed and Wax, revealing the beautiful color of the sherry wood.
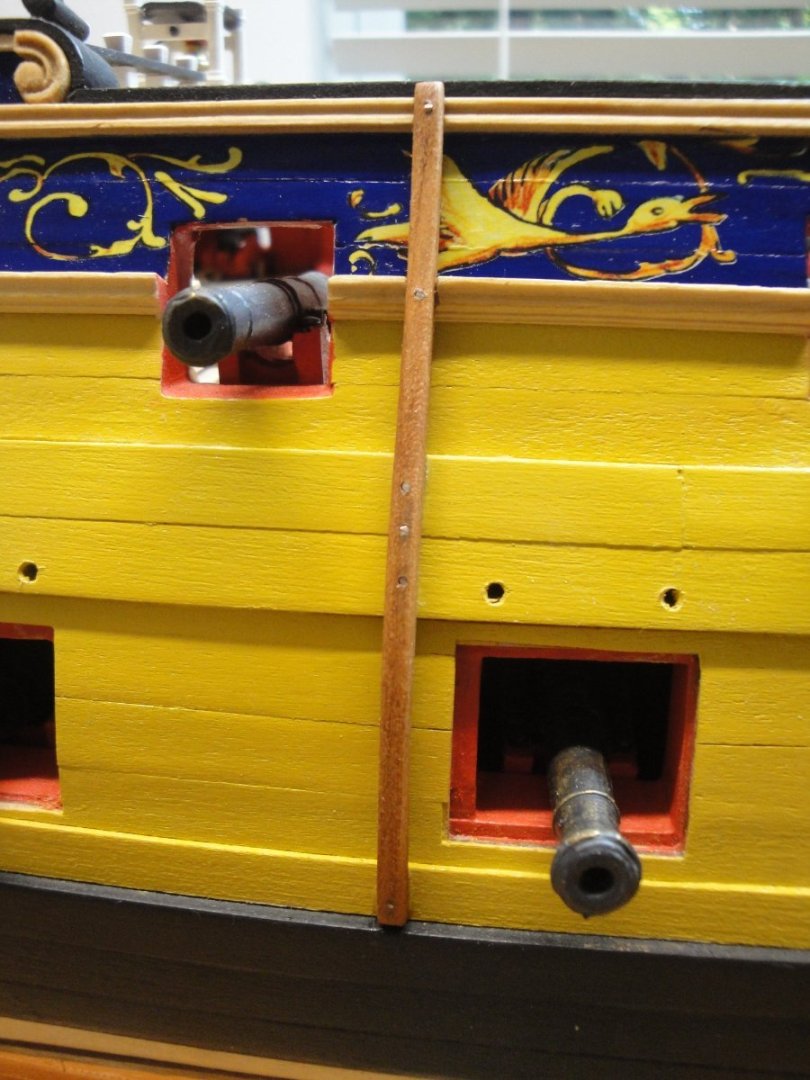
It is then glued (CA 7-10 seconds) and then pinned into place. The pins are cut and hammered down in the hull. At the end, a dab of Black Cannon acrylic paint achieves to give them the "old" look.

The steps are then installed:
Et voila, both sides have been completed:
I need to find a way to keep these ropes straight and dangling....
Yves
- grsjax, mort stoll, KARAVOKIRIS and 10 others
-
13
-
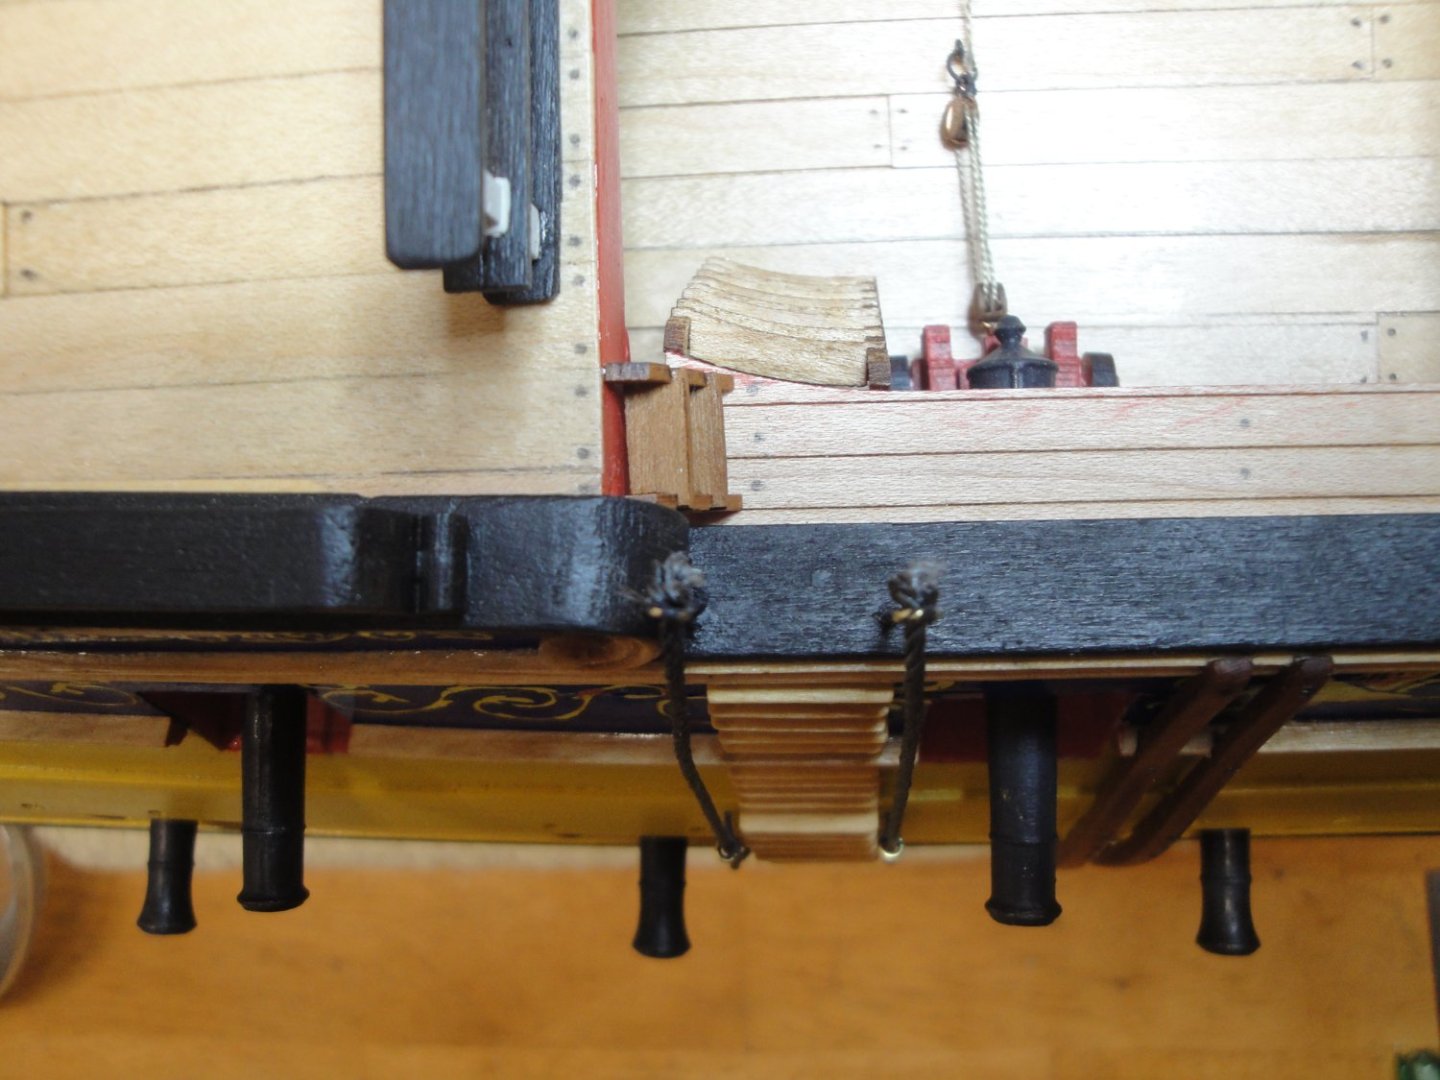
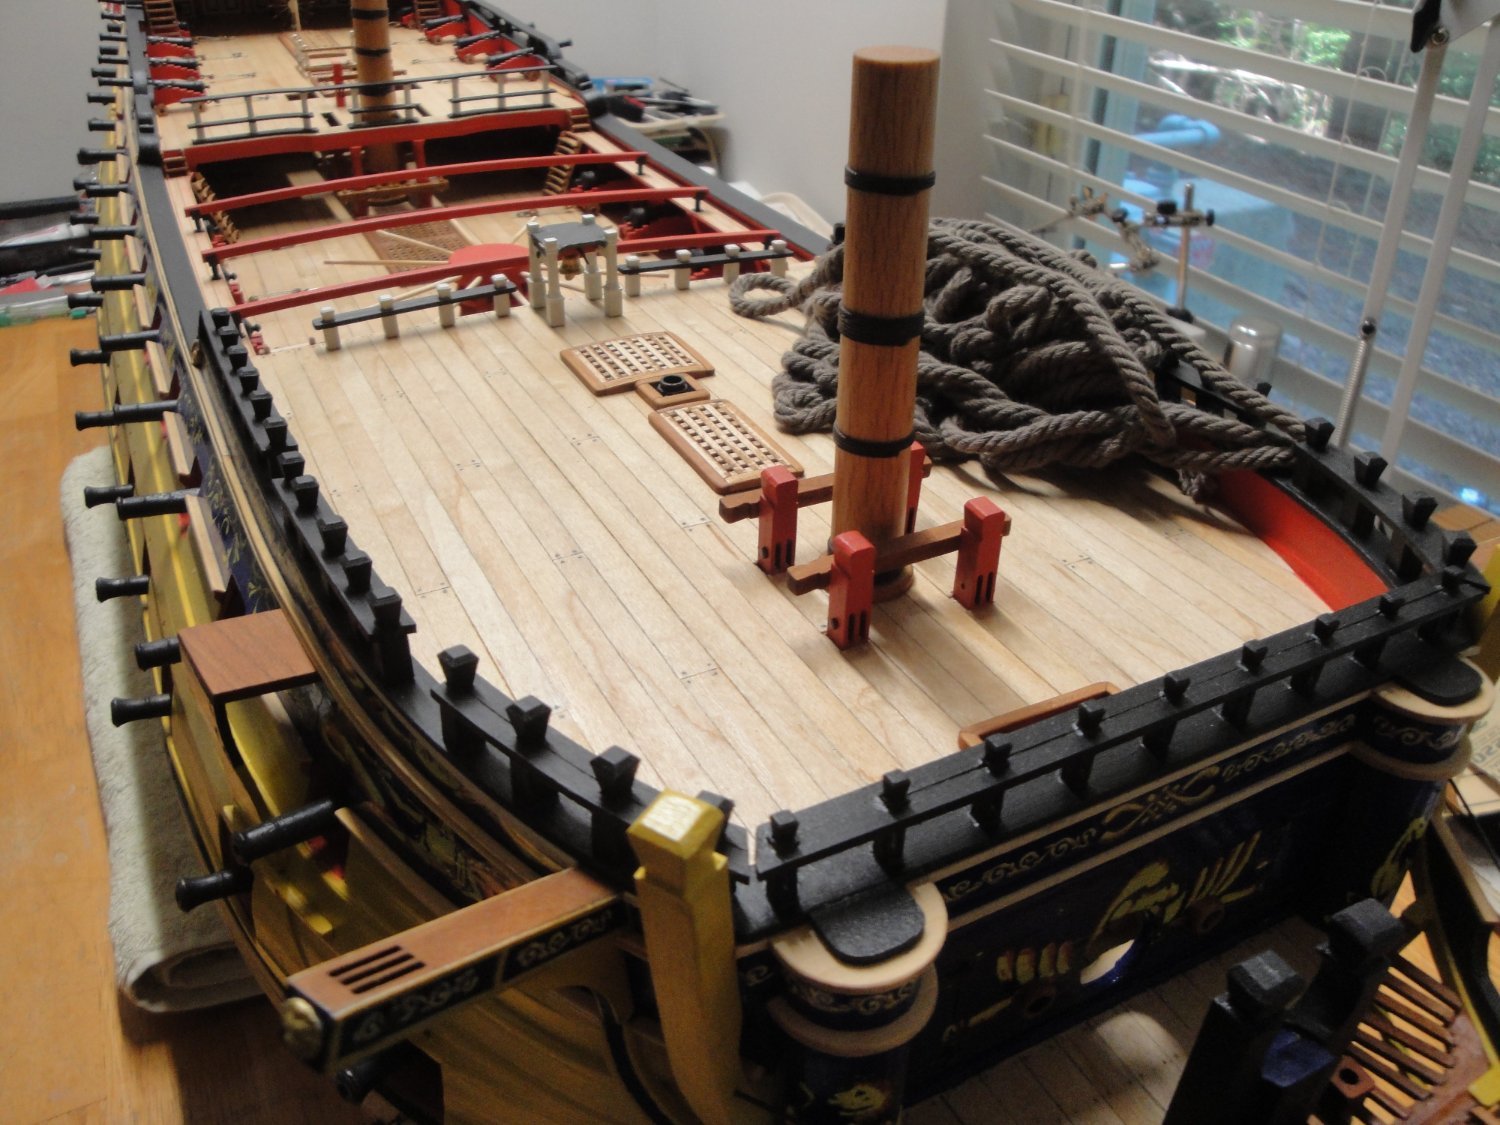
Installation of the skid beams and steps to climb aboard:
The skid beams are used to protect the hull when loading and unloading the various boats. The two close beams can serve to guide barrels and other large bags, being loaded on the ship.
Installation of these beams was a little bit nerve wracking as I did not want to damage the rails and the freezes.
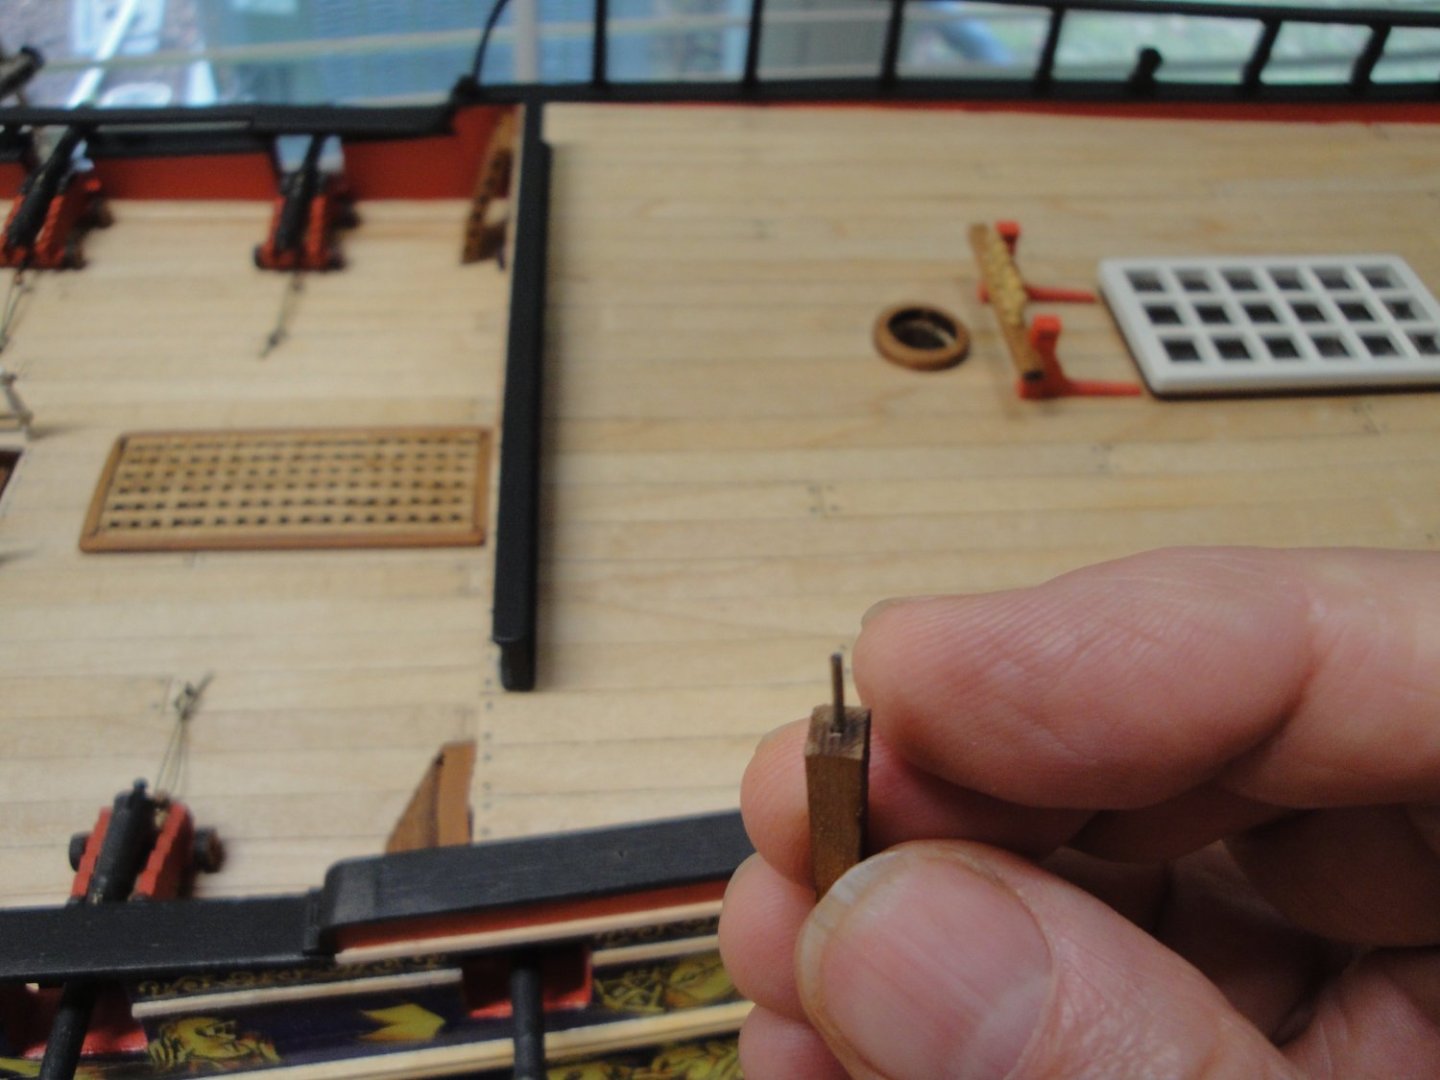
After the beams, come the steps:
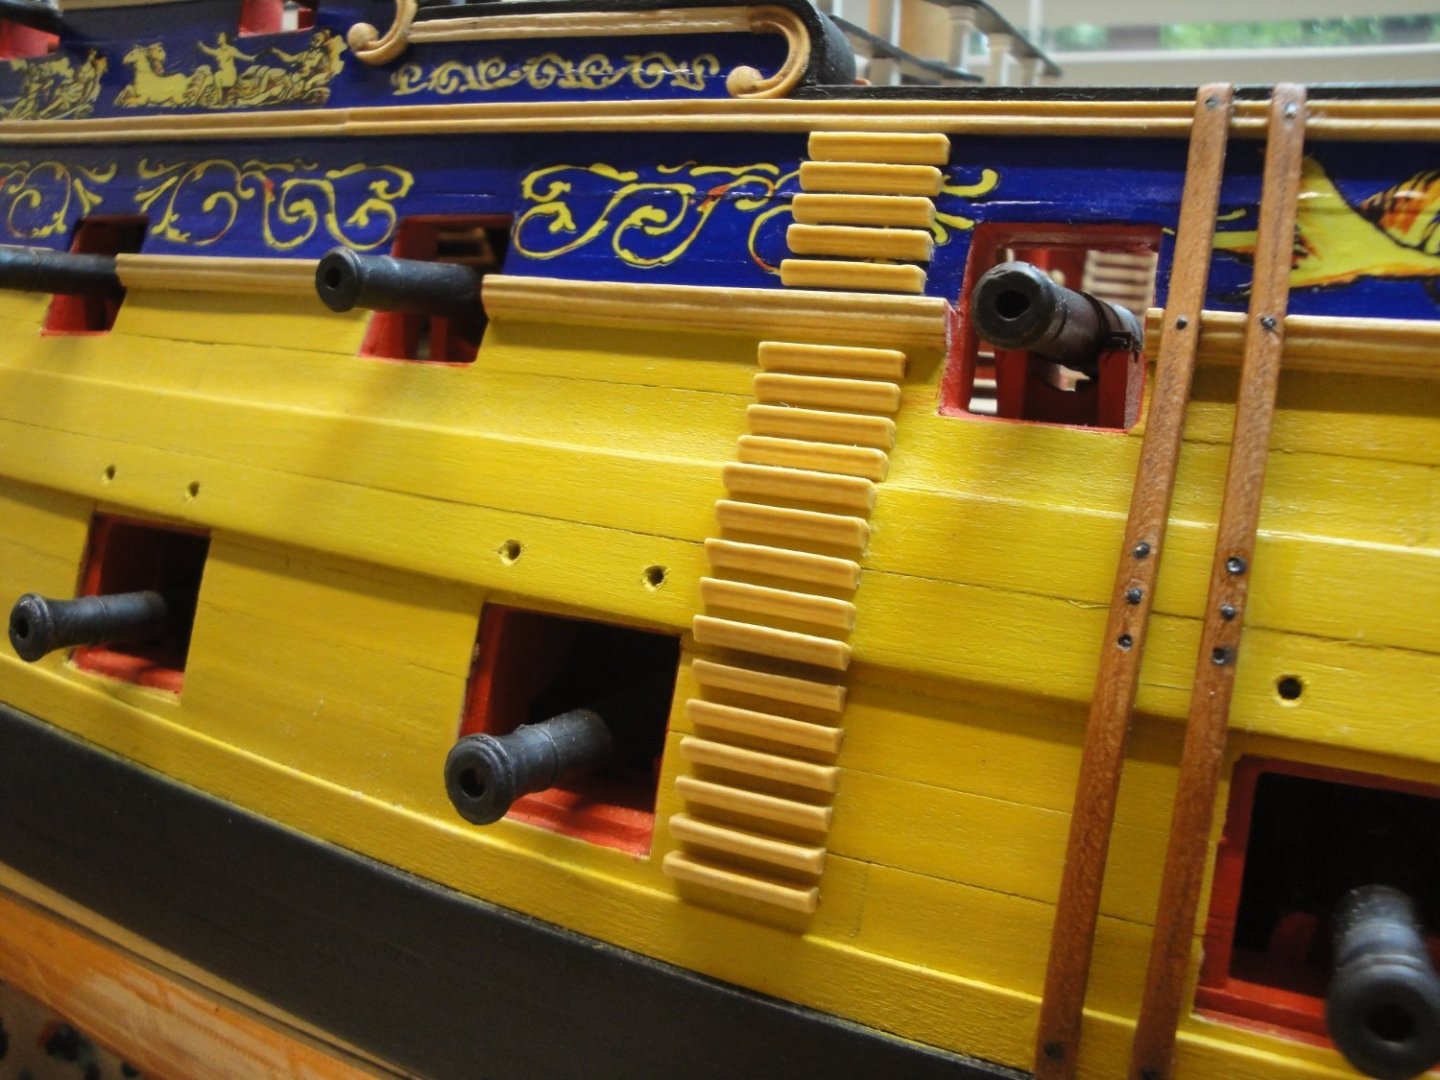
These are made with 2 x 3 mm strips, carved in the correct shape of steps. Steps are 14 mm long and separated by about 1.5 mm.
The kit instructions calls for strips of 3 x 3 mm. I found that it would be too thick and not provide enough gaps between the steps. I think that the 2 (thickness) x 3 (width) mm steps look more realistic.

It is very steep and some hand ropes seem necessary, to hold while climbing:
Below is pretty much the view that you would have, disembarking from the ship. It is like going down a slippery ladder....
Now, I just have to redo the same on the other side....
Yves
- rvchima, mort stoll, Beef Wellington and 15 others
-
11
-
 7
7
-
Lovely. I like the cats waiting for customers...
Yves
- Canute, Old Collingwood, Egilman and 3 others
-
6
-
6 minutes ago, Kevin said:
im going to let it do its own thing for now, and see what its like later on in the build, it is tarnishing much quicker than plates do
I left mine tarnish naturally for a few weeks and then sealed everything with Future Floor. It has been holding up its original color for more than a year, despite frequent handling with bare hands.
Yves
- Obormotov, Old Collingwood and mtaylor
-
3
-
Great work Kevin. Have you thought about protecting the copper or will you let it oxidize naturally?
Yves
- mtaylor, Old Collingwood and Obormotov
-
3
-
Beautiful and enchanting little boat. Not many chances to see this kind of boat built in scale models, as such thank you for sharing your passion and allowing to discover this part of the South American culture.
Yves
-
16 hours ago, rvchima said:
This bad boy wandered through my yard this morning looking for a cookout.
I was in Lake Lure this past week, and one of the bears sneaked into the boat house, took all the bread bags and emptied the trash bin. Another one was spotted swimming in Lake Lure and apparently crossing the lake....
Yves
-
You need to place a flat car on the tracks, somewhere appropriate.
Yves
- FriedClams, Old Collingwood, Canute and 6 others
-
9
-
-
8 hours ago, RGL said:
So I went away interstate with some club friends for a hobby comp, got best ship for Thetis Bay, Best Sub for U-9 and Peoples Choice for Seydlitz. Got golds for all and for HMS Zulu and a silver for the Porco Rosso. Nice review on U-Tube, last few minutes https://youtu.be/Aq1T8z5jz9g
Yes, I watched with pleasure and admiration, your models presented on the The Model News. I placed a link in your Porco Rosso thread.
Congratulations.
Yves
-
In an effort to enhance the appearance of the "stumps" provided in the kit, I placed some fine threads around the masts, respecting the number of turns and distances between the coils as described in the Anatomy of the Ship book:
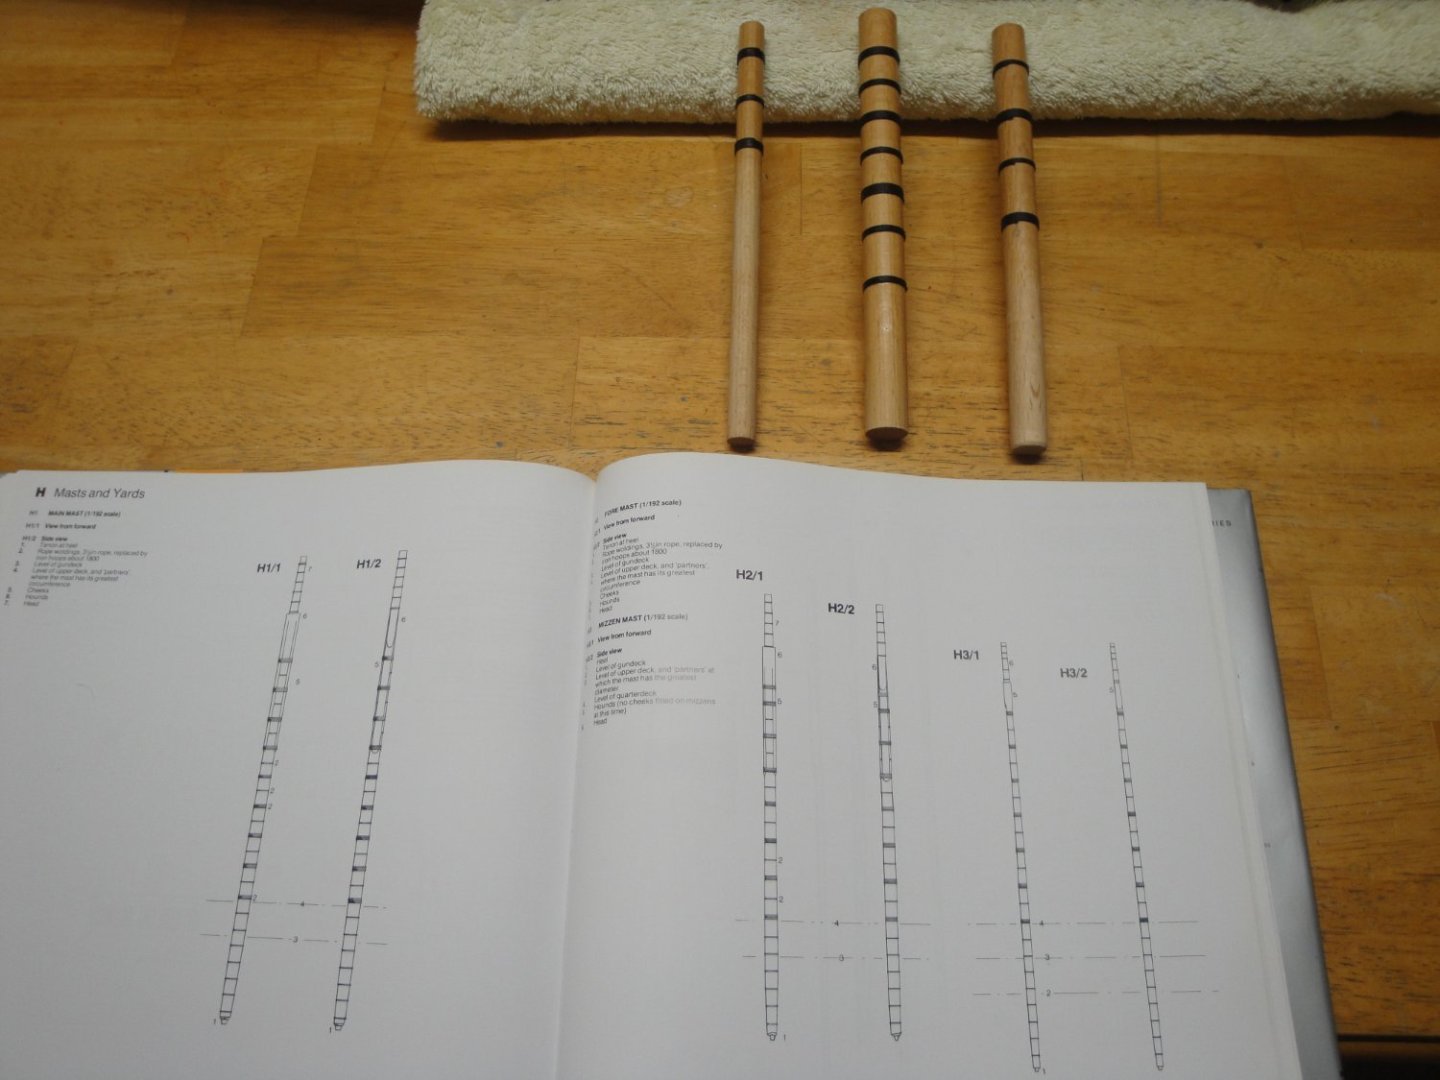
It does indeed improve the appearance of those short stubs, without departing from the Admiralty presentation:


Yves
- mort stoll, KentM, jpalmer1970 and 11 others
-
9
-
5
-
-
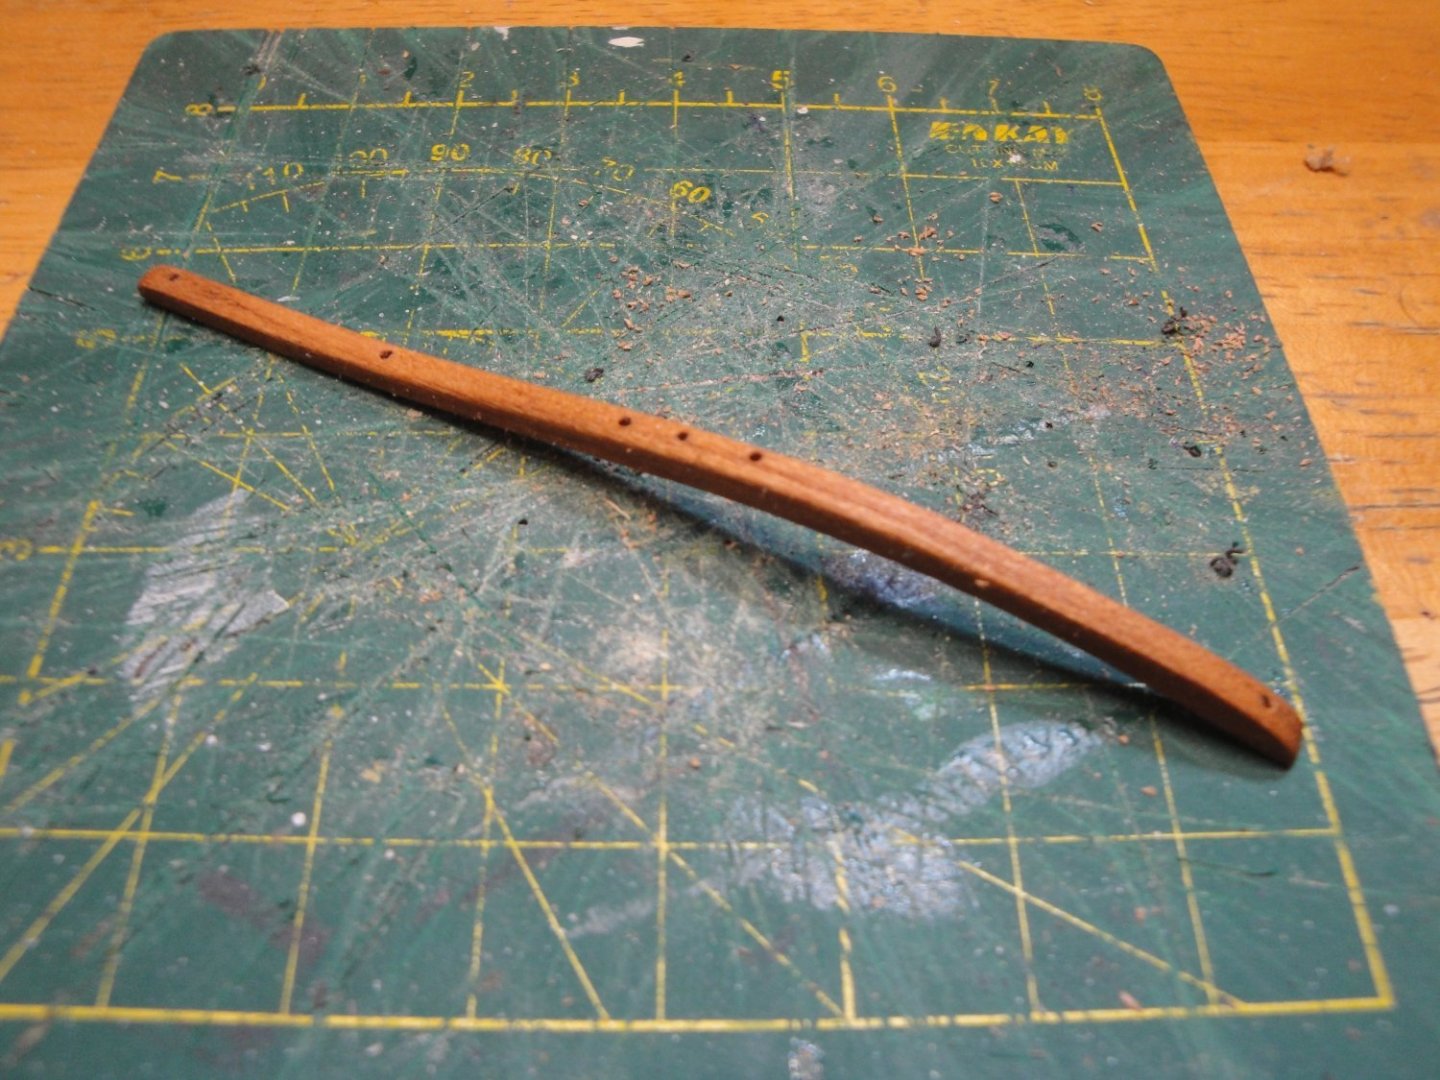
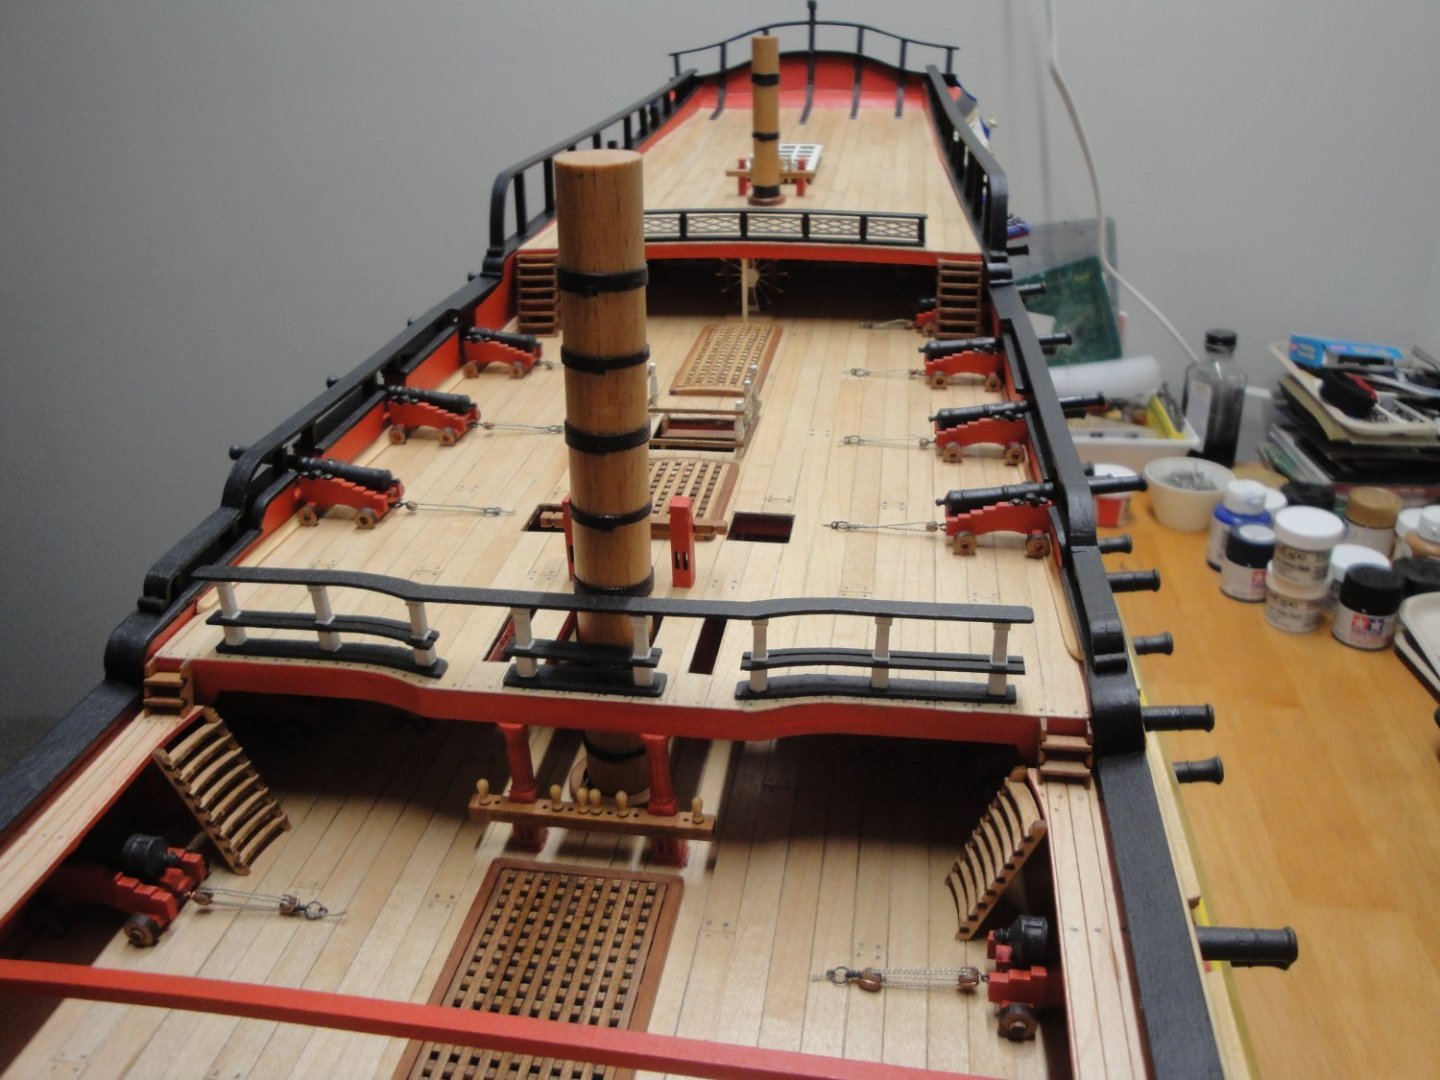
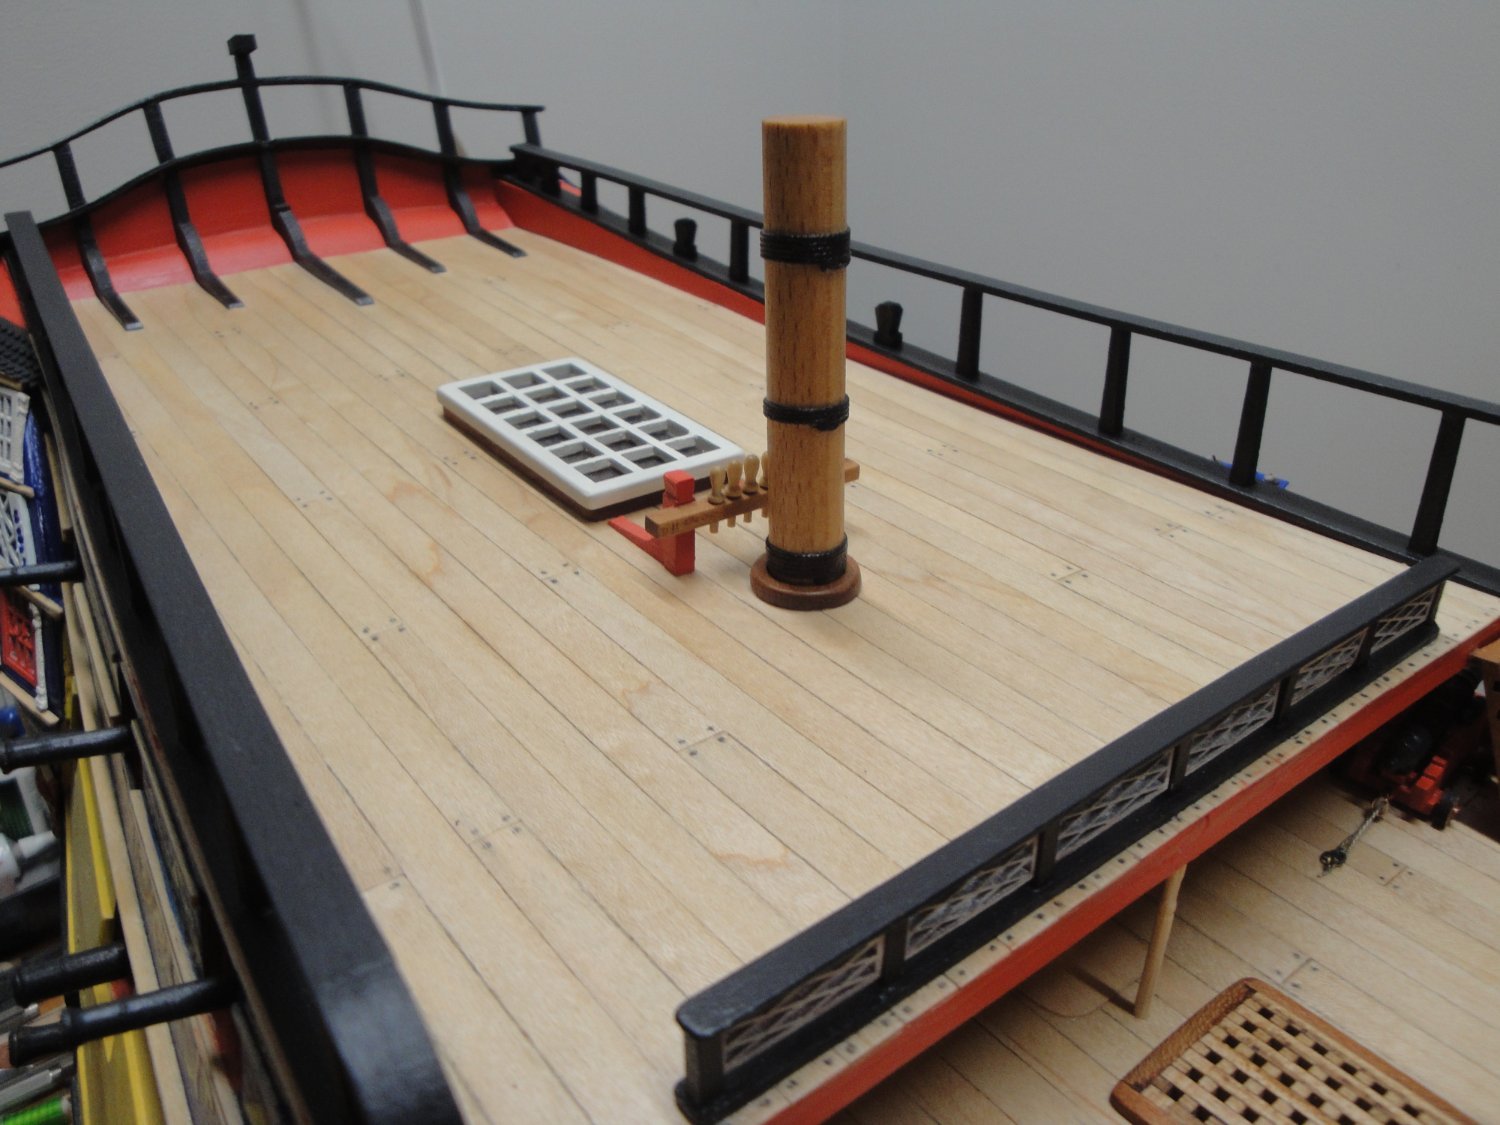
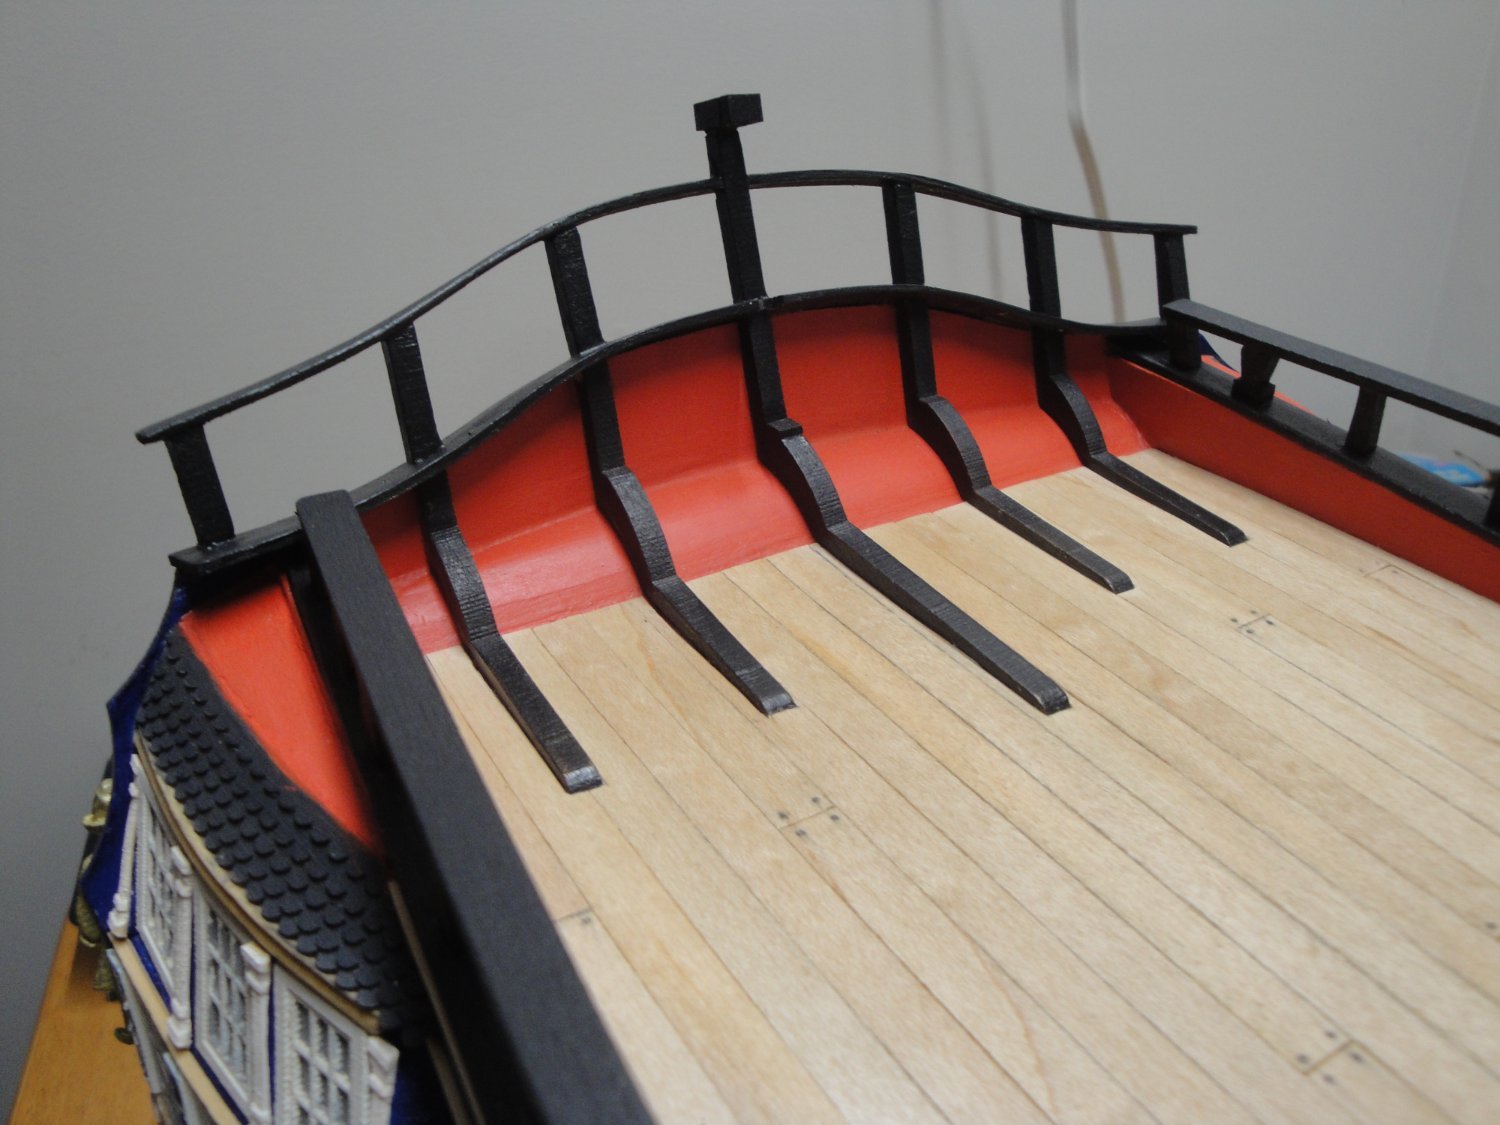
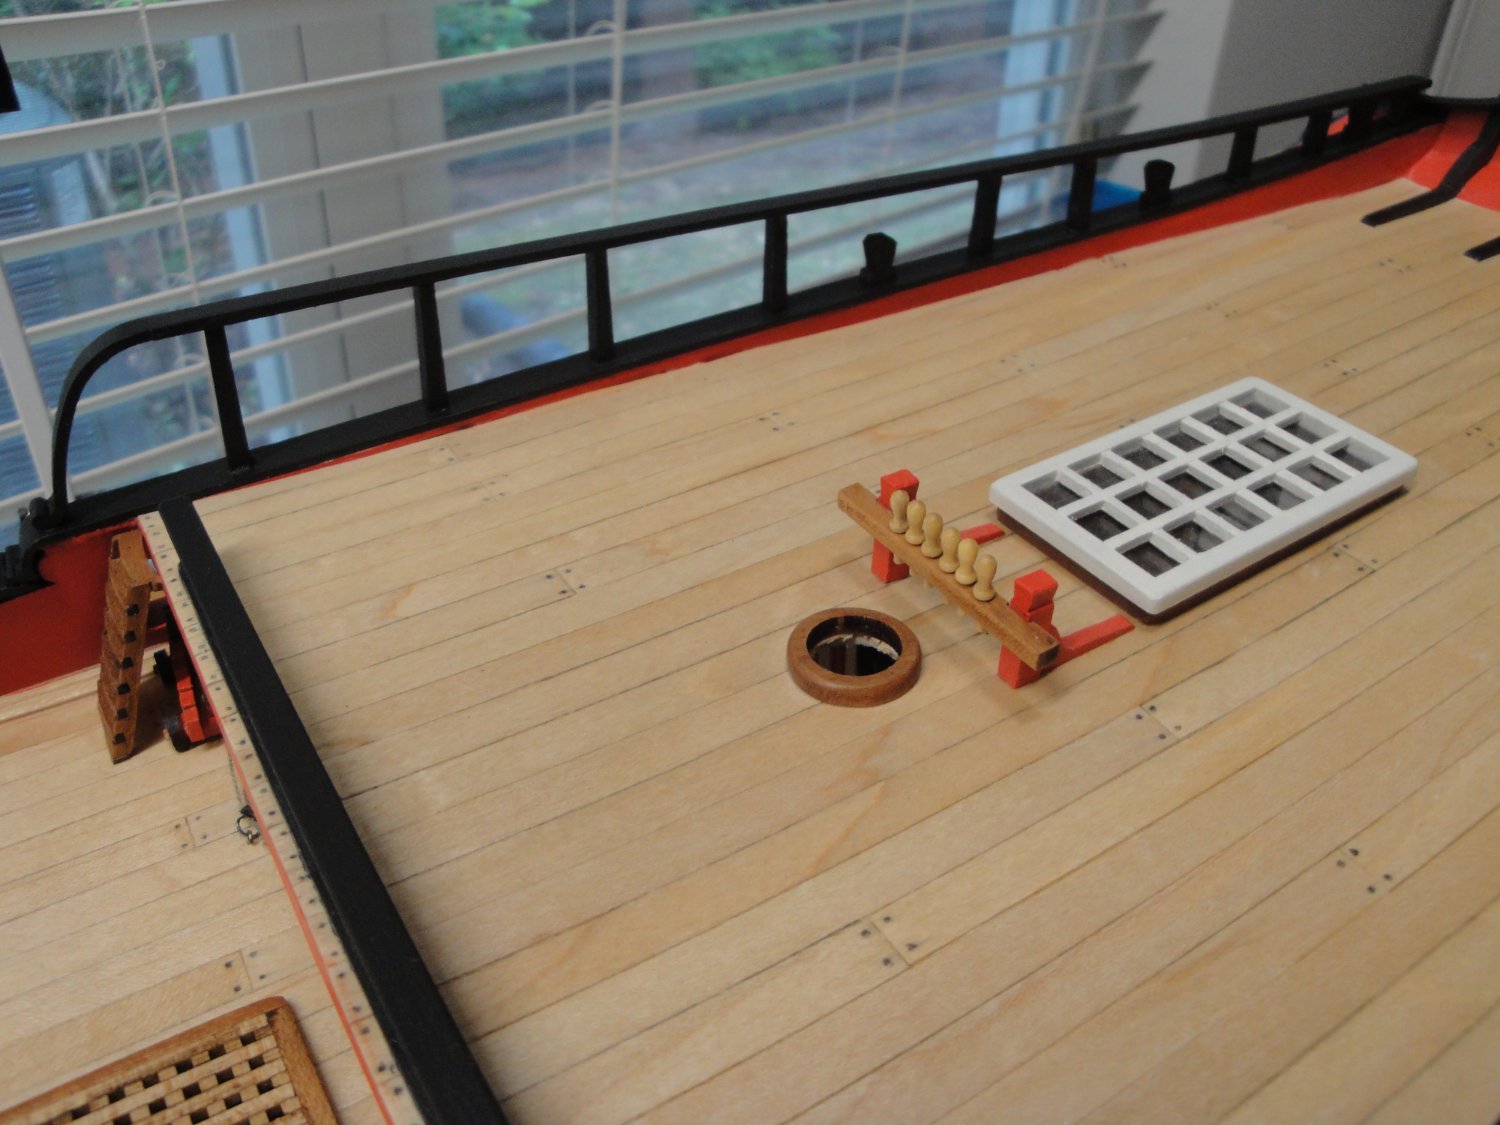
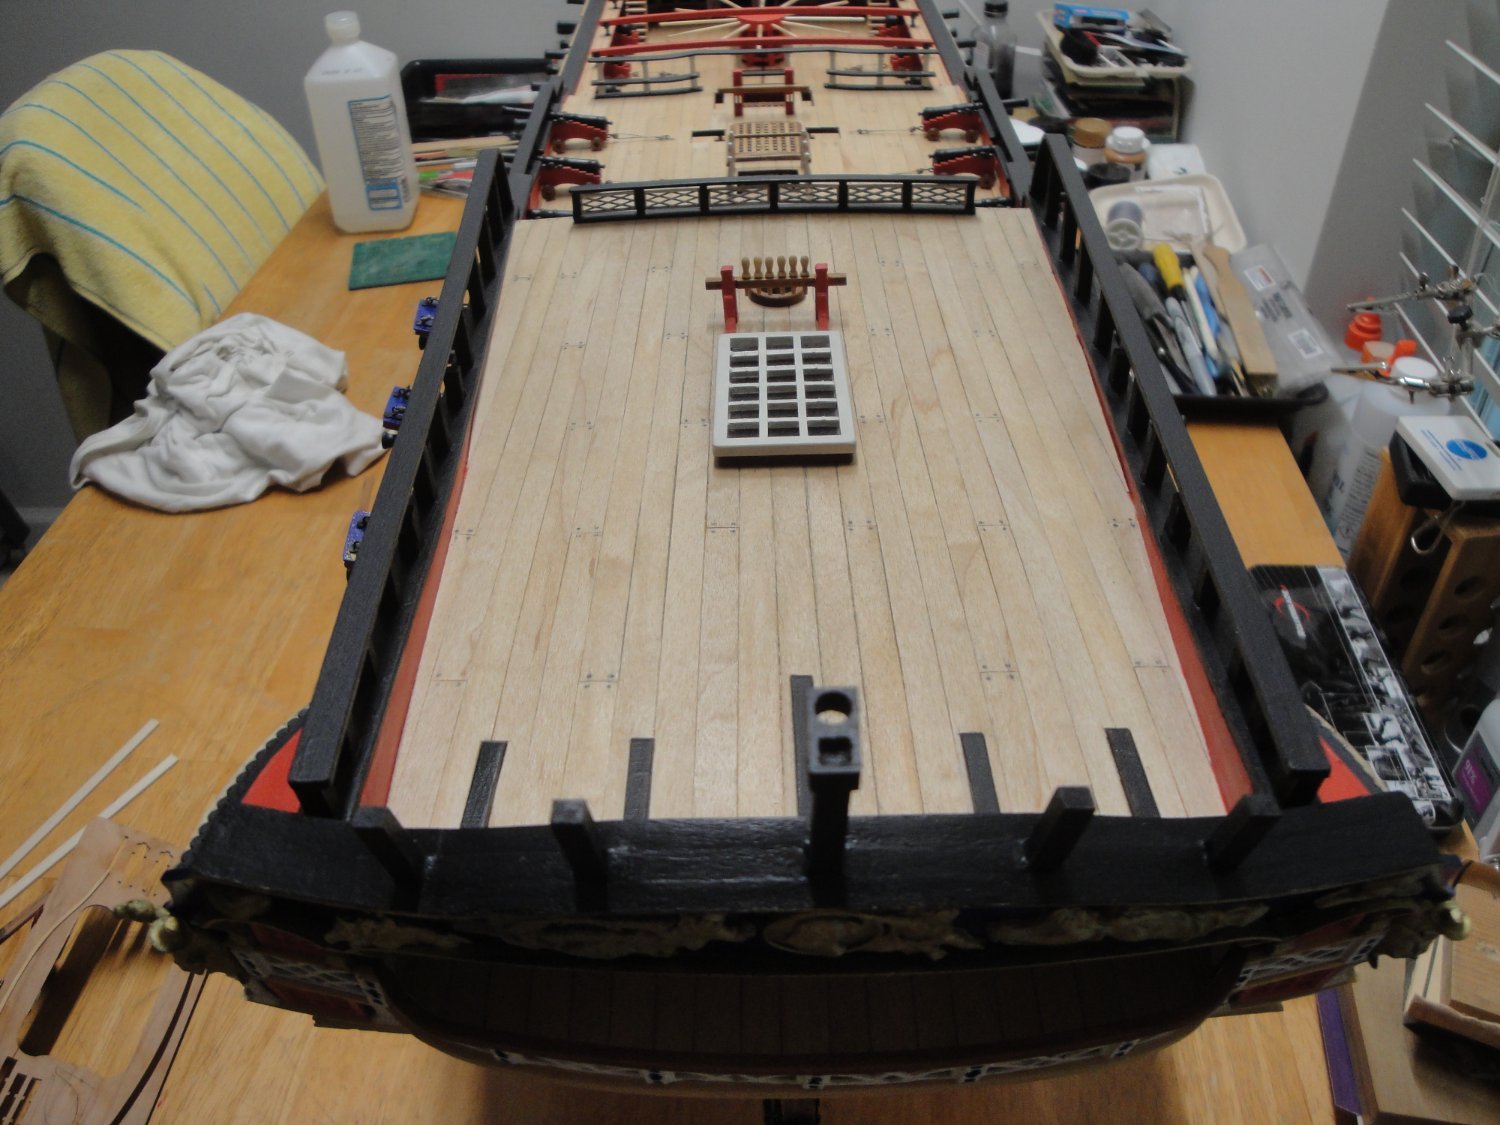
I have completed the railing of the poop deck. Overall, it is quite delicate due to the length of the stands, and the long ones must be pinned if you intend to have something that holds correctly. The pins are made with electronic components pins of about 0.8 mm diameter.

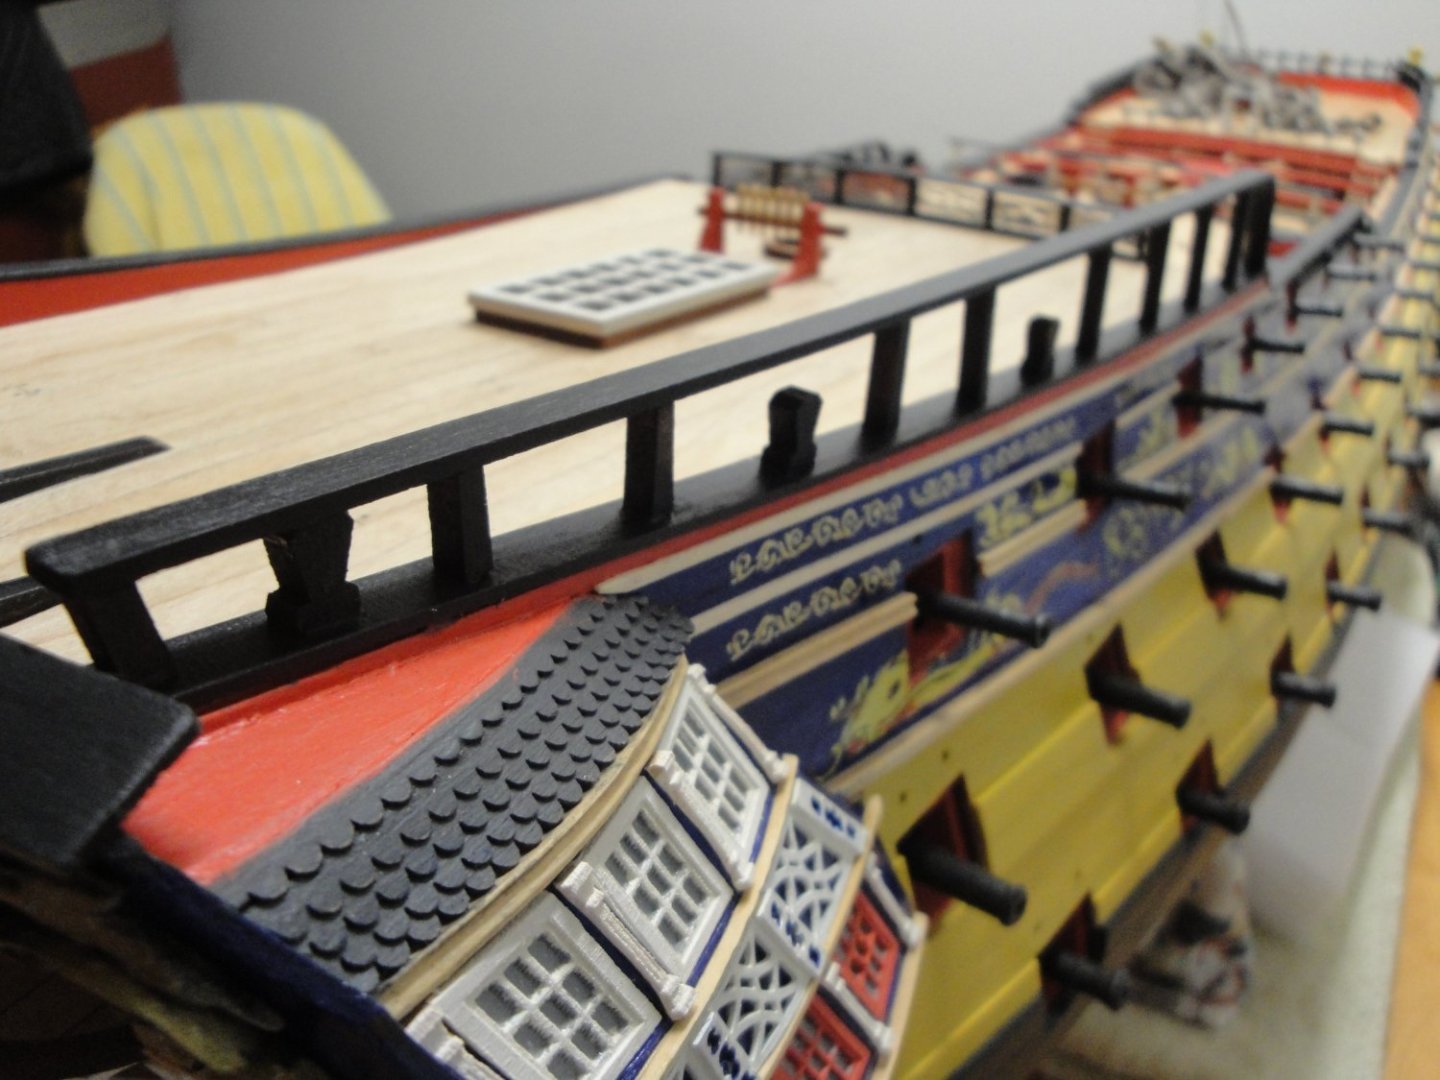
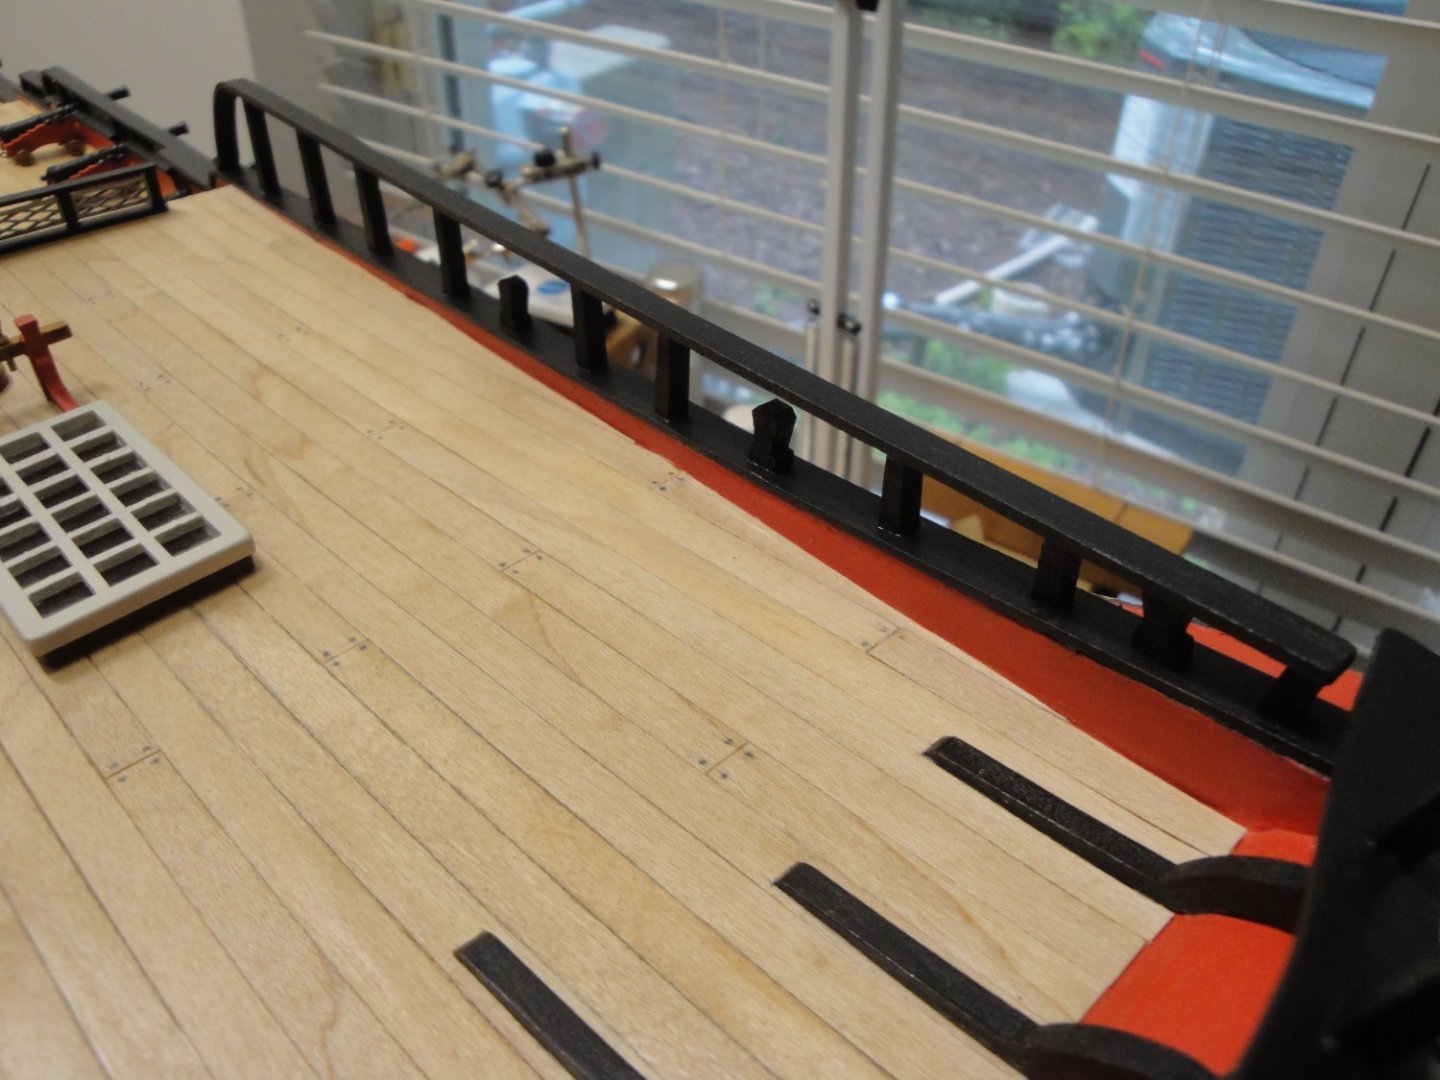
Moving to the other side:
The parts provided in the kit require some adjustment in length and angles.
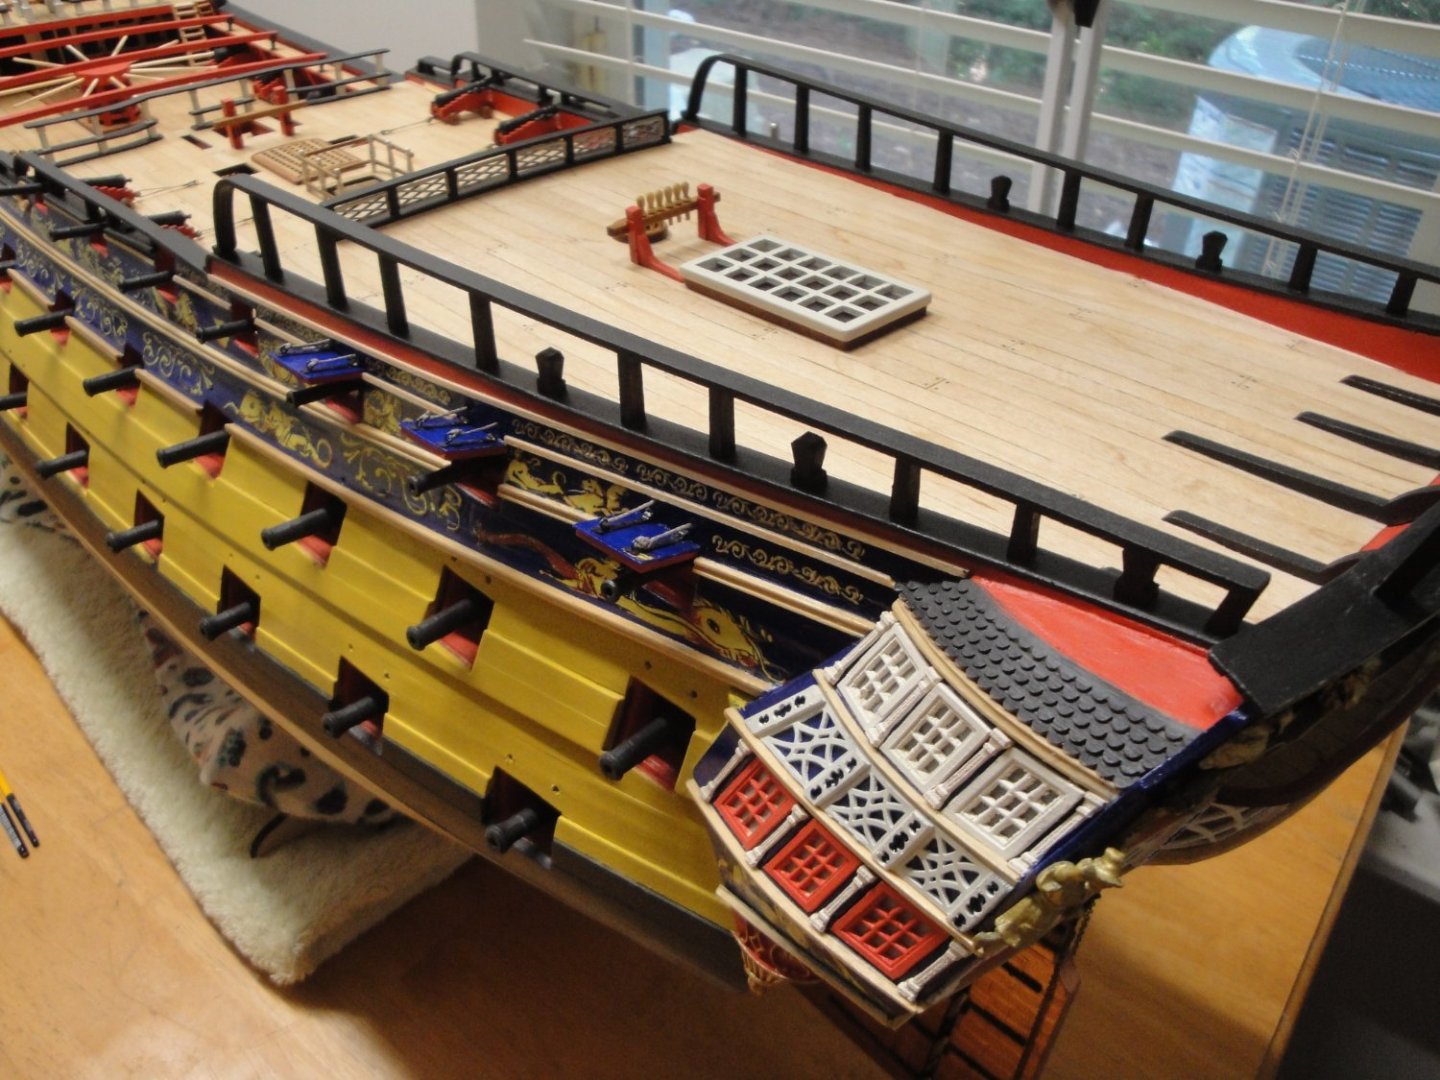
Overall view of the poop deck:
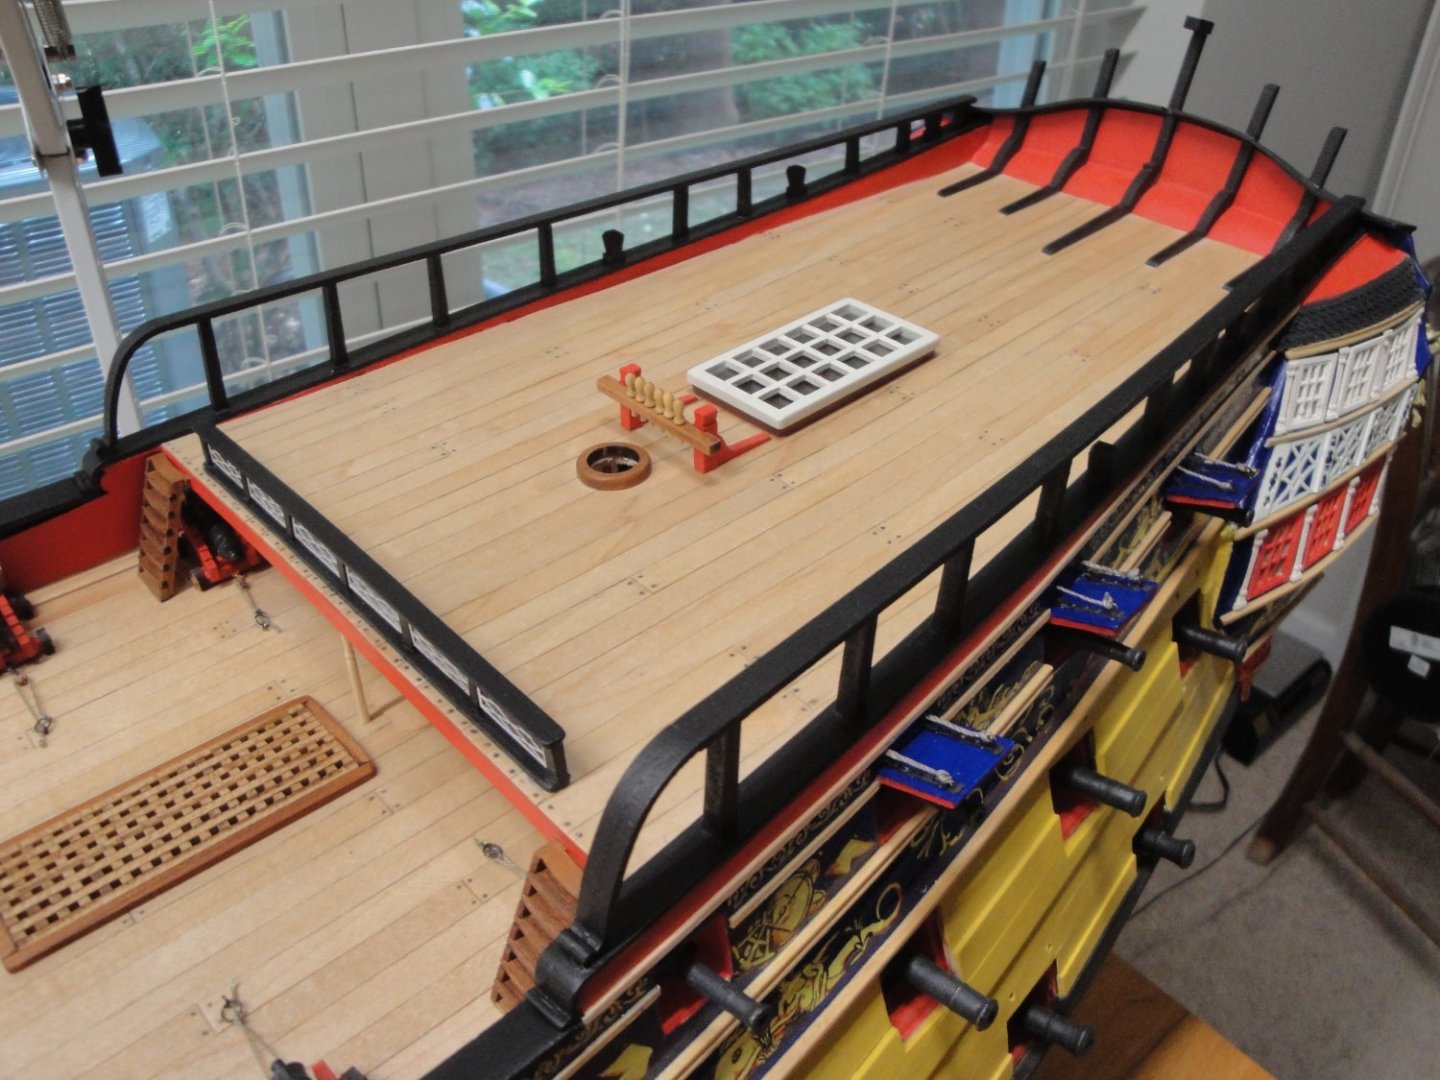


I am now going to work on finishing the taffrail and the stern flag pole. I may even attempt the assembly of the lantern....
Yves
-
Greg,
I saw your beautiful models displayed at the Australian Berkeley Plastic Models show. You have multiple entries, planes and ships.
Congratulations.
https://www.themodellingnews.com/2023/06/tmn-on-tour-illawarra-scale-model-hobby.html#more
Yves
- Egilman, mtaylor, Old Collingwood and 2 others
-
5


Le Redoutable by Oliver1973 - 1/48 - POF - based on own reconstruction
in - Build logs for subjects built 1751 - 1800
Posted
BRILLIANT !!!!
Yves