


Mike Y
-
Posts
1,513 -
Joined
-
Last visited
Content Type
Profiles
Forums
Gallery
Events
Posts posted by Mike Y
-
-
-
That was fantastic! Day well spent, strange that there are no reviews of this museum on tripadvisor
")
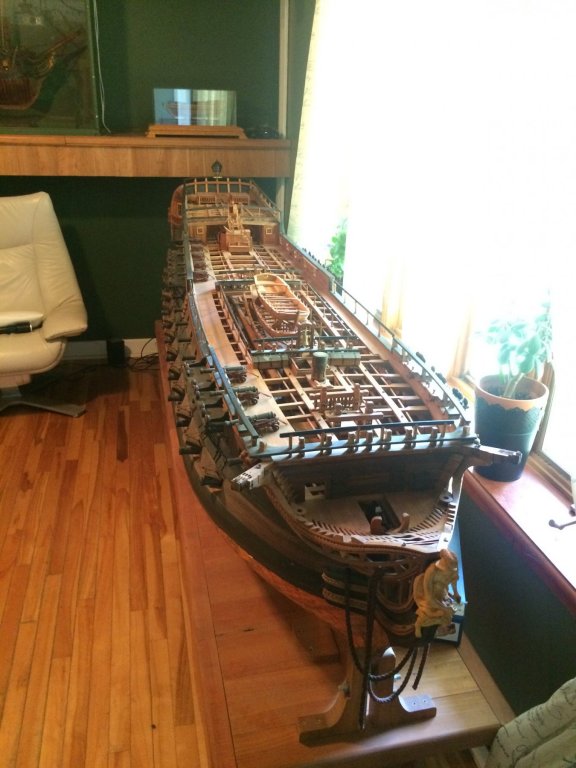
It was a pleasure to meet Gaetan and his wife, see all that models in person (logs are logs, but it is always better in reality!). We are a rare bunch, and when you meet a man who shares the same passion - this makes that day very special.
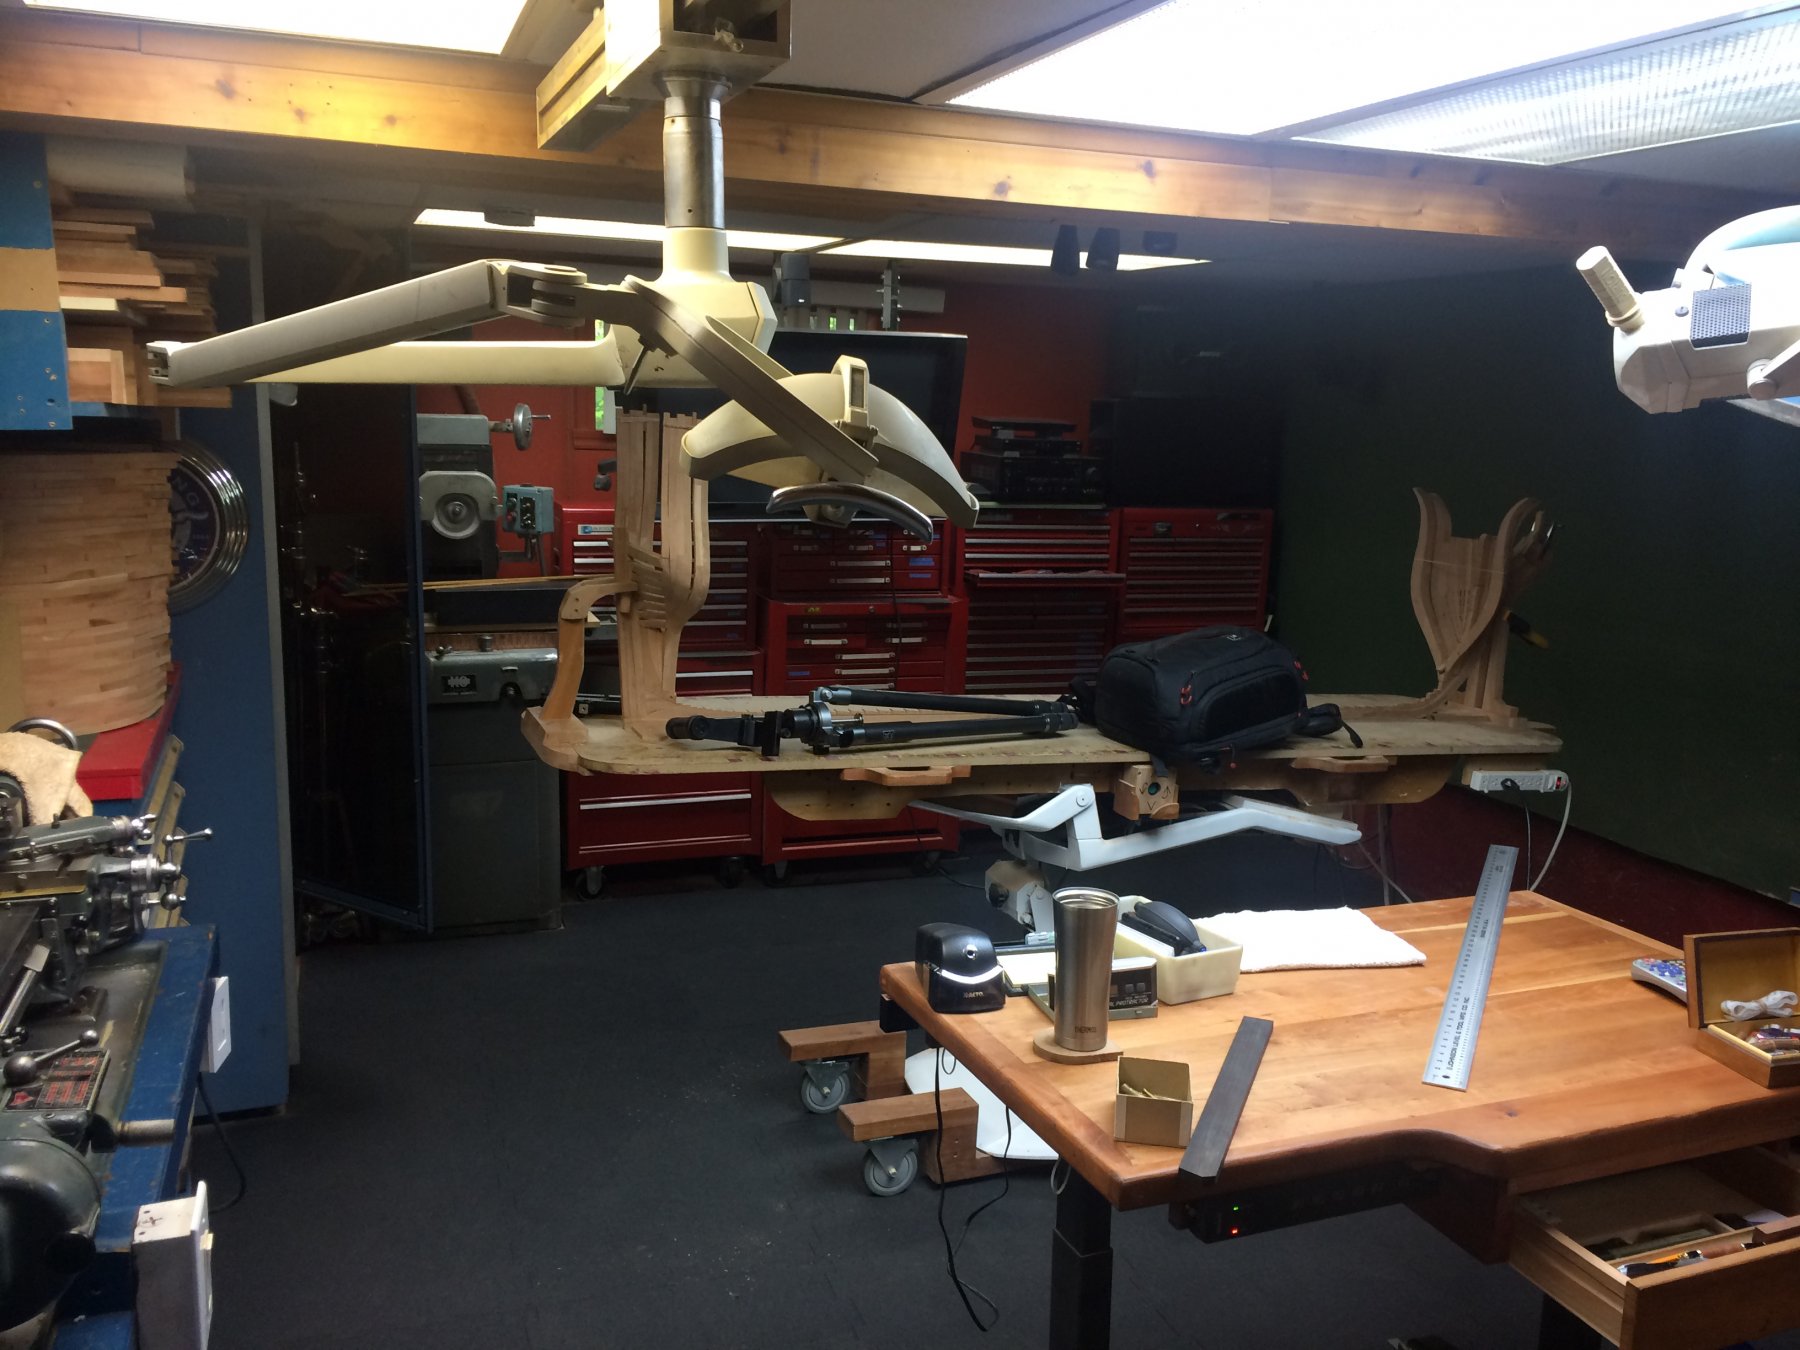
And now I know how the dream workshop looks like:


-
On 19/07/2017 at 3:50 PM, Ulises Victoria said:
I saw a couple of interesting kits: The Alfred and the Oliver Cromwell.
I don't understand the scale measurements they give: 1/4 and 1/8. What do they mean?
It is not clear to me exactly what do you get when purchasing these kits.
1/4 is 1:48 scale.
Totally agree with you about "it is not clear what exactly do you get". Is it so hard to include some photos? Argh!
So hope this will help:
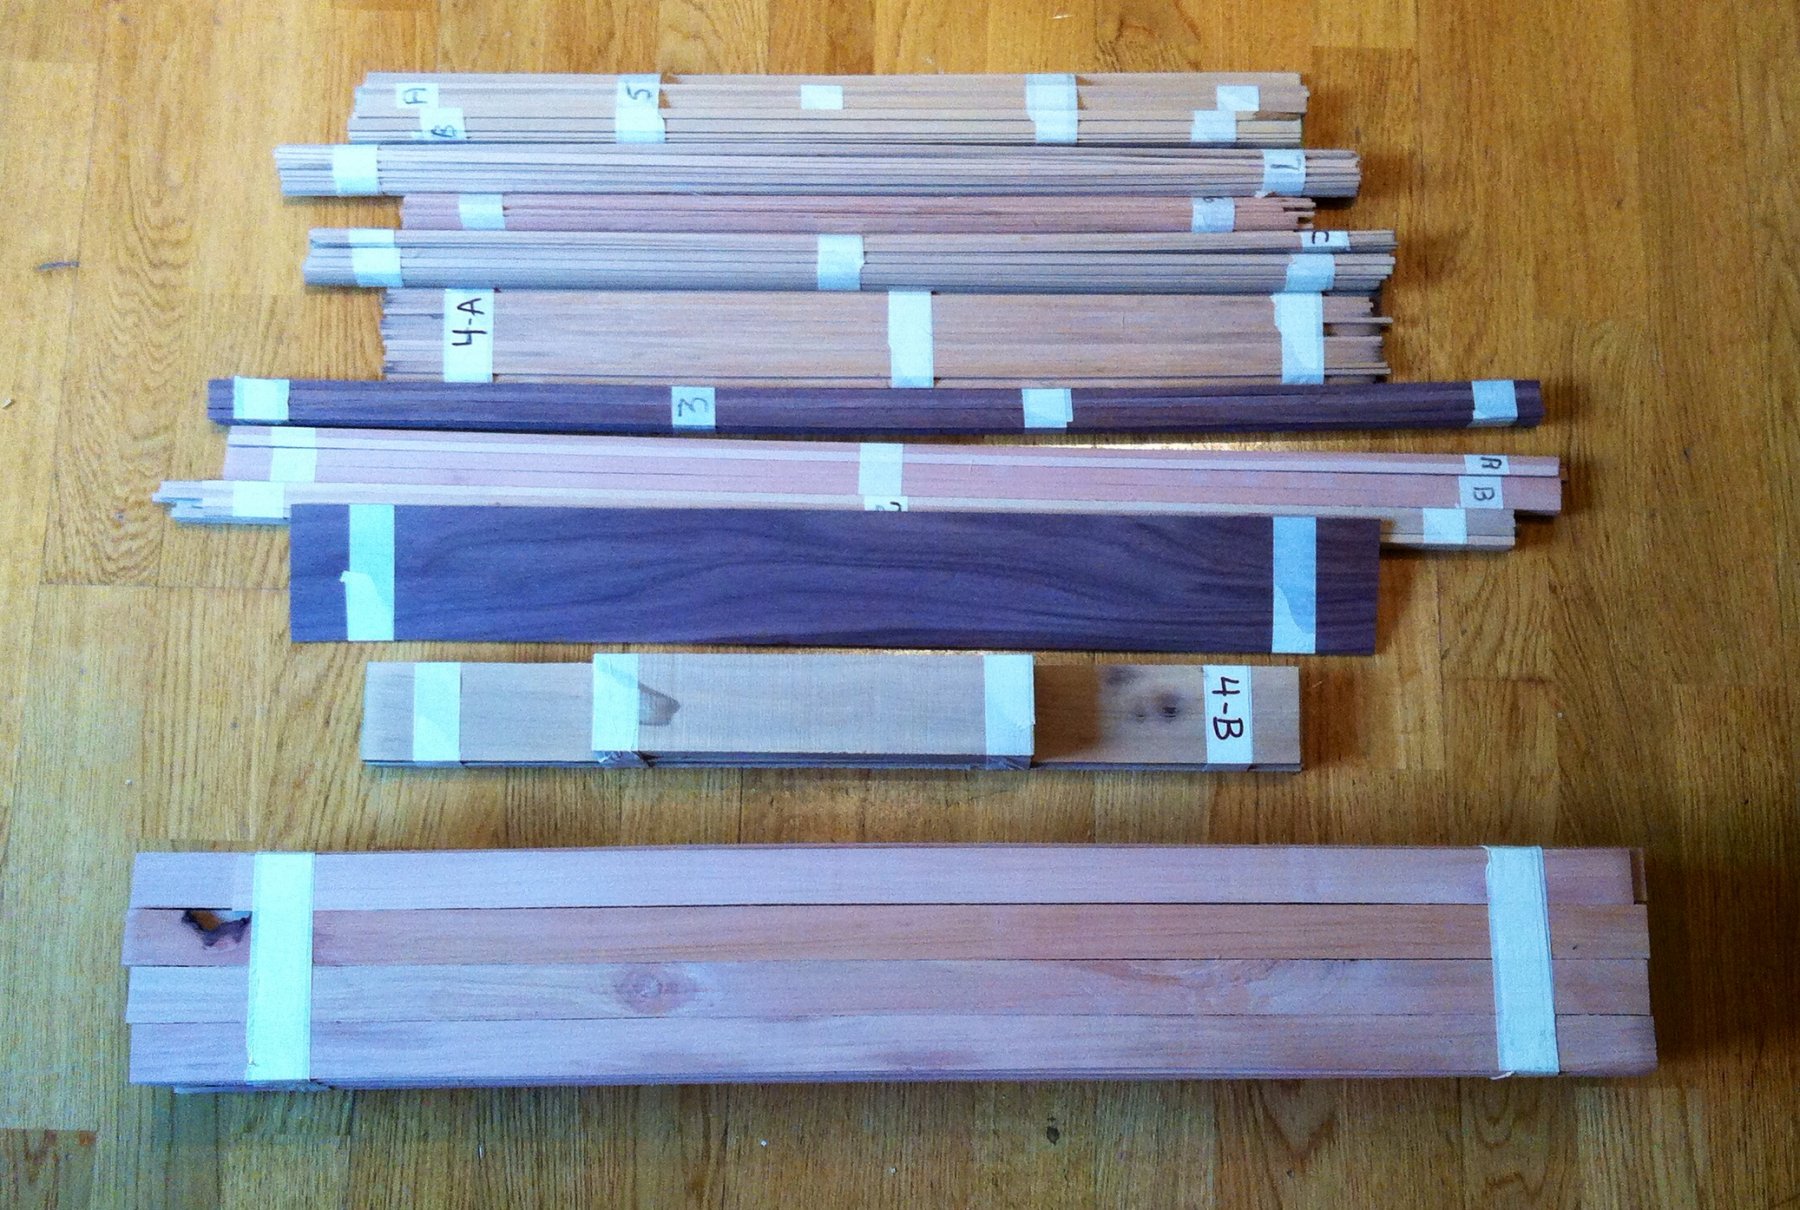
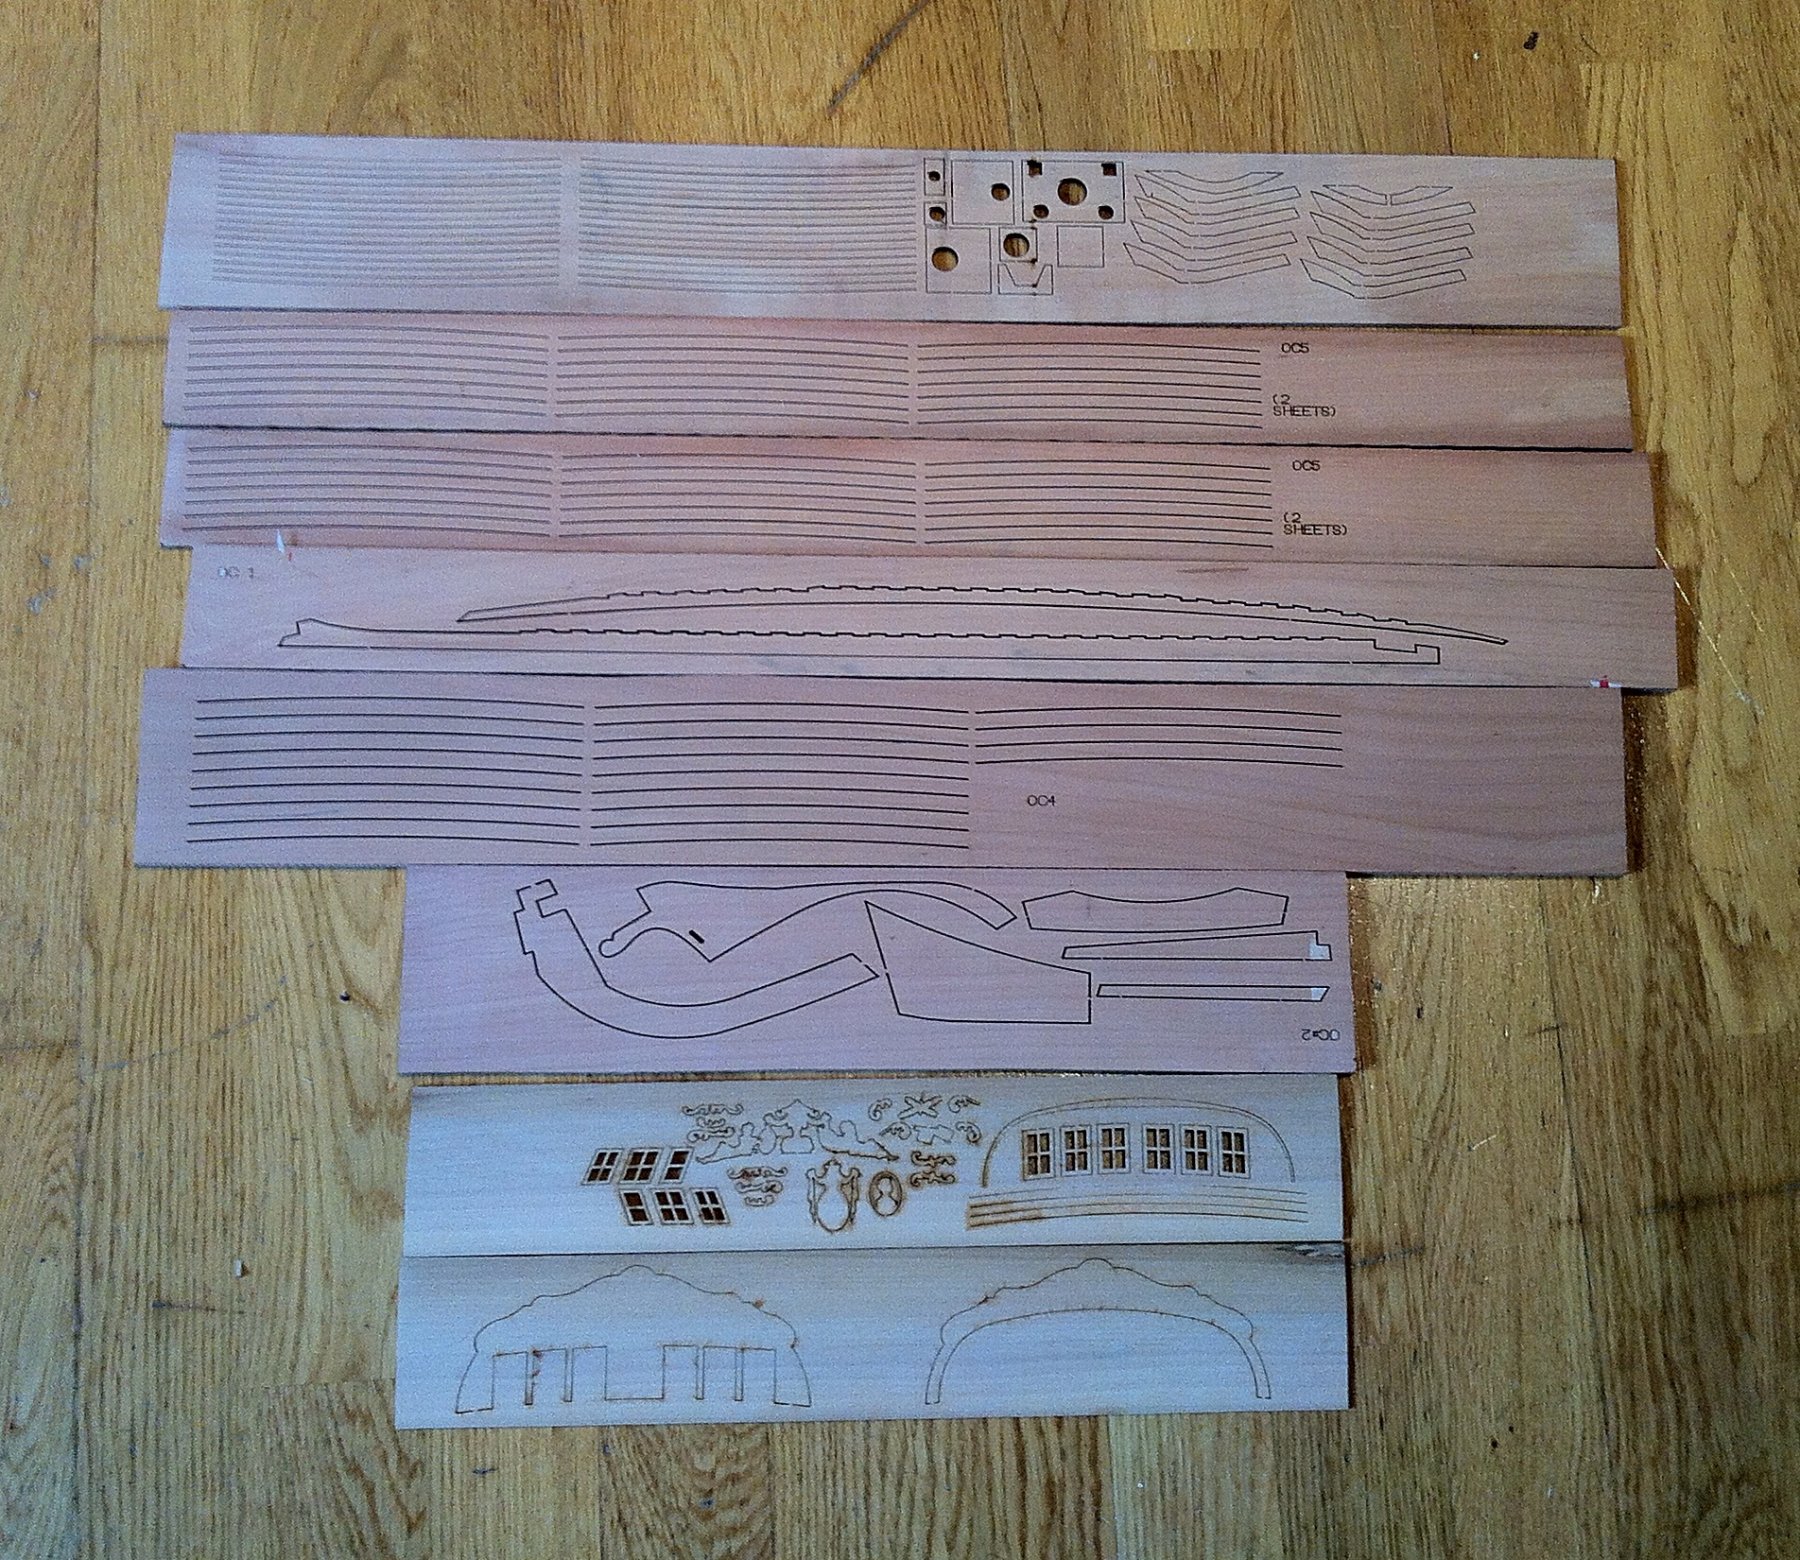
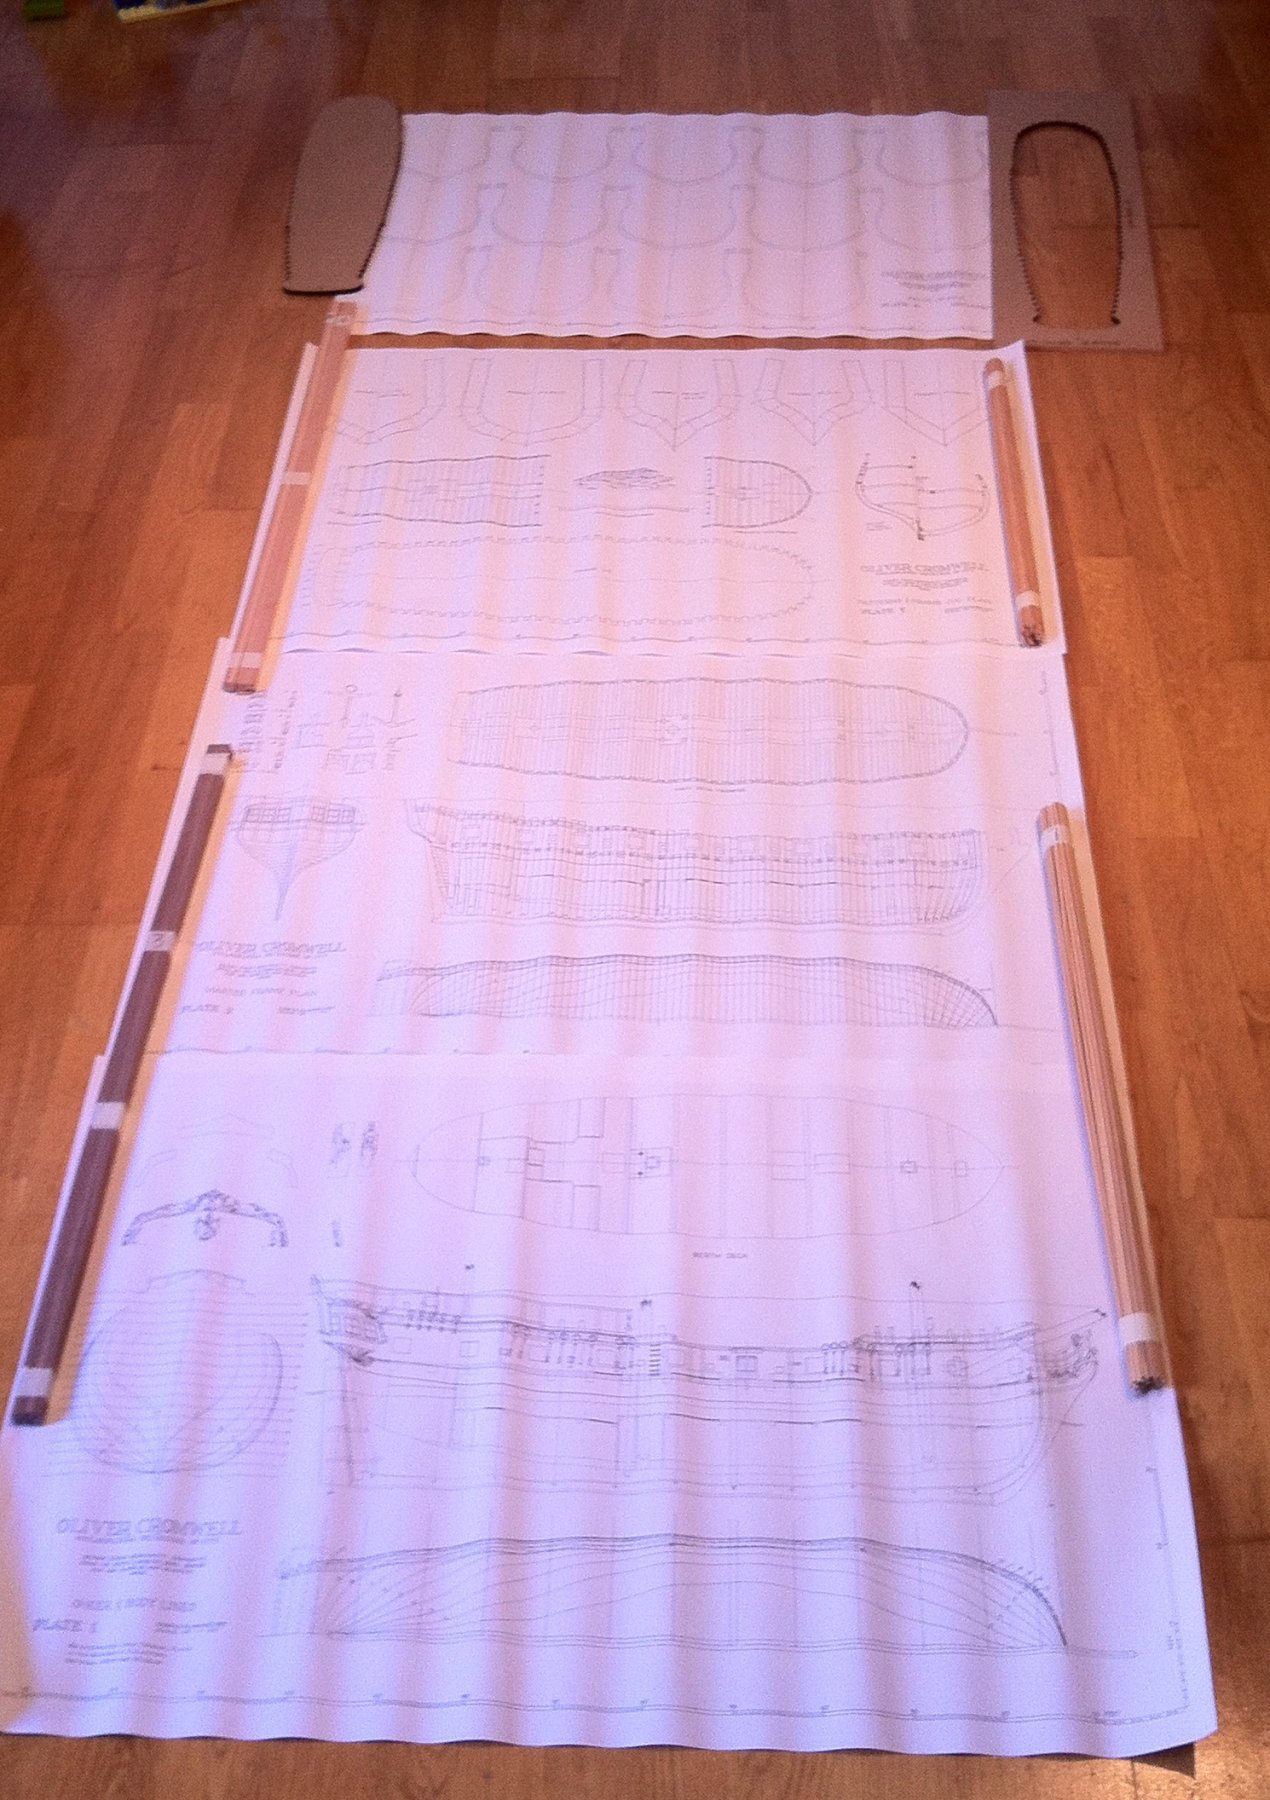
Oliver Cromwell is not really a kit - it is a laser cut jig, plans, wood sheets/strips, wood for frames, some laser cut parts.
Here is the content of the box:

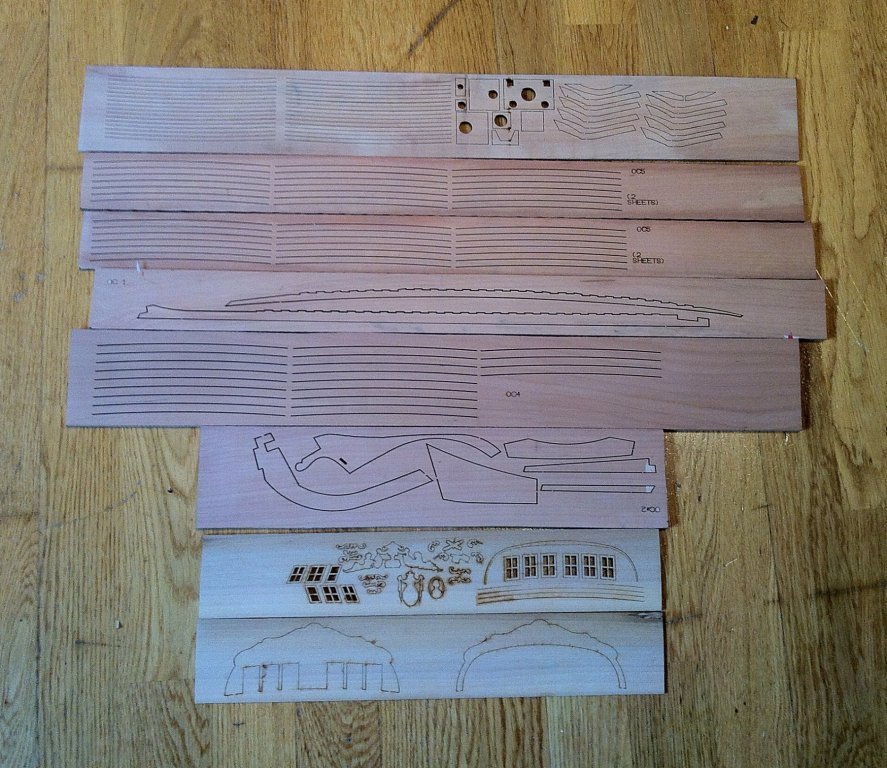

Ended up fully scratching it and not using the parts provided, for various reasons. You can read first few pages of my build log, if interested
To be honest, even if it is not a kit - I do not think it is very difficult. "Scratch building" is less scary than typically described, especially with lots of good logs on MSW that are better than any "practicums".
I was thinking about starting with Hannah or Oneida (with laser cut frames) - but decided that cleaning up all that laser char is less pleasant than just cutting the frames using bandsaw / scroll saw.
And I was really right about it! When I got that "timbering set" for Oliver Cromwell and tried to use the laser cut keel parts - cleaning up the char was a b%tch! It was not a fun process, and I hated every minute of it. I tried scraping it, sanding it, etc - takes a lot of efforts, it sits very deep into the pear wood, especially on the endgrain. You end up with very inaccurate parts after this, they do not fit together well enough.
Way easier to just cut them out of the sheet of wood. Clean and no charring!
Let me know if you have any additional questions, would be great to have another Oliver Cromwell log here! Feel free to PM
")
- Ulises Victoria, mtaylor, Mumin and 1 other
-
 4
4
-
It is a free wood, so I am not that worried about a waste
There is a place that will just charge an hourly rate for any machining you need, but that will become a golden log. Especially since I am not sure if it is a good wood at all.
It is mostly for experience and sentimental value. I envy people who build a model out of their own pear tree harvested in their garden...
-
13 hours ago, wyz said:
Mike, why would you mill wood for your model if you don't know what species it is?
Tom
Just as an experiment. There was a fallen tree close by, it had a nice orange colour on a cross-cut section, so why not?
Worst case scenario - will use it for some other projects.
Druxey, considering the size of the log, quartersawing will leave next to nothing... Even if it warps - not a big deal, I will need to plane away at least 1/3 of the thickness due to very uneven cut lines.
-
-
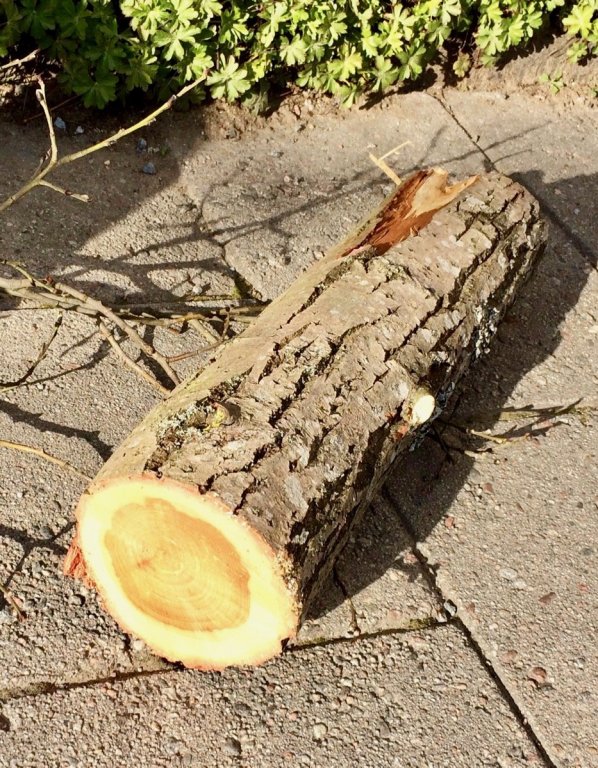
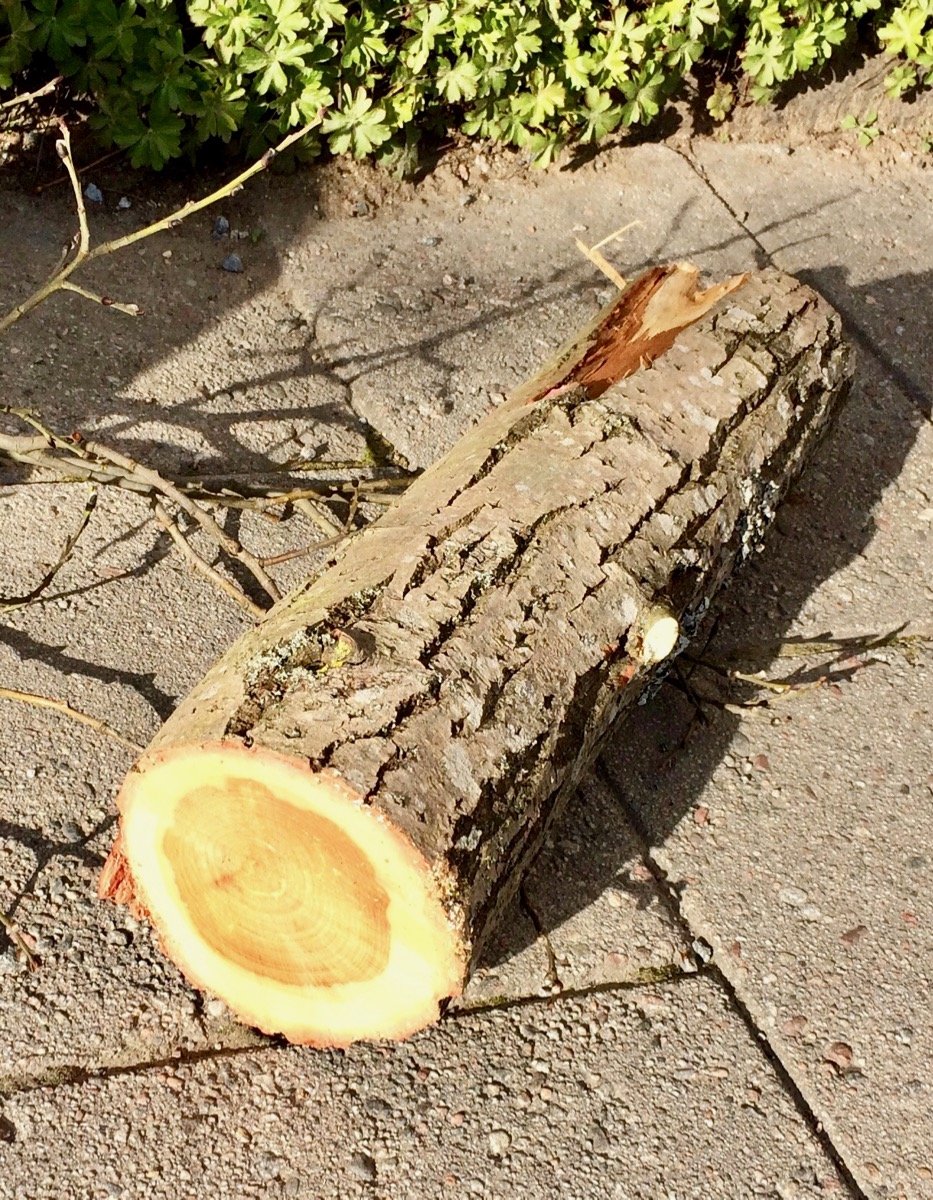
In a meanwhile, playing with milling my own wood. I cut it from the fallen tree that I found close to my apartment.
I can't really identify the tree, would appreciate the hints if somebody have some ideas!
The heartwood looks quite promising, I might even use it in the model.
And there is something special in using your own wood in the model. Really hope it will be usable for that scale.
The original mini-log:
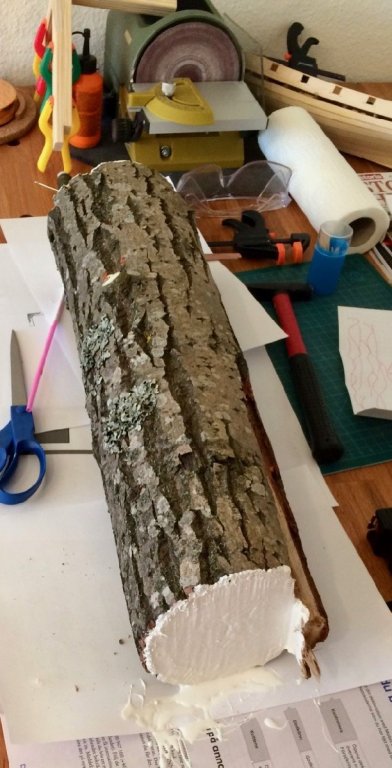
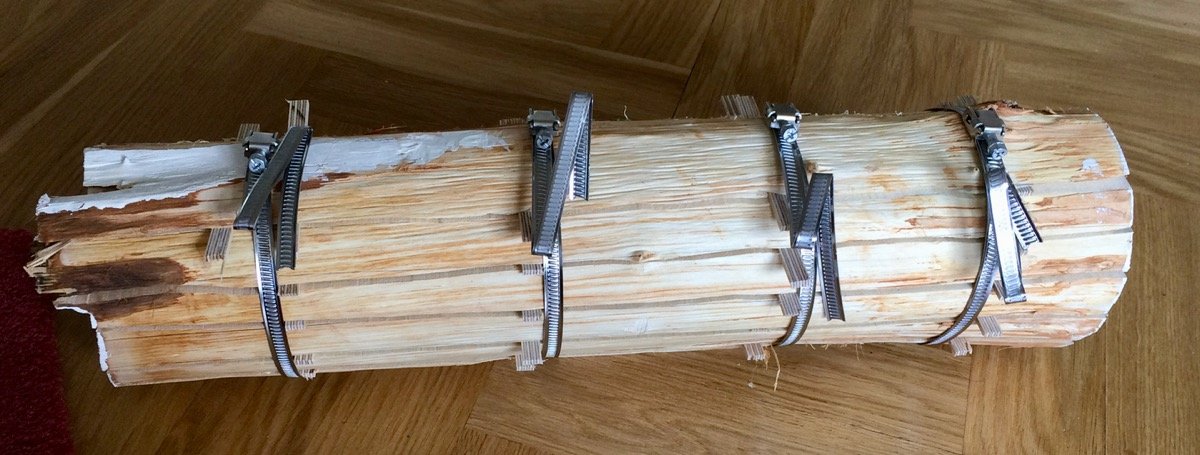
It was drying with bark off for 3 months (I am very scared of the wood-eating insects and parasites, so removed the bark and washed it before drying), and will dry for 3-6 more months.
Slabbing it was not easy, since my bandsaw is small and do not have a proper resaw blades. To fit it into the bandsaw I needed to remove the blade guide, which made it more difficult to cut straight. Oh well, lots of planing ahead once it is dry
Looks pathetic
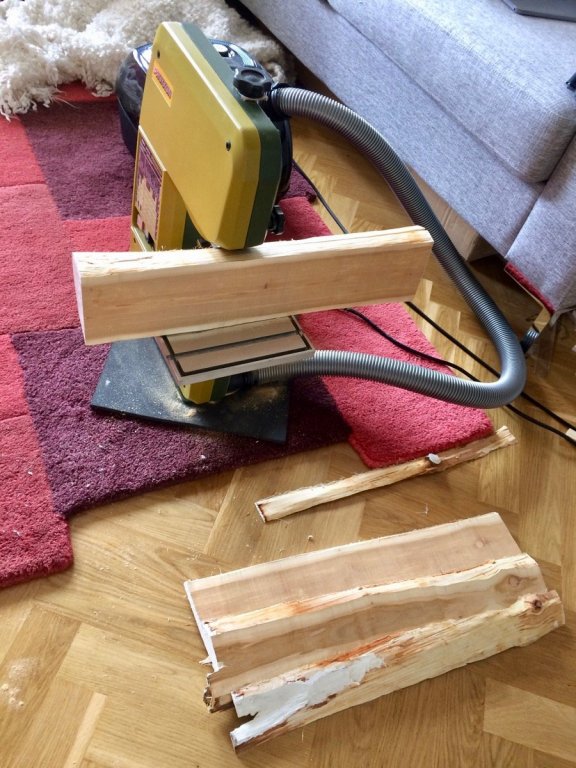
To reduce warping while drying, tightened the stack with some metal pipe clamps.

- hexnut, Stuntflyer, tadheus and 5 others
-
8
-
-
... would be still interesting to see how you approach the display case build
- mtaylor, Stuntflyer, Canute and 1 other
-
4
-
Interesting vessel! Should be a fun build, and glad that you finally jumped into the framed mode!
- Stuntflyer, mtaylor and Canute
-
3
-
17 hours ago, AON said:
Possible marrying slots may have reduced the weight by eliminating the blocks.
True, but making them will require a full-size table saw (which I do not have), or a hell lot of milling, which would not be a pleasant experience.
I will not attach the case to the base permanently until a test fit to the wall.
In practice, it is lighter than some massive TVs people hang on a wall, so will see. It might work.
If it will end up being too heavy - will re-do the base out of thinner plywood, not a big deal.
-
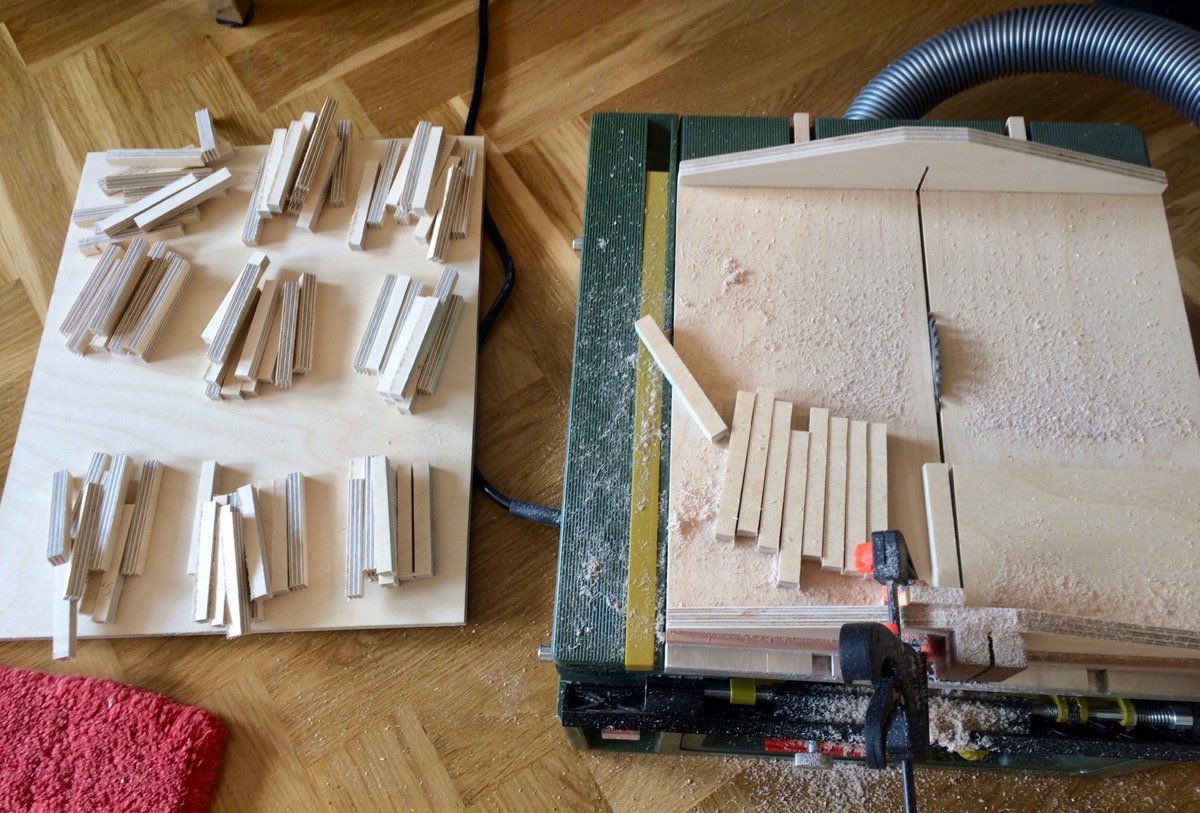
Made the display case base. It is a simple torsion box, with holes for wiring and reinforced joints.
It is quite trivial to build, but requires accuracy and a good tolerances - all parts should have equal height and be square, otherwise it would be really tough.
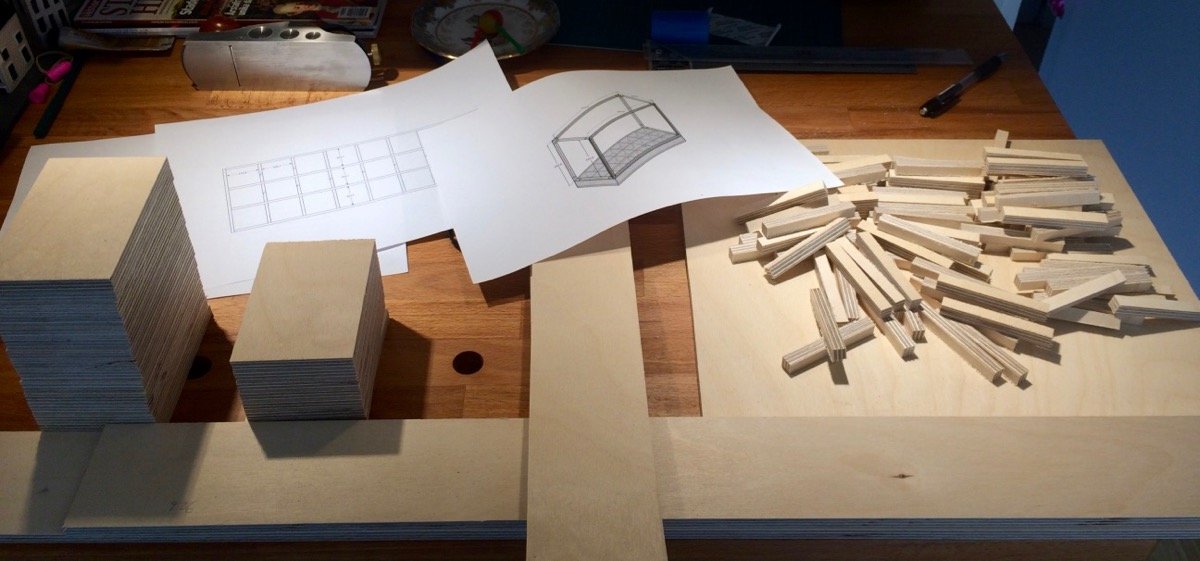
Batching out the parts:

Ready to begin!

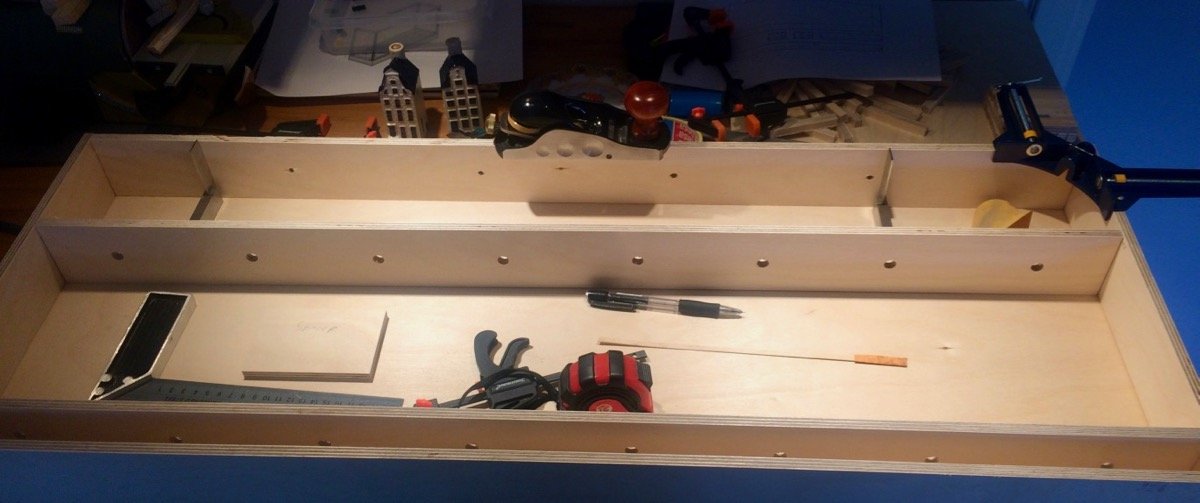
Glue-up:
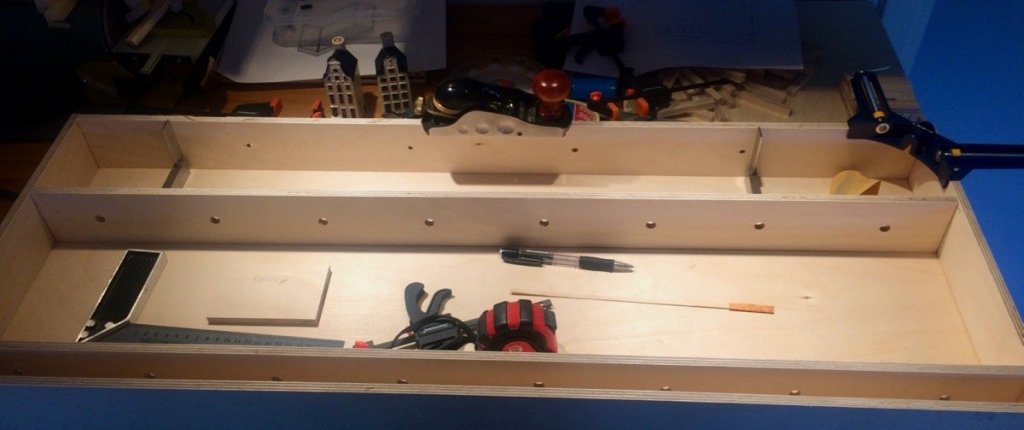
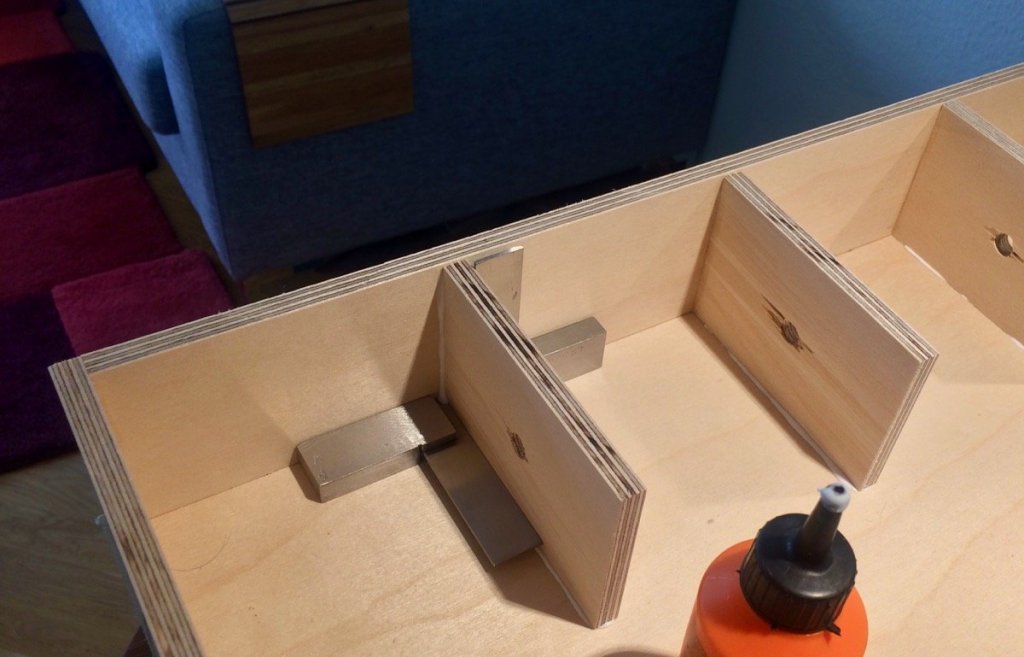
Installing diagonal cross-braces in the bottom. Note that all butt joints here are reinforced with strips from all four sides - I do not trust butt joints...
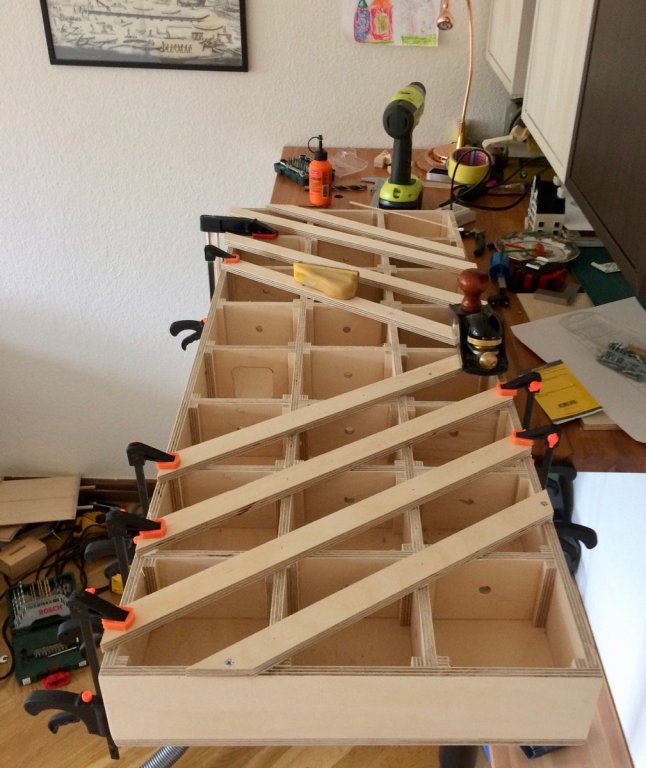
Ready! Braces are fixed with screws. The central part has no braces to allow for easy access to the electronics for LED, screws that hold it to the wall, etc.

Nevermind the ugliness, it is the underside which would be hidden from sight.
The thing turned out heavier than I thought. 10mm plywood is not so light.. From the other hand - I want it to be a good foundation. Well, hope it will not drop from the wall!
- Ryland Craze, Timmo, mtaylor and 9 others
-
12
-
-
Incredible accuracy! Something I tried to aim for, but was not as pedantic as you are, so have a few minor alignment issues here and there
Please resist the temptation to lower the bar and make shortcuts. It is common to see people being super precise and detailed when making a keel and deadwood, and then speeding up when it's time for frames. You seem to keep the same precision from the beginning of the build!
- mtaylor, Beef Wellington, Canute and 1 other
-
4
-
-
It is a big relief that you are back in the game! Hope it would be a speedy recovery!
- JesseLee, Salty Sea Dog, mtaylor and 6 others
-
9
-
-
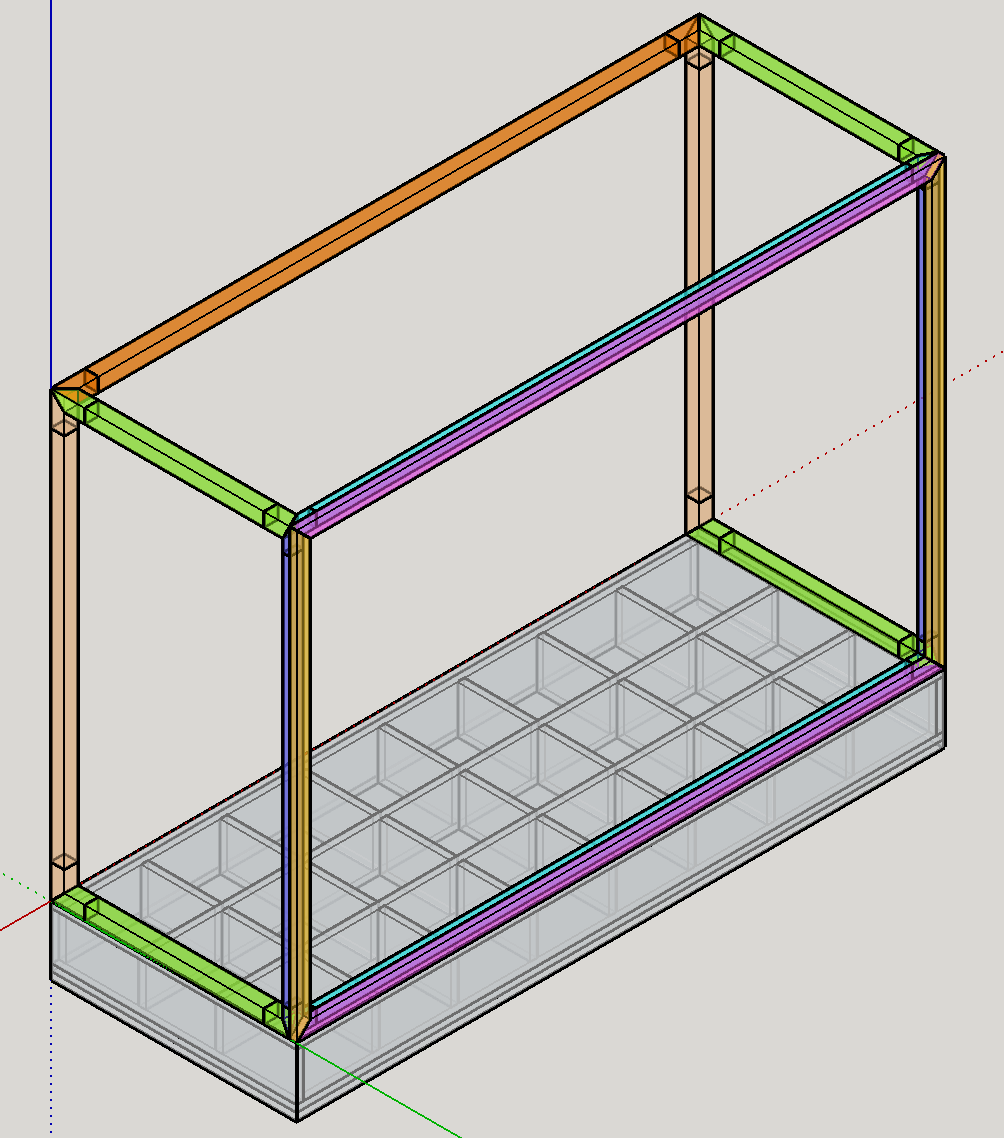
Truly appreciate all the hints and comments, pointing that sometimes less is more and display case should not take a lot of attention from the model. Well, thanks!

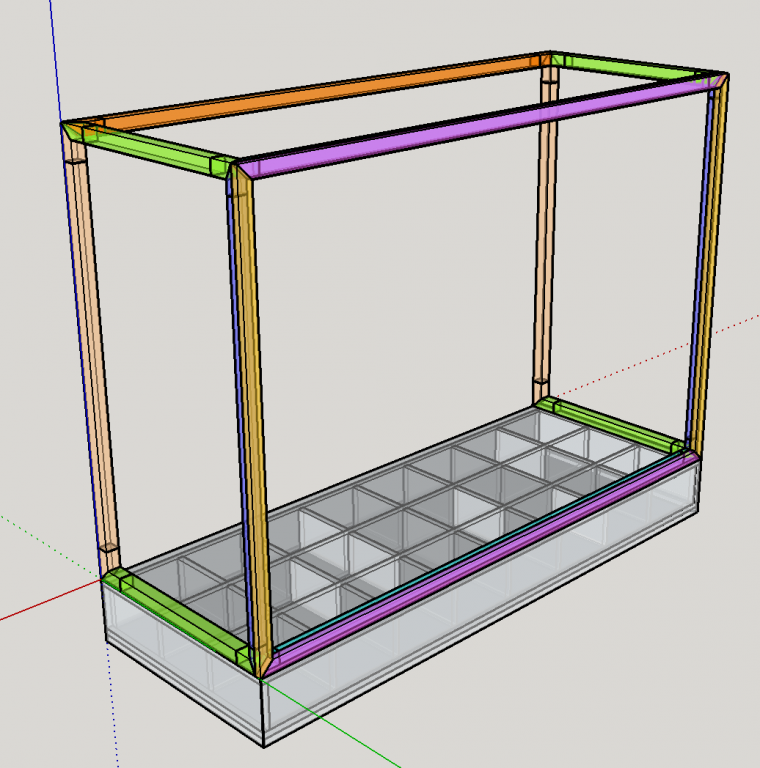
So I simplified it, will get rid of that rounded corners, and use three-way miters to join the parts of the case. Apart from that - same design.

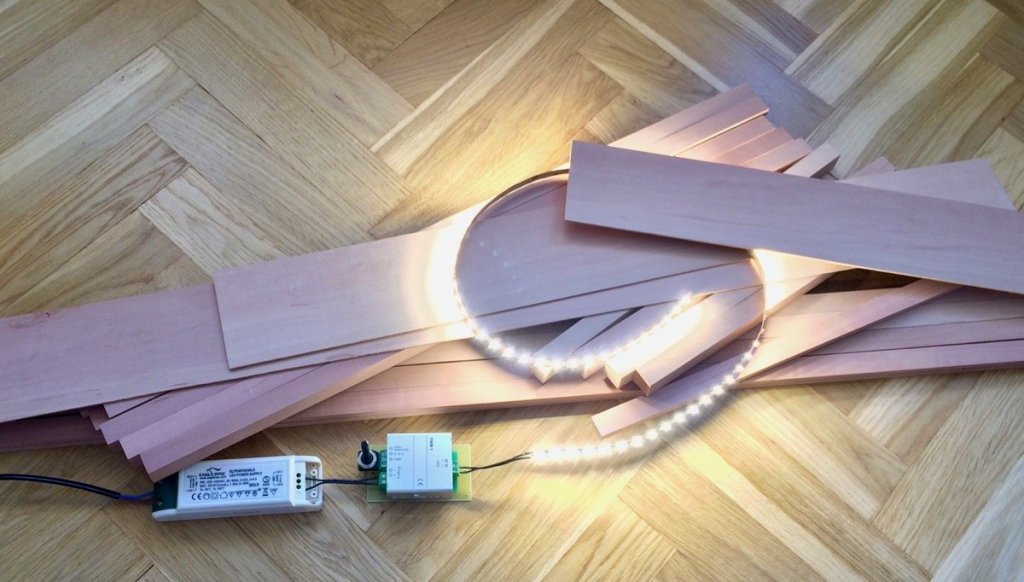
The main ingredients have arrived!
Swiss pear for all exposed parts (will use plywood for the torsion box that will provide the foundation).
And the high quality LED strip with a proper power source and dimmer:
Estimated cost so far:
Wood: 105 EUR ($116)
LED stuff: 135 EUR ($150)
Glass (optical clear grade plexiglas, 3mm, 0A570 HC): 105 EUR ($116)
Total: 345 EUR ($380)
Going to finally make some sawdust this weekend!
- Canute, druxey, Vivian Galad and 10 others
-
13
-
Thanks for likes and comments!
Re manual - haven't really used the text part of it yet, pictures are quite self-sufficient, and the text is written in a very heavy and formal way (like a precise specification), which should be handy in some complicated parts of the build.
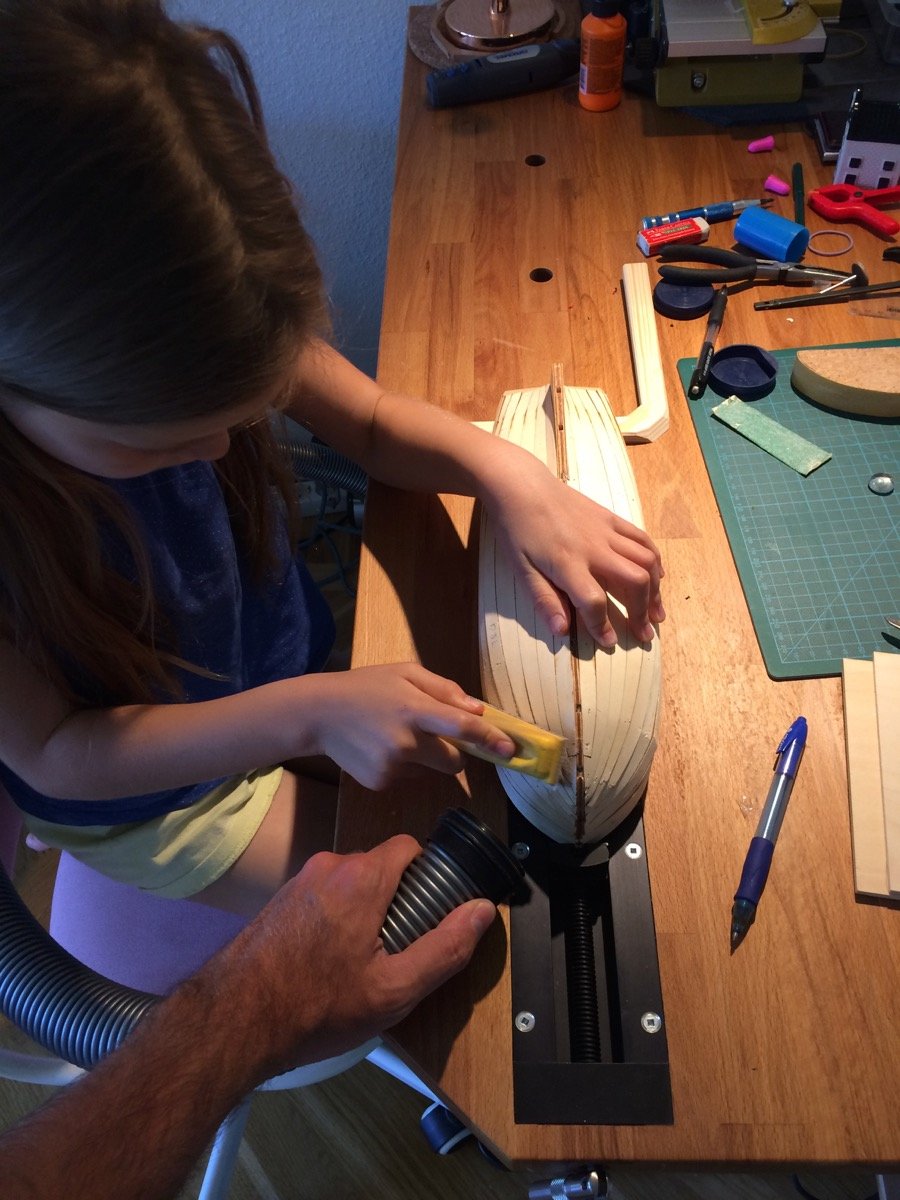
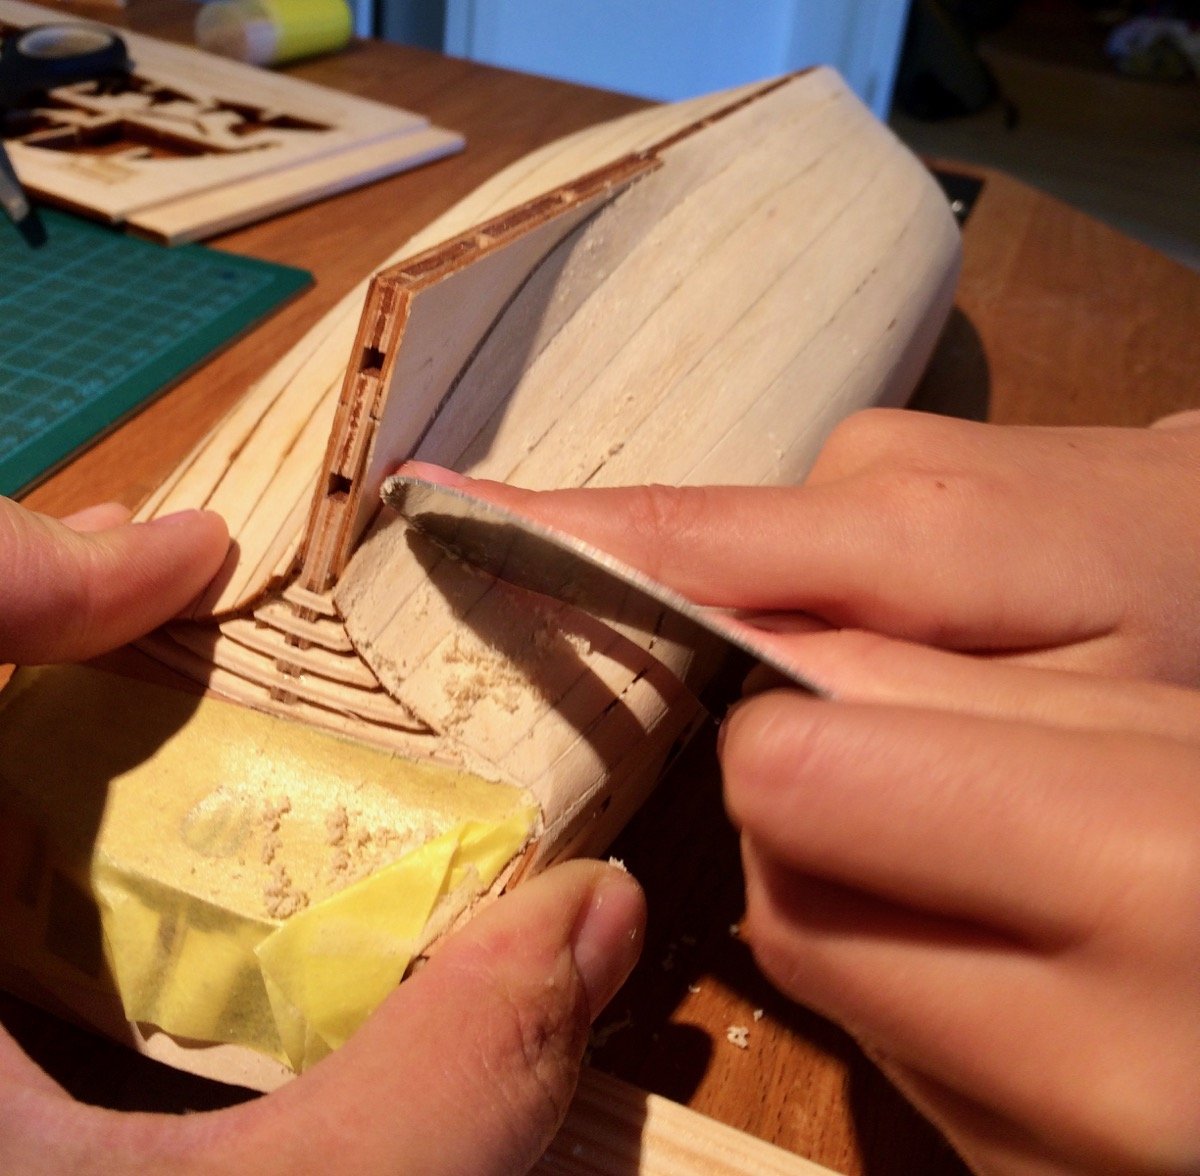
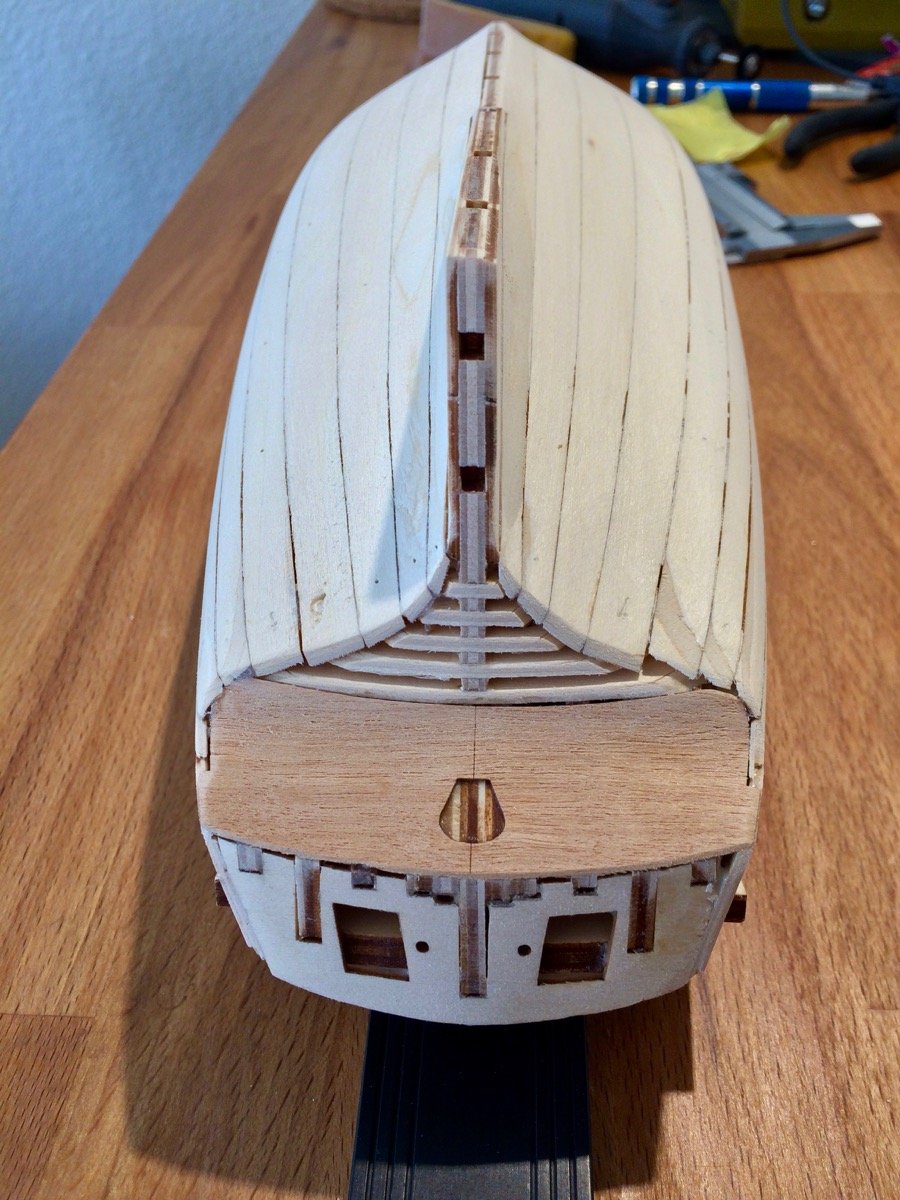
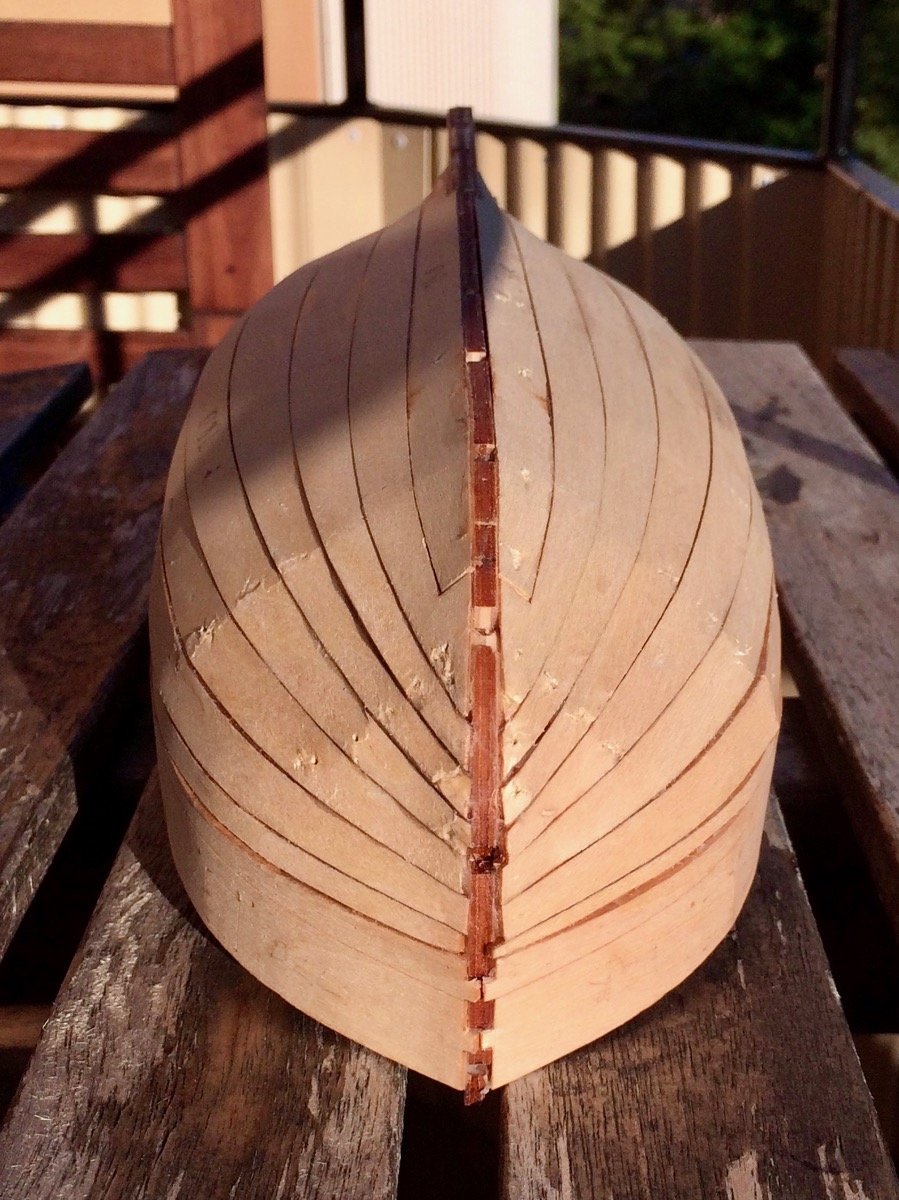
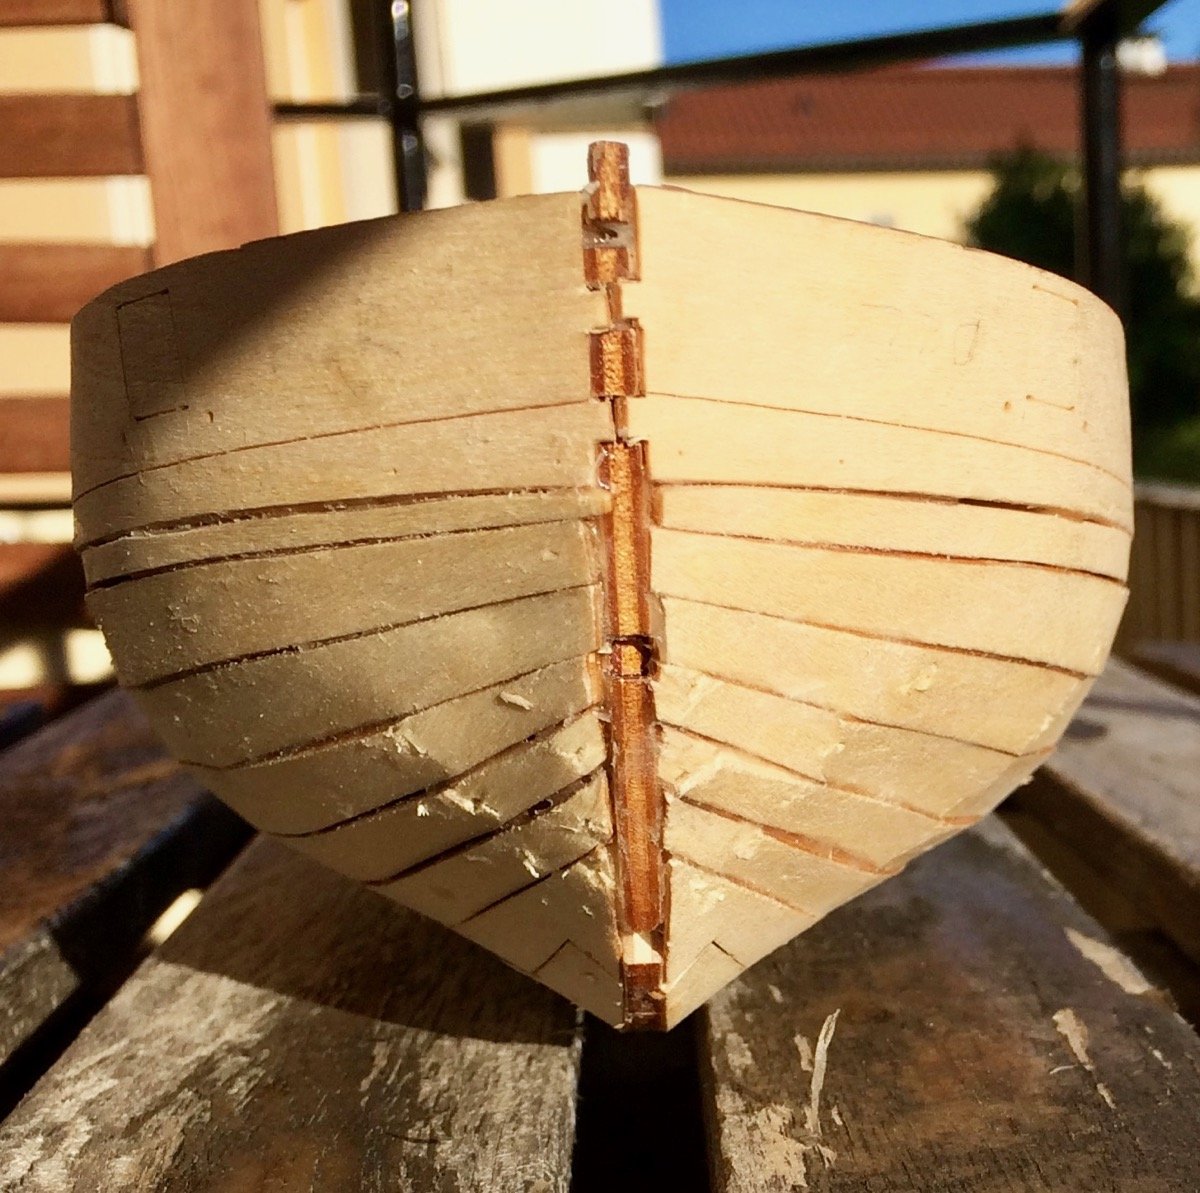
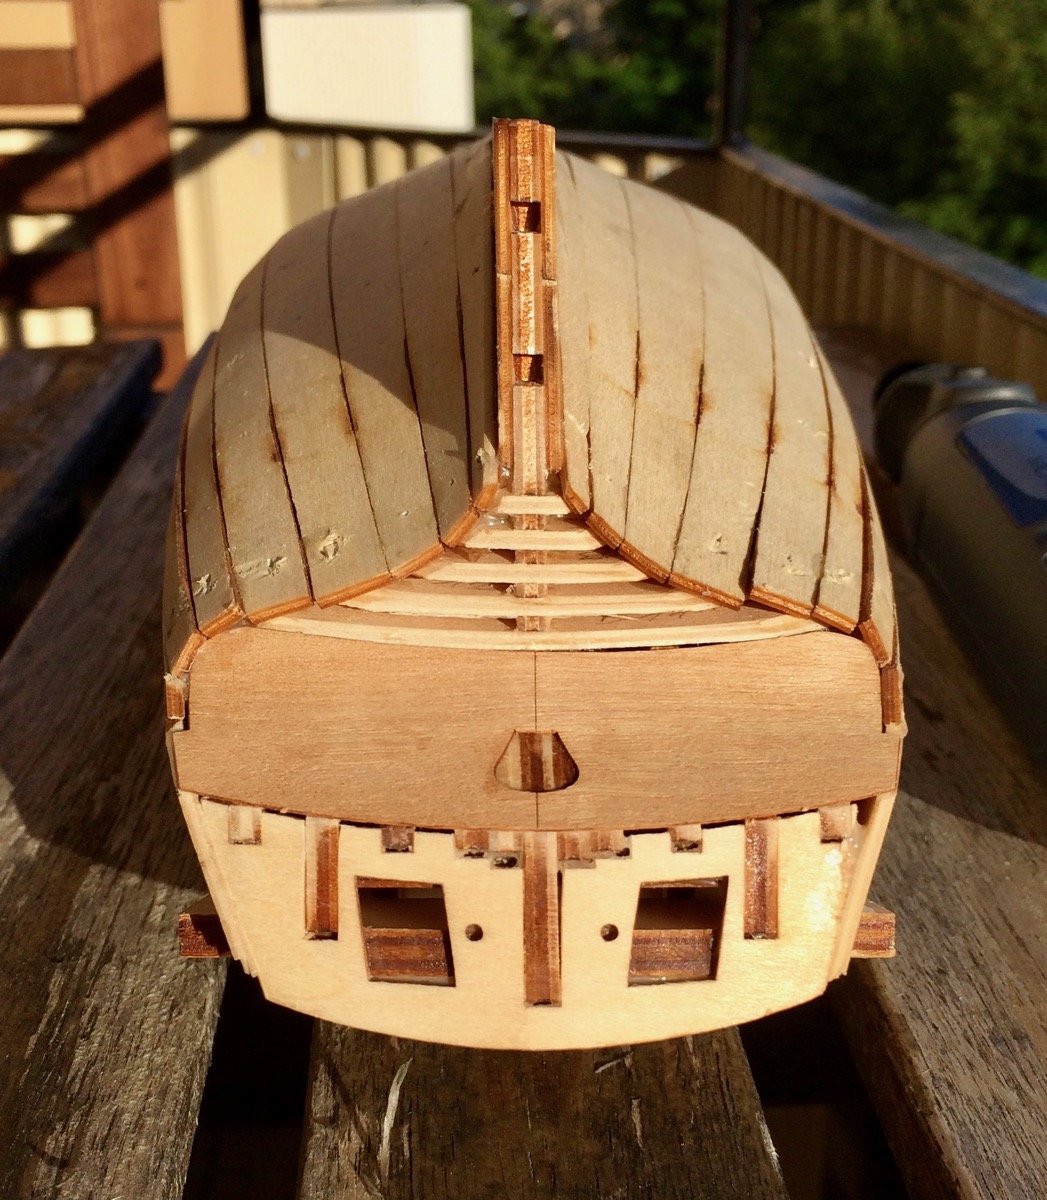
As expected, very rough and ugly first planking was easily faired
Now it provides a smooth and round foundation for planking.
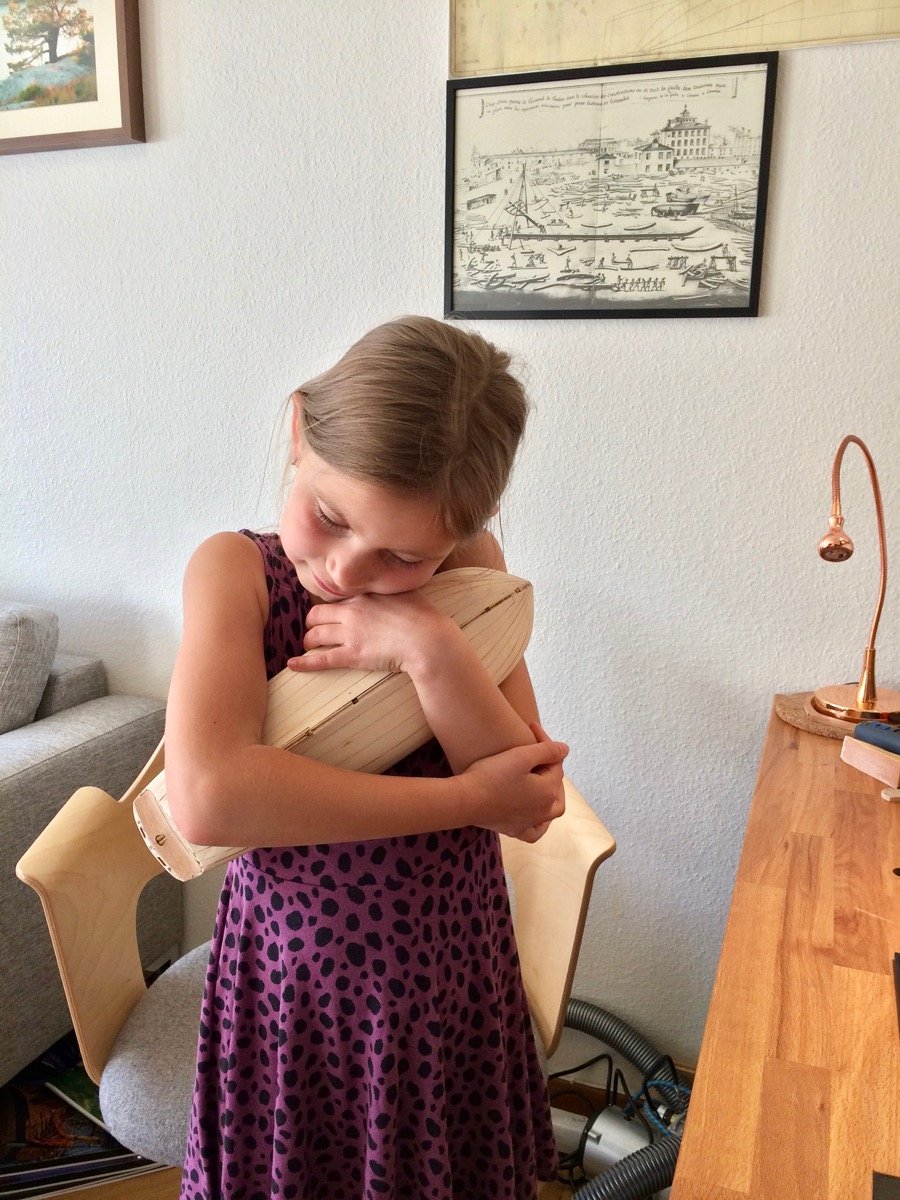
Daria enjoyed it as well - she liked the transformation of smth rough to smth smooth. That took some efforts though!
Sanding:

Scraping:
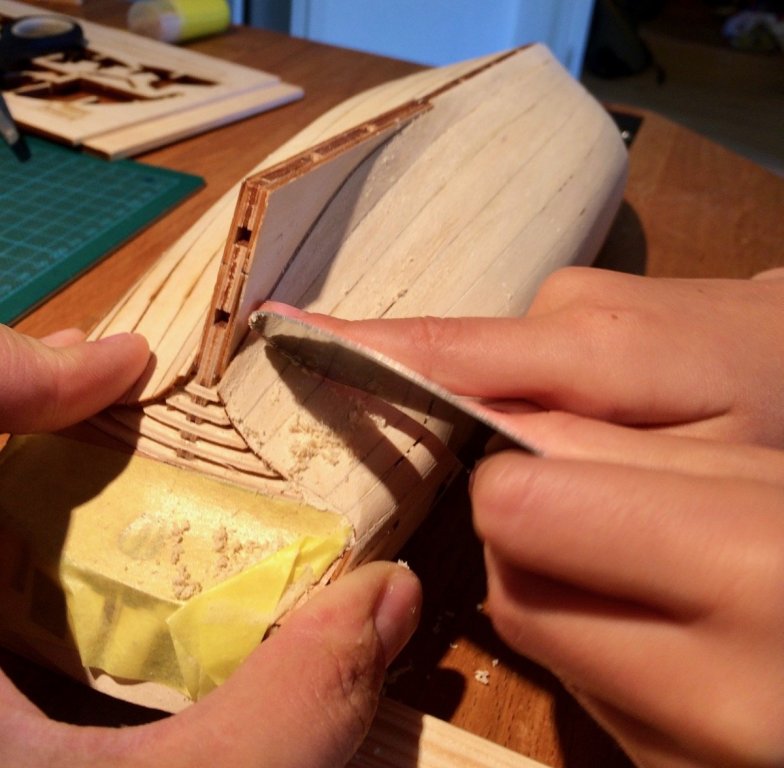
Smooth vs rough:

End result:

She ended up complaining that I was sanding myself too much (we were doing it in turns), and insisted that I should not touch it, let her finish without assistance. Hoorray!

P.S.: the build is on hold due to summer holidays that Daria will mostly spend with her grandparents, so will be back in September!
-
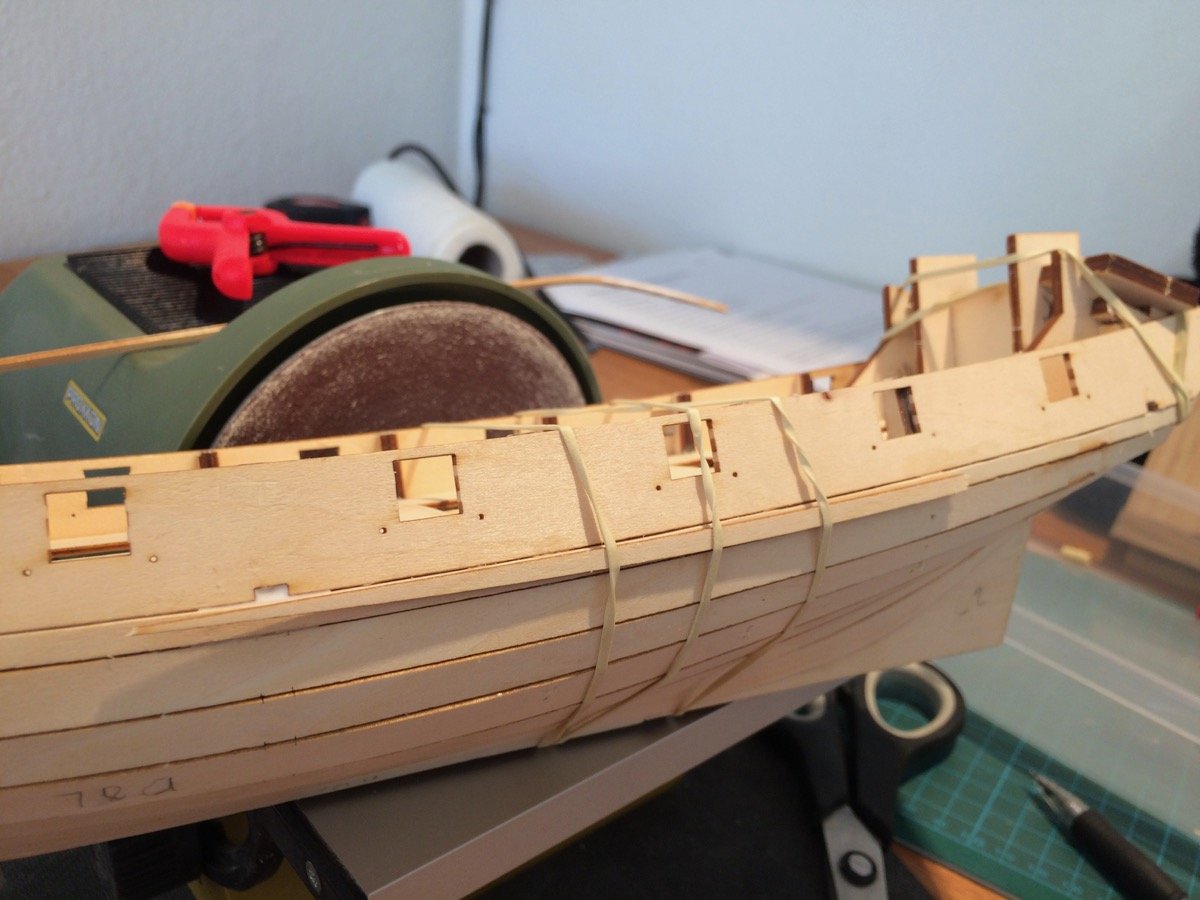
No updates for a while - Daria has a number of hobbies and interests, plus a birthday party season, so we had a long break
Some awkward clamping, second pair of hands was very useful when trying to install these clamps:
.thumb.jpg.592fc5b42ac731db9d71f802d92bf0c1.jpg)
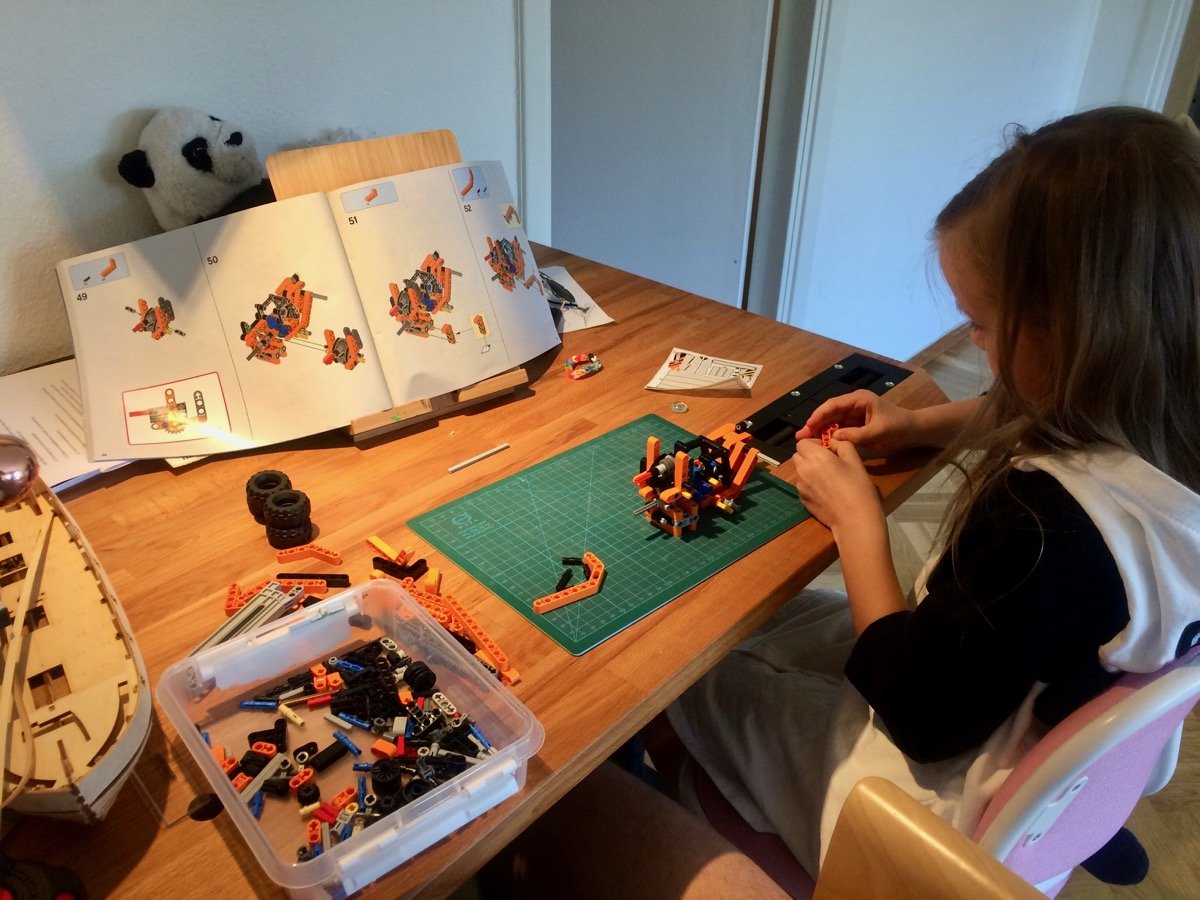
Lego break
One of many "other things"...

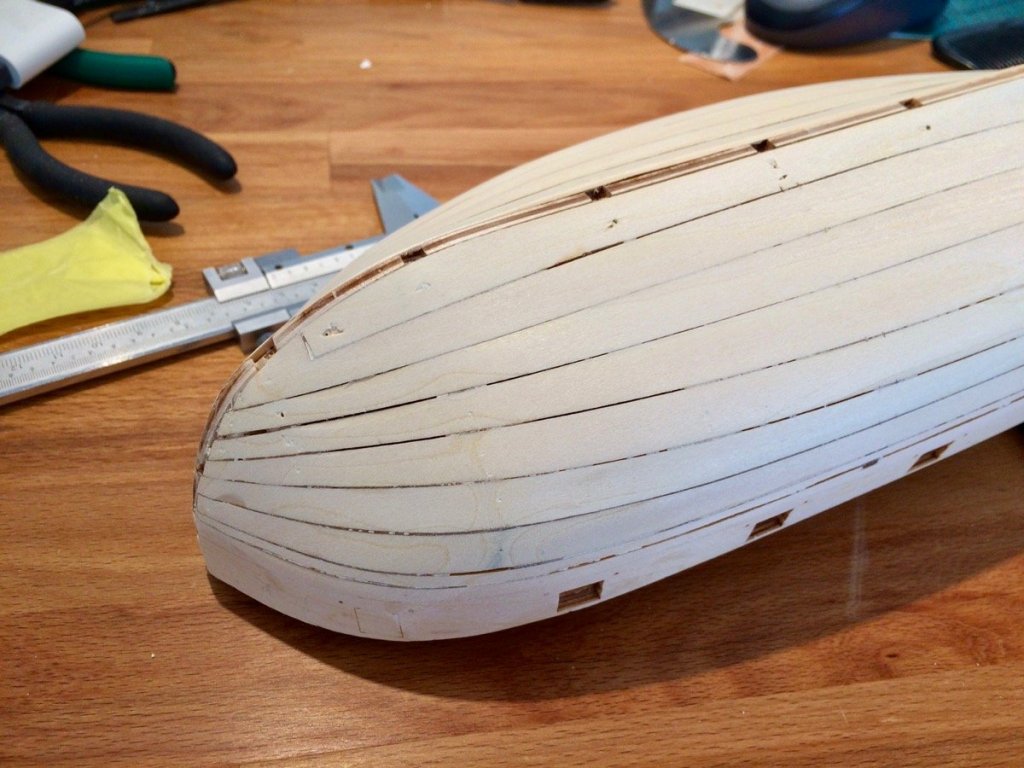
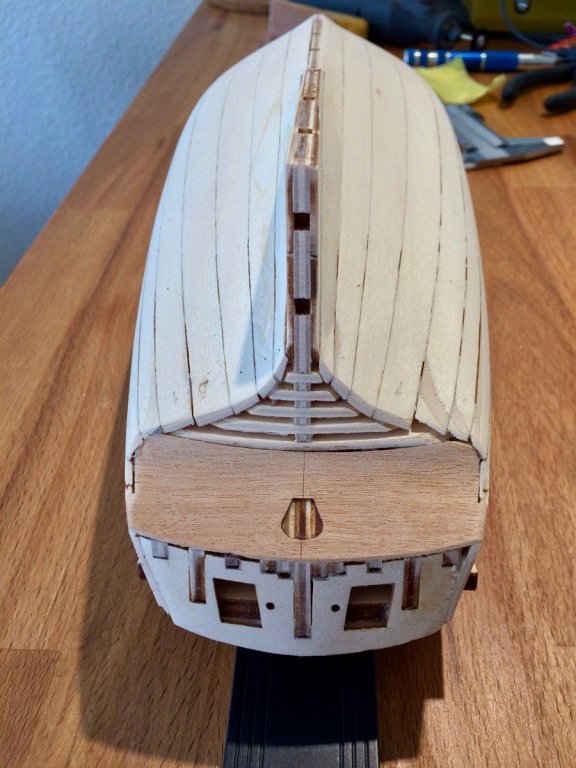
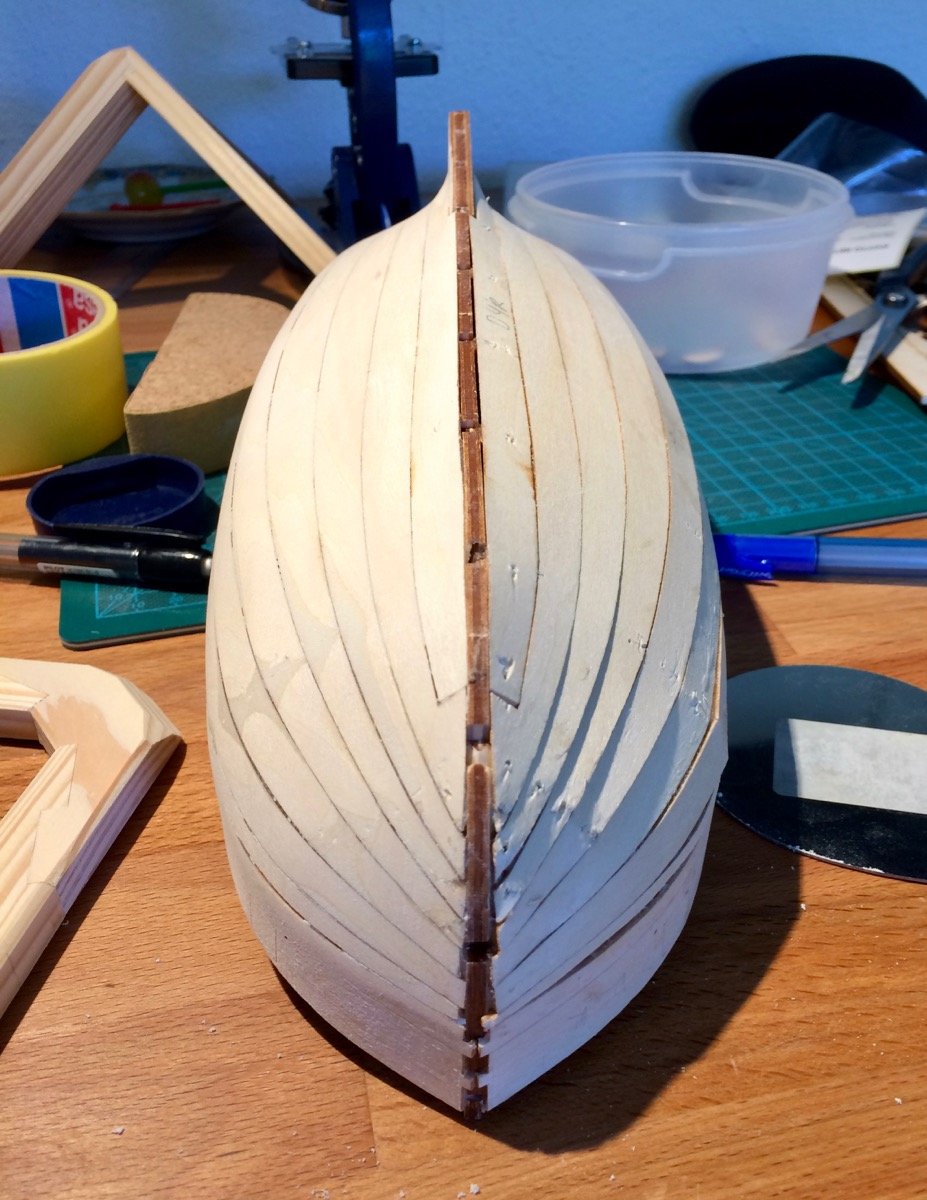
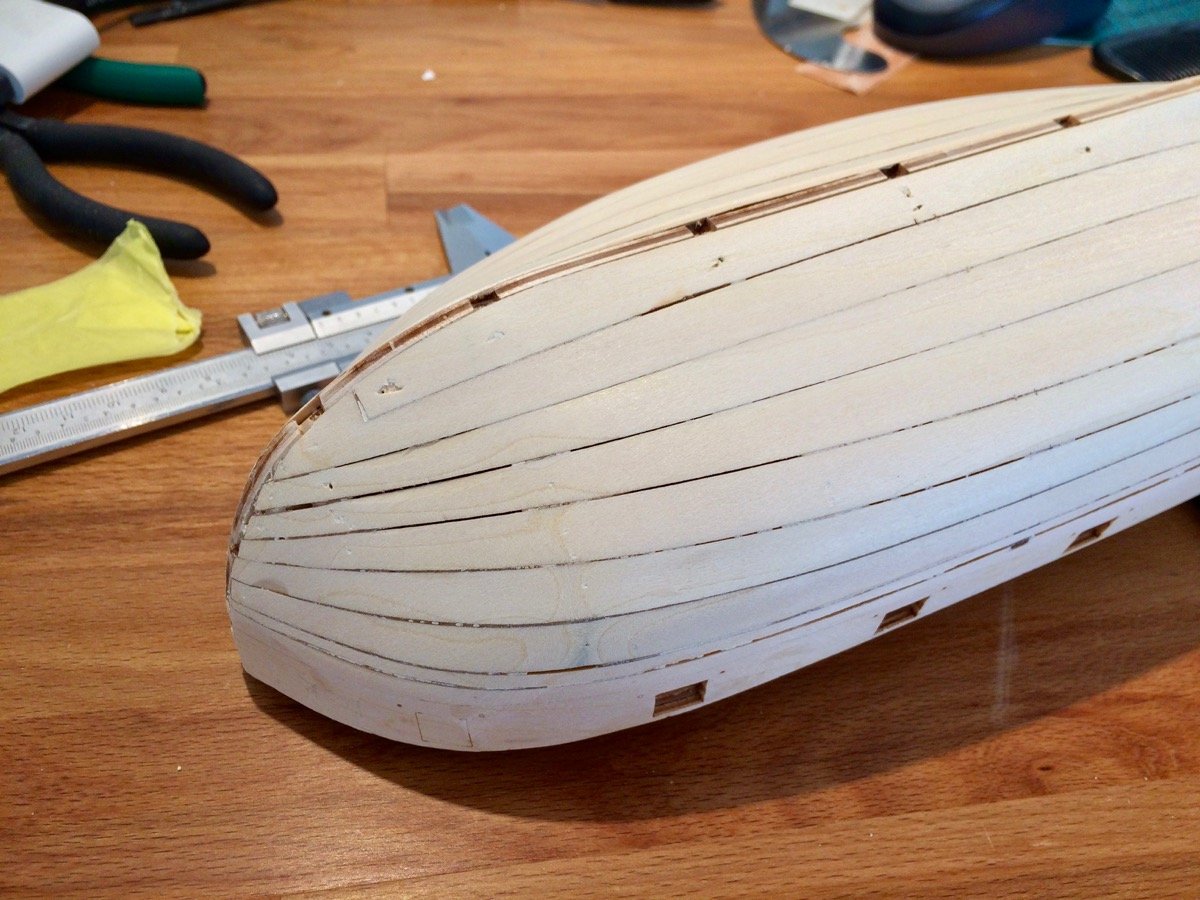
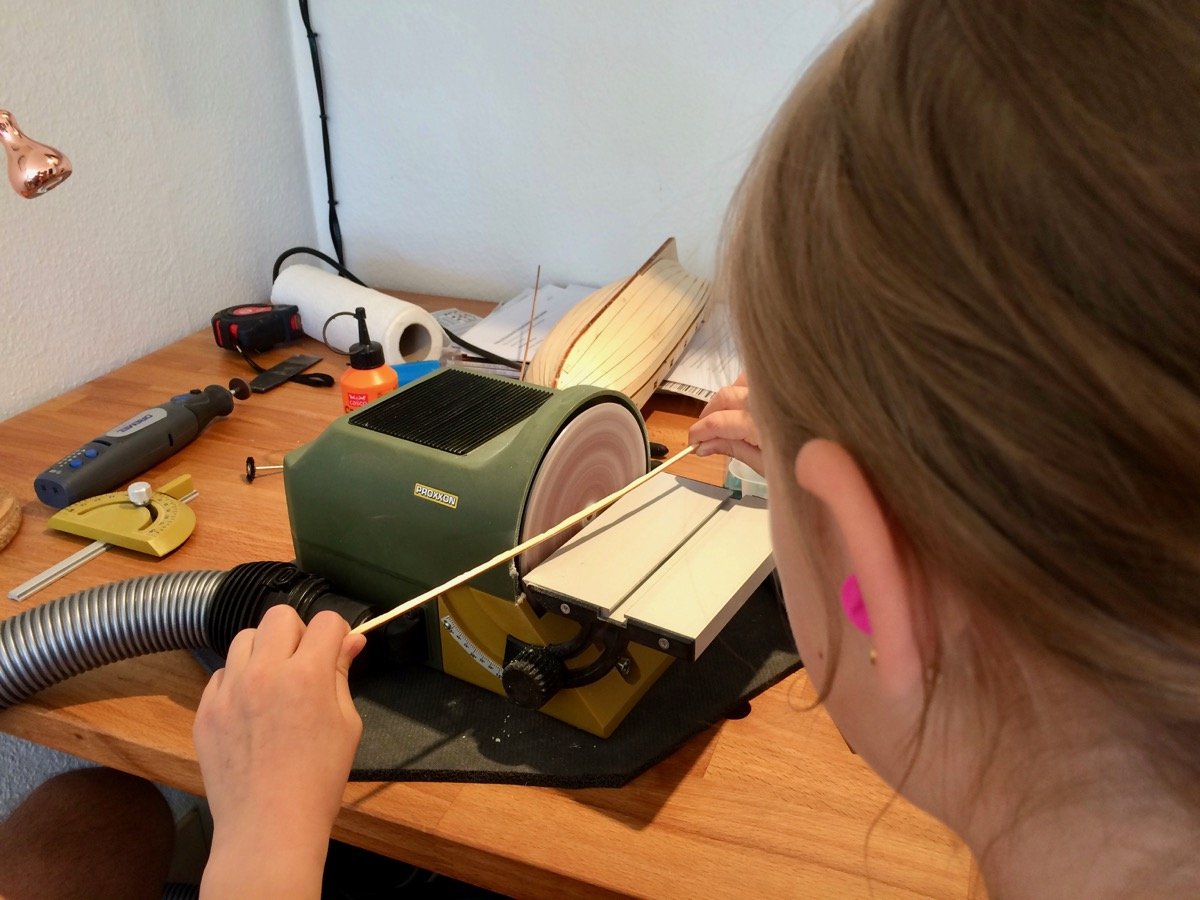
Using sander to shape the last plank:

Last one is installed!

End result. Looks super ugly, but this is a first layer that would be hidden under the second one, and I really did not want to overcomplicate it by introducing steam bending into the process. And without steaming planks crack in the bow.

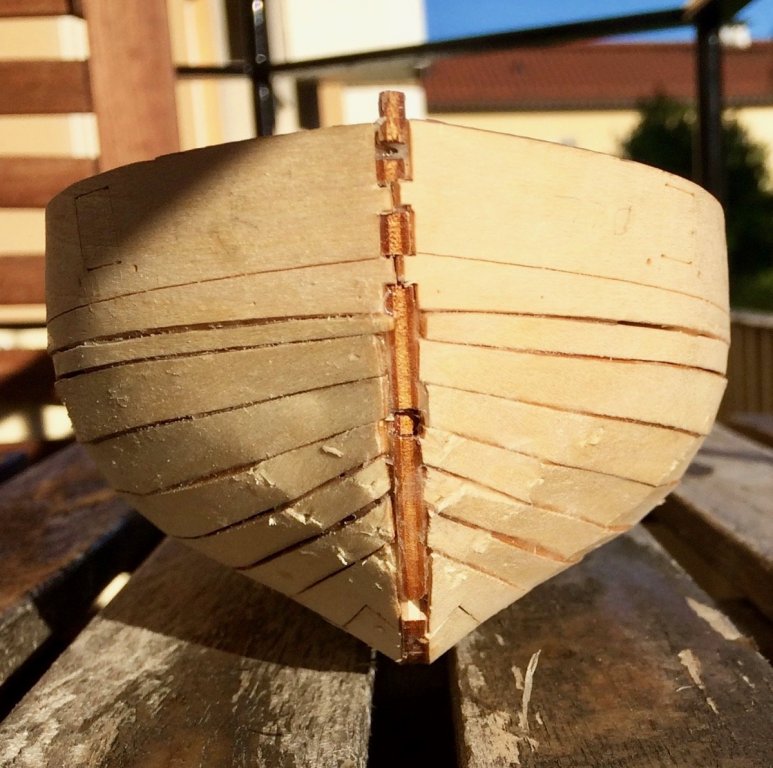

Now aiming to fair the hull and hide this horror with a nice second layer, made of veneer
-
Found these: https://www.led1.de/shop/lng/en/solarox-highcri-power-led-strip-pro-ii-with-samsung-leds-warm-white-3000k-20cm.html
Are they good? It is Samsung, not some noname thing. Though the CRI index is 85, not 95 (hope it is real CRI, not Chinese CRI index). Is that a big deal, or it should be ok?
-
Yes, 95% of them are just cheap stuff from aliexpress and ebay, intended to be used in kitchen lighting and similar applixations. I need just one meter, but of museum quality, not a crappy leds.
-
Very precise and lots of methods to learn, thanks for sharing!
unusual type of a vessel a well
- PeteB, thibaultron, Omega1234 and 3 others
-
6
-
Looking for a high quality LED strip (for the display case). It should be dimmable and have a high CRI.
I read some good reviews on this forum for FlexFire brand, but it seems to be impossible to get in Europe

Would appreciate some recommendations for shops and brands in UK / Germany / anywhere in EU.


.jpg.556b2f1f4a6b79840dd64887e0566a88.jpg)
Beavers Prize 1777 by Mike Y - 1:48 - POF - Hahn style
in - Build logs for subjects built 1751 - 1800
Posted · Edited by Mike Y
Had no modelling time for the last month, but hope to get back to the display case build next week.
In a meanwhile, remember the ebony dye test that I did 10 months ago? Here is the comment with the "before" pictures: https://modelshipworld.com/index.php?/topic/7297-oliver-cromwell-by-mike-y-148-1777-pof-hahn-style/&do=findComment&comment=455741
It's time to check the results. It was mounted to be in the direct sunlight in the window facing south - basically getting maximum possible sun exposure during the winter and summer months.
Parts of the piece were covered by paper to reduce the UV exposure (in hindsight, regular paper is probably not very effective for that).
So here it is after 10 months of sun:
And with paper removed:
So it looks like paper did nothing to protect it from UV. The spirit-based dye (in the bottom) got severely affected by the sun, very blotchy and ugly.
Water-based on (on top) shows no obvious signs of any discoloration. Note the top-right sector - it is a water-based dye with no finish. Tung oil finish (top-left) comes second, and danish oil (top-center) is too flat and glossy, without a proper texture.
Looks like I will simply use unfinished water-based dye on my wales. If it survived on a direct sun - should not be any troubles in the spot that does not have any sun exposure.