


Mike Y
-
Posts
1,513 -
Joined
-
Last visited
Content Type
Profiles
Forums
Gallery
Events
Posts posted by Mike Y
-
-
-
-
-
-
-
This is a true dream shop. Congratulations! Now looking forward to see the build log of a model from the shop!

- mtaylor, WackoWolf, thibaultron and 2 others
-
 5
5
-
Yes, it is not StewMac, that is why I was giving a link to avoid confusion. But should have been more clear.
Well, for all the good purchases I did recently, there should be a bad one as well!
- -Dallen, thibaultron, Canute and 1 other
-
4
-
Got this tool today: http://www.ebay.co.uk/itm/132022884833?_trksid=p2060353.m2749.l2649&ssPageName=STRK%3AMEBIDX%3AIT
Do not buy it. The height adjustment is crap, it floats by itself due to the vibration, so you need to carefully hold the height adjustment knobs. That makes the depth not very accurate, if that is important.
- -Dallen, PeteB, thibaultron and 1 other
-
4
-
Aha, thanks! Yes, you are right, that could be a good plane in the middle!
- thibaultron, vossiewulf, Canute and 1 other
-
4
-
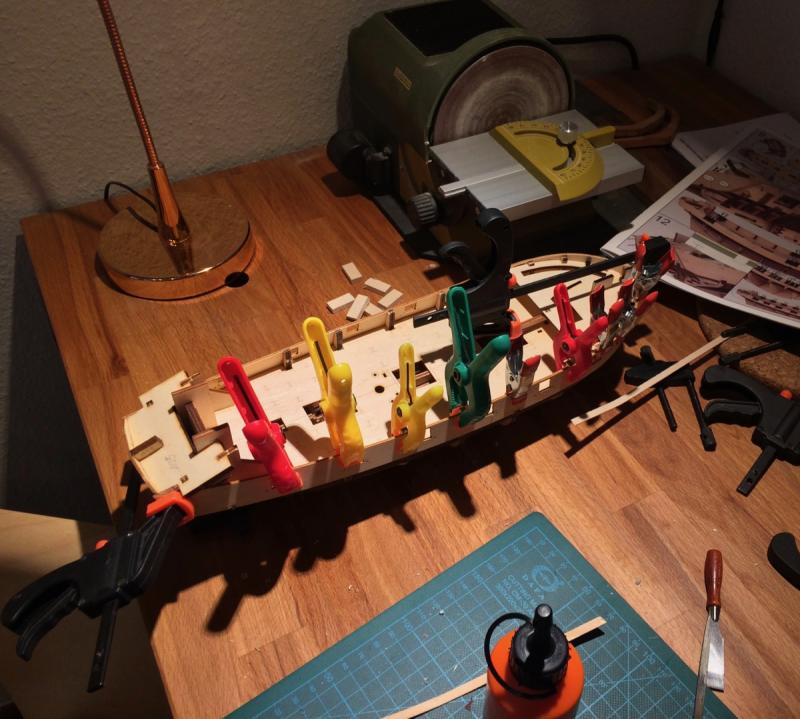
Well, I am not only using it on a model scale, it is mostly intended for something between real woodworking and model scale.
This photo should give an idea, block plane for scale.

There are two choices because I already have a block plane, and buying something similarly sized is not reasonable. So jack plane that can also be good for jointing the boards along the grain (cross grain low angle block plane is good and big enough). On the other end, I have no troubles jointing it with block plane and a straight edge.
-
Ok, now I feel it is a right place to ask
I have a Veritas low angle block plane, and looking for something to flatten small boards.There are two options:
1) buy an optional tote and a knob for the block plane (such thing exists! See http://www.leevalley.com/us/wood/page.aspx?p=41715&cat=1,41182,48942 )
2) Buy a veritas low angle jack plane and an additional 38 degree blade (for smoothing). Keep in mind it is a bevel up blade, so angles sum up.
Second option is quite expensive though..
Block plane path is cheaper, but it only has 25deg blade. I can do scraping for smoothing, though.
Ok the other hand, my boards are typically as long as the jack plane, or even shorter - so the jack could be be too large for my purposes. But could be used for jointing due to its length... So far using a block plane and a shooting board for jointing.
Would appreciate some thoughts from a more experienced craftsman here!- Julie Mo, thibaultron, Canute and 4 others
-
7
-
-
Thanks for the encouragement! We are reading all comments together, and it really makes her surprised that some People From All Over The World are watching her progress
Progress was really slow, but for a good reason - we were busy with lots of other activities.
From now on, most of the photos are described by Daria, and I am my few cents where necessary:
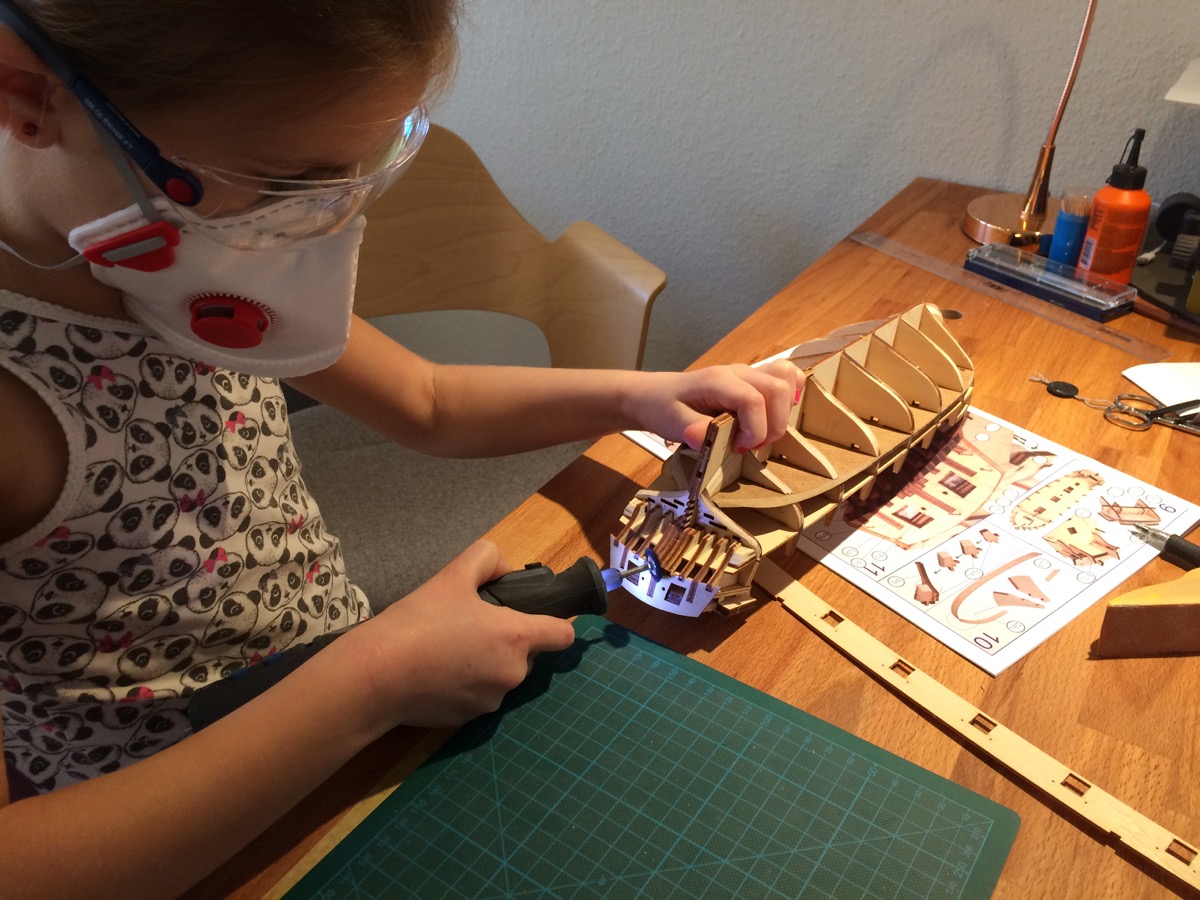
Daria: here I am cleaning up the glue with dremel, so we will be able to glue some other parts on it
My comment: making sure that using proper safety gear is a habit and not something "weird". That was easy, since at the moment she wants to be like a dad, and if dad wears safety glasses and respirator - then she will do it as well
Of course the fit is not good, the respirator is basically useless if it does not fit the face properly, so I am not doing any dusty work when she is around.
Daria: we steamed the hull sides with boiling water so they could be bent. We do everything without mistakes (trying to)

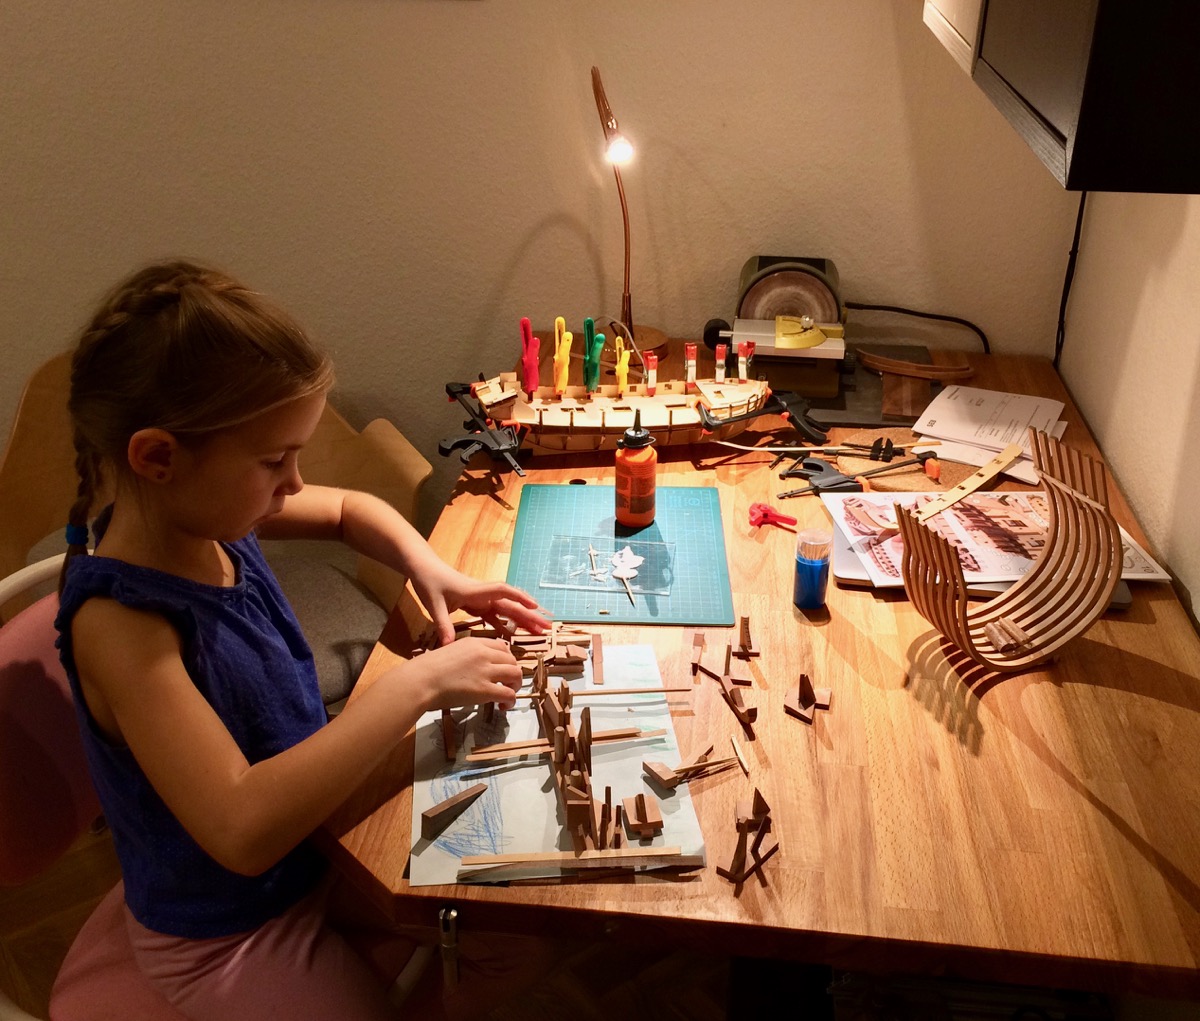
Daria: I am building a city here, myself, without any help. My dad gave me a lot of small wood pieces.
There is a man in this city, a kite, and one butterfly. This city is imaginary. It also has a trampoline, airport and few small ships. That ships sail by themselves, they know where to go.

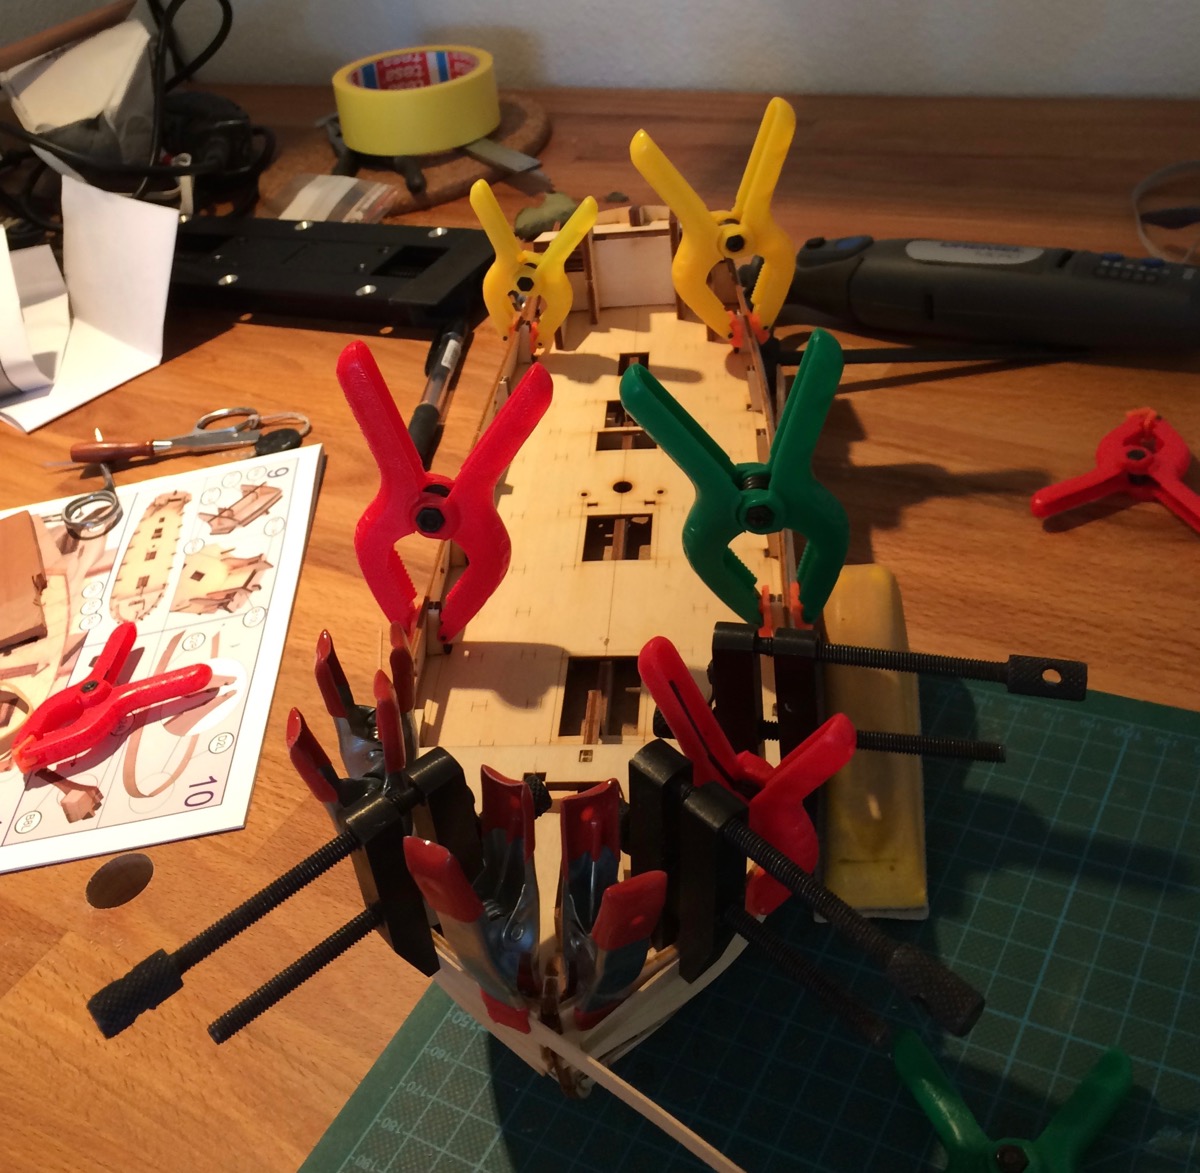
Daria: here we are gluing the right side of the hull and then we clamp it. Clamping was very tricky!
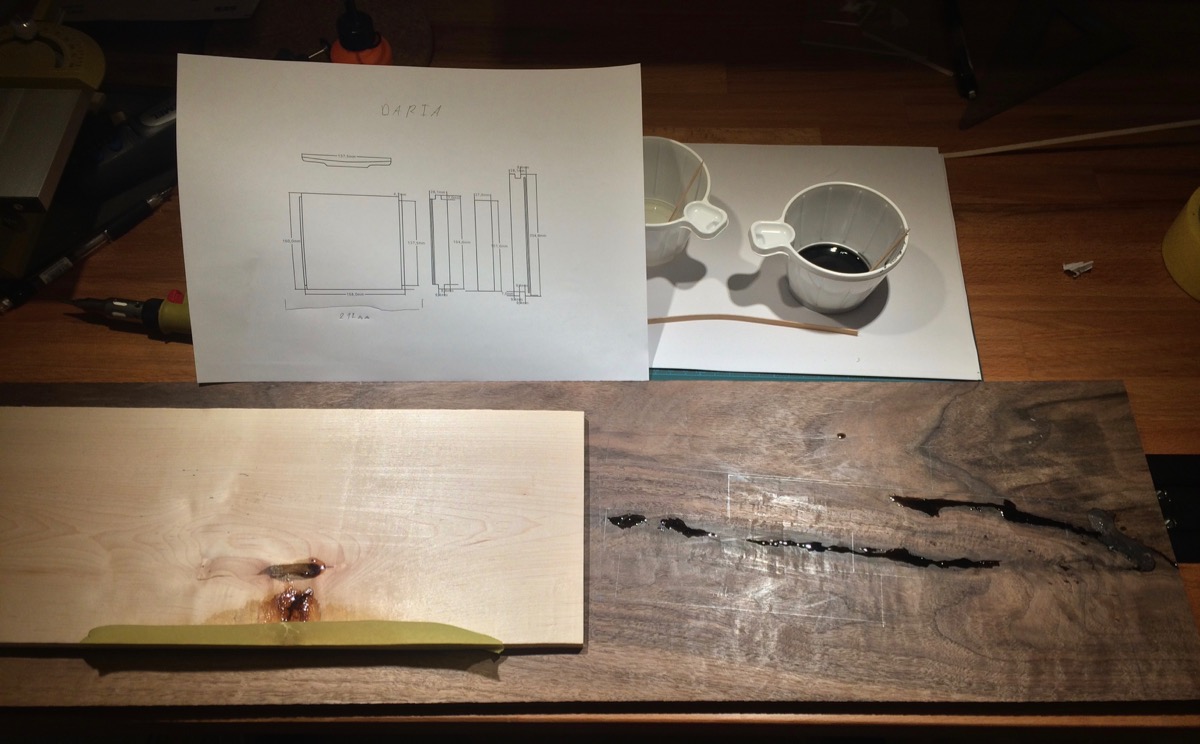
Daria: we will build a box, I will help as well. I already used a hand plane to smoothen the wood plank! I selected the most interesting parts of the planks - one looked like butterfly, one like sun, and another one like a squirrel tail!
My comment: I was really pleased that she got the idea of a wood figure, and prefers some interesting parts ("sun", "butterfly" and "squirrel") instead of just a smooth part of the plank without any figure. My previous epoxy fill was not very good, lots of bubbles, so I am redoing it properly this time, using torch to quickly get rid of all bubbles.
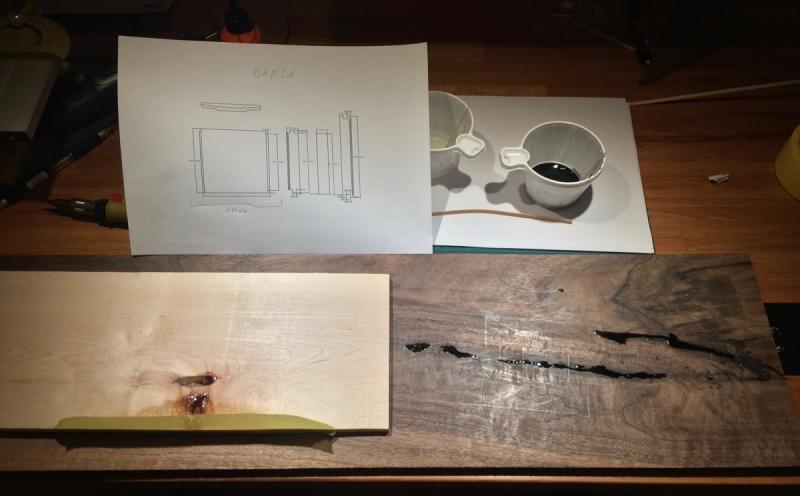
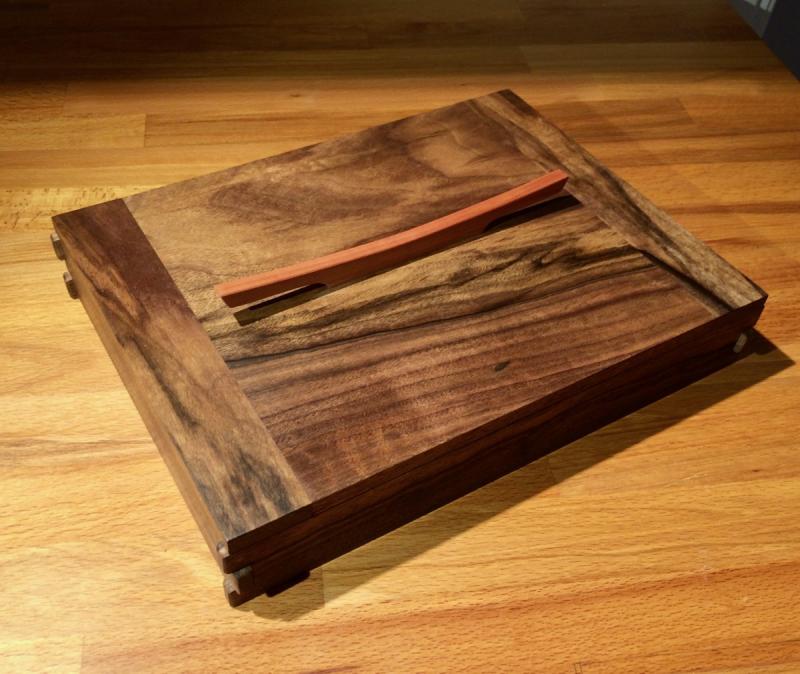
So there would be a delay again - this time to make a jewellery box, exactly like I did for my wife (photos are here: http://imgur.com/a/7fNCc ), but smaller. I promised, now need to deliver
-
Spent the last few weekends procrastinating, working on a workbench improvements.
It all started with a problem of fixing wooden boards to the table. Clamps are not really good enough, especially if you start planing. But any sort of bench vice is too ugly for the living room, and there is a door to the kid room right next to the table - so it is not convenient to have a large handle.
And then I discovered Veritas inset vice. Yes, that was perfect for the purpose! Nice, elegant, small handle.
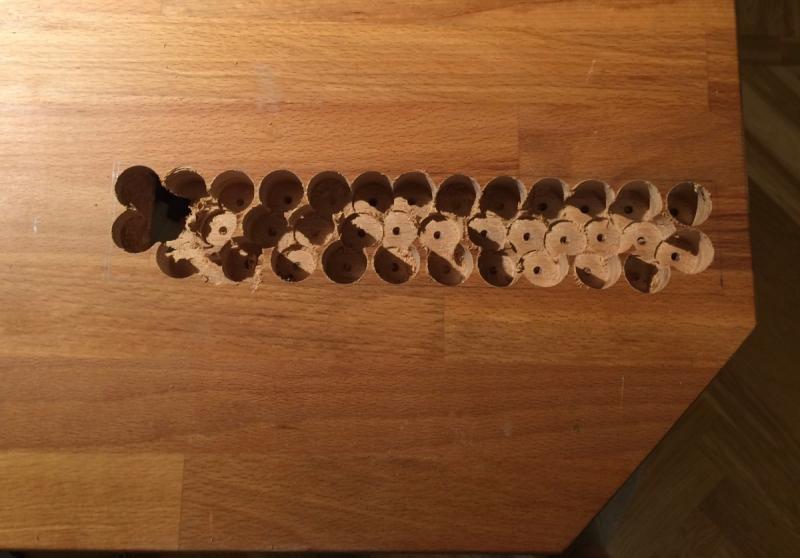
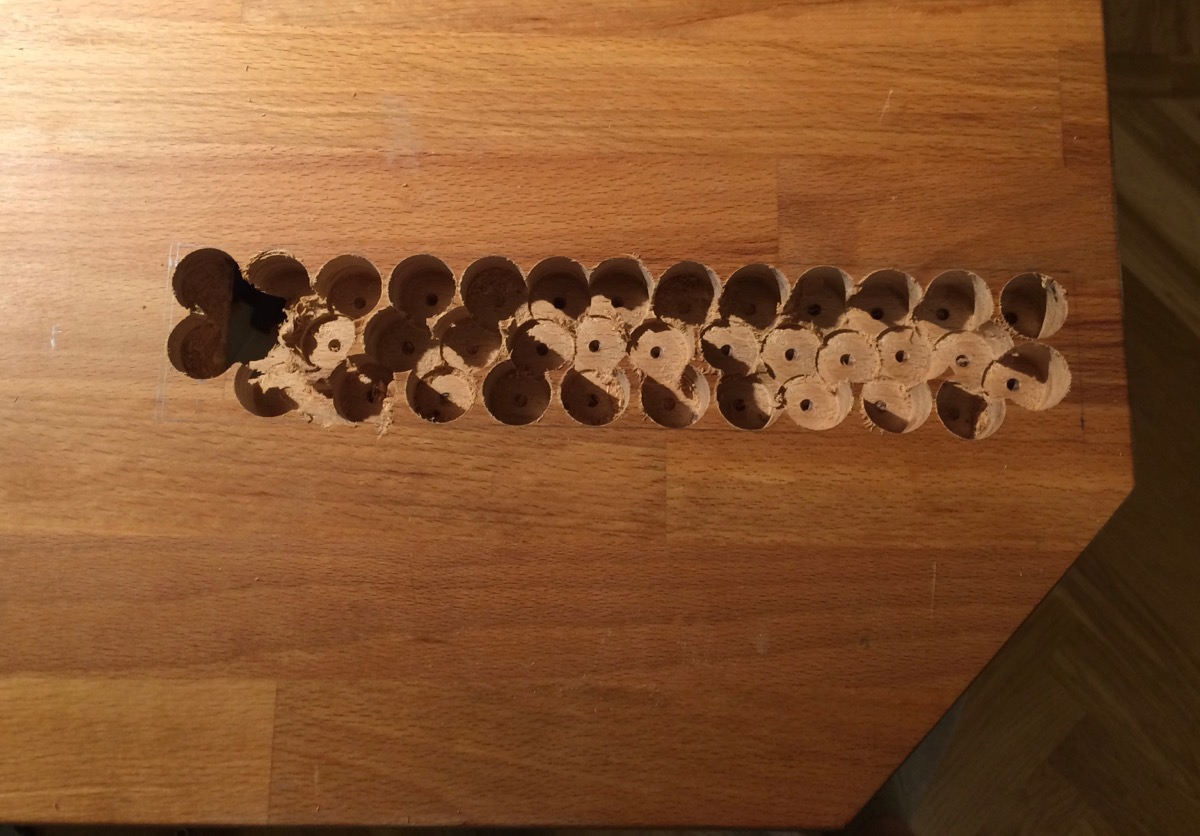
To install it, a large mortise needs to be made in the table top. Started with drilling away most of the material.

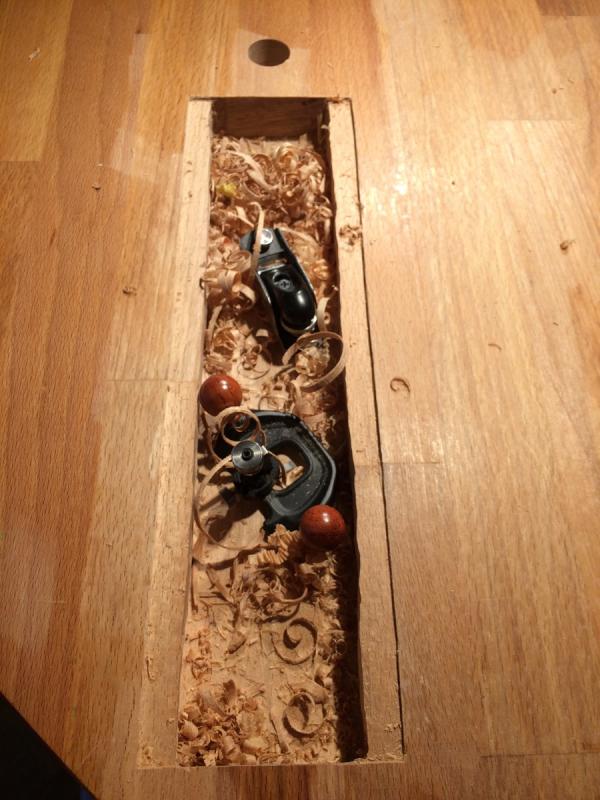
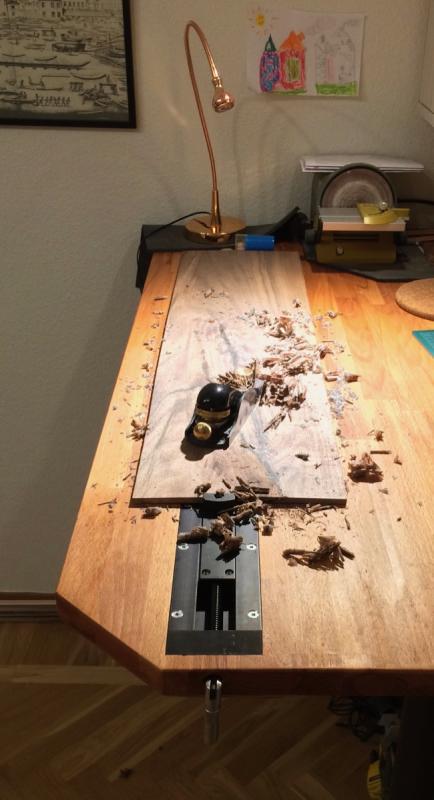
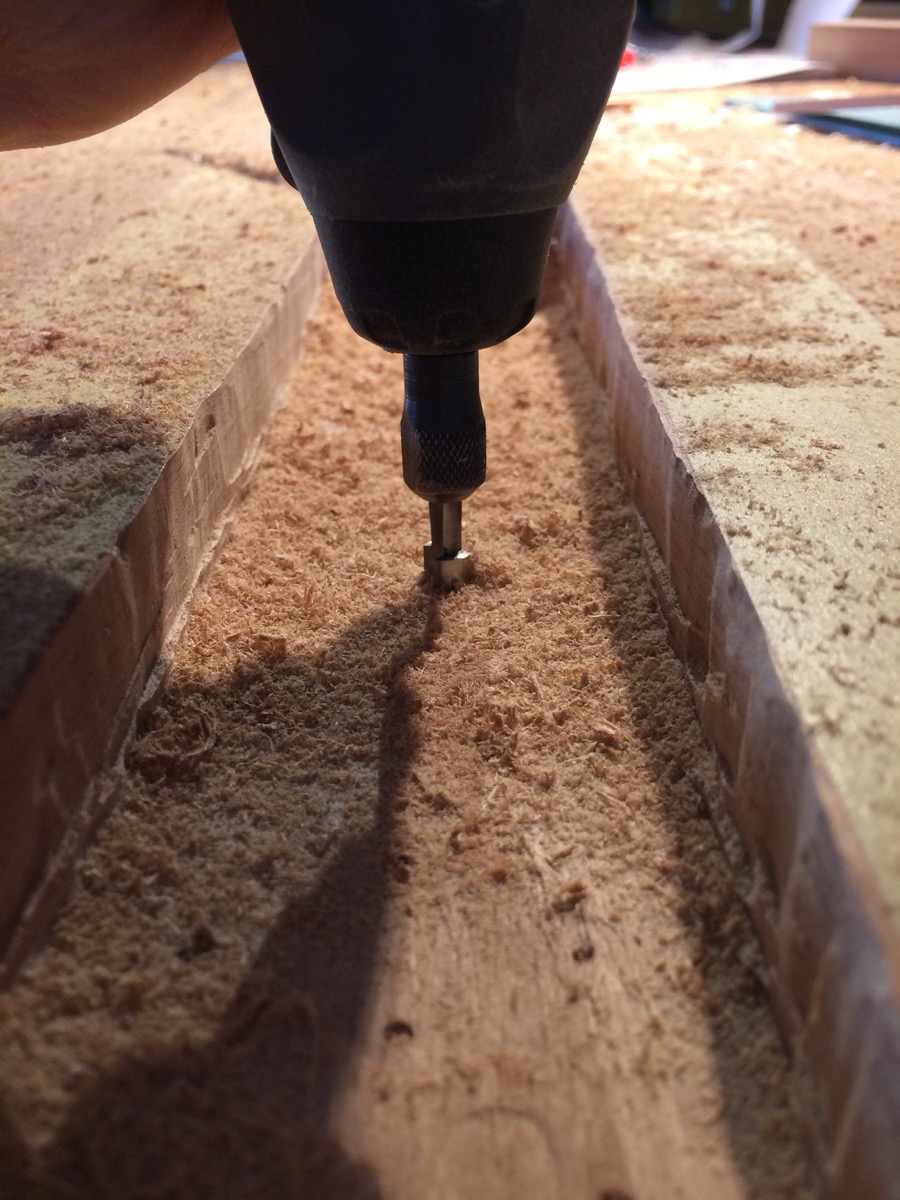
The rest was removed with a router bit and dremel. Routing freehand is super scary! But works:

Then a small "frame" was made with a miniature router plane and a block plane:
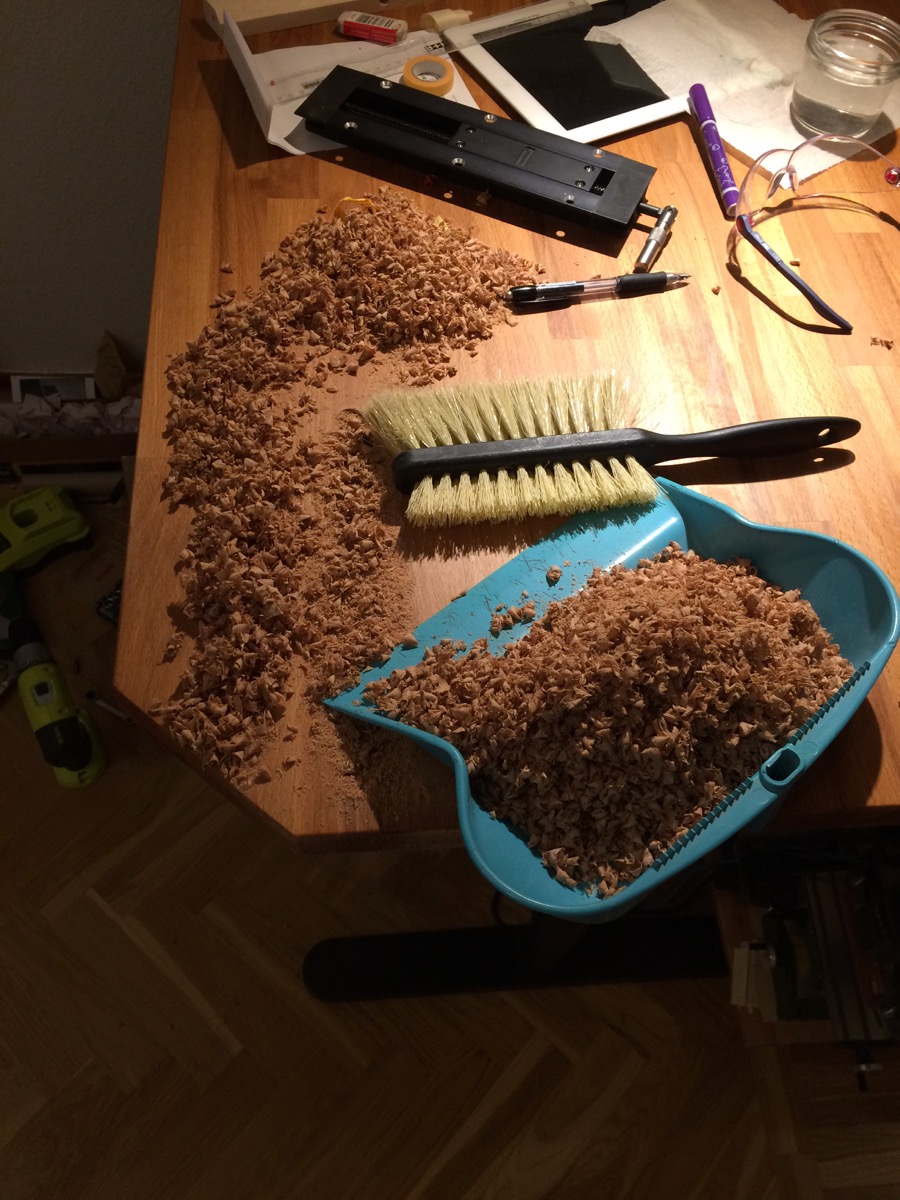
I severely underestimated the efforts required to make a mortise with the tools I have. It took too many hours and too much dust
Since my table top is not thick enough (not enough wood left under the mortise) I reinforced it with thick plywood located under the vice, fixed to the table top with glue and lots of thick dowels:
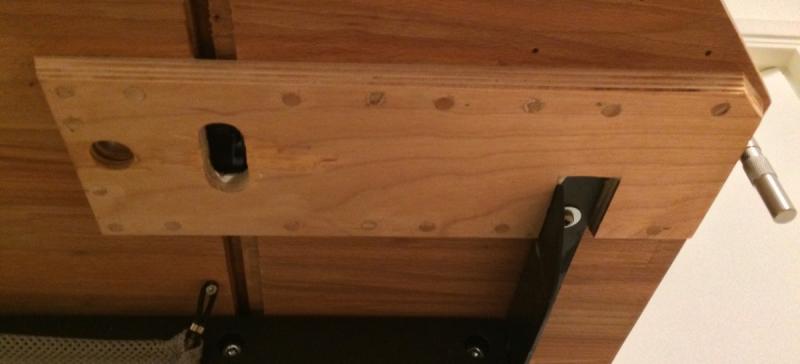
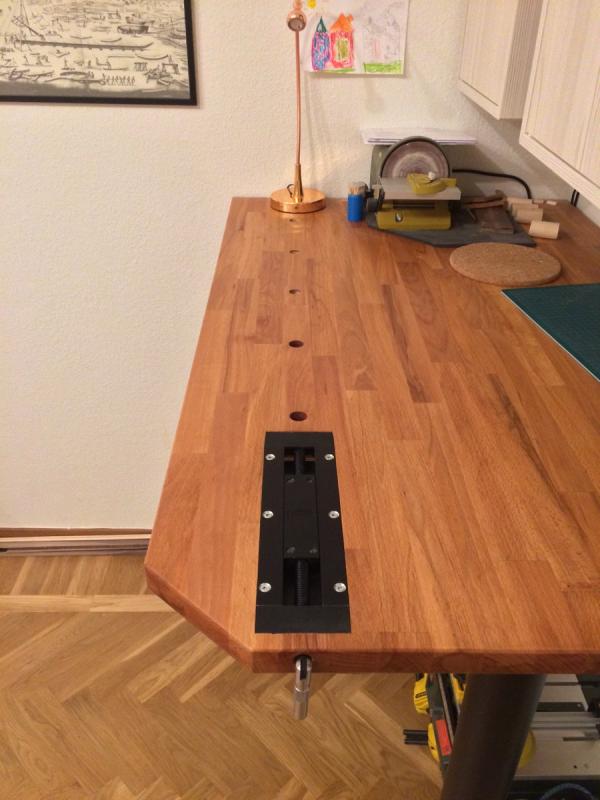
Done! It is flush with the surface (I even made it 1mm below the surface), and the handle is unlikely to be a problem even on a way to the kid room:
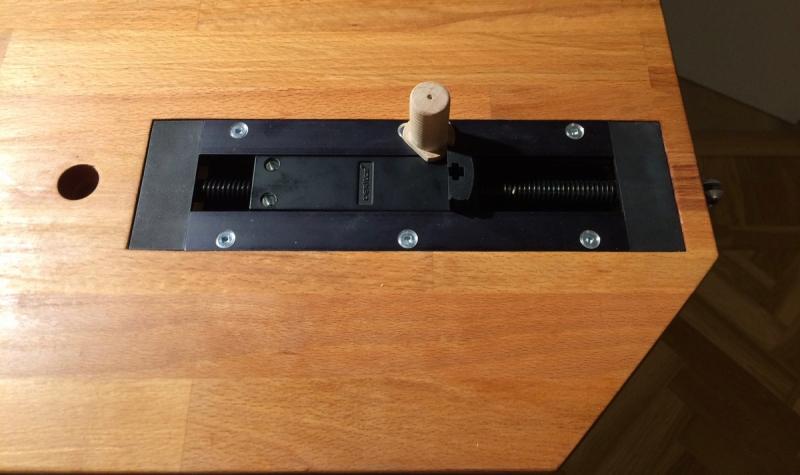
When used, bench dog (hand made) is inserted into a hole, and a small jaw is inserted into the vice:
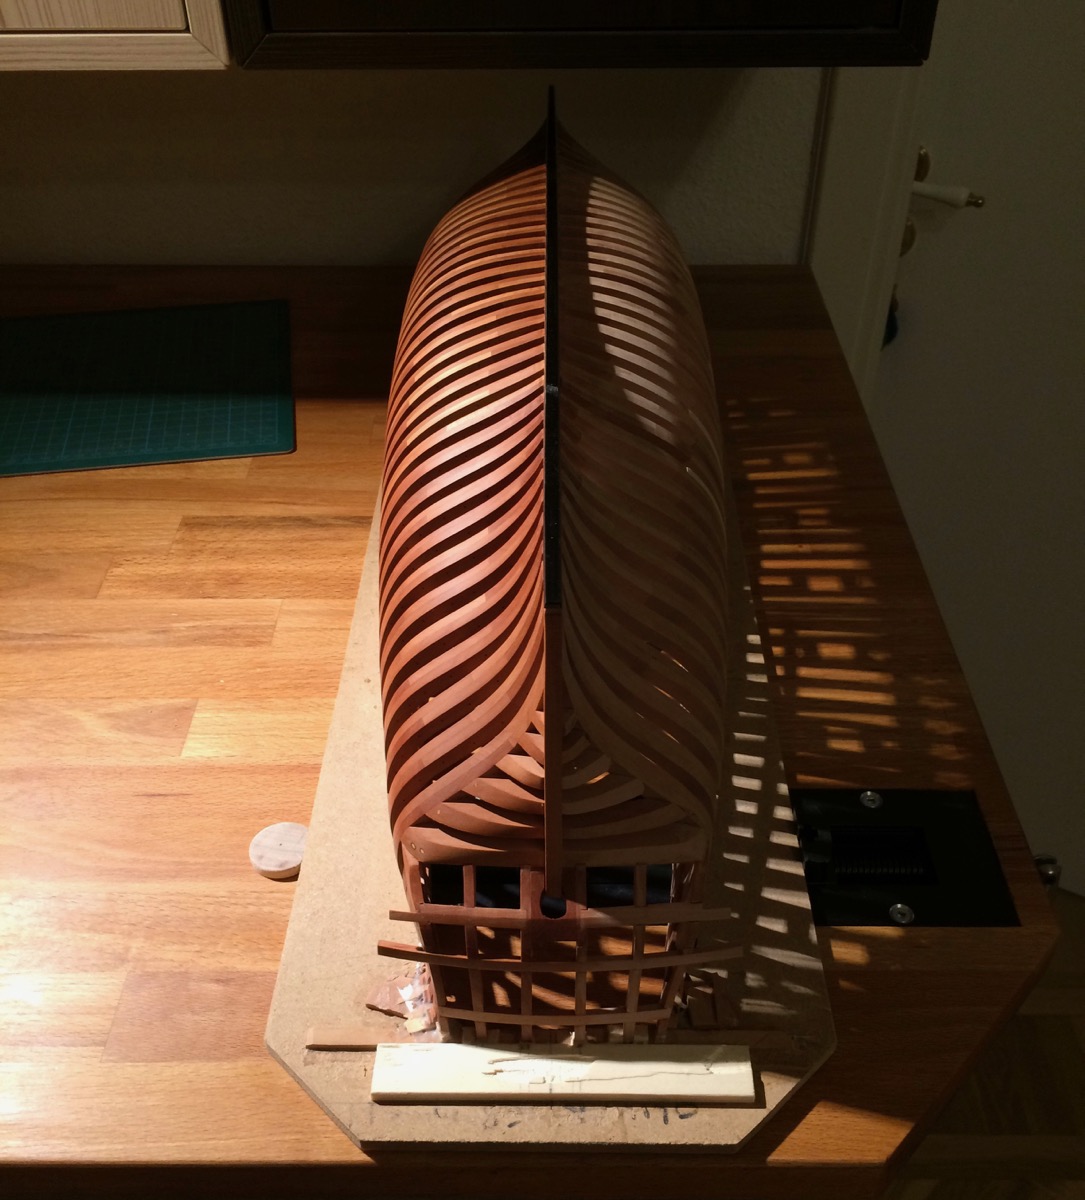
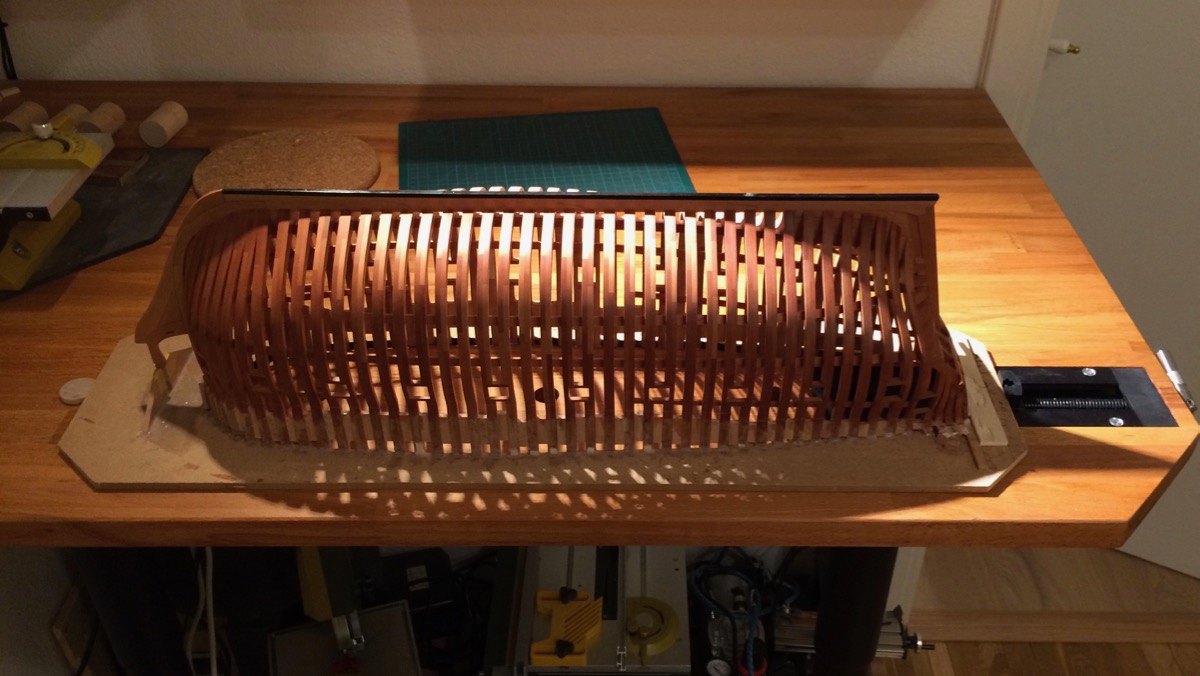
Uses are many. Starting from fixing the model in a jig (very little pressure is required, so I do not think the jig or hull will deform):

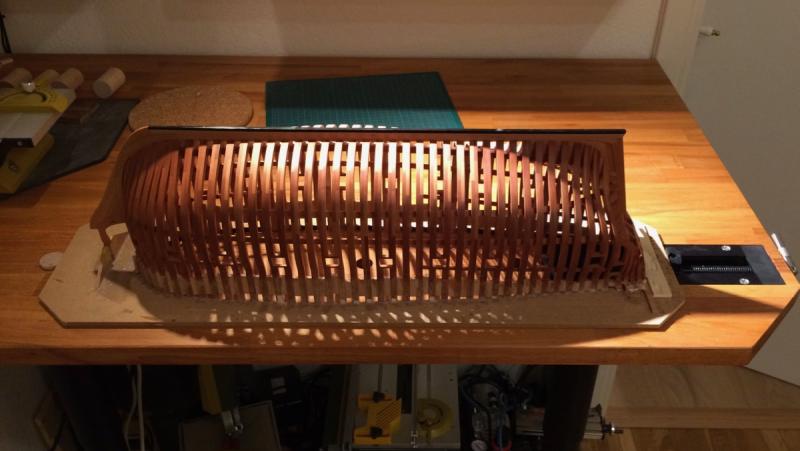
Ending with planing the wood. This beautiful walnut board with epoxy-filled cracks was waiting for the vice to be planed. Finally done!
-
Thanks for the tip! Read it a bit too late, just finished routing freehand, which is terrbile
Will buy one soon, nice tool!
- Canute, mtaylor and thibaultron
-
3
-
Semi-offtopic. Finished the jewelry box, the build log is here if somebody is interested: http://imgur.com/a/7fNCc
That was an interesting practice, took longer than expected. Totally new skill of turning a non-square non-flat warped piece of wood and making it square, flat and parallel on all sides. Jointing and planing, something not frequently used in the ship modelling!
Also, my standard way of "cutting an oversized part and sanding it to shape later on" does not work on that scale, so there were much more careful calculations and cutting to final dimensions from the first attempt. Well, maybe shaving 0.5mm from some risky pieces with the block plane..
First time I used OSMO Polyx (http://www.osmouk.com/sitechapter.cfm?chapter=82&page=247) as a wood finish. It is surprisingly good - dries fast, easy to apply, the end result is really strong. Will test it on a small scale, might be a good finish for the model. Anybody has an experience with OSMO as a ship modelling finish?

- tadheus, AnobiumPunctatum, dvm27 and 18 others
-
21
-
-
Thank you, Gary! Welcome to the log
- FriedClams, mtaylor, Canute and 1 other
-
4
-
-
-
It may comfort you that the builders of a full-size replica of the same period (see http://modelshipworld.com/index.php/topic/12395-replica-poltava-1712-russian-ship-of-the-line ) also used lamination for the internal planking in the bow, where curves are steep. And some outside curves as well.
So it is definitely not cheating!
-
May we see photos of the other completed model, please? It looks more interesting than the wall!
It is a Model Shipways Pinnace kit, designed by Chuck. The build log is in the signature, here: http://modelshipworld.com/index.php?/topic/4954-21ft-english-pinnace-by-mike-y-model-shipways-124/
Incidentally, this is the only finished model I have so far
 After the Pinnace, I started a longboat out of boxwood (the link is in the signature as well), and the hull planking is mostly ready (1-2 strakes left), but the build is on hold because I started the Oliver Cromwell build
 -
Alan, John, Druxey, Patrick, Christian - thanks for the feedback!
And a happy New Year everybody!
Possibly a thin felt gasket glued on the inside edge to keep the dust out?
You could employ a more traditional floating base... a open backed box that slips over the strong support that is bolted to the wall.
That way if someone looks underneath they see a finished face.
A set of strong magnets (or screws) could secure the "box" to the "support".
Yes, haven't really planned the dust protection yet - some felt-like material will be used between the wall (the wall has a rough texture) and the back side of the case.
As for the base - underside of the base would be left unfinished simply due to economical reasons - it is a lot of wood needed to cover it, and nobody will bend that low anyway. And kids who will see it - will appreciate the view on the internal structure and some electrical wires
Happy New Year! I like your concept for the case, especially those complicated joints. My only comment would be to have a back-surface incorporated into the case as opposed to relying on the bare wall. But, that's just my opinion.
Yes, was thinking about it, but it is so hard to decide what that back-surface should be. I was thinking about a milky-opaque plexiglas, some plywood with veneer on top of it, mirror, etc. Ended up with just a bare wall, it should look nicer and also provide more volume. Due to the location of the case, I can't make it wide (people will bump into it), so it is fairly "flat", so the visual volume matters.
And if these estimates would be wrong - it should be easy to retrofit any sort of the back material later (just sticking the correctly sized rectangle to the wall behind the case).
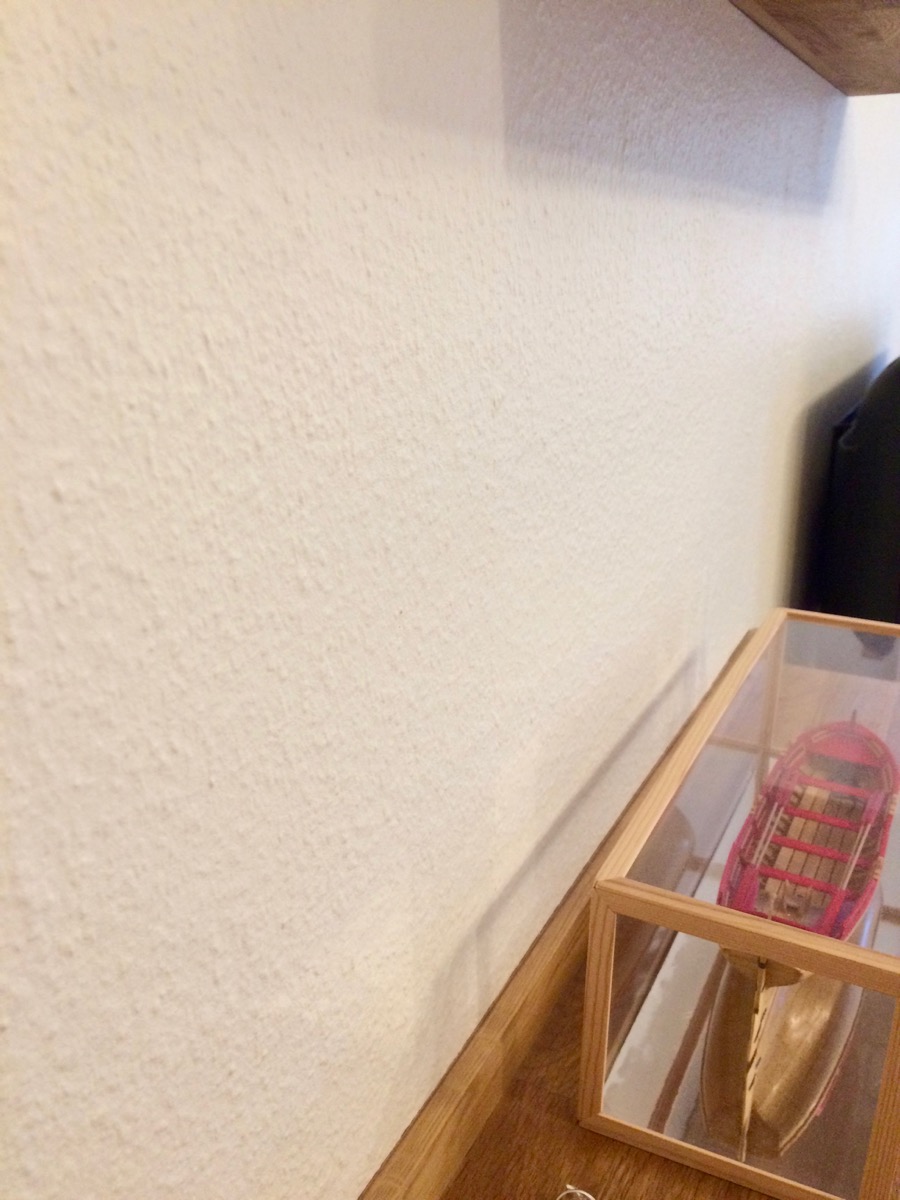
For the background, here is the wall where the display case would be mounted. It will replace the floating shelf with the pinnace model, so here is the dashed line of the estimated location:
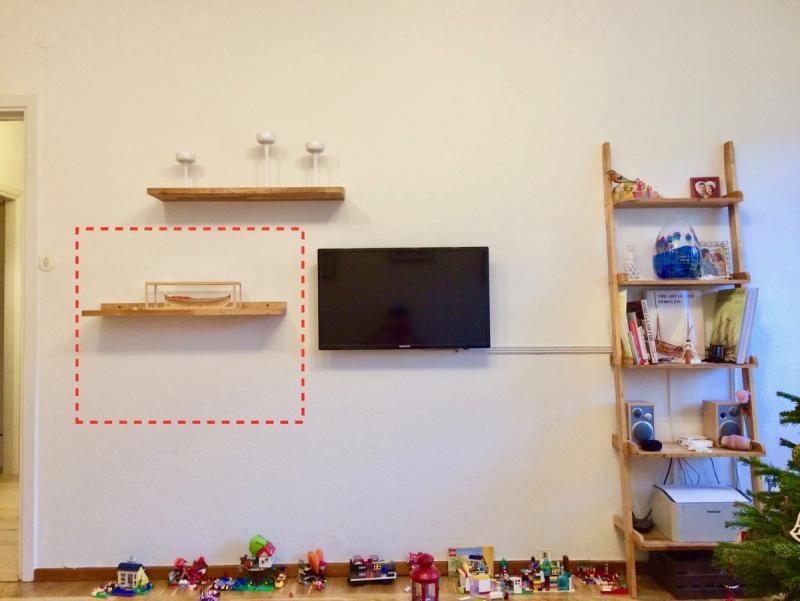
The wall close-up (it is a simple painted wallpaper):

Since this is a super common wall colour (already known as "Stockholm white"), I am quite certain that even if we move to another apartment - the wall texture and colour would be the same
- GuntherMT, FriedClams, AON and 4 others
-
7
-
Thanks for the nice comments and likes!
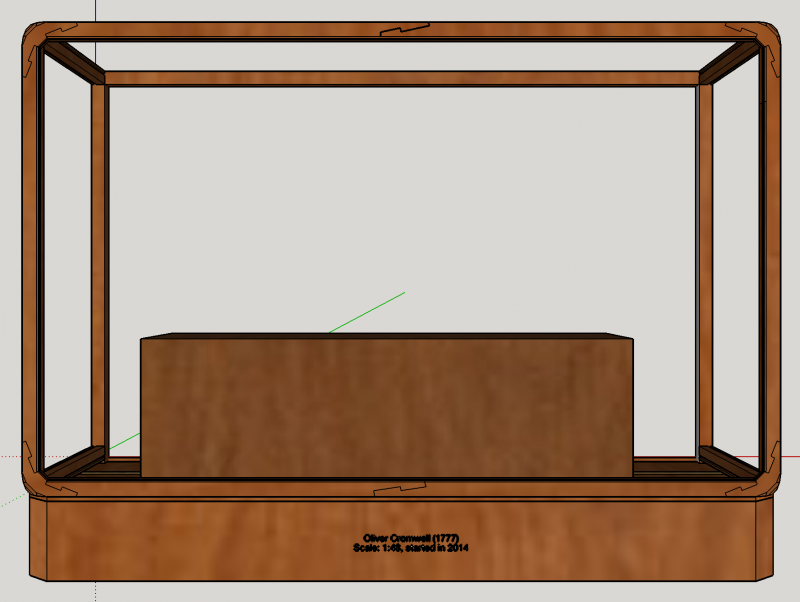
Finished a draft version of the display case sketch. Would appreciate the critics, it would be cheaper to correct the design issues now than later!
Basic characteristics: 100cm wide, 80cm high and 30cm deep (40' wide, 31' high, 12' deep). Plexiglas (3mm thick) would be used instead of glass (for safety and weight reasons). No glass on the back side, it would be mounted to the wall and the background would be a white wall.
Made out of the same swiss pear as the model. The frame would be made out of square pear stock 2x2cm (13/16').
Here is the overview first:
Front:
(yes, I love scarf joints
 )
)Isometric:
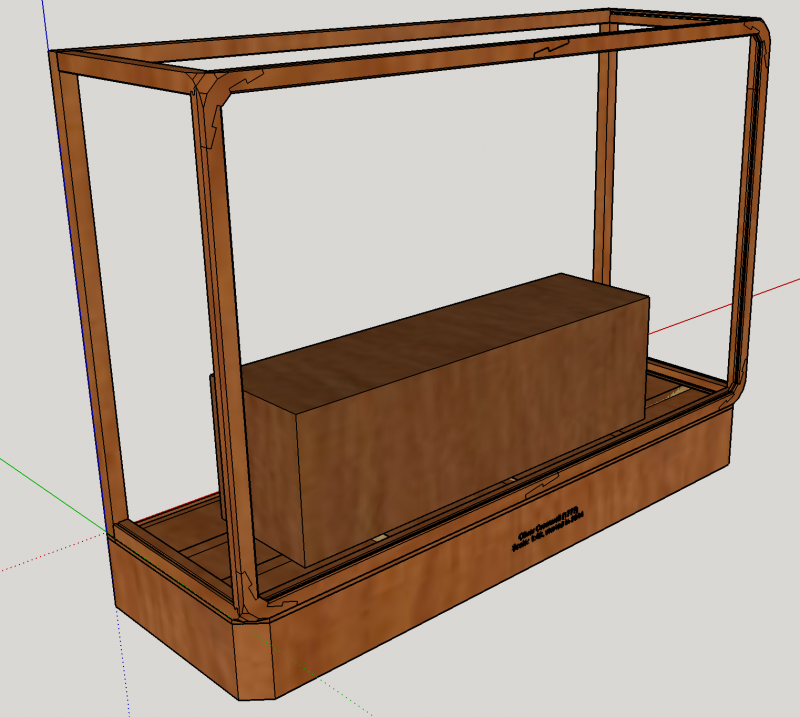
(Please ignore the joints in the back, I had no energy to draw them properly, but they be a mirrored copy of the front joints).
The load bearing part is hidden by the "skirt", and is made out of thick plywood bolted to the wall with Big Strong Bolts. Any sort of electrical stuff would be hidden in that cavities as well.
Plywood is covered by the pear "skirt" with a model description carved on it (or inlayed).
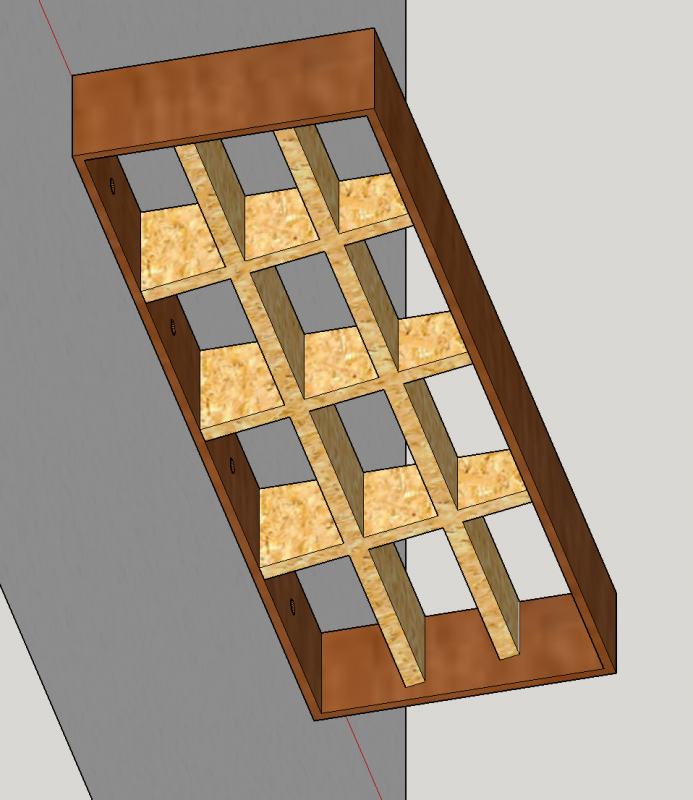
The top part of the case would be attached to the wall as well, with hidden screws, but will not take any weight.
Tricky part is the the way it would be opened. Since I will keep model in it and get it out every time I want to work on it, the opening mechanism should be easy to use (multiple times per week). Also, due to asymmetrical nature of the model, I want guests to be able to get it out easily to see the other side.
So the front window is detachable and is held by strong magnets. That means that front frame is split into two parts - one is 1cm thick and hold everything together, and another is also 1cm thick and holds the front glass.
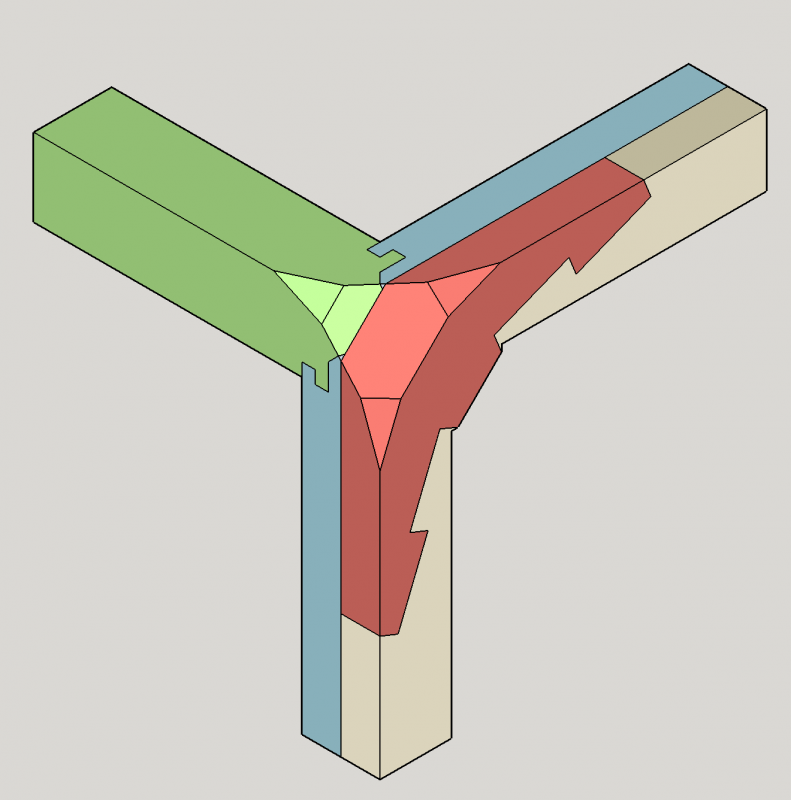
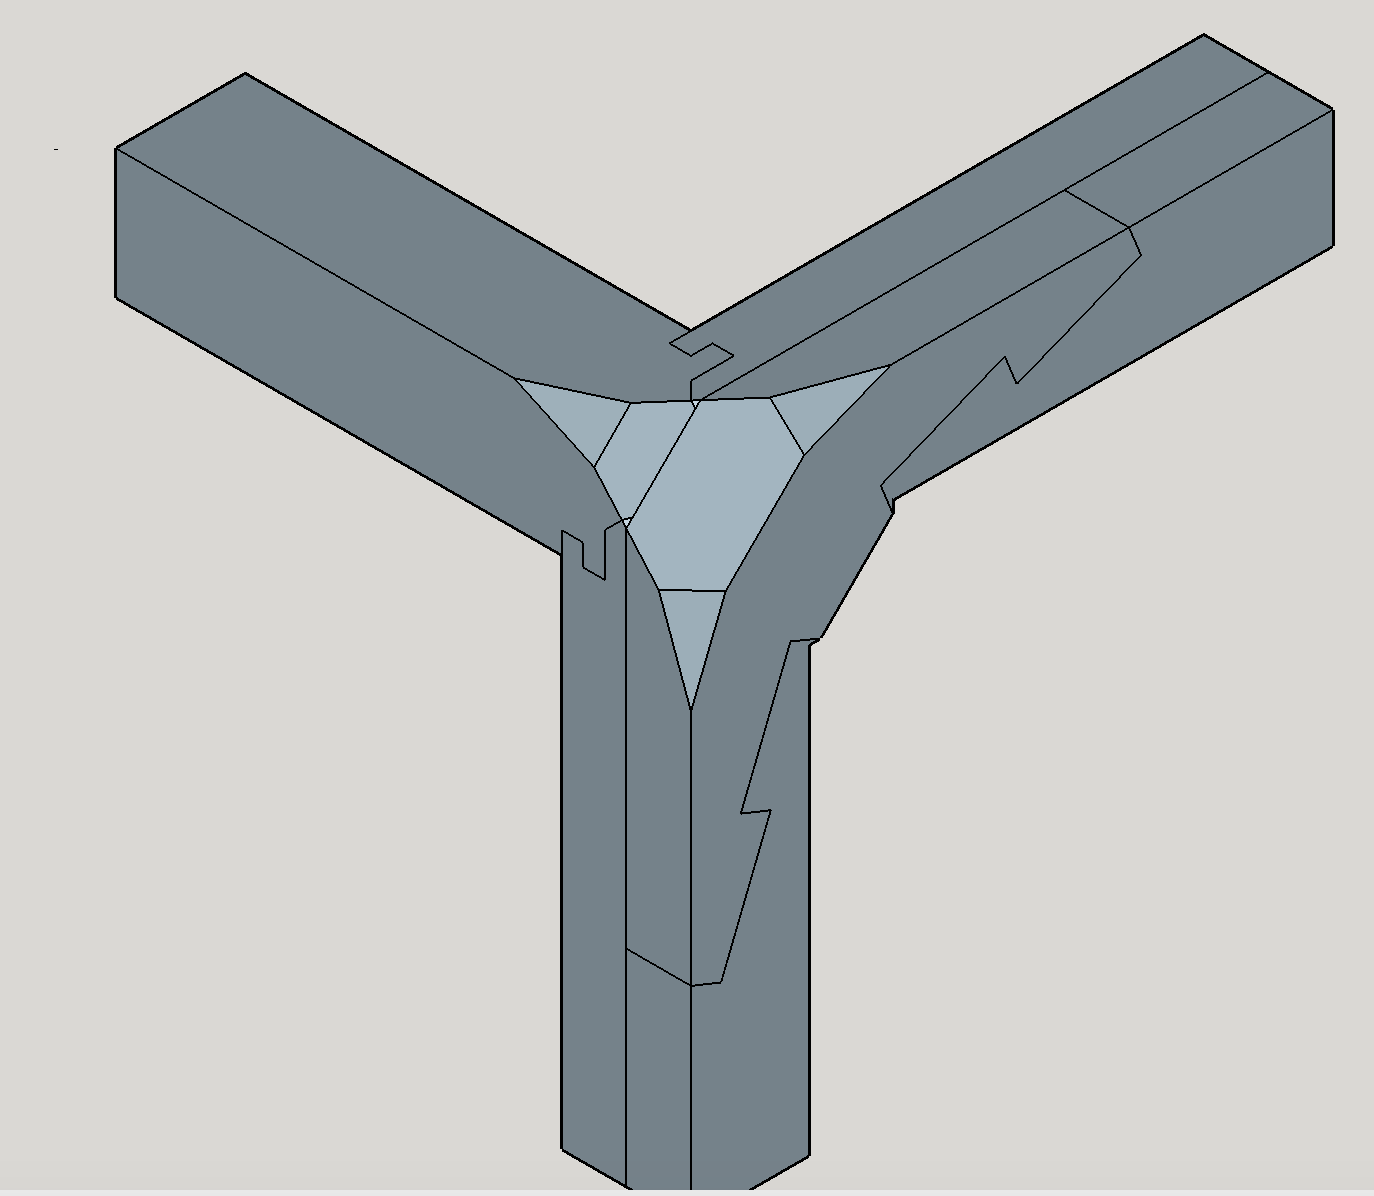
Front frame joints look like this (a bit complicated, but it is a sort of decorative joint, I want it to look nice)

Or a multi-colored version of the same joint, each color is a different wood piece:
There would be a groove inside front part of the front frame, to provide an additional support for the top glass and its frame, since otherwise it would be only supported from sides and will sag over time.
Would appreciate corrections if I forgot to over-think something in this design!
Is the plexiglas thick enough? I accounted for the wood movement, grooves for the glass are deeper to allow wood to shrink and breathe a bit. Is the base construction strong enough?


Pandora by marsalv - FINISHED - 1:52
in - Build logs for subjects built 1751 - 1800
Posted
The blocks look amazing!
What is that chuck on your Proxxon mill? And a few curiously looking milling bits that you used for that blocks
Do you mind sharing s link to them?