


Mike Y
-
Posts
1,437 -
Joined
-
Last visited
Content Type
Profiles
Forums
Gallery
Events
Posts posted by Mike Y
-
-
-
-
-
It actually looks very nice with that grain! Feels like that "flower growing through asphalt" pictures. Rough wood - and a gentle flower emerging through it

With a proper backstory, this piece could be more interesting than something carved on a "proper" wood where grain is barely visible.
And the pimple is a nice touch, not a thing to get rid of!
- Canute, aviaamator, Jack12477 and 3 others
-
 6
6
-
-
The log is not abandoned, just a very slow building due to an upcoming Christmas and everything related to it.
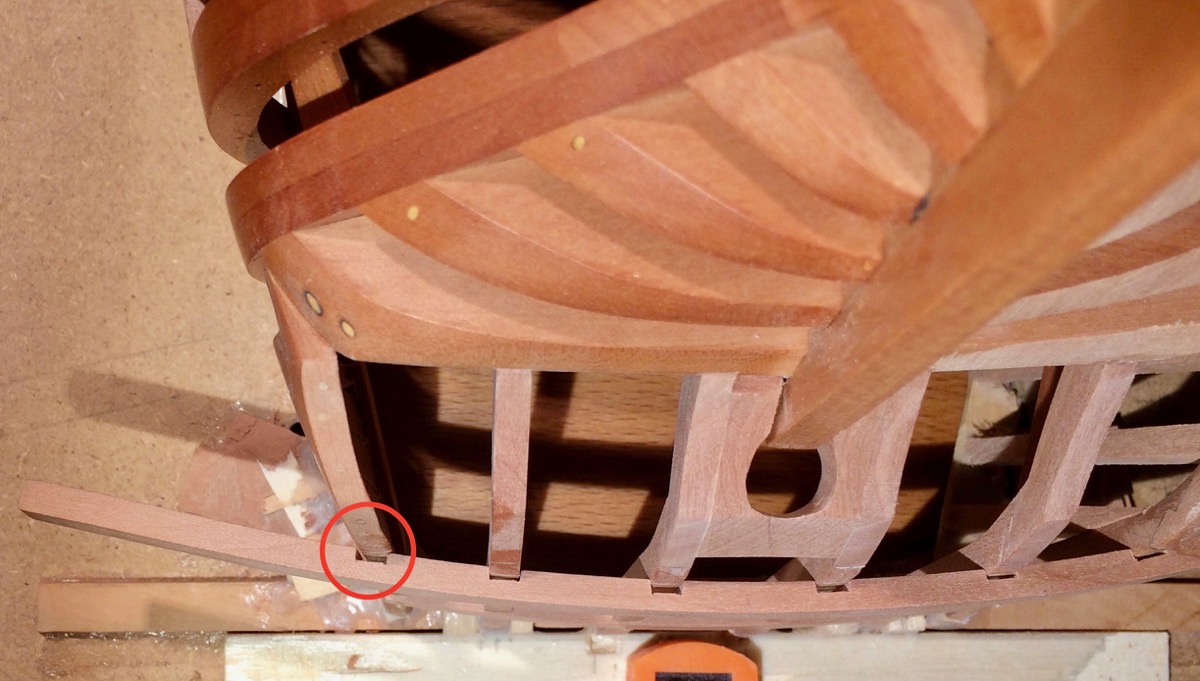
Notches lined up:
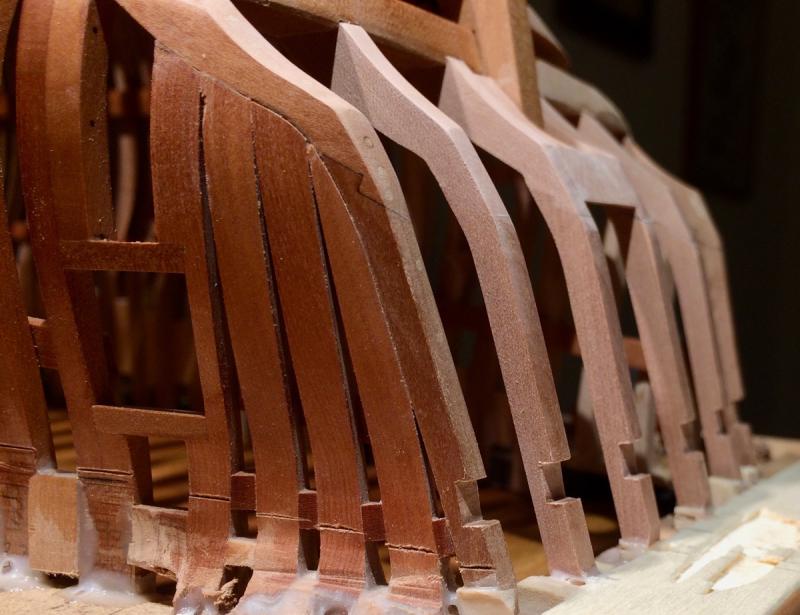
Whoopsie, forgot that wings are at an angle. Argh, redoing this piece again from scratch.
Two curved things are in place, one to go and then I can fair it nice and flush:
- Captain Poison, igorcap, mtaylor and 24 others
-
27
-
Eeeh, what? Already done? So quick?

Your productivity is incredible, especially combined with the highest quality and careful planning and research. Bravo!
Looking forward for the next project

- FriedClams, mtaylor, Mahuna and 3 others
-
6
-
1) Yes, lots of them, just look on the shaft diameter - anything between 1 and 3.2mm will fit
2) No problems, it can even handle aluminum. Just a matter to the cut depth. I am usually using it with hardwoods (pear and castello), they should be harder than plywood
3) The table surface dimensions is 7x21cm, do not have any experience with trying to fit larger pieces onto it.
- Seventynet, tkay11, mtaylor and 2 others
-
5
-
Mike:
Progress was a bit slow because I got a bit sick, so no modelling due to the quarantine mode enforced at home.
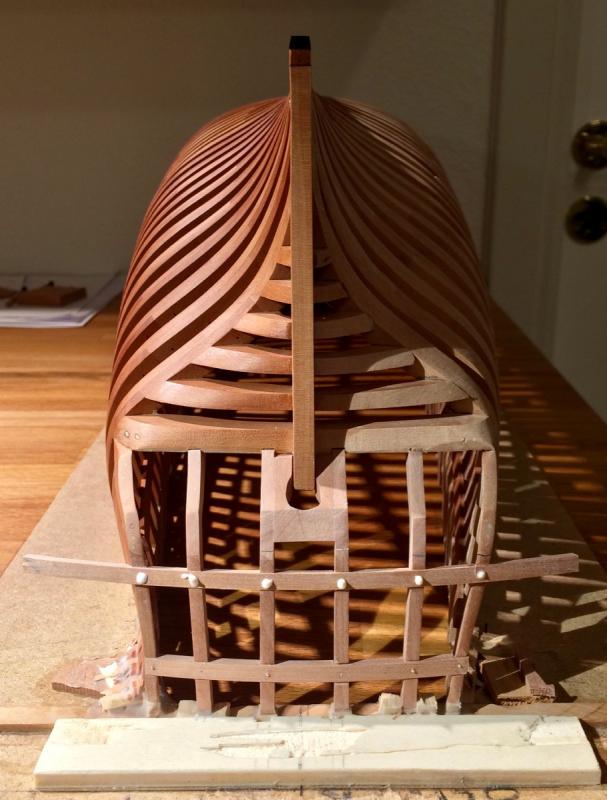
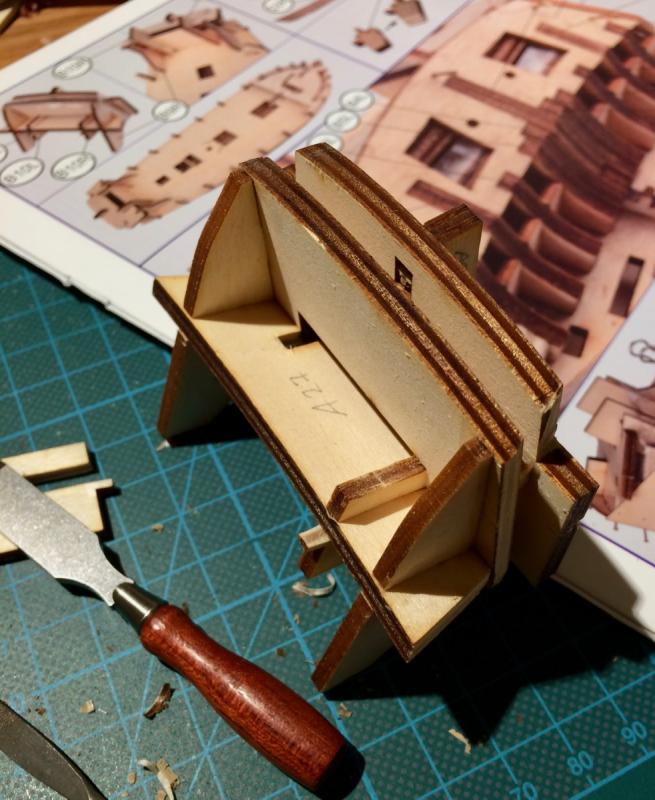
Assembling the transom. I have hard time figuring out what these parts are, because in the true spirit of POB kits this area is going to be fully planked and its internal structure is totally different from the real ships.

Tricky part to fit, it has a dozen notches that need to be enlarged to fit properly. Lot of filing!

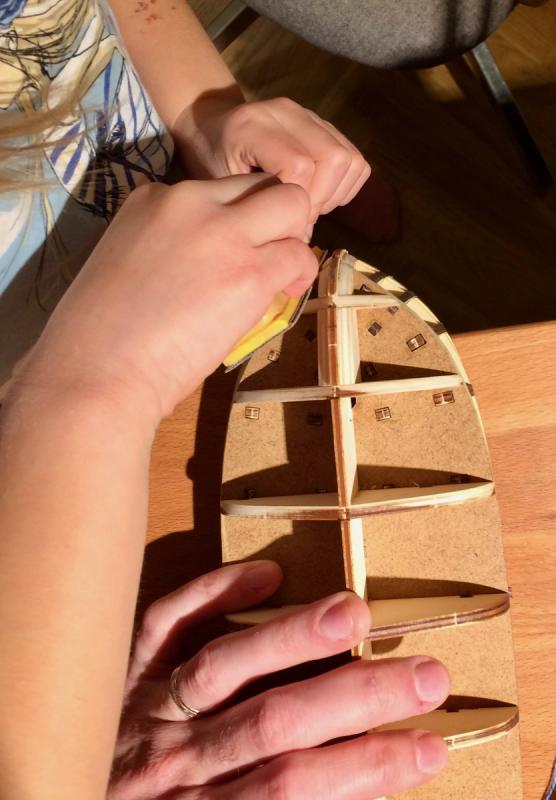
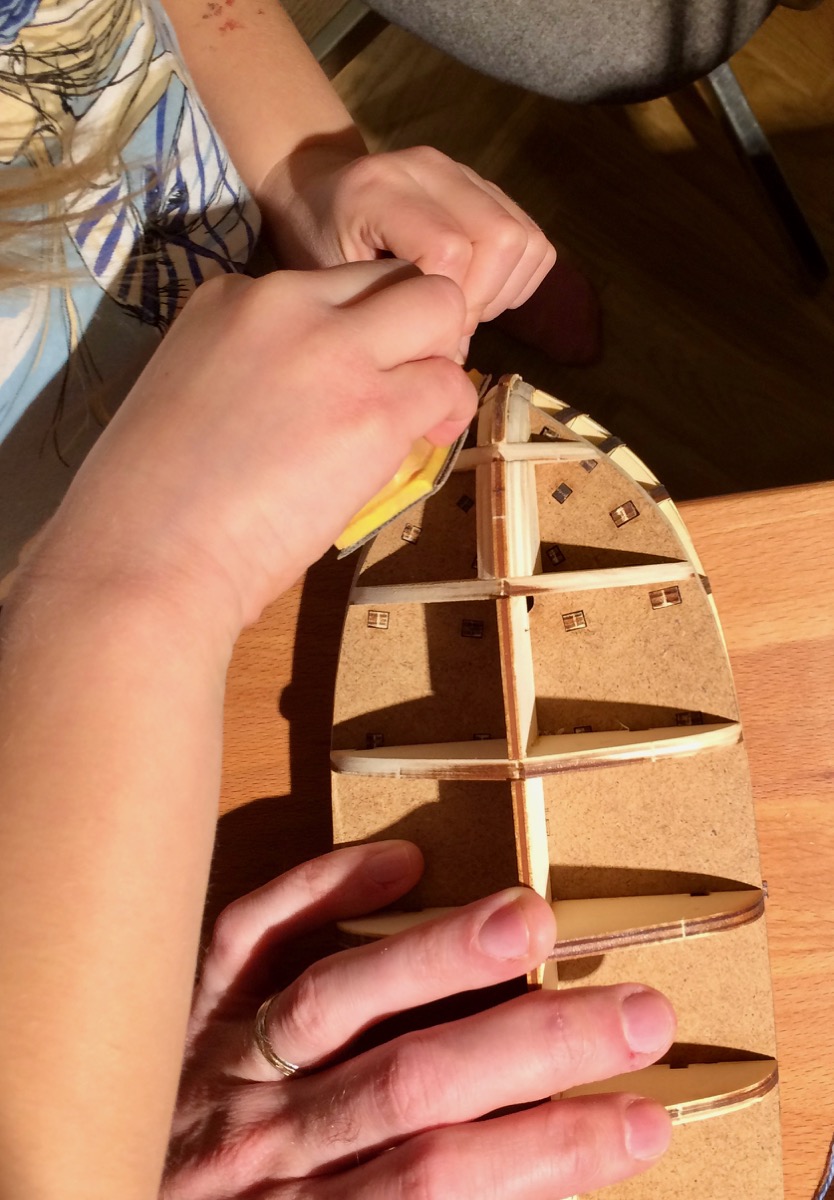
Now it is a time to fair the hull! That goes easy, because parts are cut with a good precision, so fairing is truly minimal, everything fits perfectly. I was doing it only because Daria loves the process of turning rough hull into the smooth hull. Fairing was not really necessary.
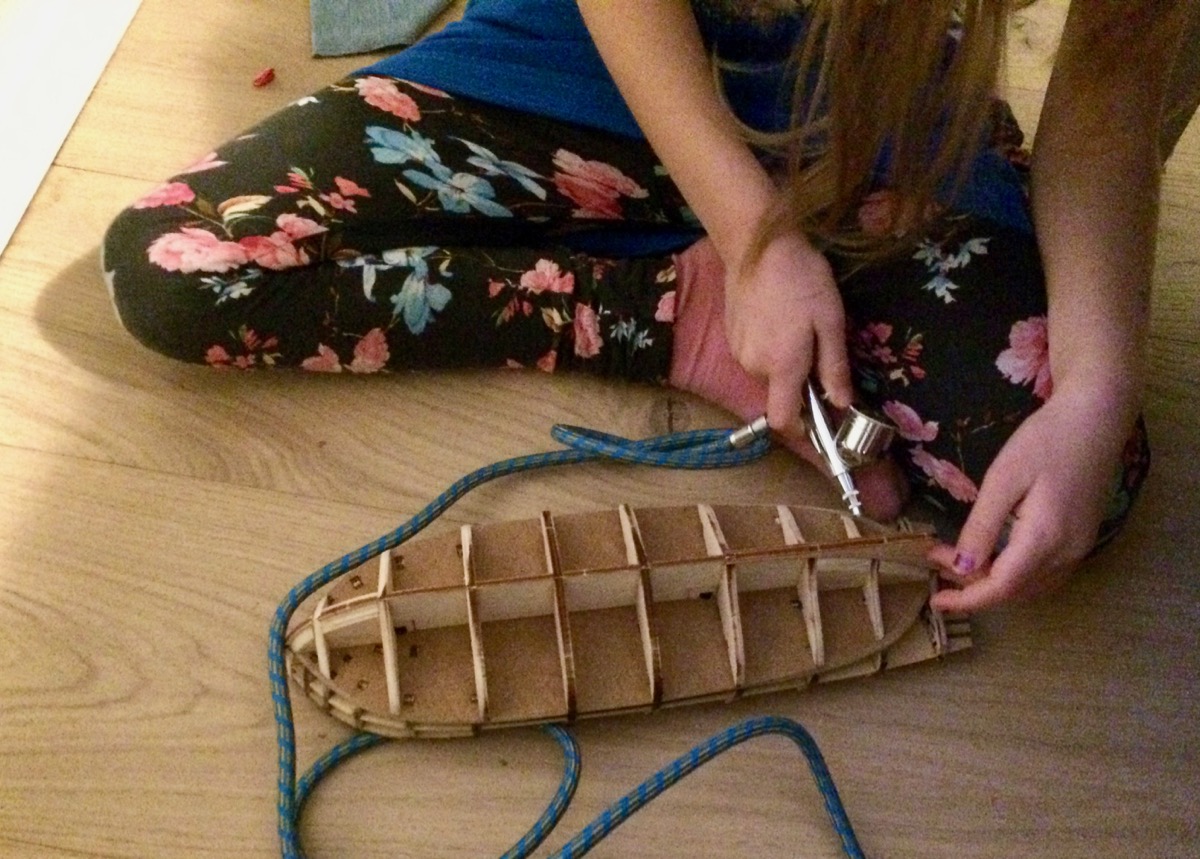
This part was lots of fun! Using compressor to get rid of the dust after fairing. Ended up playing with an air flow for a good 15 minutes

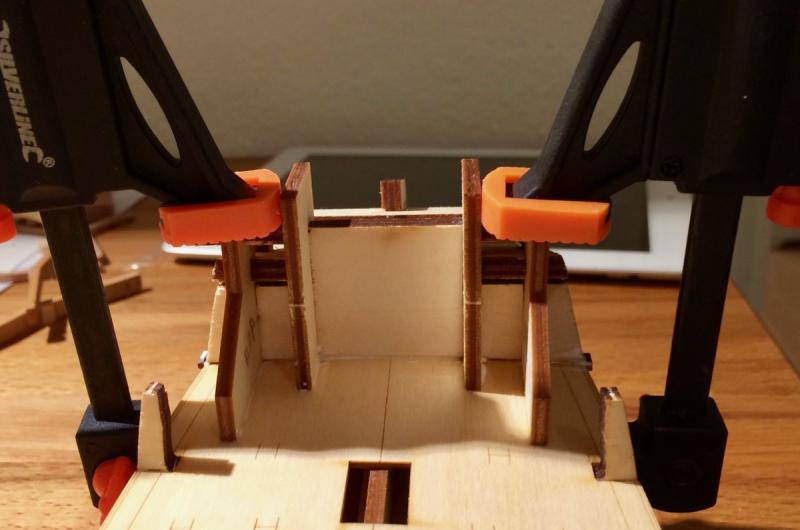
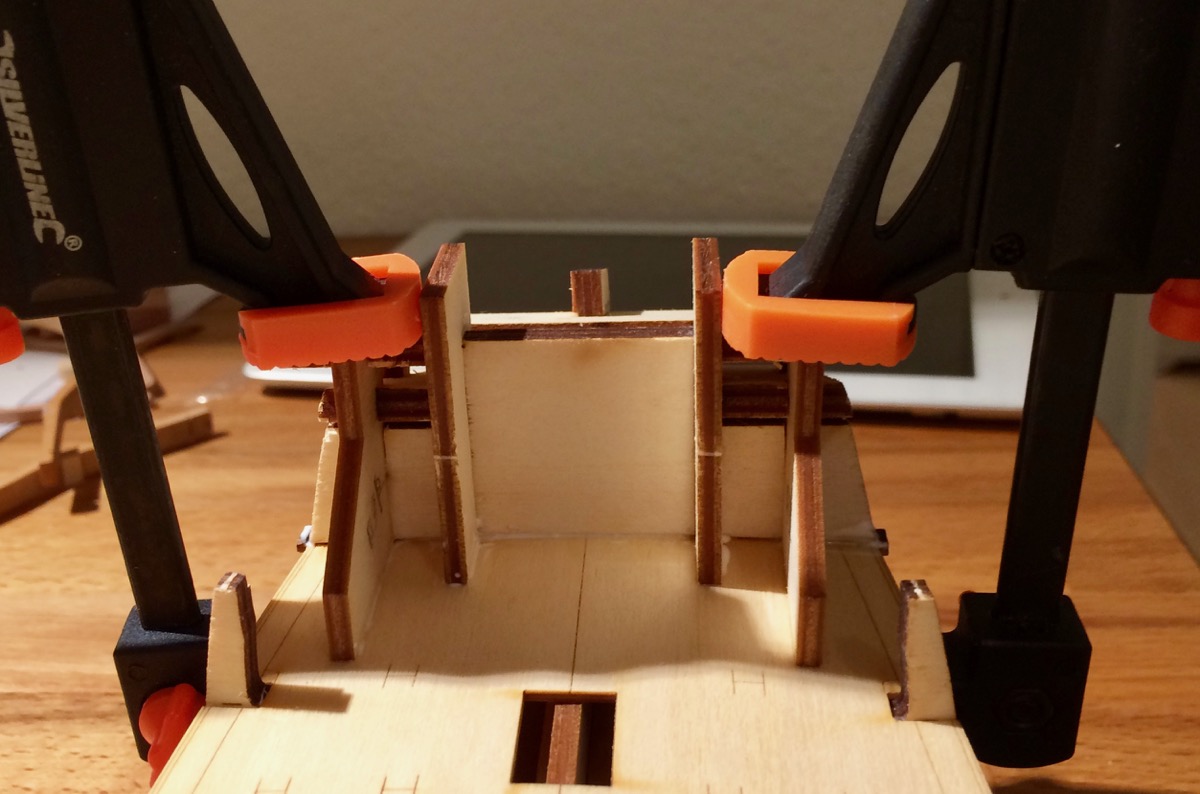
Transom continued:
Filing to ensure a good fit to the deck:

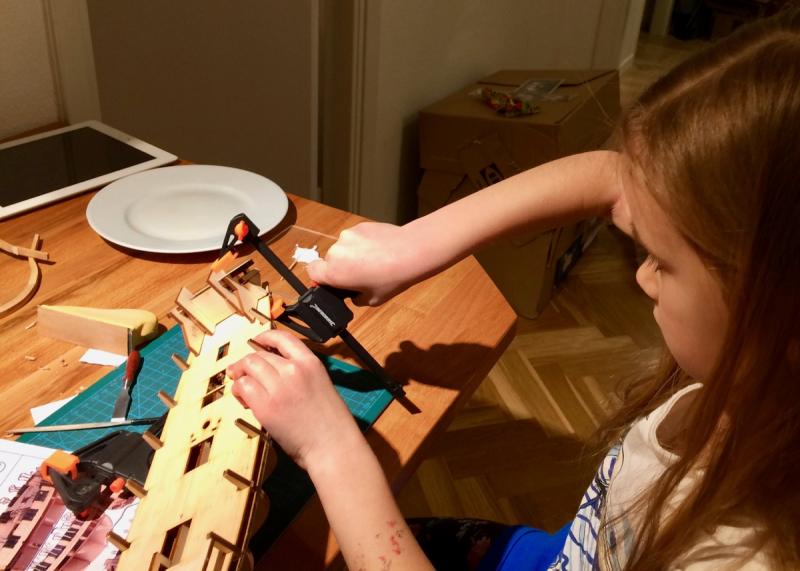
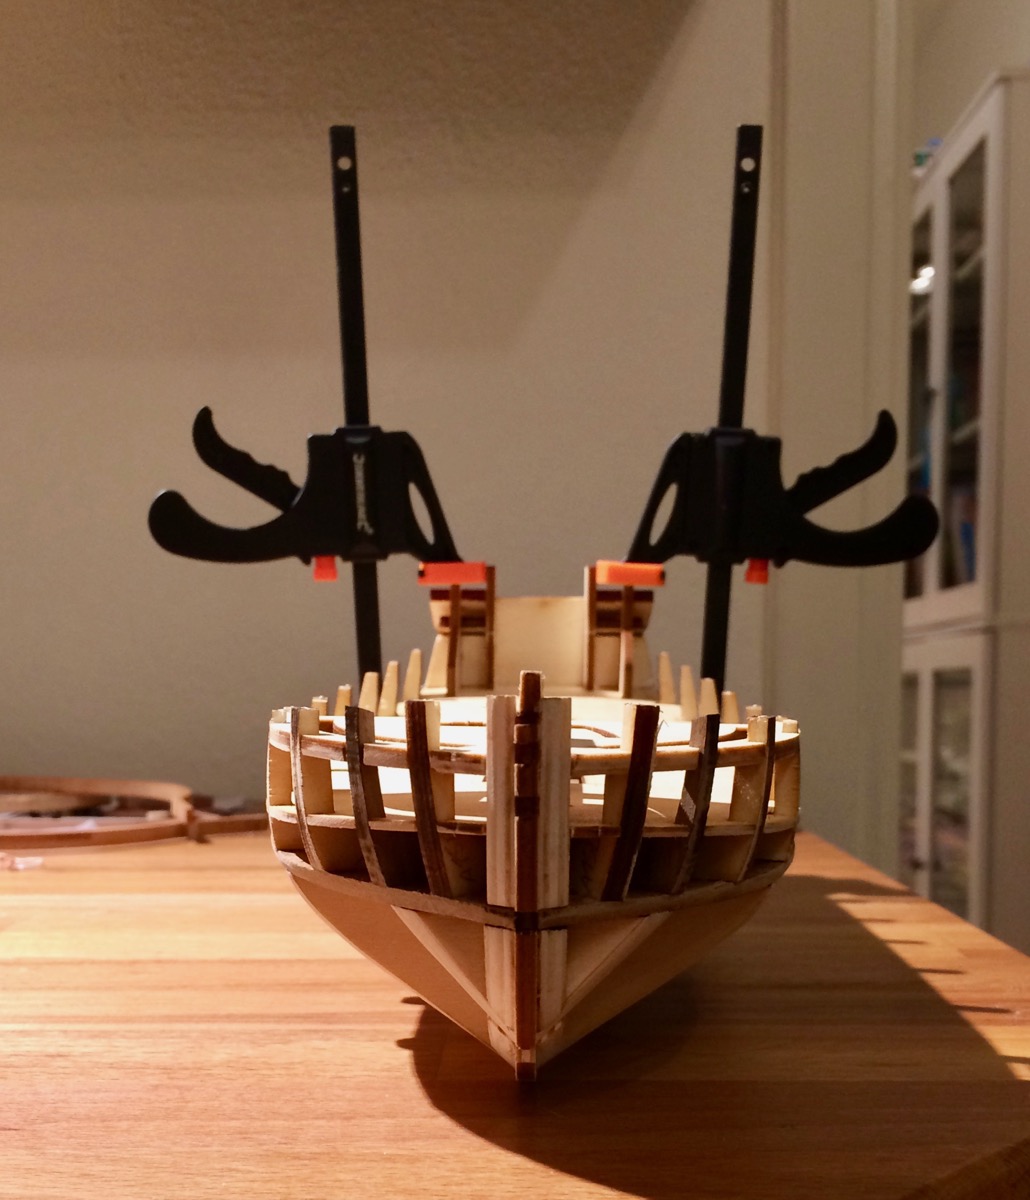
I let Daria figure out the right way to clamp the transom to the hull, and she figured it out!
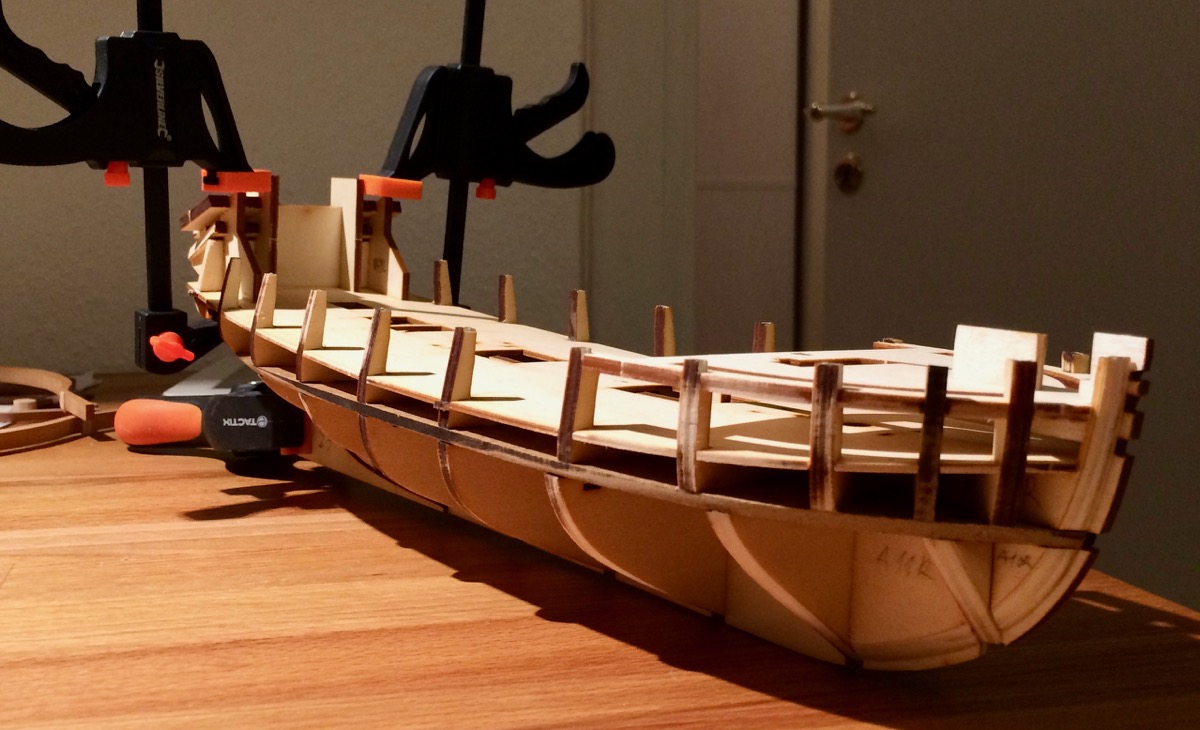
Looks like a ship!
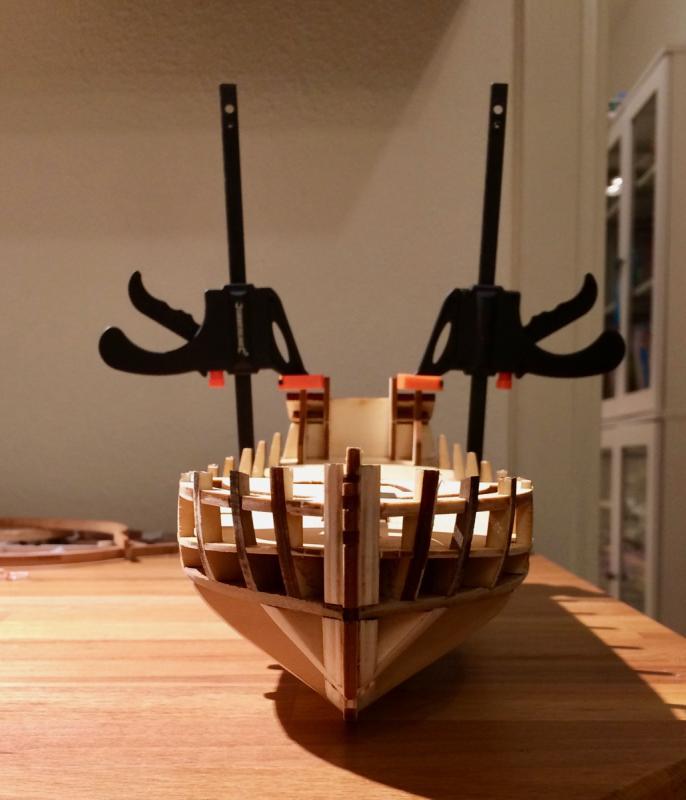

Now it's time for important stuff!

- src, piter56, zoly99sask and 10 others
-
13
-
-
With the Proxxon, you can only use very small cutters, which break easily.
Agree with the rest, it is only a question of cost. If one can afford Sherline instead of Proxxon - there are very few reasons to advocate for Proxxon (well, maybe speed, but that's it).
However, if cost is an issue, Proxxon seems to be on the level that is decent enough and problem-free.
But may I respectfully disagree with this note about the cutters?
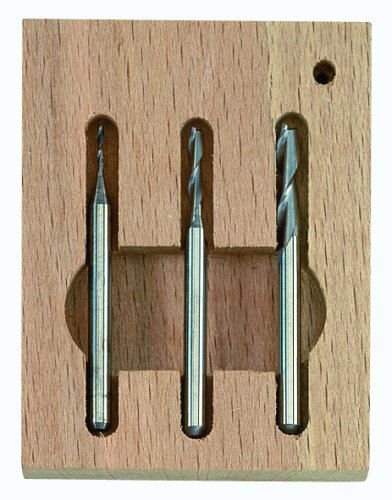
The proxxon mill accepts cutters with the shaft diameter up to 3.2mm, so there are plenty of aftermarket bits that can fit into it. And even the proxxon cutters are quite strong and sharp, I abused them a lot and haven't managed to break even the 1mm one. I am talking about this cutter set:
-
Tim, you made me blush

One thing to keep in mind when making a decision. Bare mill is hardly usable, you need a basic set of accessories:
1) Clamps to fix parts flat to the table
2) Precision vice to fix parts square to the table
3) Basic set of sharp cutters
4) Rotary table (considered basic for our hobby, milling capstan / wheel / anything round-ish is less convenient without it).
For Proxxon, #1 is included out of the box, and the rest will cost you $137. Together with the mill ($242), the whole package is $380, so roughly $400.
Sherline plus similar pack of accessories would be roughly 2x-2.5x more.
So if you look for just a "good enough" mill - MF70 should be ok and is used by a lot of great level modellers in Europe. I used it for a year already, and had zero issues with it, nothing I can presume as negative. Steady, reasonably quiet, precise! Well, maybe the wheels could have been a bit bigger...
No maintenance really, I never needed to adjust / maintain / lubricate / tune anything in it after the initial setup.But no doubt that Sherline is a more "adult" mill, that have a better customisation possibilities. I am just whining because I can't afford it (slap 25% extra on it to get the european price of sherline).
- reklein, WackoWolf, Seventynet and 5 others
-
8
-
Depends on your definition of "mini". Proxxon MF70 is the smallest, which is the key if you do not have a workshop. It is a really good piece of machinery, way better than most of the other proxxon machinery. I am supper happy with it. Also much cheaper than Sherline. But it is harder to customise it (fewer accessories), and the working area is obviously smaller (see "mini").
- genericDave, Seventynet, mtaylor and 3 others
-
6
-
They are one of my main tools (that chisels and a miniature block plane), I use them more or less every time I work on the model.

I am super happy with them! It is a nice tool and a very high quality metal, sharping is quite rare. Both are pretty sharp just out of the box.
Now I know how good tools look like
The only nuance to keep in mind - due to the size, you can't use any full-size honing guide. So either you need to make a guide yourself (block of wood, etc), or use this one: http://richardkell.co.uk/honingECom.htm (guide #1)
The guide seems to be available in US as well, just google. First result: http://www.garrettwade.com/kell-british-made-deluxe-honing-guides-gp.html
-
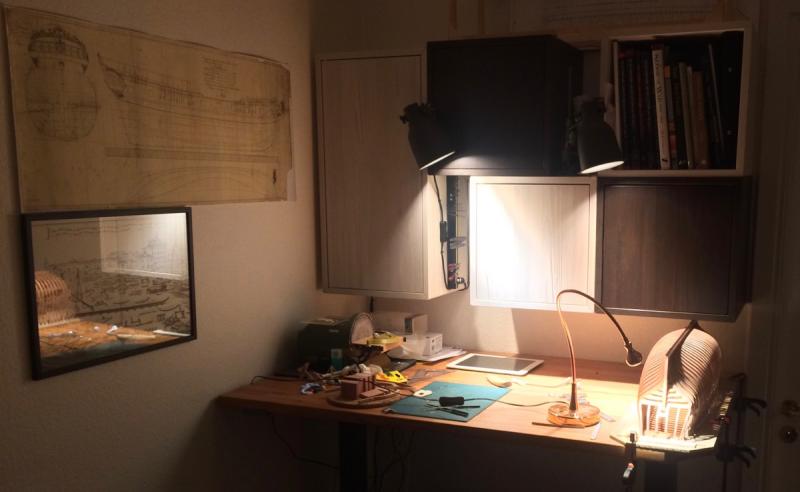
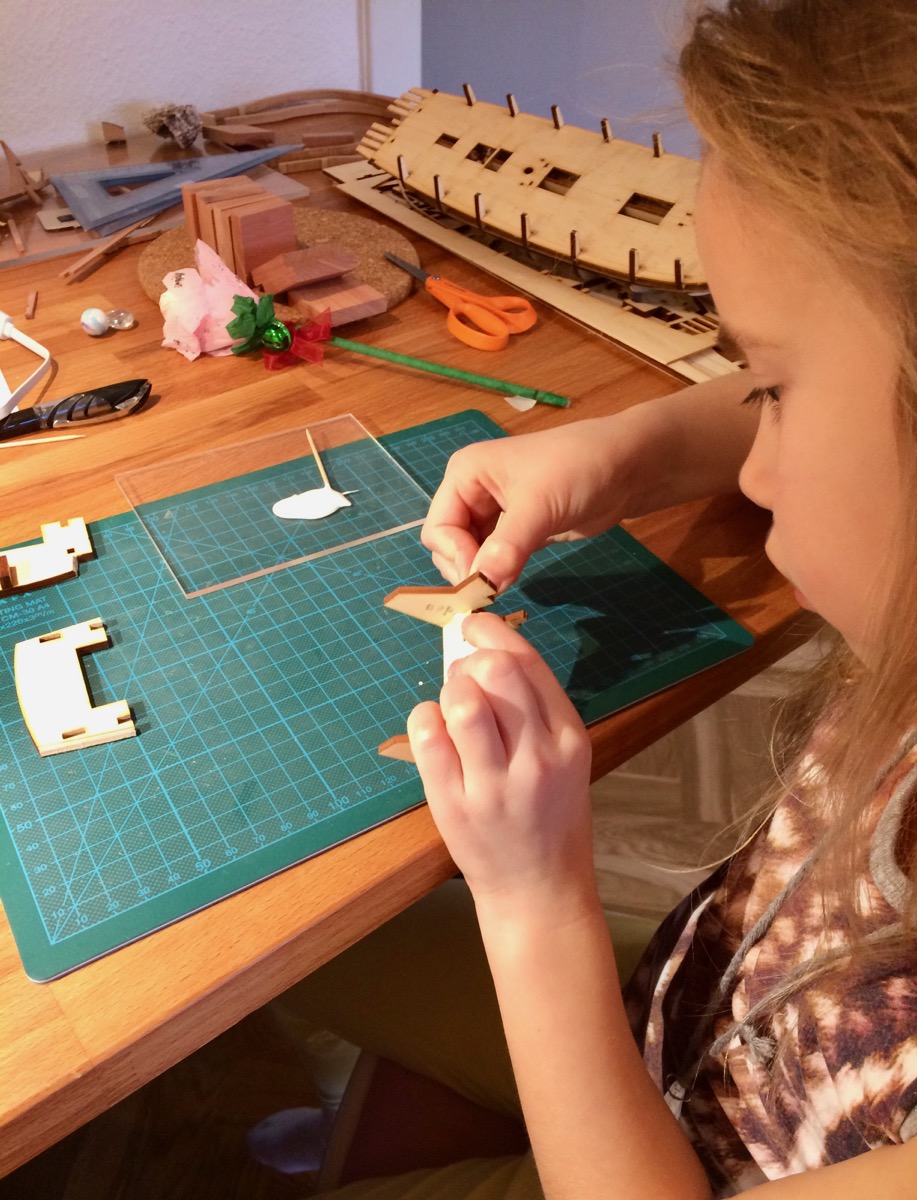
My daughter has her own table, but we build on mine, it is larger and all tools are closer
Will try acrylic as well!
I guess in depends on the desired look. I do not want to imitate ebony 1:1, I actually like when black wales are a little bit fuzzy, in this case the grain raised by water based dye is a feature, not a bug. Acrylic will hide the grain? Will see. Scrap wood experiments are a way to go! -
-
Thanks everybody for likes and comments!
The transom is slowly progressing, but due to pre-christmas chaos I am not sure I will finish it this year..
Why don't you use simple oil color? I've made different tests as preparation for my build and happy with the results. It's important to use a good quality color (Schminke, Lucas ar two German brands for example). Than you can work with very thin layers of color
The honest answer is "because I am really bad in painting and know nothing about different types of paint". Most of the models where I saw really nice wales used wood dye, so I decided to go this way. There are enough variations even with dyes, if I will start trying various paints - I will end up overcomplicating it and getting crazy with dozens of test pieces spread around my apartment
-
I can only dream about having any sort of workshop... But there is one thing that you might consider - height adjustable table. I was a bit reluctant to spend money on it, but once I got it - it is really a joy to use. It is super handy!
And nowadays you can buy a frame for it for quite a good price - http://www.ikea.com/us/en/catalog/products/50263225/#/80263224
(table top of your choice could be bought separately, or there are versions with top included). It is really steady and stable, btw. Especially if you put a heavy top on it!
I use it very frequently, basically every time I switch to another operation that requires a different height. It definitely worth it.
It would be a good addition to your shop, especially for the "clean" area, where the actual model is assembled.
-
Hello Mike Y. It's a very elegant line model at the same time as nice, the choice is a great success, I like it a lot ... and the work you're doing extraordinary.
You "HAPPY" with capital letters. A hug, Liberto
Liberto, thank you! It is really nice to hear that from a man behind such a masterpiece as yours! Hug!
-
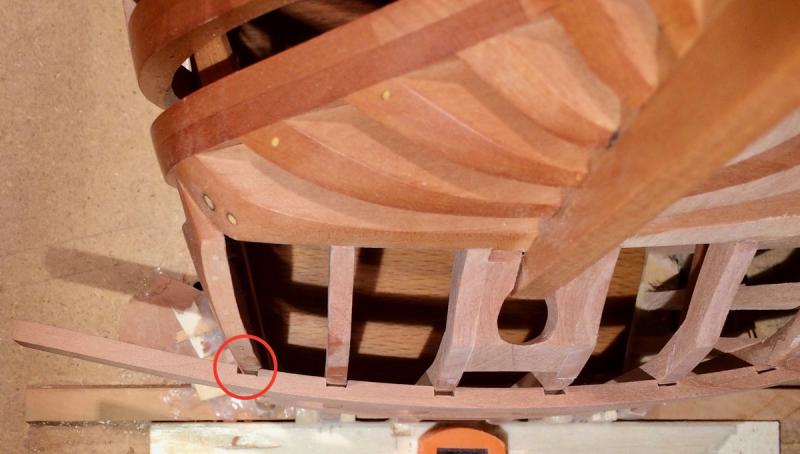
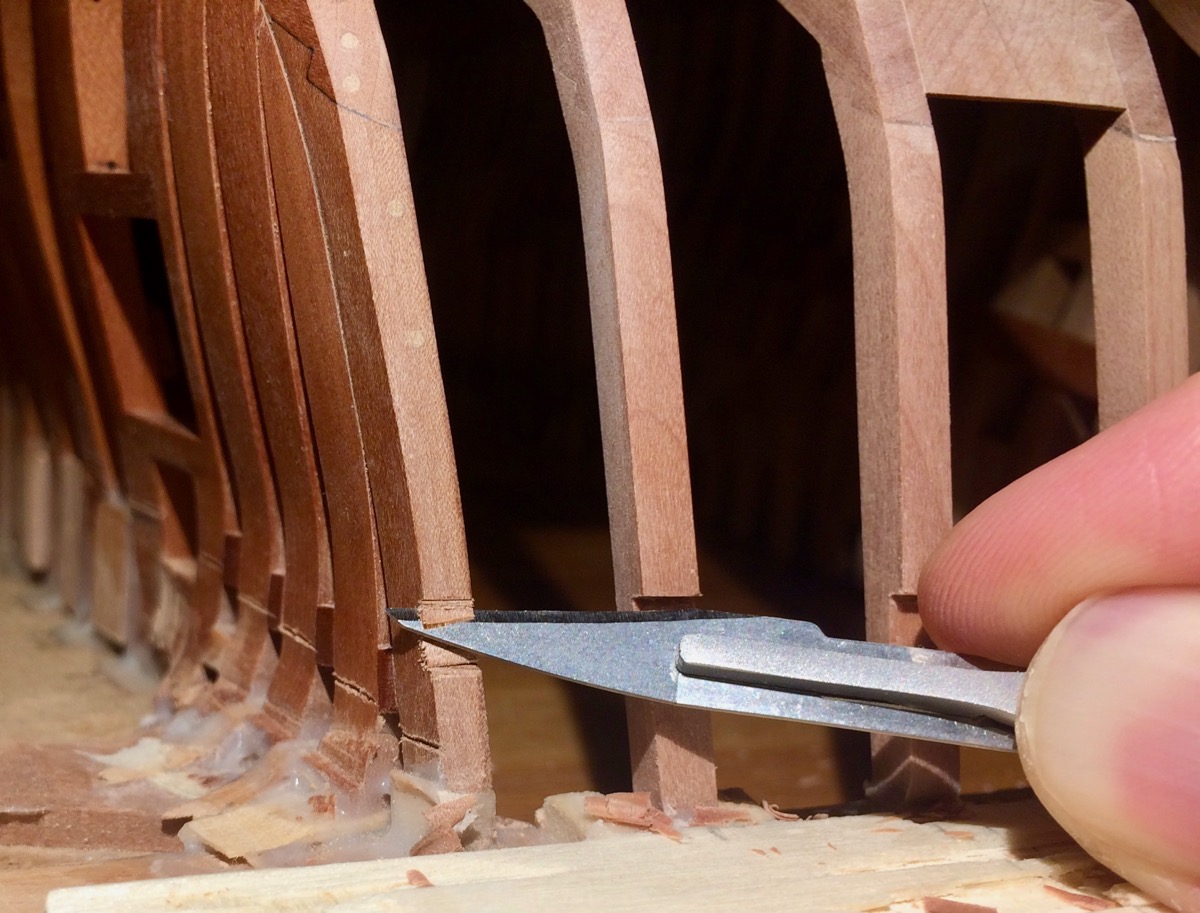
Finally got an hour to work on a model - light up some candles, prepare tea, nice music, relax..
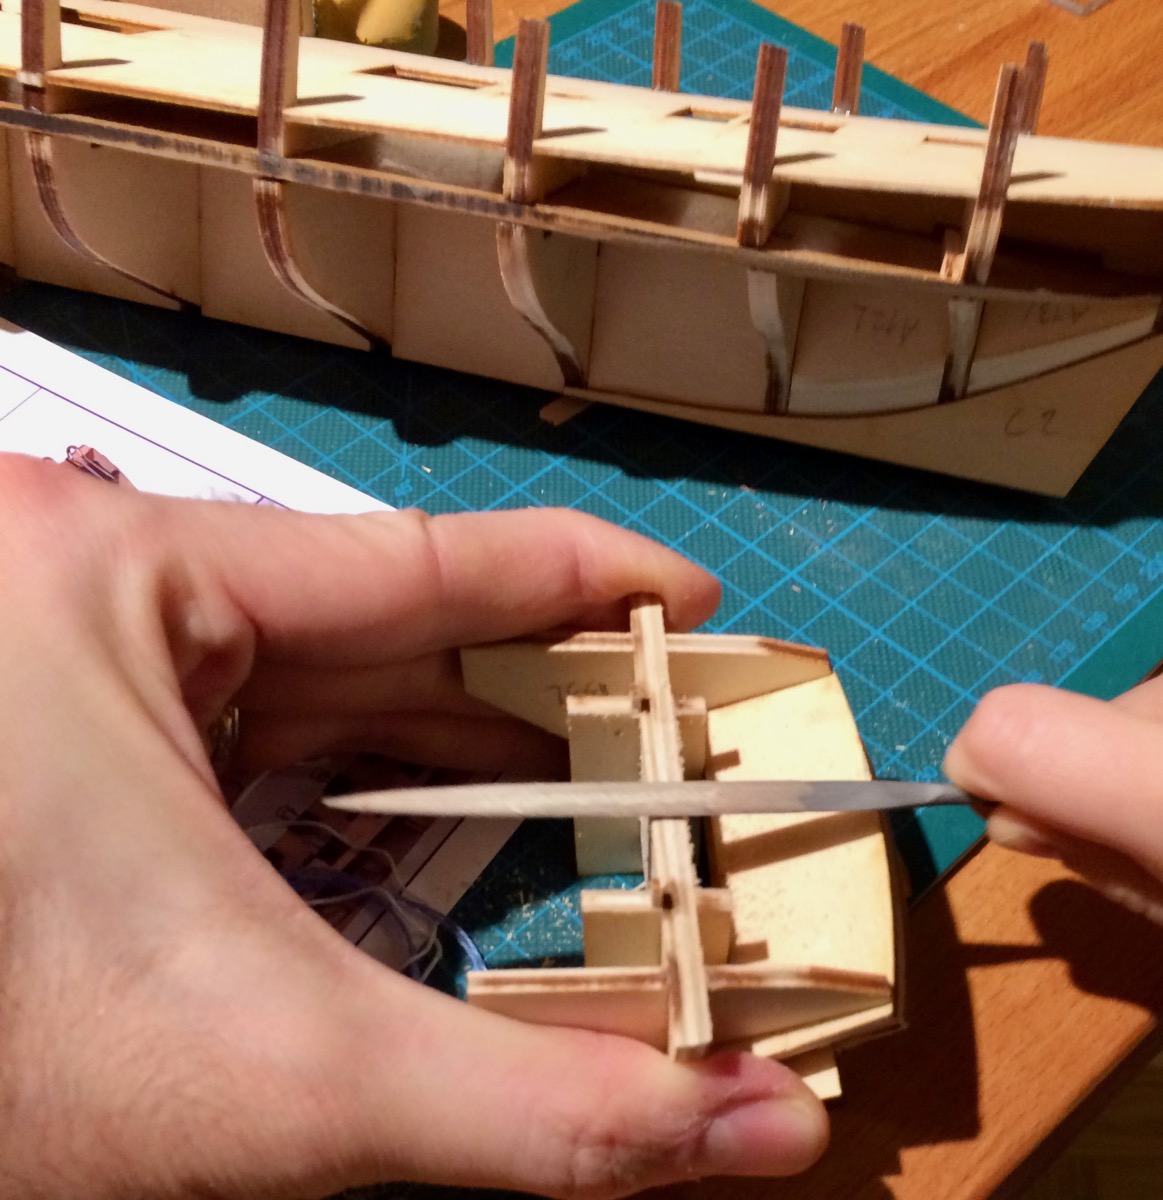
Still fine-tuning that pesky notches. Sorry for receptiveness of the photos, but want to share because this turned out to be a tricky task. I should have made the transom assembly in advance, probably...
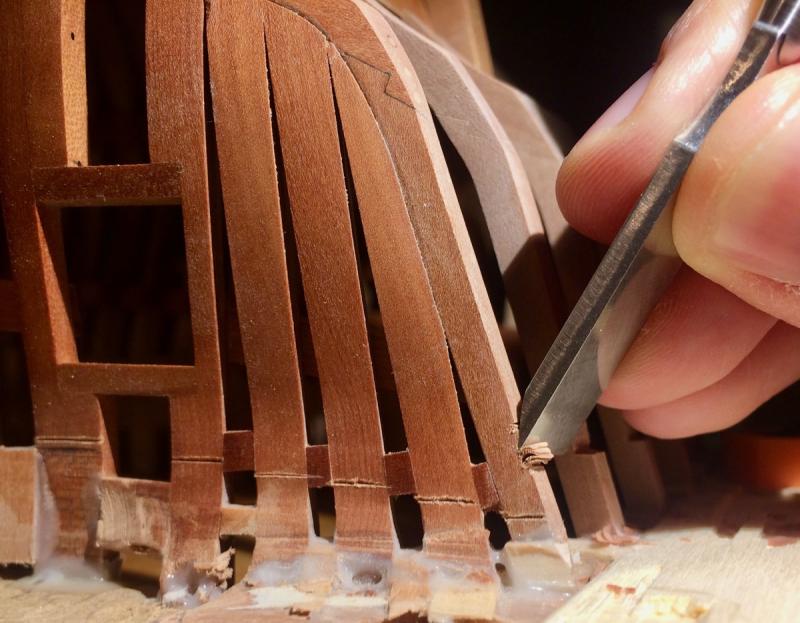
Broke the scalpel handle to make it easier to bend it - that is the only way I found to make this cut:

-
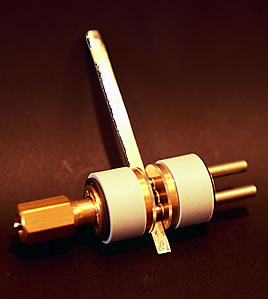
Mike great thread posts regarding your experiments and others thoughts about the ebony issue. Your grandfathers clamp is very nice is there a name on it or is it made by your grandfather?
Hi Michael,
Here is a close-up:
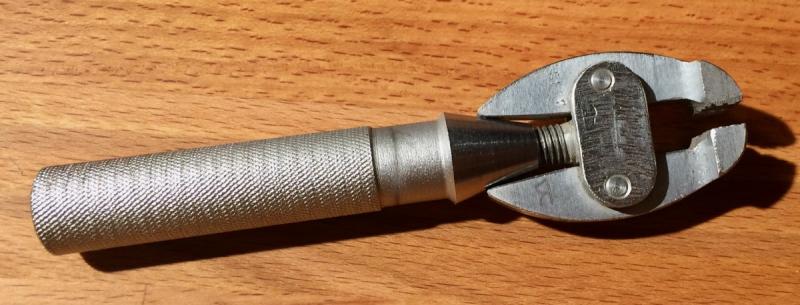
For the context: my grandfather was a radio research engineer in USSR. He was working on the technologies similar to first cellular networks. He was a total radio geek (in a good way), and had an engineering mindset applied to any part of life.
His apartment was full of various electronic elements, catalogues and reference books. Pity that he is not with us anymore, he would really appreciate my hobby and line of work, so much to share...
The vice does not have any name or logo on it, and looks really well made (especially by soviet standards). There is a first letter of his last name hand-engraved on it - to prevent his co-workers from "borrowing" that hand vice. That hints that this tool was not widely available, and was valuable enough to be protected this way (nobody will "borrow" a tool that everybody has).
Doubt that the tool is made by him personally (he was definitely not into making tools, metal working or woodworking), but it could easily be something custom-made. Any sort of factory-produced tool in USSR had an identification number and a price tag stamped on it. This one has nothing similar, so probably not produced on a large scale.
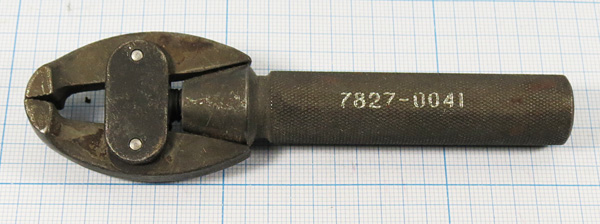
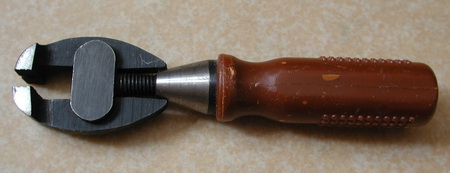
Here are similar hand vices of a factory-produced kind (not mine, pictures from the internet). Note a different handle and an identification number:
Old tools are an interesting angle to learn about history, work culture, industry of the time...
- aviaamator, allanyed, Canute and 4 others
-
7
-
-
-


Triton cross section by Anguirel -1:48
in Cross Section Build Logs for HMS TRITON
Posted
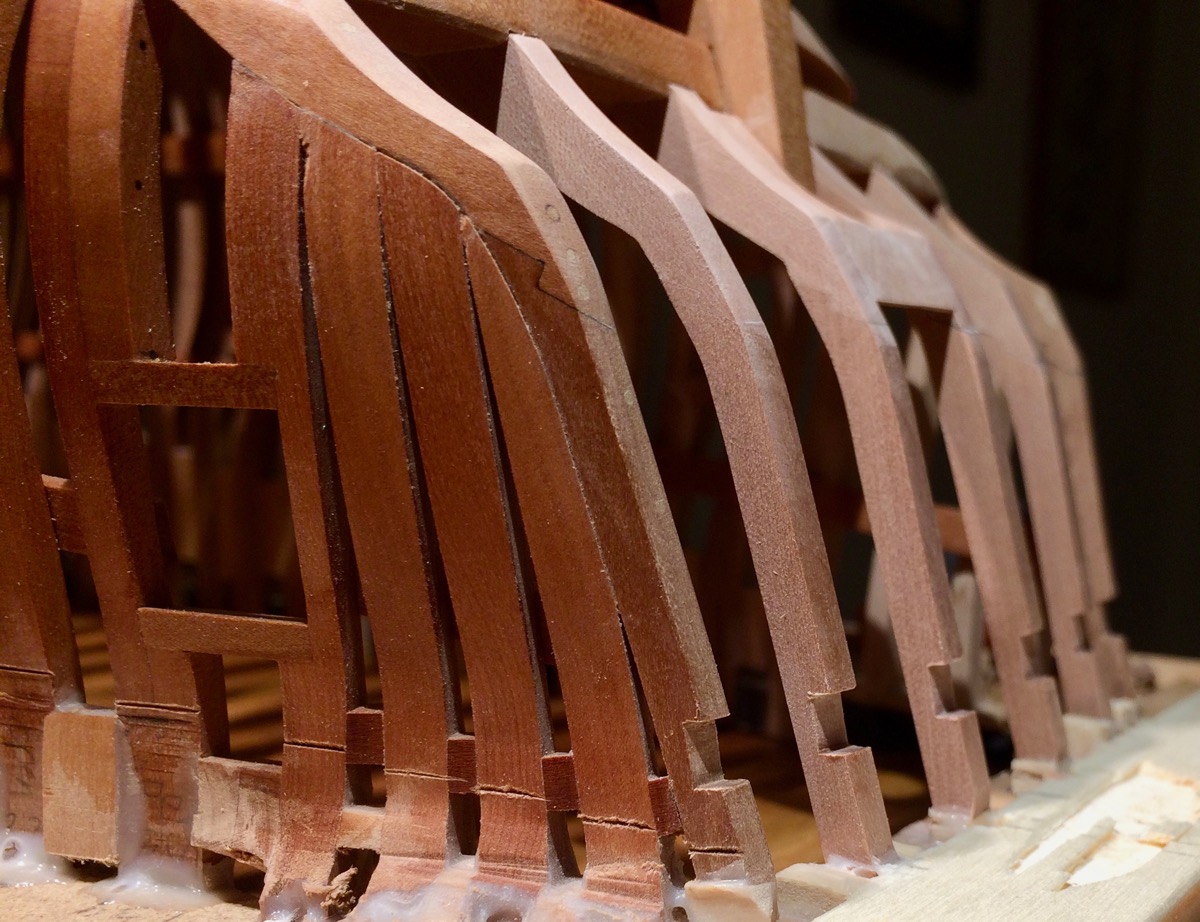
Dirk, with your quality requirements - most of that wood will not pass your picky QC even after planing and sanding