augie
-
Posts
4,669 -
Joined
-
Last visited
Content Type
Profiles
Forums
Gallery
Events
Everything posted by augie
-
 Very neat. My big smile for the day!
 -
US Brig Syren by Gahm - Model Shipways
augie replied to Gahm's topic in - Kit build logs for subjects built from 1801 - 1850
Stern looks GREAT! -
I've got to love your strategy.....having fun whilst keeping we ALL know who at bay. I love the sheaves. And looks like we can now both enjoy turning our blocks to dust. On that rope-twirler thingy, do not wear a tie or long sleeves while operating
- 1,279 replies
-
- 1
-

-
- agamemnon
- caldercraft
- (and 1 more)
-
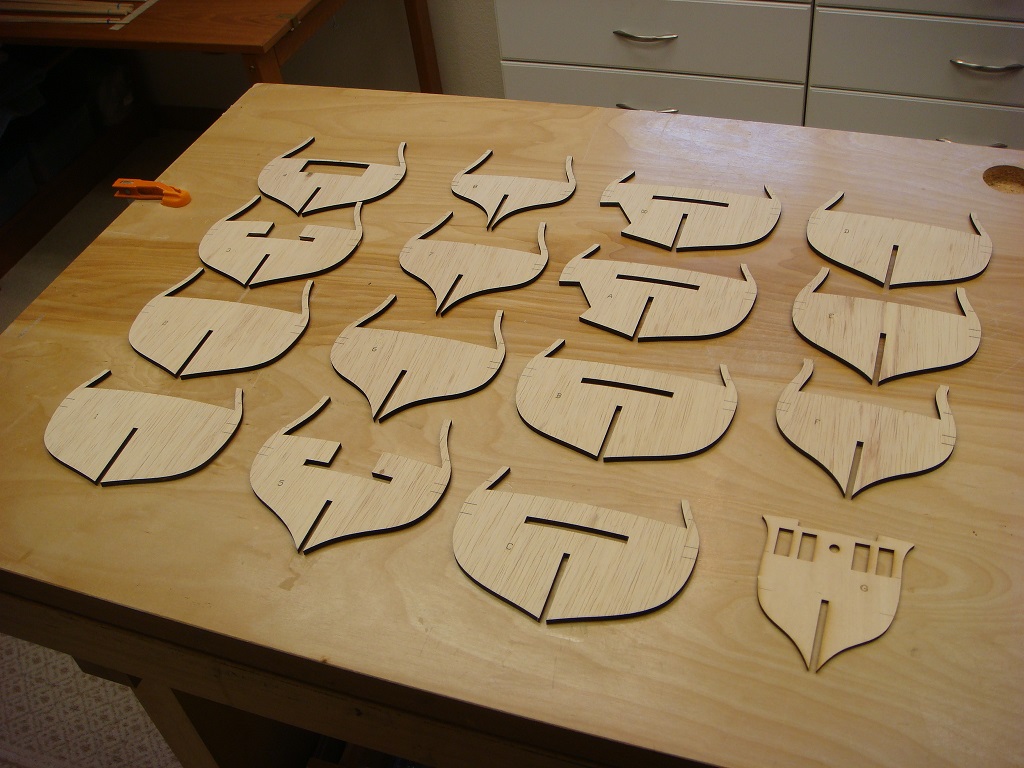
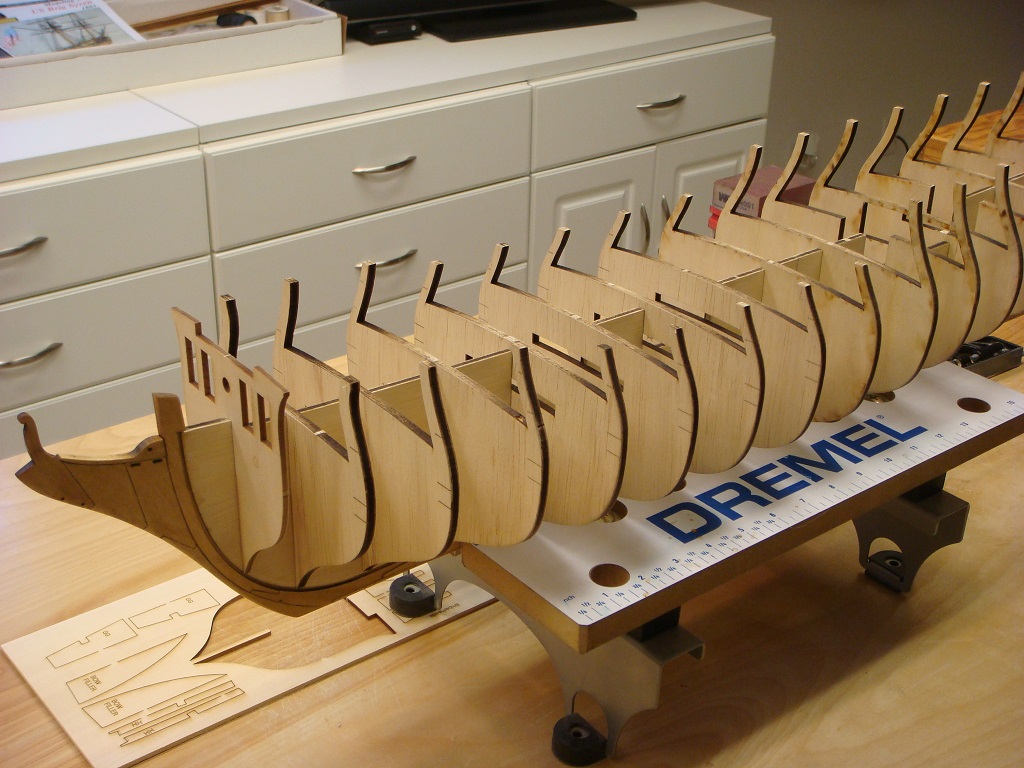
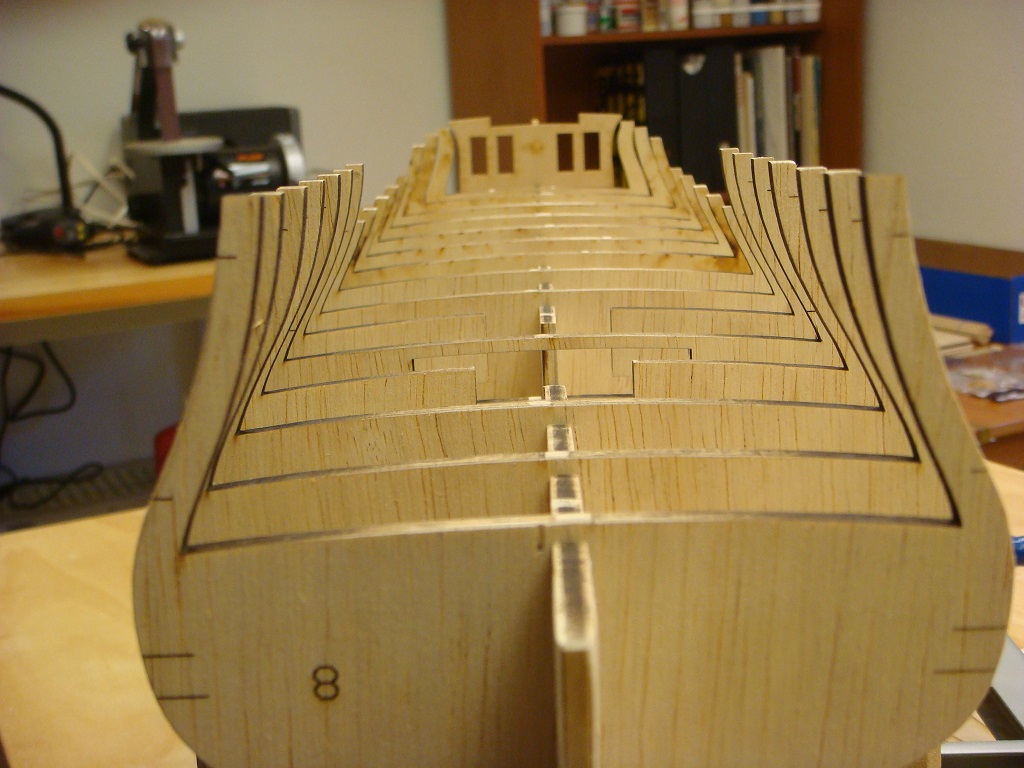
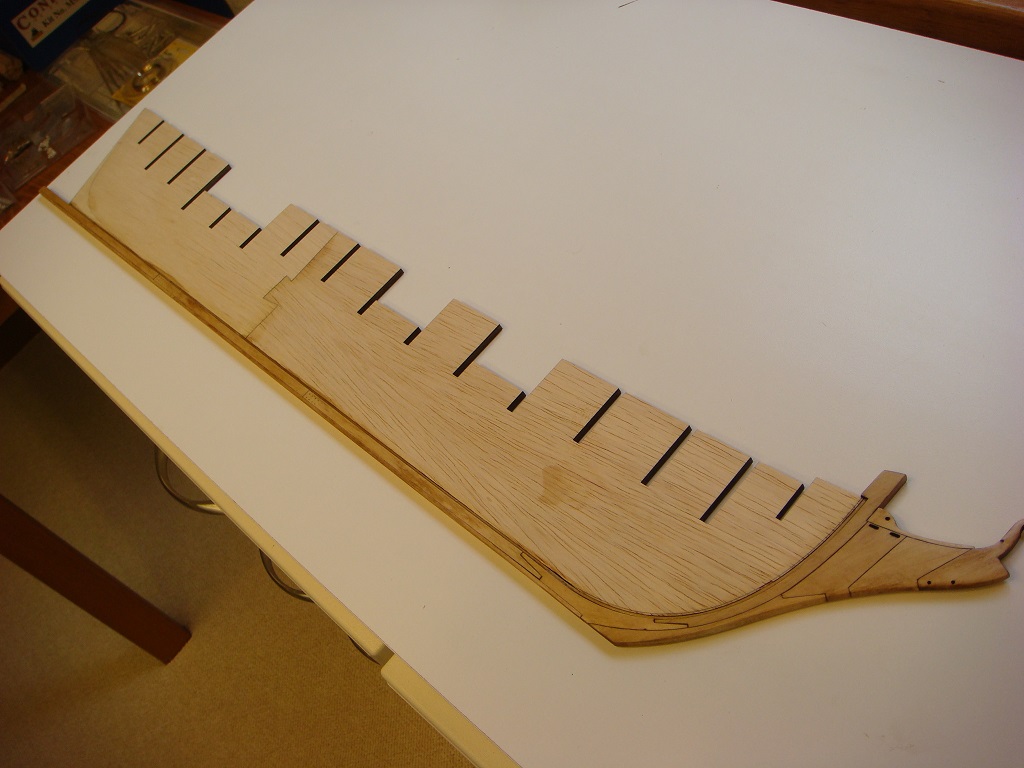
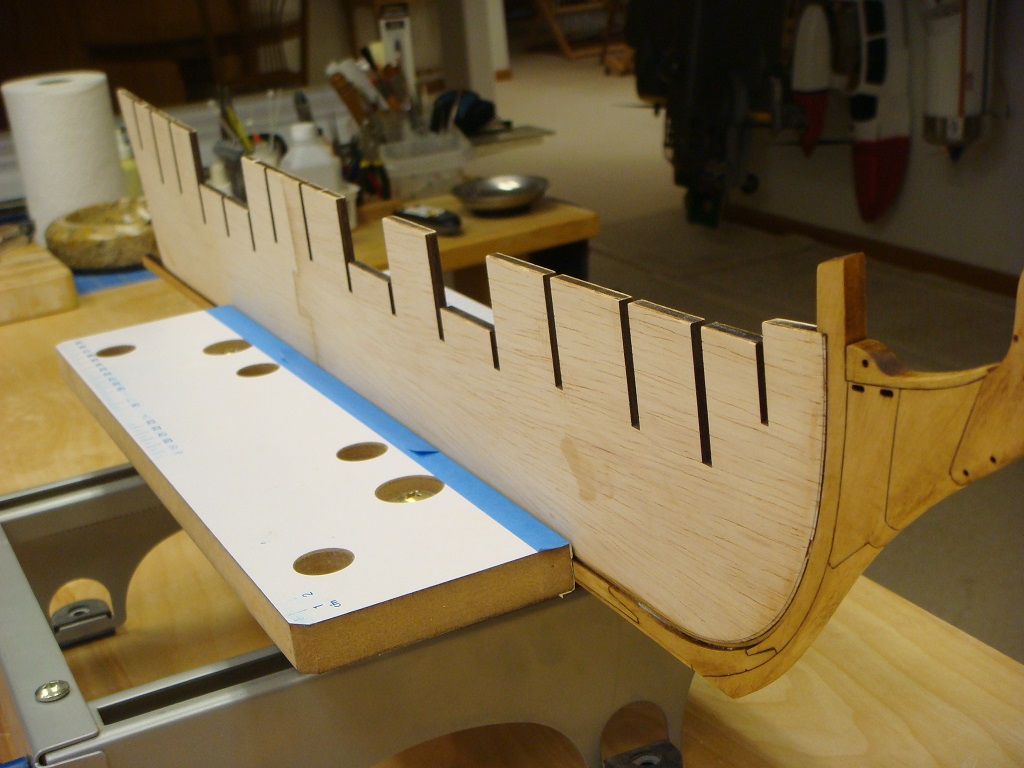
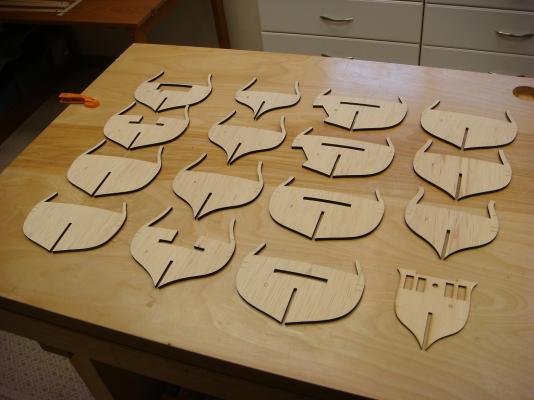
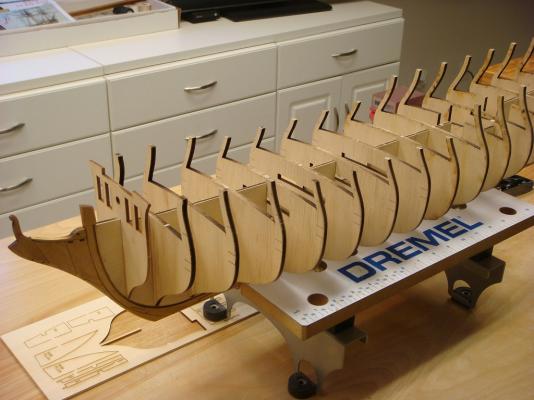
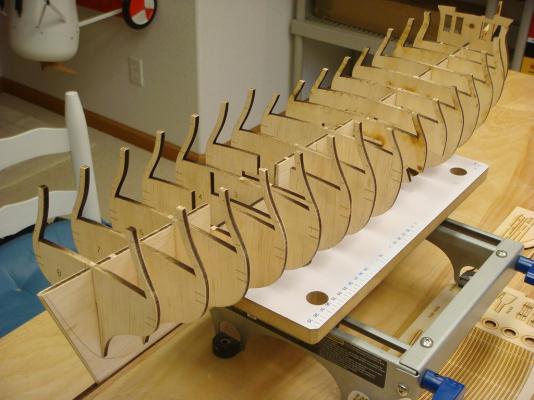
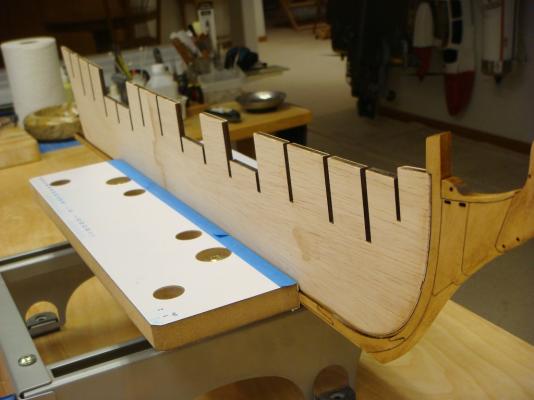
A little progress to report (need to stay ahead of the buffalo herd ). The 16 bulkheads were removed from the laser cut sheets: Note the cutouts on the starboard side of the two near the top center. This will be an opening in the finished hull where the 'framing' will be exposed. The laser cutting on these pieces was quite intense. I lightly sanded them all around but have left some laser char as I find this helps me later during the fairing process. However, the slots on these bulkheads and also the bulkhead former were completely cleaned in order to obtain a secure glue bond. The slots were also just a tad 'tight'. Here, the bulkheads have been dry fit into the former: The last photo shows that the alignment is pretty good for a dry fit: Now we will square and level everything as we permanently glue in the bulkheads. But the fish are calling so we'll be back in a day or so. In the meanwhile ---- STAY THE COURSE
- 2,191 replies
-
- 11
-
-
- confederacy
- Model Shipways
- (and 1 more)
-
I have beige shrouds/rats on my HMS Victory cross section from 1988. They still look great. Not only that, she's never been in a case and the rigging doesn't show the dust!!!! Stay healthy now.
-
That's the spirit!!!!! Stay away from the sawdust and CA for a bit and you'll be at full strength in no time. Now good luck with the tiny bits.
-
Hi JP! It's been a while. Hoping everything is ok on your end.
-
Very nice Sjors. Good to see you back at it!
-
One word ----- GORGEOUS !
-
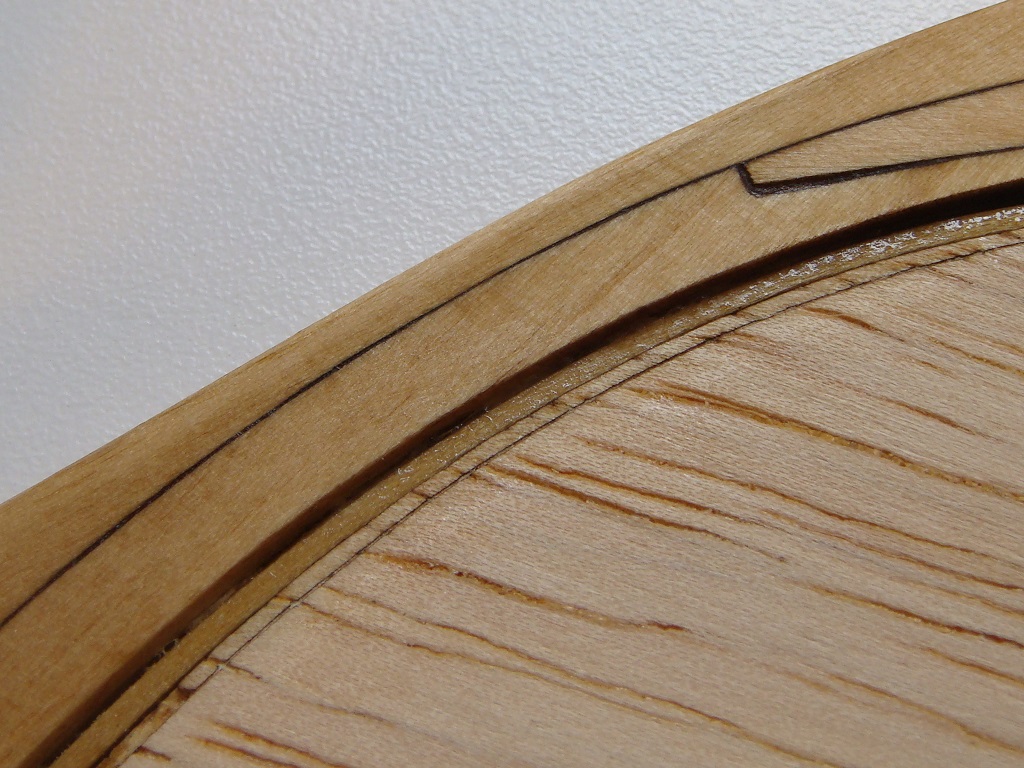
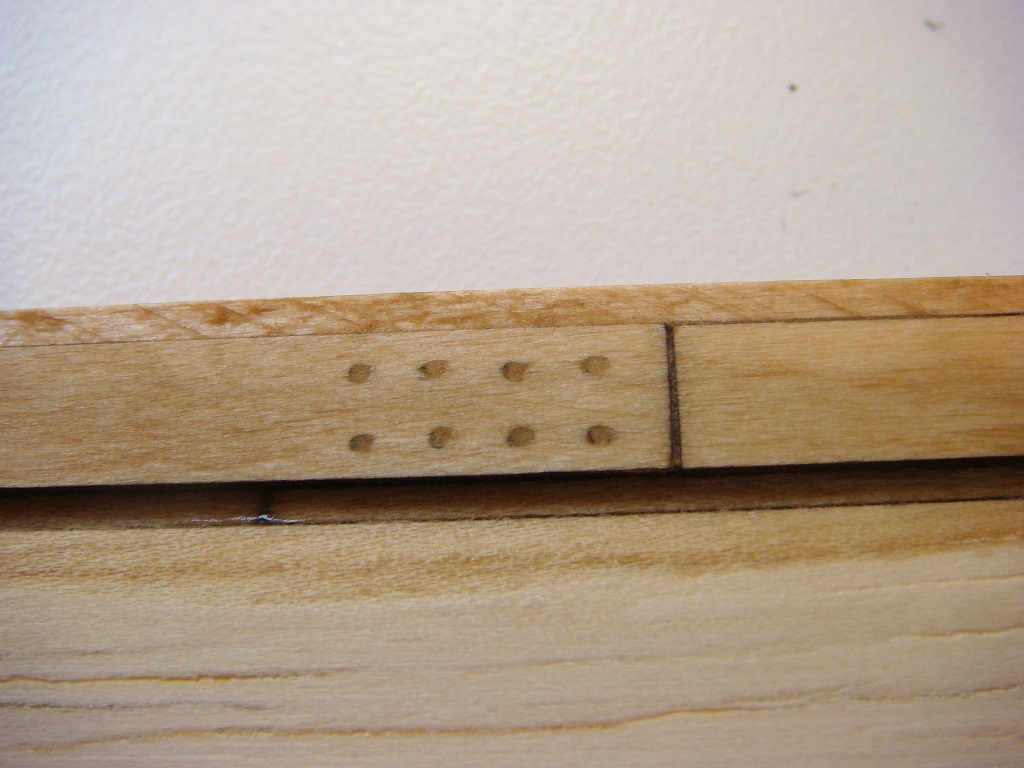
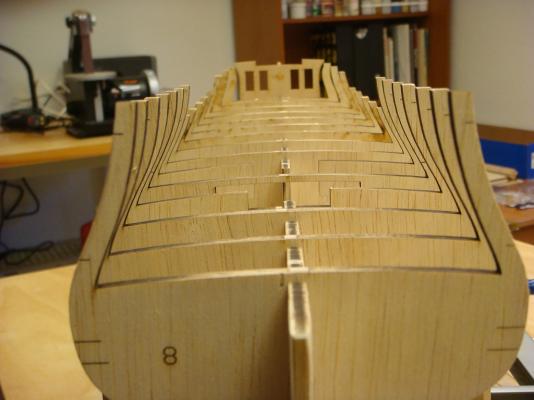
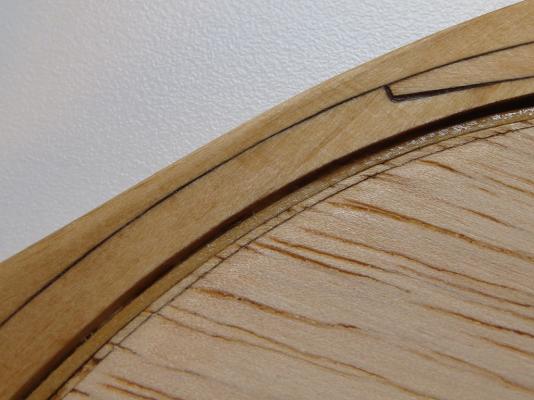
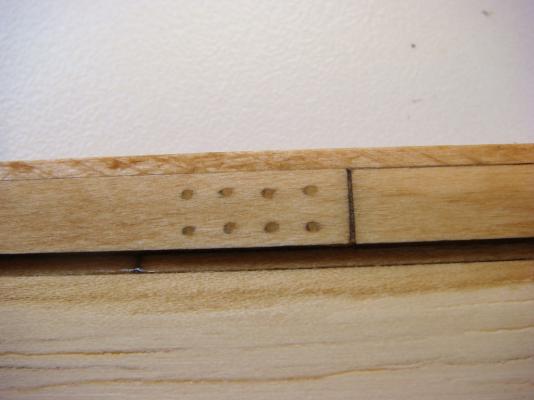
Yes John ---- I noticed. Only thing I can do is work faster (which is the opposite of what I had planned).......and try to outrun the fauna and flora . With that in mind, here's the latest update: CHAPTER ONE is completed. I promised Sjors a picture of the rabbet so here we see it completed now near the stem: I can't label the photo but I think it's easy to see how the laser drawn line on the bulkhead former (the lighter wood) has been slightly tapered down to meet the 1/8 x 1/16 rabbet strip and then the stem sits on that. The result is we have a nice clean, uniform slot which is the rabbet. This extends from stem to stern and shall be where the edge of the garboard plank (as well as the ends of the remaining planks) sit. EASY -- and no carving involved. In addition to the stem and keel now being fitted, here's a detail I like: The keel uses 2 vertical scarph joints along it's length. On the 1:1 ship, these were bolted together. Here, we've simulated those bolts with #70 drilled holes filled with tinted wood putty. This technique is similar to what I will be using for treenailing. Here's a photo of where we currently stand. Note that the false keel has been fitted and that the stem and keels have been stained. Using Minwax products, I first pre-stain then stain using a mixture of 50% 'Natural' and 50% Light Oak. This process will be used numerous times throughout the build. I generally apply several coats of WOP later on. Finally, things wouldn't be complete without introducing my infamous 'one size fits all' keel clamp ---- AKA the Dremel mini work stand. It holds her firmly and straightly in place as we proceed. I know SJORS also uses one but I got mine back when they were $ 9 (US) and I still had hair. Today is our 40th Anniversary so no more building is on the docket. But the next step will be fitting the 16 bulkheads and to say I'm looking forward to that is an understatement. All stay well

- 2,191 replies
-
- 13
-
-
- confederacy
- Model Shipways
- (and 1 more)
-
Hey Popeye....is that really you????? Last photo I remember you were working on the Revell Constitution
-
Never minds the ships. You're killing me with the lobster. We can't get them up here in the Rockies as their legs are too short to make the climb
-
I'm just plain confused (as usual). Cleaning paint brushes and the Panama Canal. Well, as long as Sjors is happy, I'm happy!
- 116 replies
-
- 2
-
-
- finished
- Lackawanna
- (and 1 more)
-
YIKES! You've caught me with my proverbial pants down on this one, Mobbsie. I defer to Chuck (as Designer in Chief) to comment. He does the thinkin' -- I just do the buildin'.
-
Best wishes that today is the HAPPIEST day all around.
-
That bow pulpit is one beautiful piece of work. Congrats!
-
Fantastic news !!!! Now go finish up all the pizza and beer, get the place ready for the return of your gal and......have a GREAT weekend!
-
As this is a first planking, do what you can filler/sanding wise to even things out. Just use care with the sanding ---it's pretty easy to go right through the planking at the higher spots if you get too 'enthusiastic'.
-
Oh no! Mesa Verde is on Sjors' 'bucket list'. I've been telling him it's in Idaho. Now you reveal that it's 2 miles from here behind the supermarket!
- 116 replies
-
- 4
-
-
- finished
- Lackawanna
- (and 1 more)
-
Bon appetit !
-
The fenders are great in themselves. But the rack is......spectacular!
-
Sjors --- this is Chuck's way of creating the rabbet....just like on Syren. There will be another plank below that 1/8 x1/16 that I just glued on. Then, when the bulkhead former is tapered toward the keel, it forms a uniform, neat slot which is the rabbet. The garboard plank sits neatly in that rabbet. It's a lot easier to see then to explain so give me a few days and I'll try and post a close up of it. In the meantime, you keep getting better!
- 2,191 replies
-
- 3
-
-
- confederacy
- Model Shipways
- (and 1 more)