


Wintergreen
-
Posts
940 -
Joined
-
Last visited
Content Type
Profiles
Forums
Gallery
Events
Posts posted by Wintergreen
-
-
-
Greetings Anguirel!
The reason for the station lines ending "inside" the outer keel line is that at those areas the keel timber is cut away, a recess, to let the planking run smoothly to the end of the rabbet.
You will see this if you look on the first pages of many builds here. I attach a picture of my own build as well for reference.
But to answer your question on where the water lines should end - I would treat the keel as full width during the drafting and end the waterlines accordingly.
Then, when you start to build the ship, keel and frames are faired so that the shapes make sense. I had troubles understanding this as well and thought in the end that once building it would be clear.
Hope this helps and if I'm completely wrong I hope someone will correct me.
Sinceramente

- mtaylor, yvesvidal, GrandpaPhil and 1 other
-
 4
4
-
Thank you B.E and welcome along for the ride!
I have chosen the scale, 1:30, so the boat would be reasonably sized (i.e. not too big) but still manageable to get a lot of detail in. We're not all like EdT that can do fully detailed HMS V at 1:96 (1/8 imperial).
And it's actually my first (almost) fully framed model.
The C is a bummer, really. My take was to be open with it, both in family but also at the job and here as well. The outcome is uncertain for most, but then life as a whole is not to be taken for granted either.
"All we have to decide is what to do with the time that is given us"
/Gandalf
- Colin B, Blue Ensign and KeithAug
-
3
-
5 hours ago, Jim Lad said:
Always fun to find the plank isn't right and have to unglue and re-set it!

Yes John, it really was ... not!
At first I just walked away, but then I realized that I probably had a chance to unglue it with water before the glue set permanently. Which actually worked quite well.
I will assess the situation today after work.
Going forward I will switch to regular carpenters white glue (outdoors edition) instead of the aliphatic resin I used for the first planks. Reason is a long setting time compared to the resin that sets within 5 minutes. It will give me a little longer peace of mind fiddling with the clamps and all.
-
Thanks for likes and comments 🙂
Today was the day apparently... first strakes fitted and glued. A small step for mankind, but a big step for me.
And of course... when doing the starboard side the first strake came up too high. Had to un-glue the forward piece and glue again (no pictures on the mishap though).
The clamps are a derivative of EdT:s clamps from the Naiad book. I've seen other renderings as well around here on MSW. I made some 15 or so as to never run out of clamps (can't have too many, right?).
Til next time, ta!
-
Interesting thread this one. The two Speedwell volumes are patiently waiting in my library.
But regarding your renders of the carvings Chuck... I can't even begin to understand how you do it in the computer.
But then, I don't have to. I think I'll just pull up a chair in the back row and admire your work. 🙂
Keep it up!
- Nirvana, FrankWouts, Ryland Craze and 4 others
-
7
-
I bet the panels look quite good at an ordinary watching distance (i.e. more than 9 inches anyway).
Finicky work, but well executed B.E.
Keep it up!
- Blue Ensign, hollowneck and mtaylor
-
3
-
Thank you guys for the encouragement!
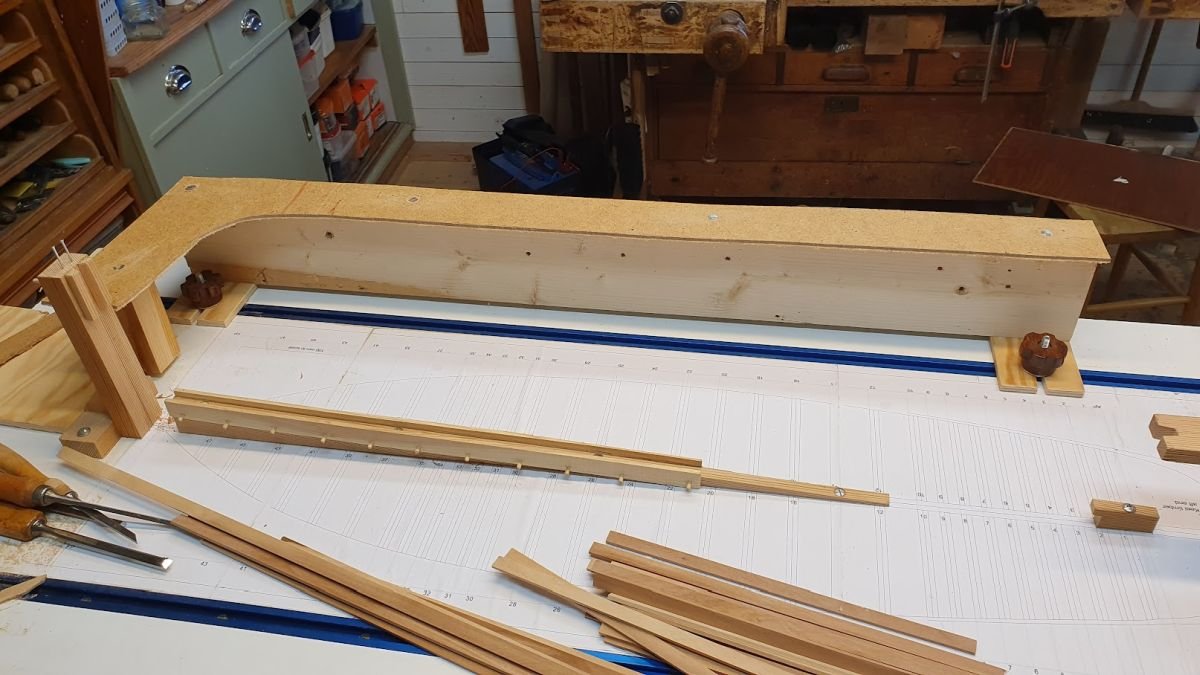
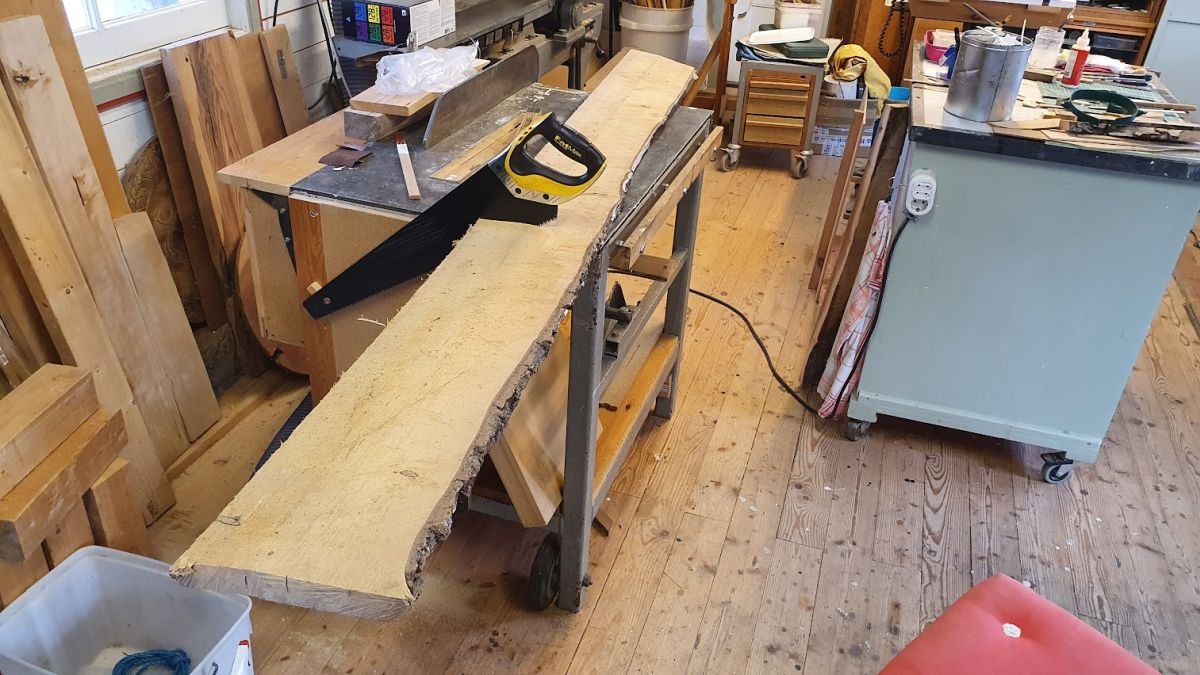
Well, I've been messing around with the software again. Below you can see my setup for the plans. It's an old drawer that's been converted, or "up-cycled" to a display board.
Works like a charm. Also in the picture are all boards for the planking. Birch if you want to know, ripped from the big plank in a previous post.
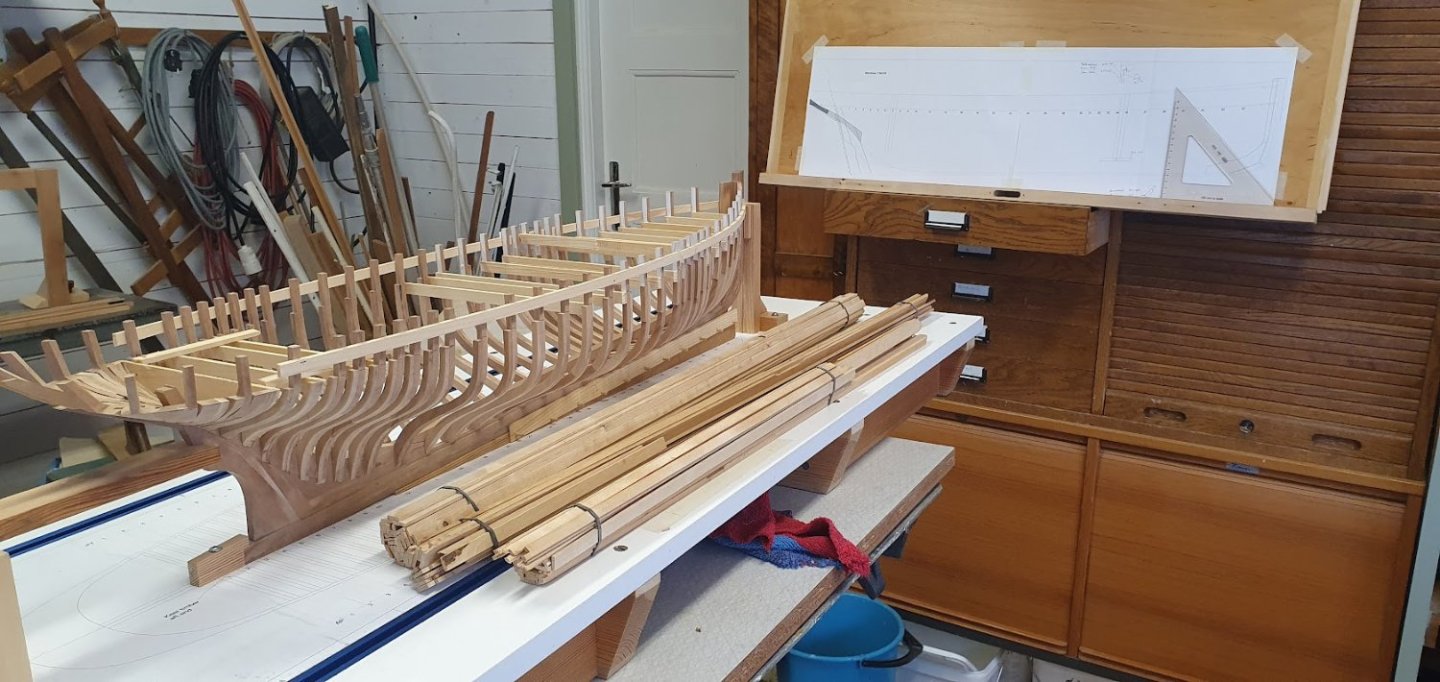
This is the status of my plans. I think I have the most important pieces there now.

It is a bit blurry because it is an image of an image... looks perfect in PDF, which I use for printing.
Planking.. any day now 😉
Cheers!- Prowler901, KORTES, FlyingFish and 6 others
-
9
-
-
What Yves said, nice save B.E!
Keep it up!
- hollowneck, mtaylor and Blue Ensign
-
3
-
-
That is some excellent planking you're showing us in the previous post!
I am a bit nervous for my own planking since I have planked only two hulls and that whas 30+ years ago.
Keep it up!
- bolin, Nirvana, Keith Black and 1 other
-
4
-
Indeed so @KeithAug 🥶
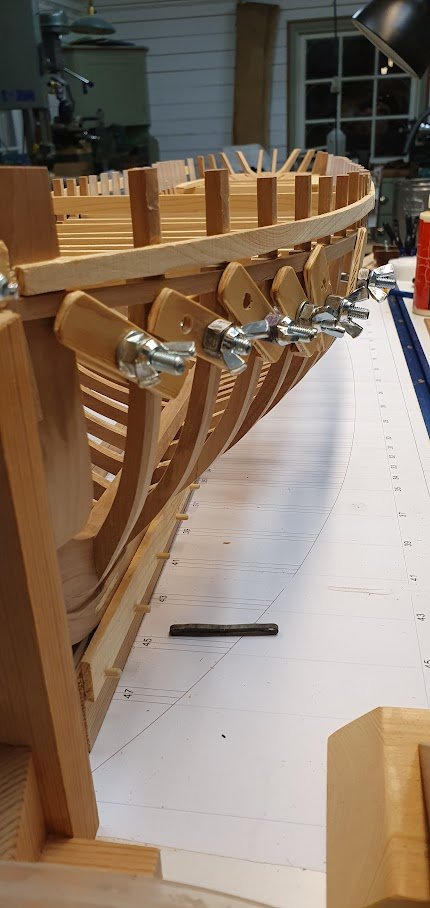
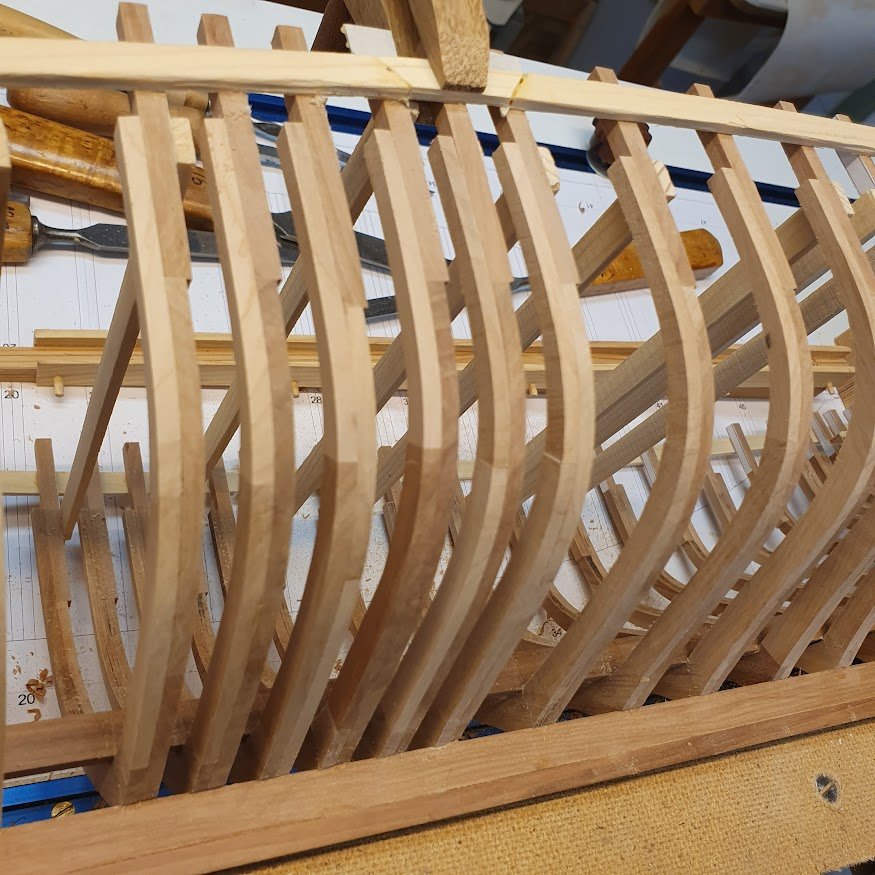
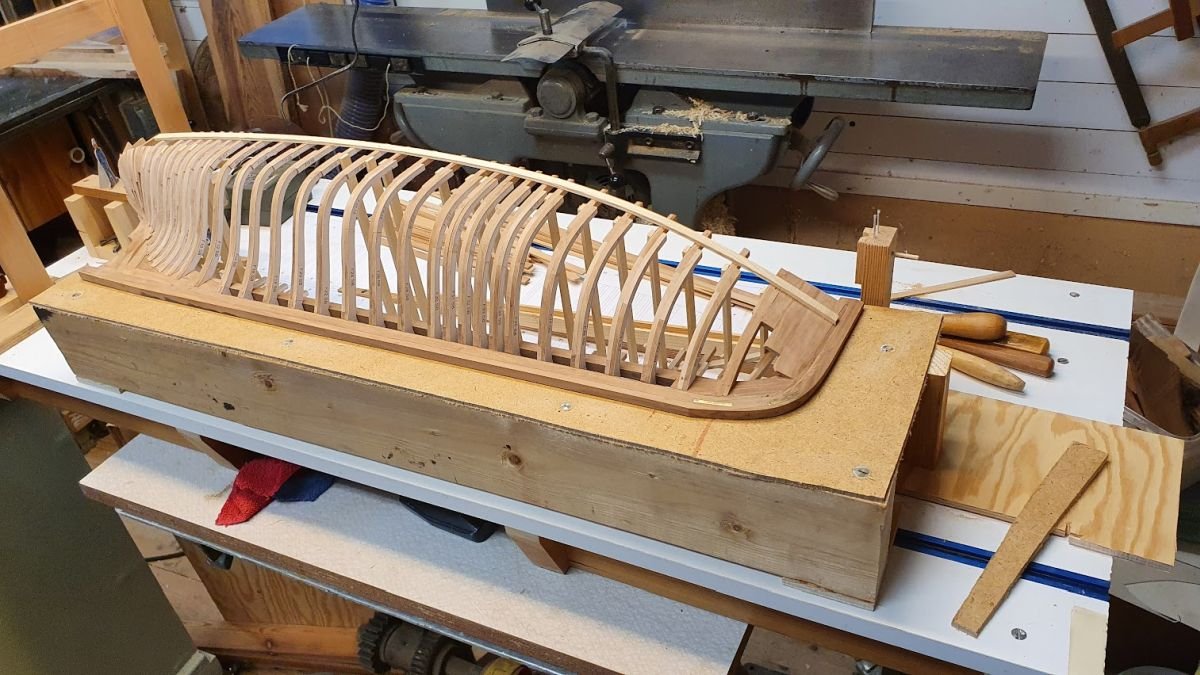
Another little issue that needed some kind of fix was one frame in particular. The frames are buildup in two layers and they were sanded smooth a while ago.
As can be seen in the following two pictures, this frame sits a bit low. Luckily the only one, and equally so on both sides.
The step is less than a millimeter but with Murphy hanging around you can bet that some of the planking will meet there and will then have a lot more sanding to do to even out the hull.
As can be seen in my pictures I have glued a soft pine strip to keep everything in place. What I simply did was to cut the pine strip on adjacent frames, carve it loose and squeeze in some cardboard strips to force the culprit outwards.
Like so.
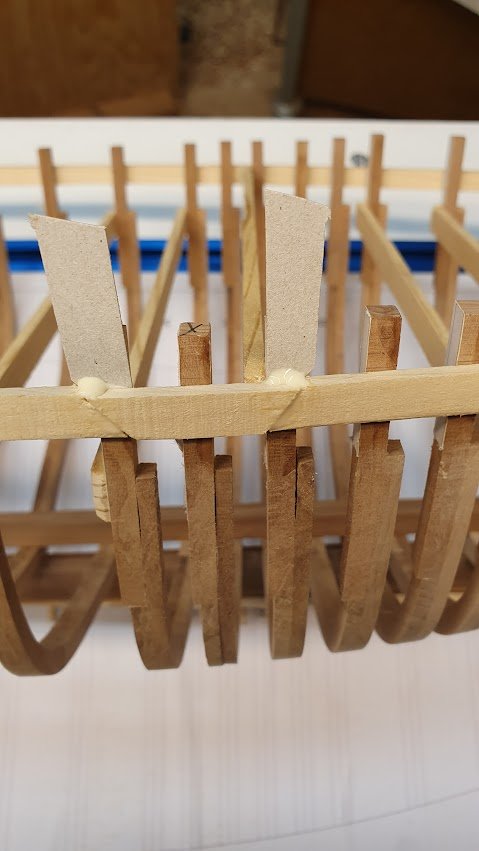
In the above picture the step is quite obvious.
Then it was a matter of more sanding and voilá!
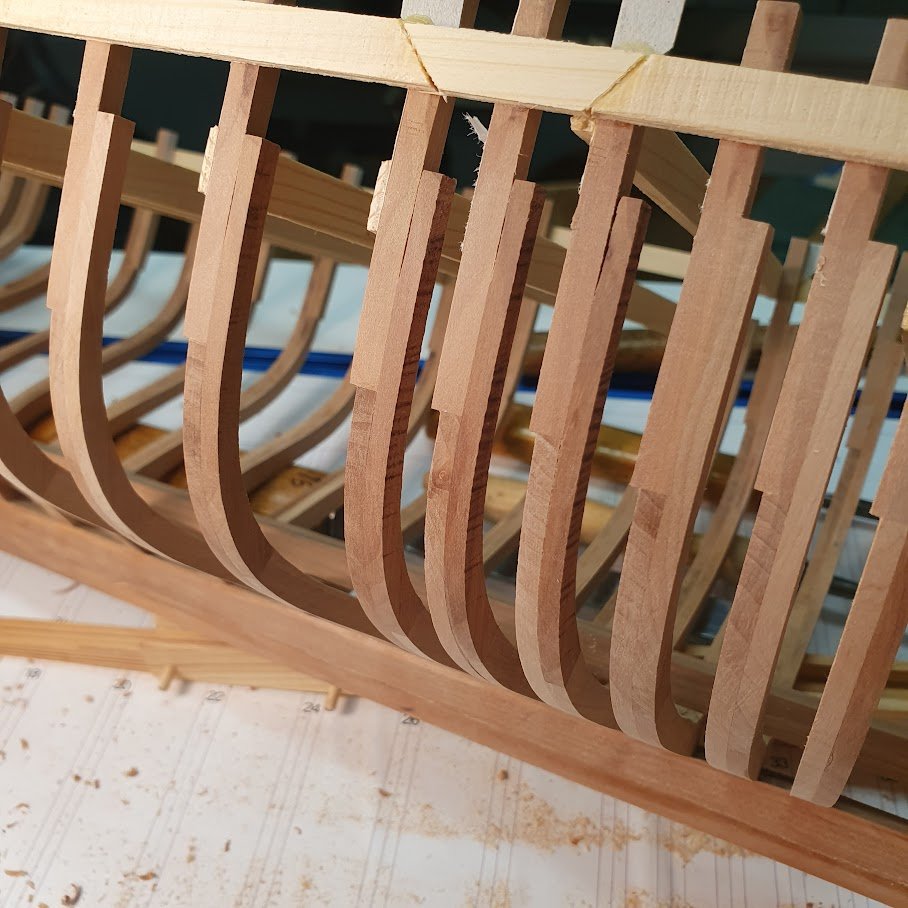
Sorry about the out of focus picture above. Seems like the phone camera honed in on the dust and shavings instead of the smooth frames.
Guess we're all guilty of that sometimes...
Thanks for likes and comments guys!
-
Hello John! Glad you popped by my blog 🙂
It is true, just let the chisel down and walk away. I tend to recognize these days quite early on, but it's so frustrating when you were planning for a day in the shed.
Well well, nothing happened to the model and what was broke is now fixed.
Today is a new day!
Exercise is already handled, onto breakfast and then some snow showelling to clear a path to the shed. First snowfall for the season, some 200mm/8". But it will thaw away coming week.
-
Thank you Keith 🙂
One struggle is that the apple wood shifts its grain pattern. And that is even though I choose as straight pieces as possible for the keel assembly.
So while the chisel cuts nicely it all of a sudden stops and I have to cut from the opposite direction. Which sometime is not even possible...
However, having really sharp chisels helps (it always helps to have really sharp chisel, no duh) but I mean Really Sharp chisels..
And then care is needed so no unplanned blood samples are given 😛
Hopefully I have a mood better suited for building tomorrow. Today was a waste, more or less.
-
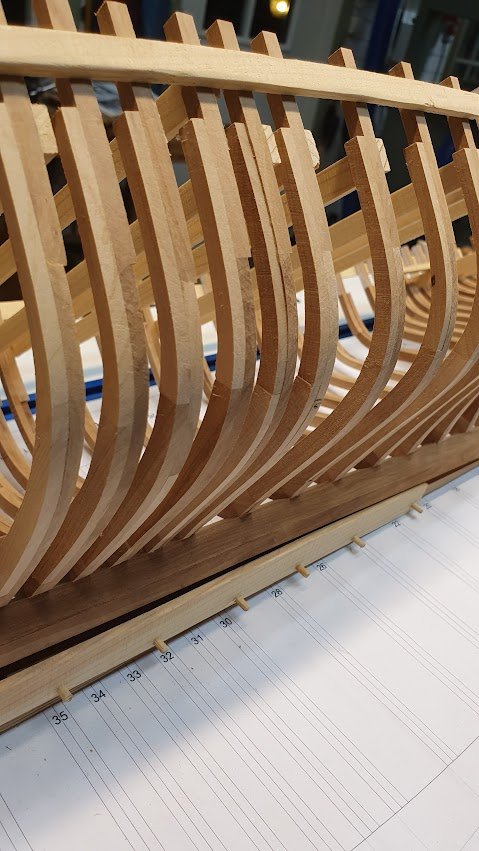
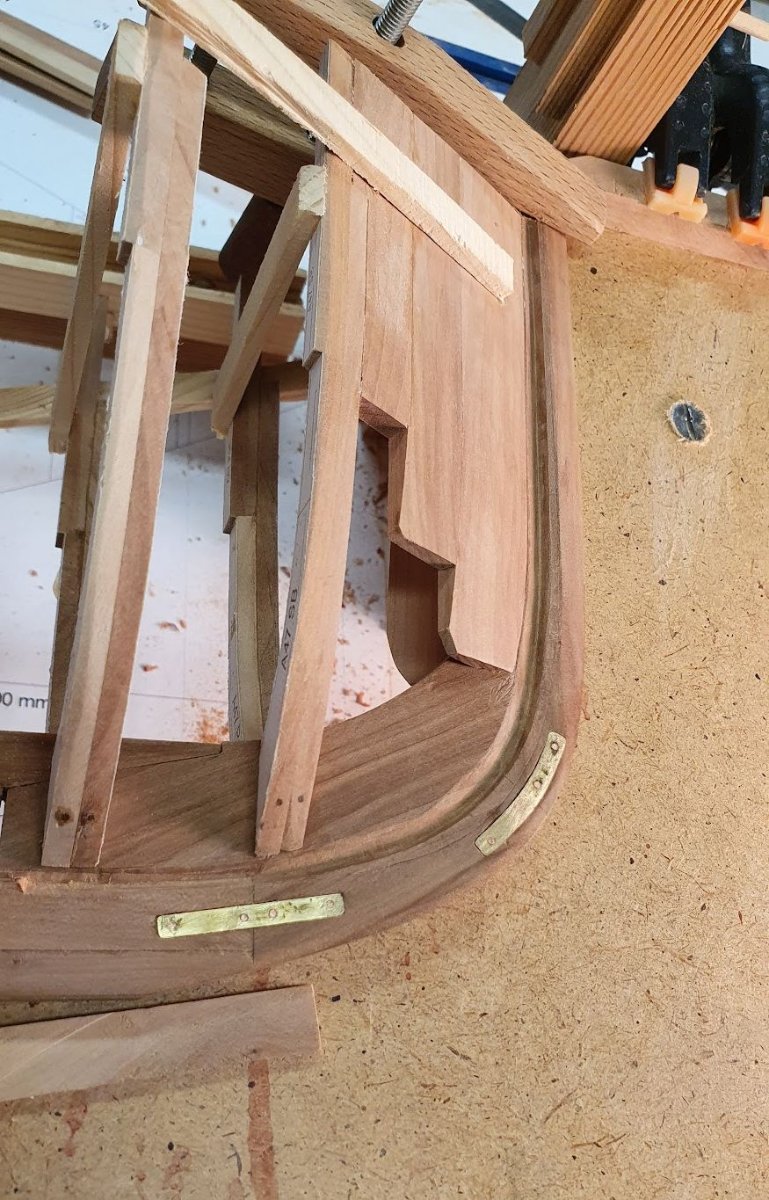
That rabbet thing is quite something.
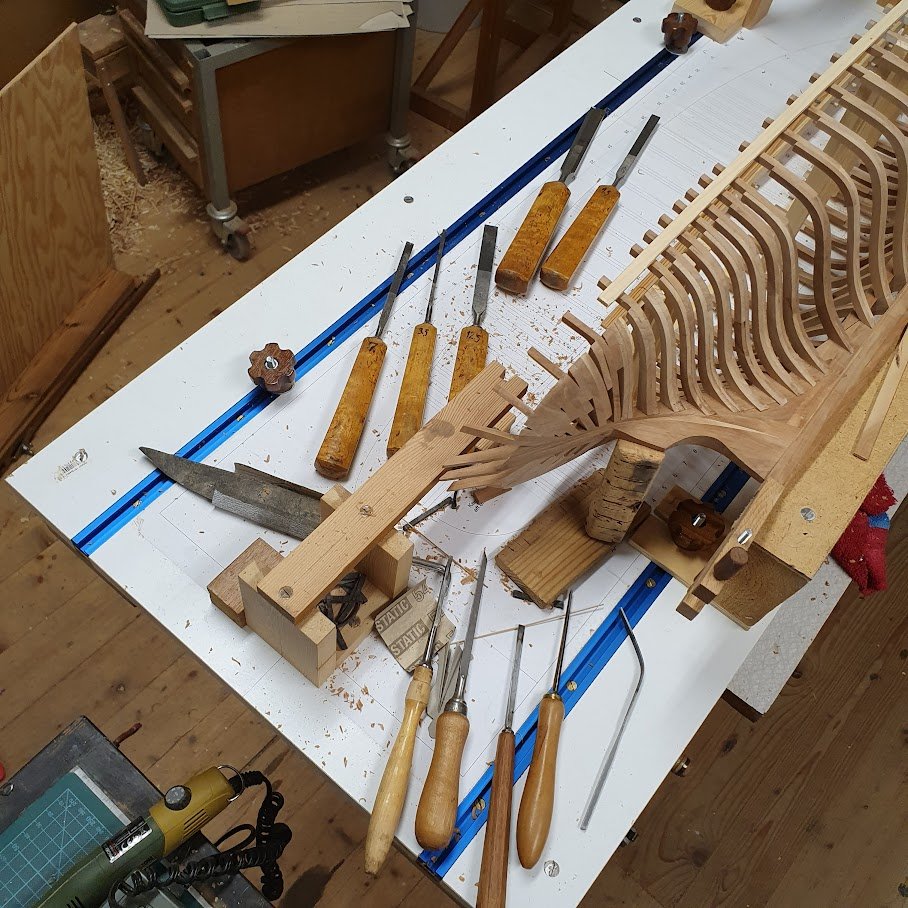
After closer inspection at the stem more work is needed. Meanwhile work has been carried out along the keel and moving aft.
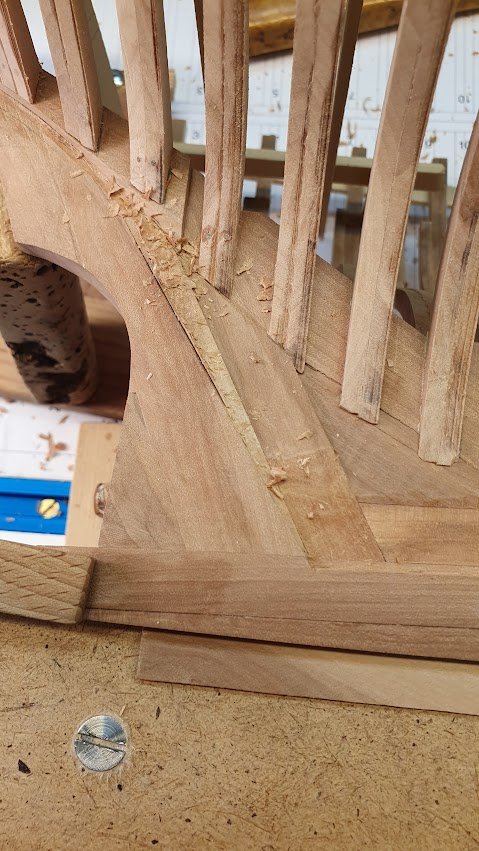
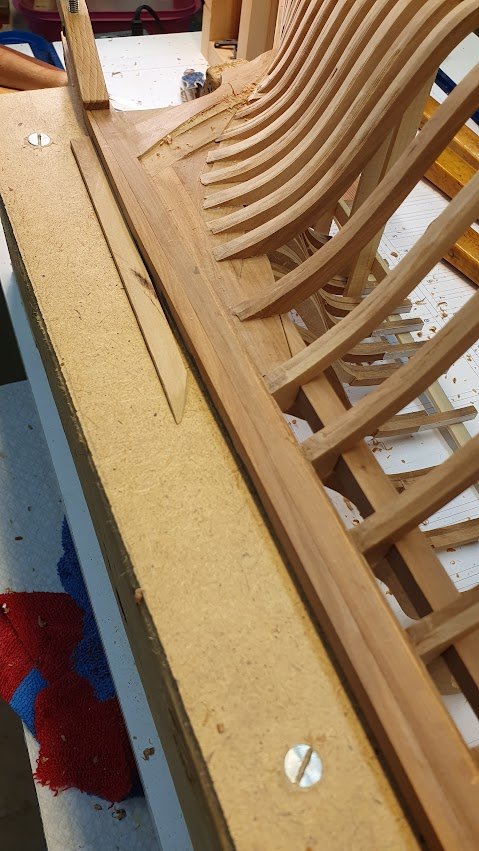
After several hours this is what it looks like (below). The hard part is the transition from deadwood and up against the transom timber.
The book is great support and I'm examining every image to find hints and evidence on how things were done.
If you think everything is so tidy and in order... think again 😉
Pax et bonum.
- Mirabell61, mtaylor, Colin B and 11 others
-
14
-
It is interesting how we tend to discover things from our photos that we don't pick at the building board.
You're doing a fine job B.E!
Good decision to go for the slimmer strake.
Keep it up!
- mtaylor and Blue Ensign
-
1
-
 1
1
-
Coming along nicely B.E.
Ivory is definitely a good choice for "white". Using a too bright colour and it just sticks out if you know what I mean.
Keep it up!
- mtaylor and Blue Ensign
-
2
-
But it looks good, even if it took half a lifetime 😉
I can really appreciate the trials and tribulations with planking small hulls... the one I did (Kågen in my signature) was at a larger scale and didn't have that many strakes and they were also wider.
And then you happen to browse past one of Gregs delicate builds and you feel totally inferior and insignificant.
I think your boat will look really good after some cleaning up and finishing B.E. I can't see anything but nice lines in the photos.
And these close up photos tend to highlight what can't be seen at an ordinary watching distance.
Keep it up!
- Blue Ensign and mtaylor
-
1
-
1
-
I just realized I got the signatures wrong, apologies for that.
Mixed up the commenter with the builder. My bad.
Well done B.E.!
- mtaylor and Blue Ensign
-
2
-
38 minutes ago, Blue Ensign said:
repeat I cannot do another large-scale build, I have not the room for another large-scale build.....
So a large scale build it is, right?
Okay, I'm glad we have got that decided then. Now then, what will it be?
Nah, just kidding! I'm just on my third somewhat sized build and can truly appreciate the placing problem. Some of the Admirals book shelfs need to go, but that is a discussion for another day.
James, 171 by 29 mm is not a very large object but you are doing a terrific job on the barge! (not suitable for children under 36 months - what a peculiar statement 🤭)
Keep it up!
-
31 minutes ago, FlyingFish said:
Great to see this Hakan, really like the original methodology, and hand working!
Well thank you Andy!
Yep, much working by hand since I have but full size woodworking machinery. No mini lathe, no mini drill/mill, no mini table saw, not even a scroll saw.
Instead, home made disc sander, home made thickness sander, sharp chisels, nice files, manual scroll saw and a can-do attitude. 😉
But I have a question for you, now that Orca is finished - what are you up to?
- mtaylor and FlyingFish
-
2
-
Haha, thank you @KeithAug for the laughter of the day!
No, I didn't get too excited, just you know, like normal excited 😛
Anyway, thanks for the likes so far.
Planking, yes. But after a second thought I checked in with the book. After framing the shipwrights put on the four topmost strakes. After that the deck structure went in and after that planking.
So... that's how I am going to do it. I think.
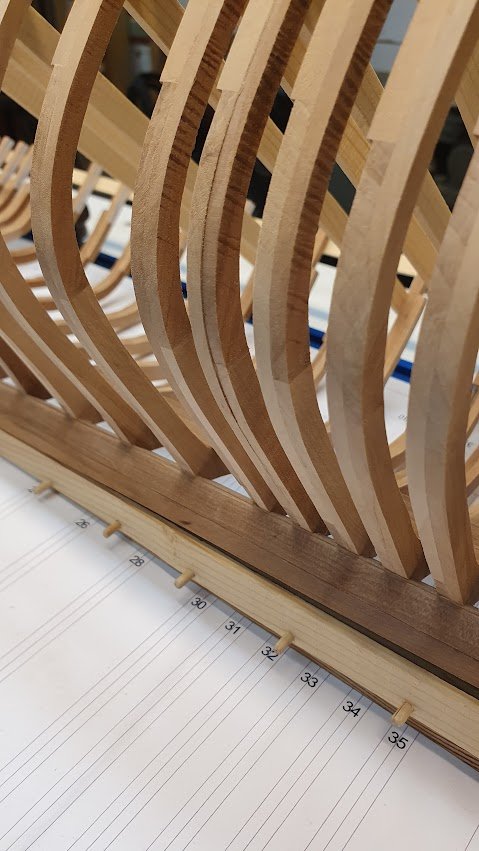
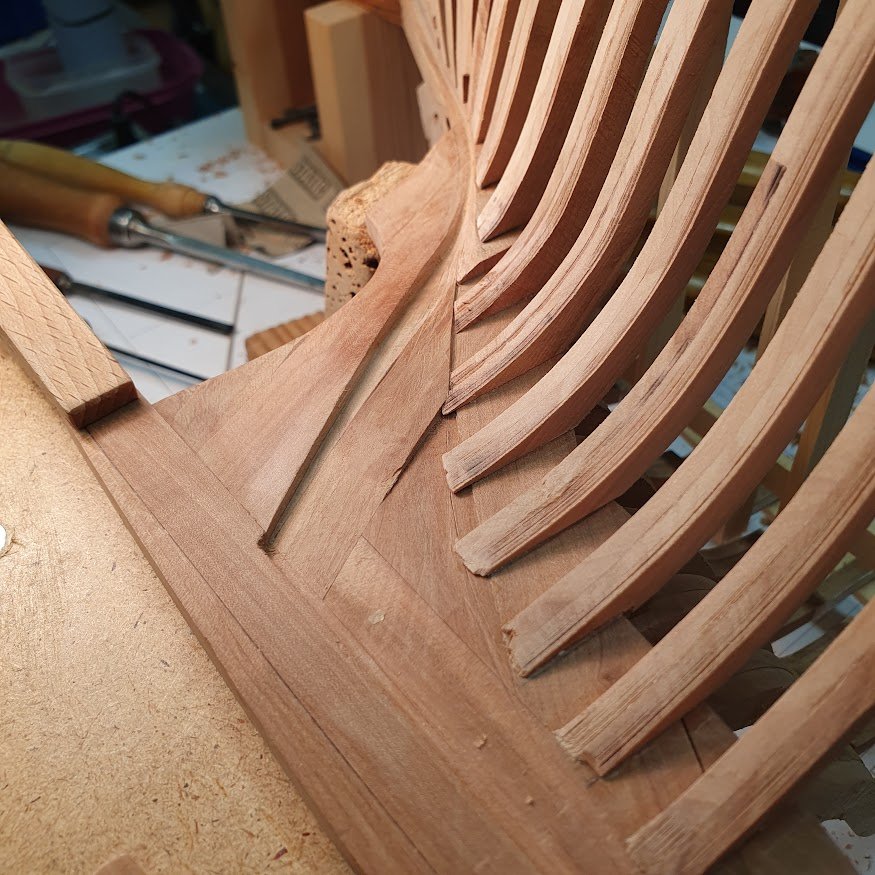
First the bollard timbers though. For them to line up properly I partly cut the rabbet in the stem, then glued stiff paper as guides and then it was just down to sanding, testingfitting, more sanding, more testfitting and so on.
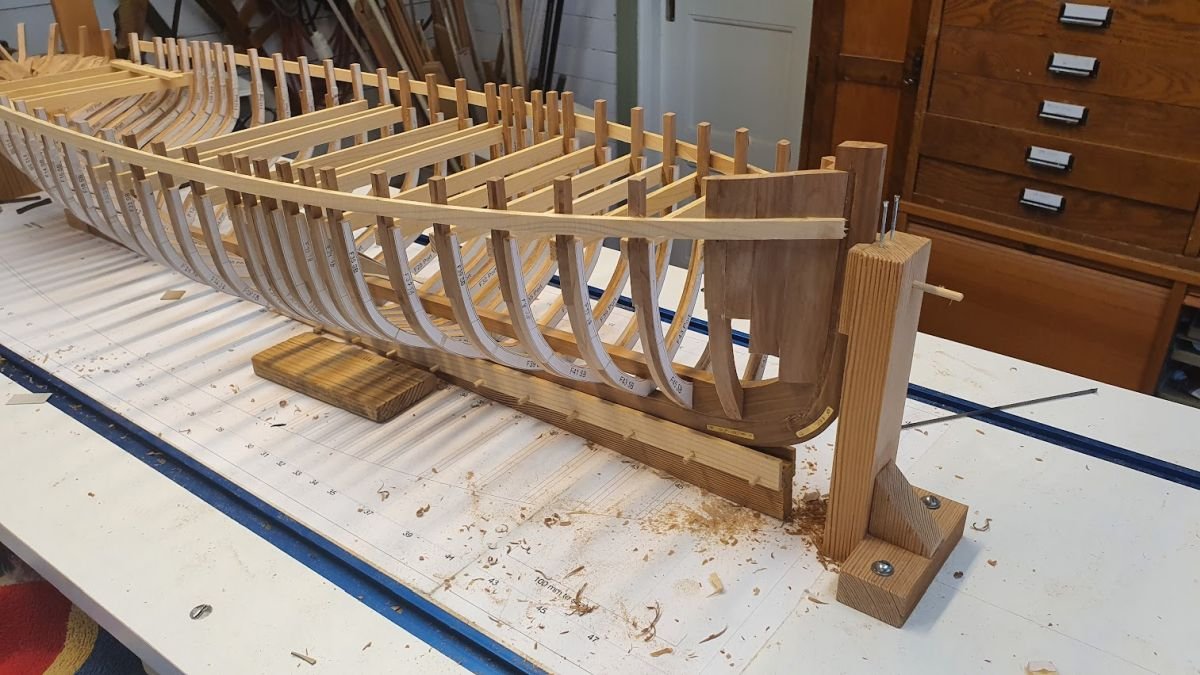
Next picture is a good deal of hours later. Rabbet is cut in the stem, frames are faired, now all I need is planks...

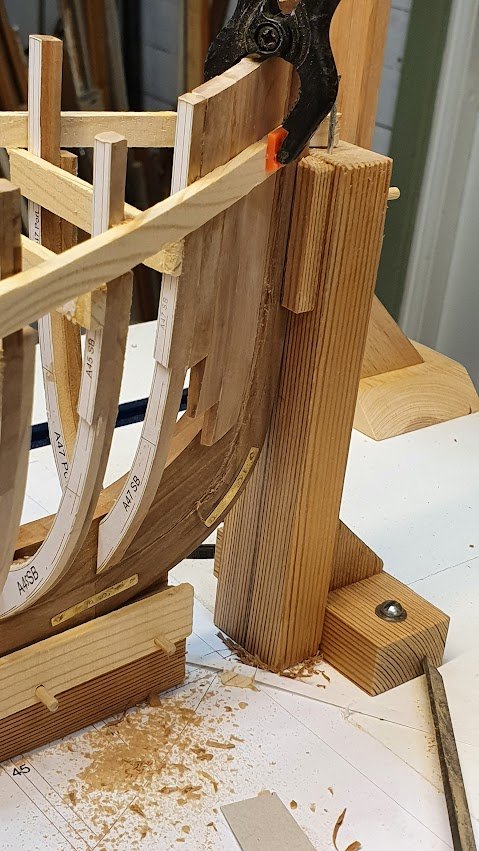
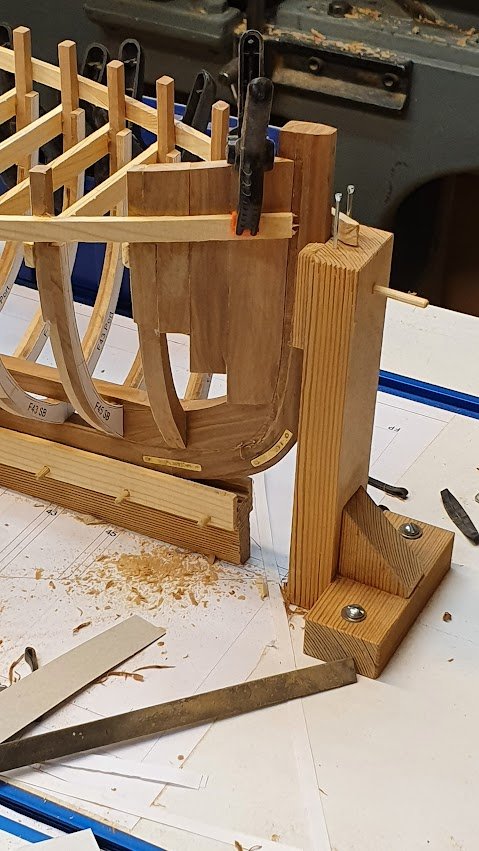
To be able to get a satisfactory result you need to be able to secure the object. Be it a piece of a frame or the entire hull structure. And also be able to see, i.e. lighting!
Initially I cut the rabbet with the hull upright on the slipway. Not ideal since it was awkward and I obscured the light with my hands. After a good nights sleep I came up with a better idea.
Not only can I secure the hull to the holder, the support itself is secured to the slipway. See next picture below.
And it is easy to flip over the pattern to match work on port side since it is screwed on top of the 2by4.
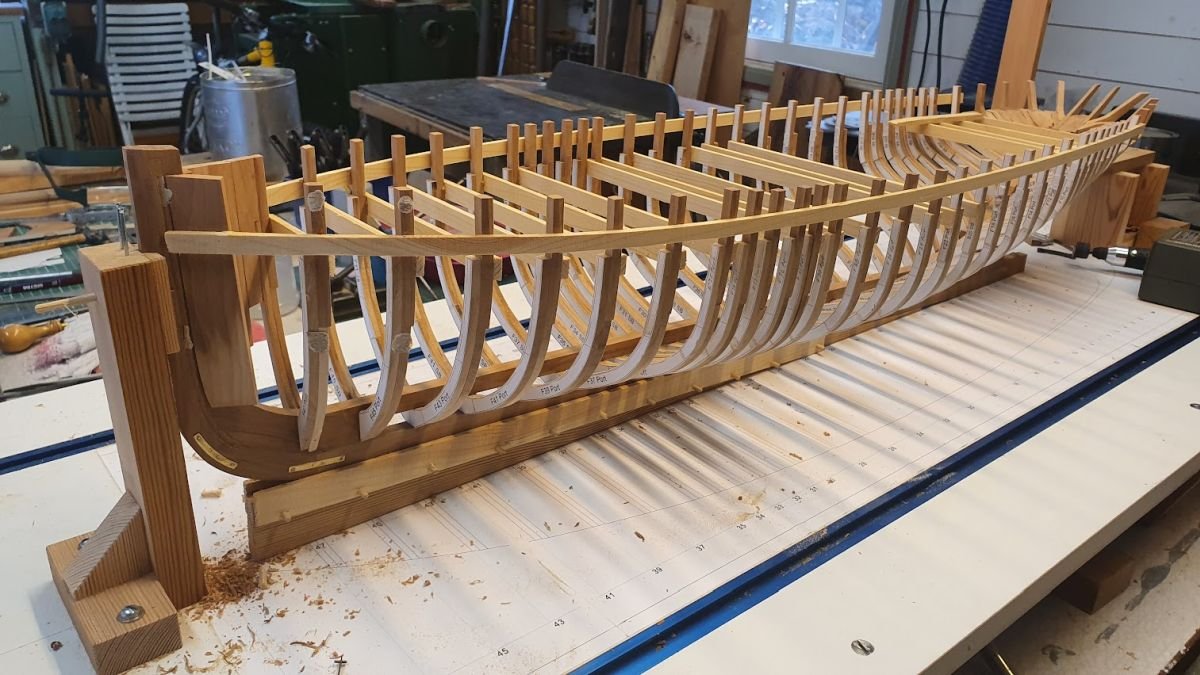
Then, about planks... in the picture above lies a bunch of planks, 3x9", and scale length 250mm. All in all 8 planks per strake and 23 strakes, plus the garboard which will be wider. That is 184 planks + the garboards. Oh my. Better start ripping... 😄
I will cut the rest to about 300mm length, even though that is beyond the scale. Reason is to have some millimeters to spare when laying out the pattern.
The keen eyed viewer will recognize the plank below as birch and that will be used for all but the garboard and rubbing strakes (the 4 topmost). These exceptions will be of apple.
Pax et bonum, fellows!
-
13 hours ago, KeithAug said:
There are so many and given the mast height they are so bulky that hanging all of them from the belaying pins would probably be impractical.
Quite true. I've done some sailing on a the boat in my avatar and the peak and throat hallyard are always on deck when the main sail is hoisted. Same goes for the mizzen sail hallyard. However I have to disagree about the "mess on the deck" 😉
Even if the surplus is just laying on deck it is stoved in a figure eight with the loose end at the bottom, under the pile. The rationale for this is that then it will not tangle if the sail has to come down in a hurry. When the sail is down and belayed, then the surplus is coiled and hanged on the belaying pin because it is much less meters of rope at that point.


36 Foot Admirals Barge by Blue Ensign – FINISHED - Vanguard Models – 1:64 scale
in - Kit build logs for subjects built from 1751 - 1800
Posted
🙂 "least worst" option goes hand in hand with the common "not too bad" option, I just love the UK-English language ❤️ (honestly I do!)
"Bloody excellent" though, would be my way of react to what you show us B.E.
Keep it up!