


Wintergreen
-
Posts
993 -
Joined
-
Last visited
Content Type
Profiles
Forums
Gallery
Events
Posts posted by Wintergreen
-
-
Just read the last part of your log Alan and to rephrase what Max von Sydow and later Russel Crowe says in Robin Hood - Try, and try again until novice becomes a master 😉
(Rise, and rise again, until lambs become lions).
Good job and as druxey said A for effort and perseverance.
Happy new year!
-
Peter, hats off for undertaking such a project!
I would be very reluctant if it was me. There are just so many different aspects of taking over/finishing someone else work.
In fact I was approached one time with the prospect of inherit the work from a friends father, but the hull did not appeal to me at all so I gave it a pass.
The Euryalus volumes sits in my library waiting ... so, in the meantime I'll tag along here. 🙂
Happy new year, mate!
-
On 12/29/2022 at 2:46 PM, druxey said:
ALS is an awful way to go
Agreed druxey. She was strong though and could separate herself from the disease.
anyhow.. Happy new year to us all!

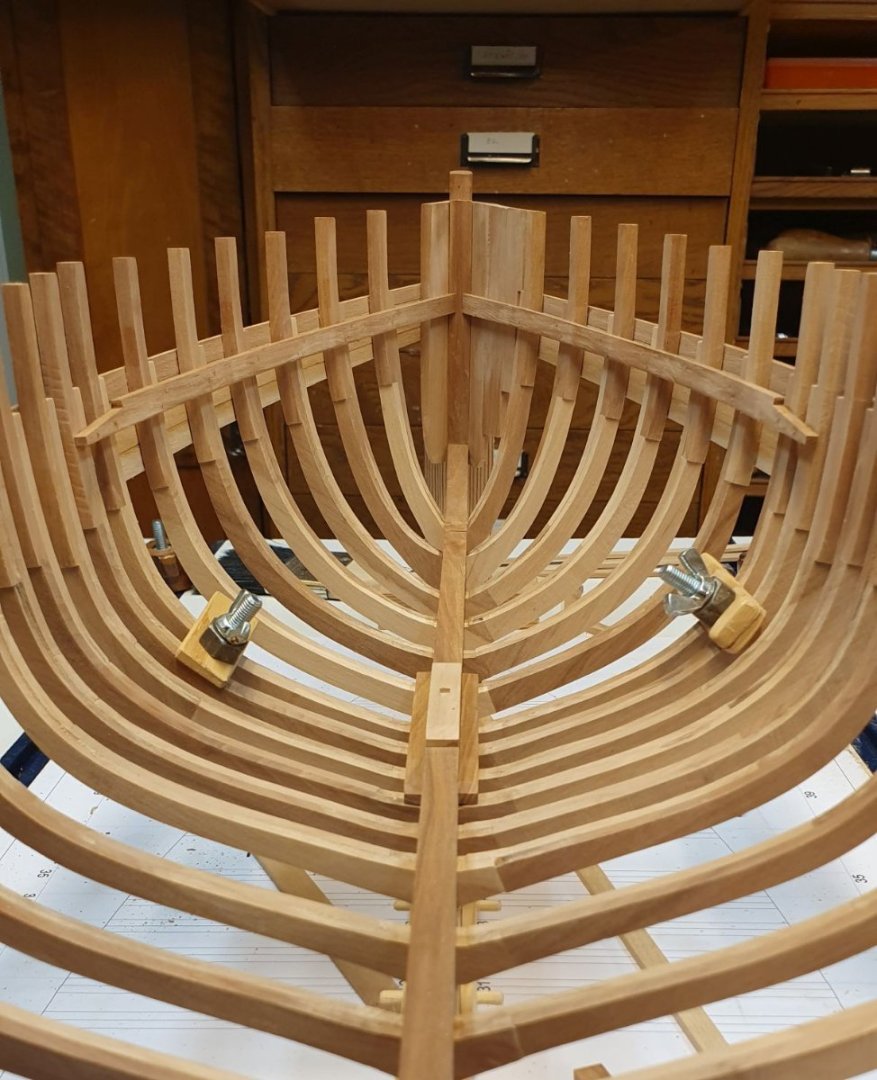
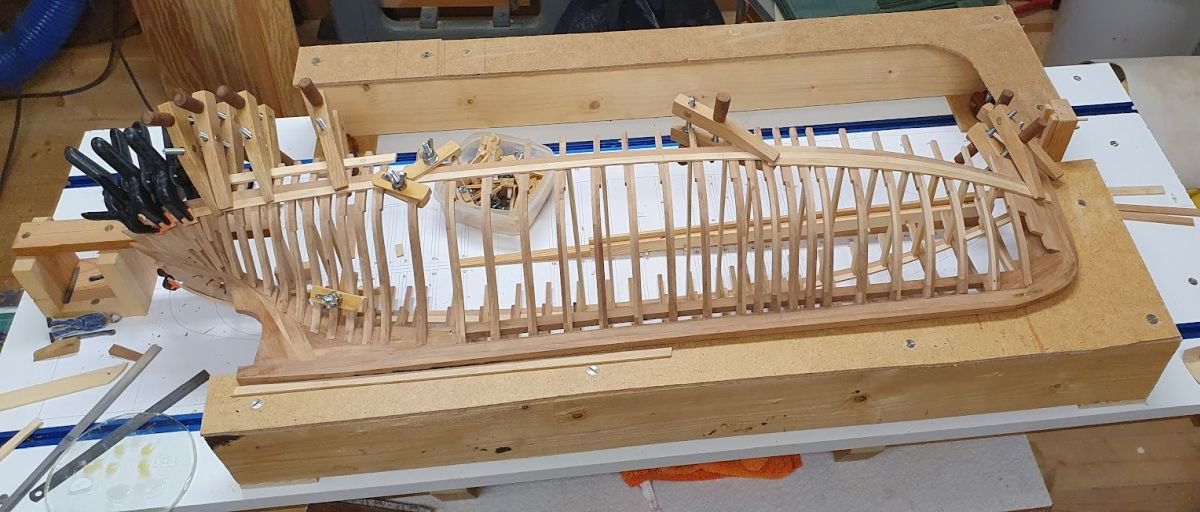
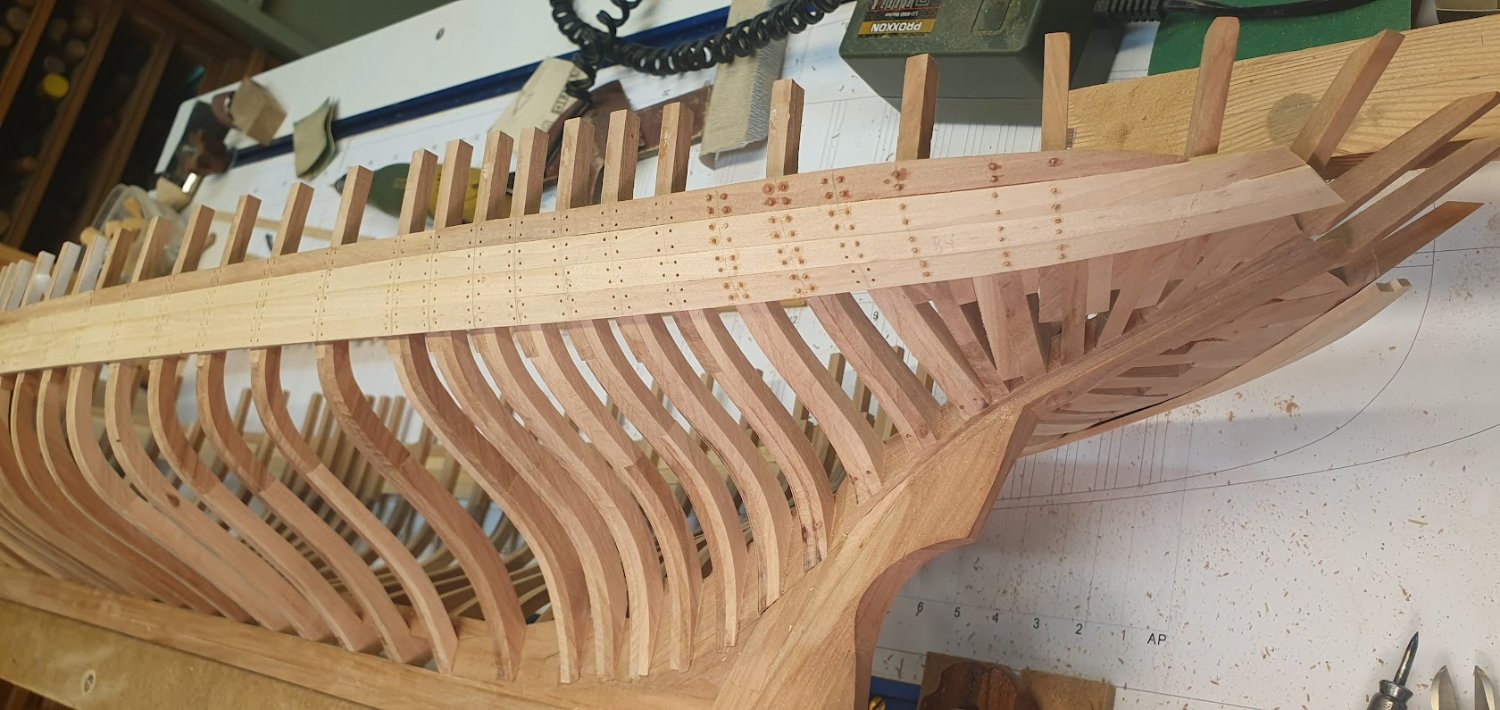
Let me take a moment to explain what is going on in the above picture...
I have come to realize that, to get a consistent and satisfying result when building from scratch jigs and fixtures are instrumental.
Above the two first parts of the beam shelf are being worked on. The starboard side is glued and fixed and the port side await its turn.
The beam shelf sits ca 160 mm beneath the sheer and the sheer is defined by the top outboard strake. As can be imagined the beam shelf needs to be edge bent as well with some degree of force.
So, the pine boards (cross members) have a 5mm tab glued to them and also some double adhesive tape to make them unwilling to move.
At the stem a stump of correct height is held in place by a large clamp in order to meet up with the front end of the beams.
With this setup it was quite easy to force the beam in place up against the pine tabs.
The keen eyed viewer can also see the mast step and supporting beams are glued in place.
After trunnels and some cleaning it looks like below.
A note on the tree nails.
On the original the following bolt dimensions where used:
entire keel structure - 1"/25mm
other places of stress - 3/4"/19mm
planks, beams aso - 5/8"/16mm
For example, hull planks where fastened with 16mm, but I've used 0,8mm (24mm real world dimension).
Mainly for two reasons,
1, drawing bamboo down to 0,8 mm is quite simple. Going the extra mile to get down to 0,53 mm (or 0,5mm to match drill bit size) adds quite some time and effort.
2, I think of it like simulating the bolt head, which of course is at least twice the bolt diameter in size.
3, inside won't be seen and outside will be painted...
Then of course there is the discussion of with type of glue to use...
For the hull planks I used medium CA and for the beams PVA. And the reasoning is that the outside will be sanded and painted and I therefore don't need to be bothered of residue. The interior will be hidden and not painted, but I still want it to look nice and PVA washes away easily with water.
- GrandpaPhil, Tony Hunt, vaddoc and 9 others
-
 12
12
-
-
-
-
1 hour ago, Jaager said:
I apologize if my response came across as an insult
Absolutely not!
We are on the same page. 🙂 it's just so hard to decipher text sometimes therefore the extra clarification.
All's well!
- mtaylor and Keith Black
-
2
-
Thank you @Jaager for a serious answer to a silly question.
I was joking about the balsa as an option. Please don't put me on your s**t-list for not being totally clear about that.
I am well aware of its shortcomings and its uses, which are few. Like you and John say - good for filler on POB builds but that's about it.
And yes, I did put myself in the hurt-locker with the frames being a bit oversize. So I knew all along what I had coming to me.
The outside of the hull was faired with power tools. Both my circular orbital sander and my orbital corner sander (sanding pad like a swollen triangle) made a somewhat quick job.
The inside is another matter and I have opted out for using power tools there. It would be far to easy to char areas unintentionally. Hence manual labour instead.
On a more philosophical level I try to balance my use of power tools for a couple of reasons.
They are for the most part noisy. (yes I do use hearing protection extensively but I appreciate the silence in my shop)
They produce a lot of dust and spreads it into the atmosphere (yes, I have a shop vac connected as far as possible, but still, it is not feasible at all times to connect a bulky hose)
I like working with my hands and f.ex. a sharp chisel removes wood fast and clean.
About sand paper or their alike. I agree there too with you Jaager.
Grit 100-120 is for removal. The rest of the spectrum is more or less to get rid of the scratches from the previous step.
Of course, smaller things can be sanded to spec using 150-180, or even 240. But in my current case with the frames, even 80 could be an option to start with.
Thanks again for comments.
- vaddoc, James G, FlyingFish and 2 others
-
5
-
1 hour ago, Keith Black said:
Sorry for the loss of your friend, my condolences.
Thank you Keith. It was a long time coming, but it still hurts like crazy.
- KeithAug, Keith Black and mtaylor
-
1
-
 2
2
-
On 12/26/2022 at 12:19 AM, KeithAug said:
the framing and planking are looking pretty special
I hope that is expressed in a positive way, Keith 😉 (tongue in cheek). 😄
Thank you John, plodding along here.
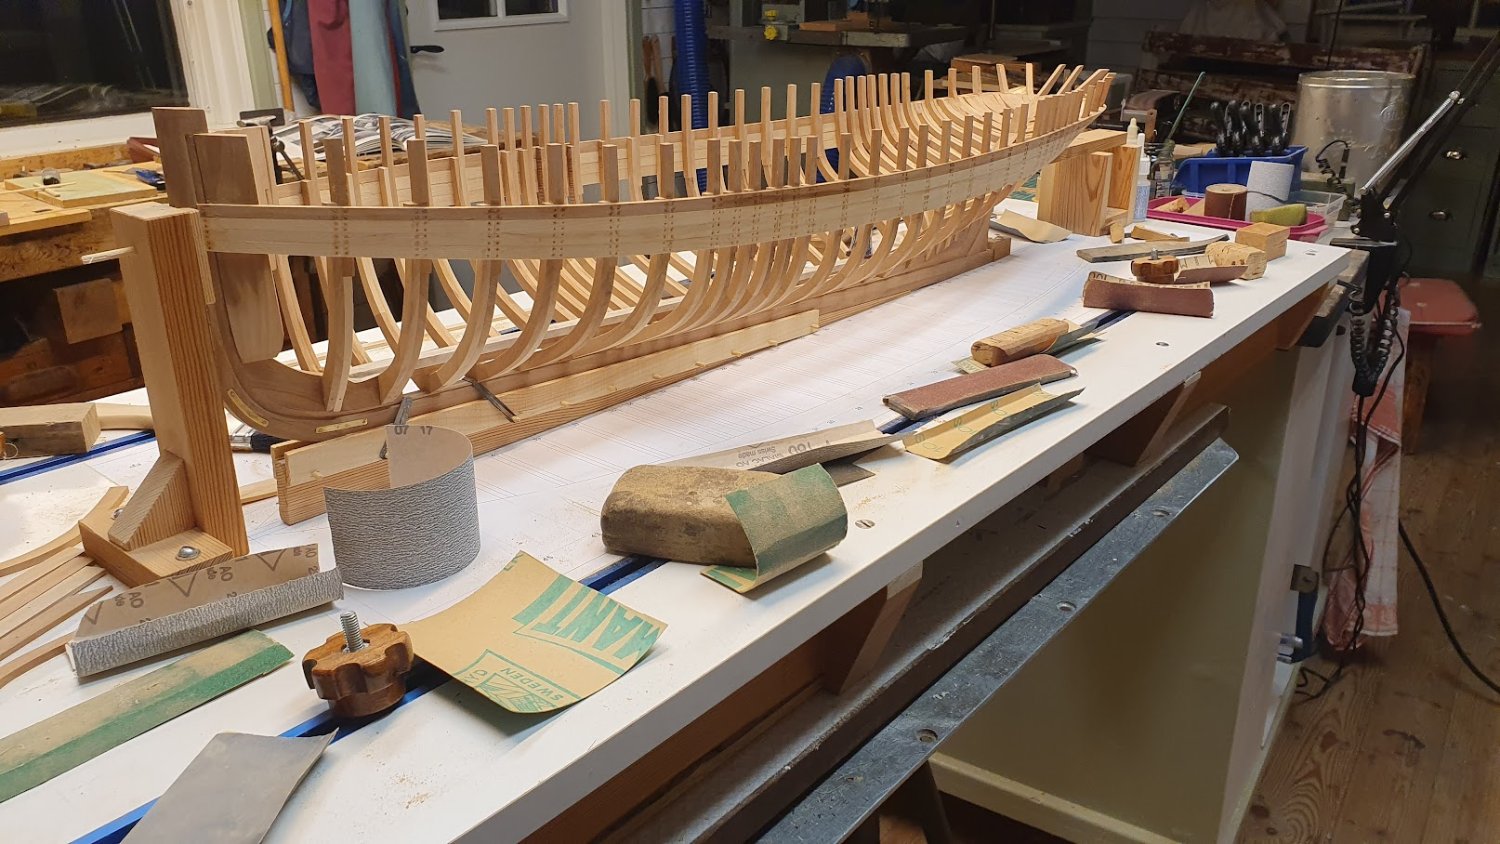
Been sanding away here since last time. Not much to show.
Note to self - I need to learn how to build closer to specs or maybe it is my drafting skills that is lacking or maybe I should study the original plans more thoroughly.
Or maybe it's all of the above.
It is about the moulded widths of the frames at the sheer line. (Correct me if I'm wrong, but moulded isn't that the athwart-ships dimension, like from the station line inwards right?).
After some measurements I've agreed on that dimension being 120 mm, or 4 mm to scale.
The frame tops that the shipwrights roughly has hewn from the stock was closer to 180 mm or 6 mm to scale.
Hence, Quite. a. Lot. Of. Sanding needed.
Maybe I should have chosen balsa instead of apple? Any takers?

The tree nails in the above picture is too prominent thanks to not being sanded flush. I've just chiseled them close at this stage.
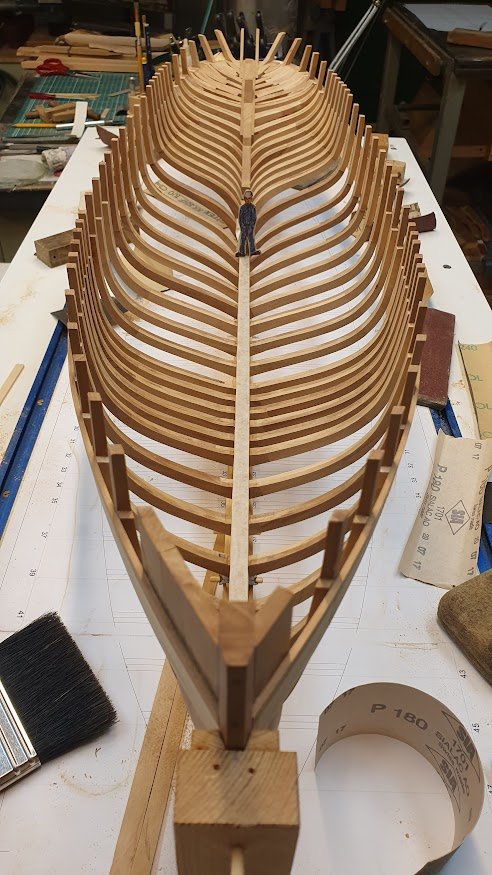
I think I'm satisfied with port side and as prophesied earlier, starboard will get another treatment with 100-120-150-180-240 and finally 320 grit paper.
When the fingers needed a break from sanding I sat down and drew sticks of bamboo through the draw plate. Another mind boggling task (ha!).
But lately I have been grateful for these mundane tasks since today was the funeral of a very dear, and close friend. We sang in the same choir since 2008 until she no longer could sing a couple of years ago. Taken away way too early by ALS (like Borje Salming if you know your NHL hall of fame).
Pax et bonum!
-
I guess that you will paint the outside of the hull? If so, all those imperfections will be hidden which is also a blessing for a first/early build. 🙂
Oh, another though crossed my mind, if you need inspiration for detailing, I think there are other whaleboats here on MSW. Just use the search function and you will find.
-
Nice work so far Jorge!
Planking such a small hull is somewhat more difficult than planking a larger hull 😉
So, when you go up in size for your next project you will have a good understanding of planking a hull.
-
Well, Christmas eve is passed and handled. Unfortunately only half of the family showed up. The other half, with the two small fairies had +39 degree of fever and stayed at home. We all live in the same village so there will other opportunities to meet.
Progress on Atlantica has overall been decent. Last week the traditional Christmas concert was ticked off, and all the practices leading up to it did slow down the build a bit, but now there is more time since I have taken a couple of days off as well.
As stated previously, after 4 strakes each side, focus turned to the inside of the hull.
In the picture below starboard side is done and I also show all the various sanding blocks I used.
Started off with 100 grit paper, then 150, 180 and finally 240. The block in the center of the picture, black, long rectangular shape is the preferred one. It is actually a rubber mat, ca 4 mm thick. It is stiff, but bends and therefore follows the shape of the hull.
At the inside of the stern I used the Proxxon with a sanding drum attached.
Attention then moved to the port side, but I will probably revisit the starboard side later on.
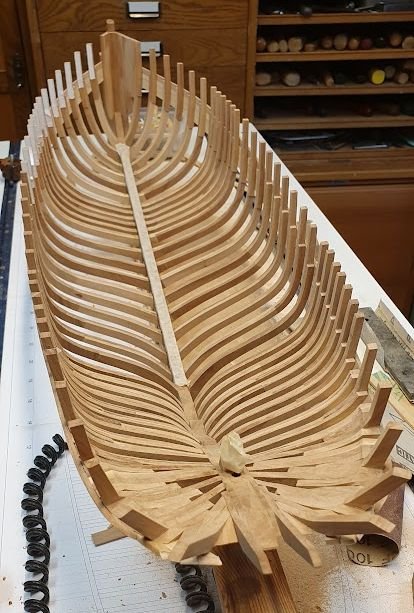
Oh, and then I dived down a rabbit hole...
One of the frames was a bit wiggly so I decided to practice some treenailing... The hull will be painted and I made a small test piece and was happy with the result.
Marking the center line of each frame, the using an awl to indent where the "bolt" will go. Without the indentation the drill bit is prone to wander which leaves an ugly result.
Finally drilling with my Proxxon and a 0.8 mm drill bit. I also made a small collar to fit on the drill bit, limiting its depth capacity to ca 5,5 mm. That was done after I drilled through on a couple of occasions. Tree nails are of bamboo and glued with CA.

Thanks for likes and comments!
- berhard, FlyingFish, yvesvidal and 9 others
-
12
-
-
What a huge improvement regarding the support for the barge!
I take it that the display case and baseboard still needs some finishing touches, but, very nice indeed.
- mtaylor and Blue Ensign
-
2
-
Yes, extra waterlines and futtock lines helps when later the frames are created. It is futtock lines they are called, isn't it?
When I first tried my luck on drafting from a original plan I had to few and over time when drafting the frames the hull shape became more and more like an egg without distinct features. I know now that when I return to that object I have to redo just about everything...
Anyhow, your work is looking good!
-
-
John, Jim, Keith, B.E, druxey - thanks for dropping by. It is always appreciated. And also thank you to all that "liked" my posts.
@druxey - apology accepted. Nah, no need for apologies! With so many active build logs here on MSW it is impossible to be up do date on ever single one. Nevertheless I'm delighted that you did drop by 🙂 and yes, this Christmas will be merry in more than one meaning... apart from my health-clearance we will have all our four grandchildren over for Christmans eve (yes, we start it on xmas eve, see this excellent J Ross clip over on Youtube: https://www.youtube.com/watch?v=wjcGAKU23Qc&ab_channel=TheJonathanRossShow they actually get it all right however the cod fish is an old tradition coming from up north while the goose blood soup is from the far south of Sweden. I'm a bit disappointed that they left out honorable mention of the herring though). And yes the OP Andersson is quite strong with an alcohol of about 40%...
The grandchildren are ranging from 2 months old to nearly 7, so it will be a blast in more then one sense 😄
- Blue Ensign, CiscoH, KeithAug and 3 others
-
6
-
Looking good B.E.
I remember that druxey mounted the oars in position on his barge he build here a couple of years ago and it looked really nice.
Another option is to stove three-four inside and the rest on a neat little stand beside the boat. You'll figure it out I'm sure 🙂
- Blue Ensign and mtaylor
-
2
-
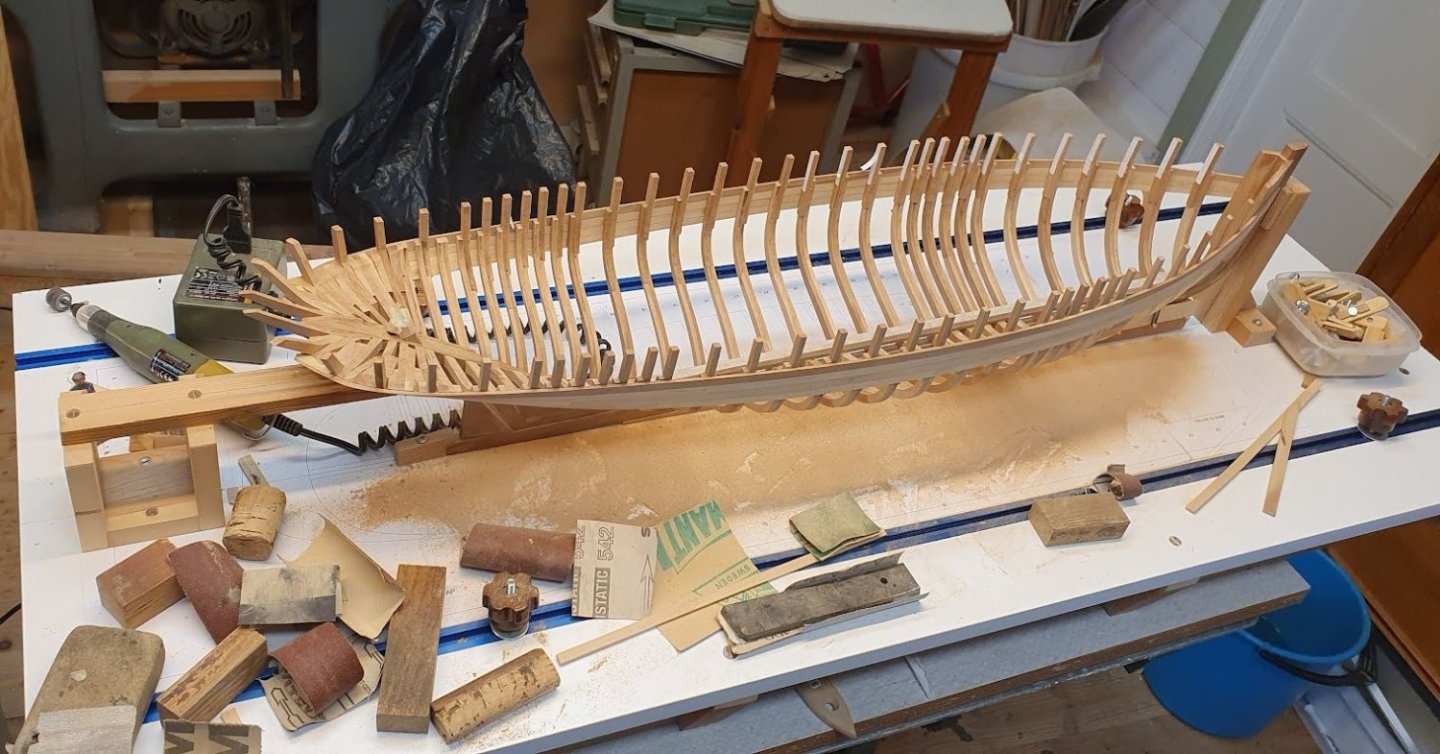
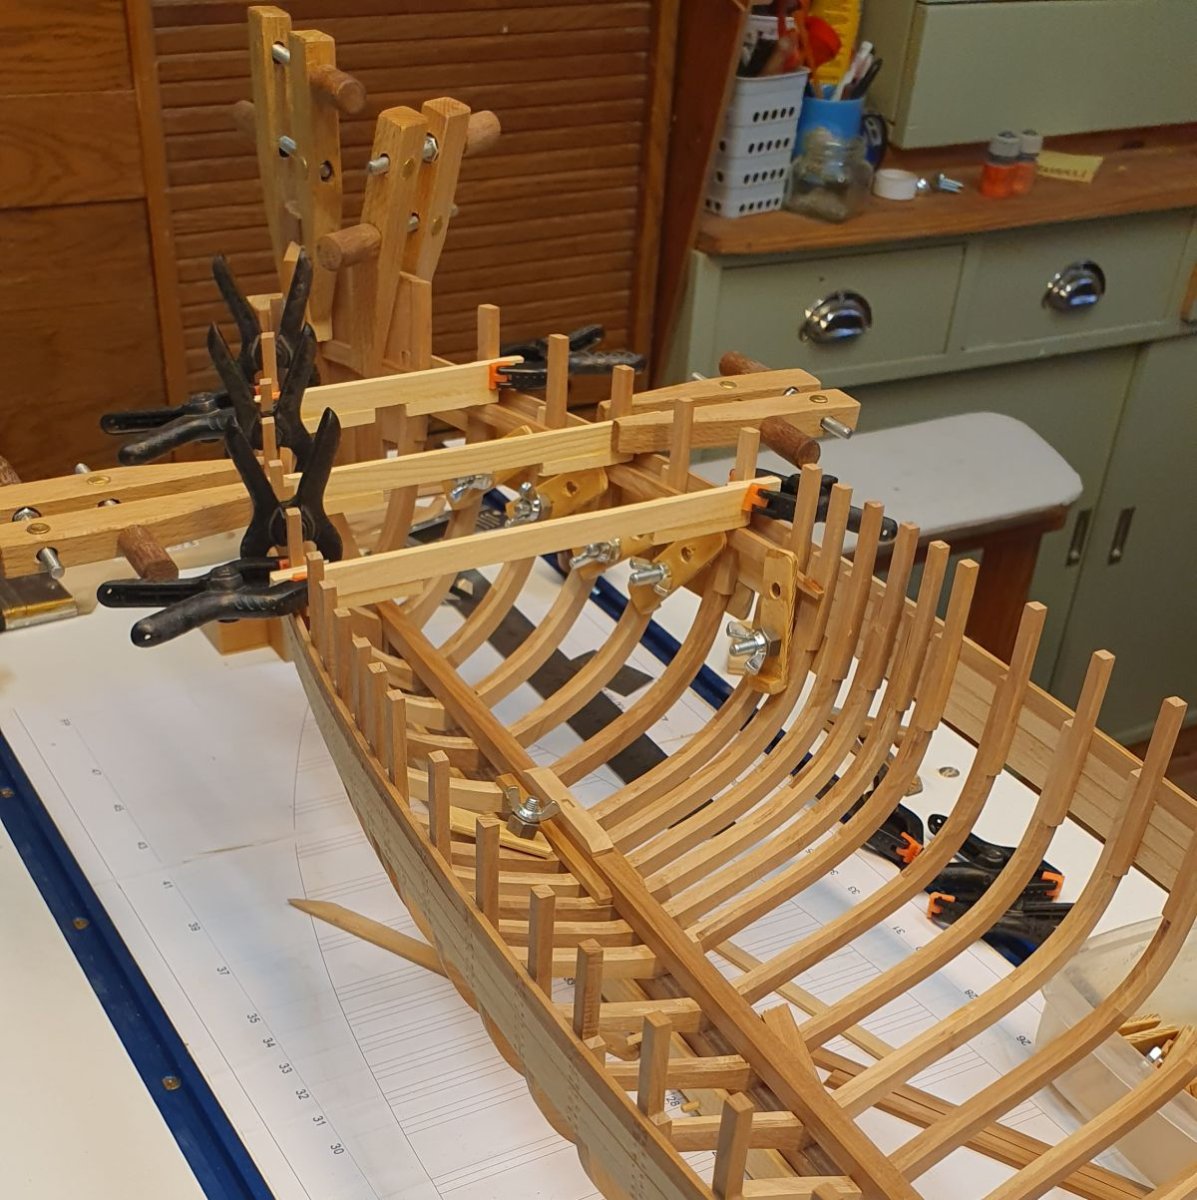
So, first bit of planking is underway.
I have gradually removed the pine-boards to get more access. For the first strake I left them on, but once no2 was in place I pried them away. The stanchions will be sand so don't worry about the glue residue.
One thing I remember about planking is that it is necessary to work on both sides interchangeably. Otherwise the hull will end up with the form of a latin gondola...
Then about the workplace, I do most of the work on the center island standing. For me it is easier to move around. Of course it comes down to personal preference.
Having the hull upright while planking made it hard to see how the planks lined up and fitted against each other. For sanding purposes I put together a simple horizontal hull-holder with the "shape" removable by screws. But, since swapping the hull from side to side is done a couple of times per session I made one more.
Now I just can flip the hull over and work on the other side. It is also really easy to see all contact points and get a good fit.
Two complete bands done and no3 is started.
When no4 is in place attention will move to the inside and prepare for the deck.
- Keith Black, bolin, vaddoc and 14 others
-
17
-
I like the attention to consequence of details, meaning the oars are obviously too short for single bank, as you say. So, what do to? Keep the originals and pretend like it's nothing or go the extra mile and manufacture new oars that fit the setup. Probably some kit builders would ignore and stick to the provided set.
I like the extra mile you took, B.E. 🙂
And I would even say that the oars score on the druxey-scale 😉
- Blue Ensign and mtaylor
-
2
-
Nicely done B.E!
It is a bit hard to envision the size of the barge even though I understand that the cutting mat i 10x10mm. Toss in a ball point pen and it will be obvious how delicate the build is.
The mdf does shame the overall impression. If it was me I would paint it. Maybe not white, but off white or something similar white-yellowish or so. Not too prominent anyway.
Or why not use the shape as template and do a build-up support instead? It would be "lighter" in impression compared to the quite sturdy mdf-supports?
- mtaylor and hollowneck
-
2
-
11 hours ago, KeithAug said:
Good that they were wrong on this occasion. I assume the surgery is to reinstate the normal bowel function. Tell the surgeon that leaks are not tolerated by shipwrights. Good luck mate.
Keith, they weren't really wrong, only suspicious. And when cancer is the issue you are sick until proven otherwise. And yes, they're going to patch me up for normal business down there.
It has been interesting to have the stomia. I understand that people can get more or less paralyzed having one, but not me. Choice of clothes is a bit different, but apart from that I have even been down to a public beach with my brothers for a swim. Only a curious 6-yo confronted me with "What's that??" So I gave him a quick explanation. His dad was nearby and surely overheard the discussion and I left it to him for the follow up 😄
@FlyingFish, @Jim Lad, @mtaylor - thank you guys! Very much appreciate the kind words ❤️
- KeithAug, vaddoc, FlyingFish and 3 others
-
6
-
Hi guys, just a quick update that I wanted to share with you.
Had an appointment with the dr today an they've finally agreed upon that there are no signs of anything malicious in my liver whatsoever!
Will be scheduled for a final surgery after new years and then I'm done! 😀
T'is the season to be jolly, fa la la la laa, la la la la!


Whaleboat by Jorge Hedges - Disarmodel - 1:40 scale
in - Kit build logs for subjects built from 1851 - 1900
Posted
Jorge, that is very smart thing to do. The extra detailing with ribs really pays off I think.
Keep it up!