


Wintergreen
-
Posts
940 -
Joined
-
Last visited
Content Type
Profiles
Forums
Gallery
Events
Posts posted by Wintergreen
-
-
11 hours ago, Keith Black said:
We are a sad lot.
Well, not all of us are. In fact, My Admiral encourages me to go out in my shop and produce sawdust. But then it's probably due my recent illness and recovery and that working by hand is good for you and for your soul.
Any progress on the display to show us @KeithAug? 🙂
- Retired guy, druxey, Keith Black and 4 others
-
 7
7
-
What?! With Xmas over and the spring still far away? Nah, what more important chores could there be, really?
- Keith Black, mtaylor, FriedClams and 3 others
-
6
-
Kitchen supplies? Who could've thought! 😄
Excellent though.
- mtaylor, FriedClams, KeithAug and 1 other
-
4
-
11 hours ago, oakheart said:
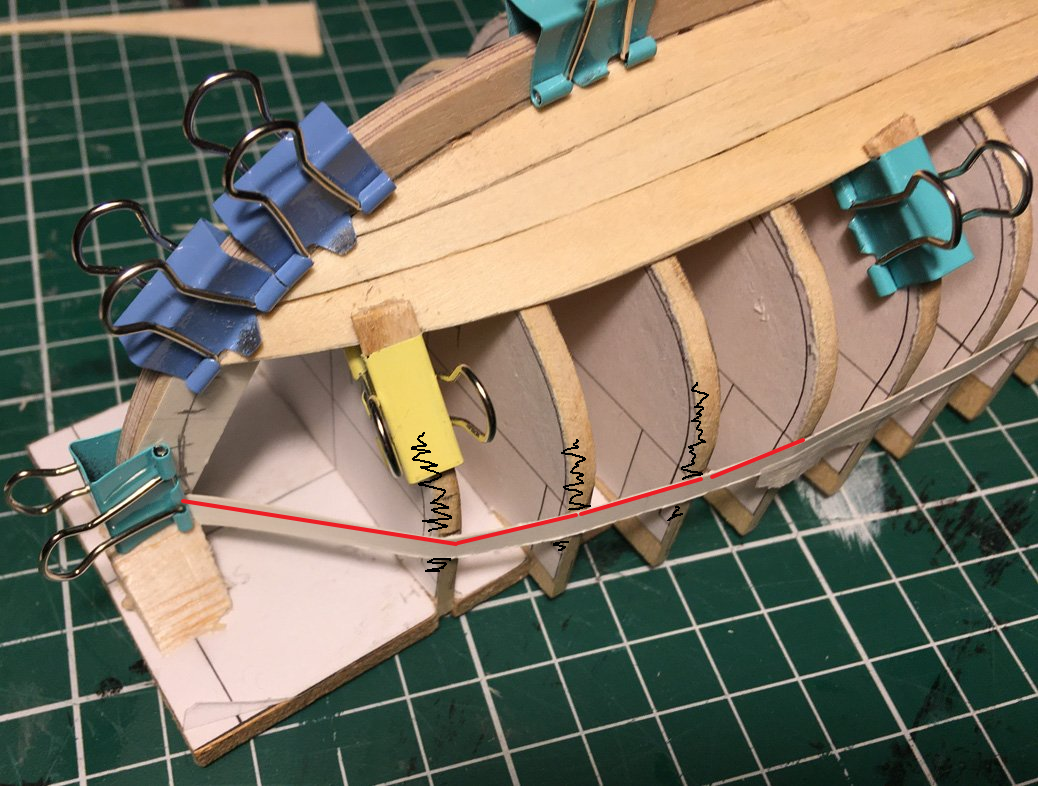
The frames are now pretty fair
Hi there! Before you're too far... a friendly advice. I think you need to do some more fairing of the forward bulkheads.
I allowed myself to do some editing in your picture.
The red line should describe a nice spline/arc, instead of as now, an indexed line. If you work a little more where I've made some ugly black scrathces, the planks will have a much better "run" over the bulkheads. Use a soft spline 2x2 mm or something too see when it is in touch with the entire width of the bulkhead and be cautious not to sand the aft end as that is your hull form line (or what to call it).
Keep it up!
- mtaylor and Keith Black
-
2
-
@vaddoc, I kind of have missed your updates, but I know how life is and that we have to make priorities for our available time. A sincere thank you for the well wish, it is a tremendous relief for me and my family (all seven of the kids...). Also thx for the encouragement re equipment. I surely will in due time 😉
Yes, I like the boat as well and I have really tried to keep it going through all this hard time. It helped it keeping me sane and out of the depression pit.
Over to answer your questions... in the book it is given that the real ship had 23 strakes and the shipwright calculated that they needed be 5" wide at the stem. So, from midships going forward planks are straight, but tapered down to a width of 5 mm. At midships the planks are 8 mm (I think). Going aft, the last plank is spiled. For these first four bands I kind of just went along. Care taken so that planks at the stern came out somewhat equal on both sides, as well as up front.
For the remaining planking I will be more careful and divide the remaining space in bands as per the planking tutorials here on MSW. The stem is easy since it is straight and flat. But the stern needs some careful planning beforehand.
Did I bevel the planks then? The answer is yes. As per the book the free side is left square and the mating side is beveled to fit tight to its neighbour. If not done where the hull form bulges in or out sanding will reveal gaps and that I want to avoid.
Tree-nailing was a bit of a test, but it came out good so I'll stick to doing it. Both the hull, where it will be more or less invisible due to paint but also the deck, where it will be visible (i.e. no paint, just added patina). Sending your leftovers would be very generous of you. Of course you are welcome to do that.
It might not look like it, but this build is a step in my skill honing for coming projects 😁 Next up will be Speedwell, scratch as well but probably not in 1:48 as in the books, rather 1:32 to match Atlantica in scale, or maybe the other way, down to 1:64 to match even later projects... future will tell.
Cheers! 🍻 (it's Friday after all)
- Tony Hunt, Keith Black, mtaylor and 3 others
-
6
-
Yes Keith, a mini talbe saw is definitely on the wish list, along with a stationary disc sander. However sweet they are, the Byrnes machines are out of the question. Way too expensive with postage and customs now. I have my eyes on the Proxxon instead.
In the meantime I have found a 5" blade that fits my full size table saw that has a kerf of 1.3-1.5 mm (can't remember) it's the blade that I cut myself on a year ago. At the other end of my blade stack is beast of 305 mm... excellent for milling purpose.
Instead of a scroll saw I use the band saw with a narrow blade, 6 mm, 0.8 mm thick. It has 4 tpi which is too coarse, and I'm in the market for some 6 tpi blades. I have a really neat one mounted now that is 0.6 mm, but at 10 mm wide only large arcs are possible (like deck beams).
- KeithAug, Keith Black, vaddoc and 1 other
-
4
-
17 hours ago, KeithAug said:
I keep wondering if I need a bandsaw
Yes, and I keep wondering if I need a scroll saw... All my big power tools was bought as an addon to when we bought the house. They were there and the old man had passed away a couple of years prior. A no brainer for me to cough up the extra cash to get them.
Now and again I wonder if I need a small table saw, or a decent scroll saw and what not.
But for the time being I'll stick to what I have and make the most of it. Model shipwrights of old did not have all these power paraphernalia that we have today and they made some marvelous models.
Thanks @Jim Lad for
poopingpopping by 🙂 (sorry 'bout that typo, geez I really had fumble fingers last night)- mtaylor and Keith Black
-
2
-
Since I today was under influence of "fumble fingers" I thought I'd better update this space.
Thanks to all that browse by and leave a like or a comment 🙂
Deck beams it was...
Curvature is given as 180mm "rise". Using the sw it was quite easy to draw a circle that fitted the given parameters. Print out and stick to some scrap pieces.
My take was to manufacture two sanding jigs, one convex (upside of beam) and one concave (under side of beam).
All beams are 200 wide and the moulded size goes in step from 180, 175 down to 150 mm. Some in-between beams are 140 both measurements.
This scales down to 6,7 wide and 6, 5.8 and 5 mm high (moulded) beams.
Birch is the wood.
The pictures roughly cover the process...
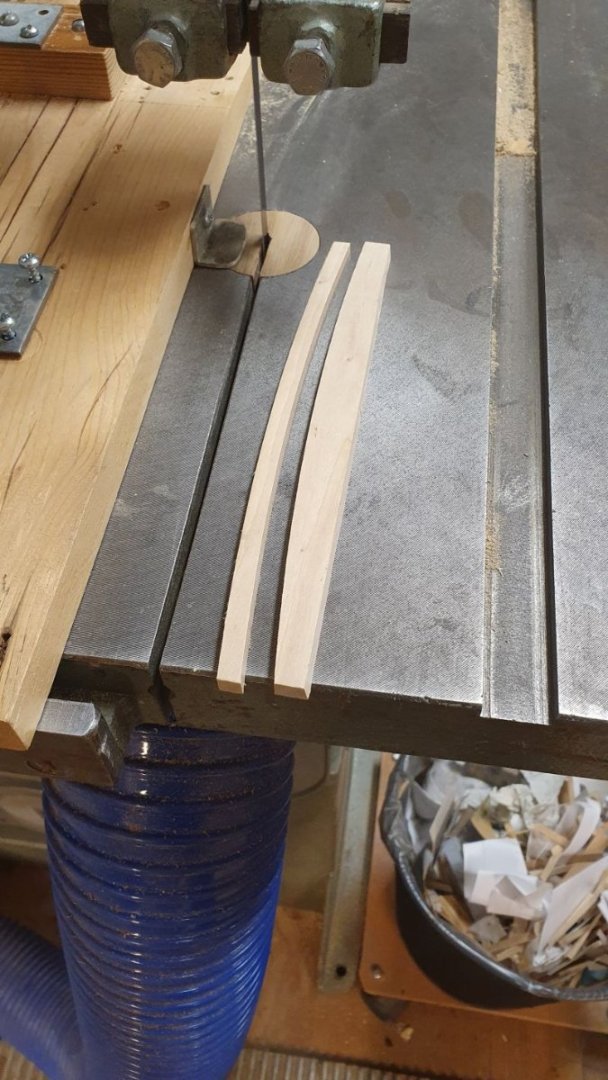
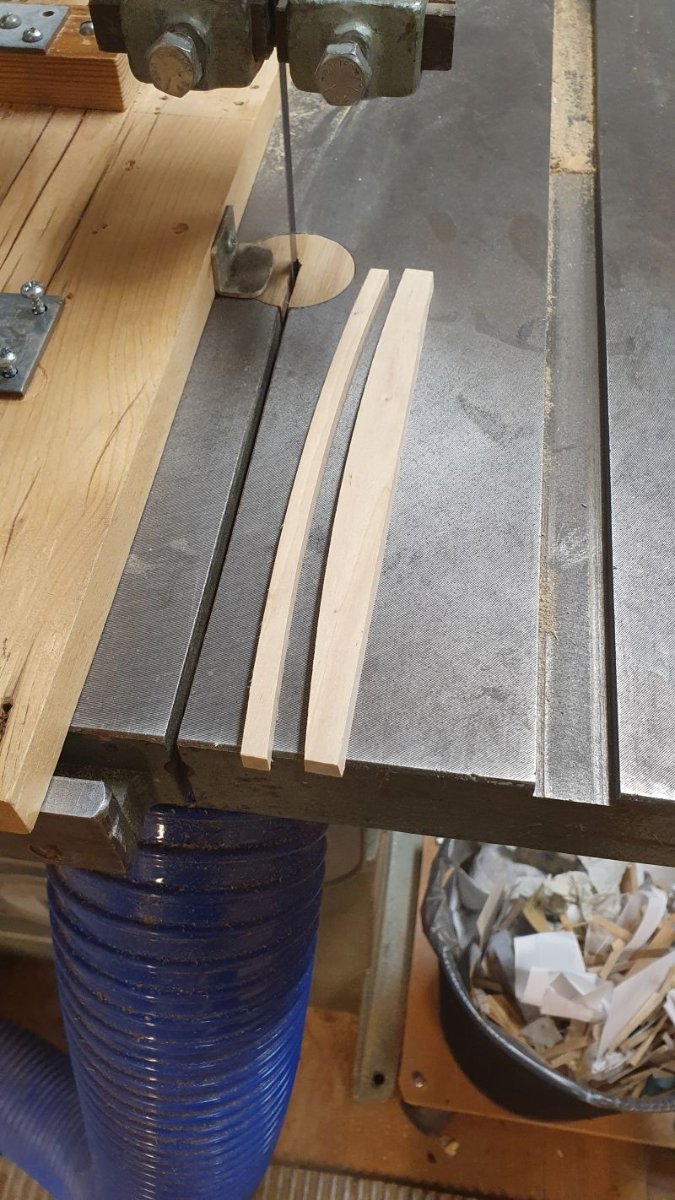
First shape is sanded below. And the sanding moulds can be seen also. 120 grit paper. Quick work since I use a narrow 6 tpi bandsaw blade.
Part a beam off the stock. A narrow guide aids so arcs can be sawn easy both ways.
Next upside-to-be is sanded.
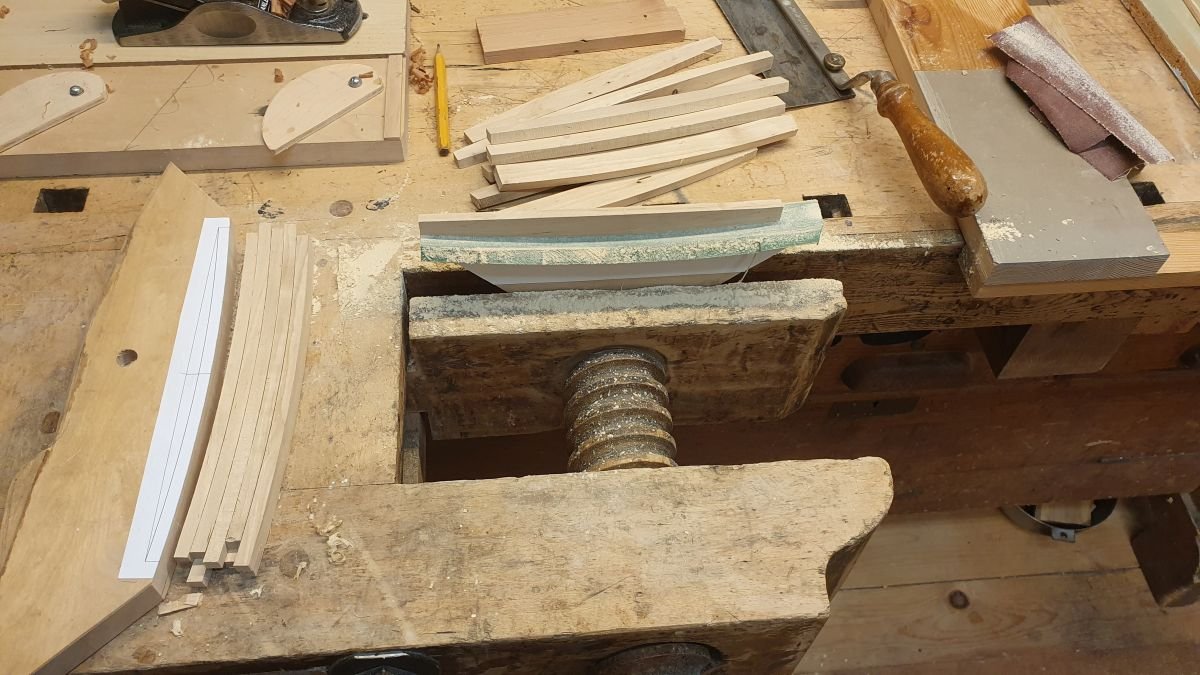
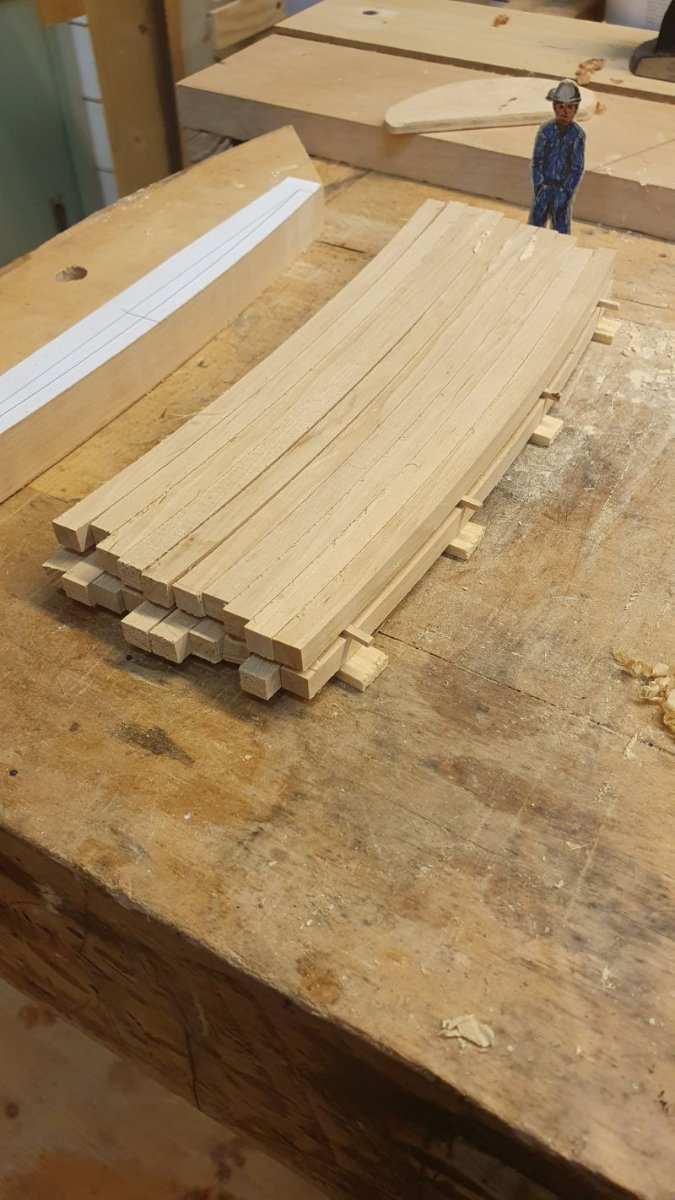
I managed up to three beams of every blank. When all beams were cut and upside sanded, focus turned to under side. Now 80 grit paper due to more needed off.
I quickly abandoned holding the beam with fingers, instead ripped off the sandpaper from the other mould and glued some guide pieces to keep the beam in place. No picture.
Then it was much more comfortable to sand all the 28 pieces. Constant measuring was needed as well.
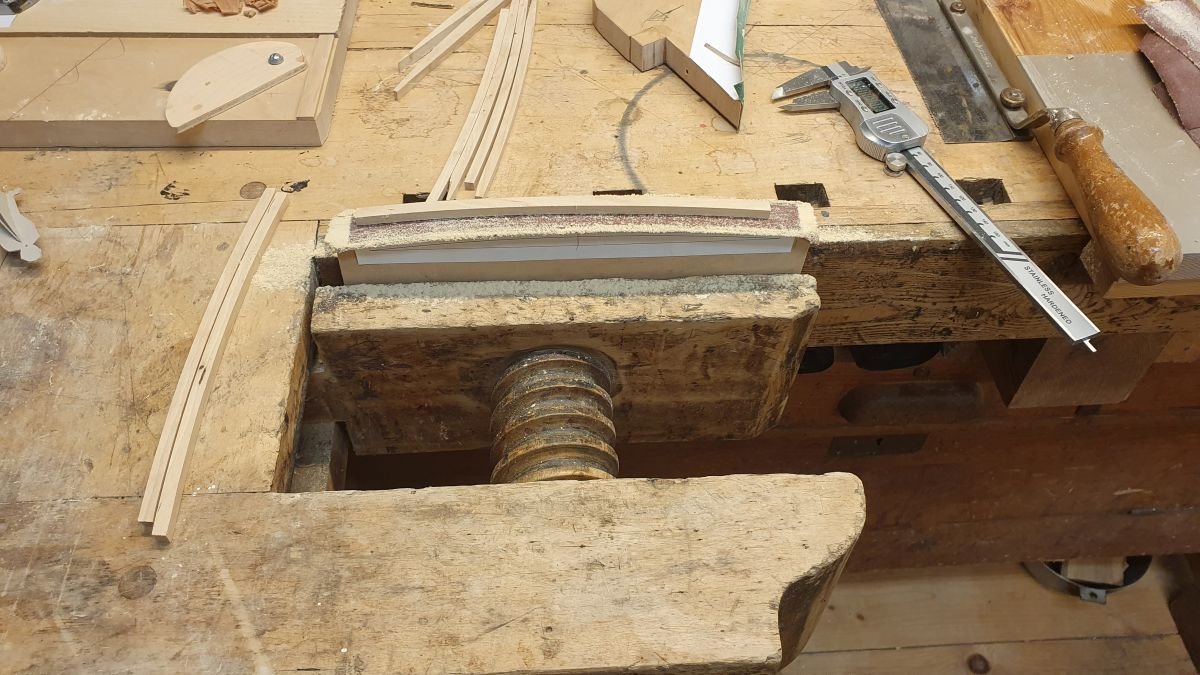
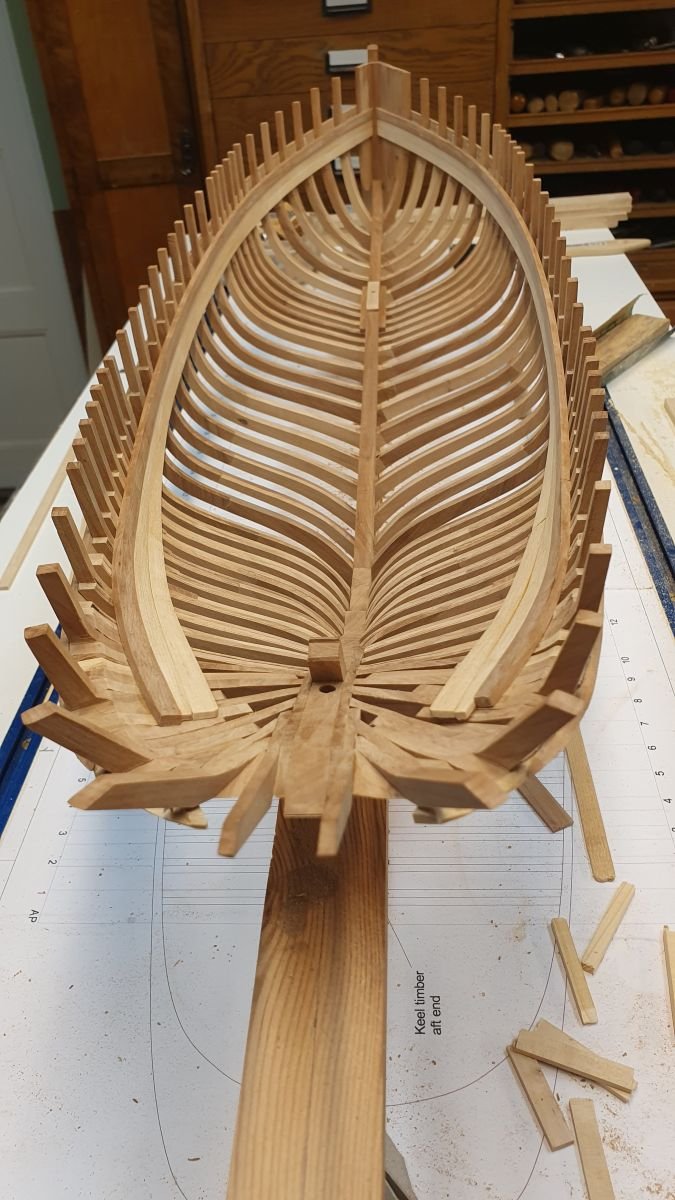
Here the shipwright inspects. (actually taken before the underside was sanded)

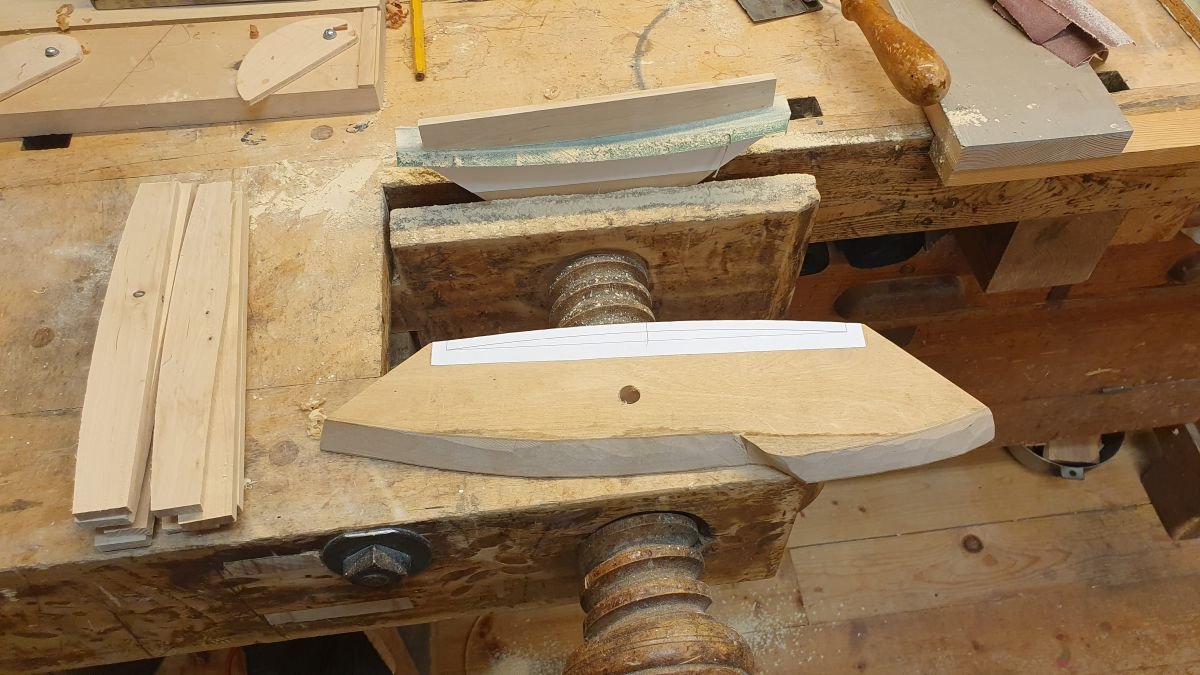
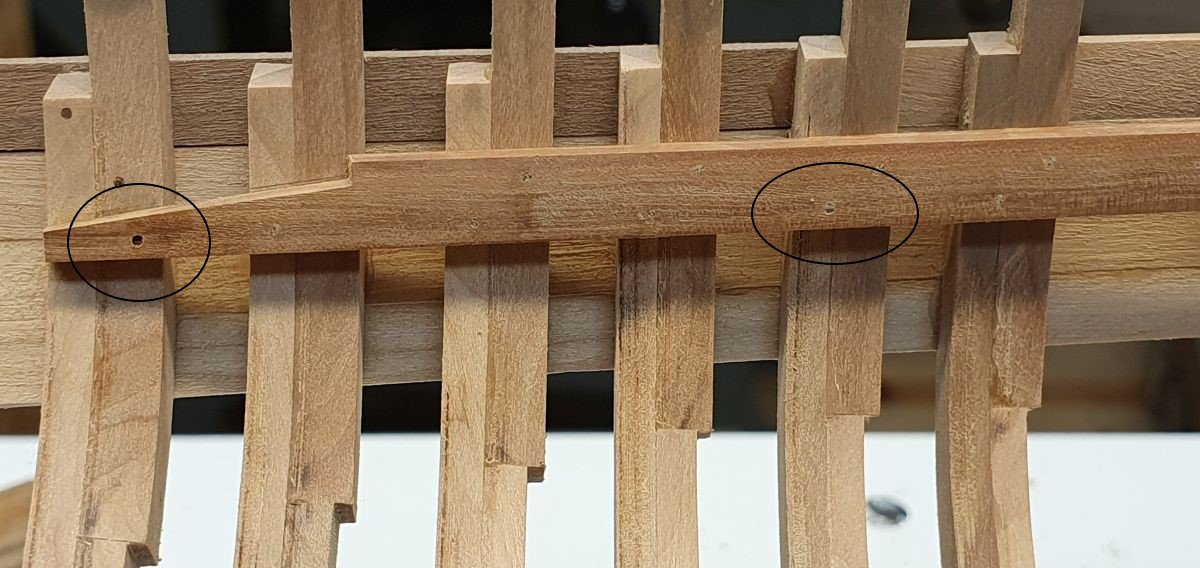
Next fun little project was the aft whatever-it-is-called big piece of timber.
And here it has come some way. Actually version 2... version 1 lies above the pen on the board.
Til next time, cheers!
-
On 6/24/2022 at 2:34 AM, mtaylor said:
Possibly "reputation" and the myths that boosted them? Back in my control line flying days, I went for the German ones. Maybe it was the colors and the looks?
I guess the same goes for the Swedish Wasa 1628. Over the top impressive at its time, but failed extraordinaire kind of direct.
-
-
Nice, it looks good and even to me.
When it comes to fairing I would chalk the edge that should remain and not be sanded. Then you know if you are overdoing it or not.
Keep it up!
- Keith Black, mtaylor and allanyed
-
3
-
-
On 12/23/2022 at 12:50 PM, oakheart said:
I am now tempted to do two versions
1: using all of my tests and other bits I produce while learning: build the tatty version.
2: then build an unpainted raw wood version using my Alaskan yellow pine.
Making two versions is a good approach. I did something similar with my "Kågen" build (see my signature). I knew that I would screw up the first attempt so starting over was mentally okay with me.
Re the drum sander, speed or rpm is an issue as well. To fast and you will burn/char the wood. (ask me how I know...). Like, the Dremels 5000 rpm is too fast as a comparison. 🙄
Keep it up!
- mtaylor, oakheart and Keith Black
-
3
-
8 minutes ago, oakheart said:
Does the diameter of the drum make a big difference ?
Hello Tim!
Just happened to see your log.
Diameter makes a difference, both the obvious radius, but I guess also that larger diameter has more mass to it and depending on your drill it can maybe affect performance.
About grit you can always take inspiration from like Byrnes thickness sander, what grits are available for it.
On my homemade thickness sander I went up from 150 to 120 after initial tests. A smooth surface is then quite quick to accomplish with 180 and finer.
Cheers!
(will read your log once off work...)
- Keith Black, oakheart, allanyed and 1 other
-
4
-
7 hours ago, Draque said:
I hope mine comes along as nicely as yours looks
Take your time and it will probably come out nicer.
I also got the numbers wrong about room and space. It's the other way around, frames are 210 mm "sided" and space between is 240mm.
Also, the moulded dimension would lessen going up from the keel so that the frame don't look top heavy. On Atlantica they go from ca 300 at the keel to 120mm at the deck line or sheer if you like.
-
Cheers Michael!
Renard is quite similar in size to what I'm currently building. Even though Atlantica was build 1980 she is a direct descendant from Gratitude, built 1907. So not so far from 1872 when Renards was built. My point is that the discussion about framing pattern with room and space equal to each other is plausible. On Atlantica the frames are 240 and the space is 210 mm.
-
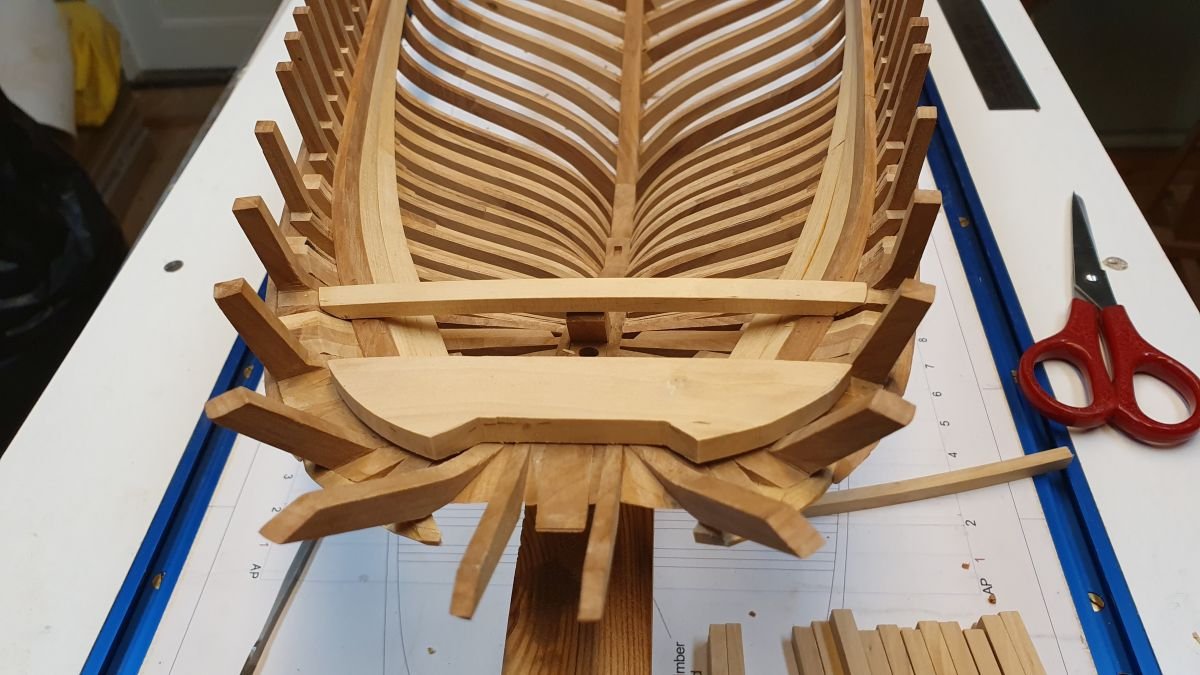
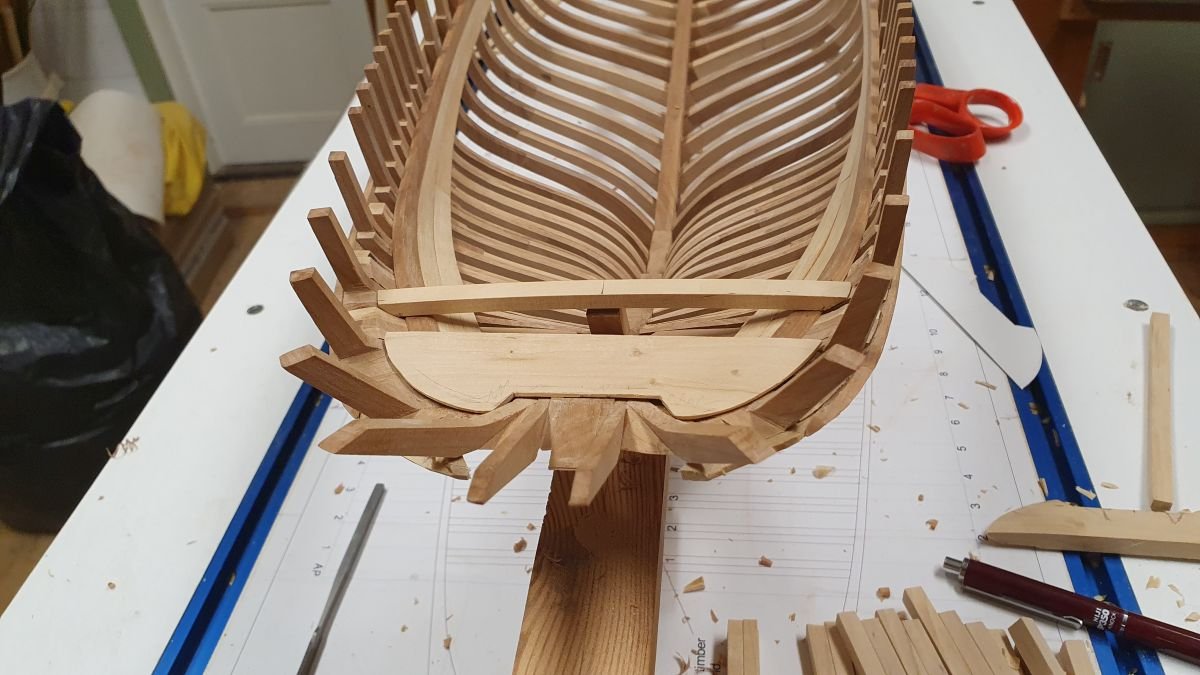
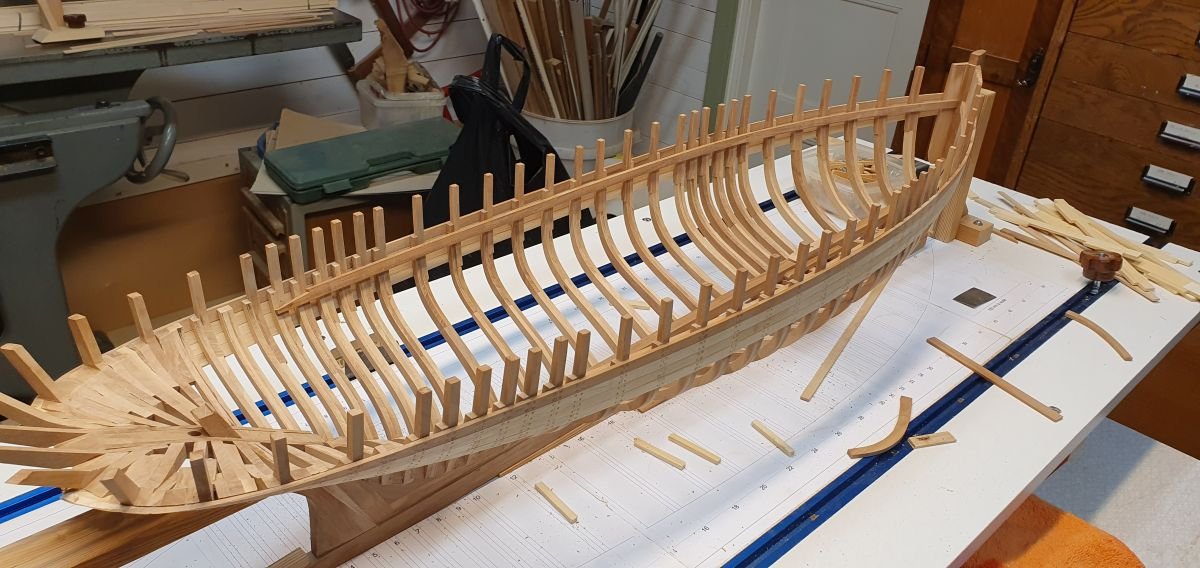
Thanks for likes and comments 🙂
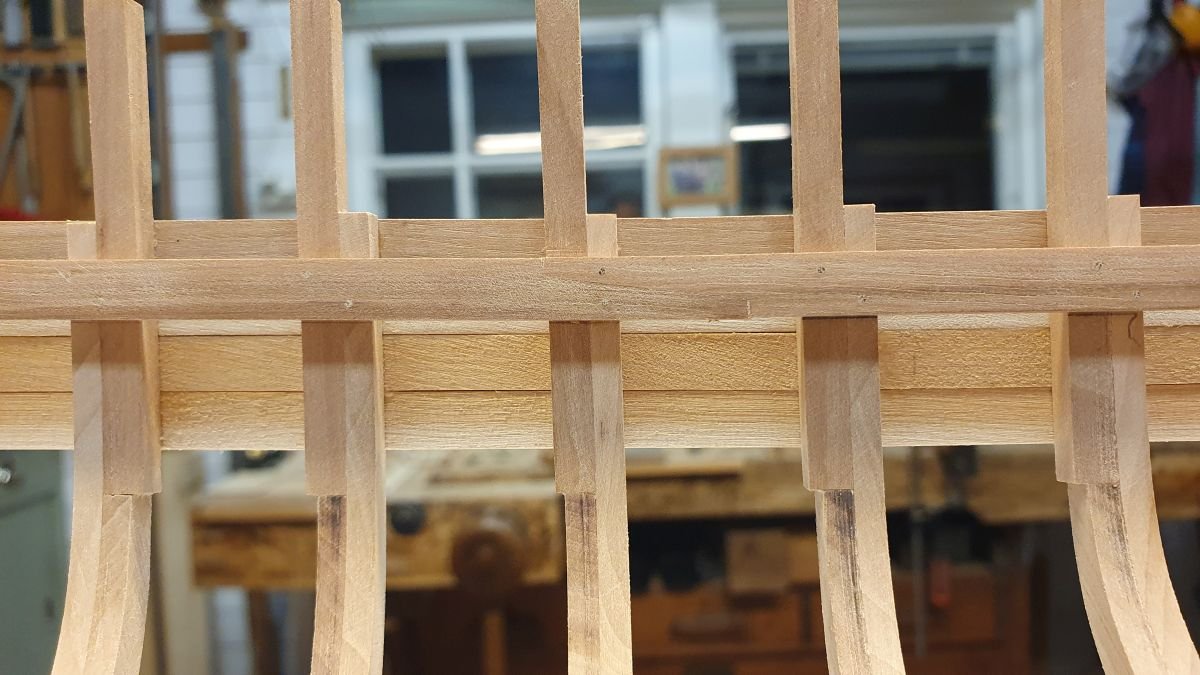
And as promised, here are the last two pieces of the beam shelf. I didn't get the shape entirely correct on the starboard one, but it will be covered by the deck, so no big deal.
Port side.
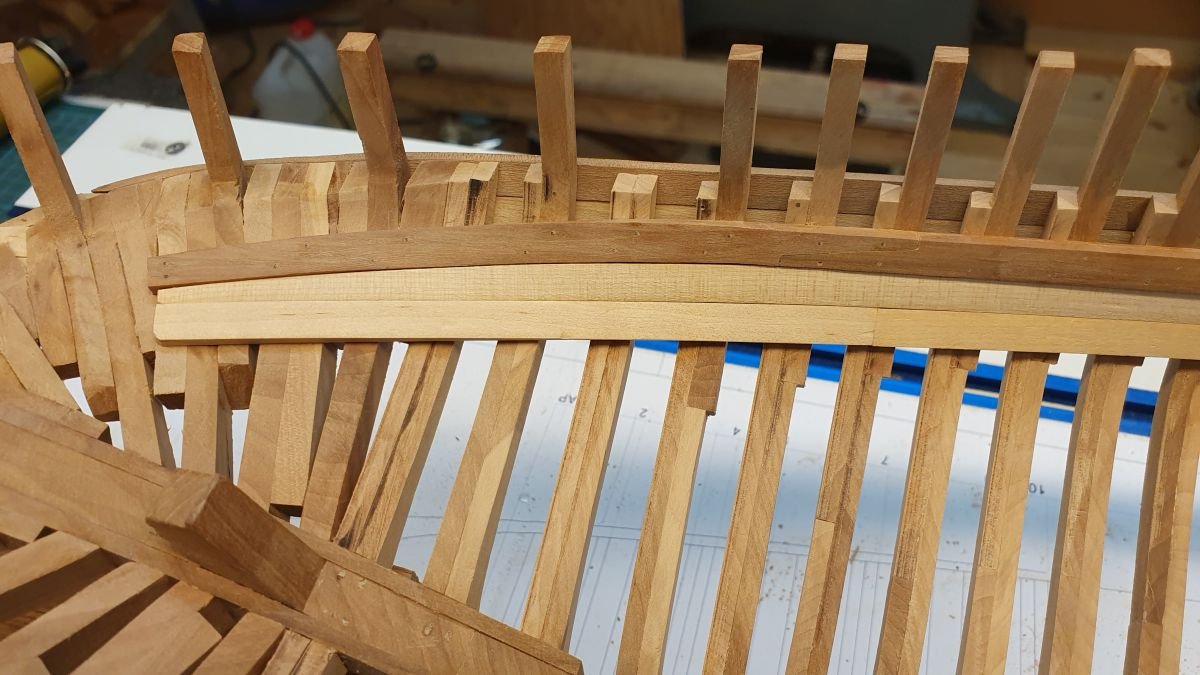
and starboard side
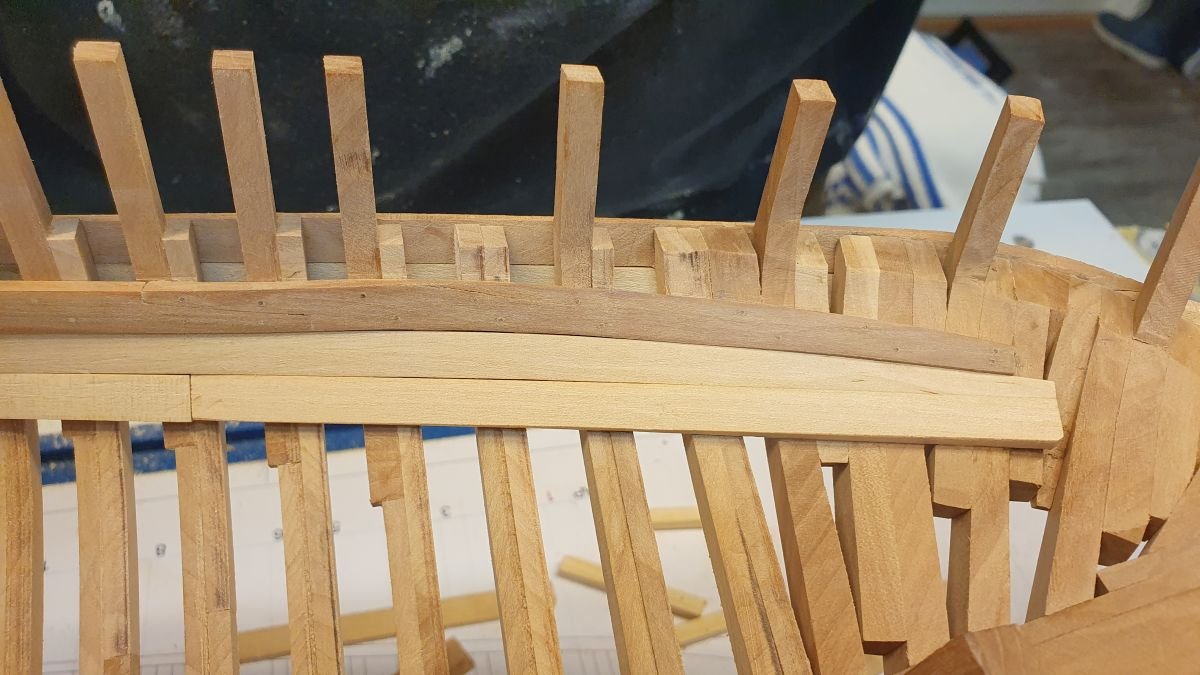
There is also a check seen, but since the piece didn't go "crack" when bent in place (steamed first) I let it be.
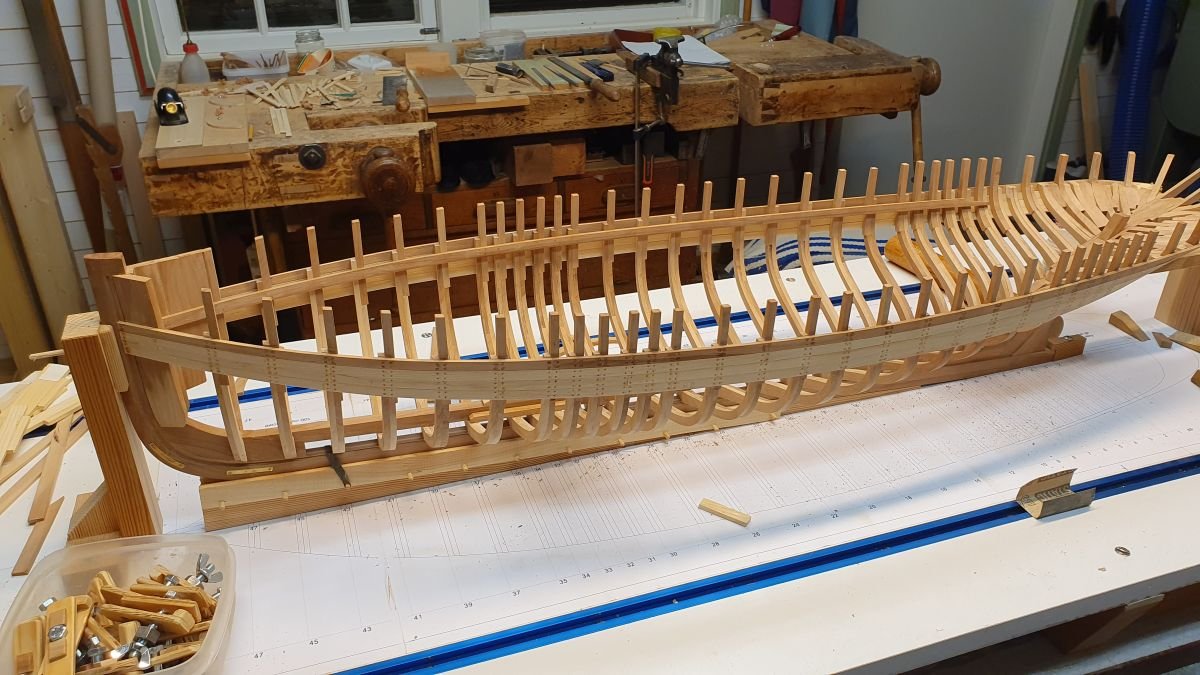
And an overall shot as well.

That will be all as far as the interior goes. Beam shelf and two stringers.
On the real ship there were a couple of stringers at the turn of the bilge apart from the slats to cover the frames.
Next up will be deck beams. But that is for another day.
Cheers!
- Keith Black, wefalck, Siggi52 and 13 others
-
16
-
2 hours ago, KeithAug said:
it looks pretty flawless to me
Thank you Keith! Yes, it turned out really neat. Probably 10 or so test fit for each scarph with minute filing in between. The last two joints came out decent, not more due to the acute curvature in the aft section. Pictures are coming soon.
1 hour ago, Blue Ensign said:I love to see nice framing, and yours fulfils that need admirably
Thank you B.E! I'm glad to provide eye candy for you. 🙂 Better make the most of it since the hull will eventually be fully planked. 😉
-
On 12/17/2022 at 4:52 PM, Jeronimo said:
I took a creative break and I decided to make a completely new start.
Good grief! What a decision to make, to start over.
But excellent start on the 1:48 🙂
-
Wow!
I guess the crew was already used to be ruled by a "Frankenstein" even before they were selected for rowing duty 😄
What a little gem you have produced B.E.
Hat or no hat, off should it be for your accomplishment 🙂
- Blue Ensign and AJohnson
-
1
-
 1
1
-
58 minutes ago, FlyingFish said:
Particularly like the steel 'treenails' great idea!!
Hehe, thank you Andy, but I will probably not take that path, my stock of drill bits will not last that long 😄
- Keith Black and mtaylor
-
 2
2
-
Thank you Tony and others that have "liked" 🙂
Work continued... not so much to read here today so I'll just treat the audience with some progress pictures.
And here in the last photo are some cro-moly "treenails" that won't shear anytime soon...
Yup, drill bits. It all went really well until.. Never mind, I'm quite well stocked with drill bits for the moment.
Pax et bonum, friends!
- vaddoc, Mike Y, Keith Black and 12 others
-
15
-
Good choice having the crew to change from blue to off white shirts. The blue didn't blend well with the red lining. Lucky they had extras 😉
Yes, I've read that too, that the crew had to supply their own garments and clothing. Harsh, when you're already poor and called for duty by demand of the Admiralty.
- Blue Ensign, mtaylor and bruce d
-
3
-
2 hours ago, Jorge Hedges said:
I am adding some additional detailing as a means of practice for the upcoming ship I will be building
Jorge, that is very smart thing to do. The extra detailing with ribs really pays off I think.
Keep it up!

Medway Longboat 1742 by Blue Ensign - Syren Ship Model Company - ½” scale
in Medway Long Boat - 1742 - Public group project.
Posted
Ah, nice! Another small build to follow.
I'll just take stool and sit in the back for the time being. 🙂
Keep it up!
And yes, adding that little extra for display is a very handsome way to go.