
HOLIDAY DONATION DRIVE - SUPPORT MSW - DO YOUR PART TO KEEP THIS GREAT FORUM GOING!
×


popeye the sailor
-
Posts
16,007 -
Joined
-
Last visited
Content Type
Profiles
Forums
Gallery
Events
Everything posted by popeye the sailor
-
 my thoughts exactly CDW..........but folks won't be modeling in the future.........they'll be doing holograms I shook the box Yves........there's one in here somewhere thanks OC ....and thanks for all the likes
 -
she's look'in good.........per our discussion.....this model is not one I'd choose for a person starting out. there's too much stuff to scratch build. your doing a fine job.......keep going. I'm not even pleased with this kit.......and I've built a few already! there are things I think could have been done better on my models.......but they are what they are. keep that thought in mind........your next model will look better for it those straps to me were brittle............I broke one trying to bend it. even the metal stropes were wrong. my offer still stands...I'll even throw in some 5 mm dead eyes.......I have plenty
-
the picture reminds me of star wars {if you were to put some legs on those critters}. they look very well done! nice
-
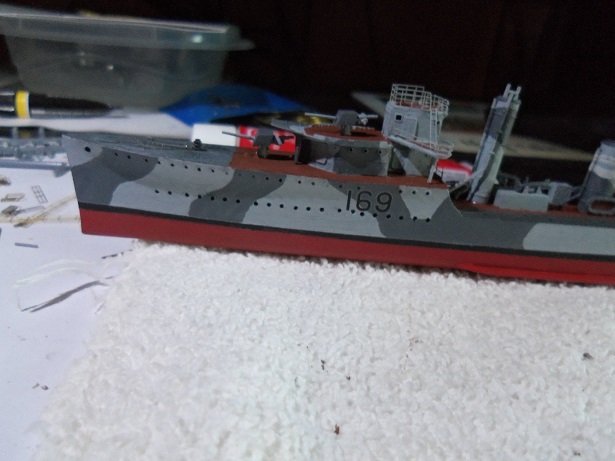
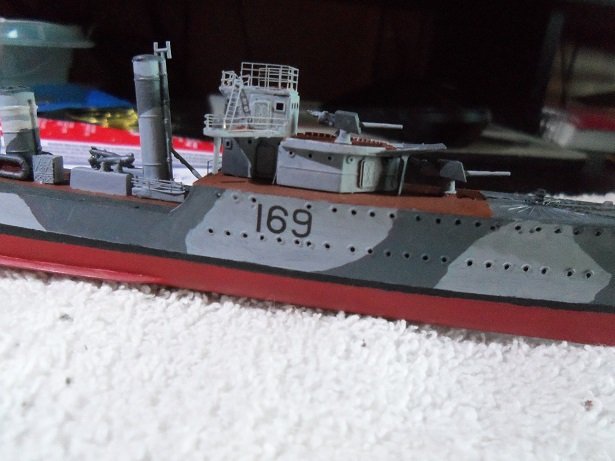
those types of vents prevent downdrafts. they can also be seen on modern fishing vessels too.
-
the hull looks awesome!..........nice job on the weathering the bow also looks great too!
-
no matter where we live........the only place I'd rather be, is in front of my table
-
hello John.......thanks for the good word this is the first solid hull model I've done. I have another one in the closet.......an old Marine Models PT boat. one of these days, I'll get to it
- 171 replies
-
- 4
-

-
- krabbenkutter
- authentic models
- (and 1 more)
-
the paint work is awesome.........she's a fine looking model so far
- 467 replies
-
- 5
-
-
- mikasa
- wave models
- (and 1 more)
-
thanks Sam............it is...........and it isn't. there is the touch ups that need to be done after, and then there are the spatters, if the paint is too thin. if the area your working on has more than one color........it can be frustrating. another thing that has always bugged me, are the tiny glue blobs that show after assembly..........I try to touch them up and get rid of them. I can see why so many choose not to paint PE.........it doesn't coat well.........it's very fragile, and painting adds a lot of extra work. but I can tell you, it's worth it, when looking at the finished model. the PE adds so much to the model, and painting it blends it all in on the model.........the detail it brings makes it look more normal. you can go either way
- 1,090 replies
-
- 5
-
-
- showcase models
- vendetta
- (and 2 more)
-
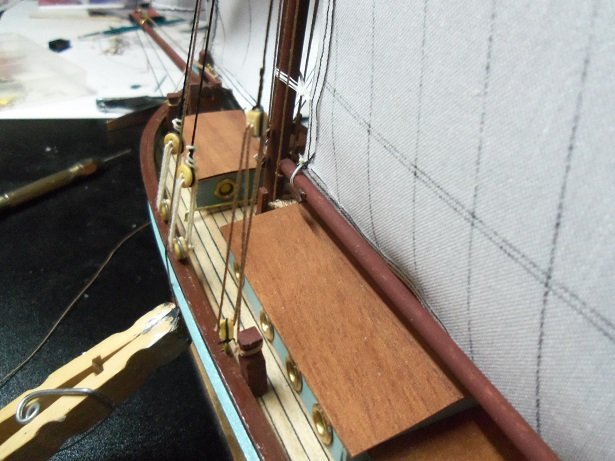
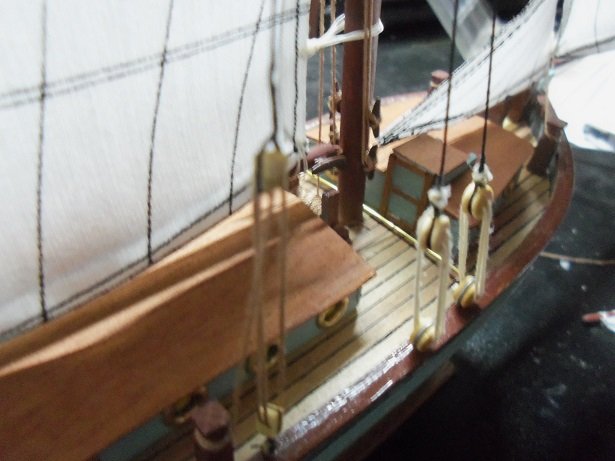
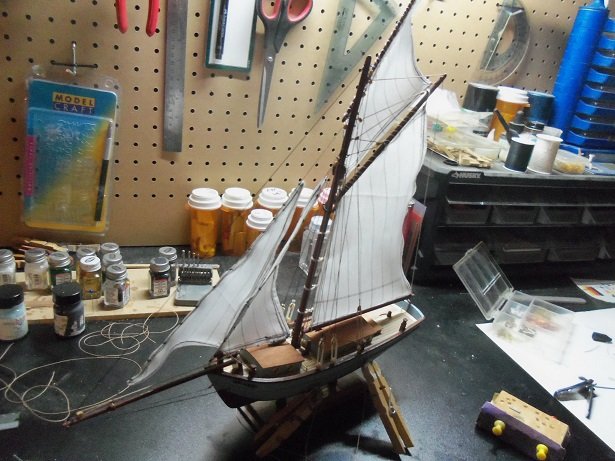
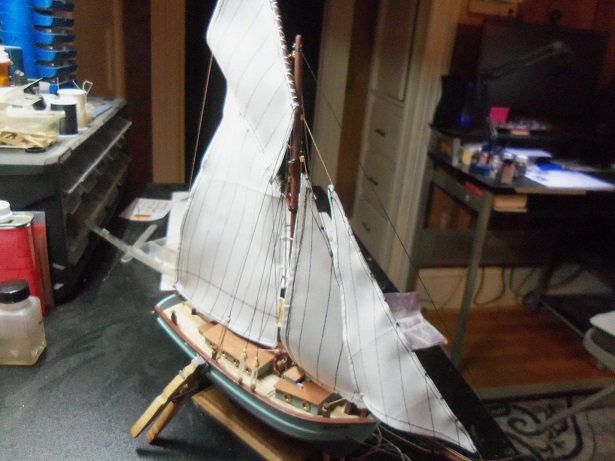
thanks John..........I am as well I want to get the Thermopylae back on the table. it was fun yesterday..........I was on fire, working on three projects. it felt good having that much fervor. I miss the days where I would do this without batt'in an eyelash. I do have to apologize for not feel'in my corn flakes. what really sucks {can't think of a better word} about all this, is it's not because of age or illness. I'm in a 'box' and I can't do anything about it until something definitive happens. it has to run it's course on a good note ....I have an update!.......on with #3! in rigging the top sail, I need to add some belaying points. I also need one for the jib. so, I added a couple more cleats..........and I mentioned I tied on another block........higher up the mast to decrease the billow of the top sail. all of the sails will have some degree of billow, so that's a good thing. you can just make out the cleats on the boom. the bottom corner of the top sail will tie off on the horse, which I still need to rig. once all was ready...........up went the sail! after this sail is terminated.........rope coils and perhaps a couple more lines, will be all that are left. almost done!
- 171 replies
-
- 11
-
-
- krabbenkutter
- authentic models
- (and 1 more)
-
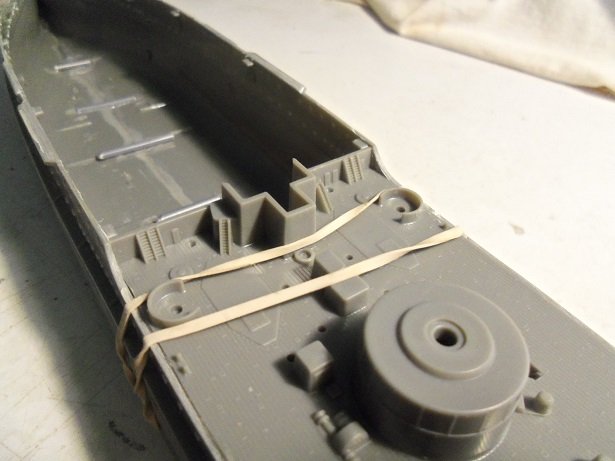
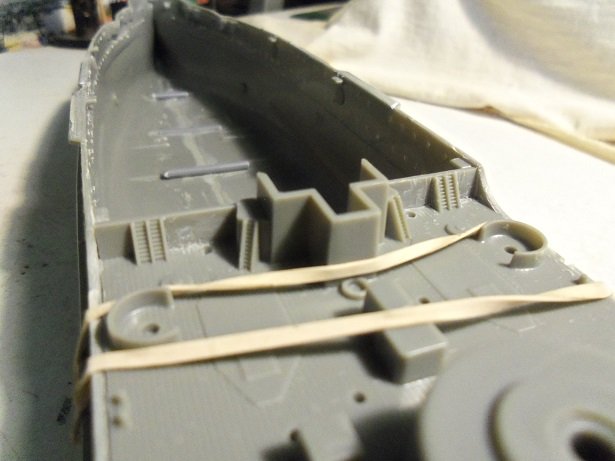
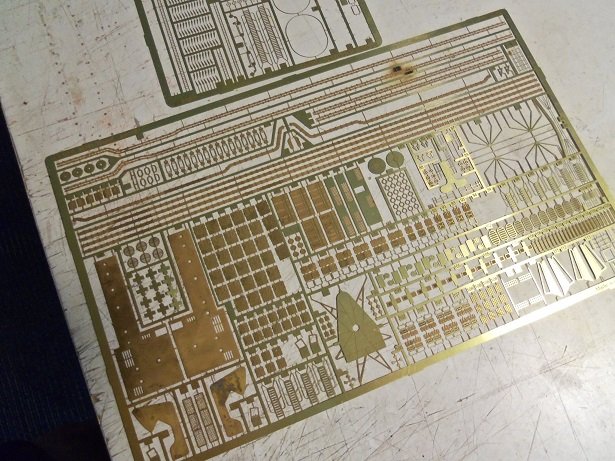
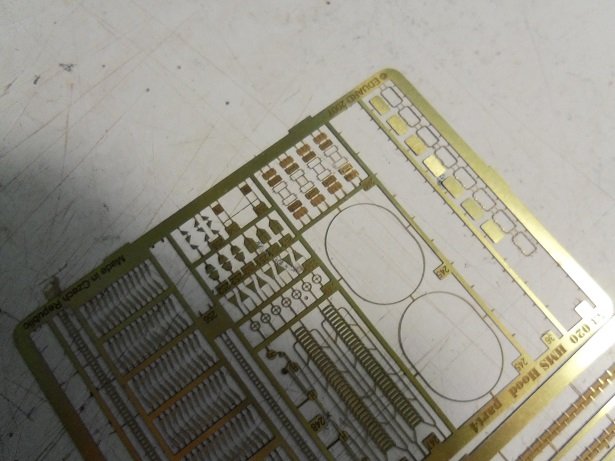
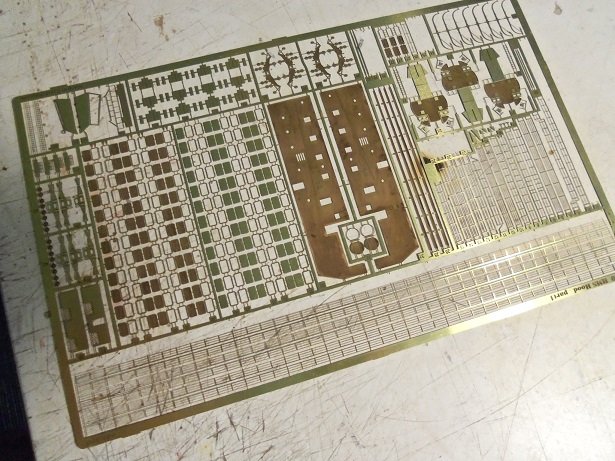
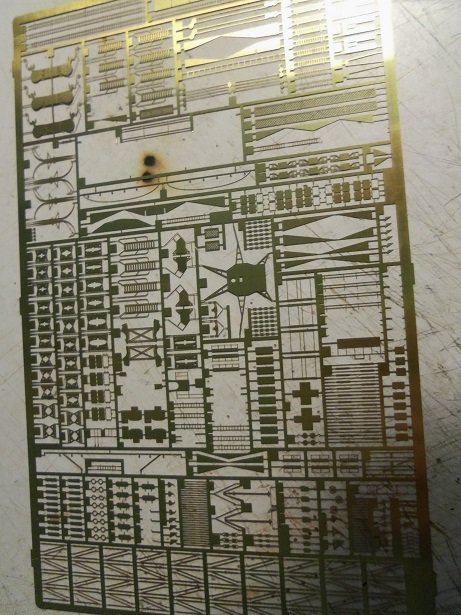
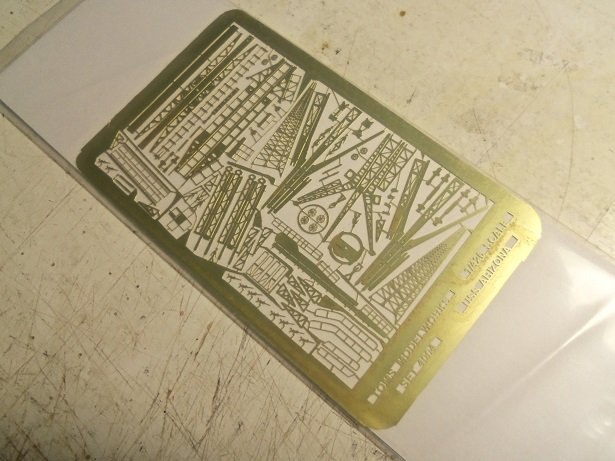
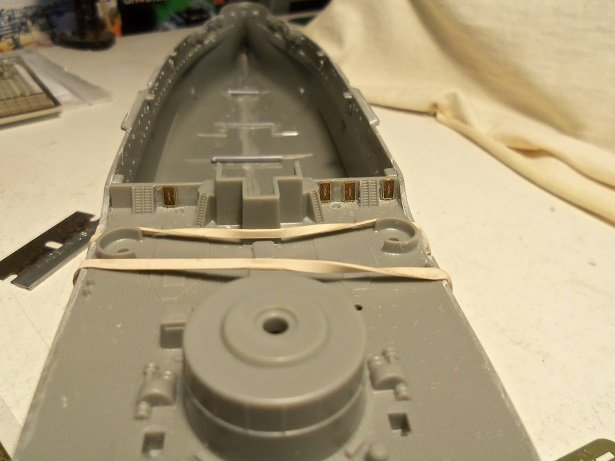
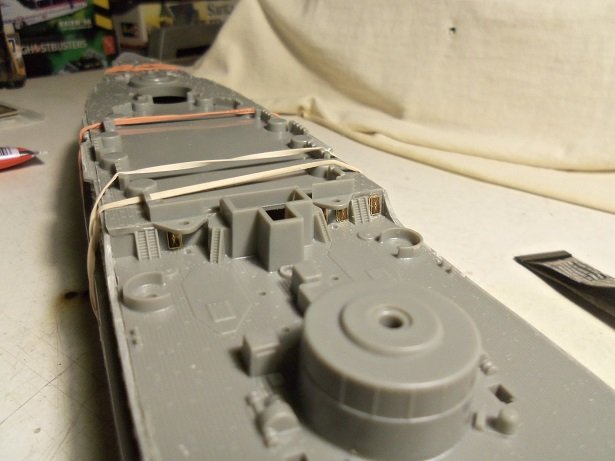
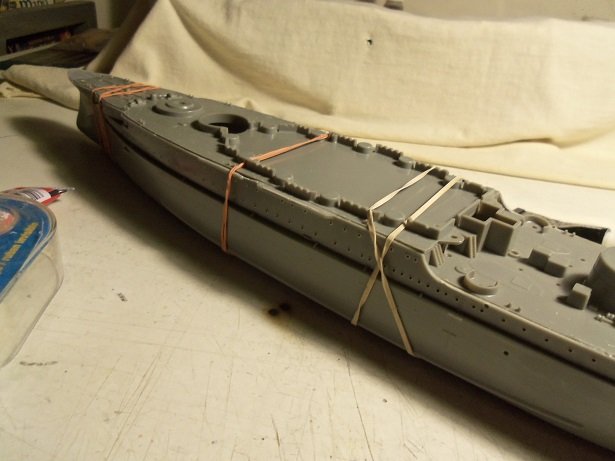
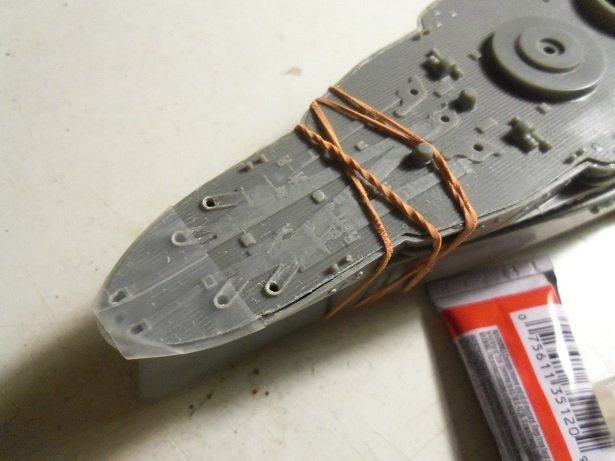
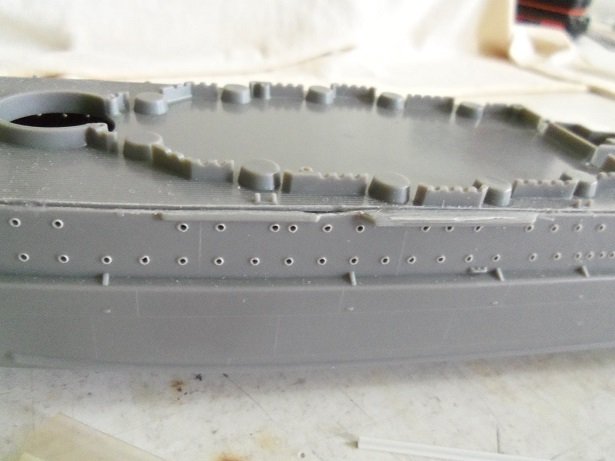
yes.......the things we did to our models....before we got old enough {and experienced enough}, to give a though into how much effort we put into them now...........our only glint of enjoyment, would be a viking funeral, if the direction of the model went south! dry ice is another form of explosive Jack.........a few chunks with water in a liter bottle....and you've got a bomb! you think cherry bombs were bad Lou.........I entered my pyro days later on. I'd build a squadron of small scale planes along with army men......and bury sacks of lighter fluid with m 80's. I run after lighting, but would be sometimes disappointed when it would go off before I could turn around anywhoooooo............I didn't think I'd do much to the model before I got these other two projects finished, but the pull was too great. I guess I was eager to get some PE on her. before the fore deck section could be cemented in place, there are some doors on the mid ship bulkhead that I wanted to do. at first glance, I thought there were only three.......but in the process of trimming off the raised molded detail, I saw that there were four of them. note the one in the far right corner. I was thinking of removing the stairs too, but it would be a lot of chopping, so I left them. it wasn't too bad removing the door detail with a little more clean up, they will be ready to replace. this will be rather interesting too........I'll be doing a sort of 'battle of the PE'. here is the Eduard's PE for the Hood....I have quite a bit to work with. then I have the cranes and catapults sheet from Tom's Model Works. it appears that it may be slightly thicker than the Eduard's PE, which may work out as an advantage for me, as I'm still a bit PE challenged. there are a few people on the sheet as well......I counted around 11 of them..........not sure if I will use them. with all this........we'll see how much I can cram onto the model. the doors were selected, cut, and cemented into place. ...and with the fore deck section finally cemented in place, one can see how hard it would be to do it at this point. the one thing I would stress to anyone building this model in the future, would be to probably glue the decks in place, before removing the railings. as you can see, there is a deficit around the edges, that will require filling. in some places, it's not bad.......but in other places, it's quite noticeable. I did another bit of much needed removal........that freak'in anchor chain! I can't believe that on a model this size, that they would do that! this also included cleaning out the hawse gates and using a file to clean them up. I think I have some small chain.......if not, I'm sure I can find some. makes me wish there was PE for this....I hope it paints well. the bow tip would have fit better......but there is a lump of plastic underneath.....for the location hole of the flag staff, and I didn't remove it. I don't plan on replacing the bollards, so I'll need to be careful not to ruin them. but then again........who knows. I may find something for them. I have to keep the budget in mind here is the worse place that I need to deal with, in regards to the deck line. so this much is done..........I'll try to do something here and there, and keep the log moving
- 259 replies
-
- 11
-
-
good info Eric none the less
-
...not only that.........isn't the adjoining block supposed to be smaller? great idea though........you could mass produce them very quickly I too like the idea of the abrasive thread.......the though of easily prepping blocks appeals to me. especially if the holes need to be enlarged. upper ratlines look fine.......I wouldn't bother removing the extra rungs you spoke of.....why mess up a good job! she looking sweet!
-
....and I have many are you talking about stash keepers Greg? I never used to........seems that since the fast few years though, I've amassed a bit of a stash myself. I have a couple kits {plastic} that I'd love to get into, but I have too many in the works and won't touch them until I finish some of my in progress projects. so, while your waiting for all the upgrades to become available, what are you going to do in the meantime? Carl still has something in the works and your almost finished with your present project. this next group build might still be a ways off. I'm sure you can think of something thanks for the compliment Carl.......really appreciate it. I buggered up the cranes for the paravanes that are at the stern.......they will be there, but not in the way that you two did yours. as a matter of fact, I have an update......you guys would have been proud of me yesterday! I worked on three projects! I was all over the place........the admiral was so confused touch ups are still needed {they will never stop until I do}, but I made decent progress. first off, the fore structure has gotten more paint......the camo, and then cemented to the deck. as this was drying, I did more at the stern. with the let down with the aft cranes, there are the chocks for the other pair of paravanes that are to be cemented to the deck. two of the paravanes I have left are garbage, so I won't add them to the model. I'll just take the ones I have left, and put them there instead. the aft mast is now back in place....correctly and hopefully with the proper rake. for what it's worth, I put the cranes in place.......even that was a huge undertaking. they both came apart in the process. the aft danits are also added and are awaiting paint. I'll do my best to get more done today. the fore railings are still on the table, as can be seen.........perhaps I can get them in place too
- 1,090 replies
-
- 11
-
-
- showcase models
- vendetta
- (and 2 more)
-
thanks Danny........always puzzled about that. so if I were to do them in the raised position, they would look better. the way you did yours looks great
-
the decks look so awesome.........the wood really bring out the realism .....and you said that you only had a few things left to put on.........yea right!.....a few hundred !
- 405 replies
-
- 7
-
-
- tamiya
- king george v
- (and 2 more)
-
absolutely........can't think of it that way. we have our experts....but we meager folk plank to the best of our abilities. sometimes we get it right.....and sometimes we don't. then you have the new comers that watch and learn.......it's all baby steps my friend I'm not an expert........you should look at some of the hatchet jobs I've done in the past here's hoping you have blue skies to go camping.......and remember to clear the brush around your campfires ✌️
-
just caught up with the build Chris.........she look'in great! well done on the railings.....decorations look sweet as well
-
catching up on the fantastic work you've been doing.........I'm in awe! the rigging looks great and the deck fittings are as well. I've always known the anchor hawse, as a chain gate. are the boarding ladders on even when the ship is underway ? I've got 'em for a couple of my builds, and I'm not sure if I should add them or not. I also thought they were removable. first rate job Danny! really nice work
-
cute pup! something about the pitter patter of little feet they are so much fun when they're pups!
-
coming along splendidly CDW...looks very clean and neat
- 467 replies
-
- 5
-
-
- mikasa
- wave models
- (and 1 more)
-
wow! great progress OC! the cranes and pom poms came out super.......look great on the superstructure. very well done!