
HOLIDAY DONATION DRIVE - SUPPORT MSW - DO YOUR PART TO KEEP THIS GREAT FORUM GOING! (89 donations so far out of 49,000 members - C'mon guys!)
×


popeye the sailor
-
Posts
16,007 -
Joined
-
Last visited
Content Type
Profiles
Forums
Gallery
Events
Everything posted by popeye the sailor
-
 thanks a bunch for the good word......and to those who hit the like button. it's a start.......it needs to get off the table......it's so close towards being finished I'm thinking to make the brow a bit more oval, rather than rounded....the front windows will be more visible. I went on the porch to make sawdust......admiral's orders.. thanks again Gerhard, John, Eddie, and Pat I'll try to come up with an update soon
 -
it's always the quiet ones, isn't it?!?!?! they are coming up John.......they need a bit more prep. I have a little more to do with the deck...........if it's any consolation, I have the bow spirit dry fitted. more very soon. thanks for the good word......and those who hit the like button. I kinda walked into that one.......is there anything else I can walk into.......a wall......or a door
- 453 replies
-
- 8
-

-
- thermopylae
- sergal
- (and 1 more)
-
the pedestals worked like they were supposed to as mentioned.......an easy fix sorry to see it happen though. I've never used pedestals......I'm a cradle guy. when is it the best time to mount your model?
-
a very nice beginning John I used to enjoy the comet and Guillow's kits when I was younger. last year I got back into it, building a Spitfire Mk1. now I'm in the middle of a Fokker Dr1.....ready for sanding and tissue. love to follow along.
-
cool looking boat Steve.......looks to be the same construction as Midwest. very nice job on an old model
-
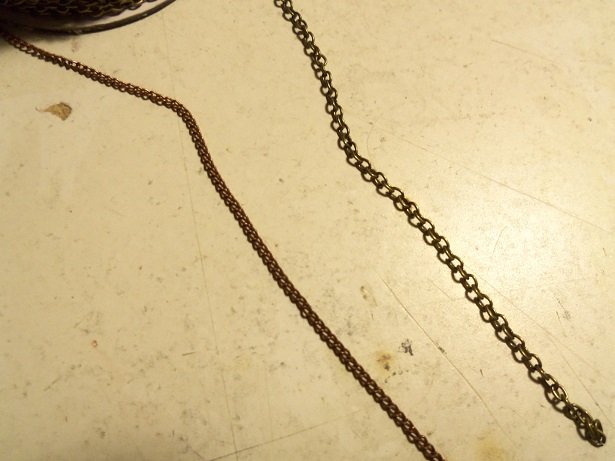
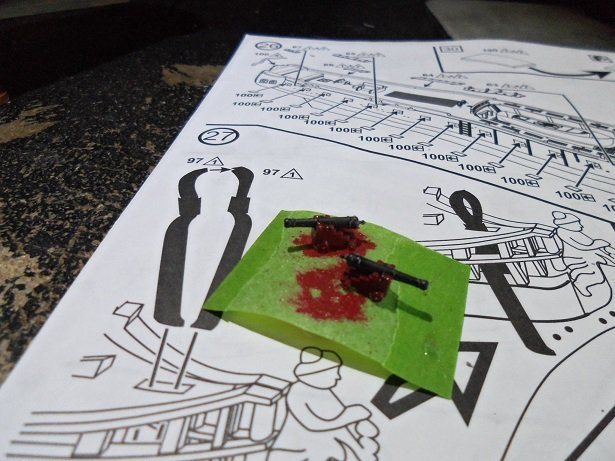
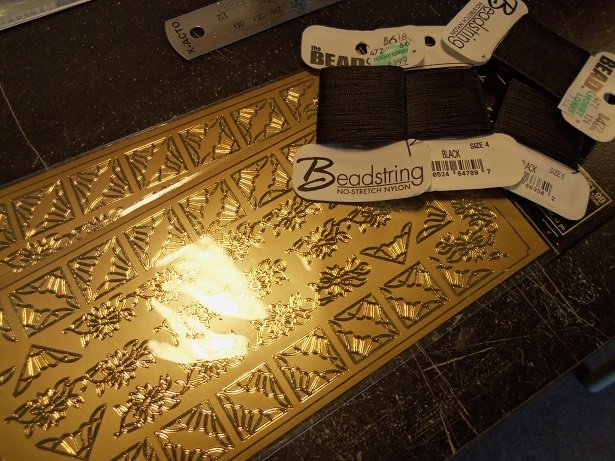
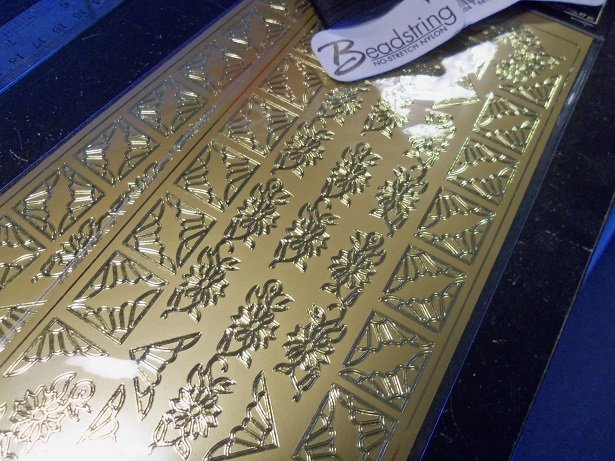
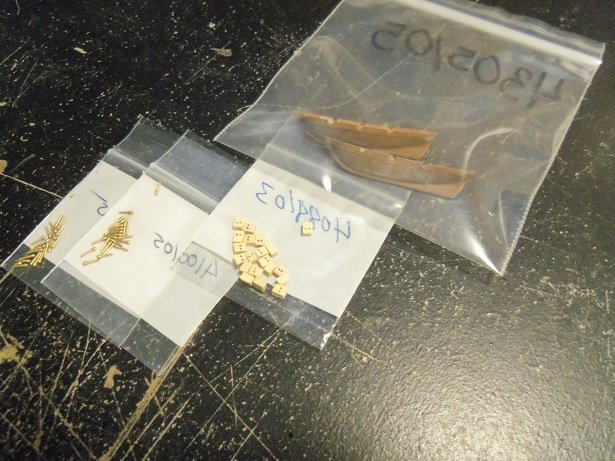
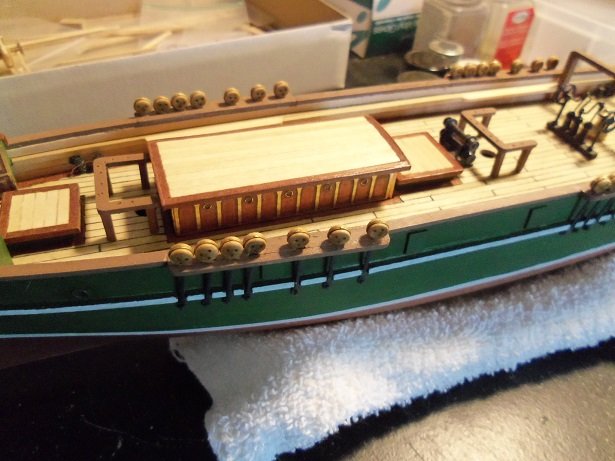
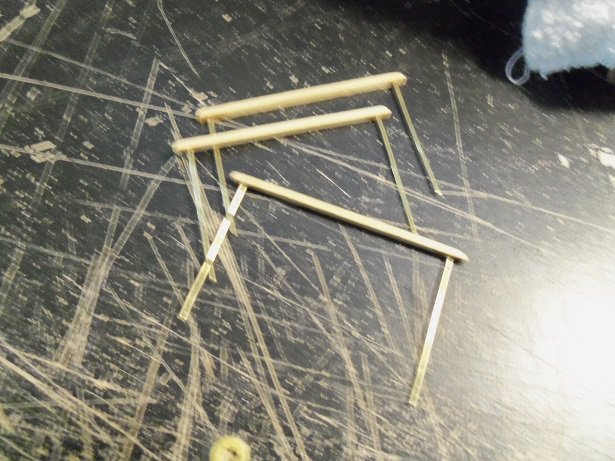
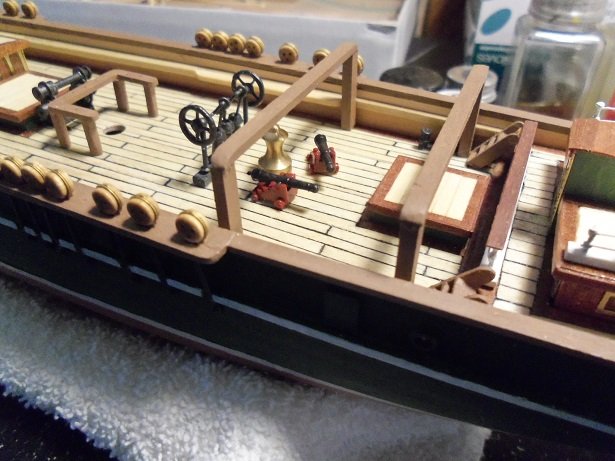
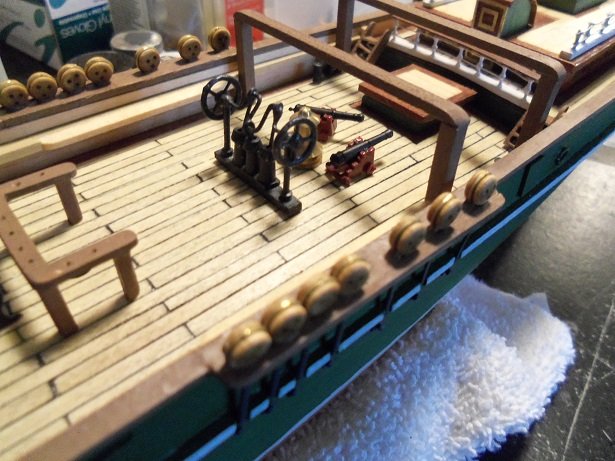
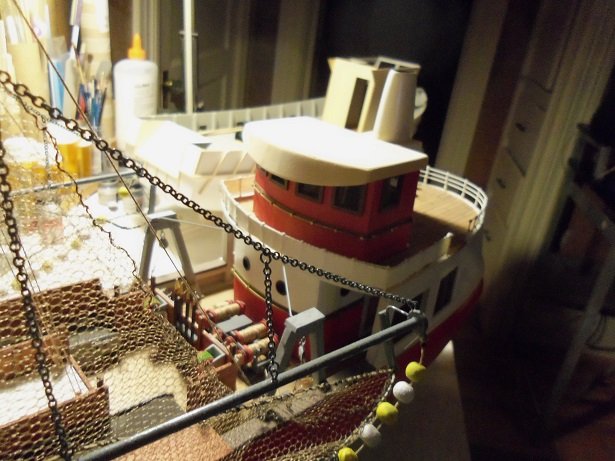
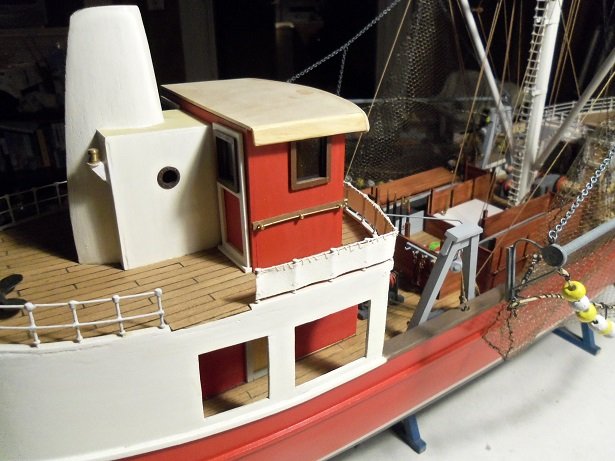
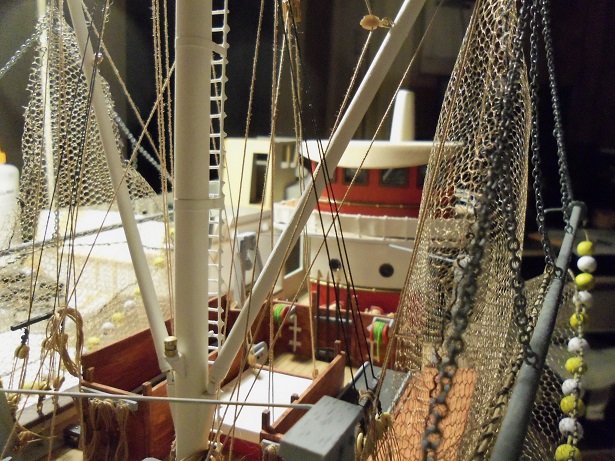
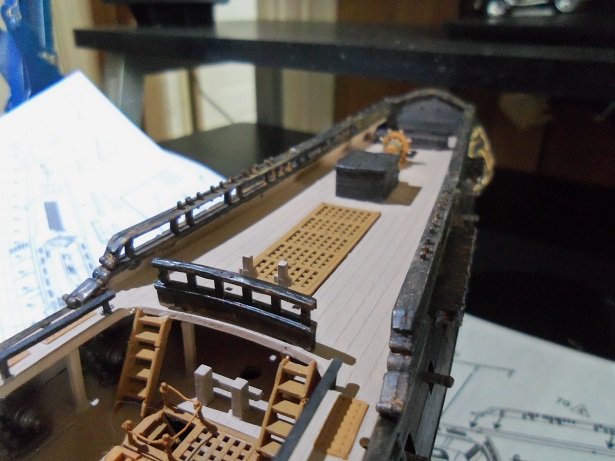
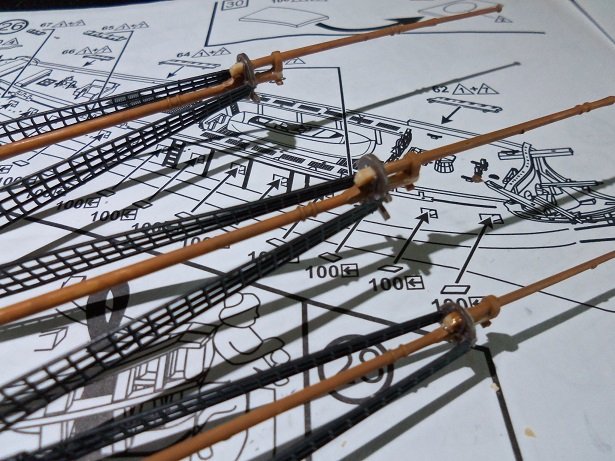
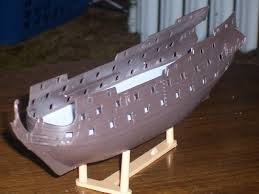
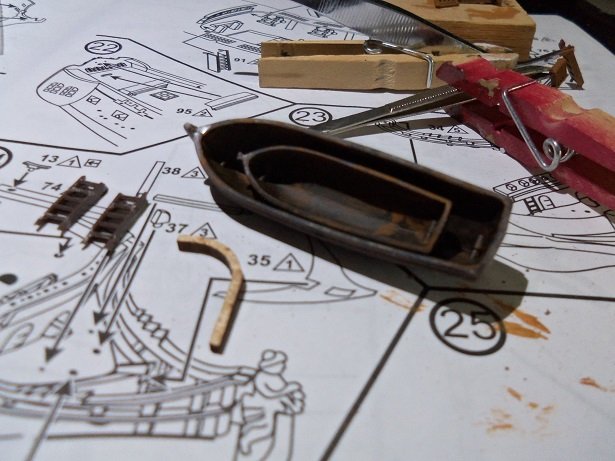
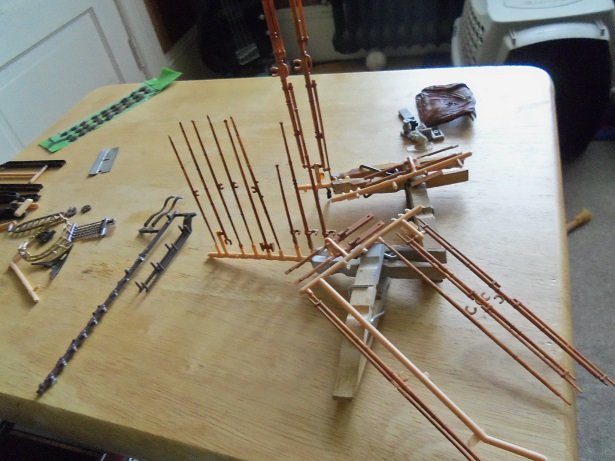
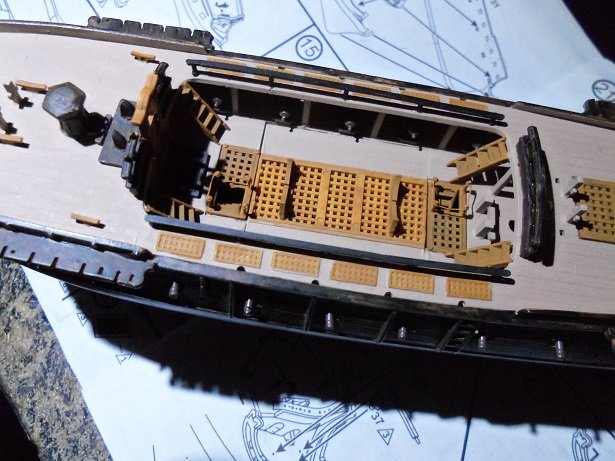
on the other table, I tested a few thing out on 'ole Thermie. my recent scavenger hunt was fruitful, although I failed to get the smaller size chain that I wanted. I bought some......but it is the same size as the other spool I had bought some time ago. I still have what looks like roughly 18 inches of that copper chain......I might have enough there. I may even have some bits and short pieces in my inventory......I'll try and make do. I was interested in the cannons I scoffed from the Jolly Rogers. I gave them some sort of paint job.......could have gone with a brownish color for the carriages, but I went with a red. I only had gloss though.......I'll hit them with the flat lacquer and kill the shine. the scavenger hunt also added two sizes of black beading thread to my inventory......I like this thread for the low fizzy quality and being prestretched. the sheets are a sort of sticker.....I do not intend on using the trail boards and the stern decoration. for the name, I have a suitable printed nameplate, that is much thinner....I just need to create the decorations along the sides. it is my hope that the 'stickers' can be cut and trimmed to do the job. the order I had place came in too......the two additional packs of belaying pins, the pack of double blocks, and the two boats. they are clinker planked, but seem to be missing the thwarts or parts for the interior....bother! here.....the fife rails need to be made shorter....... blurry picture.......but these stanchion racks need to be fitted still. I may even have to make another one here and there, due to poor fit.....still need to figure this out. I've opted to make a pair of anchors.... we'll see how that goes. the cannons were hit with a coat of flat lacquer.........great! they didn't melt! dry fitted on the deck........I think they will do quite nicely. they can be put anywhere on the aft deck and lashed down. still thinking what else can be added. more soon
- 453 replies
-
- 21
-
-
- thermopylae
- sergal
- (and 1 more)
-
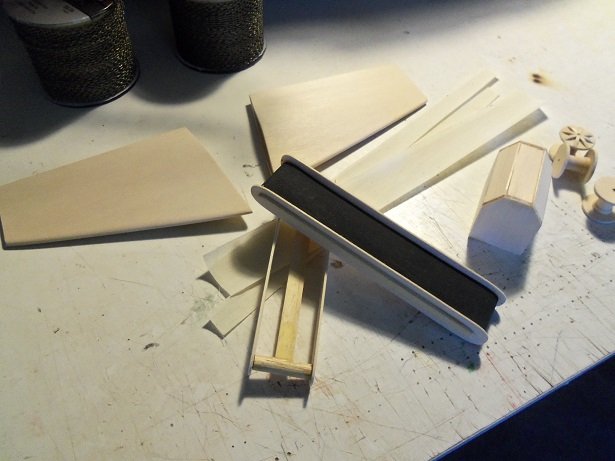
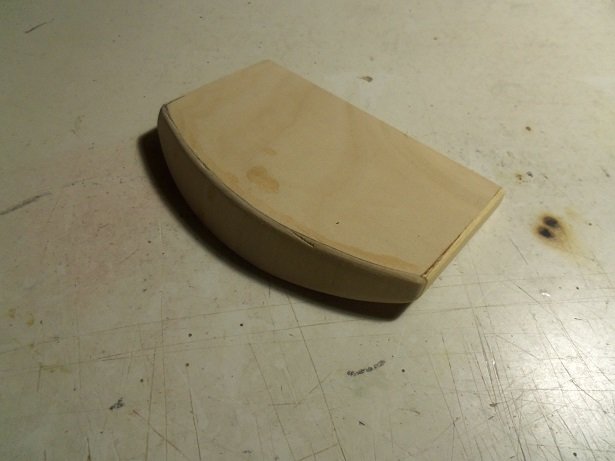
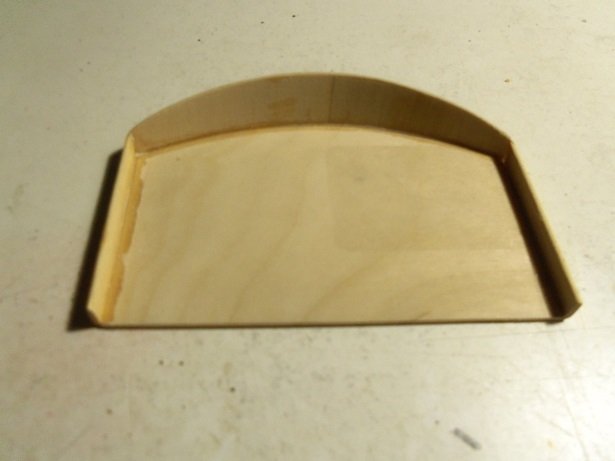
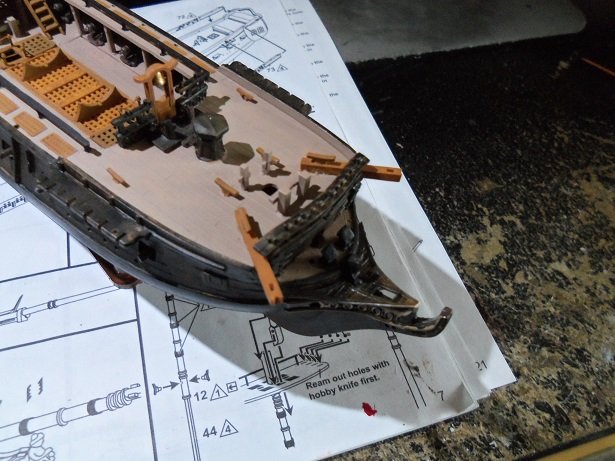
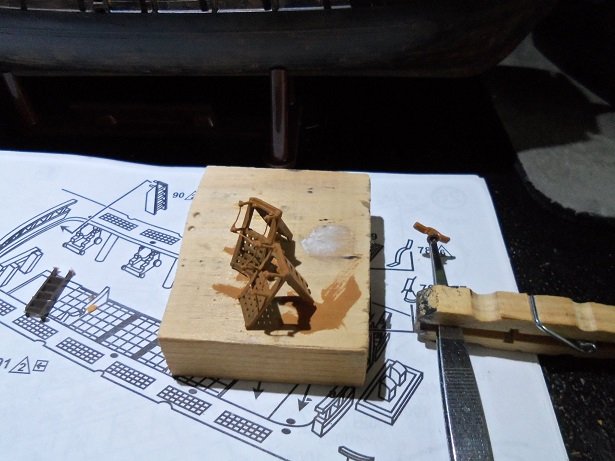
to muse, or not to muse..........awwww..heck with it.......let's muse I mentioned in a few of my logs, stuff that I had been play'in with.....put it down, and now can't seem to find. I had made a couple extra conveyors, an engine block destined to become a Hemi engine, a pair of wings {I still won't say what they are for}....and the roof to this blasted model! I looked everywhere for them....I have a special plastic bag that I keep all these partially assembled parts in....nope! the bottom compartment of my junk bin.....nada! in any of the project boxes I may have opened in the recent past, not a chance. I decided to take Patrick'e suggestion he mentioned earlier......I haven't done a progress report on the Boulogne Etaples and her offspring in quite a while.......a year, I suppose. some have seen it already......thank you very much for look'in in.......other who haven't, but wish to, it's in the Boulogne build log. I could have put it in the Holiday Harbor log, but since I missed Mother's day, I figured it fitting to post it with the Mother ship {if I'm not careful, the mother ship will come for me too}. assembling all the ships for the shoot.......I found all my parts!......nestled on one of the decks of the covered hulls......which one eludes me {immaterial}....the fact remains that I am reunited with my trove! now that the mystery is solved....I can put them somewhere else....and create another mystery! not pictured here though......is the roof I made for the Syborn..........that's because, I broke it! since I made the second one, I used that one instead......I broke the original one while fitting the brow. the brow was made with some flexible cast off wood from the junk bin. the sides are merely short pieces of planking. I wasn't sure how low the brow should be. I may lessen it......it's in the planing phase still from here.......my musings took me elsewhere. I decided to visit 'ole Thermie.
- 747 replies
-
- 16
-
-
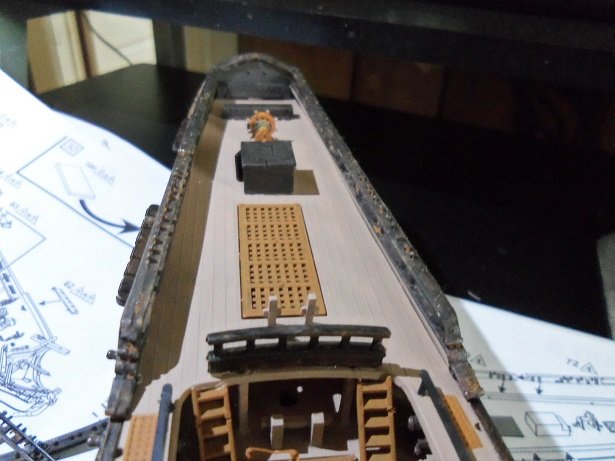
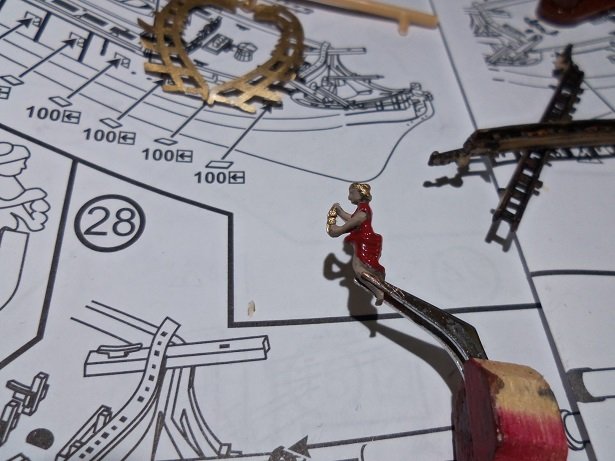
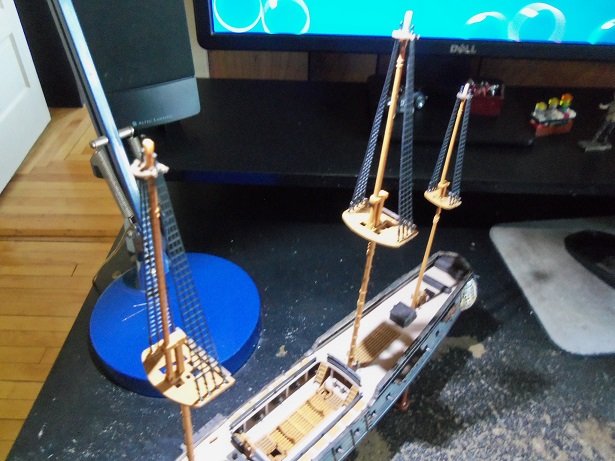
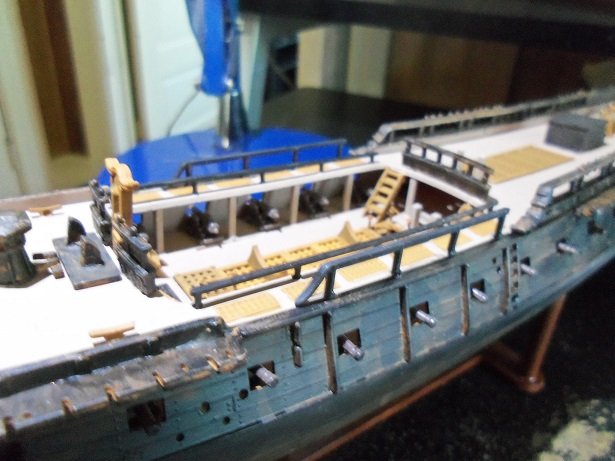
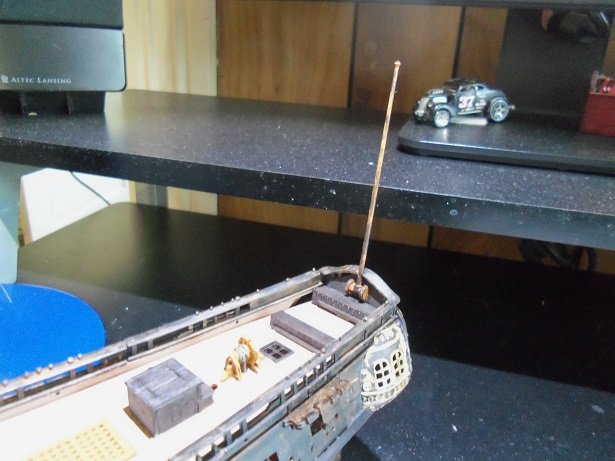
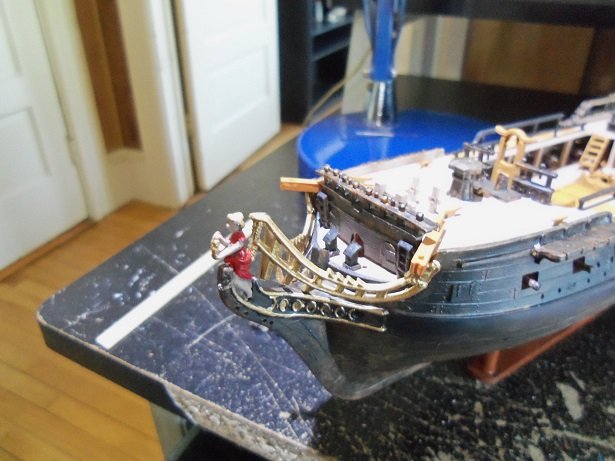
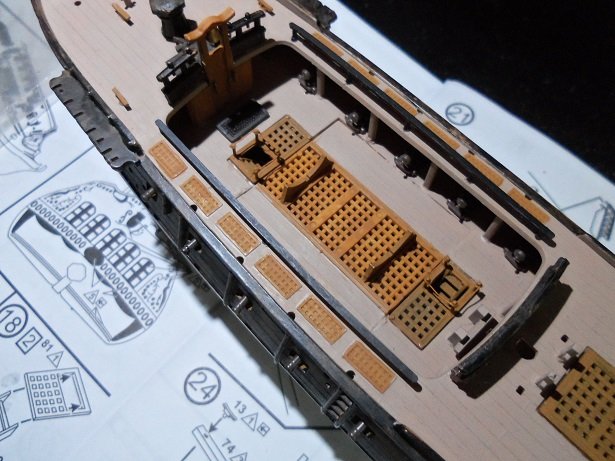
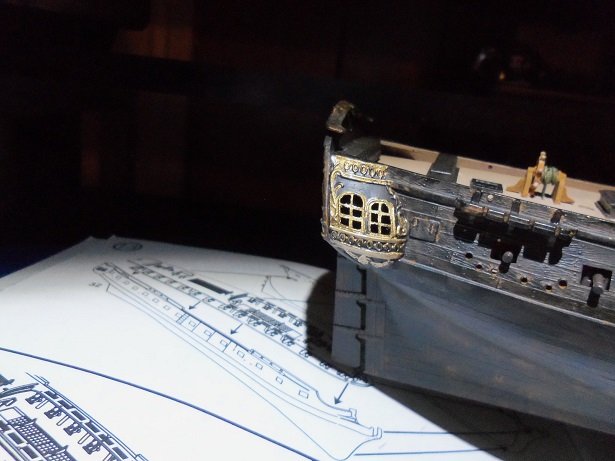
I've made some more progress. starting at the taffrail {which I added earlier}, the aft railings were added. they have tabs that locate on the outside of the bulwarks, so it works out rather well. for the pair on the bow though.....I smell trouble....the tabs want to locate on the inside of the bulwark. there is to be some trimming at the cat heads as well, so I guess fitting is in order. the figurehead was painted at this time. instead of being instructed to paint it in one color, I gave it three. keeping with outfitting the bow, the cat heads were added. adding the third step to the masts was going to be a trial.........and it's living up to my expectations. the cross trees are used to trap the shrouds at the second step cap, and then cemented in place at the tops. one of the cross trees was deformed and broken.......I tried to fix it, but it broke again as I tried to slip it over the top end of the mast. abandoning the idea of including the shrouds in this endeavor, it was repaired in place and the shrouds were located on the outside of the cross tree. the third step was added after the masts were dry, and the shroud tabs were trimmed off. along the hull/bulwarks where the deck opening is, there are two more railings that continue the bulwark railings to the bow. they were added at this time. the flag staff was added......painted wood brown and accented with the flat black wash. by this time I had to make more of it...very easy to make....just botch up some flat black paint "hey knucklehead........make me a batch of spotted paint!" "botch a batch of paint!" I was beginning to get curious about a few things.....I had to see if they would work. the bow rails were added to the beak....along with the figurehead. I don't mean to be, but I do tend to get a bit flighty with my ideas.........sometimes taking me to other projects. perhaps I should leave bread crumbs? to see where I went to next, you would need to look in the scratch build forum. the trawler's beckon call

- 140 replies
-
- 10
-
-
- jolly roger
- lindberg
- (and 1 more)
-
finally made it to the scratch build forum........looking very good! super progress
-
glad to see you got over your injury in fine shape planking is coming along nicely!
- 420 replies
-
- 2
-
-
- captain roy
- lugger
- (and 2 more)
-
amazing just how much you can put in tiny places.........some seriously nice progress there!
-
naw.......I let my "tangents' do that I've applied methods from other manufacturers with some good results.......methods by modelers work out even better
-
now I see where they came out with the phrase "oh what a web we weave" looks great EJ!
- 608 replies
-
- 4
-
-
- la couronne
- corel
- (and 1 more)
-
you could also try and reframe the windows and edge them with styrene striping from plastruct or evergreen. they have wonderful stuff to simulate angle Iron and quarter round strip. good to see your making some good progress. your gaining on it
-
not a problem it looks very well done. is there a second planking to go over the original planking?
-
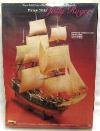
I thought about what Piet said........and what I said about this kit. it's true that this kit can be modeled after another ship......but there is a limit. the jolly rogers can be built to resemble the French vessel le Flore, and likely others like her. you've already seen the up to date box art for this kit....... here is the earlier production box art. to build a replica of the Wappen Von Hamberg, you'll need to get the capt Kidd kit. this is another Lindberg kit the third kit I saw at Hobby Lobby, was another version of the Jolly Rogers. it's based on the Henry Morgan. I imagine other ships can be modeled with this one as well. it's quite interesting what's out there.......I just mentioned to the admiral......and showed it to her.......I want to get the Capt. Kidd He.......He.....He!

.jpg.624091028e05446b46974f45acf2ec8a.jpg)
.jpg.4b0757e27104b59bb41f72dc633f4aa3.jpg)
- 140 replies
-
- 7
-
-
- jolly roger
- lindberg
- (and 1 more)
-
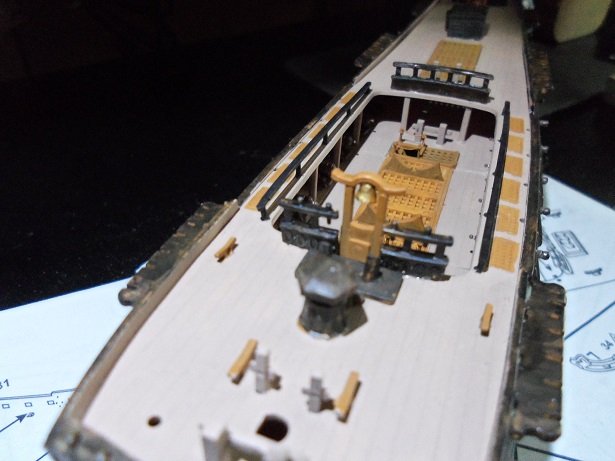
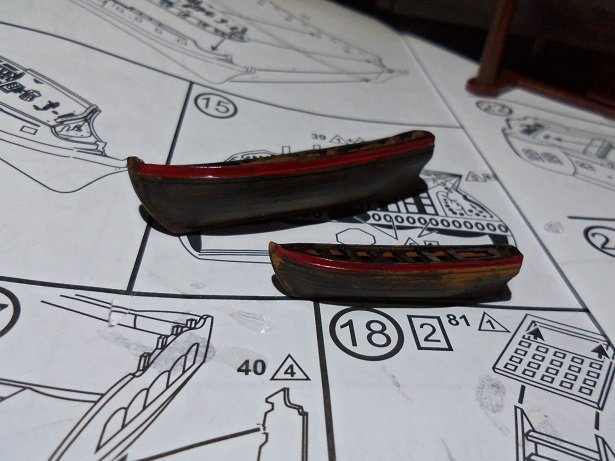
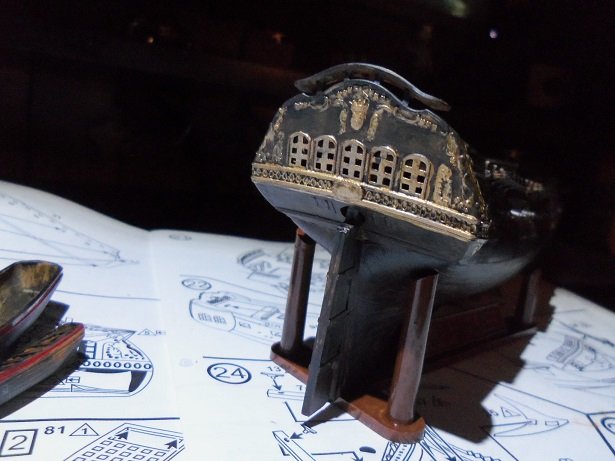
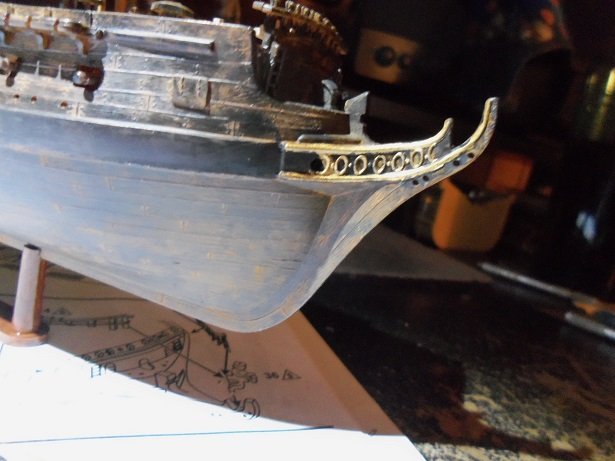
I make it a rule to try and cut off the parts, rather than do any twisting and such. the plastic is soft, and won't tolerate it without damaging the part. as mentioned, I was in and out {mentally} on the site today. I'd read.....then get carried away with painting.......snapping back to reality, when the bubbles on my screen saver would show up {bubbles.......crap...forgot to change that}. most of the parts are painted now.....I also ended up retaking pictures I took of the gold decorations at the bow and stern......bad lighting and blur. I'm using the small crane light that the admiral bought me a while ago.....Halogen and not too good. but I'm at my desk......so I make do the ladders were added to the grates that locate on the gun deck and painted wood brown. the belfry part is nearby.....still need to paint the bell. the ship's boats were next...the exterior was painted. this is how they will stack on the gun deck chocks. I'm not too keen about the large boat since there are no other parts supplied for it. I weighed out a couple thing I could do, but it will upset the apple cart too much, so I may just leave it as is. the added railings I did does get in the way slightly......the boat sits a little off, but not enough to bother with. paint them up and they should look fine. all the yards have the base color........now to add the accent colors and dress them up. the grates were dry.........they got cemented in place the belfry is in place too....... the boats are painted and pretty much ready to go..... I save all the instruction sheets........in the event someone is looking for them. so far, I've posted the Revell Cutty and the United states on one of the blog sites. to date, the Cutty is the #1 set to be asked for........I just direct them to the site these instructions are not faring too well.....I'm getting glue and paint all over them. they will be useless before long. the ladders were added to the spar deck opening. I'm horrible with detail paint like this.....but I still need to touch the areas up. these are the decorations at the bow and stern.......I made sure the pictures are better than the other ones I took. I will likely add the monkey chain on the rudder. it's late.......I'm hoping to get a bit more done. thanks for looking in and I hope to have another update real soon
- 140 replies
-
- 10
-
-
- jolly roger
- lindberg
- (and 1 more)
-
very nice Piet..........some very good progress and quite a narration you gave on her history.........Bravo!
- 83 replies
-
- 6
-
-
- o16
- pacific crossroads
- (and 2 more)
-
when I went to hobby lobby the other week, I saw all three kits there. I was tempted to pick up the Capt. Kidd. looking at them.....I thought I detected various differences with them. perhaps the next time I go, I'll pick it up to see. I didn't see any wooden kits there.....too bad I was drawn to a B 24 Libby though.......nice large scale kit. but that's a plane though....he..he there's a lot of factors for defects.......molds getting too old......storage issues of the kits before and after reaching the shelves. poor plastic batch mix ranks in there as well. making a little progress with her today.......I'm either reading or building........I'm getting dizzy!
- 140 replies
-
- 4
-
-
- jolly roger
- lindberg
- (and 1 more)
-
we're not........cool and rainy up here in the northeastern US I want our summer to kick in! your planking looks very good........going to be a fine looking hull when your finished
-
that's interesting.........the ends on the ones I did were made of plastic. then again, you mentioned that this is an older kit. very nice job of soldering
-
hello Dr. Per........just had to look in to see glad to find that I've caught the log at the beginning. I have the Billing's Bluenose.....even though they are not the same, the ship is, and the info you provide will be of great help, I'm sure. happy to follow along