
MORE HANDBOOKS ARE ON THEIR WAY! We will let you know when they get here.
×


popeye the sailor
-
Posts
16,007 -
Joined
-
Last visited
Content Type
Profiles
Forums
Gallery
Events
Everything posted by popeye the sailor
-
 thanks Gerhard......but Gibbs is a dog I've run into another uh-oh moment.......with the bow spirit in place, the fore mast won't fit into it's lower hole. bother!....I was afraid of that .......now I'll have to get a saw since this is an ocean going vessel....should I use a sea saw?
- 140 replies
-
- 7
-

-
- jolly roger
- lindberg
- (and 1 more)
-
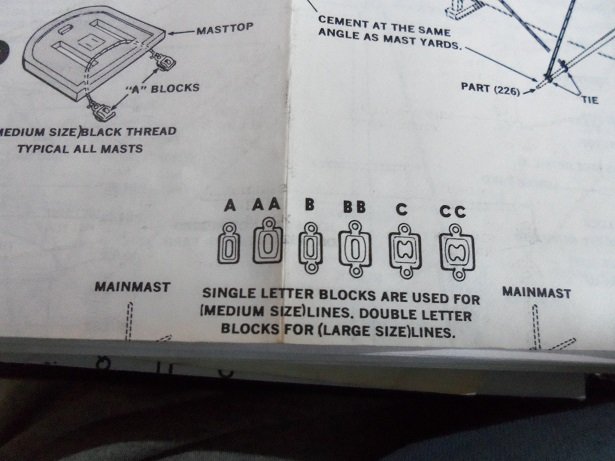
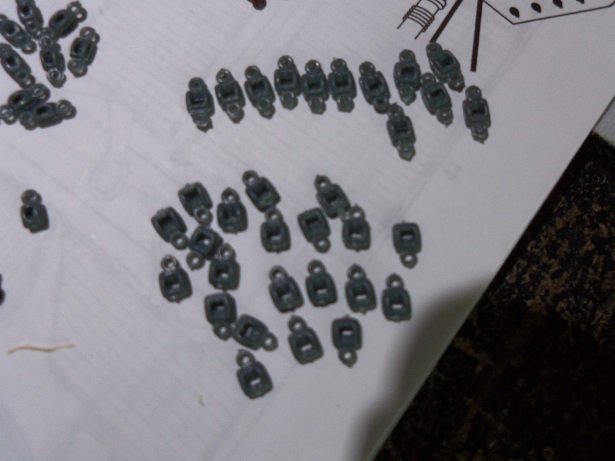
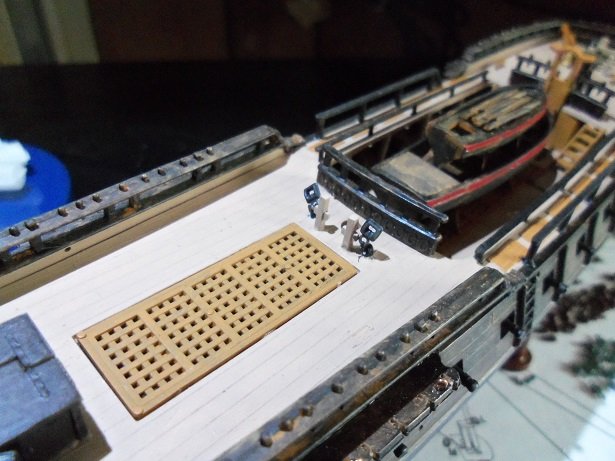
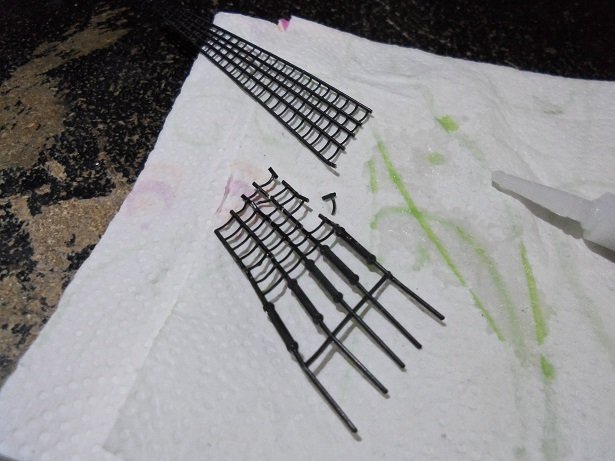
though I'm not quite ready for the rigging yet, I figured I'd separate the blocks and see what I have. I used some on the Gundalow, so I'm hoping they look better on this model too. better than the rings they supply in the kit. I still have the revell Cutty Sark instructions......but the United States instructions are right here in the binder I keep at my desk. on all of the rigging sheets for this series of Revell 1:96 scale kits, they have a block identification diagram, since to create some of them, an eye needs to be cut off. so, with them all laid out..this is what I have, since I have a better selection of the gray ones, I will be using them. trying to give you an idea of how big they are, I could have used a coin. I used ruler instead. eye bolts were added to the channels for the back stay rigging.....the starboard side is done. the mizzen stay rigging will be done as I've seen with other ship rigging logs...there will also be a block assembly associated with them too. a pair of c blocks {with an eye cut off} are fastened to the deck at the base of the main mast. for the main stays, a pair was tied at the base of the fore mast.. as can be seen, the port side back stay eye bolts are done. once I've tied blocks to the masts, they will be cemented in place. more to come.
- 140 replies
-
- 9
-
-
- jolly roger
- lindberg
- (and 1 more)
-
I sincerely apologize Lou........to be honest with you, my imagination has gotten me into quite a few situations, that I would have rather avoided! if I had gone with LED, my Titanic would probably be better off, but I don't know enough about it to change it. I would have liked it bigger too I'm not much with photo etch either.....all I use is thin brass sheet and rod/wire. the Thermopylae is the only one I have ever bought a photo etch sheet for.....and with how thick it was, I wouldn't even classify it as photo etch. I'm glad you enjoy reading my other logs...feel free to use any idea that I put in them.......especially if will keep you from getting into hot water with your admiral. I know where your coming from she doesn't like me buying all the weird stuff.....she thinks I can scratch build it out of thin air. thanks for the good word.....I hope you will follow along.
- 140 replies
-
- 4
-
-
- jolly roger
- lindberg
- (and 1 more)
-
super progress.....she's gonna look nice with sails, no matter how you fluff 'em I use the admiral's sewing machine....I've had some experience from taking Home EC in school {I did it for the Lasagna}. I didn't know that I'd be a singer operator too the worst part is setting the darn thing up..........you'll do fine
-
looks really good! I hafta agree with Jim.......but then again, I already know that
-
that sits behind the stacks!!!! oh great!.........the rising sun....with smog! super job on it......this whole build looks mighty sweet Greg!
-
always good to experiment mock up a couple test 'walls'..... planked over. sand and give'em the finish.
-
really nice progress Steve......the woolings and the added features add so much to the model kits in general leave a lot of these aspects out.....that's what makes them so generic. it's up to us modelers to do the research and add them in. your doing a swell job in that dept. I usually rig from the bow to the stern as well. the bow spirit is lashed with it's stays and is a good counter for the rigging as I go back. I do the stays first, then the shrouds, and then the back stays. the thing to keep in mind with rigging, is to stay as close to 'zero tension' as possible. keeping the tension equal will prevent other lines from sagging.......it can be a hard balancing act. supporting the yards with a pin is common, but some suspend them with the rigging as well. great job on your bounty....she's look'in really sweet!
- 291 replies
-
- 3
-
-
- bounty
- billing boats
- (and 1 more)
-
you didn't waste any time.....terrific start! looking forward in following along with this one
- 295 replies
-
- 4
-
-
- amatsukaze
- halinski
- (and 2 more)
-
superbly done Peit! you did a great job on something so small I hate it too when close ups distort wires and such.....that and cameras can be too revealing. you are definitely the go to man for subs 'round here congratz my friend!
- 83 replies
-
- 7
-
-
- o16
- pacific crossroads
- (and 2 more)
-
hi Daniel.......little hands can do a lot of damage. when my grand sons are over.....it's all I can do to break the desire to play with my boats. I can't blame them......I love play'in with them too thanks for the good word.
- 140 replies
-
- 5
-
-
- jolly roger
- lindberg
- (and 1 more)
-
thanks E.J. I'm usually pretty careful. {he's sitting right next to me, so I gotta be careful what I say} look'in for his usual dose of lov'in......we just came in from outside. I don't blame him, he's just do'in what's natural......it happens. I lose more parts with the tweezers, than I do with Gibbs yea......he's my little guy doing the eye bolts for the back stays.....one sides done. my brake job is here, so I better go do that. it won't take long thanks for the good word
- 140 replies
-
- 3
-
-
- jolly roger
- lindberg
- (and 1 more)
-
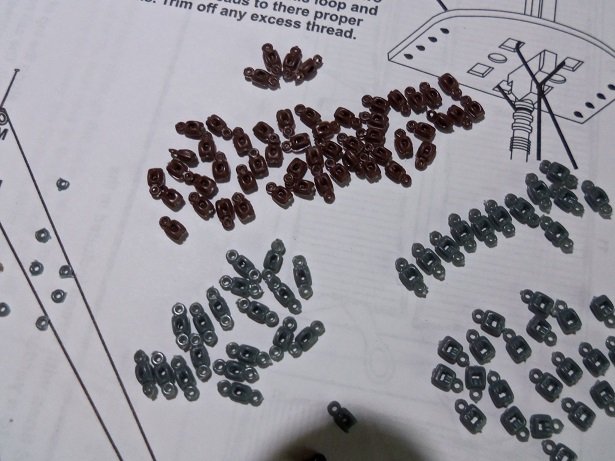
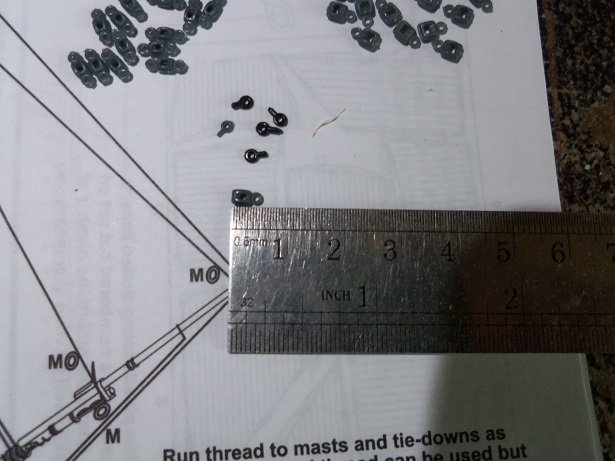
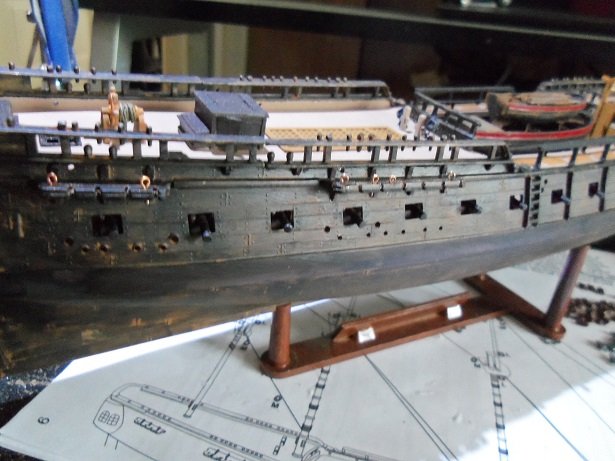
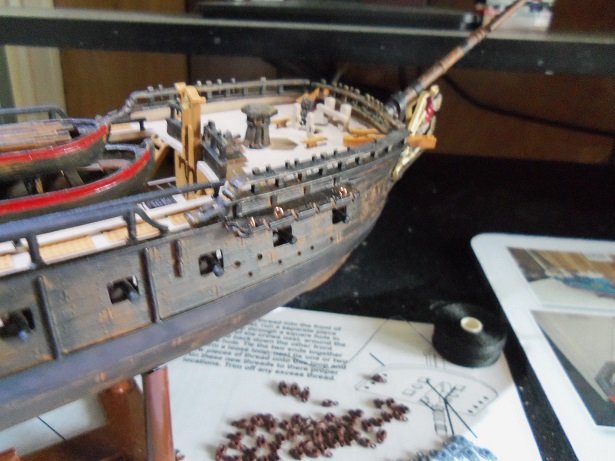
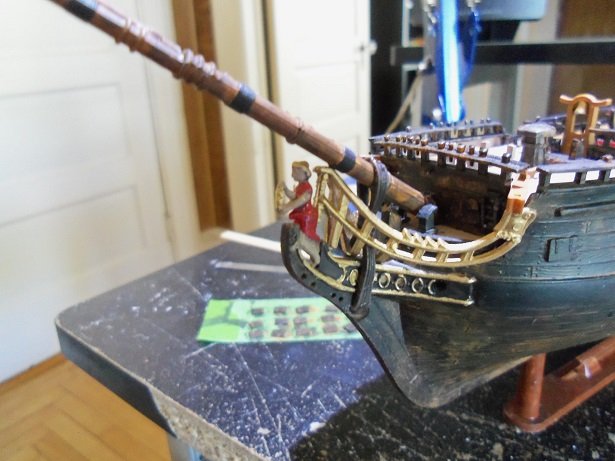
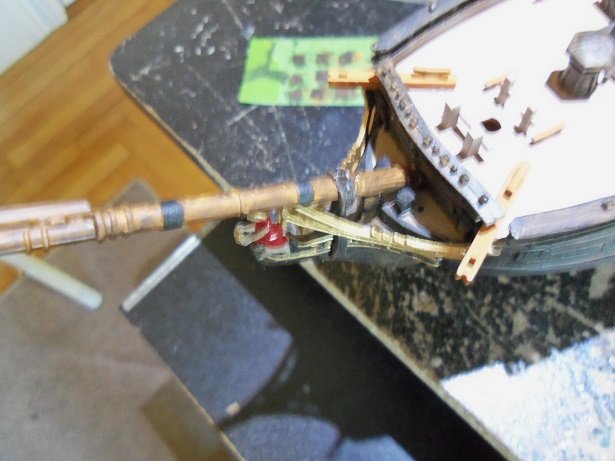
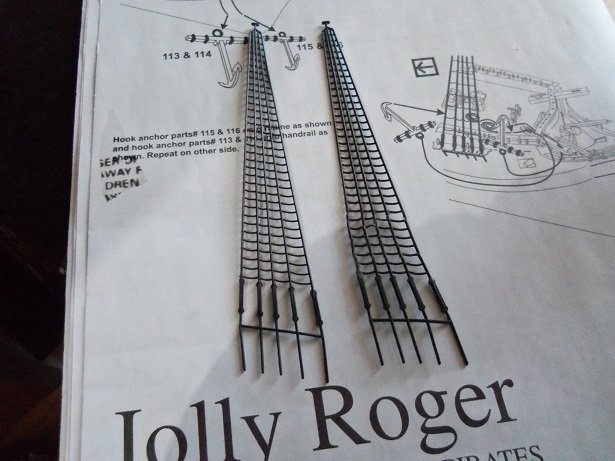
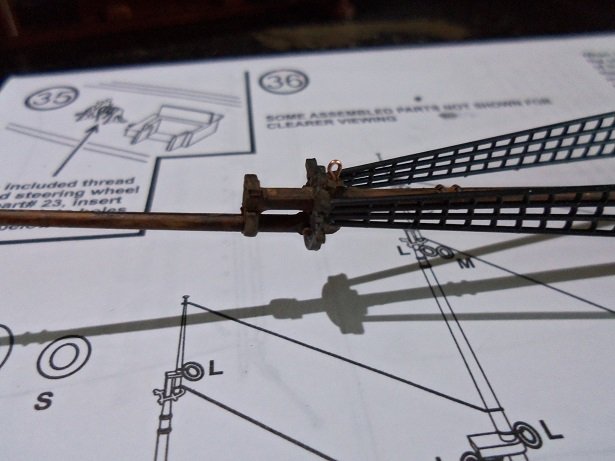
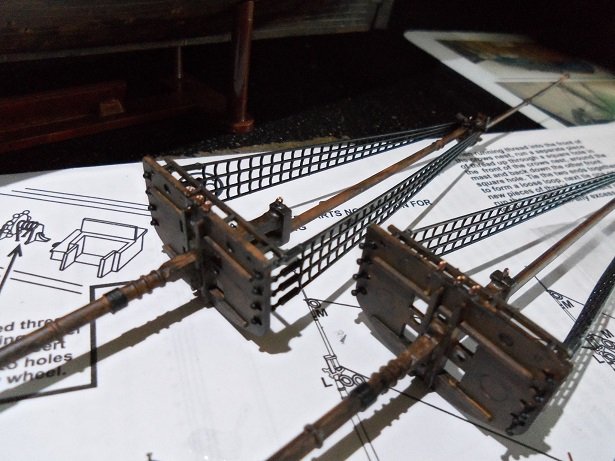
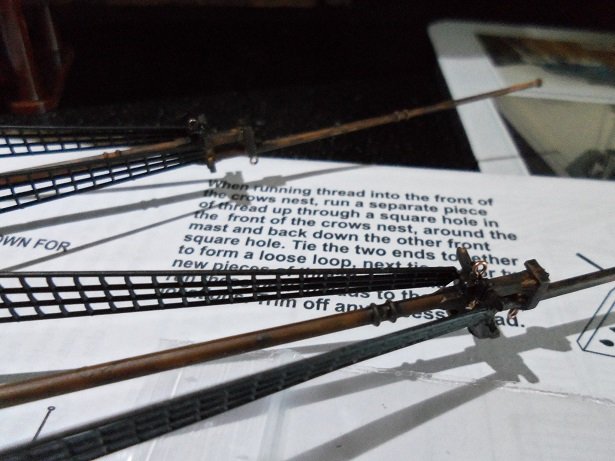
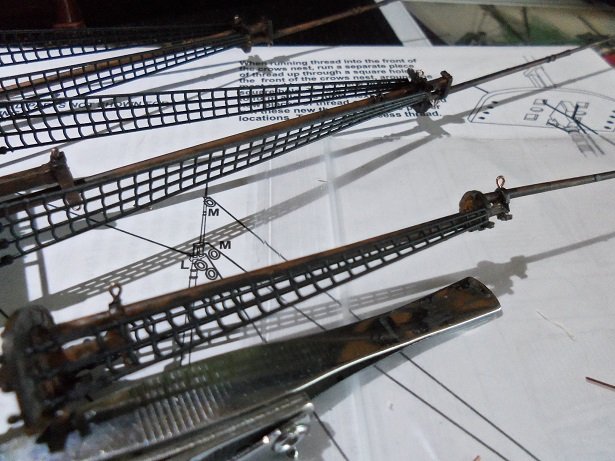
thanks Bob it's not a bad kit.....it just has a few rough points. I've on and off this week on her.......later today, I get to do a brake job on a piece of junk.....lucky me I showed the remedy for the lower shrouds....I just drilled holes through the furthest point of the slots provided for them, and it made the task easier. I did install the bow spirit and the plastic imitation gammoning.....I touched it up this morning and made it look a little better. I also reported that the carpet monster snatched up one of my fore mast shrouds, and made off to his cavern lair. it was an easy rescue.......I was surprised that it wasn't chewed to bits! it was found in three pieces.....and not in too bad a state. probably got interrupted by the furry four footers that rule the trees {seen out the window}, and rushed off to intervene the oncoming invasion. I started to piece it back together......but forgot that I hadn't taken the initial picture of it's rescued state....so this will have to do. the two halves of the bottom section, have been somewhat pieced back together. you might ask why I'm doing this......I think it best to have all the shrouds the same....having hand made ones on the lower, with the plastic upper ones, might look a bit weird. After the mend job.....sanded and painted with flat lacquer......it doesn't look too bad. I'll likely make a final adjustment when they are in place. at the moment, I'm working on the masts, installing eye bolts for rigging. I'm using the smallest ones I have. they may be hard to see. I'll be sorting out the blocks in a bit.......I have some brown ones {mostly single blocks}.......but I have quite a few gray ones, and they are a mix of single and double blocks. I'll likely stick with one color.....chances are I'll dab 'em with flat black anyways. I'll be touching the eye bolts up to lose the copper look as well. more soon

- 140 replies
-
- 7
-
-
- jolly roger
- lindberg
- (and 1 more)
-
Revell put out three different versions of the Cutty.....one without sails.....one with sails - museum, and the one that was part of a seven model series. the museum kit came with prepainted copper bottom. I built two of them......the second one's not finished yet. wonderful kits........even though they had that screwed up sectioned decking. hard to remember......but I don't believe I've seen them below $89.99. hard to find, you can pick up a Kearsarge, or the Alabama now-a-days for $250.00 I currently have my second build of the U.S.S.United States...bought the first one for $89.99, the second one I got from E-Bay for $45.00! they never knew what a treasure they had! great looking model Frank! keep on build'in!
- 20 replies
-
- 2
-
-
- cutty sark
- revell
- (and 2 more)
-
BY ALL MEANS......take care of it quick! looking forward in seeing the new cutlery in action.
- 714 replies
-
- 4
-
-
- lady nelson
- victory models
- (and 1 more)
-
basswood will give you a somewhat rough finish......but if your looking for a look that's a bit more weather worn, try Obetchi. might be a strange wood to do an outer planking with, but it has a very rough finish in it's raw state. sanded down when planked, it will smooth out, but it will retain the striated grain look. Billing Boats sells it......other kit manufacturers may supply it as well in some of their kits. super job on your first planking...looks great
-
excellent progress Piet........the idea of the crane is a perfect idea......you could do a mini diorama of it a super job on the 016!
- 83 replies
-
- 6
-
-
- o16
- pacific crossroads
- (and 2 more)
-
look'in good on the rigging so far Daniel. it might be beneficial to do your stays first {main stays and mizzen stays}. with the back stays and shrouds in place, it might be harder to do them. but hey, with the medium you work in, tight places are BREEZE for you the lower gun ports look great.......are you gonna do anything with the upper gun ports?
-
I don't speak any other language.....although one day, an Indian told me I spoke with forked tongue besides........I'm a humorist as for how you want to expand the lower deck......you made the extra bulkheads...that's good, but dry fit the spar deck to see what you can see down there, before you go further. you have that deck part in place already. you could very well trim out some of that false keel and extend it back further. but do the spar deck thing first.......see just how much you can see. wouldn't want you doing stuff for nothing
-
awesome job Danny! ship and display looks really sweet!
- 193 replies
-
- 5
-
-
- cerberus
- paper shipwright
- (and 1 more)
-
enjoy.........the model will always be there waiting
- 258 replies
-
- 1
-
-
- harriet lane
- model shipways
- (and 1 more)
-
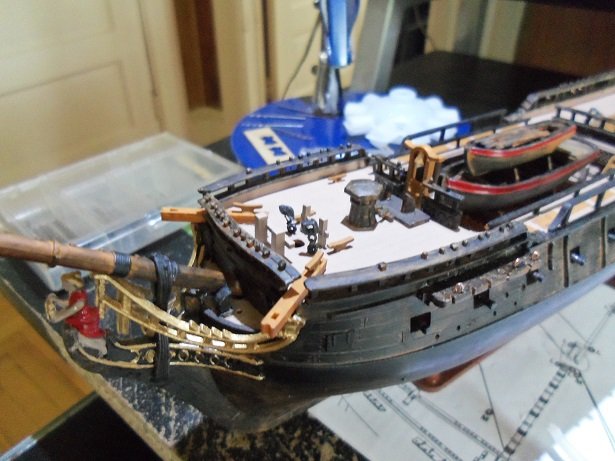
hey Daniel yes! here she is! I saw yours too so far this week, I've managed to get a little done.......got the bow spirit in place now. I also got a bit of a setback. after I took the picture above, I removed the shrouds and laid them on my desk. today, I was moving stuff on my desk, and I only had one of the shrouds.......I couldn't find the other one. once I was sure that it was not anywhere around my desk.........I went to the dreaded cavern. I found it in our bedroom, under the bed.......Gibbs had gotten it and chewed it. it's in three pieces.......I've managed to assemble the bottom parts....the top part is still in one piece. if I can repair the bottom part, then I can repair the rest. if I don't try, then I can look forward to this ship look'in weird. thanks for the good word.......dig out your J.R. and join the fun!
- 140 replies
-
- 4
-
-
- jolly roger
- lindberg
- (and 1 more)
-
I'm sorry to hear that Bob......glad your getting her sorted out
- 682 replies
-
- 3
-
-
- halifax
- lumberyard
- (and 1 more)
