
Supplies of the Ship Modeler's Handbook are running out. Get your copy NOW before they are gone! Click on photo to order.
×


popeye the sailor
-
Posts
15,993 -
Joined
-
Last visited
Content Type
Profiles
Forums
Gallery
Events
Everything posted by popeye the sailor
-
 good to see you back in the saddle Sjors........I'm sure your builds have missed you too
 -
looking good KP.........yea, the sails can be very brittle, the older they get. I used the missing parts request for some replacement sails for my second Cutty........I got two of the three sheets. Revell had stopped doing it in the US {last I knew}......but Revell Germany might still be doing it. check your instructions though, but the sheet lines shouldn't be on the same side. I think one should be tied on the starboard side, and the other end tied on the port side. I've still got the rigging sheets for the Cutty........they should be the same.
-
Jerry!...so good to see you've returned so sorry to hear that you've had a few set backs.......hopefully there are calmer seas ahead. La Nina's looking good......you've done some real fine work there. Charlene did a nice job on the sails.......I've done some experimenting with embossing sails.......I used my decal maker and printer {I suppose photo shop could be used instead} but yea.....ran the cloth right through my printer! came out really goo too. https://wenzelswharftips.wordpress.com/2014/04/29/embossing-sails-part-1/ you can read through ......figured you might get a kick out of it so glad to have you back........say hello to Charlene for me
-
thanks for the likes gents the work week is over........back to the fun stuff.......tomorrow
- 140 replies
-
- 5
-

-
- jolly roger
- lindberg
- (and 1 more)
-
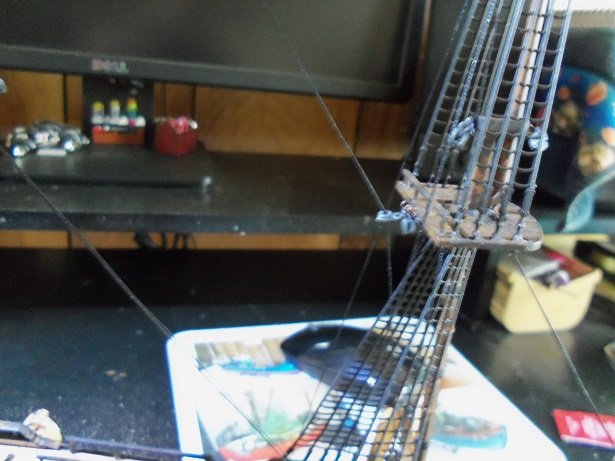
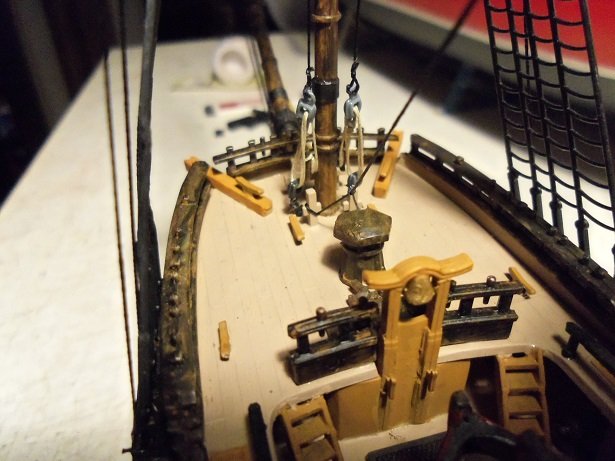
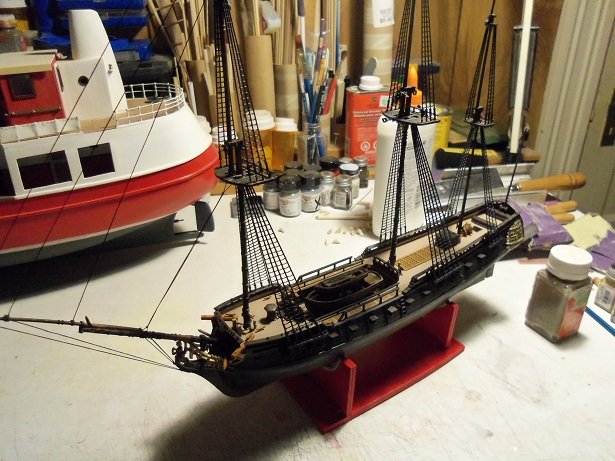
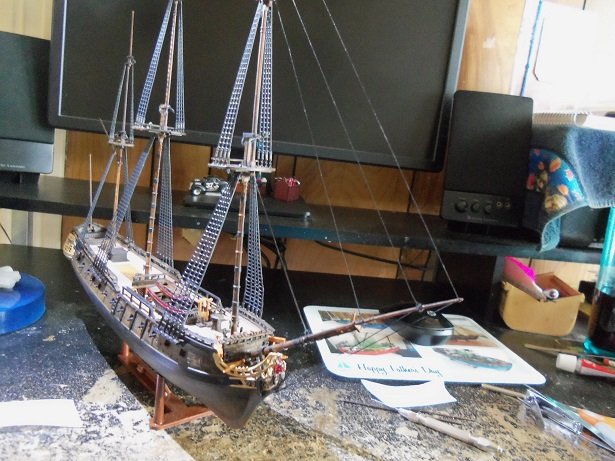
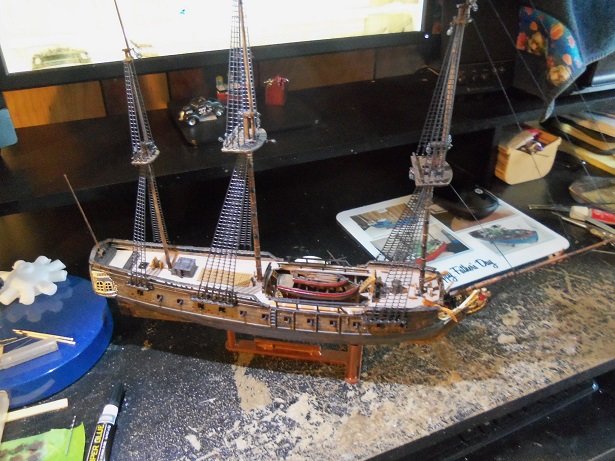
sorry I didn't get back last evening.........I had supper and Zonked out. .....tough day at work these two pictures were taken before the camera decided it needed a recharge. I was at my desk, so the pictures may not be too good. the blocks work well.......here is the what the lower one looks like.......the bottom main stay is doubled and will look thicker that all the rest. the stay will terminate with a pulley assembly at the base of the fore mast......like this... then I realized that doing the stays in this manner, would be too much for the mast trees.....causing them to bend very easily. I had to add the back stays to help me out. later, it ended up on my table.....I had to stand to better run the rigging. I didn't take too many pictures...feeding the camera.......but I ended up with this bit of progress. here's a better shot of the main stay rigging. .....and the pulley assemblies associated with them. the mizzen will only have this one stay that is done this way.........it's not tied off yet. the other blocks you see will be devoted to the braces. there is one other stay that I need to add to the mizzen........I may do it this way as well. this is the standing rigging ......so far. I will do the rest when I get back to her. then I can start the running rigging thanks for looking in thanks for the good word Piet........and thanks to those who hit the like button
- 140 replies
-
- 11
-
-
- jolly roger
- lindberg
- (and 1 more)
-
thanks you Zoltan....I don't do much in the way of weathering. I usually look at it the next day, and clean it up. I'm such a tidy whitie person it has worked out great though......I'm able to hide all the glue marks and stuff with it thanks for the good word! FRANK!!!!! so nice to see you! I was sitting here one day......and thought to myself that I hadn't seen you around...I started to get concerned. I'm not a big fan of "in your face' book....but I thought I'd give it a try. one of these days......I'll have to get SKYPE working, so we can chat! I'm glad you like the build....for an odd duck, it's coming along OK. {I changed a few things} hope to see you more ....your such a nice person thanks for the likes........I have a couple of pictures, but I have to run out at the moment........I'll be back!
- 140 replies
-
- 5
-
-
- jolly roger
- lindberg
- (and 1 more)
-
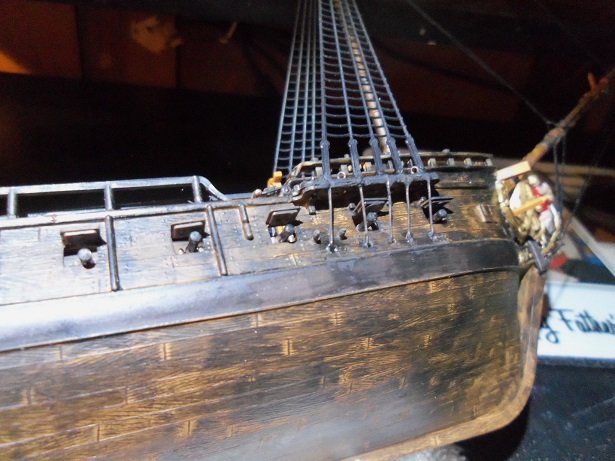
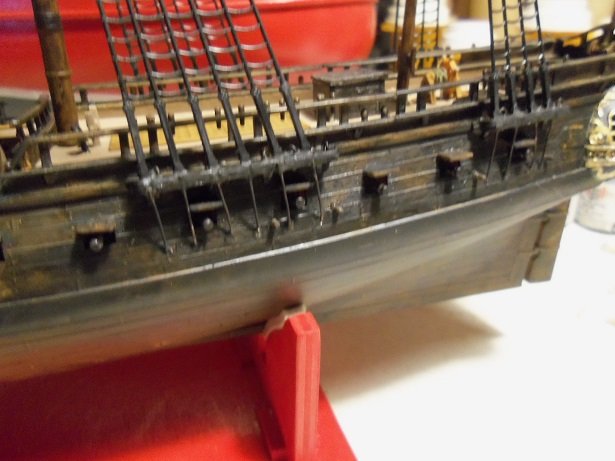
thanks Daniel........all that is, is diluted flat black enamel. once diluted to a point, it becomes a wash.......how much you dilute it, will give you different degrees of appearance. along the dead eyes and around the chains is very diluted....the chains themselves, not diluted much at all. although I did want the copper look to show through a little. thanks for the good word.......and thanks to all who hit the like button not much to report so far....the stand is working great! but with what I'm trying to do with the rigging, I'm finding that the mast trees are not very strong. I was hoping to wait on the back stays, but I'm having to do them at the same time as the other stays. update soon......thanks for look'in in
- 140 replies
-
- 7
-
-
- jolly roger
- lindberg
- (and 1 more)
-
I'll keep an eye out for the start of your next one........whatever you decide.
- 250 replies
-
- 5
-
-
- willie l bennett
- model shipways
- (and 1 more)
-
it's a good fix........as you say, your gleaning all you can for the big one
- 295 replies
-
- 8
-
-
- amatsukaze
- halinski
- (and 2 more)
-
still learning in that dept as well. to have them all equally spaced, is just a modeler's taste. it's quite a common practice for a museum quality model to have evenly spaced dead eye lanyards. you get right down to it, a lanyard off here and there, is actually added detail and makes the model look more realistic. movies show this as well. working with plastic models all my life, I never had to worry about this.......my first wooden model showed me I have some learning to do I made up a jig.......but I suspect I'll be making a few more, depicting the difference in scale.
-
sails look very nice Frank! really fills out the model
-
I just looked through her again.......I was looking for the rooms that were to be the his/her bathrooms . then I realized I was on the wrong floor! with all the sofas and love seats you have in there.....the local furniture store must LOVE you!~
-
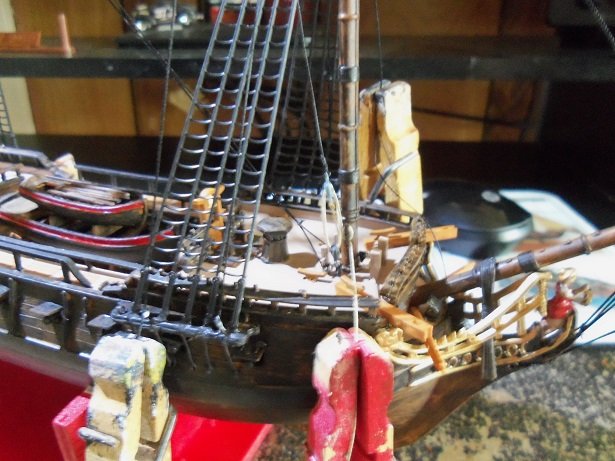
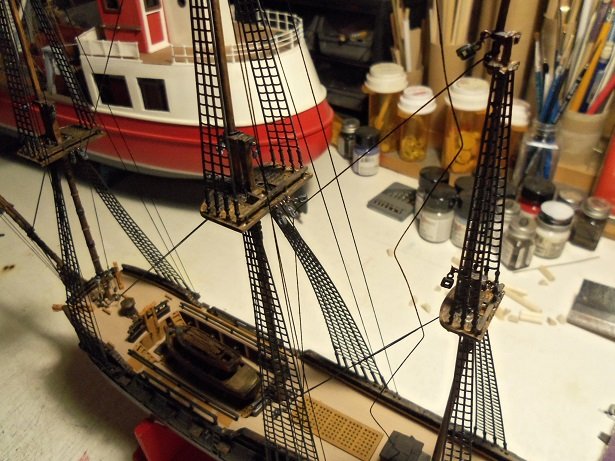
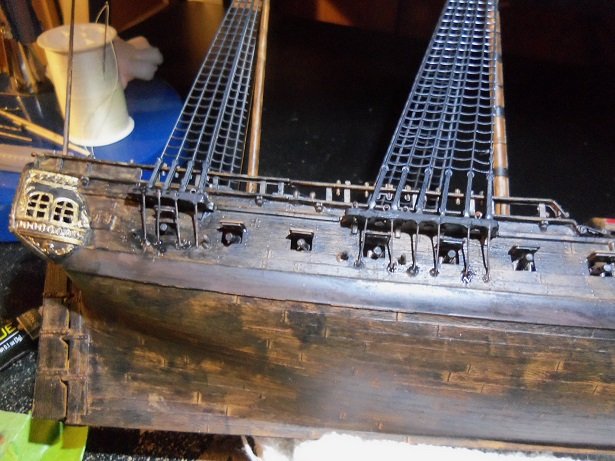
thanks Daniel..........I feel it already I went to all the trouble to make the stand.......and what do I do......use the stand from the Thermopylae. I needed to be able to put her at a pretty drastic slant. I did the chains, the gun port lids, and the pegs for the tack lines. I was going to call it an evening, and that's when I thought about using Thermie's stand. I did the starboard side first, installing everything, and then touched it all up at once. I have plenty of that super soft wire, found in many Billing kits. it was easy to cut and shape. then I did the port side. here I am complaining about this small crane light..........I got better pictures at my desk, than at my table go figure. now I can proceed with the rigging without having to worry about doing that other crap! thanks for look'in in......and thanks to all who hit the like button Happy camper signing off
- 140 replies
-
- 15
-
-
- jolly roger
- lindberg
- (and 1 more)
-
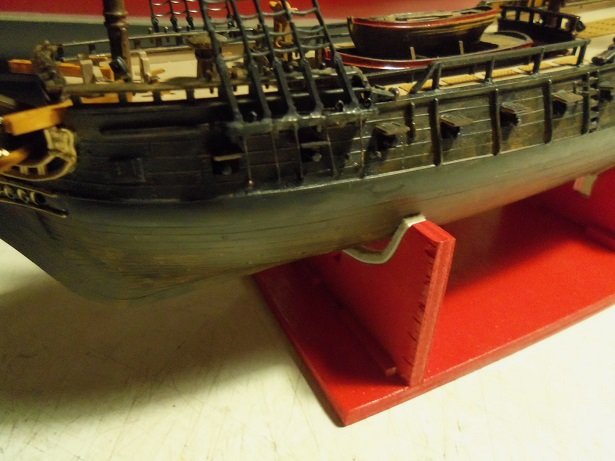
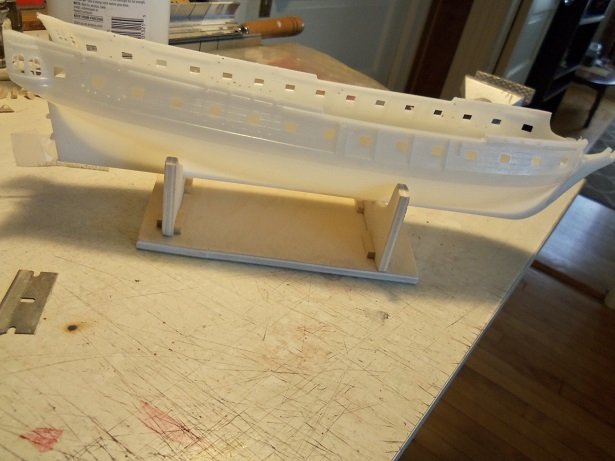
it's sturdy.......I have the J.R. on it now this isn't a remedy for all .......definitely won't fit the bigger hulls. when I get back to it, the first order of business will be to get the spanker gaff back on. I'll likely need to do the running rigging for it, to support it. odd.......I just looked under the stand.......there is what looks like the Lindberg line logo, but the field inside is etched out. I wonder why? thanks Russ!
- 140 replies
-
- 6
-
-
- jolly roger
- lindberg
- (and 1 more)
-
very nice process so far Michael......look'in very good. hat's off to the seamstress..........does she make it to the Northeast at all?
-
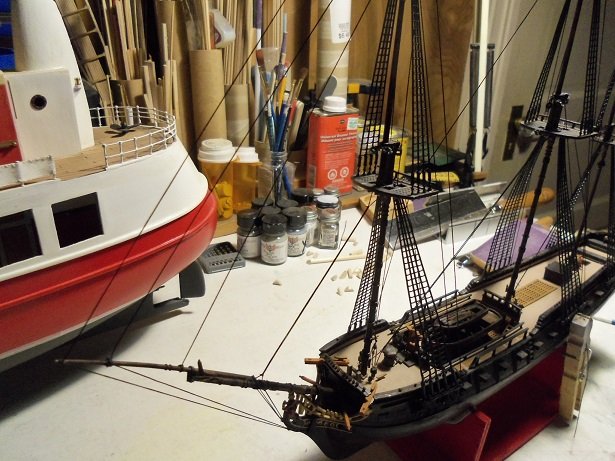
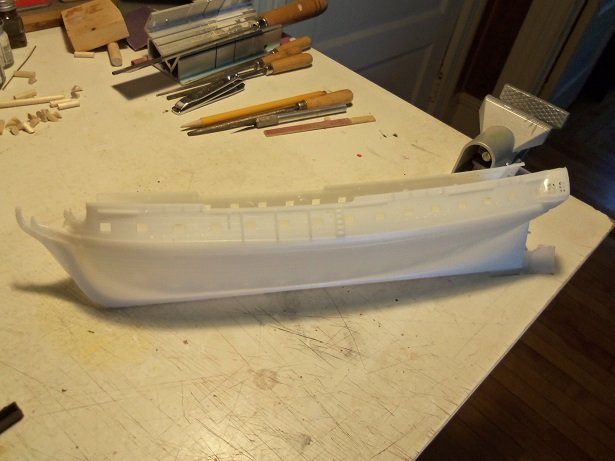
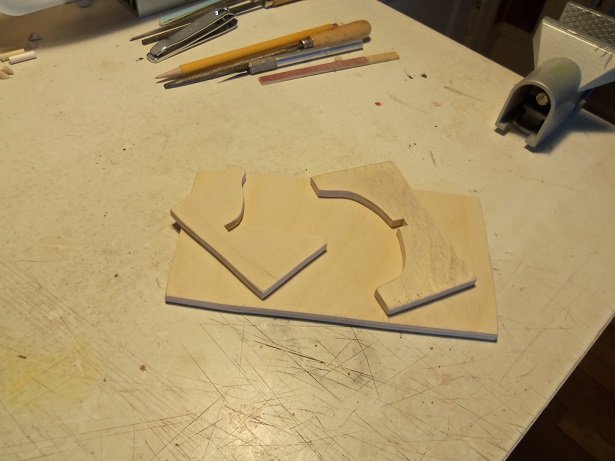
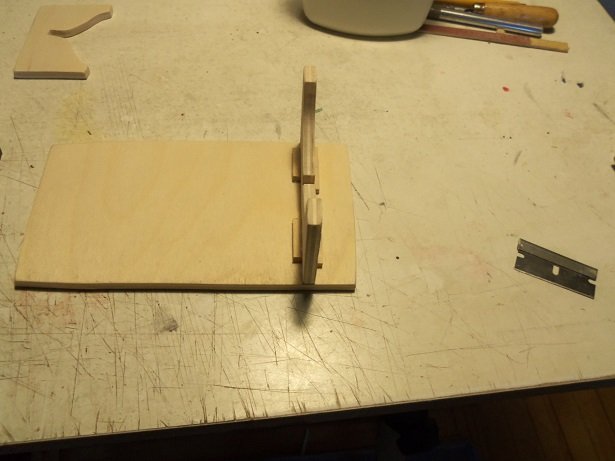
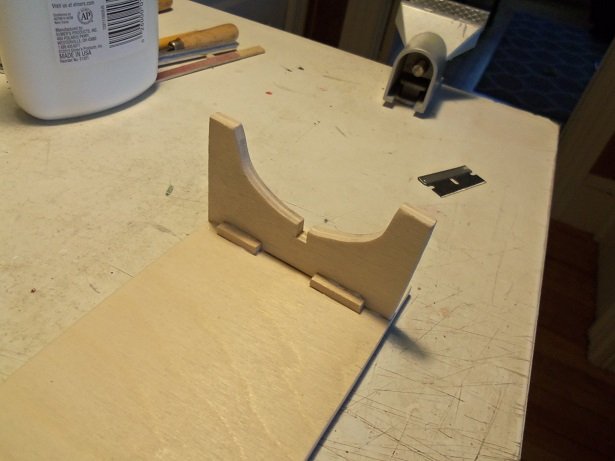
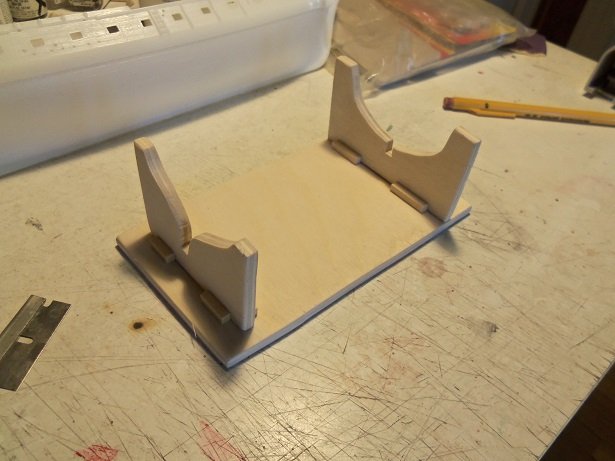
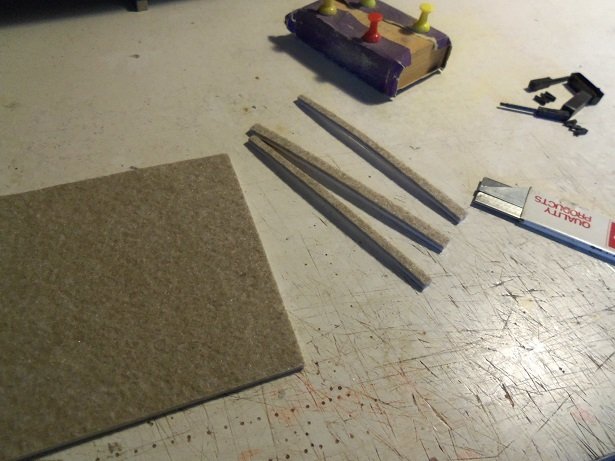
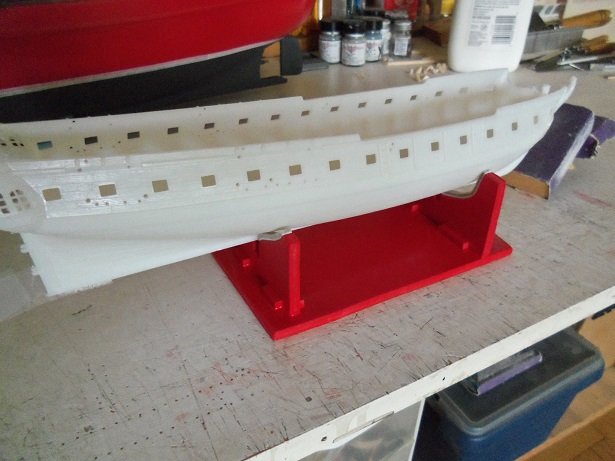
you do make a valid point though Russ......I've become too complacent relying on the supplied stands. I'll do something for this one.......but I'll look towards ramping things up a notch for this......I'll need a volunteer. you sir.........I like the cut of YOUR jib! you look like a perfect 36! step right up here.......... >the flying Dutchman comes to the table< look! he' laugh'in so hard his sides split! com'on my good man...pull yourself together.....here's some tape! nyuck.....nyuck.....nyuck! let's take a look here........stick out yer tongue!.....you got a coat on it......put on a pair of pants and take it for a walk! >where's my cigar< anyway......you look to be this.....this.....and this icky Mae. hold on wilst we go to the wood shed >lucky man....we're gonna make you your very own seats of ease! there we are! I didn't measure anything either........cut the base and the cradle parts! cemented the front cradle part to the base, and reinforced it with short lengths of square stuff. when the Dutchie could climb on board.......the other cradle part was marked off and then added to the base. I spared no expense with the xtra pieces of wood after it was dry........there were a couple of adjustments to be made.....totally cosmedic {cosmetic} {pick which one ya want I assure you....both of them gets under my skin}. Ok....climb right up there Dutchie and have a seat.......newspaper is extra not bad.....but a little more off the sides. I'll make that adjustment.....then it's out to the wood shed for a paint job. then it can get these nice cushions........a little cush for the tush >a paint job and an oil change later...............< WHOA........BABY!!!!!!! look'in good! if this is what the best dressed boat models are wearing today........ I am like soooooo enthused! now maybe I can get some rigging done........in peace
- 140 replies
-
- 14
-
-
- jolly roger
- lindberg
- (and 1 more)
-
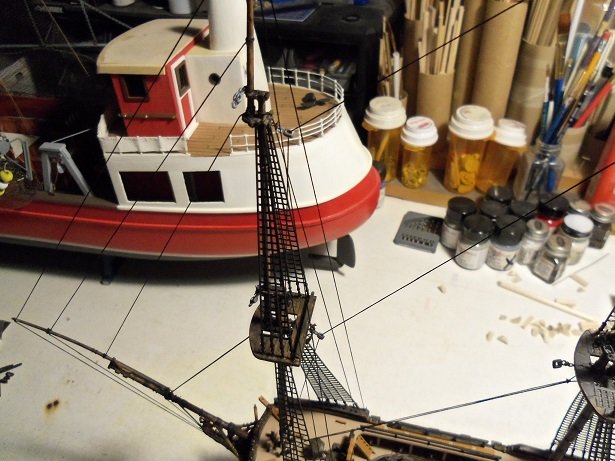
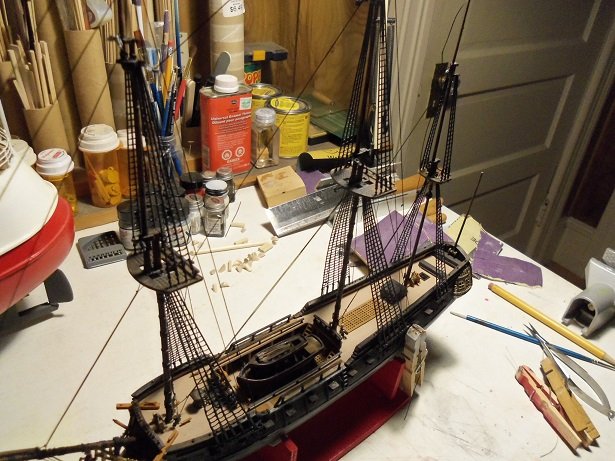
anyway.....yesterday, I began to rig the bow. I am going to use the sails ......I sewed one of the spirit sails to it's yard. that went pretty good this was met with little resistance.......but the further I went, the more it rocked the boat. I'm using a thicker black thread......it's working out OK. I sewed the sail at this time.......while I was doing that, the boat flipped on her side, and the spanker gaff broke off! at this point....everything stopped. I will make a stand to keep her steady. more on this when I get back.......the admiral announced that she's hungry! she who should be obeyed.

- 140 replies
-
- 13
-
-
- jolly roger
- lindberg
- (and 1 more)
-
I've seen them.......I may either buy one or make one in the future. I've seen quite few logs that use them. I usually do my models right on the cradle supplied in the kit. I had made an extra one when I first did the Nordkap......the trawler has it now. since I have three of these little buggers in my possession now, I'll make a stand that'll work for all of them, and use their supplied stands when they are finished. perhaps that will make for a nice Christmas present too....I'm starting to pine for power tools thanks for the suggestion Russ......I'm really starting to think about how to make my life easier thanks for the good word
- 140 replies
-
- 6
-
-
- jolly roger
- lindberg
- (and 1 more)
-
I dunno.......I just look at it.......yup, that's white black 'n white photos make it hard though. but take into consideration though that it may now be a light gray color due to aging and weathering. {my glass is always half full}
- 2,625 replies
-
- 6
-
-
- kaiser wilhelm der grosse
- passenger steamer
- (and 1 more)
-
oh....I get it........stealth mode! hey, I know what you mean. I'm on here regular enough.....but I've gotten to the point where I've got so many logs that I watch, I get trapped in either one! I really need to bounce around....a few here......a few there......I miss so much if I don't do something like that. you've made plenty of progress.....don't kid yourself.....she looks awesome! cripe! all the levels are starting to get cramped now! amazing how much you've added to her!