


popeye the sailor
-
Posts
16,007 -
Joined
-
Last visited
Content Type
Profiles
Forums
Gallery
Events
Everything posted by popeye the sailor
-

Cutty Sark by NenadM
popeye the sailor replied to NenadM's topic in - Build logs for subjects built 1851 - 1900
looks great Nenad! you'll be using this as a plug....am I right?- 4,152 replies
-
- 4
-

-
- cutty sark
- tehnodidakta
- (and 1 more)
-
thanks J.........almost done with the faring. I should be planking soon.....I think the 1 mm planking will do just fine. I've been using it to gauge the faring process. I'm actually surprised that the admiral let me do it in the computer room! I use a drywall sander....hand operated, and going across the bulkheads creates quite a noise { I try and do three at a time, moving from bow to stern}. some of the squeaks and squawks were quite ear piercing. the admiral did voice her opinion about the noise........which made me sing verses to the old song 'it's cold outside' , and my impersonation of Bella lagosi's famous line in the classic 'Dracula'....."what beautiful music they make....". "no different than me play'in my bass dear", was my next great line before I got the "well....Hurry up!" "but dear.....you can't rush these things......it's like a fine wine"......or as Groucho would've said "I'm making fine wine.....an' she's got sour grapes!" the trick here is to keep talking......any psycho babble that comes to your head she'll tone you out........and the noise follows as theories go, don'tcha know in reality..........she's a good egg about my hobby. she reads her books at her computer while I work on the boats. I was going to move the Wharf into Kevin's old room, but she was afraid that she'd never see me, so here I stay. it's nice to have her company too hope you had a great holiday as well
- 453 replies
-
- 9
-
-
- thermopylae
- sergal
- (and 1 more)
-
my bad Carl........I'll put something together. the table is laidened with faring dust at the moment. once I have 'Thermie' ready, I'll move it over and bring the Flattie out. I have to check something......I'm wondering if the mast is really the size they say it is. it's very loose in the hole.
-
good to see this build back on the table Kevin. hope you have a creative new years as well
-
WOW! very nice looking ship Pat.........would be interesting to follow along. great introduction BTW
- 1,013 replies
-
- 2
-
-
- gun dispatch vessel
- victoria
- (and 2 more)
-
the mini kit looks cool! I like the laser cuts within the parts..........it will make it easier to remove the inner areas after the boat is planked.
- 517 replies
-
- 2
-
-
- Endeavour
- Artesania Latina
- (and 1 more)
-
thanks for the kind comments and to those look'in in. part #21 is cemented in place now.......I beveled it a little, but now I can do it the rest of the way. I can finish faring the frame now. I envy you Piet..........if you want to do a wood deck for her, the kit is a spin-off of the Revell Cutty Sark. you can find wood decking here: http://www.scaledecks.com/our-story.html yes Hof.......you plank the hull, and then trim off the bulkhead posts, before planking the main deck. I read that the inner wall of the bulwarks has to be planked with walnut strips. it is always best to fare all of the bulkheads.......should one of them be off, it will show after the planking is done. it also insures the smooth run of the planking, as they follow the contour. for any novice or first timer, that would be a bad habit to be teaching them. .....and a manufacturer telling them this to boot.........I'm not being overly critical, but I just want to advise newcomers to the hobby, to be through with this......it's important. to not do this will result in a chunky looking hull......the bulkhead edging will show in a very undesirable way. another reason for this, is to match the deck platform to the bulkheads. when the planking is run, there won't be a nasty gap along the edge, should the platform need to be painted, rather than planked. there is never a dumb question Hof..........just the ones that are never asked thanks Zoltan......a happy new years to you as well now that you got your shipyard back together, I hope to see more on your Santa Maria
- 453 replies
-
- 8
-
-
- thermopylae
- sergal
- (and 1 more)
-
hello Piet....glad to see your finding time to visit the site.....hope your holiday was enjoyable and wonderful. I made some of the bark rings.......two batches. the first one, I thought wasn't thick enough, so I made the second batch. the holidays kept me from doing more on her......thanks for the good word and looking in. I looked at the hoops in the Bluenose fittings........they are 5/16, the same size that I made the birch hoops. I feel that they are too large......does anyone else agree with my thinking?
-
that's the spirit J...........keep at it till it pleases you! you could even buy some balsa blocks, or do what I do and make it out of flat stock. 1/32 {with the grain} bends real easy can't wait to see the change
-
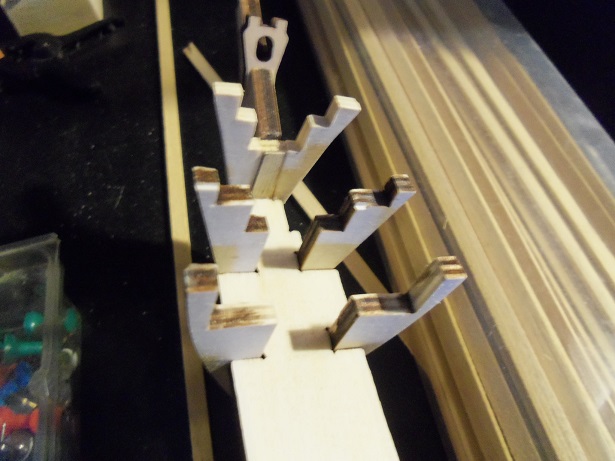
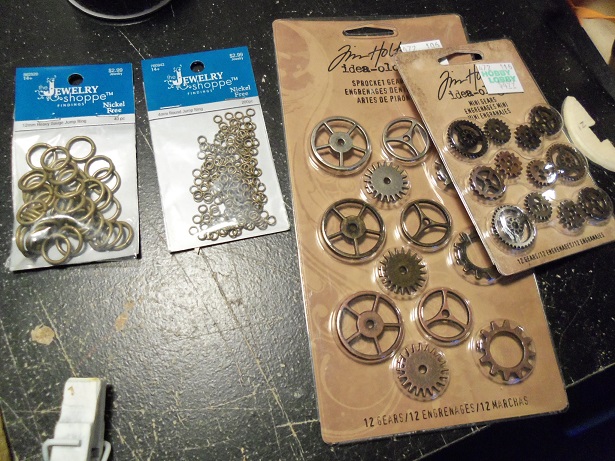
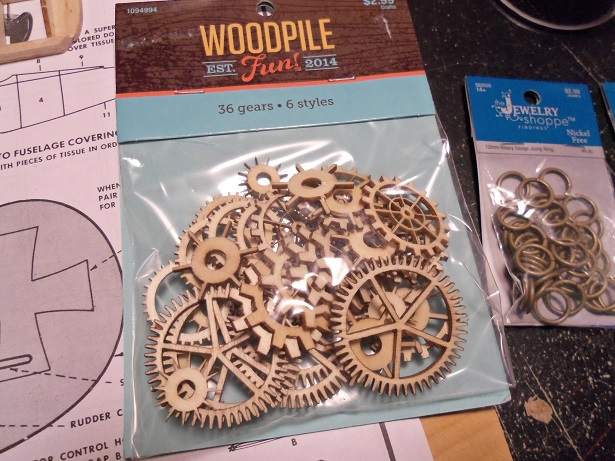
I did manage to separate most of the fittings........too bad there isn't a parts list to compare it to. I figured that I might want to scan the English instruction part, so I wouldn't have to play with the big sheet every time I need to look up something {for what there is of it}. with sheet #1 pinned to the wall, I can't even look at sheet #2, unless I take it down. I did read though that all of the : "blocks are all of the same dimension and one-hole." quote.........unquote. I don't care.....like I said, I can fix that. I did do a couple of things for right now........first, I filled in the gap left by cutting out the broken bow bulkhead. the gap is not needed, since the center spine piece is supposed to slide in the slot. I thought though that leaving it like it was would make the bow weak, and apt to break off if I got too rough with it. if I would have thought of it, when I cut out the bulkhead, I would have traced the part with the gap filled in.......all I would have had to do is shim it to the center spine and cemented it. roughly 3.5 mm filled it in as I began to fare the frame.........oh, here's a funny......in the instructions, it says to fare only bulkheads #1, #2, #12, #13, and #14. ehhhhh, shouldn't you do them all?!?!?! if for no other reason, to get the char off'em. told ya this would be a fun kit anyway.......as I started, I kept thinking that the deck platform should be in place. I would have liked to plank the deck before this is done, but they're instructing me, that between the fore castle and the poop deck, the bulwark posts need to be removed. this will be the first kit that I've ever had to do that to. the deck platform is the likes that I've never dealt with, it's made from some really rough thin plywood. I've already cracked one of the appendages between the posts, in the aft section. it wouldn't have mattered if I broke it off.....it would not be seen after the poop deck is put on. I heard another cracking sound, as I cemented it in place.......I'll have to check it out after it dries. this deck is hard to conform to the curvature, tried my best to keep rubber bands and clamps from pushing down too hard on these appendages. I wanted to take the sheet off the wall, so I could see how some of the sub assemblies go together.....haven't taken it down yet. pictured is part #21.........it needs to be beveled around the outer edge. I did it, but you might not be able to see it. the poop deck must also be cemented in place, in order to plank the stern transom and shape the counter. the fore castle deck doesn't though.......the windlass is involved with it, so best to do it later when the main deck is planked. I mentioned somewhere on one of my logs that I had gone to Hobby Lobby, to spend some of gift card money, I had gotten for Christmas {where I get my wood from as well}. I got some more of those gears that I used on the Syborn and Andrea Gail builds. I saw these other ones too.......a few of them would make great ship's wheels. I saw those rings too.......thought about using the larger ones on the Flattie........but I'm thinking differently now. the admiral showed me these.....my eyes lit up like a Christmas tree! they look so cool! these are made of wood.....as the name implies. it'll be interesting to see what I'll be able to use them on. then, I got a spool of smaller size chain. I can see if it can be used on the Syborn, but as I recall.......I don't remember seeing the martingale......or the typical rigging that these clipper ships possess. ya gotta have chain man.......not just rope {thread} rigging I might have to go for an even smaller size....I can get it...not a problem.

- 453 replies
-
- 15
-
-
- thermopylae
- sergal
- (and 1 more)
-
thanks Mark and Piet.........hope you gents and your families had a great holiday season been at the table speratically today....hoping to turn some attention to the Syborn thanks for the good word and the likes everyone!
-
nice job with the metal frames and painting.....dredges look good. don't count yourself short......you did well with the soldering, not having done it before. it'll get better........just gotta do it more {i'm not good at it either}. we try....that's what counts
- 250 replies
-
- 3
-
-
- willie l bennett
- model shipways
- (and 1 more)
-
shaping up really neat J. are there to be steps for the helm room doors?
- 258 replies
-
- 1
-
-
- harriet lane
- model shipways
- (and 1 more)
-
welcome Professor, Philo426, and to you as well Nigel it's still very early in the build as you can see.......as a mater of fact, I have the fitting on the desk at the moment........I was going to separate them. there are so many tiny metal parts, that I'm thinking it best to do it according to their assembly. you are right Nigel.......this model is very small.........I wish it was larger, like the 1:96 Revell kit. she's a beauty Philo426........and you added the studding sails, which really fills her out. I have the Cutty......my second build of her. I began to fare the frame, but I haven't gotten much further that that. I was looking through my planking strips, and I do have a good supply of 1 x 4 mm strip stock. the kit supplies 0.5 x 2 mm strip stock......not sure how contorting the 4 mm planking is gonna go. a second planking, I feel, might not be needed, since I will be painting the outer hull. still up in the air about coppering the bottom....if this was a larger kit, it might not be as big a problem. I see things that changes will benefit: eye bolts: I see an abundance of the larger brass colored eye {I forget the size}. I can substitute copper colored smaller eye bolts wherever I can, to make them more scale-like. blocks: there is a package of what looks like 2 mm single blocks supplied in the kit. from what I can see, these are the only ones in the kit......how in the heck can you make decent vangs, back stays, and pulley assemblies, with just single blocks. I have some 3 mm doubles kicking around some where.......we can fix this railings: I'm looking into getting some decent railings for this kit........bent wire just doesn't cut it. Nils has been a great help with the places he gets his from, but 1:124 scale is hard to find.......I may have to settle for the next size up.....like 1:200, or 1:350. I saw the photo etch for the Academy Titanic.... that might even do the trick. Shrouds: I know this is a small scale.......but the fore and main mast should have a wider shroud spread than shown. I'll see what I can do with this. Life boats: where? there are none in the kit. something to look into........ studding sail booms: don't recall seeing anything like them in the kit either..........again, something to look into......... a lot of this, I have time to research. I appreciate your look'in in and coming aboard. just got the badger.........got to take Gibbs out {he's scratch'in the heck out of my leg}. enjoy and hope you folks had a great holiday season!
- 453 replies
-
- 11
-
-
- thermopylae
- sergal
- (and 1 more)
-
awesome progress Daniel if anyone could make something out of this kit........you sure did!
-
consider that site bookmarked! I saw they list wood decking for the 1:96 United States........I think of all the trouble I went through to make my own
-
I'm sure you'll find a solution........I don't redo anything that's going to damage the model. firm rule of thumb of mine vents look super
-
has the look that there isn't too much head room.........standing rigging looks awesome though hope you had a super holiday!
-
have a productive 2017 Adam........glad to see you've returned
- 97 replies
-
- 3
-
-
- Willie L Bennett
- SkipJack
- (and 2 more)
-
good to see your back Adam.......hope you had a happy holidays
-
what.......crap! I thought you fell asleep sanding............ life does have it's way of robbing leisure time......there's either a lot of it, or none at all. the only thing I can suggest, is when you see it.........GO FOR IT!!! I'll have to check out your Santa Maria for any new updates. hope you had a great Holiday..
-
looking good Steffen