
HOLIDAY DONATION DRIVE - SUPPORT MSW - DO YOUR PART TO KEEP THIS GREAT FORUM GOING! (83 donations so far out of 49,000 members - C'mon guys!)
×


popeye the sailor
-
Posts
16,007 -
Joined
-
Last visited
Content Type
Profiles
Forums
Gallery
Events
Everything posted by popeye the sailor
-
 sorry for my absence Ben.....I had a rather bad case of the 'busies'.. even my vacation didn't pan out the way I wanted it to. I'm planning another one for August.......and of course, taking my birthday off too. a lot of the info I've uncovered sheds light on the same points......but there was a lot of human error and ill fate mixed in there as well. to be honest, I haven't seen too much info on that ship fatfingers. as far as the White Star buff goes, it would still be hard to nail down a definite color, as all paints were mixed on site. this suggests that the paint color might not match between ships. I settled on British Gulf LT Stone as the paint of choice. the way it allows the orange hue of the parts show through, it adds to the color. they were going to study the Britanic, since she was a close resemblance to the Titanic........I haven't read anything that tells how it worked out for them. historians.......gotta love'm I do know one thing though.......I 'm beginning to miss working on wood. I had hoped I could resume one of my other builds, once this build was under way.....there still may be hope for that happening yet! to pass some time, I brought out this one special project, that I've been chomping at the bit to start. I had to disassemble the hull, due to it becoming damaged in transit. during the larger part of the dis assembly, I began to dream of an even larger picture.....something just too delicious to pass up. but.........it gave me a chance to play in some sawdust for a little while, I need to repair the keel and clean up the ribs.........l'll shut up now I will have an update very soon
 -
it's a tough call Dave.........but a lot of folks do it, even though the above decking may hide the extra detail. unless your doing a cut-a-way, or an admiralty style build, it cannot be avoided......some of it will disappear. you've done well on the pumps........a lot better than where Revell want you to put them
-
getting caught up my friend...... your little boat.........the boat that will go in the little boat >head's spinning< is just so awesome! to do something that small is a really tough feat..........and you did a terrific job of it! love the cabinet......you said you had a plan for that piece I saw.......and man, you weren't kidding.......the chairs are really neat as well. your going way over the top on this build........superb workmanship!
-
the details are becoming more complex Nils..........with seeing the brasswork you've done in the past........should be a piece of cake looking great so far
- 2,625 replies
-
- 4
-

-
- kaiser wilhelm der grosse
- passenger steamer
- (and 1 more)
-
the riveted hull was a huge focal point............had the ship been more modern, the method of welding might have taken the place of so many rivets, although some would have had to have been used. taken from wiki....... The 2,000 hull plates were single pieces of rolled steel, mostly up to 6 feet (1.8 m) wide and 30 feet (9.1 m) long and weighing between 2.5 and 3 tons.[69] Their thickness varied from 1 inch (2.5 cm) to 1.5 inches (3.8 cm).[40] The plates were laid in a clinkered (overlapping) fashion from the keel to the bilge. Above that point they were laid in the "in and out" fashion, where strake plating was applied in bands (the "in strakes") with the gaps covered by the "out strakes", overlapping on the edges. Steel welding was still in its infancy so the structure had to be held together with over three million iron and steel rivets which by themselves weighed over 1,200 tons. They were fitted using hydraulic machines or were hammered in by hand.[70] In the 1990s some material scientists concluded[71] that the steel used for the ship was subject to being especially brittle when cold, and that this brittleness exacerbated the impact damage and hastened the sinking. It is believed that, by the standards of the time, the steel's quality was good, not faulty, but that it was inferior to what would be used for shipbuilding purposes in later decades, owing to advances in the metallurgy of steelmaking.[71]
-
take into consideration that the crew was ill trained to handle such an emergency. everything I've read and seen so far, suggests that they weren't trained properly. they had received a warning from the S.S. Californian, and from other ships about the icebergs. even the look out testified that his binoculars were missing from the crows nest.........had he had them, he might have seen them sooner. a lot that I read boasted that no expense was spared in the building of Titanic........but other accounts I've read stated otherwise. Titanic was a blunder in the making.........the one saving grace, was that she didn't have a full manifest......or the toll would have been much higher.
-
interesting article Ben......but I think another question would need to be asked. Why would the ship take a course such as that, if it's bow wasn't modified to act as an ice breaker? it doesn't appear that the Titanic was equipped to handle ice .......I would think that the bow would have had much thicker plating to withstand the impacts. the Olympic also hit an iceberg in Sept of 1911.........and the Britannic had to lay in wait, til Titanic was finished. this ship was only in service for about a year, when it was hit by an enemy mine or torpedo and sunk. the Britannic only lays in 400 feet of water..........the Titanic, in over 2 1/2 miles.
-
I went online George and found the H2 channel website........but the videos that they have are only 2 to 5 mins long. they have over 2,000 videos though, but I'm going to look on xfinity {comcast cable} and see if they have access to the H2 channel. the one I'm looking for was very recent, so it should be on file it talked about Mr. Bruce Ismay........a cryptic message sent to the White Star Line Office about the disaster, and his elusiveness after rescue. it also went into the legalities of the disaster. I find it odd though, that one of the main points of blame, was the inadequacy of the life boats. while there were only 22 life boats {and a number of collapsible life boats}, during the abandonment they were poorly filled..........so many more could have been saved. so many mistakes of decision were made during the disaster. by all means.......if you find it before I do, please let me know .......I only saw a snippet of it at work thanks Nils. the kit only supplies one size thread for the rigging........I'm pretty sure that there must have been different sizes that actually made up the rigging. I have some very nice diagrams, but at this scale, they would be hard to do. a build that your doing would do nicely Titanic Paint and Color Reference some of them might be of interest to you........take a browse through some of the sub files, and you should find them. I do wish I was doing a build at the scale in which your doing such wonderful work sir!
-
here are a couple more bits of footage for you to enjoy https://www.youtube.com/watch?v=FFfHhdjs9cI
-
thanks you for all your kind comments and suggestions....I really appreciate them another day of not finding any time to play .........but I did manage to do some browsing. I found this really good documentary on you tube. I was hoping to find the one that was on H2 {it's a history channel}.......it focused on the expansion joints that were segmented along the decks. just another guess-ta-ment on how she sank. I hope you enjoy this....it's in five parts, and the next one starts automatically {it did for me} anyone who has build planes and cars, know this plastic very well
-
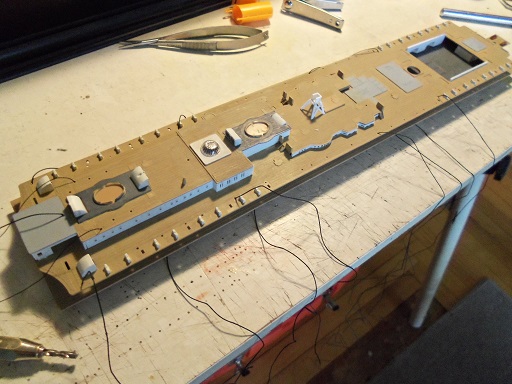
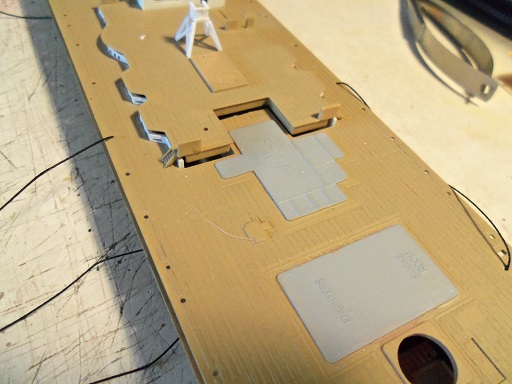
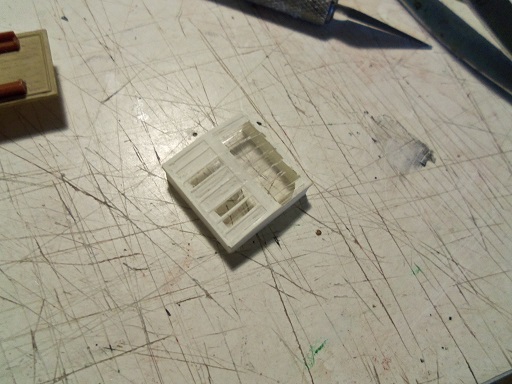
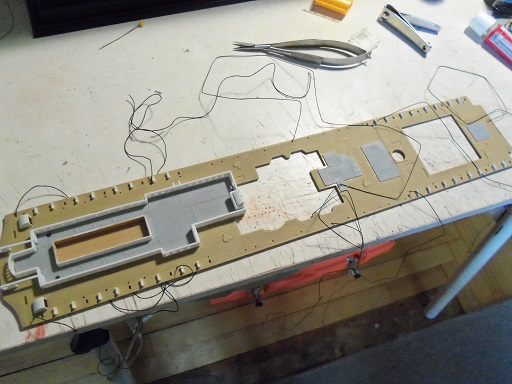
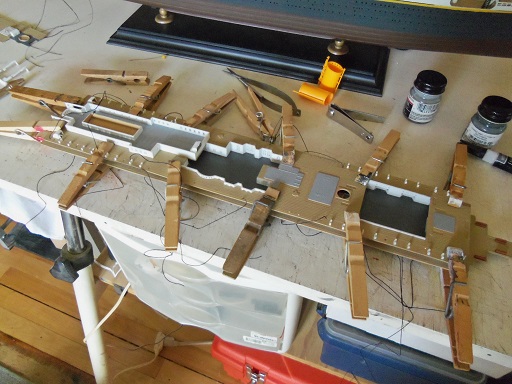
I finally got the other pictures out of the camera. when the camera was ready to go, the clamps had been removed from the two decks. I was doing some dry fitting, as well as painting some of the part with flat white. I had looked through Doris's complete build log......for those who haven't seen it, it is a work of art. she reveals another botch in the kit's design...........I may follow suit with her solution. these countersunk structures look good from the sides.......but what of the ends? to be honest, I saw a glimpse of this earlier, but didn't think much of it until I read her log. both raised decks are like this. I had mentioned that I botched up the forward skylight......tried to mask the windows, since it was made from clear plastic. it didn't go as planned. the only solution was to clean off the paint and try redoing it.........I was going paint the windows with the window maker, to see if that would fix the scratches I had put into them. but my luck went downhill fast........the part simply crumbled and broke in my hands! if you recall what I had mentioned earlier, clear plastic is pure styrene..........harder, unforgiving, and apparently a bit more brittle, that plastics that have had color additives added to them. the only recourse here, is to make another one. I was talking to the admiral about getting some thinner plastic sheet to make it from.........and then I realized that I had those decks from the United states kit.........I could use that so I've trimmed all the raised stuff off of one of the pieces, and I now have plenty of sheet plastic ti make it......as well as fix the problems with the raised decks. we'll see where I go from here


- 573 replies
-
- 17
-
-
you would be amazed with the rigging that the Titanic had Mark.........the TRMA has some very nice diagrams for those who are doing the wooden kit. it's too bad I can't include some of it on this model. I'm finding a little harder Greg..........I've been spoiled ........soooooooooooo bad! on wood, it's a lot easier Tom..........I usually use white glue. it dries flat and hardly noticeable......where I use flats almost exclusively, I'm forever touching up the glue marks.
-
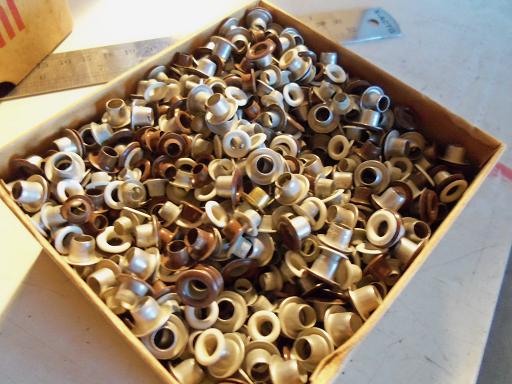
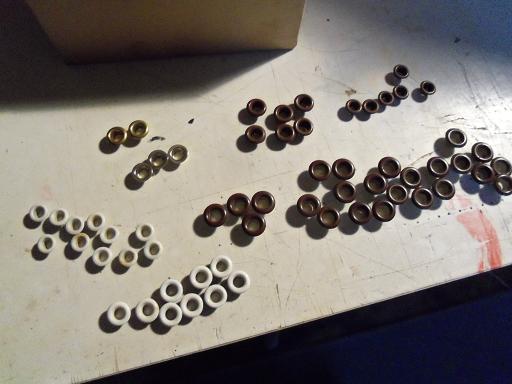
too bad you didn't ask around concerning those hole rivets I found this box of 'em in the cellar a while ago.........there's a bunch of sizes - mixed. I separated what I could stand.......it's the equivalent to the Chinese water torture I have plans for a Danmark down the road....I got more than enough, if you need any
- 2,625 replies
-
- 9
-
-
- kaiser wilhelm der grosse
- passenger steamer
- (and 1 more)
-
Cutty Sark by NenadM
popeye the sailor replied to NenadM's topic in - Build logs for subjects built 1851 - 1900
just too cool Nenad- 4,152 replies
-
- 1
-
-
- cutty sark
- tehnodidakta
- (and 1 more)
-
thanks Nenad that's the tough part.......all the little parts need to be done first....I'll be knock'in things off left 'n right wait till I tackle the communication wires
-
glad to see your back Augie........and even happier that you picked up where you left off without skipping a beat looking very nice!
- 2,191 replies
-
- 2
-
-
- confederacy
- Model Shipways
- (and 1 more)
-
I just looked in my pictures folder, and I found these two that I had imported before recharging my camera. rigging the decks needed to be done at this stage. the stern section was rigged with back stays.......then the funnel lines were added to the boat deck. then the A deck and the boat deck was cemented together I have other pictures, but they are still in the camera I'll post them later
- 573 replies
-
- 13
-
-
ohhhhhh.........getting use to being back at work again, is a complete drag! what was worse....it was above 90 degrees all week end! I'm glad it's over, and I'm on my 'week end' again they do come with difficulty levels Greg.......but, like wooden kits, they are not clearly defined. I started this medium with an expert level wooden kit, but i've found equal enjoyment with advanced beginners kits. the one big hurdle that the plastic kit has to maintain with wooden kits though, is the ability to mimic the wood appearance. plastic kits do command more attention towards painting prowess, and the ability to weather finishes. complexity of plastic kits, can be noted by the number of parts and how much detail is included into the finished model. both mediums have enjoyed the benefit of photo etch and resin.........as long as aftermarket can satisfy both mediums, then folks will find them equally as enjoyable.
-
glad to see you got them KP now the oar issue is resolved. I like what you did with the sail issue.....I wouldn't have believed they were set up like that, If I hadn't seen it for myself. I don't know about any one else, but I found that to be illogical. two opposing wind masses......and without affecting the other sail, no less...........the poor vessel would be spinning in a circle. I wonder if anyone else ever came across this?
- 119 replies
-
- 1
-
-
- la reale de france
- heller
- (and 1 more)
-
very nice progress Larry
-
Cutty Sark by NenadM
popeye the sailor replied to NenadM's topic in - Build logs for subjects built 1851 - 1900
looking awesome Nenad.......nice work on the cat heads- 4,152 replies
-
- 1
-
-
- cutty sark
- tehnodidakta
- (and 1 more)
-
congrats for the milestone of getting her off the board! the hull looks very nice...will enjoy seeing the progress you make on this fine vessel
- 2,625 replies
-
- 1
-
-
- kaiser wilhelm der grosse
- passenger steamer
- (and 1 more)