HOLIDAY DONATION DRIVE - SUPPORT MSW - DO YOUR PART TO KEEP THIS GREAT FORUM GOING! (Only 51 donations so far out of 49,000 members - C'mon guys!)
×


popeye the sailor
-
Posts
16,007 -
Joined
-
Last visited
Content Type
Profiles
Forums
Gallery
Events
Everything posted by popeye the sailor
-
 you'll also notice that it's on the other table.........I'm trying to get back to her {the Goth}.......I swear!
 -
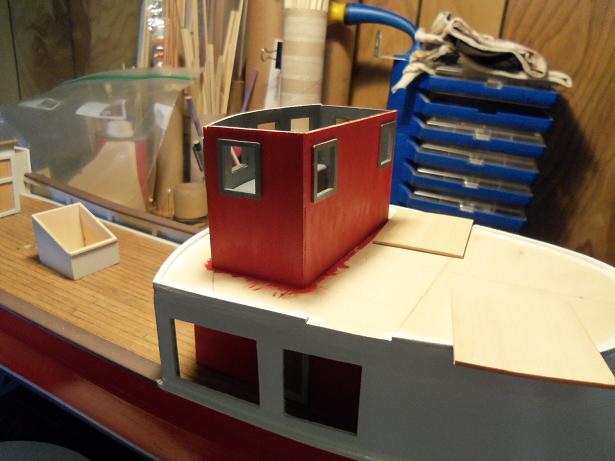
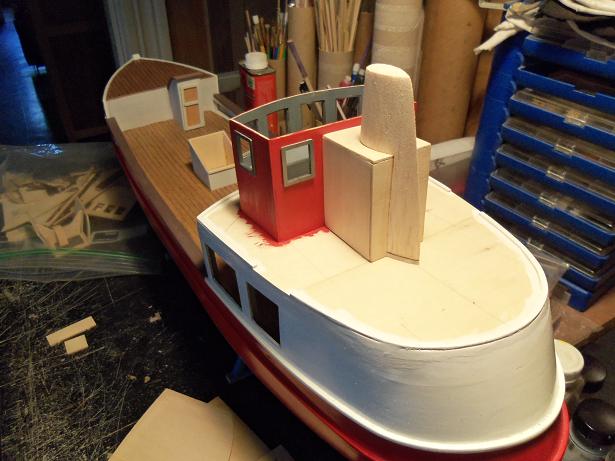
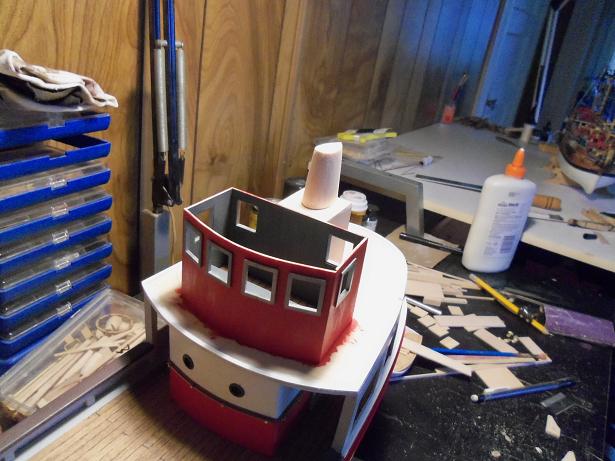
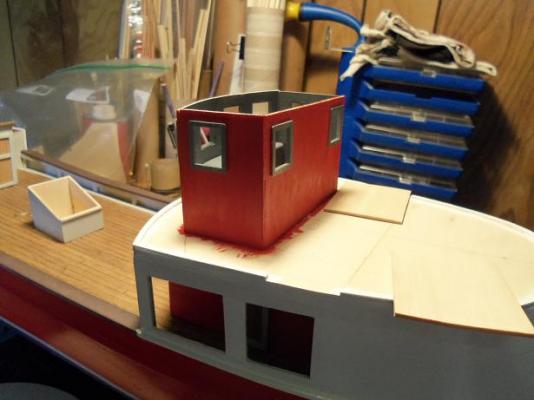
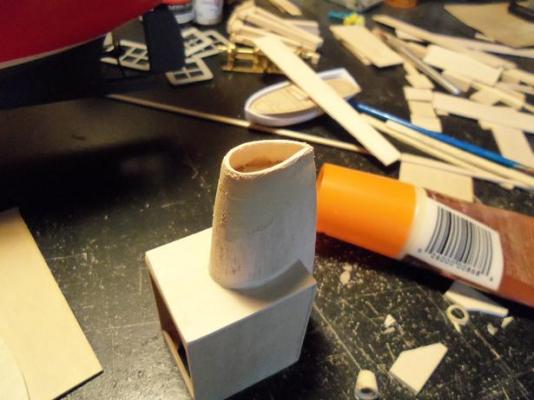
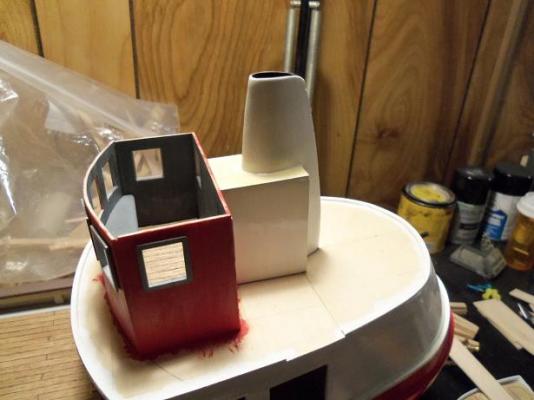
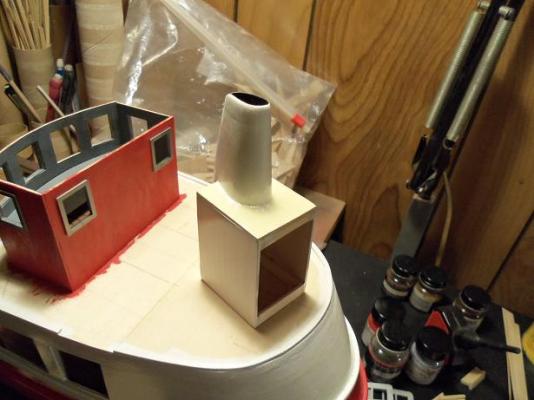
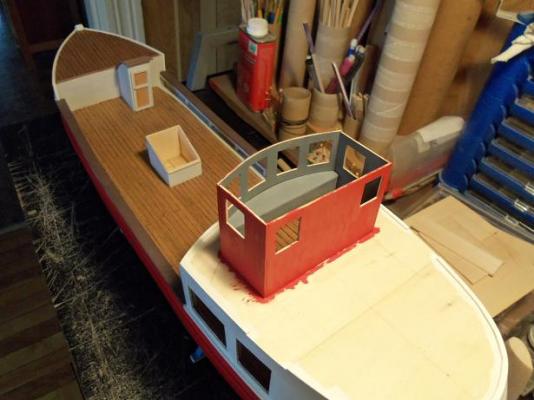
I did make more progress on it on Friday. after the paint was dry, I put the frames in it. I began to make the aft cabin once it was squared off, I did a bit of sanding, and then put the roof on. it was time to trim and attach the funnel then the rim was made from some very flexible wood stock and cemented in place. it was sanded and shaped......filler was used to fill in the small gaps I did a bit of sanding, and then gave it a coat of primer, to seal the balsa. this will be sanded a bit more later I gave it a coat of paint. perhaps I can do something to hide the small imperfections as you can see, this Billing's paint is very shiny. I have never used any paints, that had this much shine. it dries to a hard finish.....good for the balsa........god know how many marks I had to sand away while doing this


- 747 replies
-
- 13
-

-
thanks Nils............you mean the Nordkap. I started with work boats........I'd love to get another Nordkap and build another old Billing's kit out of it.....the Progress. I wouldn't mind getting another Cux as well I look forward to the day when you bring yours to the table I thank you for your kind comments....I do enjoy how much that can be added to these types of builds:) I hope I didn't teach you any bad habits David the only thing I wish I had done, was make the bow straight, not rounded. I think it would look much better. this is a method I wanted to try, since I'm not too good with CAD, or drawing blueprints. a second hull can also serve well as a test build, for when new ideas are tried. heck......it even allows a person to get the most out of a kit! thanks for the good word....pleased to have you looking in oh Sjors........your buying tools for ALL the right reasons! what I could do with those parts panels I wouldn't dispute what Piet is saying either Augie............I have done just as well without those tools. perhaps somewhere down the road, I might get into buying them. I'll stay away from the cheaper ones I appreciate all the ideas Piet........I have used the drill method. I know full well the burns you can get from heated sandpaper. I have a coping saw......don't know where I got it, but I have one. I also have my trusty scroll saw.......used it for a few ideas that sprang into my head. I bought thin blades for it........I forgot where I put them, but when I rearranged the garage, I found them. I have a dremel too. I don't use it too much though, but I got a small booklet with it that shows all the neat attachments you can get for it. I'll look into it a bit more. I do like your idea for pulleys.........I will need some for this build. I'll see what I can come up with.
-
........it's 50/50 whether you'll get a good job or not, rushing through a step. if you turn out those parts, with the way you build looks......I don't think you'll have much of a problem there fantastic work thus far Bob!
-
Cutty Sark by NenadM
popeye the sailor replied to NenadM's topic in - Build logs for subjects built 1851 - 1900
great job testing out the copper the tool looks really cool as well exactly......have fun with it!- 4,152 replies
-
- 1
-
-
- cutty sark
- tehnodidakta
- (and 1 more)
-
darn.......I see this post too late......gotta shuffle off to work......talk to you tonight thanks Piet!
-
I have those tools...........so, I guess I need to put some time into it then. sounds easy enough by 'cool tools' , I meant a lathe, or tools of that nature.......I lack in the power tool dept. so far, my waste pile has mostly been wood. I'll do a bit of experimentation.....if not on this build......the others for sure
-
unfortunately no Piet..........I did this with the Mary Ann build, and at that scale, it was a pain. of course though, I was still new at this sort of thing, and beginning to experiment with it. can't say that I've progressed much beyond that. I am going to try it on a couple of my larger scale builds, but I'll cheat a little and use doll house hinges. seeing what you and others on the site, are doing with metal, is really inspiring....but.......well, it makes me wish I had some of those cool tools but you never know....with all the cool stuff floating around here......it's vary hard, not to get ideas! thanks for the good word!
-
the crane set up looks great.......don't kid yourself the rig looks very life like...well done! you've done a really nice job on the armament too.........nice work on the prop for the torpedo. I didn't know that they were experimenting with Plutonium fuel cells back then
-
awesome looking progress John! shaping up to be a sweet looking hull!
-
just a small update: the hull dubbed Curly is in the garage. it too had gotten it's first major sanding and filler coat. when it is smooth, it will also get the rub rails and primer coat. the one thing I did notice.....is that the Boulogne hull weighs less than the Curly hull does......understandably so.......
-
I've got to make the doors...I had used a couple for the M&M build. I won't disappoint you John I also have plans for the life boat....just for you I'm not going to be painting it blue........maybe red! just kidding...........I will try and leave it a wood color, but I'm going to do the same thing on this one, as I did the Nordkap. wish me luck! thanks for the good word!
-
just a small update: the hull is in the garage..........it's had it's first sanding ans now has the first filler coat. once the hull is smooth, I will do the rub rails and give it a primer coat. I did notice one small problem with her though.......that opening in the deck that I plated over, has begun to ripple. I've shown how I'm going to make up for the thickness difference.....I'm going to do it and weight it down.....then I will give the deck area a primer coat as well. hopefully that will thwart any more of this from happening. more to come
-
I believe that wood is called mahogany {that is, if it came with the kit}......and yes......it can be a bugger! can't even breathe on it, without it splintering. I keep a small supply of different widths........the only thing I worry about is tapering. looks like you have quite a process going........I'll look forward in seeing how it works out is that a plug, or do you need to hollow it out? I'll show you what I have on my build........at least yours is wood!
-
thanks Pete, Ed and bob almost to the point of planking the upper deck........I can do the front area, but you know how it goes.....I like to be able to do the whole enchilada (not that I had Mexican tonight......just 'ole American clucker} yes Ed........I'm still trying to figure out what the heck it is I'm doing........as long as the admiral doesn't start squak'in about me clutter'in up the joint.......I'll keep doing it yepper Bob........I should be jailed for having this much fun. with the way this world is going........I'll take my fun where I can git it I'll follow your prescription........Dr. Bob! thanks for all the likes.....I know your all speechless. I'm a real boy wonder...........everyone looks at me and wonders........is that a real boy!
-
getting wood to look like metal, is a hard feat indeed. it can be done using resin.....just give it light coats and sand. to be honest, your so far along on this build, it might be something you'd want to save for the next build. I also had the privilege in starting my wood modeling with an old Billing's kit. deck and stuff printed just like yours.........and of course......not laser cut. sorry to hear of your situation.....I hope your doing better.......scary to say the least.
-
coppering looks great..........looks as though it's aging those bulwark panels are a nice bit of detail......I've not seen this in any builds, besides yours and Nenad's.........it adds quite a bit! good to see your back at the table.
-
jeeze.......I guess we'll just have to flip Sjors over and count the rings I wish you both well on your upcoming celebrations.
- 1,279 replies
-
- 2
-
-
- agamemnon
- caldercraft
- (and 1 more)
-
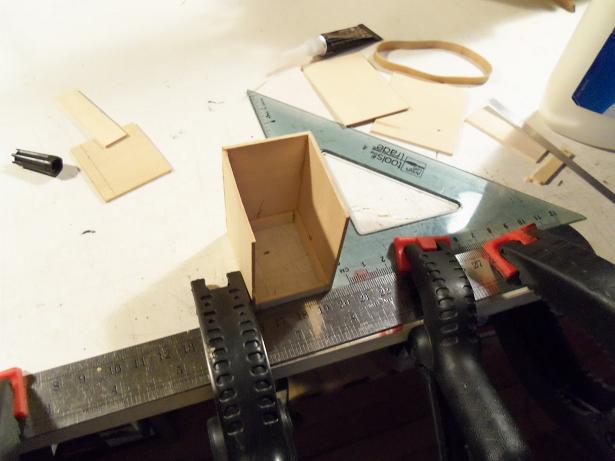
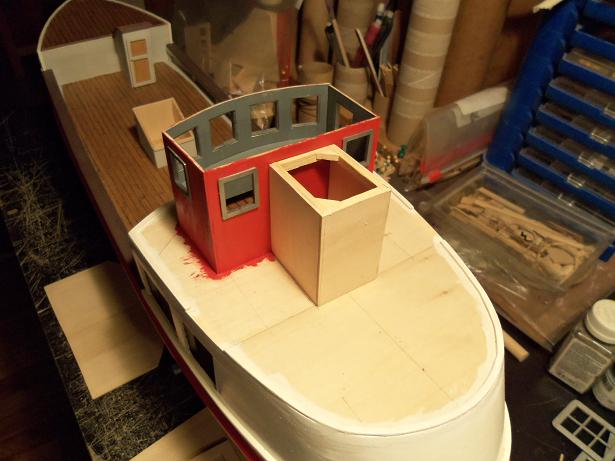
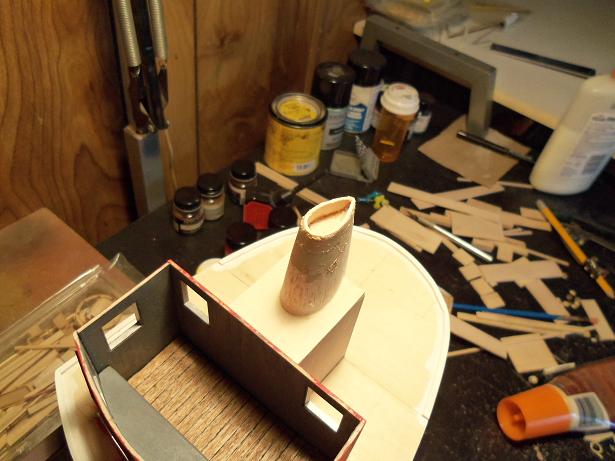
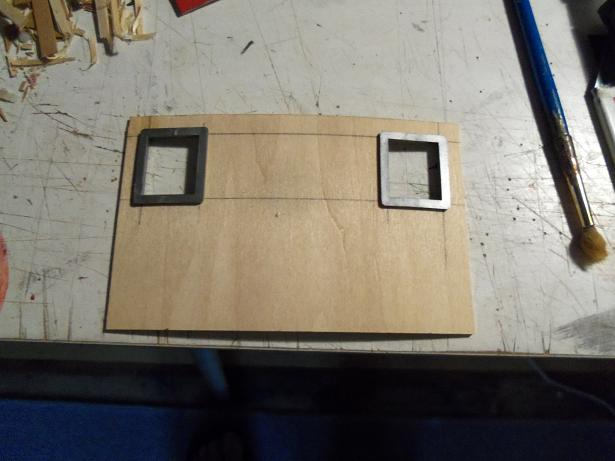
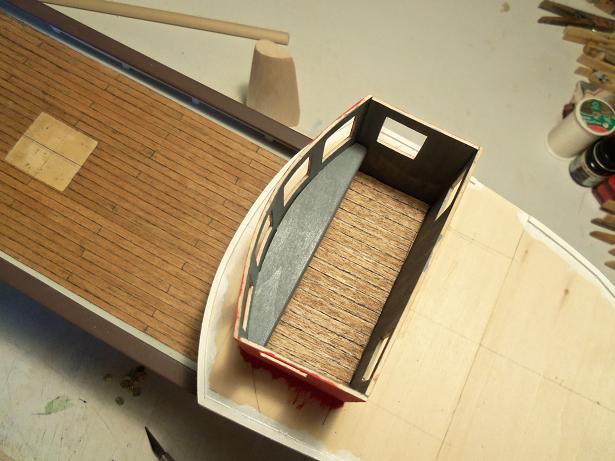
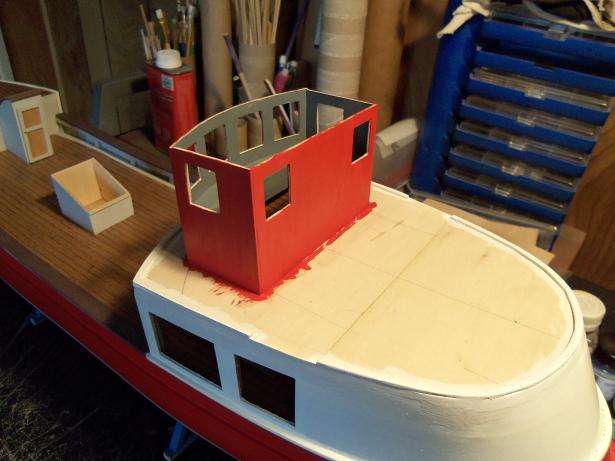
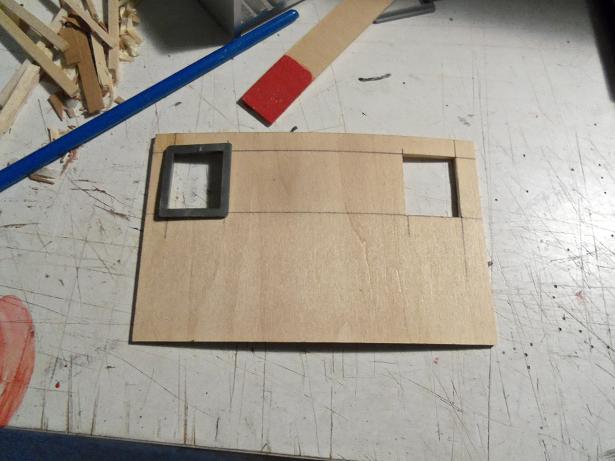
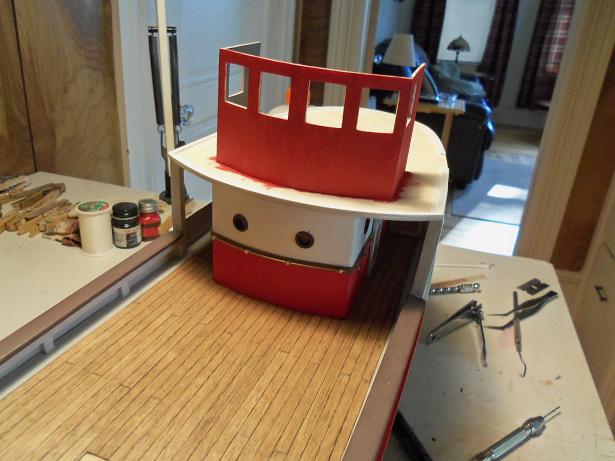
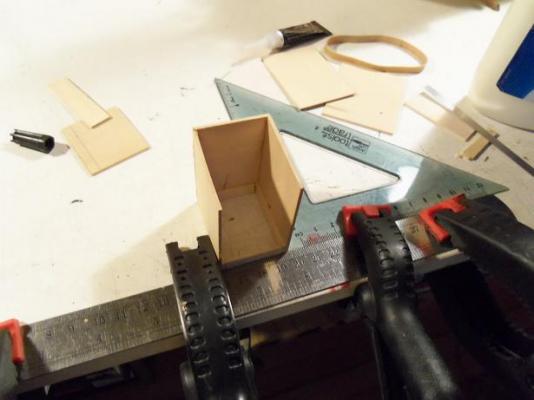
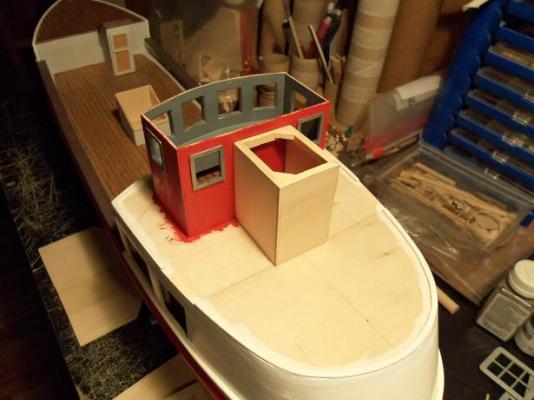
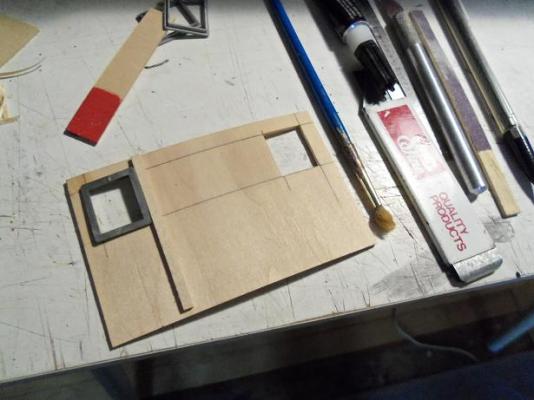
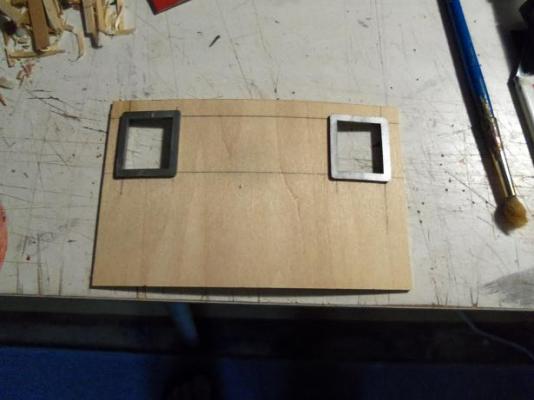
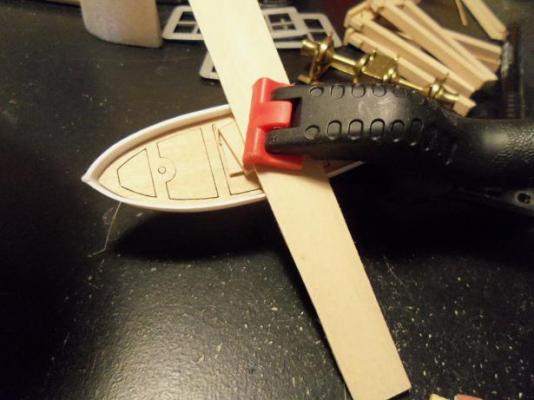
the dash was painted the same color as the interior. going back to the back wall, there was a thought to box in the windows, to create the doors for the helm the other window was sized to fit the frame the back wall was installed......but first the interior was painted. ....and the exterior was painted in signal red I have the life boat from the Nordkap booty........the insert for the interior of the boat is not laser cut. so I began to cut it out. the card it comes from was curling in the opposite direction from what I need it to......go figure........so I clamped it in the boat to see if I can persuade it to go the other way. not that this really matters.......with it totally trimmed and cut out, it will become a bit more flimsy. it's printed on 1/16 thick stiff plywood.


- 747 replies
-
- 13
-
-
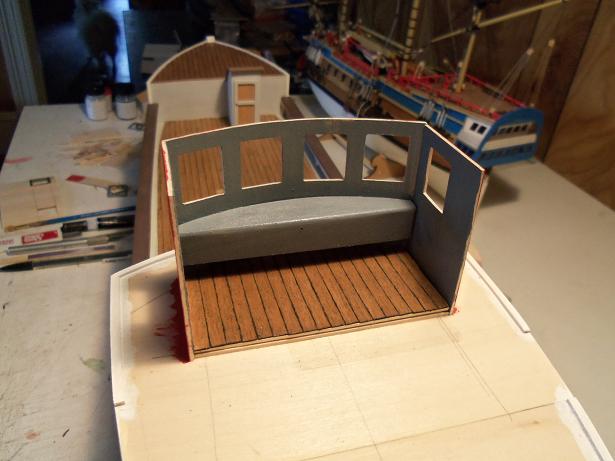
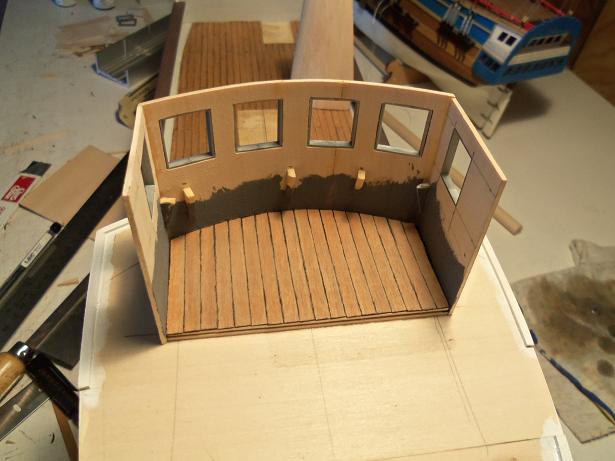
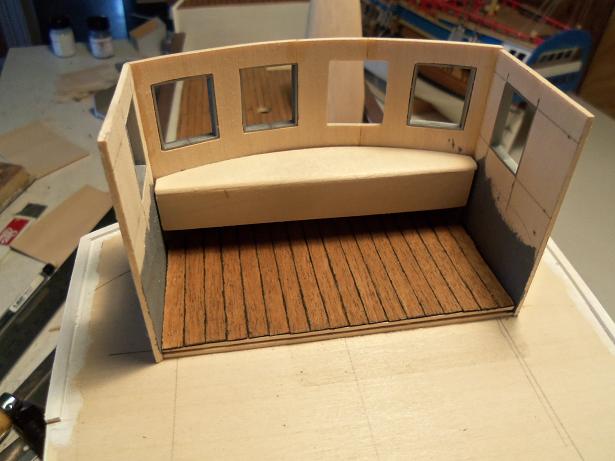
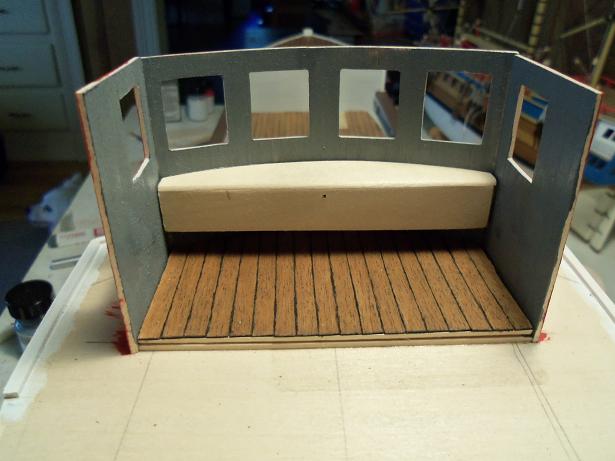
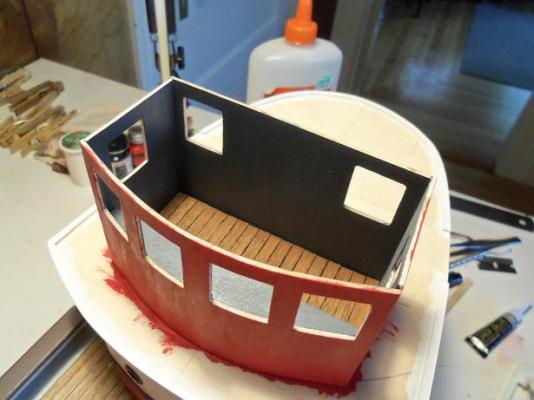
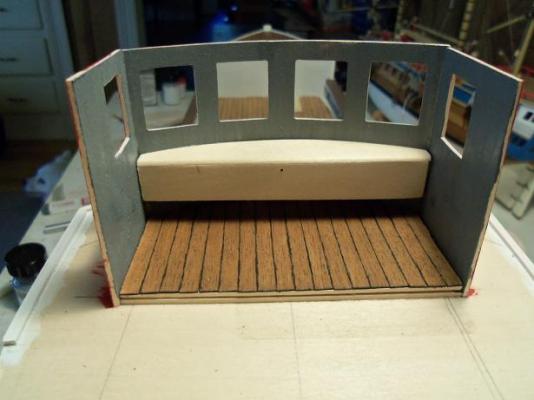
I have a few pictures from last Friday. the floor of the helm is planked after the lower part of the inner walls were painted. this is an argent gray. the floor has been sanded. then the dash was put in place just for a look see. the floor has two coats of lacquer. I began to make the back wall. the dash was cemented in place I tossed around the paint scheme. thinking that it would look odd with the two tone look, I went with a solid color. I was going to accent the windows in white, but noting that the port holes below are brown, I have to stick with that. not a big deal in my book


- 747 replies
-
- 12
-
-
I guess you could call that an Admiralty style plank method then. I would think that for anyone to do this, as far as fully planking a hull goes, if your not cutting your own planks, there could be quite a problem with gaps. the oldest method that I know of, is planking from the garboard up
-
Gnomes are like that, you know.......{although, he's pretty tall for a Gnome......that's why he lives in the big house} thanks for the updated pictures......you didn't have to, I was just wondering if you had any playtime, with all the changes you were making. your ratlines look really nice.........Aggie is looking really great!
- 1,279 replies
-
- 1
-
-
- agamemnon
- caldercraft
- (and 1 more)
-
you'll never beat Jonah.........he saw all the ribs of the whale! she's looking good Mark!