HOLIDAY DONATION DRIVE - SUPPORT MSW - DO YOUR PART TO KEEP THIS GREAT FORUM GOING! (89 donations so far out of 49,000 members - C'mon guys!)
×


popeye the sailor
-
Posts
16,007 -
Joined
-
Last visited
Content Type
Profiles
Forums
Gallery
Events
Everything posted by popeye the sailor
-
 I am as well Dave.....but sadly, much of my tool buying has been geared toward the automotive field. when I quit the garage, I went into warehouse work. now I work on trailers......been doing this for about ten years now. I have quite a few specialty tools for automotive.....stored away in my garage at home.
 -
pulley assemblies look very good......which looks good on the cannon placements. sweet job all the way around
-
very nice progress.....if your going to add weight. do you have the quadrants compartment-ed out? {fore / mid / aft}
-
scroll saw troubles
popeye the sailor replied to michaelpsutton2's topic in Modeling tools and Workshop Equipment
if I'm correct, these saw work off of a spring tension in the upper part of the arm. the tab on the end is pushed down to insert a new blade. the end under the table is the reciprocator. do you have a manual, or an exploded part's view to look at? -
scroll saw troubles
popeye the sailor replied to michaelpsutton2's topic in Modeling tools and Workshop Equipment
Your Craftsman Scroll Saw/Sander was thoroughly inspected to rigid standards prior to leaving the manufacturer's factory and should give you many years of satisfactory service. Occasionally when the Craftsman Scroll Saw/Sander is removed from its carton and the table attached, the user will notice that the blade does not appear to be perpendicular to the table surface. Before attempting to correct this condition, first check to see that the table is in its horizontal or zero degree( 0") position. Use a square or other right angle device (a piece of paper will suffice) to check the blade position relative to the table surface. if the blade is not perpendicular to the table, simply push the upper arm of the saw frame in the direction that will correct the blade alignment. Handling the saw by holding the upper arm of the saw frame can also cause the saw blade to tilt from the true vertical position. this is not an unusual condition and can be easily corrected by, again,applying slight pressure to the upper arm of the saw frame in the direction that will correct the alignment. if the user avoids the natural tendency to use the upper arm of the frame as a handle when lifting or moving the saw, there should be no further need to realign the blade. Figure 5 shows the proper way to pick up the Scroll Saw. Before deciding on any adjustment, it is recommended that you operate the saw and make some trial cuts so that you can experience scroll cutting. Be sure to check the mounting of the saw blade in the blade holder prior to cutting. Generally the blade is mounted so that the teeth are facing front. However, the blade can be mounted with the teeth facing the side. Always have the saw teeth oriented to a downward cut. Boy.......I didn't think it was this hard to copy and paste a section of a PDF manual, but the spelling was so jumbled! almost a waste to have posted this. it's not the problem. I got an old Craftsman scroll saw from a pawn shop......it has a built in side disc sander, but I don't have those parts. with the way that this scroll saw is made, I can see where this problem would arise....I found myself doing the same thing. from what I can see, there is no adjustments for the tension of the blade. what I have noticed though is that the blade suffers from deflections while it is in operation.....there is no built in guide for the blade, as it comes through the table. your looking at a 1 mm thick blade, coming through an opening that may be around 5 mm wide. even if you were to use {or make} a guide for the piece your cutting, adding to much pressure to the 'work' will make the blade 'walk' side to side. if your using a guide......work very slowly, allowing the blade to cut it's path. I thought I might have saved the link to the instructions and stuff, but I guess I deleted them. I would suggest making changes in the way your cutting, and see if it works out better for you. -
thanks for the good word and all the likes! I took Monday off......hopefully I can get more done on her thanks John thanks J........just the bow spirit for now....I have a few more parts that will go on the bow area. with the spirit in place, I can get a better idea of where the other parts go thanks for the good word! the Tee shirt idea.........I like it!
-
glad you made the trip....you two what a great way to spend a birthday
- 1,616 replies
-
- 1
-

-
- caldercraft
- agamemnon
- (and 1 more)
-
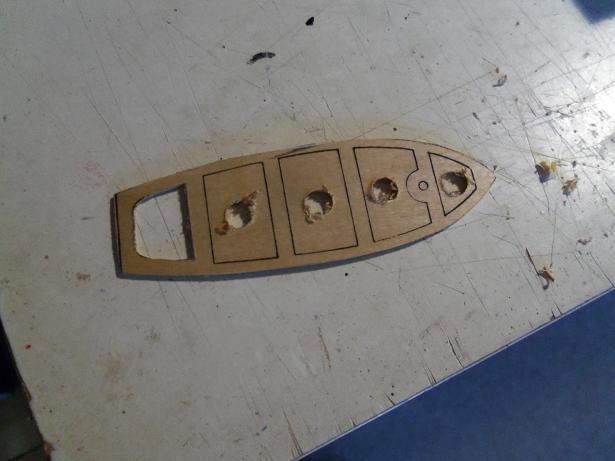
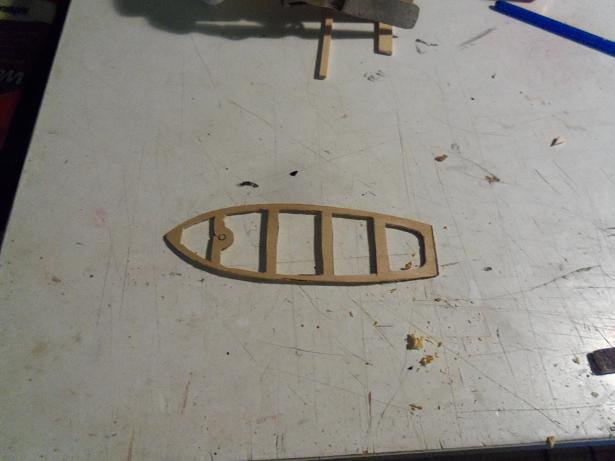
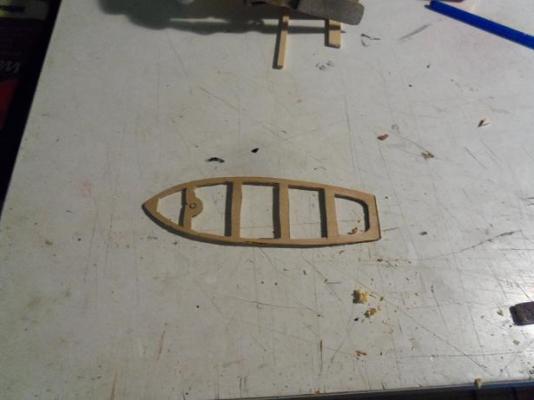
I cut out the 'punch outs' for the insert that I spoke of earlier. the part is not laser cut, so I drilled some holes in the areas that needed to be cut out. Iused my scroll saw for this. I wasn't the steadiest when I cut them out.....I may go in a different direction with this. this is a really thin plywood......very stiff and tough to sand, as well as work with. all I have at my disposal is either 1/16 and 1/8 basswood flat stock. the grain of the wood, either way is going to play a big part in how sturdy one would be...I've already tried to make a second one.....I don't like it. anyway, this one didn't come out as well as I would have liked it to. so, I may try a different approach. I began to add the ribs to the interior of the plastic boats. I continued on........and soon they both were done. I still need to trim one or two of the ribs I took another Monday off.......I'll see what I can do further on them


- 747 replies
-
- 14
-
-
thanks Pete......this was done in my first build, a newbie idea http://wenzelswharf.wordpress.com/2011/07/01/the-nordkap-476-part-40/ http://wenzelswharf.wordpress.com/2011/06/29/the-nordkap-476-part-38/ http://wenzelswharf.wordpress.com/2011/07/01/the-nordkap-476-part-39/ http://wenzelswharf.wordpress.com/2011/06/01/the-nordkap-476-part-22/ these do have some aspects of the boat.........others are just for musing. feel free to browse around the Wharf.......I don't mind at all! this build was my kick start into this wonderful medium. for an already started build that was given to me, I truly enjoyed it. .....and I learned to bash.......something I think every newbie should try. if you think about it, it's the basis for all that one will do in a build......fashioning parts and making shapes. I continued looking for the logs where I made the boat......Eureka! http://wenzelswharf.wordpress.com/2011/05/26/the-nordkap-476-part-19/ just click on the links at the bottom of the page, and you'll see these logs in order. it all boils down to what is supplied in the kit before you, and what you do with the supplied parts. sorry to have gone on such a tangent Pete, but I wanted to show you how I got this idea.......more importantly, that I was a newbie when I though of doing it....I had not read of it being done before. thanks to you as well JesseLee.........in continuance to what I've been saying, truth be told......it probably has been done before. I can't really say that it was my idea.......I probably just brought it to the forefront again I'm glad I did though......it is a good idea. for those who are at a loss with scratch building, this is a great exercise for the imagination.
-
I'm sure you'll figure that out. once you get organized......is it for fumes or for sawdust collection? if for sawdust, I think small sized dry vacs under the table {however many you think you'll need} might fit the bill. the lament will be, having to clean the 'pots' every now and then. I will look forward to the pictures......I really liked your last set up
-
glad to see your back! looks as though your taking some lessons from the Wasa {Vasa}. I like it none the less......the imagination that is going into this build is very good......keep going! I look forward in seeing more!
-
Cutty Sark by NenadM
popeye the sailor replied to NenadM's topic in - Build logs for subjects built 1851 - 1900
you've gone from massive rain to a drought!........I know all too well what your going through. I lived on a small farm when I was growing up. our water supply was from a well, and every August it would dry up. we'd have to truck the water from the river in 55 gal drums, for our use as well as the livestock. we would have supper early......after that was bath.....all of us down at the river....all eight of us {not including parents}. it was kinda cool, because it was the only time we'd see our mother swimming in the river with us ;D tried to get her to go off the rope we had in the overhanging tree......no dice I hope things turn around for you soon!- 4,152 replies
-
- 3
-
-
- cutty sark
- tehnodidakta
- (and 1 more)
-
time for that later........I think you have company
-
Sjors........the only way you can hide a hull that big.........is if you stood it on it's stern and put a lamp shade over the bow! she gave you the 'look'........didn't she? all admirals have that look......my admiral has one that'll chill me to the bone! you two have a good time!
- 1,616 replies
-
- 1
-
-
- caldercraft
- agamemnon
- (and 1 more)
-
very nice popjack! I have some sails to do as well {for a friend}. I'm on my own.......your a very lucky guy!
-
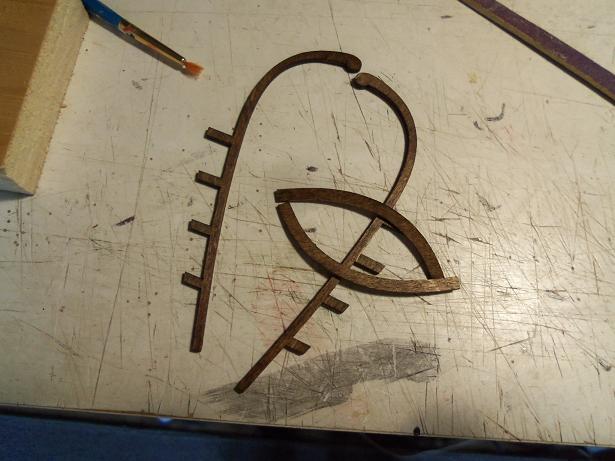
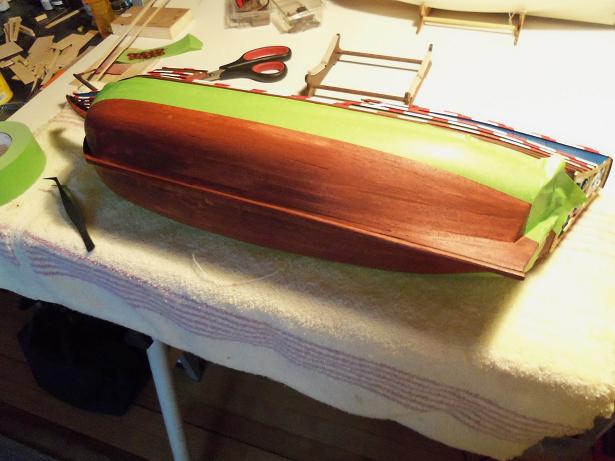
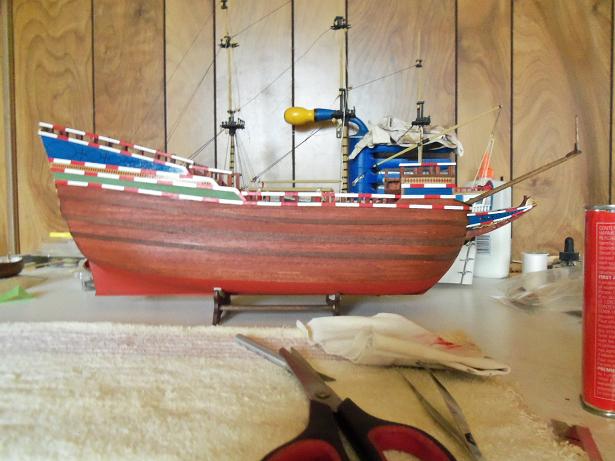
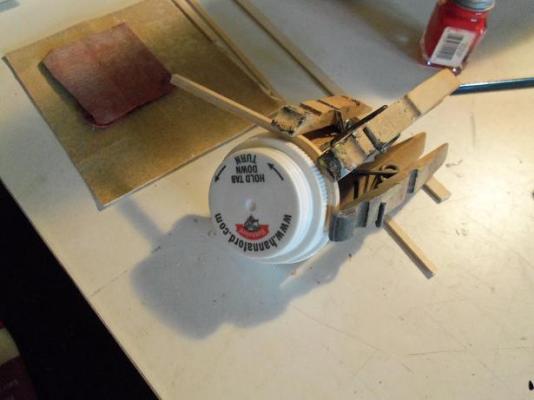
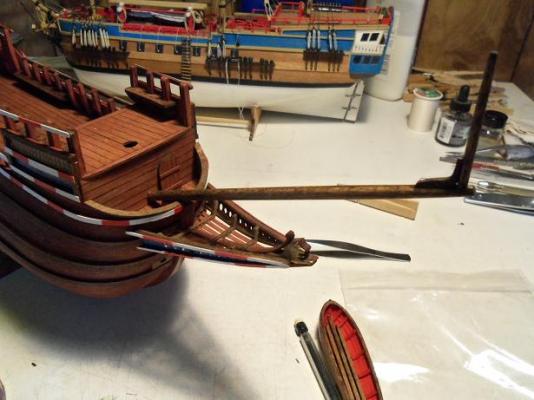
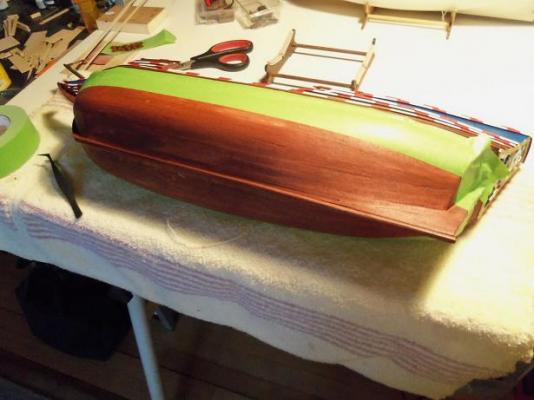
here is a little progress I made yesterday. I have more parts to add to the bow, and I stained them in prep. in my pictures of the ship, I do not see these curved rails. I will put them in though, because of what I have planned for them. I'm making a couple more parts for the ship's boat....they need to be curved. I added the bow rails at this point and installed the bow spirit. I drilled a hole in the bulkhead {at the angle needed}, and drilled a hole in the end of the bow spirit, which I installed a piece of brass rod. the rod went into the hole in the bulkhead and the spirit rests on the bow stem. when the pieces of wood were dry, they were stained and seal coated. they will be installed along the interior to serve as seat supports then I finally bit the bullet........masking the hull for the bottom paint It looks ok.......but I think I thinned the paint too much. I got a couple of areas where the paint seeped in the corners at the stern. I need to get more flat red now......I used what I had left on this little venture.


-
very nice Erik........the first planking came out really smooth! your going to be able to do a great second planking!
-
thank you Frank.....I was a bit worried that it might be too large, but I guess glad to see the latter! thanks for the good word!
-
thanks Augie......gotta finish that darn hull work, so I can feel good about getting all the parts on the deck. don't want to do it before I do! thanks for the good word!
-
thanks J......yea, that finish on them is a real problem. would have been better if they were lead or something...but they are done. I'll hit them with a spray, so I don't have to use a brush. thanks for the good word thanks Piet, John, and Bindy. still more to go......hopefully I can finally cement all these parts on her permanently. that will mark a huge leap in the progress dept. thanks for the good word! thanks Michael.....yea, even the camera doesn't like them :D I can't get a good picture of them...no how! I'm just glad that I could get them.....can't wait to see them on the build! thanks for the good word! thanks Dragzz......hope to see an update on your build soon! thanks Ferit......so good to have you here! looking forward in seeing more of your fine work!
-
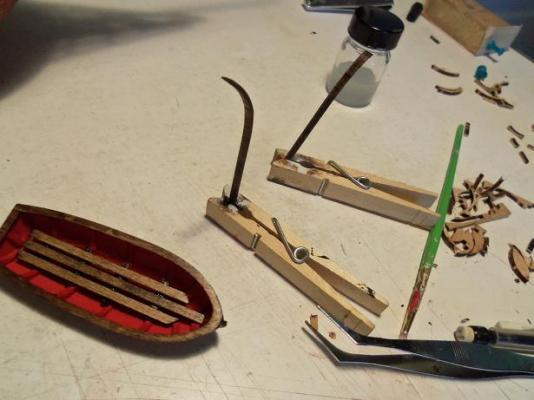
thanks for the likes.........I know you've seen most of the pictures earlier, but it keeps the gaps out of the build. it's my hope that I can get the both of them on the build.........who knows.......maybe some davits?!?!?!? thanks Carl....this is good info for those who find these plastic boats in their builds........."now, what the heck do I do with these?" either that, the keel and skeg can be removed and the shell can be used as plugs. thanks David.......you must be referring to the scratch built boat. the only part that was used from the Half Moon kit, was the gunwale...it was the only real part I had. the rest of it is mainly basswood and Annegre {an African wood....rough cut}. the planking for the plastic boats, is Annegre, which from what I've been told, is a light mahogany....comes in two different shades. the rest of these two will be scratch built.......the ribs will be the only parts I'll use for them. as for the different parts........it's not what you get in a kit........it's what you do with the supplied parts I've got parts from other builds that I hang onto......didn't fit my concept of the subject I was working with. one day, out of the blue......I may need a certain part. I'll look in that bag {it's getting to the point that I need a box}, and I'll see something that I can modify. I jokingly call it my bag of tricks
-
you moved a while ago.........didn't you? hope this shop tops your other one I'll say it first............pictures??
-
are you at your summer place? love to see more!
-
thanks Nenad.........there is quite a bit of info here about these small boats. some use a plug to make them, and some have these mini kits waiting for them in their builds. you may elect to scratch build them........but you might also look into some of the kit manufacturers that offer them. I'm sure someone can help you better than I can........I tend to fly by the seat of my pants......I do it so much......I got grab handles!