DONATION DRIVE - SUPPORT MSW - DO YOUR PART TO KEEP THIS GREAT FORUM GOING! (91 donations so far out of 49,000 members - C'mon guys!)
×


popeye the sailor
-
Posts
16,007 -
Joined
-
Last visited
Content Type
Profiles
Forums
Gallery
Events
Everything posted by popeye the sailor
-

Cutty Sark by NenadM
popeye the sailor replied to NenadM's topic in - Build logs for subjects built 1851 - 1900
ahhhhhh....another person to see a jewelry dept in a different light.... :D :D I have found the jewelry dept to be a good place to find eye bolts, eyelets and things that can be fashioned into bracketing and such. there are also inlays and intricate stuff that works well for decorations. the bead dept is also a good place. you perhaps should charge him.........but I wouldn't..............................................a lesson learned once, is a lesson well learned- 4,152 replies
-
- 3
-

-
- cutty sark
- tehnodidakta
- (and 1 more)
-
Bismarck by NBP - 1:100
popeye the sailor replied to NBP's topic in - Build logs for subjects built 1901 - Present Day
some really superb work there.... such attention to detail would be better preserved in a case, but that me be sure to get a video of it when you do. very well done on the super structures......gonna look sweet when fully assembled. nice planking as well.....I've not had to cut veneer yet......but it looks interesting. a very nice update indeed! -
very interesting
-
this is a very unique take on build logs..........done on a ship that has already been built folks always look at a model....and the burning question is "how did you do it?". she's a very beautiful model Nils.........I'd be happy to see what it took to build her interesting how the hull frame was made, using stringers. very nicely done!
-
Billings Boats Gladan/Falken
popeye the sailor replied to Q A's Revenge's topic in Wood ship model kits
I don't recall seeing that one in their catalogs.......very nice looking boat I would think that if it were the wood parts, you could get them for free........but the fittings though I had gotten an already started kit of the Nordkap from a friend, and had to purchase the fittings kit for it. the kit was so old, that they were sold separately......the kit not even being laser cut. there was a silver lining though, because my friend later found the fitting kit for it, and so I had a boon of parts. Billing instructions have a parts list within the last few pages....if you take into account of what you might need, you can order them from here: Ages of Sail - Product Catalog Billing Boats Official Website 2012 as you can see.......I have an old catalog :D I have a lot of the plastic blocks......not too keen with them, but I do like the detail molded into them........and I have used them on a few of my builds. really would like to see you pick back up on this one.......I think it's a very interesting ship. do you have any pictures of the build, as to where you are on it? there are plenty of places where you can purchase the parts......probably cheaper than buying a parts kit from Billing's {if they have one for it } the fitting's kit for the Nordkap was $220.00! {but I got a special deal } all's fun in love and modeling I do hope you proceed. -
probably one of the moderators can fix that for you. my camera does that........I always have to turn at least one or two :D your hull looks really good........nice to see your almost ready if your using a sanding block, keep a close eye on the bulwark edges and stern contours. you don't want to round off any squared edges. look forward in seeing more.
-
mines had some amount of buoyancy.......I'm sure that there was some sort of mechanism to launch them from the top. they were also tethered to the ocean floor by some means......an anchor system and chain to allow them to float, but not reach the surface. also the thought that they were able to launch them, without hitting the detonation spikes / buttons on the outer casing of the mine.
-
that's some pretty cool detail..........with a plastic build, this bit of detail would be molded in. these ports have never been done on a plastic kit........or any kit that I've seen.........so this is a very big plus! very nice work!
-
....off again on another adventure....BRAVO! your off to a really good start.......I'll look forward in seeing your progress you can alter the scale a little.......but check fit them to be sure they are not too large. I totally agree with you on the window thing though.....I did a few things on one build, but because the windows were too small, you couldn't see the interior I never use a hammer on any of my builds. I have a pin pusher for the brad work.......then when dry I usually pull them out.......to used them again on another build. this tool can be found on E-Bay......not very expensive. create........imagine..........and enjoy!
-
you've completed a very nice ship Vivian, a lot of thought went into her. first ship..........surly won't be your last!
-
Cutty Sark by NenadM
popeye the sailor replied to NenadM's topic in - Build logs for subjects built 1851 - 1900
never a dull moment.........eh, Nenad :D your on a positive track.......it's all good! -
glad to hear your having fun...........it show quite well, by the way your build looks
-
she looks great Adam........love the color you chose really sweet job!
-
looking really super Andy.........better and better every time I see it the mesh really changes the looks......really nice!
- 382 replies
-
- 1
-
-
- stadacona
- sylvan scale models
- (and 1 more)
-
if you used white glue to cement in the dowels, perhaps you could use water to get the glue solvent again...and then contort the frame to make the adjustment. sandwich the keel between two stiff lengths of wood and clamp in place, when you do it....let dry
-
looking good Russ.....the bow lines are very nice
-
Cutty Sark by NenadM
popeye the sailor replied to NenadM's topic in - Build logs for subjects built 1851 - 1900
what you would need to do is solder two pieces of straight wire together at the proper angles and then trim to fit. a jig might be helpful. as you get more familiar with it....I'm sure you'll figure it out looking good Nenad....don't stop experimenting !- 4,152 replies
-
- 2
-
-
- cutty sark
- tehnodidakta
- (and 1 more)
-
sorry about that john.....not too much going on now. the real headache will start when I begin to outfit them
-
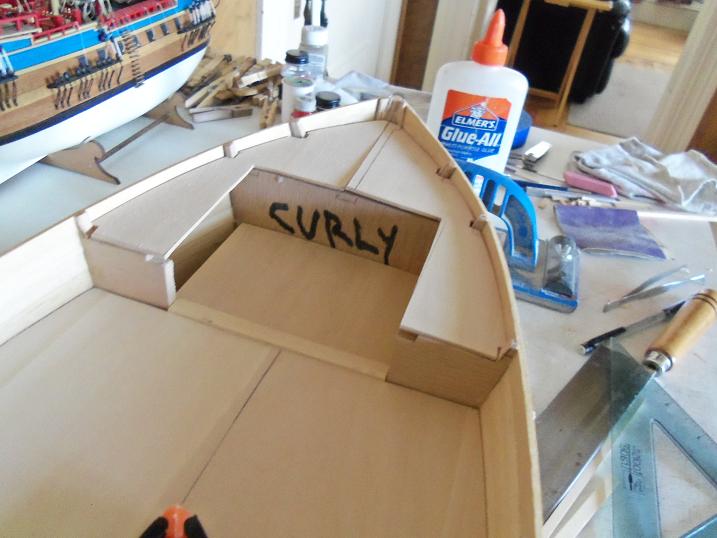
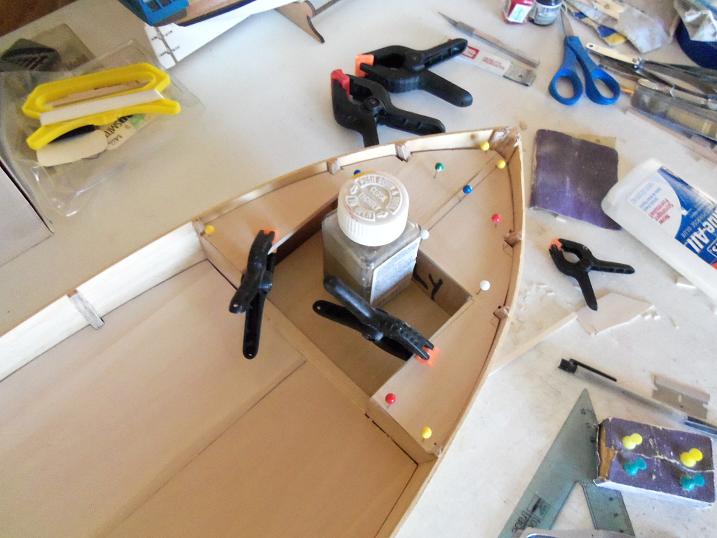
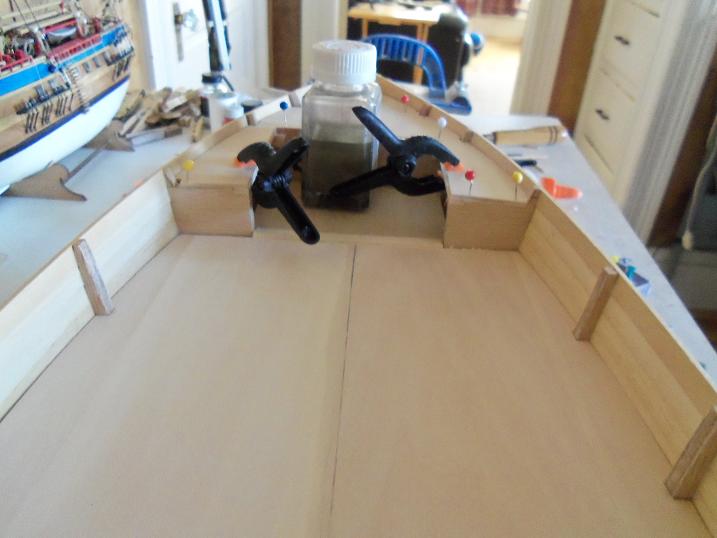
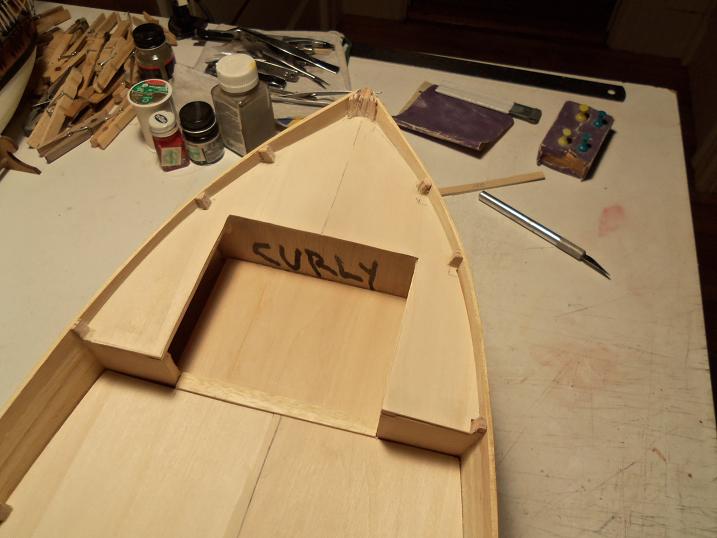
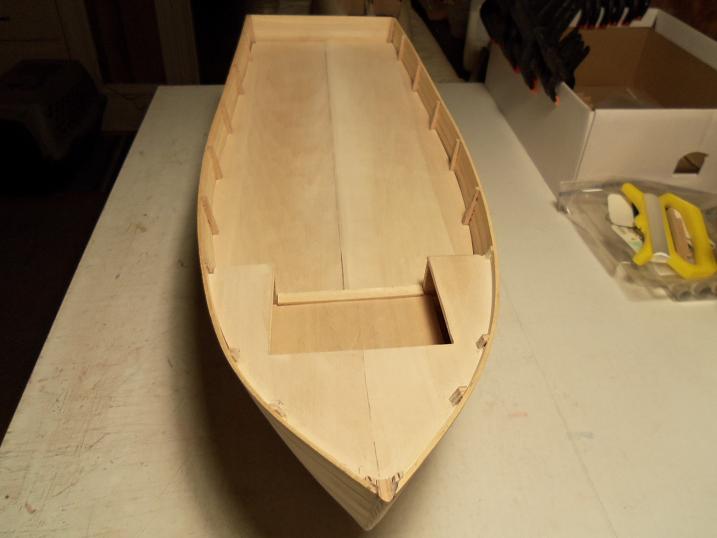
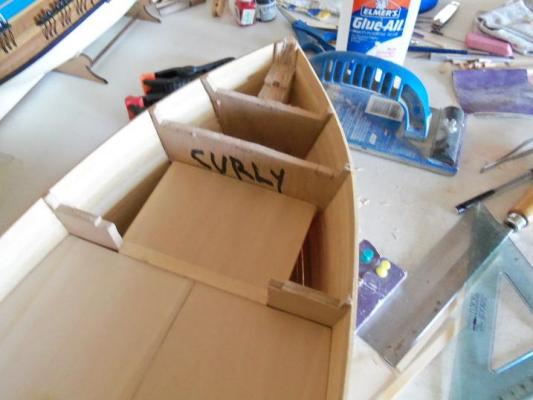
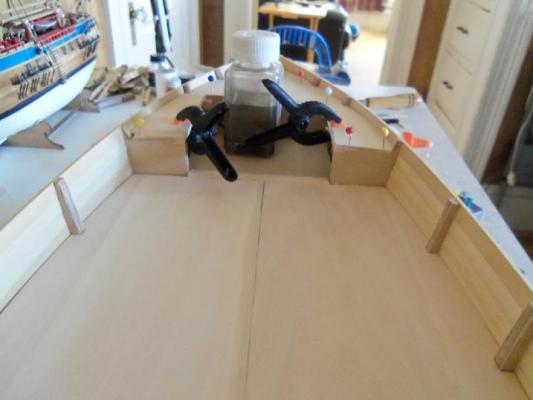
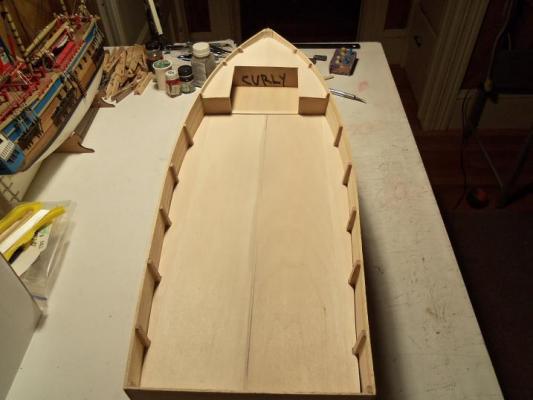
OK.......so the final thing I'm going to do to the hull dubbed Curly, will be the bow deck layout. from here, I will just be sanding the hull, so I'll get busy planking the hull Larry, and bring it up to snuff. since my thoughts about a different pilot house layout was too late, I will go with a common layout with Curly. I had cut out the two parts, but I ended up making up a third one......one side didn't come out right. I wasn't too sure how I wanted to do the floor........to insure that the floor was level to the main deck, I cemented in the necessary joices and cemented it in place. still some tweaking needed to be done.......but I said the heck with it. the bow deck platforms were cemented in place. I'll just use filler on the nonconformaties. after a bit of filler and some sanding, here is the bow decking, roughed out.


-
thanks Kevin........so far it's just the hull dubbed Curly. the other two are at different phases of planking. when I get the bow roughed out, I'll take on the next one.......that will be Larry. thank you for the good word.........looking forward to an update on the Bismark
-
looking really sweet Bob.....the stern has a nice shape to it like the concept with the stern rails as well.........nice!