HOLIDAY DONATION DRIVE - SUPPORT MSW - DO YOUR PART TO KEEP THIS GREAT FORUM GOING! (Only 36 donations so far out of 49,000 members - C'mon guys!)
×


popeye the sailor
-
Posts
16,007 -
Joined
-
Last visited
Content Type
Profiles
Forums
Gallery
Events
Everything posted by popeye the sailor
-
 you gonna go down the same road as I do with my boats? should be interesting. will it be a what if? What if - Index what's with the purple.......easter's over........I didn't win the Eduard's quarantine contest......
-
your getting there OC....... look'in good!
-
really nice work
-
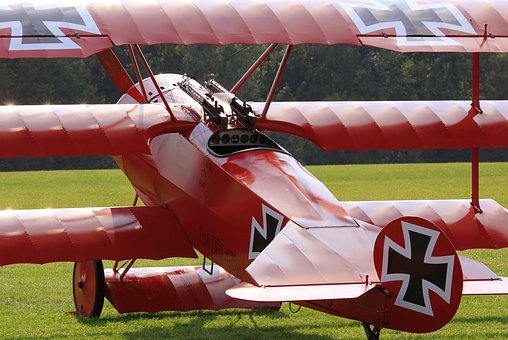
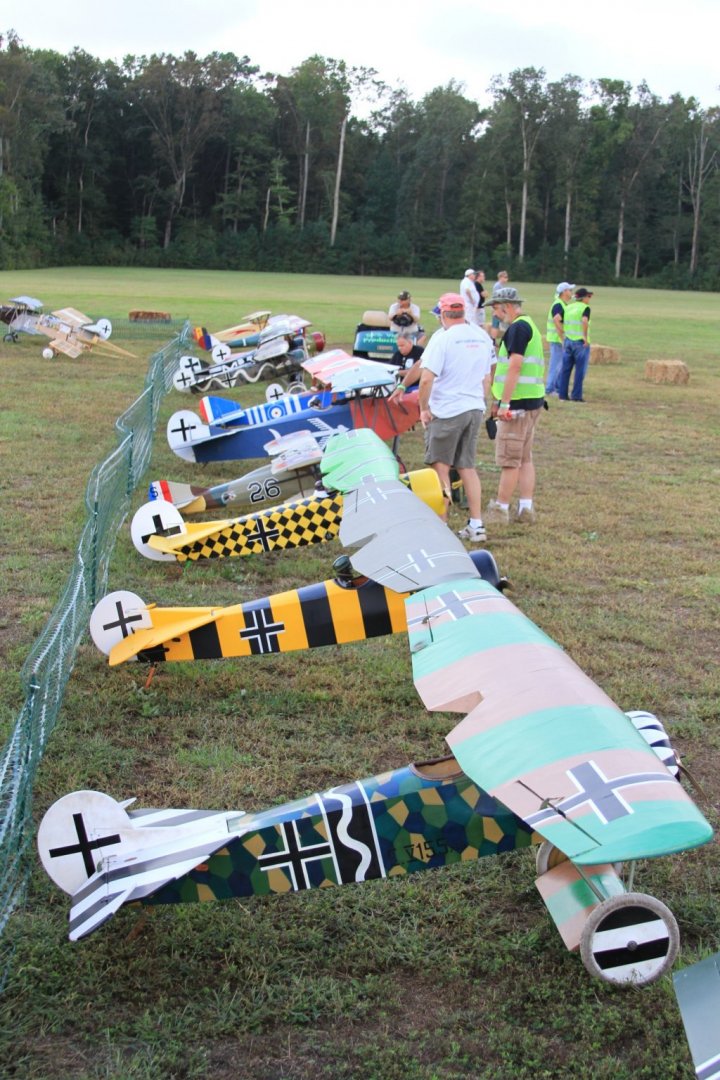
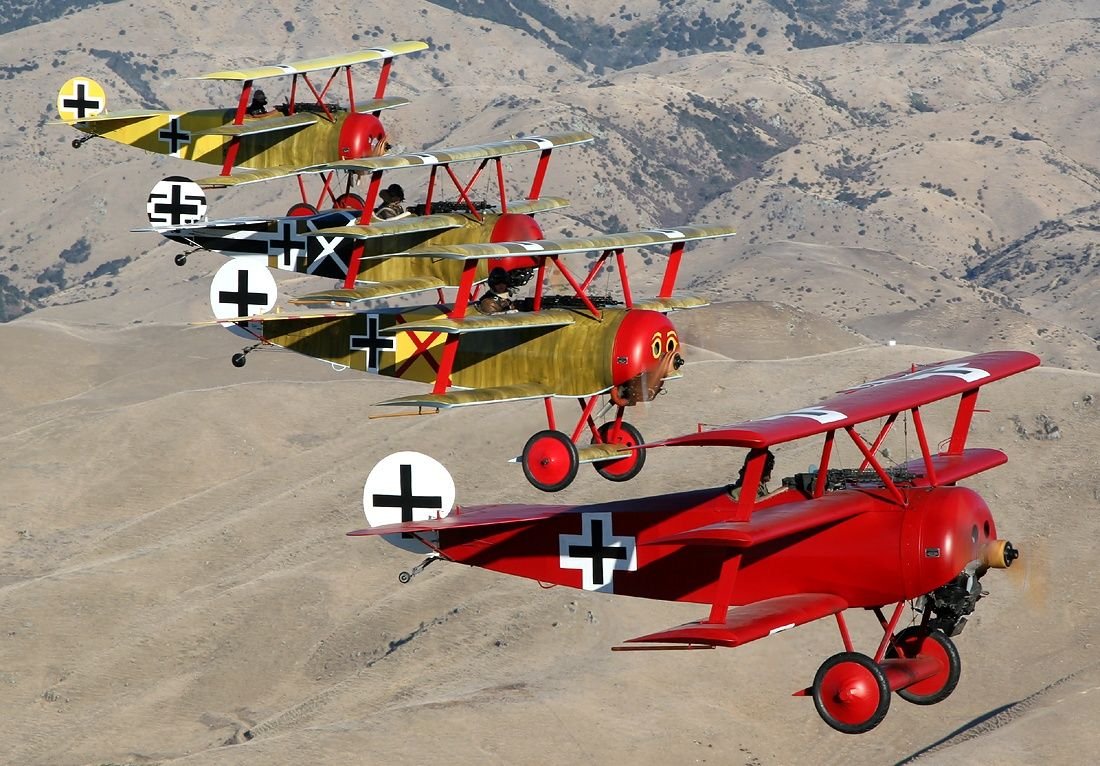
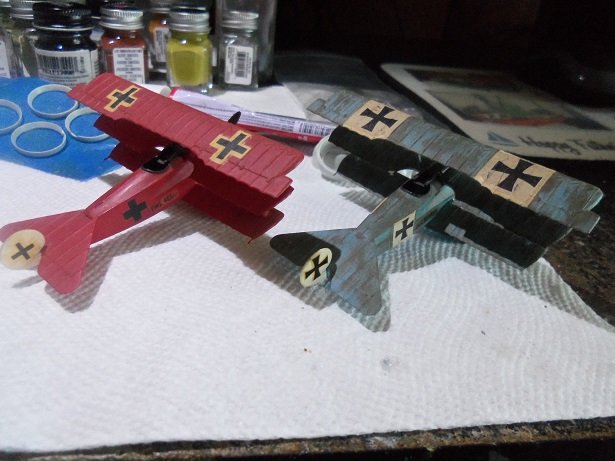
I did some looking into that aileron thing.... to me, this would be incorrect. when the prototype was first tested, it was found to have bad handling characteristics. the V5 {F1} modifications were: larger wing surface, the ailerons {thought to be imbalanced} and the leading edges of the stabilizer fin(s). looking at pictures show both, but not as show on my two smaller models. keen to note that these are reproductions and may not reflect what was on the actual aircraft. this model does show it........the serial number is that of Ltn. Wolff {not sure of the scheme. this picture of the red Baron's plane doesn't show the different ailerons. this is a group of Fokker D VIII's........the wings are totally wrong, but a very colorful group {there's a scout tucked in there.........what tha..........} there were no D VIII's in Berthold's squadron either the Guillow's kit I built, has the top wing, as seen on the Dr 1's. this one may appear to be a 'Berthold's boys' replica, but his squadron did not host the raven........or the white tail very nicely done though.......I think this is the Guillow's kit {if I do alright, I'm in for a treat!} I thought this picture was cool too. so........be the first kid on your block to have a Fokker in your driveway! here's an old fixer-up to get you started
-
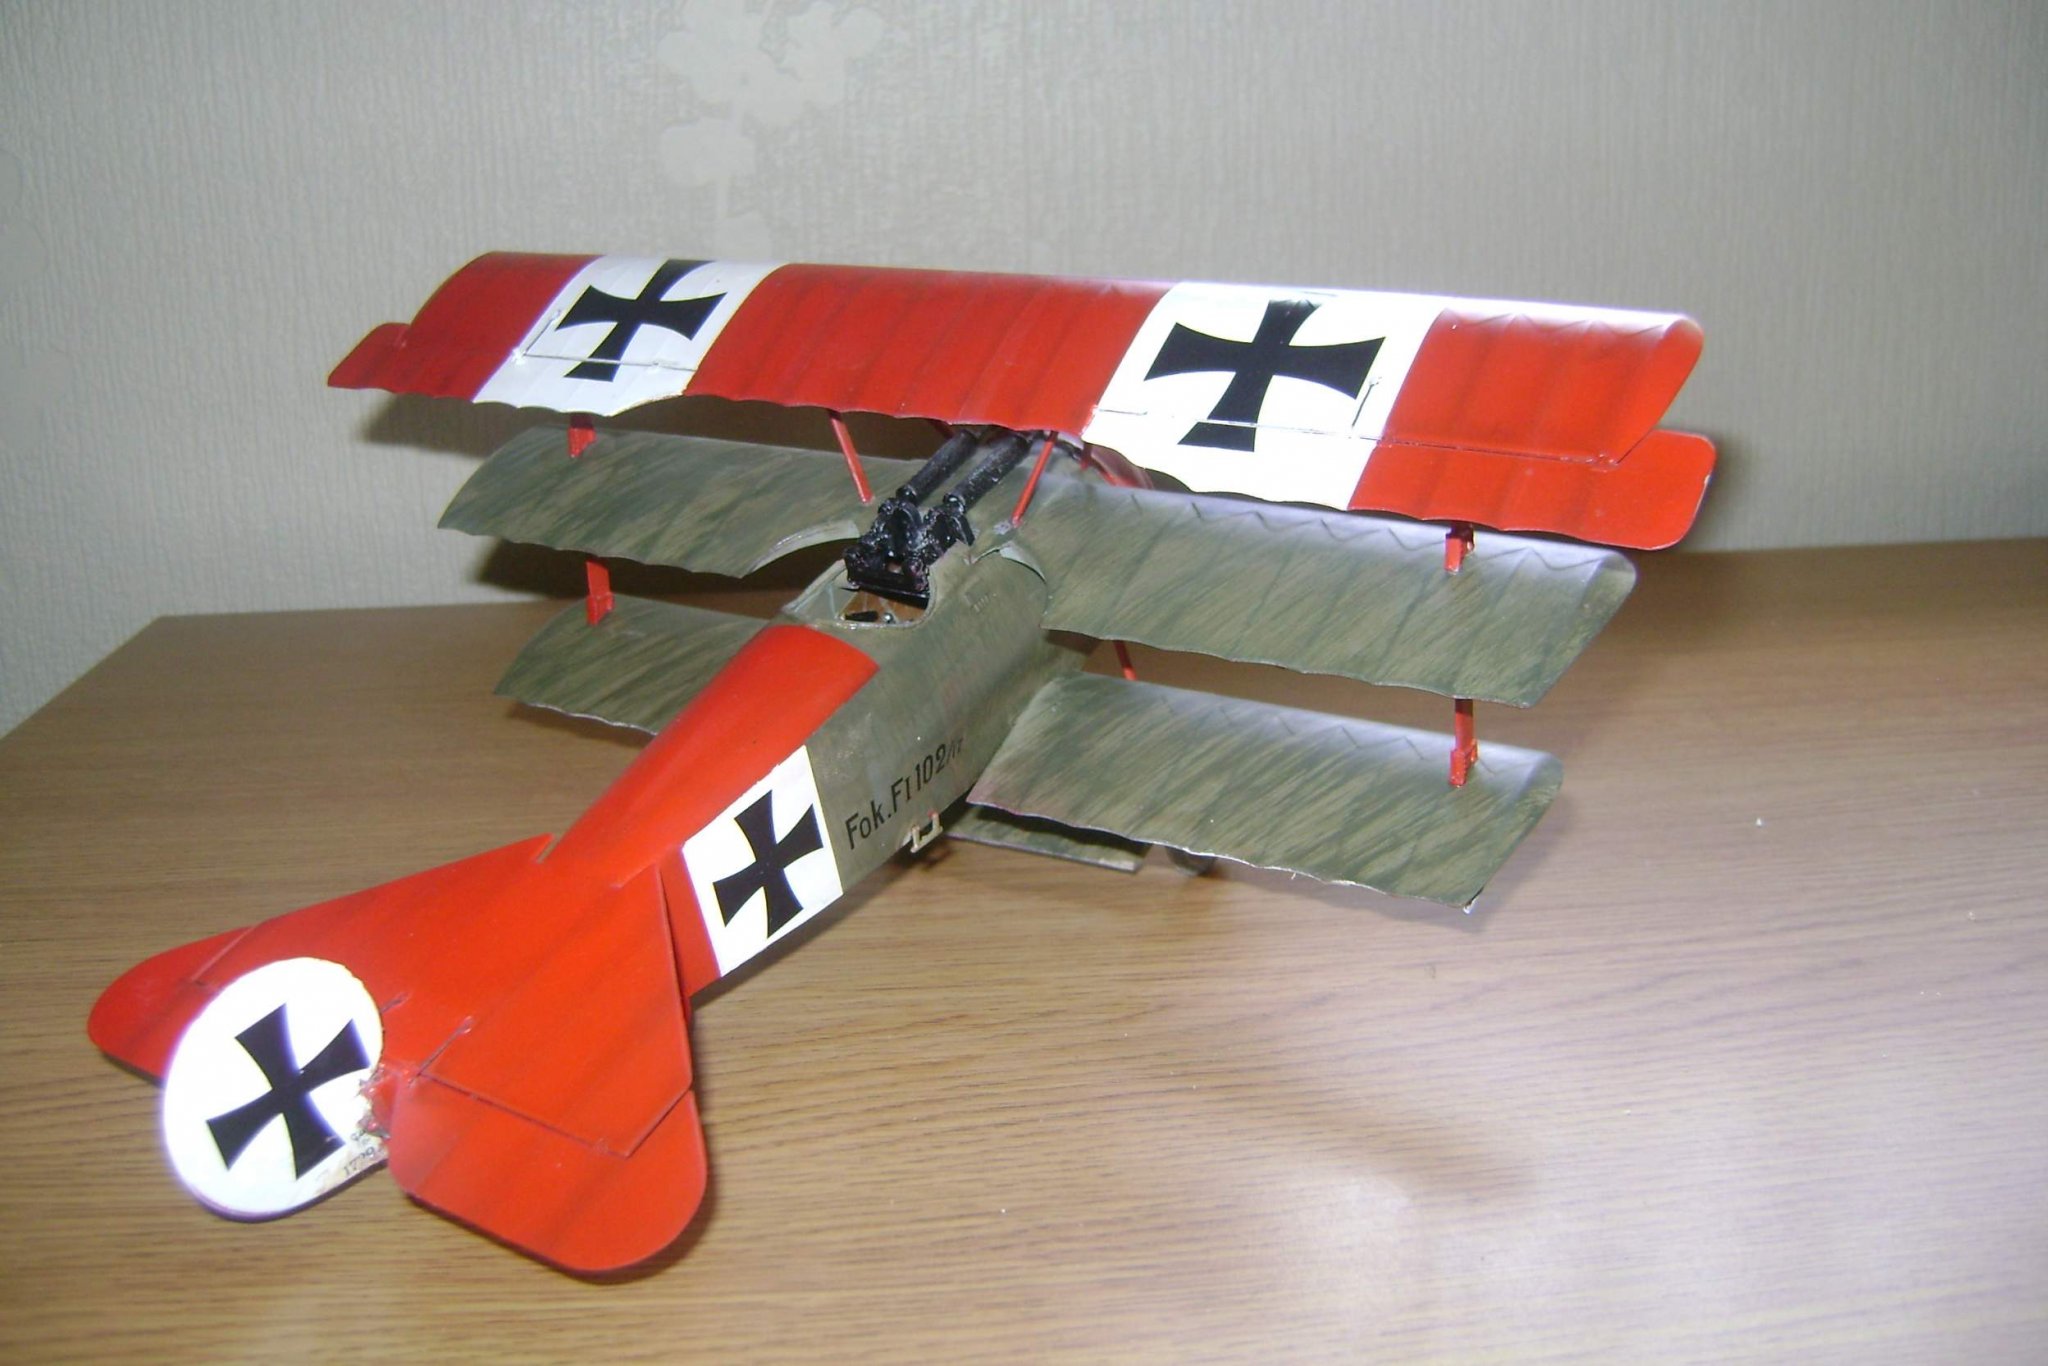
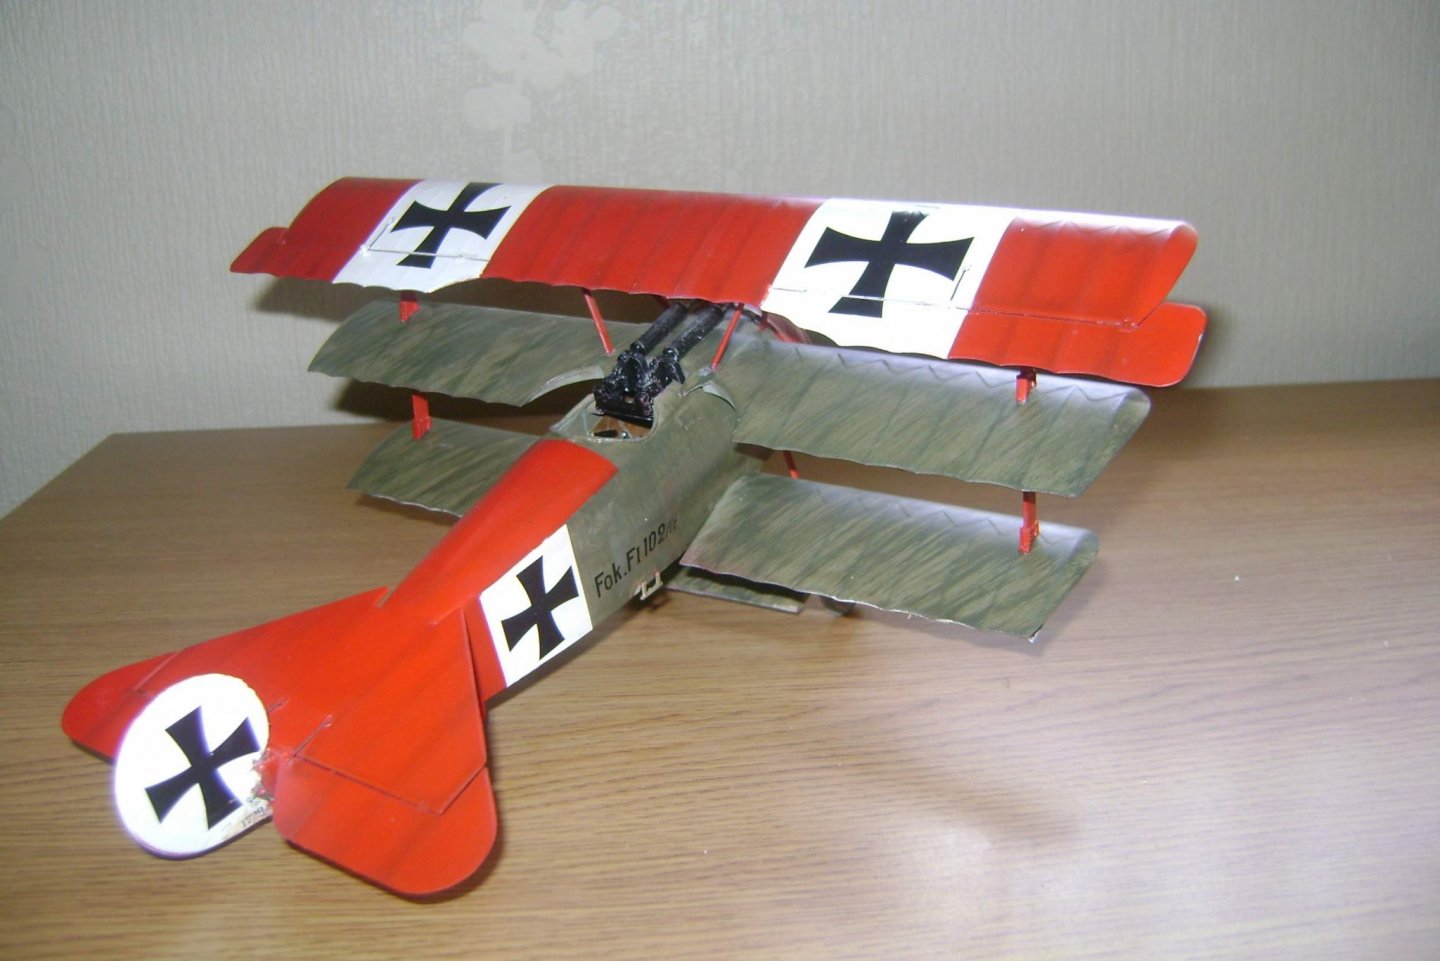
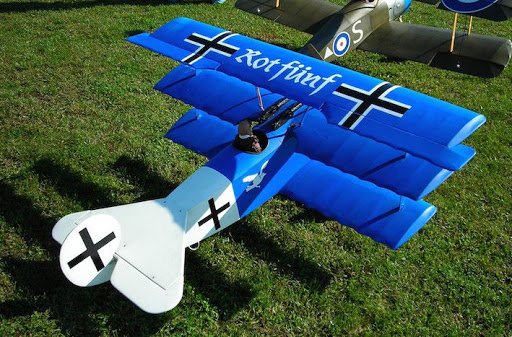
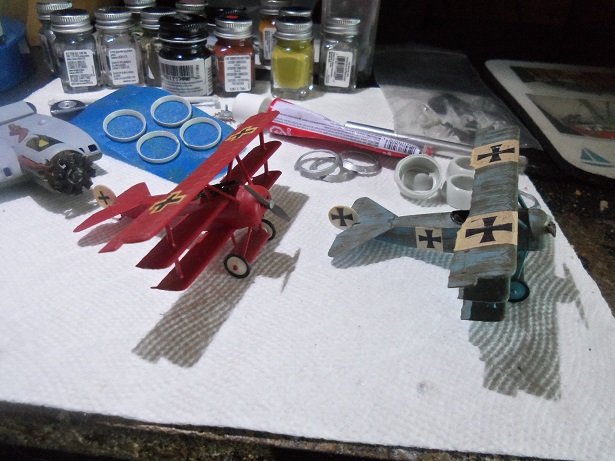
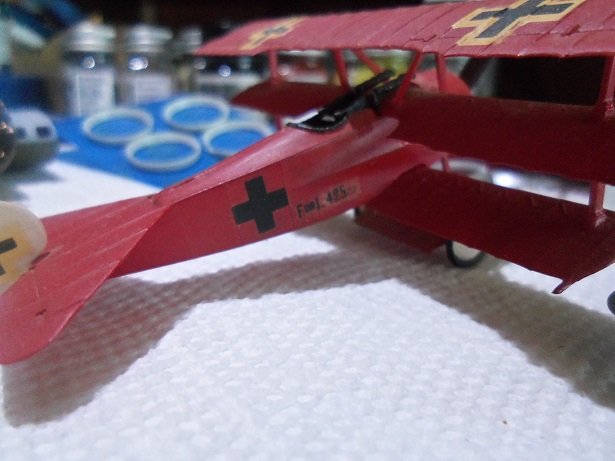
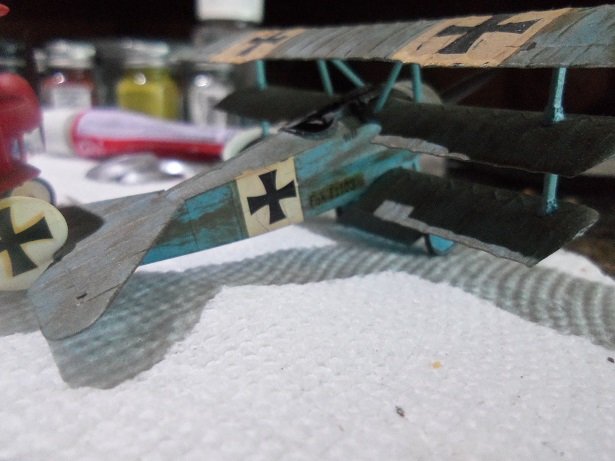
I really like that scheme.........whose plane is that? cripes.......pretty soon, you'll have the prettiest flock in the sky! my two must be the same scale.......been so long, I've forgotten when I got back into modeling, I got them from an English chap on E Bay...same fellow I got my 1:48 D VII . I built that one back in my younger days. built them back in the '90's. they are the correct serial numbers : Richthofen's Dr 1 425/17 and Voss's F1 103/17........the only discrepancy is that there is no white border on Richthofen's fuselage insignias. Voss's cowl does have the 'face' on it.......but I though that the Baron had it too....... the decals were old to start with.......they are even worse now. ........you know........I just noticed that about these two planes. looking at the port aileron, the curvature is only one rib.........but on the starboard aileron, it is two ribs that's interesting....I'll have to look into that the only update I have on theis model, is just paint.
-
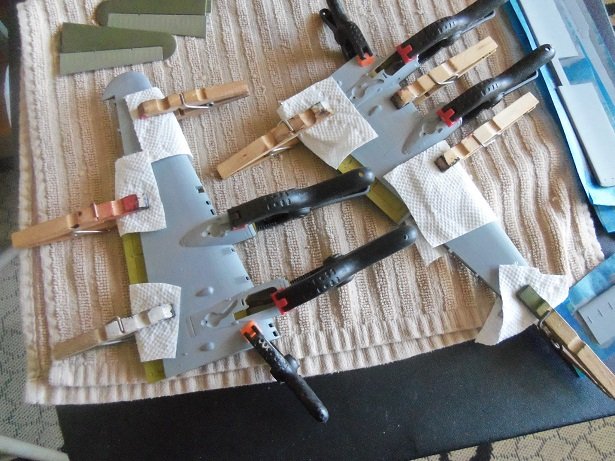
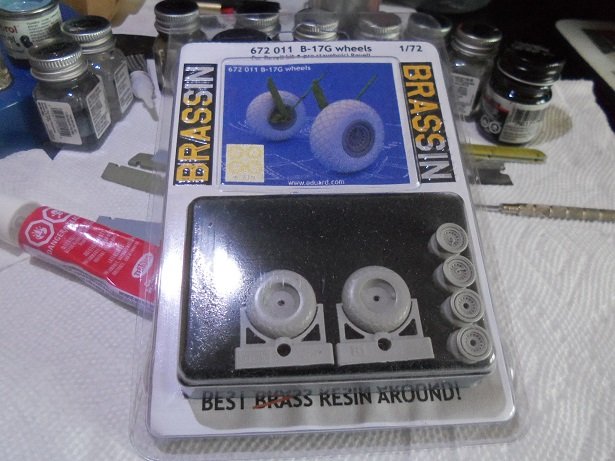
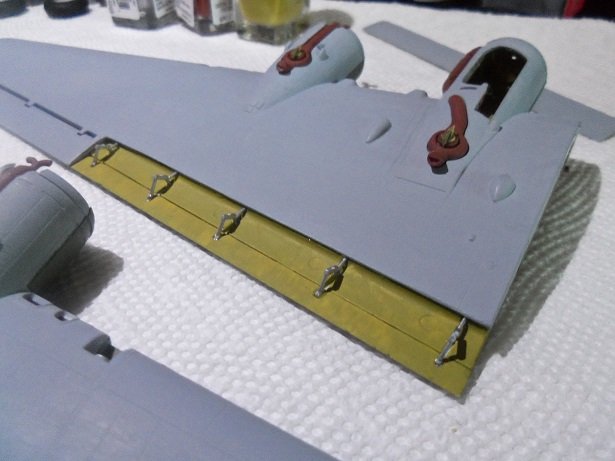
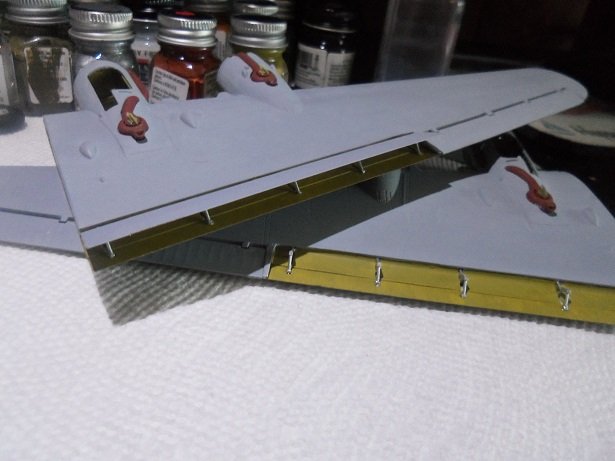
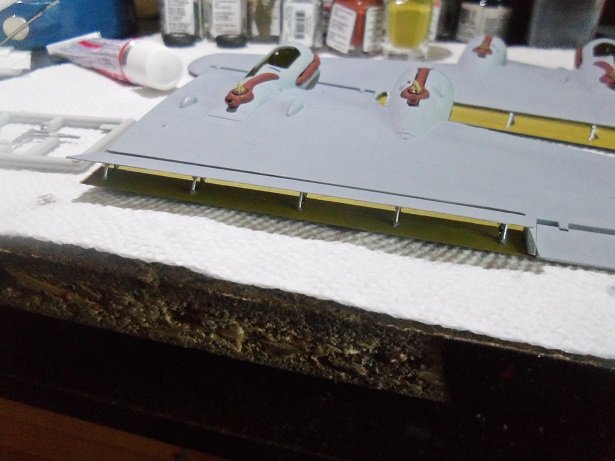
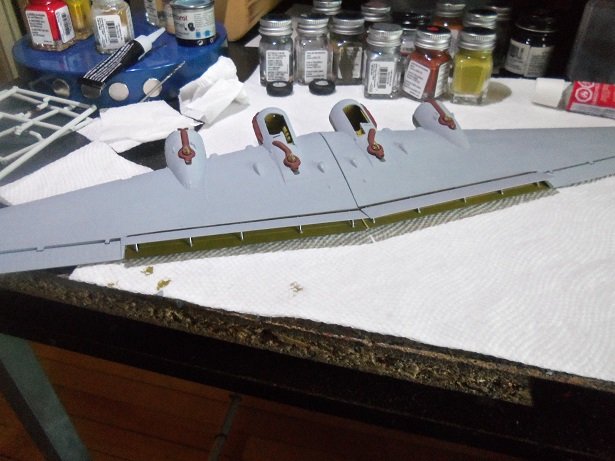
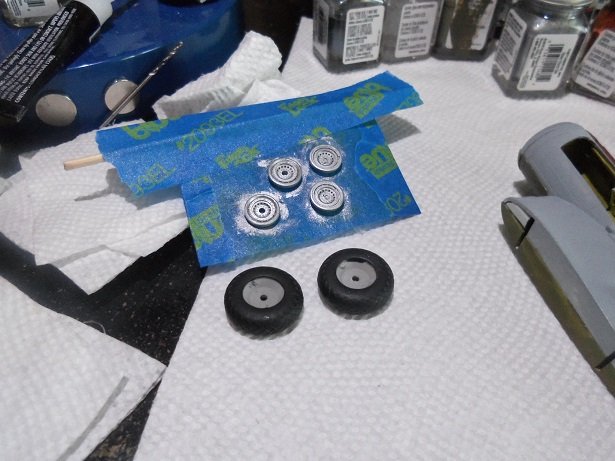
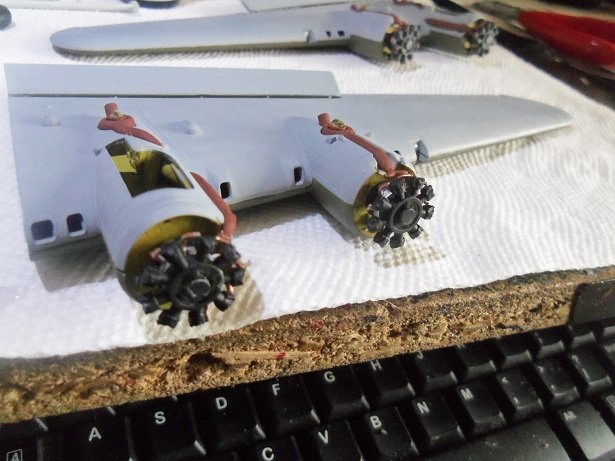
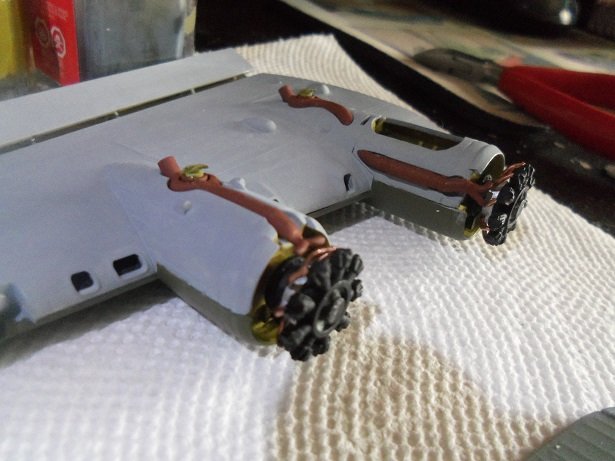
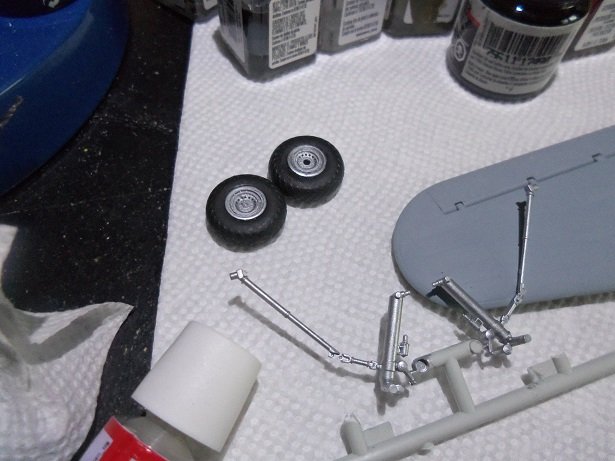
thanks Robert for the kind comment......and thanks to those who hit the like button I'm almost at the end of my two week hiatus from work.........Saturday will be a very sad day. I mention that I got the notification for the wheels, that they have been shipped. they were on my doorstep Wednesday afternoon! I forgot that these folks at located in NAshua, N.H. ......someone told me that at one time. I got quite a bit done, and of course, I'll have the blooper of the day as well. I started with the stabilizers and elevators, assembling the stabs first and adding the elevators a bit later. next was the wings....a bit of a bugger around the nacelles, but the job is done. I was a little surprised that there were only the main wheels in the package, but there is little detail to the tail wheel, so this is likely the reason for it. comes with the hubs too. it also comes with a mask set, but seeing how they are, I never used it. the parts were prepped for painting. the ailerons were added to the wings...done in Bomber tan. the next step would be the outboard turbo chargers.... I added them all. looking in the inboard nacelles...I saw that I forgot to paint the inside inboard area with the chromate........that was quickly remedied. all of the brackets for the flaps were added. the flaps were added when these had set enough. putting them side by side, I made sure they were both at the same height..........almost looks like the flying wing the wheels and hubs painted...... here's where things got to be sort of a head scratcher. there are the exhaust rings that locate on the backs of the engines. the have to be assembled in such a way, that the gap fits on both side of the turbo pipes. I tried a couple of time to attach them, but there is no way to be sure that they are correct for the inboard or outboard engines........the engine was becoming saturated with cement...........BLECH! since these parts won't be seen in the great scheme of things, I've opted to leave them off. just cementing the engines in place. ....and then came the blooper of the day ! the cowl flaps can be added open or in the close position......I wanted to do the open position. the two tabs that are on opposite sides of the ring will not fit correctly. with no logical means to accomplish this. as I was fiddling around with this......test fitting and jubbling parts, I picked up one of the wings {the starboard side...I just checked}........grabbing it where the flap is, and breaking it completely off the wing! of course, the glue just didn't let go of the flap part.........instead it broke all but one of the brackets! I managed to get the flap back on, rejoining all of the brackets and at the correct height and all.....but the pizz-poor lighting at my desk made it hard. so all is back to good on the meter....just need to check for touch ups. I was sitting here, typing this..........I tried another way to add the open cowl flaps......and it may work. so I think the open cowl flaps thing is back on .....decisions.....decisions......... the wheels are assembled now.......ready to be added to the gears........and then to the wings. I find that I will need to drill a hole for each gear assembly.......sounds like another potential blooper for me....we'll see how that goes for those following the Clotilda escapades, you'll be pleased to hear that one side of the second hull is done........the other side is very close to being closed finally . it's been a trial....I can tell ya that. then I can resume with the Clotilda and work on them both .....the hull planking was the super hard part. I'm planning some scratch building for the second hull anyway, so it will be slow anyways..........I'll start a separate log when I get a little more further along {if that makes any sense}. still getting the best of both worlds.......and I love it
-
lot of carving! wow!...very nice there is some beautiful artistry here
-
jeeze........best thing to do is contact them.........hold on I did some looking around........one site I looked at described them as being on a CD. another place I looked at showed them as a book. in Nautical.......take a peek.
-
nice progress George where did you find that PE hand wheel assortment? they look really neat
-
that's funny........the Half Moon log has been busy of late. usually when that happens, I end up bringing the model back out to the table. heck.....I made those decals for her......and I got the tack line decorations from Corel........seems a shame I haven't worked on her since 2015. I'm almost ashamed.....but I'll get over it just think....if I bring her back out, you won't have to wonder what to do where I stopped nawwww, there are plenty of logs of this fine lady on the site that you could follow....some likely better than mine. always an honor for folks to use my logs.......it why we post them
-
here you are glad to see Louie back on the table .
-
fabulous looking model Greg........come to expect nothing but the best from you very nice!
-
Revell 1/8 corvette by kpnuts
popeye the sailor replied to kpnuts's topic in Non-ship/categorised builds
had a customer at the garage that had one......fiberglass body. he was forever having the fenders repaired.......would crack by the headlights from vibration and stress -
thanks.........
-
Revell 1/8 corvette by kpnuts
popeye the sailor replied to kpnuts's topic in Non-ship/categorised builds
'77 stingray...........nice -
look'in really good KP
-
you got both sides........was there one for the doors? good to see some headway her
-
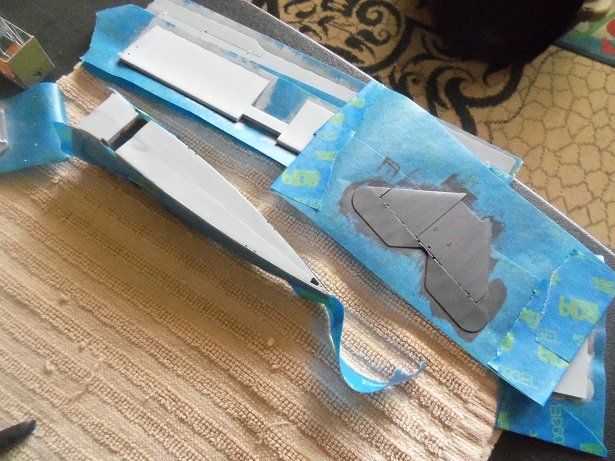
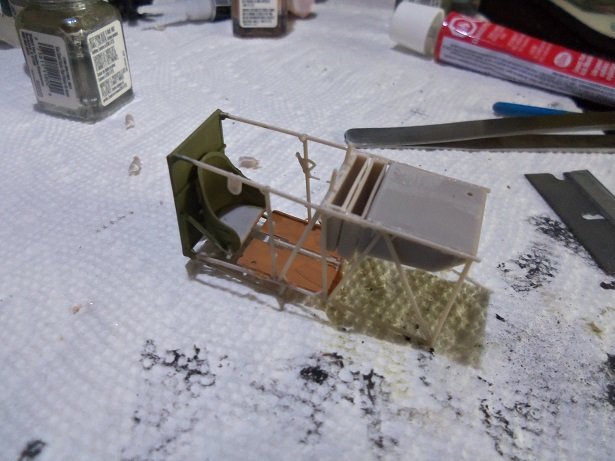
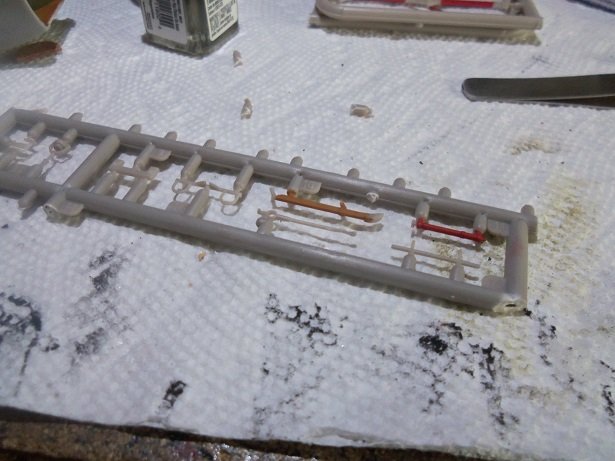
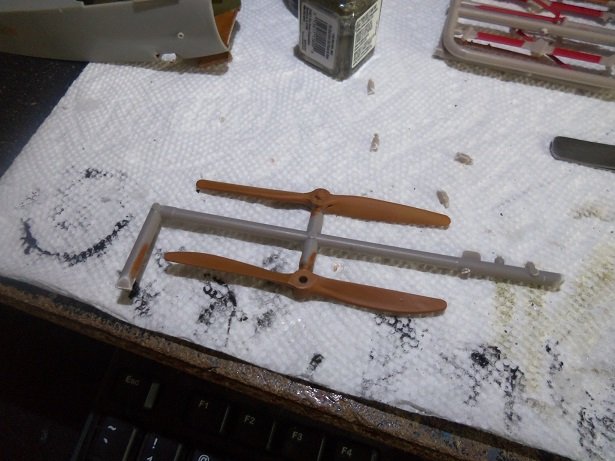
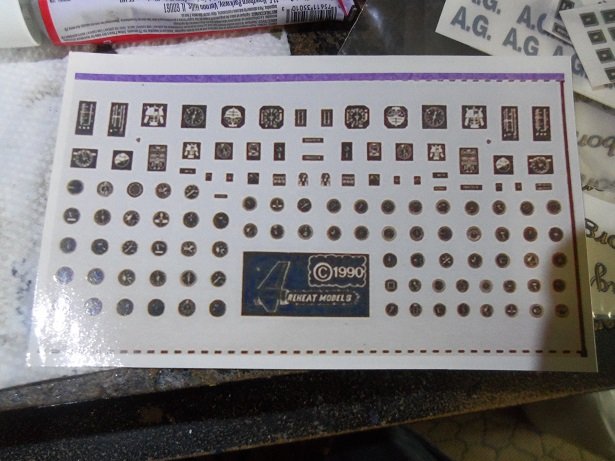
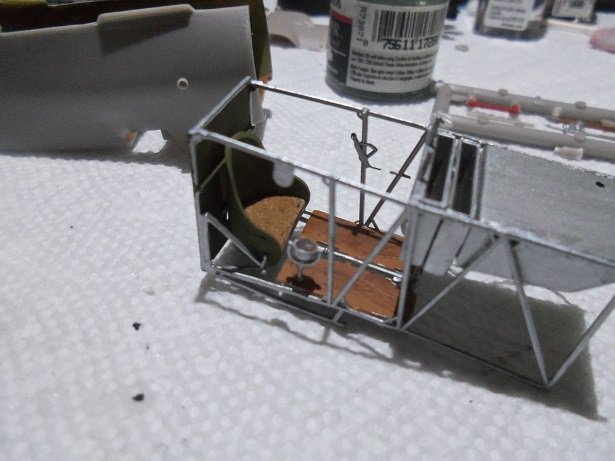
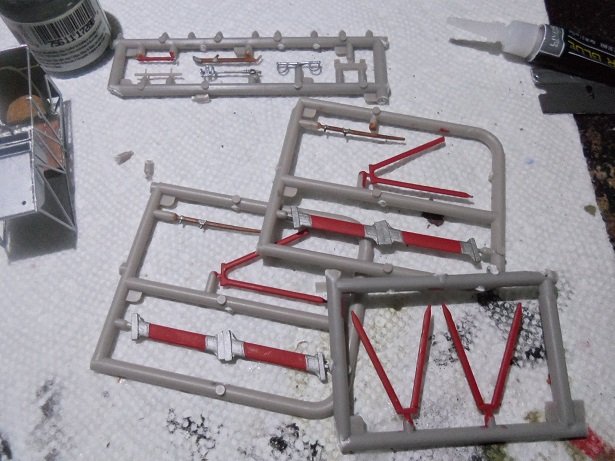
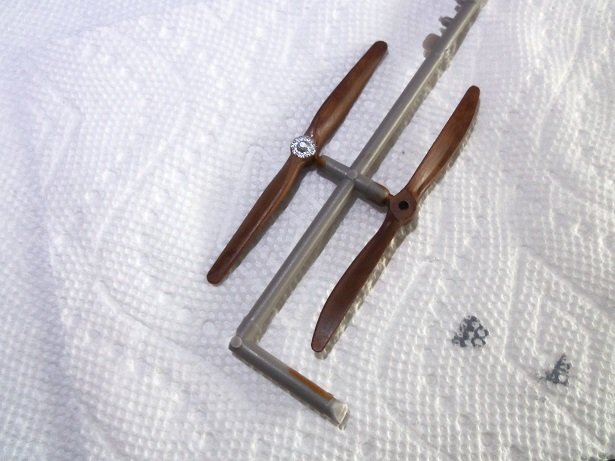
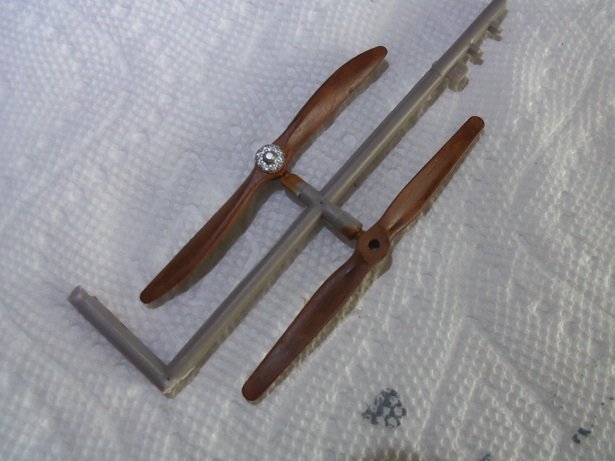
it looks like the kit......I do believe I saw that one, but the one I saw was out of stock { new item}. at least it's a correct model........the only two that got the F1 was Voss and wolff.......Werner Voss got 103/17. he died less than a month later. the kit I have has an MSRP of around $60.00....so the site listed........I didn't pay that much for it from OMKs. I did bookmark the military model site.......there is information on becoming a distributor.......should I ever retire, I'd like to look into something like that. might be something good.......I even have a name picked out.........'Mantel Models' pipe dream............. the Roden kits are good to a point. they are molded well, but the hardness of the plastic and the varied thickness can be a bother. the absence of locator tabs is another bother, wondering if the part is in the proper place. more was done yesterday......the assembly is going fairly well with the cockpit.......trying not to break the darn thing. I started to do some painting as it was assembled. I looked in my odds and ends to see if I had anything to reinforce the frame........I didn't think of it at the time, but I do have some Plastruct thin stuff kick'in 'round. where I can reinforce it, it will never be seen, so that's a good thing. I also did some small parts painting. the props were painted in a wood color and allowed to dry. looking at the cockpit frame.....say a lot about the comfort in flying one of these planes. pilots found it hard to see down the runway, sitting in such an upward angle. it was fairly cramped in the cockpit as well, almost to the point of claustrophobia. head trauma was common during a bad landing........even worse in a crash........the machine gun breeches were situated so close to the pilot, that a good jolt would cause them to headbutt them. I added a couple of things here......one addition was to the compass. I looked on the decal sheet, but there no face to give it some detail. one of the first decal sheets I printed, was a sheet of dials and gauges for light Balsa aircraft......Cessna's and such. I dug it out of the inventory. I should locate it in my files and do another one...perhaps when I get a new ink cartridge. finding the suitable correct size, it was cut out and applied. more painting was done to the frame. there really isn't a color chart for painting this........what there is...sure, what there isn't...I'm just going with what looks logical. came to the seat.......no color suggested, except that where the pilot sits should be red leather. I went a little bit further here and cut out a piece of leather that I bought for the stage coach model..........glued that in for the seat padding. I have to have at least one blooper in my session........somewhere sometimes it's minor and not worth mentioning.......and other time, just to show that I'm human. I painted the cabane and interplane struts, accenting the brackets with flat steel. if I was building Richthofen's plane, it would have been alright......but I'm building Kempf's plane and the color for his is gray. ....guess I'll be changing the color. even if I changed my mind.......I would have to change the color of the cowl. Kempf's is black, while Richthofen's cowl is red.......already painted the cowl flat black I painted the undersides of the wings while I was play'in a computer game.......a little hack 'n slash was in order the session ended with accenting the props with some darker brown and flat steel. looking at the kit box that CW posted, the prop on the left would be used for the F1........I'll be using the prop on the right. hope you have fun with the kit Craig......if you really want a clunky kit.......look for a HobbyCraft kit. you won't believe the thickness of the plastic. builds into quite the paperweight
- 157 replies
-
- 11
-

-
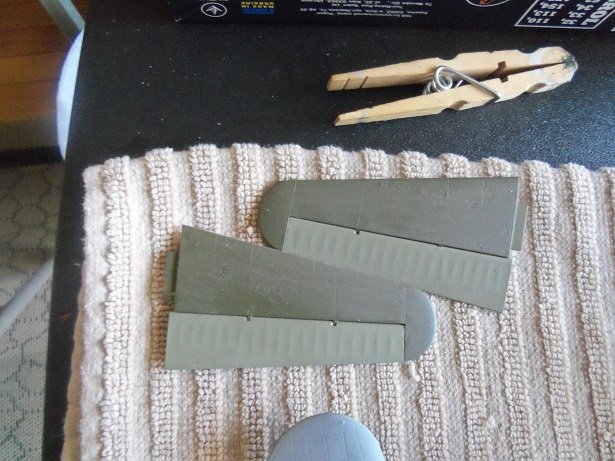
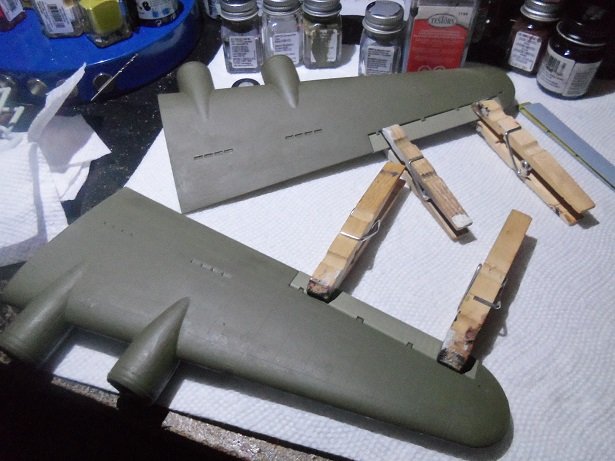
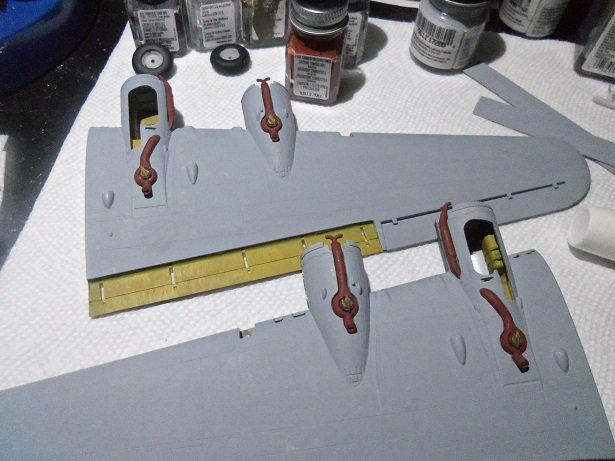
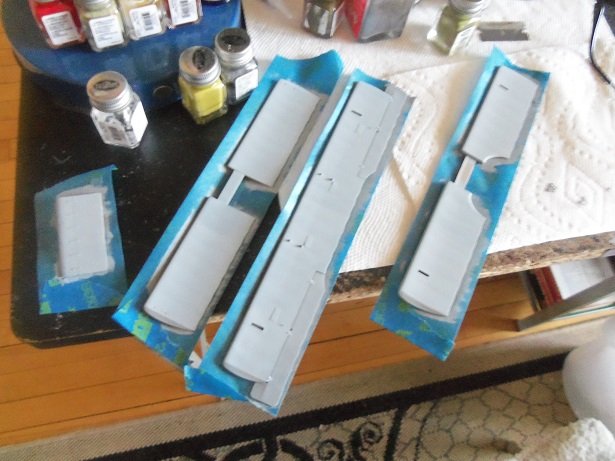
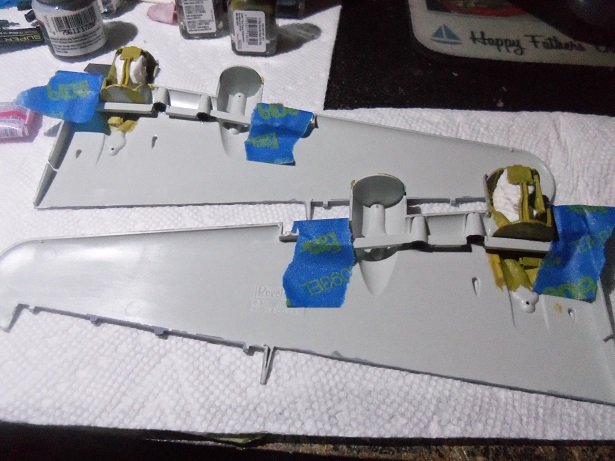
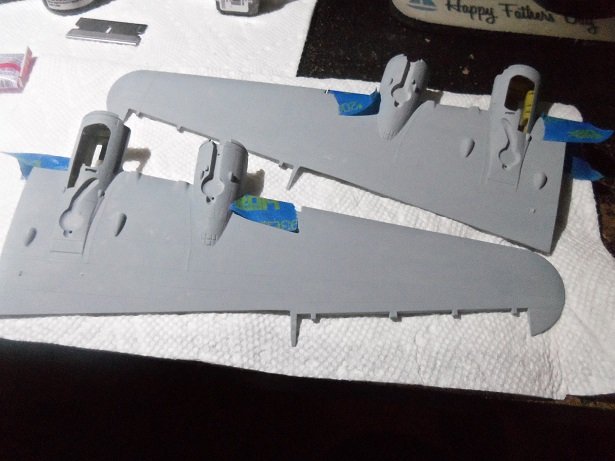
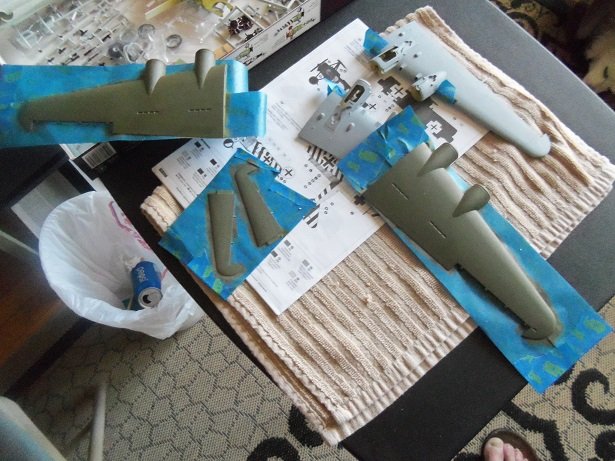
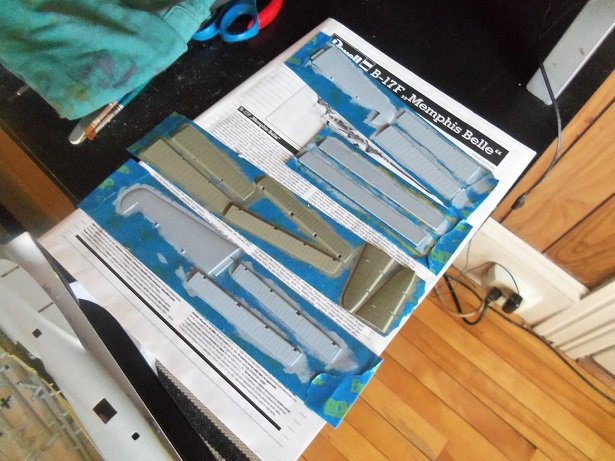
I have more progress on the Memphis Belle. as mentioned earlier......checking in the camera, there were pictures I was looking at the wing vents wondering what I could do with them...the answer was nothing that could be seen after the wing is assembled. since all that would be seen would be black vastness, I opted to do nothing.....not even adding the two caps for the center ones. the throats were painted flat black, and then cemented in place on the bottom wing halves. before this happened, the outer surface was painted in light ghost gray. so, here came the boo boo.....the upper wing halves. I thought that I would lightly brush on a second coat to freshen them up. as they sat around, they developed sheened skuff marks and a couple tiny paint dings. when using an airbrush to paint flats, unlike gloss paints, the surface can obtain a grainy finish. rubbing the surface with a cloth or your fingers, will remove the grainy aspect and produce this very faint sheen. this is what I'm referring to. the mistake came, when I took the bottle of thinned paint {for the airbrush}, and put it back onto the bottle of paint I poured it from. this paint is some of the paint from the Lou collection. I worked very quickly, brushing from one end of the wing to the other, setting them aside. when dry, I was going to assemble the wings. checking to see if they were dry, I was saddened to see that the under coat in spots, had lifted and wrinkled........the stabilizer fins were worse. the likely cause for this is simple......too much thinner not much to say at this point.........I'll never learn.......what could have been a good thing, turned out horribly wrong. I waited for them to fully dry, and all I had to do, was rub them with an old face cloth to remove all the loose paint. light sanding took off pretty much the rest. so, all I had left, I could clean up with thinner. they are repainted now and back to square one. as for the flaps, ailerons, elevators, and rudder halves, they are fine........tops and bottoms have been painted.......light ghost gray and Bomber tan. next will be the fuselage..........and I can assemble the wings. on a happy note, I finally got the e-mail that the wheels have been shipped.......I ordered them on the 28th of April. they said that they would ship by the 30th, but not getting the notification on that date, I figured they were on corvid time. good to know my hunch was right. so I should have another update for you soon.

-
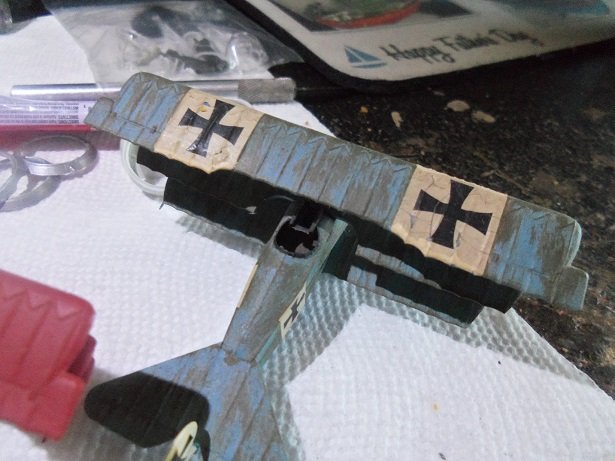
the ailerons with the two rib curvature was present on the first prototype.........the F1's on had the single rib curvature. it's a big question why they even have them in the kit. speaking of that........there is a card in the box, which you fill out, it goes to a place here in the states......Texas. in all actuality, they are a distributor for Squadron models.....just look'in to get feedback from the kit purchase. I looked through the model listing.....1:32, and I saw a kit for a Fokker F1. this is strange, since there were only two F1's built........I like to build obscure models........but yea, that would be obscure {and I thought building a V4 would be cool}. I rigged the Hobbycraft model.......it's a 1:32 scale model. I would have to drill all the holes for the cables........the only other bit of rigging is at the landing gear. got more done today.......have to change the color on the interplane struts and cabane struts....... either that, or I'd be doing Richthofen's plane {and then I'd have to change the color of the cowl} I'll try to get the pictures up later.
-
have you started a log for her?