-
Posts
3,852 -
Joined
-
Last visited
Content Type
Profiles
Forums
Gallery
Events
Posts posted by glbarlow
-
-
Thank you for the replies. This model definitely got me going again, @Chuck's Cheerful is a challenge. I'm also first in line for @Chris Watten's upcoming HM Flirt and already have HM Speedy on my shelf. I'm good to go for a long while now.
- Ryland Craze and MEDDO
-
 2
2
-
NOTE: The last post for my transfer of my other forum build log to MSW] Thanks to @chris watton for a design he created for another company a long time ago but still holds up today.
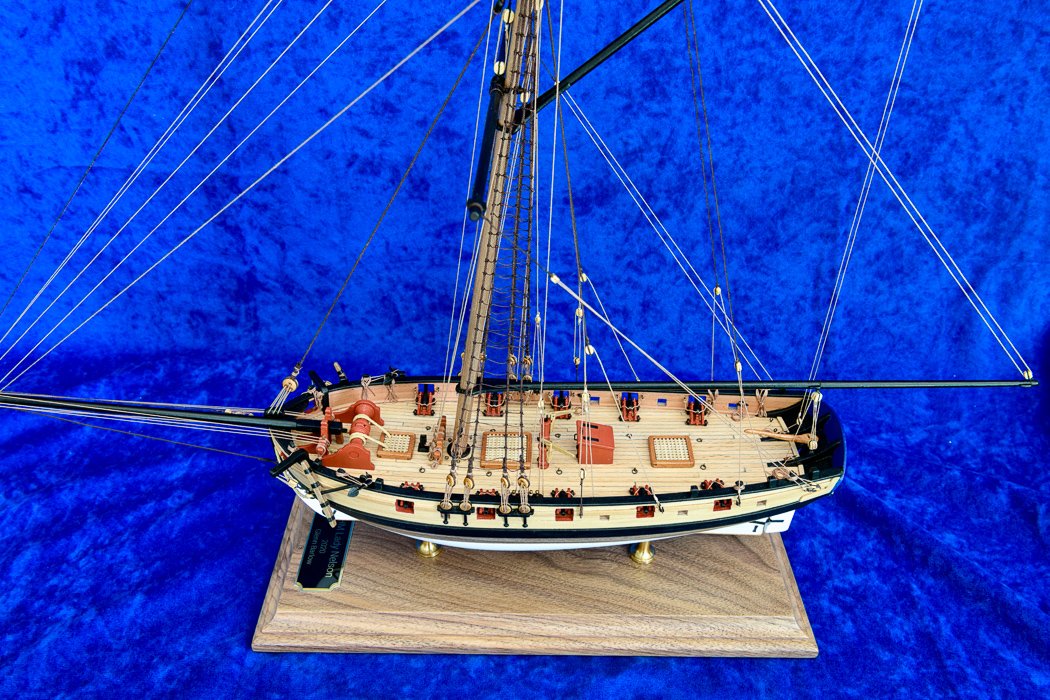
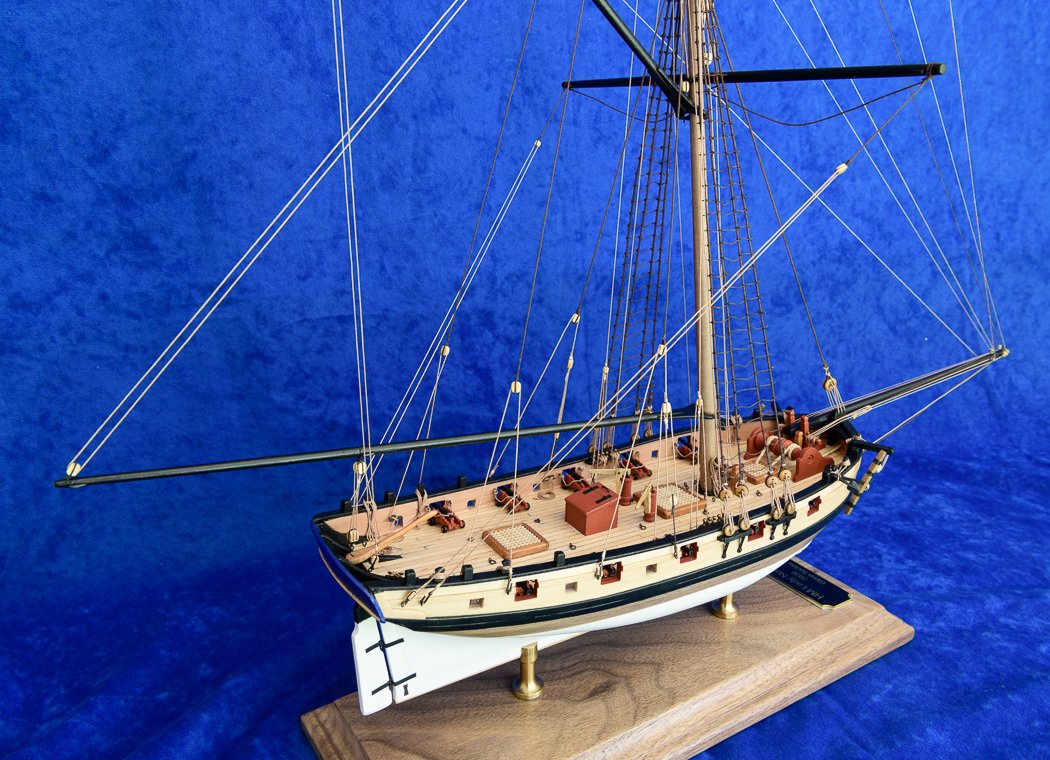
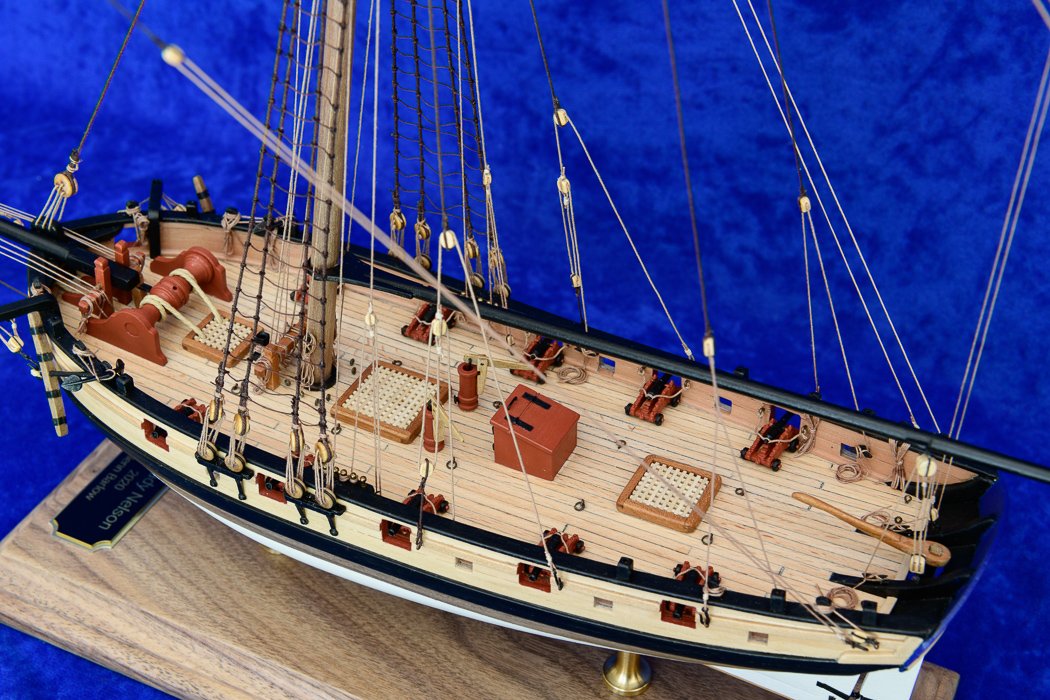
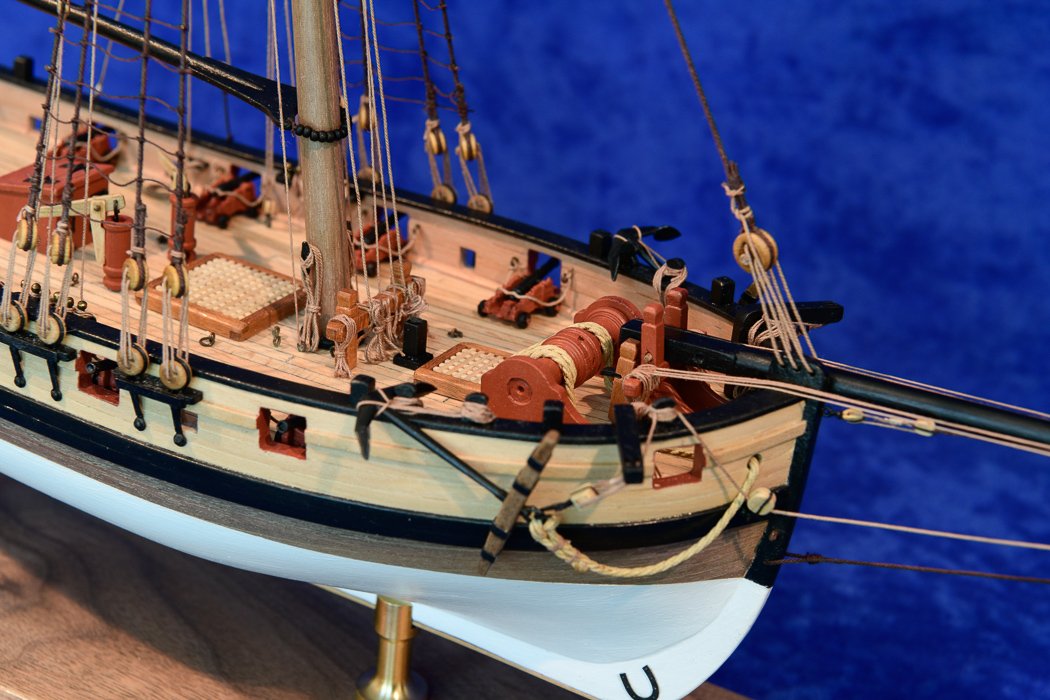
My back to basics kit after a multi-year layoff from modeling is finished. I bashed it pretty well as most of the kit walnut was replaced, planked with boxwood above the wales, and the deck furniture scratch built (other than the winch, which I kinda wish I’d done now).
I added a good deal of rigging, likely not historically accurate, but it wasn't a real ship so... I enjoyed using Chuck's Passaro's blocks and ropes throughout the model. It was fun, took just 3 months, and energized me to take up modeling again. It was coincidence that with recent events I had lots of home time to build.
Here are some of the finished photos. I created a gallery here as well.

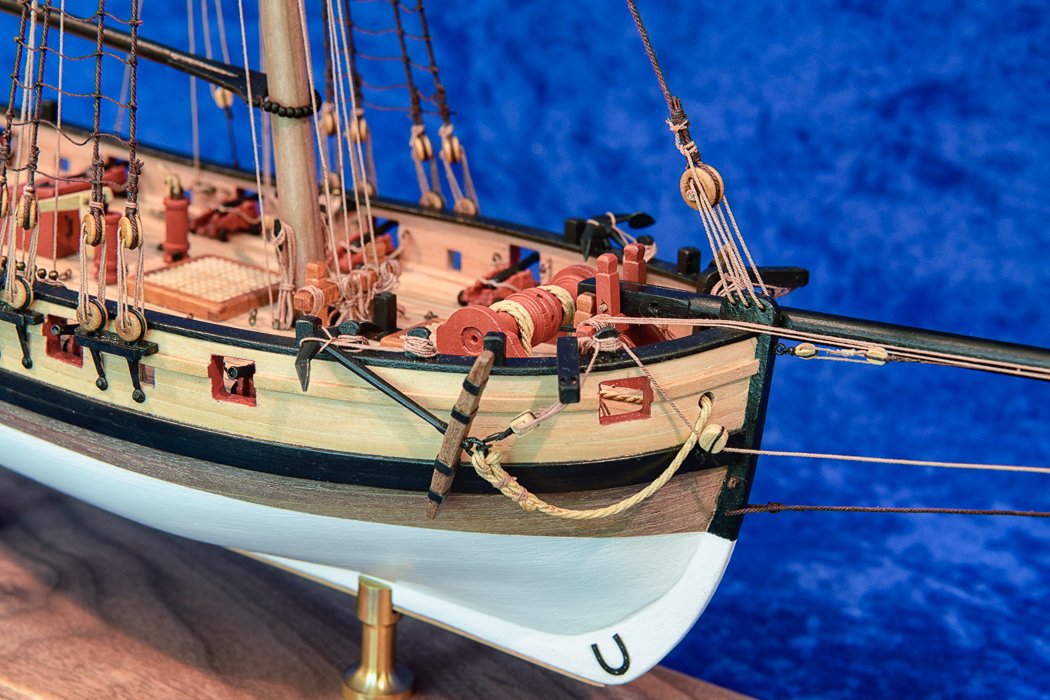
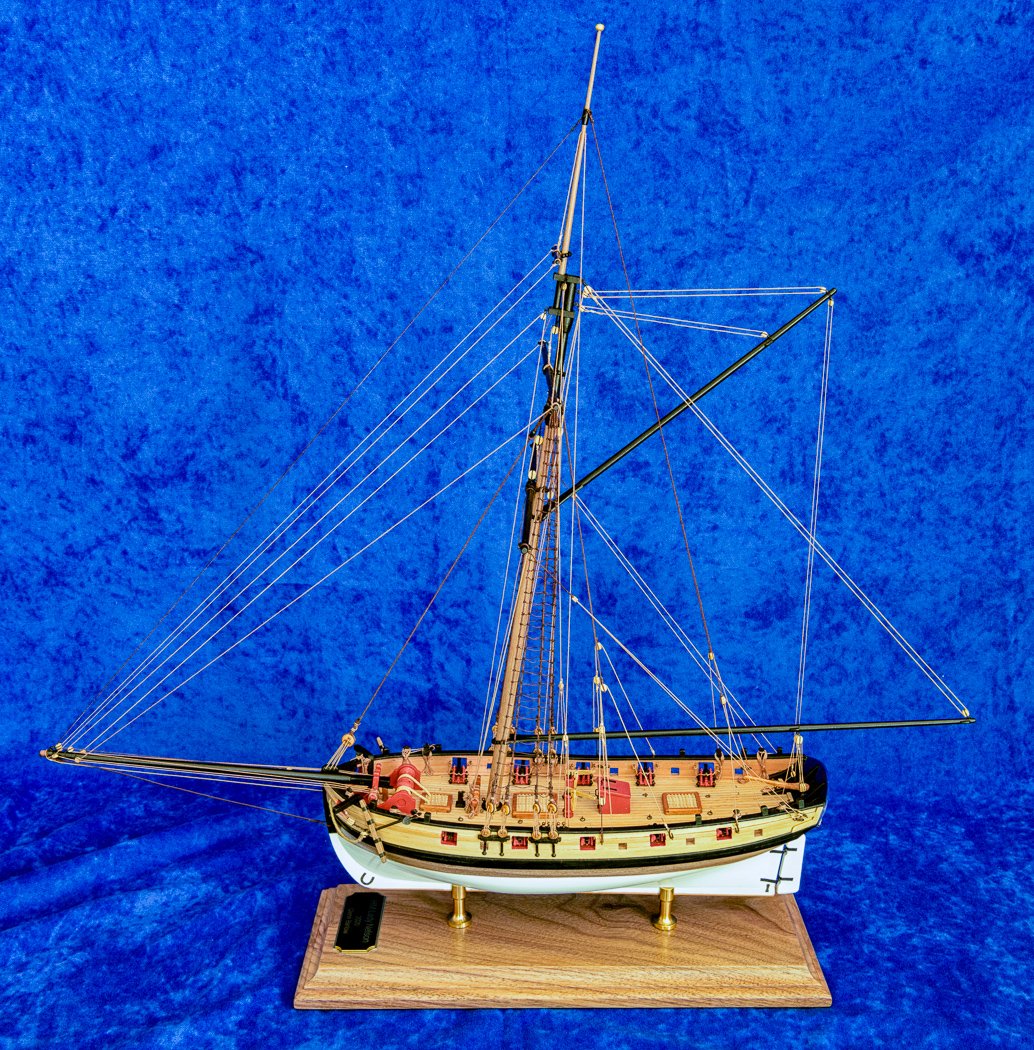
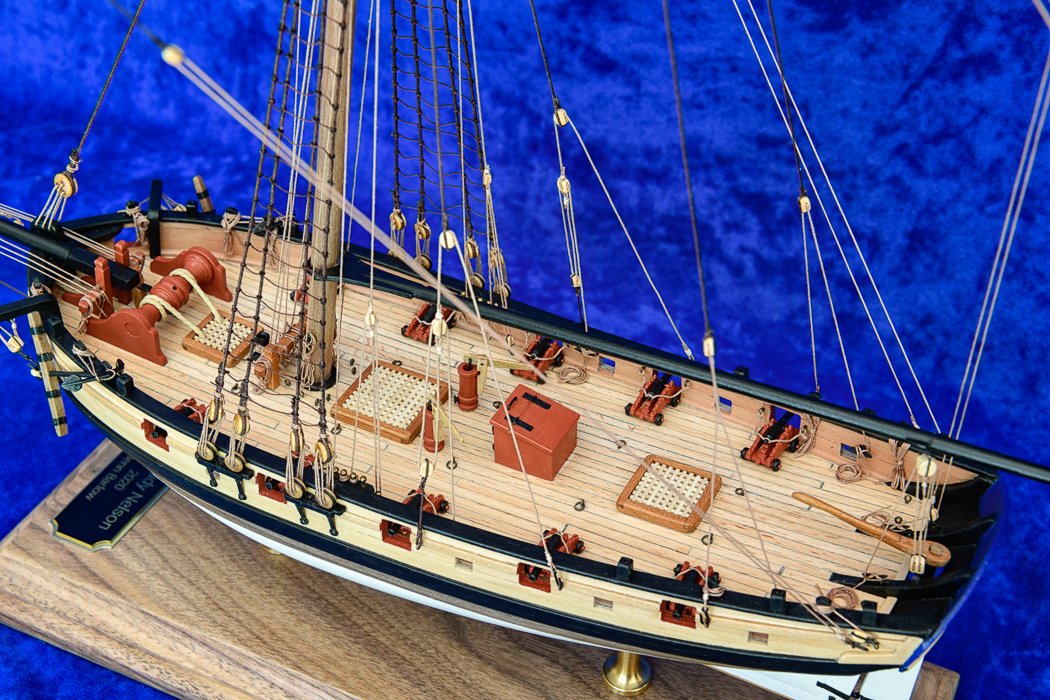
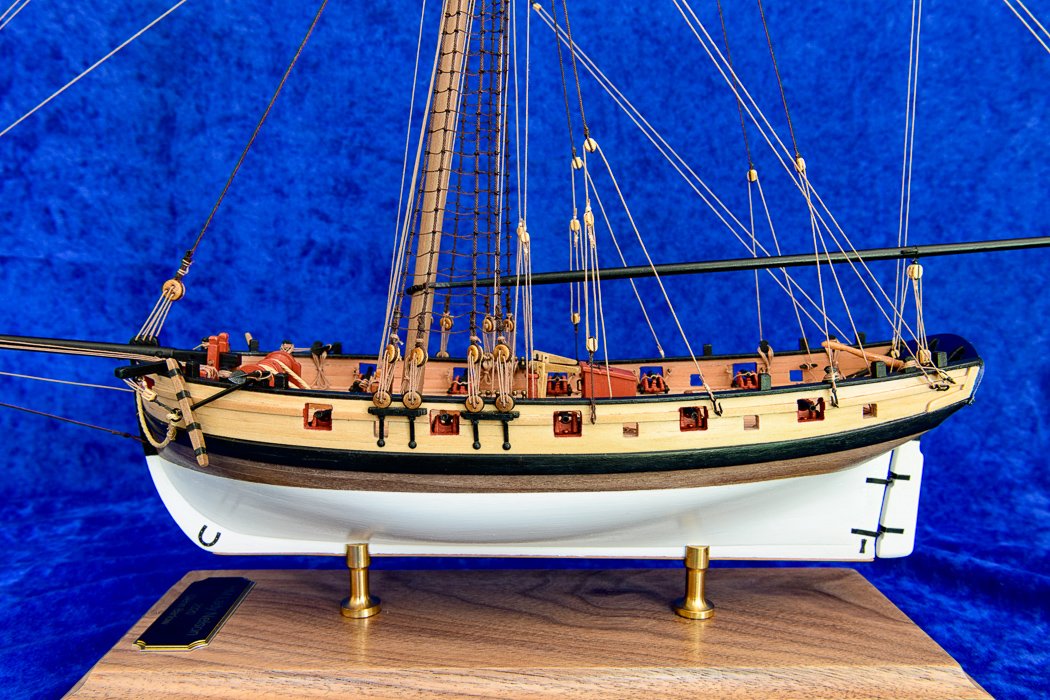
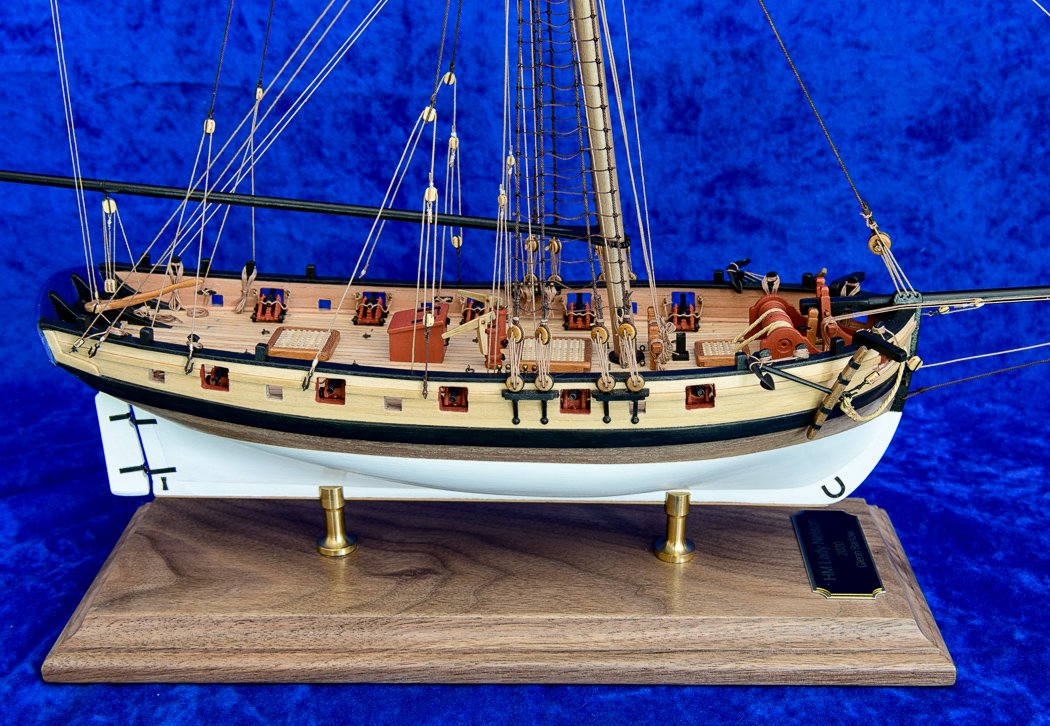
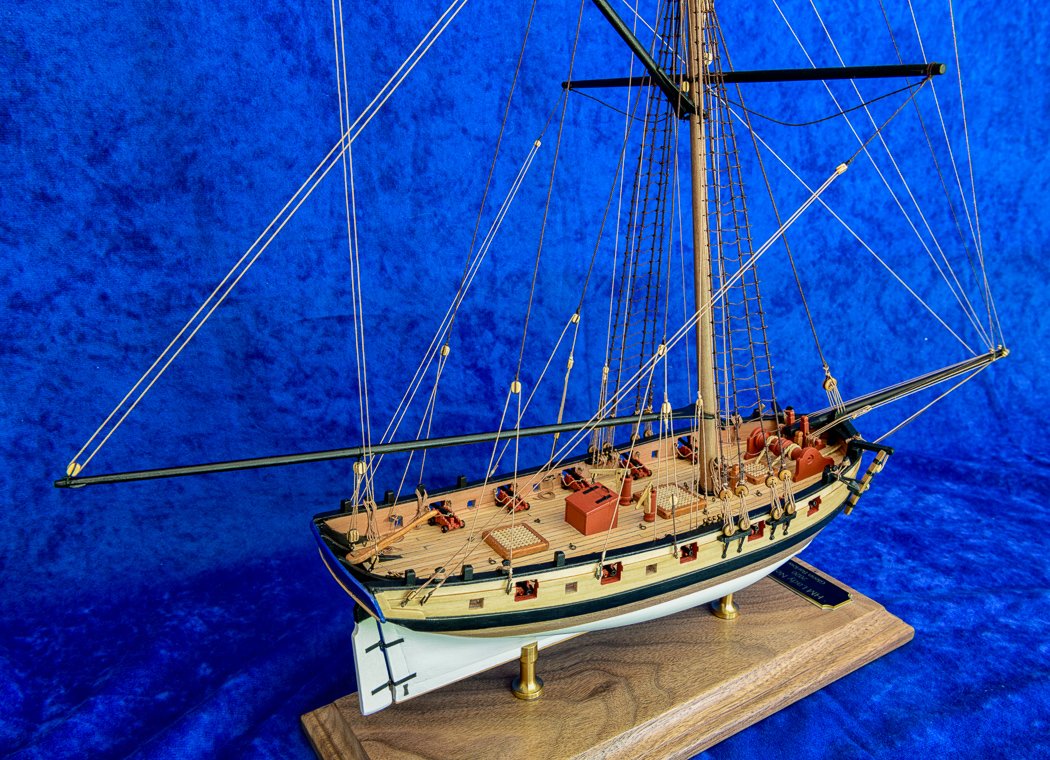
- EricWilliamMarshall, BenD, Jared and 17 others
-
 20
20
-
The mast is rigged with every rope both standing and running rope in advance including the loosely fitted shrouds. It looks like a mess now but doing this makes installing the rigging so much easier by doing all the seizing and blocks off the ship.
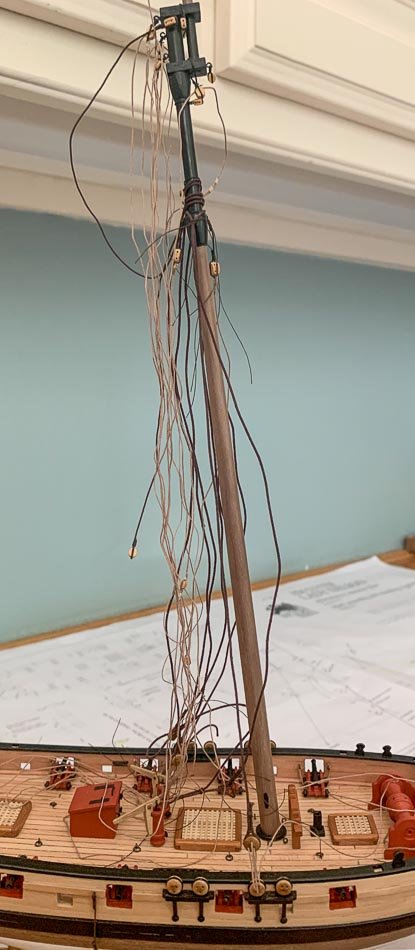
The next step is critical, stepping the mast permanently in place. Do this wrong and I’ll just toss the whole thing away - a crooked or twisted mast does not a ship make. The small ship with a tall mast makes it a little bit more of a chore finding and keeping level. I started by inserting a cut off straight pin in the bottom of the mast leaving only about 5mm protruding. This does a nice job of grabbing purchase in the mast seat below the deck to prevent it slipping around.
Next is leveling the boat which I confirm by the line level on the deck, I did this before I epoxied it into the stand, I was happy to see it still level on the stand (which I also confirm with another line level on the table to check they match up.
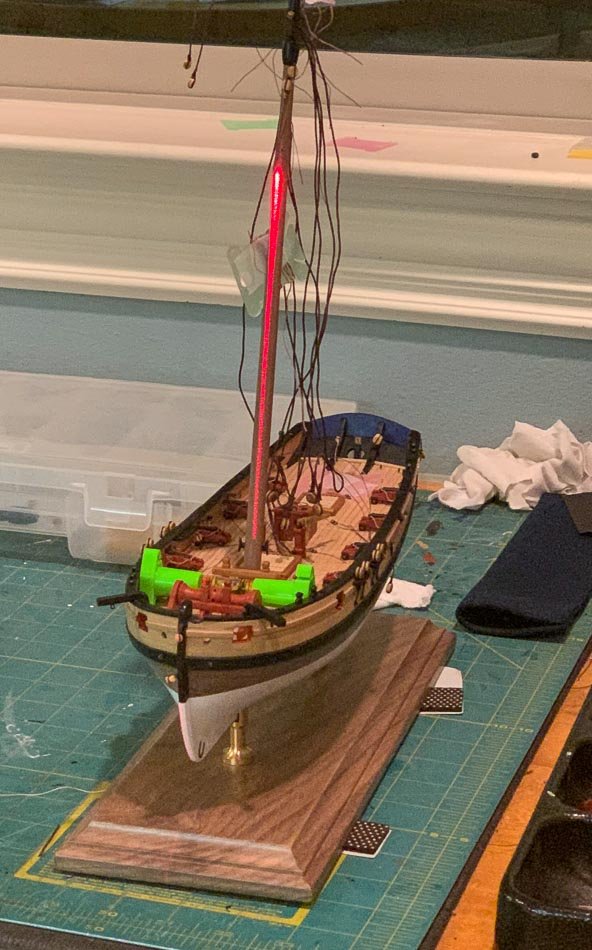
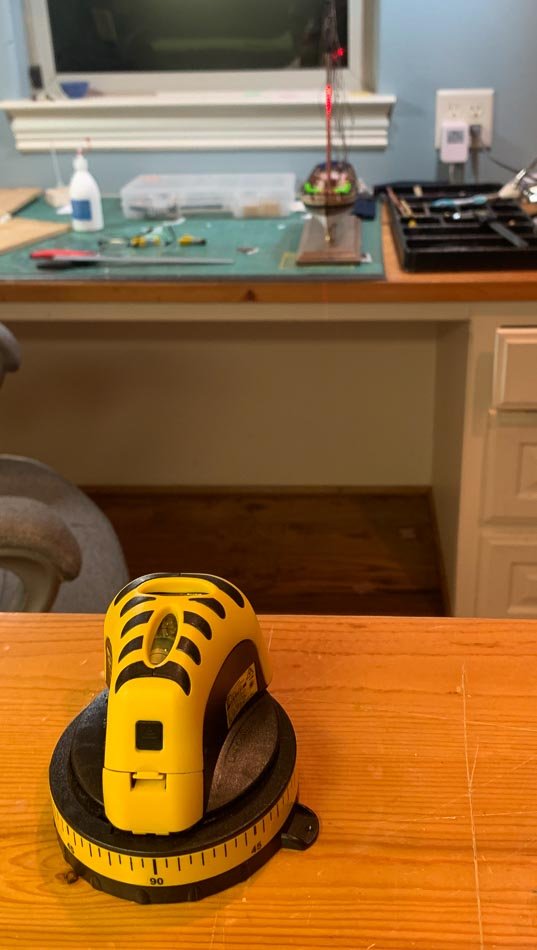
The red laser up the mast confirms its level on dry fit, so I take the mast out, dump in the PVA and insert the mast. The pin catches the seat, a little maneuvering to make sure its straight and facing the right direction (wouldn’t that be fun to find later I had it facing backwards).
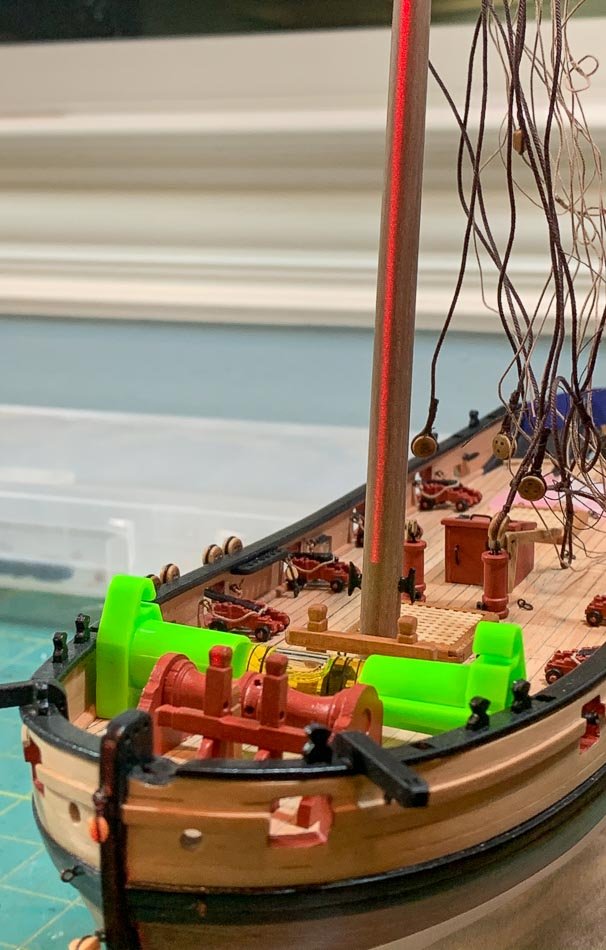
I doubly confirm its all lined up, if you look close you can see the laser hits the stem, the forward bit and the mast, then travels straight up the mast. I carefully backed out of the room and left it to dry and cure overnight.
I’m going to leave off the swivel guns, they are so comically out of scale they make the whole ship look silly. I made new posts to fill the slots on the cap rail.
Now the final attachment of the rigging begins and the ship is almost done. My log to myself will then be complete.
- oneslim, DelF, Ryland Craze and 4 others
-
 7
7
-
Just recording progress at this point, if anyone has any questions please feel free to reply. [NOTE: This log on the other forum was built over several months, the dearth of replies other than 'nice post' from moderators was very discouraging.]
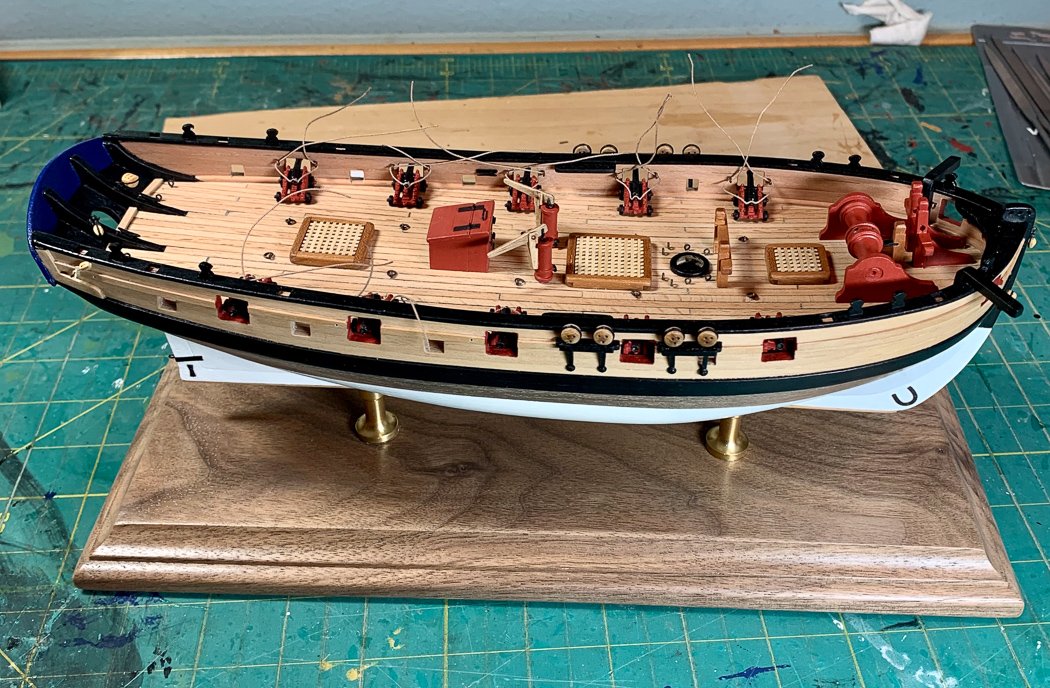
Since the last update I’ve added the channels and deadeyes and made the transition to the cutter’s final home. A step I always take prior to beginning rigging as I need the ship steady and looking like it will look on my shelf. I prepare for this step at the very beginning as is noted in my earliest posts by drilling the 2mm hole in the keel and matching it up to brass wire and pedestals on a 12 inch walnut display board. This always pays off in making the mounting so much easier. I’ll confess the 3mm keel had me a little concerned, I always used threaded bars for the extra grip. I see no need for the elaborate nuts and bolts built into the keel, I haven’t had one come off the base yet. However, this time I couldn’t find something so small so I had to use smooth brass. I needed have been concerned, the JB Weld Clear epoxy mix I used, properly applied and allowed to cure has melted the boat, wire, pedestals and board into a single entity. The big challenge is to make sure the boat is level on the stand before it sets. I have a number of line and small levels to match the boat, board, and surface its sitting an are all equally level. I should have taken a photo, but bottom line its all level and taking the time to do that carefully is a must.
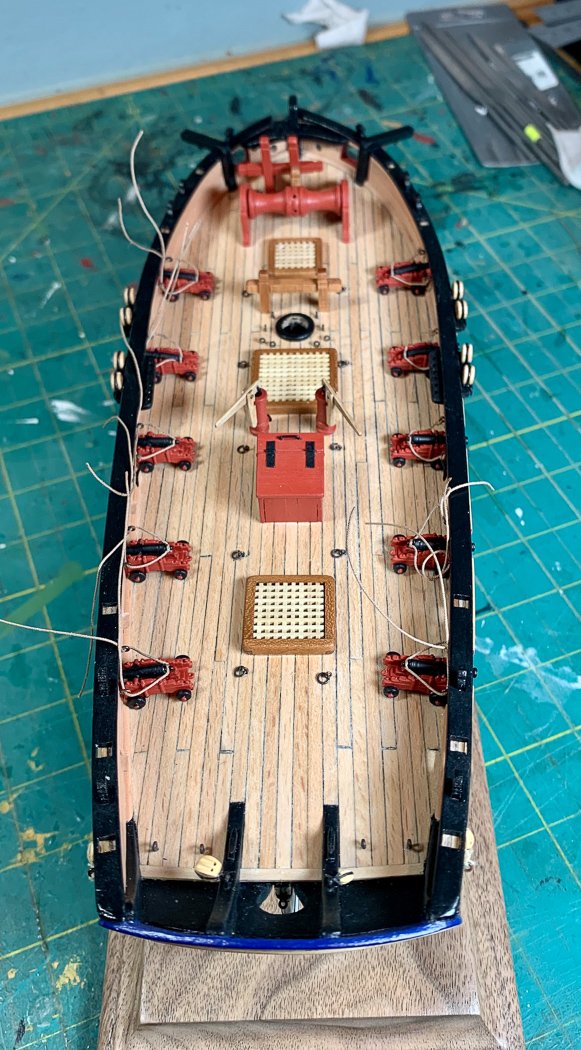
The cannons are now mounted and the rigging has begun. I’m only adding breech ropes for this model, the small 4 pounders are just too little for me to rig and have any semblance of scale.
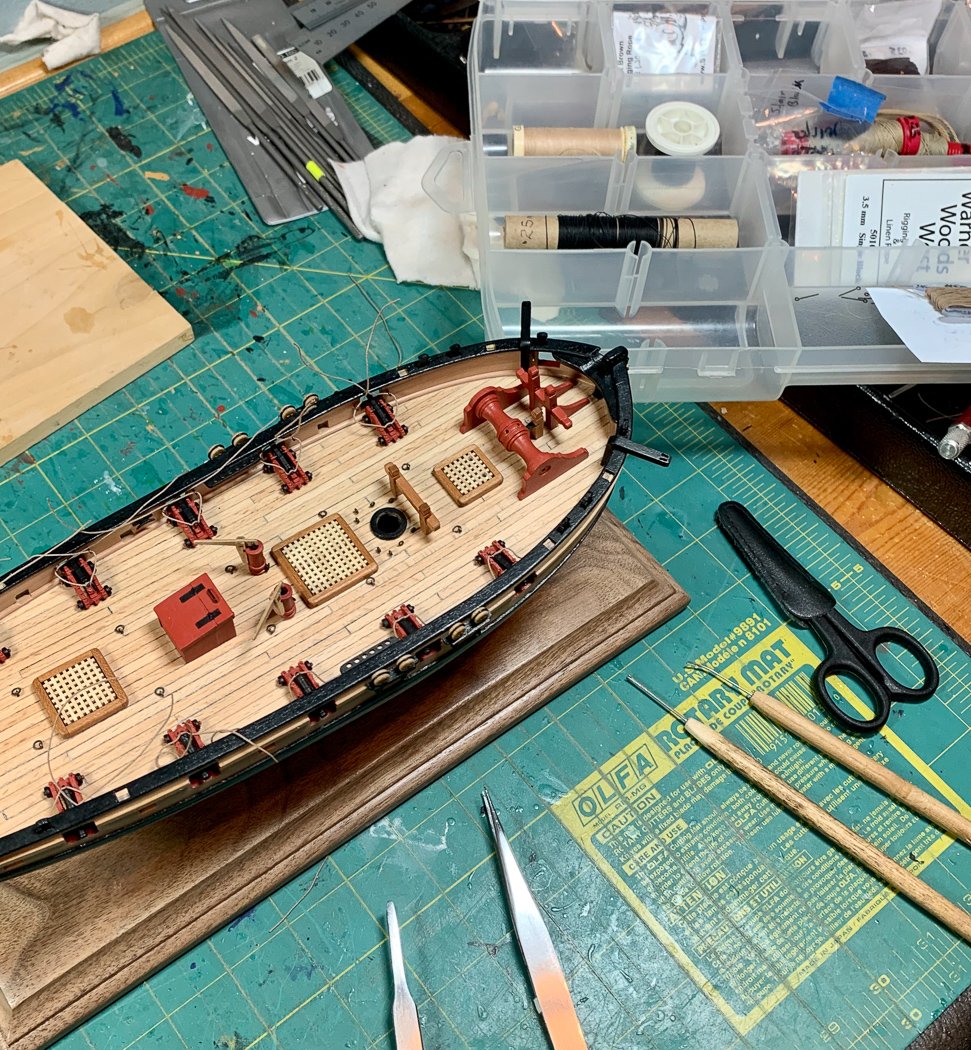
So my work area converts to my rigging box. I’m using Syren Ship Company blocks and rope. [NOTE: I started with some Warner blocks I've had for a long while but switched them out.] @Chuck's product are superior to anything I've used on my eight prior models.
After rigging the cannon it's time to make the main mast, the bow sprit is already done and rigged but will be the near last thing I install - cutters have long bowsprits and not a lot of rigging to hold them.
All the yards, booms, and masts are made. My process is to cut the appropriate dowel 3 inches too long, stick it in my DeWalt drill and spin them into shape with sand paper, files, and my digital caliper. Once I have the shape and size, I just cut off the extra length. I leave my workshop and sit out on the porch, wear a mask, and let the sawdust fly. I was happy with how they all turned out not having done this for a long while, especially the extra baskets on the mast.
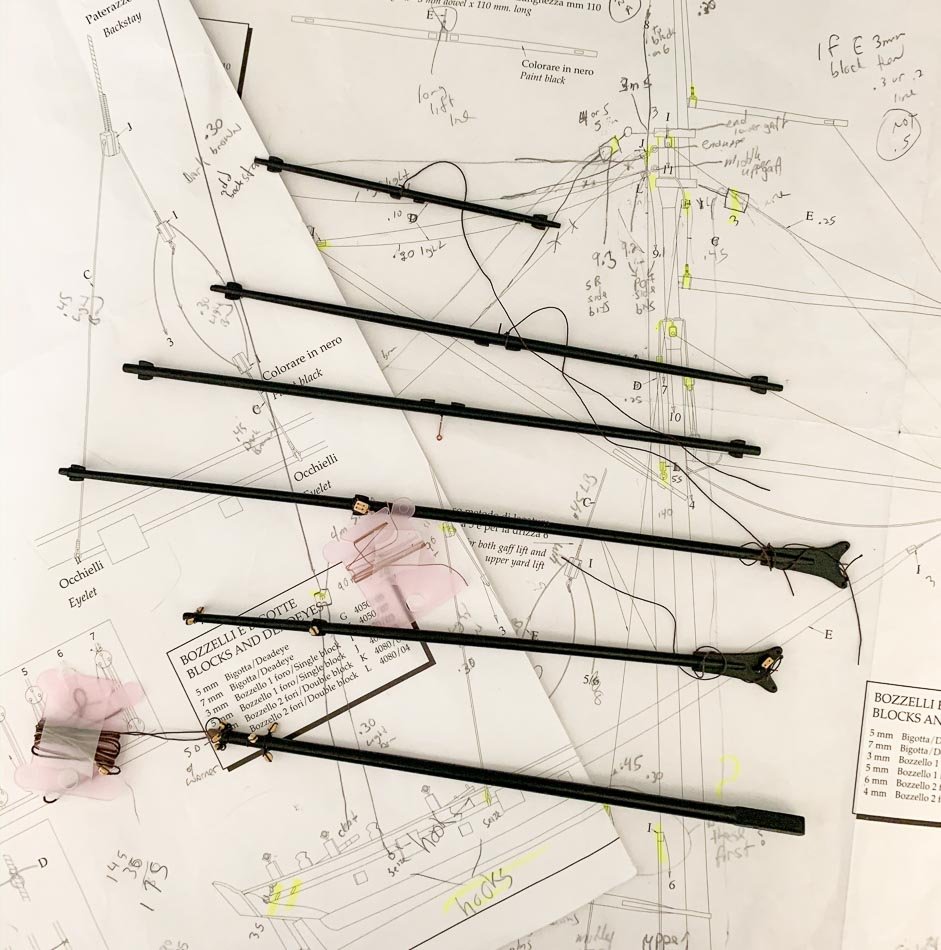
The kit rigging is a bit sparse for me so I added a my own lines and blocks, it's reasonably accurate but I’m sure not fully so. My goal is shelf appearance, I’m not sailing it anywhere.
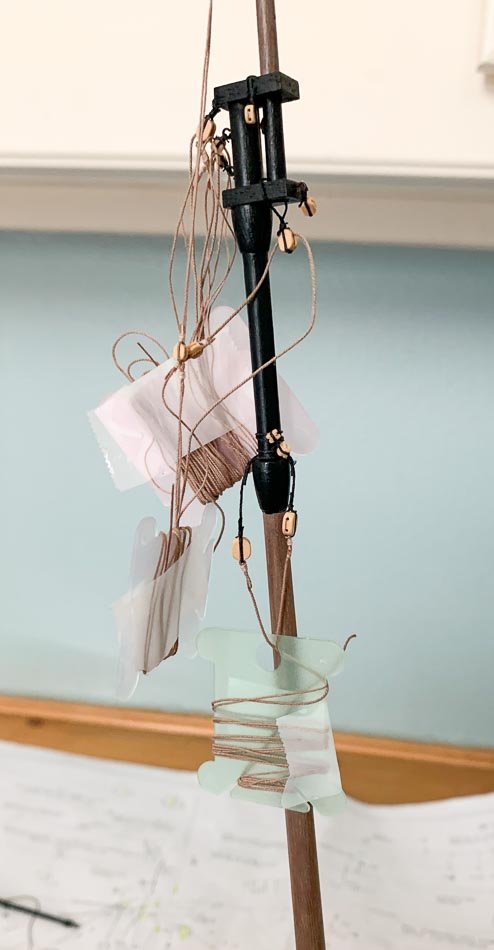
Then I set about rigging them with the objective to compete every standing and running line I can before anything is installed on the ship. I found these color coded tabs when I was looking for something to store my Syren rope, they came with a little inexpensive winding tool that works just great for moving the rope from their loose coil to these tabs, the rope is then easy to work with and free of tangles. They also work great along with low adhesion tape to keep the installed lines out of the way until I’m ready to deploy them. The last thing yet to do on the mast is adding the shrouds. They do kink the rope a little, but I find it you wind it loosely it's not so bad. I may need to find spools, but its just so easy to store it this way.
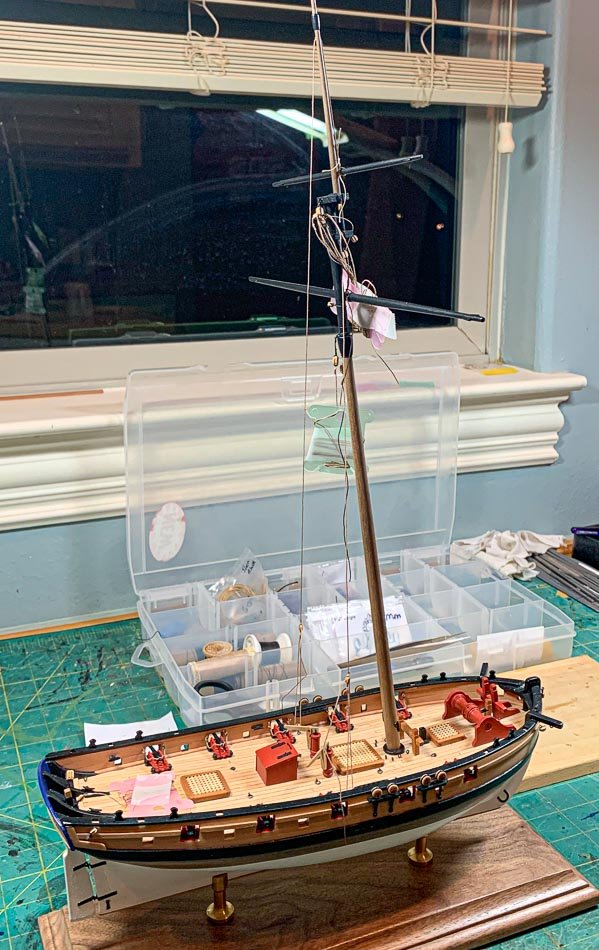
So here it sits with the mast dry-fitted while I check and install lines and I get ready to move to the final stage of building. If you look close forward of the bits I added something just yesterday. It occurred to me the crew had no means for a hot meal, so I built a stove, installed it below decks and then built and added the stove chimney to the deck...Ok, I did one of those things.
- DelF, Jonny 007, Ryland Craze and 4 others
-
 7
7
-
Short log for a lot of work. As noted by @Chuck instructions and multiple Cheerful logs this part, seemingly simple, takes a lot of “fiddling” as my English friends say. I’ll be honest and say while I finished with 2 sills and 2 lintels, more than 4 were used in the making of this stern.
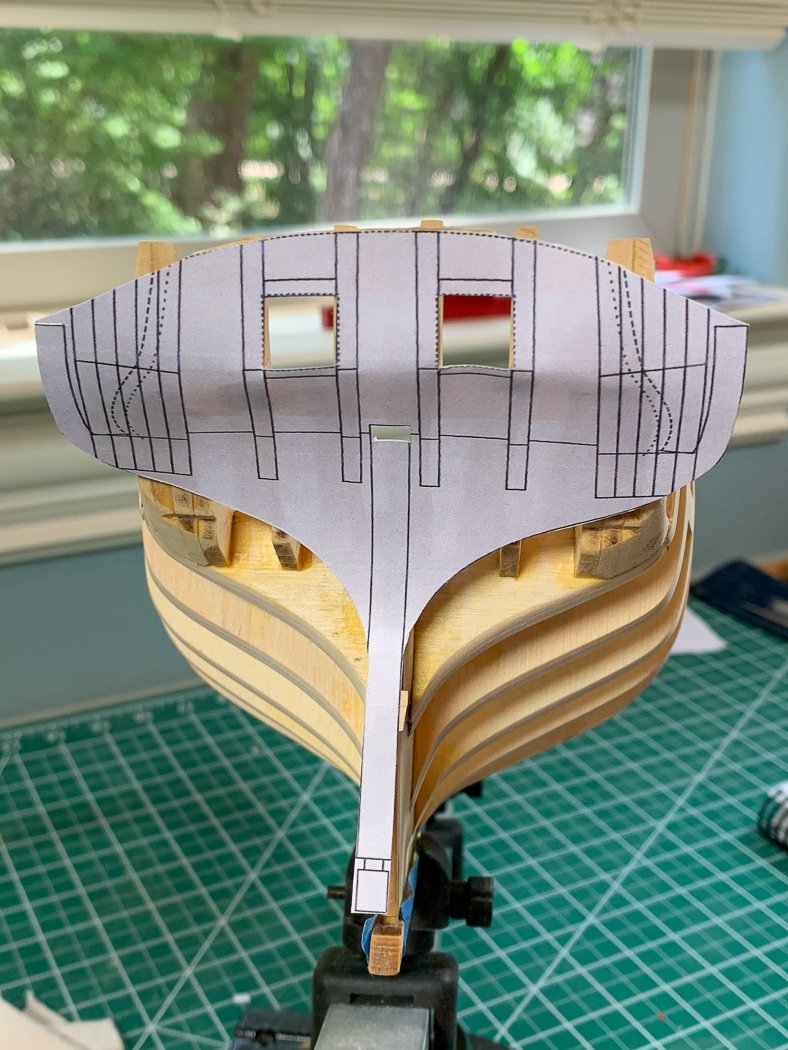
Cutting out the stern pattern from a copy of the plans is the first step to get a feel and mark where they go. But that in itself isn’t enough.
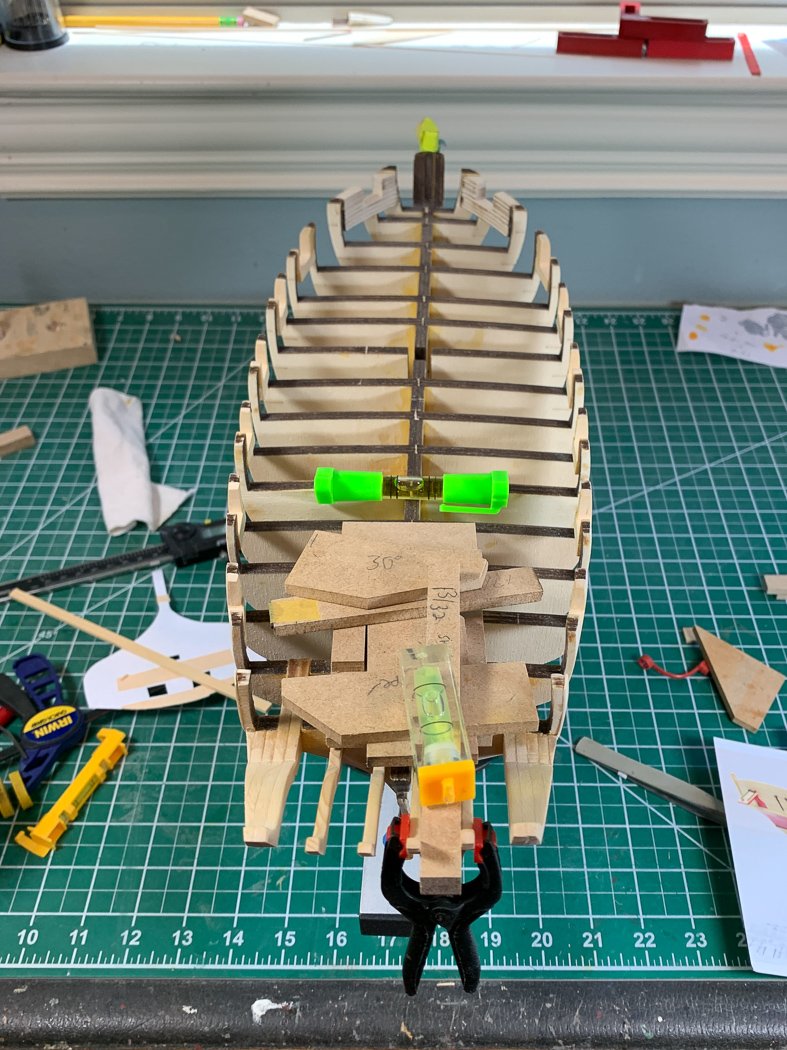
I modified my port shaper for these smaller ports, its a great jig to both get the size right, keep the port squared, and with the help of various levels to get the sill parallel with the waterline (matching to another level not shown here setting at midship positioned bow to stern). And for those taking notes, the level was straight when I wasn't posing it for photos.
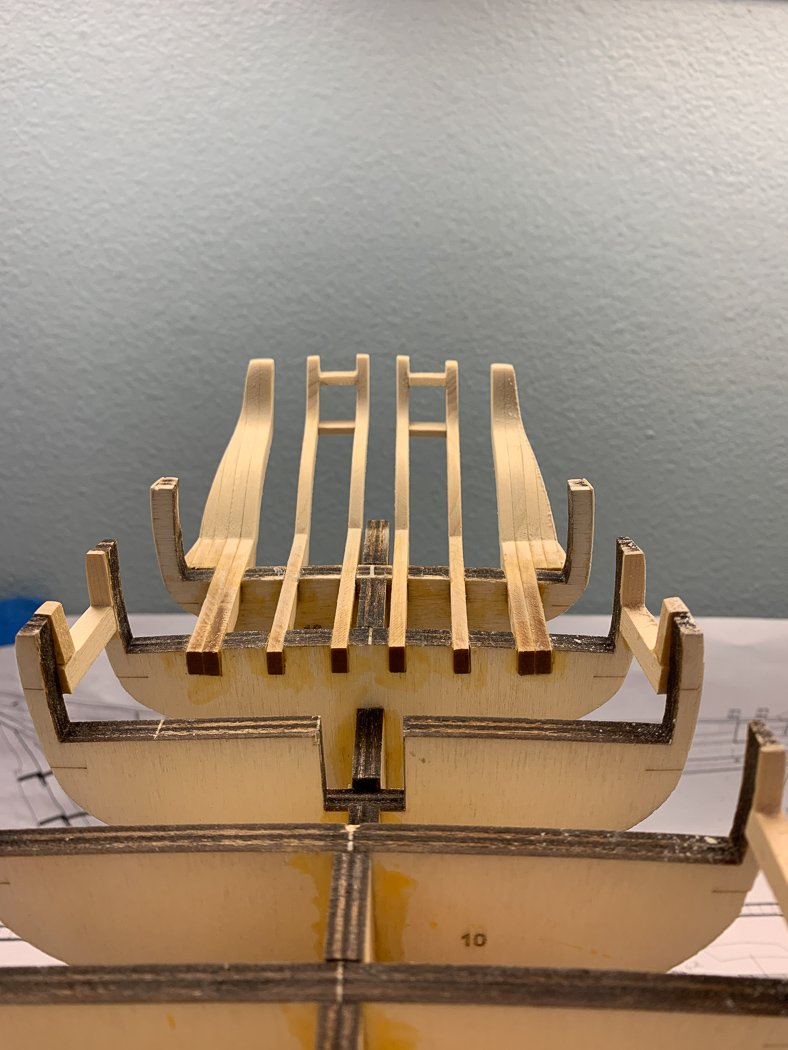
Definitely an opportunity to demonstrate patience and taking the time to get it right. I almost settled at one point with one slightly off but quickly said no I’m not doing that.
Though still a bit more fairing to do, including the top of the frames, but that comes later. In the end I got there, a little smarter than when I started.
- Ryland Craze, DelF, Edwardkenway and 11 others
-
 14
14
-
-
Thanks for the input, its good to know there's another builder out there, especially one ahead of me. I used the time between starts on my 1st and 2nd hull to complete the winch and have a post on it you may find useful. It was fun to put together I thought, but you're correct, we have to do it right to make it work. It's an amazing design by @Chuck no matter how you look at it. It looks great finished.
-
-
5 hours ago, DelF said:
the marking jig.
Thanks for the reply, I’ve never had this happen in all my previous models. It was traumatic.
The fairing took three days, both times, with this single planked ship It’s critical to have a smooth run plus the ports sills also have to be be faired to the hull.
The marking jig is nothing but a piece of board with pencil lead glued/taped to the end. I ran the board along the hull frames to mark the run of the planks onto the stern frames to establish the starting point for fairing them. It was Rusty’s clever way to mark this line.
- EricWilliamMarshall, MEDDO, Saburo and 4 others
-
 7
7
-
3 minutes ago, Ryland Craze said:
I could not "like" that post.
Yeah, it took me a while to be able to post it, I had to get past where I’d been stopped before I could do it, not to mention some passing of time;-/
Yes, laser char is never fun but for some reason the little bit on those boxwood fames was much harder than removing it from the hull Or the stem and keel pieces. I don’t what the deal is with them.
- Saburo, egkb, Ryland Craze and 1 other
-
 4
4
-
40 minutes ago, JToma said:
doing a nice job
7 minutes ago, Ryland Craze said:Keep up the good work.
Thanks guys. FYI, this is a model I’ve already finished, the build log was done on the other forum and I’m slowly porting it over having had my account there “suspended” for questioning their stance on piracy multiple times. Since I won’t go back there I just wanted the log captured in the hopes it might someday help someone.
This simple little build was to check my interest in returning to modeling after a near 4 year absence.
Nonetheless, I appreciate the comments.
- JeffT, EricWilliamMarshall, maddog33 and 1 other
-
 4
4
-
-
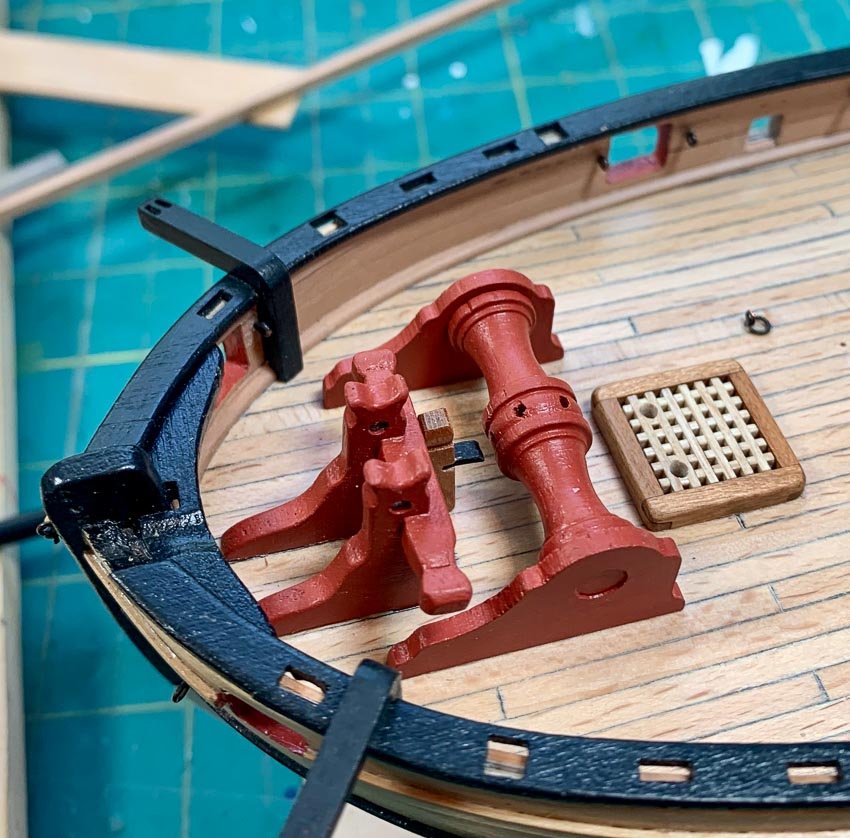
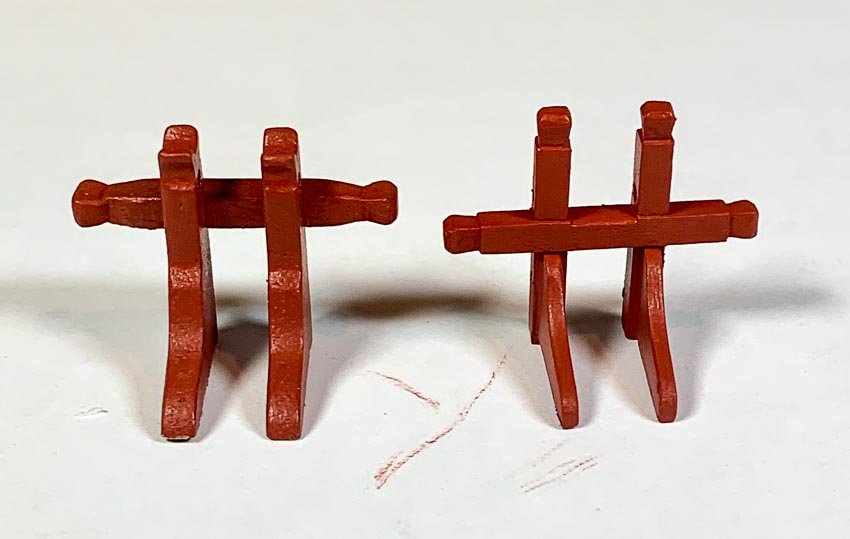
I replaced the last of the kit walnut by building the bits from cherry, the kit provided piece is laying on the hatch for comparison
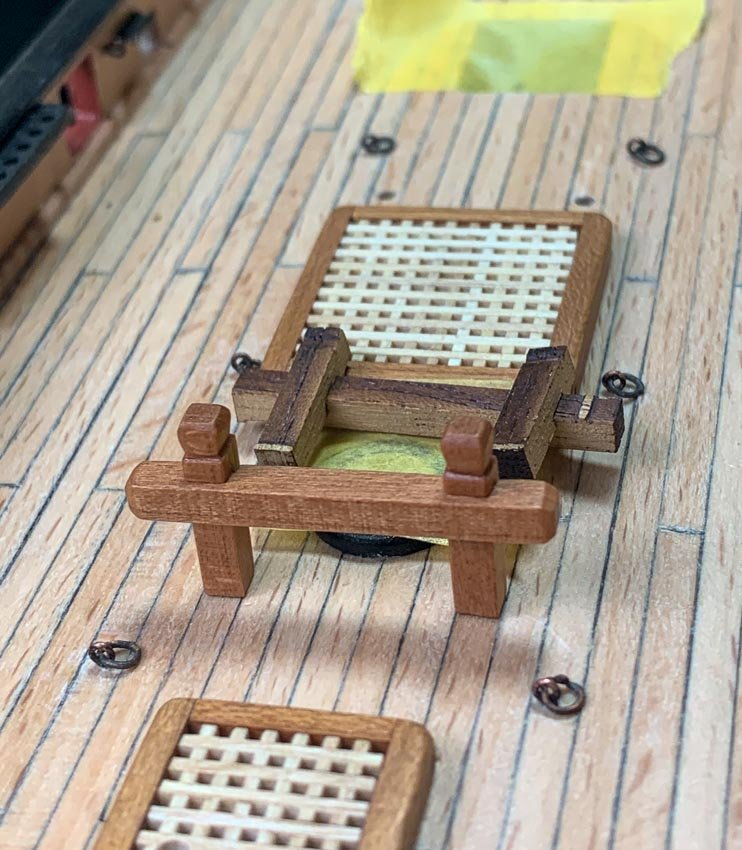
The tape over the mast hole was belatedly added after I dropped one of the pieces into the hull. Fortunately with a few lucky upside down shakes and tweezers I was able to retrieve it.
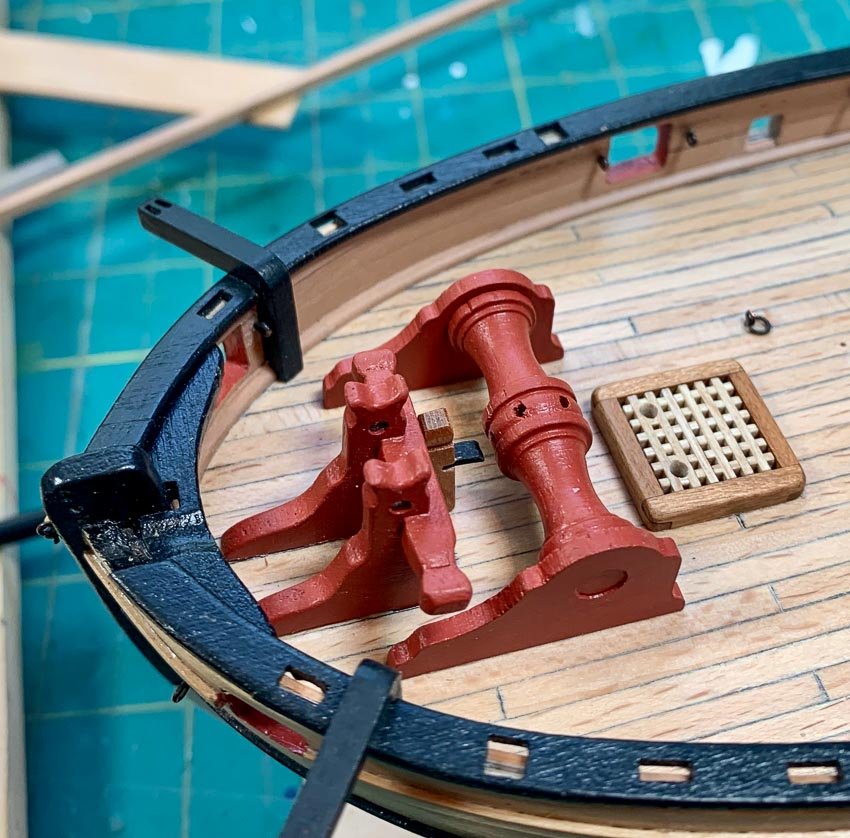
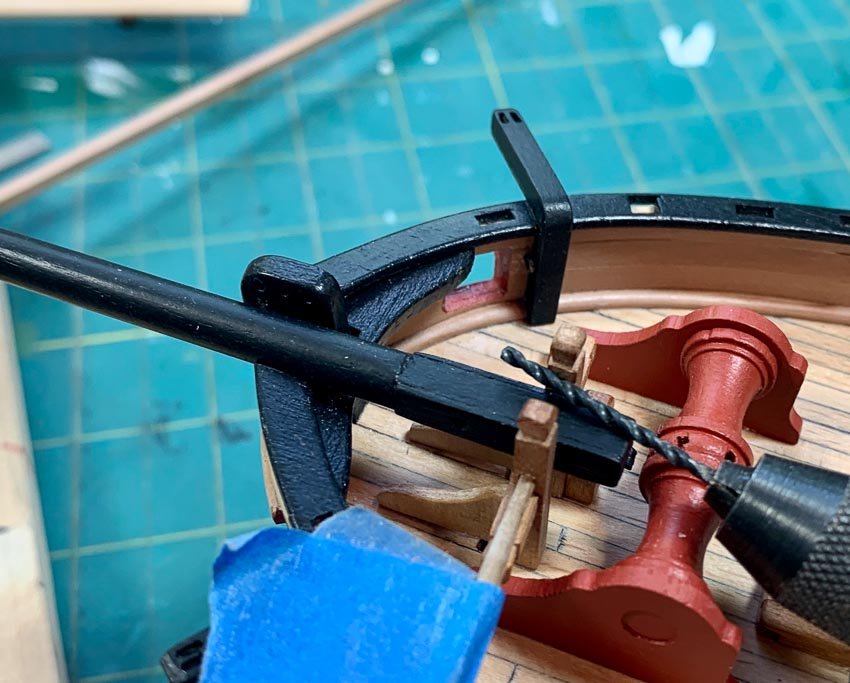
The kit design and parts has a significant flaw that I recognized and had been struggling to find a solution. The bowsprit bit is either out of scale or just too high. I built the bowsprit, and found two problems. Once braced on the bit It sits to high above the rail, almost 5mm. There is also not way in the plans on how to secure it. I contacted Chris Watten, who designed this kit several decades ago he says and he agreed but couldn't remember his original design, probably not follow by Amati so they could use an existing bit in the kit. I’m not sure how the box photo is holding the bowsprit either. He told me on his new Vanguard Alert model, a similar cutter, the stem is much higher and he provides a photo etched brass ring to secure it on the stem at the rail. I tried fabricating one from wire, but that pushes the bowsprit off center and with the short stem it simply wasn’t a solution. So where to go. I could just glue it to the side of the stem but it looked bad sitting so much above the notch in the rail and that’s no way to build a model.
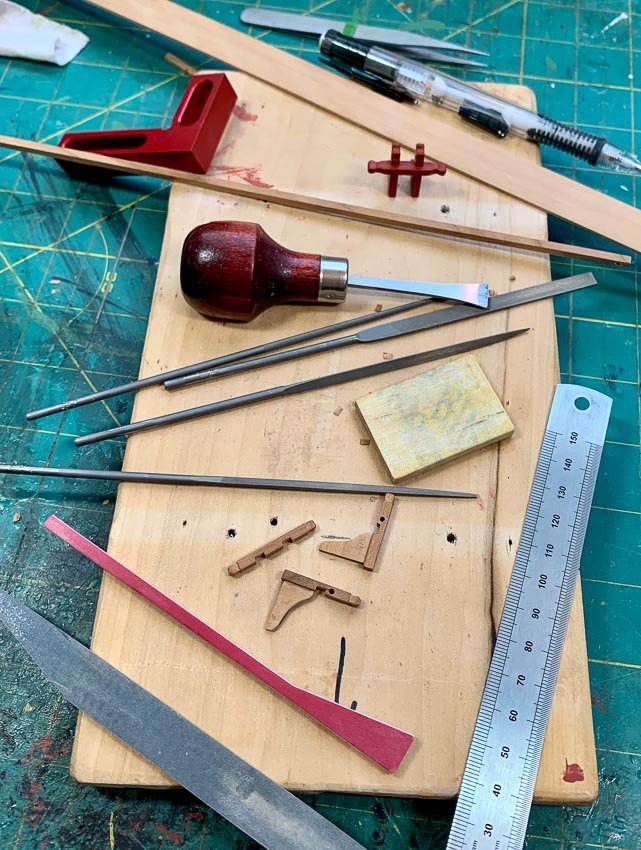
So I ripped the kit provide bit off the deck, got out my trusty tools along with some cherry and boxwood and scratch built new bits.
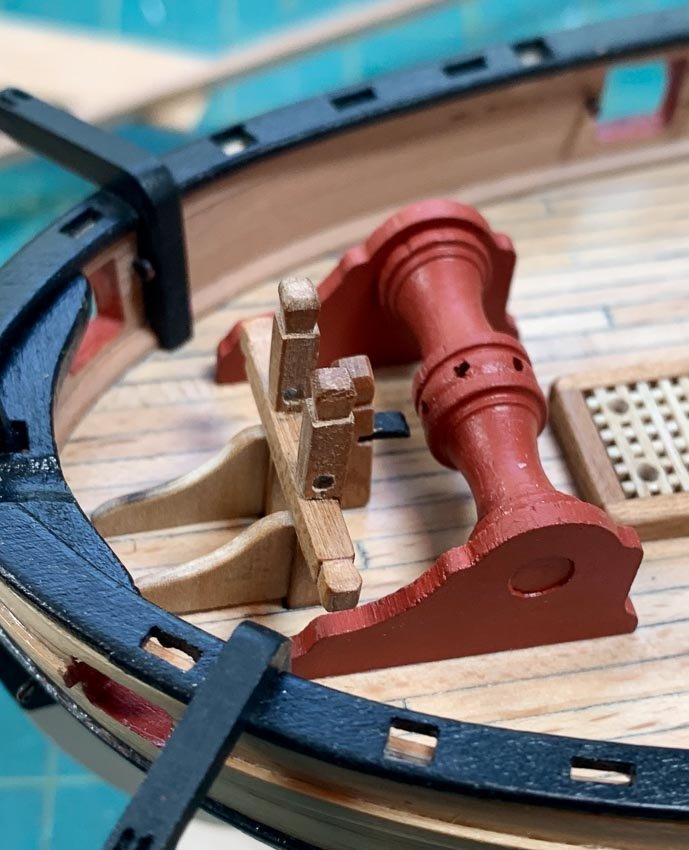
I was tempted to leave them natural, but it has the reverse affect of highlighting the somewhat oversized wench - I thought about rebuilding that but decided enough is enough, I have Cheerful waiting for me.
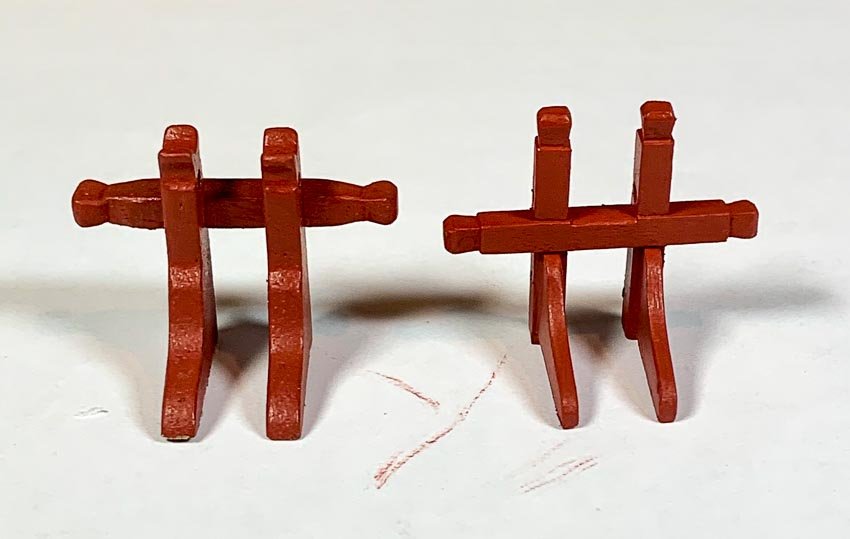
Seeing the two sitting side by side it doesn’t seem I made much difference, but its far more to scale and the with the difference in height of the bar allows the bowsprit to lay right in the groove with enough clearance on the stem for the later rigging. (the drill is just holding it in place during this dry fit, the blue tape on the connecting dowel is so I don’t loose it on my work desk)
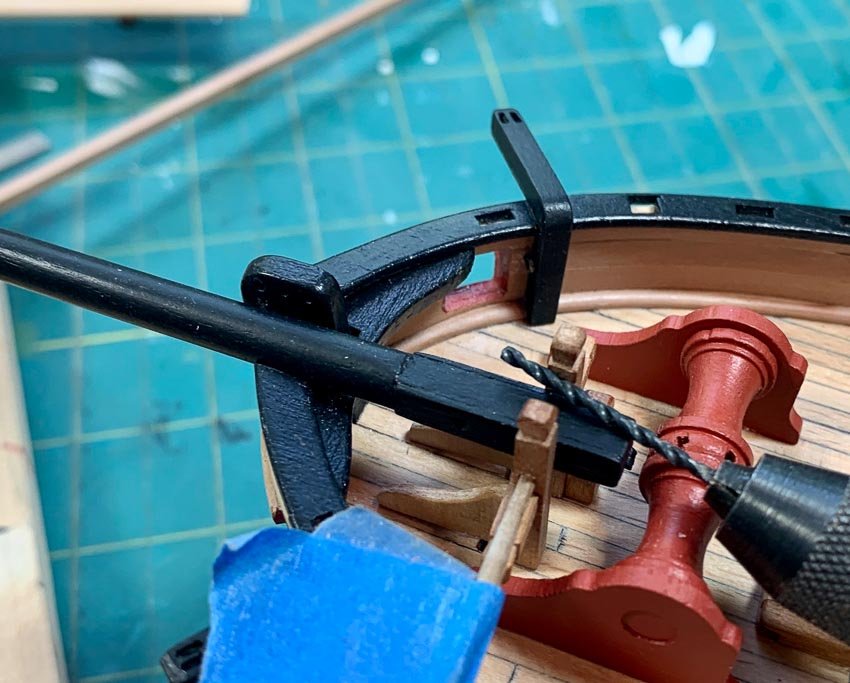
I’ve now completed all the deck furniture, next of is the rail stanchions and gun mounts, plus two cannon left to paint.
Here is the finished hull. The swivel guns are made but won’t be put on until the end. I’ve also completed the cannons and will install those after adding the channels and deadeyes.
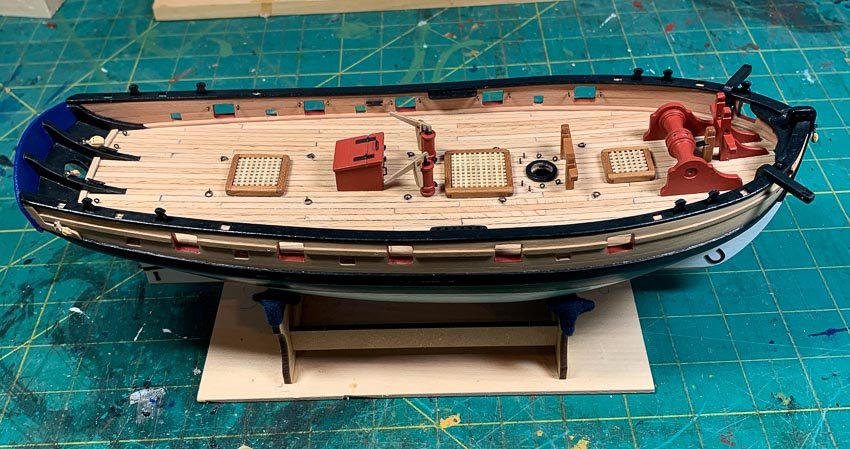
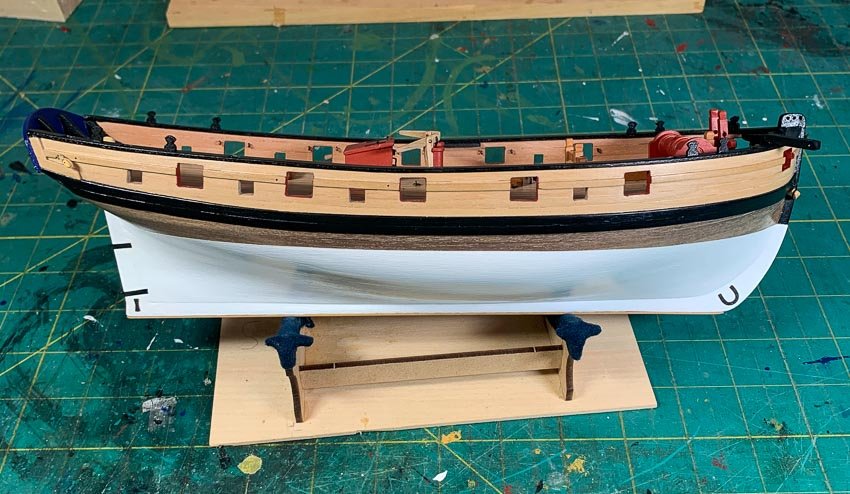
[NOTE: Still a bit to go to complete the move of this log to MSW, more to follow]
-
Continuing on with the world’s least read build log [NOTE: that was true on the other forum but it's starting to seem true here as well, I guess this little cutter isn't that exciting, or I'm not]
Since I’ve decided to take on my first scratch build project with the Cutter Cheerful [which I did and I am] a log of my remaining Nelson build will include trying new things, which if done right will be of benefit to Nelson. One example was the companionway, the next is the hatch covers. First off I started by ripping a 2x3mm of cherry I have on had, I’m abandoning the brittle kit wood wherever I can.
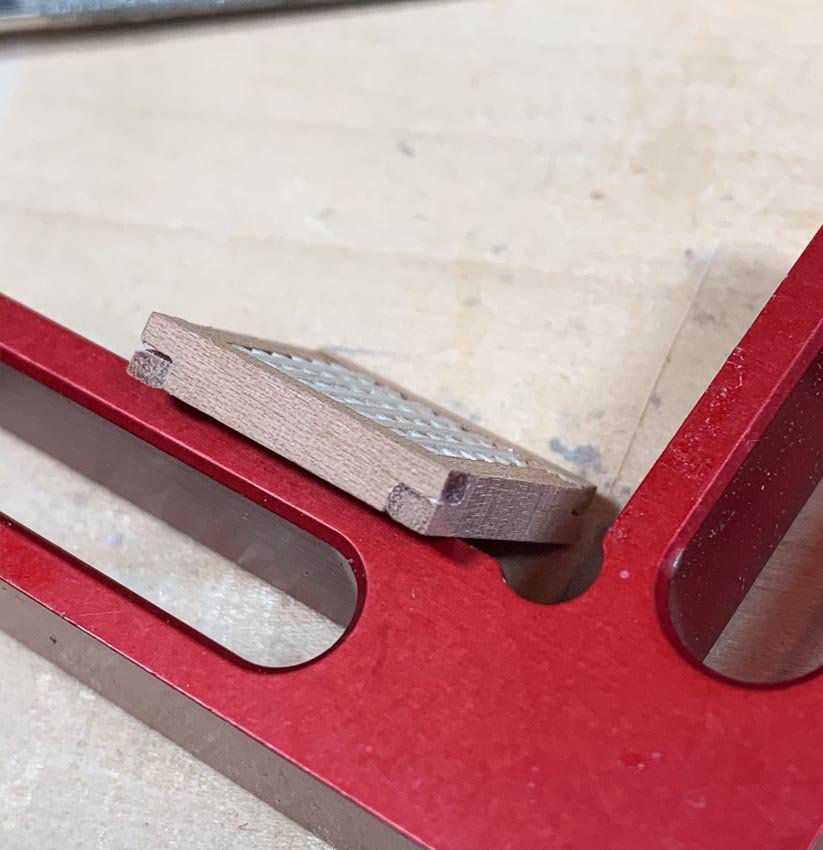
The easy way is to just over lap the edges or nor much harder make them 45 degree mitered joints but the real way is lap joints. It seems pretty easy but I had to be very precise with the cuts.
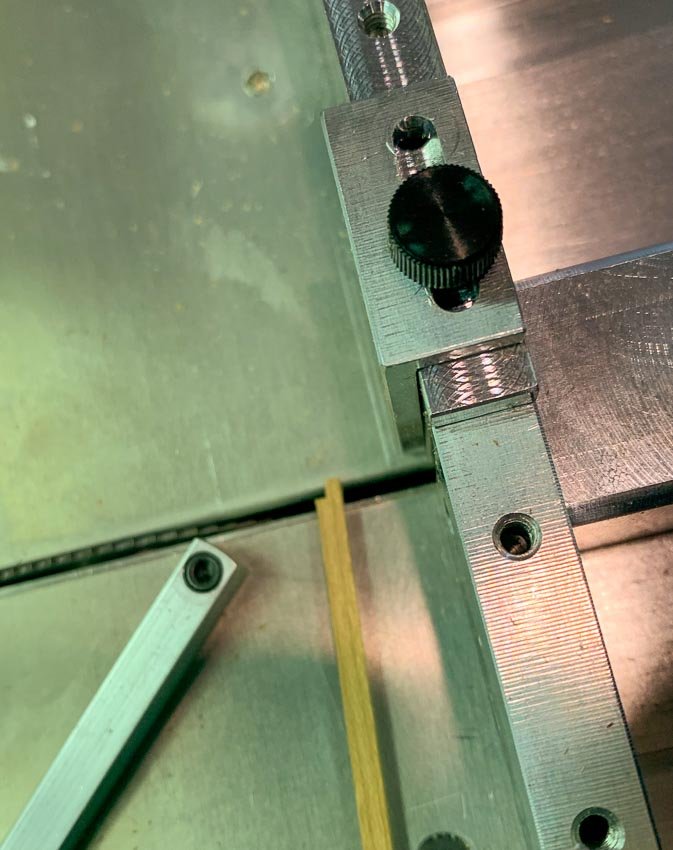
My latest addition is the sliding table to go with my Byrnes saw. I’m already wondering how I did without it. I cut the 4 sides of the hatch the exact same length - determined not by the opening but by the completed hatch crossing pieces - plus the width of two sides. Then I set the blade the width of one side and half the height of the board - I knocked out the resulting notch with my #11 blade.
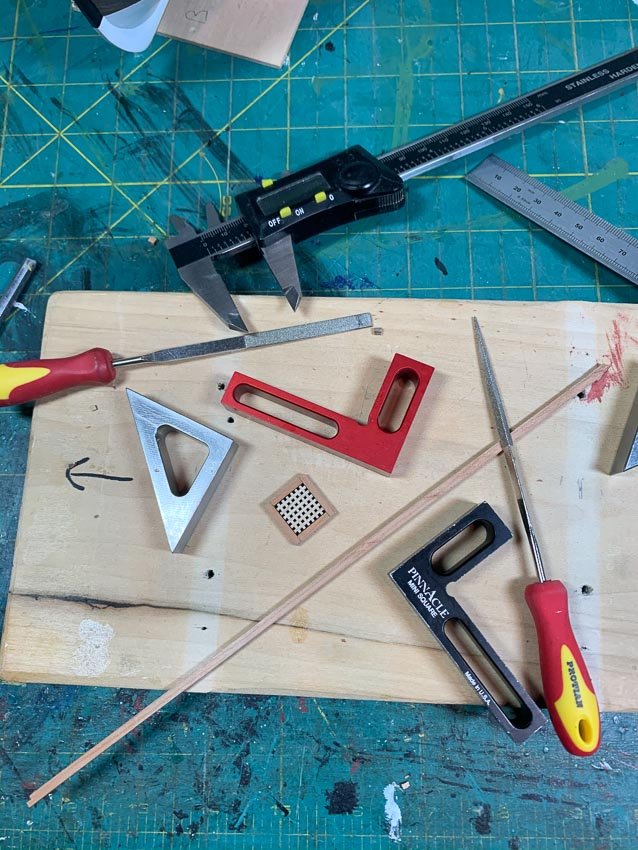
Then its filling and sanding to get the over lapping joints to fit perfectly, be perfectly square, and have the completed hatch crossing perfectly fit inside the resulting box. All my various squares. rulers, and calipers all placed a part.
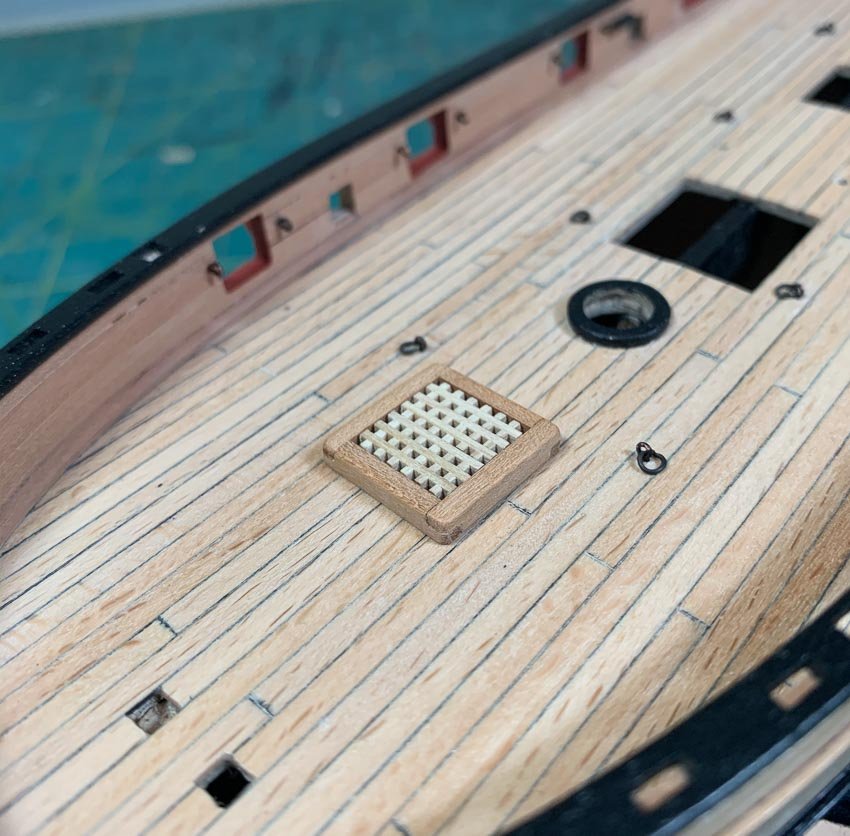
I did great with this first of three, but then rushed the next one and as a result I’m throwing it away and starting all over. It took my building five to get three I liked, the hatches are completed and installed. It takes precision to get eight notches the right height and depth to make lap joints, not to mention for each of the boards to come together for the right interior measurements. Even building the “box” after measuring the completed hatch material is a nice challenge. [NOTE: I realize none of this is new for many, but it was new for me, now it's like "whatever."]
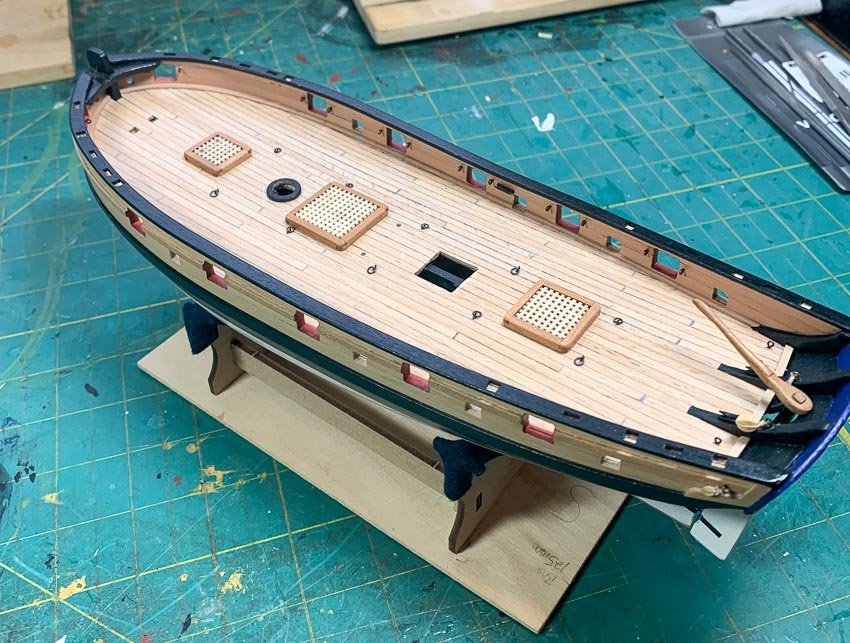
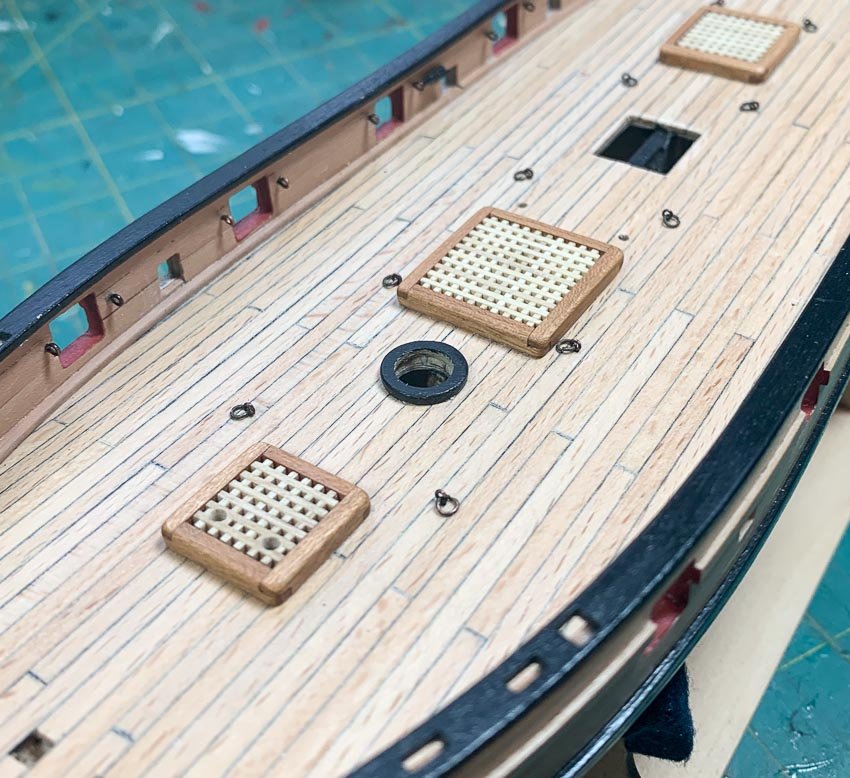
The end result is worth it, they look good and I’m happy with how they turned out. So much better with cherry than walnut. I ended up adding wipe on poly to the covers and the tiller, probably the only place I’ll use it on the ship. I also added holes not mentioned in the plans for the hawser rope, also not included with the kit - but I have lots of different sizes, opted for 1.6mm. I used a round file to slowly make the holes, drilling would have shattered the fragile strips.
I turned my attention to my next scratch built piece, the catheads. While I wanted to do this in order to make the “pulleys” it was an easy call given the poor quality of the kit supplied part. The plans just have this mounted with no ropes so its a very brittle and flimsy piece of walnut.
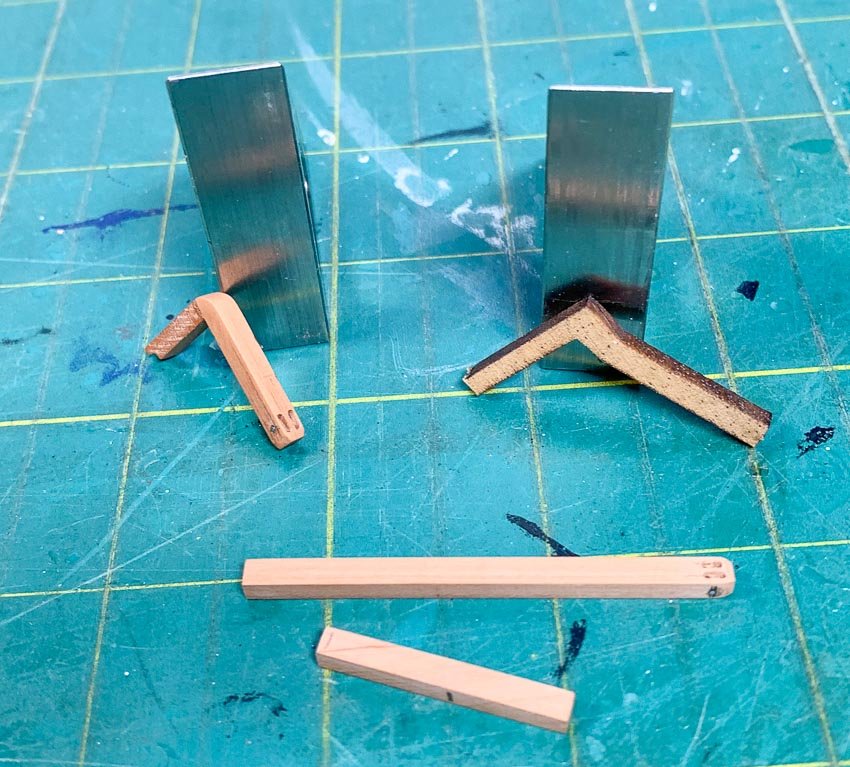
Here you can see it beside my near final product. I used Swiss Pear in this instance as I’ll paint it black before installing it. I made it in two parts, the upper leg is long just to make it easier to handle while cutting the two notches. It was also easier having the lower part a little long in order to properly fit it against the bulwarks.
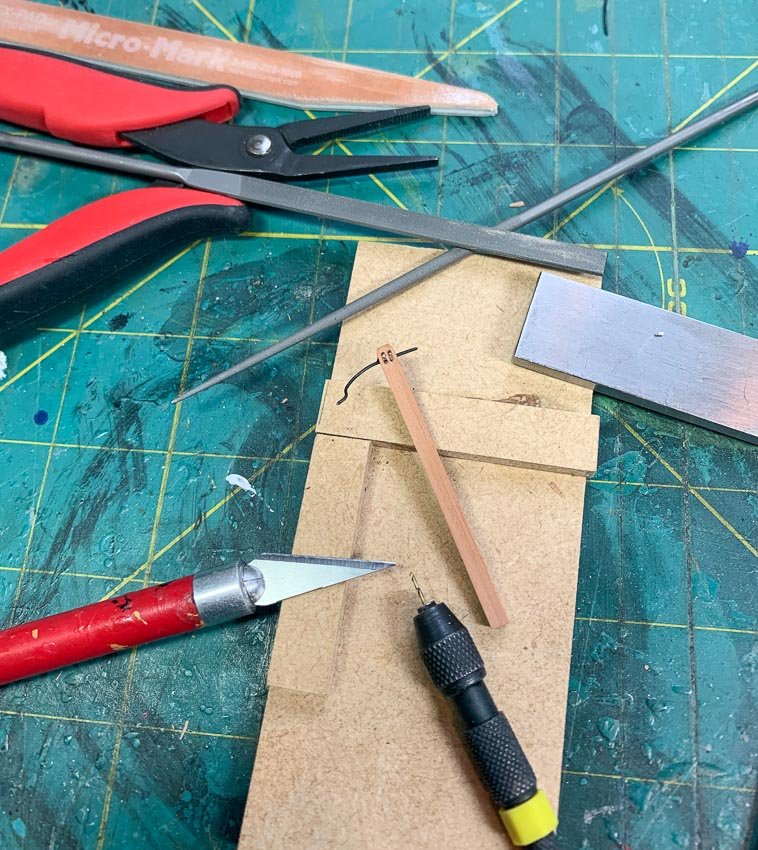
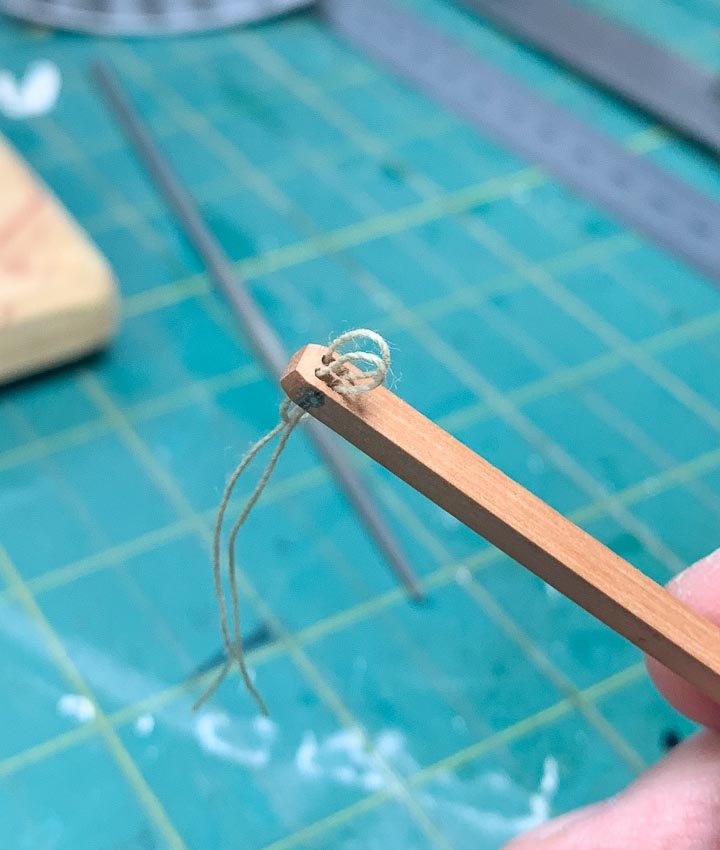
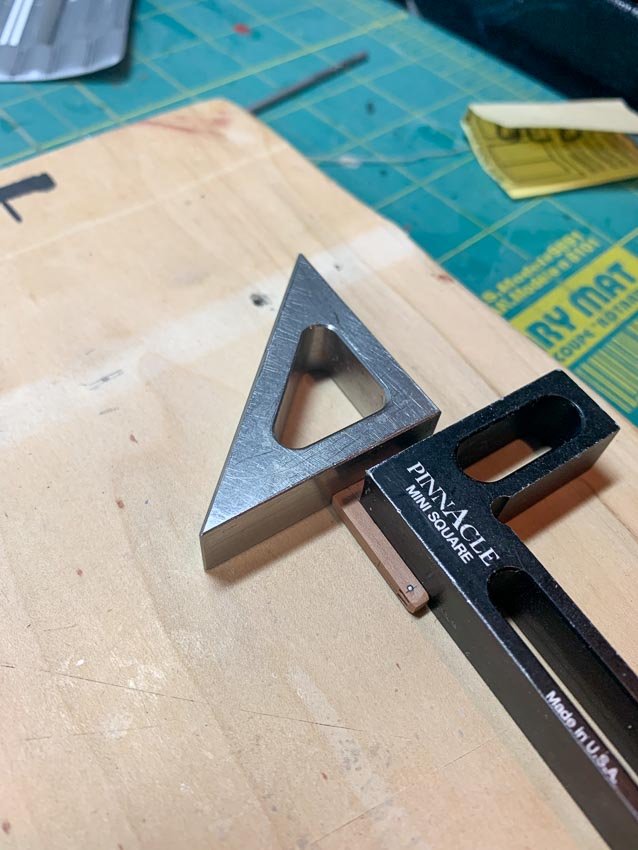
I built a little jig as a working surface and to help hold the piece steady while cutting the notches. This started by measuring and marking basically a tick-tac-toe layout. From there I drilled four holes then used my #11 blade, a round file, and some 24 gauge annealed wire to work open the notches between two holes on both sides. I tried several different “elegant” methods, none of which worked and I ended up coming back to just “digging it out.” The challenge is not to do one, its to do 4 (on two catheads) that are near the same size and look. It took more than one attempt but I think I got there. [NOTE: This is what people who don't have mills do, I'm pretty sure I'll have one before I build the next cat head.]
Once I had the notches then I drilled the hole the side, managed not to crush the notches and glued my “pulley” through the center - a strip of 24 gauge wire glued through. I cut off both ends, filed it down just enough so it stand proud. The final test was passing rope through all four of the resulting slots which I’ll later rig for the anchors. Then I mounted them into place, cutting the rail, waterway, and base of the cat head to get a flush fit with the bulwark.
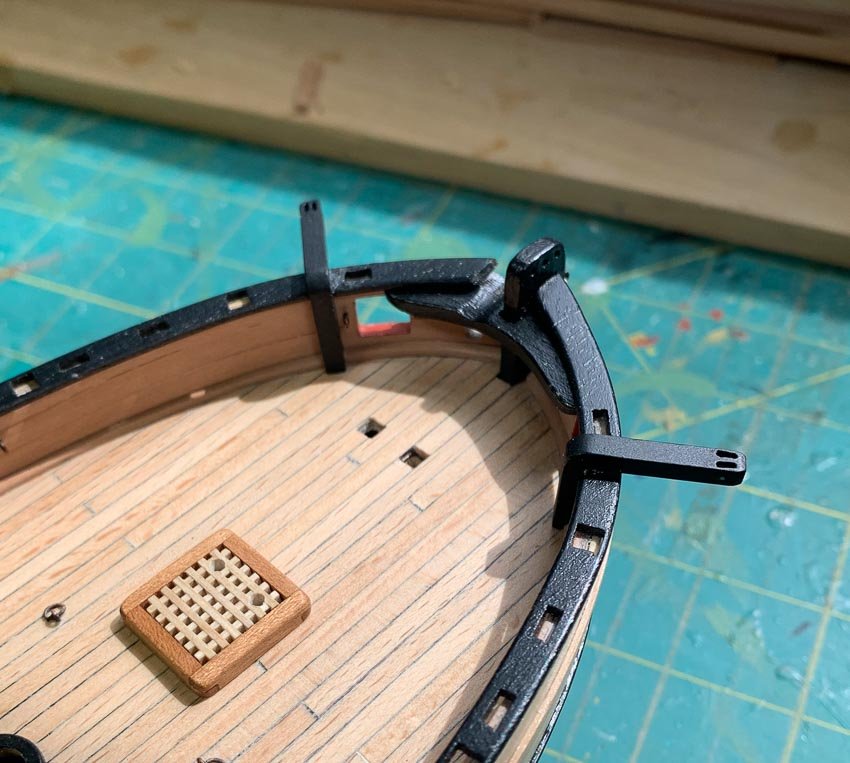
Now let’s see what else I can scratch build. So far I haven’t used any of the kit parts on the deck other than the grids for the hatch.
-
Be sure to put some cannon on those fishing vessels.
- Edwardkenway and Jonny 007
-
 2
2
-
Not wasting anytime I moved on to the stern. Every stern on every model has been an adventure for me. I’m not trying not to over- optimize and going very slowly. Chucks instructions are easy and clear. Well, the words are easy and clear, but the work isn’t simple and nothing like any kit I’ve ever done - can you say scratch build…
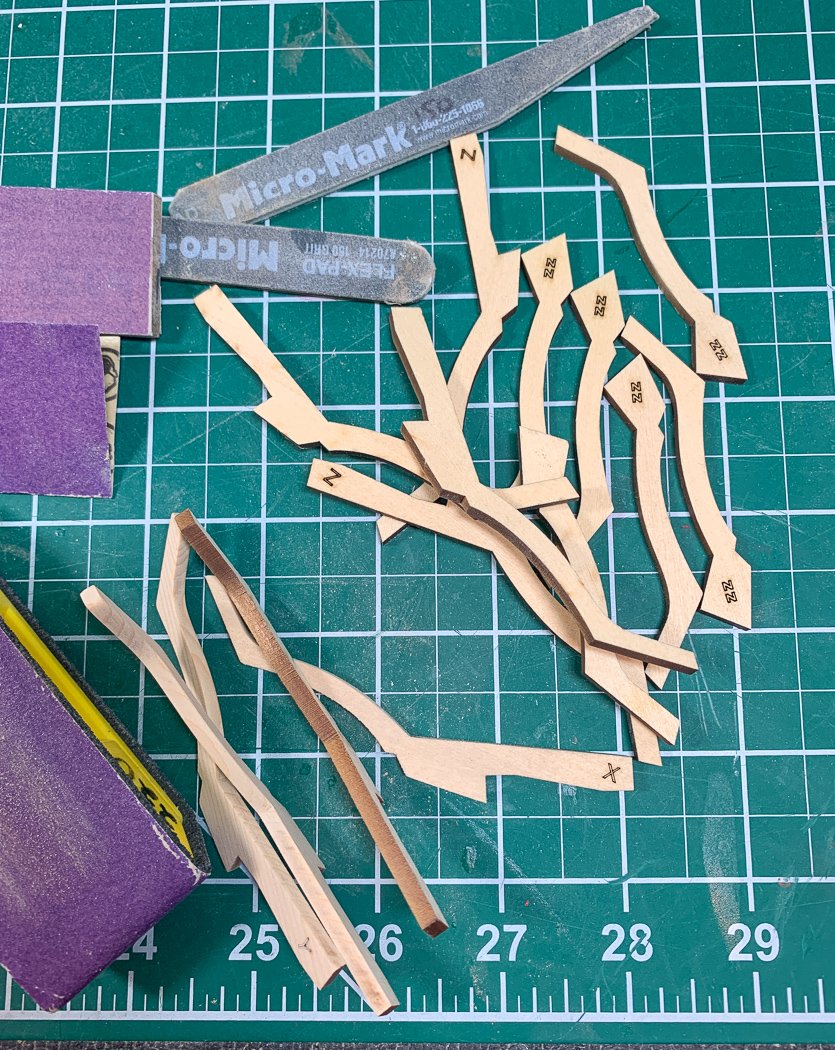
Chuck provides a set of stern frames as part of the starter kit wonderfully and precisely cut in boxwood. The fun part of these is that apparently boxwood likes a suntan, the laser char though light in color was not at all easy to remove, especially as I’m trying hard not to take too much off. My approach was to skin each frame by frame (not taking to much) before they are installed on the ship. So sand and sand and sand I did for each of the 12 stern frames.
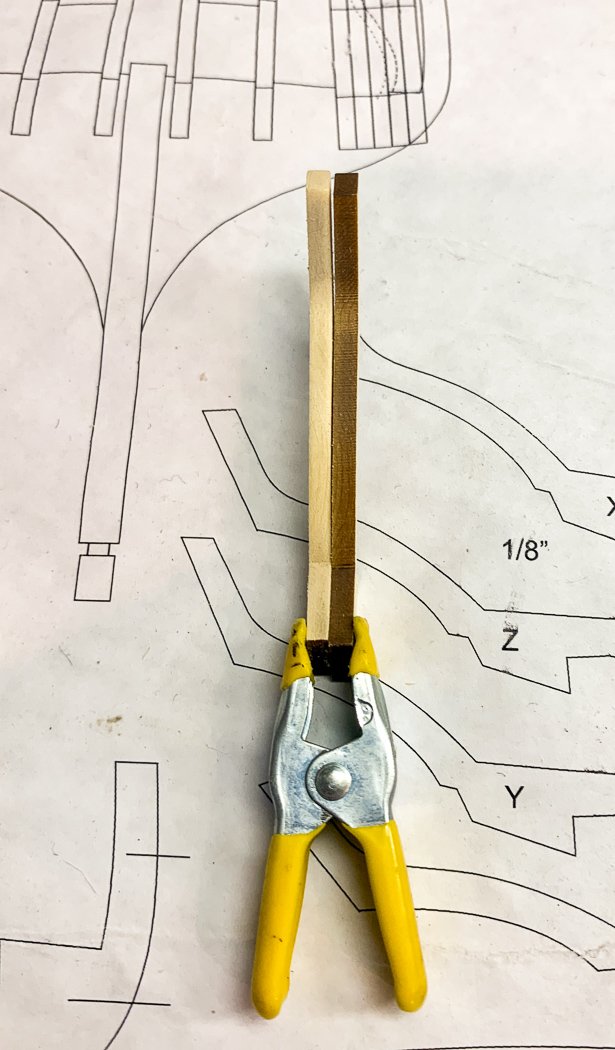
From the one on the right to the one on the left I finally got them all done with the skin gone from my forefinger.
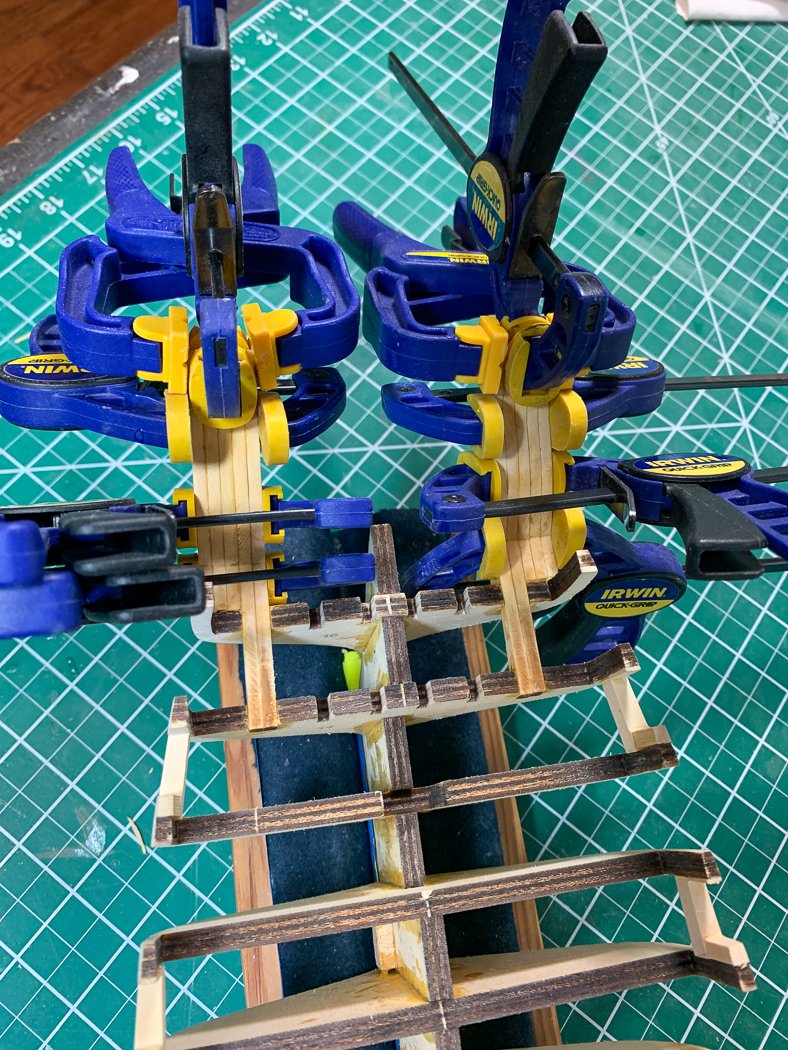
Then its gluing Z and its three ZZ friends to port and starboard, most of these will be faired off but you have to start off right to get it right.
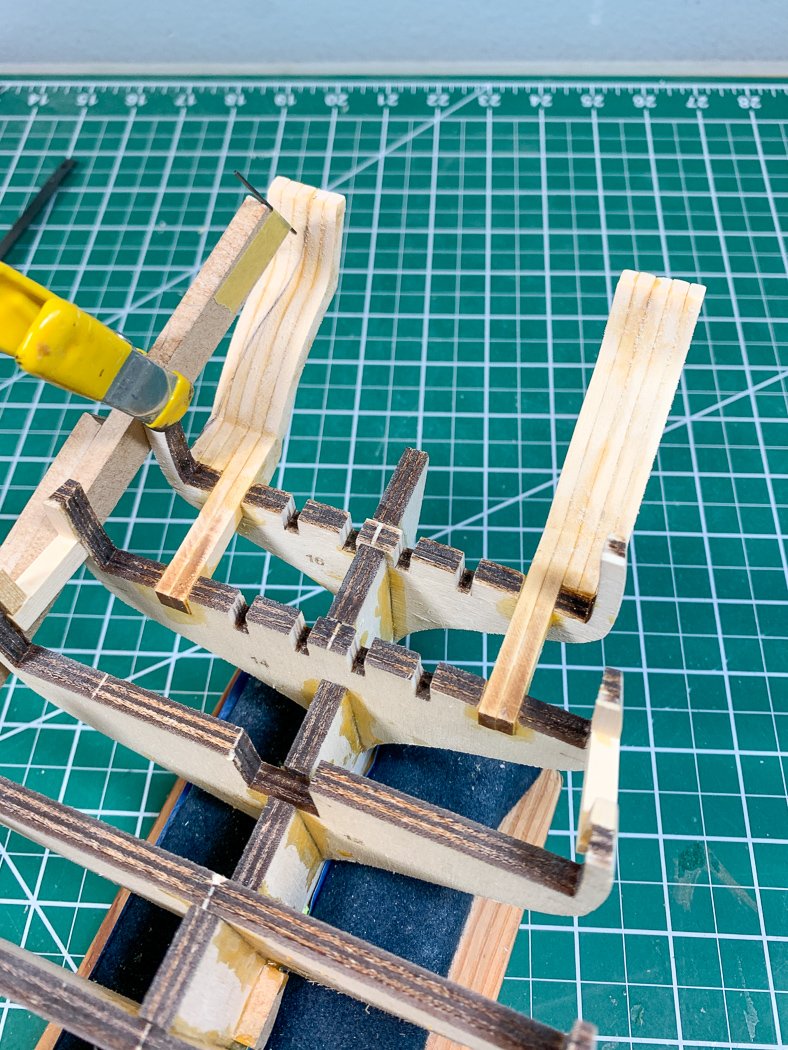
Next its creating my version of Rusty’s pencil lead marking jig to identify the line to fair. That’s the easy part. Next is the semi-panicked step of grinding it down to near that line with my Dremel tool with sanding drums. Go slow Glenn..don’t go to near the line Glenn...don’t drop it Glenn…
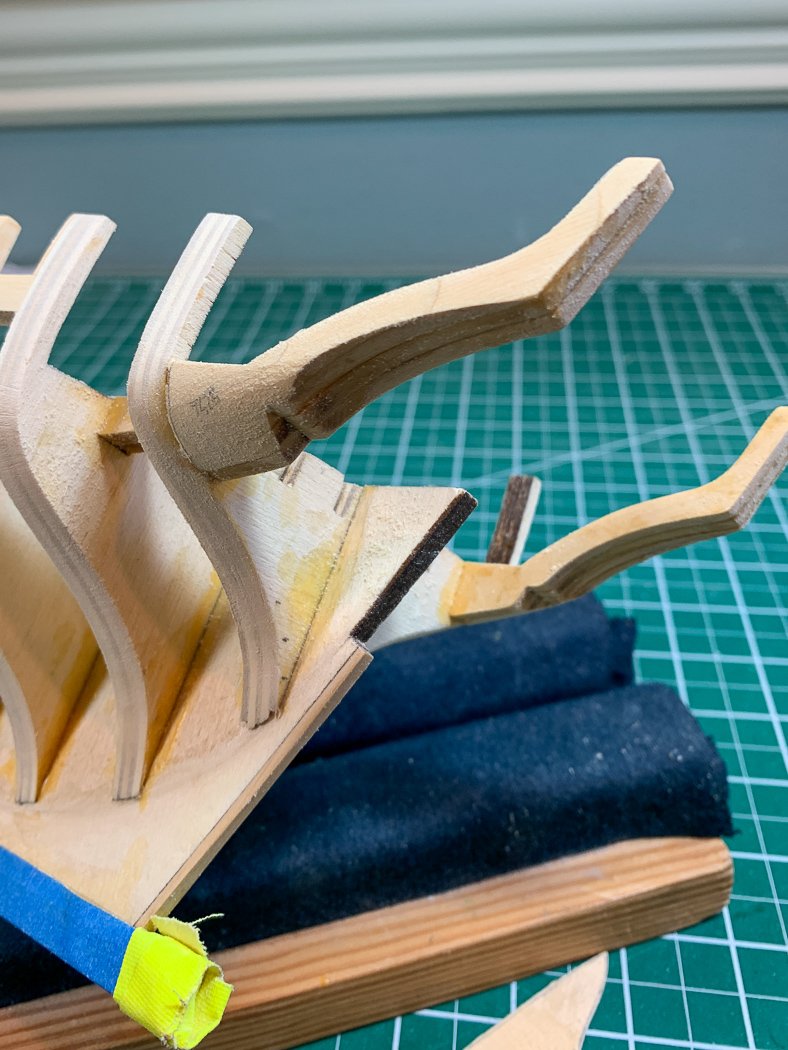
After managing not to do any of those things its back to sanding to shape up the combined four Z and ZZ frames making up the outer stern (it is not done yet in the photo).
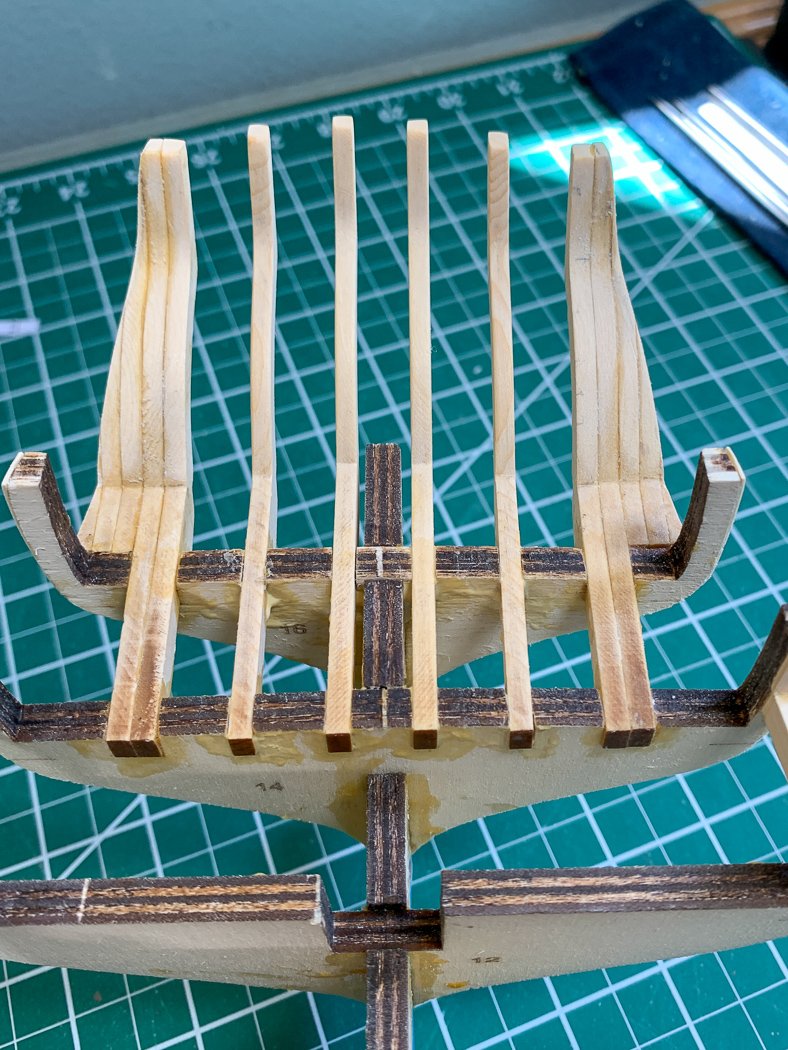
After adding the interior X and Y frames I finally reach a new point of the build. From here on I really want to just do everything once if that’s ok.
Next up stern ports and the start of the square tuck. I finally get to see what one of those are. So far I know it starts with a triangle so ….
-
It’s been a while. So, here’s what happened:
I reached the point where I had started on the stern when disaster struck, every modeler’s worst fear. My hull was knocked to the floor and didn’t just break, it shattered. I think it actually bounced but everything is foggy now. The hull broke in half, multiple BH extensions broke off, one of the Z stern frames and installed ports broke off and the stem shredded. It was hopeless. I just sat there on the floor holding my wreck for a long while.
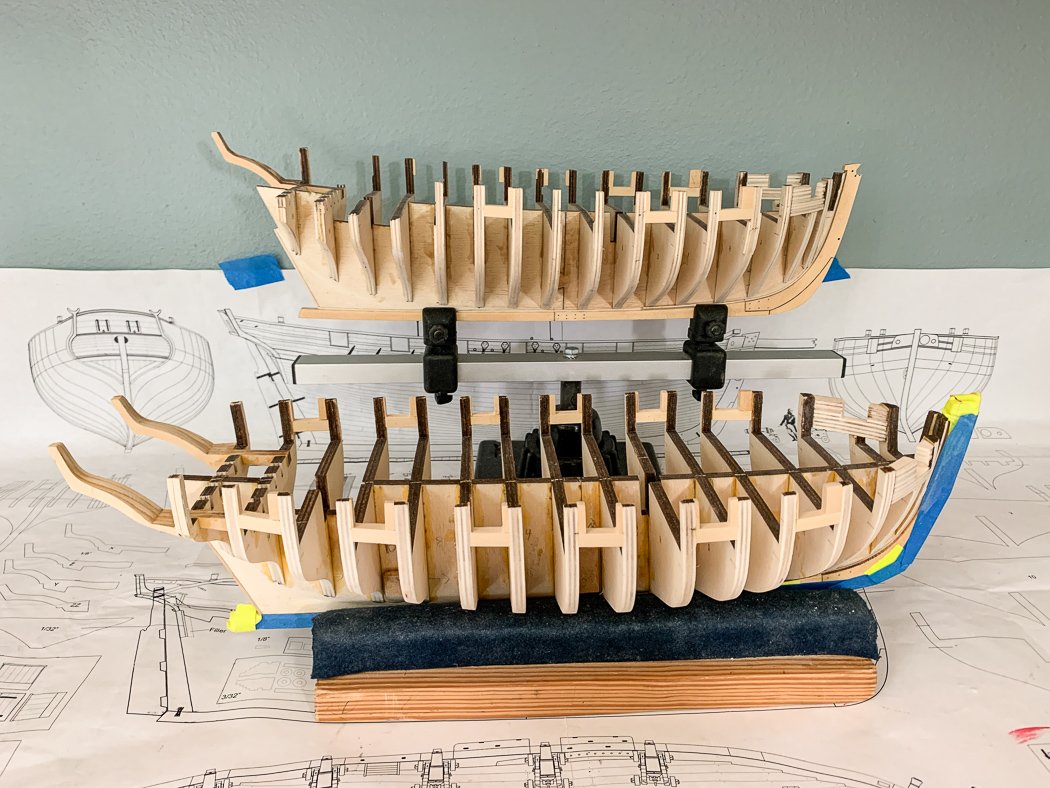
So - with nothing else left to do I ordered a new frame set and started all over. Prepared the new keel and stem, glued new frames, installed new ports, and faired a second hull. You may notice the yellow tape, like Modelers loved Tamiya tape photographers love gaffer tape. It sticks to everything but leaves no residue and is thick enough to provide some protection, I'm not quite ready to unwrap it yet. Chuck asked if it was easier the second time around, maybe physically easier, mentally it was tough going through the same steps. Today I got past the point where I last worked on the first hull. I feel like now I can share, set aside my pain, and move on. I don’t think I have starting a third one in me so here’s hoping.
-
Continuing with the transfer of my build log to MSW:
j
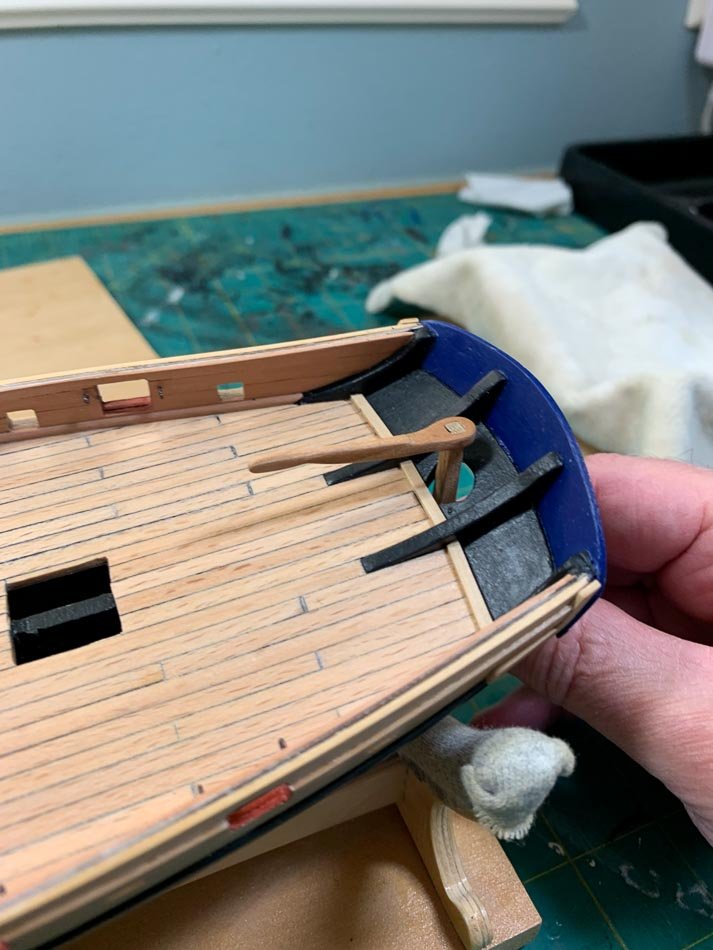
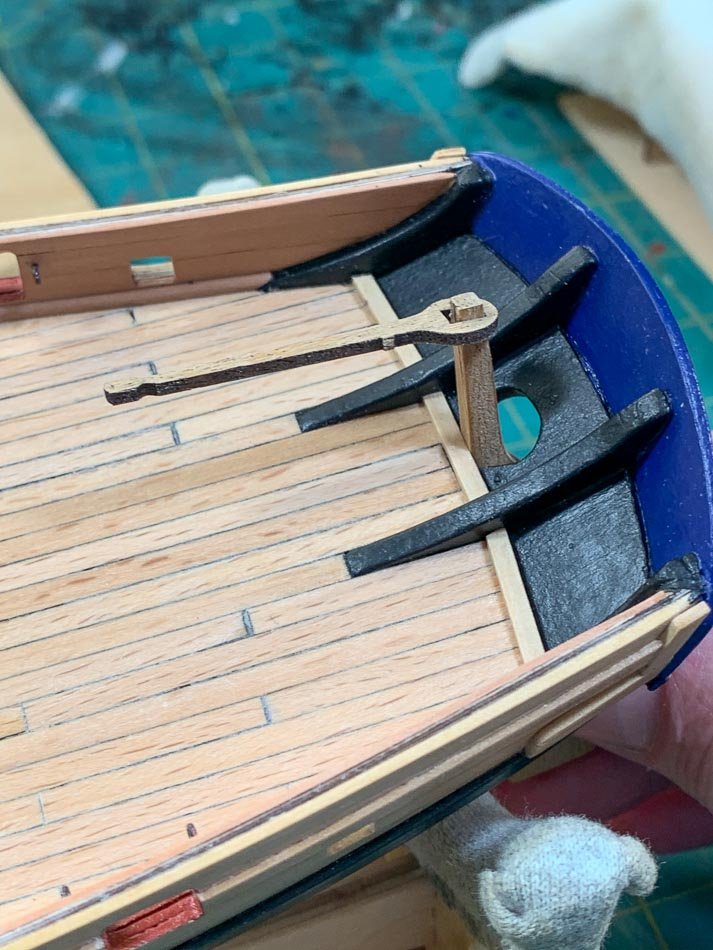
The kit supplied tiller was pretty ugly so I made my own. Just two pieces of cherry parts scrap from my Fair American build glued together, one horizontal to one vertical. No plan, I just filed and sanded until I had something I liked. It looked even better after some buffing and satin poly. So what if it's the only cherry wood on the boat…so far. [Note: that wasn't the last of the cherry, and I kept shaping this tiller almost until it was mounted at the end]
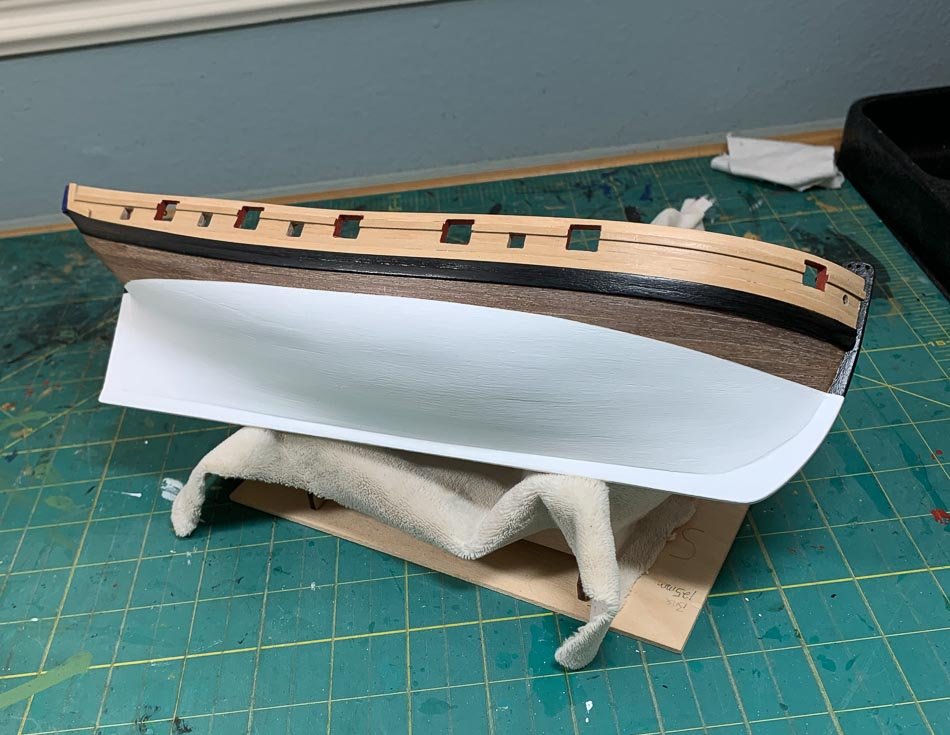
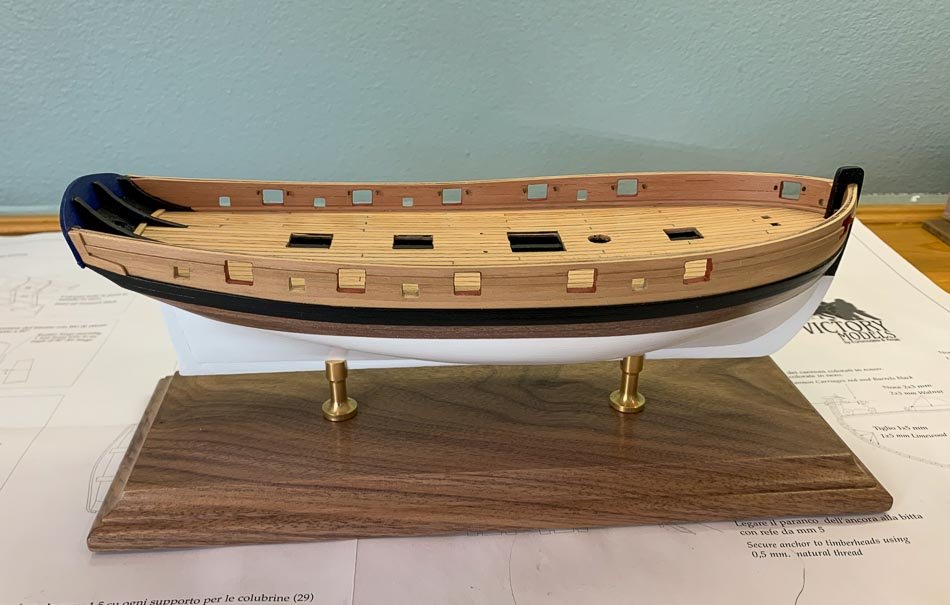
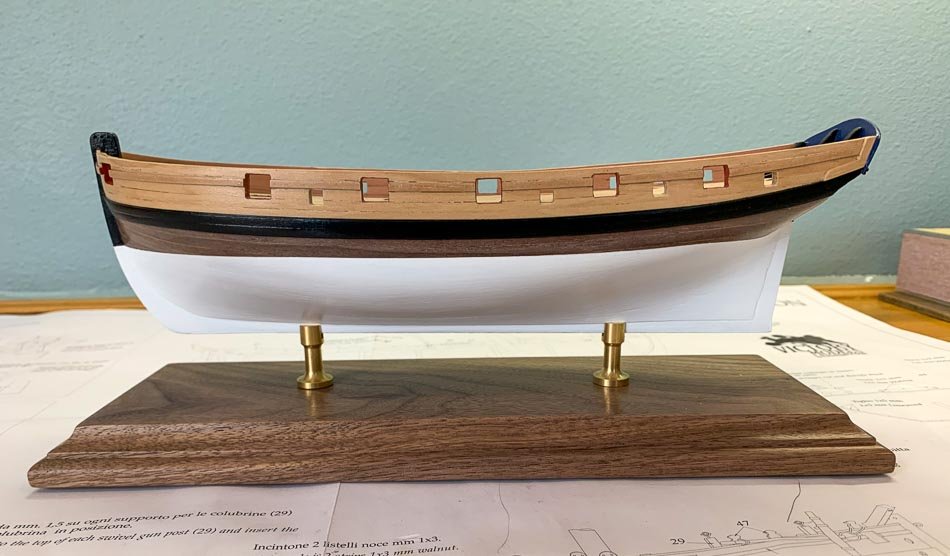
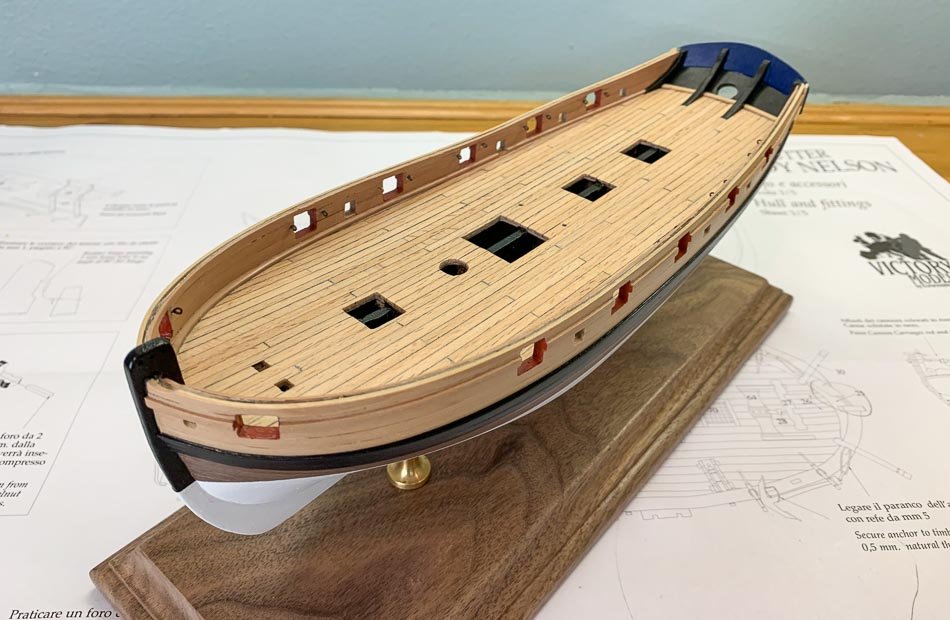
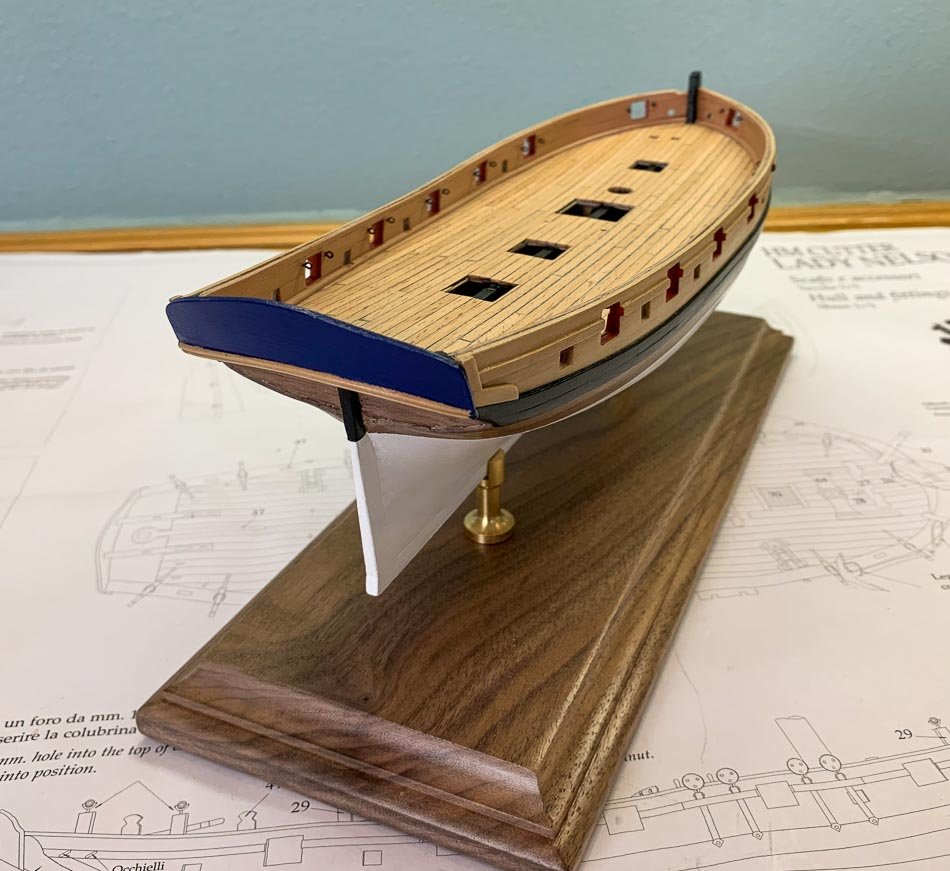
Swiss Pear for inner bulwarks. Matte Poly for interior, Satin Poly for exterior of hull. Admiralty White Matte paint for hull - about 6 coats to get it deep and pure looking.
Nothing historic about it, but it wasn’t a real ship anyway, so why not boxwood, walnut, swiss pear and kit deck material to go with black white, and a little Admiralty Red Ochre in the ports and French Blue trim. Haven’t decided on deck furniture paint yet.
Checked fit and level of final mount, its back off into the working cradle. Cap rail and stern rail are up next.
------
A few updates: I completed the cap rail and a few other hull finishings, but not without one minor problem that turned into a two hour fix.
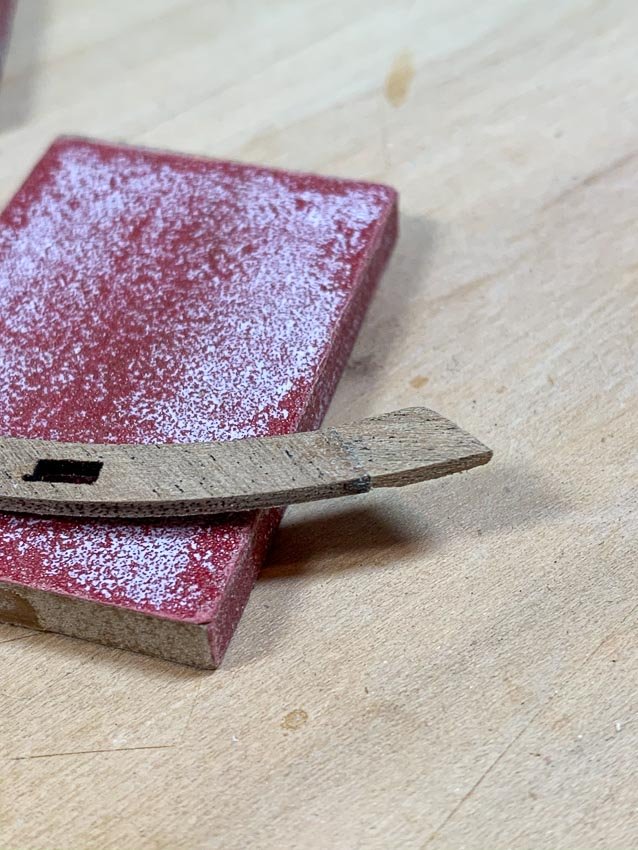
For some silly reason I put the edge of the cap rail up to my sander to add a 15 degree angle to the leading edge, something I could easily do with my sanding block. The wood in this kit is very brittle, the front 15mm of the cap rail was snapped off and devoured by the sander. So I had to use the plans, cut a template with tracing paper and card stock, manufacture the missing piece from the same parts board the cap rail came from then glue and sand it into shape. Now that its on the ship and painted you’d never know - other than the two hours it derailed my day into recovering from a one second bad decision. Oh well.
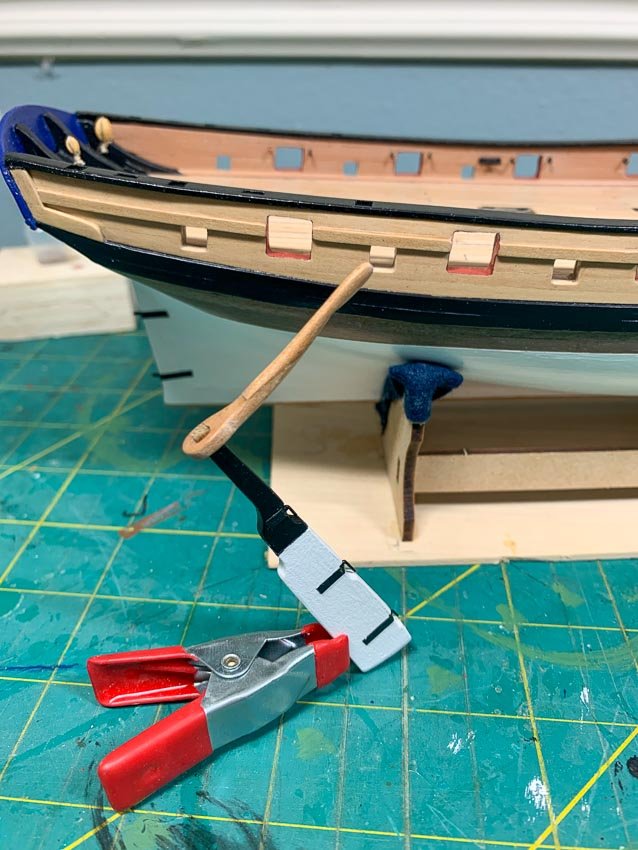
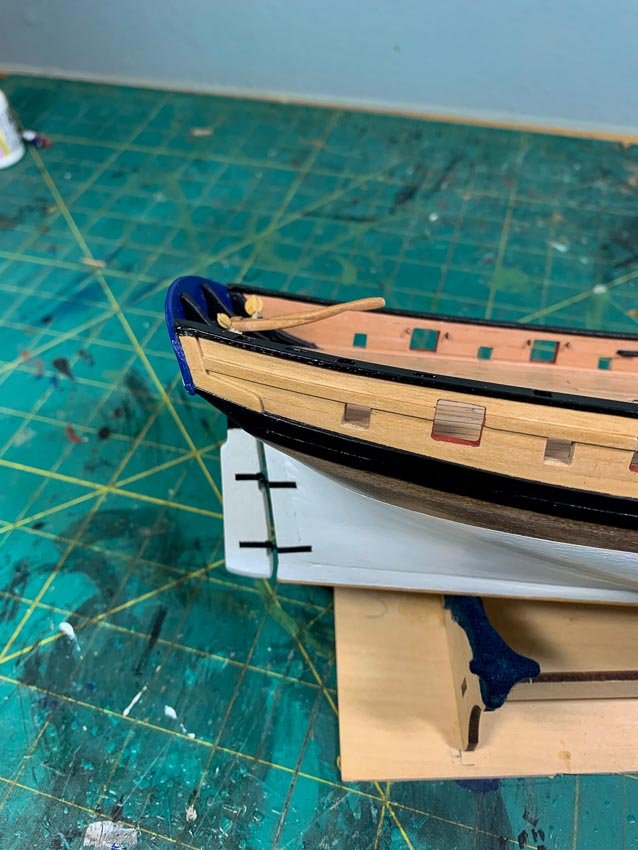
I turned my attention to the rudder. While etched brass fittings are provided, they never work for me, they seem to heavy and are a poor fit. I use black card stock cut to 2mm width and blackened brass eyelets, the ring removed on the rudder and the brass bent to a hook to hang in the eyelets on the hull side. It’s a simple method than gives a better look in my opinion.
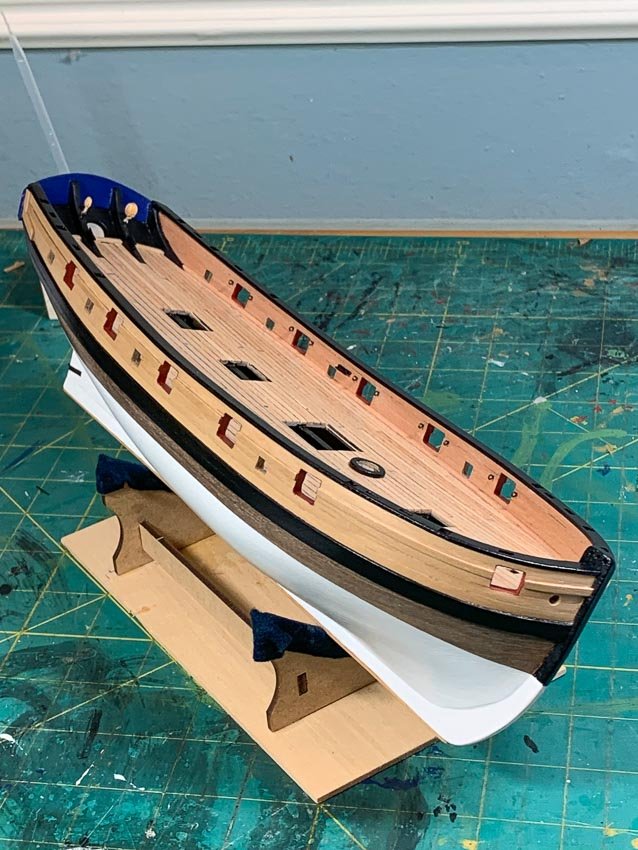
With the hull now completed I’m going to rig the blocks that attach directly to the deck and hull and drill the holes fore eyelets used later for stays and rigging while I have a lot of room to work before moving on to the deck furniture. I'm going to use blocks from Syren Ship Modeling Company - kit blocks are always the worst. I just throw them away.
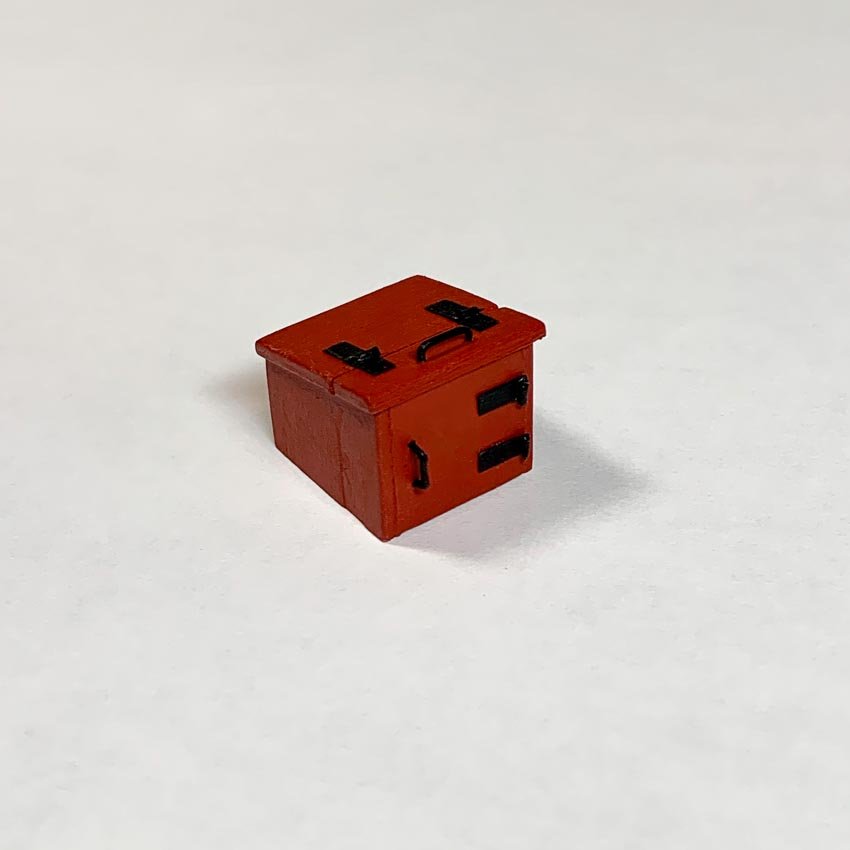
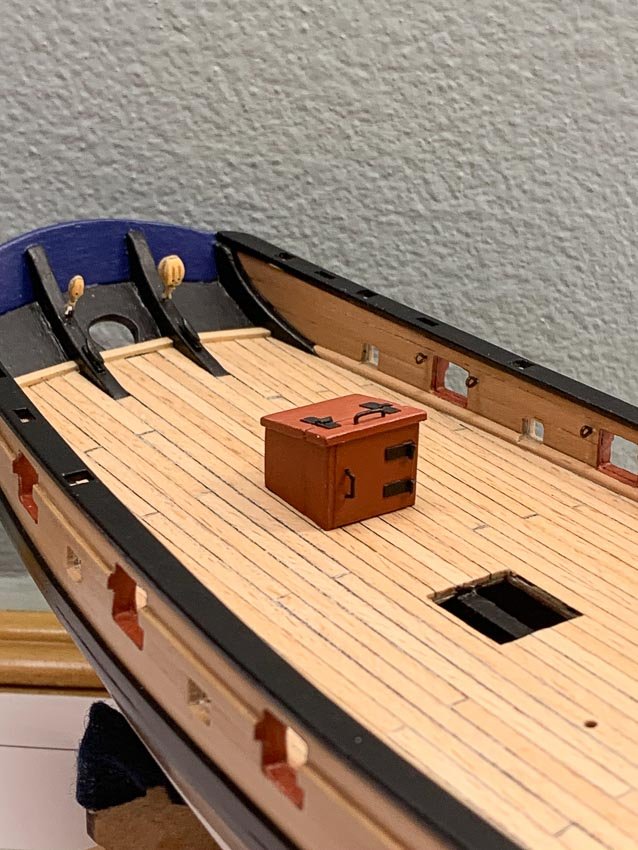
Back to the deck furniture. The Nelson is a basic model, I knew that going in. I wasn’t expecting the parts boards to be so brittle but I can deal with that by being careful (and not putting them up against the sander but I digress). [NOTE: the blocks in the above photo were replaced later with Syren blocks].
However I looked at the companionway and decided it was too basic, too brittle, and too boring so I took a single strip of 4mm boxwood, a little 24 gauge wire, and some black card stock and scratch built my own companionway.
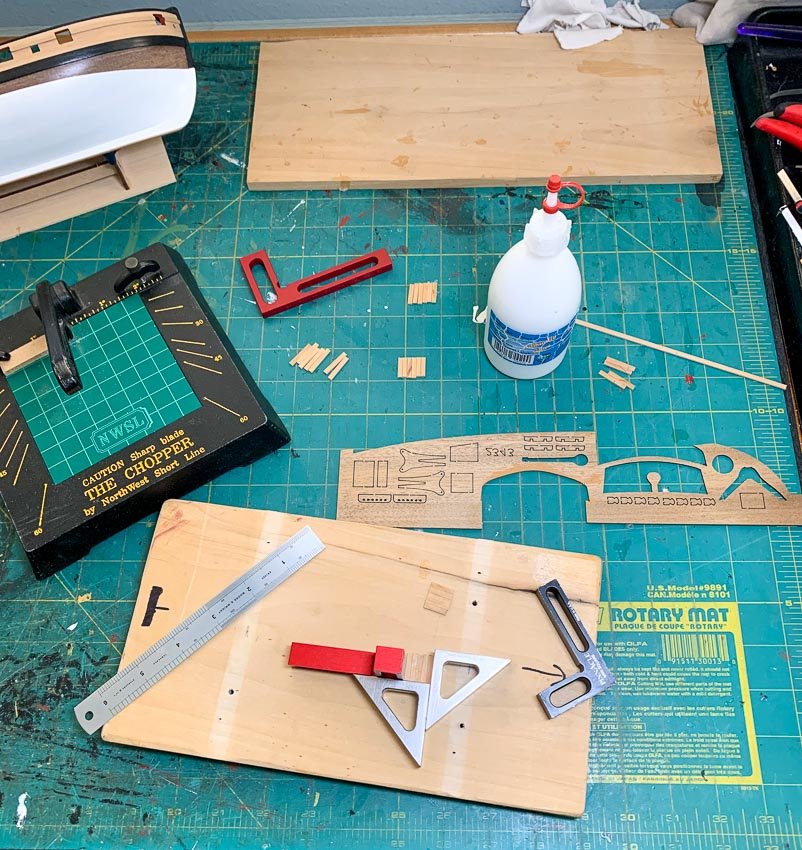
Using the parts board only for a start on the measurements I constructed the 6 pieces by cutting and gluing the strip wood side by side in to rough shapes, then used my Byrnes saw to get them to precise sizes. No surprise, for 6 pieces (the top is two) the measurements have to be very precise to get a square box with a slanted roof to work. My metal squares are purpose built to square up the parts while gluing them together.
Cutting wire to 2mm lengths for the hinges is no picnic - snip…where did it go…catch in my hand…it rolls off the bench never to be seen again..my bare feet will find it later…start again.
I did the top in two pieces to show, by sanding and gluing a strip of black card stock between the two, separation the way the companionway would open fo access. One lesson learned is I wish I had left that card stock piece unpainted but it still shows up well enough.
Practically the front door may have been two separate swing open from the middle doors, but at this small scale that would have been too much “weight” in my opinion with the hinges and handles on a 14x14mm square. As it is I could have made the hinge straps 1mm instead of the two they are - imagine trying to cut and find 1mm wire…
Anyway I’m pretty happy with the result and will now move on to rigging out the hull before the rest of the deck furniture is added.
- DelF, Vladimir_Wairoa, maddog33 and 7 others
-
 10
10
-
-
Planking is messy stuff, I'm almost there on my little ship. For anyone that doubts planks can be curved and bent the wrong way without soaking - here's proof. Nothing more than a hot travel iron involved in the bending of this wood.
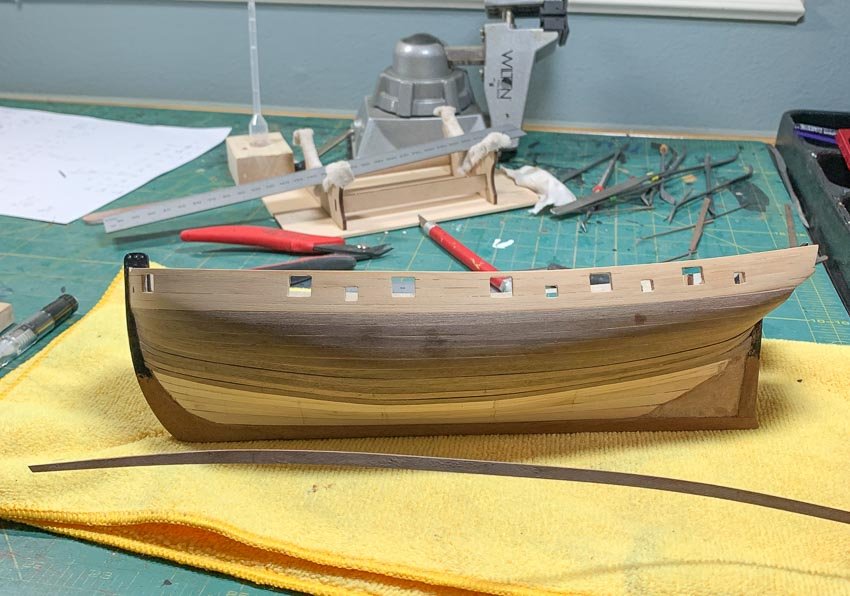
I'm learning I have to trust the measurements and the ability to bend more. The overlap point that I used to use as where to start the tapering doesn't always apply, if there is a conflict from that traditional approach I used through all my prior models and the measurements taken at every bulkhead - I know now to go with the measurements and bend the plank to fit. It also may seem counter-intuitive to bend the plank down to go up on the hull, but it works.
PS: the upper band has preliminary light sanding, the lower band none - hence the temporary uneven look.
PS2: I really wish I hadn't put the sternpost on with the frame, the planking would be sooo much easier...
I had originally planned to use some ebony on the wales, but what I had would just have overwhelmed this little model and the wood supplier I contacted didn’t come through, so I went with two strips of 3mm walnut that came with the kit. My only really (small) challenge was matching up the top of the wale perfectly with the bottom edge of the boxwood upper planks keeping the boxwood separate from the walnut below.
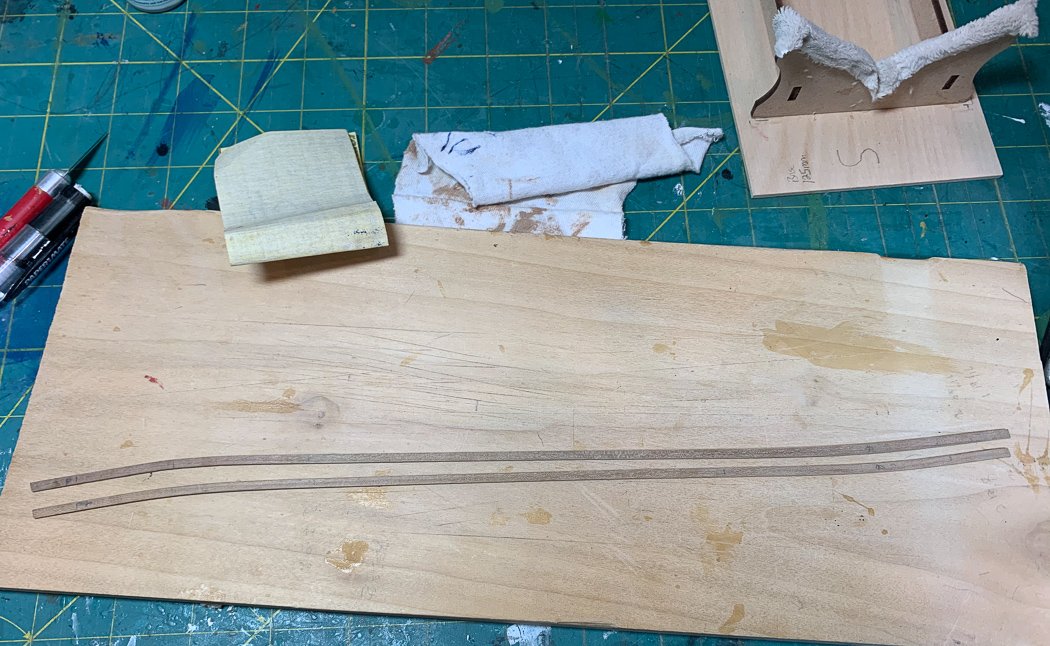
Of course I now never want to miss a chance to bend wood so I added the appropriate curves to the wood for the wales. Mine flare up a bit more at the stern than the plans, I wanted it to meet my modified stern at the right places.
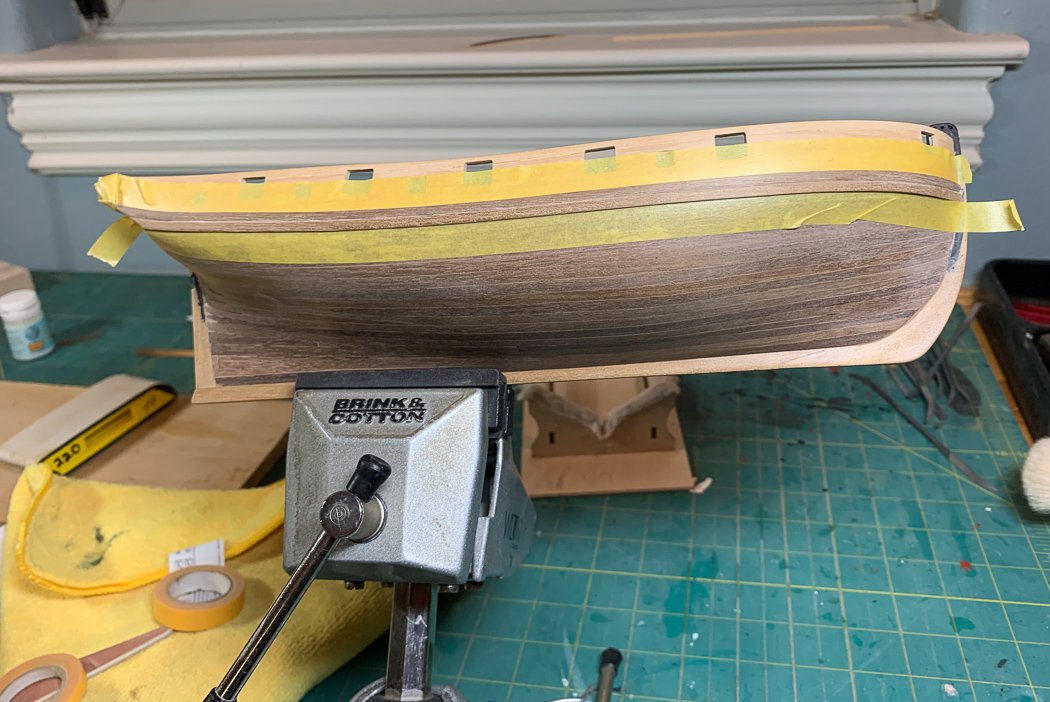
Once glued and sanded it was time to paint. I’m sure many modelers know of Tamiya masking tape, this stuff is perfect for us. Installed correctly it prevents any leak or bleed over and makes painting so much easier on a task like the wales. I also like to put a plug in for Admiralty Paints. The Dull Black looks great and takes only two coats for complete coverage. [NOTE: Turns out I like Ironwood Black better, even for the wales. It's all I used on the masts and spars.]
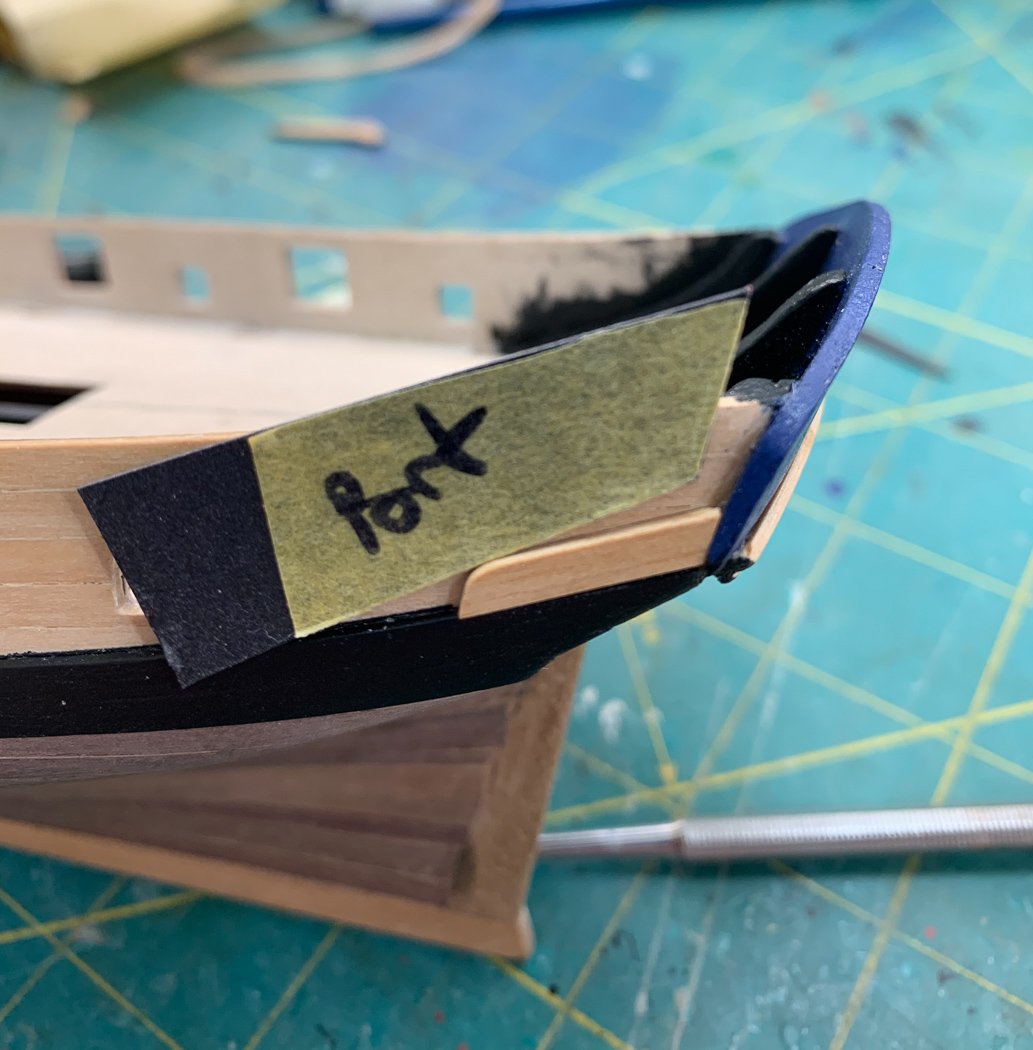
Having used boxwood above the wales the kit supplied facia wasn’t going to work, plus the whole 2 mm parts sheet is of very poor quality walnut, I may be making more parts later. I opted for this simple design. This is a generic cutter, fancy just doesn’t work for me, plus I’m not good at carving ….
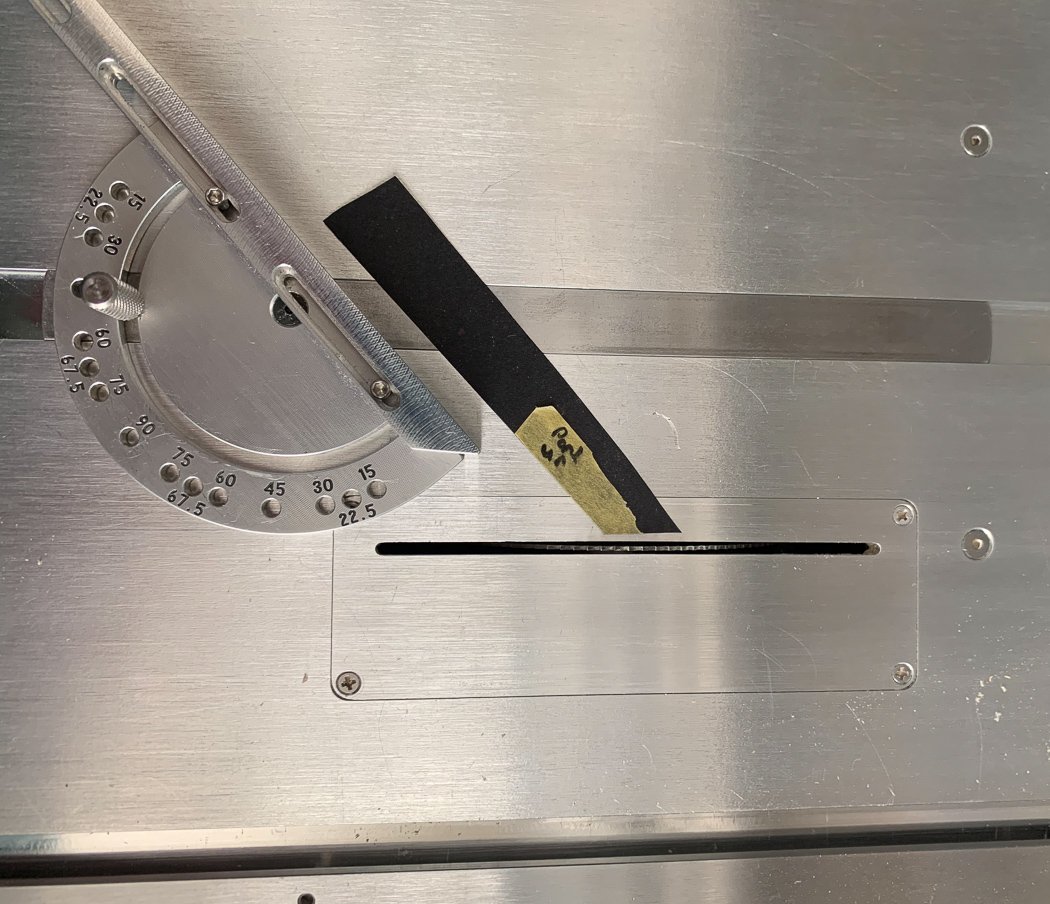
To get the right angles I fitted a piece of Tamiya tape then cut it to fit the wale and stern lines, port and starboard are just a tiny bit different so I did both sides. I lifted the tape and placed it on card paper stock, then cut that out with my trusty #11 blade and metal ruler. I intentionally extended the line (on the second attempt, hence the different photos) and used that to line up the perfect angle on my Byrnes saw.
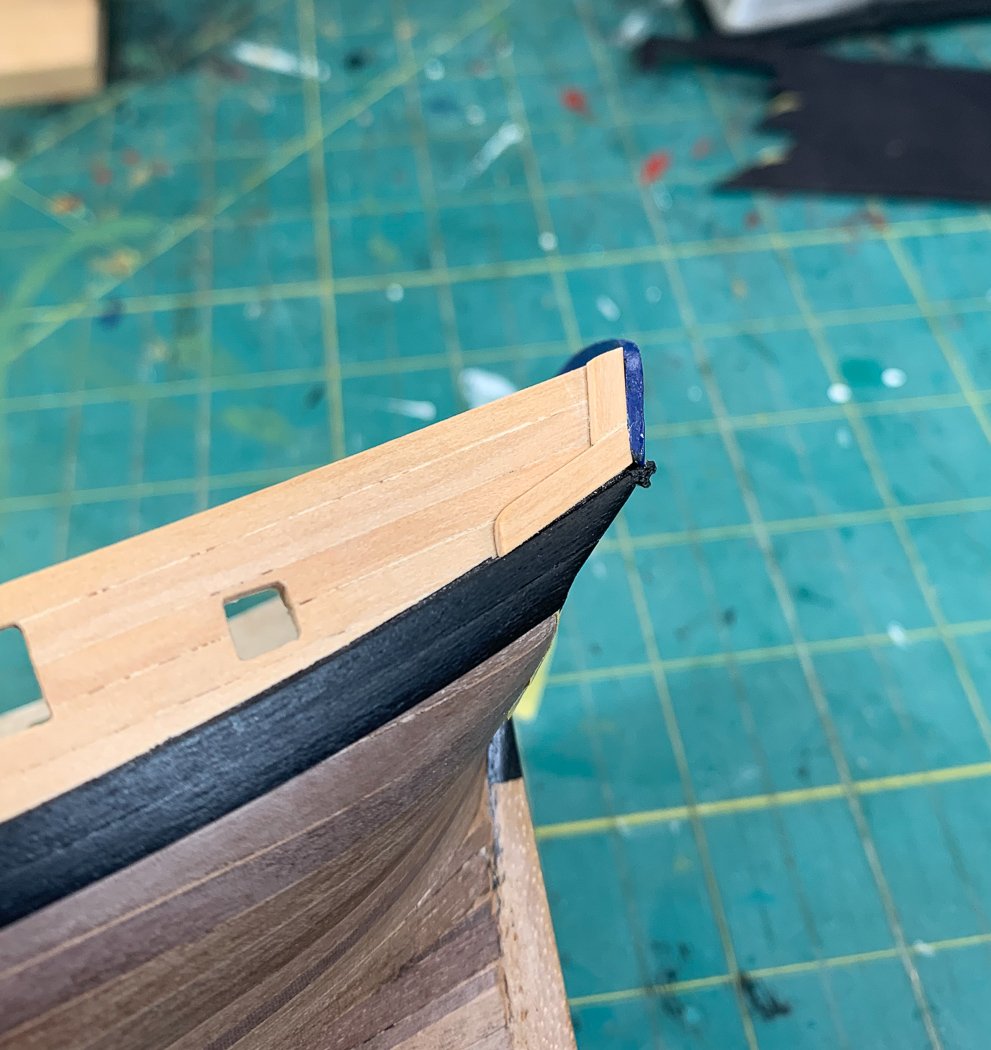
I like the clean simple look of the final result.
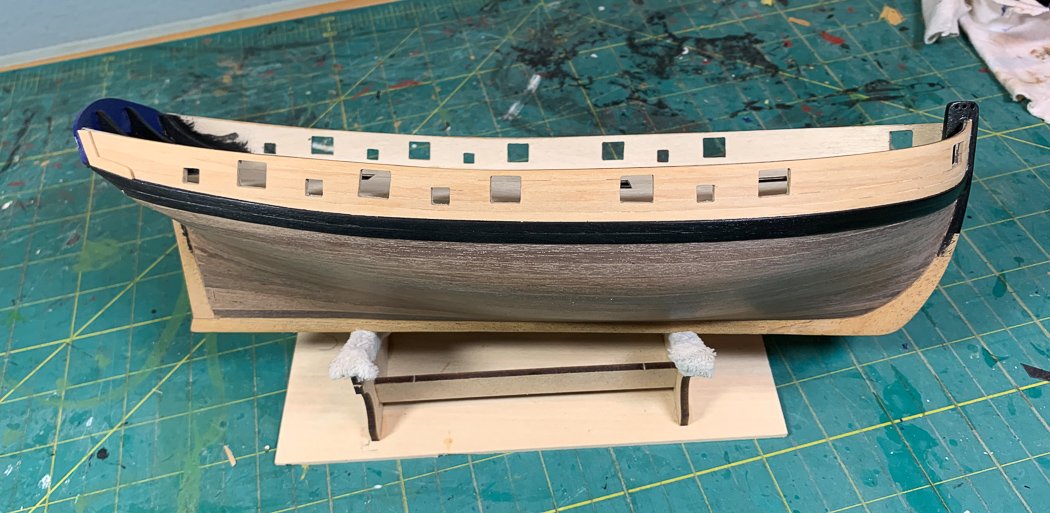
I have one more thin moulding strip to add between the gun ports (also boxwood, not the kit supplied walnut) and then its time to move inside the ship for deck and bulwark planking.
I’ll appreciate my log as notes to myself one day. [NOTE: At this point with no interaction from anyone on the other forum except two moderators that would say 'nice post' it as getting frustrating over there...crickets.... I decided I was going to complete the log for myself because I don't like abandoned logs, but beyond that I had moved on to MSW for everything except this log. For the photo below I had a single post that said:]
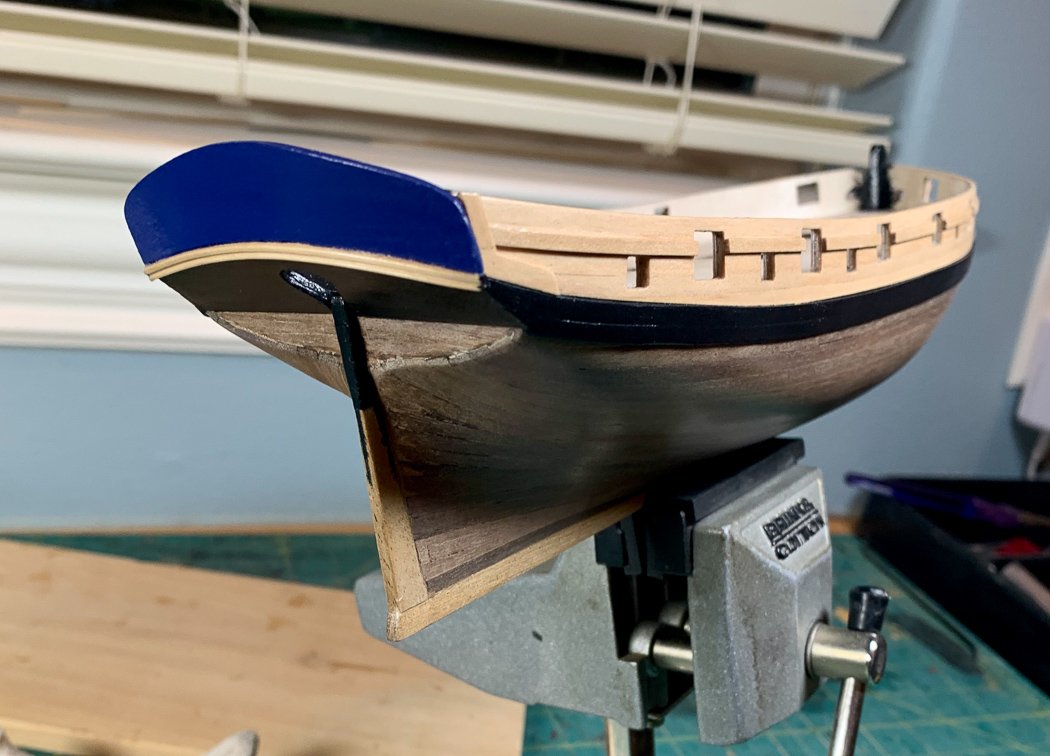
Here is a photo of the completed stern.
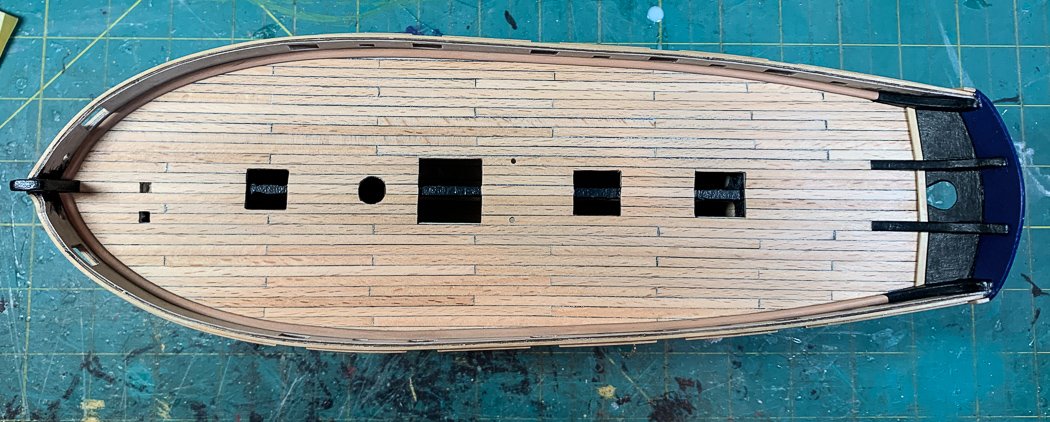
[Followed by the next post that said] So here's the completed deck.
I followed my own 3 butt pattern in laying the planks. I elected to use the kit wood and save my remaining holly. I added the boxwood fashion pieces at the stern since the wood looked odd just terminating at the stern. I fashioned the my own "waterways" by shaping a 2x3mm swiss pear strip and using my new plank bending station to shape it with an angled overlay at the stern. It will be less noticeable when I complete the inner bulwarks with more Swiss Pear 1x3s. I'm finishing the deck with Matte Poly but using Satin Poly on the hull, no reason other than I like it.
[NOTE: There are more posts to follow these so please stay tuned.]
-
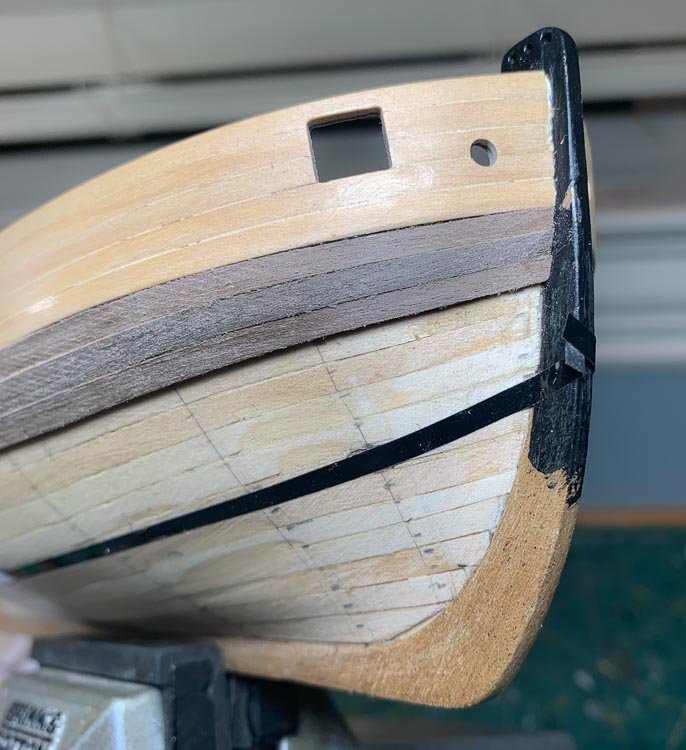
A good start with a new way. The planning and marking took most of the morning, then there was the Super Bowl so work stopped and beer was consumed.
So here’s where I am - starboard complete. I’m pleased with the result.
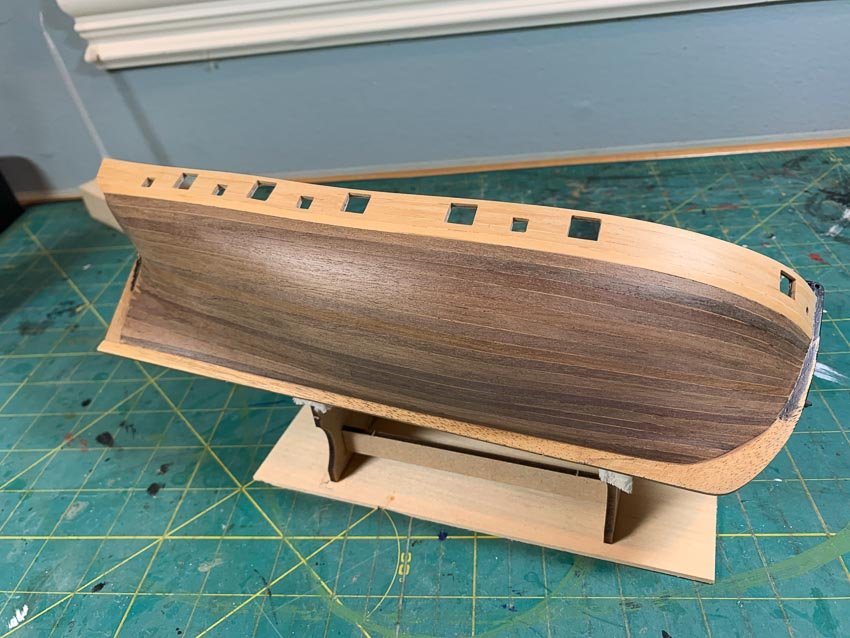
To be clear, I take no credit for this method. I researched a new way of planking that fit my style of working (fast, without battens and without pins, using CA) and found it in Chuck Passaro’s method. I followed the .pdf he has posted on Model Ship World at Lining Off your hull for planking.pdf. There are also some videos including a recording of Chuck at a workshop - in that video he does things much simpler maybe less precise than in the .pdf that gets the same result, I used those, no french curves for me. As it is it took me several days to get this small ship planked.
I’ve always done something similar with measuring and determining where to begin tapering, but it was a lot more ad-hoc. That part of my process has worked, I’m built some nice ships doing it. What is really different and game-changing for me is his plank bending method. I’m not going to go through it all in detail, you can read the .pdf, but I want to share a bit of it in hopes that a beginner might be inspired enough to learn more. The headline is no soaking and no twisting to fit.
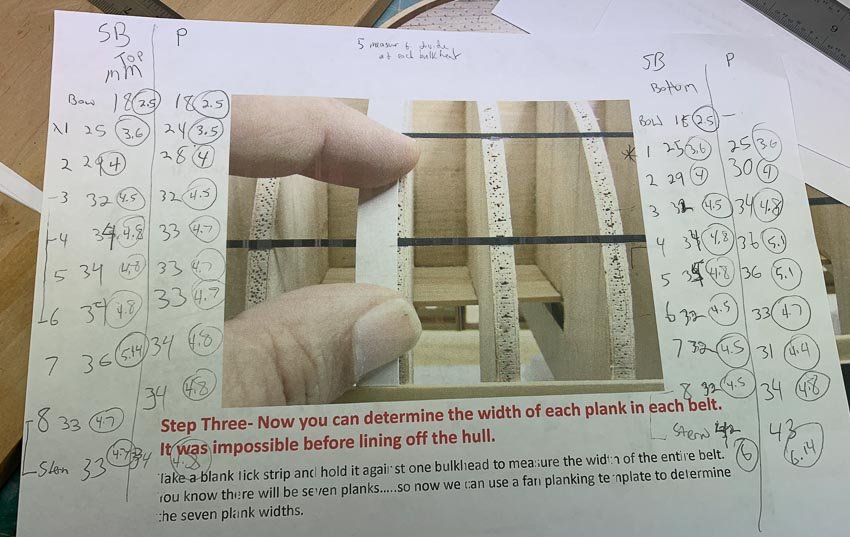
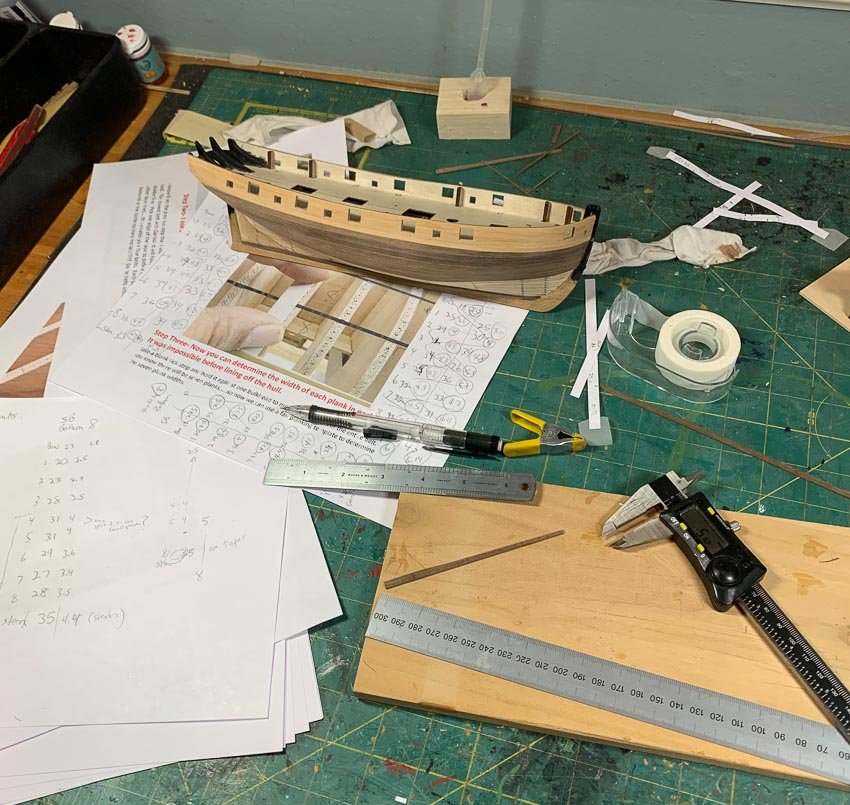
First there is taking the time to do the planning - using tick strips to take measurements at each bulkhead, counting the number of strips at the widest point and converting that to the ships hull at bow and stern. Chuck used fan strip, I prefer a calculator. If it’s seven 4mm strips at midships, using the tick strips to get distance I determined it has to become 2.5mm at the bow. This is tedious work, but worth it. Because it was here I learned my first error in my old ways. I was starting the taper too soon, I learned through measuring in detail that I didn’t need to taper (on this particular hull, it will obviously vary) until midway between bulkhead 2 and 3, and not at all to the stern. That got me a much more even and consistent look.
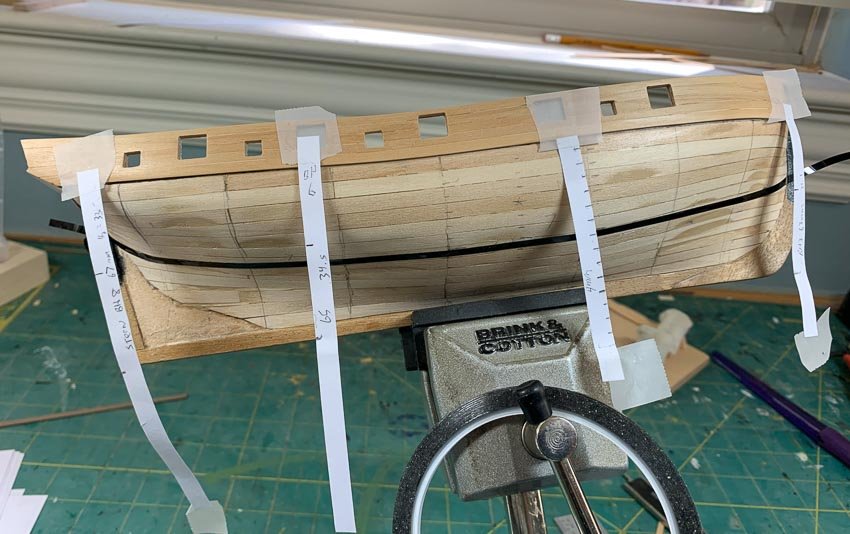
Dividing the hull in half and determining the “line” I wanted the planks to follow (3 or 4 bands for a bigger model) allowed me to be more precise and get a cleaner look instead of ad-hoc figuring it out as I went. These strips are hanging there just for the photo, I'm a little more precise doing the actual measurements.
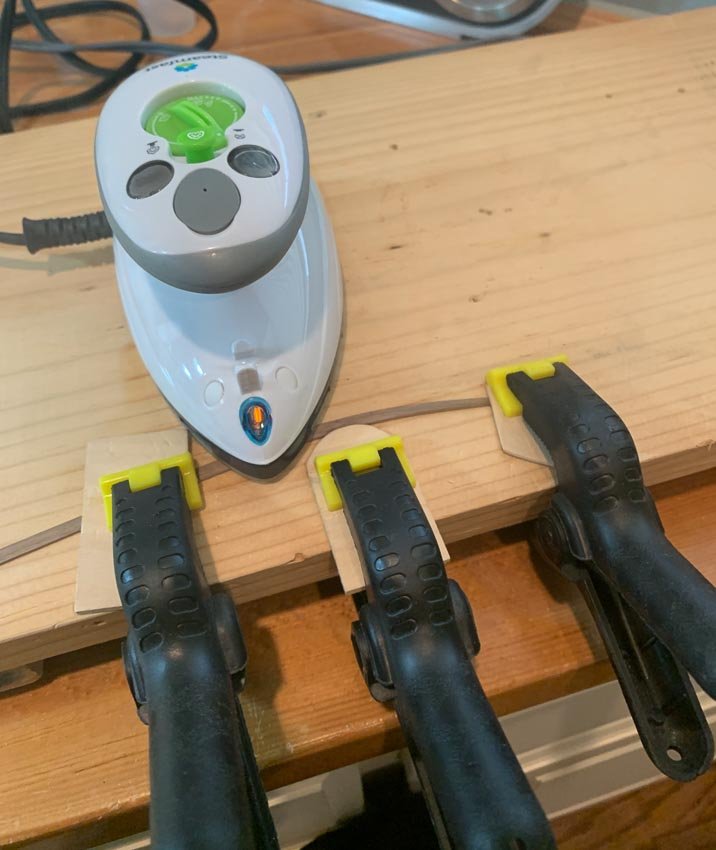
All well and good, but here’s the fun part - quick and easy “bending the wrong way” using my personal plank bending station. Consisting of a raised board three clamps, three pieces of thin wood - two for preventing clamp marks and one to set the point of the curve, and one inexpensive steam travel iron.
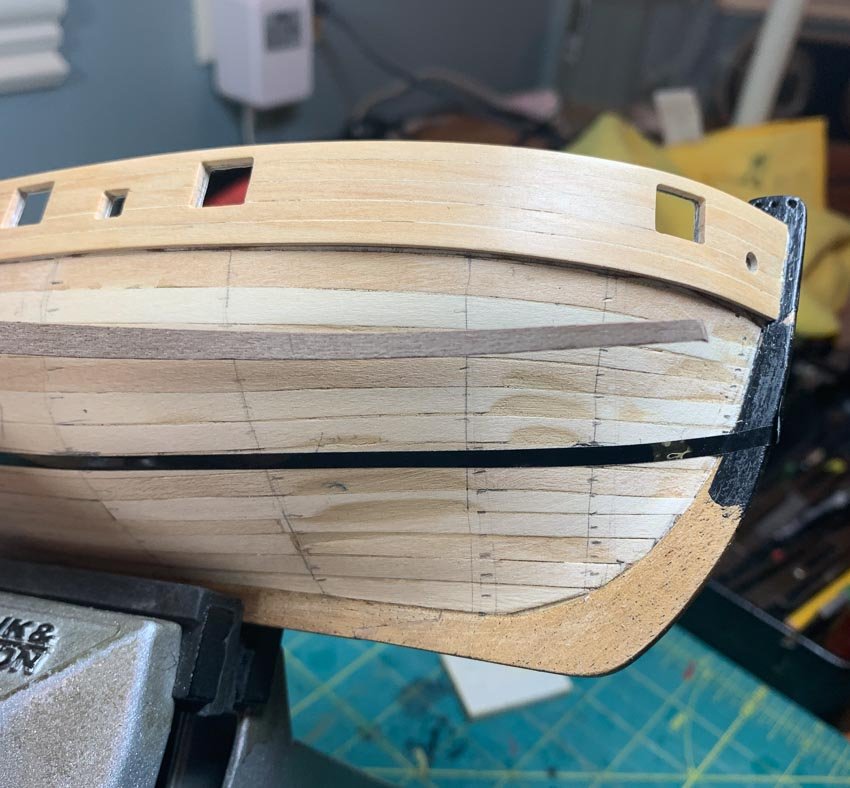
NOTE: The plank in this photo is being accidentally held upside down, plank bending is bending down to turn up on the bow, so to install it's upside down shallow U not as shown here. Placing the strip on the hull at the beginning of the taper point and bending it to the bow with my fingers (no glue) produces a curve, the apex of that curve is the bending point. Mark it and put that center on the middle of the clamp then gently pull down and clamp on both sides. I broke only one plank, the strip wood had more elasticity than I would have thought. I DID NOT soak the strips in water. I put my finger in water and ran it over the wood then “ironed” the strip for several seconds. Let it cool for a minute and you have a curved plank.
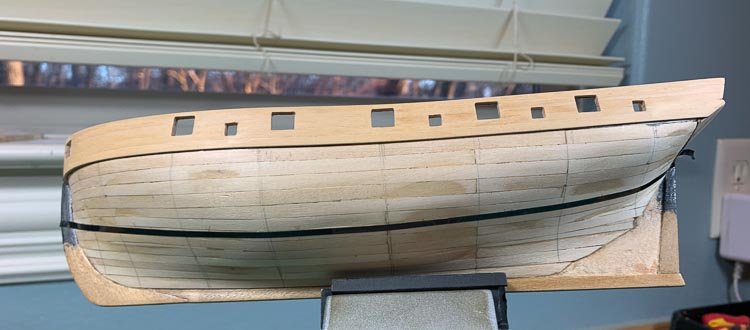
I then just kept track of my measurements, I did redo them a few times on the lower half, 4mm planks aren’t a perfect fit so I ripped two to 3mm each to fill the gap (and not have one super skinny). It still was a lot easier adjusting for the final pieces. Most importantly the planks, while it looks odd in a two dimensional photo, fit flush to the hull and its double curve by adding the downward bend in the tapered plank. Again, no soaking, no bending no twisting. I used drops of CA, first gluing it tight at the bow, then just 1-2 bulkheads at a time. I had roughed up the 1st planking with 100 grit sandpaper to help with adherence.
Here I will admit my major error, or the error the instructions led me to do - that’s attaching the sternpost when I built the frame. It is so much easier at the stern to not install that until after the second planking. I know this, I blame it on the three year layoff since my last build. It wasn’t a show-stopper, it just made fitting the lower band of planks harder since they had to be cut to fit precisely at the stern post. On my next model I’ll not install the sternpost until after all the planking is done.
On to the next step…
-
I’ve completed the planking above the wales using boxwood. Why, because I like Boxwood and I had some. It’s a remarkable wood, so easy to work and bend into place.
These are actually from my first attempt at ripping my own out of a plank. I read a few tutorials, got some input from reliable sources and went at it with my Byrnes saw (with the right blade). My first couple weren’t going that well with the blade binding and the wood backing up. I got the hang of it though. They were a tad thick, but they worked out great on the boat. [NOTE: Thanks to Chuck, Rusty, and Jim Byrnes who all offered advice and help I can do this pretty well now. That I hadn't in all my prior models is because I bashed them all with wood from Jeff at Hobbymill. He did provided high quality wood already cut so I didn't have to. Sadly Jeff is no longer in business. I'm ripping like crazy for my current Cheerful build.]
I mentioned before I attach the gunport patterns I score each side of the tabs above the deck. I also only glue at the top point and the bottom. I elected to break off the three tabs on each side that were obstructing my cutting out gun ports electing to leave the rest in until I complete the first planking. After all the cutting and filing and cutting and filing and cutting and filing and being thankful this is a 12 gun ship, not the Vanguard [the model not Chris' company 🙂 ], I did some basic sanding (leaving the rest and needed filling until the 2nd planking is complete. I put a coat of satin poly just to keep the boxwood clean.
I’ve also spent a LOT of time fidldling and pondering how to finish up the stern. I have the last piece painted and ready to attach but I’m going to leave it off until I finish sanding the 2nd planking. I’m still not sure about the fashion piece on the sides, the part included with the model is a disappointing. More on all that later.
So the moment has arrived to learn a new method of planking following Chuck’s tutorials and videos. First step is lining off the hull, I made pencil marks where the bulkheads are and dividing the hull into two bands using artist tape. Bulkhead 4 is marked as the widest part of the ship. Now to make the tick marks… At this point this thing looks a bit beat up. It’ll all come together.
Who knows how this is going to turn out. If there is never another entry in this log you’ll know it went badly.
-
After seeing my sorrowful job of first planking I decided to take a step back and re-learn planking with some practice and tutorials. Lady Nelson will become a test bed for a new technique, well new for me.
NOTE: [This was originally on the "other" forum, I wanted to promote Vanguard there].
I just received the HMS Speedy from Vanguard Models, Chris Watton’s starting his own company and this is one of the first two kits out. It’s a really great looking kit, I recommend checking his website out at https://vanguardmodels.co.uk So now Nelson is just to relearn and reinvent my skills in preparation.
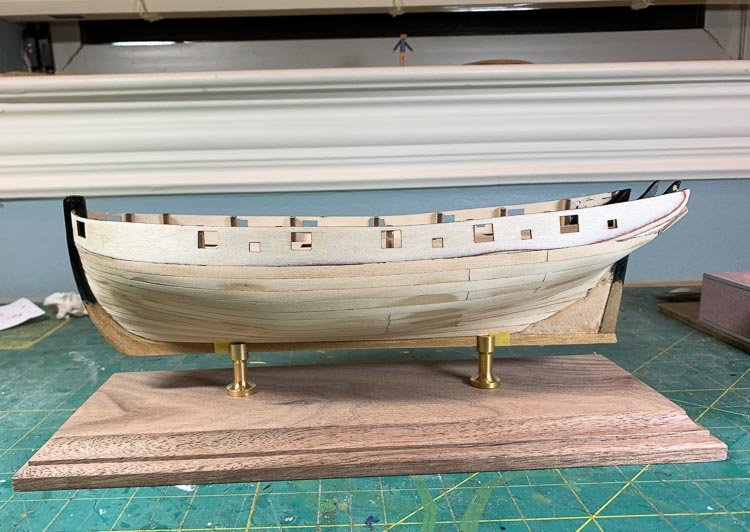
As I always do I plan mounting my model at the very beginning, drilling the holes in the keel before installing the first bulkhead. Normally I use a small gauge threaded machine screw, but the Nelson is so small there is no screw to fit the inside 3mm Keel, so I’m using 1.5mm brass wire I’ll epoxy into the base of the ship and the mounting board. I glue scrap MDF either side of the drilled hole and make sure it goes through the keel into the MDF by at least a few mm. I did all the trial fitting last night and happy with how it will eventually sit. Measure 4 times, drill once is the method here.
The first planking is ugly, but its smooth and will provide the necessary base for the 2nd planking. I really should care more but really all I want to do is cover the ship. ... If I say that enough times I may start believing it.
So off to the tutorials and practice. No idea how my other ships came out looking as good as they do, must have been luck.
- Ryland Craze, DelF and Jonny 007
-
 3
3
-


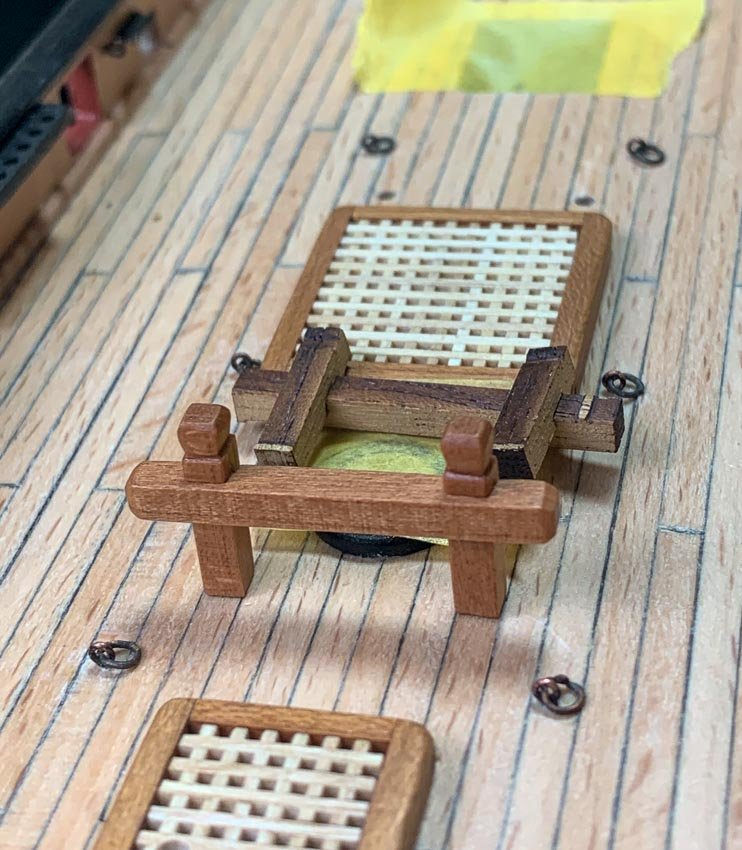
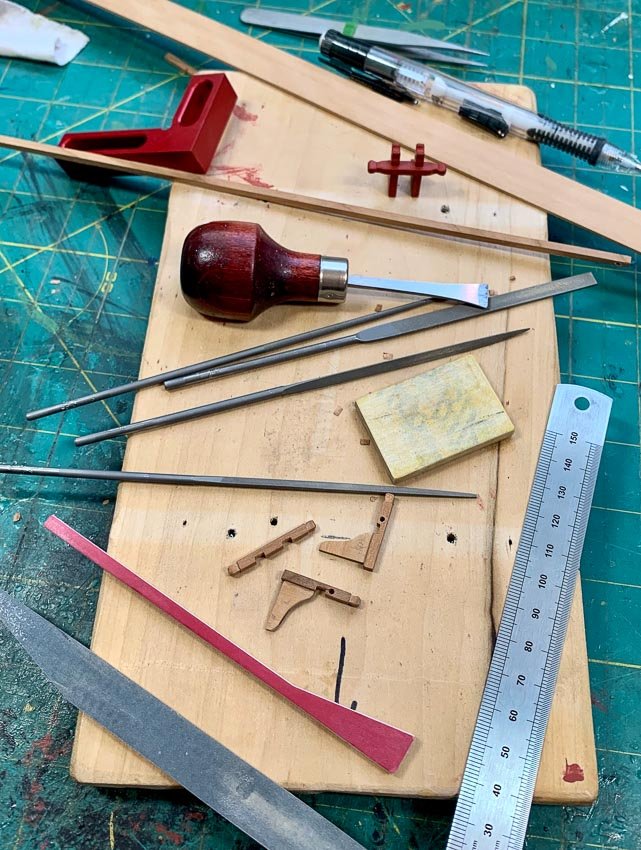
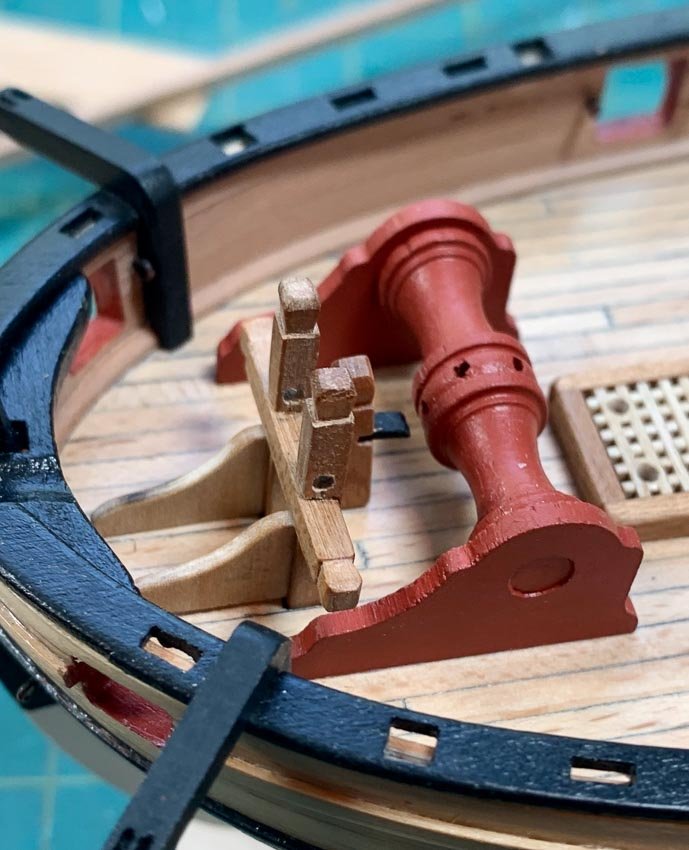


Lady Nelson by glbarlow - FINISHED - Amati/Victory Models - 1:64
in - Kit build logs for subjects built from 1801 - 1850
Posted
Thanks for saying so. I put a lot of detail in my logs and sometimes feel it’s too much. But if it helps just a few people then it’s worth it.