


glbarlow
-
Posts
4,035 -
Joined
-
Last visited
Content Type
Profiles
Forums
Gallery
Events
Posts posted by glbarlow
-
-
3 hours ago, James H said:
is one very heavy model,
I’m enjoying watching you build this monster. I just shake my head at the size of this thing. So already the extra work you did on the orlop is lost forever other than a tiny glimpse down a hatch. Definitely for the detail enthusiast, but so beautiful design.
-
1 hour ago, DelF said:
dismiss the butler
😂🤣I hate it when I have to let any of the Manor staff go...😂🤣
-
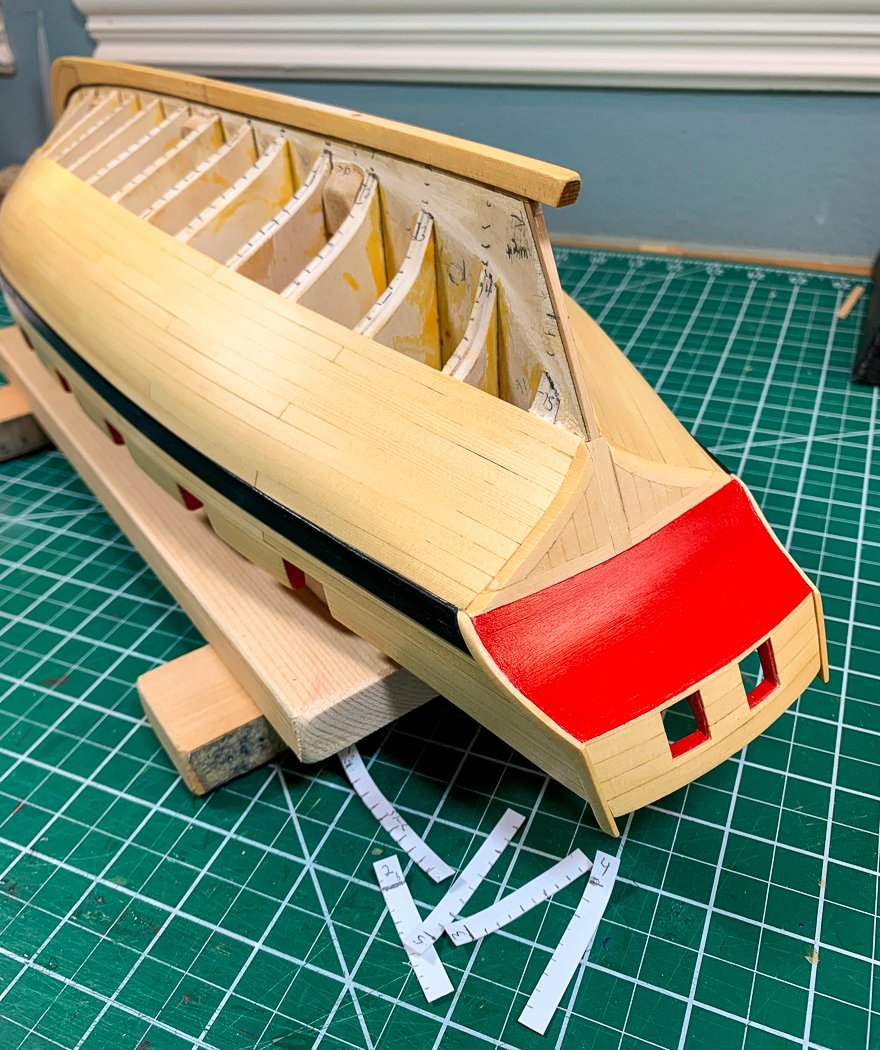
I've started lining the lower planking belt. It is a chore but so worth the effort once the planking starts. I also use the plans to add a vertical hashmark where the plank joints are so I remember to cut the planks the proper lengths.
Really though I just wanted to share a photo of my ***RED*** counter. For Cheerful I wanted to go RED or go home, I think I'm successful. I've never used anything but Admiralty Paints Red Ochre, this Golden Medium Cadium Red makes a statement. 😄
Of course I've already painted the gun ports a long while ago, but the counter really pops against the gold of the Alaskan Cedar. (five thin coats in case you're wondering).
- GrandpaPhil, Rustyj, BobG and 15 others
-
 18
18
-
On 7/27/2020 at 2:21 PM, Vane said:
Proxxon lathe really delivered
Dang it, I may have to buy another tool.
-
The better way - you'll not like it later if you don't.
I expect the same encouragement when I'm faltering on rigging Flirt 🙂
- Edwardkenway, Ronald-V and DelF
-
3
-
30 minutes ago, DelF said:
you're getting on OK
Haven't really used them yet, no rigging or small hands work with where I am on Cheerful. It does look very solid and better than the little extra hands thing I've used for years.
-
I went for the 4 hands version, I’ve never needed more than 3 plus I thought the 6x9 inch base would fit better on mu bench. I was hesitant until Derek assured me of the strength of the magnets to the base.
i need to stop reading these forums, I learn about too many great tools that I can’t resist. Amazon just makes it all too easy.
- Edwardkenway, DelF and RichardG
-
3
-
-
11 hours ago, ErnieL said:
So, I now own all five of Chris’s releases,
I only have the two, guess I better get busy ordering stuff. Texans are very competitive 😁
- ErnieL, Ryland Craze, mtaylor and 3 others
-
6
-
Great and creative display for your excellent barge. If this is your first model, we’ll all look forward to more great build logs!
-
3 hours ago, popeye2sea said:
Are you sure about USS Bainbridge
My mistake, it was the USS Kidd in Baton Rouge. There were 4-5 destroyers named Bainbridge including the first one in 1903 and a current Arleigh Burke class but apparently not in the movie Greyhound.
- mtaylor and thibaultron
-
2
-
3 hours ago, dvm27 said:
damn Apple TV movie
I watched it on my 85 inch TV using Amazon Fire Stick and the Apple TV app. Apple TV is not limited to a computer.
- mtaylor and thibaultron
-
2
-
18 minutes ago, Suzdal said:
book which can be found on the Internet is much better
I read the book after seeing the movie, I found it tedious. The movie is 98 minutes of action, the book dwelled on and on and on about inner thoughts. I'm generally a fan of the book over the movie and of Forrester's books - not this time.
- Canute, mtaylor and thibaultron
-
3
-
1 minute ago, Charles Green said:
still-photo was reversed.
Not the best example but as a photographer I know that photos used for trailer or magazine covers are often reversed just to accommodate the text placement - someone should have noticed the reversed letters on the helmet, that could have been easily reversed back.
- Canute, thibaultron and mtaylor
-
3
-
-
13 hours ago, Louie da fly said:
nice work, Glen
Thank you for saying so.
8 hours ago, JpR62 said:very instructive step by step again
I hope it proves helpful to others
13 hours ago, Blue Ensign said:I'd be very happy with that
I refer to your Cheerful log a lot, thank you.
13 hours ago, mugje said:That's beautiful
I appreciate your thinking so.
-
20 minutes ago, Bossman said:
Cheerful is next on my stocks
It's a challenging but interesting build, you'll enjoy it.
3 hours ago, BobG said:We're our own worst critics
I'm going to run out of wood if I don't quit critiquing myself 😄
4 hours ago, garthog said:Beautiful work and a great narration
I enjoy the writing, thank you Garthog 🙂
4 hours ago, Geowolf said:one of the best planking
Thank you!
- Ryland Craze, mtaylor and BobG
-
3
-
Thanks for the comments and likes everyone, they are appreciated and inspirational!
-
On 6/17/2020 at 9:51 AM, VTHokiEE said:
draught markings
Those look nice and I’m sure a challenge to get on so straight.
- VTHokiEE and Old Collingwood
-
2
-
Those are some nice looking Cannon! I do think the tiny handles add a nice touch and are worth the effort.
My cheat is to use some small brass belaying pins cut off and drilled in.
-
Here’s some photos. They may be a little disappointing because the parts are in their sealed plastic bags. I have a long way to go on Cheerful so in their bags they’ll remain.
I included a bag of boxwood next to my bag of pear for Speedy. Again sorry also in their bags.
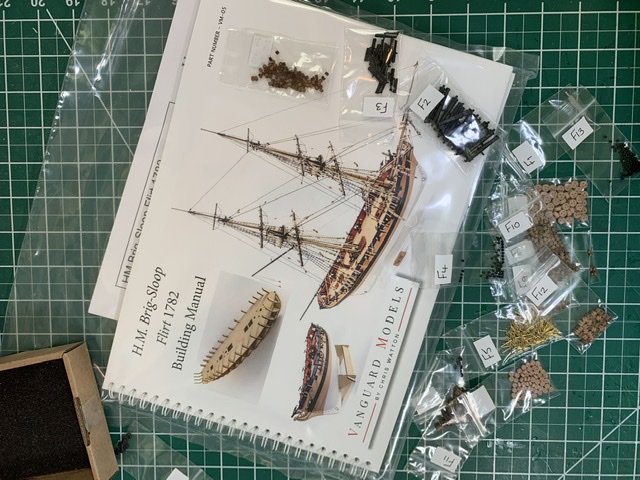
You can see how neatly it’s packaged, every bag has a part number including the ropes and blocks Many of the lasered parts are also numbered.
I can say I’ve never seen a kit so well packed and packaged... well except for Speedy .. but Chris has taken it up a notch with this MS version of Flirt.
I really want to tear into the bags, but will resist.
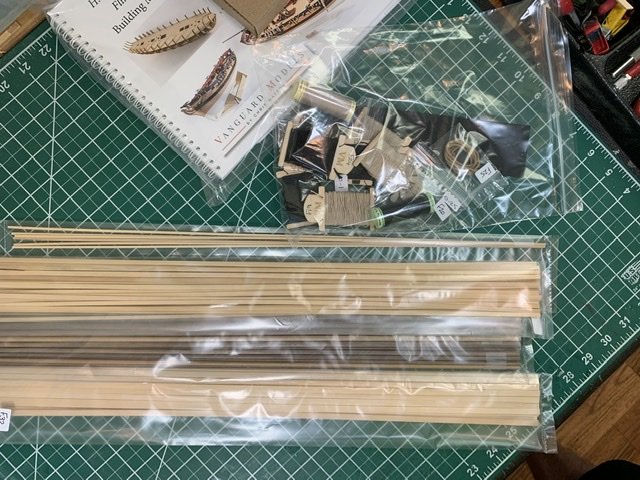
Pear from Speedy on top, Boxwood for Flirt on bottom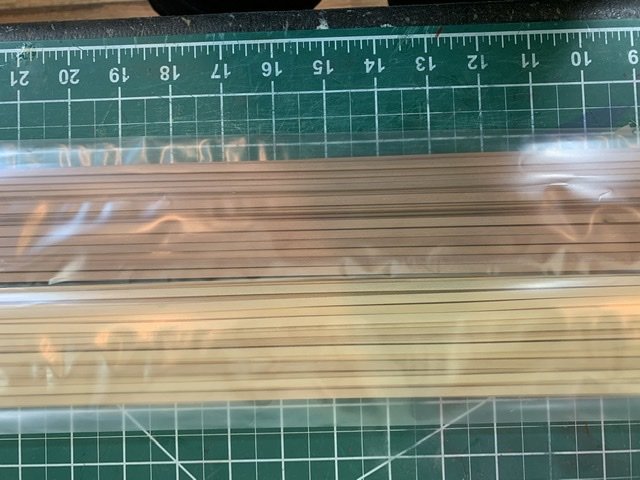
Notice the thick, full color, spiral bound instructions.
So much boxwood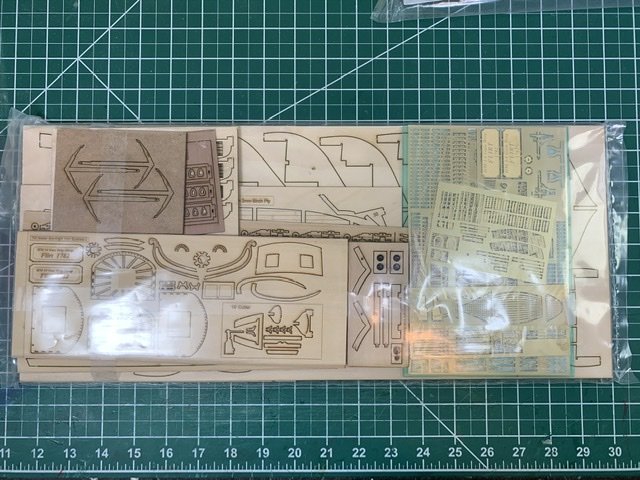
-
14 minutes ago, DelF said:
carpentry
13 minutes ago, MEDDO said:square tuck looks
Thanks guys. I’m kinda happy with it if I can just stop looking at the errors.
- Mike the Maxx and mtaylor
-
2
-
22 minutes ago, Chuck said:
Well done
I need to again be clear that Cheerful comes with a live coach. On many more than one occasion I’ve reached out and quickly got expert advice from Chuck, including here. Thanks Chuck!!
- VTHokiEE, MEDDO, Ryland Craze and 2 others
-
5
-
There were a number of things about building Cheerful I’d never done or seen before. In the case of the square tuck I didn’t even know what one was. Fortunately @Chuck instructions are clear enough - I just dove in and took it a step at a time.
I’d already made it challenging by not leaving enough of a gap between the bottom layer of the of the square tuck and the counter. So I filed and sanded until what once was a 1/32 backing triangle was now equal in thickness to a communion wafer. I elected to use 3/32 wood for the square tuck itself instead of recommended 1/8 for a better fit.

Step one is adding the center piece and the two top pieces, that was pretty easy, if only I could stop there.
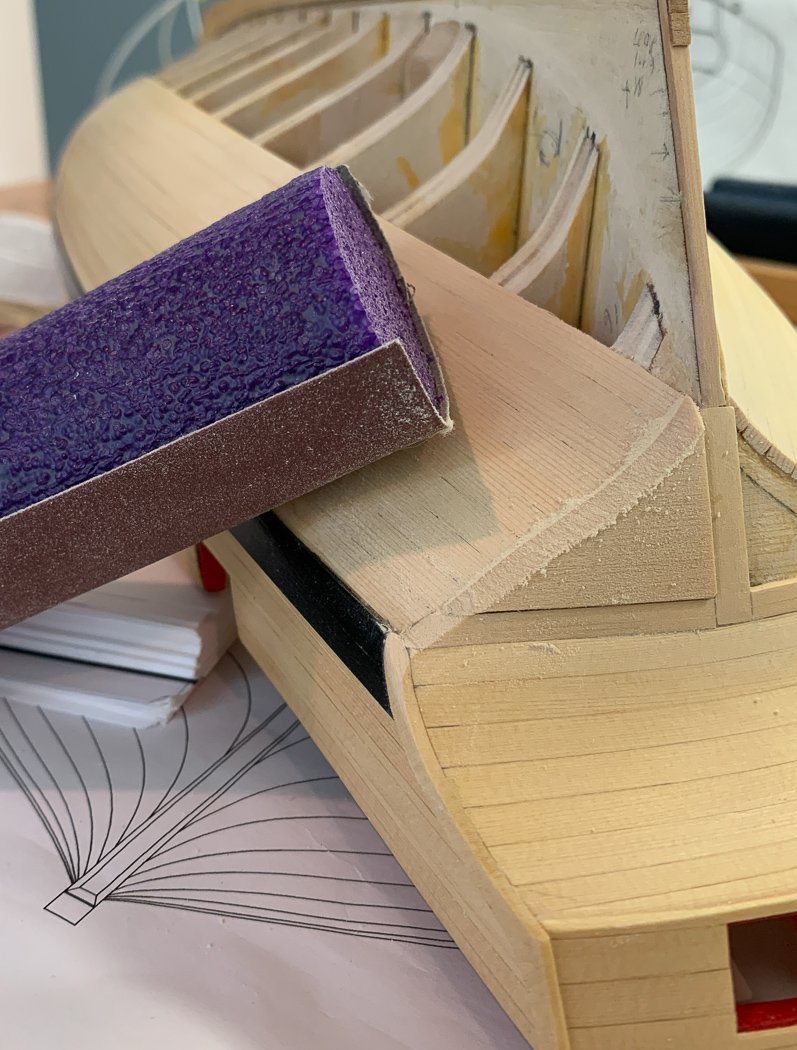
And then the fun begins, I got a little involved and forgot to take a lot of photos. The next step is shaping a solid piece to fit against the top and center pieces, lightly attach it to my wafer thin backing with just two small drops of CA, then shape it to fit flush and follow the flow of the bottom of the hull. My recently acquired foam sanders in different shapes came in handy. Of course the key is to sand the piece flush but not go through the bottom of the already sanded hull, which I managed not to do.
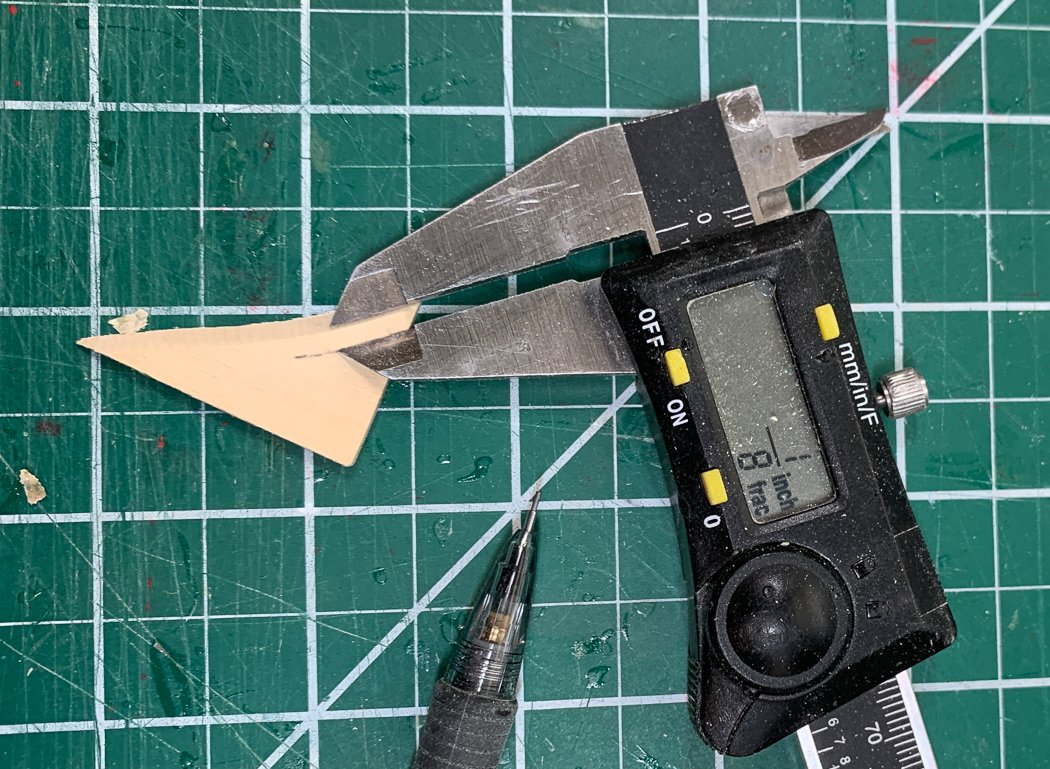
With it sanded smooth and a flush fit, using 180, 220, and finally 320 sandpaper, I pried it off with pair of pliers...not... Actually very carefully with an extremely thin putty blade. I marked a 1/8th line along the curve using my digital caliper and a series of marks as I moved it around the outside of the curve. I don’t have a scroll saw, I was able to rough out the curve with my #11 blade, one benefit of using the thinner 3/32 wood I suppose. I cut away from the line and then carefully sanded it down to the 1/8 mark - measuring the top flat part of the wood. The sanded slant doesn’t matter and is not included in the 1/8.
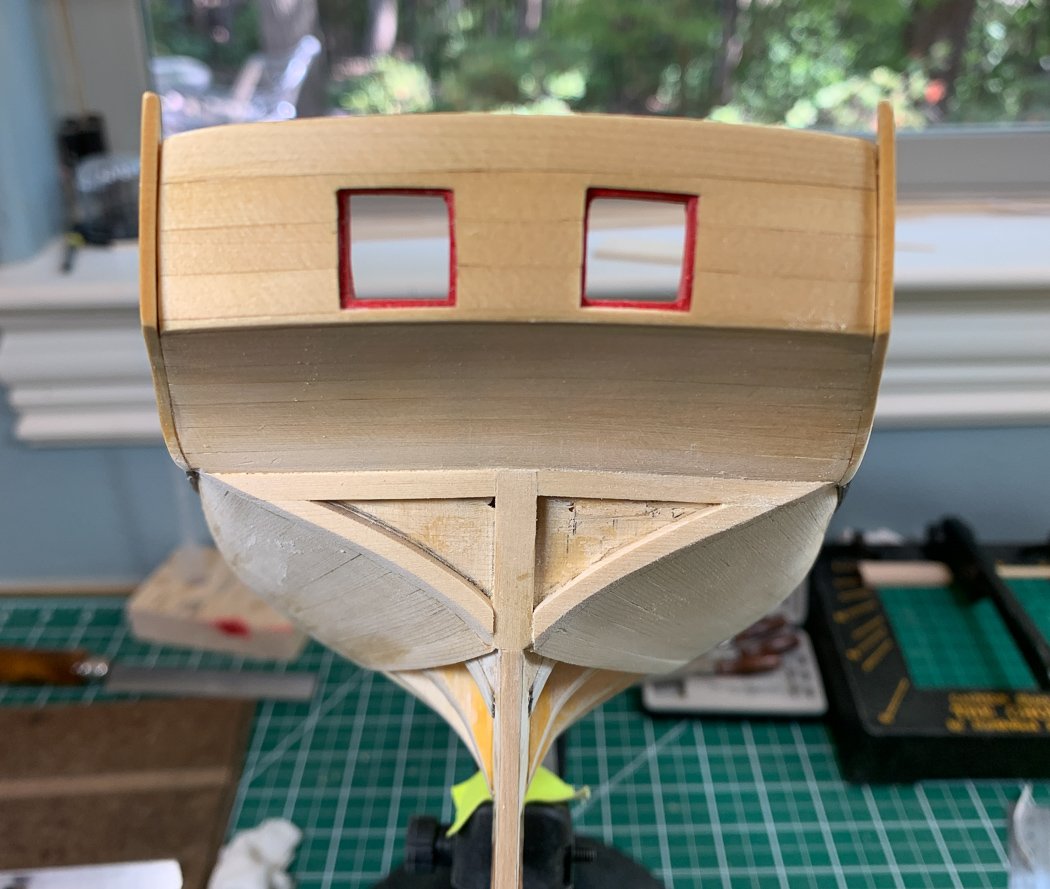
With both sides complete I attached them permanently and began the process of filling them with 3/16 wide planks cut from the 3/32 wood (although plank width, regular planks are too thin). I didn’t take any photos of that process. I first sanded the top angle to match the top piece (I never changed that angle on my Byrnes Sander so it was easy to match). then measured the two lengths of the bottom angle to fit….and yes while 10 planks are fitted, more than 10 were cut - my scrap pile got a little taller. I also used my phatic glue and cedar saw dust to fill in gaps. There was only one, otherwise I was perfect. I can say that because they are all nicely filled and no one can tell now…ok there were two…ok more than two.
All sterns are different, mine being no exception - I had to use a piece of 6mm wide (about 1-2mm wider than 3/16 wood) for the teeny tiny triangle of the outer most piece to fill the gap. This is the mindset I have been able to adjust to, differing from kits. I have a lot of uncut wood in various thicknesses, I’m not limited to what’s in the kit - so I needed wider piece I cut a wider piece.
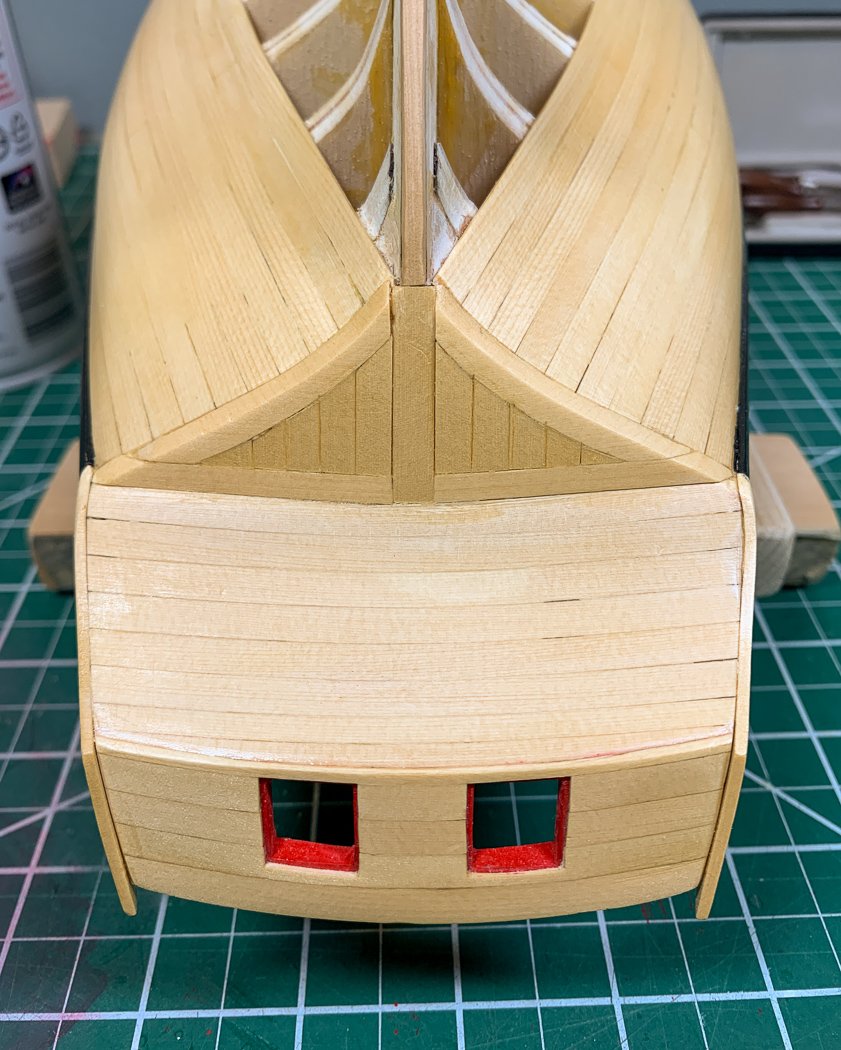
And now I have a square tuck, though I still don’t know what’s square about it. It's not perfect. Once I finished mine I stopped looking at Chuck’s nice photos in his monograph, no good can come from that. So I've added a little more character to my model.
I have the counter sanded ready to paint red but I’m not going to do that until I get a good tight fit of the stern post. For whatever reason at the moment I’m not close to it fitting tight - hard to know what part to sand where. That’s a challenge for tomorrow.
- VTHokiEE, BLACK VIKING, Ronald-V and 18 others
-
21
HMS Speedy by Vane - Vanguard Models - Scale 1:64 - Master Shipwright (limited edition)
in - Kit build logs for subjects built from 1751 - 1800
Posted
crisp and clean workmanship, nice!