-
Posts
3,851 -
Joined
-
Last visited
Content Type
Profiles
Forums
Gallery
Events
Posts posted by glbarlow
-
-
I understand the desire to plank it, I have a maple deck for Speedy/Flirt I got from Chris. It just looks so good I will use it. I have enough holly planked decks, this one time I’m going to forgo that experience.
I do like planking the lower deck, I’m sure this model will look great with the hatch open. Maybe throw some fish blood in their to liven it up 🤣😂
As Soyglass says, we all knew you’d bash it 😊
- Blue Ensign, Martin W, BobG and 1 other
-
 4
4
-
I’m not much a fan of fishing vessels, but this is a great looking model I may need to add to my collection once I negotiate for more display space.
- Blue Ensign, Martin W and BobG
-
 3
3
-
-
-
On 5/14/2020 at 10:37 AM, DelF said:
fitting the bow rails
Nice work on a very tricky part of the model. They look great.
-
I’m a Nikon shooter as well and appreciate the setup description. Photography Is my other ‘hobby,’ I’m primarily a nature and wildlife guy. http://glennbarlow.com. I only pull out the portrait stuff for important things like my grandkids. I’ve shot photos of them on large curved white paper. I’ll have to get it out next time I shoot a completed model.
Your photos are well lit, not as easy to do as some might think. The mesh in front of the lights is a nice touch, your own soft box. 👍🏻
- hollowneck, egkb, James H and 2 others
-
 5
5
-
Nice! I like the black and red paint scheme. The stem looks like it has a smiley face, or is that just me...
You’re going to make us all feel bad about our planking and photography skills, are you shooting that in a white product box?
-
9 hours ago, mtaylor said:
If there's a tracking number,
I agree, it’s why the first thing I asked them back over a month ago for the tracking number, onLy to find out there wasn’t one.
I recently ordered the plans for Cheerful from the NMM in the U.K., they also sent it postal airmail, but provided me with a tracking number and I received two weeks later (about three weeks ago). I’m pretty sure my order is lost but without a tracking number, who knows...
-
48 minutes ago, mtaylor said:
tracking number
I asked, they don’t ship with tracking numbers was their answer. As I said I placed a second order a few days after this one. I received it in 2 weeks. Whatever the current situation 9 weeks is a long time. It is not helping that they don’t use tracking numbers.
Why do you ask?
-
4 hours ago, garthog said:
Jim Byrnes’ sander
I have that as well, my second favorite tool. I've talked to both Jim and his wife a couple of times on the phone. The very definition of small business owners with great customer service and great products. My latest addition is the sliding table for the saw. I wasn't sure I needed it, now I don't know how I got along without it. I used it to cut 24 perfect lap joints for the three cargo hatches on my Nelson project, great way to make consistent, repeatable cuts on very small wood pieces.
Cornwall is placing blame on the US Postal Service since they sent it 'Air Mail.' The funny thing is I did receive a second order I'd placed a week after the one I don't have yet....I think it fell off the conveyor belt somewhere along the line.
-
7 hours ago, garthog said:
where did you get your Admiralty White PVA
Thanks for the comment. I like doing the writing, sometimes I think I get carried away.
I got it and all my Admiralty Paints from Cornwall Boats in the U.K. I used to received orders in 7-10 days. However I have an order I’ve been waiting 9 weeks, all they say is be patient. I haven’t found a US source for Admiralty paints.
-
14 hours ago, MEDDO said:
type of saw you used and what kind of blade
I have the Byrnes Saw with a Thurston I-292 .030 kerf slitter blade. I’m a big fan of the Byrnes saw.
- mtaylor, Ryland Craze, MEDDO and 1 other
-
 4
4
-
I have a maple etched deck from Chris for HM Speedy replacing the pear that came with the kit.
While I haven’t installed it yet so I don’t how it will look sanded I can tell you without hesitation it is anything but hokey or taking the easy way out. A laser etched deck is definitely an item that could run the gambit in quality. My maple deck from Vanguard Models instantly changed my mine about planking it myself.
I've planked the decks of nine models, always kit bashing using my own cut holly. I have some nice looking decks, except for the fact that once it’s masted, rigged, and furniture in place you barely notice.
While I’ll cut and plank the deck for Cheerful, I’ll use the laser etched maple deck on the shipwright version of HM Flirt and be proud of it.
- ccoyle, Gregory, Nunnehi (Don) and 4 others
-
 7
7
-
I think you felled a tree to plank Winnie, but it looks great.
- Rustyj, FrankWouts and Edwardkenway
-
 3
3
-
Any creative ideas about how to maintain a 1/64th inch gap above, below, and alongside the ports?
I did cut my first run of 3/64" thick planks from 3/16, 1/16 and 5/32 lumber, I'm a bit proud of that having never done that before in volume. Again I will say the Yellow Cedar flew through the saw, and I'm typing with ten fingers.
-
Beautiful work!
Can you plank mine for me😂
- Rustyj, FrankWouts and Edwardkenway
-
 2
2
-
 1
1
-
-
-
5 hours ago, MEDDO said:
There is one question
Good observation. All the sides of the gun ports run perpendicular to the water. Per the plans gun port sills on 4-6 do slant upward following the run of the deck so you’re right about the slant but it’s correct per the design. Chuck included reference lines on the bulkhead. I just had to match the top of the sills to each mark. 4 does seem to stand out more in the photo, but it’s the same as 5 & 6.
I think the spacer bars, which are more or less straight, accent the slant and not in a good way. They’re ugly but I hope helpful later in the build. If you look at the previous post of the port side the slant is there but looks more ‘elegant’ without the spacer bars.
Thanks for the comment. Everything about this build is new to me, I’ll take all the help I can get.
- mtaylor, Saburo, Ryland Craze and 1 other
-
 4
4
-
7 hours ago, James H said:
I never closed that gap on mine.
First I’ve heard that working. I’ll quit offering advice then.
-
You'll want to close that gap at the bottom before adding a plank. I cut the shape of the bow from a scrap piece of wood using the plans as a template. I can put the soaked wood on it and clamp the heck out of it so its a tight fit. If you keep going from here make sure to get clamps down at the bottom to get it tight on the frame.
The first rule of modeling is when you think you have enough clamps, go buy more clamps.
You're having fun now....
- Jonny 007, ErnieL and Edwardkenway
-
 3
3
-
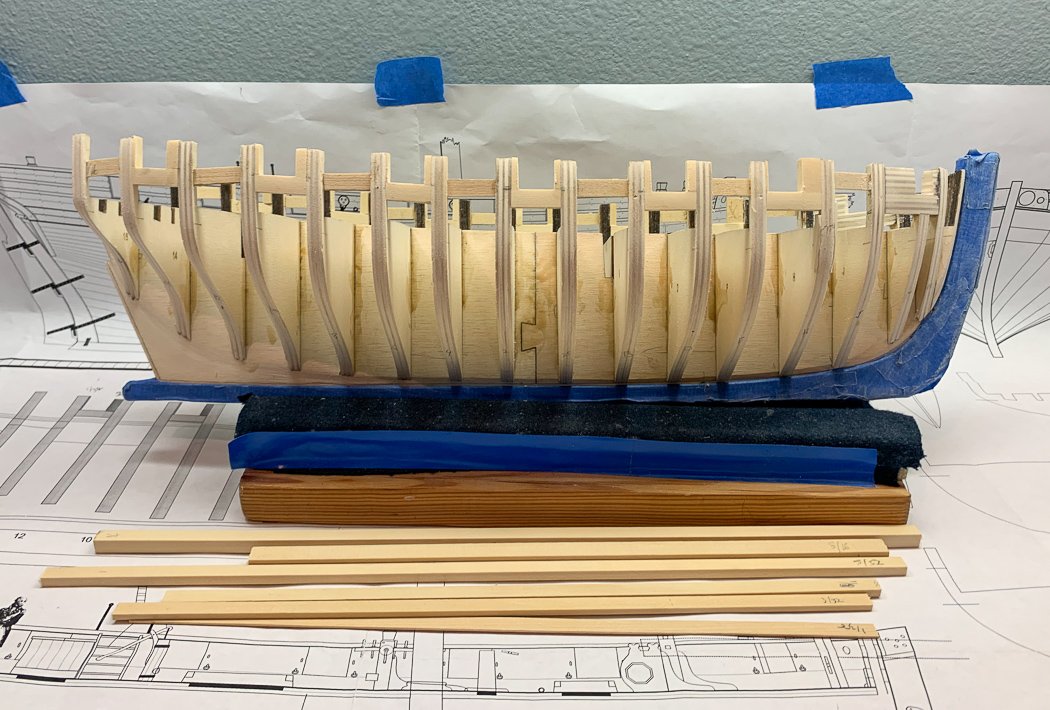
While I still have fine tuning to do, I’ve completed the ports and fairing on both sides. The second side went in easier since I had a little experience, I’d also cut some of the pieces by duplicating the fit on the port side before I installed them, making finding the size and angles easier on the stern ports. In the foreground are the various sized wood I ripped to make the ports - I’m sure the remainder will come in handy later.
You can see I’ve added some ugly, casually placed reinforcement between bulkheads without ports. I took this from Rusty’s log sort of, his were much neater. I used 1/16 and put them close to the outside after doing the fairing. I’m anticipating some challenging sanding on the inward side later, these are more preparation for that. Of course they’ll be covered by planking and if the get in the way they’ll be easy to remove. So I sacrificed form for function, there went my pretty faired ship.
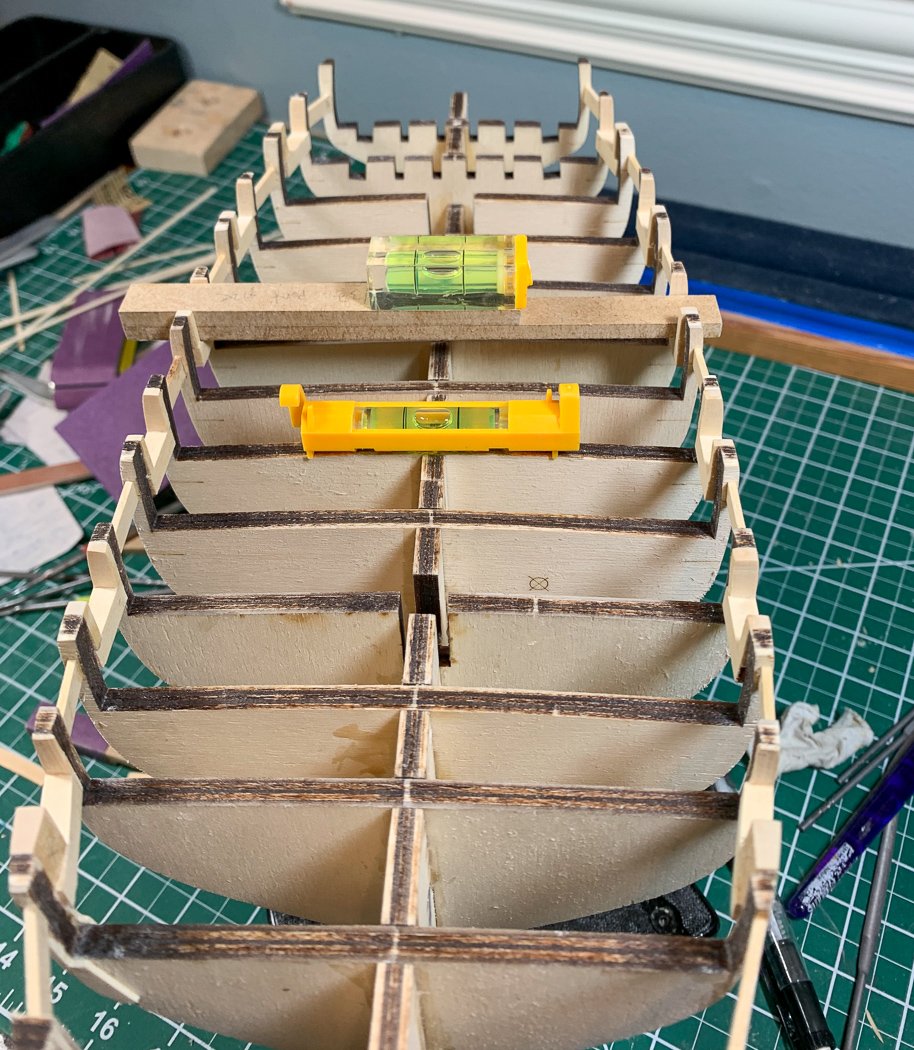
A lot of doing the second side is keeping it equal in all ways to the first side, my little port leveler made sure I had the ports aligned and the sills on opposing sides level with each other. I even measured the width of the remaining bulkheads at the stern and bow so I don’t end up with a lopsided ship. I may still end up that way, but this helps reduce my chances. Everything measured up fine, once again a testament to the design. I am taking it very slow and careful with this frame - hopefully that pays off later.
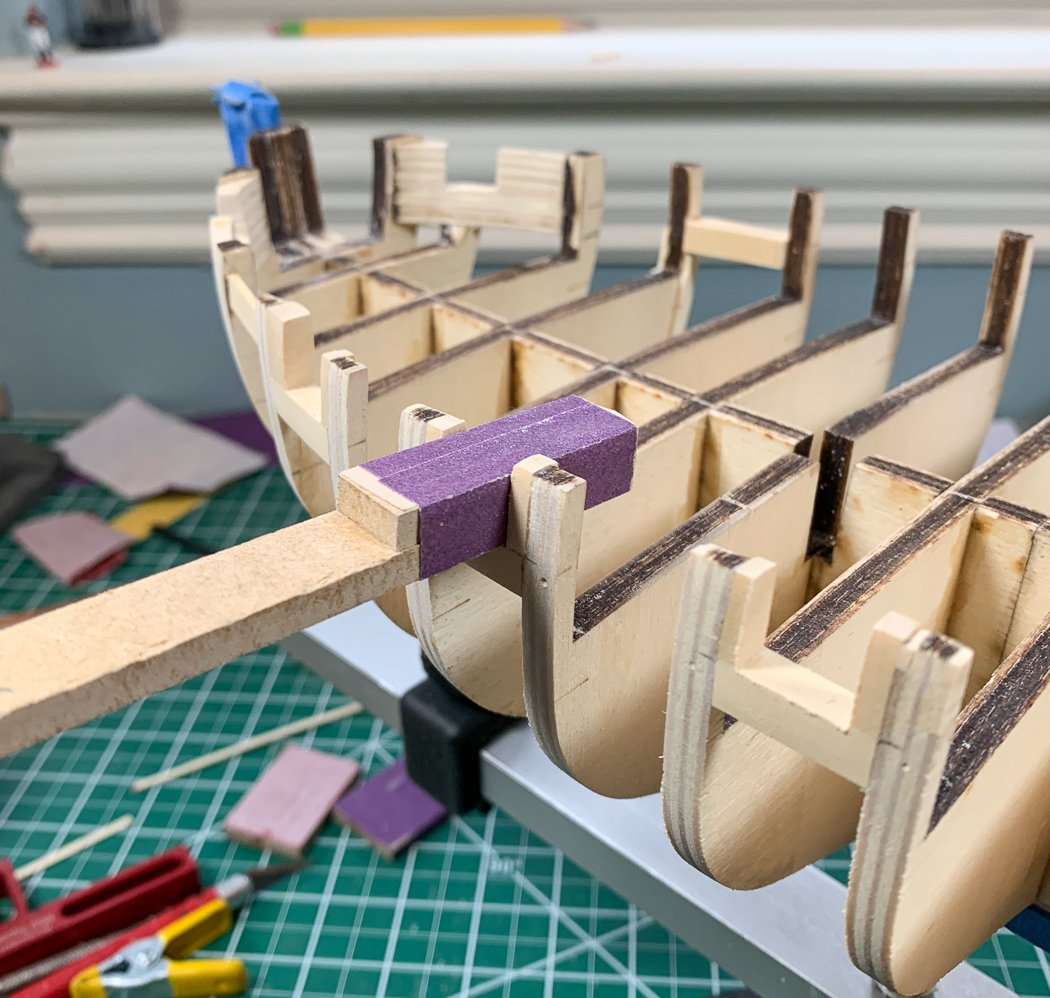
My other consistency jig was my “port sizer” I had the wood gauges to use as I was building - my last step was take a square jig - reduced in size just enough so it was 17/32 including the 320 grit sandpaper wrap. While I was close for the most part, using this little tool to run through and through settled all my ports to be consistent in size, including the chase ports up front where it really came in handy.
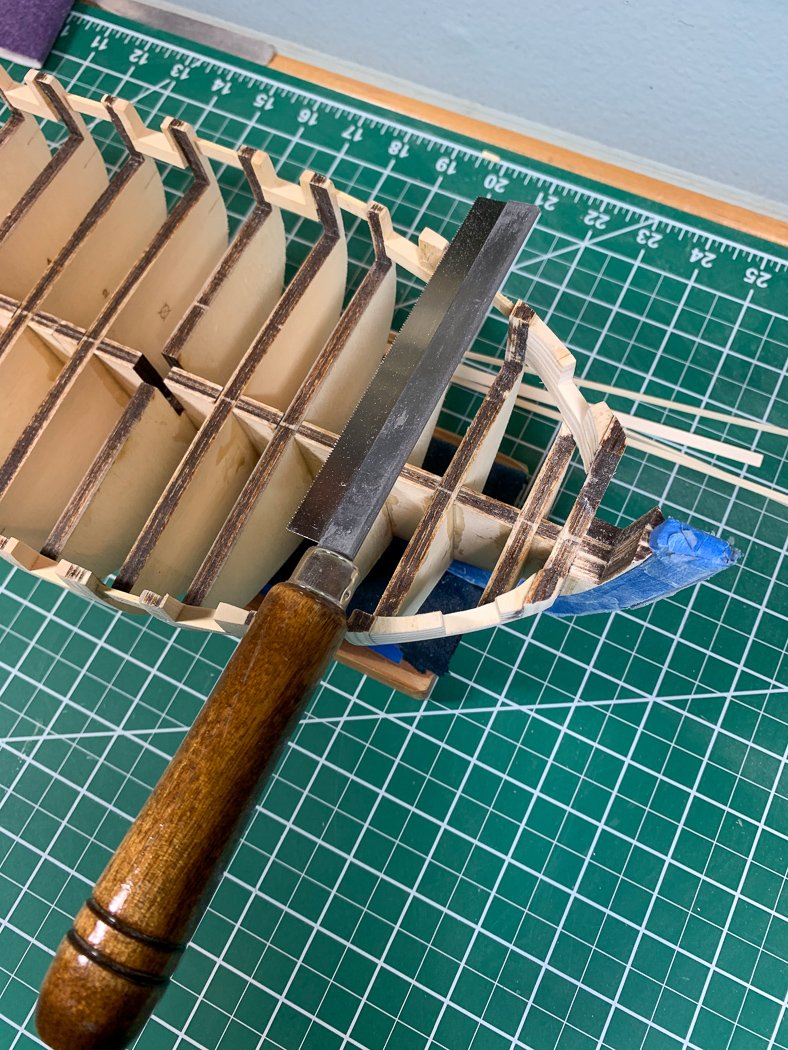
My tool of choice for cutting the chase ports was my Razor Saw. As Chuck advised, I cut inside the line and short of the bottom, used my #11 blade to clear and my port sizer to size after first using some sanding sticks to get it close. I measured the port side to the plans, I was more focused on matching the starboard to the port - remarkably they came out the same. How’d that happen - oh I measured a lot.
I will confess I was working in millimeters. I’m trying to be a good imperial boy, but I fall back to the MM ruler every time I need to measure something close. I’m still trying to get my head around numerator/denominator measuring. I wasn't listening during the fractions portion of my elementary education.
I know some have opted to line the chase port with wood. I have elected not to do so, though I thought about it. The wood to me is so smooth and the cut so square I’m ok painting it as it is.
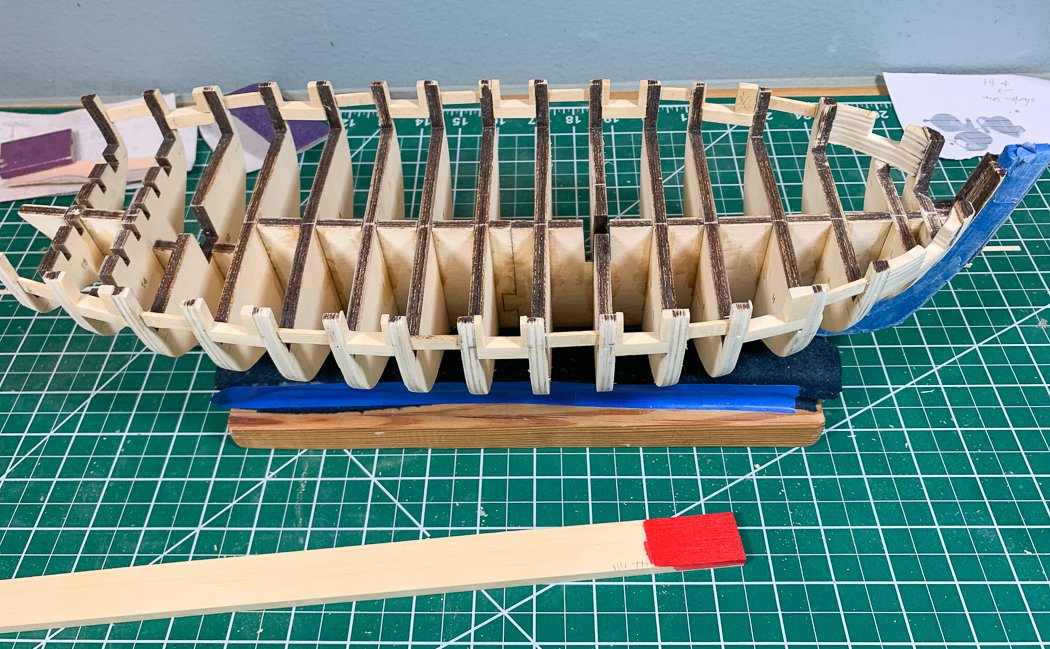
Speaking of which, here is my earlier mentioned choice of Golden Cadium. It’s not quite as bright as this photo, but it is very red and I’m ok with that.
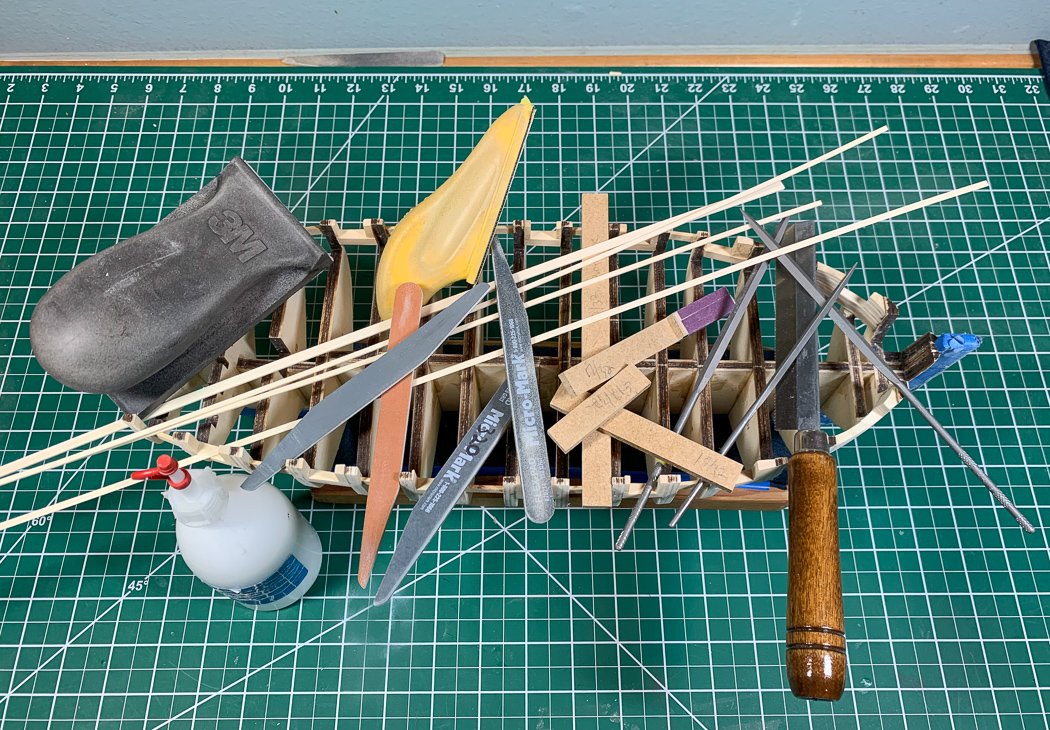
Finally, here is my collection of various tools and sanders I used for this stage of the build. I instantly regretted piling it on my ship. The flexible 3M holder was used for the heavy lifting. It has velcro face and matching sandpaper, I used 80, 120, and 220 with it. The yellow handle has the same velcro connector, I used it for tighter quarters and fine tuning. The sanding sticks, 120, 220, and 320 grit for even more fine tuning and opening the ports. I will finish the ports with a fine stick before painting.
I discovered these Vallorbe Barrette files on Derek’s Speedy build log, they are really great. They file only on one side, I have them in coarse and medium. I’ve always had an issue with a standard flat file since it files on the side edge as well. These eliminate that issue, important when you’re trying to square something up, like a port. I also prefer the triangular file for corners as opposed to the square one for the same reason, I can file the side I want without impacting the other and the point of the triangle cuts a nice corner. I have so many versions of needle files, they are now tossed in a drawer. I now have a full set these Swiss Vallorbe files, they are sharp and cut evenly. I also highly recommend them. There is my file lesson for the day.
So I feel a stern is coming, see what I did there. Uh Oh, more new ground for me. Here I can ponder such questions as why is a square tuck a triangle. I won’t get ahead of myself. First I have to attach and fair some stern brackets without breaking anything.
-
-


HM Cutter Alert by VTHokiEE - FINISHED - Vanguard Models - 1:64
in - Kit build logs for subjects built from 1751 - 1800
Posted
Great progress. I never ceased to be amazed at the transformation in wood created by wipe-on poly.
Your paint lines are very crisp, nice work.