


glbarlow
-
Posts
3,812 -
Joined
-
Last visited
Content Type
Profiles
Forums
Gallery
Events
Posts posted by glbarlow
-
-
19 hours ago, Trussben said:
need to sand the outside of the outermost frames thinner,
Thank you for the heads up, I was intentionally waiting until I had the qg framing based on seeing some had over-sanded the counter. I’m very good at over-sanding 😆
- AlleyCat, Saburo and FrankWouts
-
 3
3
-
Total gimmick and totally unnecessary. You’re guilty of overthinking it again. You can simply sand the bevel onto the inside top edge of the plank. You don’t need to get overly detailed with this, especially if the plank is properly tapered and shaped
- georgeband, Ryland Craze, Gregory and 4 others
-
7
-
I forget comments are put at the end…. I was admiring your stern, you showed some of the tools you used to make the scraper for it, it was that one I was asking about. I’ve not made anything with that much depth and tiered so well.
-
-
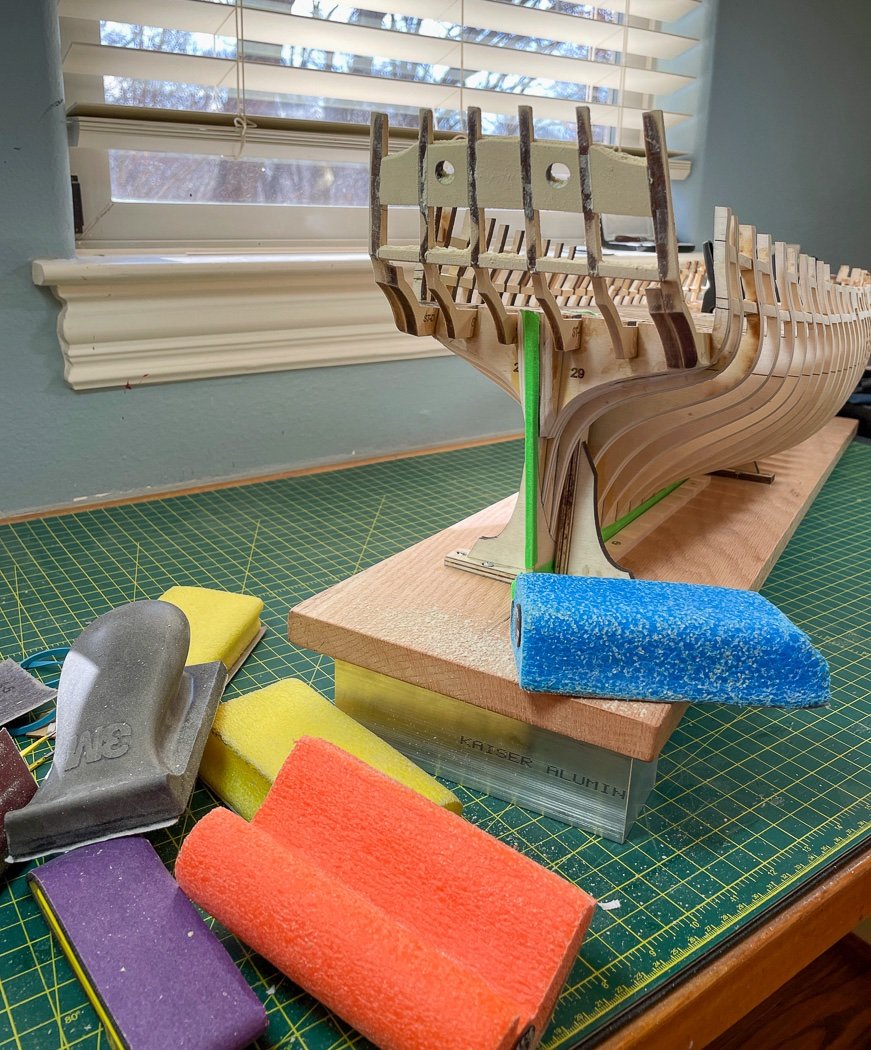
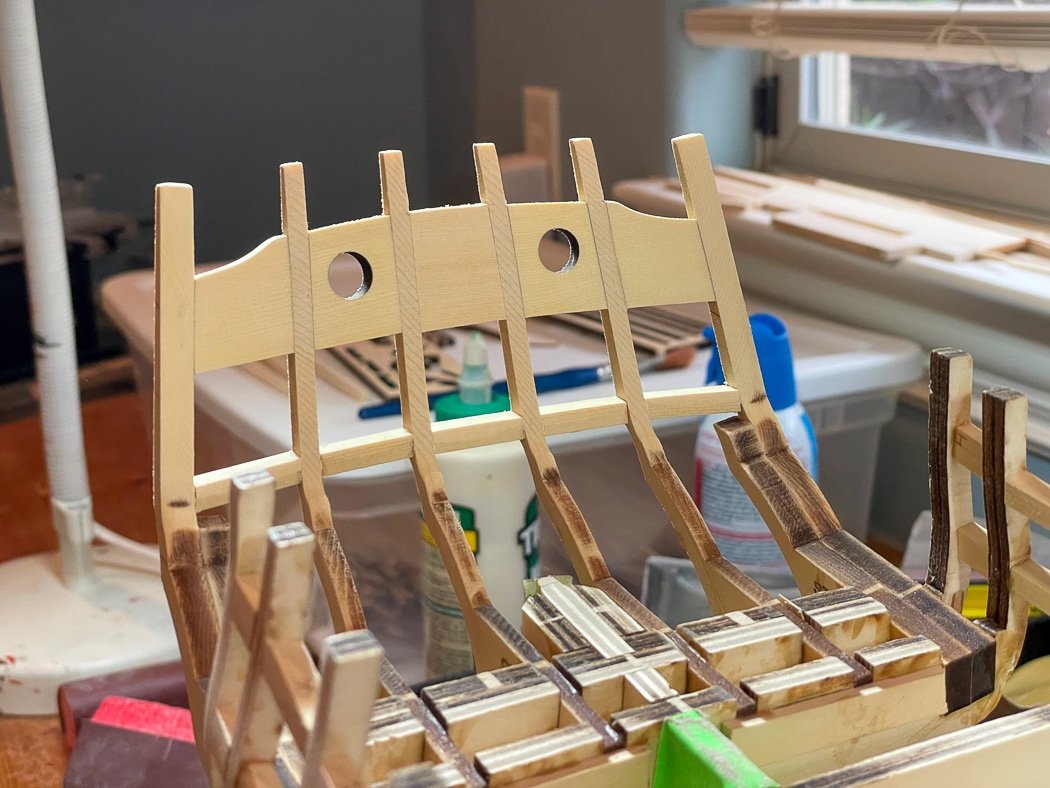
Stern framing
Patience and perseverance - just a couple of random words, probably not connected to this post…
Ship sterns on kits always seem problematic, no matter what level of quality they might be they often seem to be an afterthought, overly simple, or at best a challenge to fit pre-cut pieces together properly. The challenge part doesn’t go away with Winchelsea but any questions of design do. I felt like I was building the actual ship with Chuck’s well thoughtout process for Winchelsea.
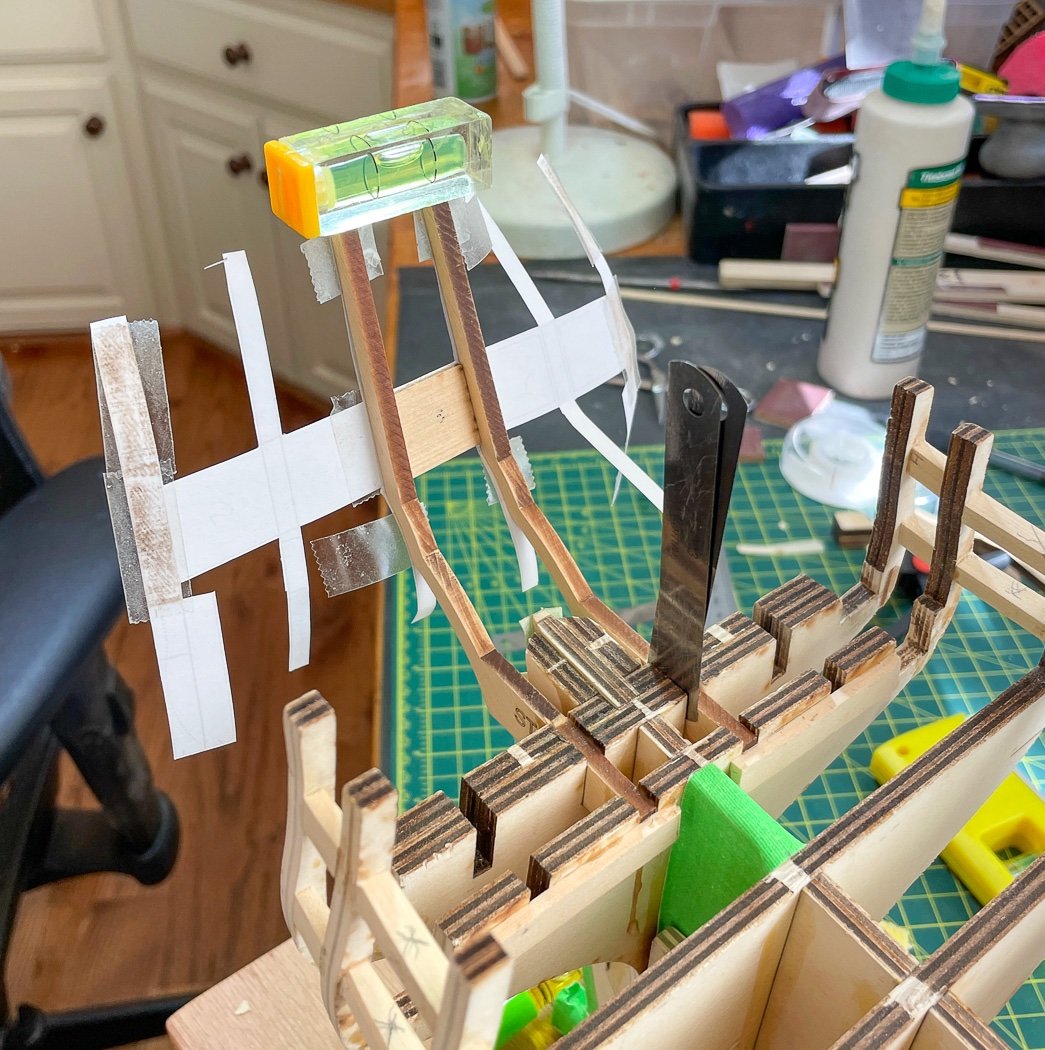
I made several copies of the provided stern plan, I’m not sure I needed each use after the fact but at the time they were helpful in some way. There are six frames with the outer one bulked up with an additional half frame. The objective is for them to be all properly spaced and equal distance in pairs, level and equal in height also in pairs, together forming a curve. For whatever reason one frame didn’t want to cooperate so I had to file the slot a bit. A couple of my old feeler gauge blades used for milling work came in handy as a temporary spacer to determine the position and were later replaced with a thin shim glued into place.
It’s hard for me to walk away to wait on glue, but that’s what I did, a couple of hours for each pair (I sanded some other stuff). Then I left them overnight to lock them in place.
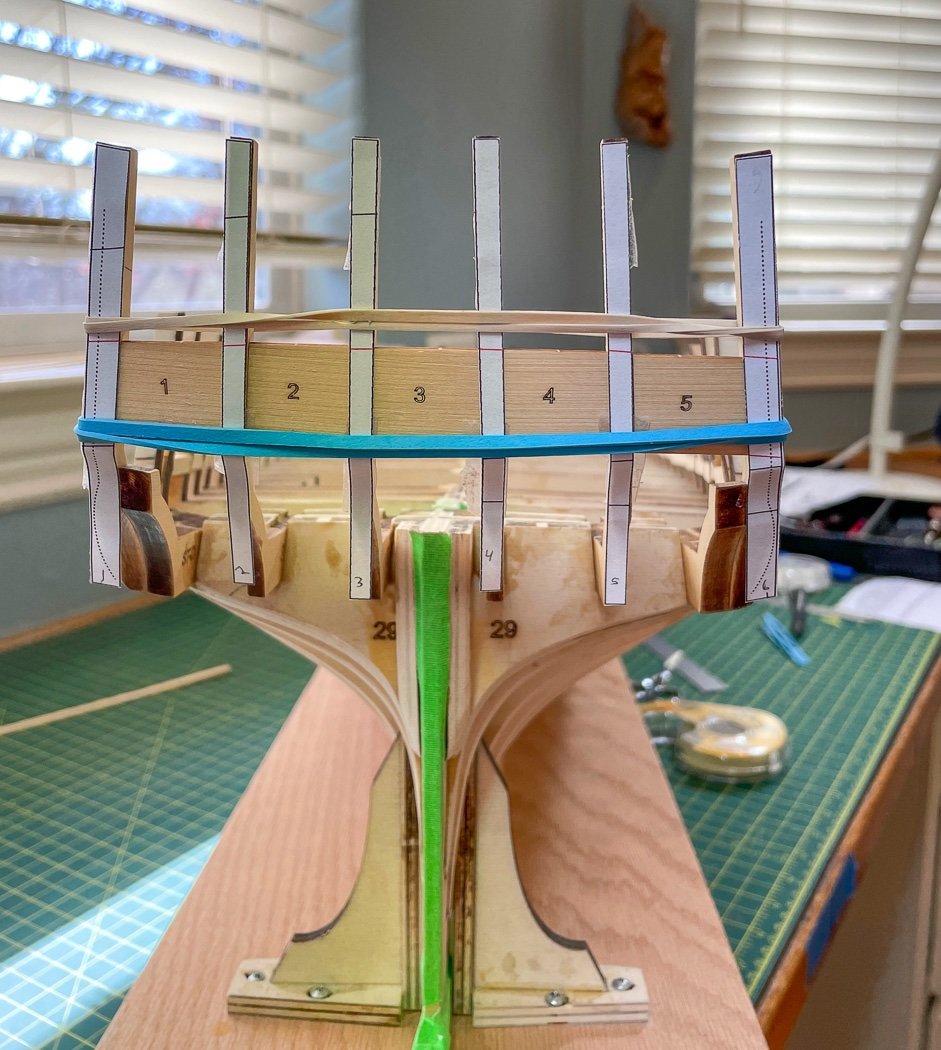
Another copy of the stern plan was sliced up and double sided taped to each frame. That plus the temporary templates shown in the photo make the whole thing possible, they set the widths and heights for the fillers and sills. Despite my careful frame alignment they didn’t stay in place without the help of a rubber band (I only needed the blue one, the second was to help with this photo).

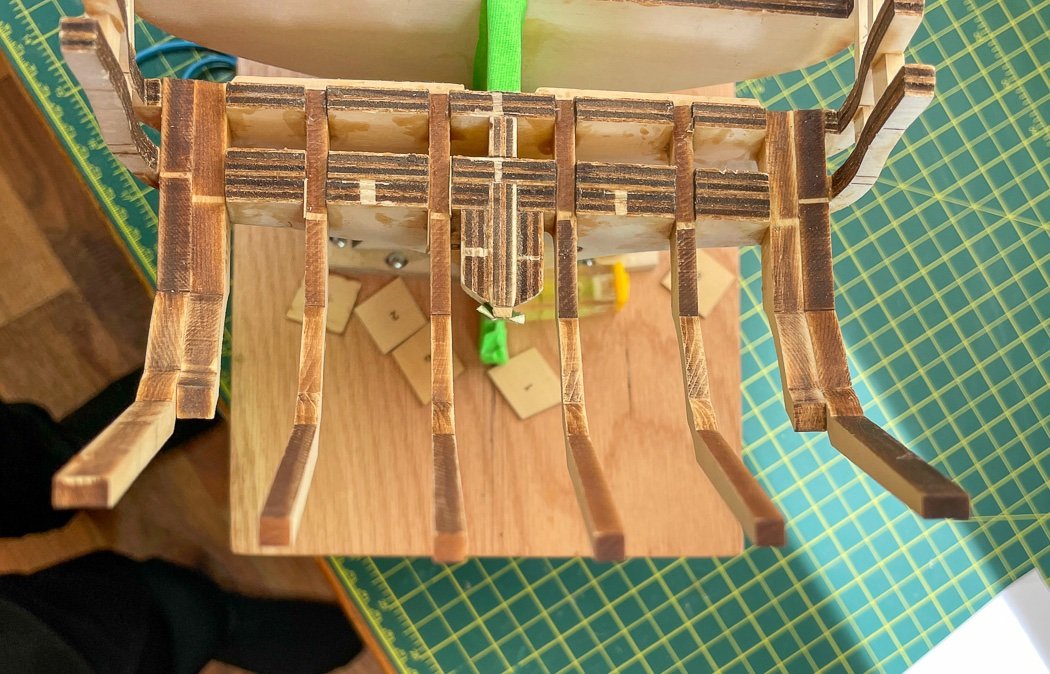
The laser cut fillers are provided as part of the Chapter 1 parts package. Despite the fact that essentially all I needed to do was bevel the sides properly to account for the curve I managed to use all the duplicate fillers Chuck provides in doing so, some people are slow learners - plus I was a little obsessed with getting them right (and they aren't in this photo, but later they were).
With the fillers in place next up was the sills - again the templates coupled with the strips taped to the stern made it possible. All I had to do was get the right level, bevel and width from a length of ¼ x 3/16 wood. Fortunately 3/16 is the same thickness as Cheerful’s planking and I had a few leftover planking billets I cut into ¼ widths. Why you ask, because it took me a lot more than 5 attempts to get the 5 sills, again slow learner or too heavy handed on the Byrnes Sander (which was once again indispensable in gaining the angles and sizes required along with the cross cut table for my Byrnes Saw)
…Measure. cut, sand, dammit, repeat…
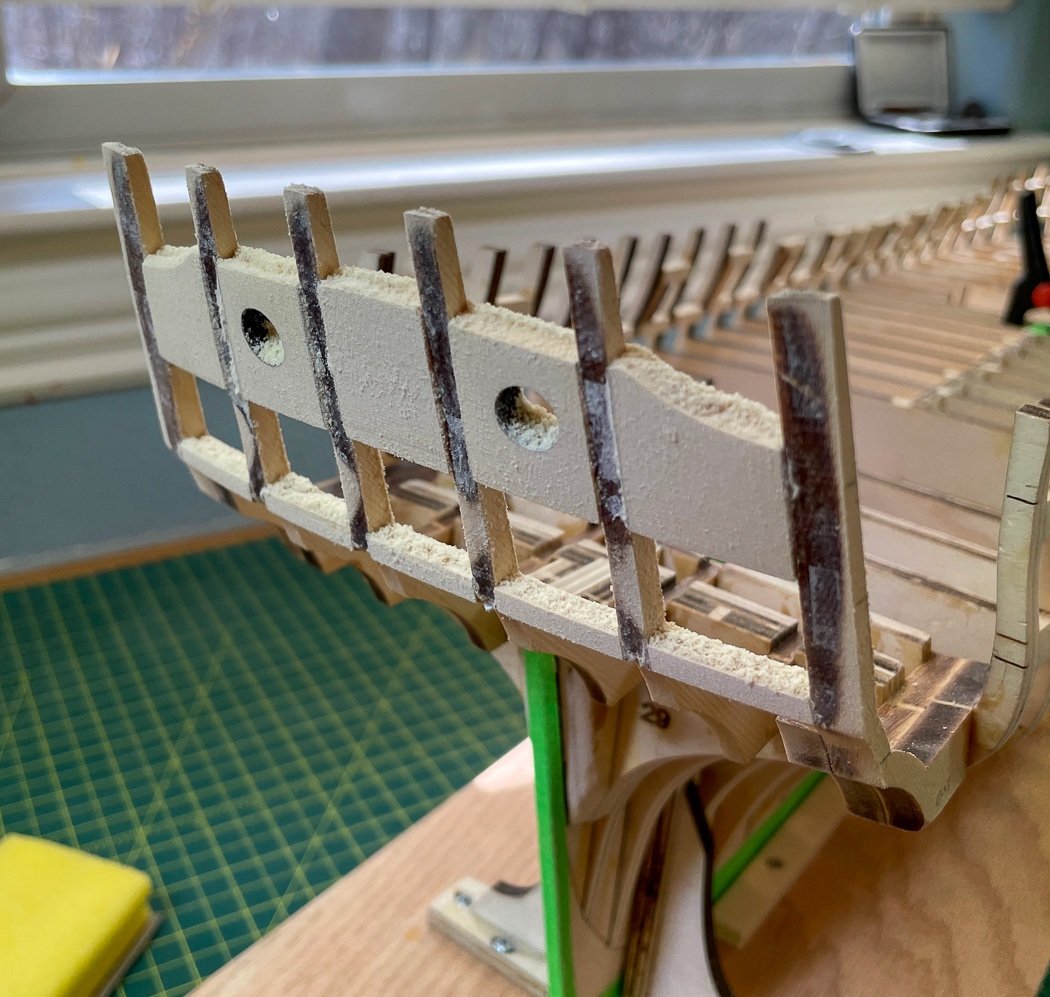
After an overnight glue drying session it was sanding day, and I mean it took me a full day to fair the front and back sides.
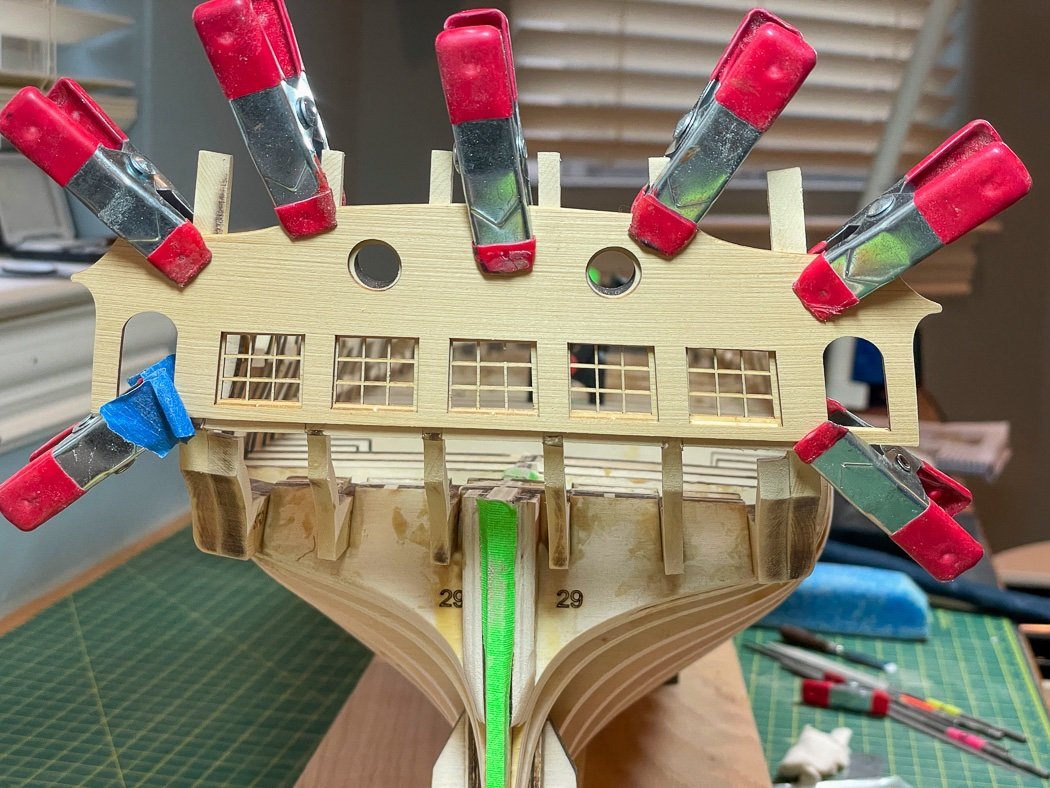
I needed a little comforting so I unwrapped my chapter 3 parts and tested the fit of the transom piece and the windows. Remarkably (or really not, its designed for them to do so, just means I followed the monograph) they all fit properly. (note in the photo the transom isn’t exactly level or even, I corrected it later and confirmed the fit but didn’t re-take the photo).
I also needed a few adjustments to ensure it was even across the top between pieces, they are now.

And with that the stern framing is complete. Is Yellow Cedar pretty or what...
What doesn’t show in a two dimensional photo is the gentle curve resulting from all the alignment, angled, and beveled cuts I made brought out by the fairing. It’s quite pleasing, and pretty remarkable I more or less pulled it off. New respect for all the Winchelsea builders that have gone before. There was nothing easy about building this stern, it is though rewarding to see it completed.
On to the quarter gallery framing.
Thanks for stopping by along with the likes and the comments. Happy New Year!
-
-
I ended buying multiple sizes for Cheerful (of course it only has 14 guns so not that many to buy) I can tell you 15mm is way too big🤣. I thought between 8-11mm were good options just my opinion, no supporting research😊
- FrankWouts, Rustyj and JpR62
-
3
-
4 hours ago, Dave_E said:
do the string thing
A batten is a good idea, I recommend a long very thin, like 1/32, plank rather than string. I have several such planks for only that purpose.
As I’ve recommended a couple of times, pick a method and stick with it. Personally I never soak planks due to the possibility they warp, expand, and shrink - especially kit planks. But as I’ve said their are many methods and people are zealous about theirs. Choose one and don’t mix methods. Just reading about all them is enough to leave your head spinning.
- LyleK1, Keith Black, CiscoH and 1 other
-
4
-
I love these prints. Happy New Year!
- chris watton and DelF
-
1
-
 1
1
-
I used 8mm ones from Crafty Sailor on my Cheerful. I agree 6mm is too small, maybe time for another order😊
- FrankWouts, Matt D and Saburo
-
3
-
I’m all Apple products so not windows specific as I’ve encountered the problem as well.
-
The crop doesn’t matter, I always crop freehand for uploads.
Nice looking work, you’ve done a great job, not only the model but recovering from the mistakes we all have.
- WalrusGuy and hollowneck
-
2
-
On 4/3/2020 at 12:05 PM, Stuntflyer said:
tools I used for shaping the scraper. .
Mike,
Do you have a photo of the actual scraper you used for molding? You have such a great profile.
-
The edge bending method I described in my logs accounts for the curves of the bow, that’s why it works so well. My best advice on this process is in my logs.
You’ll find in other logs to sand down the gun port pattern, not fill up to it.
- Keith Black and Dave_E
-
1
-
1
-
I took a look back at my log and saw, much to @DelF delight, every time I wrote ‘winch’ autocorrect changed it to ‘wench.’ I need to do better editing.
I see Flirt sitting on my shelf waiting for her rigging, I haven’t forgotten.
- chris watton and EKE
-
2
-
-
-
This is where I said choose one method and go with it. Mine (the Chuck method) requires only heat, I don’t soak anything. I use CA and don’t pin anything. Like I said there are many methods, most work ok, but trying to blend them won’t help.
-
I don’t think your explanation to a disgruntled poster is necessary, the vast majority know all this. That guy needs to take it up with his government, not the provider.
- CiscoH, FrankWouts and Jack12477
-
3
-
- Dave_E and Keith Black
-
1
-
1
-
1 hour ago, usedtosail said:
bent them in the opposite direction
This is fundamental to the edge bending method.
I recommend you plan out your second planking using tick strips to taper them in order to prevent the problem you have with the first planking ending in the middle.
-
You need only two belts for LN, no more. You definitely don’t need a drop plank and stealers only if you don’t plan and taper correctly. You can see this in my log.
choose one method and start. Way too many opinions and methods, you’ll be paralyzed looking at them all and definitely don’t try to blend two.
just start.
- Dave_E, Keith Black and SUBaron
-
2
-
1
-
That small variance can easily be sanded out. You’re fortunate, that’s not much at all.
- Keith Black and Dave_E
-
1
-
1
-
Chuck’s plank bending method and using CA as I describe in my logs is the way to go.


HMS Winchelsea 1764 by glbarlow - 1:48
in Member Build logs for the HMS Winchelsea
Posted
Thank you, it’s a long road, but at least I’m now on it😊
Thanks Rusty. If I can just stay out of my own way and not obsess about small millimeter discrepancies …
Thank you. It’s gaffer tape, it’s thick enough to protect and leaves no residue when removed. The neon colors is a fun bonus 😊