


glbarlow
-
Posts
3,812 -
Joined
-
Last visited
Content Type
Profiles
Forums
Gallery
Events
Posts posted by glbarlow
-
-
This will be fun to make.
-
33 minutes ago, Stuntflyer said:
brush it on and then rub it off with your thumb
Thanks Mike!
-
That’s really excellent detailed work on the cap rail. I hope to borrow that some day.
- Stuntflyer and FrankWouts
-
 2
2
-
Leaving the frieze long is a simple step but a masterful idea I’ll remember.
did you use the fruitwood gel on your figurehead? It looks great, for me it seemed to cake on so I’m sure I’m doing something wrong with the thick gel stain.
- Saburo and FrankWouts
-
2
-
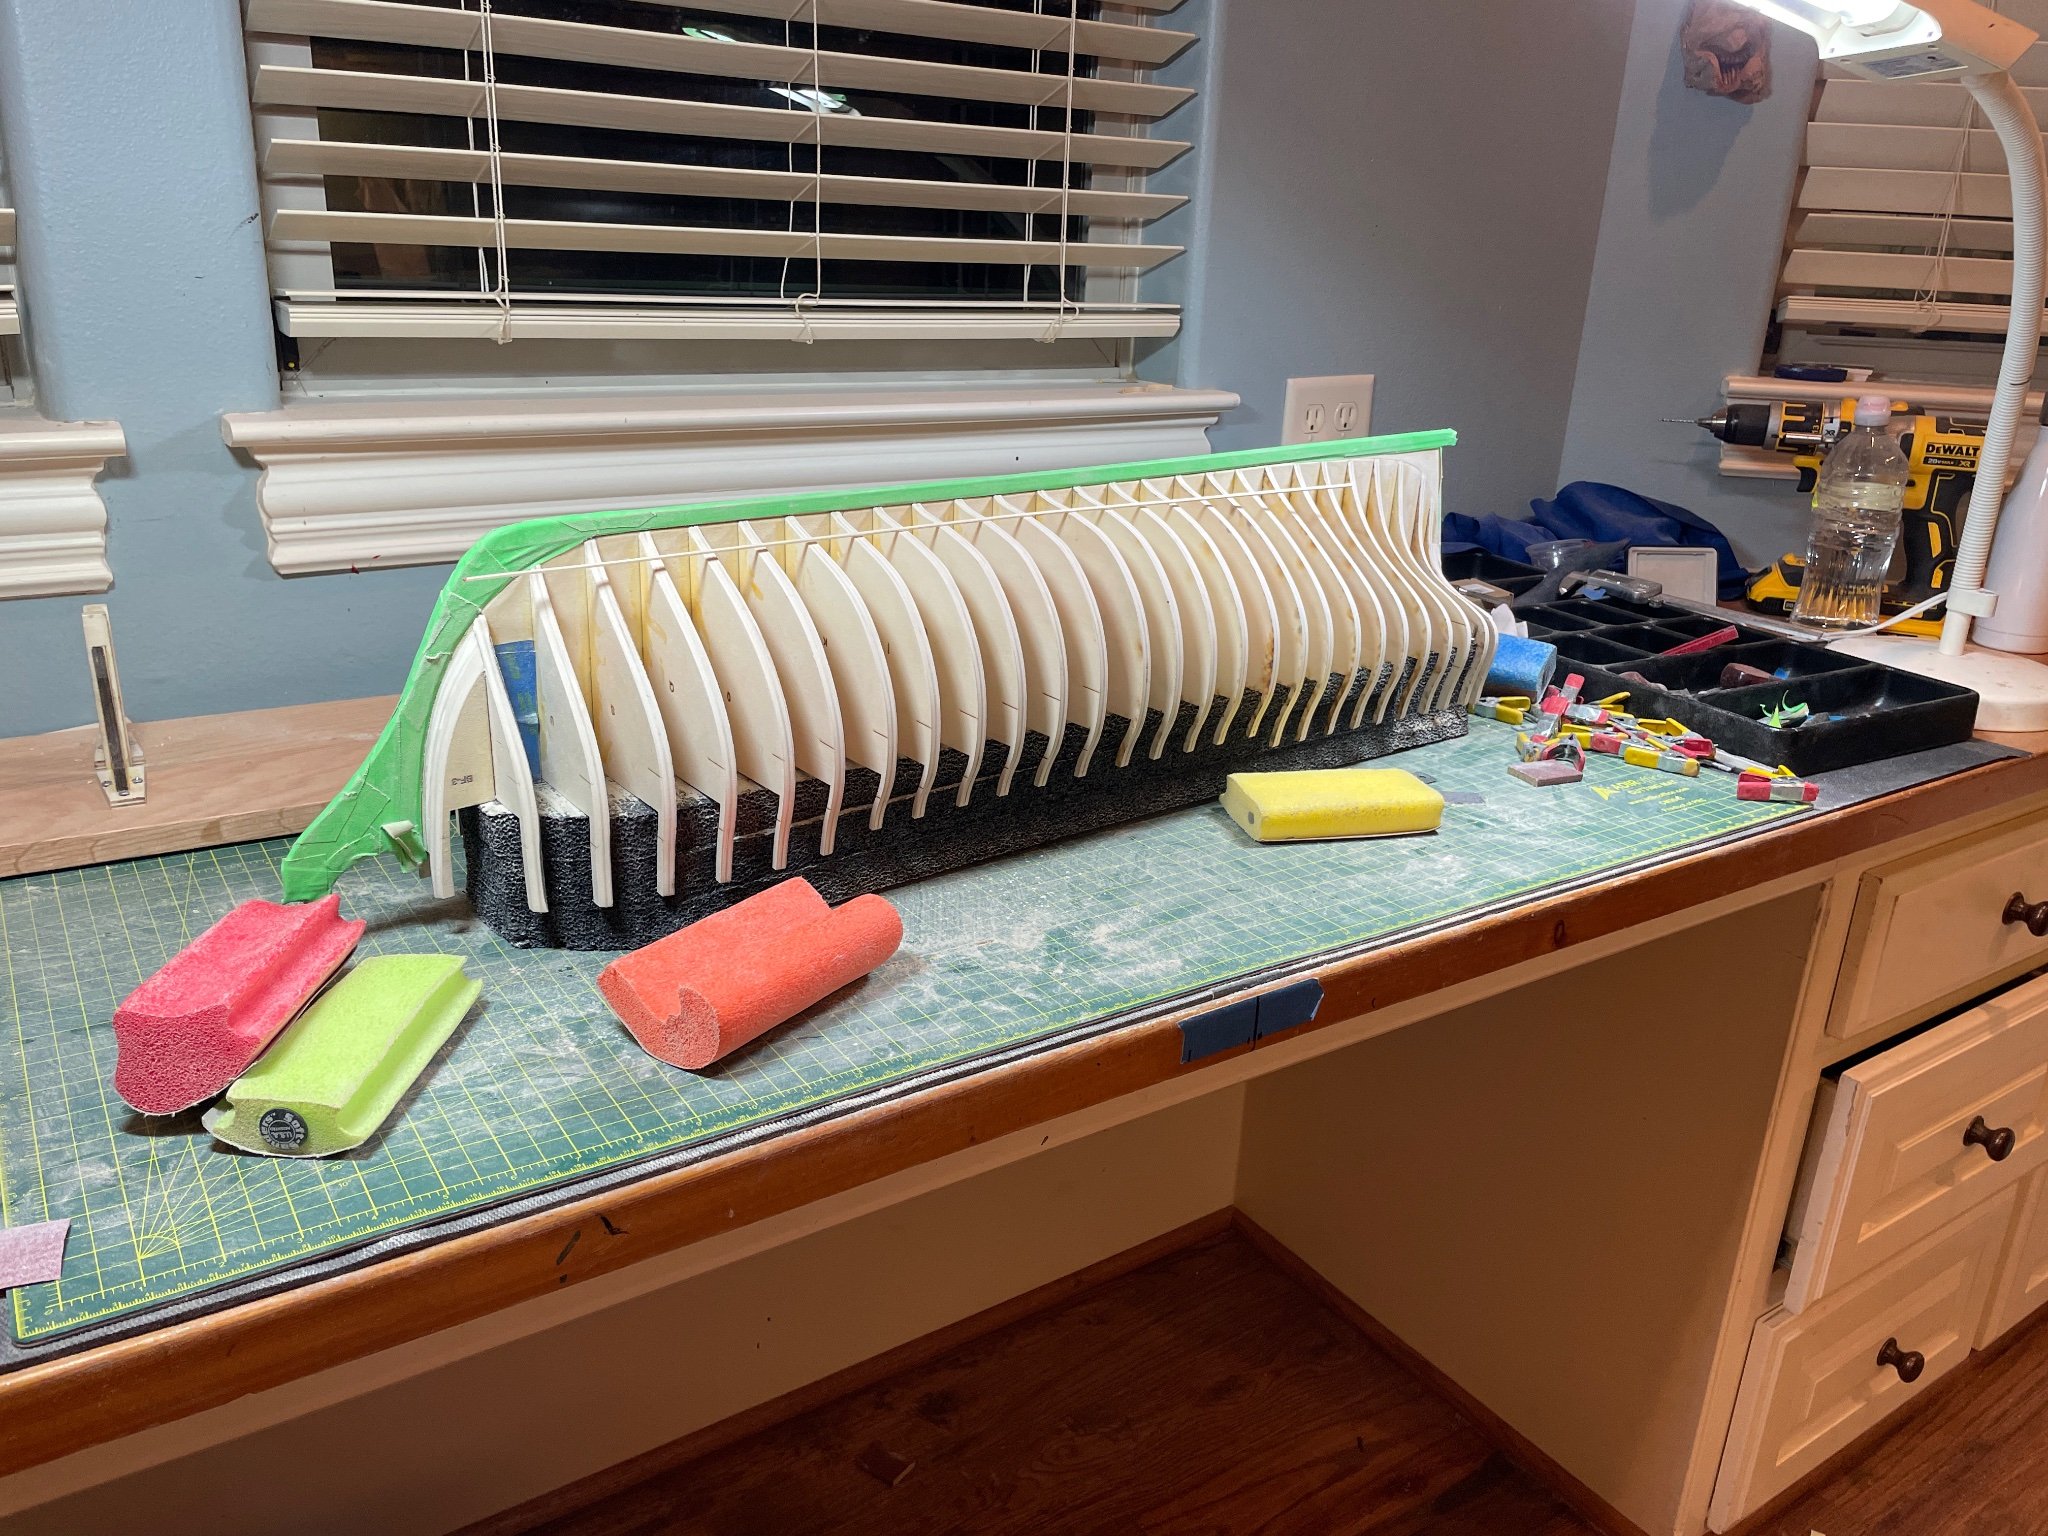
After spending Thanksgiving week with family I spent the last two days fairing and still have more to go. Can’t quite get the bow right and don’t want to take too much off doing it.

My recently neat and clean work shop is that no more. A more detailed post to follow, when I can lift my sanding arm again.
Yay for sawdust…
- Matt D, Edwardkenway, DelF and 13 others
-
16
-
-
I’ve found Admiralty Ironworks Black looks great on wood for more of a Matt finish than the Dull (really gloss) black. I used it on Cheerful’s booms and spars to a nice effect. Your wales look great.
Not a soul would know if the scuppers connect to the waterways, like you id not attempt that.
- hollowneck, mtaylor, dunnock and 2 others
-
5
-
On 4/12/2020 at 11:23 PM, mtaylor said:
Thurston blades
Jim Byrnes now recommends Martindale blades, which I use on my Byrnes saw. A new blade from Jim costs $17, why fool around with old blades. I maintain the saw as Jim recommends an periodically clean the blade with alcohol before much of anything builds up. I’ve had, and cared for, the saw for at least 20+ years and have had zero problems with it other than replacing the blades I use only twice during those 20+ years.
I did cut through the stop on the cross cut table once, Jim sent me a replacement. As someone said, let’s support the maker of the best tools modelers could find and buy what we need from Byrnes Model Machines.
- hollowneck, No Idea, KentM and 5 others
-
8
-
-
13 hours ago, VTHokiEE said:
stick with the water stone method?
I followed Derek and the you tube video he referenced by using various grits of adhesive sandpaper, 220, 320, 400, 800, 1000, 1200 adhered to a flat tile (or glass). That plus the Kell honing guide and a small amount of honing fluid on the sandpaper works great. Once they’re sharp the 400-1200 is all I use to keep them tuned up to a 30 degree edge (½ inch of the chisel extended from the guide).
Don’t forget to condition them by flattening the back side, just run them perfectly flat on your sharpening surface a few times. Stone or sandpaper paper, the Kell guide was a game changer for me. Mine are perfectly sharp now.
- VTHokiEE, Old Collingwood, druxey and 4 others
-
7
-
A never ending source of good ideas and techniques. A really great job of detailed paintwork. I enjoy this work myself and appreciate others taking the time and having the skill to do it right. Nice work!
-
-
17 hours ago, Blue Ensign said:
There is very little on a wooden model that can’t be rectified and where it is possible it is always a good idea to go back, otherwise these things tend to catch your eye forever.
So very true!
- Blue Ensign and mtaylor
-
2
-
-
-
I’m content with good lighting and a pair of 2.0 and 2.5x readers. I tried the head magnifiers, didn’t like my field of vision restricted and for me they just weren’t comfortable.
- DaveBaxt, mtaylor, thibaultron and 1 other
-
4
-
Most models don’t include sails. For me the reason is simple: this is a model, I don’t want cloth hiding and covering all the detailed work I did on the model and on the rigging. I included every line Pegasus would have, I added some lines to Lady Nelson per my reference book on cutters because the plans are sparse, so far as I know Cheerful includes all her rigging, etc.. I never considered attaching cloth to any of them, why conceal my work. In this case I do have contemporary models on my side, they don’t include sails, I imagine for the same reason.
-
-
The bow area can and should be faired for the smooth flow of a batten top than bottom stem to the fourth or even fifth bulkhead. There should be no reason to add a strip. Often in my experience it is the 2nd or 3rd bulkheads that have not been faired properly and considered as part of a unit, not individual or 1 to 2 or 2 to 3. It looks like 2 in your photo has insufficient angle faired but it’s hard to see what’s causing. It isn’t faired until a plank runs smooth
Keep the back edge of bulkheads fore of midship and front edge of bulkheads aft of midship as long as you can not to lose the proper design of the hull and both sides equal -
Great work, such expert carpentry and painting.
- Stuntflyer and FrankWouts
-
2
-
Welcome from another Texas Glenn, I’m an Army vet
- Ryland Craze, GAStan and mtaylor
-
3
-
-
That all looks great Rusty.
-
Stem & Keel
One of the many signature items for our Winchelsea build is the stem and the multiple components that make it up. Constructing it is a project in and of itself and an enjoyable one at that.
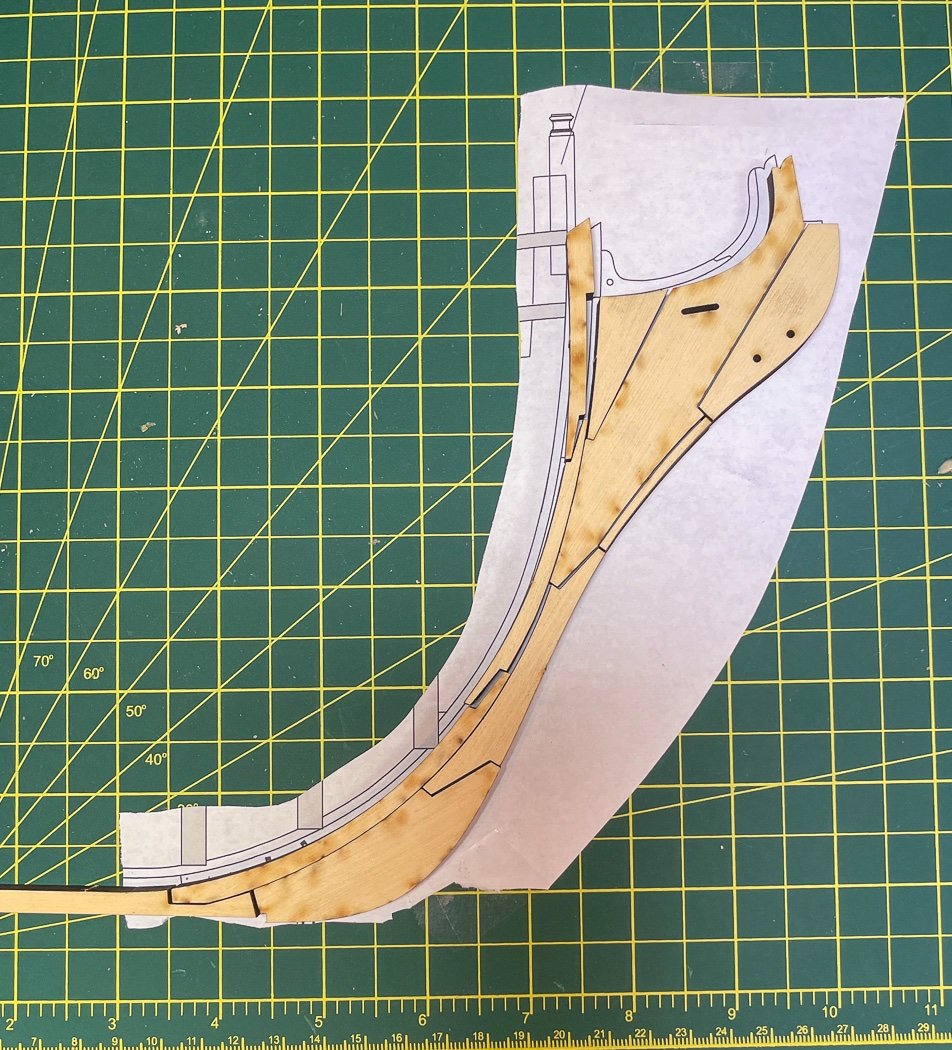
The necessary, maybe not so fun, part is removing a lot of laser char. Though it isn't cleared from the inside edges, simulating the tar used on the real thing. I did scrape off the “gummy” part of the char off to get a tighter fit. Chuck provided a nice tip to sand the sides while still in the billet, this protects the parts edges and frankly is just easier to do.
As those that have built theirs know, assembling the steam not as simple as it might look. It takes some micro-sanding to get a tight fit on some of the pieces. I took my time with tapering, going from 1/4th at the aft to 1/8 on the upper fore, while fading that back to ¼ on the lower fore, fun. One of my challenges was interpreting the instruction's use maritime names for each piece, which I’d otherwise refer to as the triangle thingy, the sorta oval thingy, the skinny piece, etc. I needed a diagram, in fact I turned to my research books (yes I have them) and improved my naval education a bit (I’m an Army veteran, the squids were never much use to me back then).
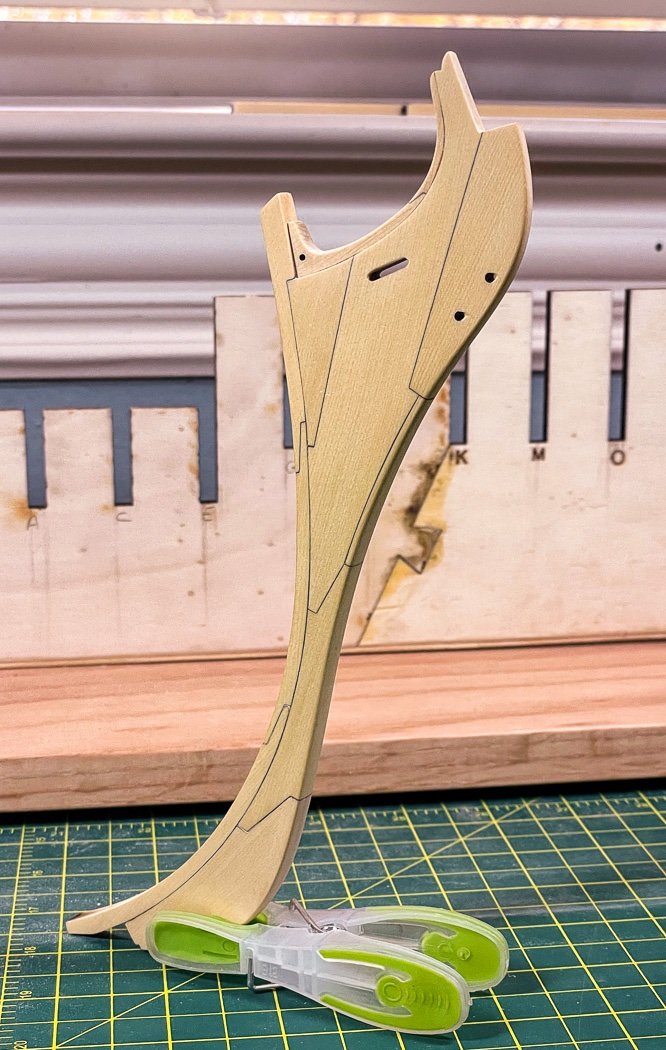
The gammon knee and extension pieces on the top took me most of a day to get the right fit. I had looked at the parts billet and wondered why Chuck provided three of each, by the end of the day I was wondering why he didn’t provide four. They are tricky little dudes (maritime term) to tuck tightly into that curve.

The point of the tapering, aside from looking really cool, is to provide a seat for Rolo (I decided that’s his name), the mandolin playing dude, to sit on. Guided by the instructions I brushed on and wiped off Old Masters fruitwood gel stain, it really adds highlights. These resin castings from Syren are amazingly sharp in detail, I think I can make out fingernails.
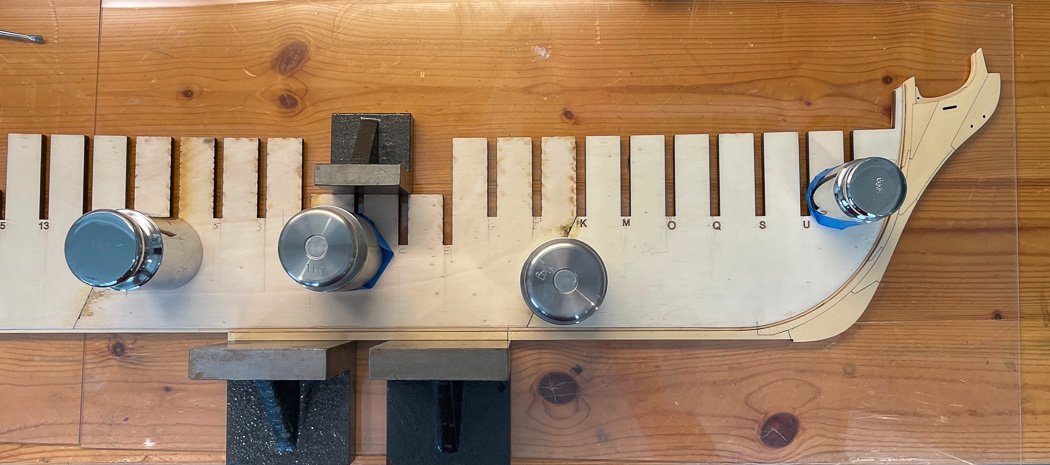
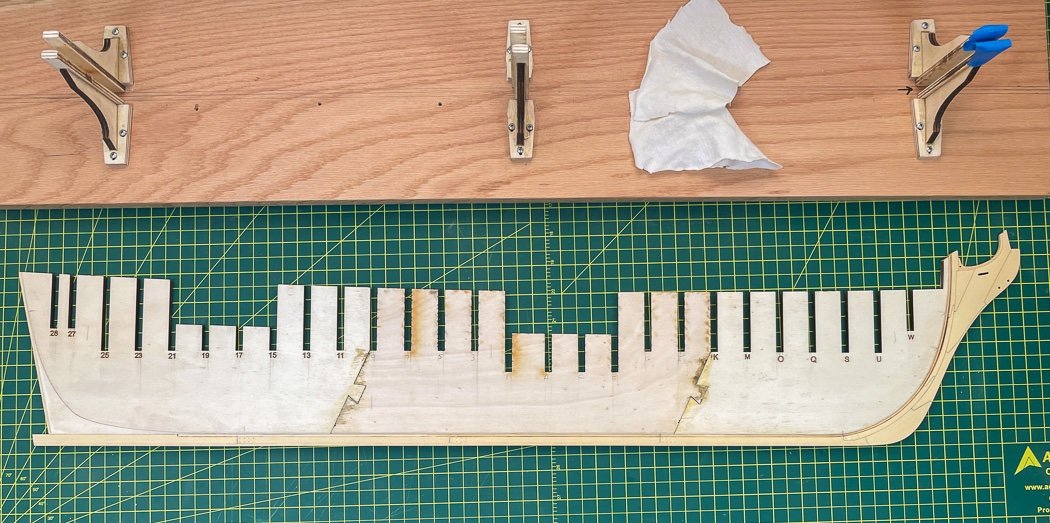
After spending a considerable amount of time micro-adjusting the stem and former to fit tightly it was time to glue the stem, keel, and false keel together with the former. Again more patience, taking it a section at time (there are three plus the stem). My acrylic sheets were an inexpensive and worthwhile purchase to provide a nice flat service for this task. Like clamps I’m beginning to think I can never have enough weights. I have a slight bend in the former, I made sure I held it flat with the weights while applying the keel. Chuck tells me I’ll be ok once I add the bulkheads and fit it into the building board with its tight brackets. Plus now I can add wood strips along the bottom of the build board to further help keep it straight. Have I mentioned how big this thing is. I used 27.5 inches just for the false keel.
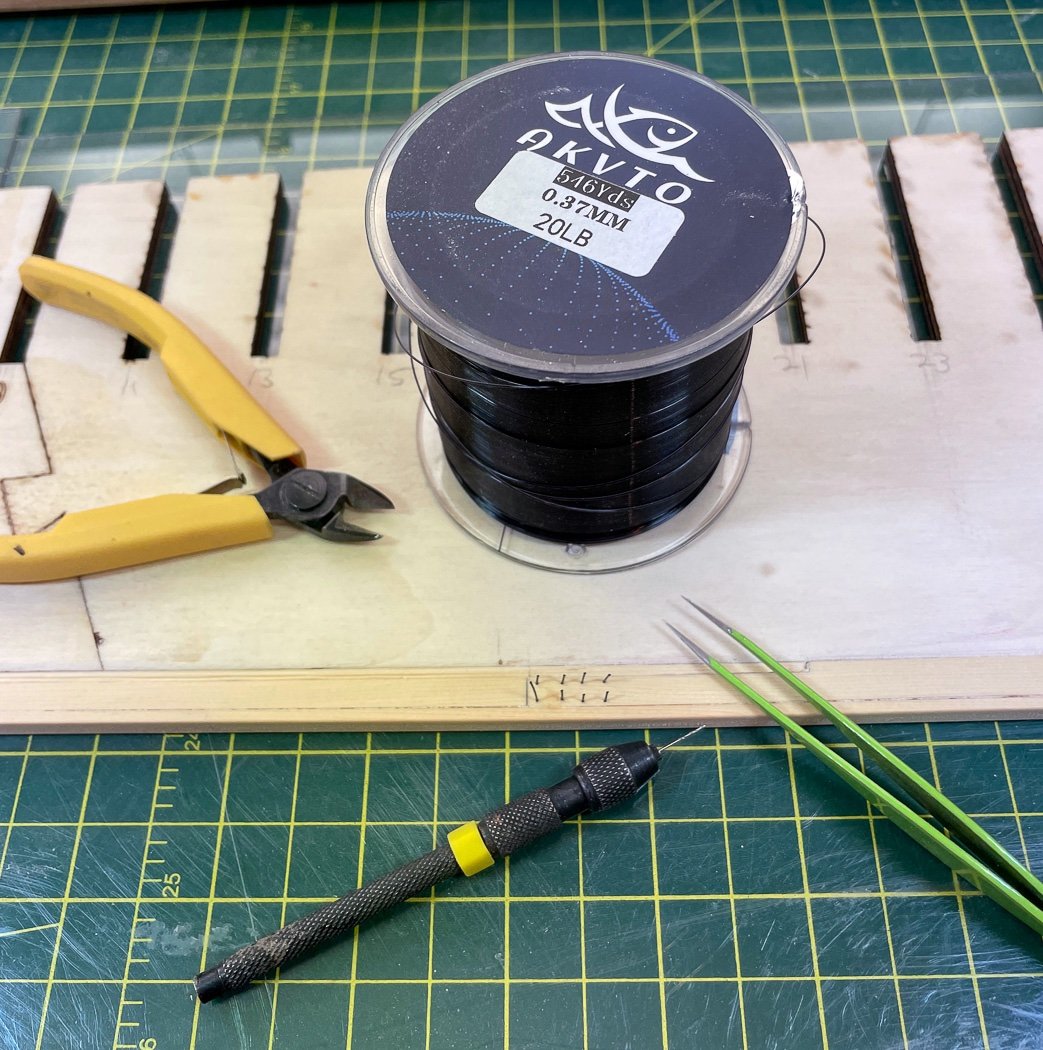
Next up is adding the bolts along the keel. I pre-drilled the holes before attaching the keel sections, much easier to do that way. I’m using black monofilament (not braided) fishing line to simulate the bolts. After a bit of experimenting I elected to use 20 pound line with a #77 drill bit. Glue, snip, sand times 56 and we’re done.
-
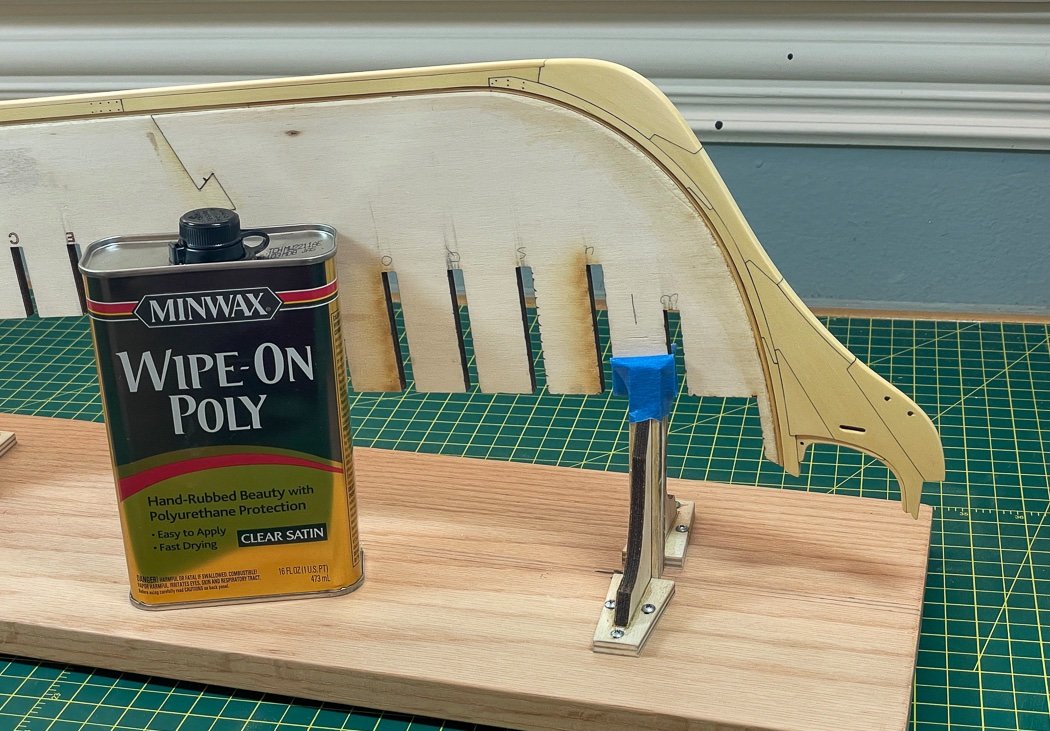
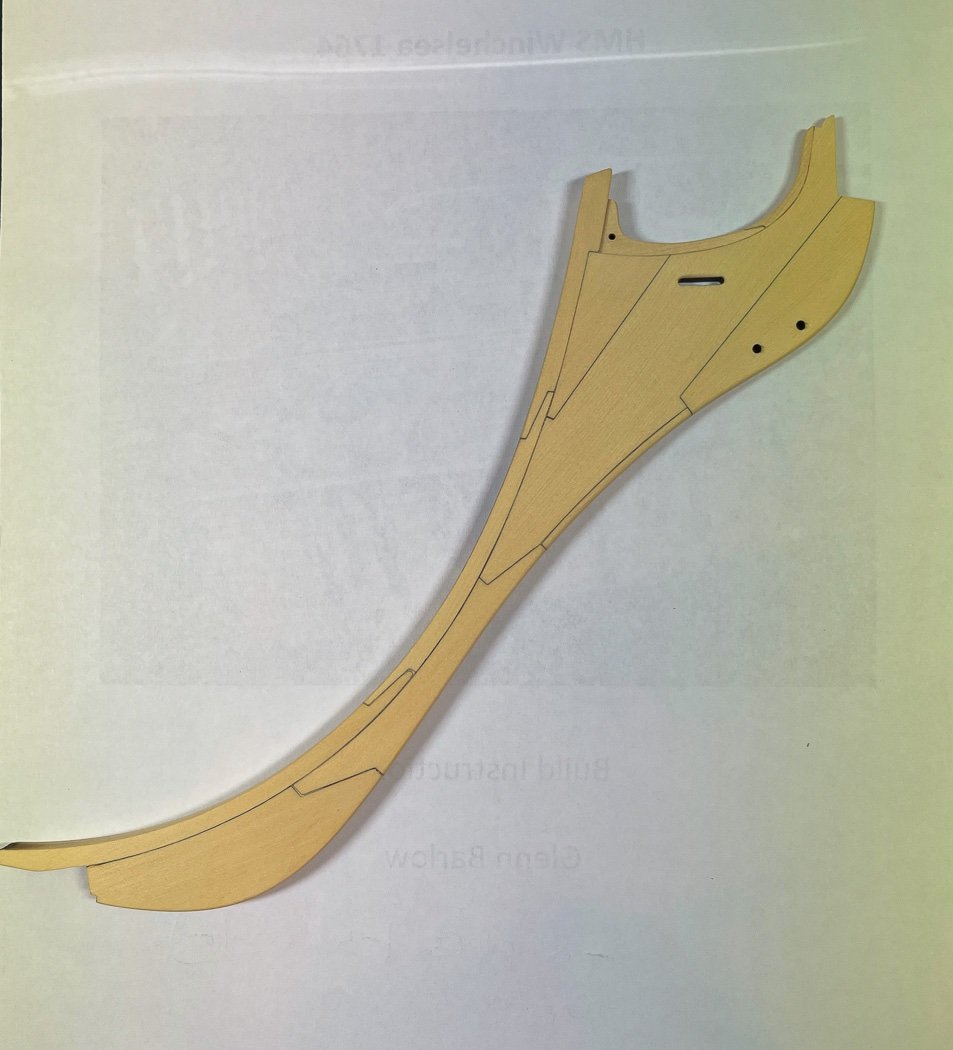
The last step before adding the bulkheads is applying Satin Wipe On Poly. I’m always amazed at how fast the Alaskan Yellow Cedar absorbs the WOP after sanding with 400 grit. With a clean cotton cloth I wipe it on and wipe it off, it’s almost dry before I’m done wiping it off. The first coat barely shows up with the absorption factor. I’ll do a second coat once this first one has had time to dry thoroughly. I’ve said it other places, I’ll add it here, WOP is the way to go as a finish in my opinion. The AYC in particular loves it, turning the wood a nice golden color. My Cheerful has had a few months now to “age,” the WOP on it keeps looking better. The key is ‘Wipe On-Wipe Off,’ don’t let it sit. It’s just a great look. I’ve done Tung Oil and other finishes on earlier models, in my opinion WOP tops them all - especially on Boxwood and AYC.
So with that, and later the second coat of WOP, I’lll move to attaching the bulkheads. I’m enjoying this, just need to keep myself in check and keep going slow.
Thanks to Chuck for a great model, the Winnie builders group leading the way, and all your likes and comments.
- PRS, Rustyj, CaptMorgan and 16 others
-
19

HMS Sphinx 1775 by mtaylor - FINISHED - Vanguard Models - 1:64
in - Kit build logs for subjects built from 1751 - 1800
Posted
I’ve done both, both work so it’s really your choice