


glbarlow
-
Posts
3,813 -
Joined
-
Last visited
Content Type
Profiles
Forums
Gallery
Events
Posts posted by glbarlow
-
-
Those are tricky angles for sure
-
I’ve never visited this forum, sounds like I will continue not to 🤣
- scrubbyj427, hollowneck, mtaylor and 1 other
-
 4
4
-
Glad it helped Frank. Your English is more than fine. Let me know if I can help further
I am scupper free so can’t help there.
- FrankWouts and Dave_E
-
1
-
 1
1
-
5 hours ago, hollowneck said:
showed your latest posts to a granddaughter
Thanks, I think 😊 that’s not a connection I’d make.
- FrankWouts and Dave_E
-
2
-
1 hour ago, FrankWouts said:
How did you anticipate with the cams or inlets at the sides that the deckbeams are perpendicular to the deck planking, i.e. the long axle of the ship?
Sorry Frank, I don’t understand the question. Are you referring to the deck clamps and the notches that hold the beams?
If so that was an important step as I mounted the clamps. I prepared a couple of the beams, mounted the deck clamp on one side per the plans and instructions then used a mini-square and lots of measuring with the test beams to set the other side so the beams both perpendicular and the same height at both bulwarks (so parallel) to the deck. Most notches had to be widened, I only did that from the bow side so the stern side of the notch never changed. I also checked each beam against the plans templates for distance between beams and again checked heights as I went. As noted in the post adjustments were later required at the bow, still need a good starting point though.
If that’s not what you were asking, please let me know.
- FrankWouts, Dave_E and Thukydides
-
3
-
A little respect for this site and our moderators would be nice. Go to Facebook if you want to post stupid stuff.
- mtaylor, hollowneck, Gregory and 8 others
-
11
-
3 hours ago, Thukydides said:
care you take with your work to get it just righ
Thank you, I do try.
- Thukydides, FrankWouts and Dave_E
-
3
-
20 hours ago, scrubbyj427 said:
didn’t want to cover any of that structure up either
Thanks JJ. I think about it every time I’m putting the third coat of red on a knee 🤣
- FrankWouts and Dave_E
-
2
-
3 hours ago, James G said:
have you used your Byrnes thickness sander much
Thanks for the comment.
I ran every plank I used on the hull and deck through it to ensure a consistent thickness an a number of other times as well. It’s the tool I never knew I needed until I got one and not sure how I did without it now that I have it.
-
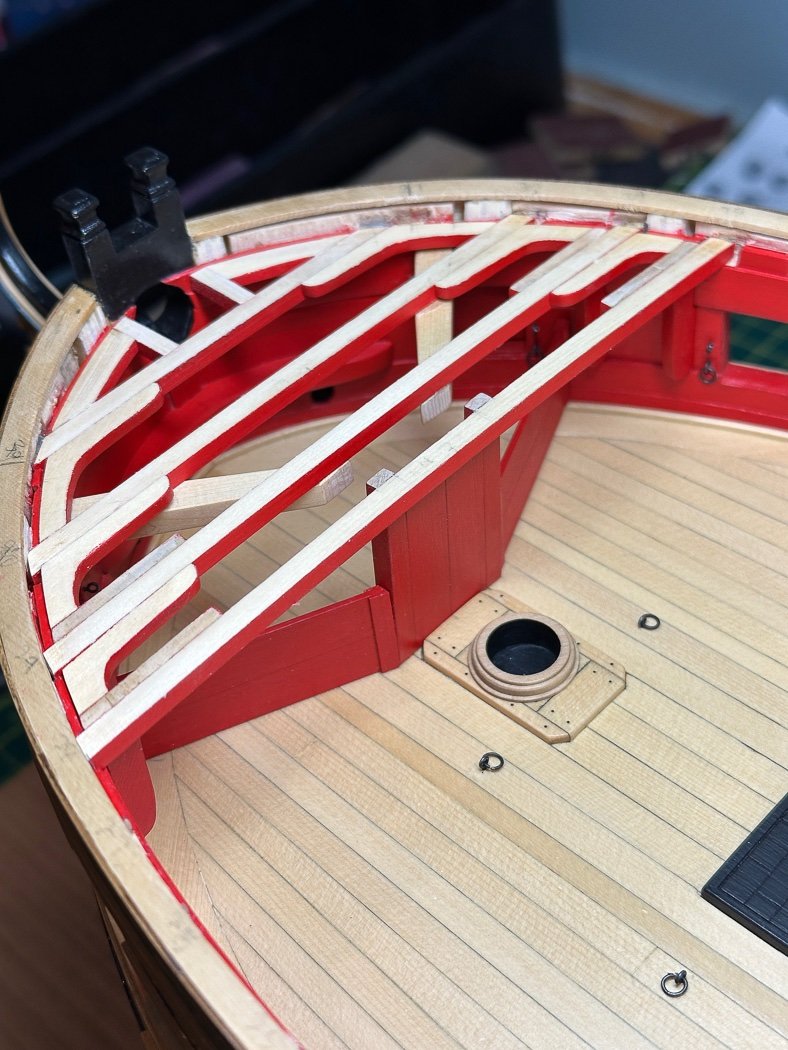
Starting the Forecastle
Moving on to the bow, it having looked so empty after finishing the first phase of the quarterdeck. I had fit the forecastle beams a while back so that meant re-fitting to match the template. In my case that meant the most forward six had to all be moved forward by varying amounts and the deck clamps modified accordingly. Chuck points out this was a known challenge going into the planning given the two vs. three dimensional view and variance amongst as-built hulls.

I picked up using these surgeon quality chisels from @Blue Ensign a while back. The two sizes, the larger one shown here, are very sharp. The only version I could find were sterile (consequently more expensive) but they are more than worth the price for jobs like widening the deck clamp slots. Plus I don’t have to worry about my wood getting an infection.
I elected to install the forward most beam once I had the proper distance from beam 7, 8, and 9 (triple confirmation) as those three along with 10 matched the template. That gave me measurements in two directions for moving the remaining 2-6 beams, double and triple confirmation.

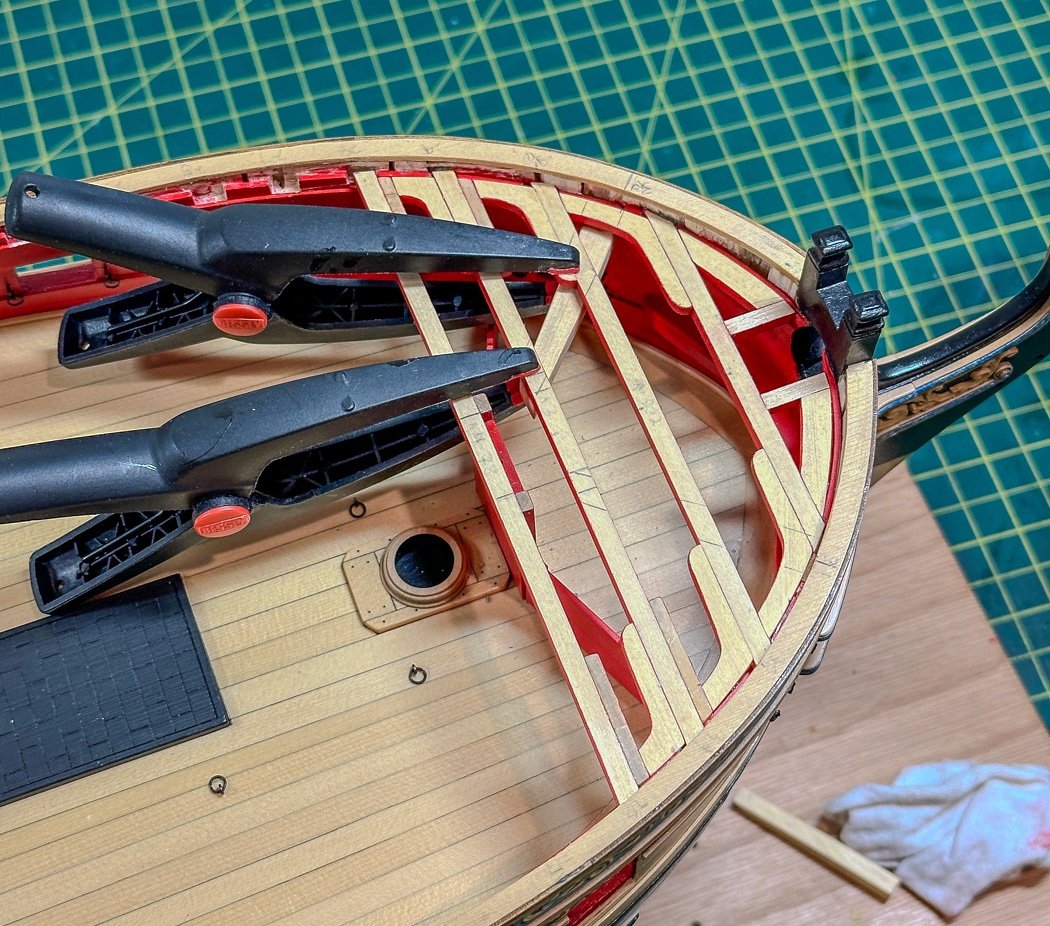
I got ahead of myself by not taking photos, and the ones I did take are off-angle. The bowsprit step, composed of four bits of boxwood laser cut was up next followed by the manger boards composed of 6 pieces (times two) including a strips of 1/64 x 1/8 planed to that thickness by my Byrnes thickness sander, 1/64 is about as thin as it goes, but it did it. Interestingly, but obvious when you think about it, the bowsprit step has a slight rearward lean to it, something to remember when setting the fully upright manager boards. Not shown, but as per the instructions, I also made the bits to match the step which will be added on top later (as Chuck points out in reality it would be all one piece but we won’t know the difference once added).
The manger boards have to be shaped to fit the angle of the bowsprit step and also slightly more challenging, the bulwarks. They must fit and not block the knee for beam 3, so to keep that from happening I first permanently installed beams 2 and 3 and then the hanging knees for beam 3. Again my photos taking lagged building, the lodging knees were added after all this followed by beam 4 and its hanging knees.
Finally, once all the lodging knees were in place the cat tails were added. It was tricky placing and fitting them. A provided handy template marked the bulwark side. Here again, while in reality one piece the catheads will be added later. I found this interesting, no other model I’ve built shows this detail. NOTE: I realized I’d missed-marked the starboard side, fortunately before gluing the cattail. It was erased and marked correctly.
I used the bowsprit step as a reference point for the inward edges first by laying them on top and adding pencil marks as the guide suggested by the instructions, then the fun task of gluing, placing and clamping to bottom of the beams while aligning with my little finger and flat headed tweezers. I also added the foremost carlings only because I wanted to see how it looked.
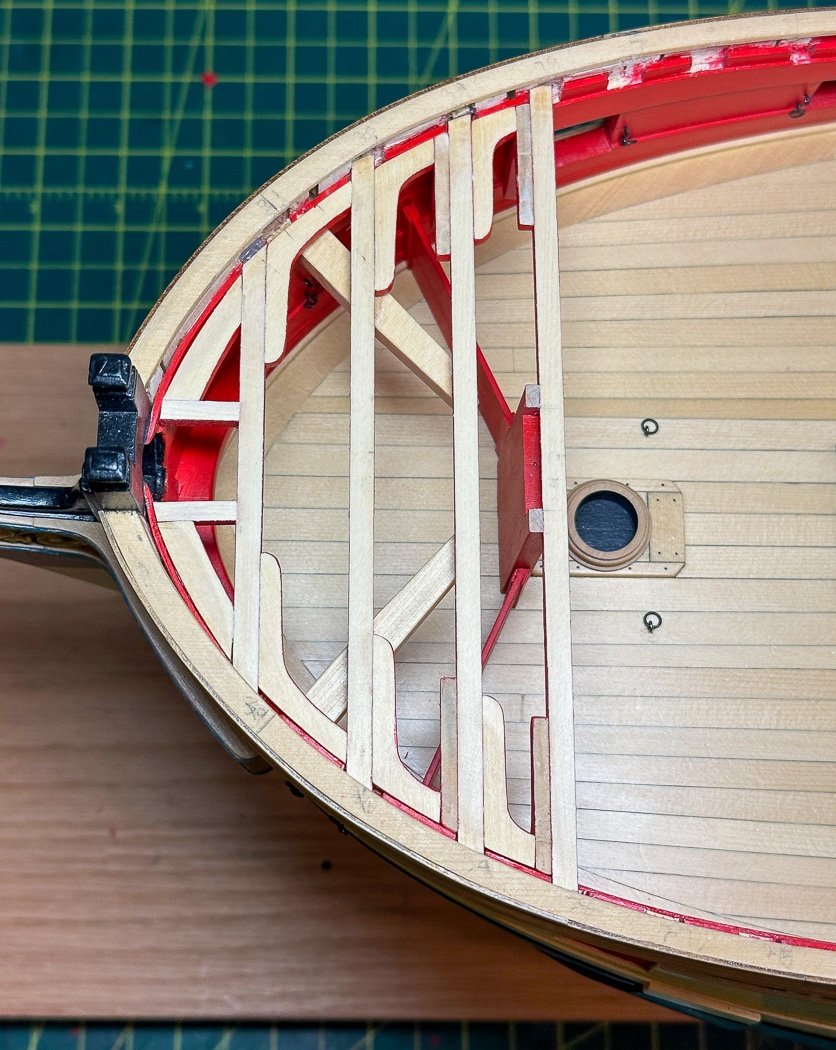
And this is how it all looks completed. I sometimes wonder if I really want to cover almost all of this work up with deck planking later, a decision I will defer to much later.
The key for me is to work slowly front to back and not install anything until I ensure it won’t make installing the next thing more difficult. In short read and plan ahead.
On to the rest of Chapter 8 and the remainder of the forecastle structure. As always, thank you for your likes and comments. They are encouraging and appreciated.
-
I actually found the old cast metal cannons the cheapest part of older kits, they never looked at all good. The new technology “plastic” ones finish so much better primed, painted with acrylic, and weathered, and much more realistic fitted out properly.
As you said, can’t please everyone, especially the uniformed.
-
-
That’s excellent, you’re right there! Checking all this stuff now makes the next steps a little easier
- James G and FrankWouts
-
1
-
1
-
Agree with all, well done on the mouldings. I see a problem though, they didn’t have cars like those in the parking lot next to where they were building Winchelsea🤣
- James G, FrankWouts and Matt D
-
1
-
 2
2
-
That’s excellent, you’re right there! Checking all this stuff now makes the next steps a little easier
- FrankWouts, Vladimir_Wairoa and James G
-
2
-
1
-
I actually printed and cutout the lower counter decoration (in B&W)to see how it would fit, of course the planking and wales add width. Looks like your ready to plank, let the fun begin.
- FrankWouts and James G
-
1
-
1
-
Those letters definitely don’t work on your wonderful model.
- billocrates, allanyed and mtaylor
-
3
-
Looks good, seems like excellent work on the fairing. One suggestion if you haven’t already done it. Make a copy and cut out the transom diagram and check your fairing, especially the lower counter where the curve meets the wales. It doesn’t have to be exact but it should be close, almost a reverse C.
- James G and FrankWouts
-
1
-
1
-
-
22 hours ago, Blue Ensign said:
Personally, I didn’t fancy creating such a complex shape
I completely understand, makes me even more grateful for the beautiful boxwood carvings available separately for Winchelsea. Your solution is perfectly grand. My statement regarding James OOB build was not a reflection on your skills, more one wondering what Chris had in mind. You always bring something extra to the table.
The session clips are on my order list, so many times these would work where I had to resolve to a finger clamp (and the resulting cramp).
-
I’m definitely interested in a 1:48 POB version if that’s on the table.
- thibaultron, Canute and mtaylor
-
3
-
I’m still a year or two from completing Winchelsea, the design and quality of parts are second to none. I don’t think I’d be a buyer of the POF model. Not because of price, the work required for framing isn’t something that appeals to me. Not that I don’t fully admire the work of those that do. I will however be very interested in a fully rigged POB model. Is there a chance it might be 1:48, I’m running out of prime display space for very large models, or at least my wife says I am.
- mtaylor, hollowneck, thibaultron and 1 other
-
4
-
The session clips are quite creative, I guess they have enough tension to hold things. I’m surprised the drop is so ‘off.’ It’d would be interesting to see how it fit on James prototype.
Your attention to detail is always so impressive, the galleries are shaping up despite the drop problems, the transom looks great.
- mtaylor and hollowneck
-
2
-
I think to answer that fairly it would help to know your material costs. Certainly your time and your design has value but too high a price for the first two chapters without knowing what the eventual full kit cost would be makes for a difficult buyer’s decision.
Not much help I realize.
- Canute, thibaultron and mtaylor
-
3

HMS Winchelsea - FINISHED - 1764 - by Chuck (1/4" scale)
in Member Build logs for the HMS Winchelsea
Posted
Just curious as to why?
The two fore riding bits are so much larger and more ‘beefy’ than the main mast bits on Winchelsea.
Were they used differently or have a different purpose? Just curious.