HOLIDAY DONATION DRIVE - SUPPORT MSW - DO YOUR PART TO KEEP THIS GREAT FORUM GOING! (Only 75 donations so far out of 49,000 members - C'mon guys!)
×


druxey
-
Posts
13,327 -
Joined
-
Last visited
Content Type
Profiles
Forums
Gallery
Events
Everything posted by druxey
-
 Sometimes we just have to do what works. I suspect it was the same in a real shipyard as well. It's looking very good. Sorry to read that you came down with the dreaded 'lurgy, but good to read that you are recovering.
 -
I suppose the question is whether the bow transom will bother you. If so, changing it will be a good exercise in correcting things. Most, if not all of us, have a bottle of rubbing alcohol handy for ungluing things. For instance, just yesterday I unglued an item twice and re-made it for the third time because I knew it would bother me if I didn't correct it.
-
Lovely, Claire! I can almost smell the wood shavings....
-
Space was at a premium. You would only hit your head once on the cross-piece coming up the ladderway. After that you'd instinctively duck!
-
Nice! All those studded rivets definitely give this a very (steam) punk look! great work, Michael.
-
Red Ochre Paint
druxey replied to starlight's topic in Painting, finishing and weathering products and techniques
'Out of the tube' artists' acrylic or oil colors are generally too intense for a model without some modification. Paints specifically for models might be a better choice. -
Nice precis of a complex build!
-
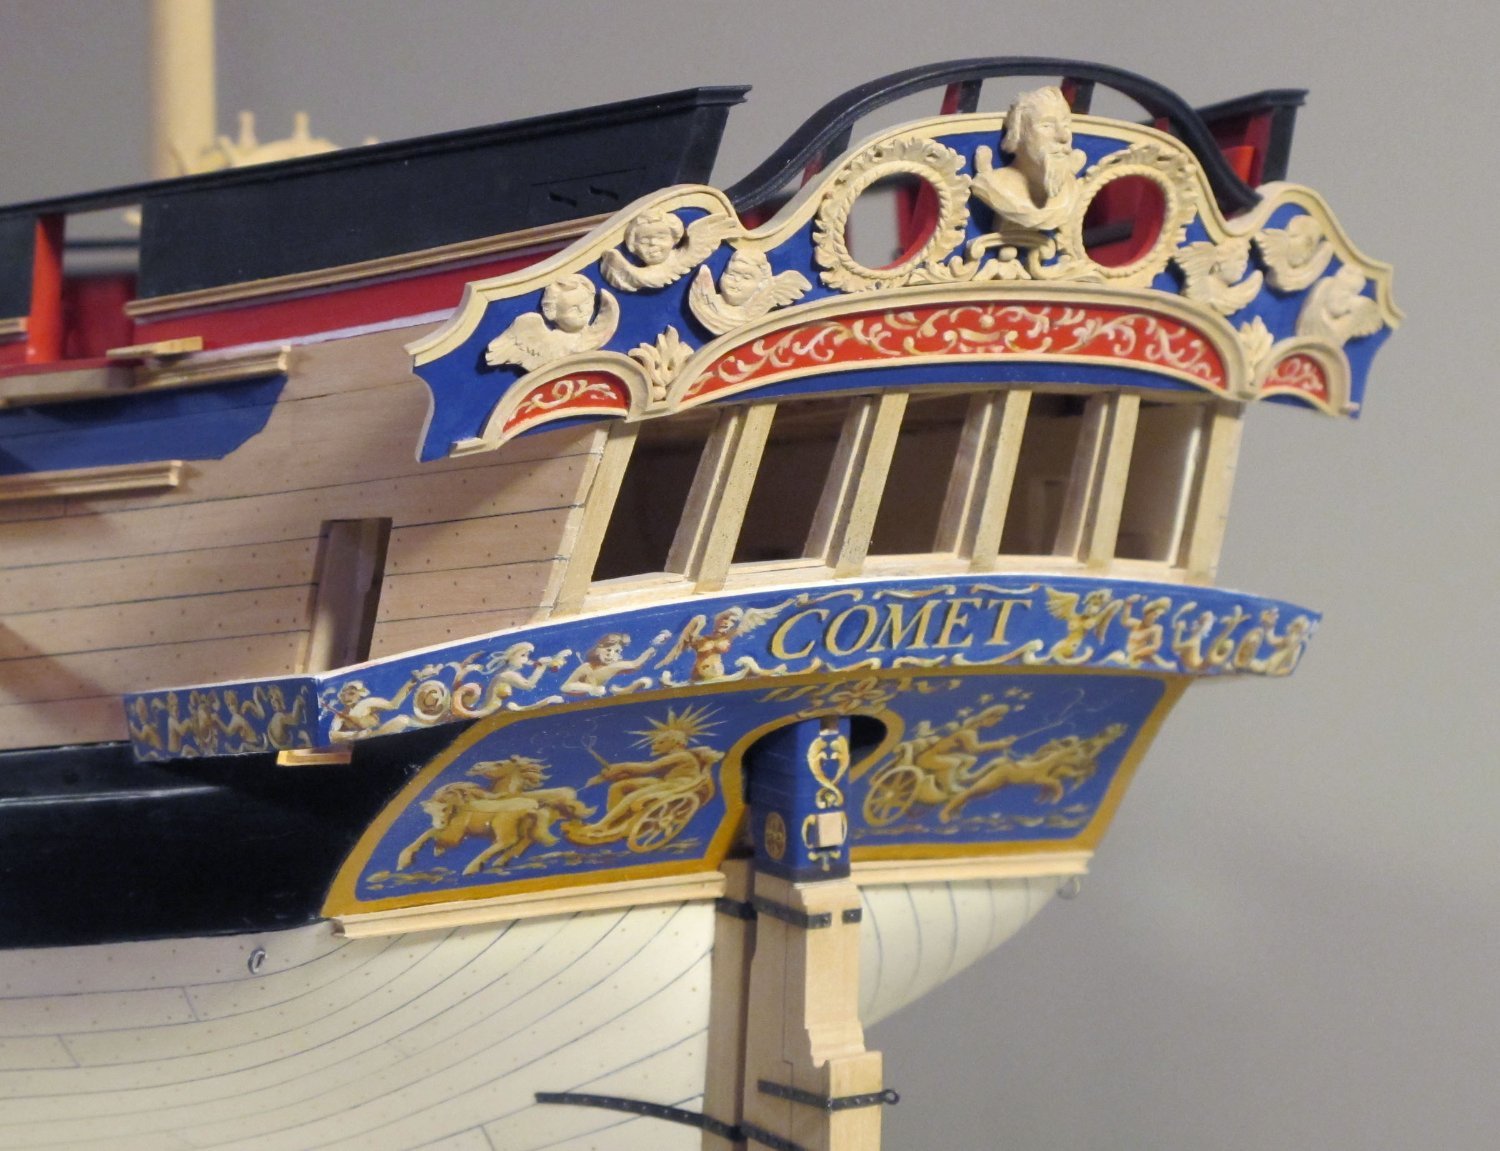
Welcome back, Mark! Those fixed blocks are tricky. looks like you've got them beat though. Had you considered painting your friezes on thin paper and then gluing them to the ship's sides? Contemporary models show that this was often done, rather than painting directly on the wood. I found this much easier to accomplish, particularly when the surface was directed downward!


-
Untangling and rerigging or start from scratch?
druxey replied to Rgpracer's topic in Masting, rigging and sails
If this were a valuable historic model, one would try to save as much of the original material as possible, This is not the case here, so Roger's advice is very good advice. -
Yes, Caruana's untimely death was a great pity. To confirm, there is no Volume III that he had planned on.
-
Chamfering Cutting Tool
druxey replied to Dave_E's topic in Building, Framing, Planking and plating a ships hull and deck
Sometimes scraping alone, done well, is the finishing 'sanding'. Don't scrape after sanding: small abrasive particles shed by the sandpaper and embedded in the wood surface will blunt your scraper. -
The most detailed information is in Volume 2 of Adrian Caruana's The History of English Sea Ordnance 1523-1875, The Age of the System. Unless you have deep pockets, inter-library loan is your best bet!
-
Well, having seen and been aboard Cutty Sark, what a behemoth Glory of the Seas is in comparison! Thank you for giving us a better idea of her size this way.
- 3,560 replies
-
- 2
-

-
- clipper
- hull model
- (and 2 more)
-
Neat result, Maury!
-
Corazal - the little Scots dredger that could - and did
druxey replied to druxey's topic in Nautical/Naval History
Keep us posted, She would make a fascinating subject, Brian. -
Corazal - the little Scots dredger that could - and did
druxey replied to druxey's topic in Nautical/Naval History
You could try a scratch-built one, Brian! -
Neat work, but it seems like Olha complicated things more than she needed to. However, it's her model, not mine!
-
An interesting news item about a dredger and the lost model of her: https://www.bbc.com/news/uk-scotland-59644117
-
Lathesmanship coming along, Maury! Nice progress.
-
NAIAD 1797 by Bitao - 1:60
druxey replied to Bitao's topic in - Build logs for subjects built 1751 - 1800
Interesting variation on a 45 degree holder or jig. The hold-downs on this are something new to me.