HOLIDAY DONATION DRIVE - SUPPORT MSW - DO YOUR PART TO KEEP THIS GREAT FORUM GOING! (Only 20 donations so far - C'mon guys!)
×


druxey
-
Posts
13,298 -
Joined
-
Last visited
Content Type
Profiles
Forums
Gallery
Events
Everything posted by druxey
-
 Ah, well. You still have the evidence of your deck joinery in your photographic records. Well done, Frank.
 -
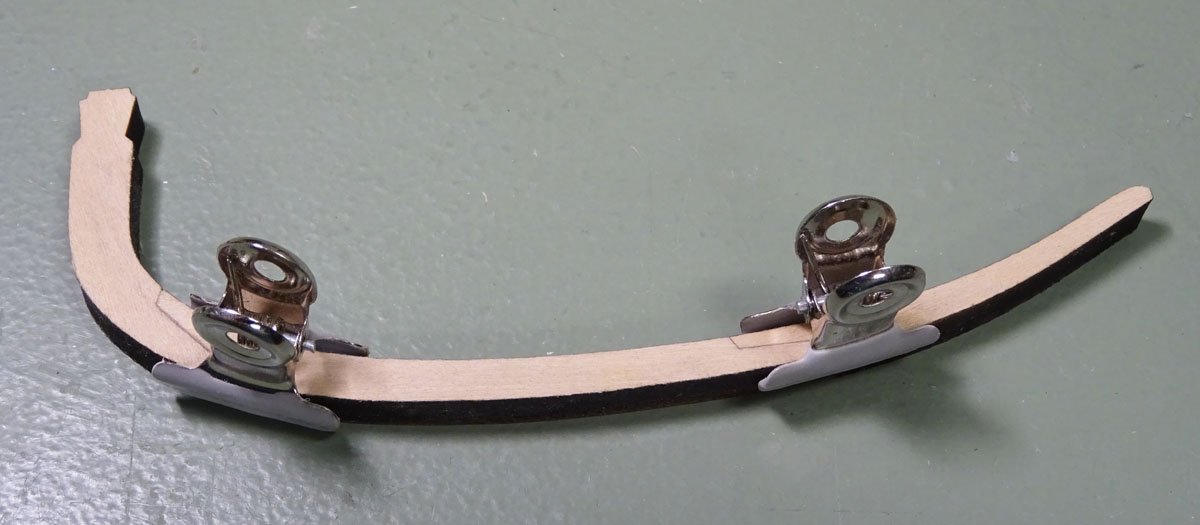
I apologize for the late reply, Steven: I was away. The clips from Oz are seen in the photo. No idea where my wife picked them up, other than an office supply type store. I imagine you should be able to find them. As for removing 'extra' glue from the interior of the hull, if you used white or yellow glue, it should soften with a careful application of rubbing alcohol.

-
Beautifully crafted, as usual!
-
For those not familiar with 4H leads, these are invaluable (held in a clutch pencil/mechanical holder) for mark-out. Sharpened, they keep a point and one can draw extremely thin lines using them. They improve accuracy of mark-out dramatically! Cliff is offering you a great deal - take advantage of it!
- 3 replies
-
- 2
-

-
- 4h leads
- mechanical pencil
- (and 1 more)
-
For yet another approach, see the topic under 'Reviews': Swan IV, Sailmaking Supplement.
-
Thanks for this contribution, Richard!
- 4 replies
-
- 1
-
-
- 70 gun
- third rate
- (and 4 more)
-
Good progress, Maury. You might consider raising the demarkation line a little fore and aft before painting the underwater body. It counteracts the optical illusion of the ends of the line dropping due to the shape of the hull.
- 525 replies
-
- 4
-
-
- anchor hoy
- hoy
- (and 1 more)
-
Excellent progress, Mike. Looks like you are developing a rhythm!
-
All looks pretty convincing to my eye, Chuck!
- 269 replies
-
- 6
-
-
- Queen Anne Barge
- Syren Ship Model Company
- (and 1 more)
-
ancre Le Fleuron 1729 by rekon54 - 1:24
druxey replied to rekon54's topic in - Build logs for subjects built 1501 - 1750
Superb work there, Giorgio! -
Nice progress, Clare.
-
I note that you live in Oz. I have some small plastic coated bulldog clips that my wife brought back from Australia. They are really useful for model-making in situations like you show. Unfortunately I can't get them here in N. America, but you should be able to find them easily.
-
Congratulations on reaching this milestone, Steven. De-plugging (if there is such a word!) is always a stressful moment.
-
Superb metalwork, Ed! Maybe a temporary card protector over them?
- 3,618 replies
-
- 6
-
-
- young america
- clipper
- (and 1 more)
-
ancre Chebece 1750 by Jeronimo - FINISHED
druxey replied to Jeronimo's topic in - Build logs for subjects built 1501 - 1750
I'm terribly sorry to read of your workshop disaster, Karl. But, a phoenix will arise from the ashes. Except it was water, not fire in this case. -
Fascinating work, as usual, Gerald. I've seen resistance soldering demonstrated; it is a very useful tool and technique for neat soft soldering. I wish one could silver solder the in the same way!
- 281 replies
-
- 2
-
-
- falls of clyde
- tanker
- (and 2 more)
-
Gregory: I believe that the popularity of using ebony in models was started by the late Harold Hahn. His stylized models have ebony false keels and wales. Certain trends and fads in modelling come from a wish to emulate star model-makers.
-
Is the joint soft-soldered? If so, it won't take the strain, or stand annealing. Silver soldering is required, which anneals the metal as the heat is sufficient to do so.
-
I personally dye wood to resemble ebony, but I mentioned the substitute for those who want to avoid dyes. Mark, I don't know how flexible the product is. I've not tried working with it.
-
There is a possible substitute for ebony now offered by Lee Valley Tools. As you know, natural ebony is hard to work and glue, as well as creates toxic, messy dust. The polyester substitute is available in rods or sheets. Sheets are about 9" x 11" and about 1/8" thick. Synthetic ivory and bone are also available. I can't vouch for gluing properties or longevity, but these might be worth experimenting with.
-
Tricky little beasts, aren't they? If you've never made a set of these before, you did well, Toni. There's an Admiralty Models workshop on making head timbers at the end of October. You got to the finish line a little too soon for that!
-
Check the width of modern oar blades. I don't think that they are more than 5" wide. 18th century sweeps had a blade width of 3 1/2" to 6".