Supplies of the Ship Modeler's Handbook are running out. Get your copy NOW before they are gone! Click on photo to order.
×


druxey
-
Posts
13,133 -
Joined
-
Last visited
Content Type
Profiles
Forums
Gallery
Events
Everything posted by druxey
-
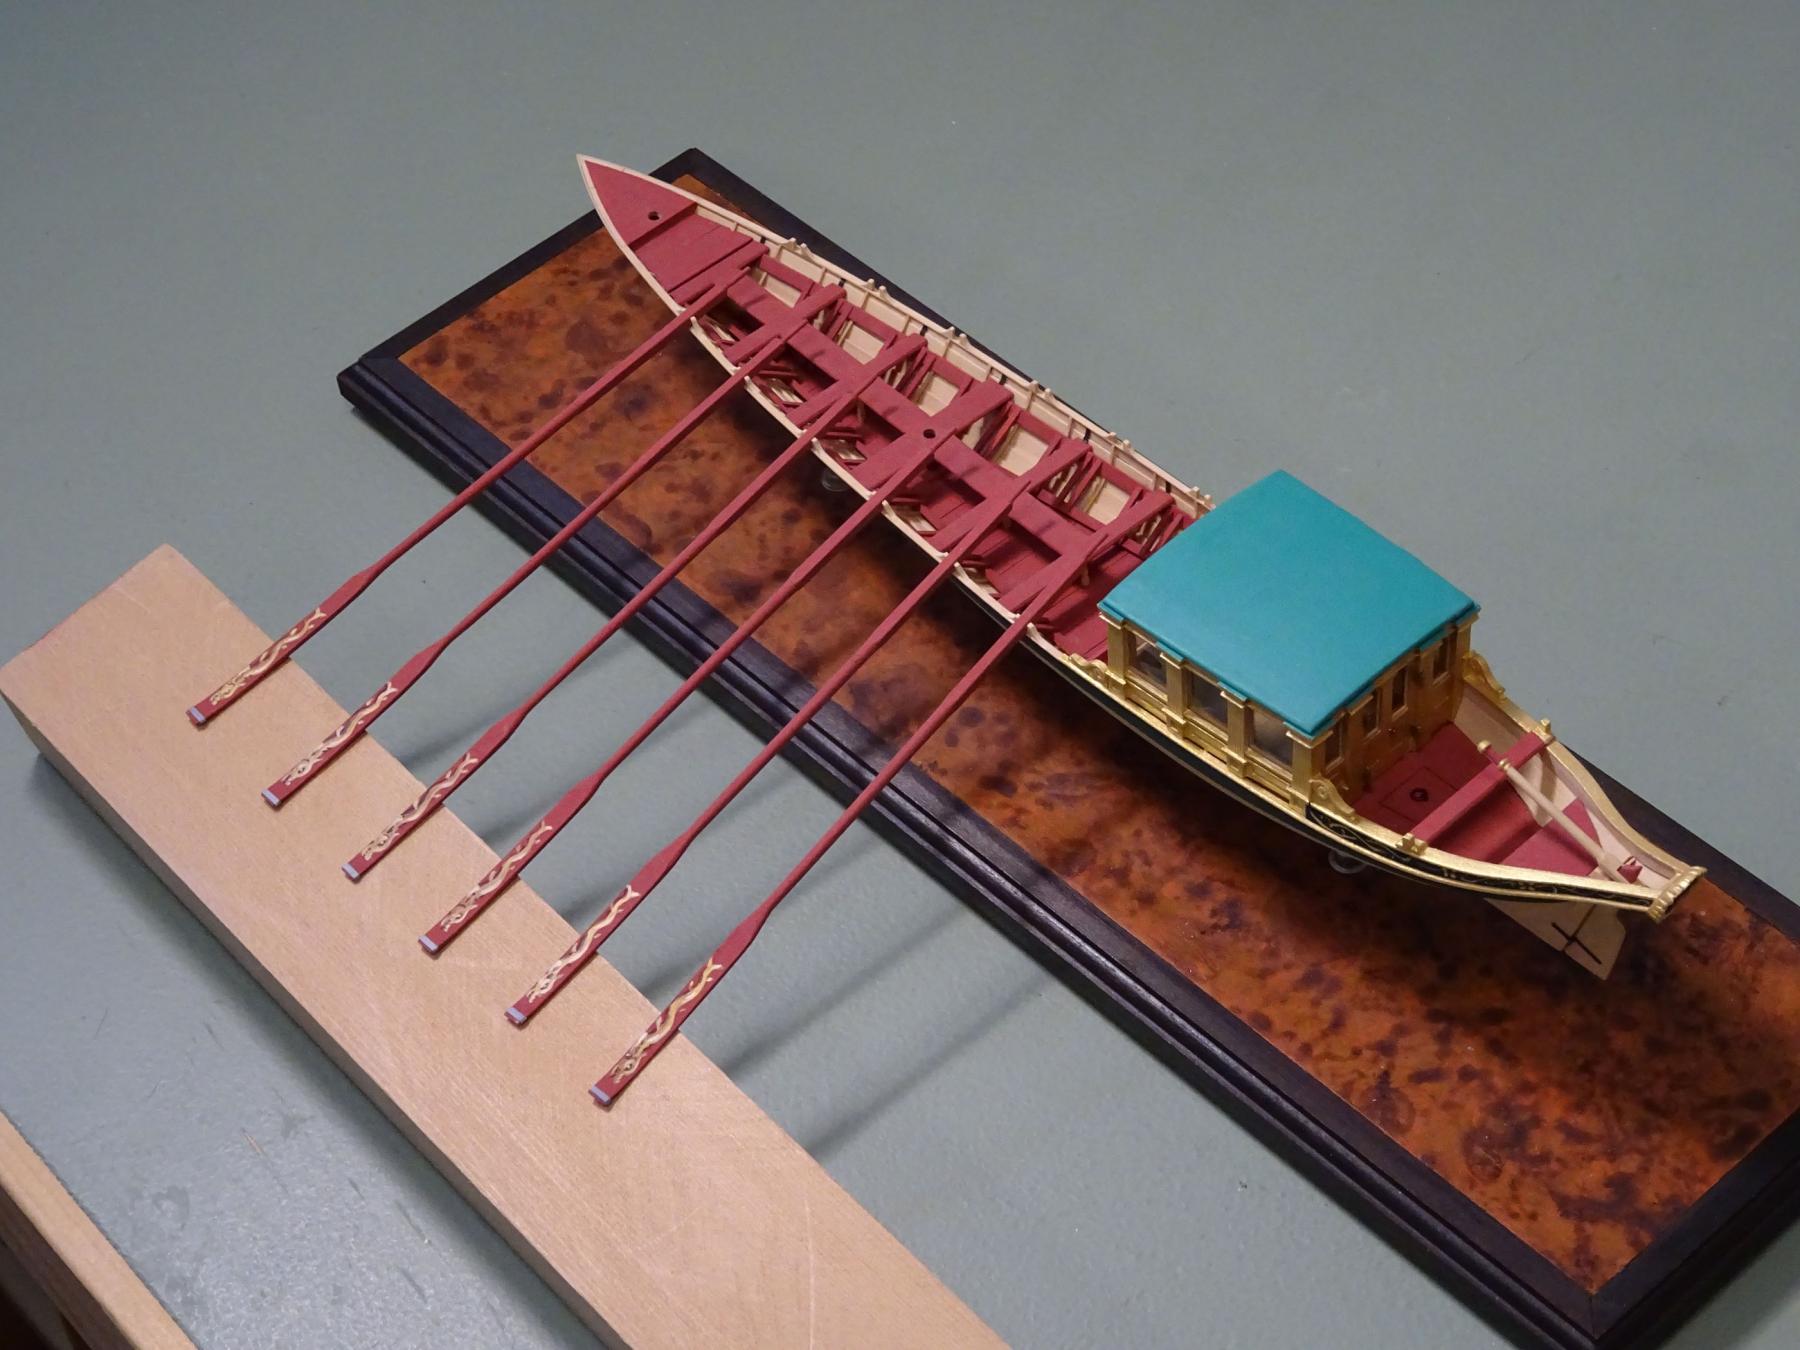
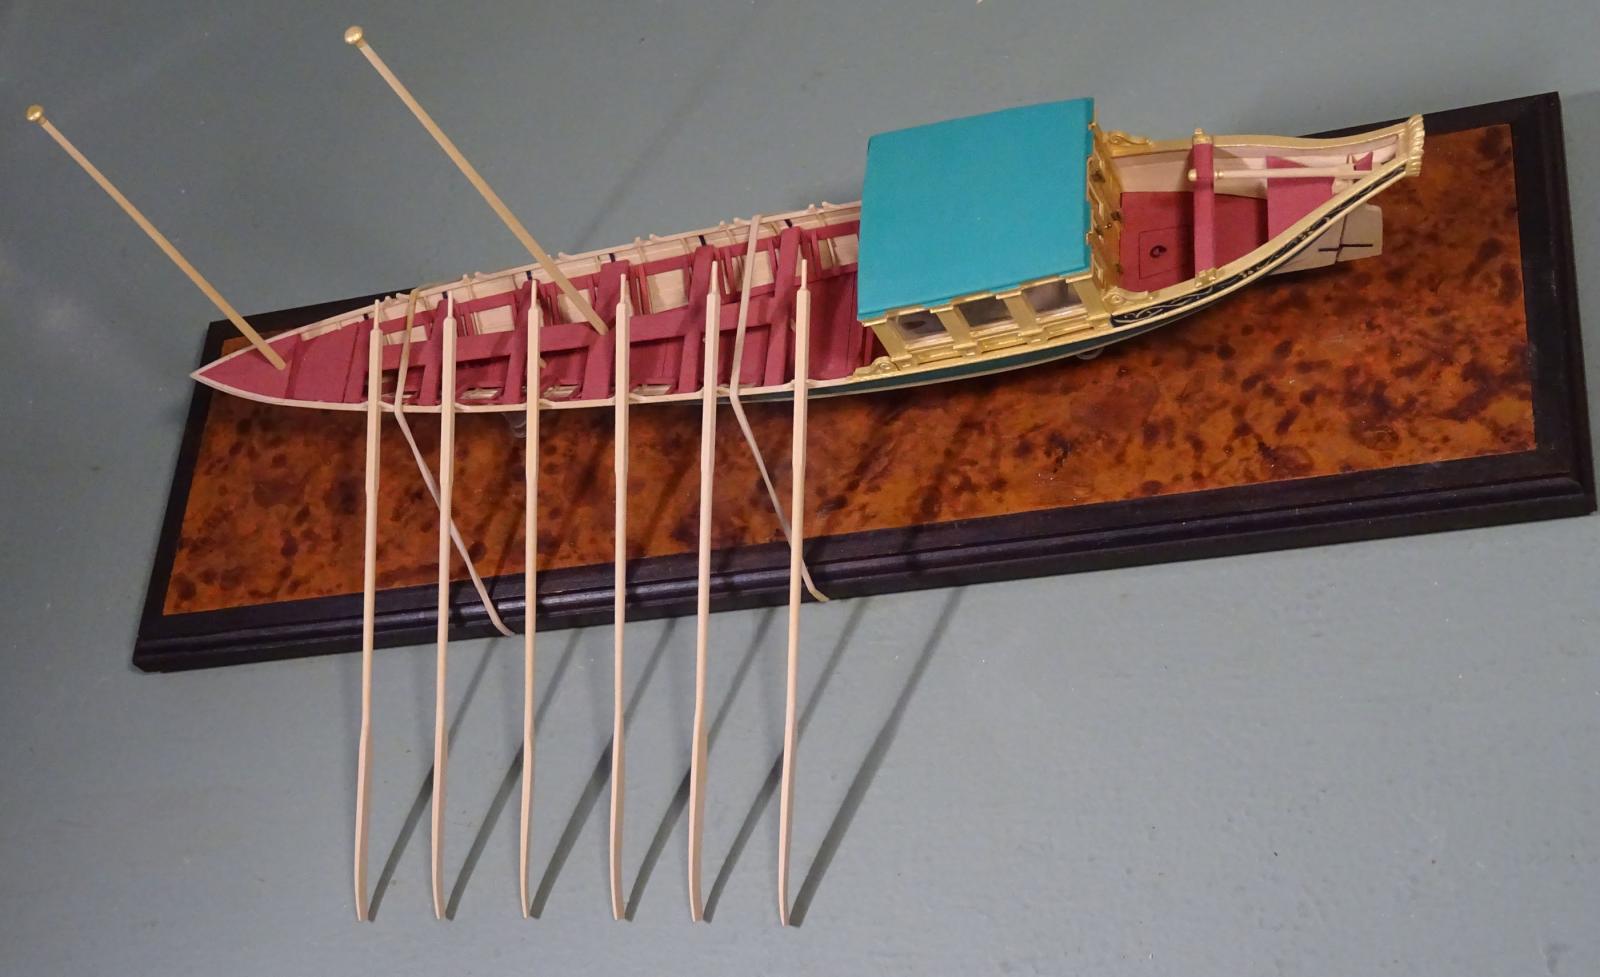
 Well, a dozen dolphins done! I've secured the model permanently on the base and pedestals and set up a trial placement for the sweeps on one side. Comments, anyone?
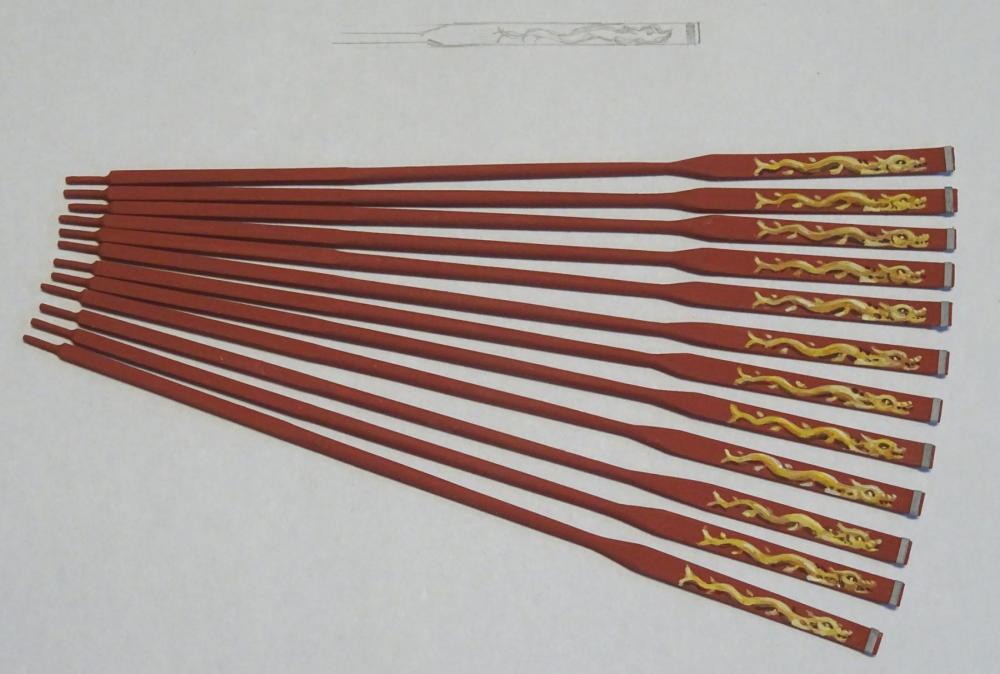

- 641 replies
-
- 42
-

-
- greenwich hospital
- barge
- (and 1 more)
-
Enjoy your new toy - I mean, tool! Nice progress on your frames as well, Frank.
- 649 replies
-
- 5
-
-
- dunbrody
- famine ship
- (and 2 more)
-
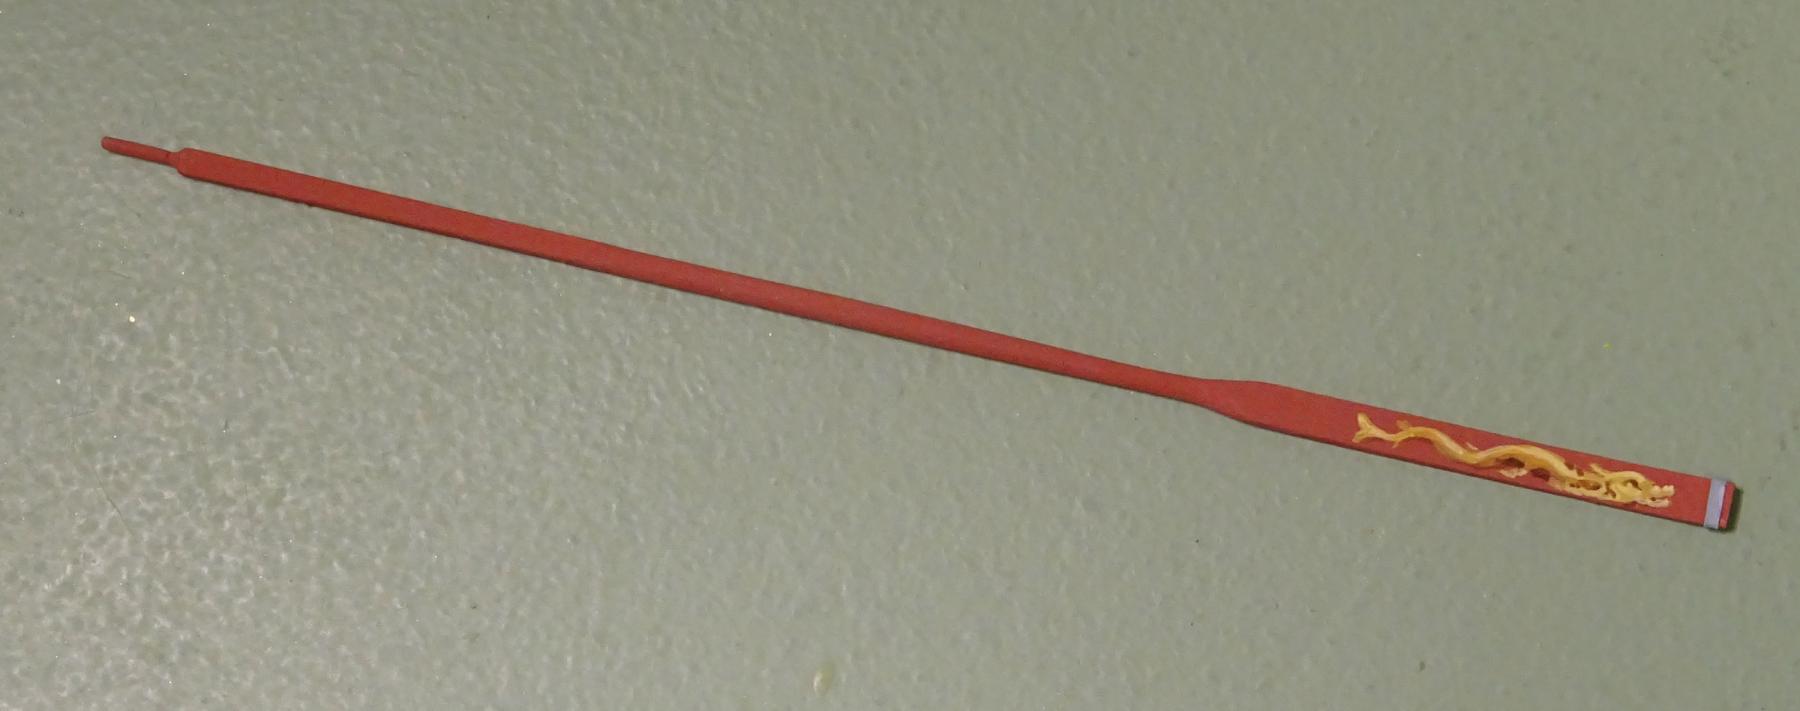
Thanks for the pictures and comments, everyone. How do I curve the blades? They are carved that way. I thought of steam bending, but they would never be entirely consistent. The dolphin paint job is done with high-grade watercolour sable brushes in 0 and 1 sizes, using acrylic paints.
- 641 replies
-
- 4
-
-
- greenwich hospital
- barge
- (and 1 more)
-
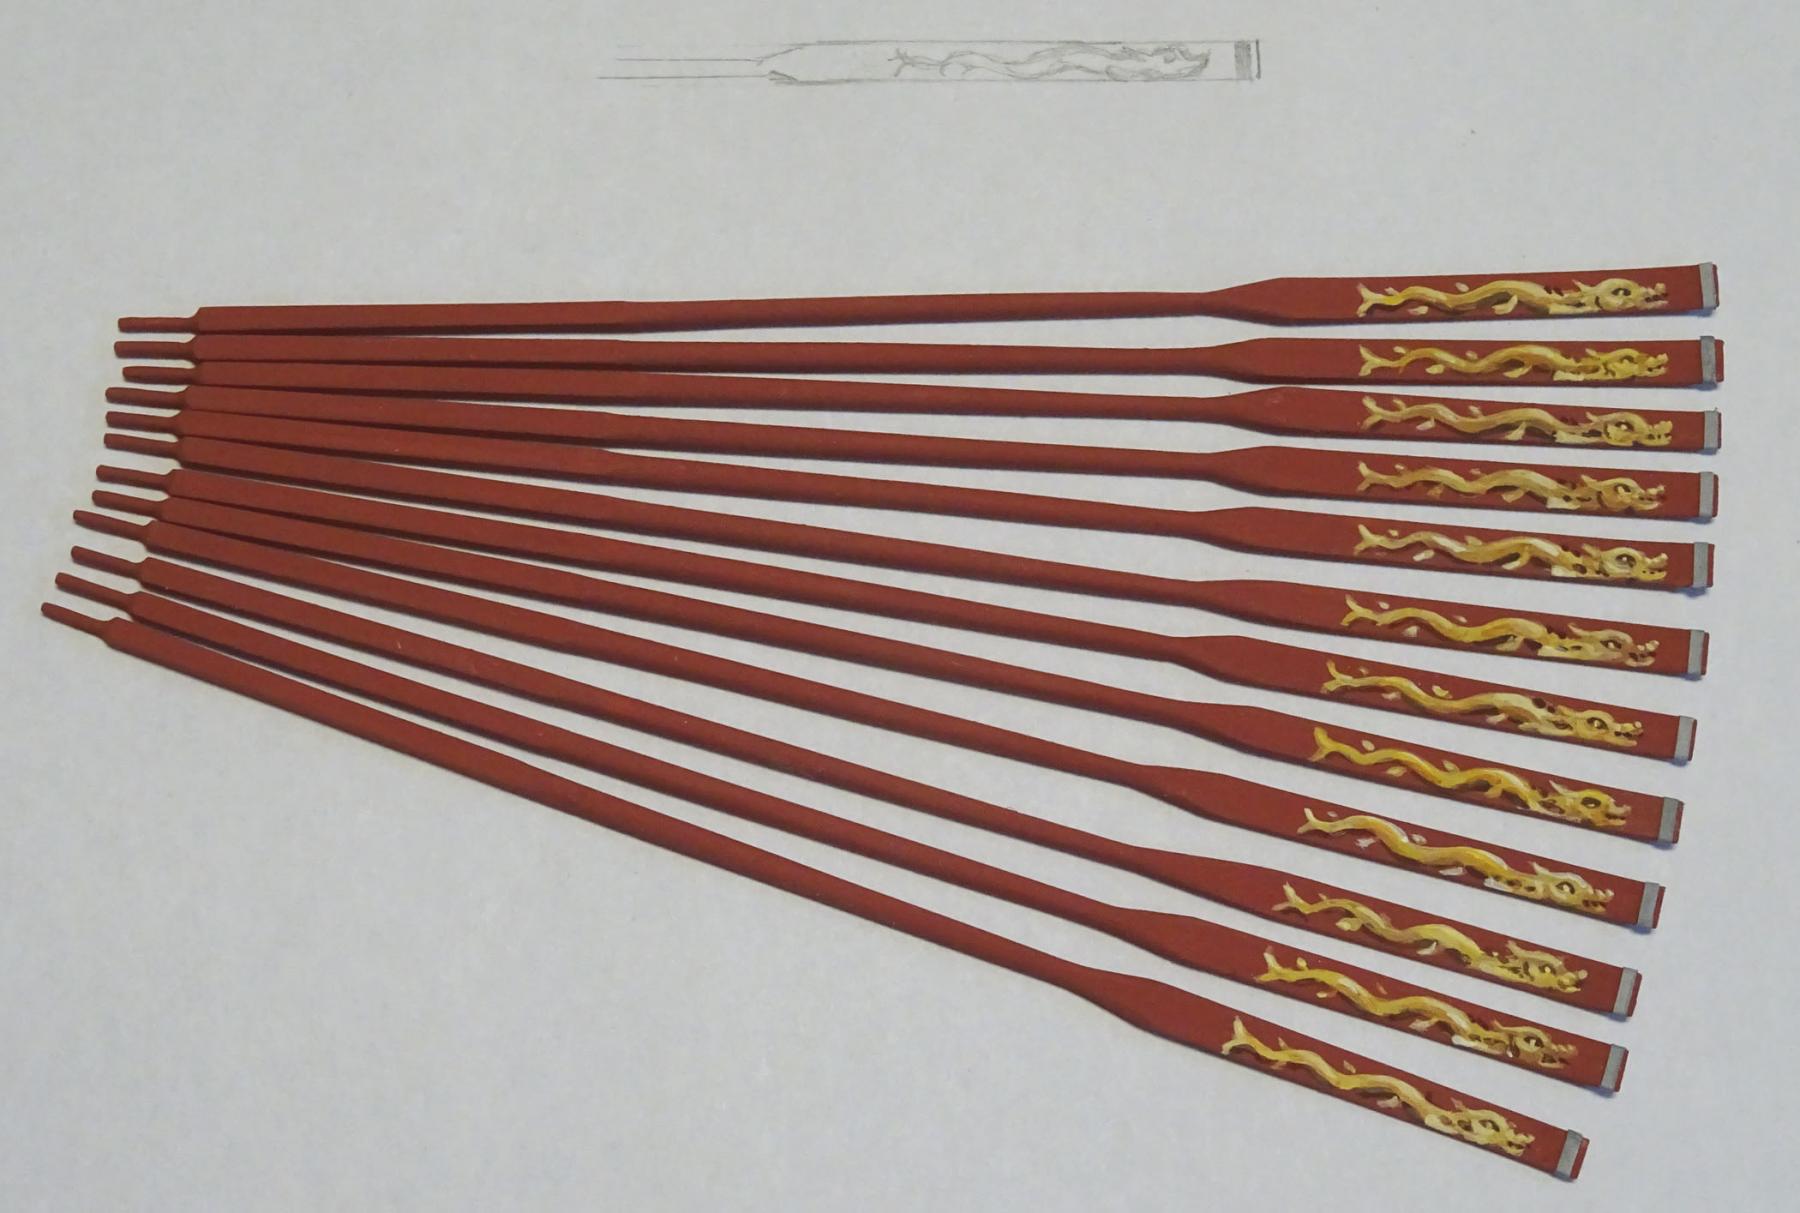
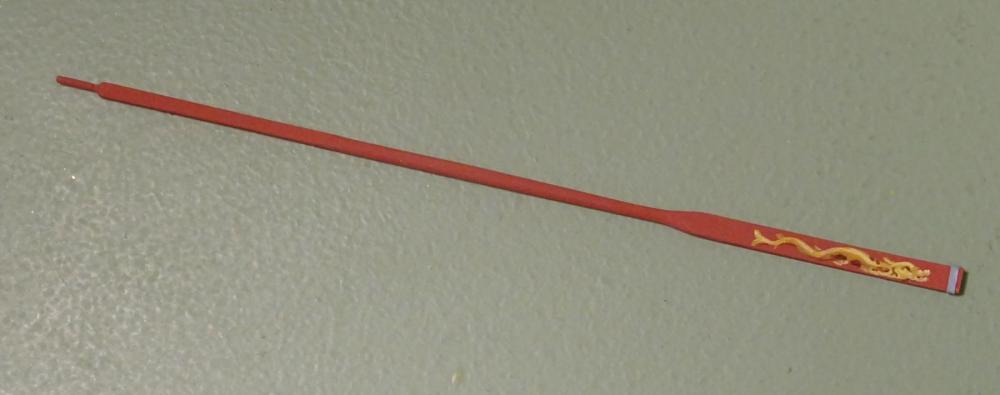
The first of twelve dolphins has been painted. It is based on an actual example in the RMG collection. By the way, the oar blade is ⅛" wide. Eleven more to go! (Click on the image to see the complete sweep)
- 641 replies
-
- 29
-
-
- greenwich hospital
- barge
- (and 1 more)
-
I misunderstood the question; thanks for the clarification, Daniel. Those look like cleats with a shadow below to my eye. That 1805 breastwork is rather utilitarian looking!
-
Pandora by marsalv - FINISHED - 1:52
druxey replied to marsalv's topic in - Build logs for subjects built 1751 - 1800
Terrific progress, Marsalv. -
Just catching up on your progress. Lovely work and detail!
- 184 replies
-
- 3
-
-
- ruby & arthur reed
- lifeboat
- (and 1 more)
-
Free floating at an appropriate level, E&T. As the sweeps will overhang the base by some distance, there will be sub-base as well. Thanks for the other comments above. I've decided to paint dolphins on the blades. Why not? The oars are now crimson and look a little unfinished yet. More later.
- 641 replies
-
- 8
-
-
- greenwich hospital
- barge
- (and 1 more)
-
The three central items in the Turner sketch could be for the wheel tell-tale. The two outer ones each side were most likely eyebolts.
-
Looks like you are almost ready to roast a whole quail on that, Paul! It looks very functional.
-
I think, after much thought (read 'dithering'!) I've come to a decision on sweep display. I plan on mounting them in a similar fashion to those shown in post #503. Many thanks to everyone for your opinions and input on the subject. These certainly helped to clarify my thinking. Pictures to follow.
- 641 replies
-
- 14
-
-
- greenwich hospital
- barge
- (and 1 more)
-
The solder trick of using marker pen is a new one to me: how simple and effective! Thanks for sharing this, Gerald. Your frame construction looks terrific.
- 281 replies
-
- 3
-
-
- falls of clyde
- tanker
- (and 2 more)
-
Still not quite decided on presentation, but finally have completed cutting and shaping all 12 sweeps. Whew! Next will be to paint them.

- 641 replies
-
- 30
-
-
- greenwich hospital
- barge
- (and 1 more)
-
Nice progress, Ed. BTW, I've successfully used Clapham's paste wax on my blocks and deadeyes to give a low luster shine.
- 3,618 replies
-
- 5
-
-
- young america
- clipper
- (and 1 more)
-
Well, ammonia will make your eyes water, for sure. Water alone does the same thing, really. One can steam wood to shape as well. Damp bending and applying dry heat (a temperature controlled iron) will also work. However, with thicker pieces of wood, wood will tend to revert to where it wants to go.
-
Yes, best wishes for the success of your art show, Michael. I'd be a bit suspicious of using rubber cement on your sails: after a few years it turns brown. Have you thought of using acrylic matt medium for the purpose?
-
Ours is not to reason why... just take as much contemporary evidence as we can find and make our judgements accordingly. P. S. Prince Frederick's barge, Queen Mary's shallop and the Charles II state barge all show square-sectioned looms to their sweeps. So who am I to argue otherwise?
- 641 replies
-
- 6
-
-
- greenwich hospital
- barge
- (and 1 more)
-
Stem Bolting Arrangement
druxey replied to Matrim's topic in Building, Framing, Planking and plating a ships hull and deck
I believe that six (or more) bolts were used for larger classes of vessel. The Shipbuilders' Repository (1788) definitely specifies 5 bolts for keel scarphs and, presumably, the boxing joint. -
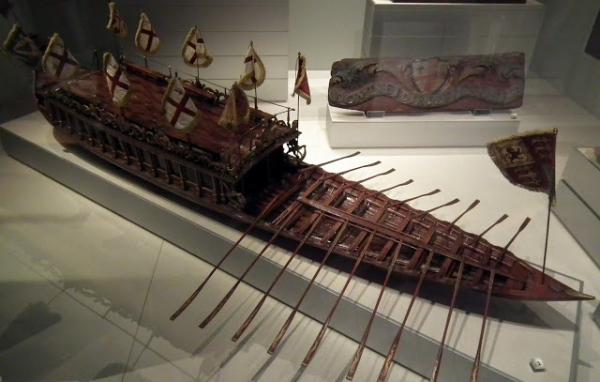
Thanks again, all. Further to the sub-topic by Alan (AON), a contemporary model (c.1808) with oars definitely shows squared looms to the sweeps. This is a model of the 18 oared Lord Mayor's barge, in the London Museum Docklands.
- 641 replies
-
- 9
-
-
- greenwich hospital
- barge
- (and 1 more)
-
Well folks, a variety of solutions to my dilemma! Thanks, everyone, for all the input and positive comments. Although I'm still undecided, one of my correspondents AON (Alan) questioned the loom (squared portion) of the sweep. I looked up my source (Steel, 1816 edition) and found that the loom was often made round, not square, in section. I suspect that, given the limited clearance of the sweeps in the tholes, that this was the case here. I may now re-work those looms.
- 641 replies
-
- 4
-
-
- greenwich hospital
- barge
- (and 1 more)
-
Thanks again for the opinions expressed so far. I've now shaped half the sweeps. Perhaps comments on the accompanying photograph? I've simply staged the sweeps resting on the workbench. Also, they will be painted dull crimson when complete. I did try laying them out on the baseboard, but it looked rather crowded.

- 641 replies
-
- 26
-
-
- greenwich hospital
- barge
- (and 1 more)
-
ancre La Salamandre by tadheus - 1:24
druxey replied to tadheus's topic in - Build logs for subjects built 1751 - 1800
Is the 16mm difference a drafting error or plan reproduction problem? That's annoying! -
Good to see you back at work, Nils. That mast looks beautifully done.
- 2,625 replies
-
- 5
-
-
- kaiser wilhelm der grosse
- passenger steamer
- (and 1 more)
-
Breaking news! I am pleased to announce that SeaWatchBooks will publish a book on the construction of open boats. The clinker planked example will be the Hospital barge, and the book will also cover construction of a carvel planked open boat. Now all I have to do is write it....
- 641 replies
-
- 32
-
-
- greenwich hospital
- barge
- (and 1 more)