


druxey
-
Posts
13,383 -
Joined
-
Last visited
Content Type
Profiles
Forums
Gallery
Events
Everything posted by druxey
-
 A guide as to lantern level; the door needs to clear the tafferel or it won't open! Also, it should be at a height comfortable for someone on the deck to place the light into. "Form follows function", as usual.
- 1,784 replies
-
- 4
-

-
- winchelsea
- Syren Ship Model Company
- (and 1 more)
-
The word 'patent' seems to have caused a stumble. It is not a model submitted for a patent, but one built to a patented design! Well done, Bruce and Patrick, in attributing the number to a particular serviceman.
-
This is an interesting, well-built model of some age. The builder was obviously very familiar with clinker style planking. It is odd that all the internal parts are either missing (those three small screw holes) or were never completed.
-
It seems that you have become the beta builder, Bob! I appreciate you being patient as you wait for bits and bobs to arrive. A little bird has told me that future kits will have in-house beta test builds before they go on the market.
- 146 replies
-
- 1
-
-
- Harriet Lane
- Model Shipways
- (and 1 more)
-
Matching Deck Colors
druxey replied to hof00's topic in Painting, finishing and weathering products and techniques
Washes are very thin transparent coats of paint thinned with either water or a solvent, depending on the type of paint used. -
It's called serving. It is usually done by wrapping the thread around the line on a serving machine. You can see examples of these machines on MSW and on line.
-
Sorry to read of your physical issues. Hopefully they can be reduced so that you can enjoy building again.
-
Yes, coming along nicely, RM. Do wear a dust mask; basswood particles in the air are very fine.
- 34 replies
-
- 3
-
-
- first build
- Model Shipways
- (and 2 more)
-
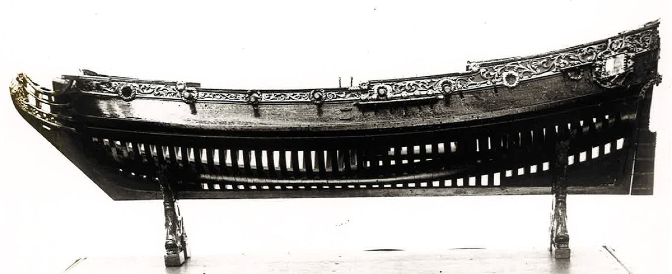
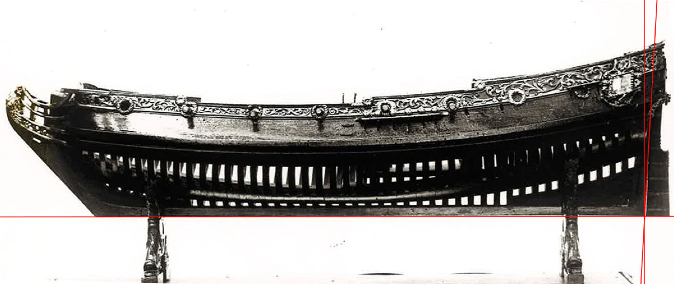
I see much discussion on distance and point of view being considered, but very little on lens distortion. Camera lenses, especially earlier ones, could produce spherical distortion - and not necessarily uniformly. You need to take this into consideration as well. The angle that the camera is pointing also introduces distortion. An example of an uncorrected and corrected image from 1912 is shown here. Those pedestals are vertical - but you can see the degree of distortion produced simply by tipping the camera'a axis from horizontal. The stem is actually at 45 degrees and the stern post 5 degrees, not 10 as in the uncorrected version.
- 3,560 replies
-
- 2
-
-
- clipper
- hull model
- (and 2 more)
-
Matching Deck Colors
druxey replied to hof00's topic in Painting, finishing and weathering products and techniques
Washes over a base coat as wefalck describes is really the only way to imitate wood. Again, techniques will differ slightly depending on the scale that you are working at. His radial planking at miniature scale is exceptional. -
Aren't you glad she is not a 74? Looking good, Mark.
- 505 replies
-
- 5
-
-
- vanguard models
- Sphinx
- (and 1 more)
-
Slow and steady is good - this is not a race! What you write shows that you have the right attitude, P.S.
- 23 replies
-
- 3
-
-
- Model Shipways
- Shipwright Series
- (and 2 more)
-
18th and early 19th Century cutter models
druxey replied to tkay11's topic in Nautical/Naval History
Some contemporary plans show sweep ports (the proper term for those little square ports) and some do not. They would, however, be present on these small craft. Occasionally the sweep ports were circular with a small slot on each side just large enough to slide the blade of the sweep through. One could not work a sweep in a gun port; it would slide back and forth wasting effort, quite apart from the fact one would need to move all the guns - to where? The decks were crowded enough already!- 42 replies
-
- 3
-
-
- Cutter
- 18th Century
- (and 4 more)
-
To keep manufacturing costs down, I doubt that there are any unnecessary parts! They must have a function.
-
Domanoff's PL4 Upgrades
druxey replied to DispleasedOwl's topic in Modeling tools and Workshop Equipment
It all looks very effective. Let us hope that you are now less displeased!- 1 reply
-
- 3
-

-
-
Interesting. Normally bowsprit shrouds do not have ratlines! Well done for solving that mystery.
-
Well, first congratulations for the recovery of those frames. We all have disasters and learn how to dig ourselves out! It's part of the process. Don't stress yourself about making mistakes - see previous sentence. And it looks as if you are well on your way now.
- 34 replies
-
- 2
-
-
- first build
- Model Shipways
- (and 2 more)
-
Doing a fine job, Bob. Hope the other spurling arrives soon!
- 146 replies
-
- 1
-
-
- Harriet Lane
- Model Shipways
- (and 1 more)
-
Welcome aboard, Deep Diver!
-
Oh, dear. Both perspective and lens distortion!
-
The only other explanation is that whoever rigged the model originally made one shroud leg too short (or long!) so that the upper deadeyes were not level with each other as they should be.
-
Unfortunately felines are notorious for damaging ship models. Never leave them - felines or models - unattended. But you know that already. I'm sorry for your disaster. Replacement parts are probably far easier to manage than trying to fabricate your own at this stage of your model-making career. If it's any consolation, all of us have suffered a disaster (feline induced or self-inflicted) at some point. Don't be discouraged.
- 34 replies
-
- 3
-
-
- first build
- Model Shipways
- (and 2 more)
