HOLIDAY DONATION DRIVE - SUPPORT MSW - DO YOUR PART TO KEEP THIS GREAT FORUM GOING! (Only 72 donations so far out of 49,000 members - Can we at least get 100? C'mon guys!)
×


CaptainSteve
-
Posts
1,858 -
Joined
-
Last visited
Content Type
Profiles
Forums
Gallery
Events
Everything posted by CaptainSteve
-
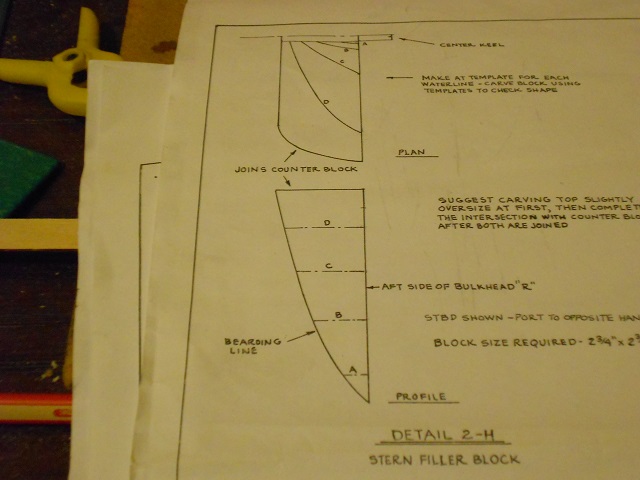
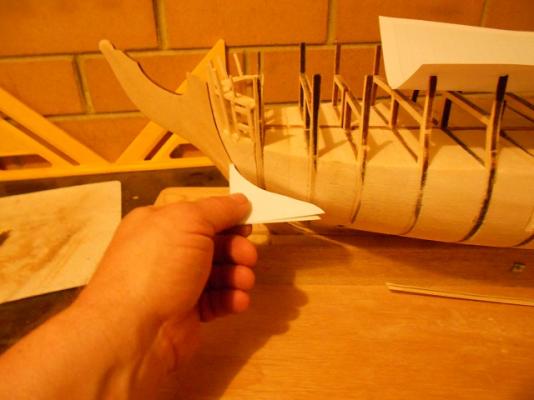
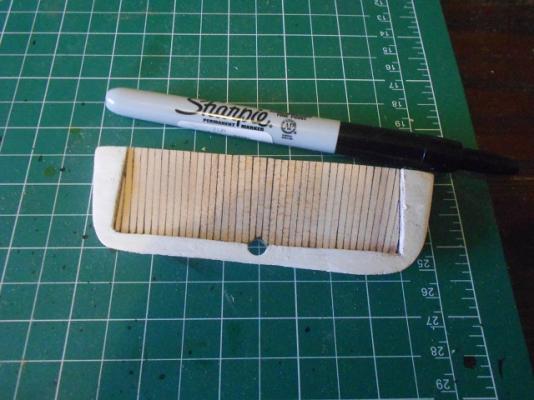
 Michael, Unfortunately, I did not keep the templates I had made once the filler blocks were done. All I did was to trace these templates from my plans ... Starting with the upper picture of Detail 2-H above, each of four templates would be cut from the left-hand side, and going through to the relevant curved line. When transferred to card and cut-out, these are then held against the hull at the relevant levels (see lower picture of 2-H). They will indicate if your filler block still requires more trimming ... Hope that helps, and maybe others have better pictures of this process !!
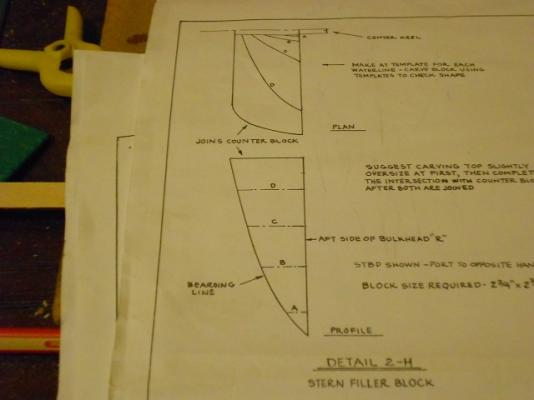
-
To help with doing filler blocks, trace the templates from your kit plans, and then glue these to some stiff card. Once the glue has dried, cut them out, paying particular attention to the inside of the curves, which will be where these templates will marry-up with your shaped filler blocks. Also using your kit plans, there should be markings to show at which level each template should fit (mine were labelled A, B, C and D). Mark these "levels" on the backs (where they will be joined to your false keel and the bulk-heads) and across the faces of your filler blocks. For me, at least, I found these templates to be an easy way to check that I had (finally !!) removed enough wood !!


-
May I be addin' me Birthday Wishes as well, Jesse !!
- 1,306 replies
-
- 6
-

-
- syren
- model shipways
- (and 1 more)
-
Arr ... None of us are in in any doubt that you will pull this off, Tom !!
- 1,350 replies
-
- 2
-
-
- constitution
- model shipways
- (and 1 more)
-
Just remind yourself, Dave, the good doctor not only has the training to know where your bodily orifices are, he ALSO has access to sharp, pointy instruments.
- 209 replies
-
- 8
-
-
- cheerful
- Syren Ship Model Company
- (and 1 more)
-
Arrr ... Reading thru your log has made fer a most heartily enjoyable read, Martin !! Seriously though, before reading your log I had actually been considering this very kit for my next build. Now, I be lookin' fer the "Add To Cart" button !! At this stage of your build, may I humbly suggest that you re-re-re-read (I be fairly sure that's not a typo !!) thru your rigging plan sheets to ensure that you have ALL of your anchor points in place before making a start on your rigging. (Just looking to save you from some unnecessary pain down the track a bit.)
-
Just a totally random thought here, Jesse, but what if you were to take a photo of your coppered hull once a day (or once a week) over the course of your build. I would imagine that you'd gather a nice collection of pics which would make for a seriously interesting slide-show of the patina developing !!
- 1,306 replies
-
- 9
-
-
- syren
- model shipways
- (and 1 more)
-
Arr. 'Tis nice to see that others also make errors sometimes, Piet. Thank Ye, muchly !!
-
You won't need an extra piece. You don't need to cut it or glue it. Just pull any strip from your wood supply and use it as a test. Then it can go back in the box for later. Keep at it, LSMan. PS: I'm guessing from your pics (being 1979), that we would be of approximately the same age.
-
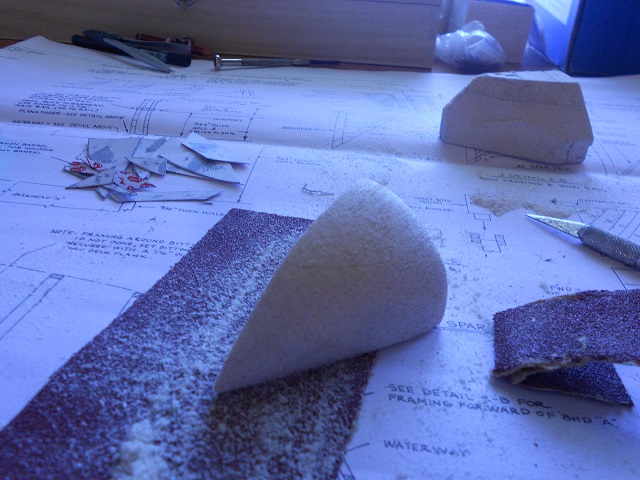
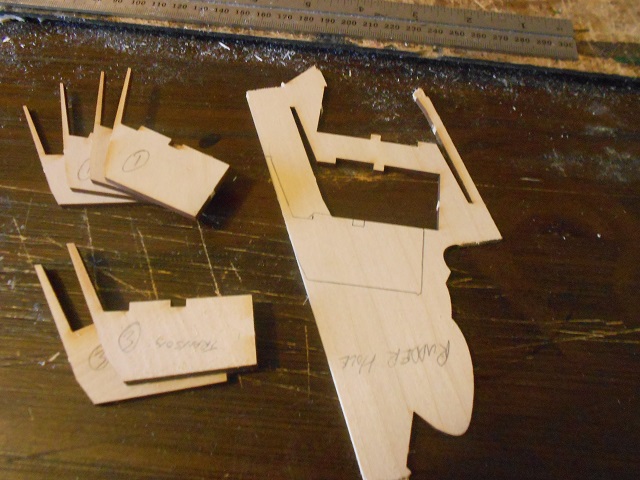
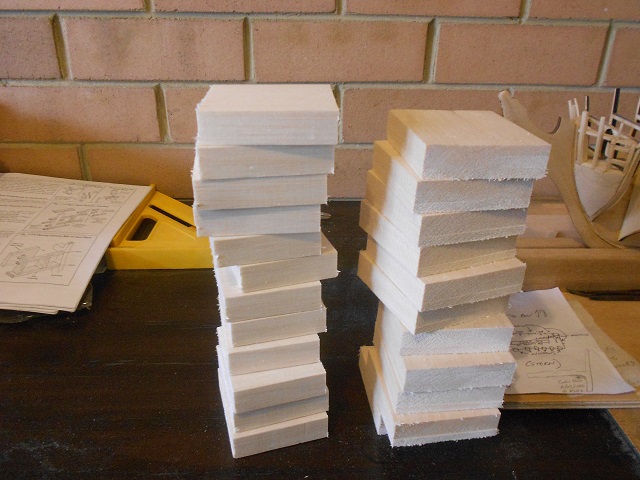
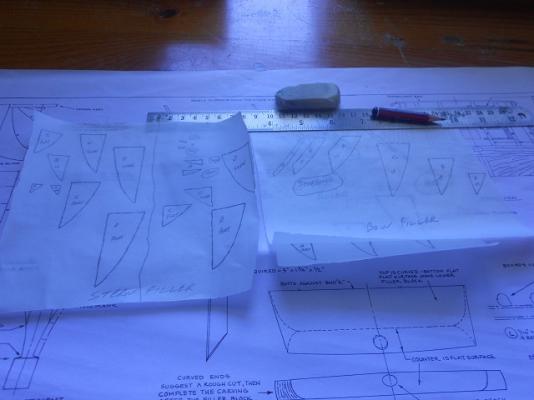
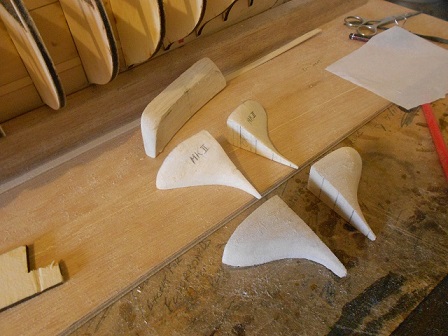
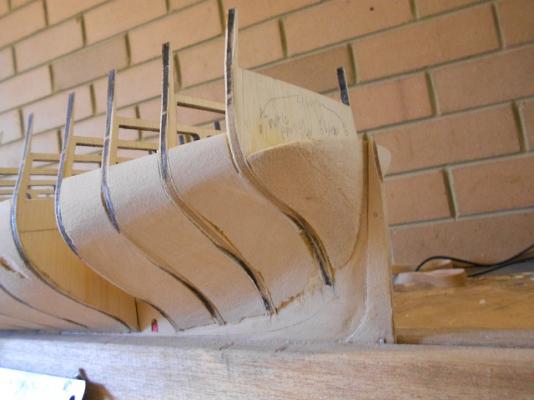
Having only just recently finished doing my own filler blocks, I can relate with the saw-dust issue. Even more so, if you choose to do them over a couple of times like I needed to do. Sorry to say, but from looking at your bow picture above, I think you still need to reduce yours down further. Try running a test-plank from the rabbet groove, over your bow filler block, and back towards the stern. Alternatively, make yourself a set of cardboard templates by tracing your filler blocks from the plans. HINT: Don't do them like I did in the picture above. You will find they work better by making a template of the outside of the curve. This was how I learned that I needed to reduce my own filler blocks further. ... and they ended up like this. I also found the stern blocks to be a real challenge. In the above picture, the top pair are one of the earlier sets. The bottom pair were the final set. They were sanded down further to ensure a better fit for the planking, once they were glued into place. Hope this helps, LSMan !! PS: Looks like you are ahead of me on the bow-framing.


-
That's some fantastic banding on the tub, Buck !! (And 'tis great to see that The Master of Miniature Detailing has returned.)
- 515 replies
-
- 4
-
-
- artesania latina
- whaleboat
- (and 1 more)
-
Your Ranger be a beautiful thing to behold indeed, Matt !! As for the serving, my opinion is that you and your squirrels are correct in that the primary purpose would have been to provide additional protection to the lines to prevent breakages/unravel-lings. I can just imagine that nothing would ruin your day more than having a back-stay fail during an extremely rough squall. So, certainly, serving the rigging, particularly at the stress points, would help to prevent this from occurring. Purely for artistic reasons (which I know are near an' dear to yourself), have you considered worming the lines ?? (Not the kind that prevents the pet dog/squirrel from dragging his rump across the lawn !!) For myself, I thought this method of seizing/serving the back-stays showed off the contrast of the lines just that little bit better. Either way, I'm looking forward to seeing whatever you do to bring this build all together !!
-
Nor I, Tom ... nor I !!
-
As Colin Hay (from Men At Work) sang, "I come from a land Down Under ... " Ahhh Queensland !! Beautiful one day ... perfect the next !! Congrats on the new career move, Grant. Here's hoping everything turns out as planned.
- 456 replies
-
- 6
-
-
- finished
- bomb ketch
- (and 2 more)
-
Your 'bread 'n' butter' longboat be coming along nicely there, Mark. Ah yes ... the wailing and gnashing of teeth, as well as ample usage of ye olde sailing language, wouldst be a staple in my build room.
-
Ken, I be jus' a-wonderin' if ye be makin' further progress on getting yer Launch launched ??
-
That be some damn fine work there, Boyd !!
-
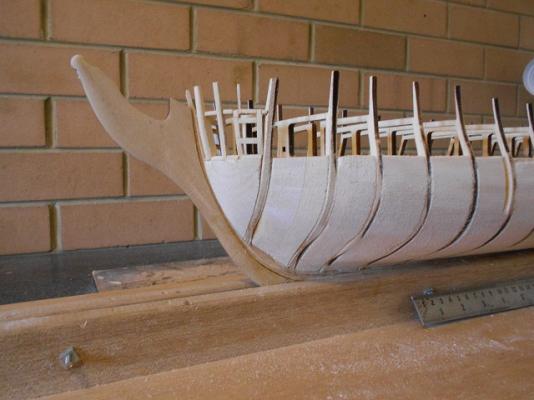
Thanks one and all. 'Tis good to be back. You most certainly may, Mark !! Coz every time you do, it saves me heaps of work ... and wood !! Thanks. I'll give that idea a shot this weekend. I've purchased a small sheet of plywood of the same thickness as the kit-supplied frames, so I will have another go at making them, this time with a touch of diluted glue. Mobbsie. That ain't styrene. In effect, I've created a solid wood hull.
-
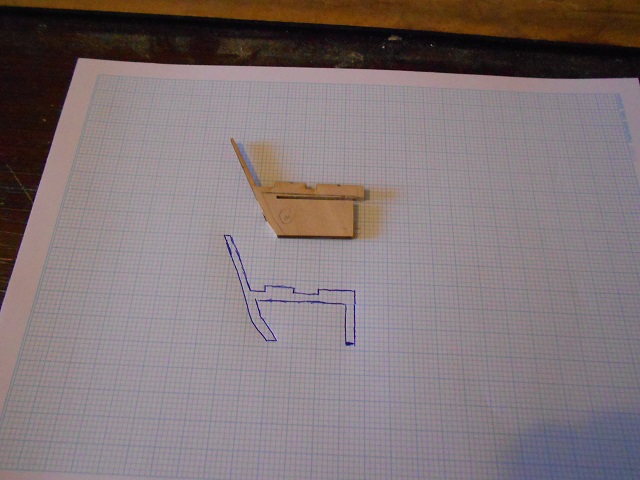
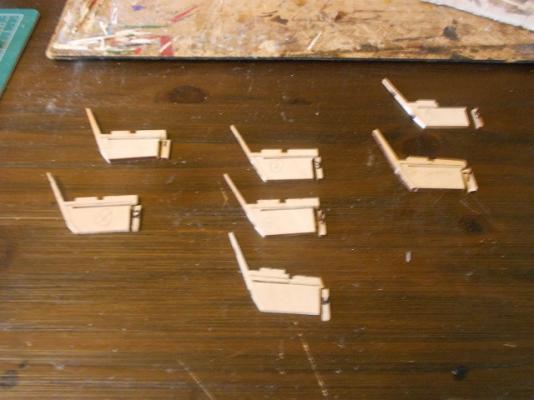
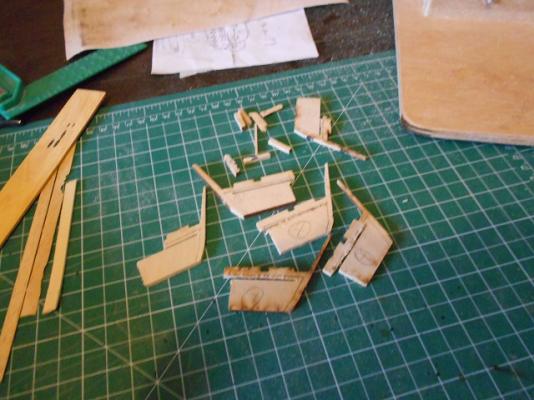
Thank ye all fer the well-wishin's. I hope to finally be gettin' some work done on me Connie, for a change. As fer work done thus far, the above be bringin’ ye all up-to-date with what CaptainSteve has actually accomplished. Plans have been afoot for sometime as to what he doth intend to do with the sternal region … but, thus far, nought hath been achieved – except fer many new additions to me bone-yard. Indeedeth, George, Our Hero doth intend to use the kit supplied stern frames. He be intendin’ to be a-modifyin’ them to create an open (and viewable) area beneath. “To go-eth from six frames up to seven (thusly allowing fer six windows),” he explained, “wouldst be-eth a most simple matter. It just be meanin’ that I be needin’ to make one additional copy of the central (larger) frame.” But problems a-plenty didst plague CaptainSteve whence he were to try cut-ething out the body of the kit-frames. Wi’ much wailin’ and gnashing of teeth, were Our Hero to discover the pieces be a-breaking up on him. Essentially, what he be trying to achieve wouldst be to removeth the bulk of the material, to leaveth him something like in this sketch below. Having spat-eth out his pacifier many a time, more work remains for Our Hero with regards these. “Mayhaps,” he were heard to mutter, “after I hath picked up a Scroll Saw.” When he doth, eventually, get these cut and sized, then CaptainSteve has plans for how he wouldst like to see the Captain’s quarters (and stern galleries) to be a-takin’ shape. “It be nought but mere conjecturin’ at this point in time,” he postulated. “But, I wouldst like-eth ye to check out the work of a couple more muses which I has been following of late.” First up, wouldst be Siggi52 with his HMS Dragon build. If you haven’t already seen this log, then do-eth yerself a favour and spend-eth an hour or two in amazement. Secondly be NenadM’s Cutty Sark build. Here, Nenad has actually shown Our Hero precisely how he can go about achieving the look that he wouldst wish-eth. “I be a-figurin’’, he were to close, “on riding the coat-tails of these two fine gentlemen in order to have me stern quarters come-eth to life.” More work doth remain …


-
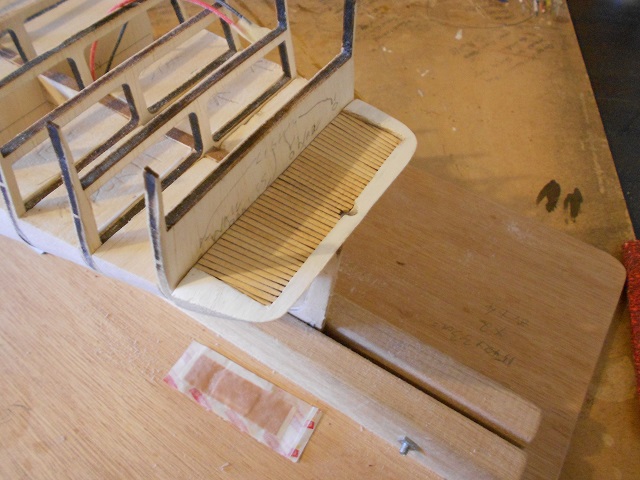
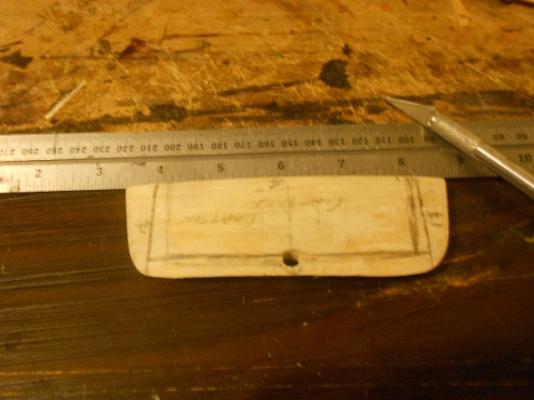
Now, as ‘tis widely known throughout the land, CaptainSteve be aiming to do an 1812-ish build of his USS Constitution. “This”, he didst start to explain, “be a-dictating that I shall need to totally reconstruct-eth the stern details o’ me Model Shipways kit.” O’course, as any naval historian worth his salt will tell you, this couldst be-eth in reference to the before/during/after effects o’ any one o’ the numerous actions which this fine ship be involved in during the War of 1812/Barbary Pirates era. “Ahem !!” coughed Our Hero. “This be jus’ mine own opinion, but-eth fer certain details, in particurly the physical matterings,” he didst try to explain-eth, “I be most in favour o’ the Hull modellin’.” As always, he were to go-eth on, “I jus’ be not understandin’ how sailors on the ship at the very time o’ the Guerriere encounterings couldst not know-eth how many windows there be-eth astern !!” (Ahh, CaptainSteve. But you do-eth ignore that it be highly possible Connie went from 5 windows to six, sometime after their first encounter (aka the Great Chase, and before their final, fated duel.) But since days long gone afore, Our Hero hath fond memories from his youth of spreading waaaaay too much glue o’er all the pieces of his Revell plastic kit o’ Connie. (“In my defence,” CaptainSteve were heard to mumble, “I were but twelve years o’ age !!”) Firstly, Our Hero were to be considering the counter piece. To begin-eth with, he were to take-eth up his knife and began to hack-eth away at his counter piece. After levelling out the top, yet maintaining an external curvature, the total area for the stern cabin is 4” x 1½”. CaptainSteve has, so far, only planked the counter-piece. More plans are afoot. “Hmmm,” Our Hero be a-ponderin’, “that band-aid hath found its’ way back into me picturin’s.” We noticed, CaptainSteve. What on earth be that all about … ?? ‘Twere around abouts this point that he were to be going off the rails a tad … “I be seein’ a picture in me mind,” Our Hero announced blankly, “O’ how I be a-wanting this section to appear-eth.” That be all well and good, CaptainSteve. However, whilst there most likely be plenty o’ room fer seating inside your head, that really be not much help to those poor people trying to follow along with you. “More soon … I doth promise !!”


-
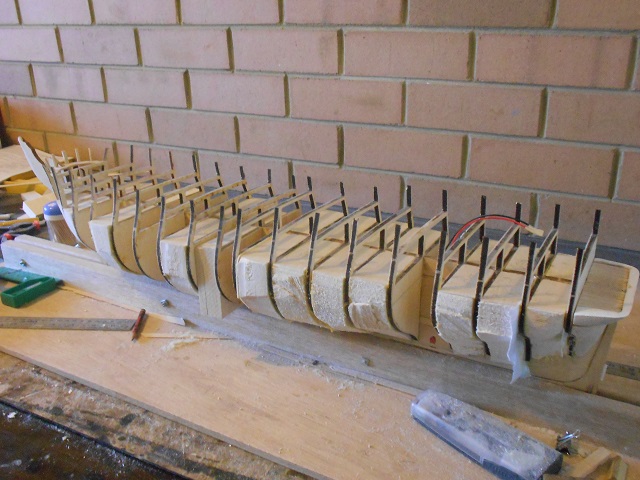
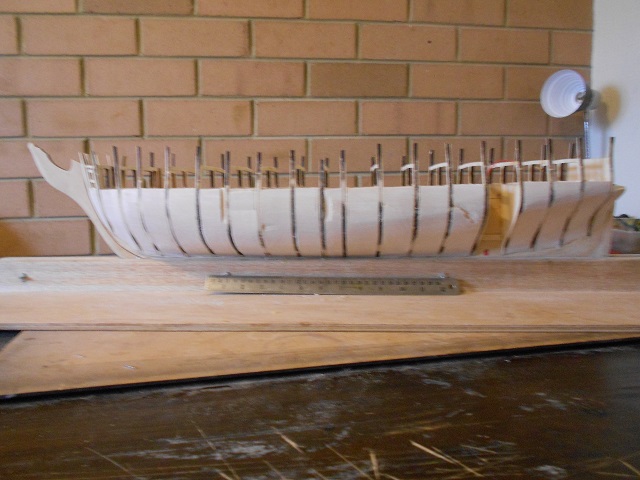
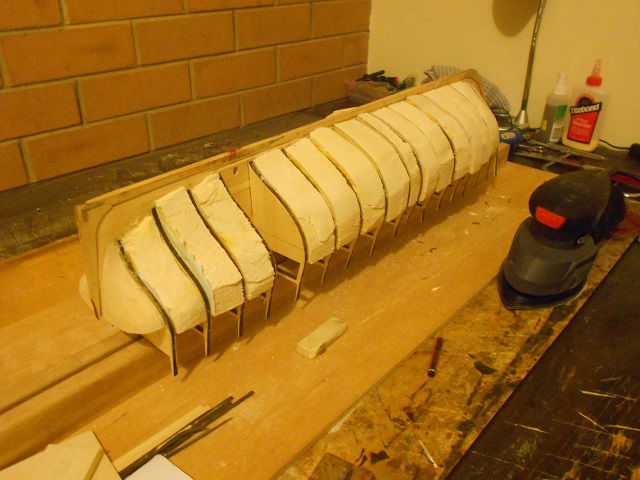
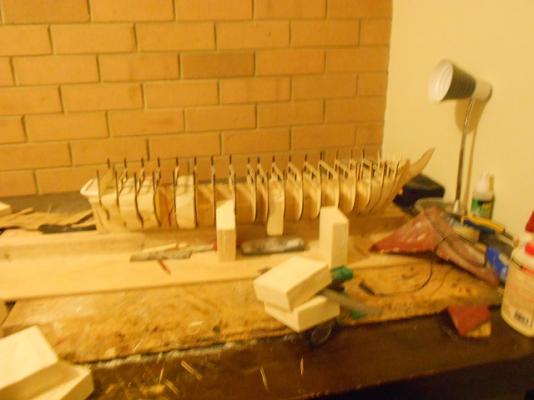
Arrg-eth !! CaptainSteve doest wish to apologize most sincerely to the assembled Horde fer his tardiness in posting an update o’ late, but he has been somewhat distracted with life. “Well, firstly an’ foremost”, Our Hero began. “May I just be saying, thank ye very muchly fer your concern there, Nigel (an’ everyone else what has asked.)” “In truth an’ most verily,” he didst attempt to explain-eth. “I be not a-wanting to bore the bejeezus out of those o’ ye who be only here fer the saw-dust with e’ery minute minutiae.” Howe’er, he doth be slowly getting himself ship-shape and back into action with Connie. “At least this girl cannae be unfriendin’ me on the FaceBook.com !!”, he were to mumble-eth into ‘is beard. Ahem (cough cough) … “Anyways, as noted, you lot be here fer the sawdust. So let’s get back to the ship modellin’.” And so, whence last we left him, CaptainSteve had made some grandiose promises. The first of these matters which he didst wish to deal with, was to be lookin’ to a-strengthenin’ and a-re-inforcin’ his ‘ull. O’er the past few weeks, CaptainSteve hath spent many a moment a-starin’ at his shapely rear end. “Err, that be Connie’s shapely rear end,” he didst state, by way o’ clarification. Even though the better part o’ the past two years hath been devoted to learn-ething as much as he couldst about the real Connie, he didst give-eth narry a thought unto how those details may affect-eth the actual construction of his model !! Verily, ne’er afore hath Our Hero added blockage to the POB kits what he has done-eth. “That be-eth true,” he were to say, “but I doth wish to do this build justice to ‘er name.” Indeedeth, CaptainSteve didst draw inspiration from a goodly number o’ the wonderful builds here on MSW. Two of these would be by MrHollom and JesseLee. And so, first up he didst spend-eth some time installing filler blocks to go betwixt the bulkheads. "Here be pictures !!", was all Our Hero would say, in closing.


-
Mobbsie, not sure if you can pick it up in Ol' Blighty, but down here in the Colony I managed to get hold of a wood stain called Black Japan. I'm planning on using it for my Connie when planking time comes. Reckon it will allow the wood-grain to show through better than if I were to paint.
- 255 replies
-
- 3
-
-
- granado
- bomb ketch
- (and 2 more)