

.jpg.f26acc9a74319261612561bfa7da1303.jpg)
vaddoc
-
Posts
1,579 -
Joined
-
Last visited
Content Type
Profiles
Forums
Gallery
Events
Posts posted by vaddoc
-
-
Valeriy I am late to the party but I just read all 17 pages of your log, to catch up. Truly exceptional work. Too much to take in! The precision of your work is mind blowing.
- Keith Black, FriedClams, lmagna and 3 others
-
 6
6
-
Moab, I share your problem. Essentially, how to work metal without proper metal working tools, that is a lathe and all the needed accessories and skills. I honestly think it cant be done. I tried also using the Dremel, files and sand paper to shape brass and copper. Failed miserably and burned my fingers.
Maybe use another material and use metal paints?
- mtaylor, Keith Black and Moab
-
3
-
Now Michael, how about that Skipjack and its lovely engine and gearbox, this is certainly on hiatus. The boats will not build themselves you know. The barbarians at the gates...😁
- thibaultron, druxey, Keith Black and 1 other
-
4
-
Thanks Flying Fish! Yes, the width of the planks over the most curved parts will be (hopefully) 8 mm which I think should be fine. The planks will need to be heavily bevelled though.
-
I thought I d just post a few more pictures. Half way through the outer planking!

- FlyingFish, FriedClams, Blackreed and 7 others
-
10
-
You are progressing very well Hakan, the boat looks fantastic.
Gold is quite dense if you are straggling for space, It would make an excellent choice for ballast.
-
You seem to be progressing very well Mark! I have no experience with bread and butter construction but I think this way of building a model is certainly challenging, with plank on frame the planks can show which frame is too high or low but with a solid hull I guess you just need to eyeball things. A lot of wood to be removed!
-
Just noticed you started a new project Michael, excellent! I ll be following from the back of the room.
- Keith Black, FriedClams, mtaylor and 1 other
-
4
-
-
So I think I should provide an update!
Despite my efforts, the sheets never became really flat. Now these sheets can be easily replaced but I thought I d try and rescue them/ The last efford was wetting them thoroughly and leaving them compressed between flat surfaces. 3 days later, they had become mouldy! Bottom line: Wood in this state cannot be salvaged.
1 hour ago, Charles Green said:It is not water - but the heat in hot water - that allows warped wood to be reformed, or straight wood to be bent.
Actually, water does dissolve some bonds and allow some wood movement. From then on it is indeed heat that softens the lignin but moisture dramatically decreases the temperature threshold for the wood to become soft.
- mtaylor, thibaultron and Canute
-
3
-
On 3/22/2021 at 8:15 PM, KeithAug said:
Are you intent on burying all this hard work under paint?
Oh dear Keith! I must admit I feel a bit guilty. I did not take this boat seriously in the beginning, hence the horrible plywood frames and the general casualness in the planning, fairing and overall arrangement. Indeed, I initially intended to paint the boat. But I do agree with you, if after the filler goes in, the wood sanded and sealed, it looks any good, I ll leave it unpainted.
On 3/23/2021 at 5:45 PM, Michael_A said:I keep thinking that the hull shape of your craft is similar to some bigger classic sailboats and I wonder if there are any other models out there with a similar form that you could use as a guide. I'm just not sure how to find the right photos / models.
Michael, I think you have a point. Bluenose, J class boats and many other (I think mostly American) boats have similar shapes, with horn timbers and the widest part of the hull very close to the stern. I tried to find on the net photos with raw planking but could not find any.
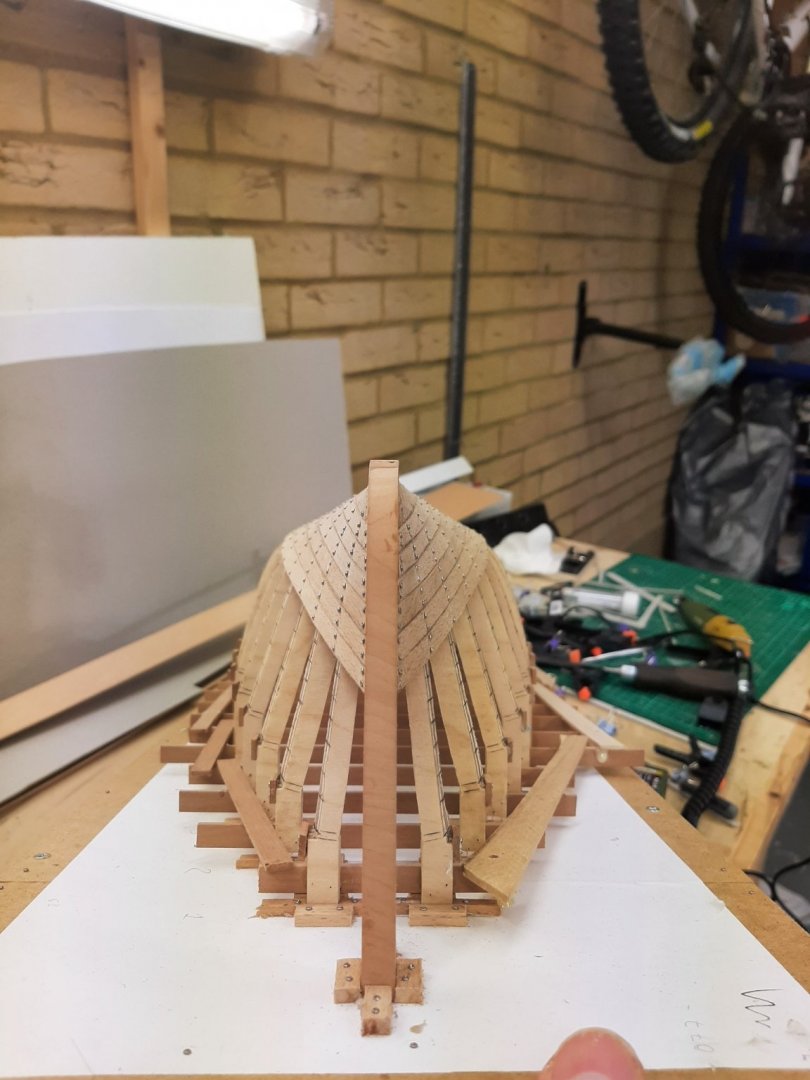
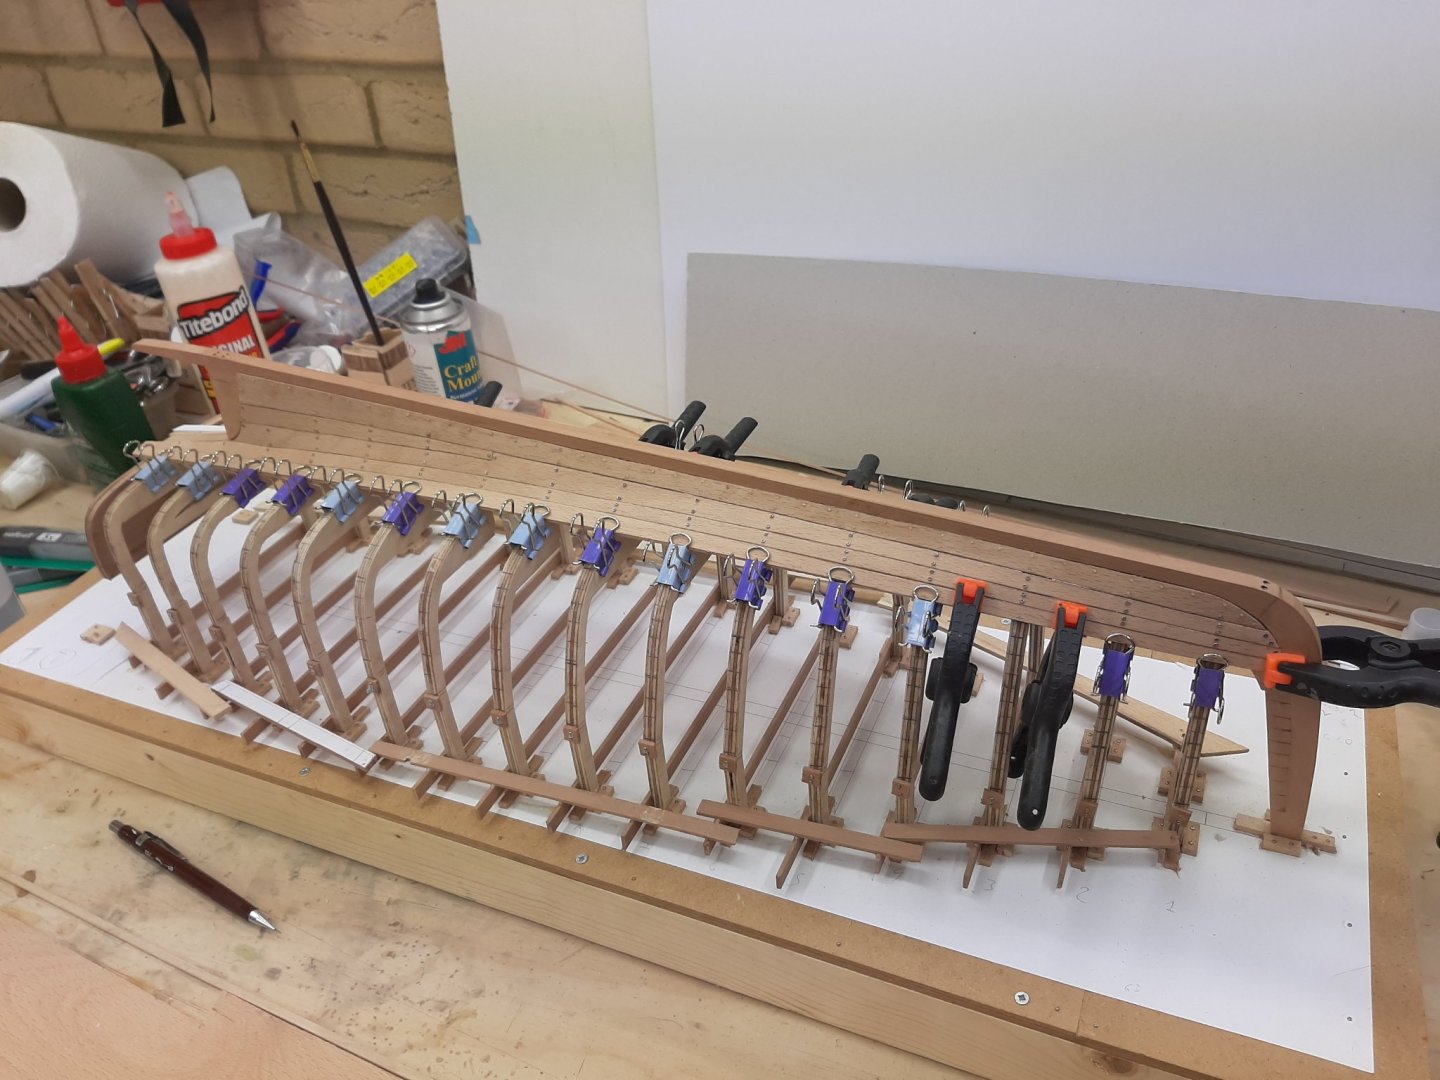
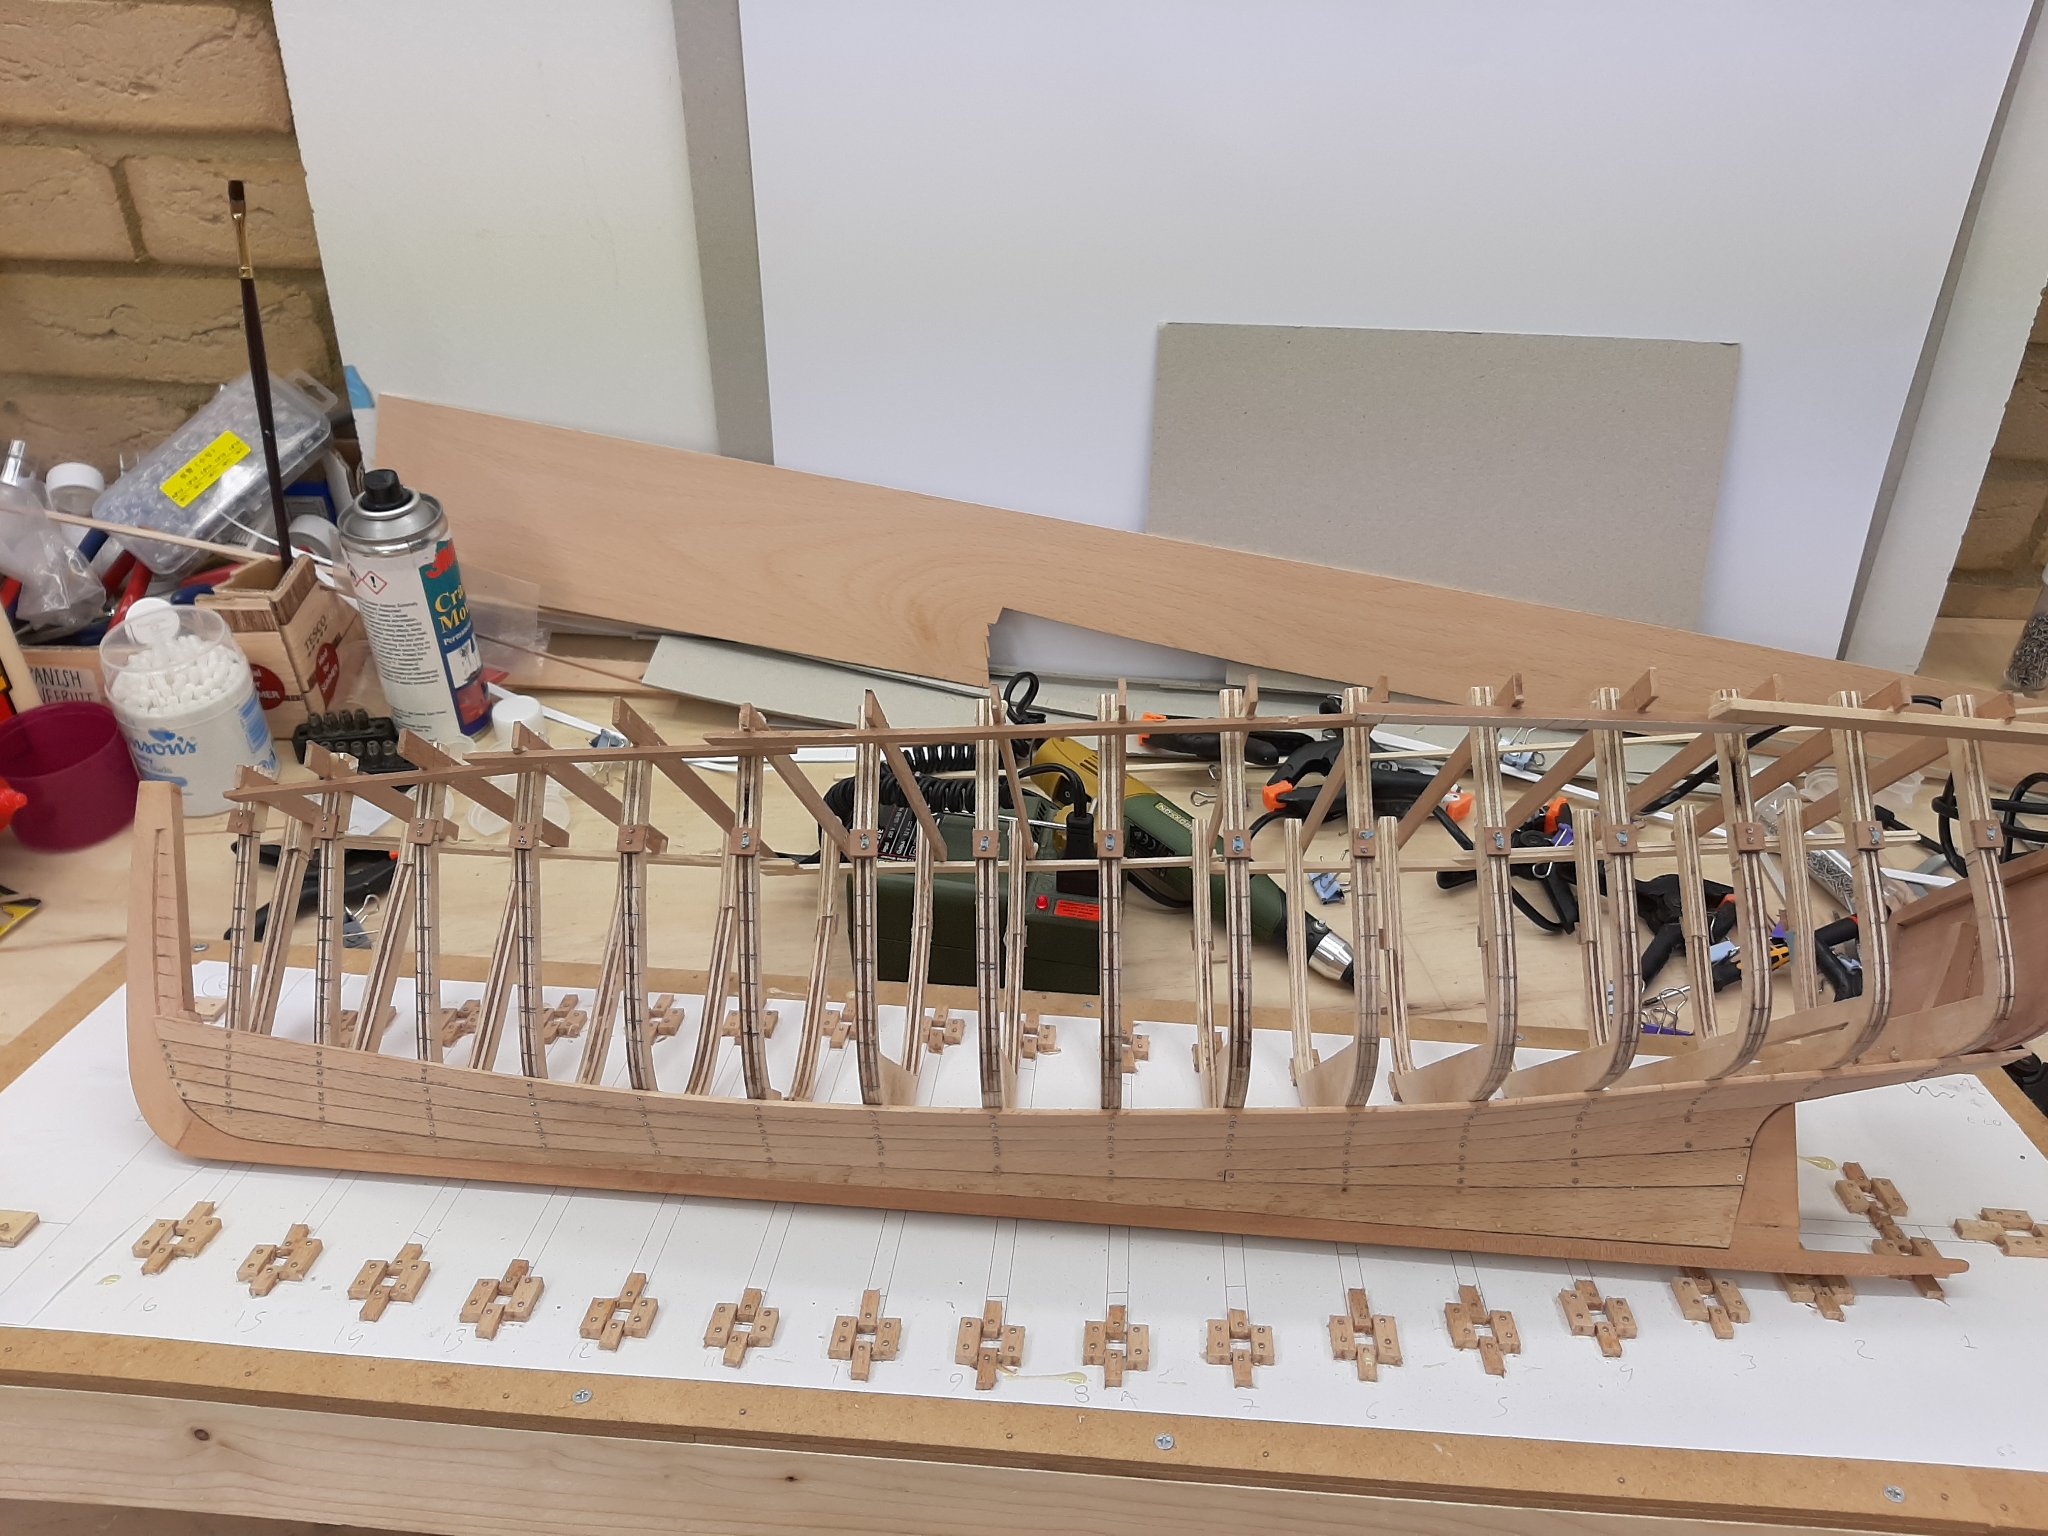
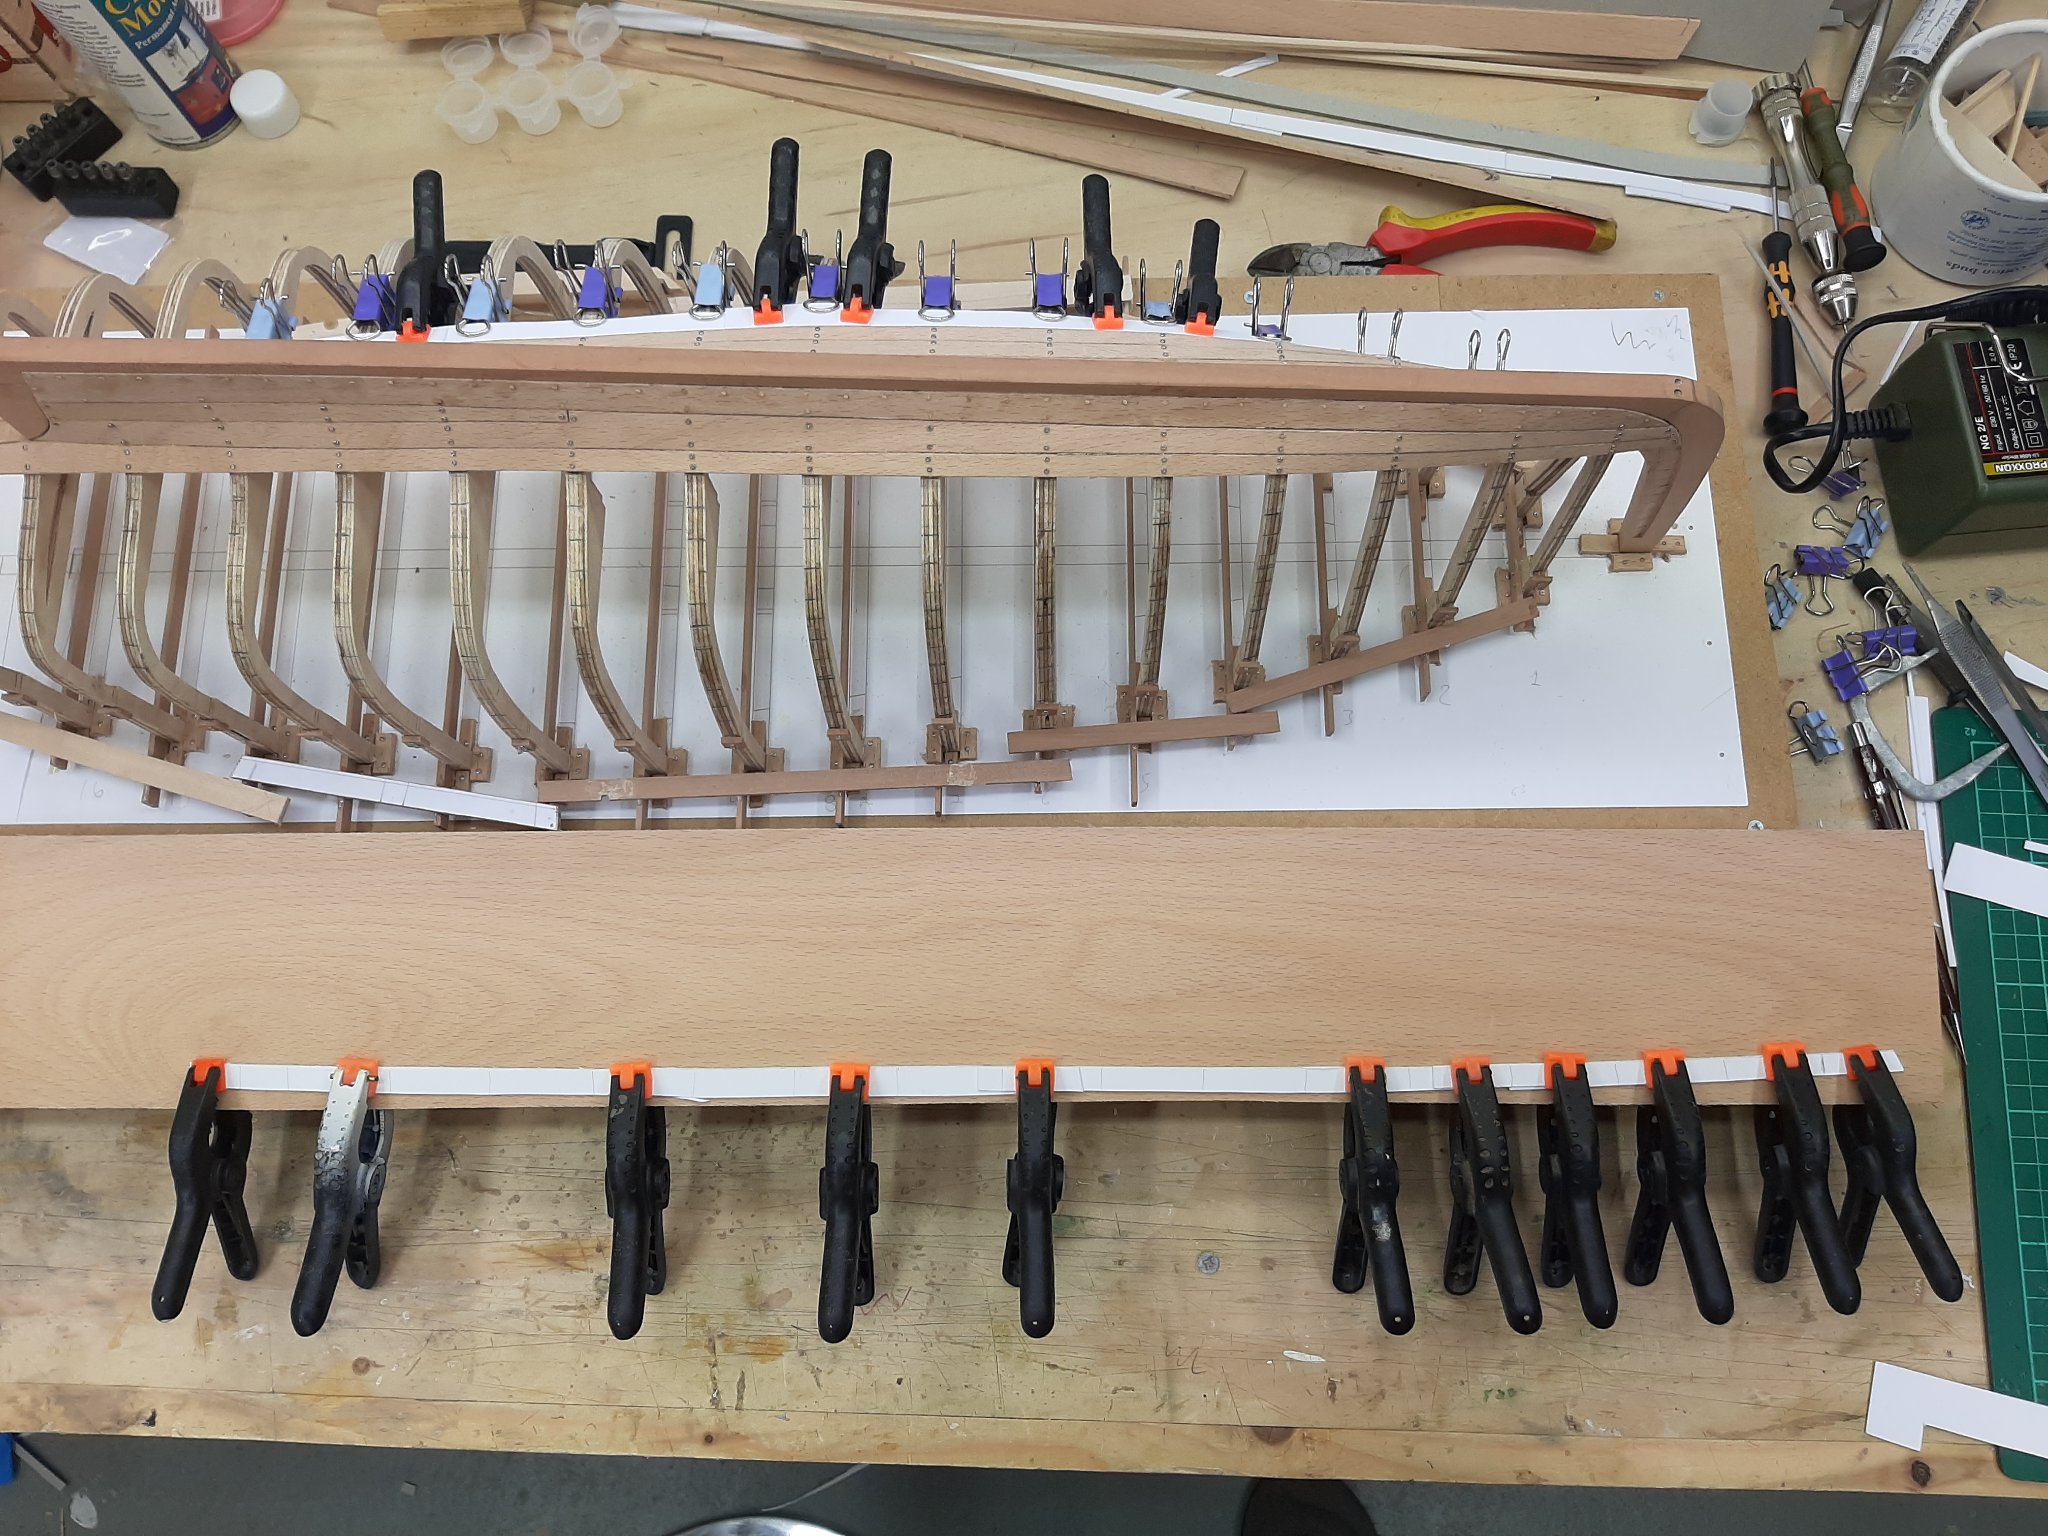
So I ve done a few more planks, things are moving on much faster for a number of reasons. The planks are easier to spill, I am getting better at it and there is no need to steam the planks, they take the curve well. Beech is a very nice wood for planking!
My frame fairing is abysmal though! A couple of frames aft in particular are very wrong. Not sure what happened but I correct them as I go.
So far, the initial plank planning is working. The planks just bellow the turn of the bilge are the ones that I think will need the most spilling and are quite curved. However, they are not impossible and in real life should be feasible to produce.
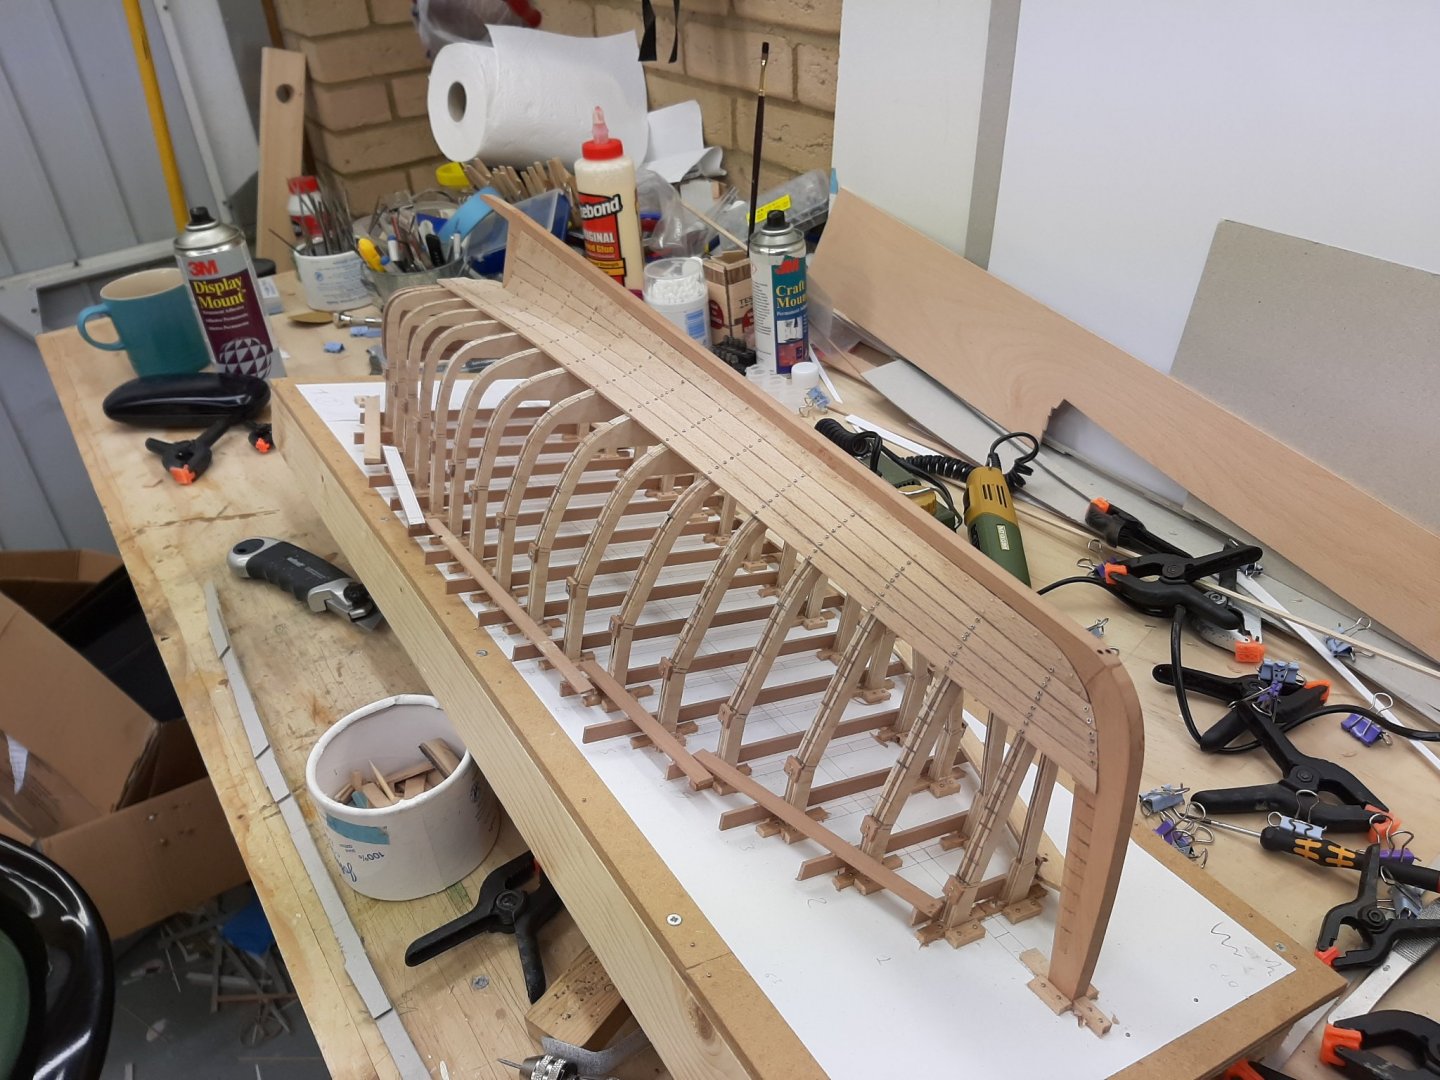
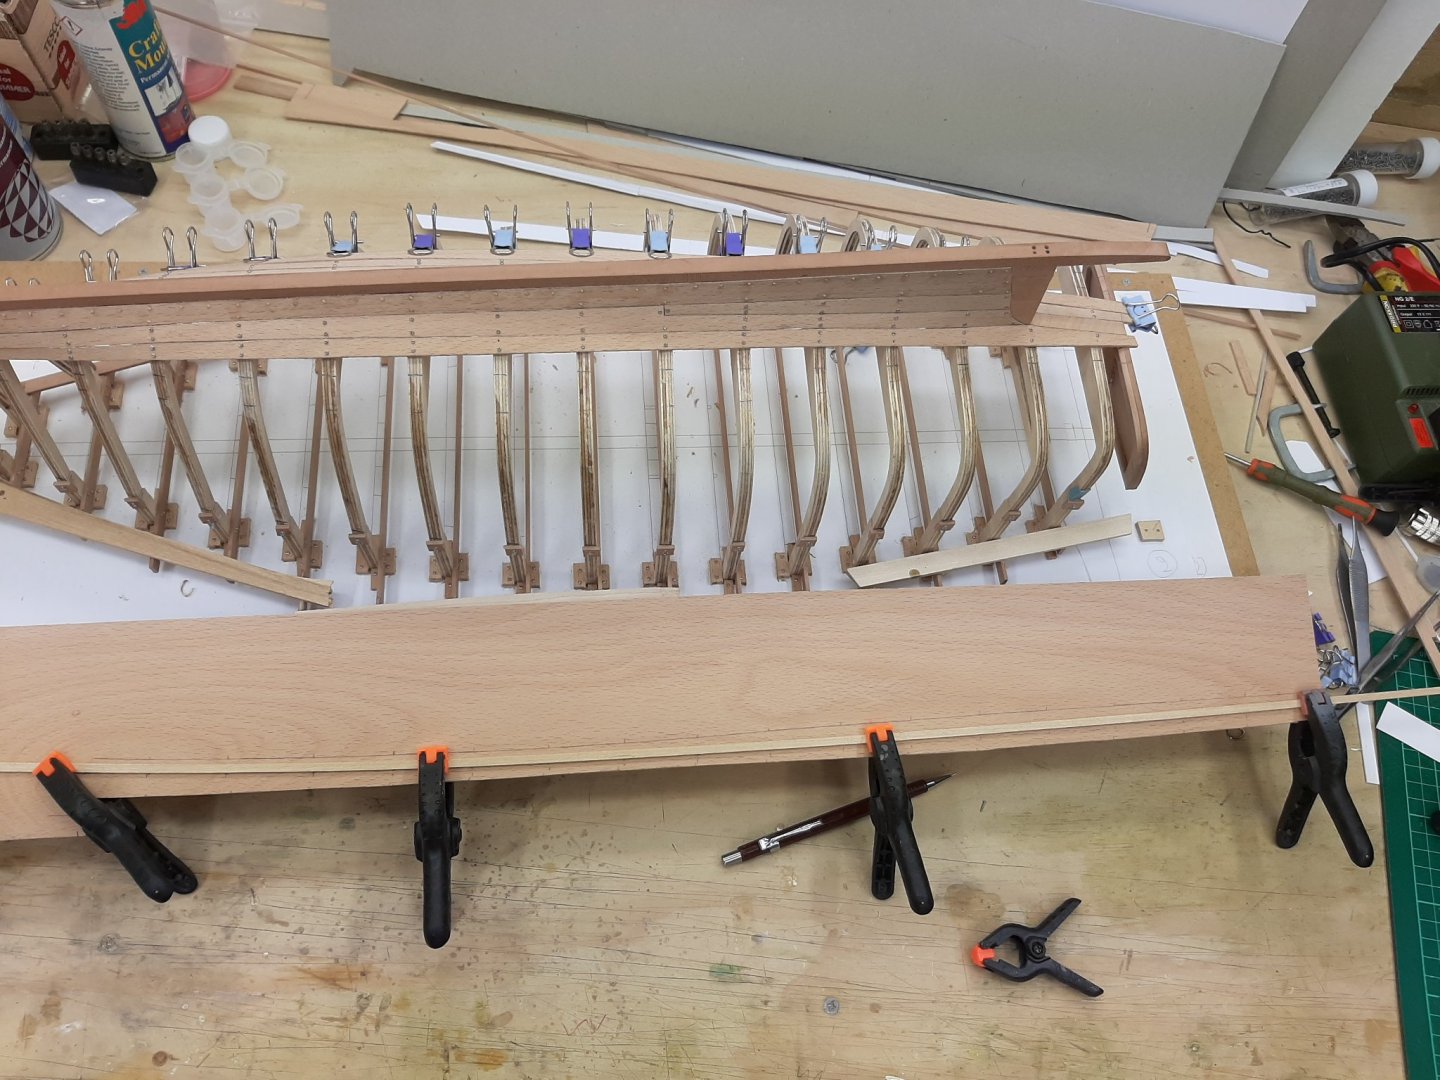
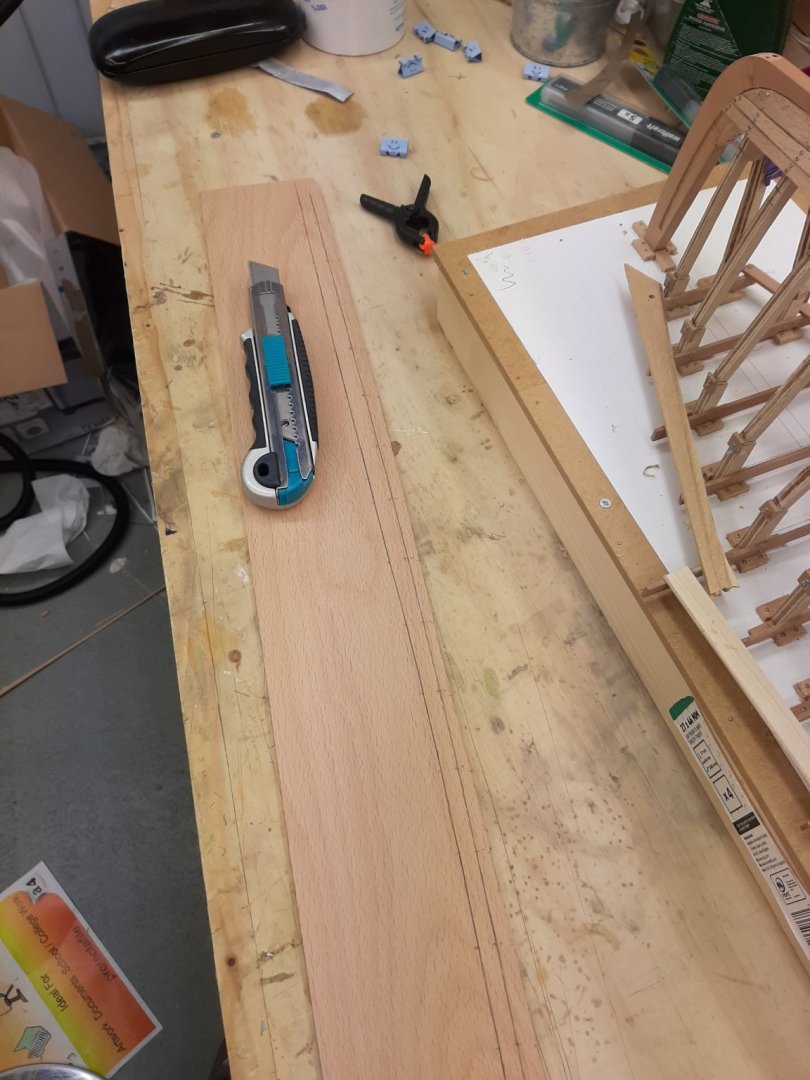
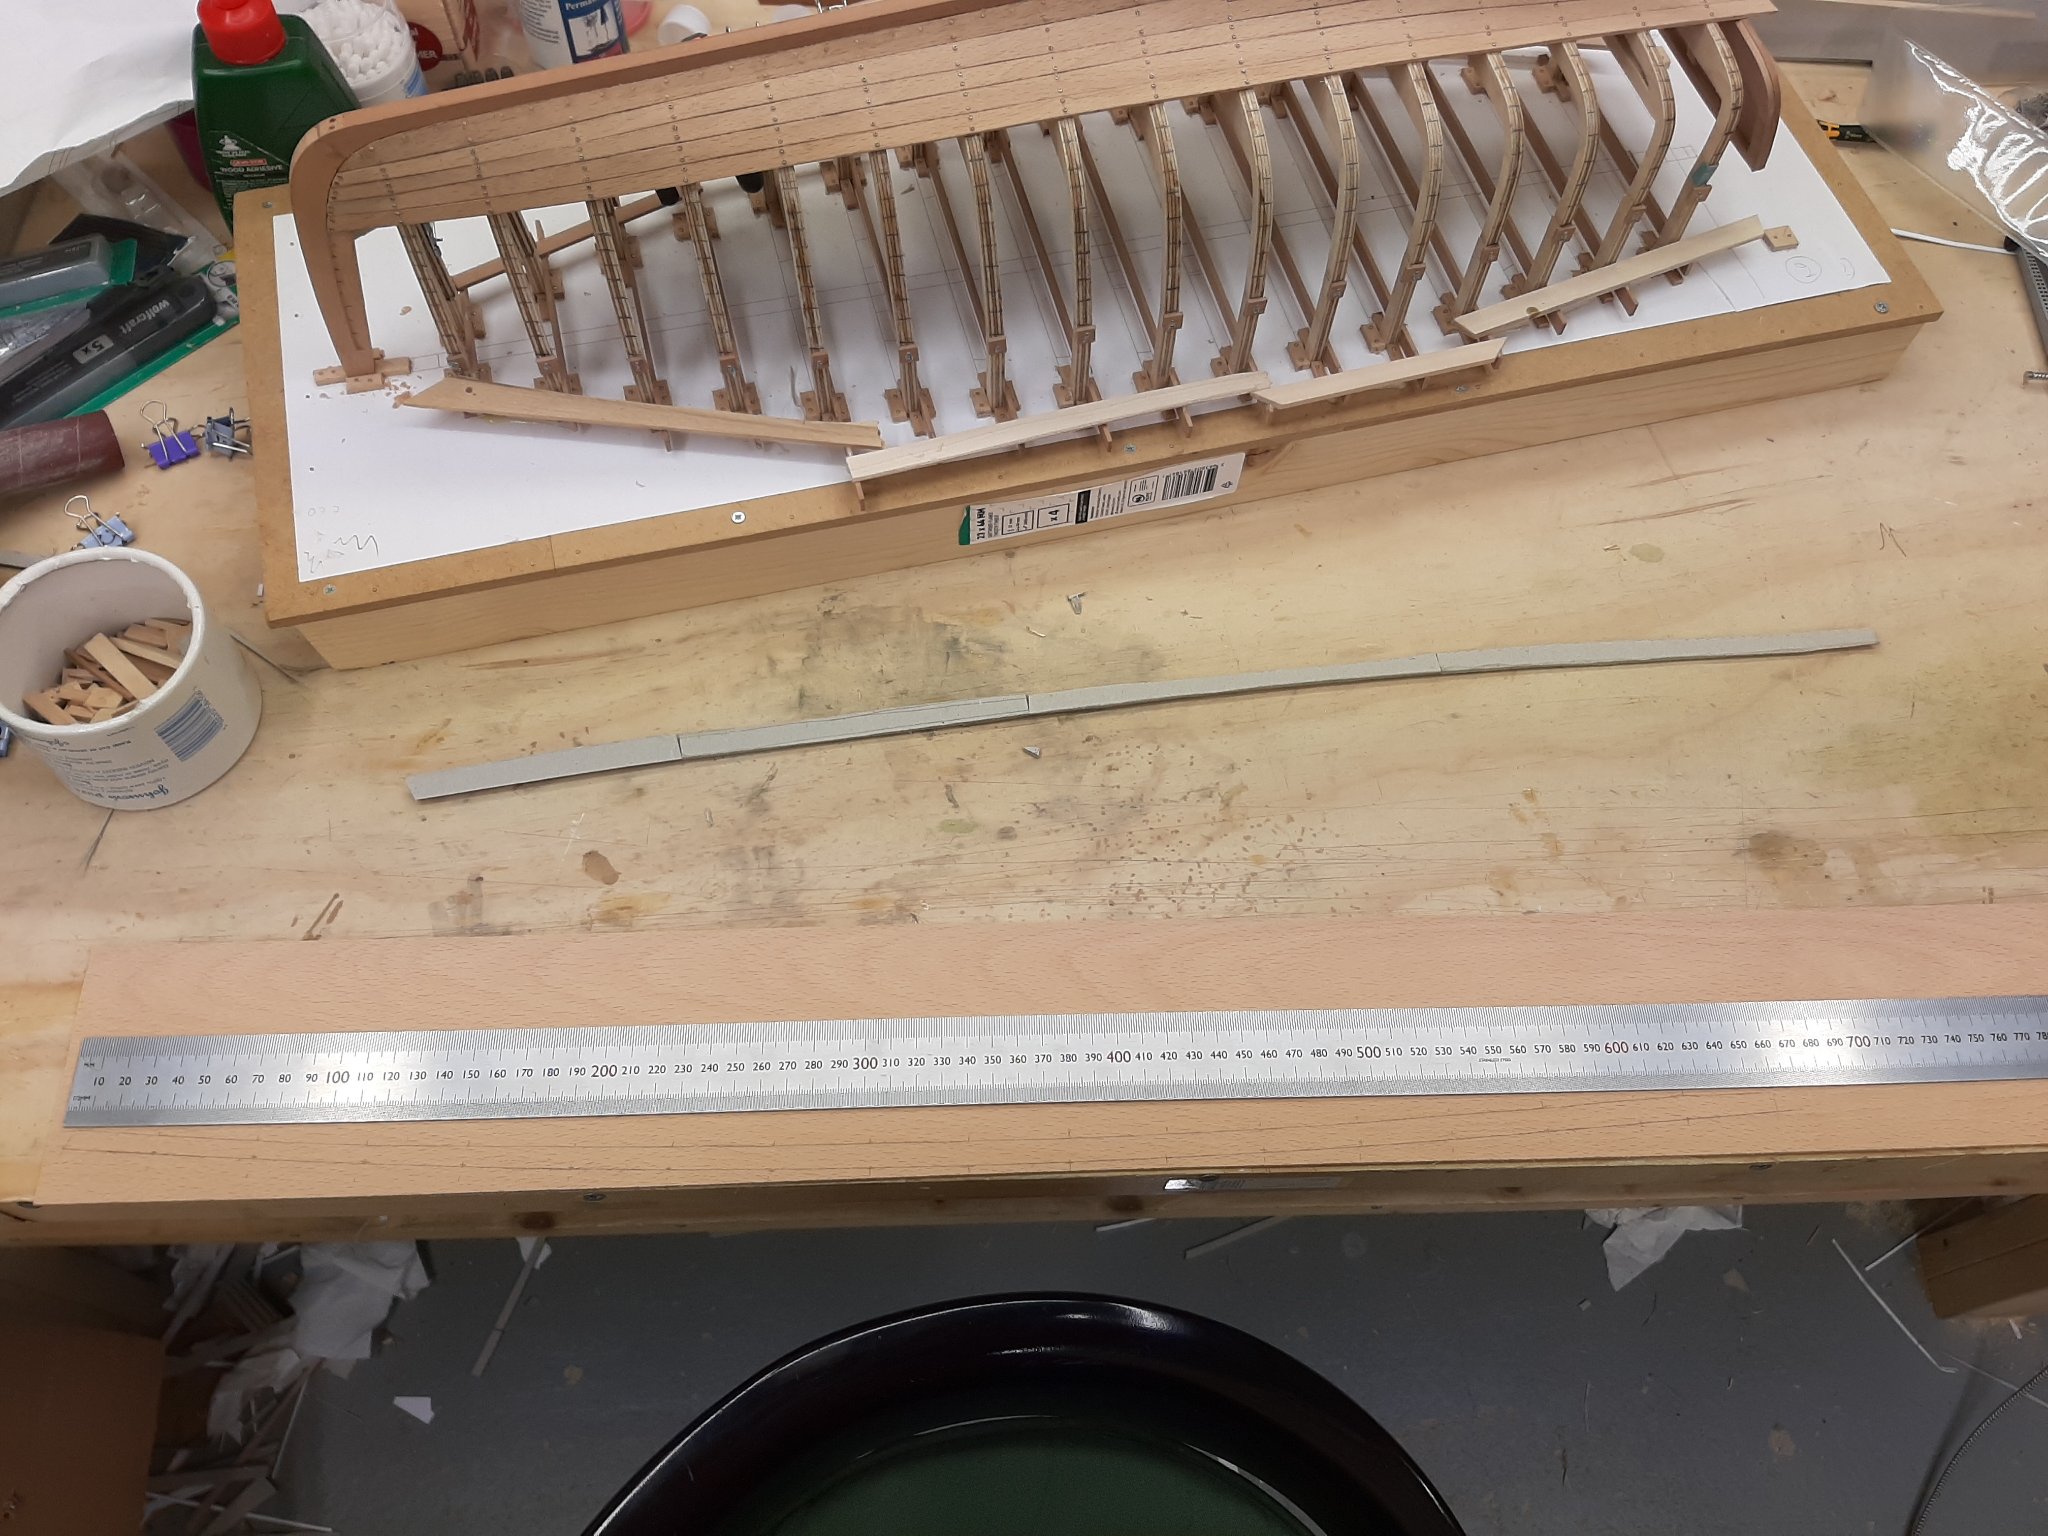
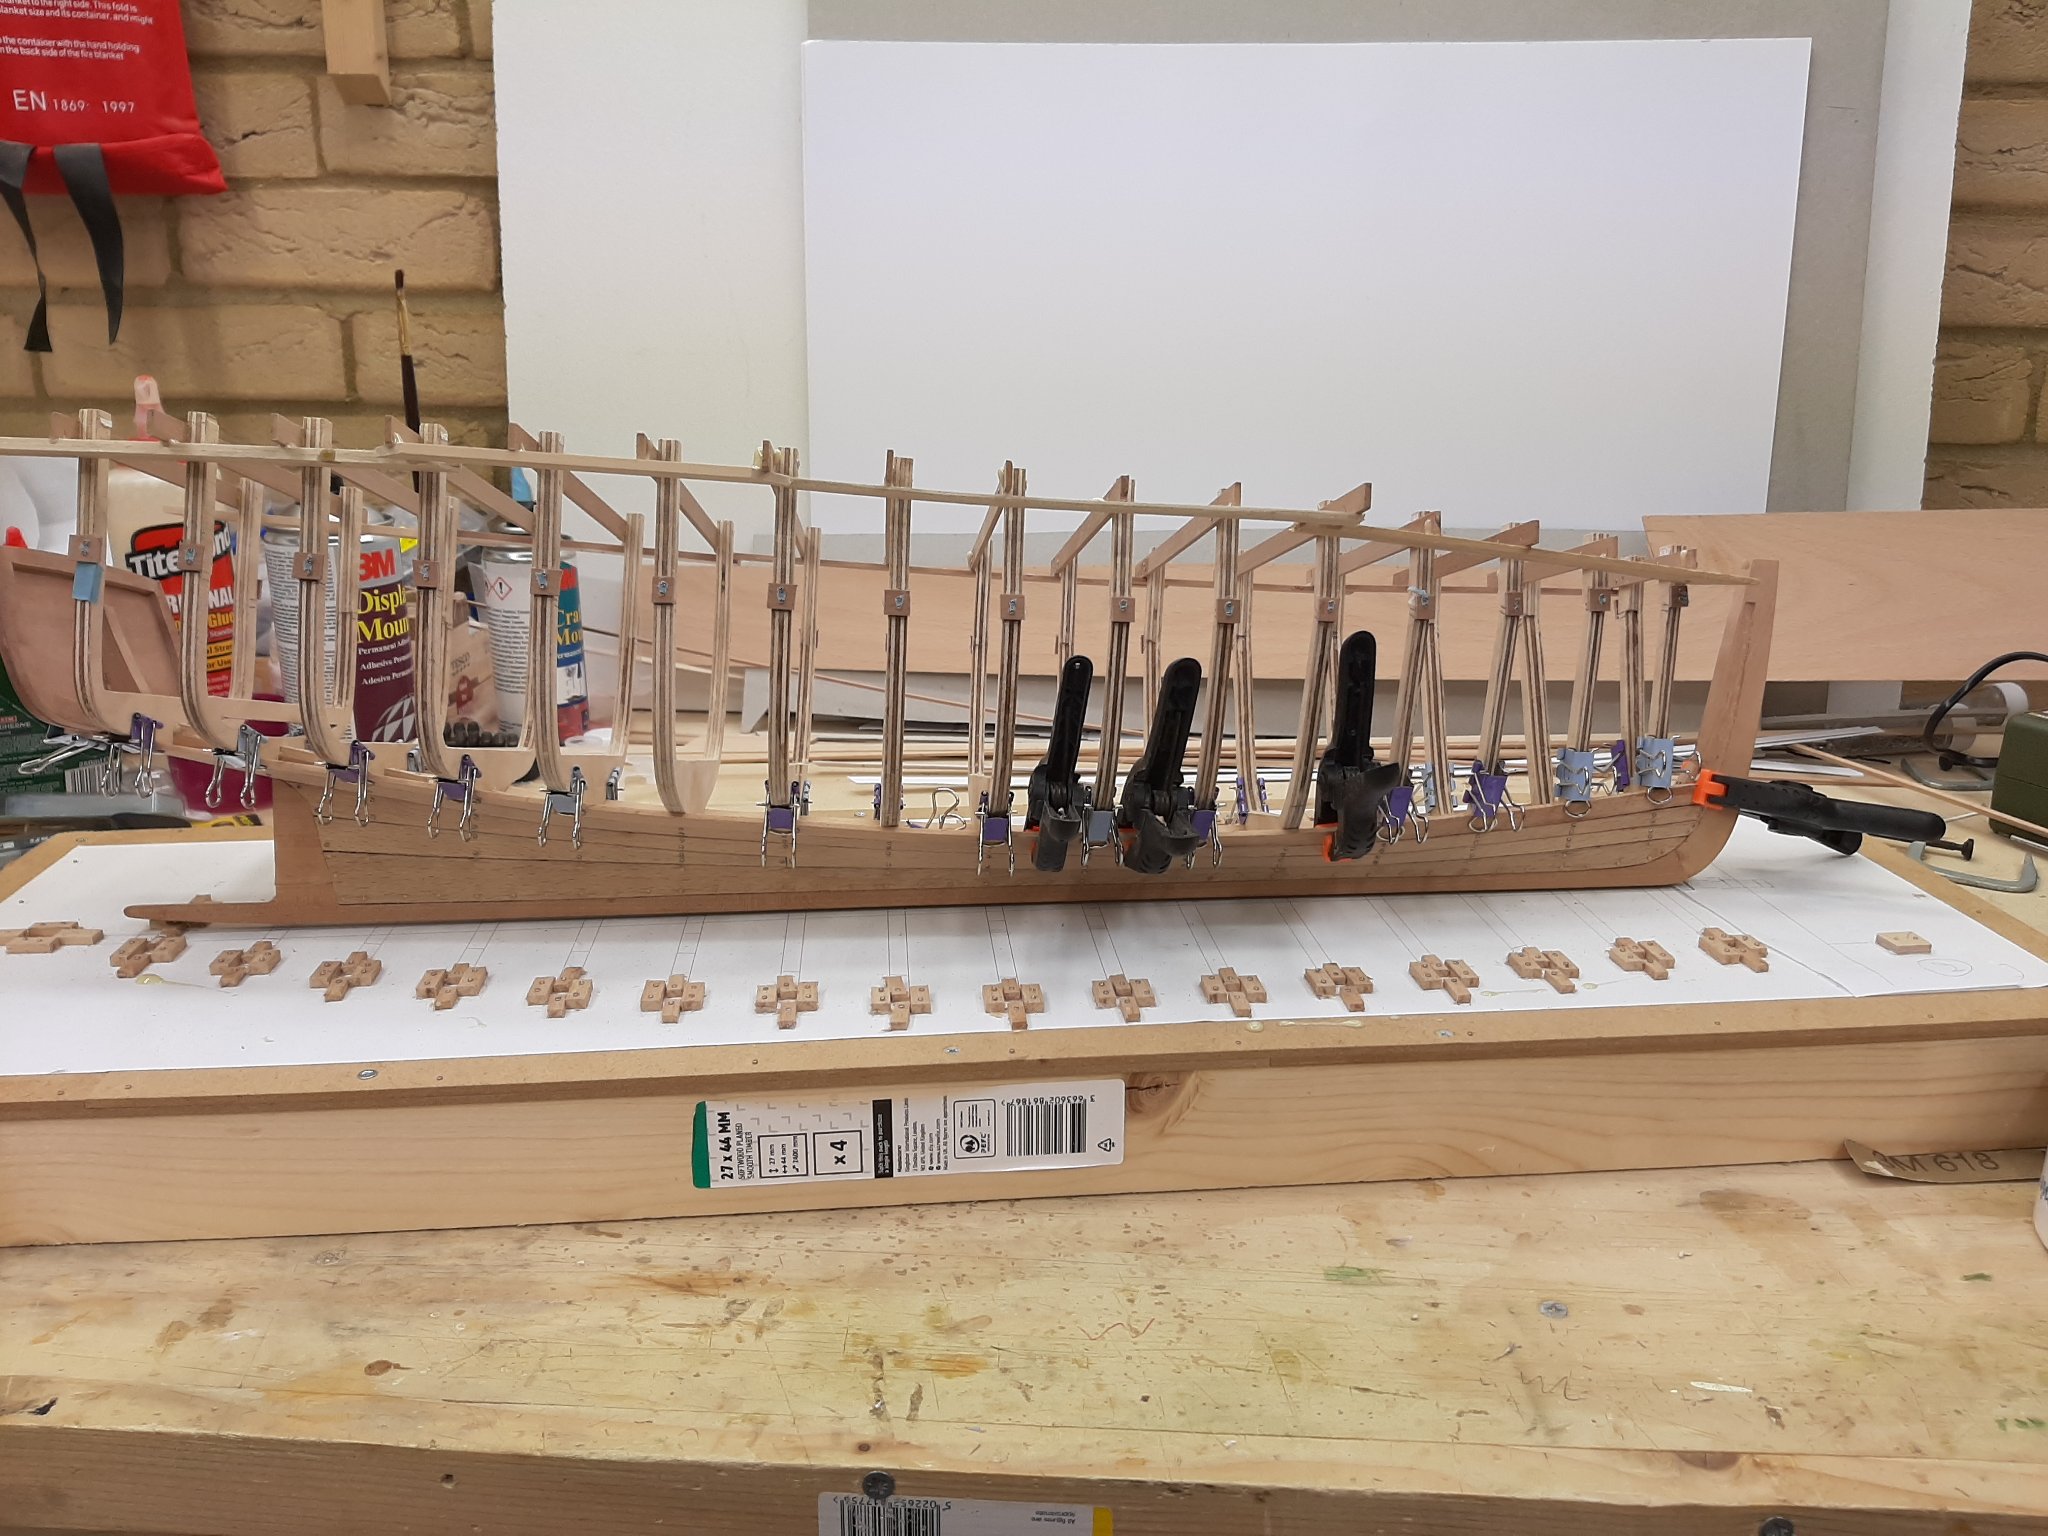
Some photos for your daily dose of planking:
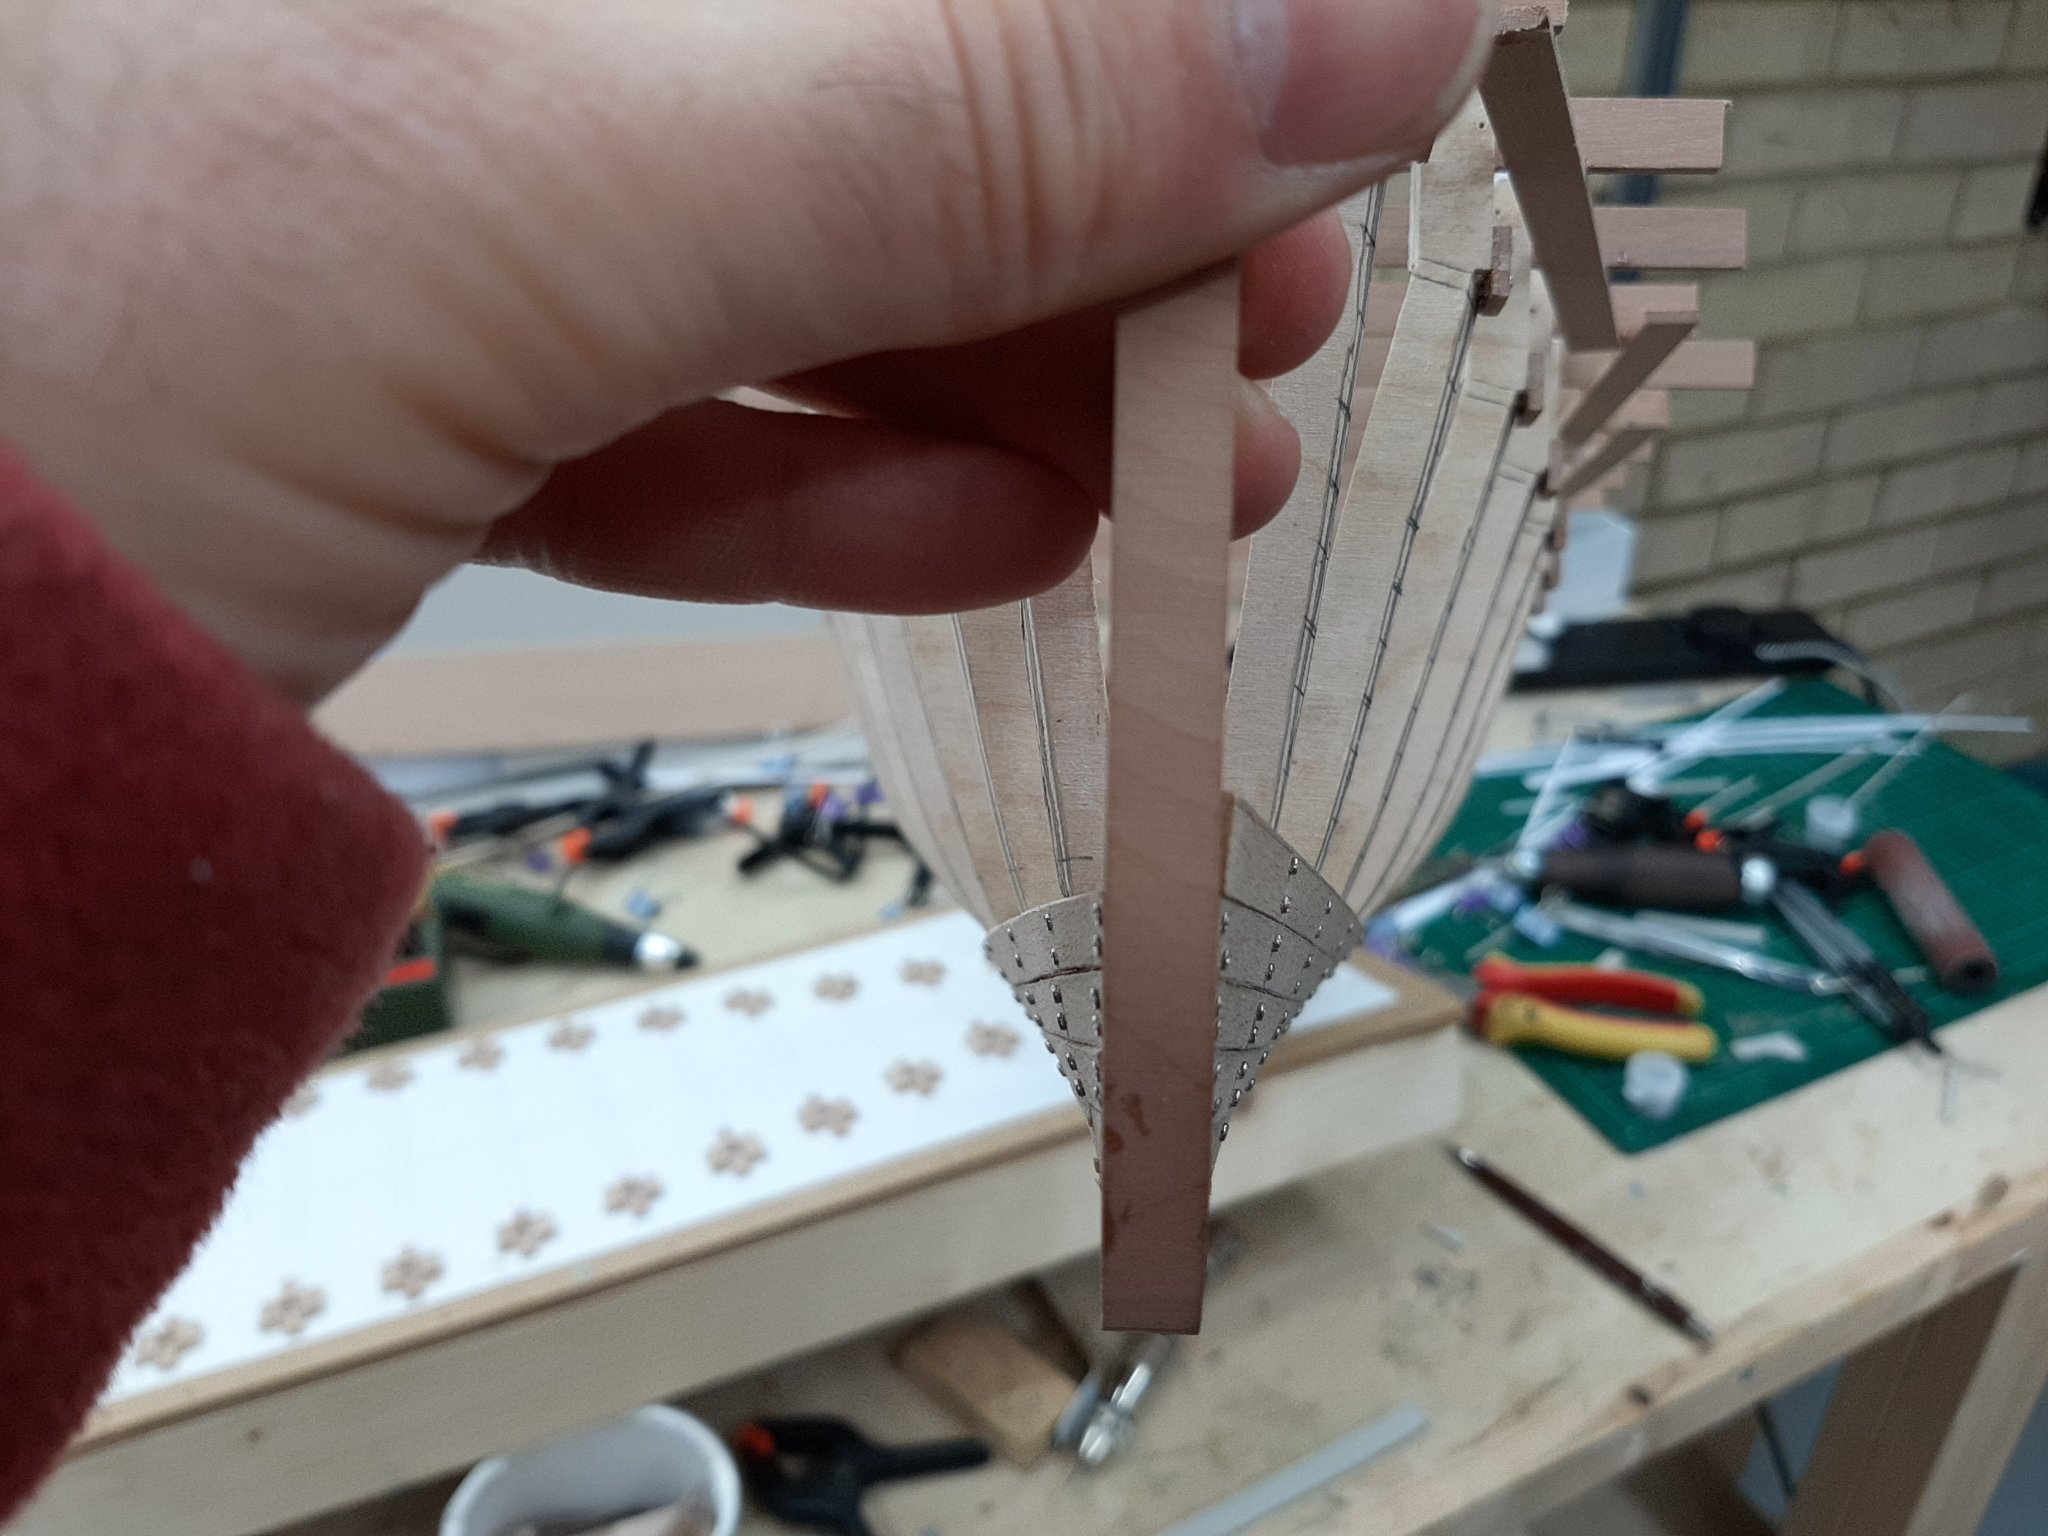
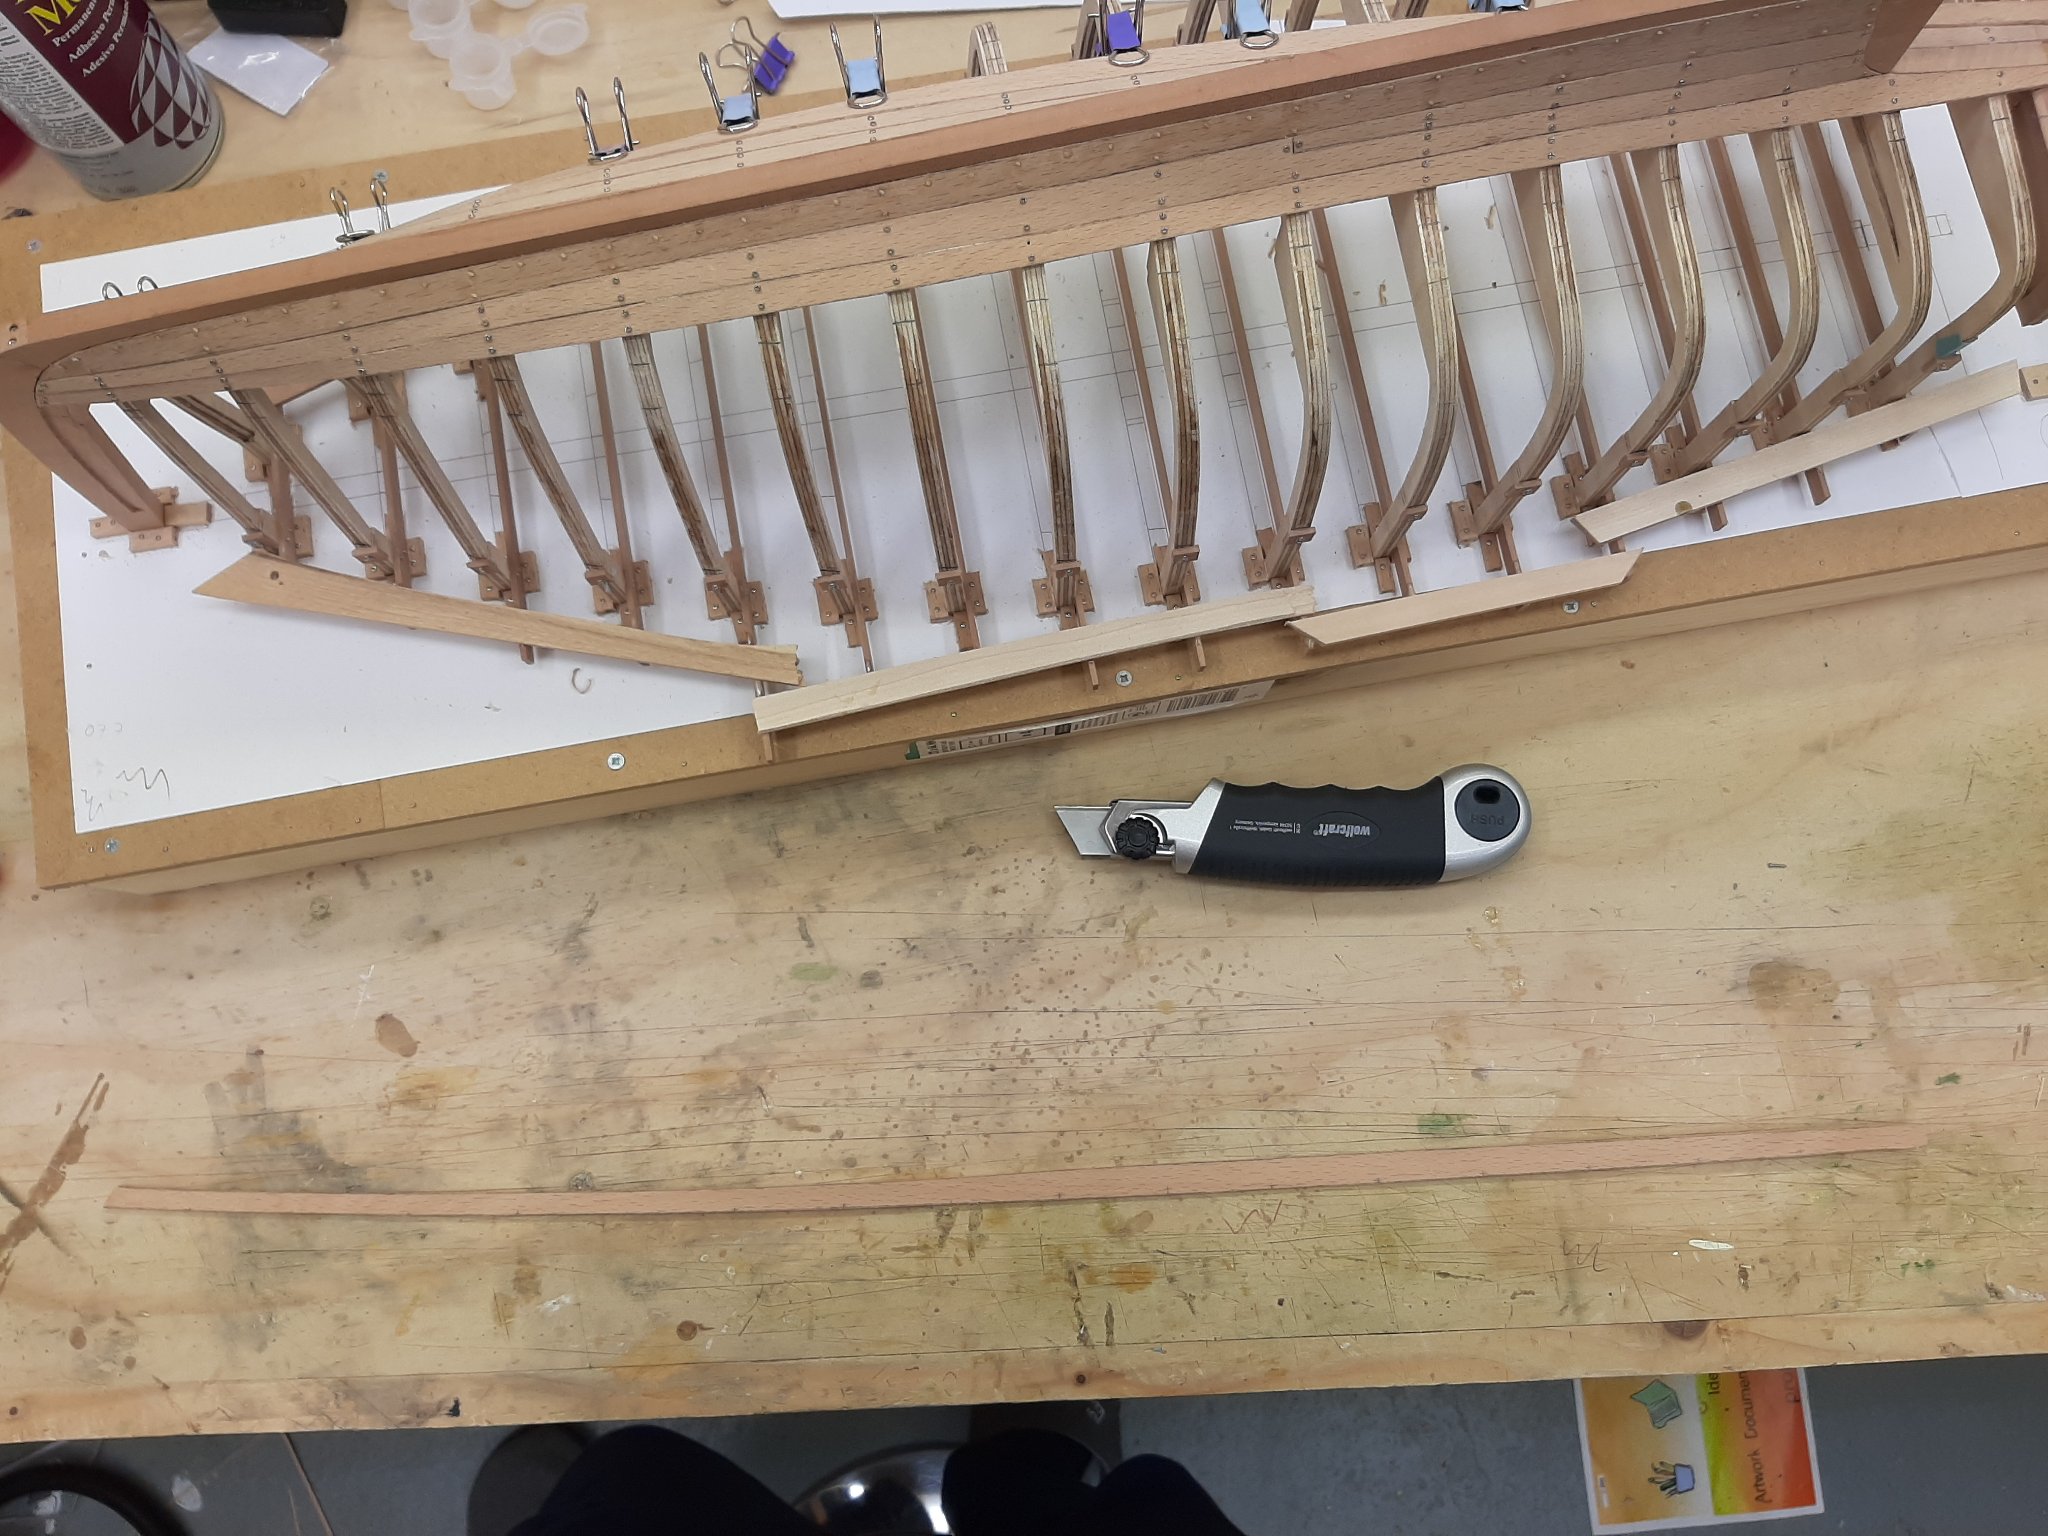
The planks are now 65 cm long-6.5 meters in real boat. This is one of the most curved planks.

However, this plank will only need 25 cm wide stock.

This is the state of the boat now. This plank needs a bit more work before it can be installed.
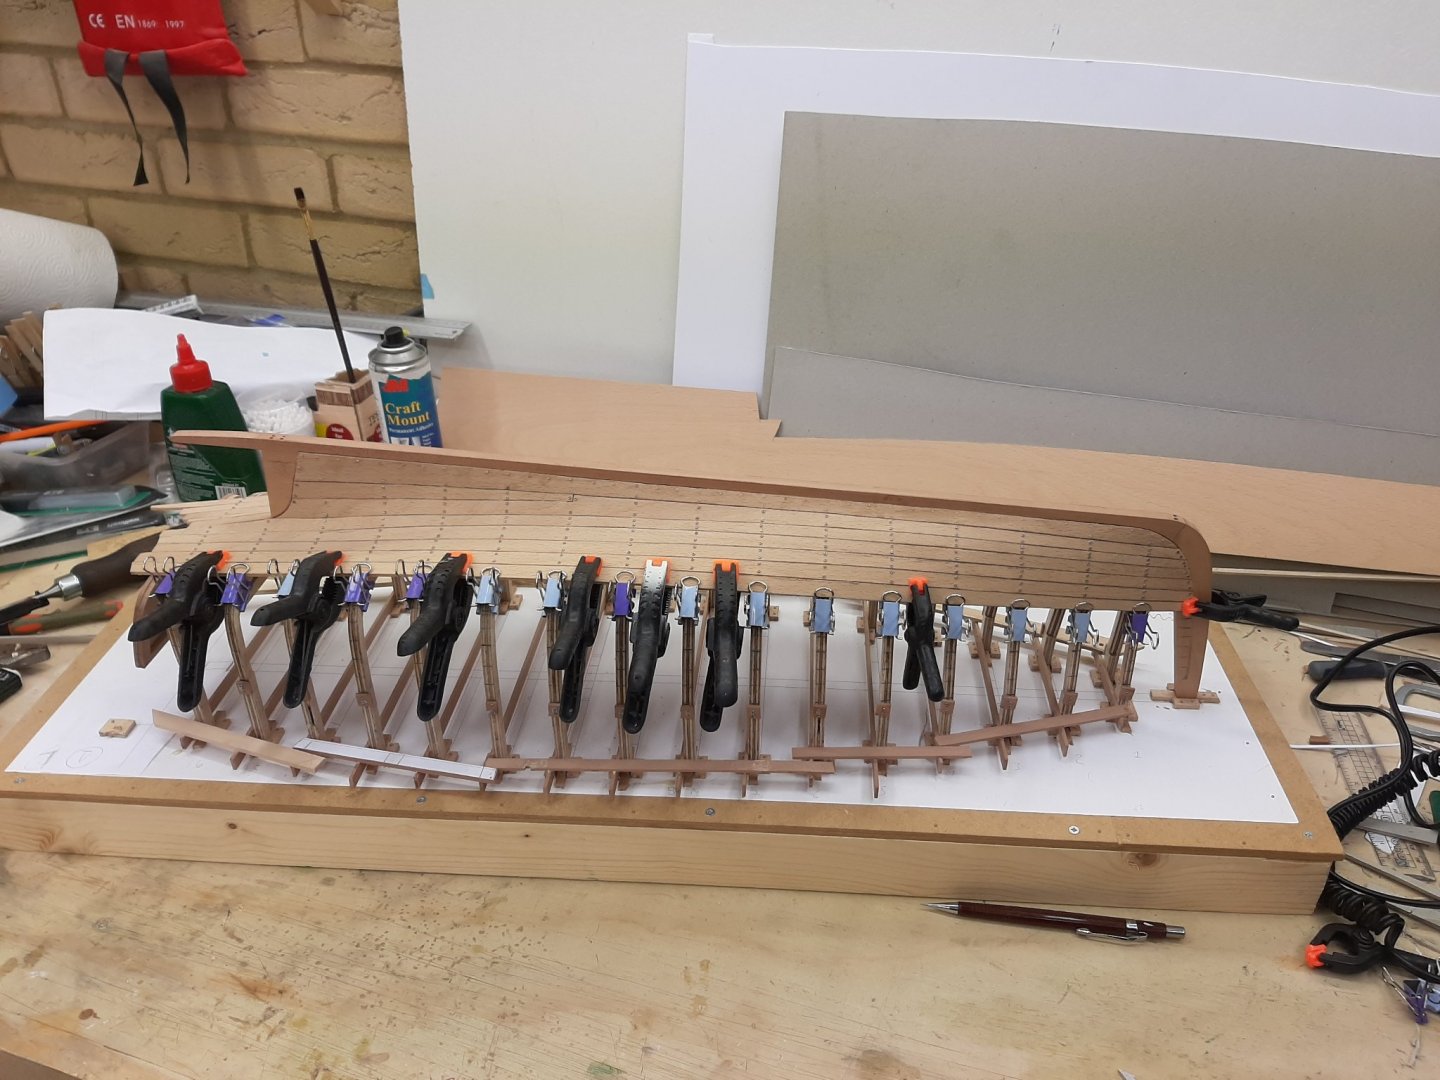
This is plank No 13, just 15 planks more left.
- FriedClams, BobG, bruce d and 4 others
-
7
-
Welcome Halvor! Have fun building your first boat.
Regards
Vaddoc
- Keith Black, Halvor and thibaultron
-
3
-
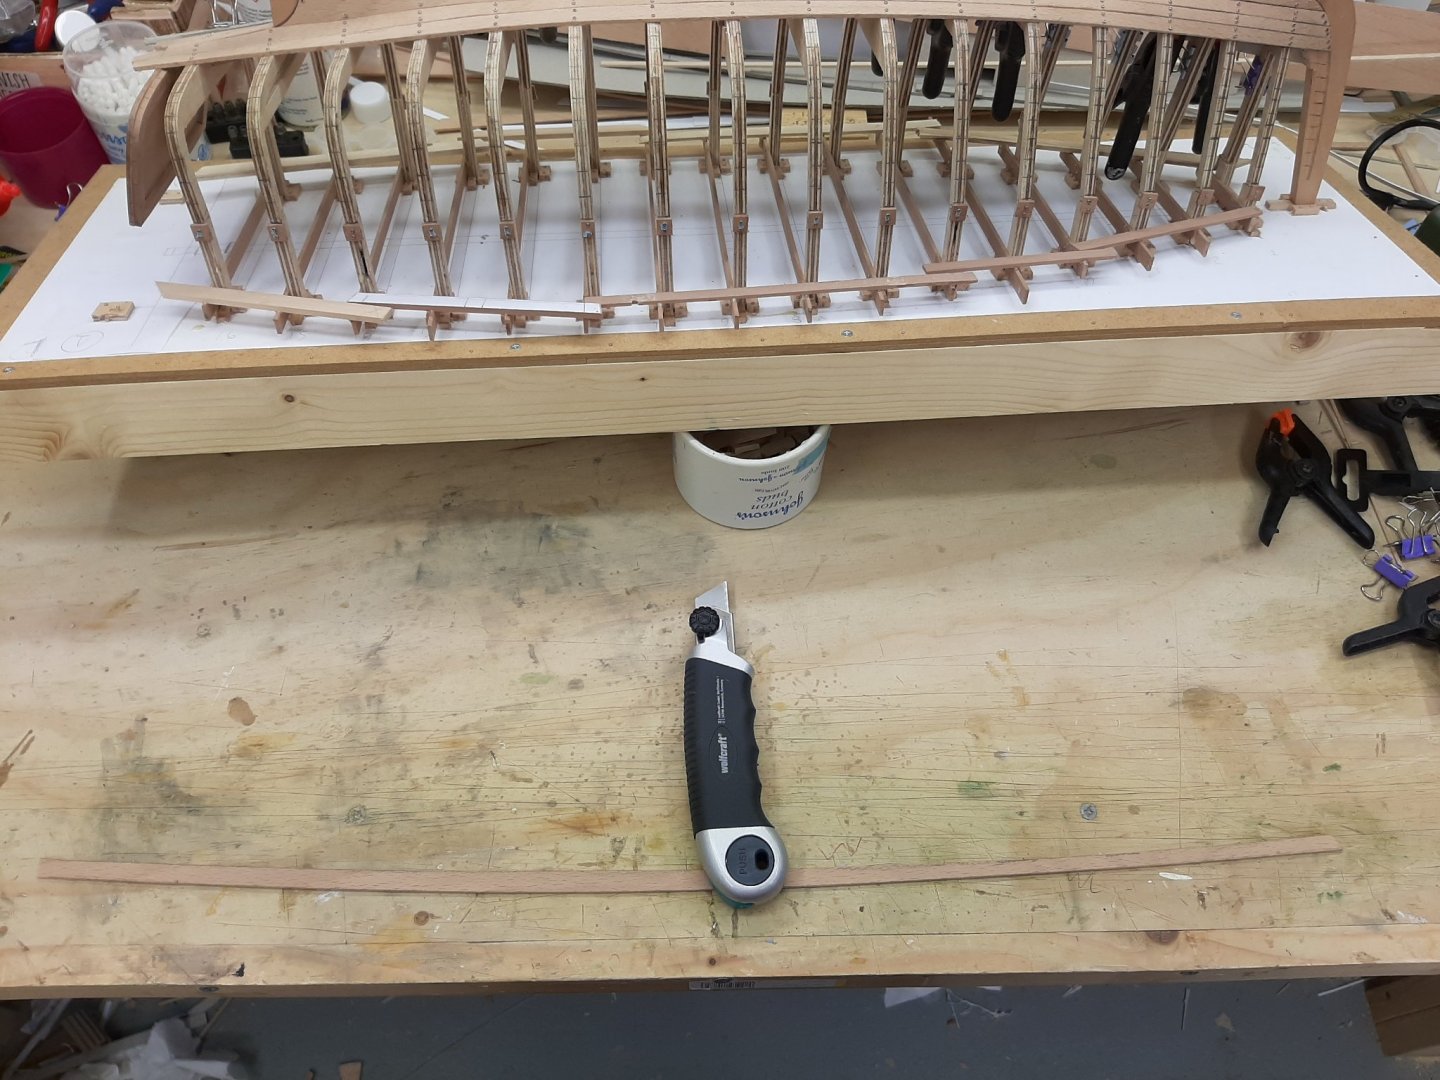
I have a similar tool-very unsuitable for modelling. Very aggressive, very inaccurate, awkward to use. I have not find it useful not even for DIY
My 2 c!
- thibaultron, bruce d, mtaylor and 2 others
-
5
-
Indeed a nice book. I found especially useful the part describing top sail arrangements-could not find this info anywhere else. Leather's "Gaff rig" also combines well if someone wants to understand gaff rigging
- mtaylor, Harvey Golden and thibaultron
-
3
-
9 hours ago, wefalck said:
your planks should already begin to be wider in the middle
Wefalck, this is a difficult boat to plank-the shape is odd.
Because of the slopping keel, the widest part of the keel (or planking) is actually near the stern, not midships. The hull has a couple of very acute curves that need narrow planks. Also, any other run of the planks, especially with wider planks, would need after spilling such curved planks that would simply be impossible to produce from available stock or would need scarfing which I do not want to do.
Another issue is that, in certain areas, quite wide planks could be used but would look very odd, very wide planks and very narrow side by side. Near the sheer and midships my planks indeed get wider but still maintain some symmetry.
Planking is not easy. Now, are there different ways to plank a specific hull? I honestly do not know, I have never seen two shipwrights planking the same boat to compare their planking. This would be really very interesting. Or maybe in the future someone will build his own version of the boat and may have a different arrangement.
The Yawl I expect will be a very different boat to plank and I suspect the priority there will be plank width symmetry.
@Michael_A, maybe you have some thoughts on the planking?
- KeithAug and FriedClams
-
2
-
6 hours ago, Michael_A said:
how will you fasten them permanently when you are done?
Thanks Michael!
I ll be using exclusively treenails, I ve already made a couple of thousand. For the Yawl though, I am thinking of using threaded 0.8 mm brass wire.
-
Fantastic work Bolin, unfortunately I missed much of the journey. Your lapstrake came out very nice! Very sturdy construction with all these frames and cross members/thwarts.
-
Many thanks to all!
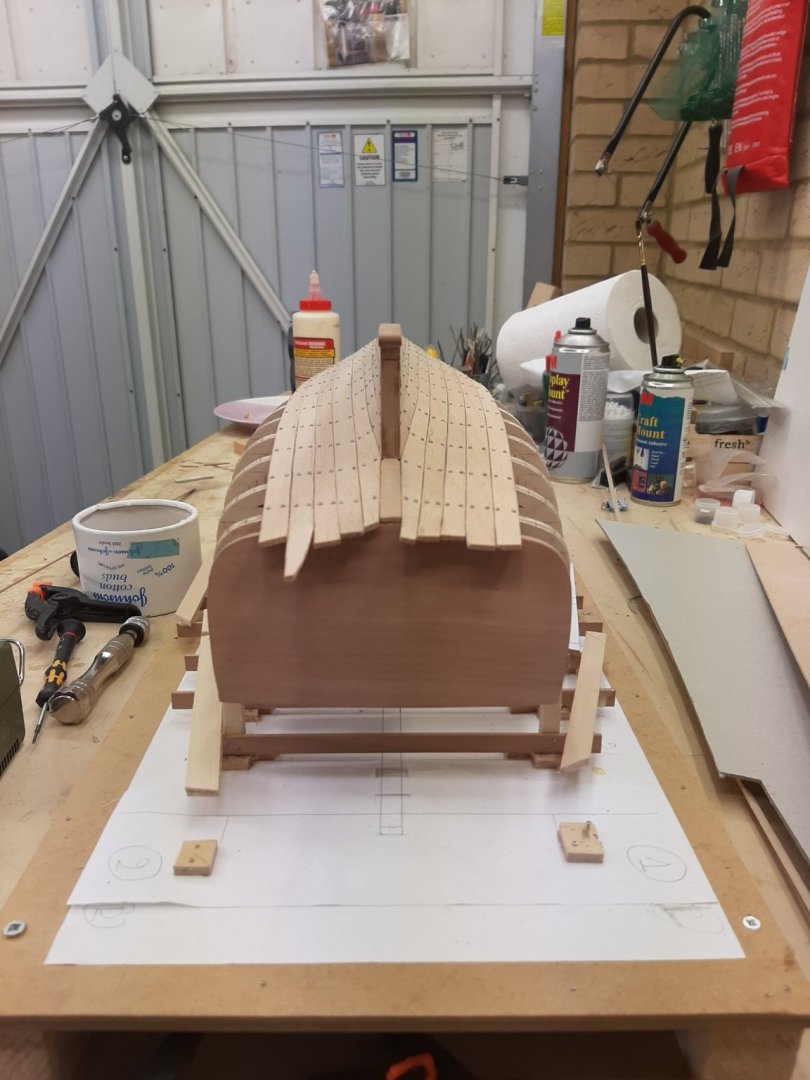
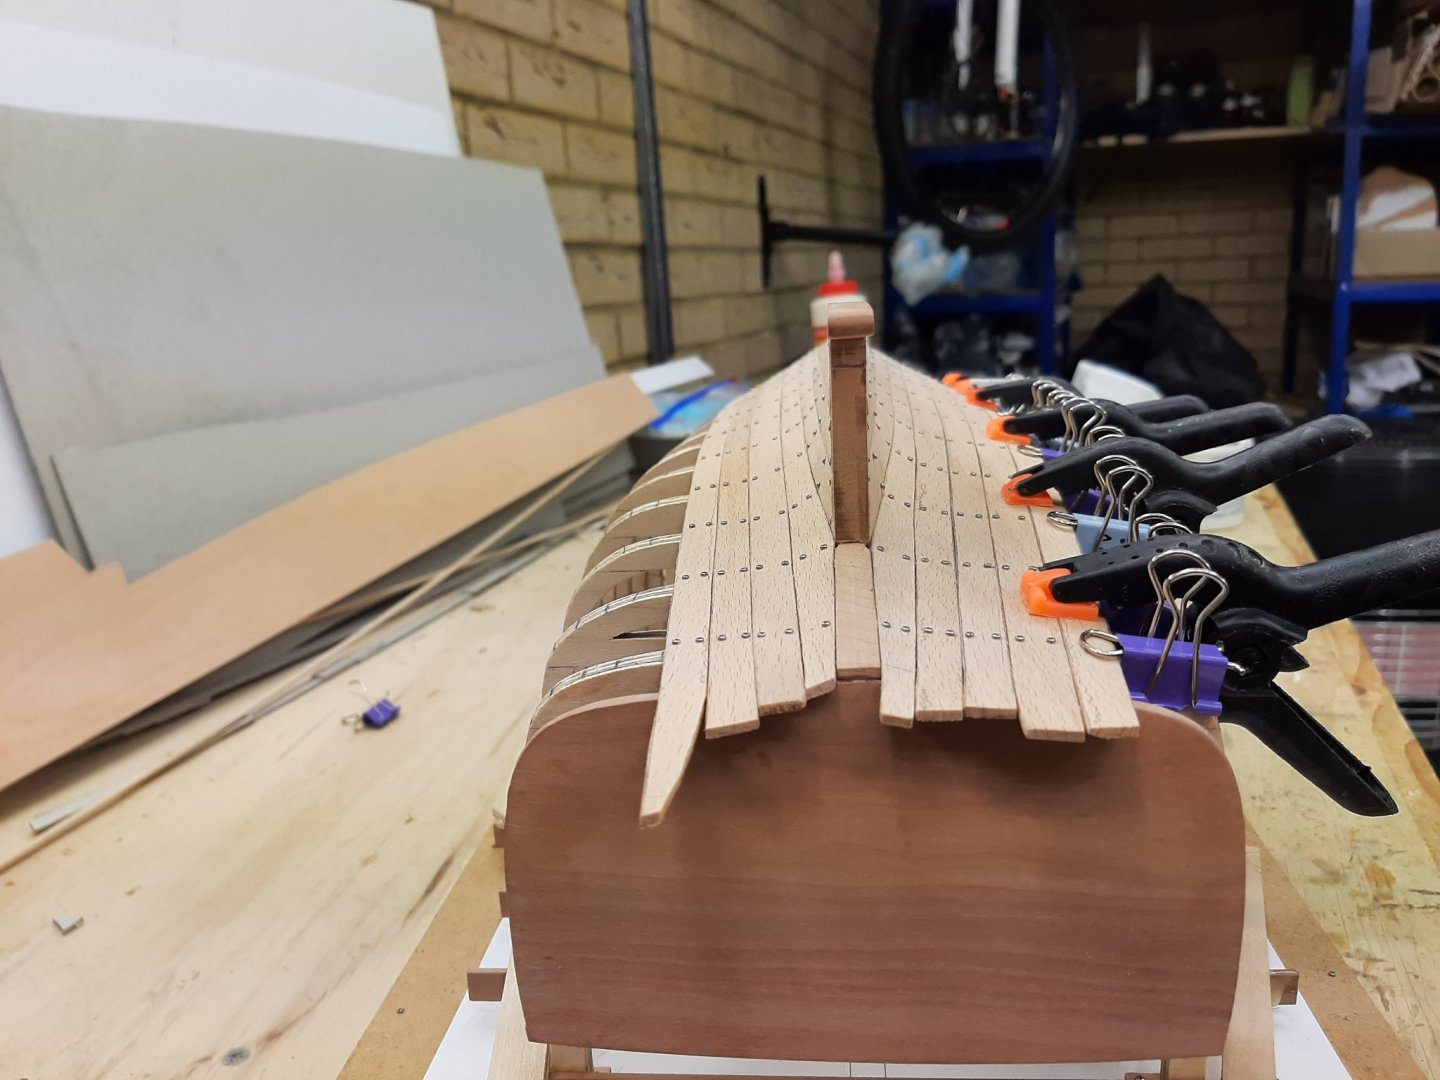
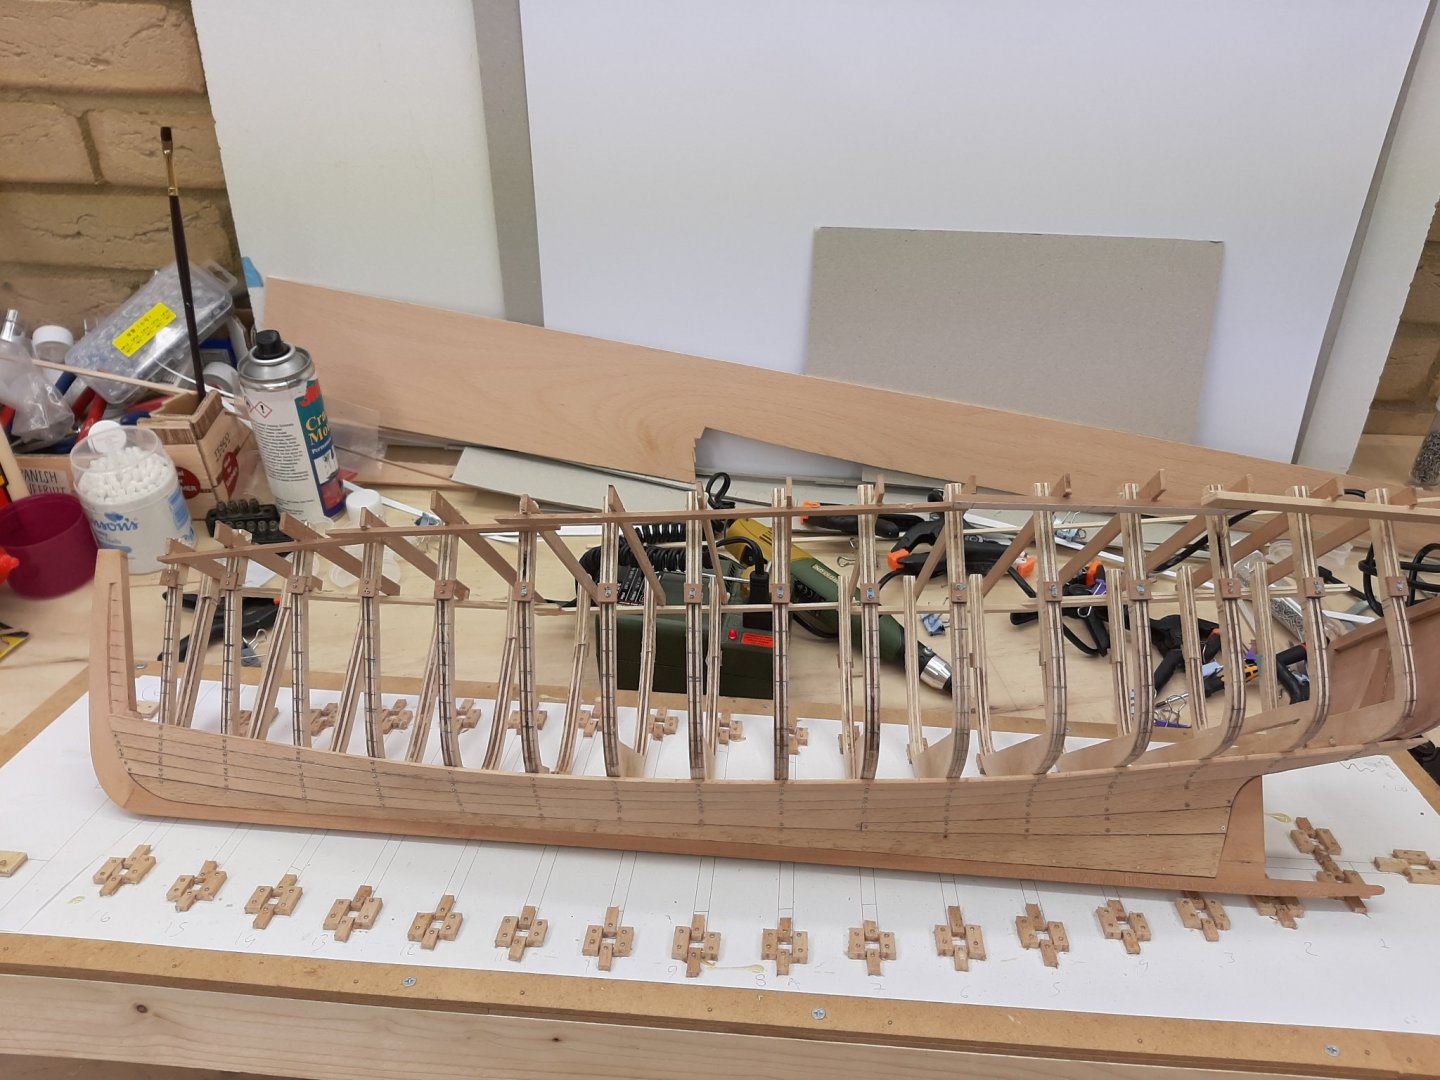
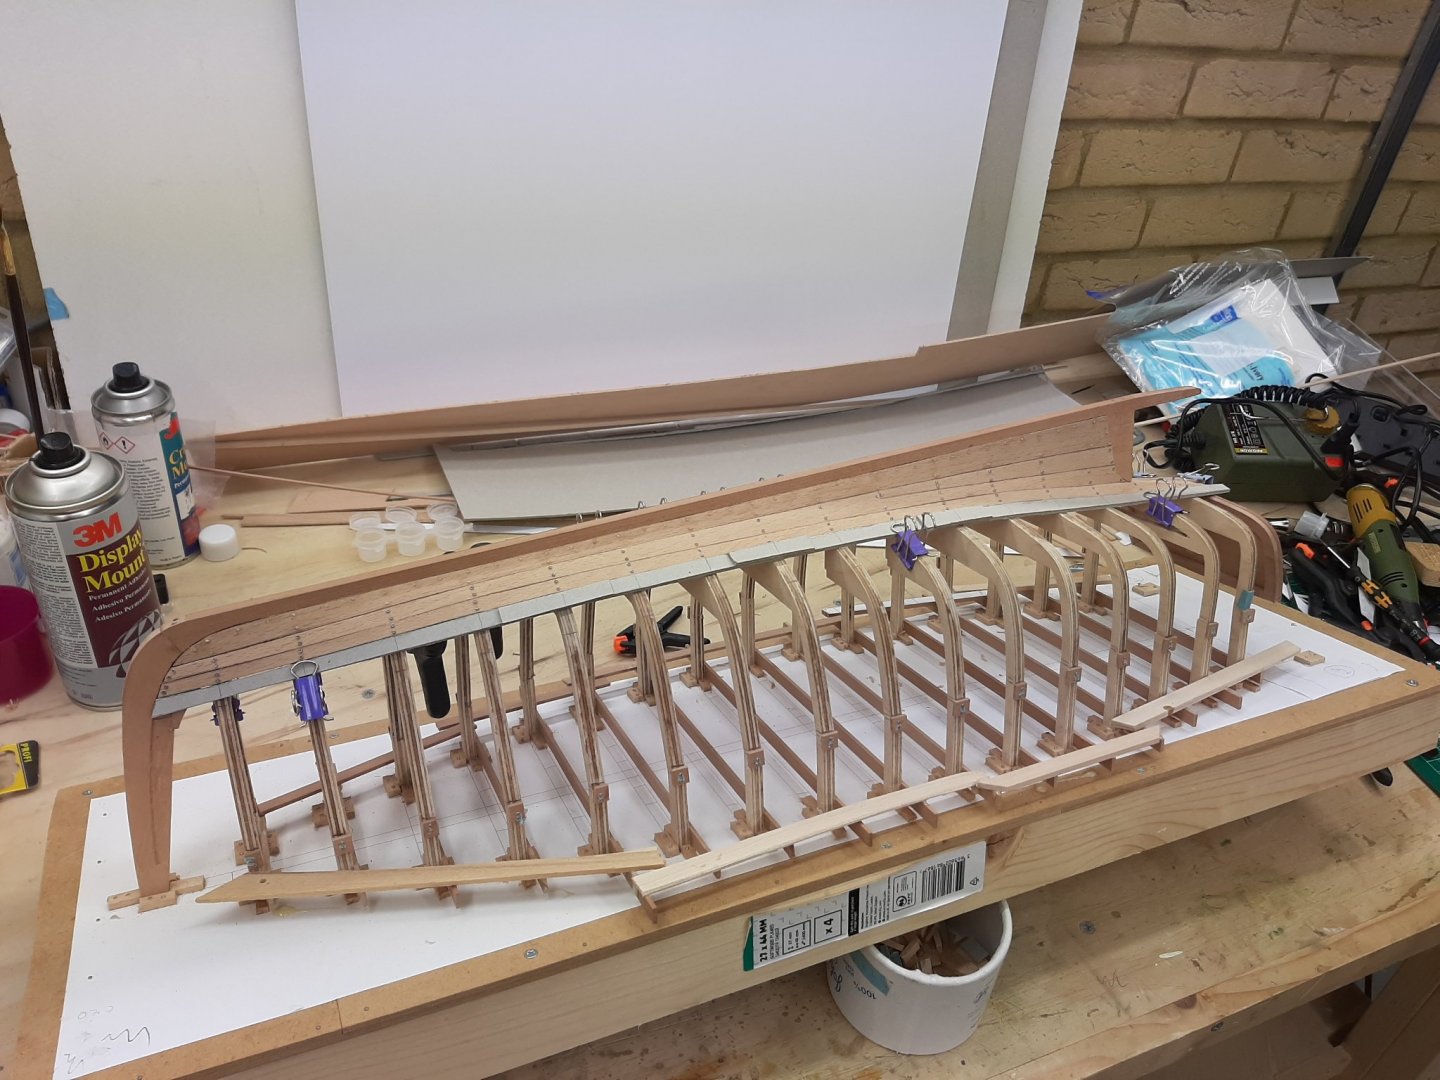
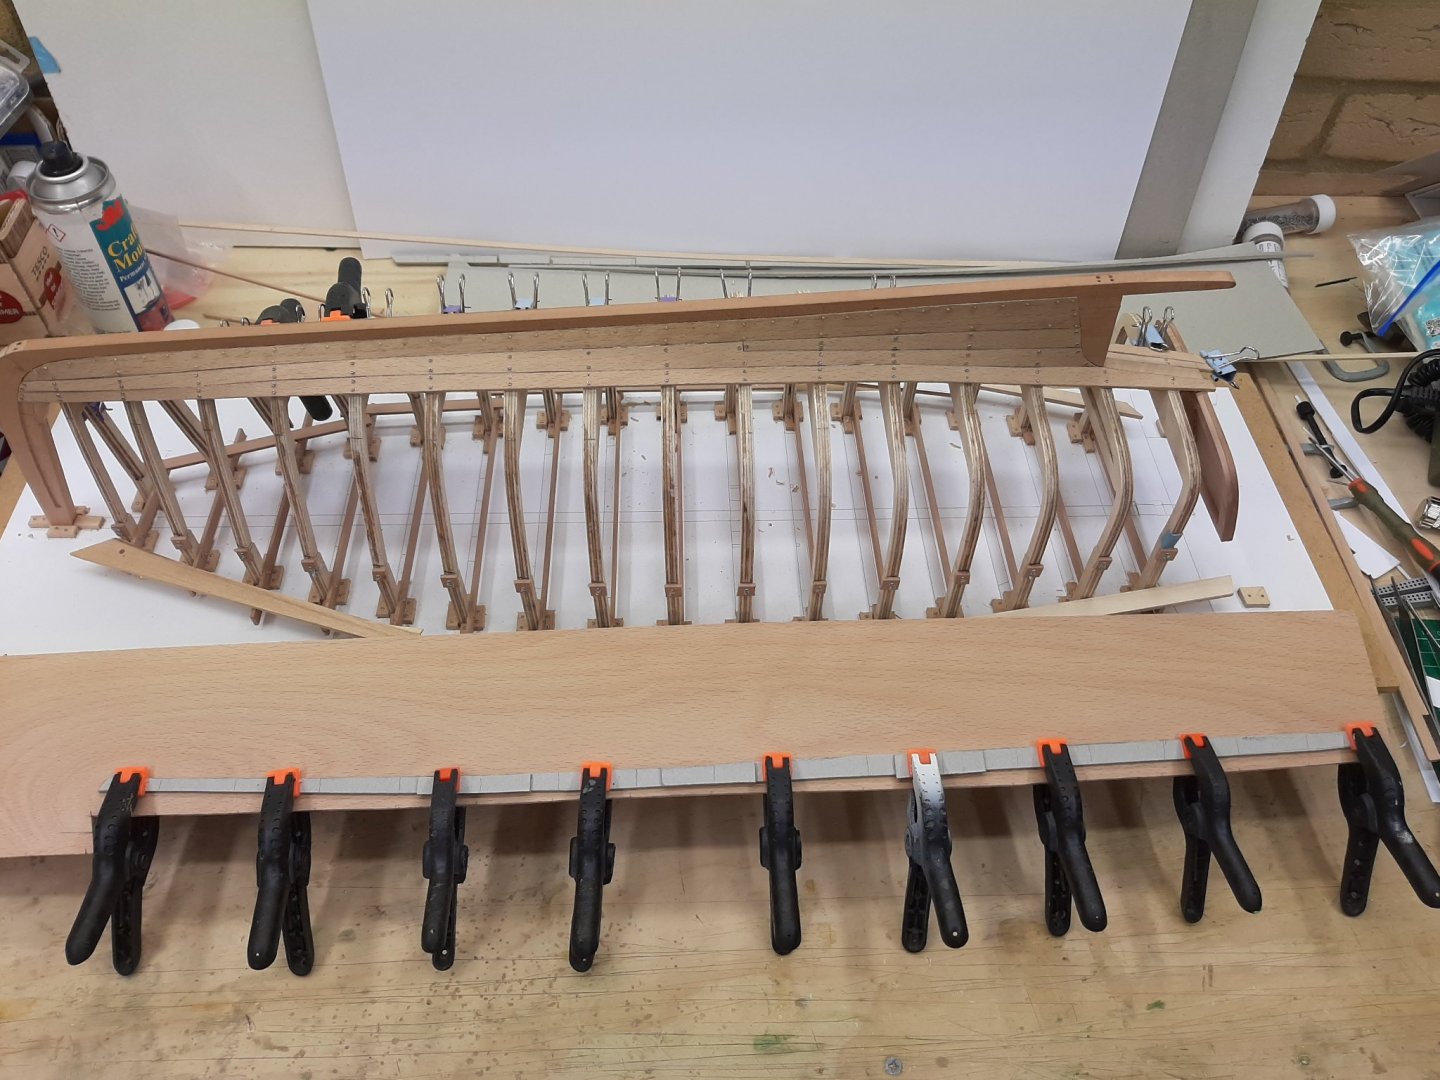
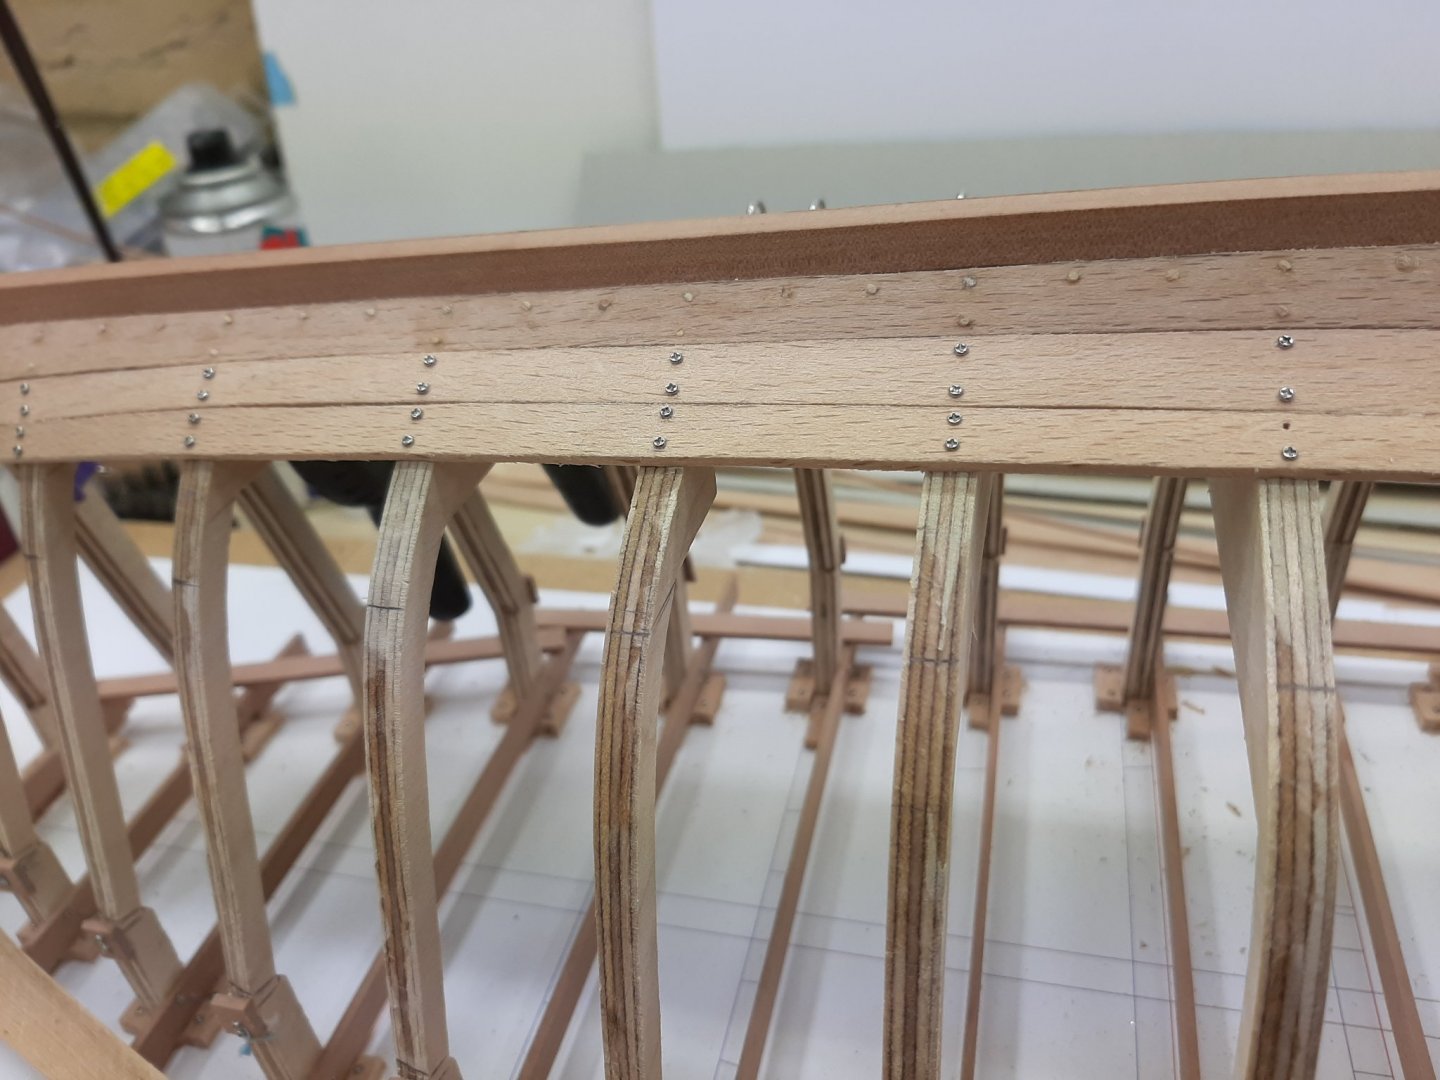
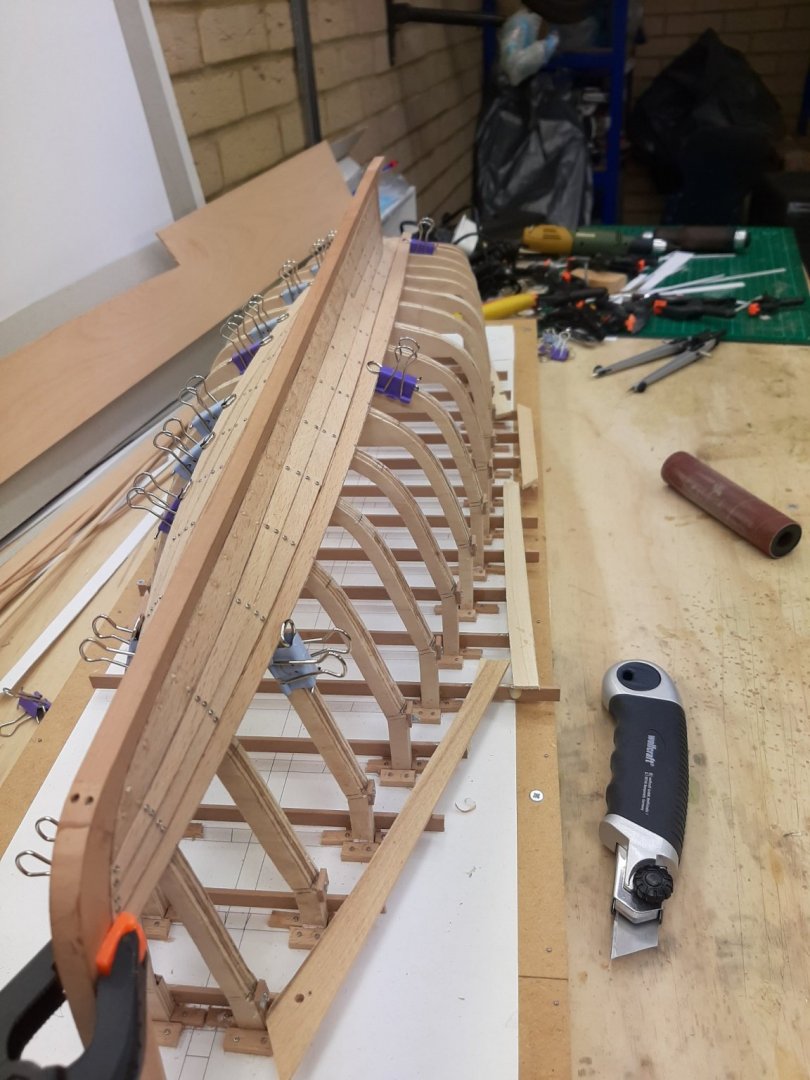
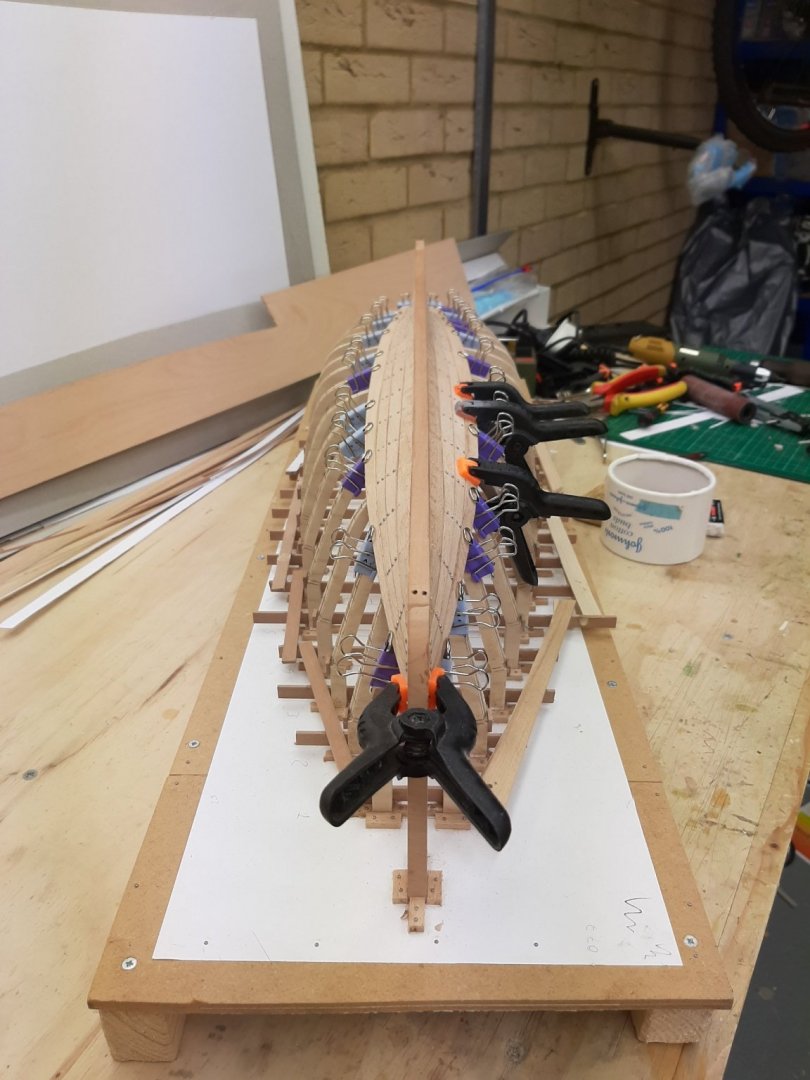
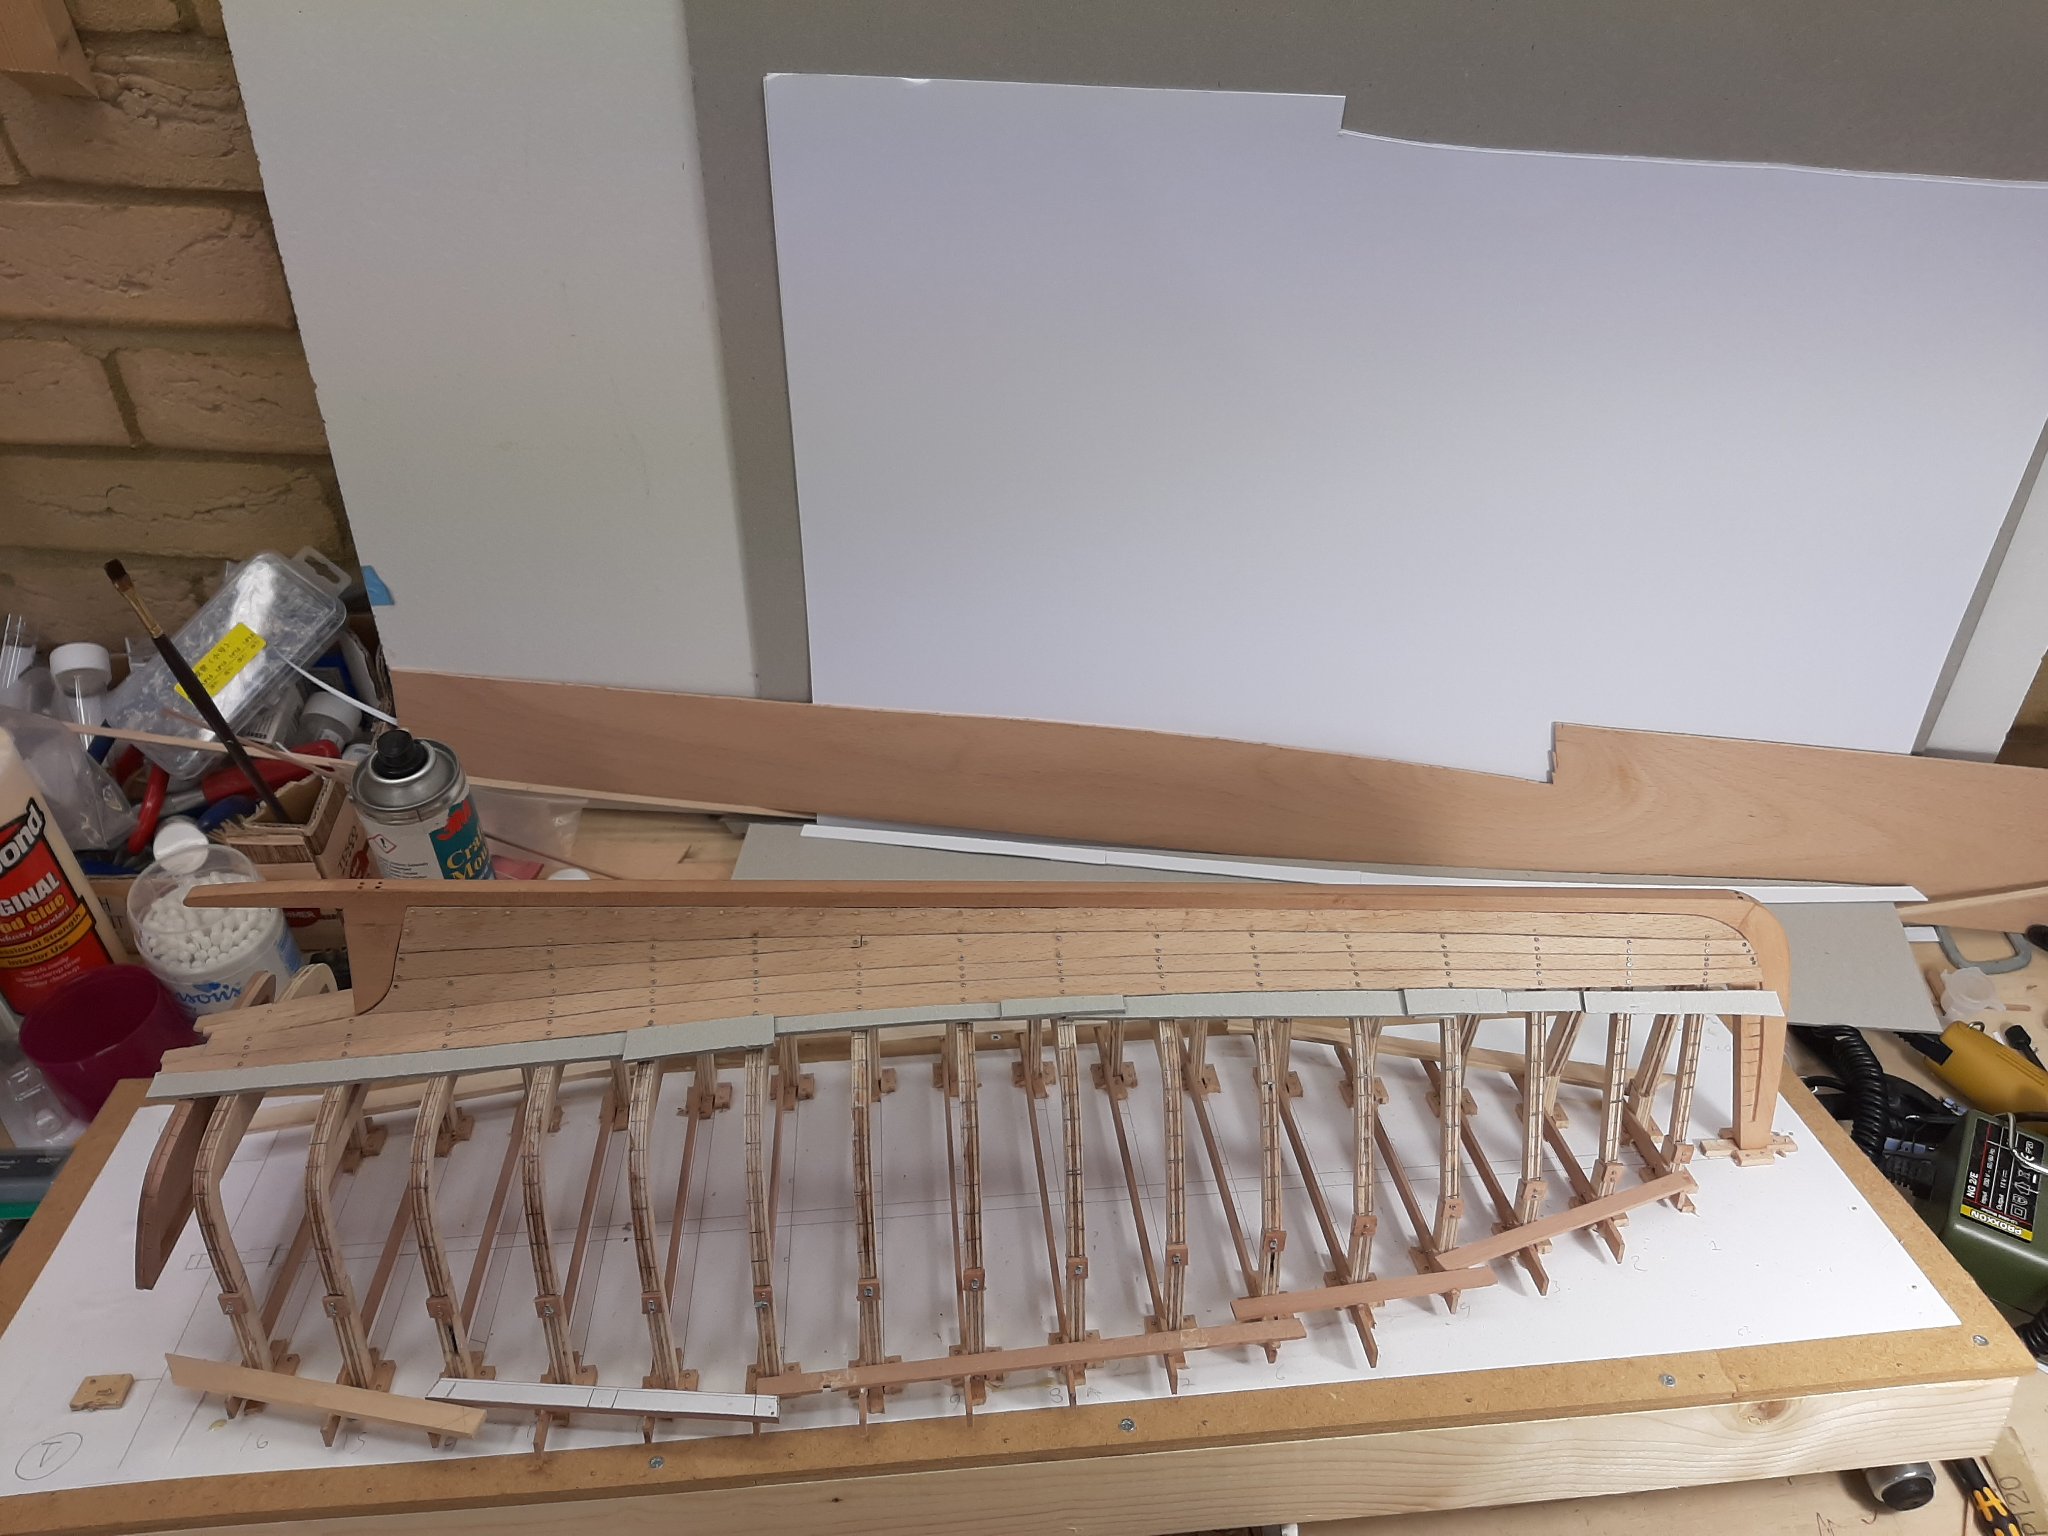
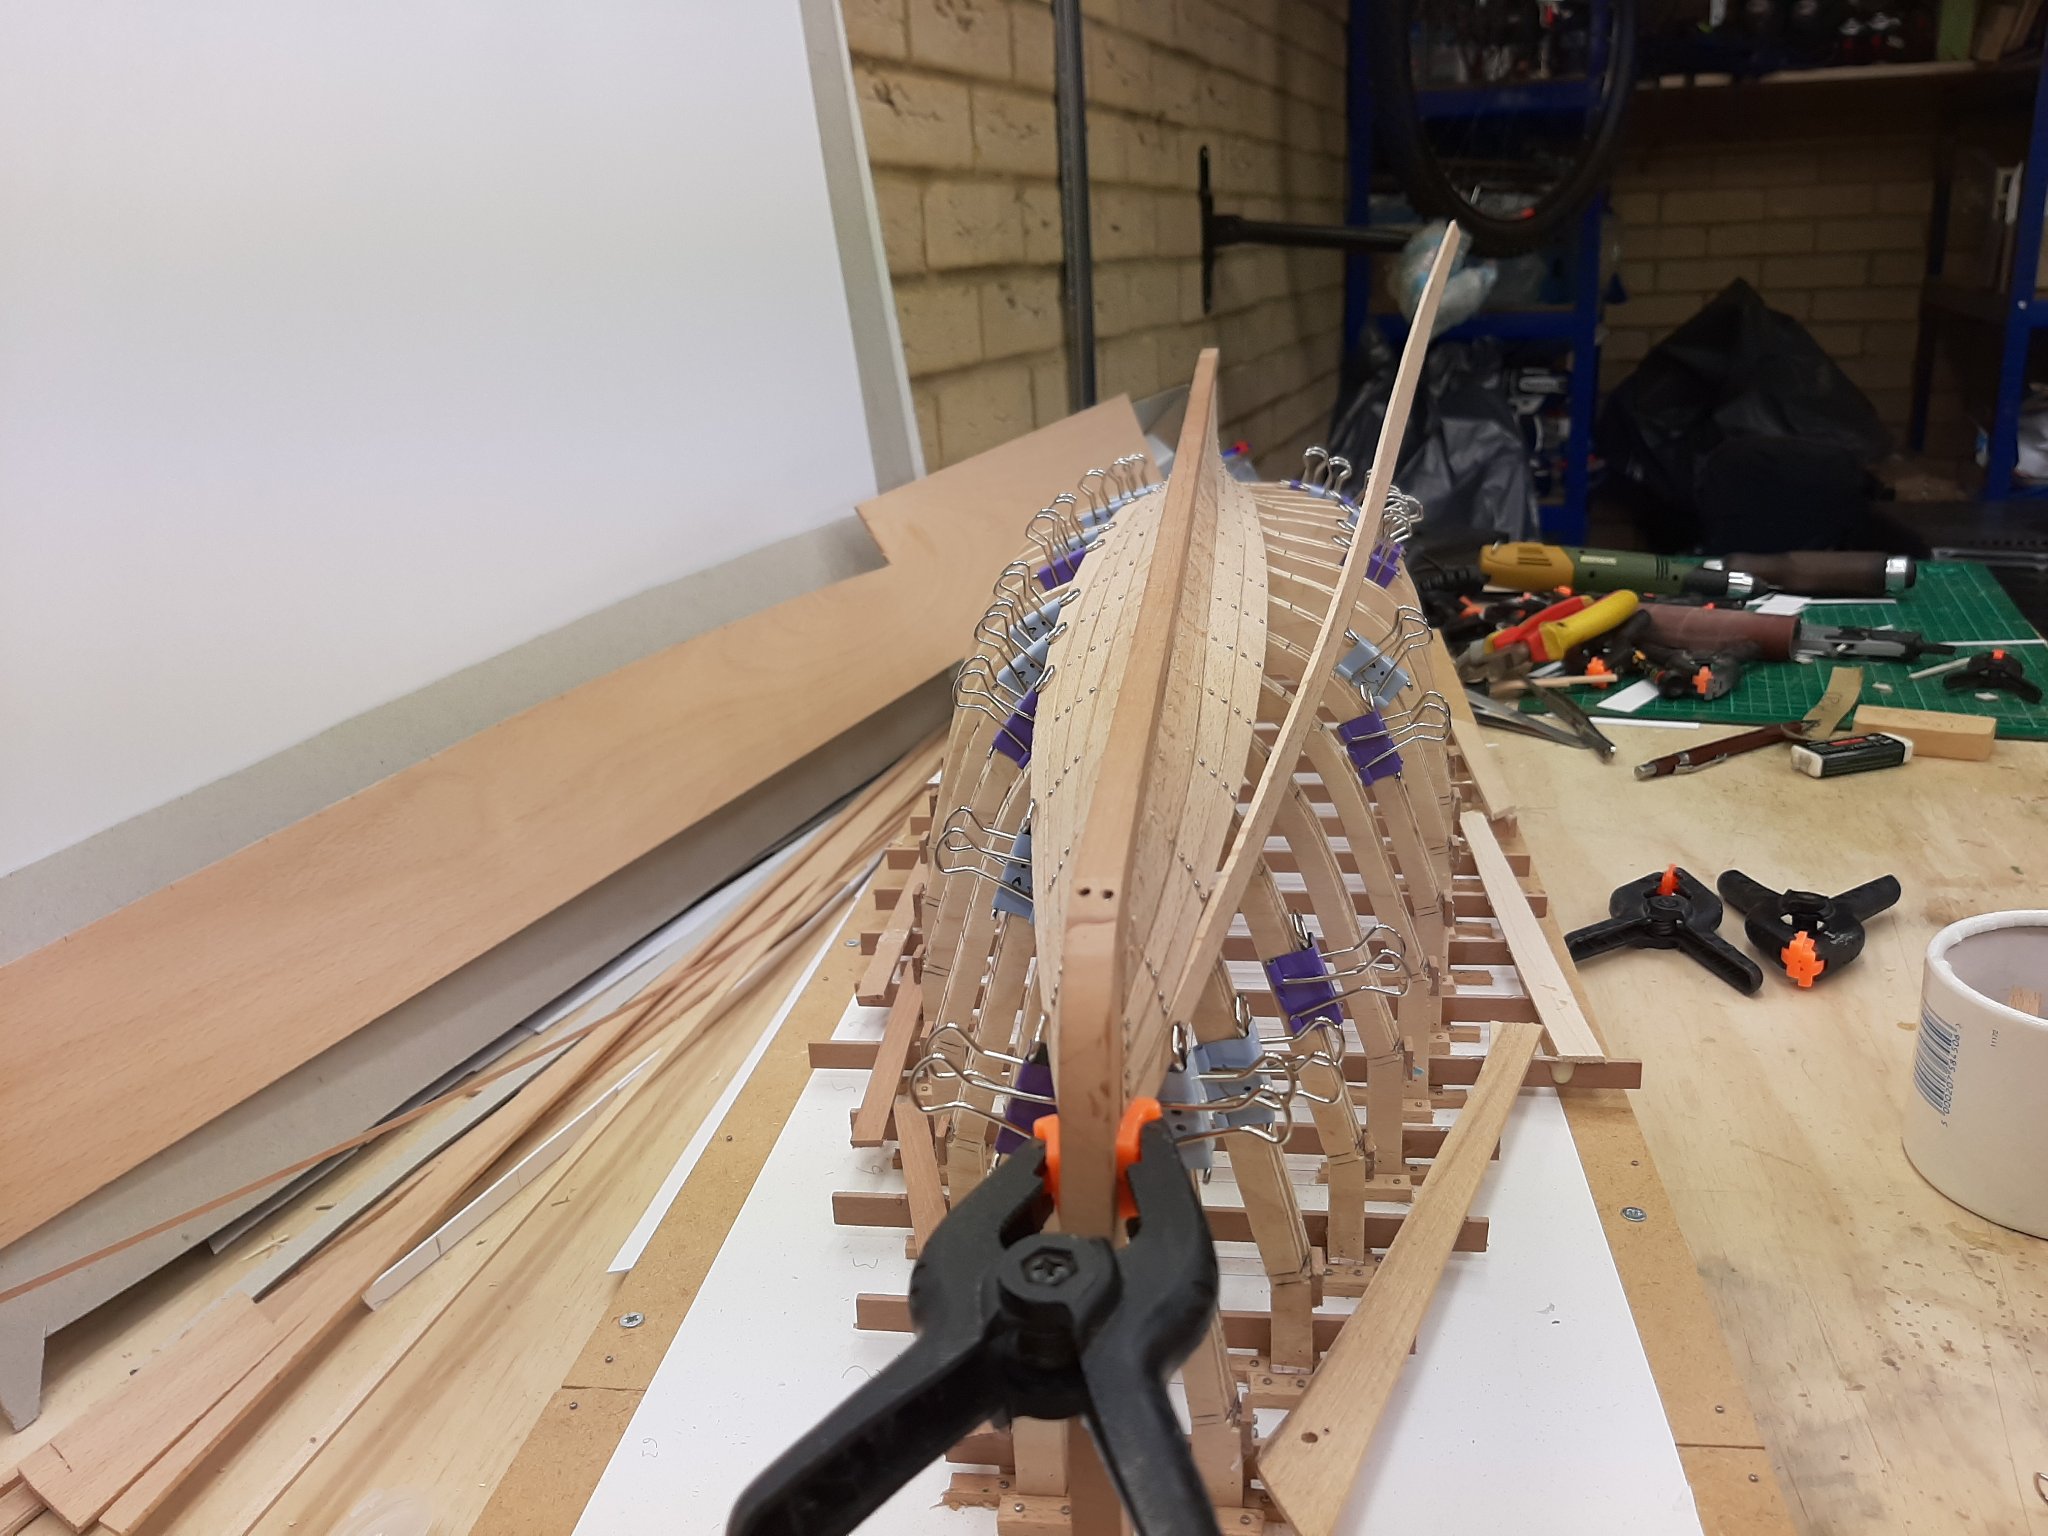
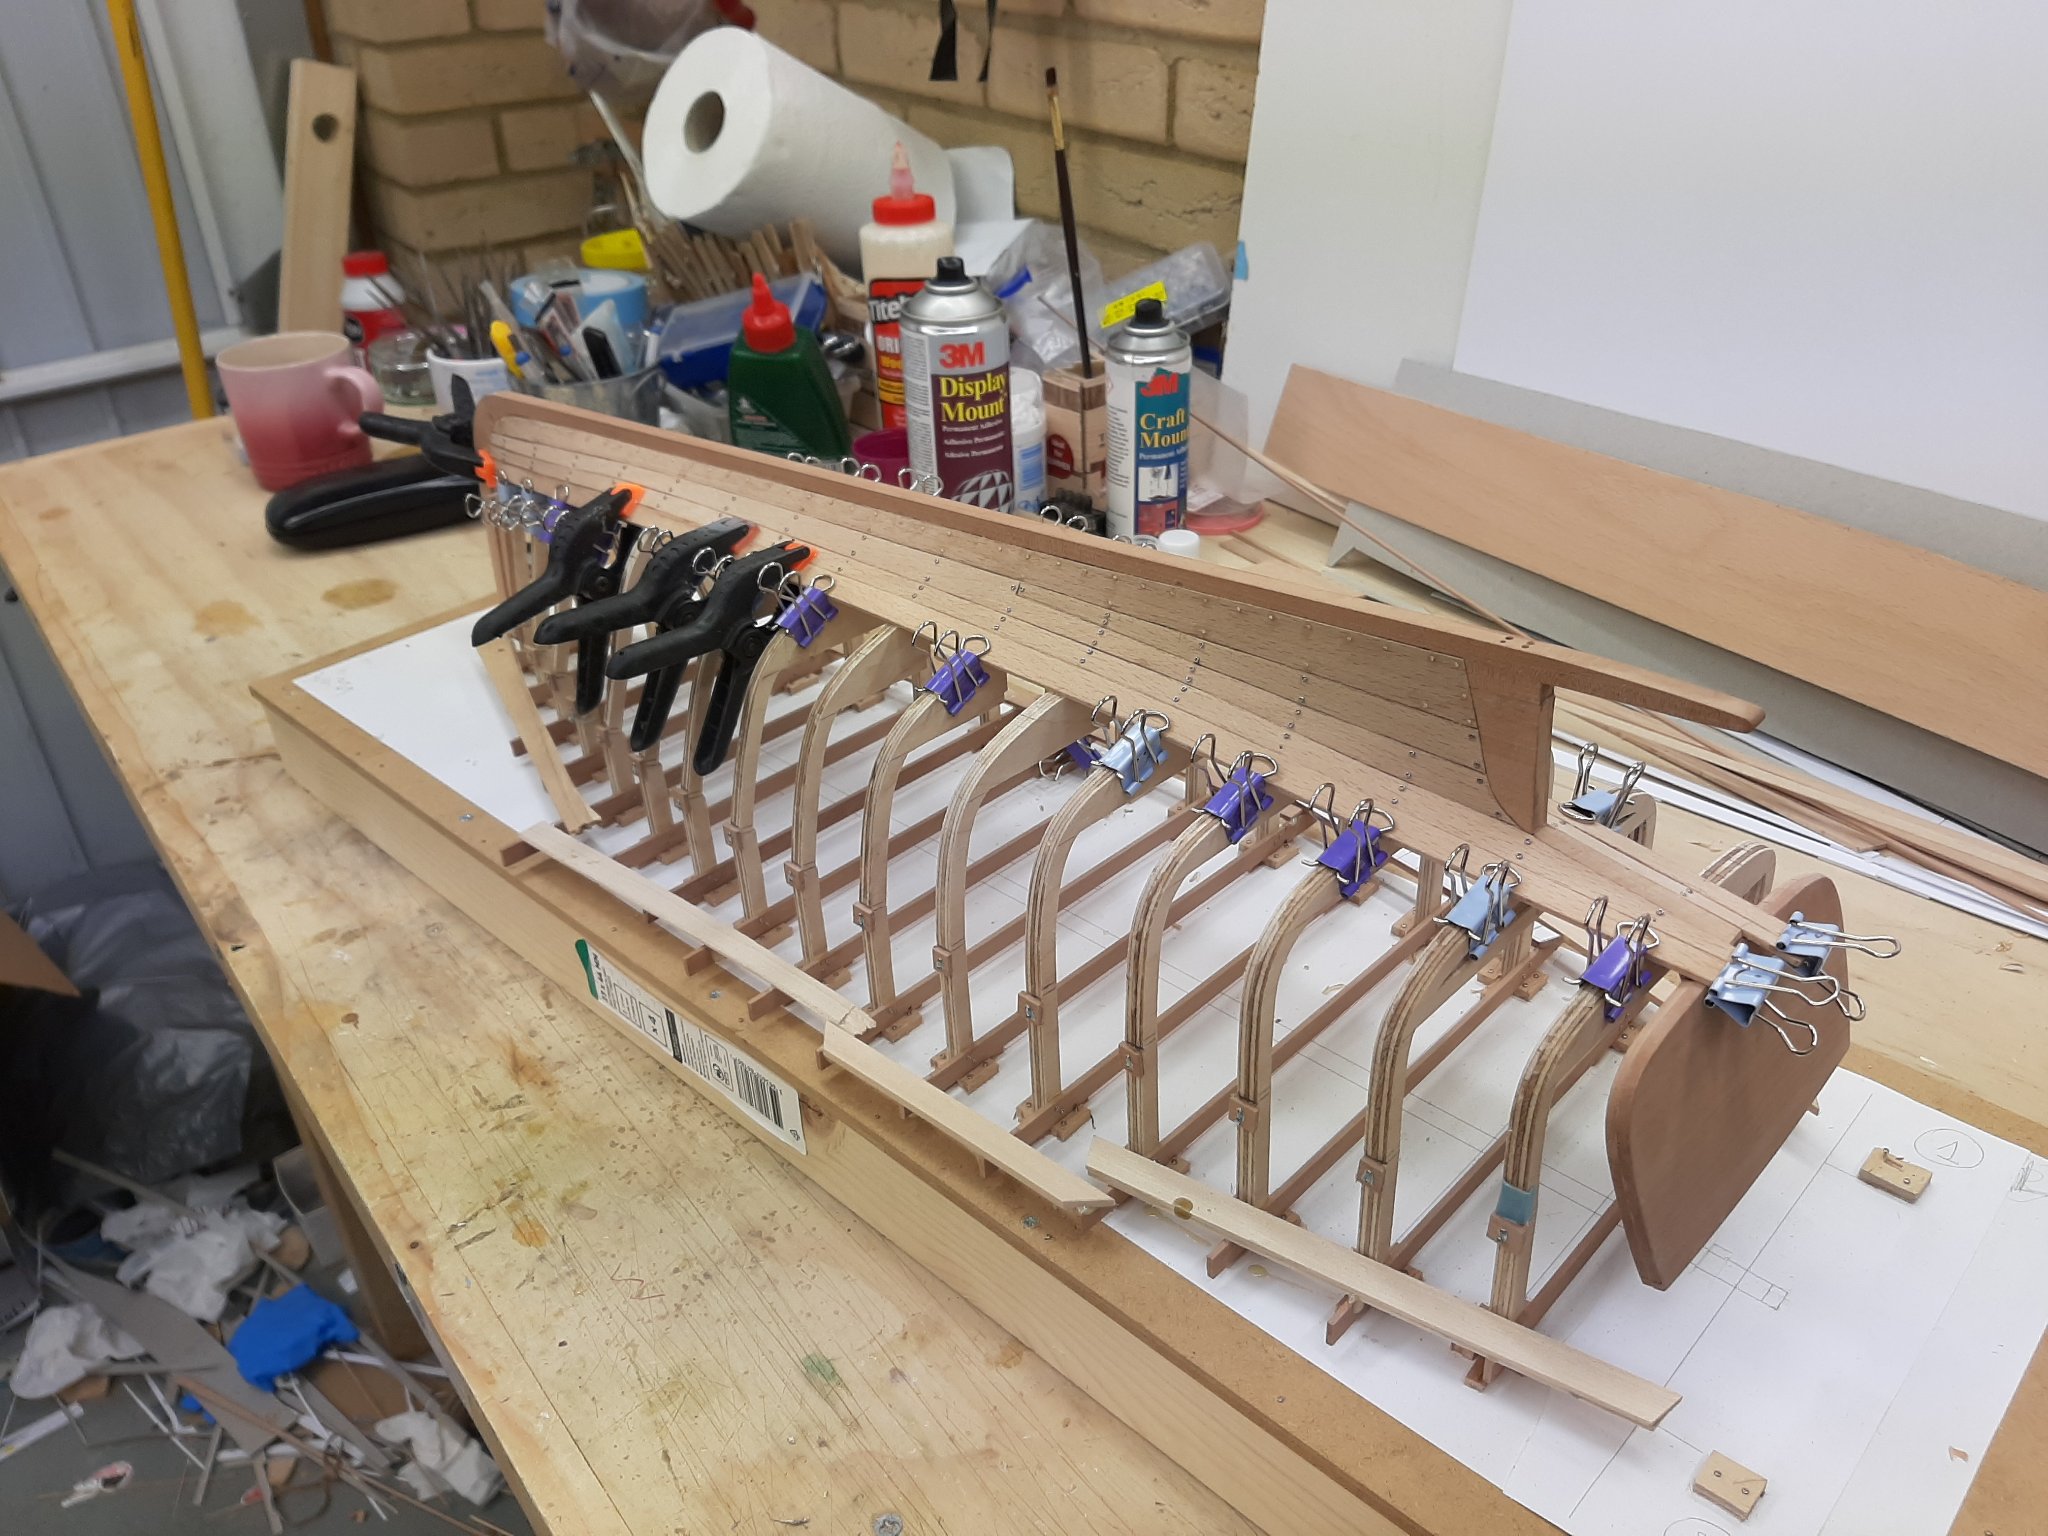
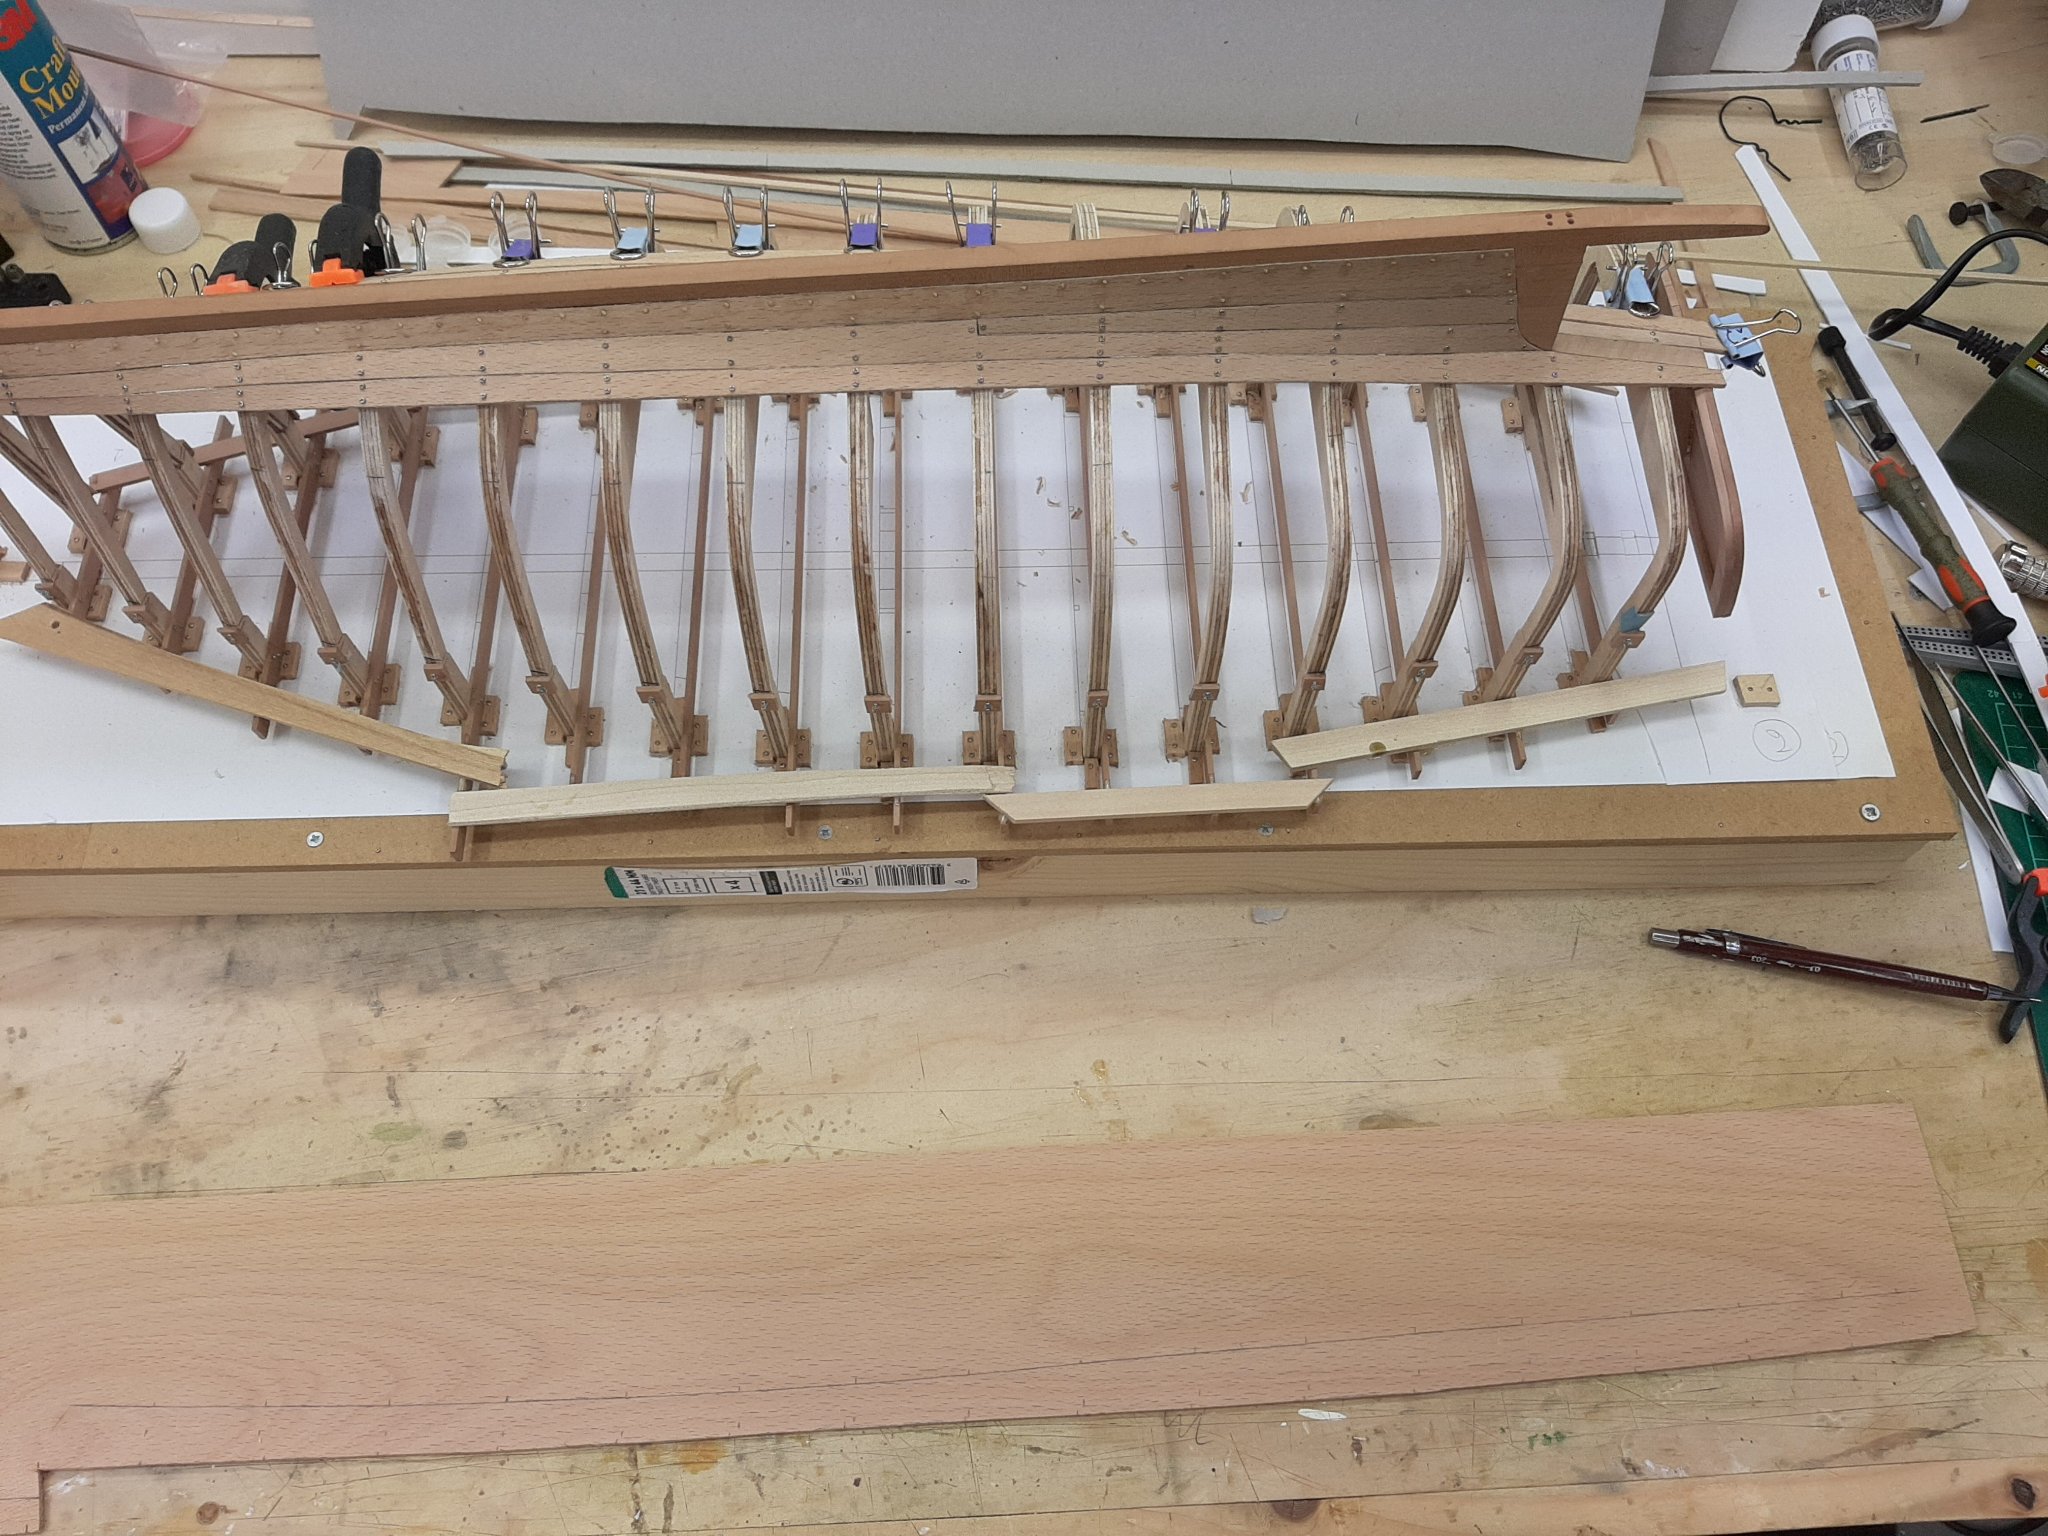
I ve been very busy but managed to add one more plank. Indeed, the planks get easier as I move away from the keel. This plank actually did not need steaming, it happily bent into place. They are still challenging though due to their length-it is very easy to make a mistake.
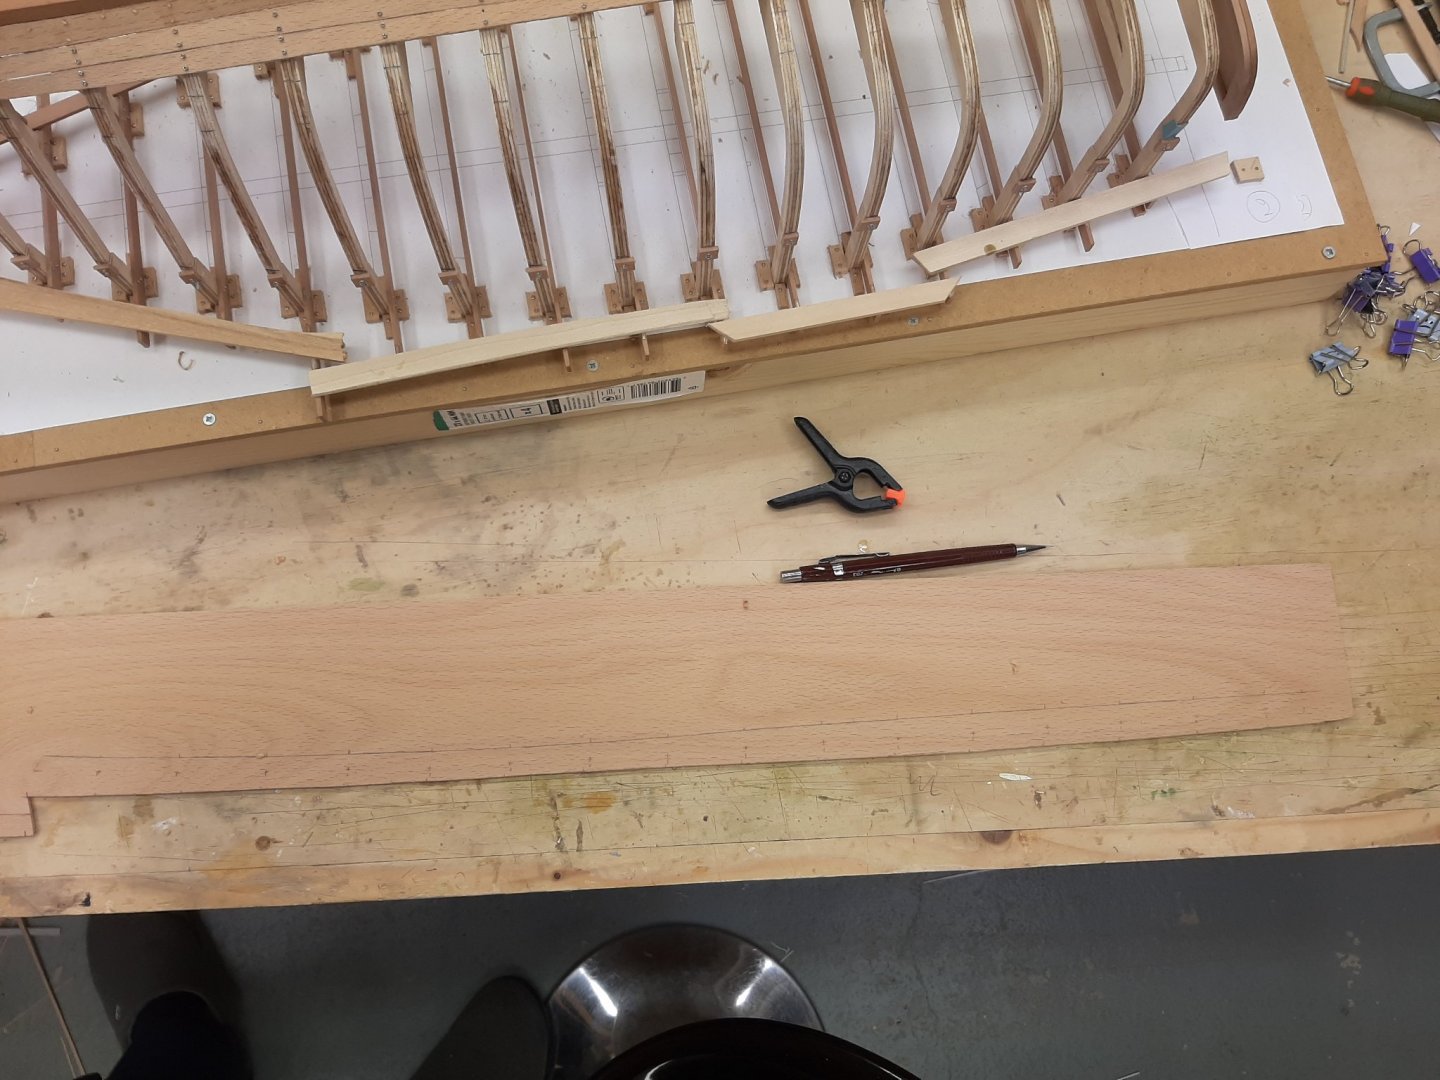
So, again a template was made (3 times) and a very long plank was cut. I am now getting into rhythm and have not had any failures recently-no wasted wood.


This and probably the next couple of planks will have the most curvature. Still, they would require stock about 30 cm wide which I think is feasible in real life.
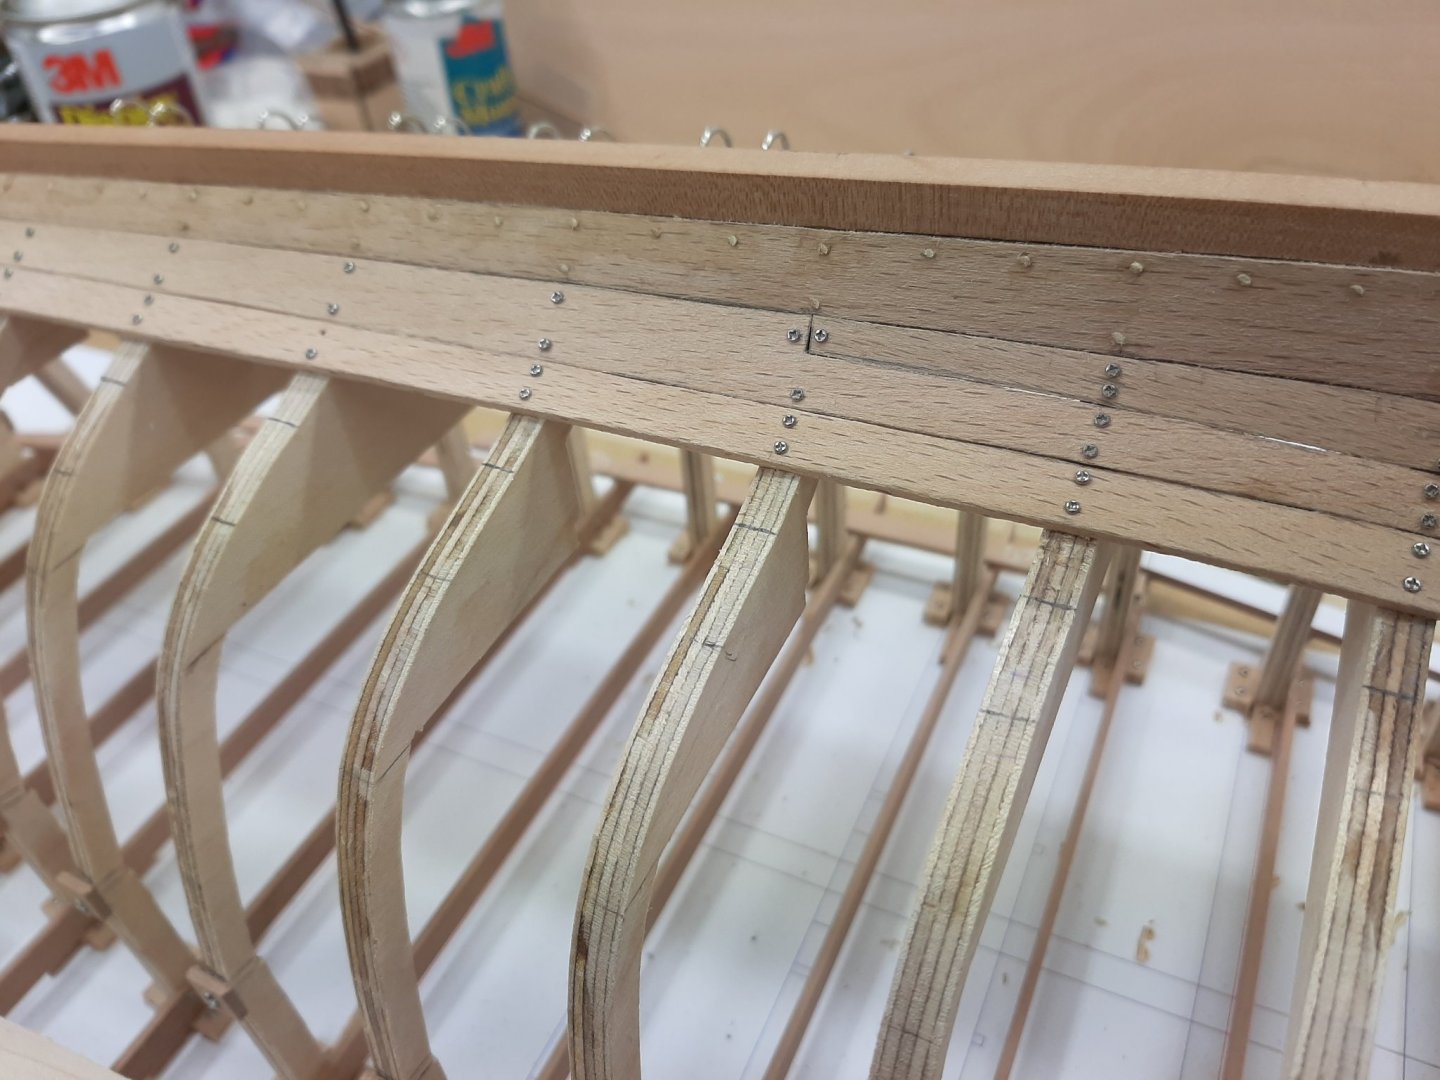
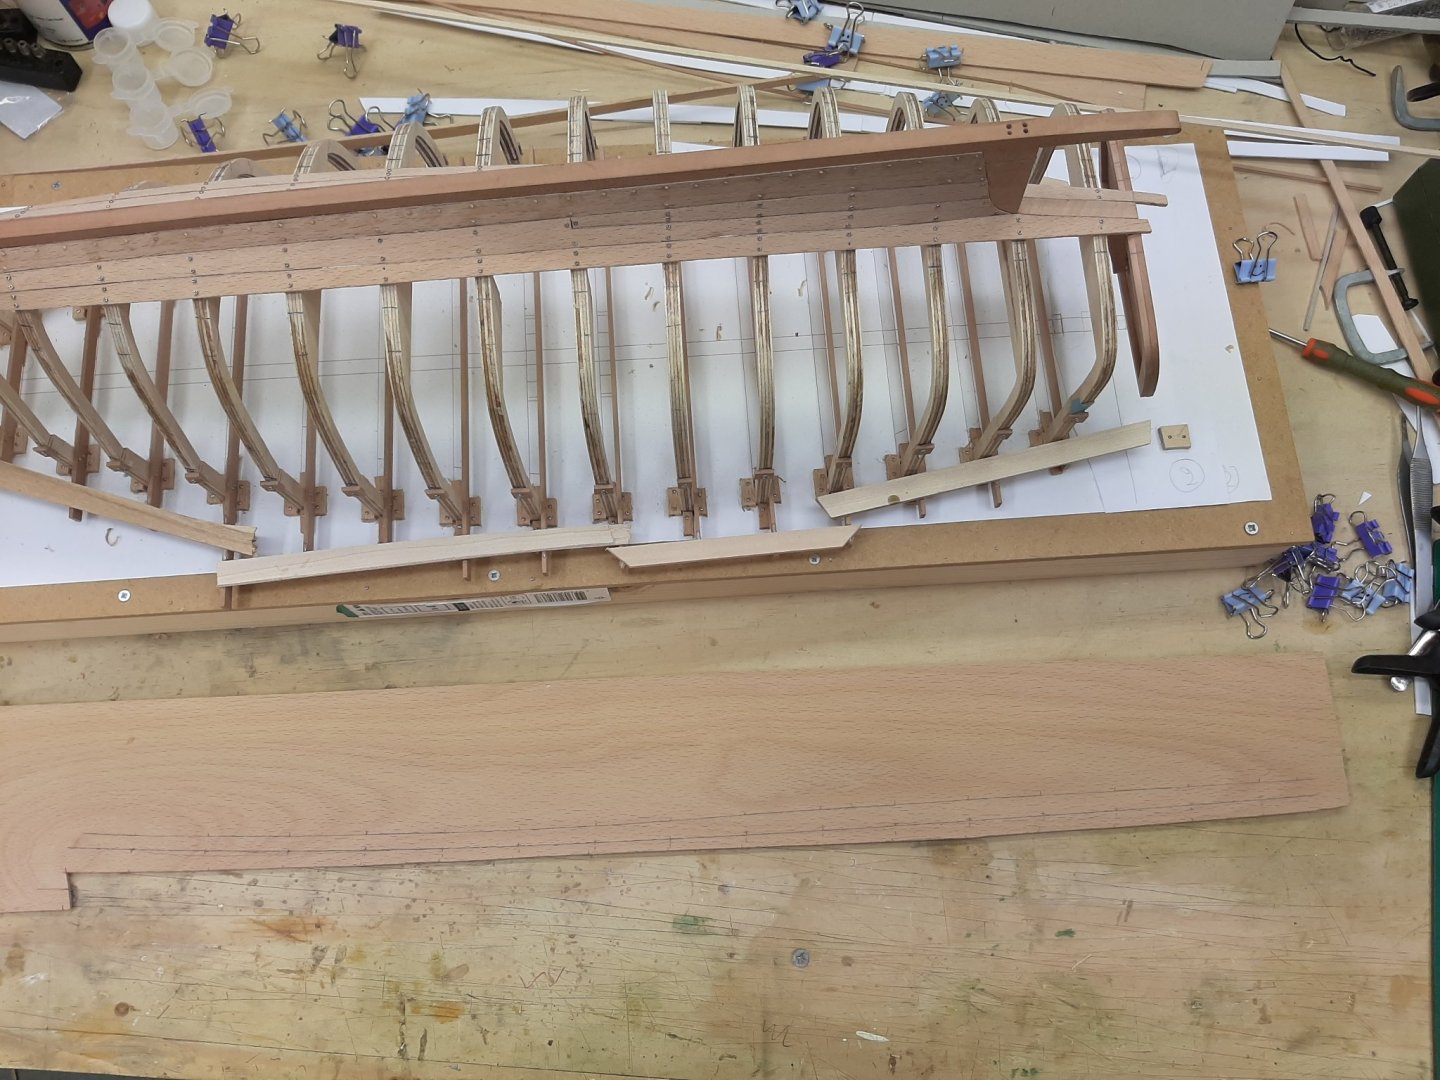
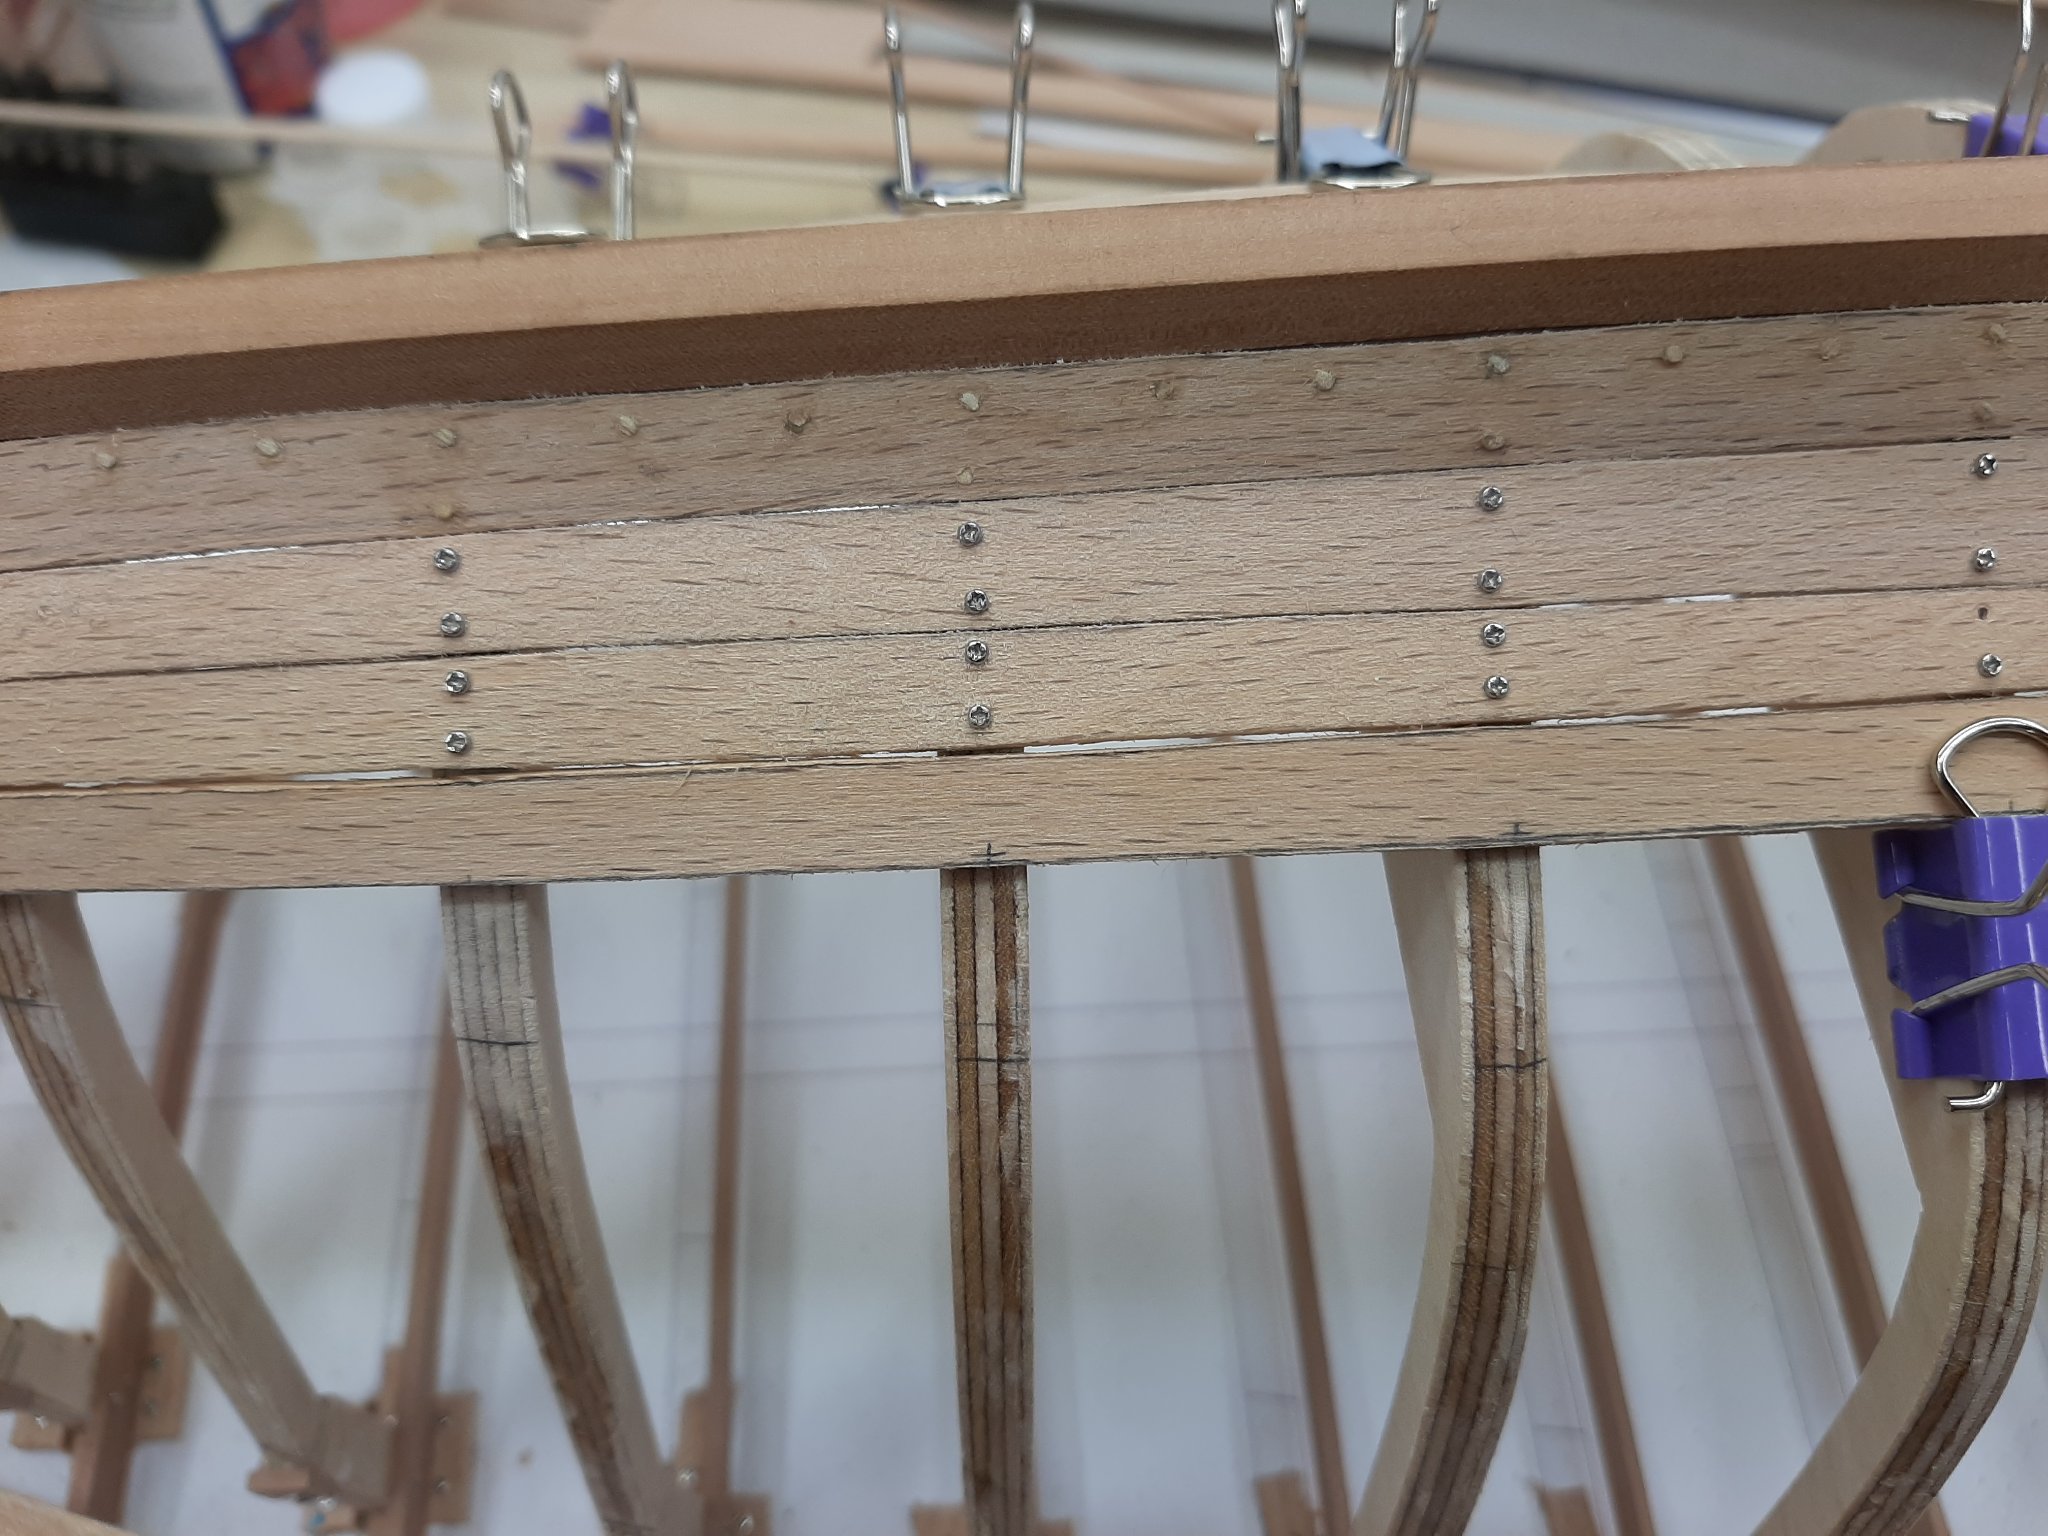
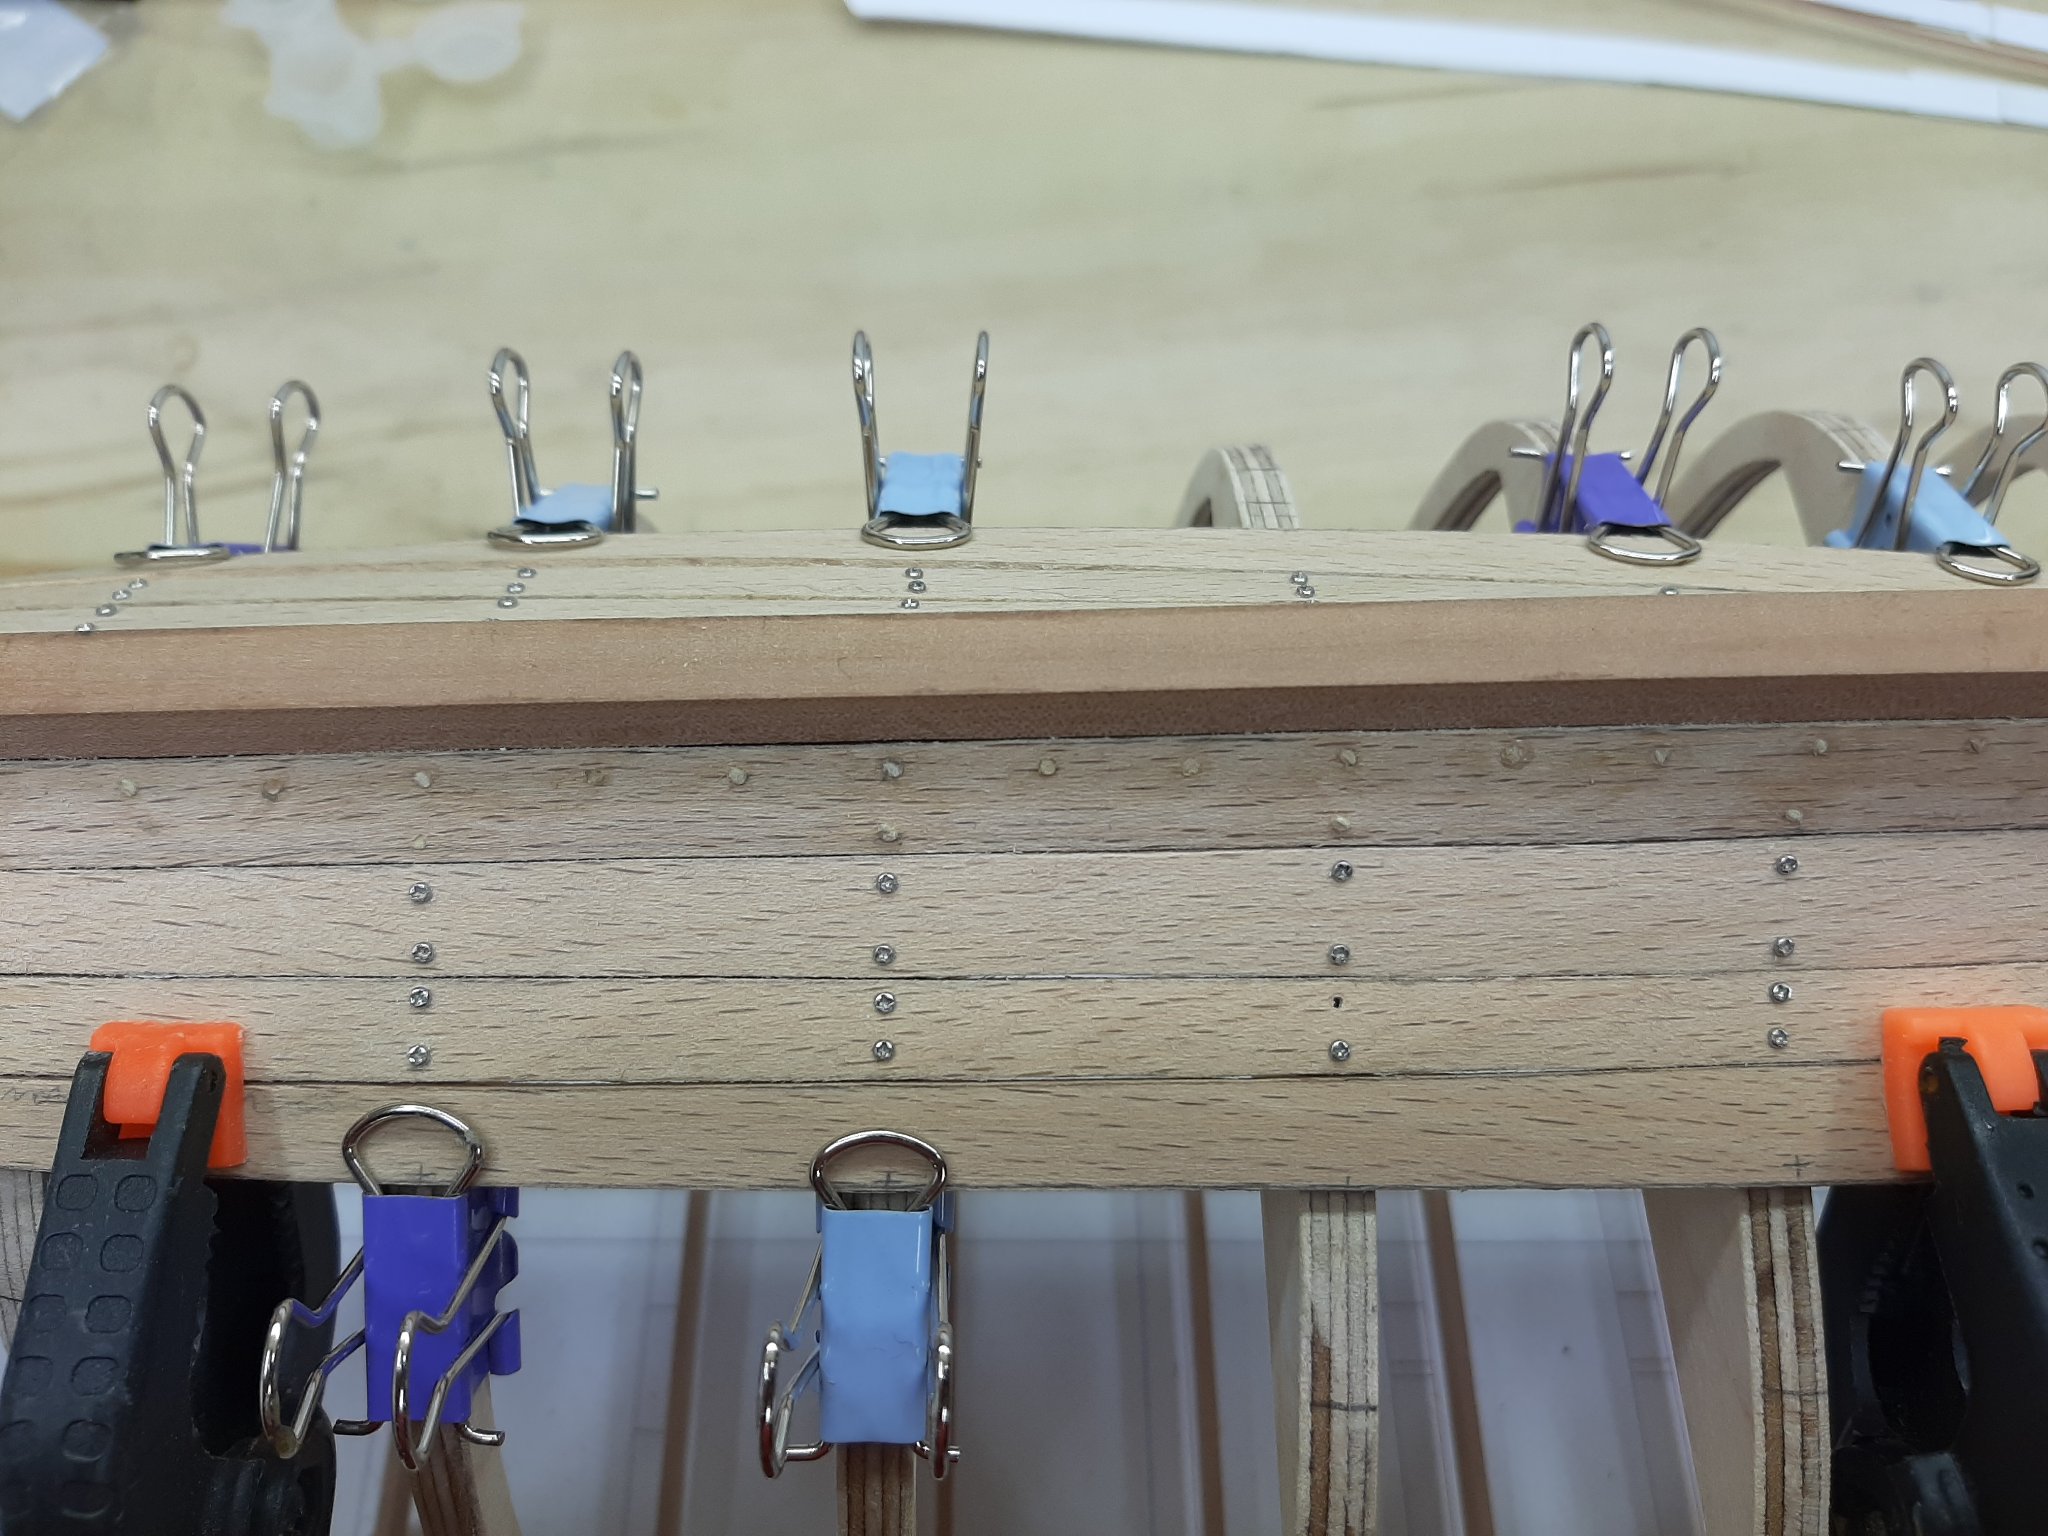
Plank in place

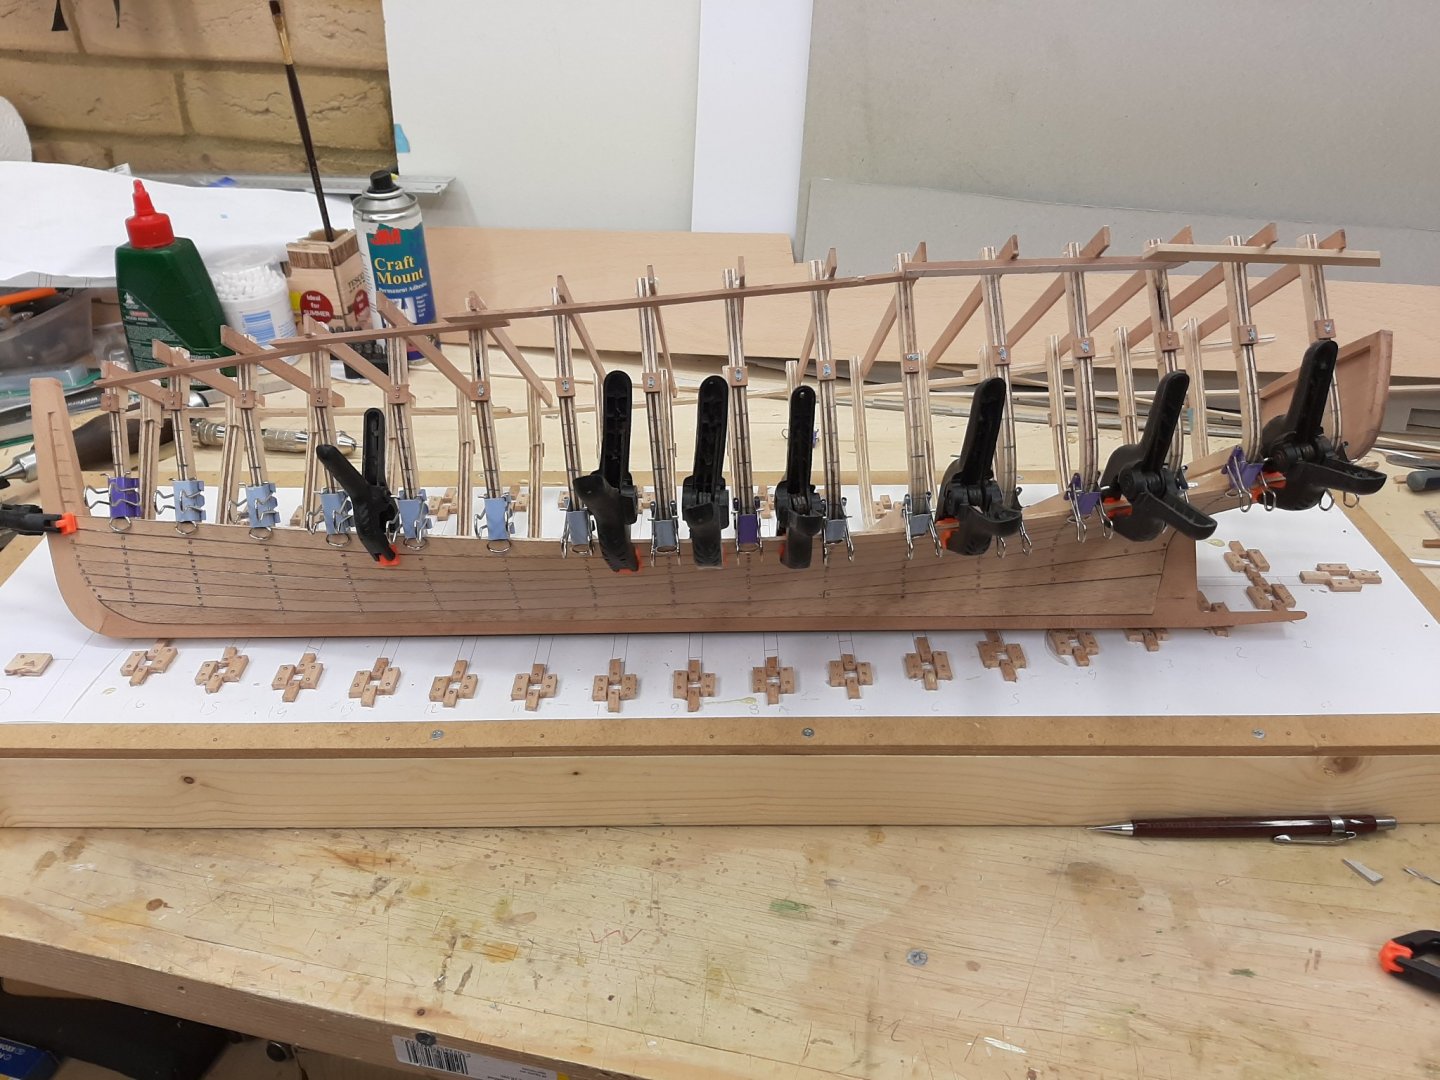
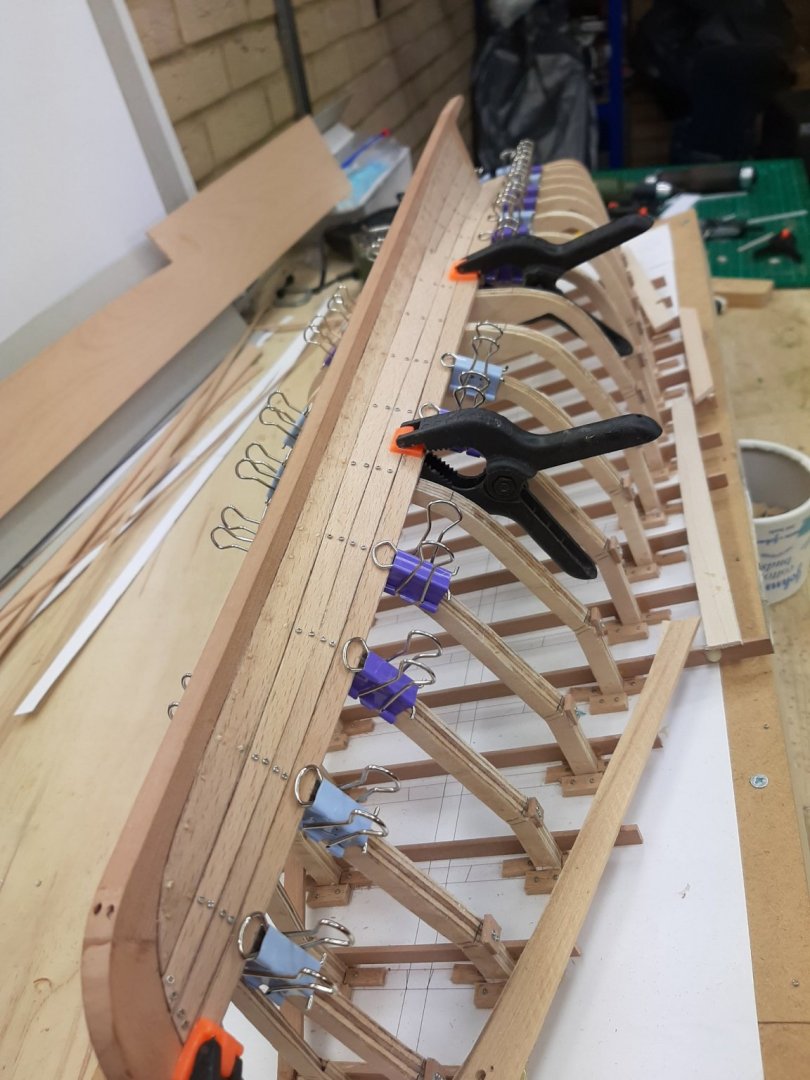
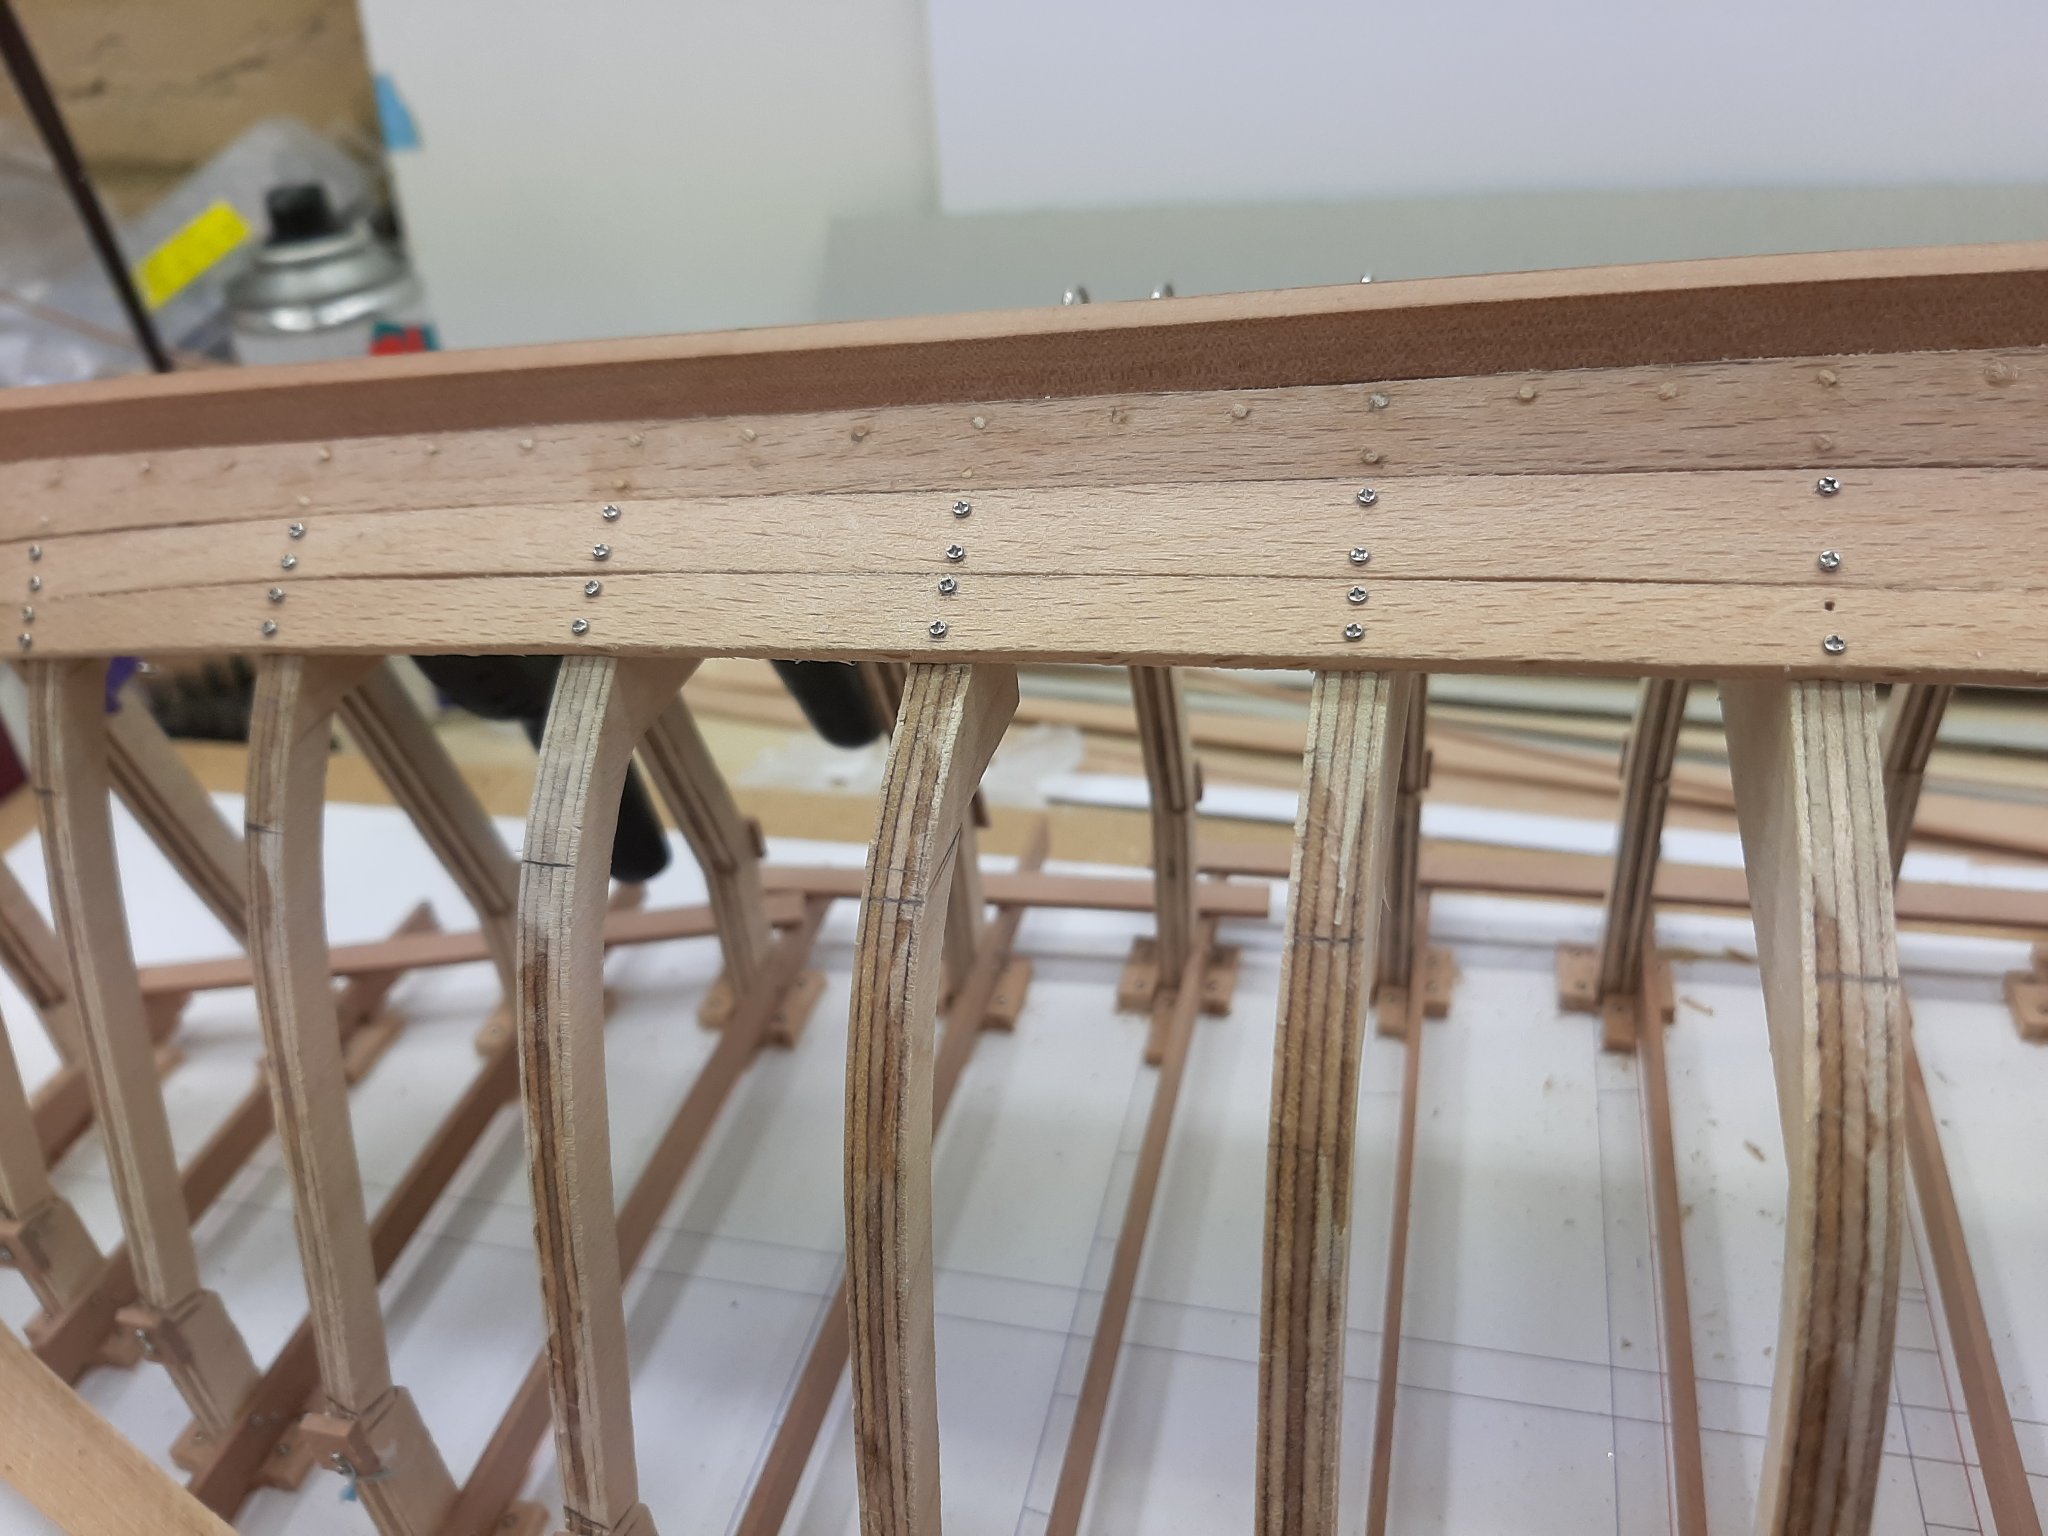
And the template for the other side made.

I then spend about an hour transferring the plank markings from one side to the other. There were a few things that did not make much sense but I ll let the wood make the corrections. Also, my frame fairing is horrible but then again, I have been trimming the frames as I go and on a couple of places added sims. With the plank screwed in place, it is very easy to see low or high spots on the frames just eyeballing the run of the plank. As the plank is not permanently in place, it is easy to make corrections.
I will continue posting updates on the planking but I do not expect any excitement. It is a tedious and time consuming job, each pair of planks takes about a week so I expect planking to take about 3 more months-unless life gets in the way. As you might have suspected by now, I really like planking!
I wonder however if it is time to go back to the Yawl and start planning that planking. It is a very different shape and it will be lapstrake so a bit of a different (more difficult) approach will be needed. If I have time this week I might bend a few batens and if you are not desperately fed up reading about planks, you are all most welcome!
Regards
Vaddoc
- GrandpaPhil, KeithAug, bruce d and 3 others
-
6
-
-
-
Many thanks to all for your likes and input.
I ve created another thread where I presented my way of spilling, may help others in their projects.
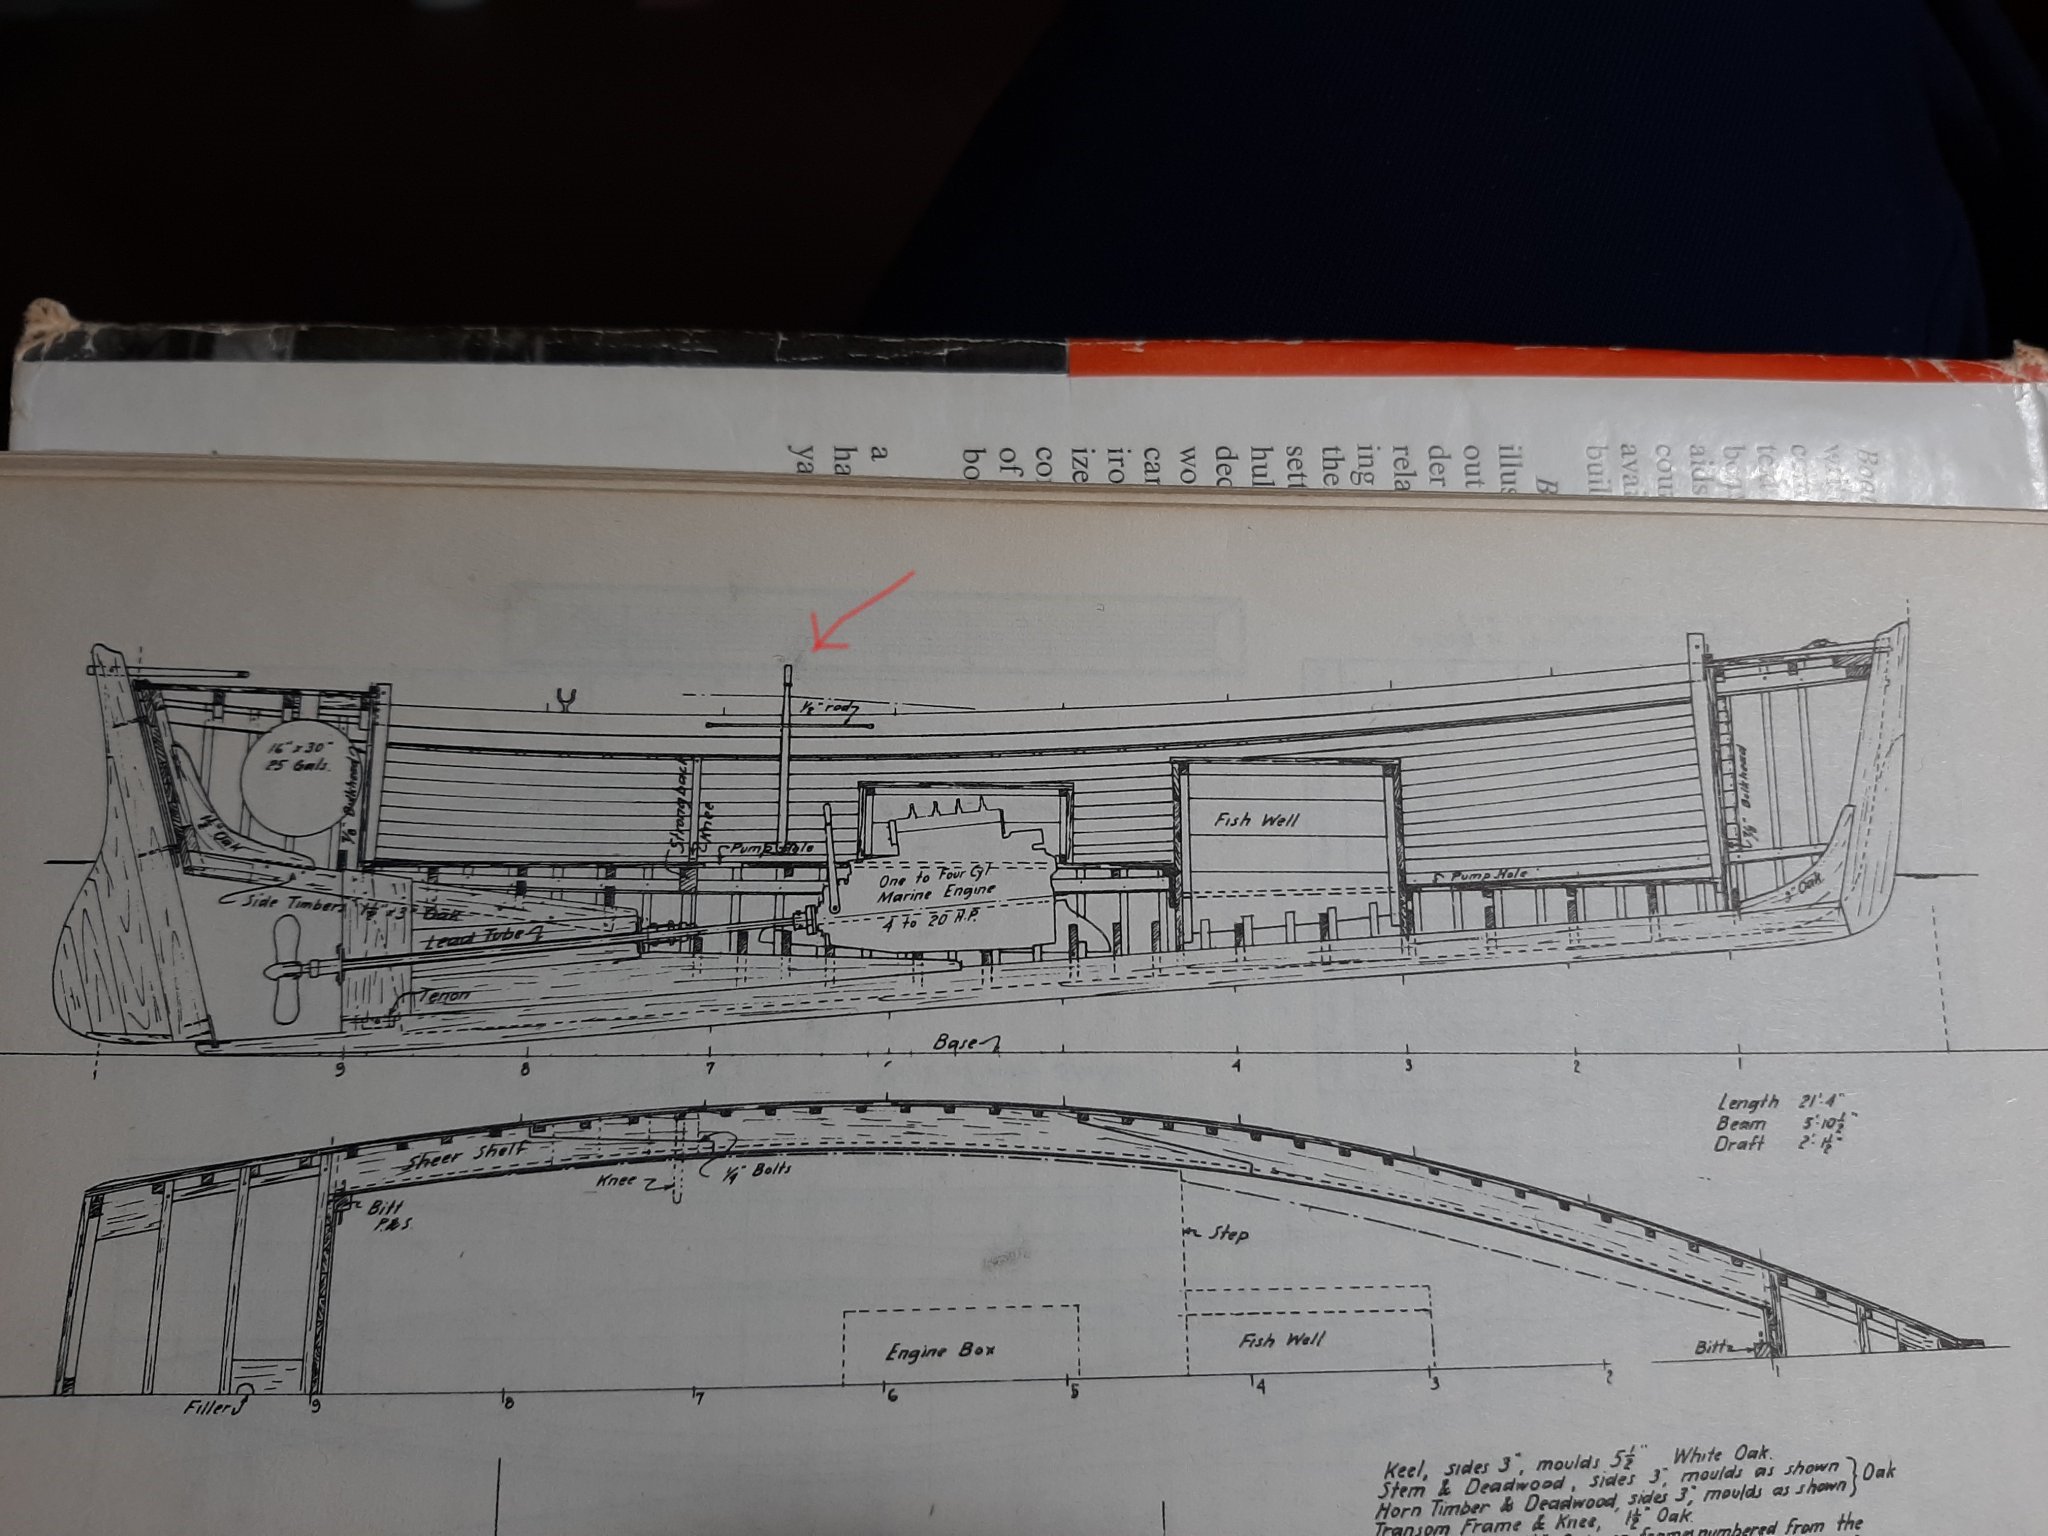
Now Michael, I did a bit of search and given it some thought-I think you are right, this must be a vertical tiler in the plans. This is why the tiler is so short-I had noticed it and could not understand why.
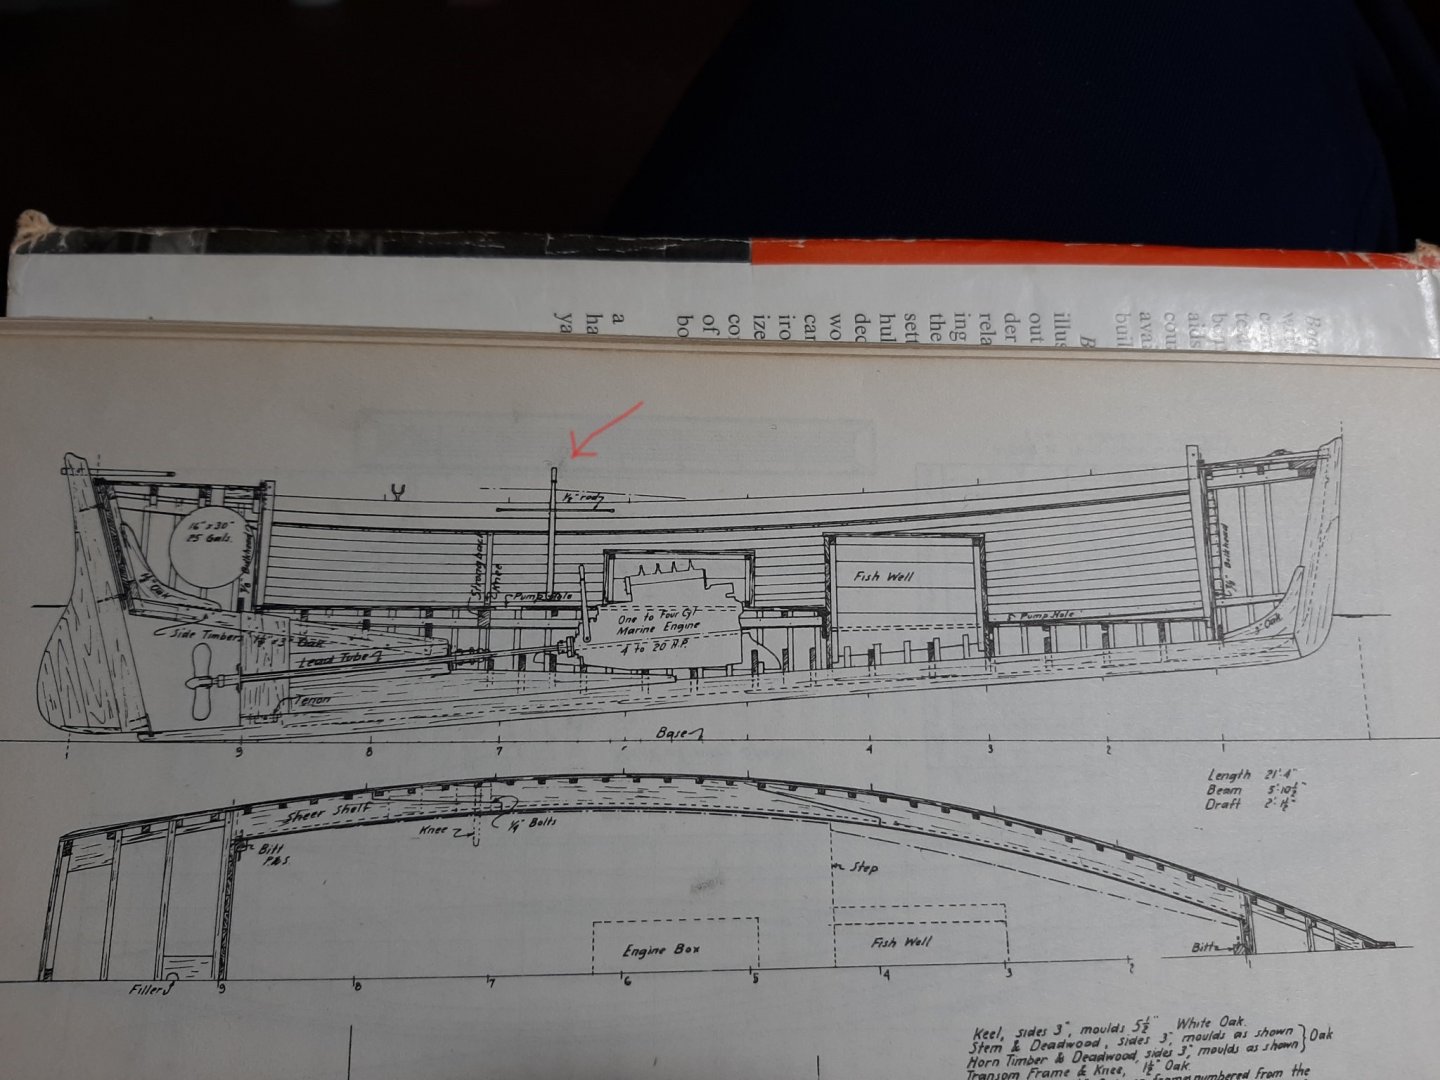
Well, this will need some further thought, there should be lines on rollers going aft. Hmmm...
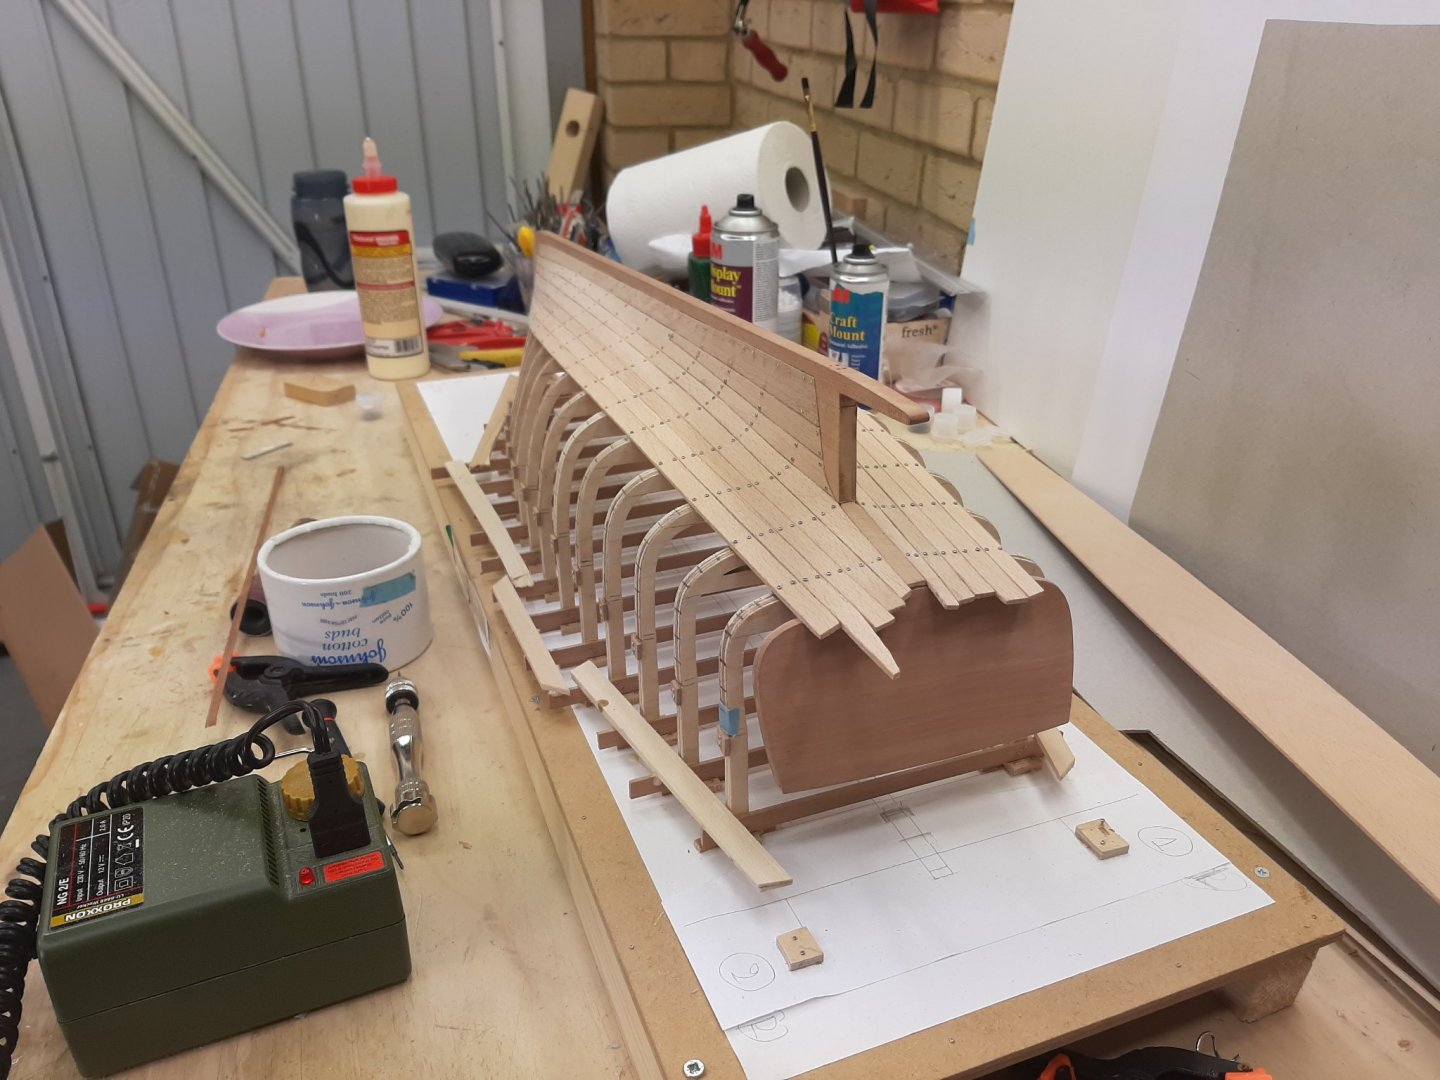
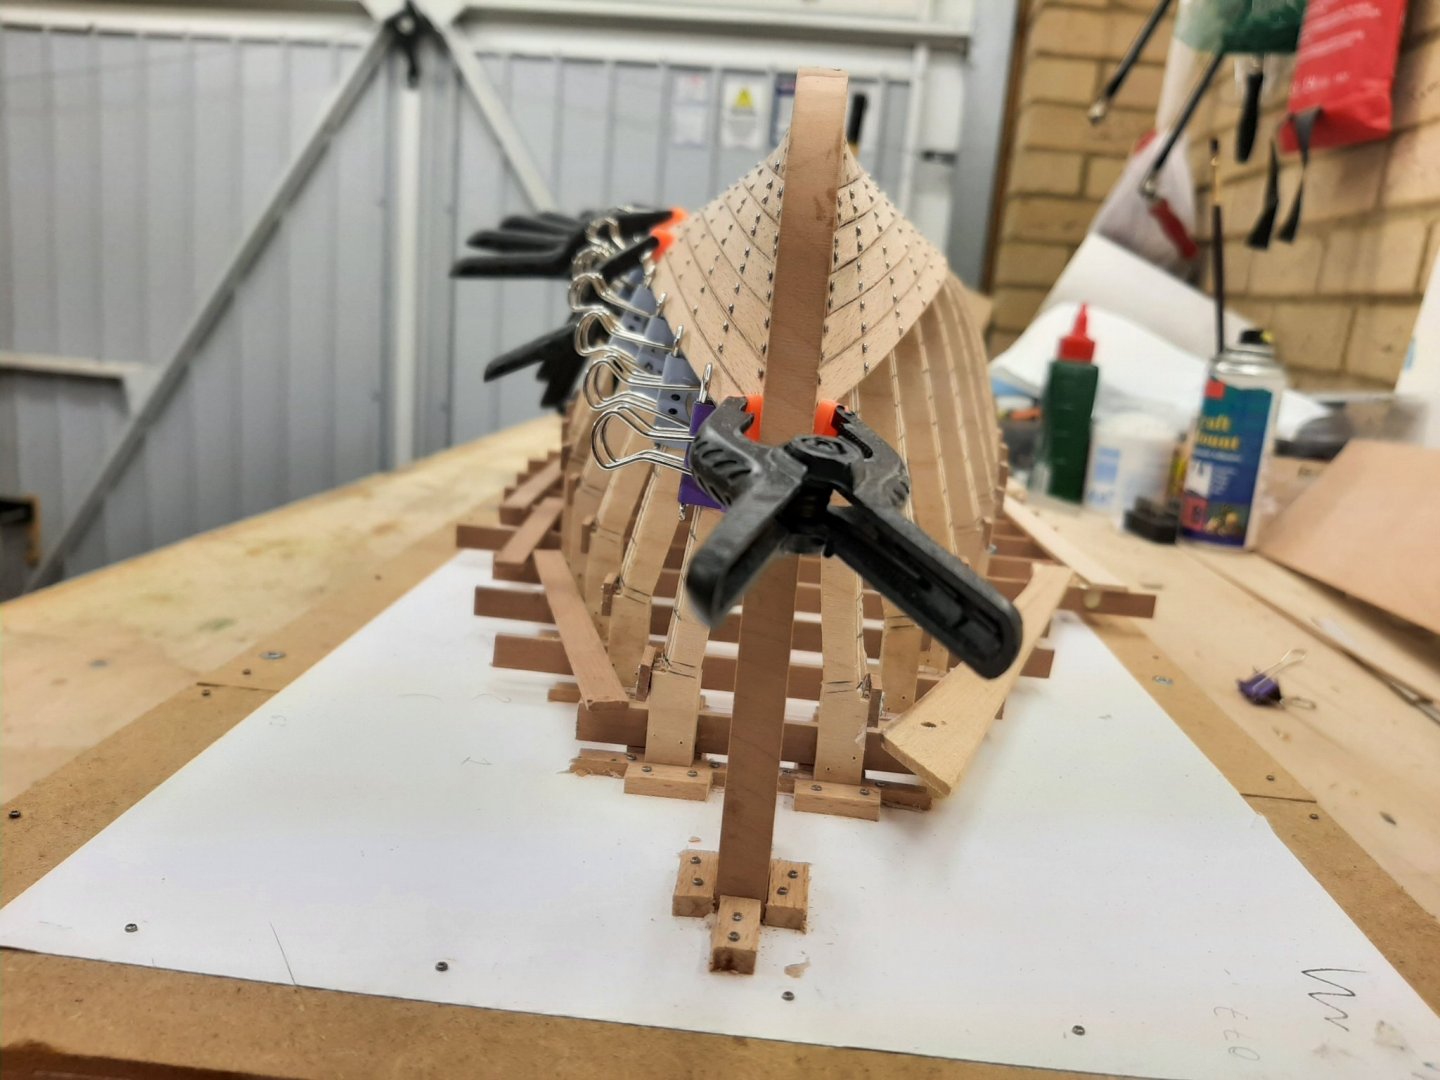
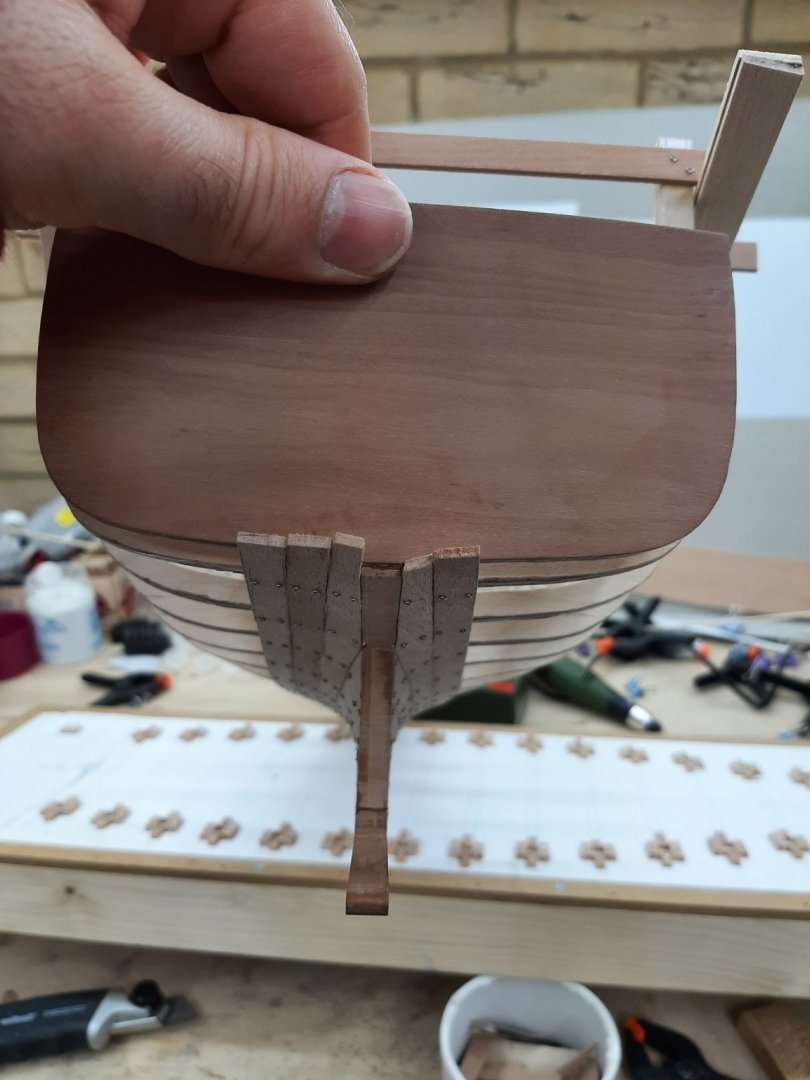
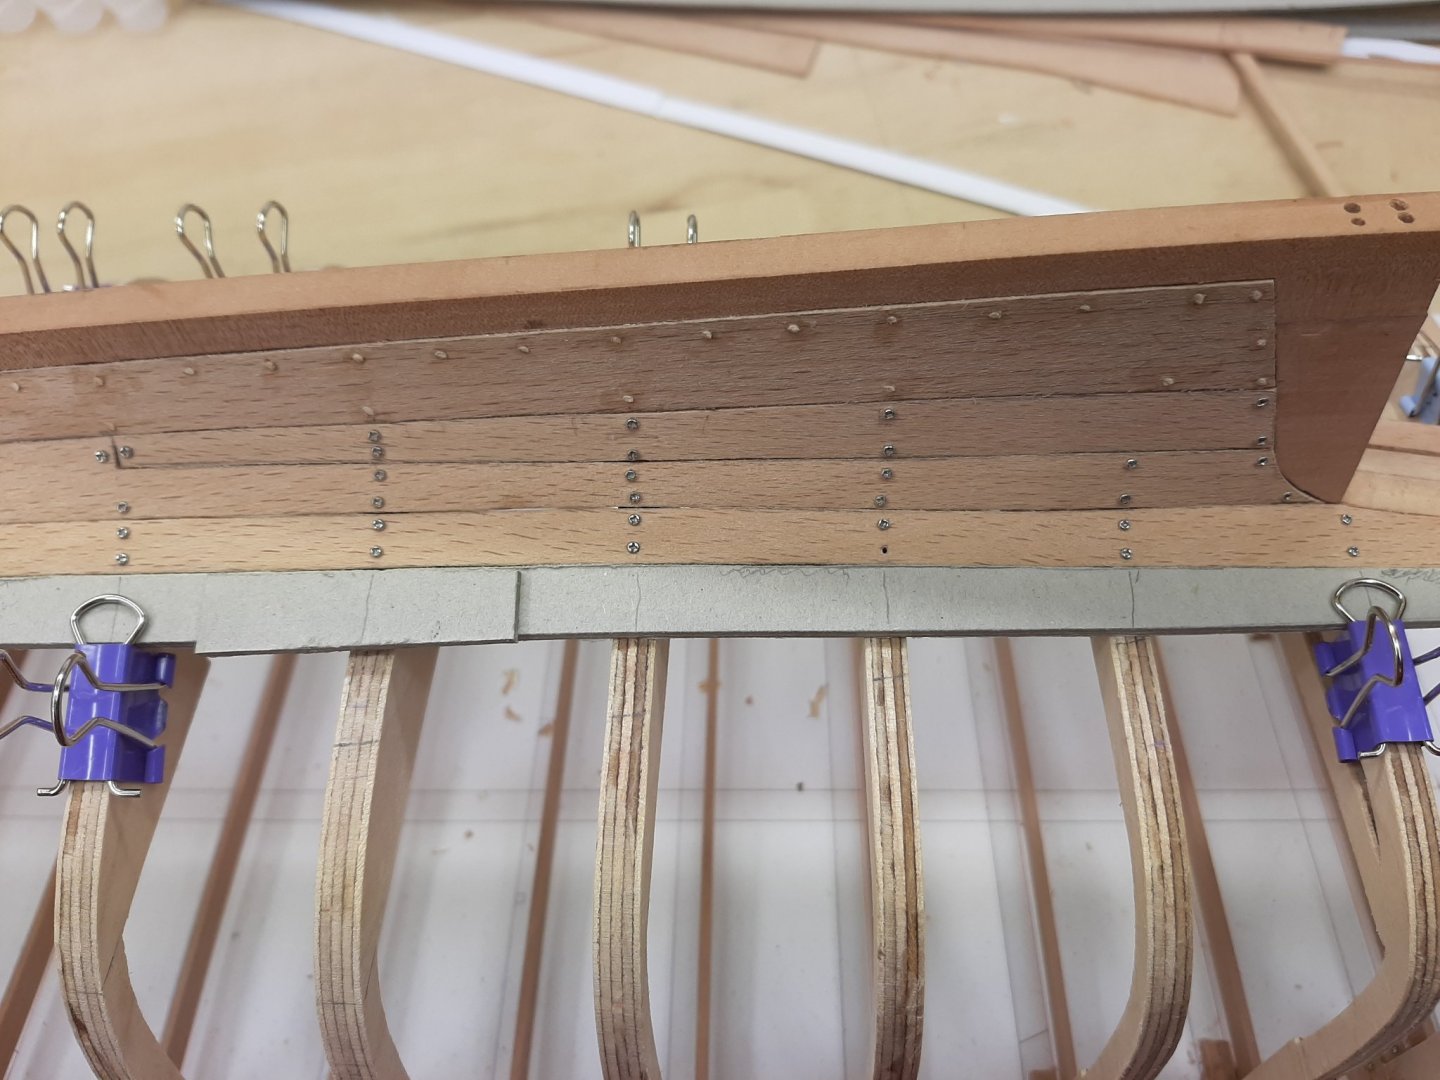
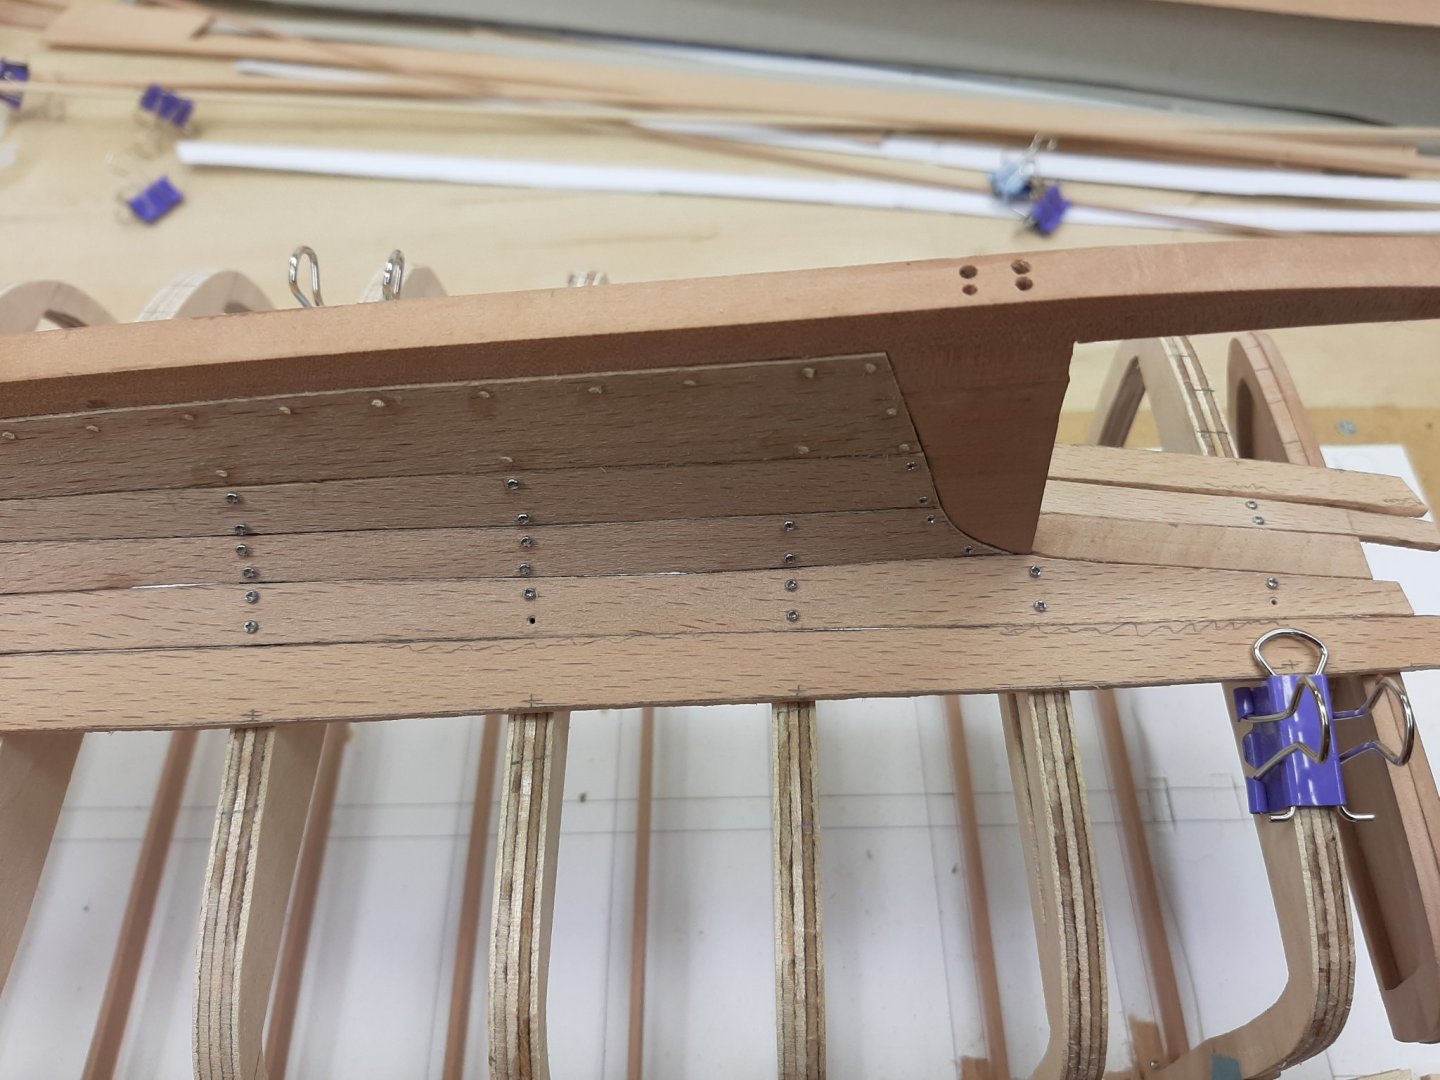
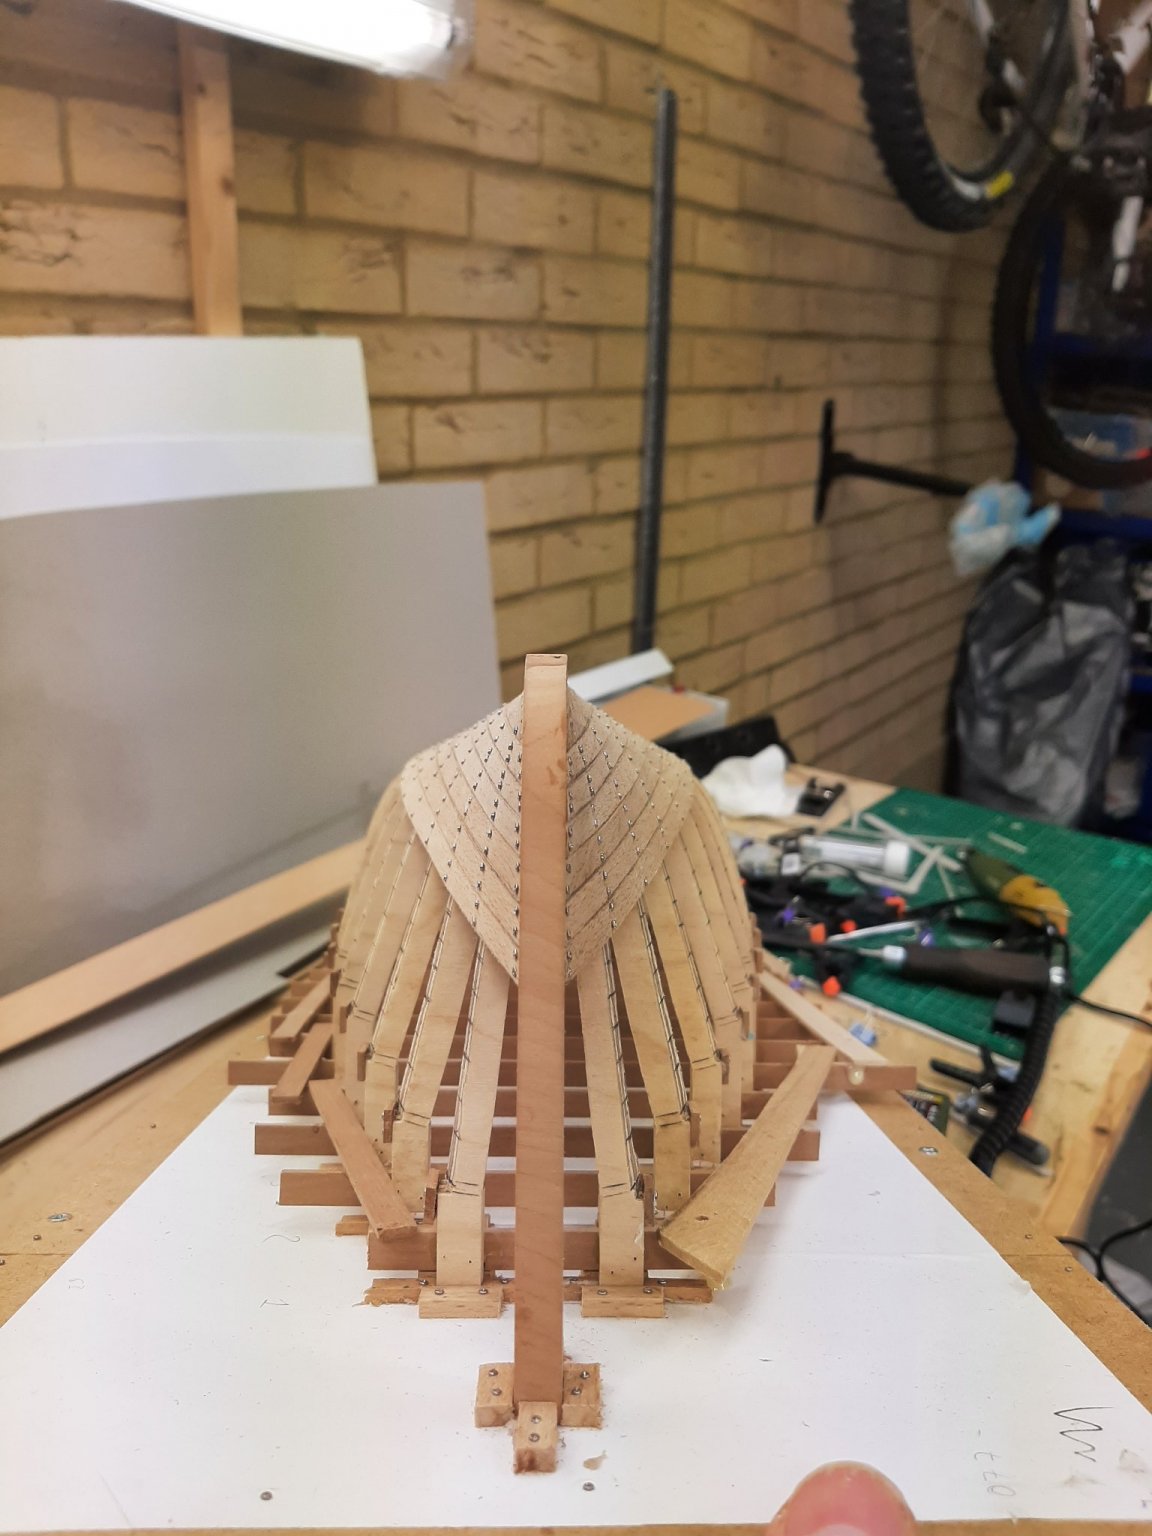
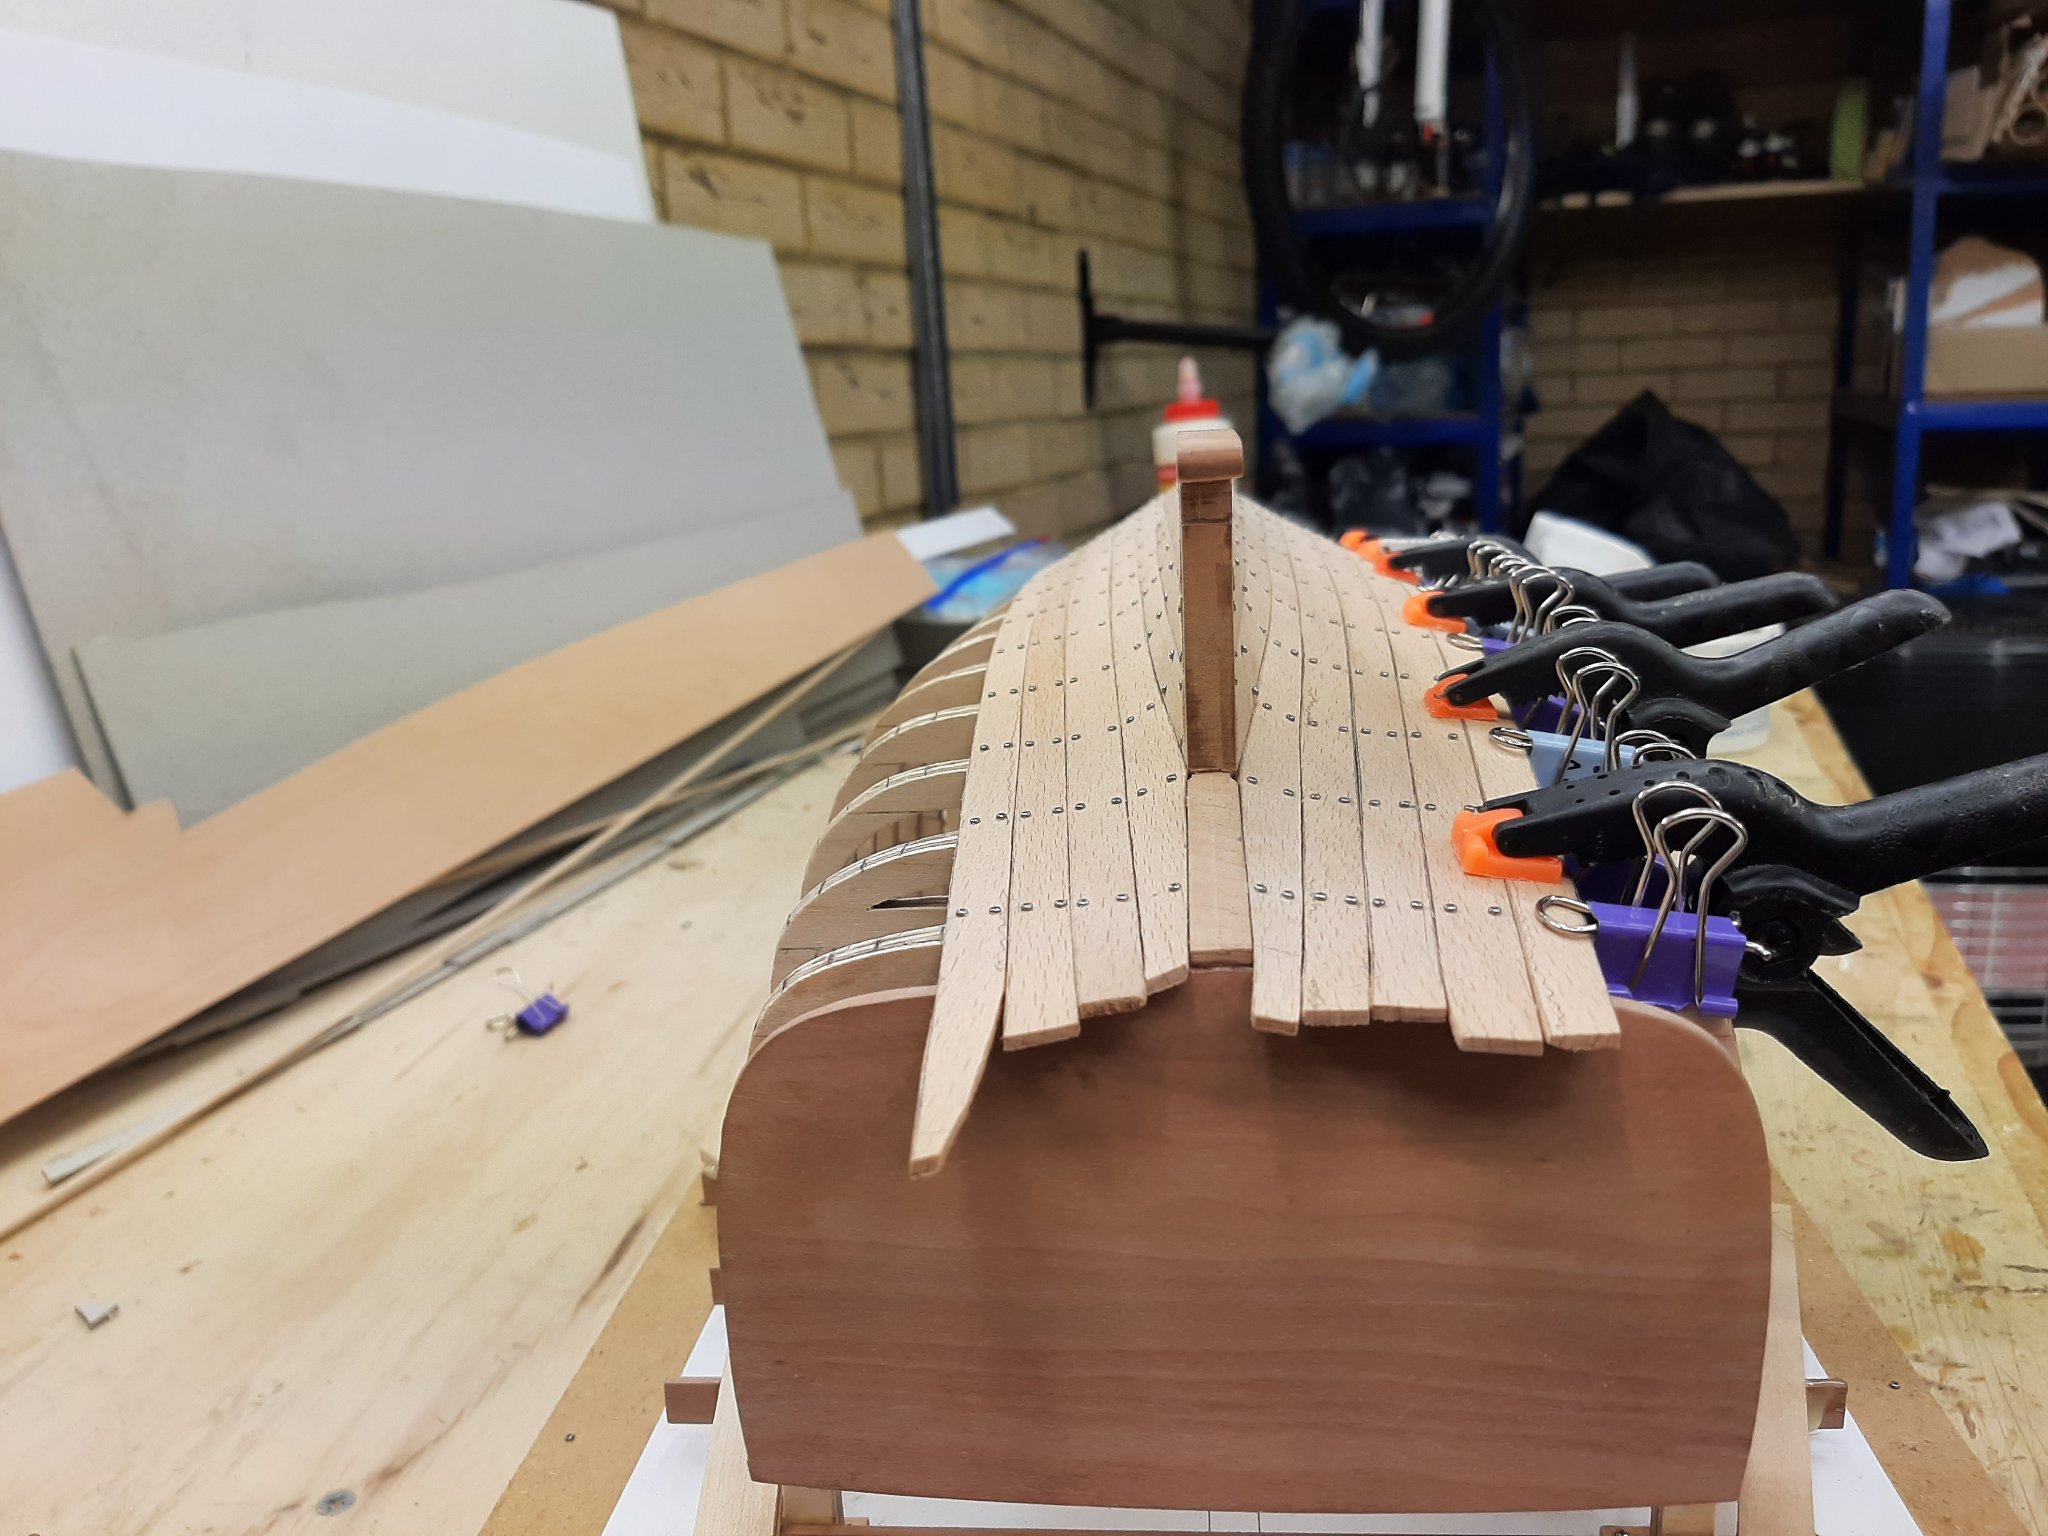
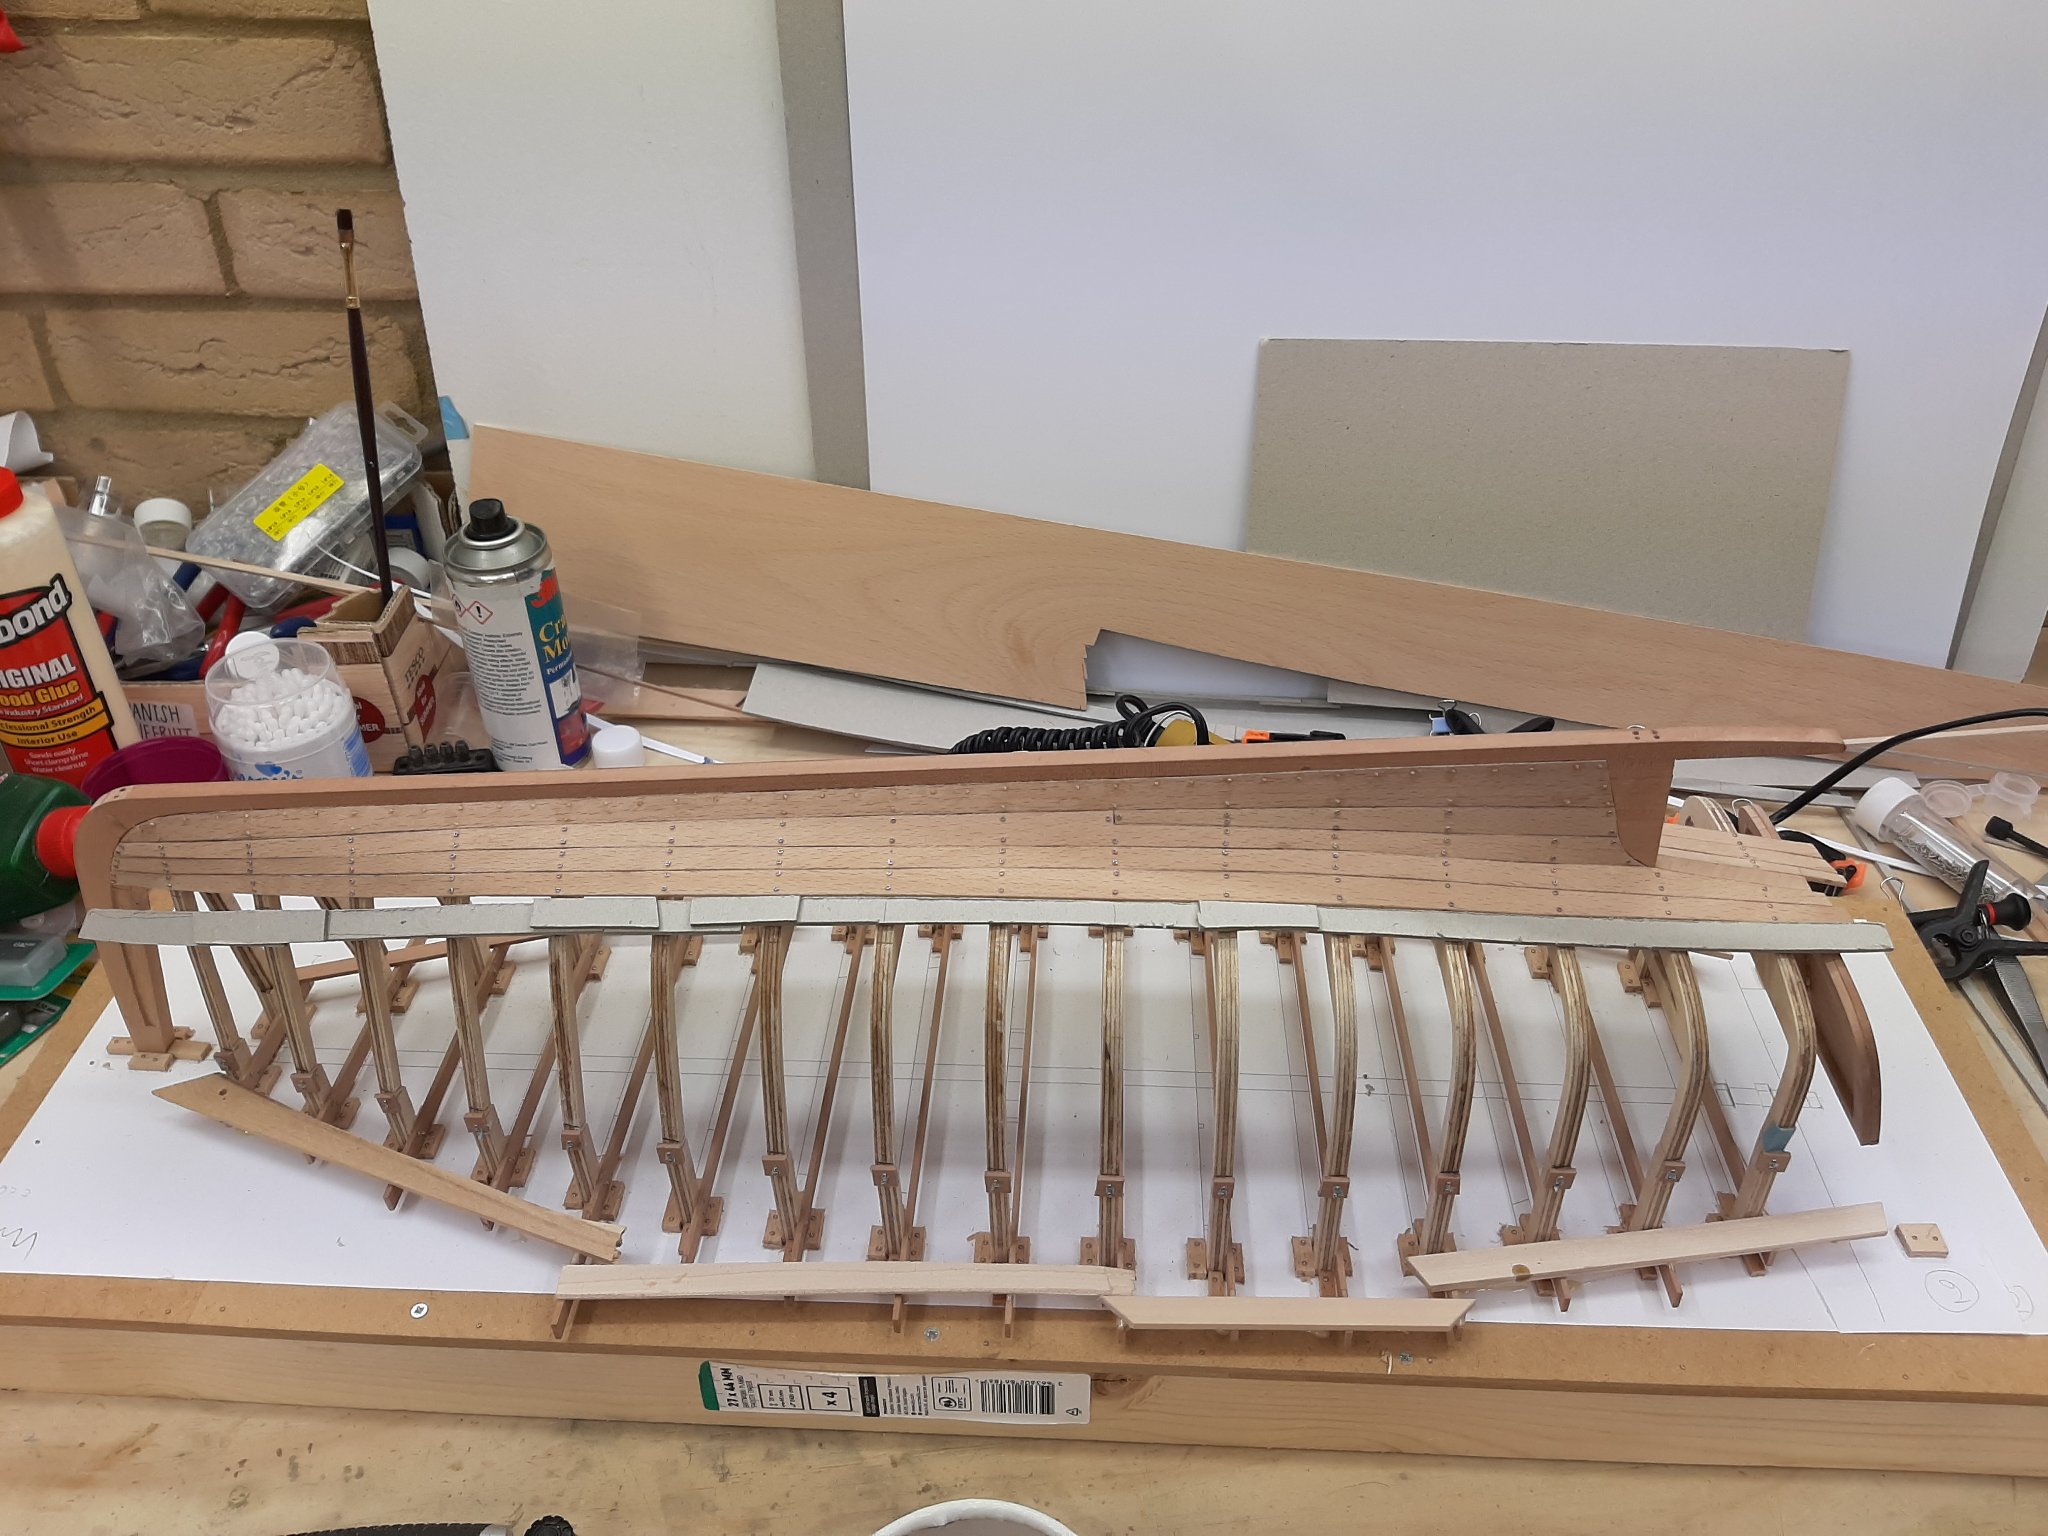
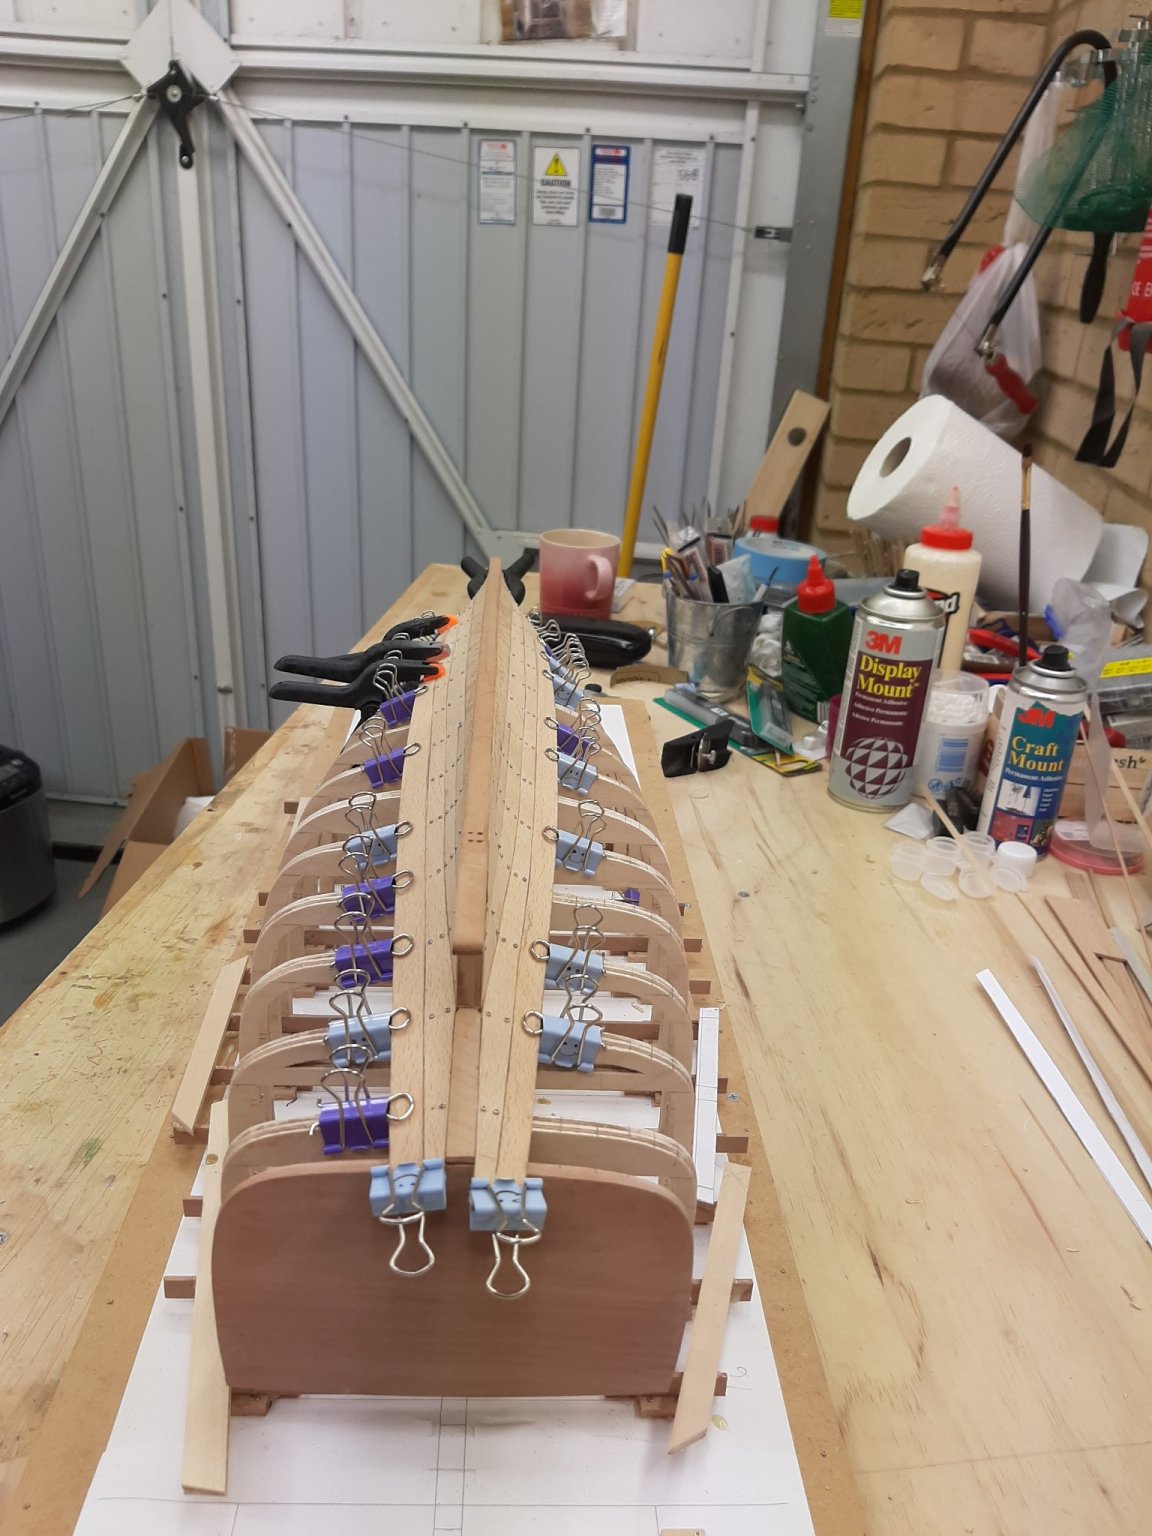
On a different note, I finished one more pair of planks. These planks are a bit curved but still acceptable, they would need stock only 25 cm wide.
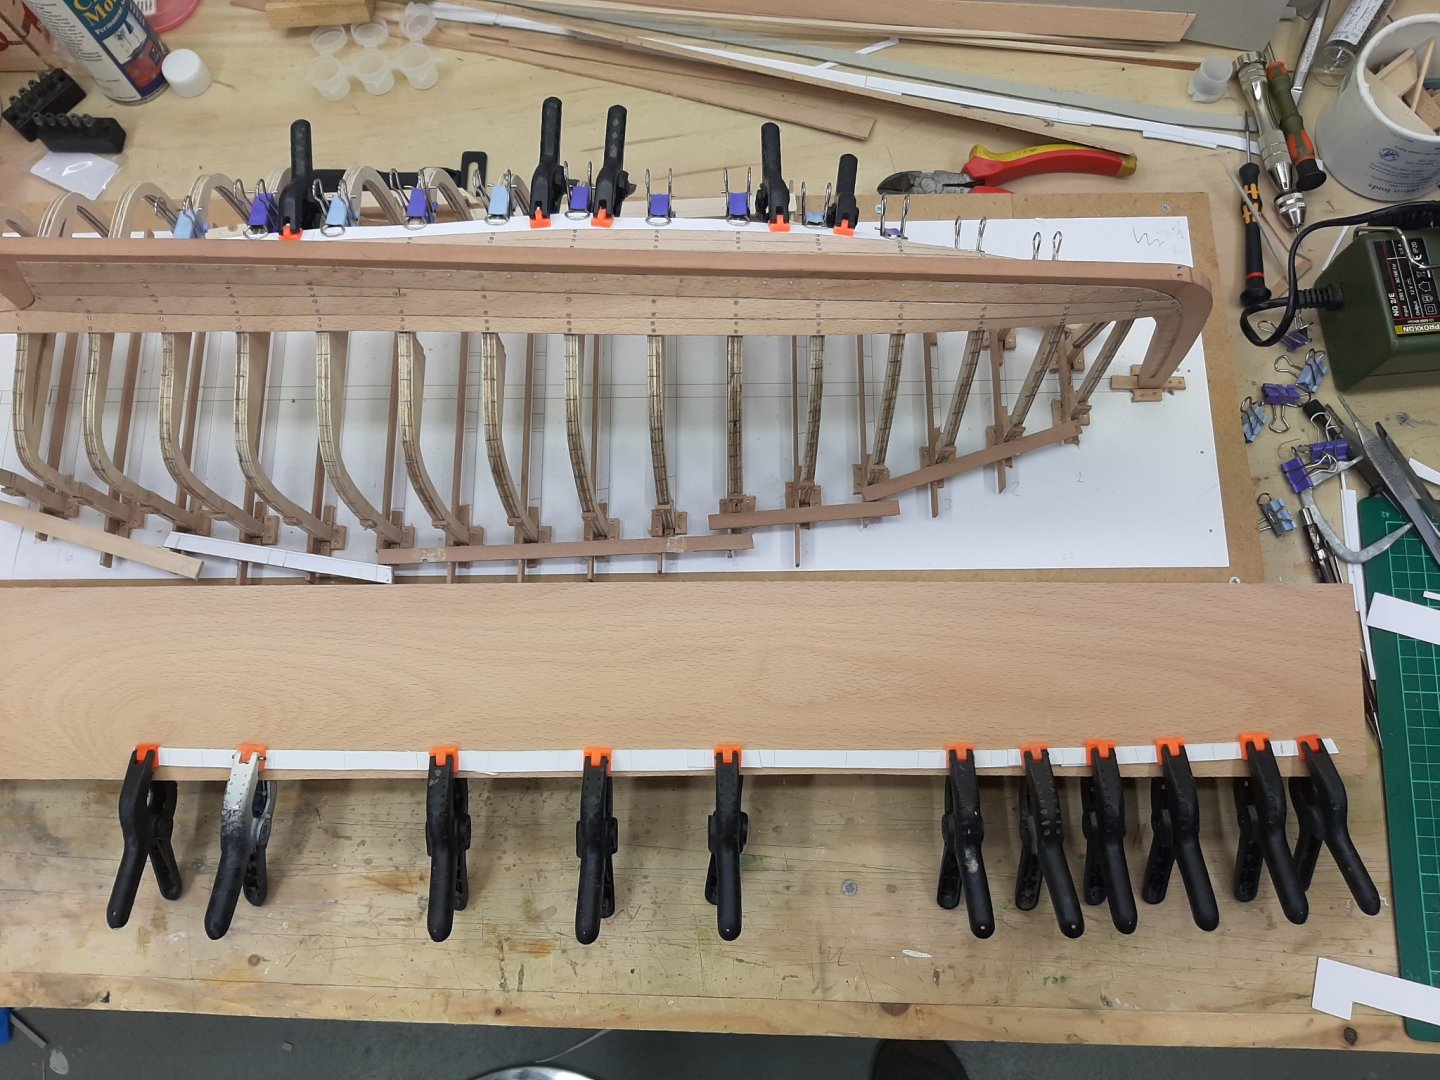
These planks were easier to make and have less of a twist but still need steaming. This is how the plank wants to sit unsteamed

I now wait a day after steaming to allow the wood to shrink.
The hull slowly is starting to emerge.


Vaddoc
-
Dear all
As I am currently immersed in planking, I thought it might be useful to share my way of spilling planks.
In my fishing boat log I have presented in detail the way the plank run can be defined but it is a long and difficult read. Showing how to spill planks is much easier and perhaps will help some builders.
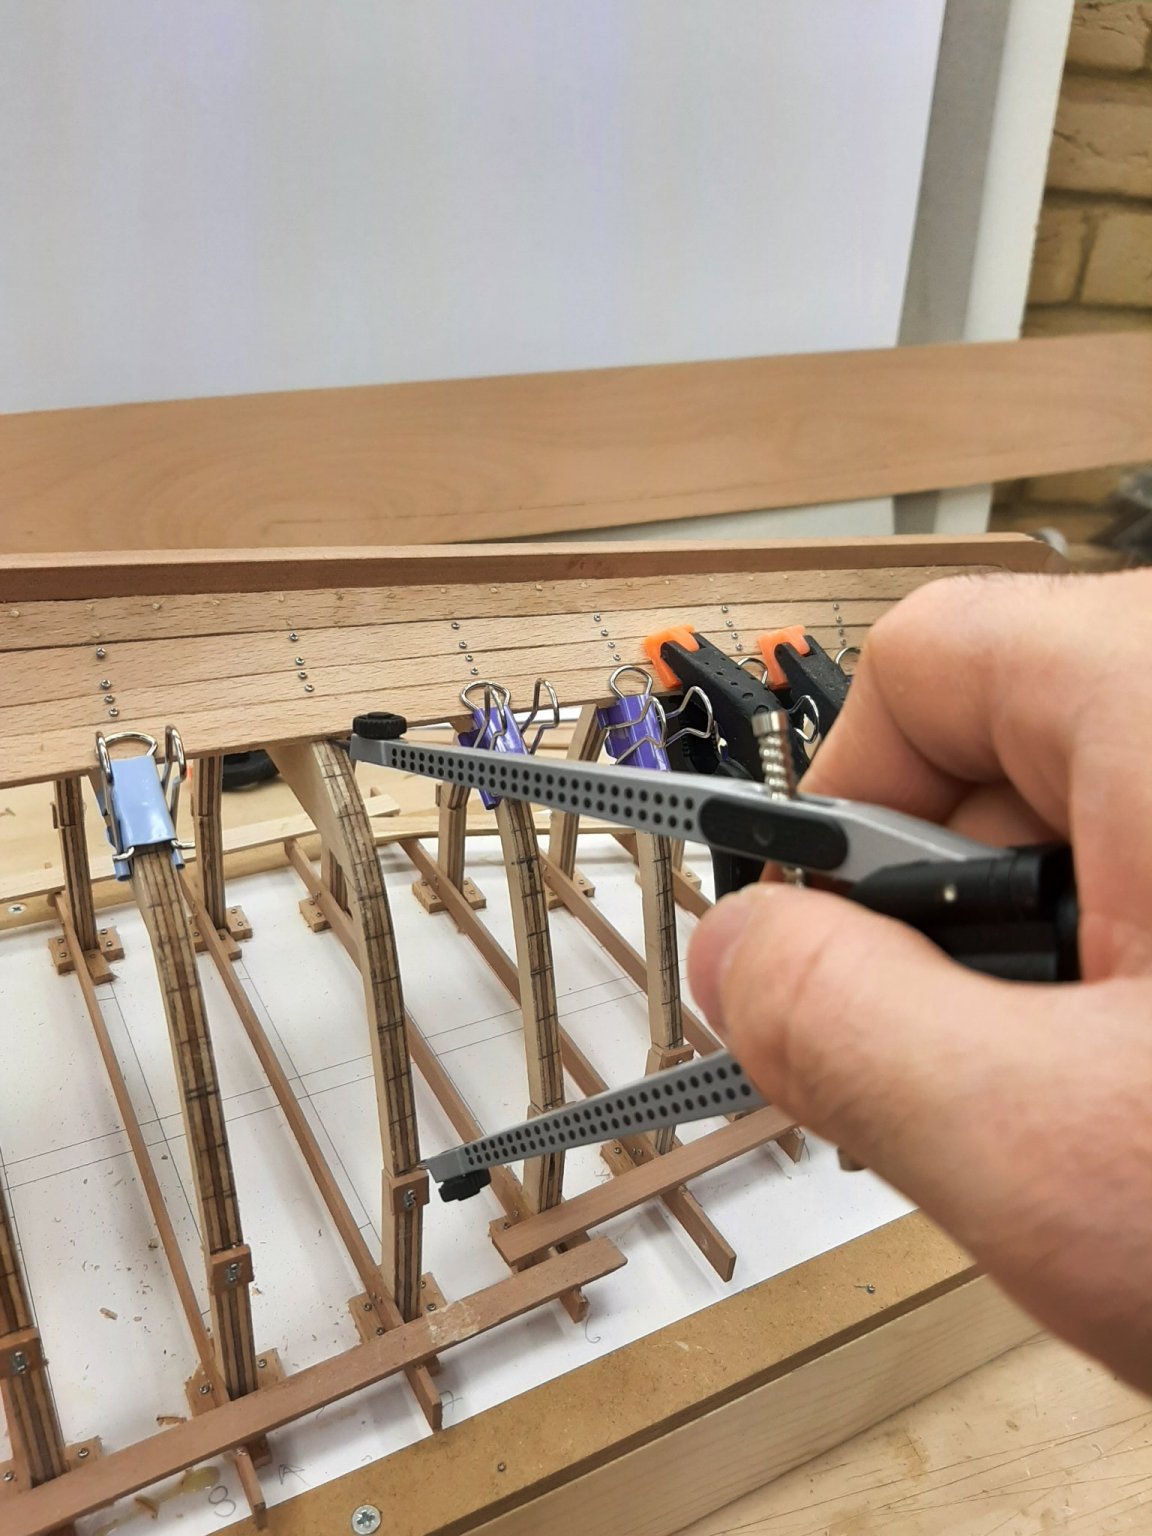
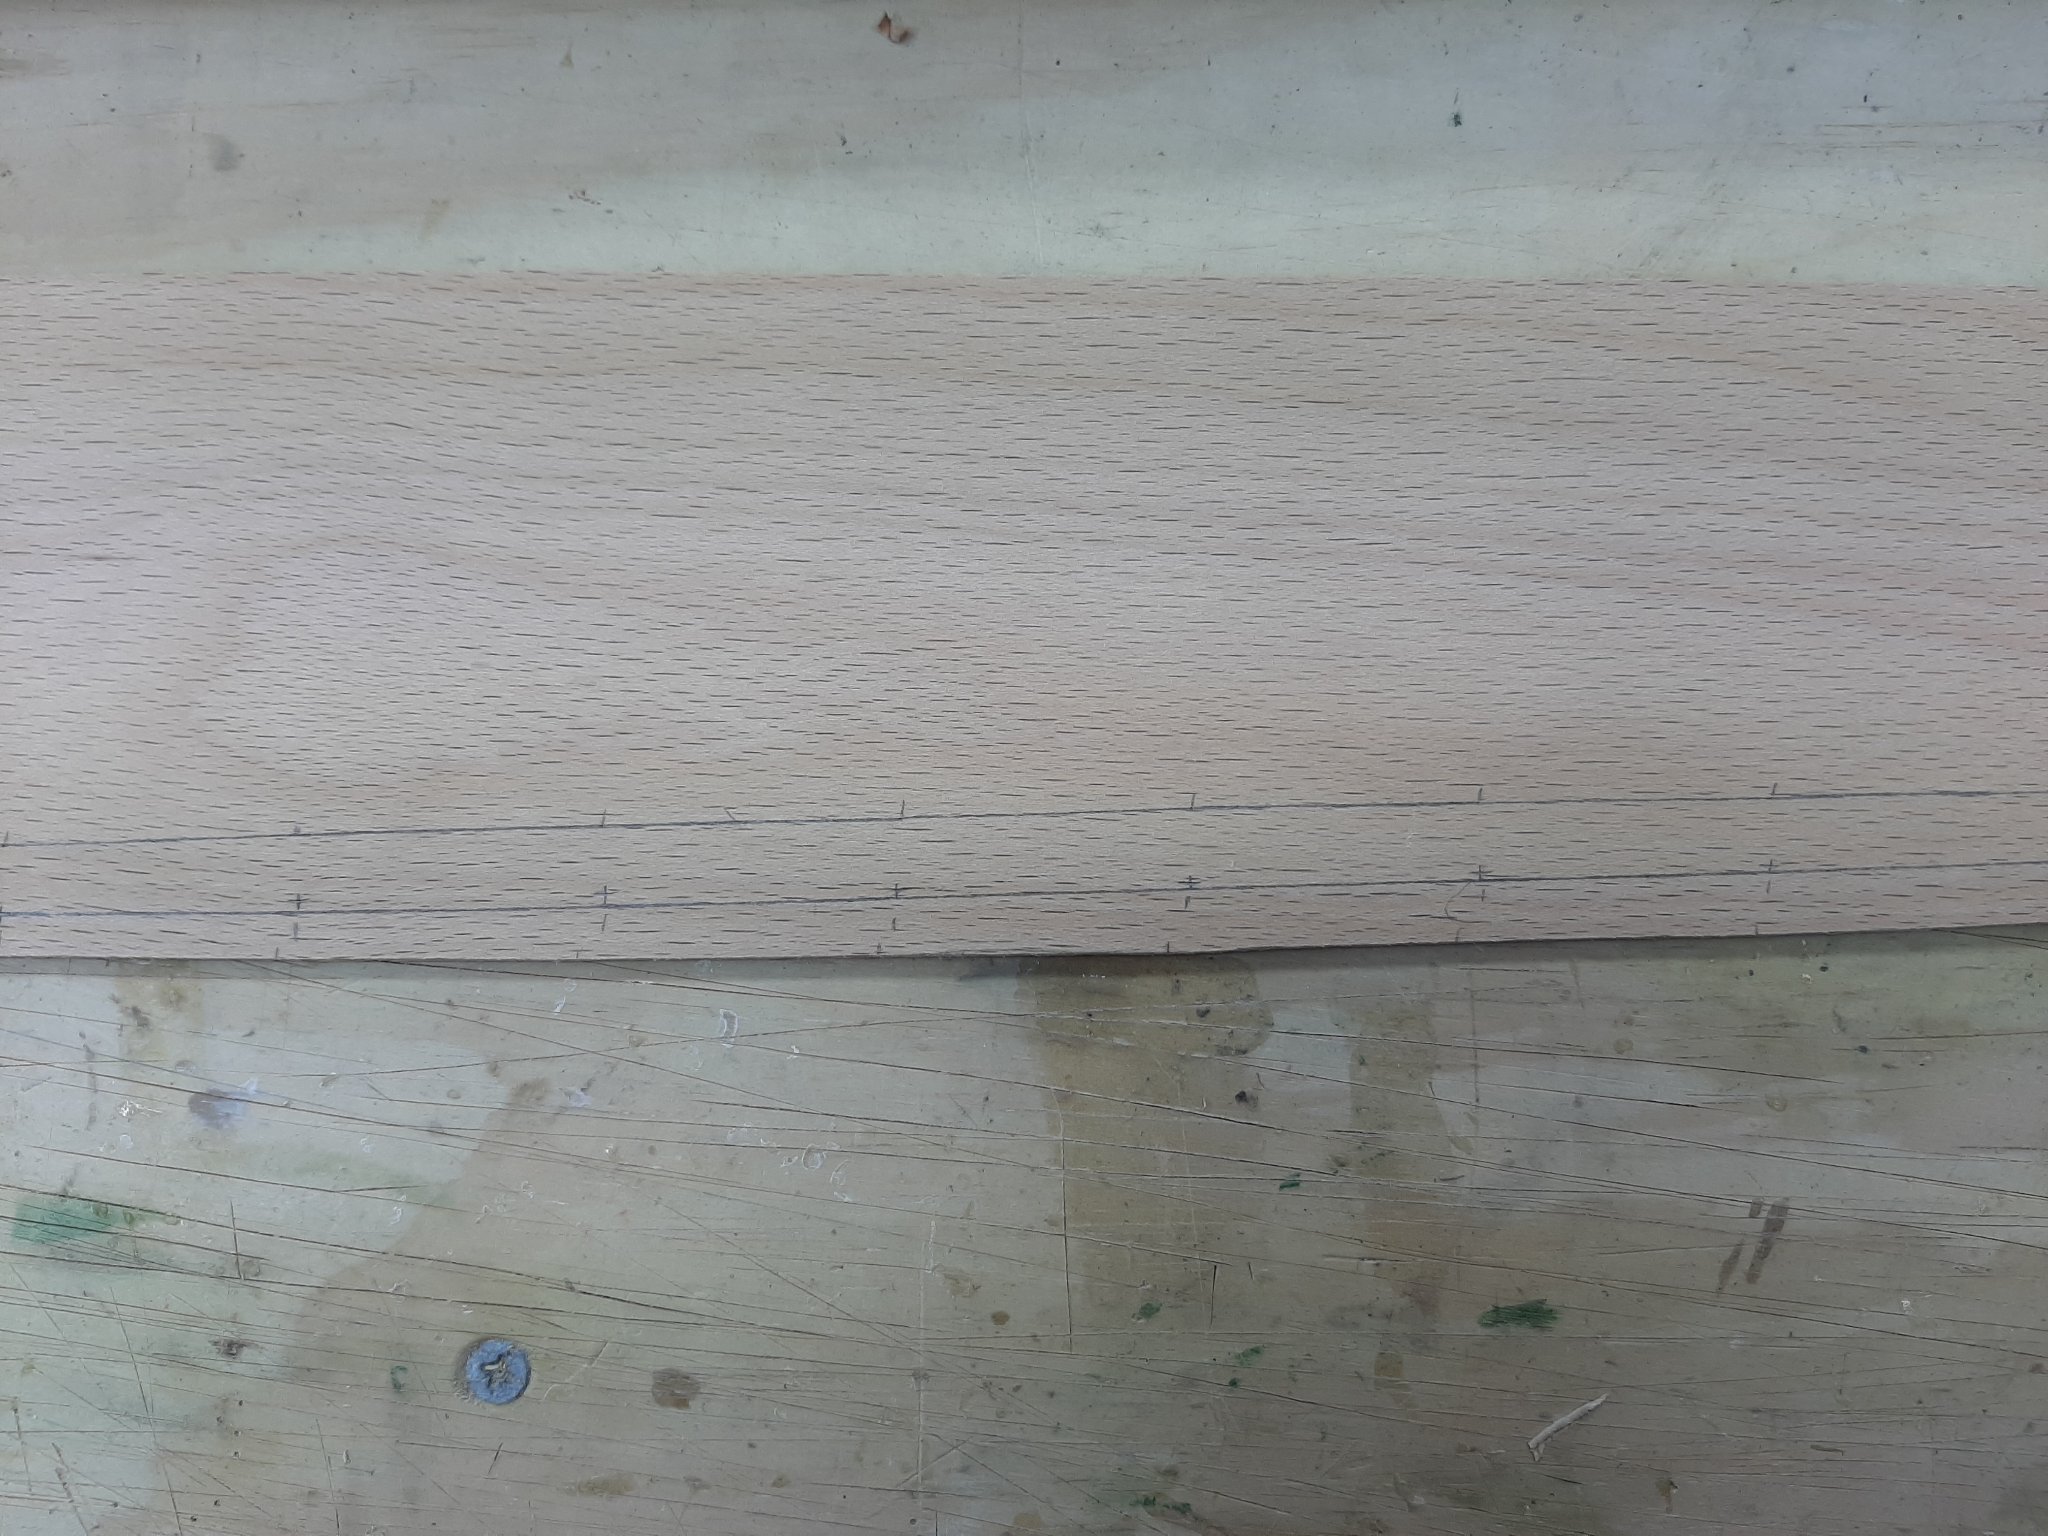
So lets spill a plank in the fishing boat. T he positions of all planks have been marked on the port side and these positions will need to be transferred over to the starboard side as we go along. The planks should be twins but in reality they never are, at least in my boats so every plank needs to be individually spilled.
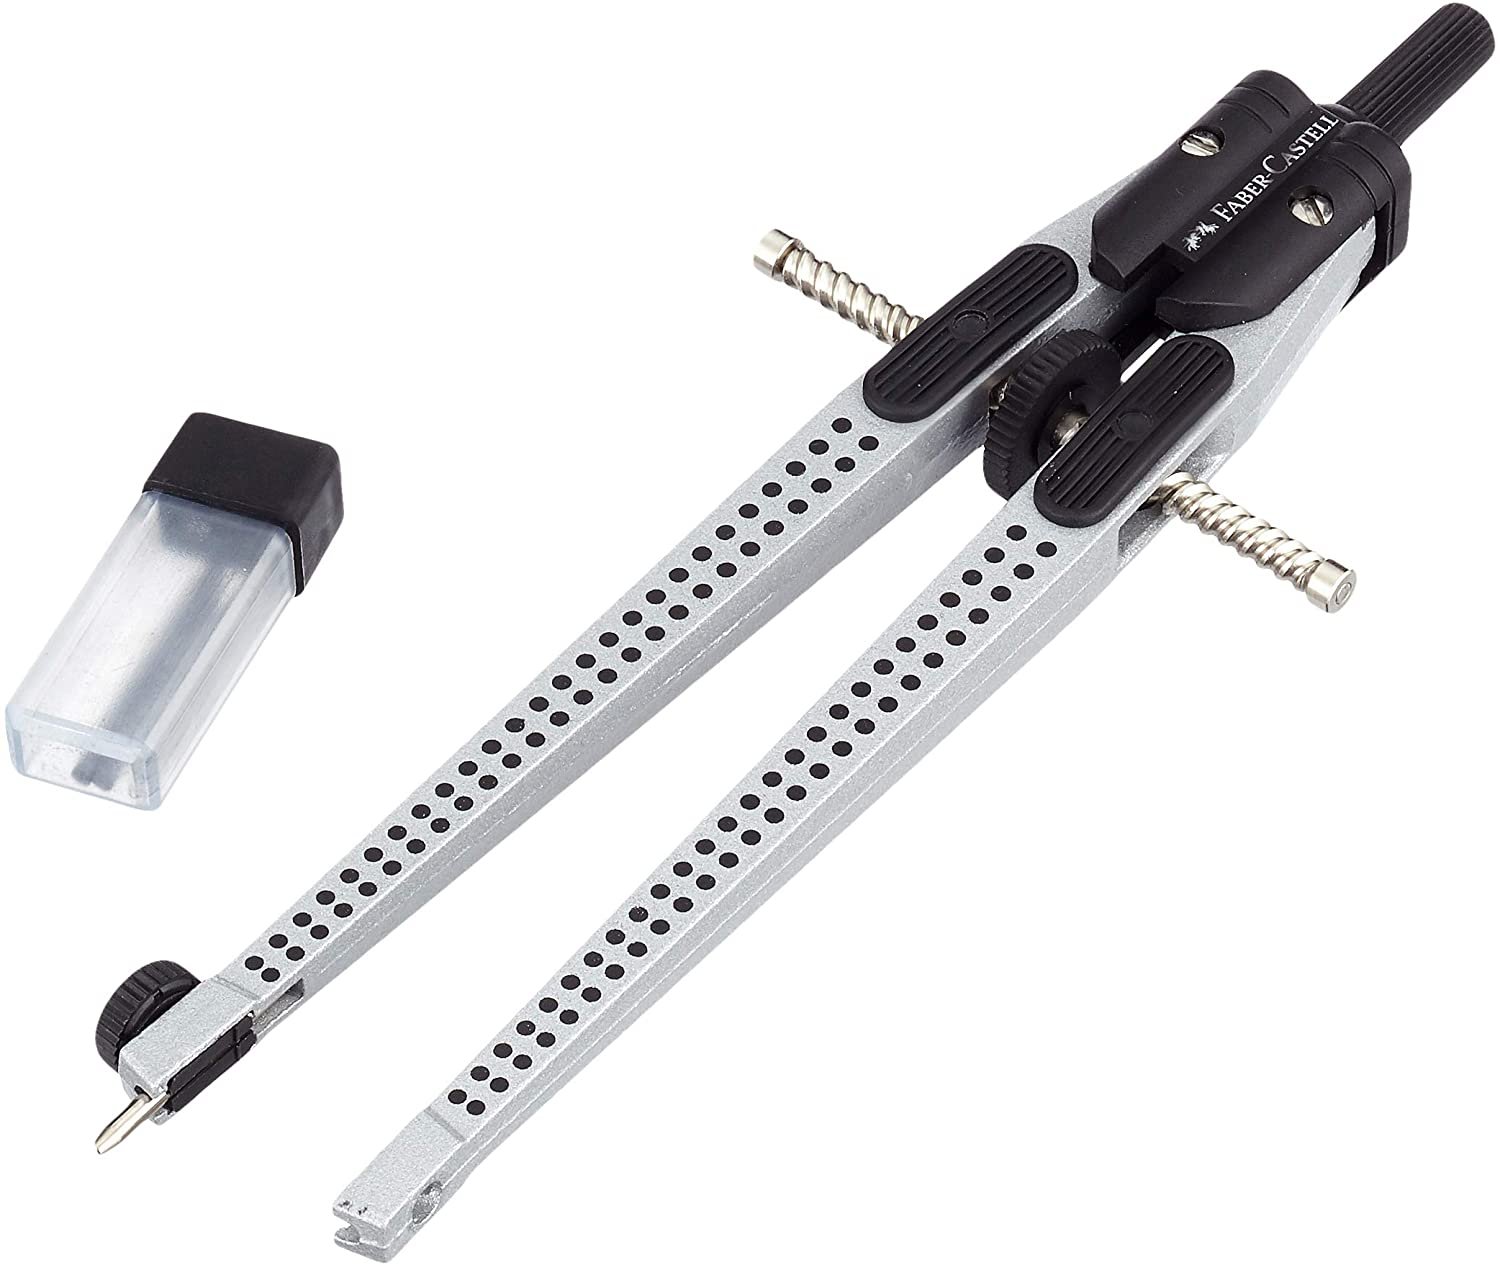
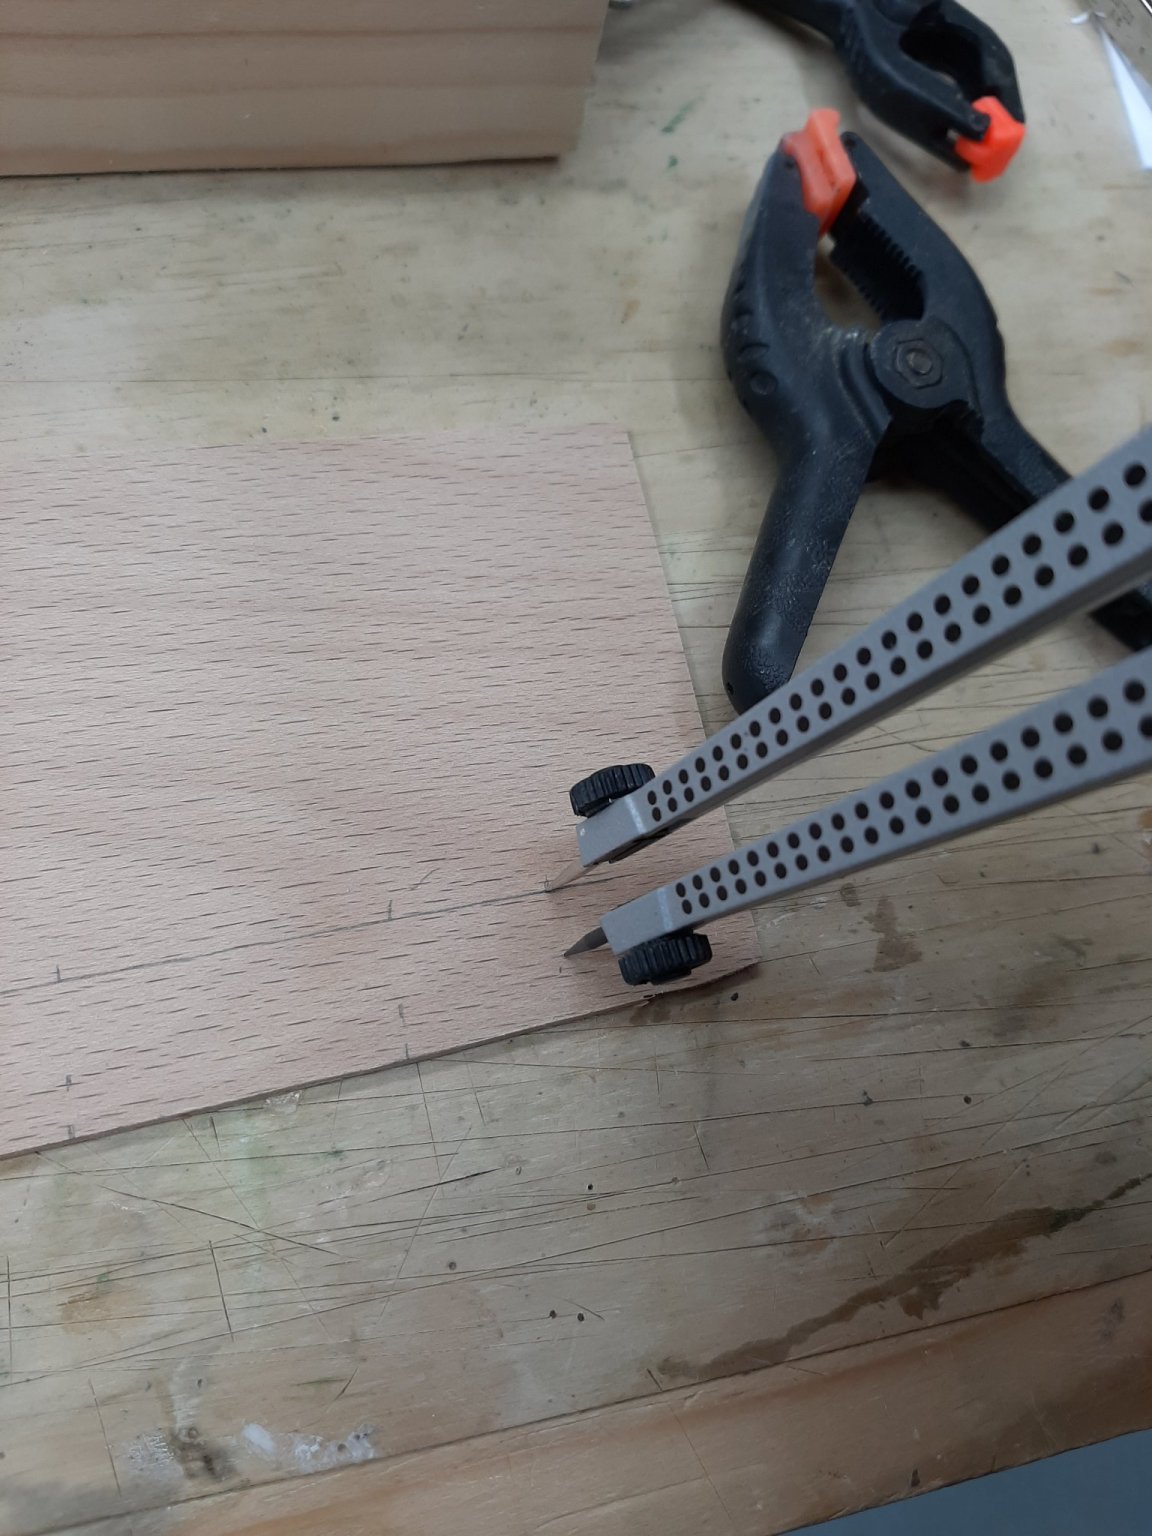
A good compass is needed, this is the one I use
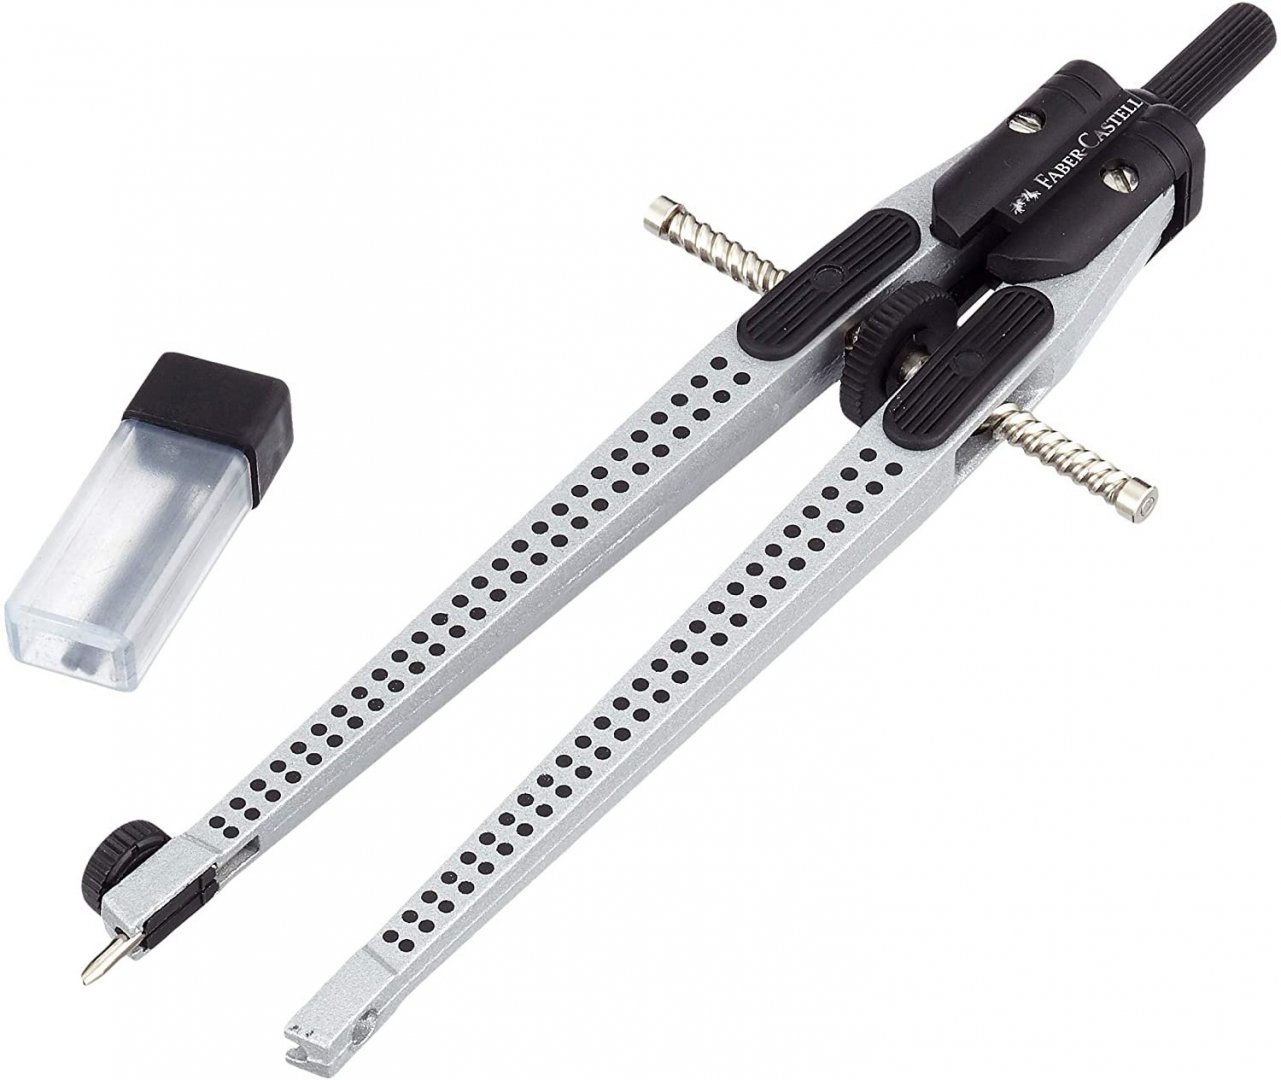
The plank we will be making will be a starboard plank, its sister plank on the port side is already installed. A picture is a thousand words: This is the port plank steamed in place and the markings for all the rest of the planks are visible. We need to make this plank for the other side.
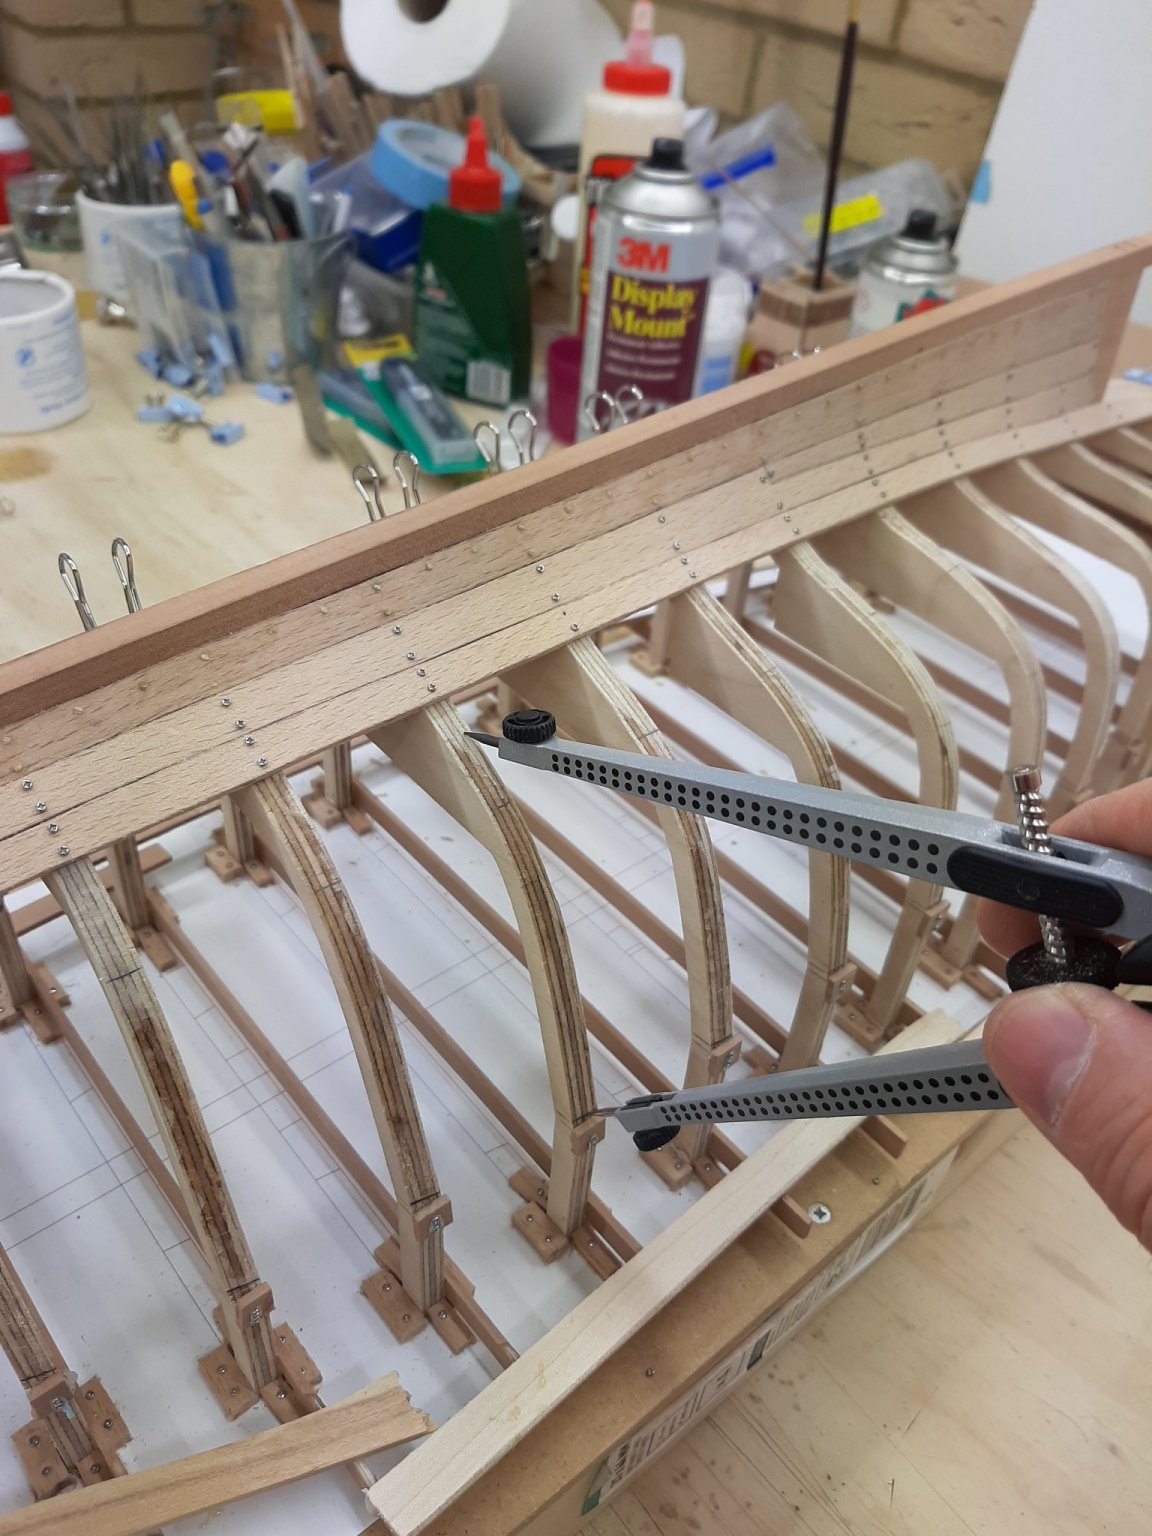
Now, every new plank will have two edges. The bottom one that meets the previous plank, and this needs to be shaped so it fits well, and the upper free edge that we will define ourselves based on our markings and planning of the planks but needs to be as fair as possible.
I use either very stiff card or thick cardboard to make templates of the bottom edge. I cut pieces as long as possible, hold them close to the edge of the previous plank and use a compass to mark the pattern. I run the compass along the piece of cardboard with the needle on the edge of the previous plank and the pencil tip on the card. Then I cut on the line with a very sharp knife and repeat on the next segment. I glue and connect the pieces into a long continuous card pattern. This is how it should look.
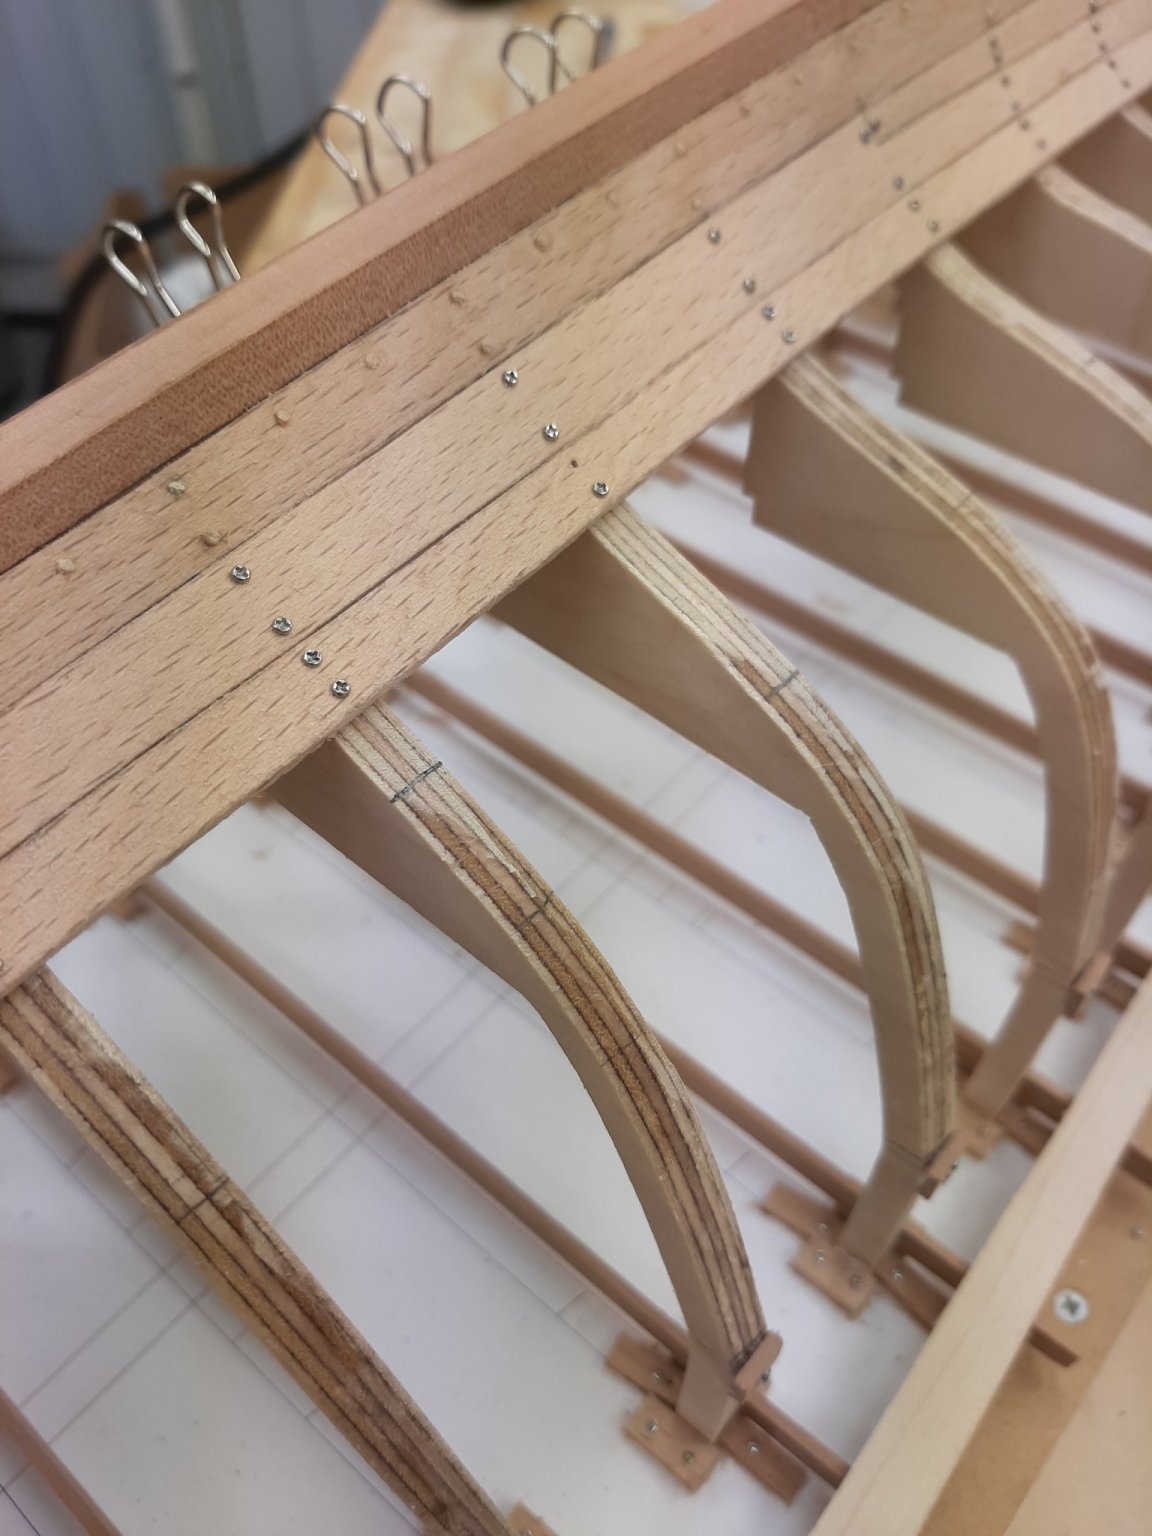
This is 1:10 scale and this plank is 60 cm long. The card needs to lie comfortably without absolutely any edge bend. Even a tiny strain on the card will produce huge gaps on the other end of the plank and wood will not tolerate edge bending (It will, but only a little). This is the most crucial step, if there is any doubt the template must be readjusted. This particular template was the third one. Do not make the card pieces too wide because the angles will change and you ll be getting constantly erratic results.
Then, mark the positions of the frames on the card pattern.
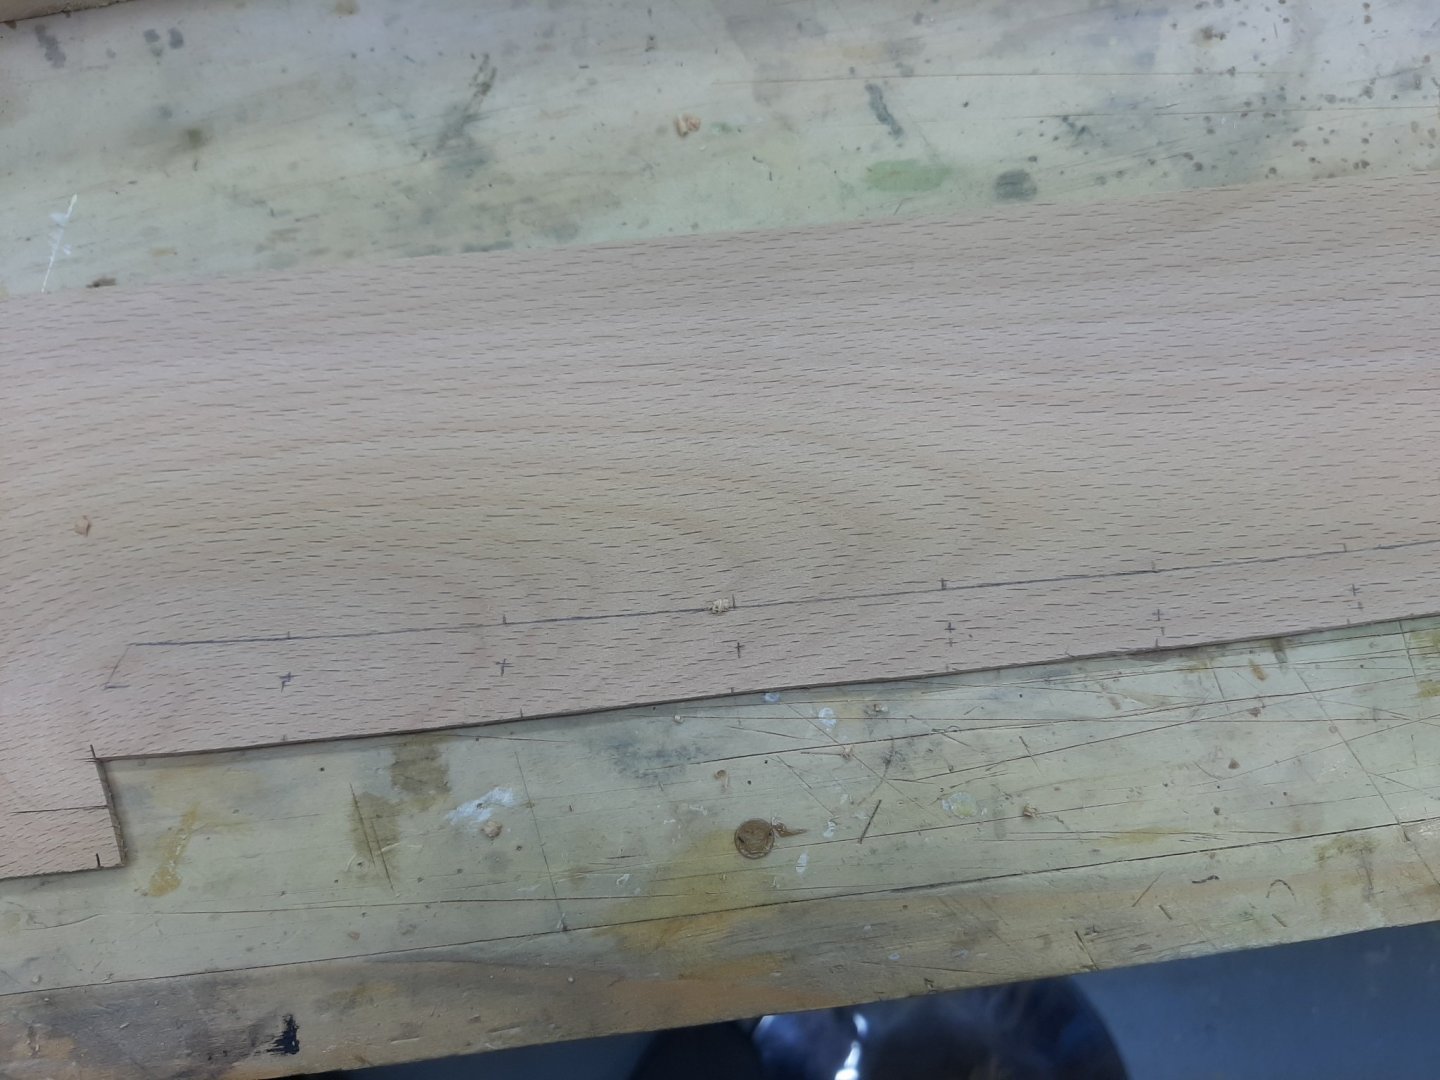
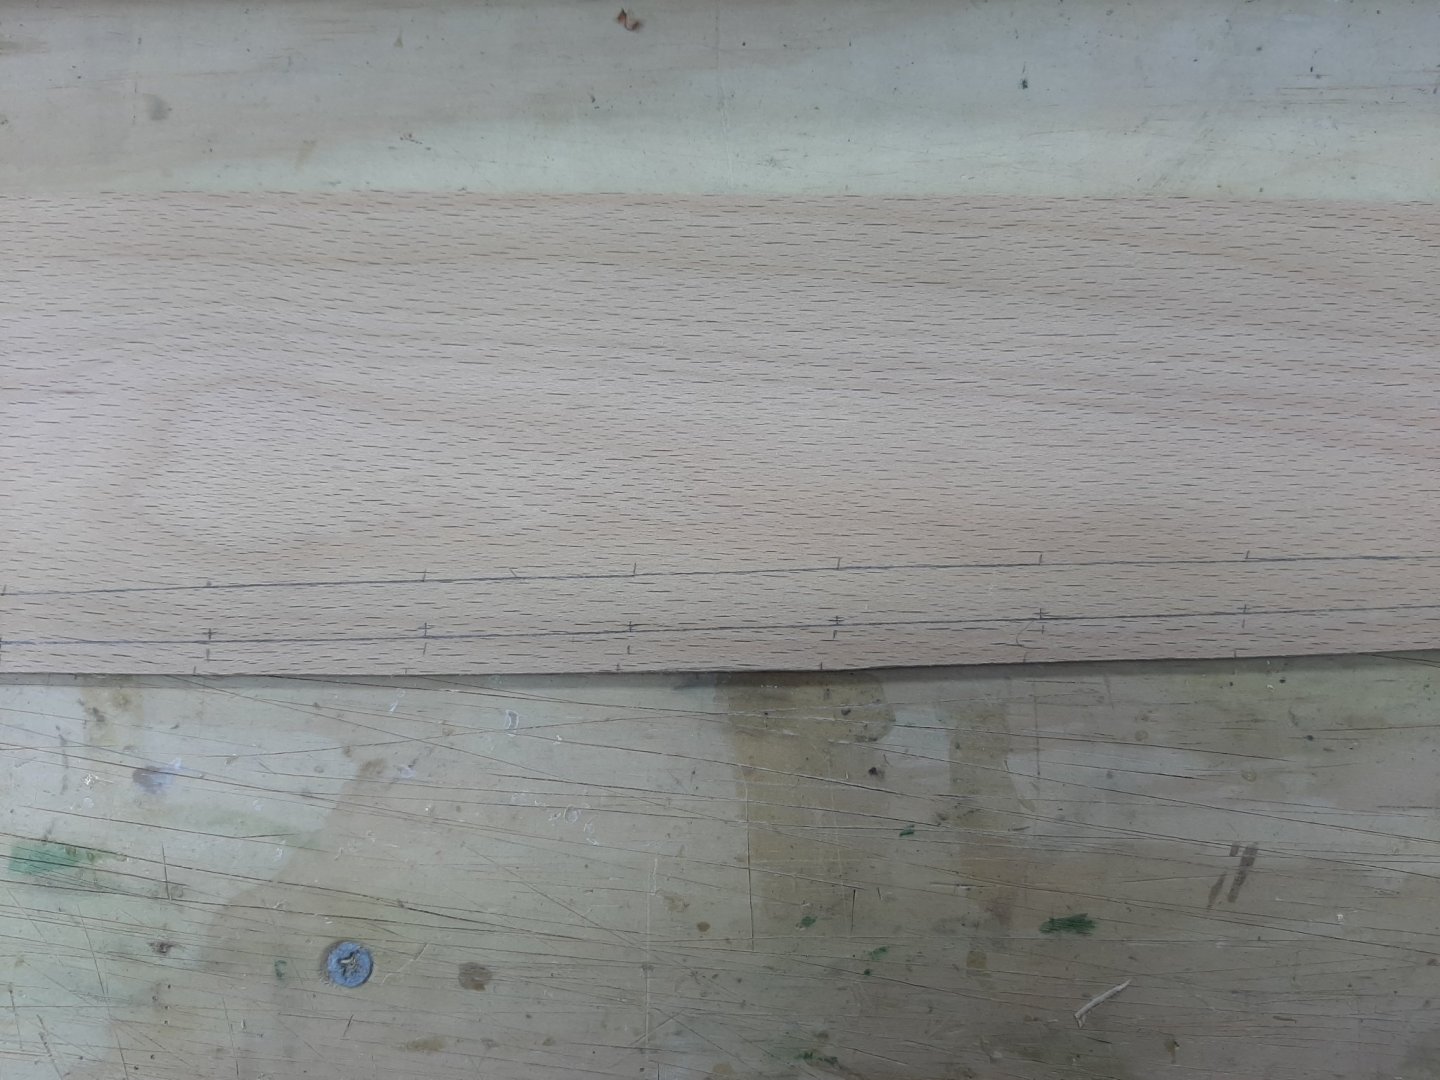
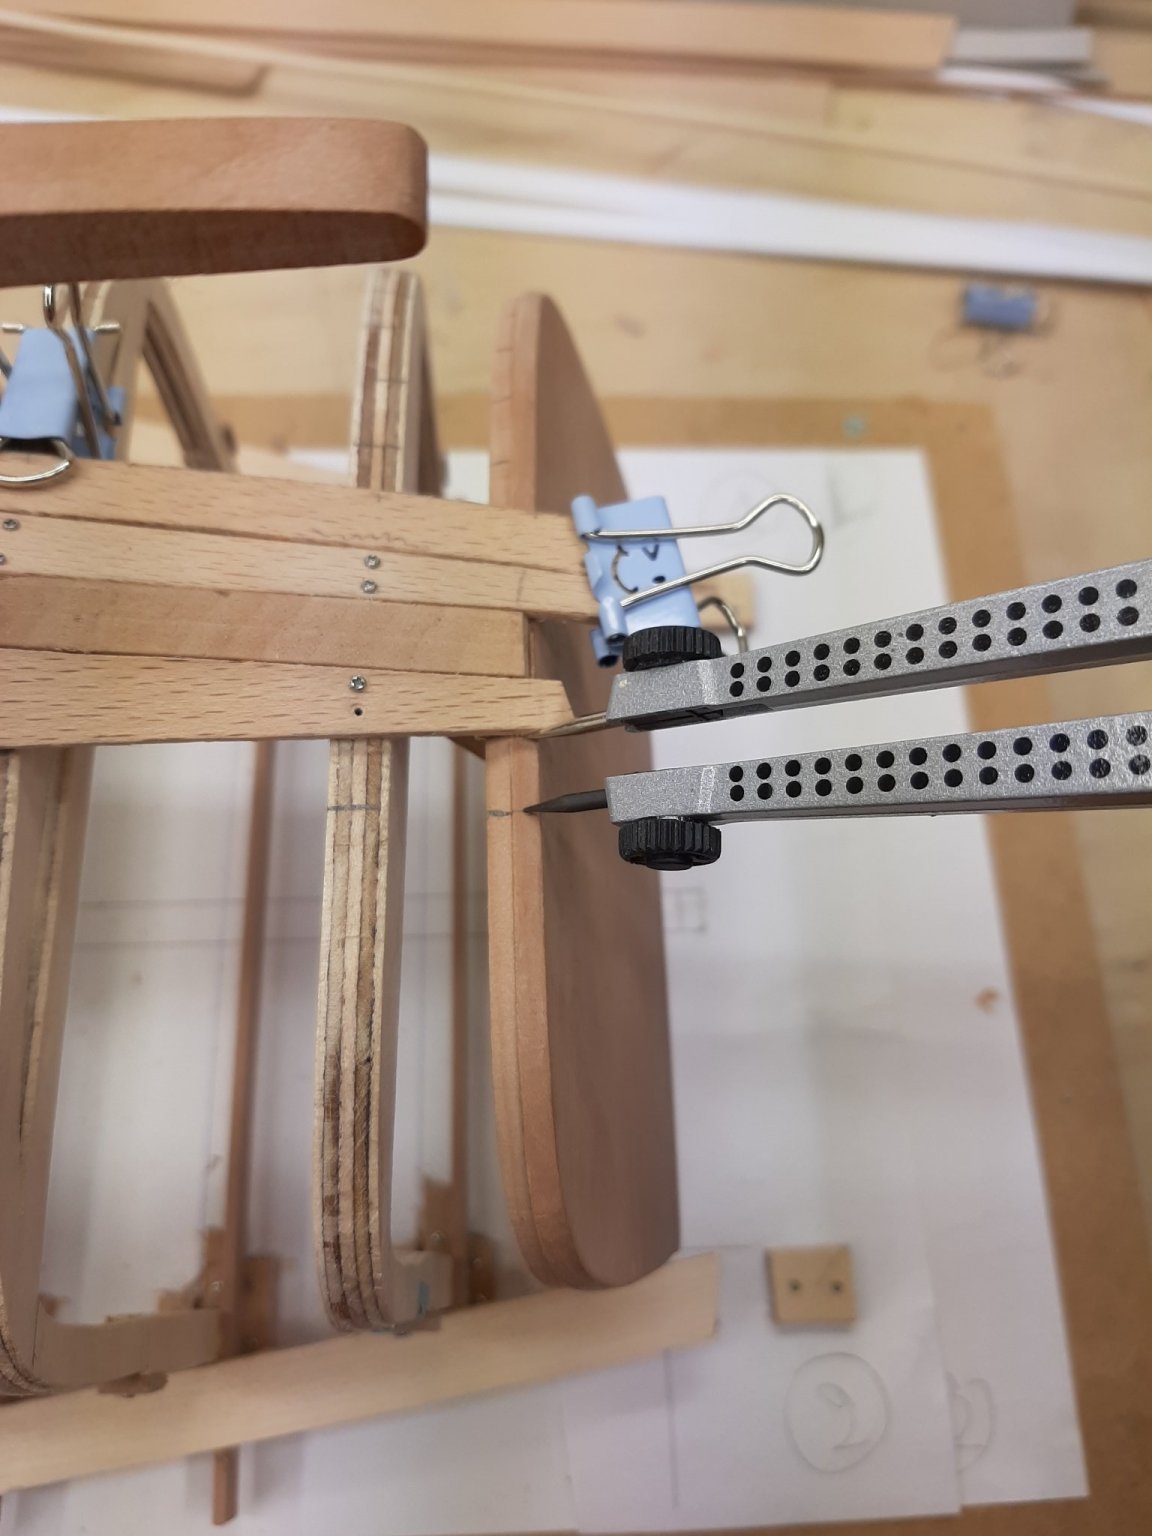
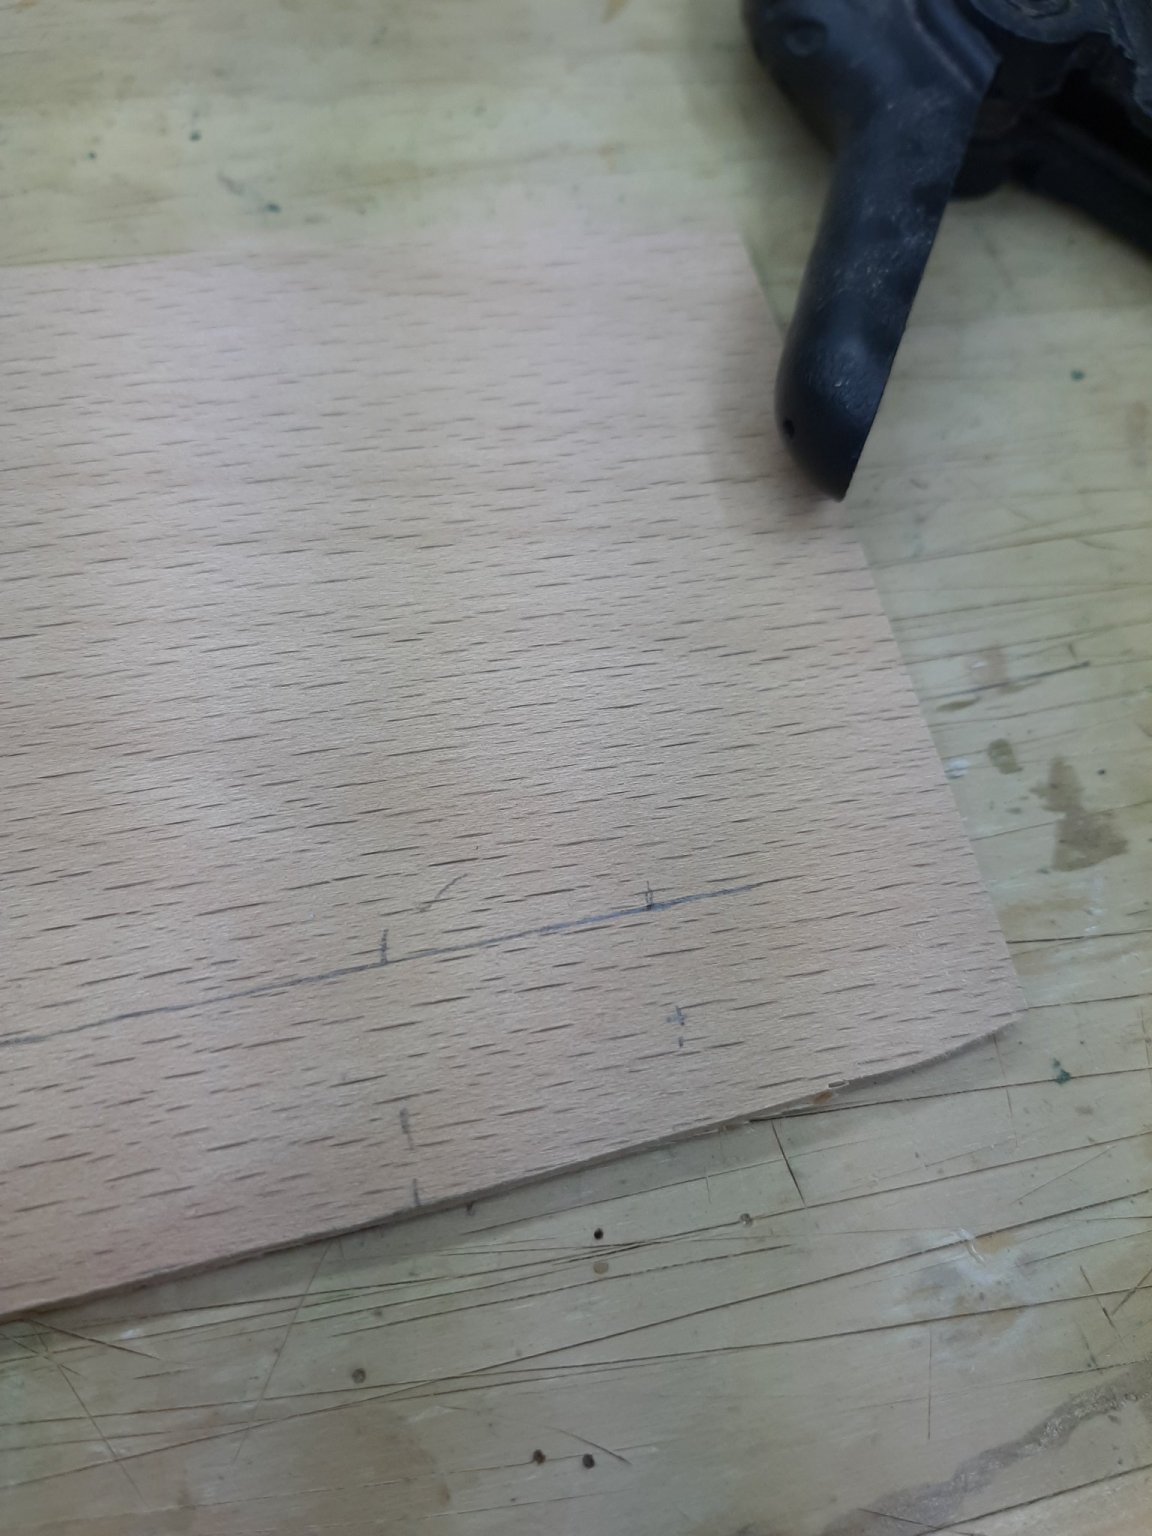
Then, very carefully, making sure there is no edge bend at all, secure the card pattern on the wood sheet.
Run a pencil (I use 0.3 mm mechanical one) along the edge and also mark the positions of the frames. This is the result

This is the bottom edge of our plank and should fit closely to the previous plank. We need now to define the upper edge so we need the thickness of the plank at the various frames. On the port side, this thicknesses are already marked. To make sure that the two sides are as similar as possible, I ve been marking the starboard side measuring from the sheer.


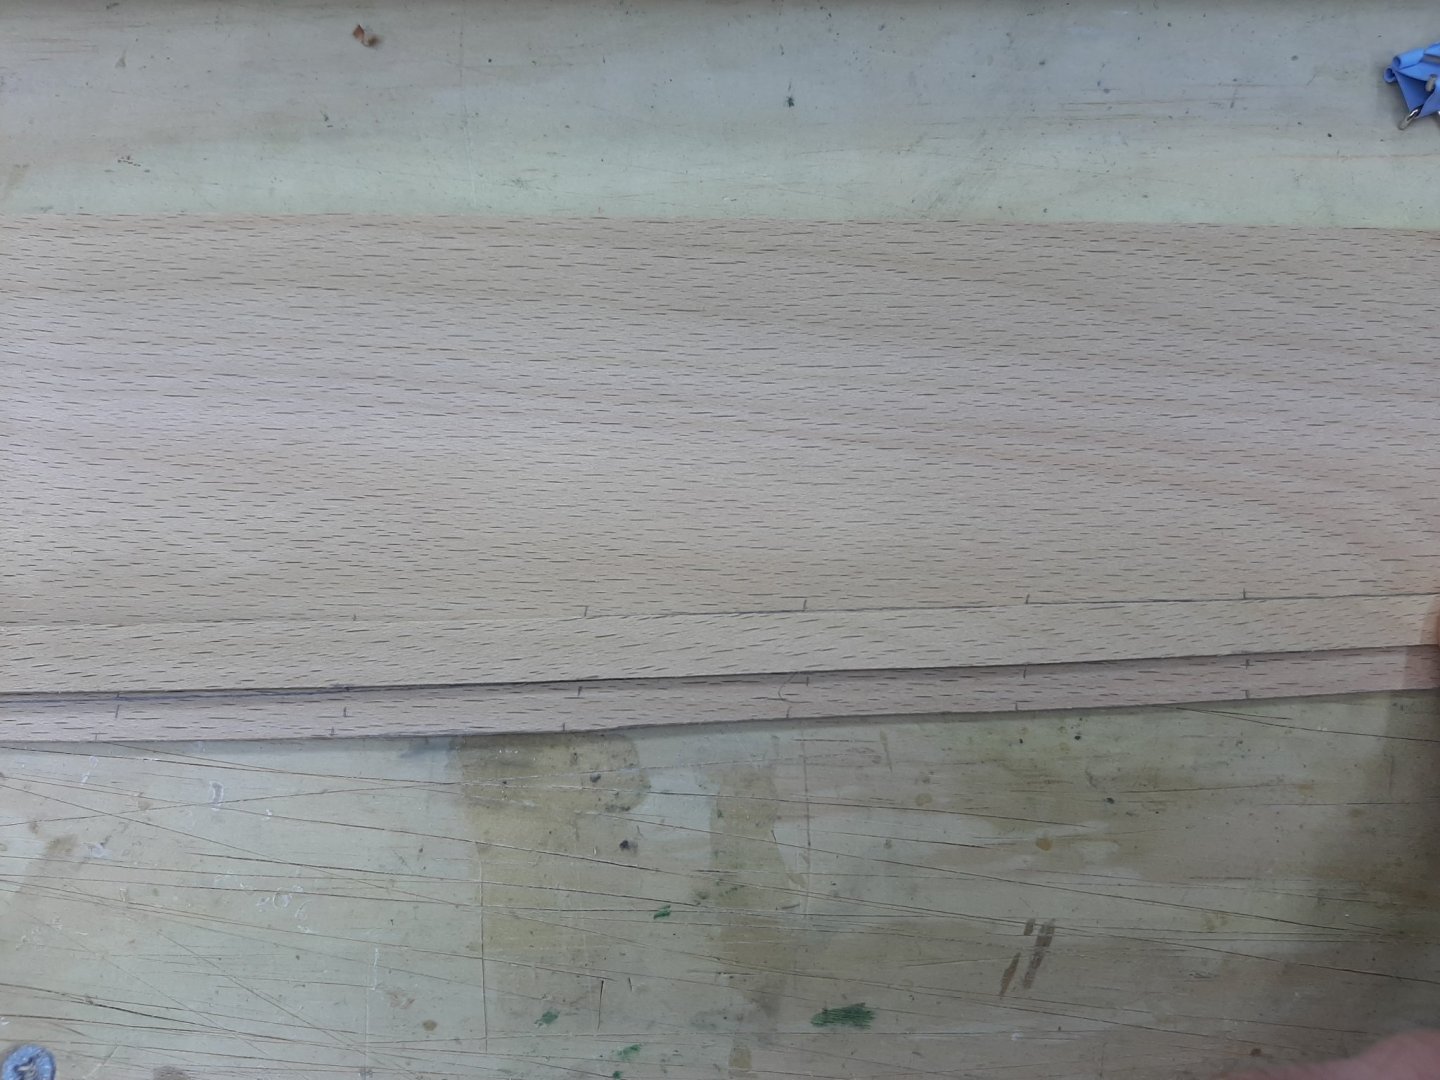
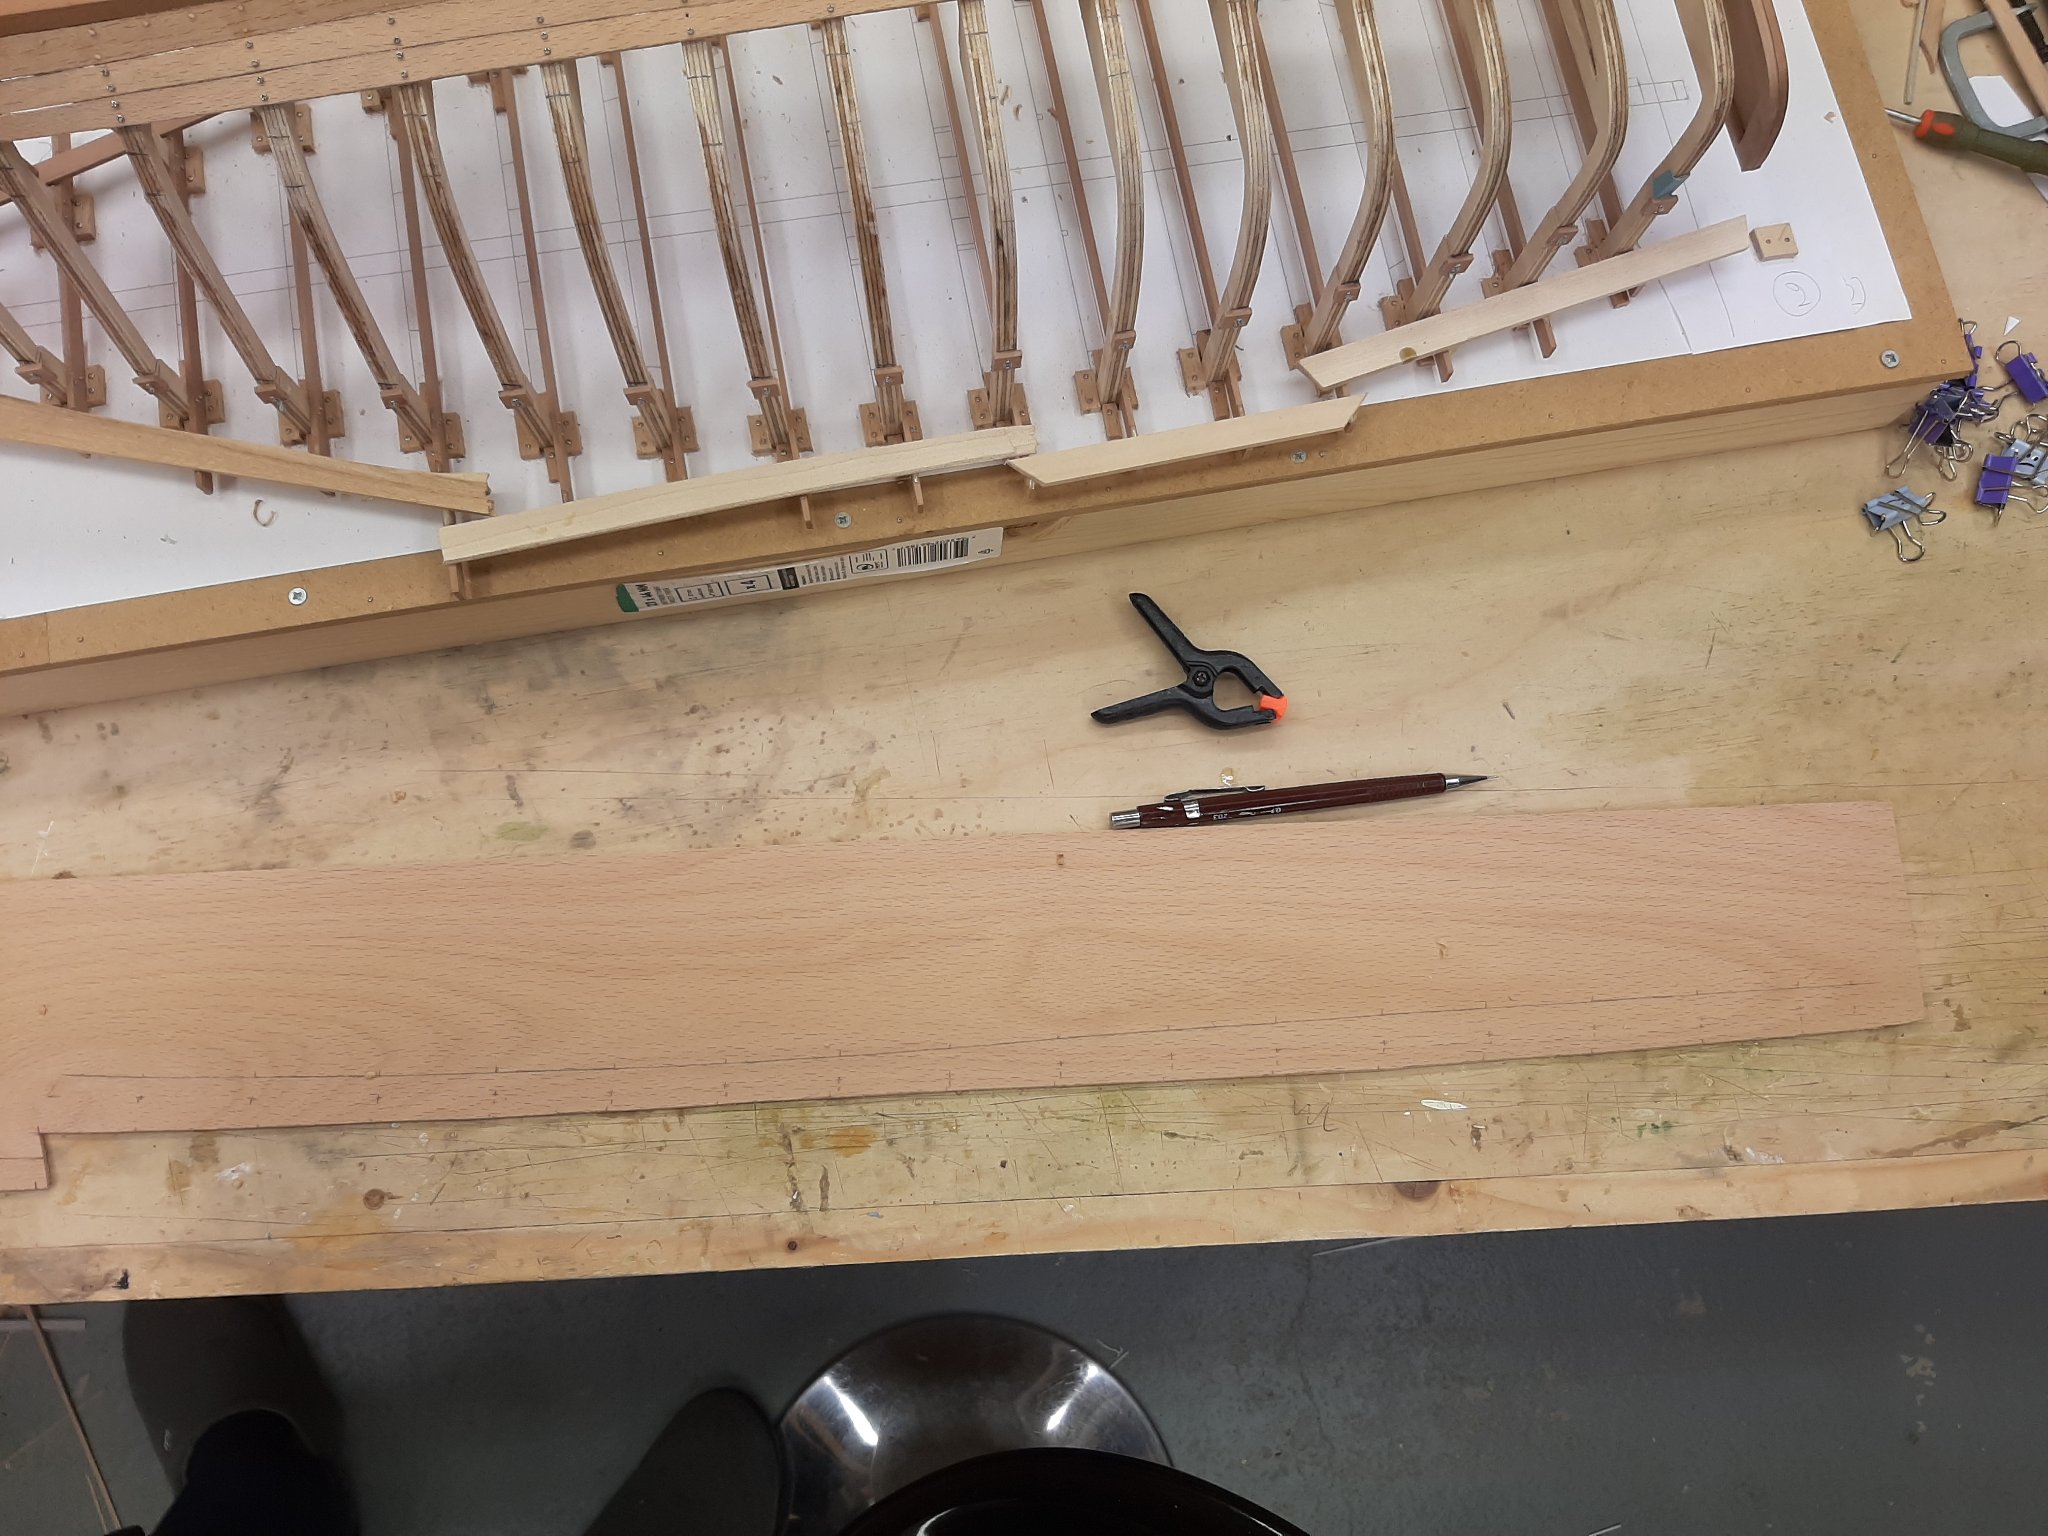
So the upper edge of our plank is marked in all frames.
Now, these widths need to be transferred to the plank, again using the compass. The width at the stem will be defined using the contralateral plank end.


All sites marked.
These points need to be connected but with a fair line. To do this we must use a baten, arranging it so that it is close to all the points.
Now this line, which is the upper edge of the plank, does not pass through all the points but it is ok. Actually, if we put the contralateral plank on the pattern, the widths are exactly the same!
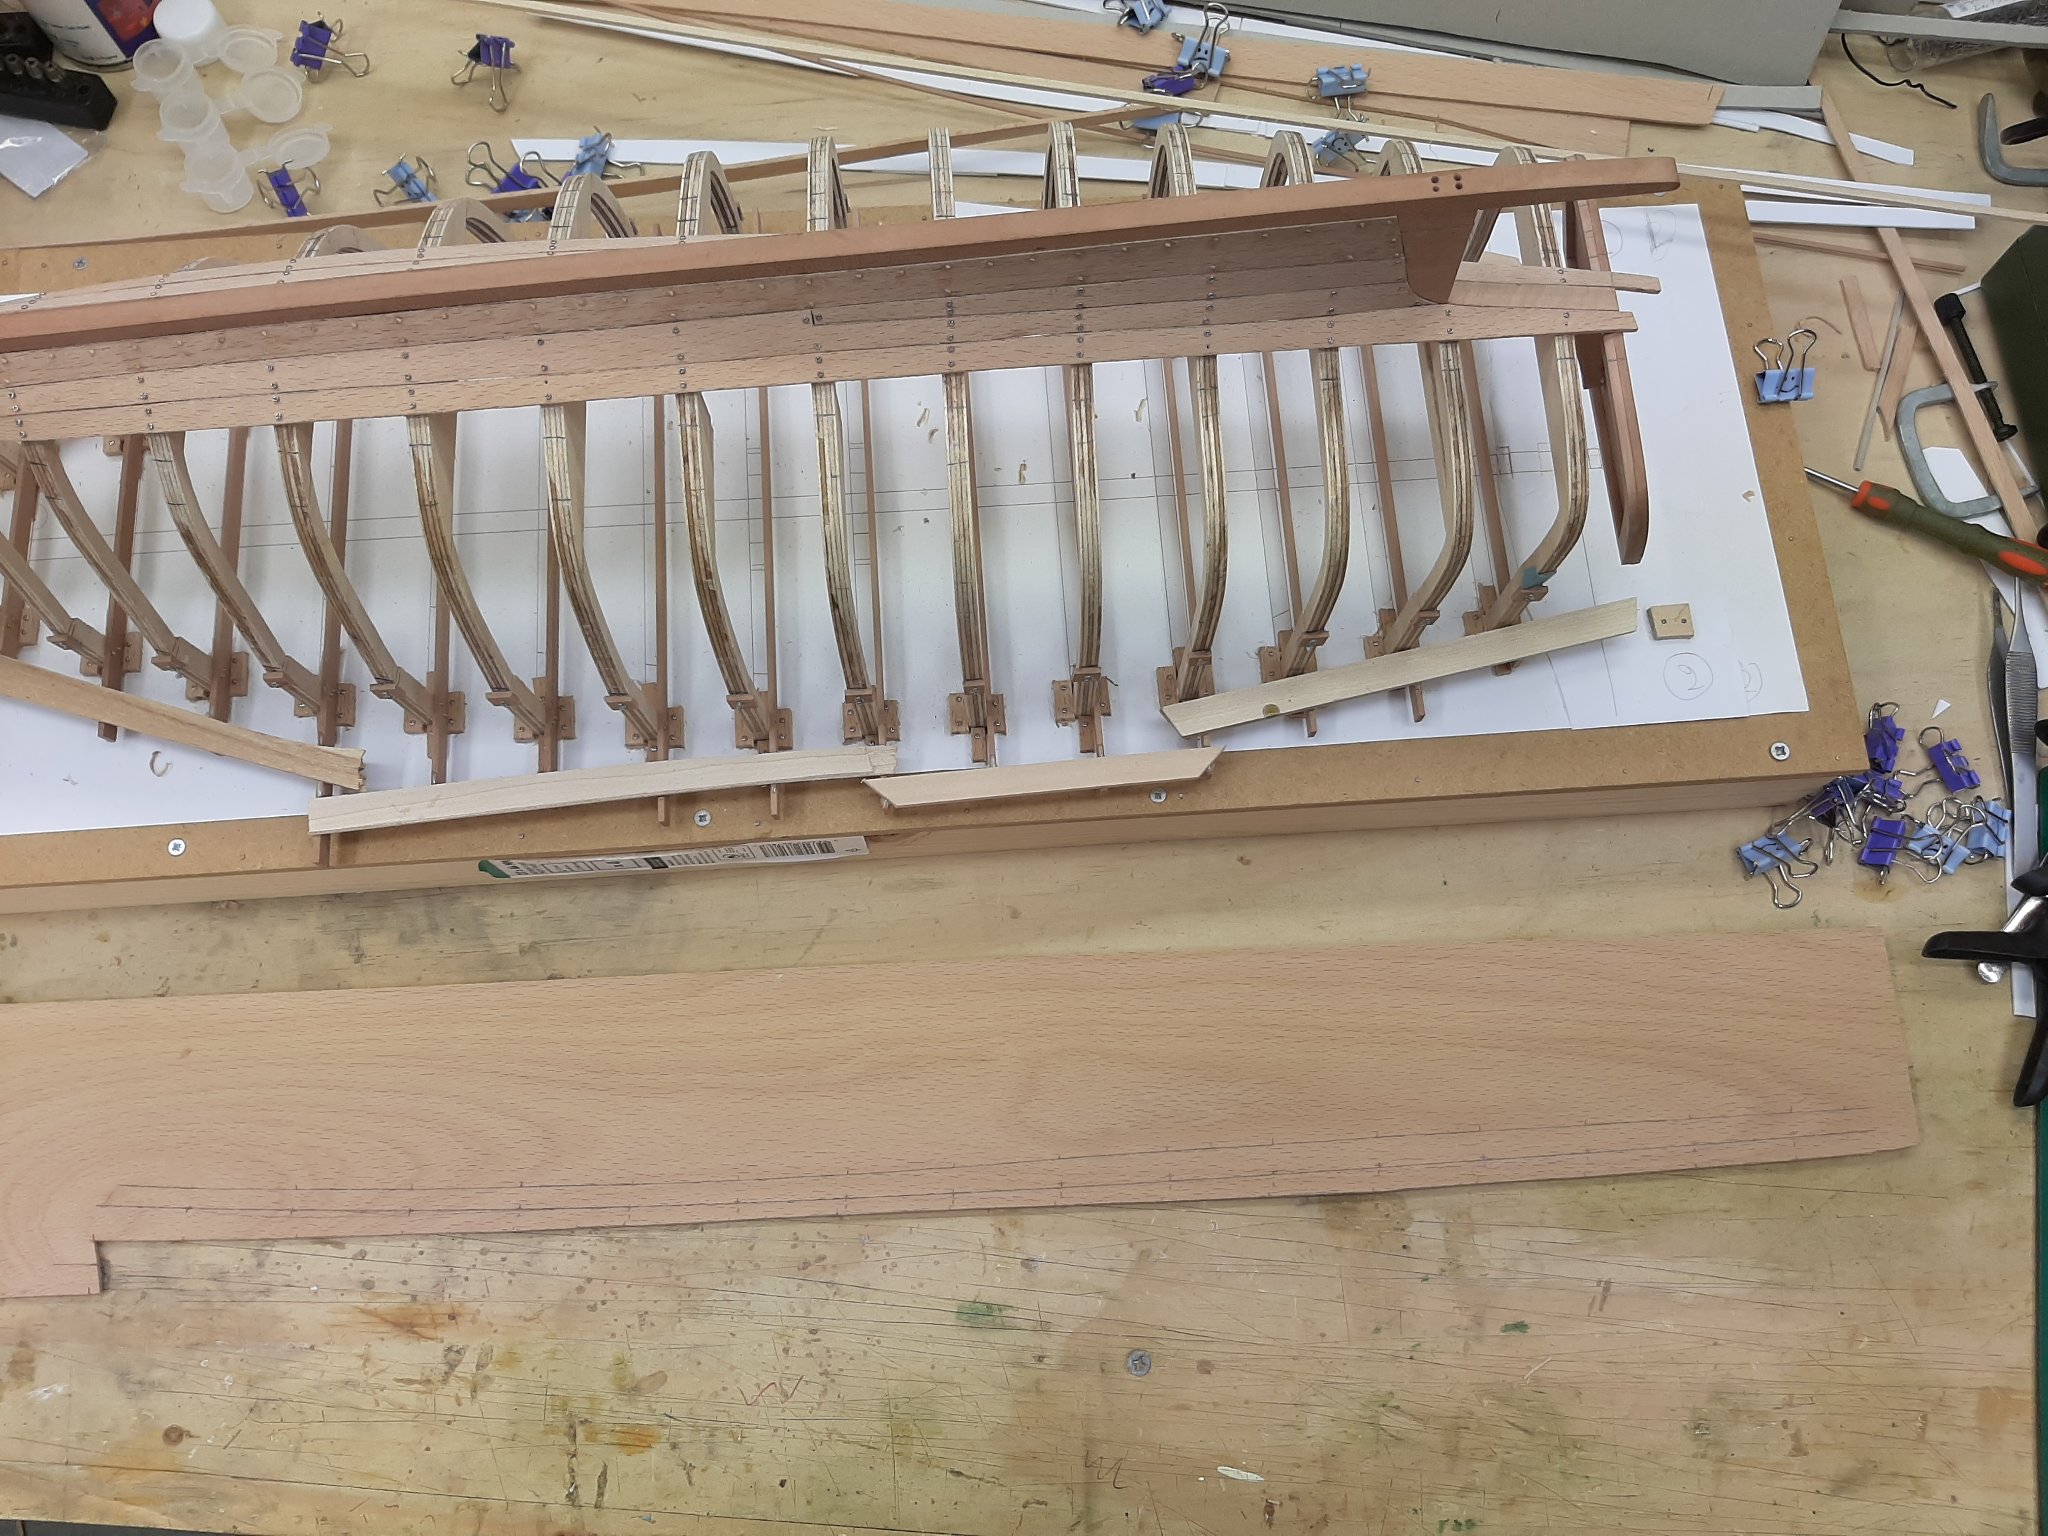
On this boat I use a very sharp knife to cut the plank with multiple passes, breaking off a segment of the blade every couple of passes. After careful cutting to the lines, the plank is produced.

Placing the plank on the boat, it does not fit well.

No need to panic, it just needs a bit of micro adjustement. We need to find the high spots and carefully sand them so the gaps will start closing. These are the high spots in this case.

After sanding and with a bit of edge bending, the plank seems to fit fine now.

These micro-adjustements and a bit of edge bevelling can continue until the fit is very close but for this boat this is enough, with some filler it will be fine. I also lightly sand the upper edge to smooth out the peaks and make fitting the next plank easier.
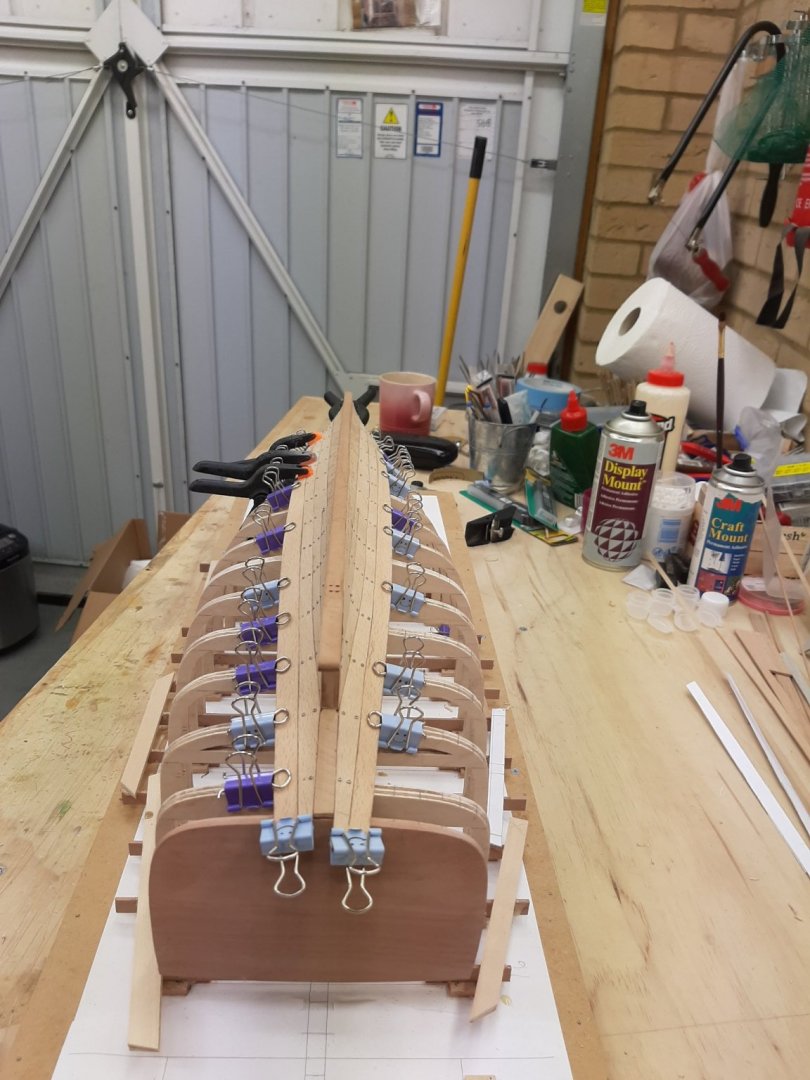
Both planks steamed in place.
And that's it! Now repeat the process 30 odd times and planking is done.
Vaddoc
-
2 hours ago, michael mott said:
Many annealings and bashings later with a leather mallet
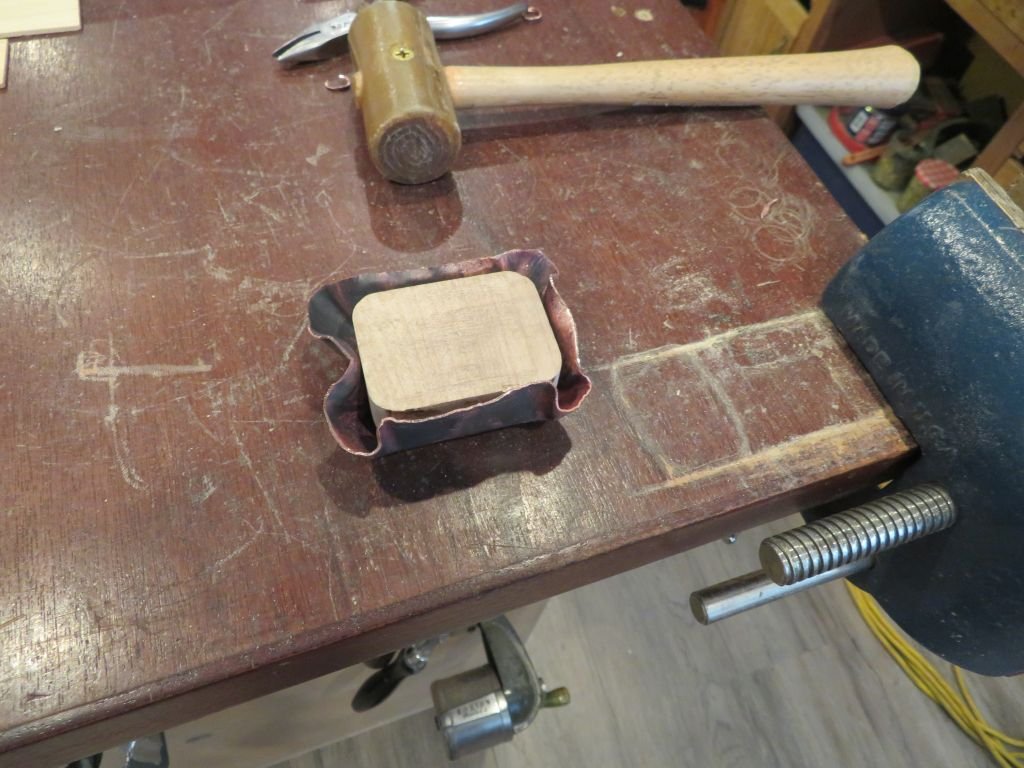
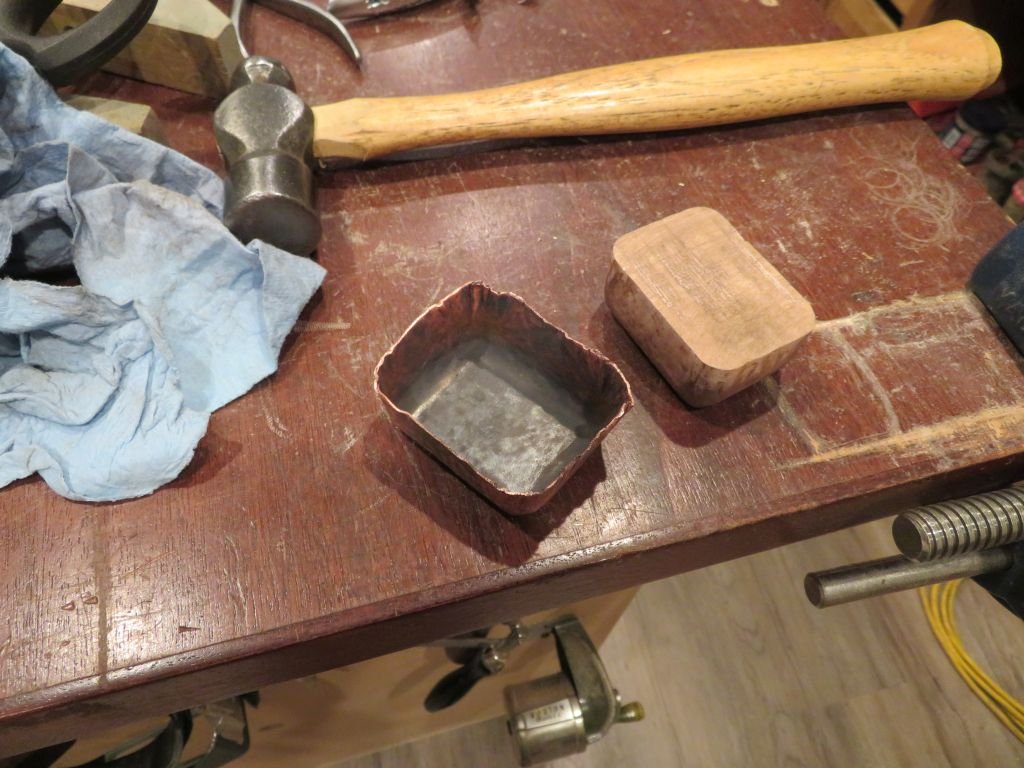
Just caught up Michael, the things I read are out of this world! Such a great pleasure to follow your work!
Now, I do get that copper annealed is soft and can bend, stretch and be worked easily until it work-hardens. However, from the stage above left how did you avoid dog ears and the edges folding? Is it possible to re-distribute and shrink the metal with the hammer?
- FriedClams, Bill Brown, mtaylor and 2 others
-
5
-
This is indeed interesting. I actually have been casually looking from time to time for some plans for a Uboat on the net, mainly to design the boat on CAD and take it from there but could not find any. This kit looks ideal for this purpose, photo copy the parts and use it as background template for the CAD drawings. Just saying...
- lmagna, thibaultron, mtaylor and 1 other
-
4


Clipper d'Argenteuil by G.L. - scale 1/15 - POF - SMALL
in - Build logs for subjects built 1851 - 1900
Posted
Not too late I hope GL, this is a nice boat! Your sanding bow and method is a great idea, I should have seen this earlier before I make such mess of my frames.
I am curious to see how you will laminate the frames. I would think that it would be easier to laminate and then sand the bevels. Also, are you going to use PVA or epoxy? My attempts laminating with PVA faired poorly, the laminate was just not stiff enough.