mtaylor
-
Posts
26,273 -
Joined
-
Last visited
Content Type
Profiles
Forums
Gallery
Events
Everything posted by mtaylor
-
I looked that over... nice concept but... the acrylic hull/viewports makes me nervous and there's no maximum dive depth listed. I like it and it would be great for me, a couple of minions in spiffy uniforms and a white cat to get to the dead volcano island.
-
Looks like marine diesel to me, Patrick. I don't think I'd try to put the Caterpillar logo on the rocker cover, however.
-
So far, so good, Sean. Looks good from over here in the cheap seats... If you haven't done so, have a look here: http://modelshipworld.com/index.php/topic/540-how-to-add-pictures-in-your-posts-and-pms/ I think you're missing a step about "adding to post".
-
I like the way the badges turned out, Pat. I suspect you're right about the way the shutters were hung. Any other way would put some added stress on the hardware. Nice metal work on the guns. I'm looking forward to seeing how they turn out.
- 517 replies
-
- 2
-

-
- Endeavour
- Artesania Latina
- (and 1 more)
-
Super nice, Popeye. I like the plain wood for this.
-
The little things we never think about and then we see someone else do it and...as others have said... the light goes on.
- 641 replies
-
- 8
-
-
- greenwich hospital
- barge
- (and 1 more)
-
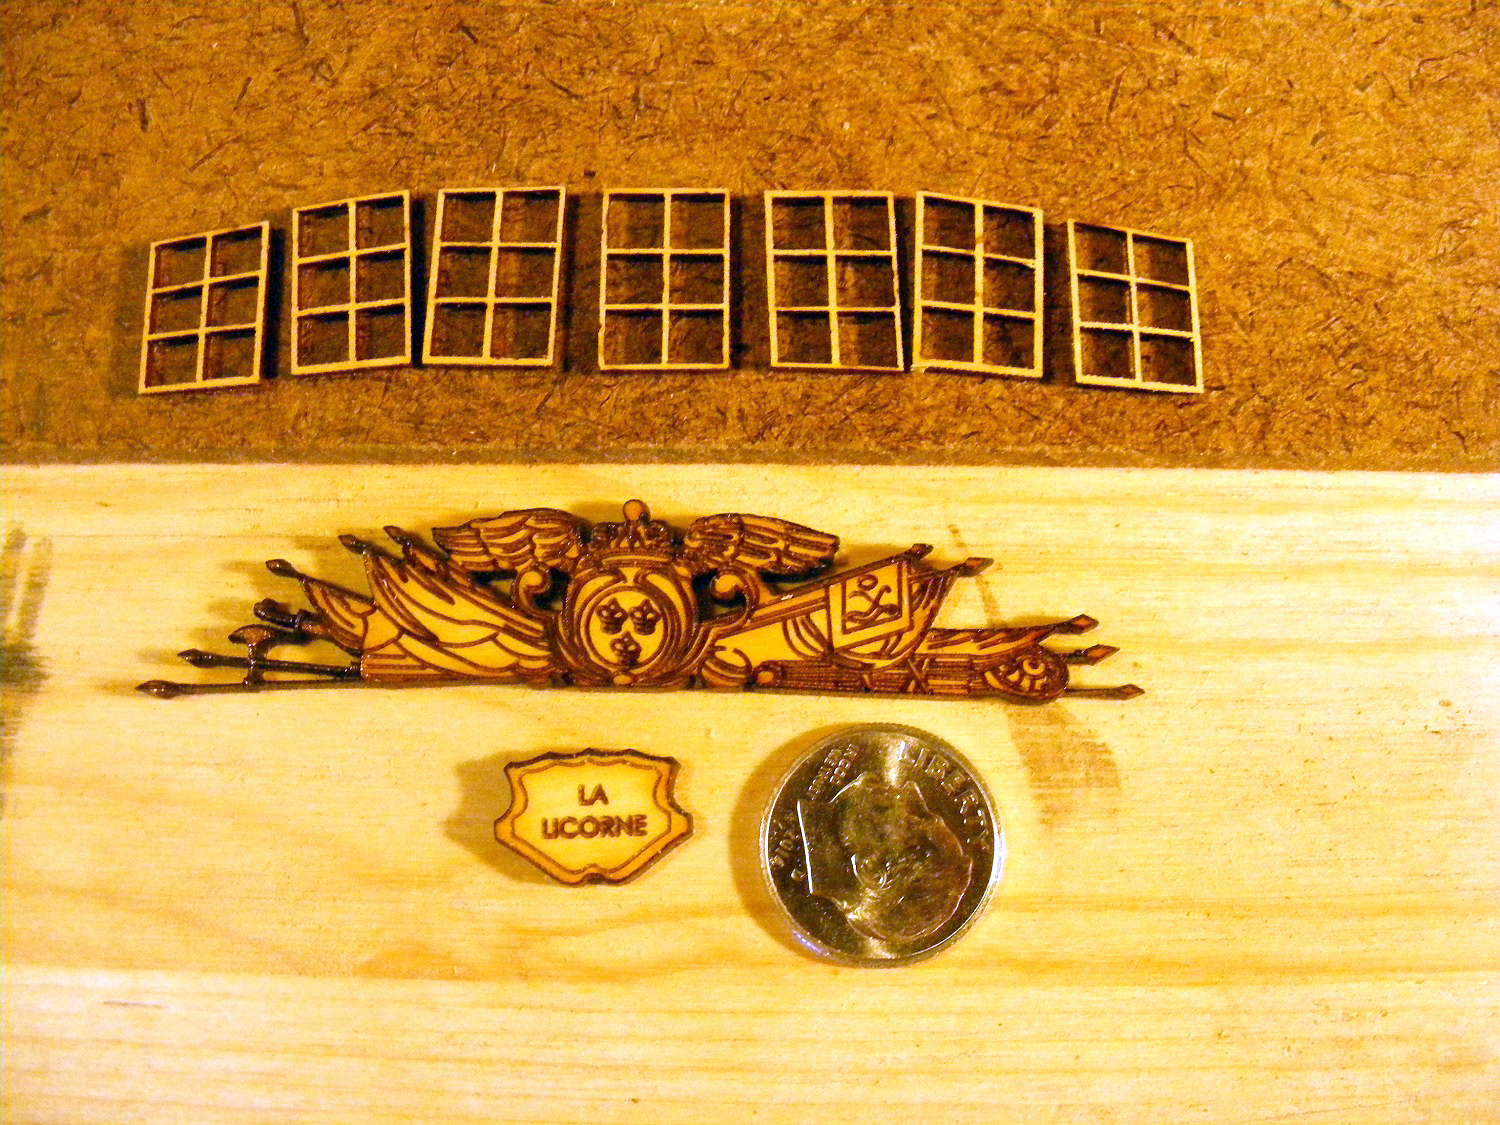
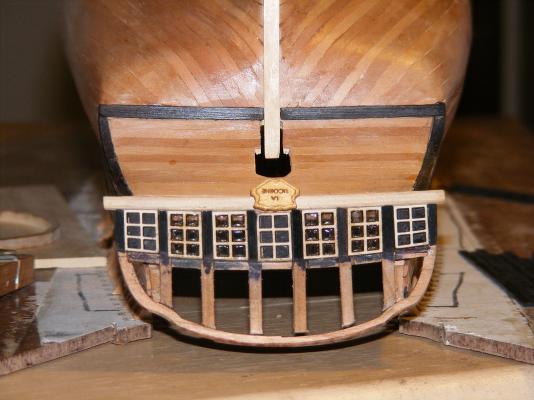
Hi Jose, thanks for the comments. I used Coreldraw to create a drawing and cut the windows out using the laser cutter. They're 1/32" thick (roughly 0.5mm) and the munnions and outside framing are the same. In the photo, the frames are on top and you can see the size by comparing them to the dime in the picture. To glaze them, I used MicroMark's Micro-Glaze. It's a white liquid that when dry is is clear and thin. Because the wood is so thin, I had to change the way I did it from the instructions because the frames warped badly. I put the window frame on a piece of polyethylene bag (the stuff sticks to everything else including glass) and filled the openings with the glazing. I put another piece of bag on top and then a piece of thick, heavy plate glass on top. I let it sit for 24 hours and remove the top glass and bag. At this point, the glaze was "set" but not dry and still white. I left off the bag and glass until it was almost clear. At this point the wood would start to warp again and I'd put the glass back on for another 12 hours or so. I hope that helps.

-
Thanks for the likes and the comments. Hi Carl. Simply put, it's a question of does the moling go around the taffrail or just to it? I've been staring at the drawings (both NMM and Hahn's) a lot lately trying to sort out what carvings are there on the rail. I think I've got it sorted out and it's gonna' be tough. Hahn has a rough outlines of two figures and then some sort of vine or rope up higher. I think the NMM shows acanthus much like near the catheads.I think I got it sorted and have trimmed them. Thanks Charlie. That's not paint, BTW. The black on the framing is archival pen (like a Sharpie but not a Sharpie). The lights are 1/32" thick and the framing and munnions are a tad under 1/32" wide. Between each light is 1/32" thick ebony. The ink is there in case there's any gaps between them. More for peace of mind than anything else. Thanks, Scott. It's not that hard actually. Just a bit of a mindset. I do take a heck of a lot of photos during the build and usually rotate them 180 degrees to right side up to keep myself sane. Thanks, Pat. Hmm.. good question. Stern exterior, rudder, quarter galleries, a few details along the outside of the hull, and the cheeks and bow rails. I do flip it regularly to examine from a different perspective. I also want the interior and exterior mostly done before cutting her loose from the build board but that might change.
-
I somehow missed this build. Fascinating work, Francesca.
-
Ian, That picture is dead on. Looking at the breeching rings on the side, I'd say it's not French. And then I read the link.... yep.. not French so it should work for you. The same form and numbers of tackles would apply even though they were small by comparison to the main armament, they were still heavy. Just smaller lines. I believe the general rule of thumb is that the breeching ropes are same diameter as the bore. When in doubt, go with what you think is right or works.
-
ancre La Salamandre by tadheus - 1:24
mtaylor replied to tadheus's topic in - Build logs for subjects built 1751 - 1800
Beautiful capstans, Paul. -
Sweet work, Denis. I'm waiting with you to see how the glazing turns out.
-
Beautiful, Dave. I think you have a handle on these "over the top" decorated ships.
- 962 replies
-
- 7
-
-
- sovereign of the seas
- ship of the line
- (and 1 more)
-
Magnificent in build and presentation, Siggi. I too am in awe of this ship and the builder.
-
Cutty Sark by NenadM
mtaylor replied to NenadM's topic in - Build logs for subjects built 1851 - 1900
Dave, I think you're onto something... A dowel through the base and into the hull. No screws needed.- 4,152 replies
-
- 6
-
-
- cutty sark
- tehnodidakta
- (and 1 more)
-
Help with buying the Caldercraft HMS Victory
mtaylor replied to yangliyuan's topic in Wood ship model kits
Kevin, I hope you'll consider doing a build log once you start. -
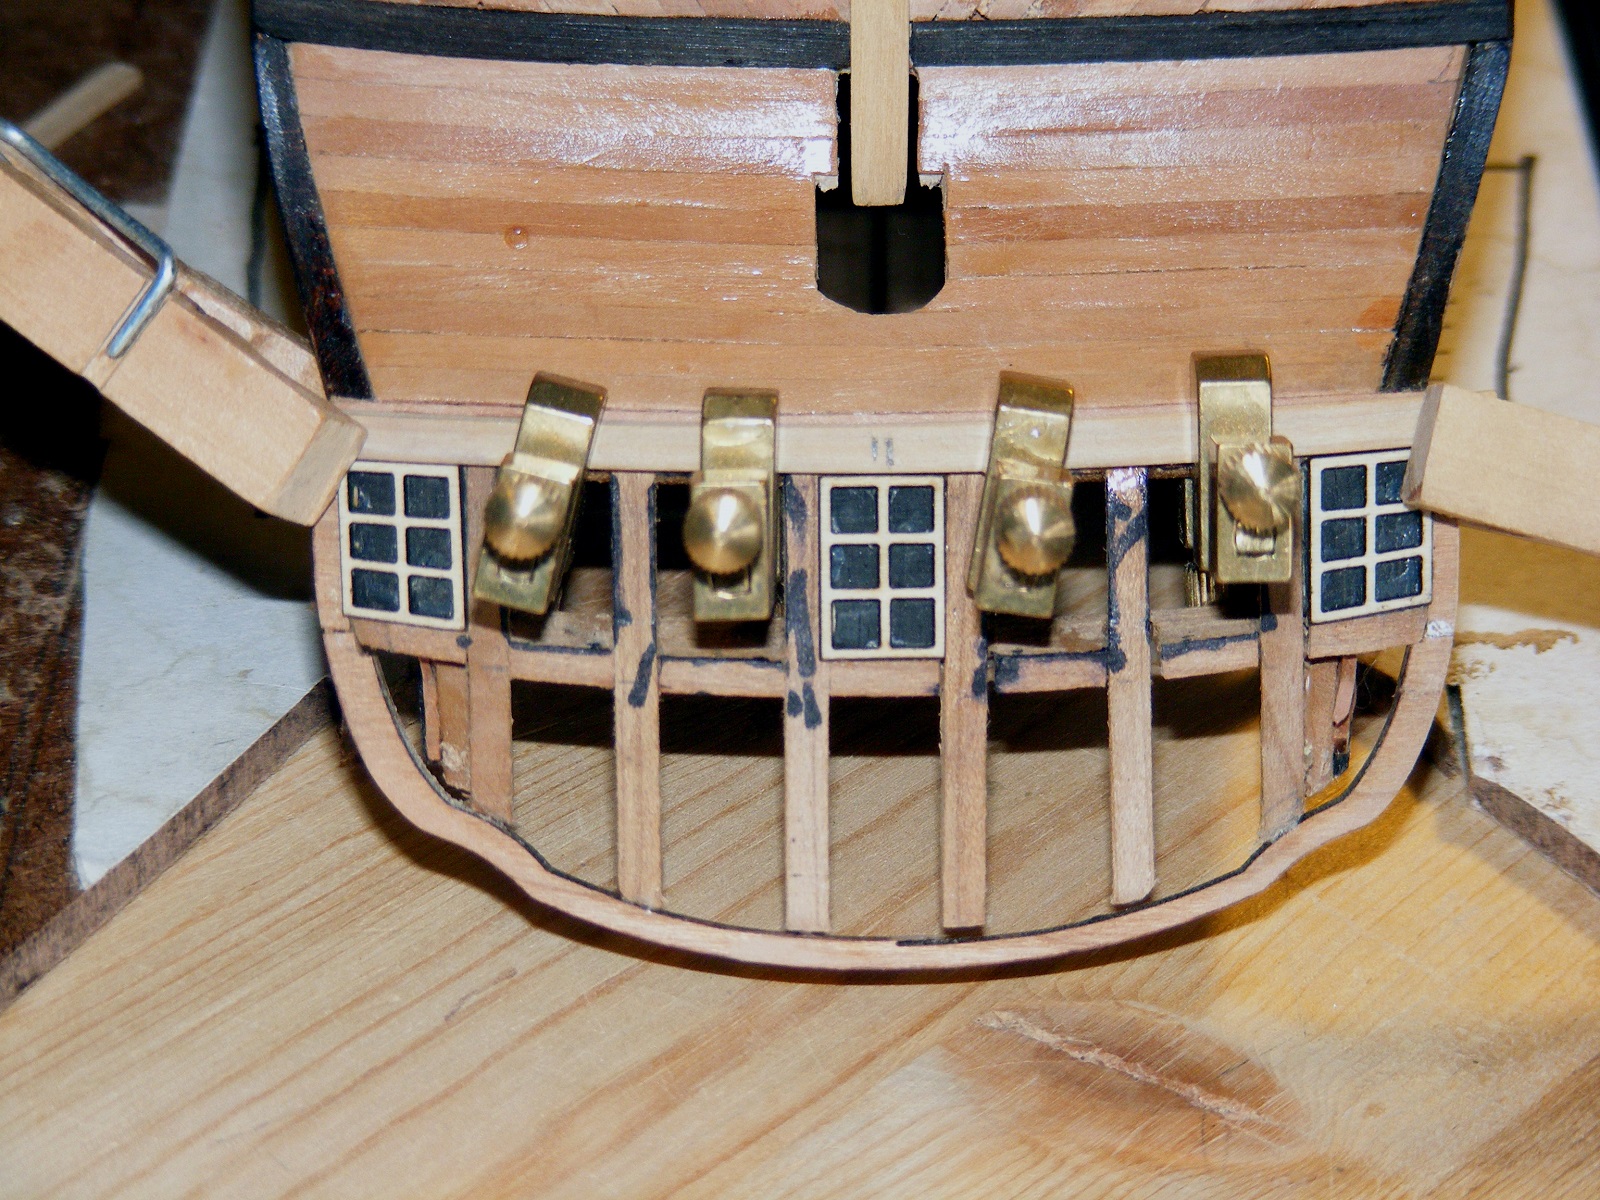
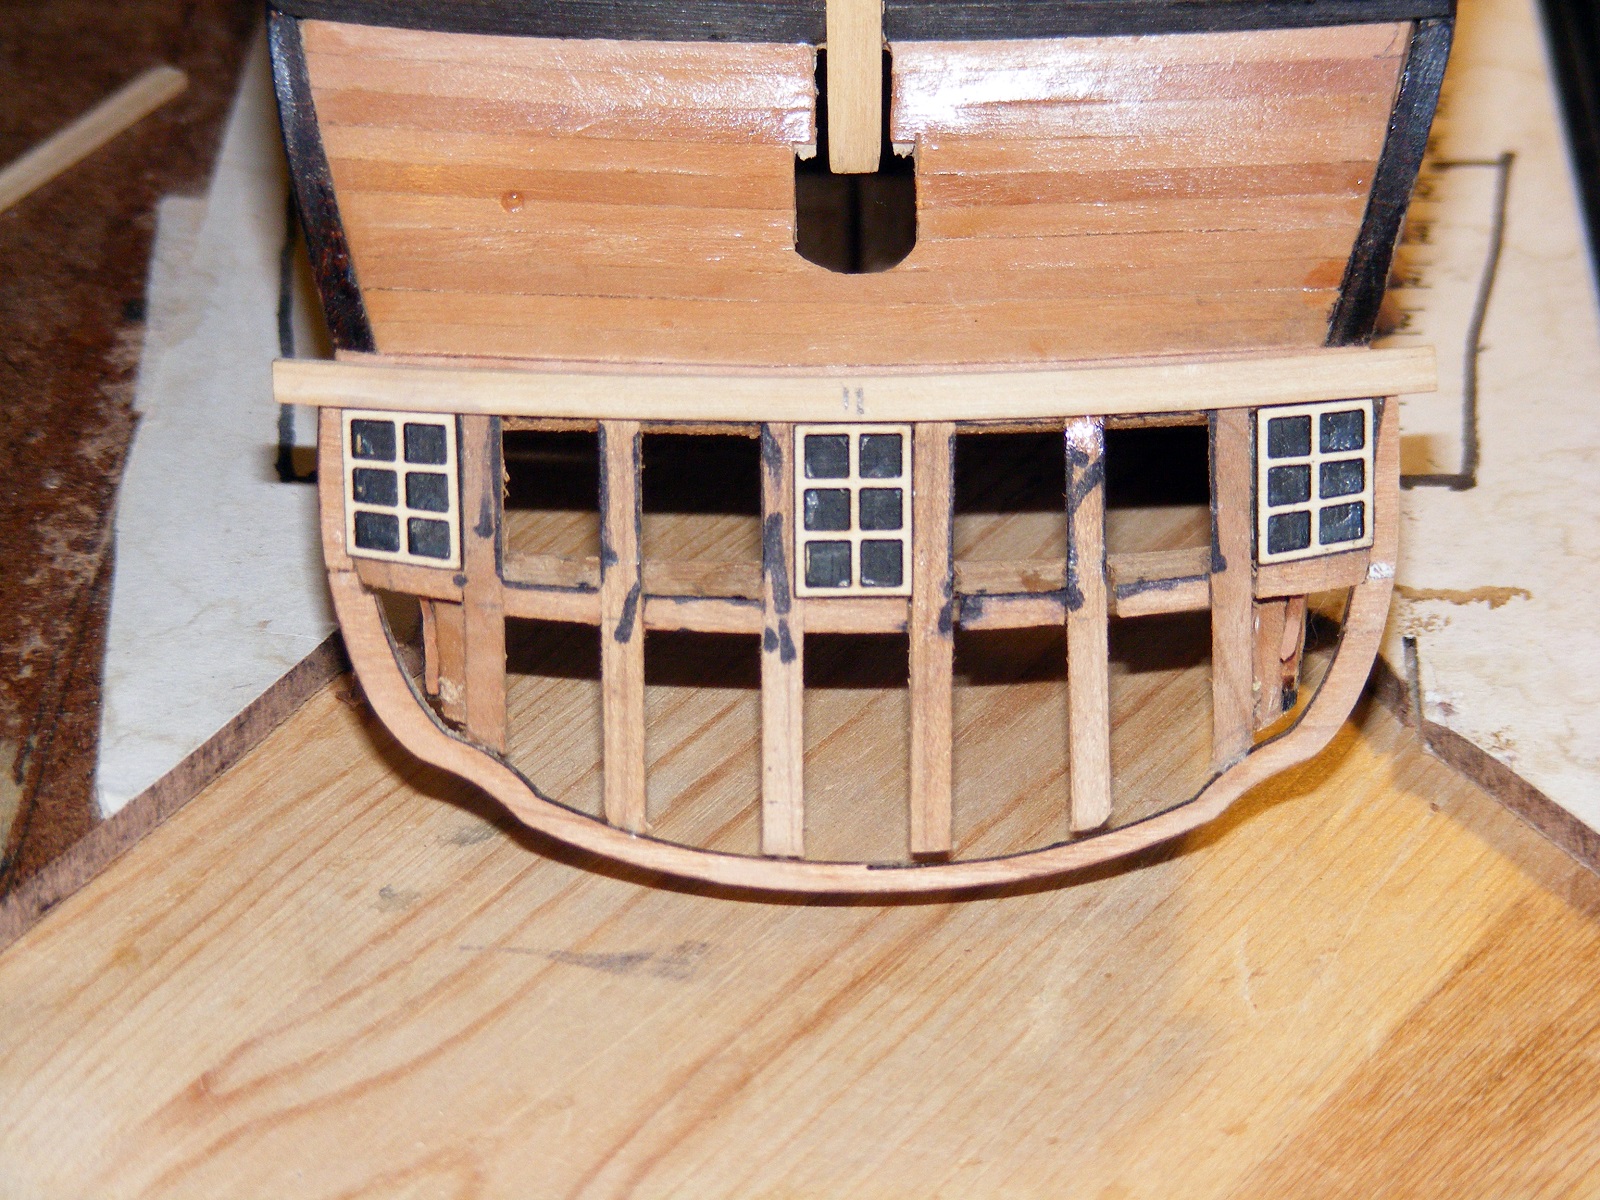
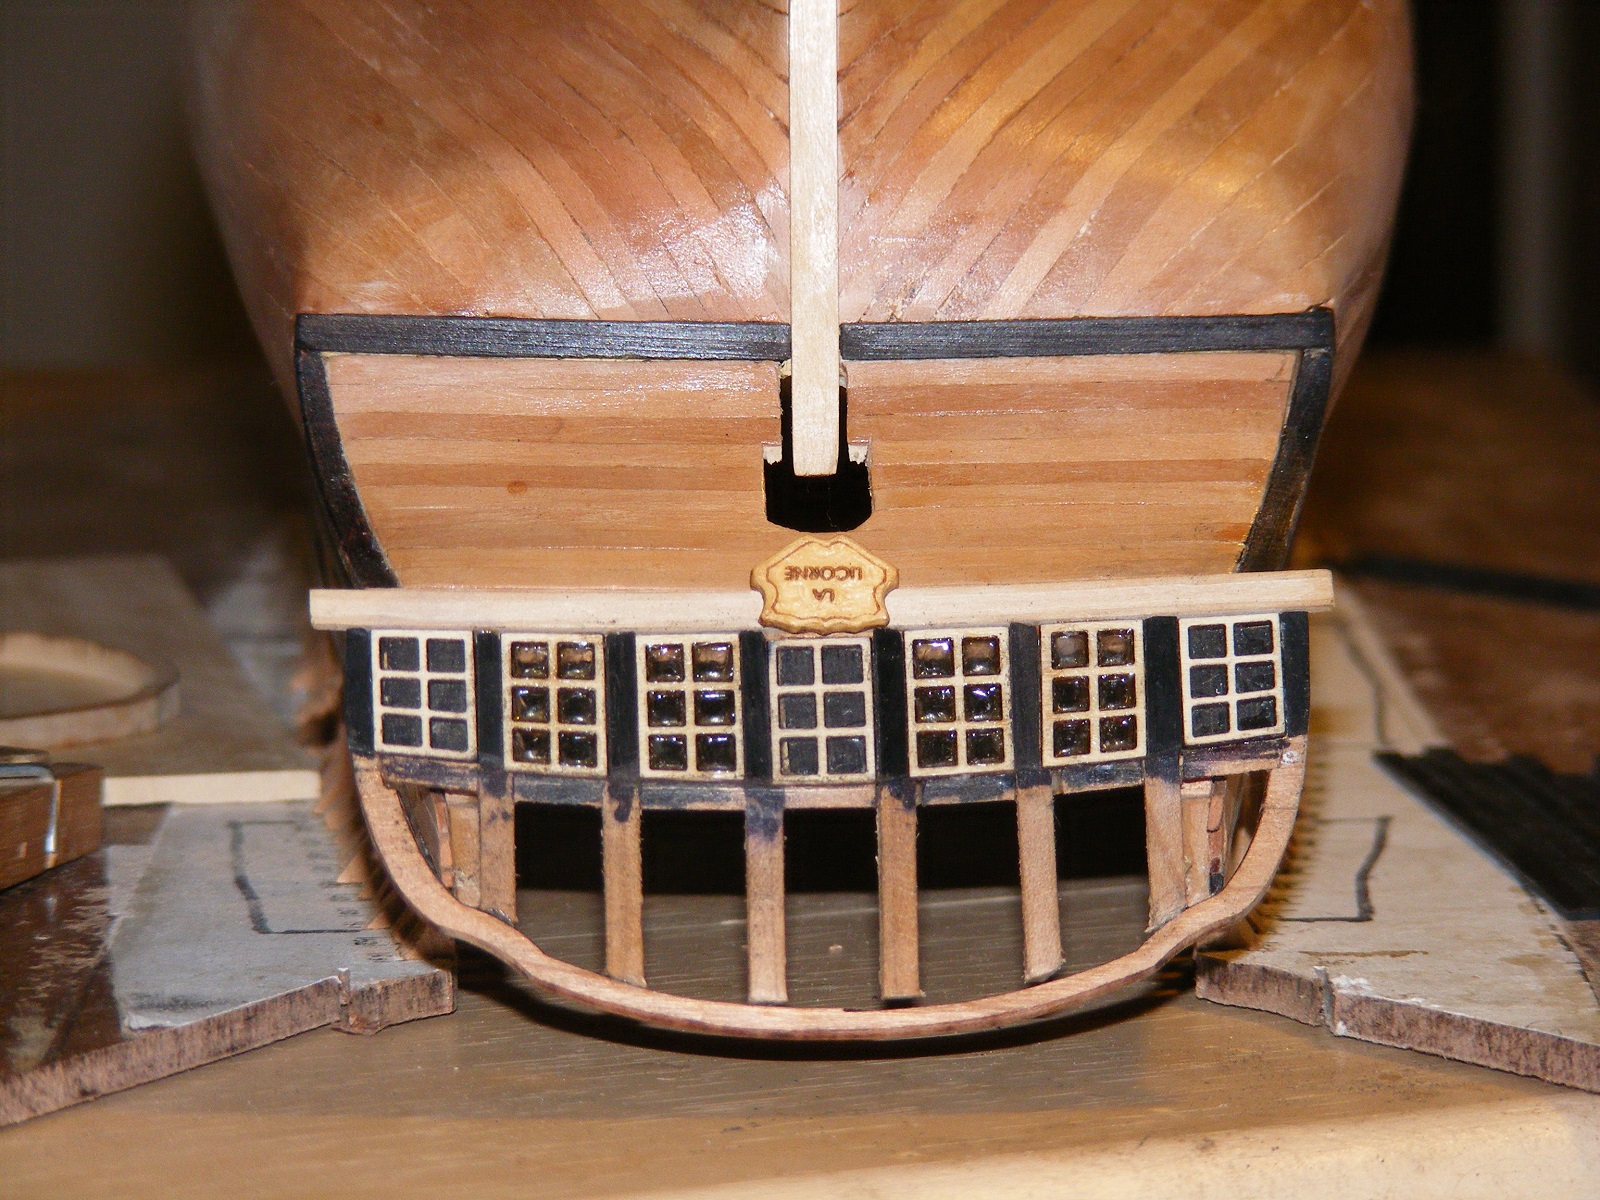
Thanks for the "likes" and comments.. An update.. the stern. I'm going to paraphrase a line from a speech by John Kennedy about the Apollo program. I think it fits with model ships... "We do things not because they are easy but because they are hard". I had the full quote sitting on my desk at work for many years. I finally dug it out of the box and now have it again in place to remind me. Anyway, so much for philosophy today but you'll understand it down this post a bit... Here's the step by step... I glued the previously cut light frames over the ebony filled opening for the 3 deadlights. I made a scraper and scraped the lower molding strip to the profile on the plans. The boxwood molding was mildly edge bent with heat and glued and secured into position with clamps. I then turned to the next step, the glazed lights. I checked locally for mica from gem/mineral shops locally. All the locals were are the kind that sell "new age" crystals and cut stones for the chanting brigade. So.. Google is my friend... I find bags of mica sheets but... no guarantee that any of the sheets in the bags would be clear. Scratch that. Back to Google.. started calling all the shops within a 200 mile radius. No clear except one place... and it was a 10 pound chunk. Yikes!!! Time to fall back to Plan "B"... liquid glazing. I used it and glazed the 4 lights following directions... and they warped badly. Cut 4 more using the Deathstar (I guess scratchbuilding is called the "darkside" for a reason ) and modified the method. I applied the glazed, put it between two 1/4" plates of glass over night. The next morning, I took off the top glass and let it sit until the glazing was clear and then the lights started to warp. Put the glass plate back on and let it sit for 24 hours. Success!!!! I glued on the lights and added the ebony strips between them as there aren't faux columns between them, just plain wood. The next steps will be to make and install the mold strip above the lights, and add the ebony planking for the rest of the transom. The lower mold strip needs to be trimmed back and the inside of the transom needs to be planked. Then I can add the taffrail. They do look better in real life than in macro. To be continued.....


-
Have you contacted Corel? That would be the best place to start.
-
Doing good, Charlie. She's looking sharp and your "prototyping" the parts with the laser is a good idea. When you go to do the cuts in boxwood, etc., take extra with you to test cut first. Each wood will cut differently and need different settings.
-
Ian, I can't speak the English, but the French would use a taller carriage for the "light" guns of 3-4 pounds. The only reason I can come up with was ergonomics -- didn't want the gunners on their knees while serving them. The added benefit is that if the guns were upgraded, new ports would not have to be cut.
-
Sweet looking anchors, Piet.