mtaylor
-
Posts
25,861 -
Joined
-
Last visited
Content Type
Profiles
Forums
Gallery
Events
Everything posted by mtaylor
-
Need help with rigging on the French Chebec Indiscreet.
mtaylor replied to DougM's topic in Masting, rigging and sails
Hi Doug, Welcome to MSW. As Robin suggested... Google Chebec and also separately Xebec. Here on MSW, there's only one that got the point of the rigging being completed: http://modelshipworld.com/index.php/topic/5126-xebec-160-scale-scratch-build-by-mij/page-3 The pictures might help you out. -
Just incredible and it looks that door would actually work... almost scary how realistic it looks.

-
Brig Eagle by robnbill - 1:48
mtaylor replied to robnbill's topic in - Build logs for subjects built 1801 - 1850
Allen's paper is in the database also... under the Furniture section. http://modelshipworldforum.com/ship-modeling-articles-and-downloads.php I guess I should have mentioned it.... -
Brig Eagle by robnbill - 1:48
mtaylor replied to robnbill's topic in - Build logs for subjects built 1801 - 1850
Dave, Here's a set from the database: http://modelshipworldforum.com/resources/furniture/stove.PDF -
If the jig is working, it can't possibly be ugly, Mike. I like it.
- 887 replies
-
- 4
-

-
- hahn
- oliver cromwell
- (and 1 more)
-
THE 74-GUN SHIP by Jeronimo
mtaylor replied to Jeronimo's topic in - Build logs for subjects built 1751 - 1800
I thought 1:48 would be large but 1:36 will almost need a room of it's own... -
Micro-Mark MicroLux LaserKnife 2525 – A Review
mtaylor replied to mtaylor's topic in Modeling tools and Workshop Equipment
Ok.. that works. I wasn't sure since the 220V power supply in the unit is also available as a 110V power supply. -
Just incredible, Jay. Great work, indeed. That turkey made me smile.
- 572 replies
-
- 3
-
-
- constitution
- frigate
- (and 1 more)
-
Breathtaking work, Siggi. Knees where "beneficial"... under the poop's gunports maybe?
-
Congratulations Ben (and to your Admiral)!!!! I guess you'll be starting a second ship for your son at some point!?
-
Micro-Mark MicroLux LaserKnife 2525 – A Review
mtaylor replied to mtaylor's topic in Modeling tools and Workshop Equipment
No, it's not the American 220VAC, George. It has the, I believe it is, the European style plug with round posts. I've run into these on cruise ships and some other places and it's what's on my cutter.. err.. LaserKnife.
-
Micro-Mark MicroLux LaserKnife 2525 – A Review
mtaylor replied to mtaylor's topic in Modeling tools and Workshop Equipment
Tom, Checked out the new manual. Maybe I read it wrong... the new units have a 110V Power Supply. Is this a 110V input as I think it is? The setup and much of the rest of the manual tell the user to plug it into a 220V source which would not be a good thing. I stopped reading at that point and thought I'd better ask. -
Micro-Mark MicroLux LaserKnife 2525 – A Review
mtaylor replied to mtaylor's topic in Modeling tools and Workshop Equipment
Hi Tom, Thanks for the feedback.. and no hard-hat needed. We're a pretty friendly bunch. If you not familiar with this hobby, we do use a lot of exotic hardwoods and do some things maybe differently than say the RR hobby. Part of what made me look into this was the woods and thicknesses listed that you tested. If all it had said was "basswood" or "nothing more than 1/8" thick;", I wouldn't have bothered. Anyway.. 30 day trial period is a fair testing time. And the customer service problem is understandable. I just felt abandoned on my questions. I'm happy you're updating the manual. I'd be happy to take a look at it if you'd like. I spent the first 25 years of my working life as tech writer for various companies. I hope there's a better explanation of how to align the mirrors. That was a tough one.... At this point, the machine is doing what I ask of it... I've listed my parameters elsewhere about wood thickness and what woods work and don't work. My initial testing was truly a "let's wring this thing out and see what it will do"... along with "what did I learn today?". Anyway, I do have a fairly complete list of the quality issues (I understand... first batch) and also a couple of improvements. 1) The honeycomb bed wasn't level. The spacers that hold it up, on two of them, the screws were stripped. Also, they were not evenly countersunk so until I re-did the countersink, the bed wouldn't fit level. 2) The bed was a tighter fit at the one end than the other in the machine due to the pop rivets being different heights from the frame. Relieving this also helped it sit level to the lens mechanism. 3) The lens issues. The tube when extended out for thin cardstock or woods canted because of the play between the tube and holder. My suggestion is either move the securing screw down about 1/4" or increase the height of the spacers between 1/4" and 1/2" inch. This will improve the performance and repeatability of cuts if that play can be minimized. I'll flip the lens back and re-test based on your input. The flipping might be a good point to put in the manual as the etching I think we would do, is mostly very fine, a light surface burn to highlight or in my case to mark the wood for carving. Right now, I'm still fiddling and testing various power levels and speeds on given thicknesses and wood types. I'm also sorting out accounting for the kerf thickness on drawings I'm making. -
I guess the answer is "it depends"... a bit of Googling turns up: http://www.sawmillcreek.org/showthread.php?155809-peach-tree-wood about halfway down this page: http://www.museumfurniture.com/wood/ http://www.scrollsawer.com/forum/wood-and-materials/5453.htm http://filipfrydrysiak.com/about-wood/
-
Rob, It's in here: http://modelshipworldforum.com/ship-modeling-articles-and-downloads.php In the tools section.
-
Jack, Contact Dafi via PM here on MSW. I'm not sure who does his photoetch but it's over there on your side of the Atlantic.
-
Micro-Mark MicroLux LaserKnife 2525 – A Review
mtaylor replied to mtaylor's topic in Modeling tools and Workshop Equipment
thanks for the feedback, gentlemen. If anyone is interested I do have a complete list of quality control items that I found that have to be address. I guess I'm so jaded by the lack of quality control in Chinese goods that I just fix them and go on my merry way. I have yet to see any product involving tech that doesn't have these or similar issues. Jack, I'll be using a mix. I have some Dockyard micros, assorted Swann-Morton plastic surgeon scalpels, a micro-motor and assorted micro cutting and grinding burrs. Along with the obligatory lighted magnifier and an optivisor. I'm looking forward to doing those... and holding my breath about doing them at the same time. . -
That is well done mortar pit, Grant. If you hadn't mentioned the carling cuts being off, we probably wouldn't have noticed.
- 456 replies
-
- 1
-
-
- finished
- bomb ketch
- (and 2 more)
-
Xander, Gently cut them free with a #11 Xacto type blade. You'll have this probem with laser cut, CNC cut, or stamp cut. The wood around the pieces protect them. It's just takes a wee bit of time to cut them loose.
-
Micro-Mark MicroLux LaserKnife 2525 – A Review
mtaylor replied to mtaylor's topic in Modeling tools and Workshop Equipment
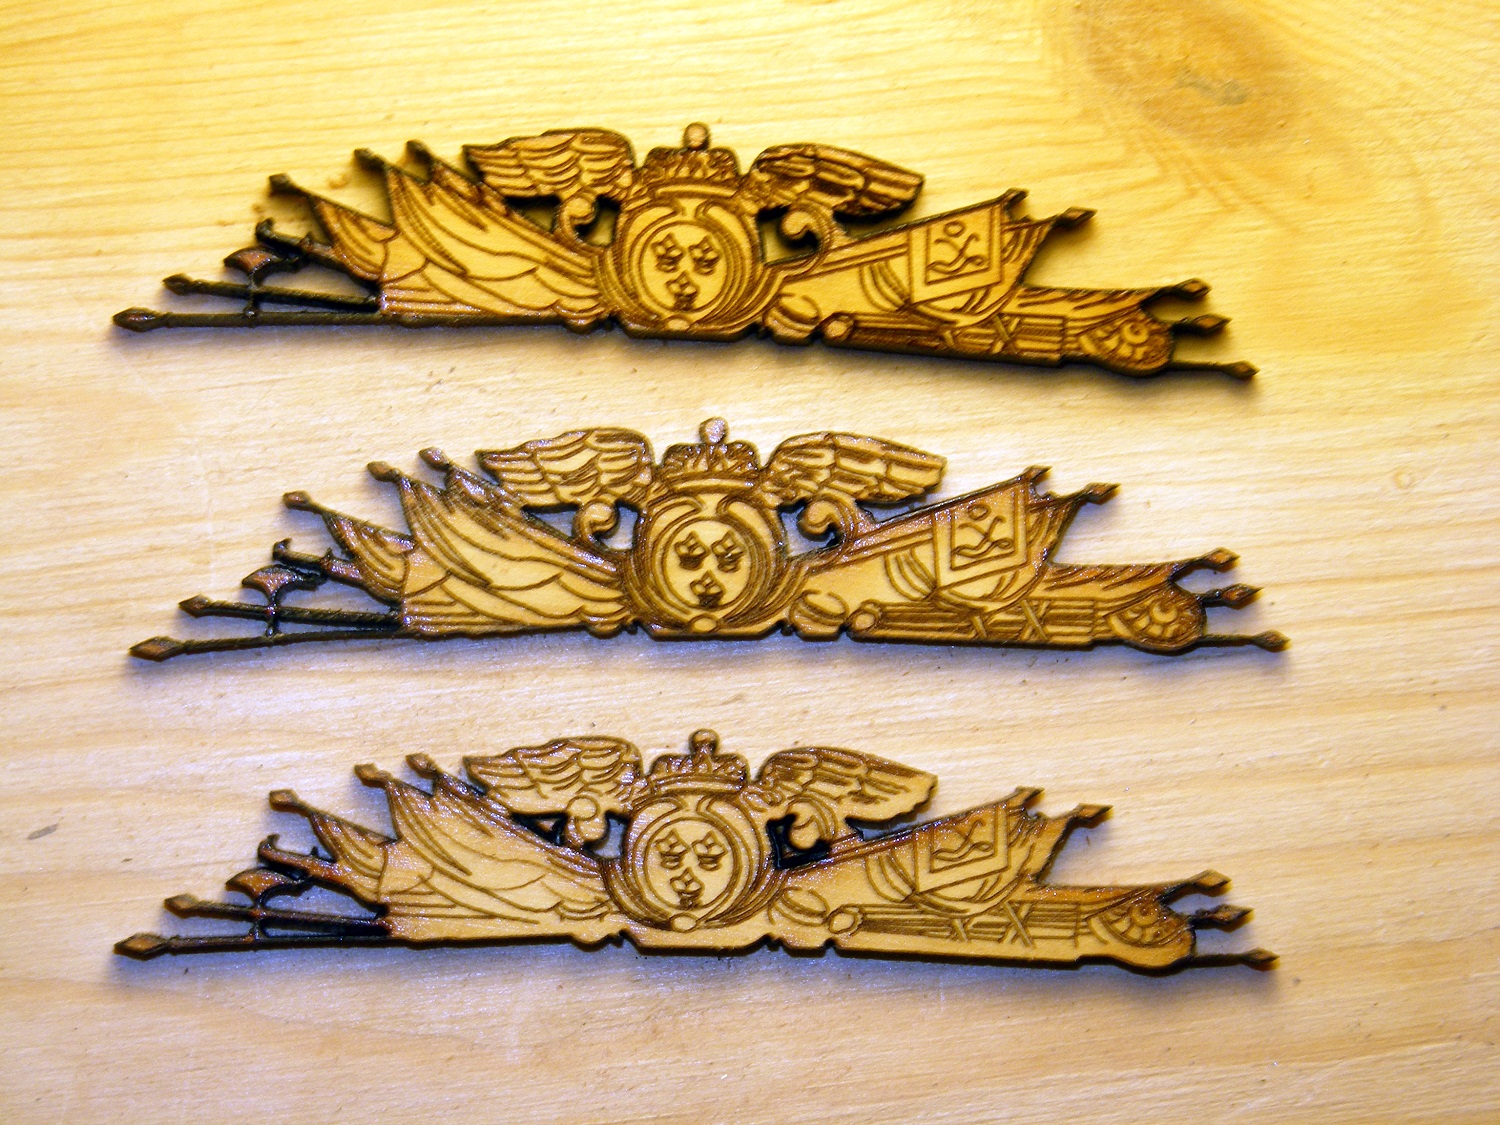
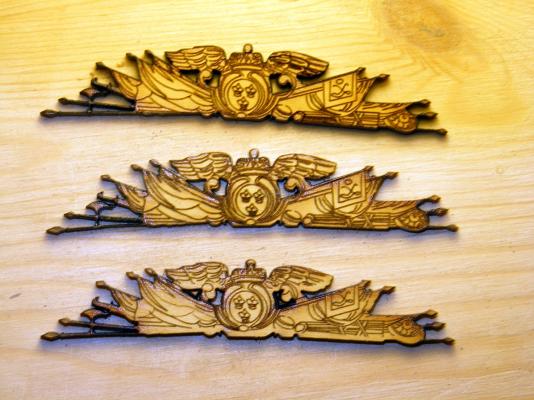
Final Adjustments and Conclusions This should be my final review post on this cutter. There's two images attached showing the progression of things. This is with Euro Boxwood and these are either tiny, or detailed and are items that I couldn't cut out of a sheet of with a scroll saw to save my soul. Euro box is even harder and a bit oilier than Castello. By the way, just an observation, Euro does char but it's more like a glaze than a soft ash from Castello. I realize I'm pushing this thing to it's limit and while there might be some more in it, I need to get back to my build. For the record, I'm keeping this machine. It will meet my needs and there are upgrade parts out there much like any complex tool to increase versatility. I replaced the lens with a high-quality lens from the Internet and also the lens holder (about $100 total and some choice language during the swap which required some serious fiddling). There was some slop in the factory lens tube which I thought might be creating some issues. I had to adjust for this and it took some time to sort out. But the kerf is now down to 0.02 inches or less after comparing cuts with the factory lens and new lens. They're straighter and almost no taper and will probably get better as I fine adjust the speed and power settings. Yeah... I just blew the warranty. I realize that the photos may not show a big difference but when I stick them under magnification for carving, the differences become obvious to me. The first photo is the nameplate. Tiny, not very complex but the lettering is the important part. These will be bas-relief carved. The final one is the bottom. I could do some better spacing on the lettering but I can live with it. The kerf is narrower and while I had the power setting a tad too high, I like the less charring I'm seeing on the cut. The second is the Arms of France for the stern (again bas-relief carving needed) and are approximately 3 inches wide. Again, Euro box and it's probably the most complex piece I'll ever have to cut. I'm happiest with the bottom one which is what I cut tonight. The kerf was straight, less charring. A bit more definition to the relief lines to guide the carving. My thoughts are that if I can do these detailed cuts, I can do the bigger stuff like framing futtocks without a hitch. I do need to adjust my drawings for the kerf but again that's learning. Also the different woods we use... ebony is a no go.. it turns to charcoal at the drop of a hat. Holly... I tried some 1/32" and it flamed even at low power that didn't completely cut through the wood. Cherry, pear, Swiss pear, and Castello seem to work best. I've not tried basswood as I don't use it except for prototyping or making jigs. I realize I've got the first version and I see on the website that they're making updates as they go. I do hope there's some focus on the quality control at the Chinese end, but I guess I'm jaded and have come to expect that any tech I get from China is iffy at best quality control wise. I also realize there's a pretty steep learning curve with any new tech. I guess one more consideration... I'm working at 1:64 which allows (or demands) thinner wood and smaller parts than 1:48. I realize that 3/16" thick hardwood is pushing the limit. 1/4" is, without upping the laser tube power, really pushing it and it may not give the results one wants as it takes two passes and the kerf is a V-shape because of it. At this point, from 1/32" up to 3/16" I'm now cutting all pieces with a single pass and not pushing the power limit which will help with tube life. When the tube dies, I'll probably replace it with a more powerful tube and a case extender and I'll still be under the cost of the next higher price machine. I've double and triple checked the specs and the power supply should handle it nicely. Last observation.. I don't think it has the workspace for many of the 1:48 scale pieces, notably in the stem, keel, and keelson areas as they are quite a bit larger than the same pieces at 1:64. I won't say "buy it" and I won't say, "don't buy it". I've got almost a month at 6-8 hours a day learning, working and tweaking at this point. It will require perhaps more time and effort than you're willing to put into it or maybe you like challenges. I guess I do, otherwise I wouldn't be trying to scratchbuild a relatively unknown frigate. Shipbuilding is a rather unique hobby as we do go outside the normal of things. Thanks for joining me on this voyage of sometimes frustrating and sometimes rewarding exploration. Let's go build some ships now, shall we?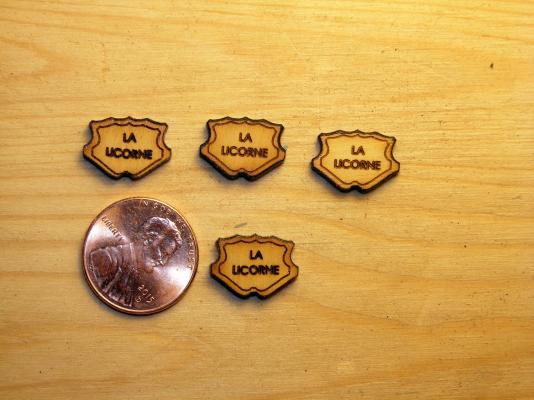
- 82 replies
-
- 17
-