mtaylor
-
Posts
26,273 -
Joined
-
Last visited
Content Type
Profiles
Forums
Gallery
Events
Everything posted by mtaylor
-
Adriaan, Are these online prices or have you checked any local home improvement stores? I got mine at a home improvement/hardware store for <$200 US. Hitachi with a 16" table and it takes both types of blades. I would hope you have something similar over there in Oz. BTW, no matter what saw you get, you'll need to make a zero-clearance plug to replace whatever the saw comes with. The holes in the plug from factory are always huge.
-
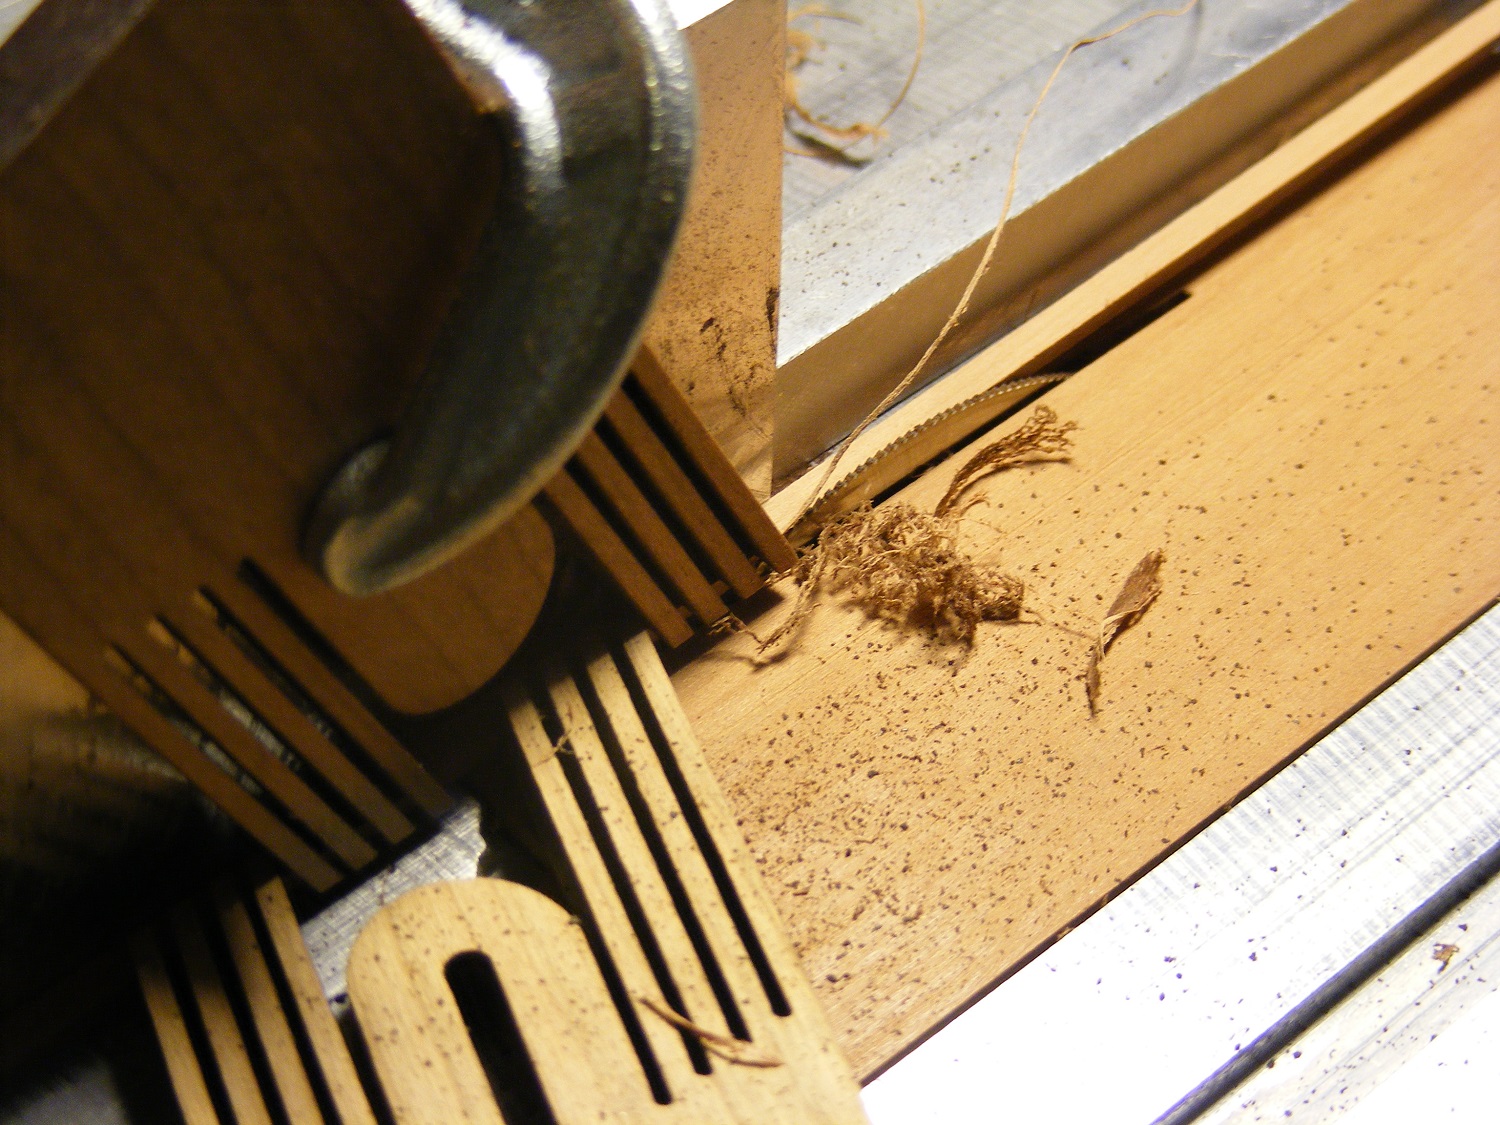
Thanks for the "likes and" comments. Just a break from building here while dimensioning my Swiss Pear supply for this. For hull planking, I'm need 4 sizes of wood: 1/32" X 1/8", 3/32" X 3/16", 1/16" X 1/8" and 1/16" X 3/16". I have an ample supply of planking wood that is +1/16" X +1/8" and +3/32 X +3/16" that I'm converting down. I've been testing out my technique on this and sorting things out. For the first batch of 1/32" X 1/8", what I'll be doing is running it through the thicknesser to get it down to 1/32" (dead on exact) and then running it thought the table saw with a 230T blade to get the exact 1/8" I want.. For those on metric, 1/32" is equal to about 1mm. I give the raw dimensions as "+" because they're all a tad oversize and the oversize seems to be inconsistent. I'm attaching two pics of the saw with the wood being run through it. You can see that very little wood is being removed and also how I'm keeping my big paws away from the blade. I hope to have planking underway pretty soon. In fact, maybe tomorrow, I'll take a break from dimensioning and do the counter. Hmmm... I need some ebony for the stern above the lights so I'll have to do that also. Overall view: Close up of blade area:


-
Matti, I'm glad to hear the meds are working and I'm also loving the progress on Wasan.
-
Lovely planking, Mike. The anchor stocks look super neat.
-
I'm always one clamp short, no matter how many I have.
-
Cutty Sark by NenadM
mtaylor replied to NenadM's topic in - Build logs for subjects built 1851 - 1900
What CaptainSteve said. I couldn't have said it better.- 4,152 replies
-
- 1
-

-
- cutty sark
- tehnodidakta
- (and 1 more)
-
I quite agree with B.E. There's issues to be sure, but they are a great help when figuring things out.
-
thanks for all the comments and "likes". No need to buy more wood at this point. I have a nice stash. Fully planked, sir, but it won't come out of the jig until the exterior planking is finished and may leave it there while I do much of the internal work. It makes a nice way to hold it. Right now, it looks like these will be the woods... Ebony - wales (but not all main, only the top strake), rails, stern above the windows, the trim where the counter meets the hull. Quarter gallery trim. I'm also thinking the yards but that may change to something with an ebony stain. Swiss Pear - external planking. Boxwood - decking and carvings, trim strips on the stern above and below the windows and the window framing. Also, quarter galleries. Possibly the masts but that's subject to change. Also maybe gratings, not sure just yet. Pear - coamings, pin rails, bitts, head rails, capstans and possibly some on the galleries. Silver Maple - ceiling and inner bulwarks. Probably gratings, not sure. Holly - figurehead with hopefully ebony for hooves and eyes, as it is a unicorn. I'm undecided still on the gun carriages (maybe pear or swiss pear? I also have some nice walnut that might work.) Same goes for the Great Cabin... maybe boxwood or pear for the trim fittings. Need to think on what to put in there as furniture, if any and also things like buckets, gun handling items.... we'll see. Anyway back to figuring out what I need to mill and how much. And more importantly, how to do the milling.
-
I think these ribs would be a bit on the tough side. I'm feeling a 1000% better about this version. Thanks Harvey. Yep, I started the framing in mid-April. Moving right along, I am.
-
I believe that the Victory has the same type of cannon. There is documentary on Youtube for their firing a broadside and that was mentioned.
-
Thanks for the comments and the "likes"... Dan, I've noticed that with cherry about inconsistent and that's part of what is the conundrum and decision process. I'm not coppering so I'm just musing as I've discovered some planking challenges that need addressing. One of which is that at the wales, the planks are 1 foot (real or 3/16" scaled) and after 10 strakes they change to 9" (real or 1/8" scaled). The planking then goes back to the larger for the garboard strake. Should be an interesting trip down that road. Right now I'm checking my wood supply and figuring out if I have enough of either one. I'll order more no matter which way I go.
-
Longboat by Rao A.L.G. - FINISHED
mtaylor replied to Rao A.L.G.'s topic in - Build logs for subjects built 1751 - 1800
Lovely work, Rao. I hope you have a nice place picked out to display her. -
Hit a big milestone... framing is complete and ready for planking. Well, one minor tweak to the transoms to get smooth run to the counter but that's not going to be a stopper. Right now, I'm having second thoughts about the bulk of the planking in Swiss Pear and am considering cherry. I'll ponder a bit more.....

-
They do replica guns to ease the strain on the old timbers in case you're wondering.
-
HMS Alert 1777 by Jaekon Lee - 1/64
mtaylor replied to Jaekon Lee's topic in - Build logs for subjects built 1751 - 1800
Yep... you're right. I didn't have my thinking cap on straight. -
Well.. that's about normal. I've found it takes some sometimes careful re-wording of the search to find what we need in this hobby.
-
Nice progress that looks wonderful, Hamilton. Keep telling us what's on the menu and I think there will a bunch of us outside your door on Christmas. Have a great one.
- 69 replies
-
- 1
-
-
- fair rosamund
- occre
- (and 1 more)
-
I went the same way but since you wanted "origin"... I had to fine hone the search... baggiewrinkles then added until I found something: definition, etymology, and finally hit it on: origin I'm not the brightest light in the chandelier.

-
Have look here: http://modelshipworldforum.com/resources/materials_and_tools/ToolsNotToBotherWith.pdf The general answer that's been posted many times is: save your money.
-
I was wondering the same thing that Greg mentioned. Your output and quality is amazing. This goes way beyond a "like" button. It's a masterpiece. Edit.. I needed to find out what the broaching was about.. now I know: http://en.wikipedia.org/wiki/Broaching_(metalworking) Your builds are an education unto themselves. Thanks for that also.
-
The only reference to it's origin that I could find by Googling is: https://books.google.com/books?id=Fp63wWByImQC&pg=PA16&lpg=PA16&dq=baggywrinkle+etymology&source=bl&ots=dvNAIl65rv&sig=R2NGugN_d39jN1wF2fj3OnoFcQg&hl=en&sa=X&ei=rSyTVPnSLMSeggSTt4DgDg&ved=0CD0Q6AEwBA#v=onepage&q=baggywrinkle%20etymology&f=false

-
HMS Alert 1777 by Jaekon Lee - 1/64
mtaylor replied to Jaekon Lee's topic in - Build logs for subjects built 1751 - 1800
Lee, It looks like that joggle in the middle got sorted out with the keel and limber. As for the breasthook, I think it connects to the stem and to the frames.