Old Collingwood
-
Posts
12,106 -
Joined
-
Last visited
Content Type
Profiles
Forums
Gallery
Events
Everything posted by Old Collingwood
-
 You need to start building on here lou - life is to short we want to see your work...........no excuses. OC.
 -
Okie dokie, just wonderd as I have heard they are quite good. OC.
-
That is looking awsome. OC.
-
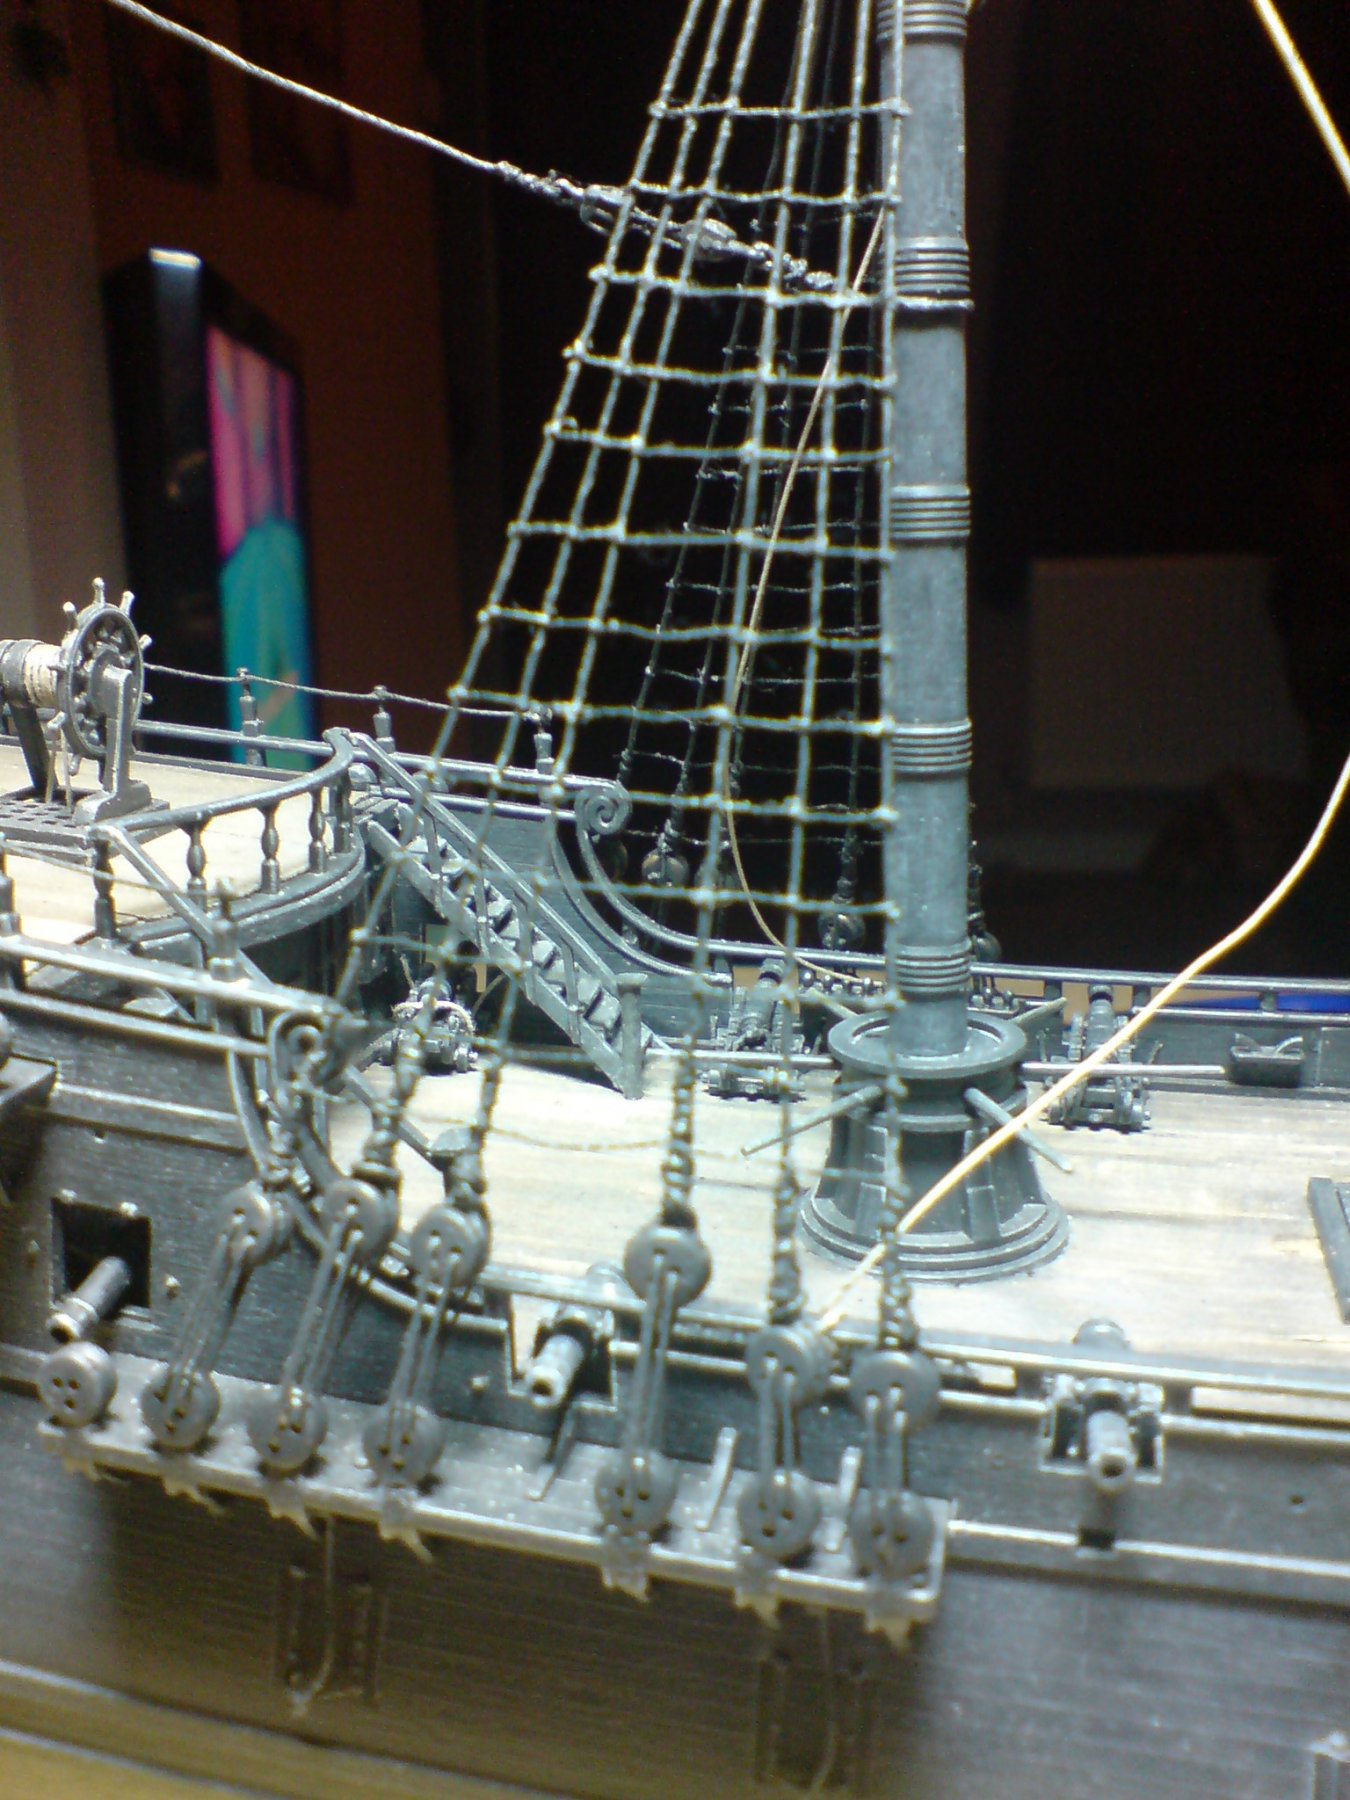
So later - I will finish the main mast ratlines, give it a coat of paint then fit the futtock shrouds to the top before fitting it to the mast. OC.
-
What about Extradecal arnt they no good for you? OC.
-
Anyway - despite how painful me mouth might be I aint bowing out yet got too much to do - got the pearl to finish for the admiral, got that film about Nelson/Trafalgar I am still pushing to see it made for a good friend, and I am also involved in trying to create a taxi worthy Sea Harrier jet for another friend. Oh and dont foreget my project in honour of my late farther. Busy busy. OC.
-
Cant get insurance to cover work over here lou, ite either NHS (If you can find one) or you pay cash by the visit. OC.
-
It will clear up its not the first time I have suffered I sound like a big girl over it but honestly I can take pain - heck I broke my leg some years back dissplaced fractured femur - was on traction and had to have it pined through my knee and through my femur, that pain didn'y worry me but dentist "No Way Brother" OC.
-
The National Healthe Service NHS, has been going for as long as I remember over here, it was set up to provide treatment for Hospital work operations and like, dental work and hearing/eyesight work, the hospital work is still free (for now till they privatise it) but the other services is getting less and less available as less dentists are accepting paitents on NHS grounds, back in the 70/80/90s you could step into most dentists and just sign a form and be covered for all your work if you was not in work. disabled or on certain govenment benefits. OC.
-
I tried lou, he just sent me away saying it is a dentists concern he was very short with me for waisting his time, we have a dentist in town and when I went to see them straight after getting turned away from the docs, they couldn't prescribe anti biotics and quoted me mega bucks to sort my mouth out, its my own fault I have always had a sever phobia of dentists all my life, and despite many attempted visits in the pat when dentists had more NHS vacancies I just ran from them time after time after time. I have always said I would have to be knocked out and have all the work done then and there. OC.
-
Thanks Ken, the problem is - over here its getting harder and harder to find NHS dentists, almost all are private and the cost for private dental treatment is just stupid money - out of mine ands many other peoples reach. OC.
-
Some really nice work going on there - looks so real. OC.
-
There are no NHS dentists round by us and my doctor wont see me as he says its not his responsibility - bit of a catch twenty two. OC.
-
I havn't been able to do anything to day as I couldn't concentrate - been in too much pain with a mouthful of abscess's, Its caused all my face to swell up causing pain and a bad headache, hopefully back on the pearl tomorrow. OC.
-
Amazing work again . OC.
-
18TH Century Dry docks for 1st rates
Old Collingwood replied to Kevin's topic in Nautical/Naval History
A rough scetch just to show a front on view showing the dock wall on the right and beams and keel blocks (in brown) OC.
-
18TH Century Dry docks for 1st rates
Old Collingwood replied to Kevin's topic in Nautical/Naval History
Why dont you do a Long side (at the rear of the ship) and an end (could be the gate), you could secure her as I think they did with beams secured from the dock walls (steps) and attached to the hull (possibly pins) and similar under her keel onto the keel dock blocks. It would be secure and look Fantastic. OC. -
Havn't got much more to do - Finish the ratlines, then paint them to flatten them down, fit the masttop, make the futtock shrouds - fit then paint, attack two blocks at each end of the foremast main yard, then tie to forecastle deck railing and blocks on the mainmast masttop, then I will need to work on making a wood upper mainmast section, then paint/weather it before fitting it to the opper main trestltree assembly, then fit/lash and connect the upper main shrouds to the masttop deadeyes, then make/serv another main to foremast stay rope and associated blocks, then make and fit the topmast to topgallant support ropes on both main and foremast. Thats before I make more yards from dowel and fit them with thier blocks and ropes OC.