scrubbyj427
-
Posts
1,712 -
Joined
-
Last visited
Content Type
Profiles
Forums
Gallery
Events
Everything posted by scrubbyj427
-
 I’m fairly certain that model shipways uses the 3m copper tape as well... or some version of it. I’m 100% sold on the tape now after seeing your results with Bellona and having used the pre made tiles in the past. Fantastic work!
 -
Thank you Glenn. That was my first go around at Chucks method of planking and dare I say it, but I’m excited to try it again soon. The results are well worth it. Your planking work is very methodical and well planned, it’s setting the bar high.
- 840 replies
-
- 2
-

-
- winchelsea
- Syren Ship Model Company
- (and 1 more)
-
That looks awesome Glenn! For a second, after looking at your stellar planking job, I briefly thought about replanking my Winnie. She’s looking really nice, looking forward to seeing more. JJ
- 840 replies
-
- 1
-
-
- winchelsea
- Syren Ship Model Company
- (and 1 more)
-
Your Winnie looks great Bob! She’s turning out very nice! JJ
-
That looks very nice. I couldn’t notice any error (if you can call it an error) and neither will anyone else. That decking looks great! Well done.
-
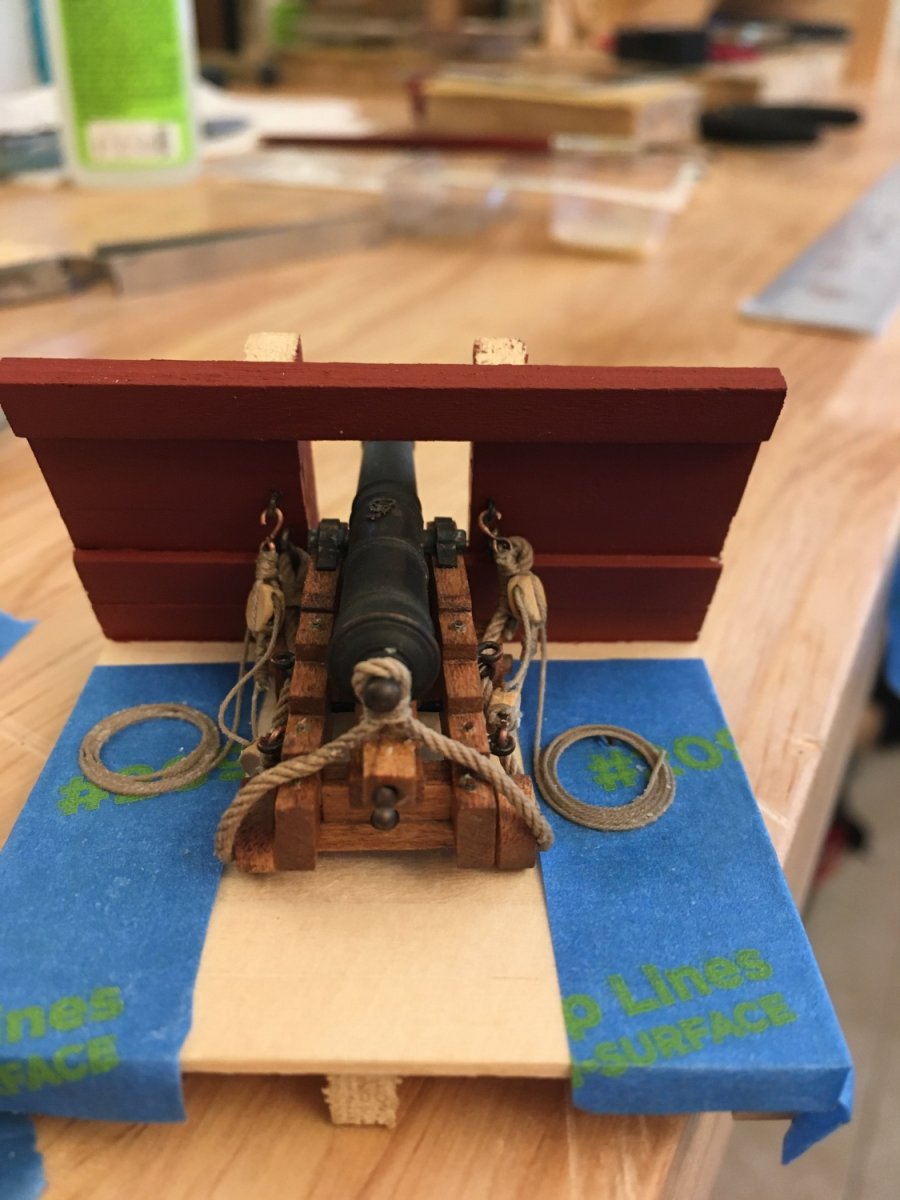
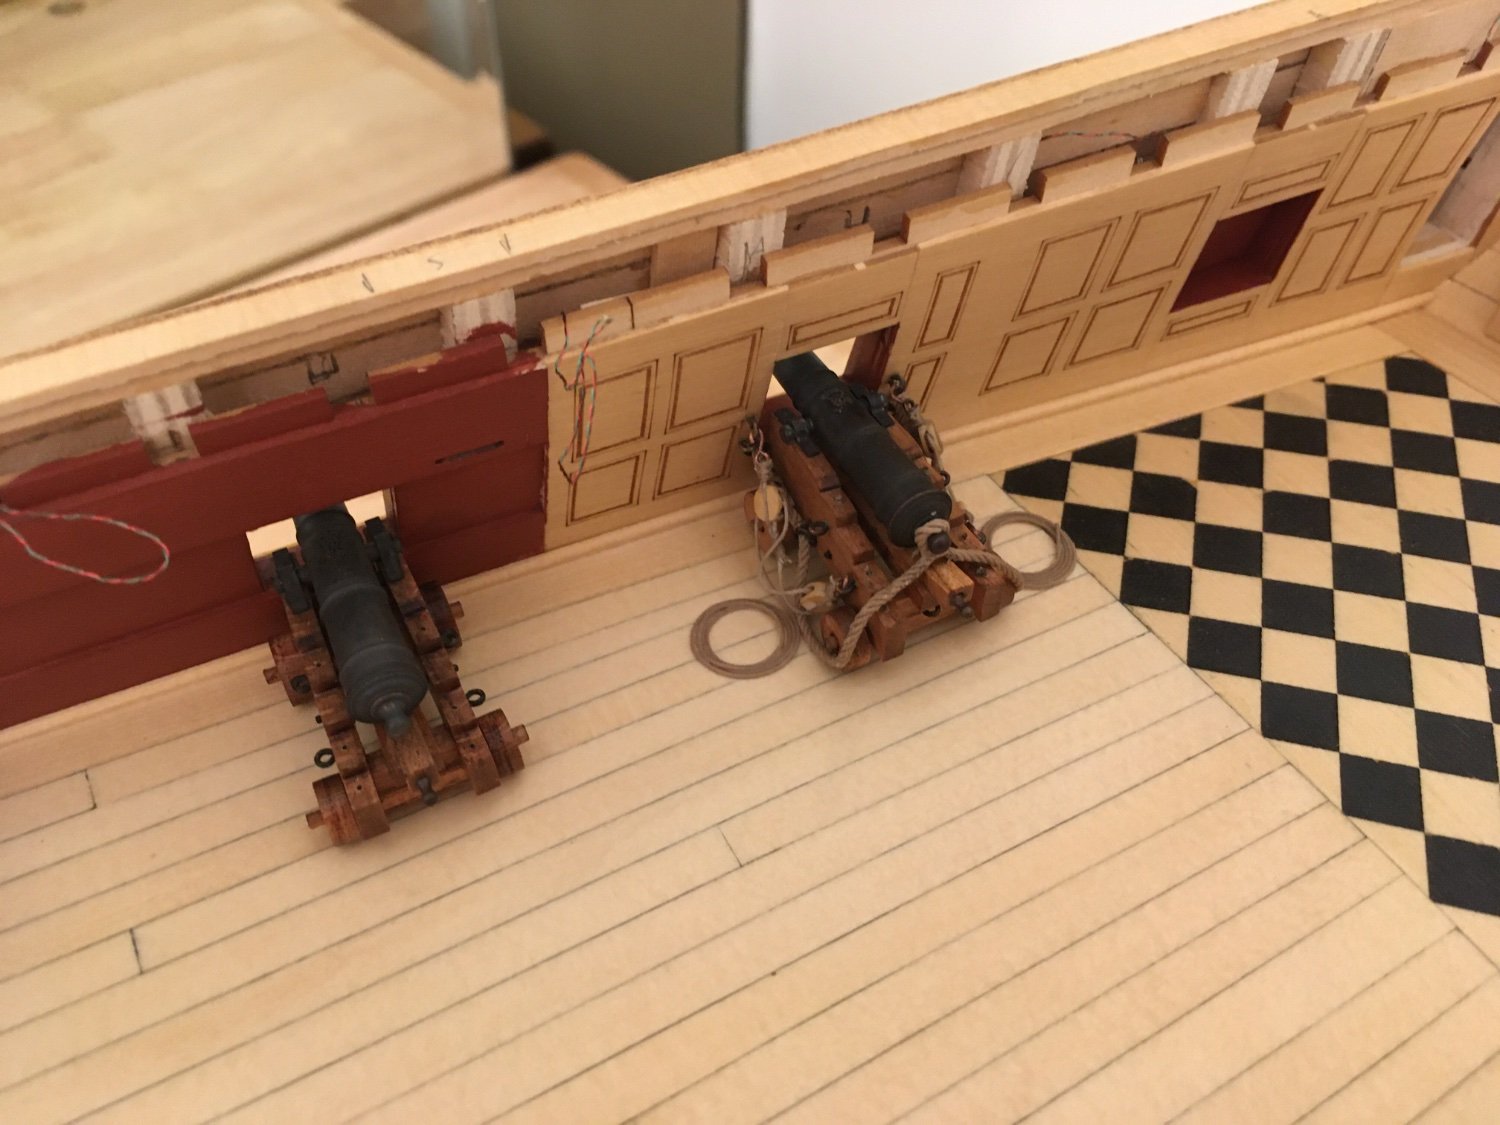
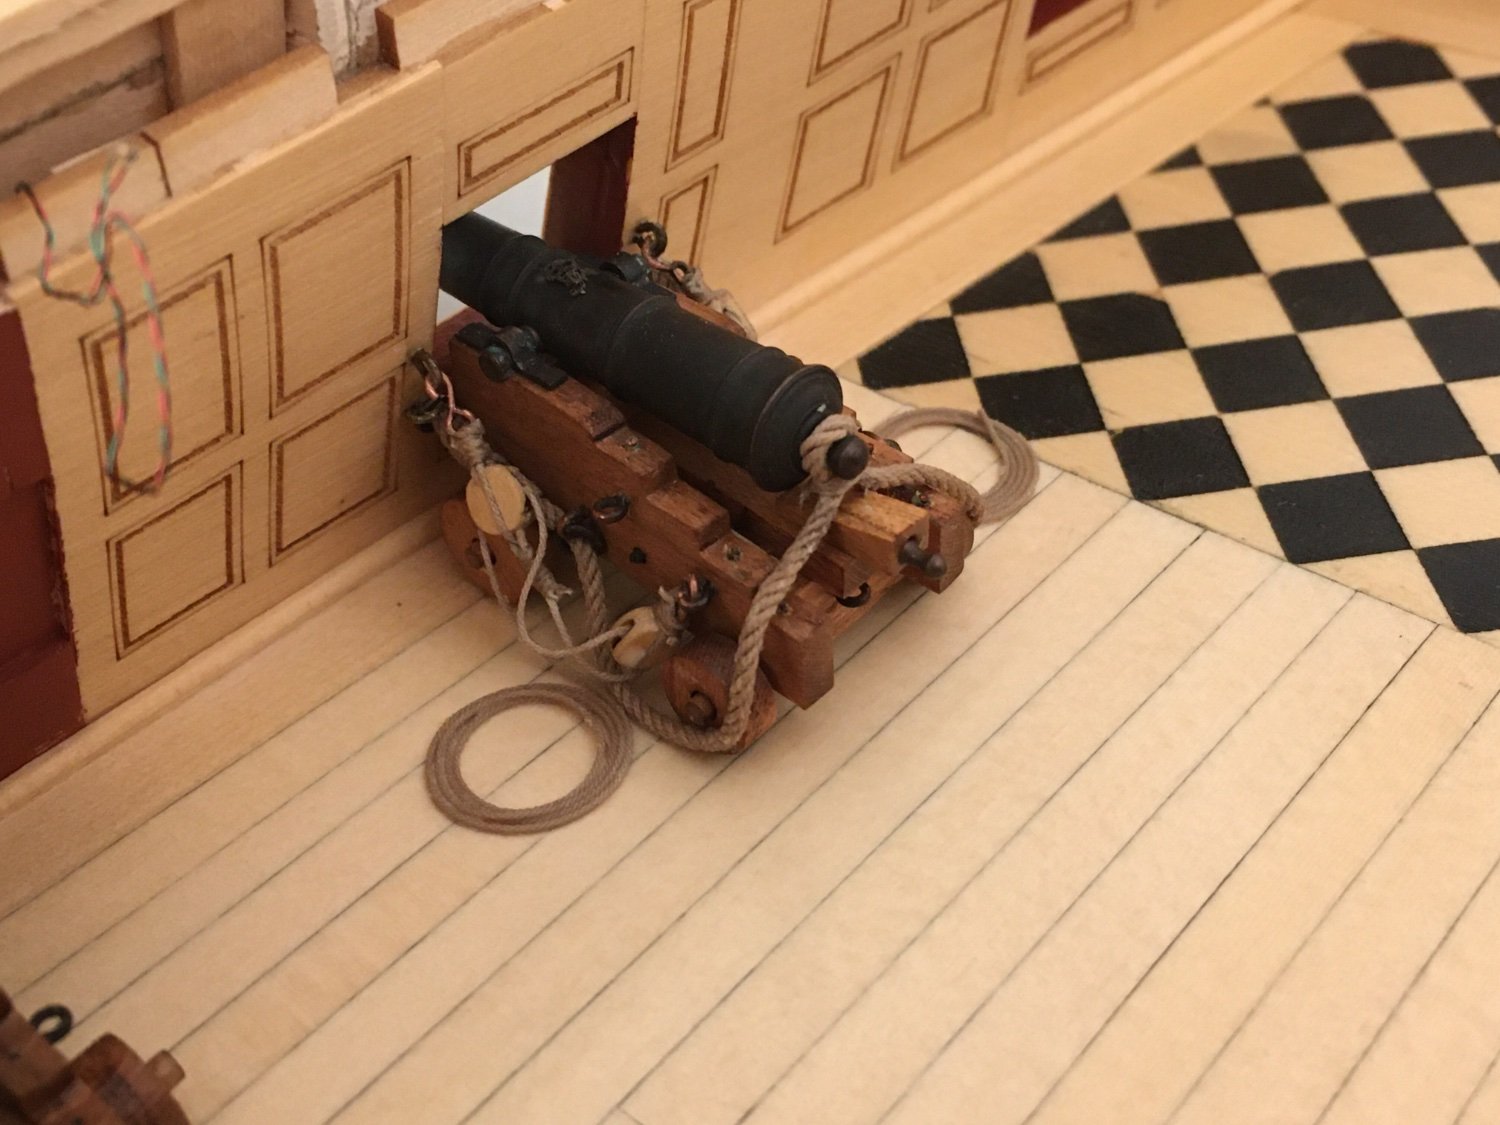
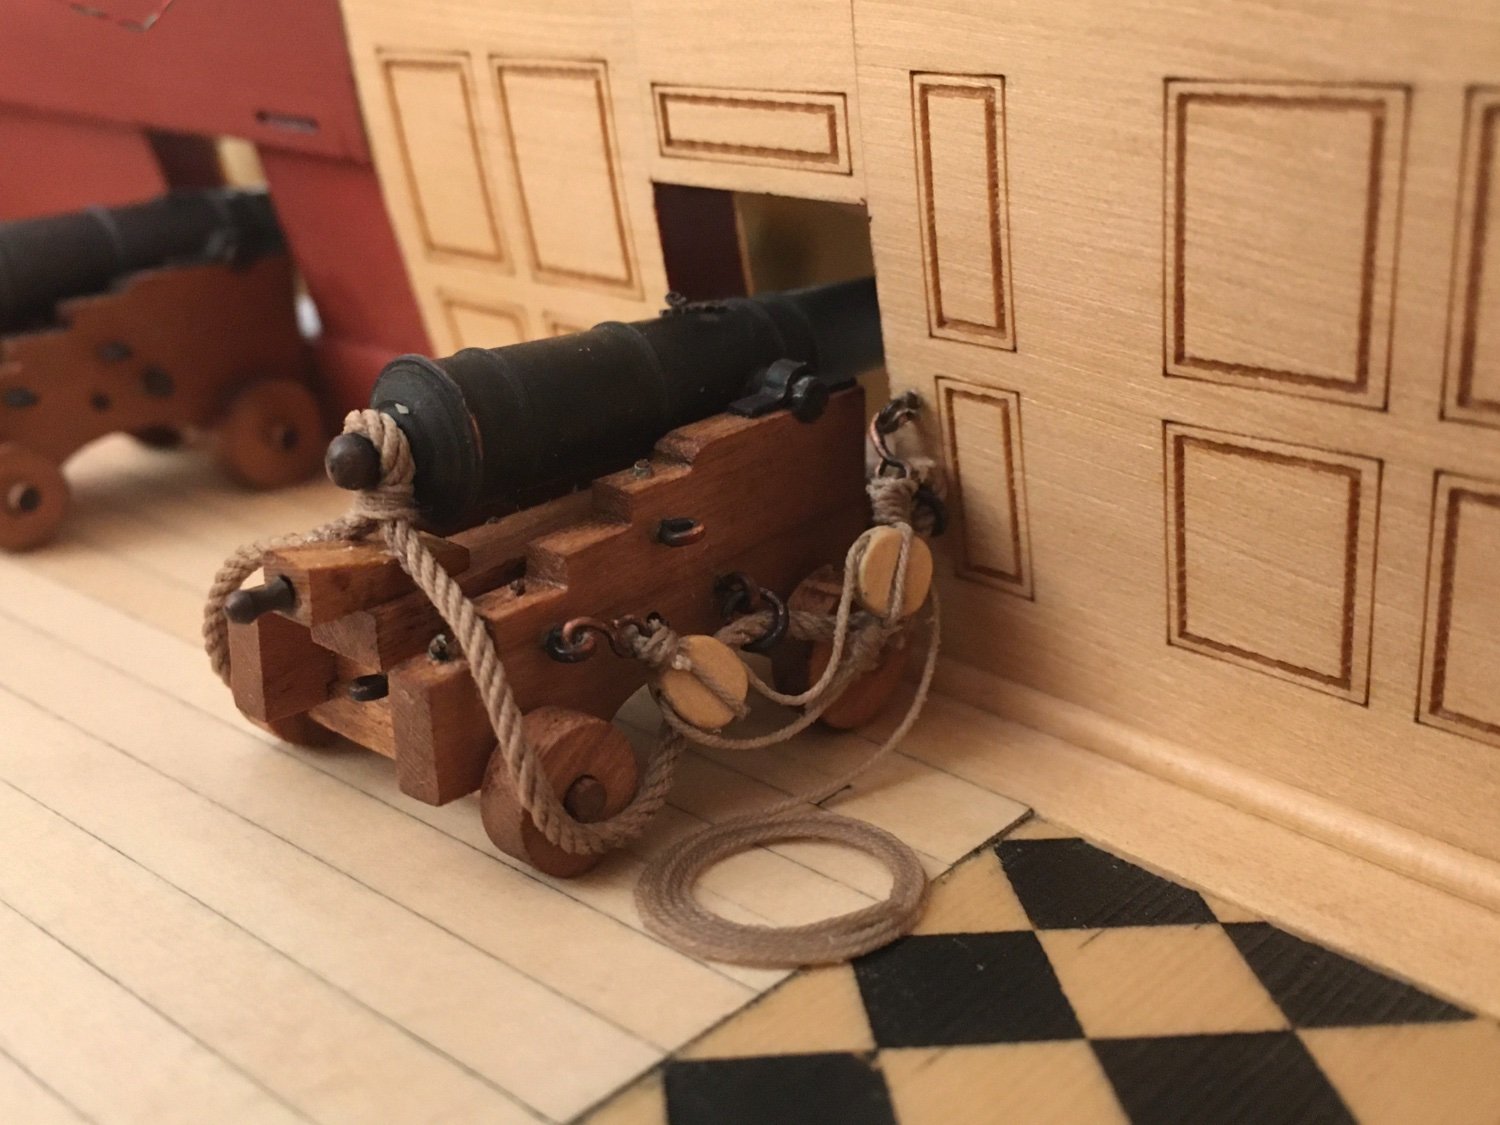
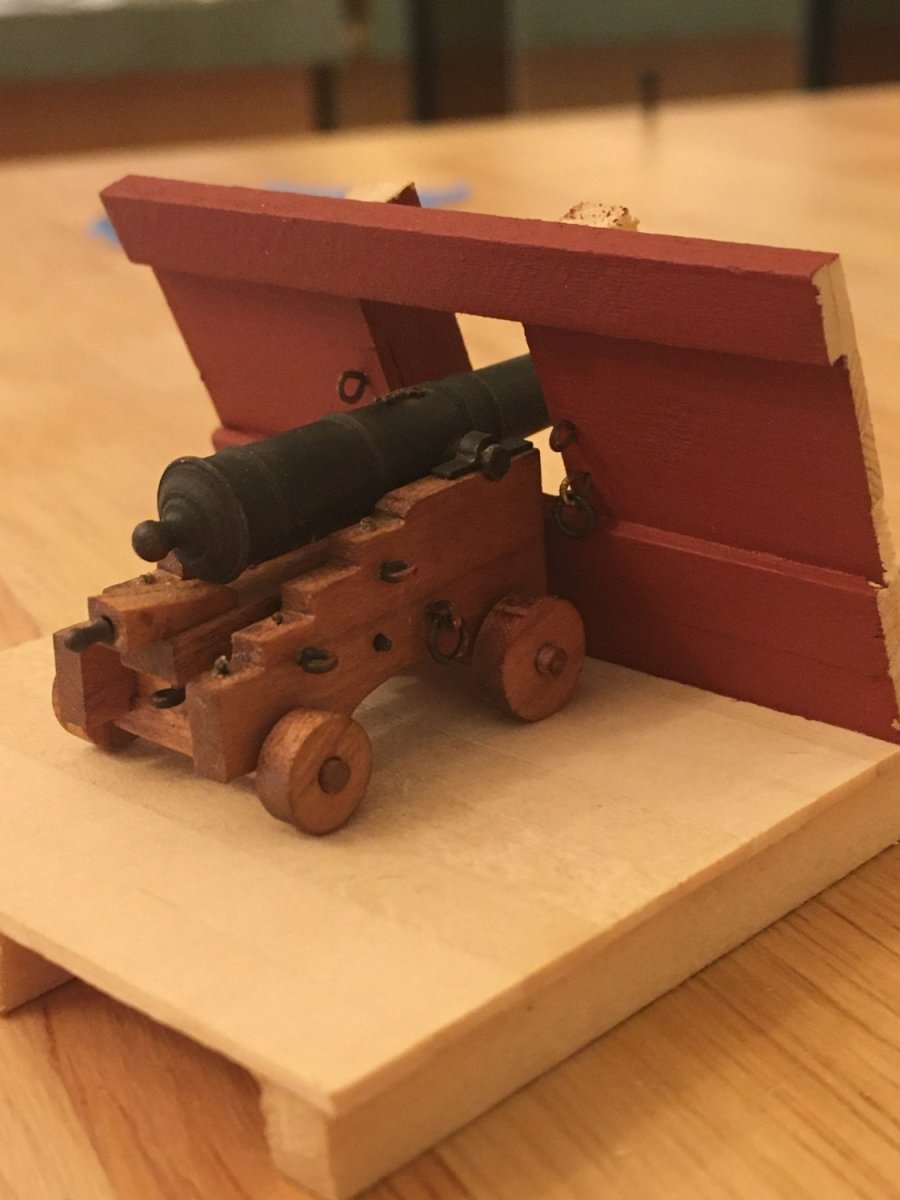
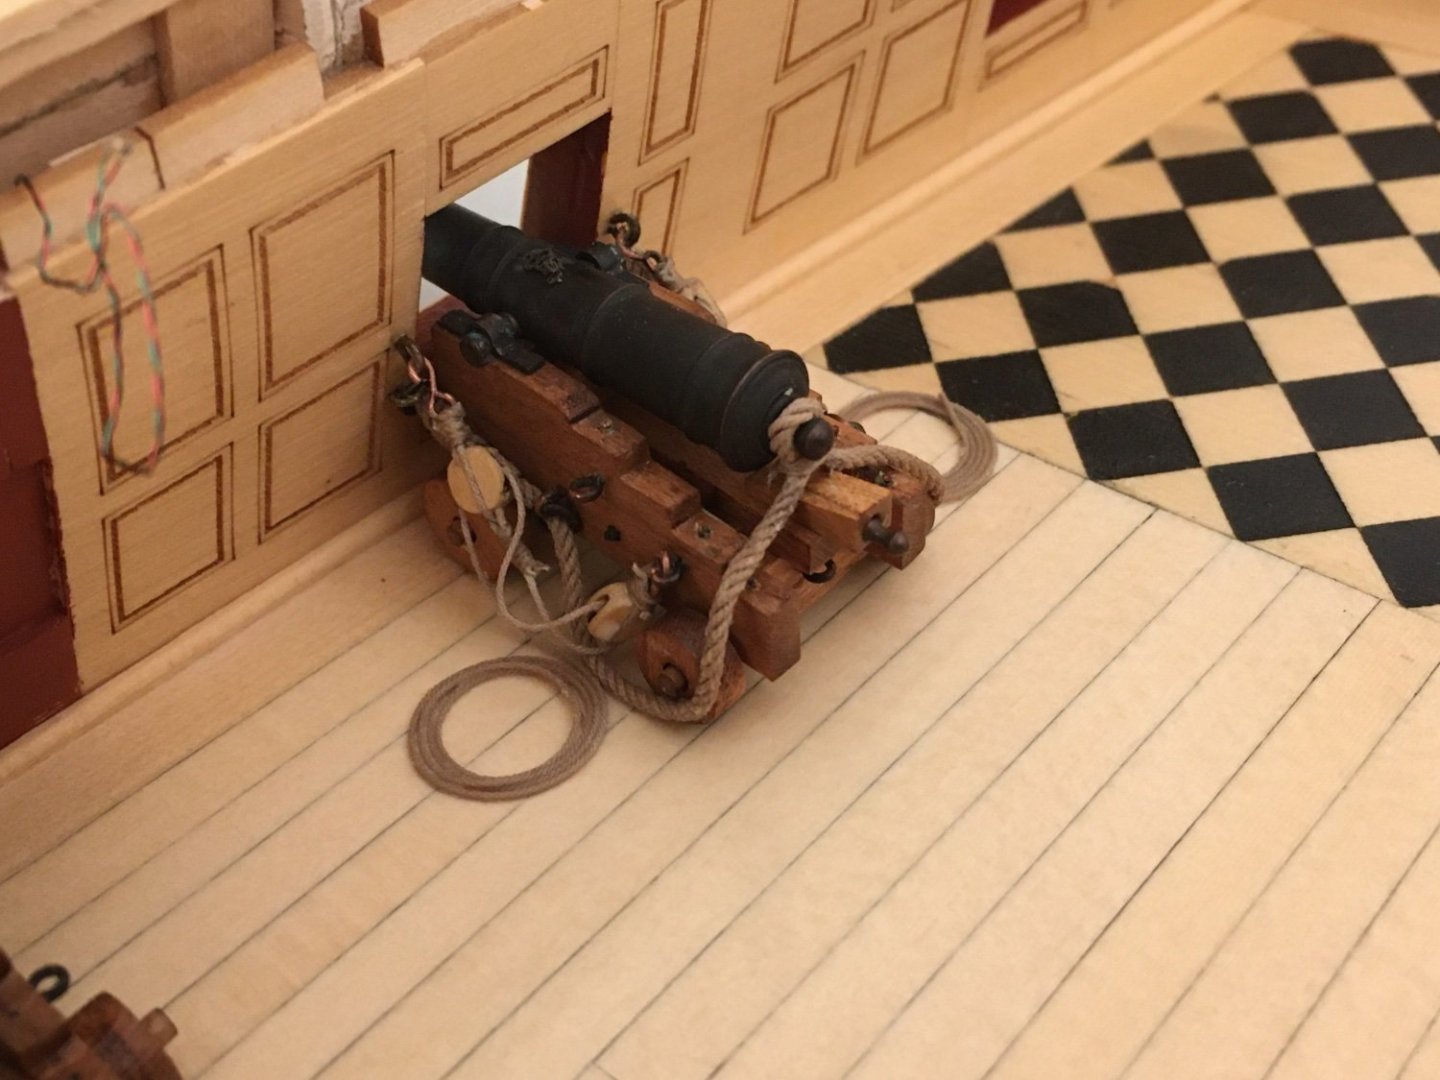
I think Chuck described frapping in an earlier post as a method of securing the lines on museum ships so folks don’t trip over the lines while walking the gun decks. as far as the breech lines being cross looped or seized as I have shown, I’m still unsure, which is fine as I have to wait for a bunch of hooks to show up before I continue with hun work. Fred...where did you come up with your breech configuration? Glenn, you’ll be there before you know it, you’ll succumb to the desire to rig them. Lol!
-
So I’m hoping someone smarter than me chimes in as well! Haha. so after examining a few logs I came up With that method, I mostly borrowed from Fred’s log @jfhealey and From what I could see that is similar to how he did his breech lines. maybe Fred will chime in with some advice? JJ
-
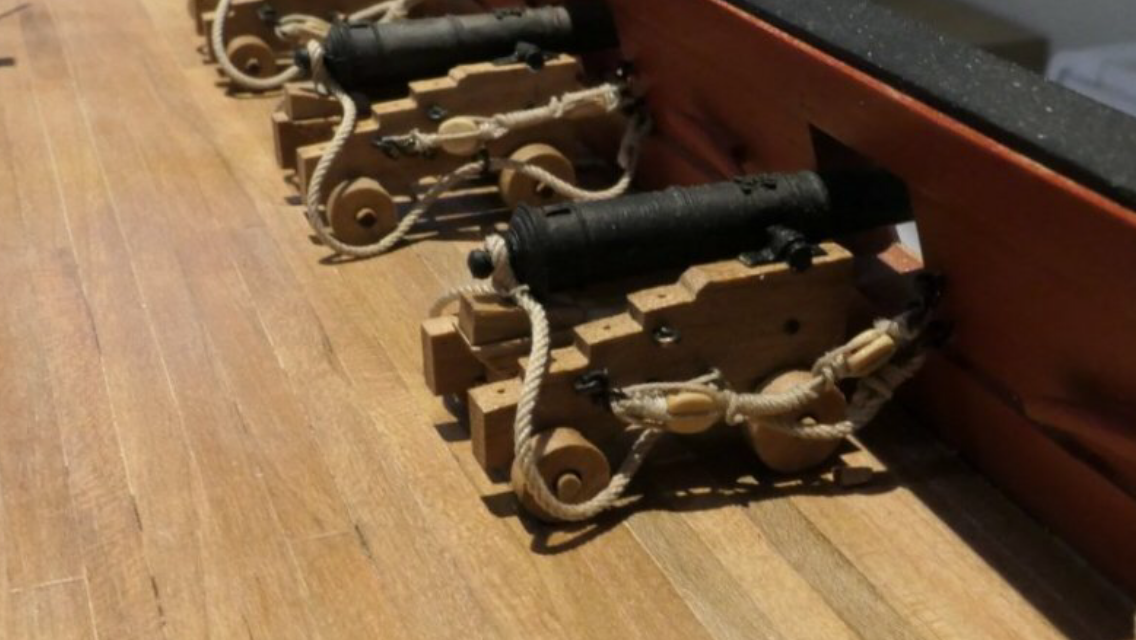
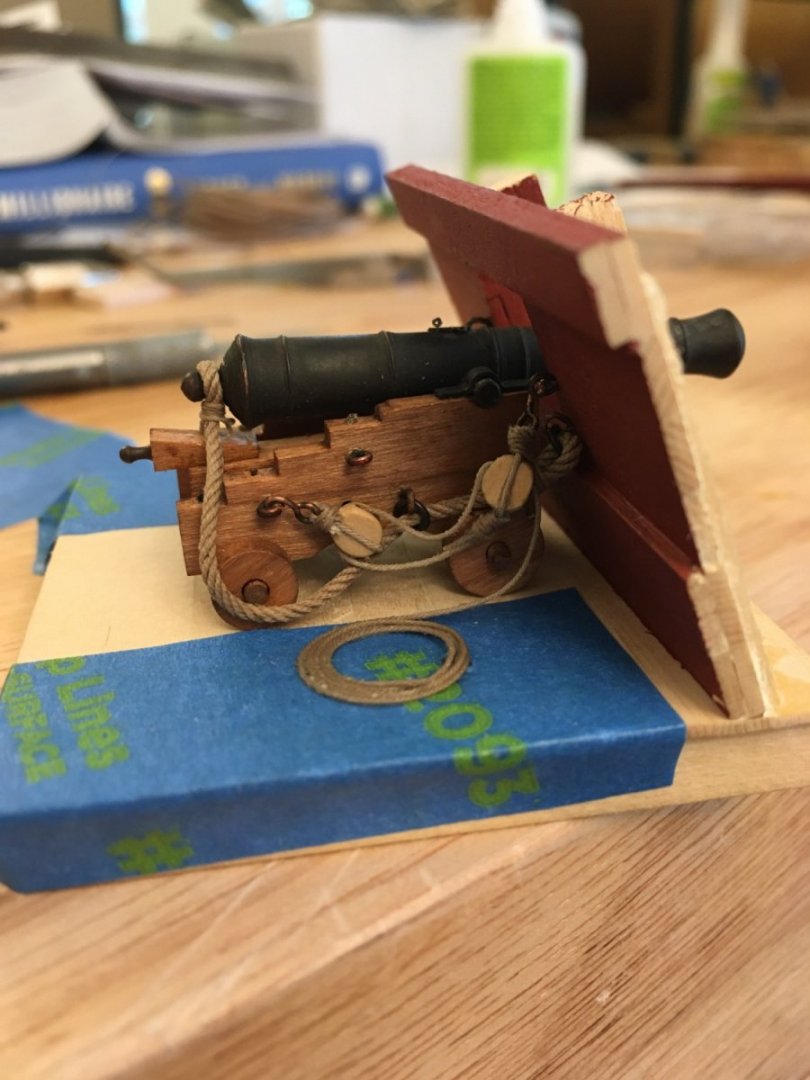
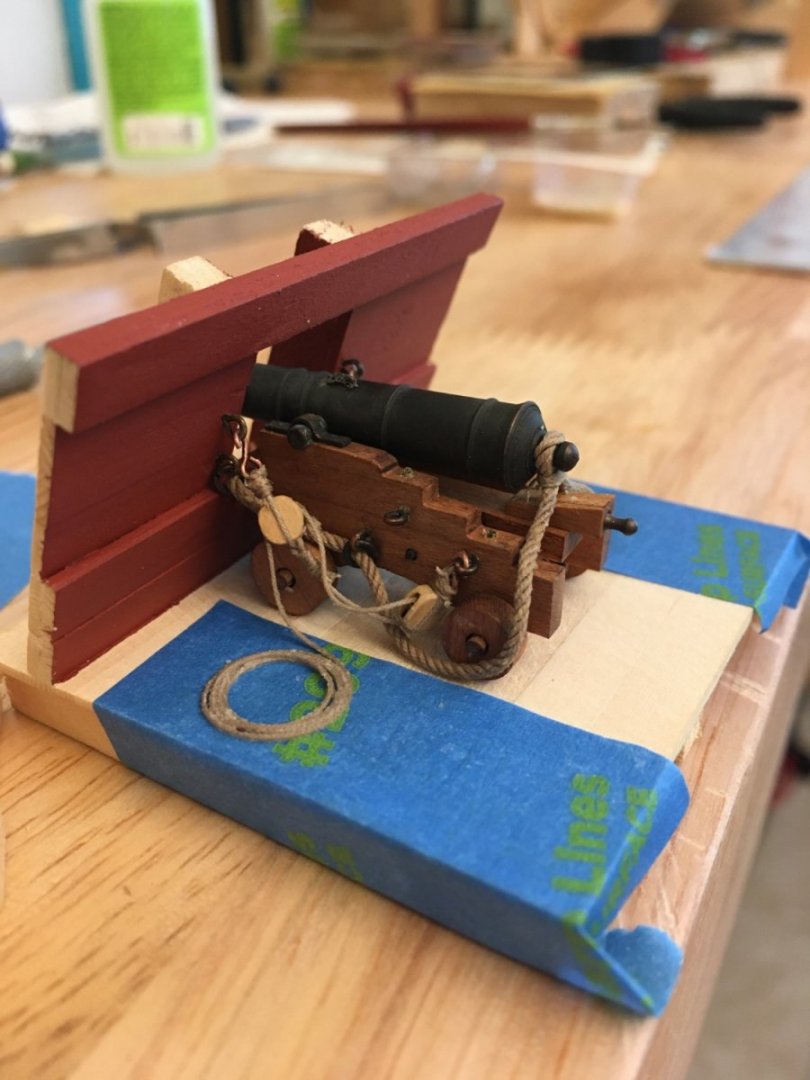
Thanks for the comments and likes guys, I was about to abandon the whole gun rigging process but finally getting one finished the way I wanted it, inspired to me keep going...at the expense of setting back chapter 7 for a very long time. Lol. I’m going to get started on another one soon, hopefully it will get easier. Glenn, I think I understand what you are saying, I’ve seen both examples online. I’ll post a photo of my next one when I start. Would it just be crossed and that’s it? No seizing or smaller line to at all to keep the loop crossed? Would that be standard on a 12pdr? JJ
-
Awesome work!
-
Looks great Ben! Looking forward to seeing your decks complete. JJ
- 399 replies
-
- 2
-
-
- winchelsea
- Syren Ship Model Company
- (and 1 more)
-
The struggle is real... no joke! One down, many more to go. JJ


-
Looks great Rusty! What a great shop.. one can only dream.
- 642 replies
-
- 1
-
-
- winchelsea
- Syren Ship Model Company
- (and 1 more)
-
I really like the balsa idea, I’m going to borrow that from you on my next project. Getting those frames sanded evenly from that angle was a pain!
- 840 replies
-
- 2
-
-
- winchelsea
- Syren Ship Model Company
- (and 1 more)
-
That looks awesome! Amazing work, Chuck!
- 1,784 replies
-
- 5
-
-
- winchelsea
- Syren Ship Model Company
- (and 1 more)
-
That looks great Rusty. Wonderful work!
- 642 replies
-
- 2
-
-
- winchelsea
- Syren Ship Model Company
- (and 1 more)
-
Beautiful work! Glad to see some updates on this again! She’s looking great!
-
Your Sphinx is looking really nice Mark! It’s fun watching all these wonderful Sphinx builds come together.
- 505 replies
-
- 5
-
-
- vanguard models
- Sphinx
- (and 1 more)
-
Beautiful work! Great progress so far!
- 840 replies
-
- 2
-
-
- winchelsea
- Syren Ship Model Company
- (and 1 more)
-
Beautiful work Mike! Good pointers, thank you.
- 607 replies
-
- 1
-
-
- winchelsea
- Syren Ship Model Company
- (and 1 more)
-
That looks excellent Frank! Very well done!
-
Thanks Ben, great minds think alike! I couldn’t resist, it was such a good deal.
-
So I built my rigging jig today, I’m going to assemble all the tackle and metal parts in this jig first and then when everything is dry and stable I’ll carefully transfer one gun and tackle at a time over to Winnie. I think the process won’t be too bad once I get rolling.

-
😬 I’m getting nervous just looking at that. If my little guy gets anywhere near my Winnie, she’s toast!
-
She will be here for a few more months then back to sea again... for real. I think my Winnie has more sea miles under her keel than the real one did lol! Thanks Matt, it’s reassuring to know others will be participating in the party. I’m Getting started today... I’m going to make a gun rigging jig maybe I’ll have one complete within a week🤞