HOLIDAY DONATION DRIVE - SUPPORT MSW - DO YOUR PART TO KEEP THIS GREAT FORUM GOING! (Only 13 donations so far - C'mon guys!)
×


vossiewulf
-
Posts
1,477 -
Joined
-
Last visited
Content Type
Profiles
Forums
Gallery
Events
Everything posted by vossiewulf
-
 There are a couple hundred pitfalls you can drop into that are basically invisible until you've fallen into them, so don't get down, you fix whatever you need to and move on a bit wiser in the ways of building ships. When it comes to gluing a piece back that has broken off, drill a small hole on each side and glue in a small dowel at the same time you glue the two pieces back together. It will make the joint much stronger. So one thing you definitely need is a set of small drill bits and a pin vise to hold them for drilling holes.
- 10 replies
-
- 1
-

-
- 18th century longboat
- model shipways
- (and 1 more)
-
My LN has a clear-finished holly counter and transom for no justifiable historic reason, and clear-finished cocobolo wales, stem, keel, and sternpost. No one has attempted to burn me at the stake yet.
-
Jolene, as you can see here, sanding those planks once in place is going to be tricky. In those cases, it's best to fully sand and prepare the parts before installing them, doing so at least considerably reduces the need to sand into corners and around things. Also you can level a wood surface like that by scraping with a sharp Xacto blade, often faster than sanding. That said, balance what I am saying against how much those planks will really be seen.
-
In modeling software this is a primary use case, as 3d objects have to be texture mapped with 2d graphics. Therefore the modeling software has to be able to project all of the surfaces onto a 2d plane, it's called unwrapping UVWs, UVW being the XYZ axes of the texture space. So if I made a model in 3DS MAX with all the planks, it would then be very easy to output all of the plank shapes into a 2D file that could be used to drive a laser. But most people will use CAD, where as described above the process is a little different, but the result is the same. So the answer is that 3D CAD/modeling applications have built in functions for several reasons that are able to take 3D shapes and project them into 2d.
-
That reminds me, I need to threaten to take out a contract on Keith if he paints that mahogany.
-
Horst, try Seamanship in the Age of Sail. It does a reasonably good job of explaining what everything is and how it all works.
-
Yes, when painting the hull it's largely irrelevant, but it will always be relevant for the deck at least. Just something to keep in mind for the next time around.
-
Sounds like you learned a lot with the longboat and made good use of it here, the planking is nice and smooth. I'm not sure what the instructions tell you so you may have just followed instructions, but one suggestion would be to change your planking pattern to a four-butt shift which was pretty much standard throughout the age of sail. Here you've done a two-butt shift and that makes for very visible vertical lines where half the planks are ending. Instead, you divide your plank length by four and shift the next plank by 1/4 of the plank length, next one shifted another 1/4, then one more and the fourth plank will be in the same position the first plank is in. See below.
- 38 replies
-
- 2
-
-
- bluenose
- model shipways
- (and 1 more)
-
To me, the best choices are easy, Castello boxwood and Swiss pear, the primary deciding factor being which color you like better. Although I haven't used the latter, I've watched Kortes bending it about into noodles with steam on his Dutch boier model, and it's a preferred wood of many builders. The only downside is that both are relatively expensive. Look at Crown Timberyard.
-
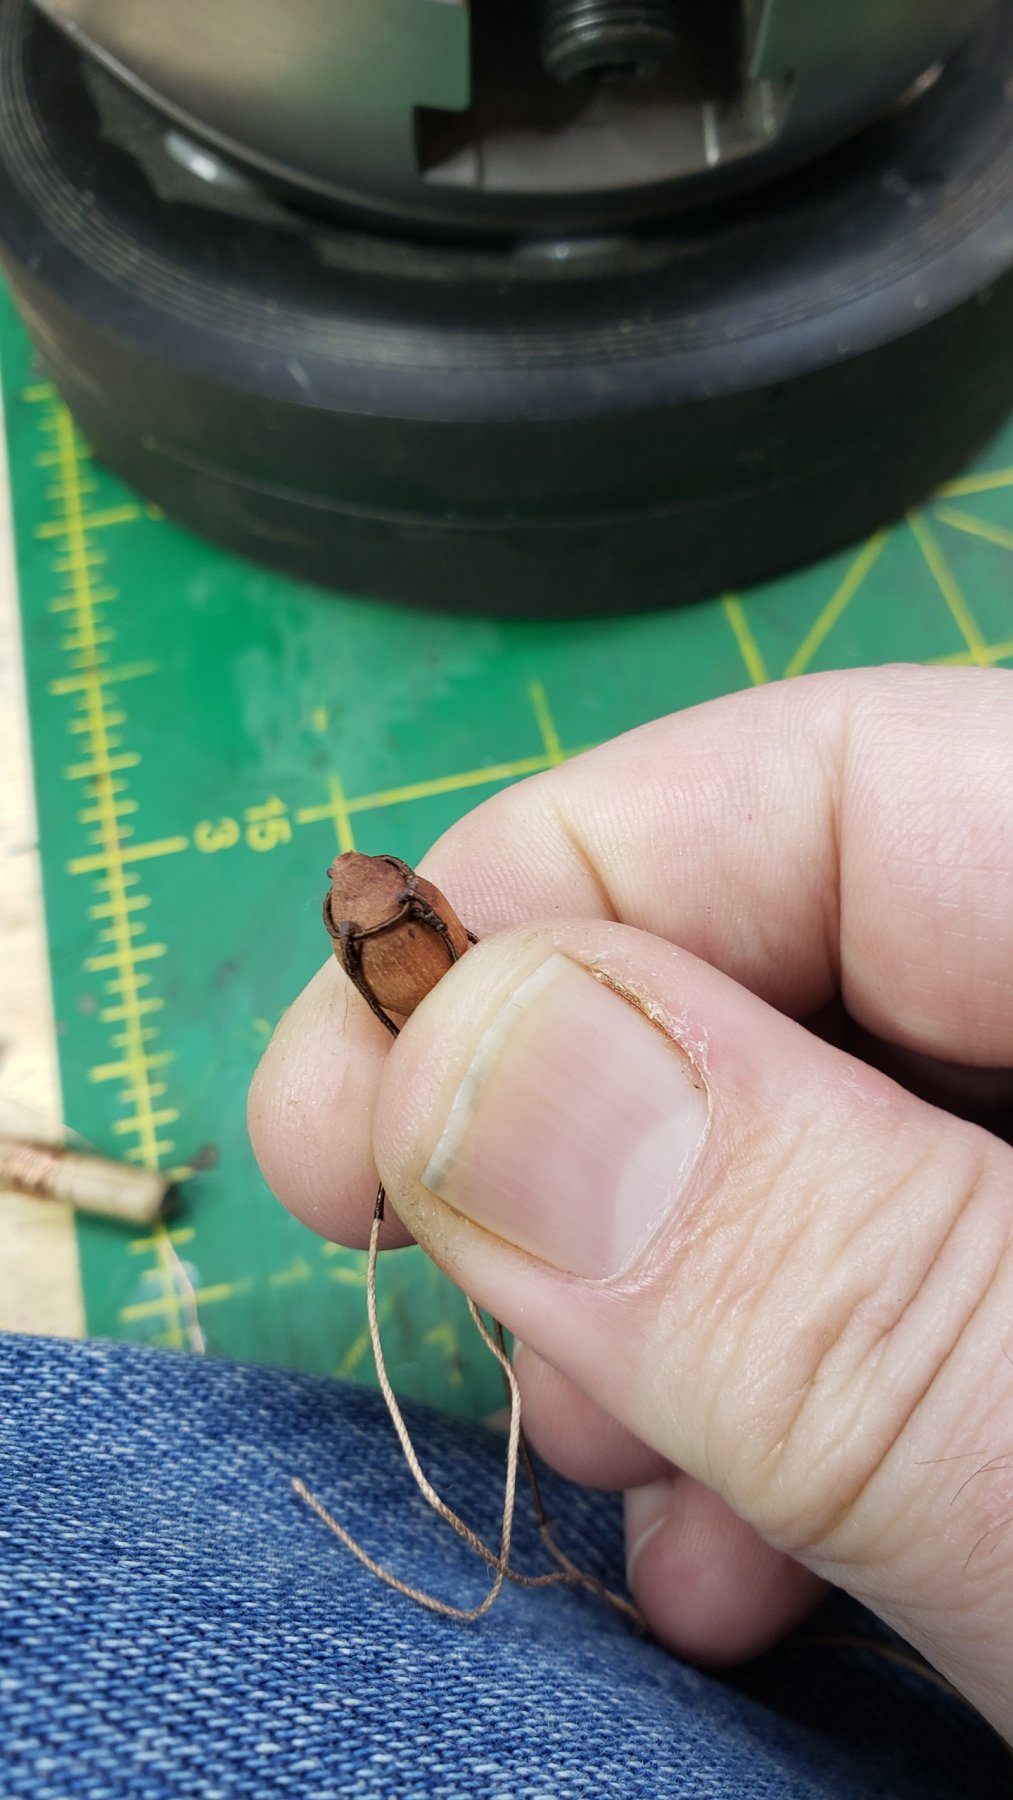
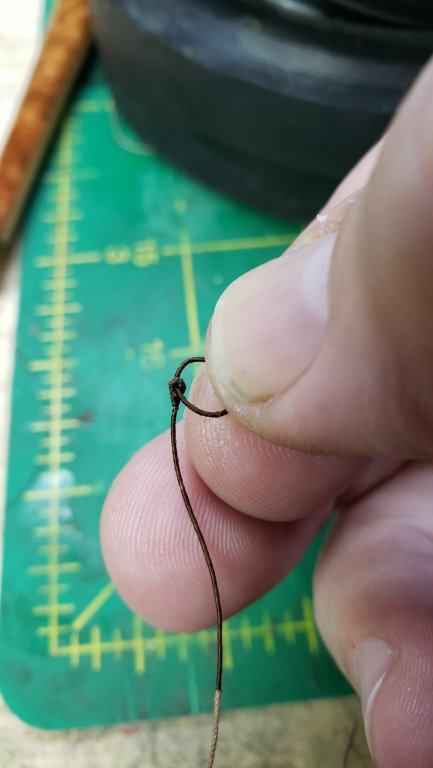
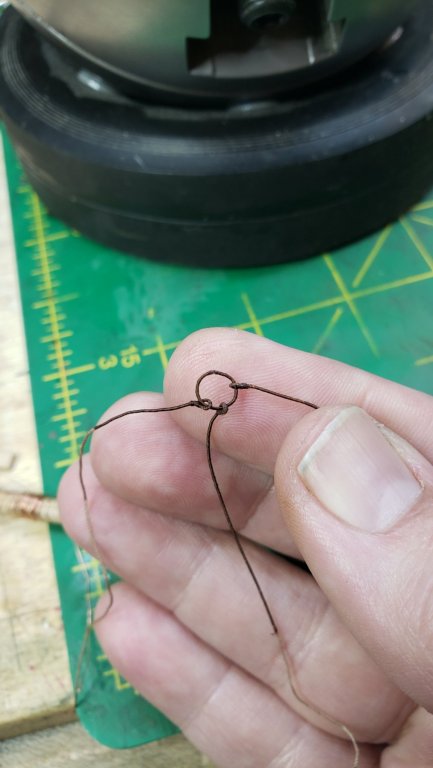
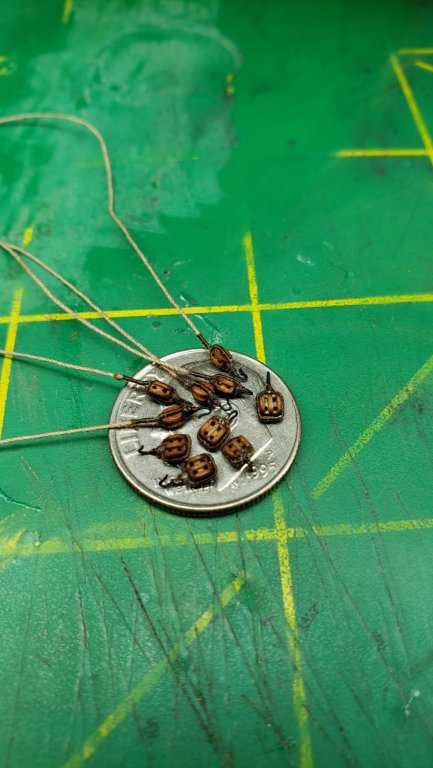
Thanks @popeye, @Landlubber Mike, and @BANYAN. Mike, I am having lots of choice words trying to get those baskets in the right place on the buoys, I thought making those baskets would be the hard part, noooooooo. Pat, thanks, but I am taking advantage of using fly tying line, which at least lays flat when wrapped if not being flat coming off the bobbin. It's specifically designed to make it easy to do a smooth wrapping like that, fly tyers are at least as nutty about their things as ship modelers are about ships. If you find a place that needs small-scale serving, give it a spin, costs like $4USD a bobbin. I'm using 6/0 to do the basic serving of the line, and 14/0 for wrapping the loop splices, and I bought some 3/0 to serve larger things like stays.
- 714 replies
-
- 3
-
-
- lady nelson
- victory models
- (and 1 more)
-
Agree with Mark, the bulkheads clearly are designed for two more stringers going down the port and starboard sides and that will stiffen the structure significantly and make the following steps easier.
-
Plank Bender....
vossiewulf replied to dvlp47's topic in Building, Framing, Planking and plating a ships hull and deck
Or use steam, you can even do it in the microwave, just wrap the wood in wet paper towels and nuke it on high. Then pin around a form and let cool. -
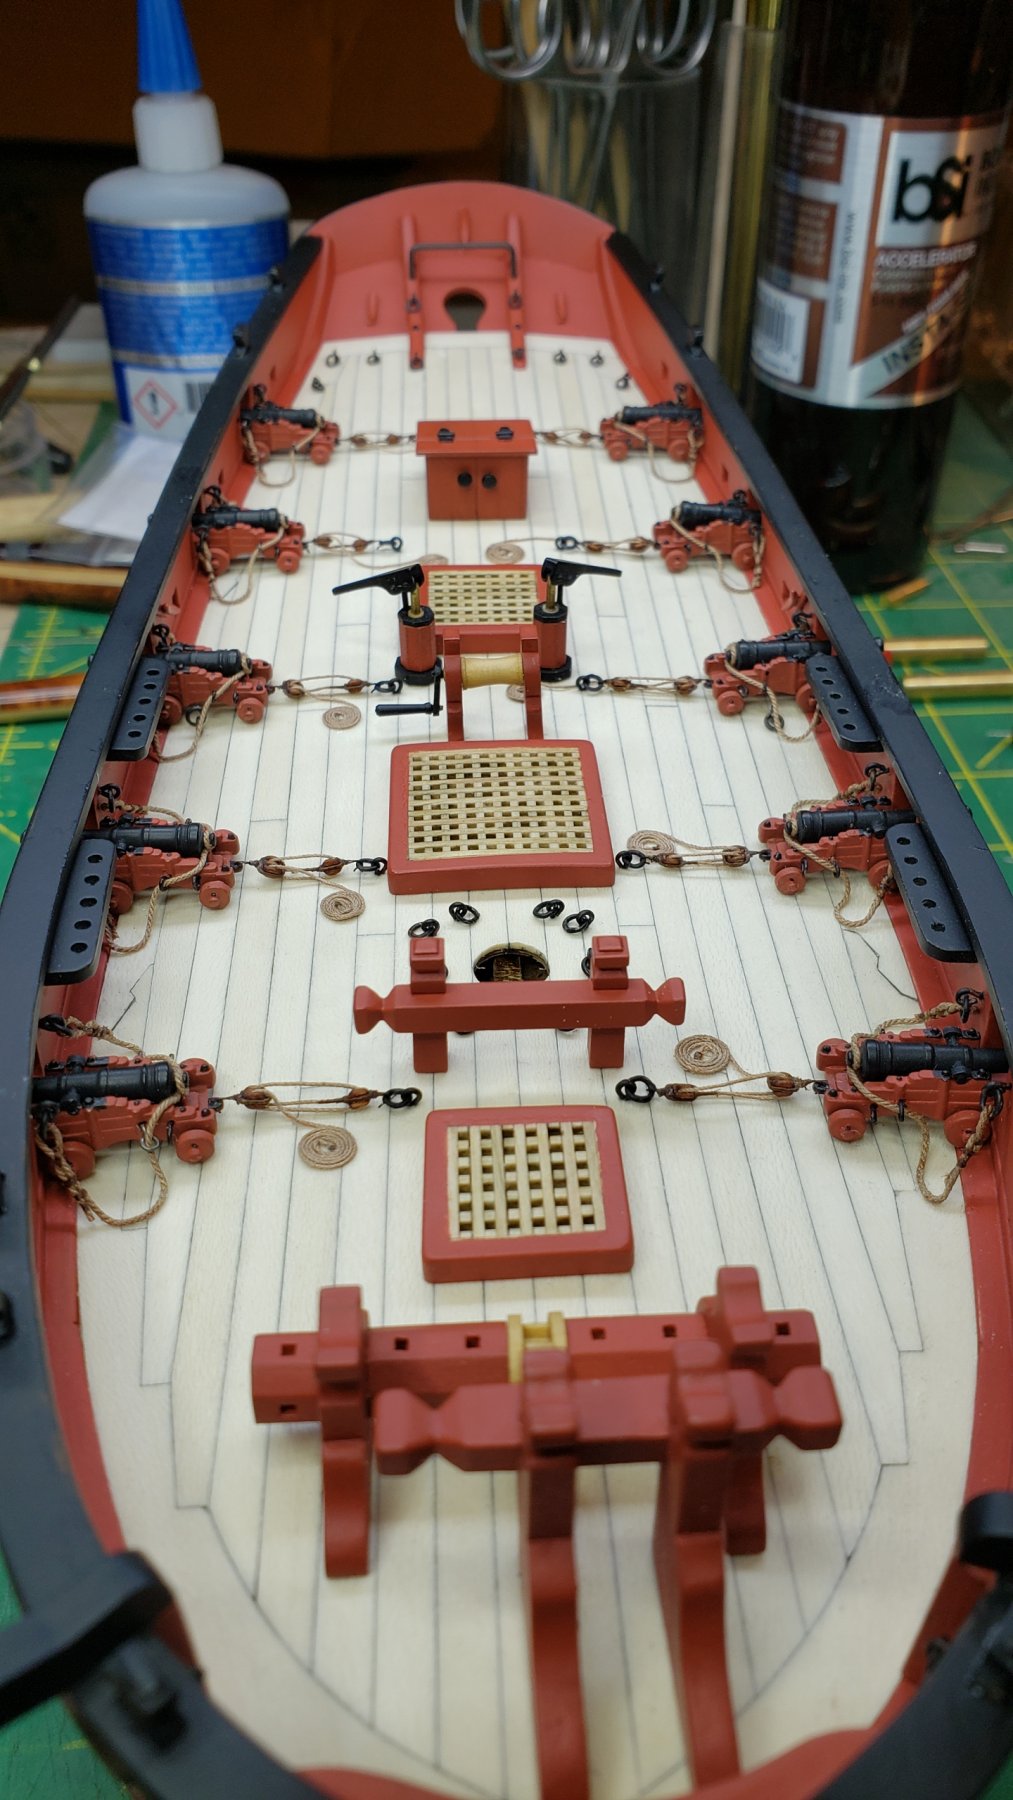
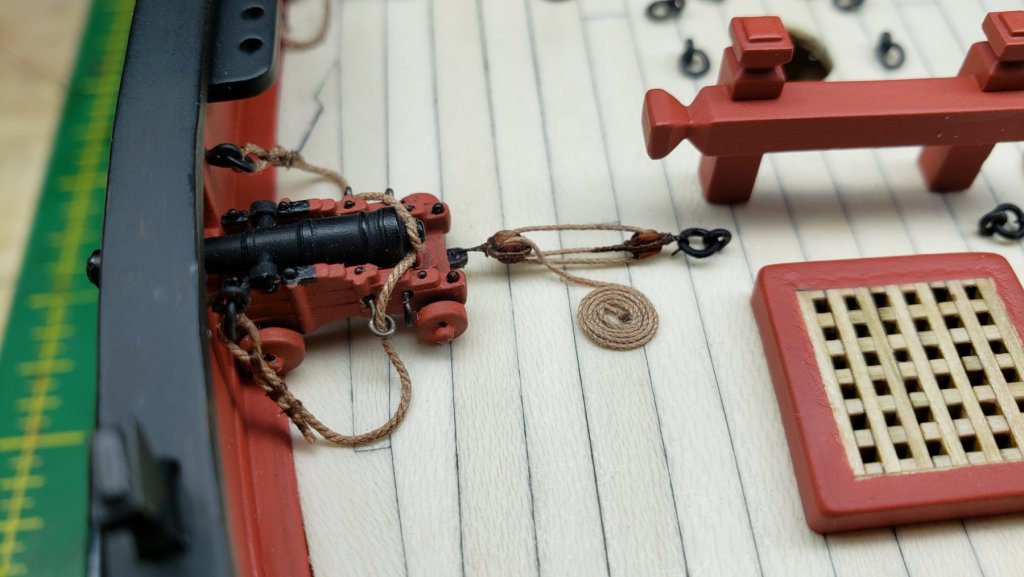
It was a significant pain in the butt to do it on my cutter, not least of which is that on LN the rings are too close to the carriages so I had to simplify the rigging. But in the end I think it looks pretty good, maybe you shouldn't give up on the idea just yet
- 574 replies
-
- 1
-
-
- cheerful
- Syren Ship Model Company
- (and 1 more)
-
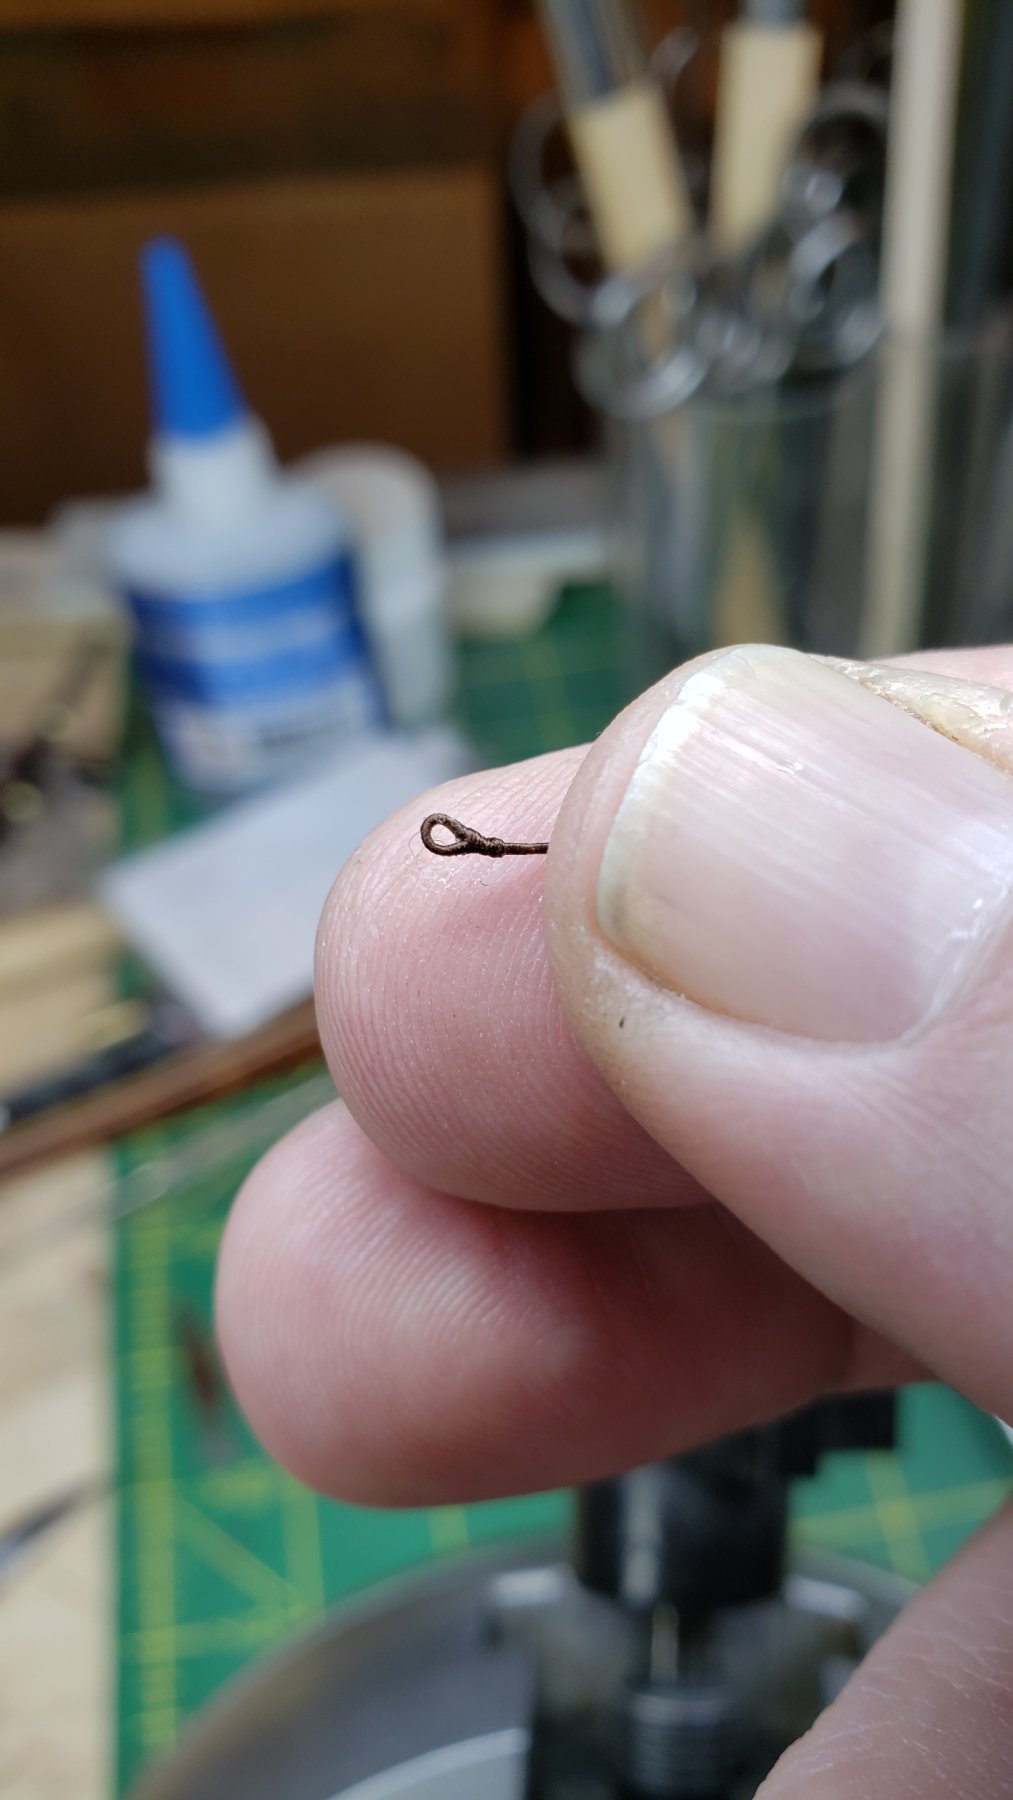
Working on the not simple rigging of the anchor buoys. I've made up the rings and six lines (one line on each side will double over to form the loop at the ends) for one buoy, so should be able to finish one and mostly finish another tomorrow.


- 714 replies
-
- 14
-
-
- lady nelson
- victory models
- (and 1 more)
-
Remember the primary red pigment of red ochre which was by far the most common red paint was iron oxide. Bright red isn't correct.
- 90 replies
-
- 2
-
-
- english pinnace
- Finished
- (and 1 more)
-
Byrnes Table Saw
vossiewulf replied to Jorge Hedges's topic in Modeling tools and Workshop Equipment
I don't know whether anyone answered one of your earlier questions, yes it makes total sense for blade dullness to show up first in ripping vs. crosscutting. Ripping is far more stressful because the blade is basically cutting end grain. Crosscutting is side grain and much easier. -
Pointzero Airbrushs
vossiewulf replied to grsjax's topic in Painting, finishing and weathering products and techniques
None with that brand, but I can say having used Paasche, Badger, and Iwata brushes, all airbrushes are damned squirrely devices, like the electrical system on old Jaguars. I have Iwata brushes now which are well made, but it doesn't matter- the ONLY way to keep them operating correctly is to completely disassemble the airbrush, clean every single part, and reassemble it after every single use. And you must have either thin pipe cleaners or the tiny test-tube brush style nylon brushes that are made for airbrush cleaning. Seriously, don't ever put one down without doing that. The nightmare of cleaning them once the paint has dried is a massively bigger pain in the butt. Don't think that when you spray thinner through it and it comes out clear that all the paint is gone, it most certainly ain't gone and is hoping you leave it there so it can totally screw up your next spray session. On the up side of course is that nothing can give you the smooth finish with fine control that an airbrush provides. -
Jo. although people are giving you good advice as to what to think about, my advice is do not go overboard with attempted precision in your first build. I promise your ship will not suddenly explode into flames if one of the bulkheads is one degree out from square, the worst that will happen is you'll have to taper filler blocks a little. It's always better to be perfect, but you need practice being basically accurate first and shouldn't slow yourself to a crawl trying for perfect. Speaking of filler blocks, I recommend you put them in between all bulkheads, I wish I had done so at first and not had to try to retrofit them later. I also promise that doing so will make your planking go much easier, with more accurate results and considerably less frustration about filling flat spots. That's one extra step that is in my opinion worth the time spent. Balsa is fine for this purpose and therefore very easy to sand. And I'll let you know if you need to answer me
-
MONTAÑES by Amalio
vossiewulf replied to Amalio's topic in - Build logs for subjects built 1751 - 1800
Or it could be just a trick to make us THINK he's human! All the while he's operating with those 8 arms Am I understanding you Amalio that you remove the dried glue with the nylon brushes turning very slowly? I've never heard of removing PVA glue that way and I've been using it for too many years. Interesting. -
Thanks Chris! I was mostly teasing Pat but I appreciate the kind words. I know, was just having fun giving you a hard time It's LIT m***********!
- 714 replies
-
- 1
-
-
- lady nelson
- victory models
- (and 1 more)
-
So many hours for "pretty good." Sigh Guns done, on to rigging the anchors. After looking at the pics, I'm not done with the guns, it seems the left side breeching rope eye on the pictured gun got turned 90 degrees somehow.

- 714 replies
-
- 17
-
-
- lady nelson
- victory models
- (and 1 more)
-
You don't really need to glue them at all against the bulkheads, just edge glue one to the next. If you feel you have to glue them, just tack them- use as little glue as possible in one spot which will make it easy to pull the bulkhead piece off later without damage. And this is a standard convention with plank on bulkhead ships, the upper parts of the bulkheads are just temporary forms for the bulkhead planking. Which itself will then probably be planked a second time from the inside.