Nirvana
-
Posts
5,458 -
Joined
-
Last visited
Content Type
Profiles
Forums
Gallery
Events
Everything posted by Nirvana
-

What brand of #11 blades do you use
Nirvana replied to bigcreekdad's topic in Modeling tools and Workshop Equipment
Just checked out Amazon for this purpose and there are options, look into the reviews and do not read the 4 or 5 star ratings , read the 2 or 1 and base your purchase on that. Prices are good all over board so it wouldn't be to hard to get some for trial purpose. Check out surgical tools as they can be useful for our building adventures. Edit: best part for us, even though you buy a 100 pack for some dollars they will last a long time as we can use them over and over again. And not dispose after one usage. -
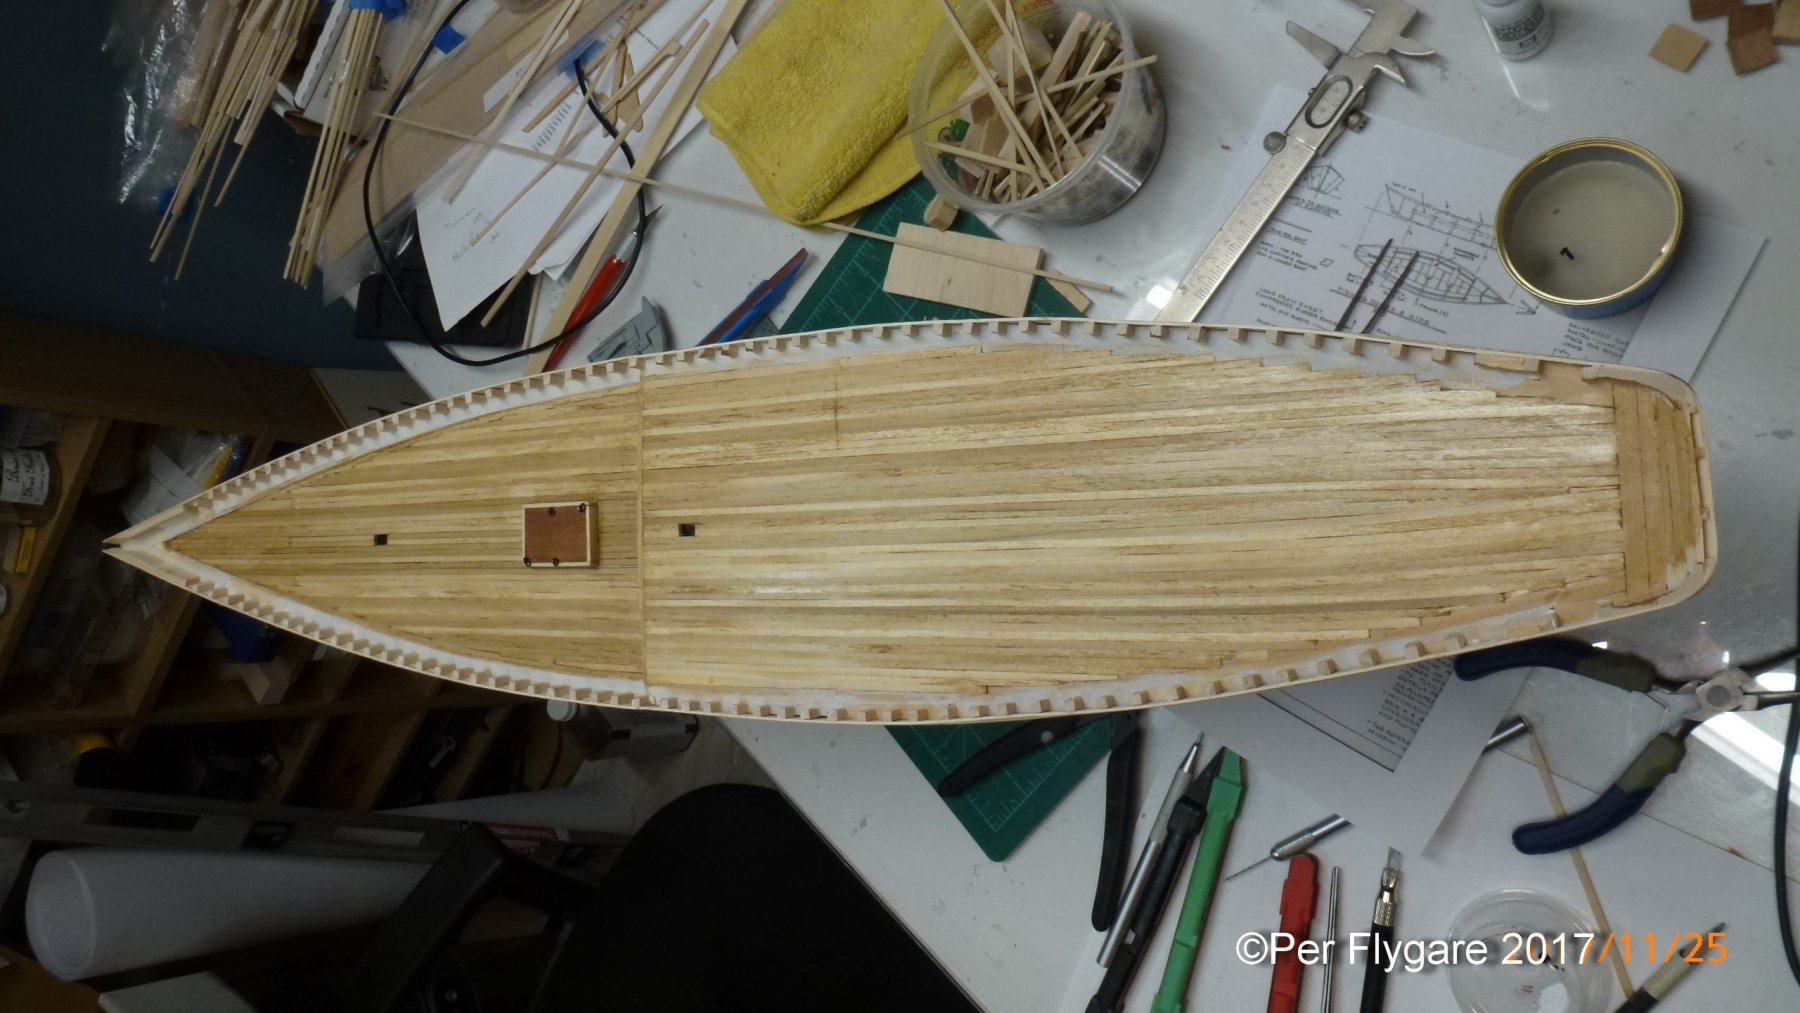
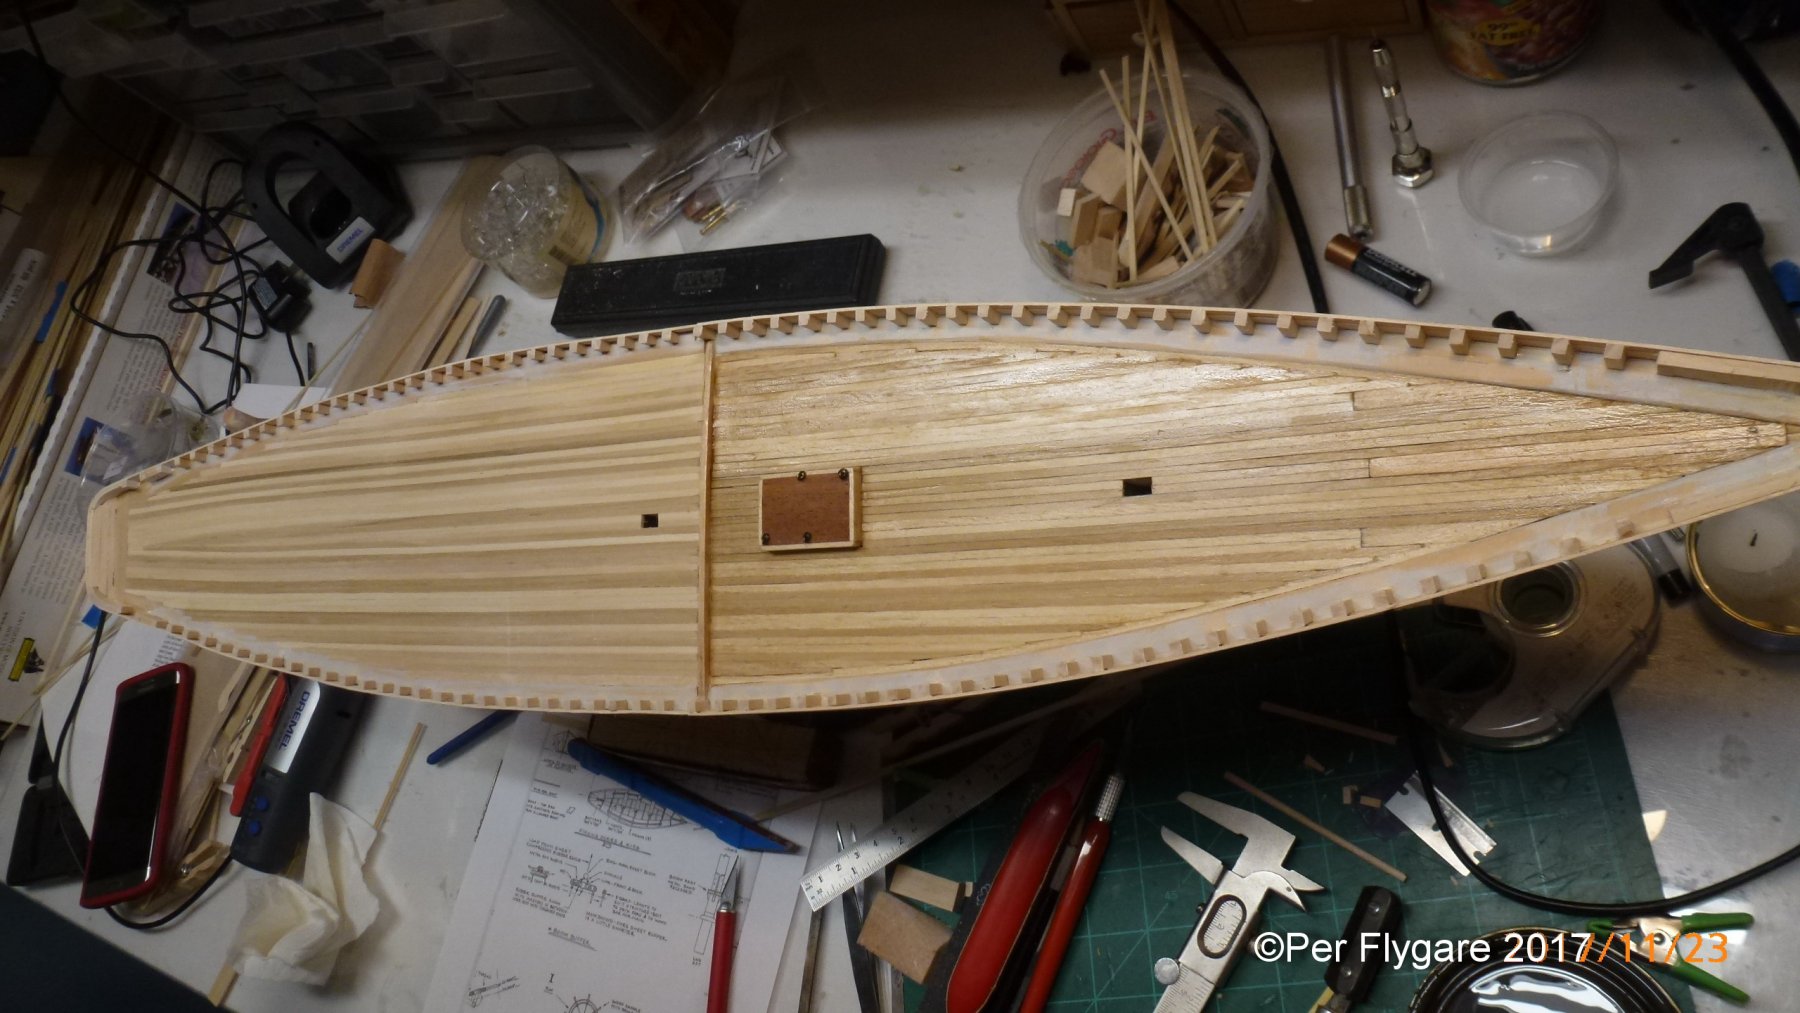
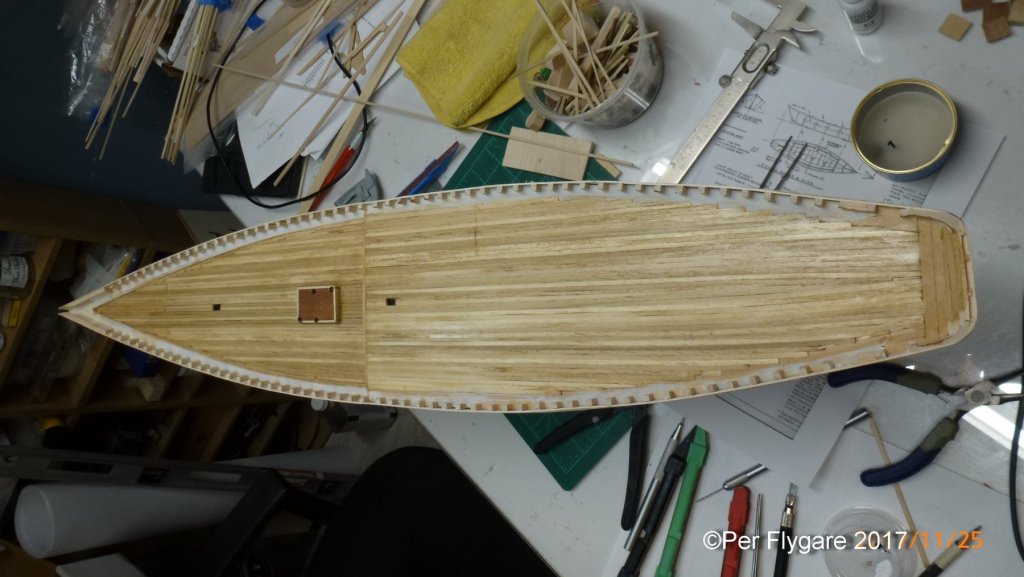
The buffer house is now completed with the buffer inserted, some touch up paint is in need. The part along with the rail is not glued into place yet, but I am pleased with the result. The over view of the decking is showing the second layer of varnish, I used golden oak which is very universal varnish. It's now drying and waiting for more add-ons.
-
Doug, then after battle there would be less to clean up........
-
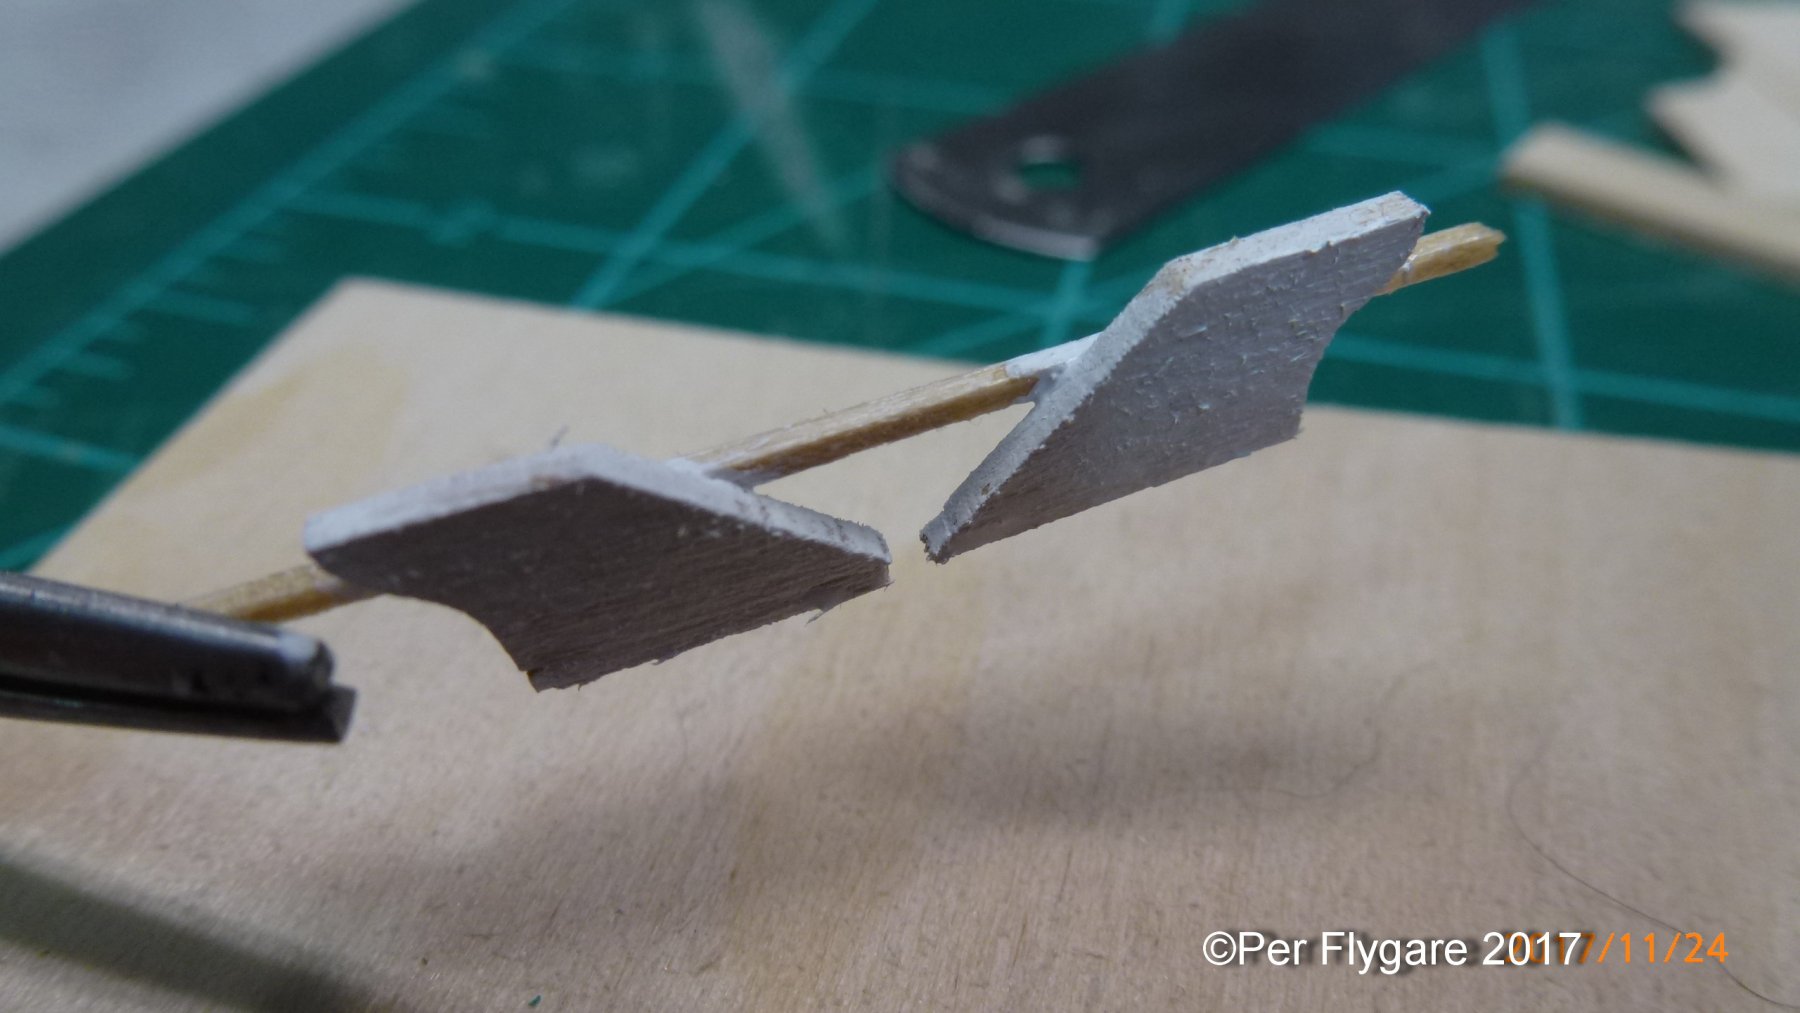
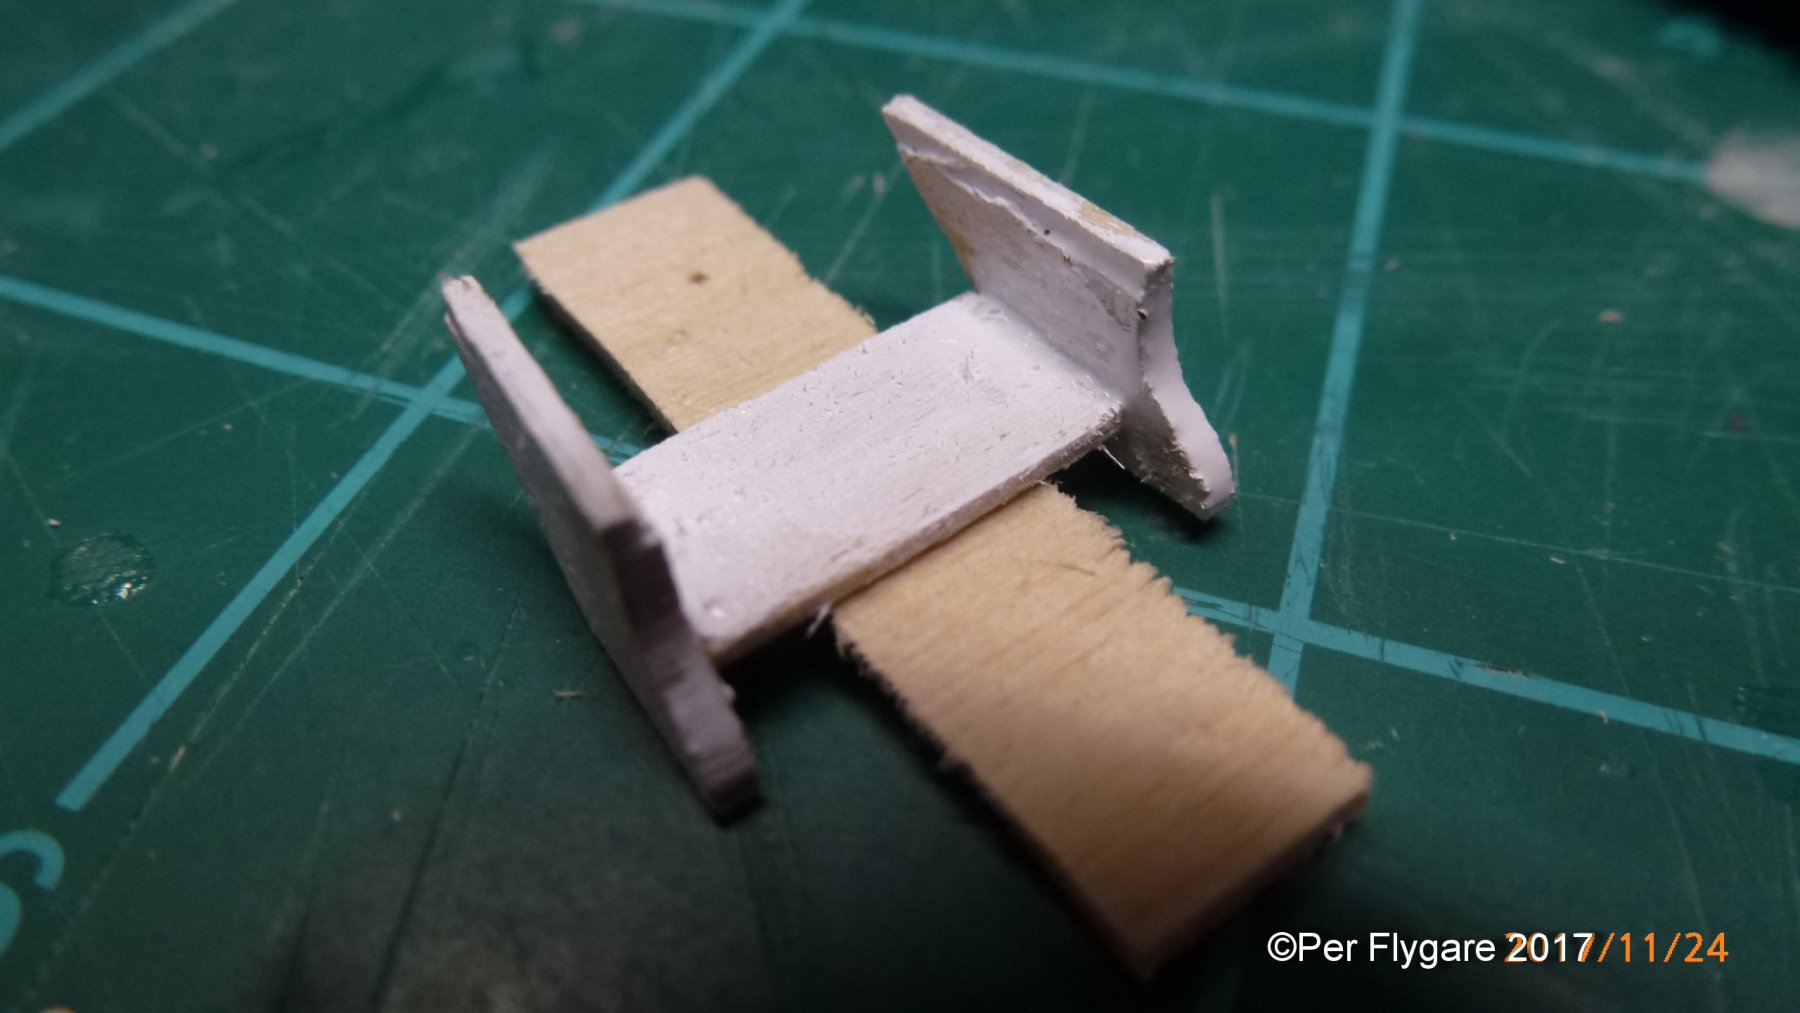
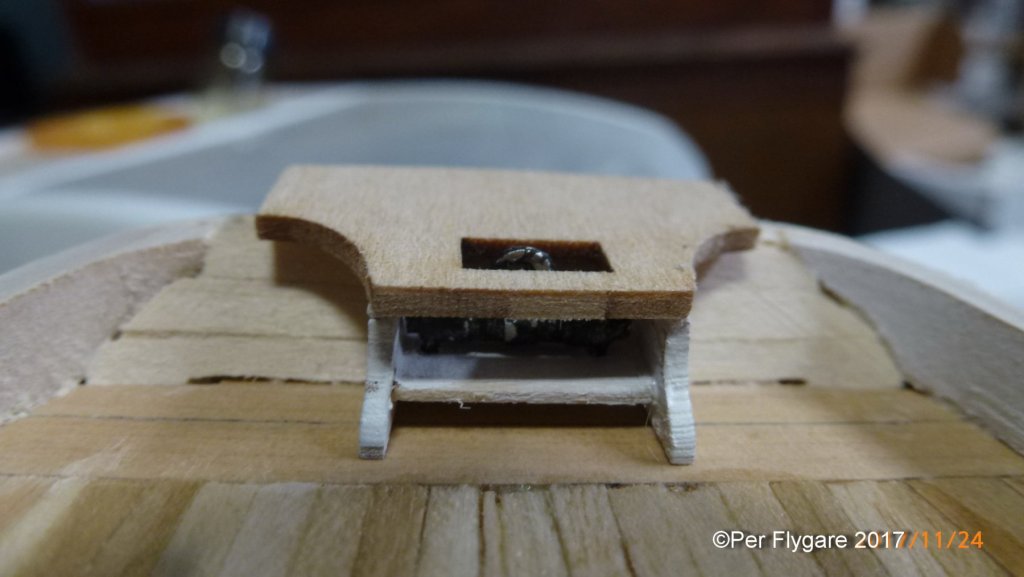
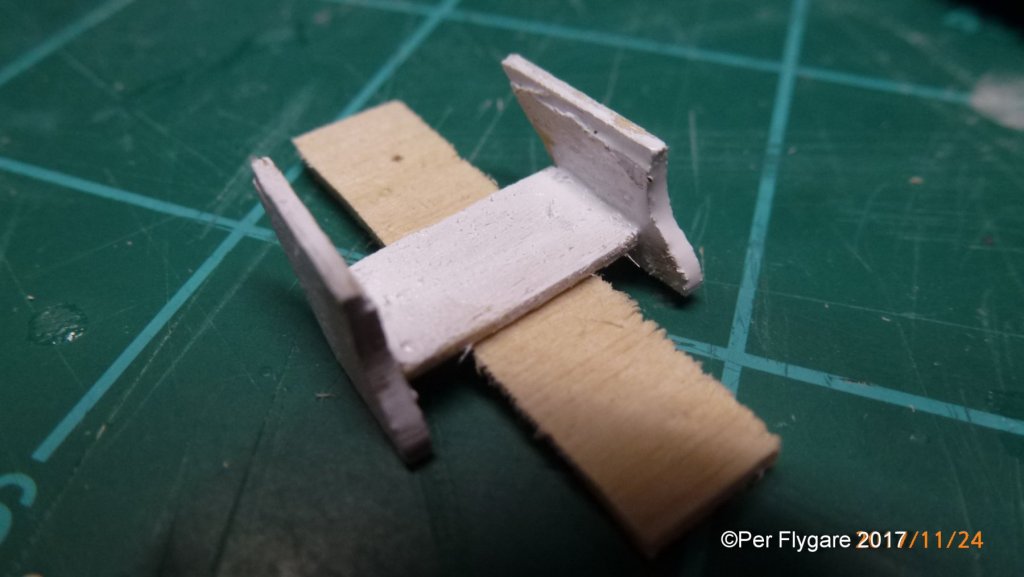
So there is always curve-balls thrown at us ship-modelers, and this ball at the stern has really got me going. For a while I was on my own creating my own boom sheet buffer. But I couldn't get it right so I stayed with the metal piece provided in the kit. However, the legs weren't long enough to have them sticking down into the deck as the plans were showing. Again, the think hat had to come on. And this is the outcome. Some extra sanding is needed and final painting too. Oh, I had to add some extra material on top of the side parts as they were shorter than the stern piece.


-
Doug, I am okay with it, the nibbling was a challenge and with the varnish the flaws are showing up.
-
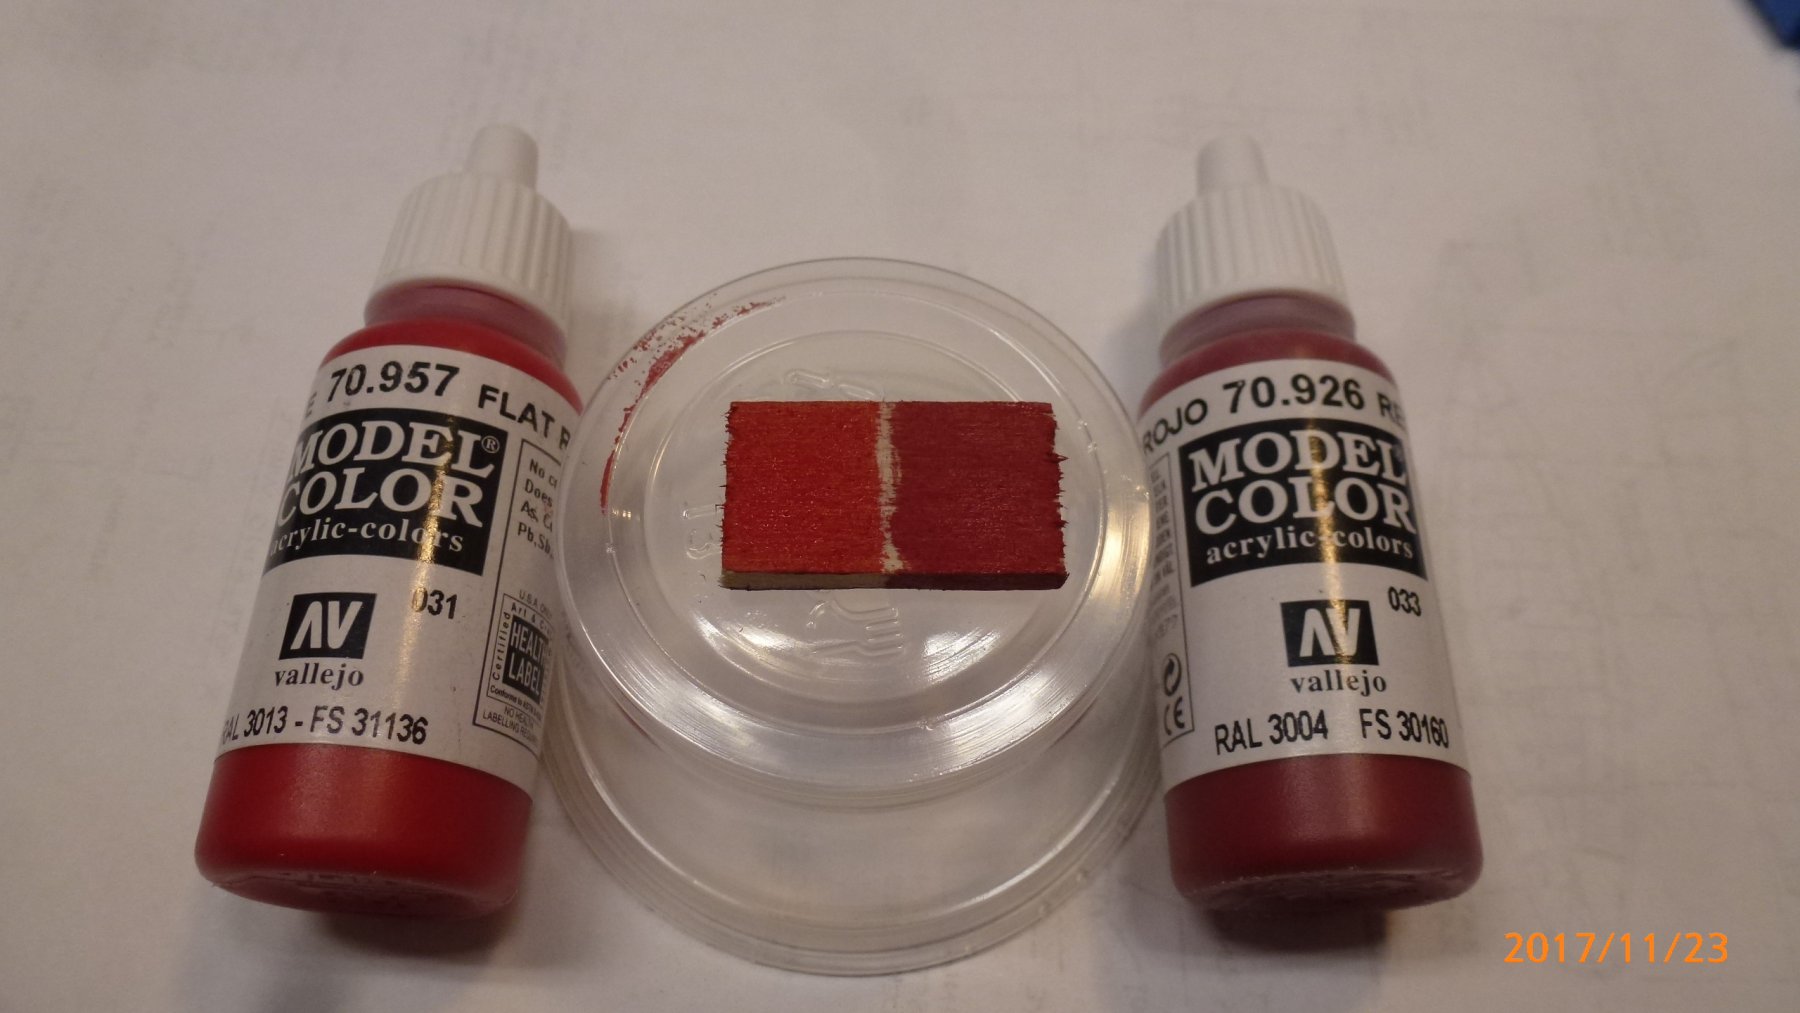
While I am waiting for varnish to dry on Bluenose I tried out the red colors I have available. I think I found my red color. It's the one to the right, I will make a try of mixing them as well. Could probably turn out nice.

-
So I tried various varnishes for my deck on separate planks. Fell for one that enhanced just a notch, here is the fore-deck still wet. I think together with the grey waterway and white inside of waist and stanchions it will turn out okay. This is a lighter varnish, and maybe gives me a chance to make it darker if I like.

-
Derek, thanks that makes me feel better.
-
Mike, I don't know about the new sails..... little to bright in my opinion, I do like the original as it gives some character to the Brigantine.... but it seems that the restoration is coming along nicely.
-
Floyd, great update regarding the Syren..... I like the story from the last weekend. Sorry that nobody understood that Syren is powered by the wind.
-
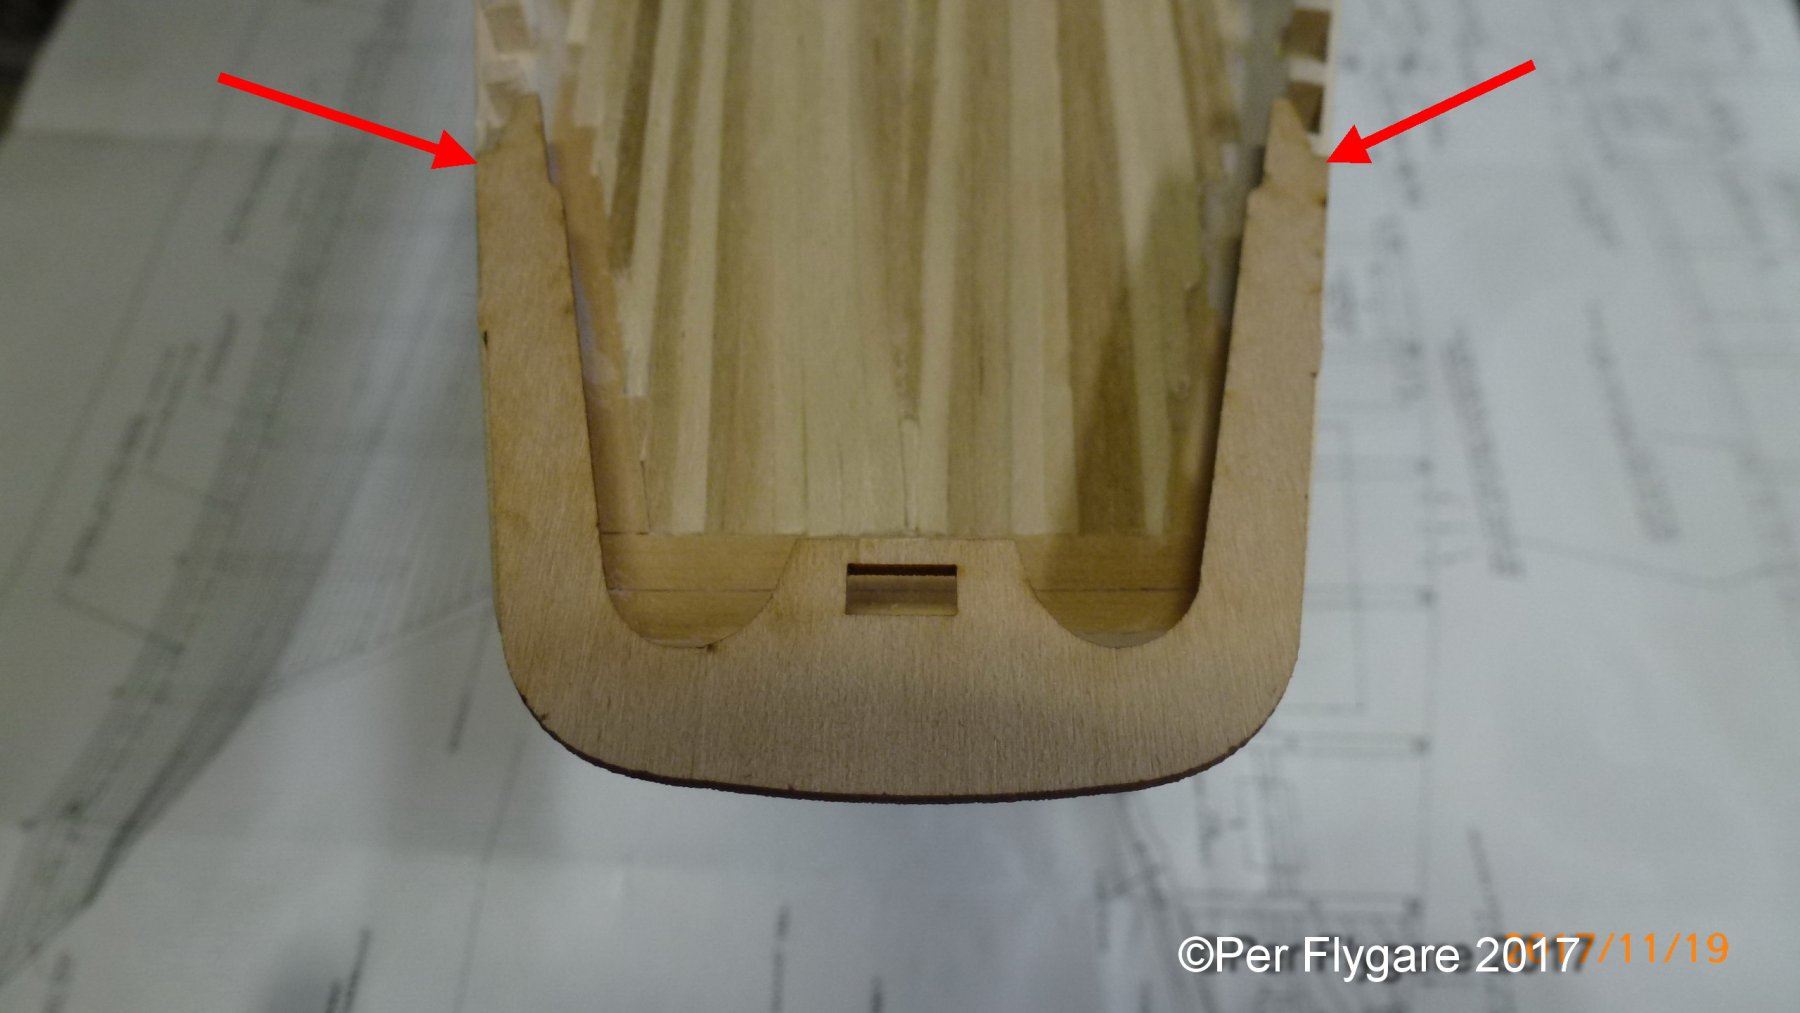
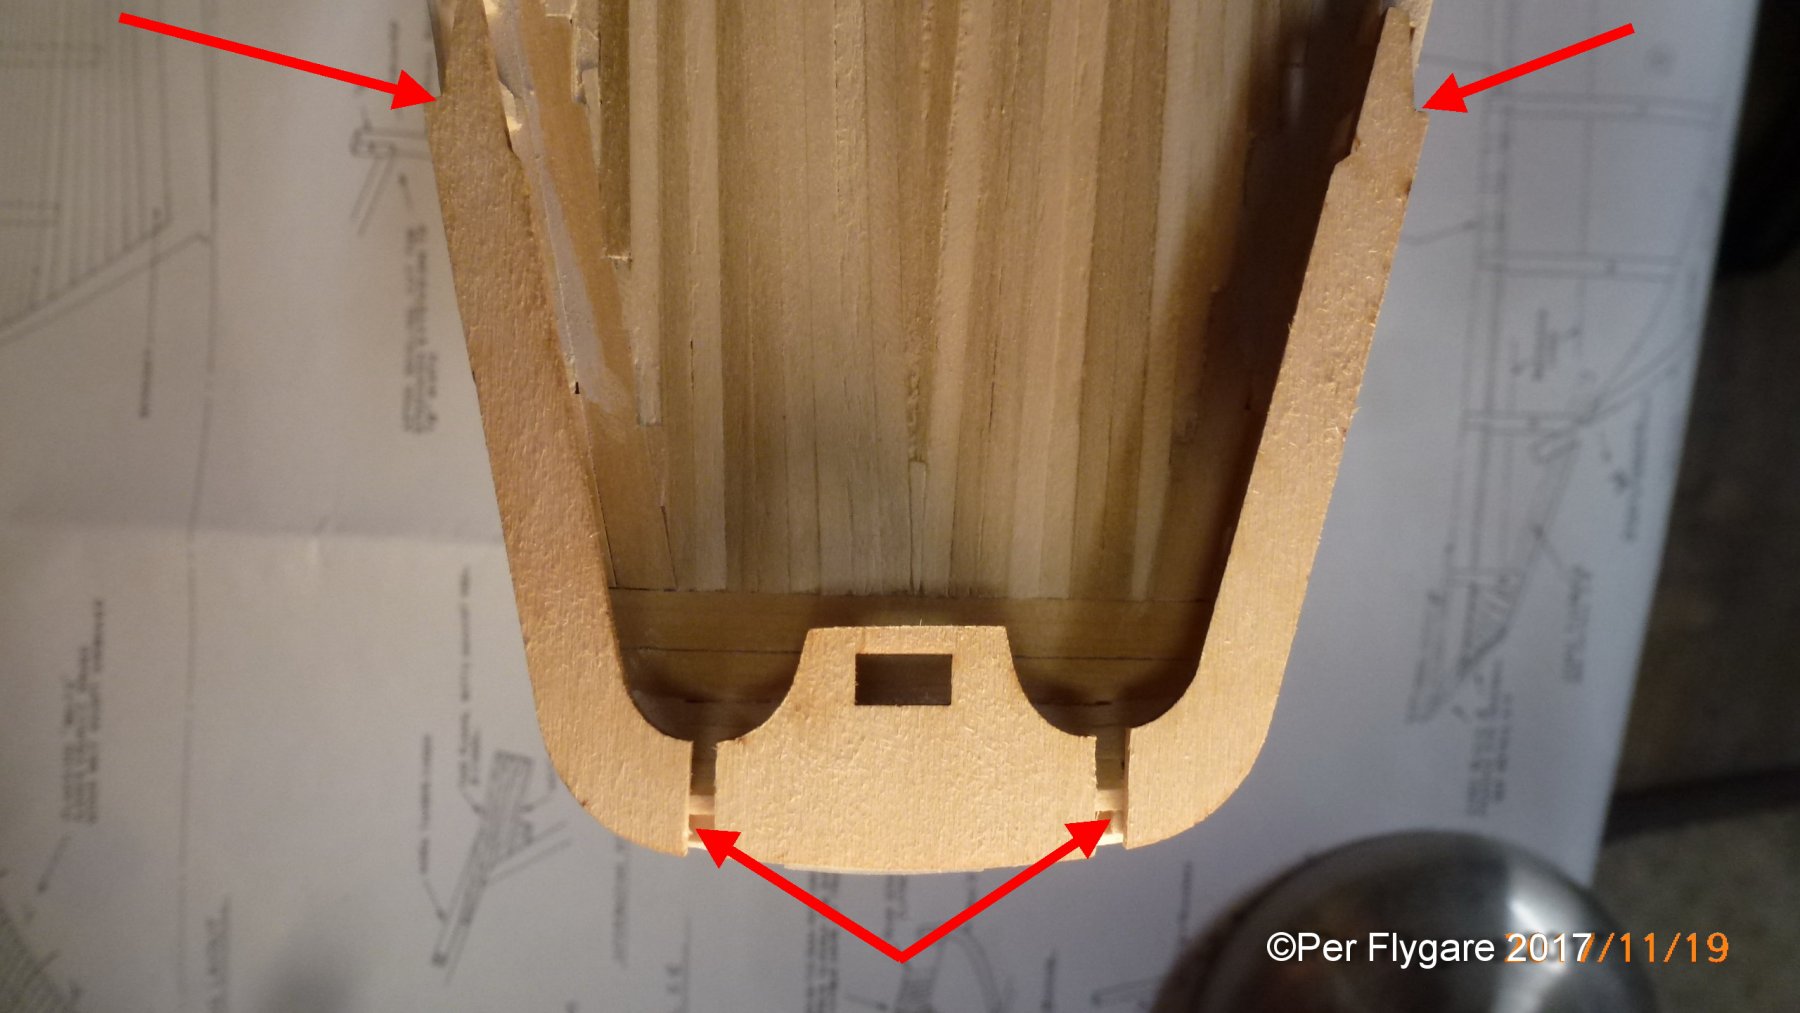
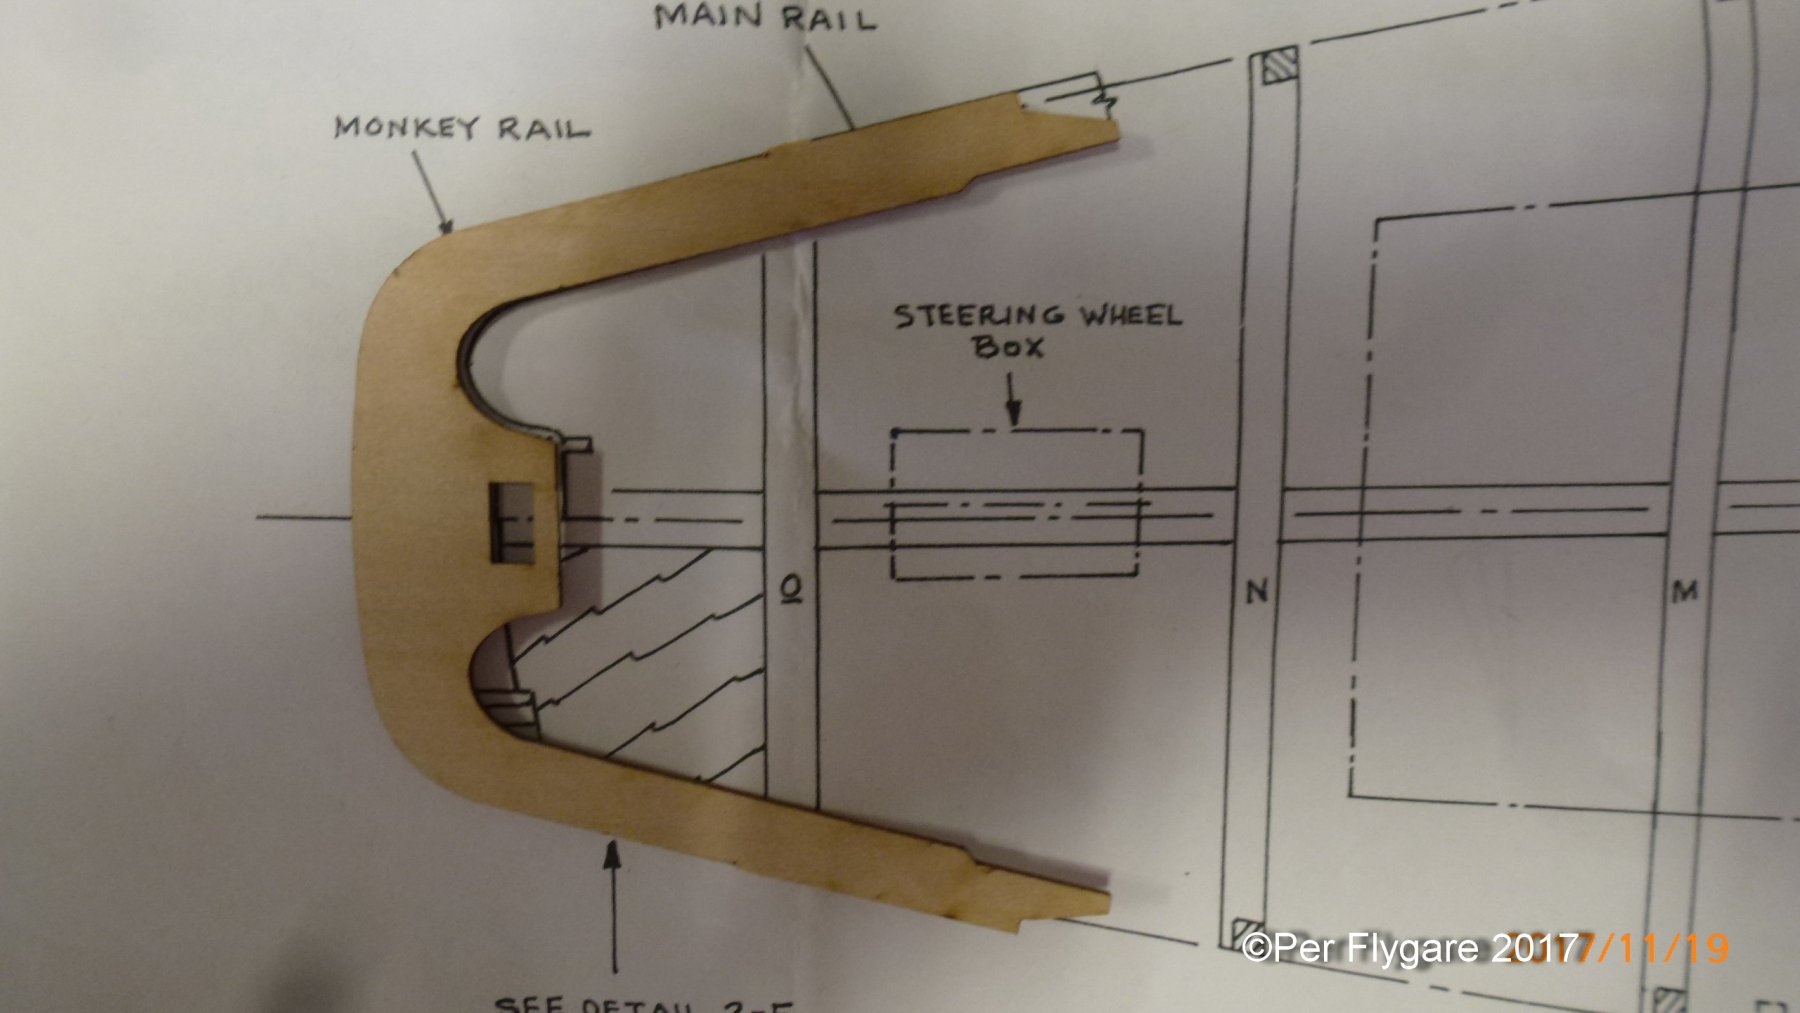
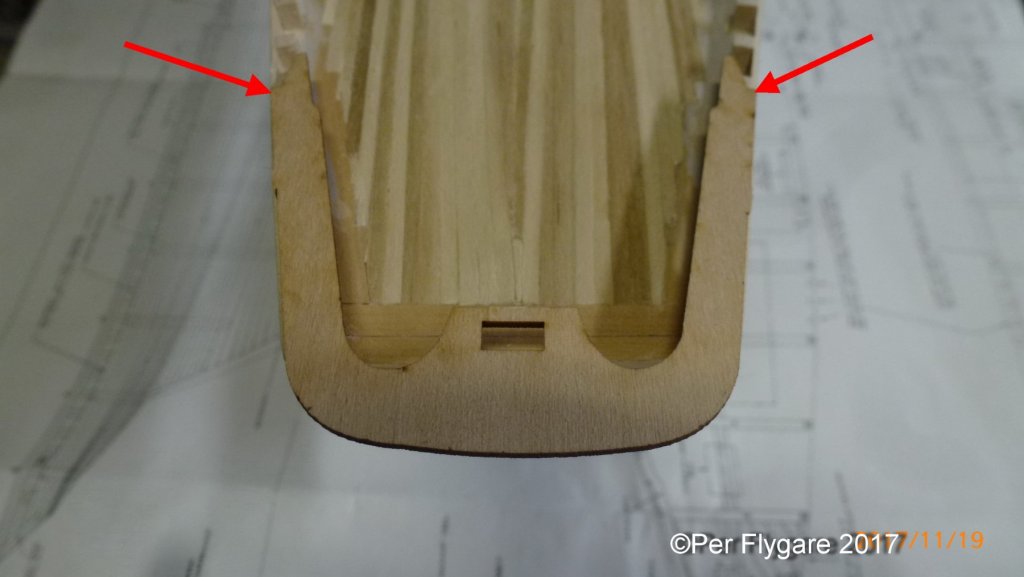
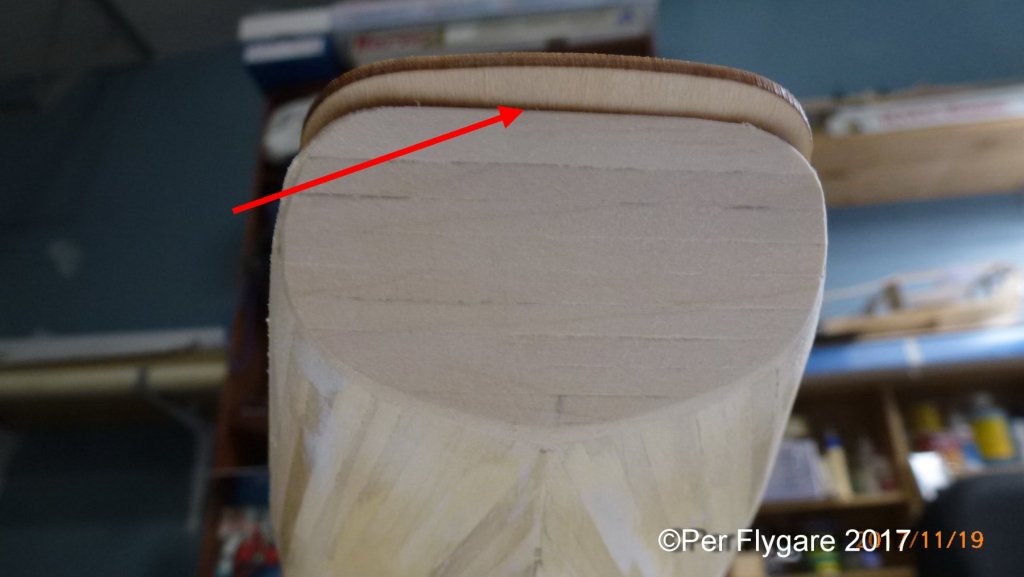
Hmm, so it seems that my bluenose got a little fat stern area... Nothing that can be fixed. First I checked the laser piece towards the plan, and found it accurate. Well, placing the piece on the ship and I saw she was wider than I thought, must be all the ice cream consumed while modeling When doing so having the main rail part on the stanchions, I can have it flush with the waist without any overhang, but this will give her a large lip instead. My solution and this was the easy way out instead of making a whole new piece. I made two cuts into the part, and then will create fill pieces. Once painted only I will know along with everybody else following this thread. This way there won't be a lip but also I will get the overhang I am looking for. Pictures are exaggerated.


-
Maury, As I read your last posting, and looked at the background..... the masts are surely plumbed. If you wouldn't had mentioned about the window, I would had said something about it. Looks nice.
- 525 replies
-
- 2
-

-
- anchor hoy
- hoy
- (and 1 more)
-
Mike, Where I work we have a display for our company's small gifts, when I realized maybe I should look up the length of Confederacy. Total length of her is 35" the display we have is 40" and it's huge!' I have no idea where to put such a display. Fortunate she is not carrying full rigging!
- 843 replies
-
- 2
-
-
- niagara
- model shipways
- (and 2 more)
-
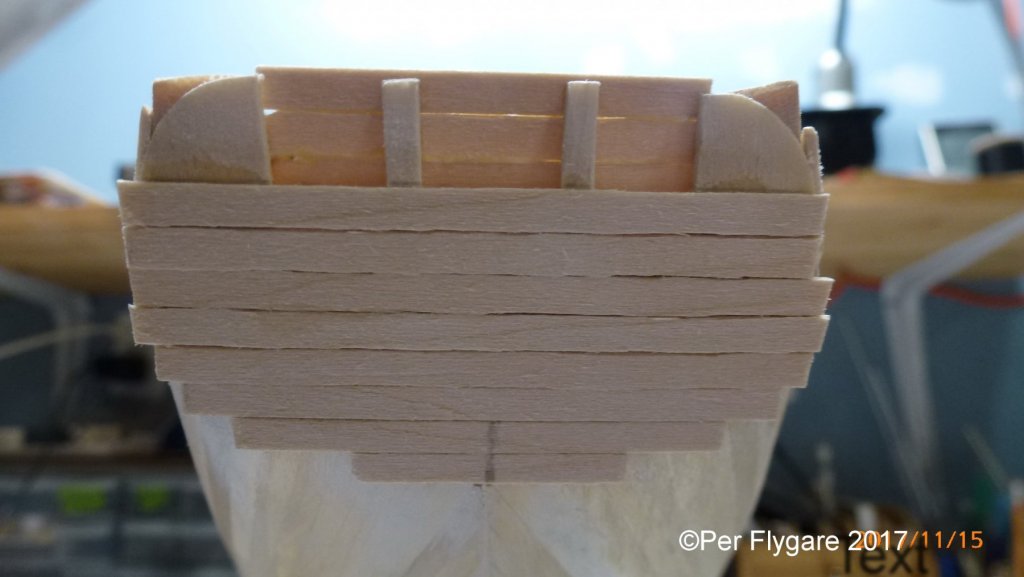
Getting closer to final "dressing" of the stern planking. The planking is certainly in need of putty and sanding to get that smooth surface Bluenose is in need of.

-
Gary, very nice pictures. Something interesting I am seeing though in the last picture with the masts is the rake. I did experience the same thing as the distance where the mast are setting in the deck versus the top of the masts. Maybe it's an illusion in your picture and the distances are the same. But for me the distance are different, it's not much but it's noticeable.
-
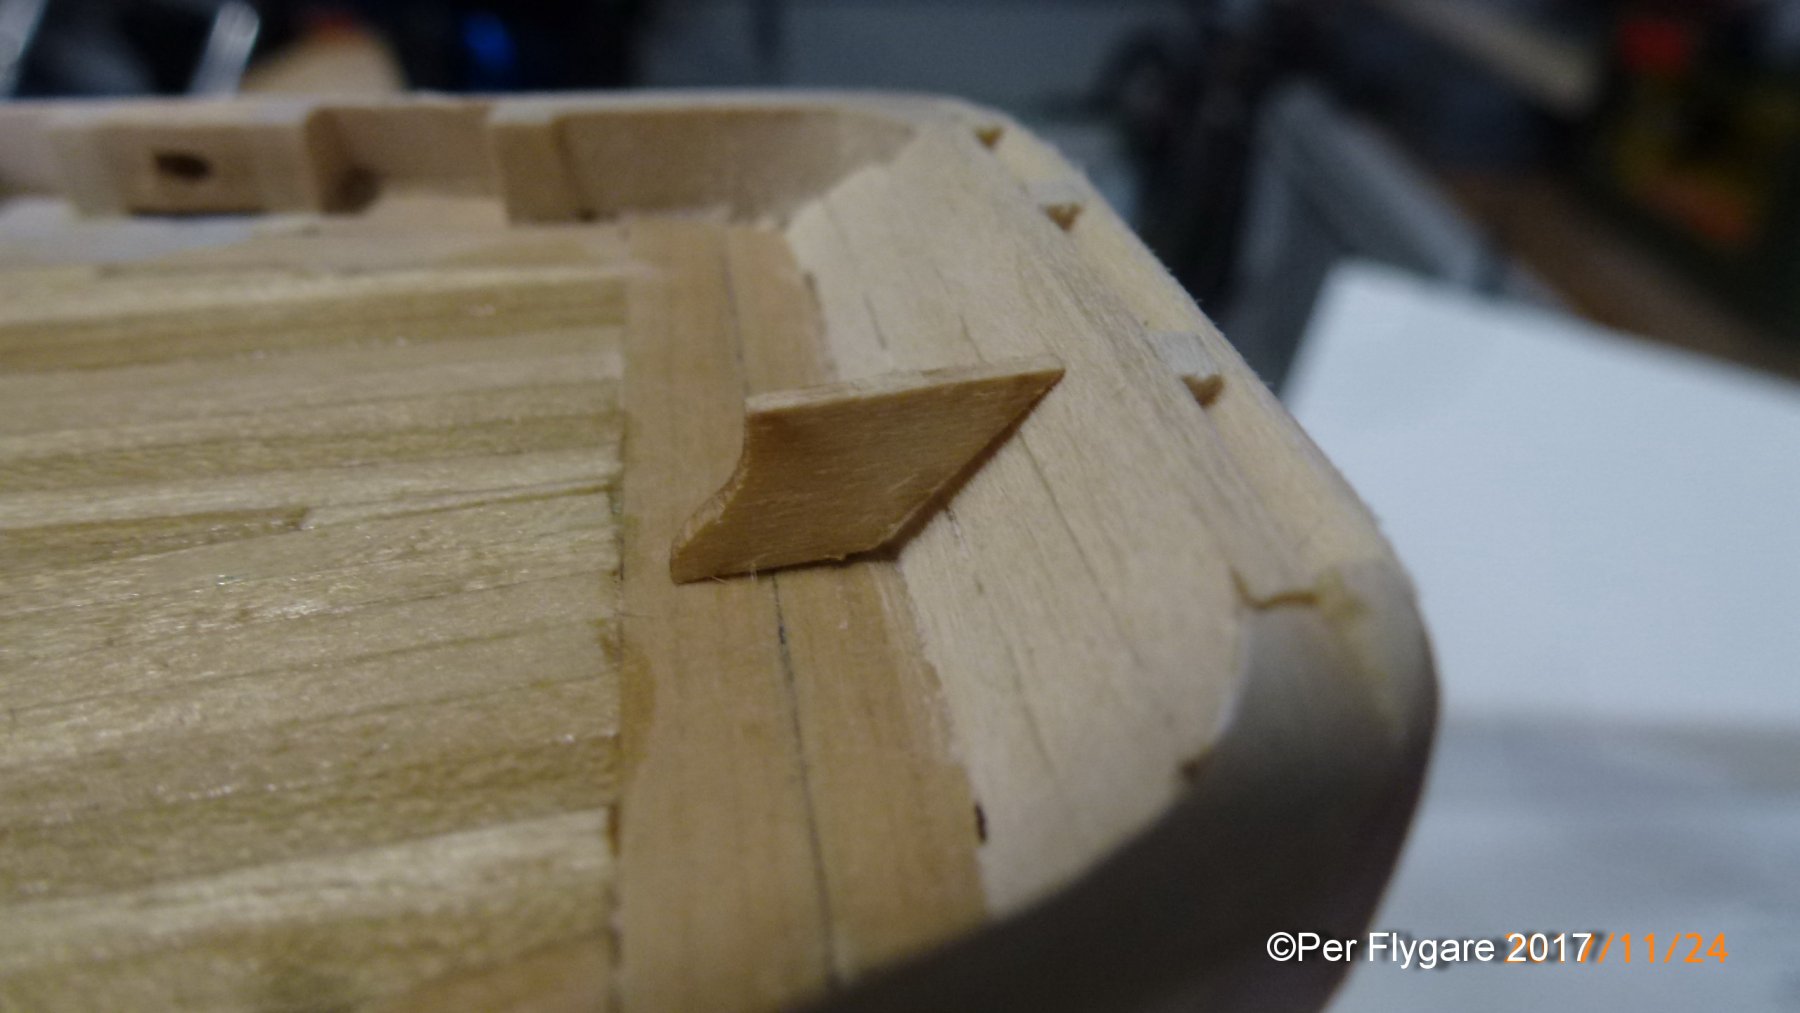
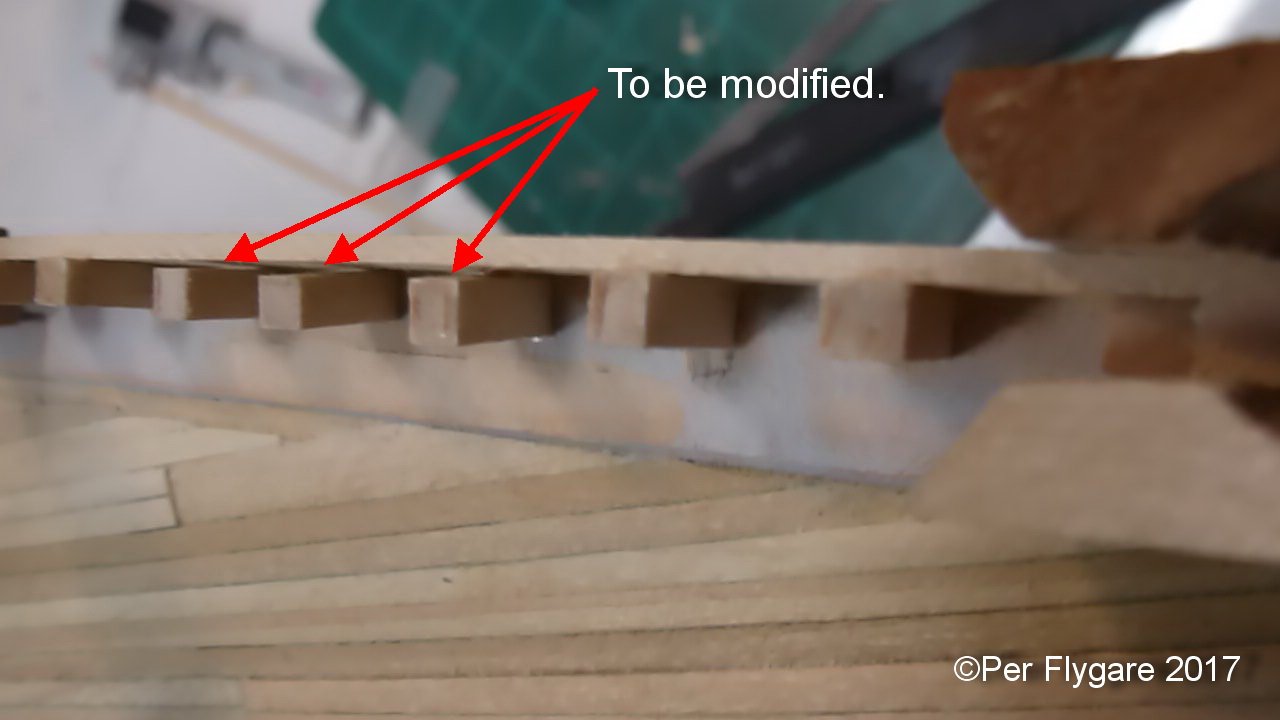
Derek, you are absolutely right, those inserts has to be a little wider since they are not cut at 90 degrees. Brian, the inserts between the bulkheads are to be shaped according to the hull line. See my previous picture.
-
Mike, if the case is to big for the mantle, then what is plan B? And what will you do instead?
- 843 replies
-
- 2
-
-
- niagara
- model shipways
- (and 2 more)
-
William As we say in here at MSW, this is no race...... three years are nothing. And a big welcome to you!
-
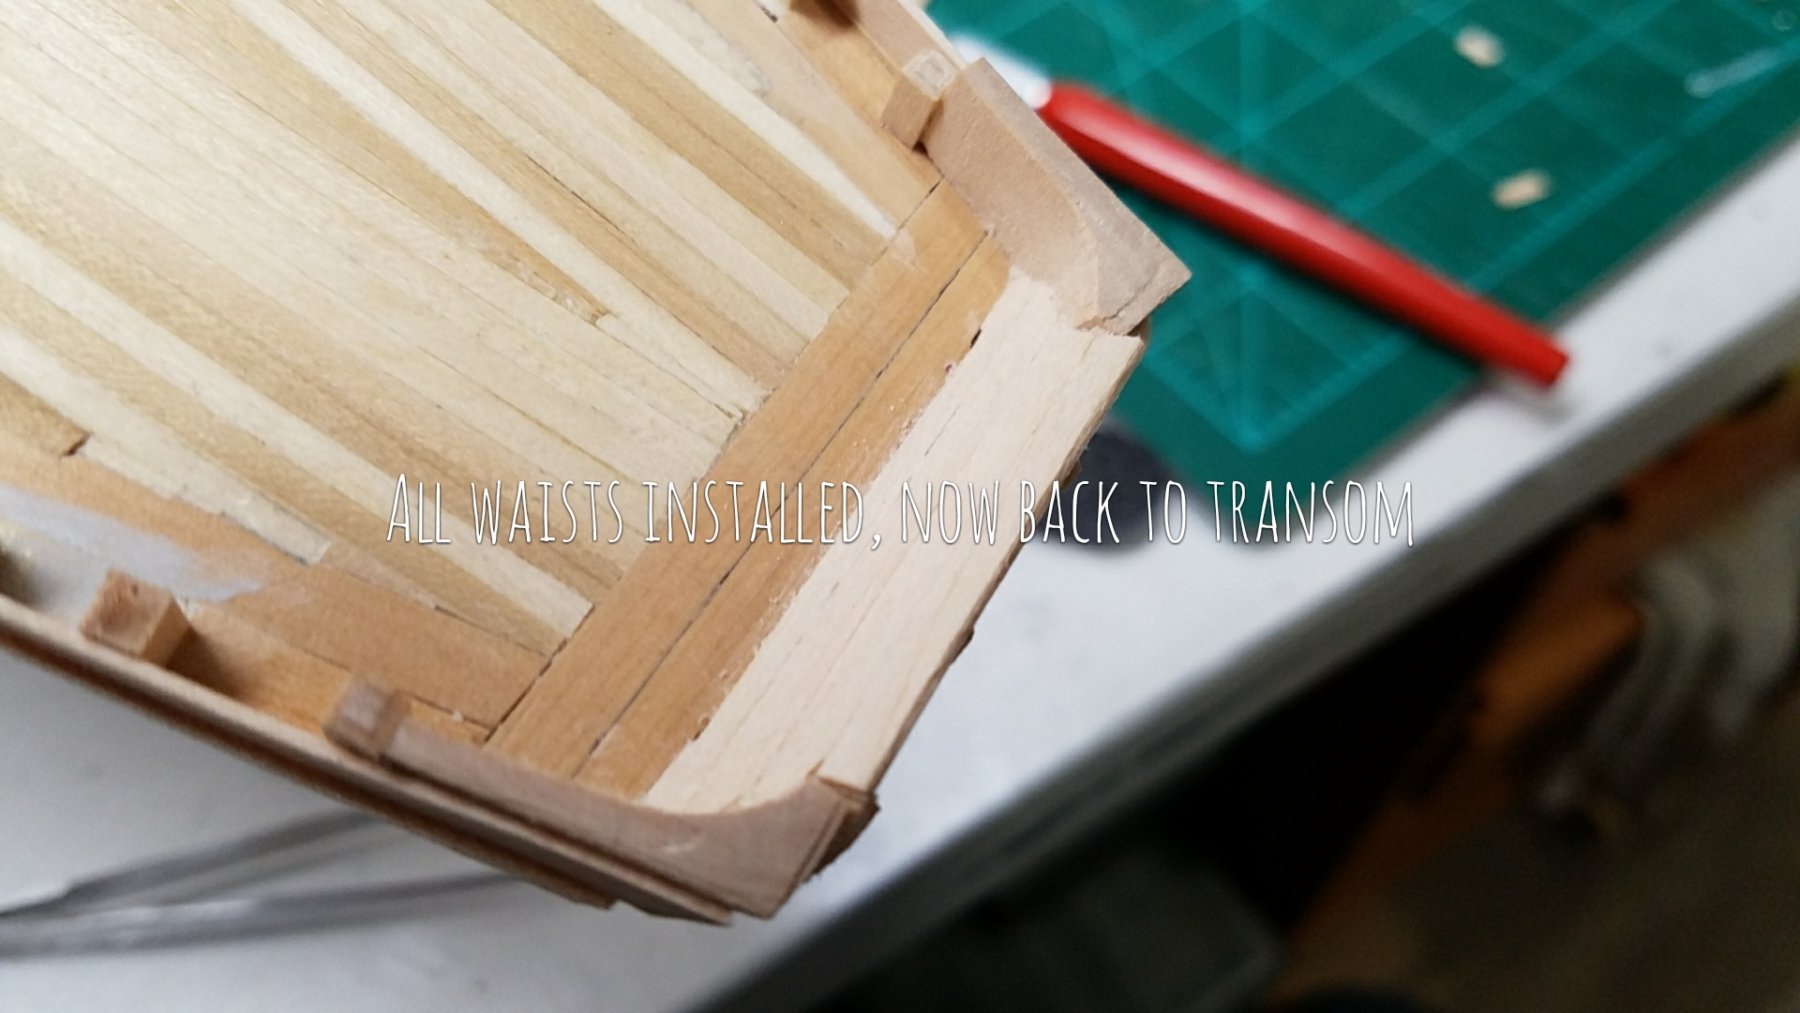
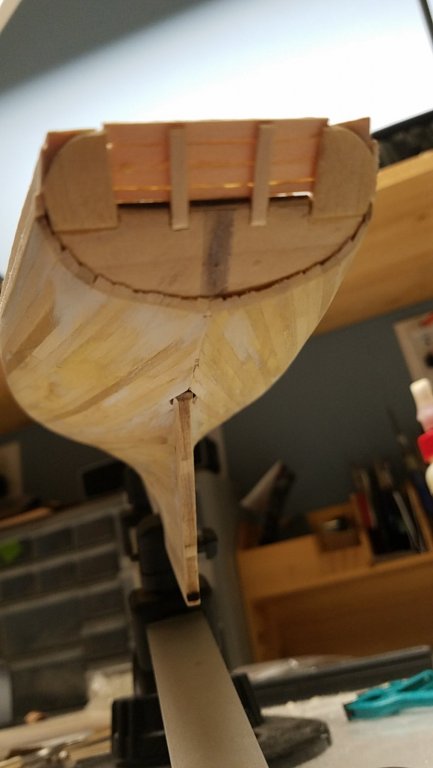
I have to make sure I do a backup of pictures for build log, this as I use both regular camera but also the phones camera. Update from last night. The interior stern planking is completed. And I didn't break the posts. Remaining planking of transom/stern is now in progress (not for the moment this hour)

-
I have bought kits from Cornwall Models as well, without paying duties. Real good selection and fast service. One time I bought items from ModelExpo and Cornwall on the same day, guess which package I had faster.
- 50 replies
-
- 1
-
-
- artesania latina
- Virginia
- (and 2 more)
-
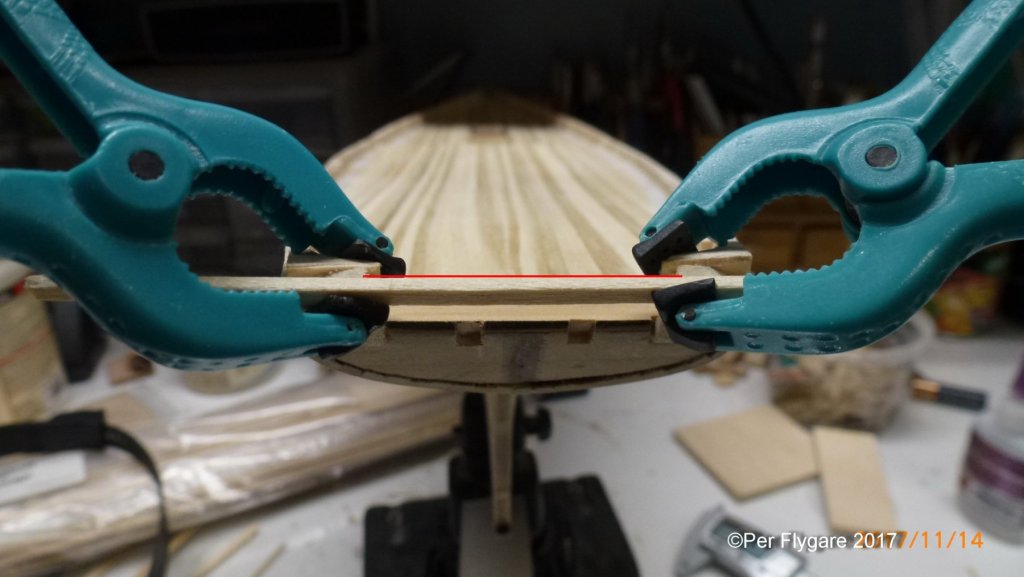
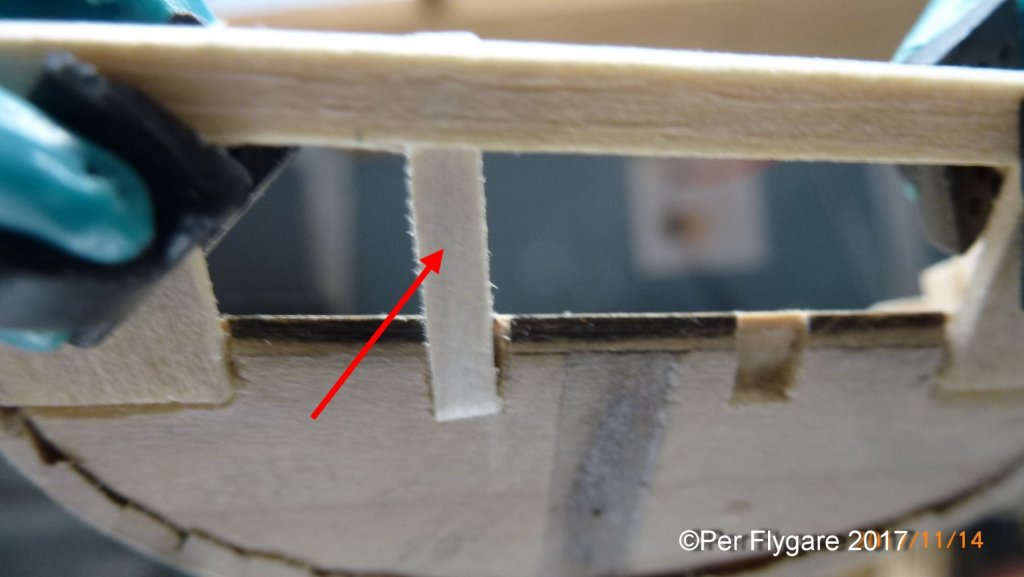
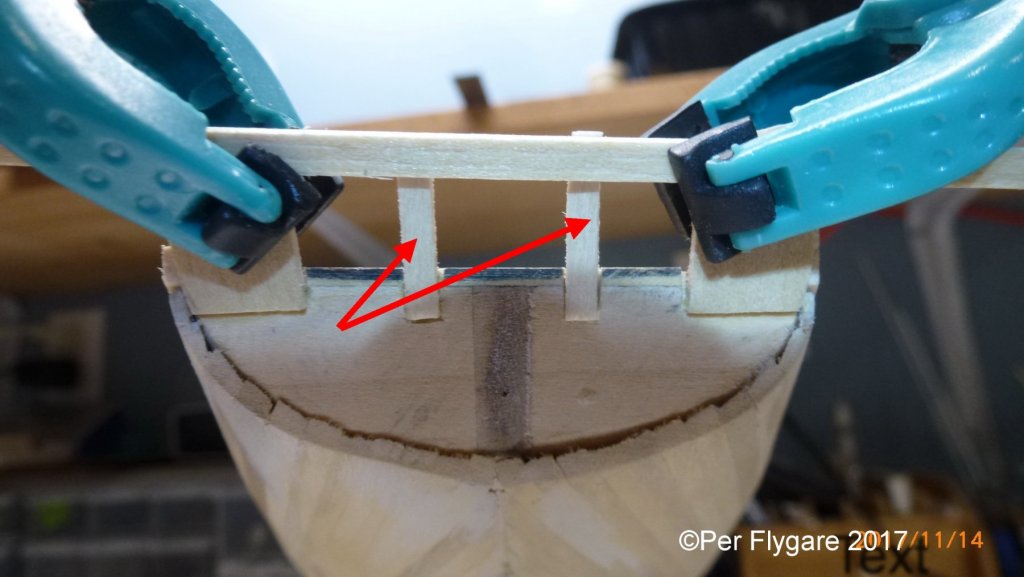
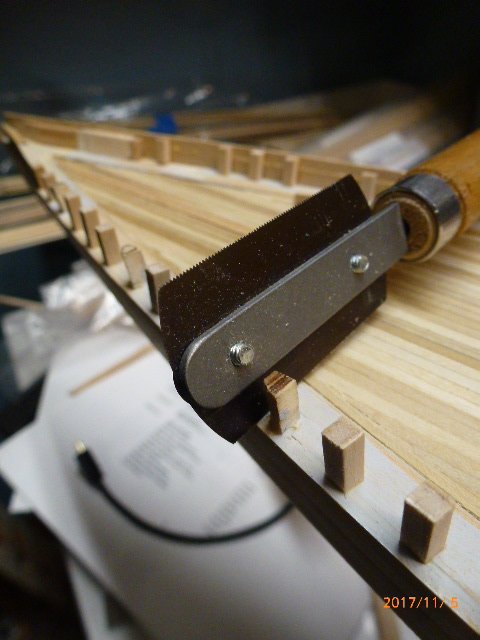
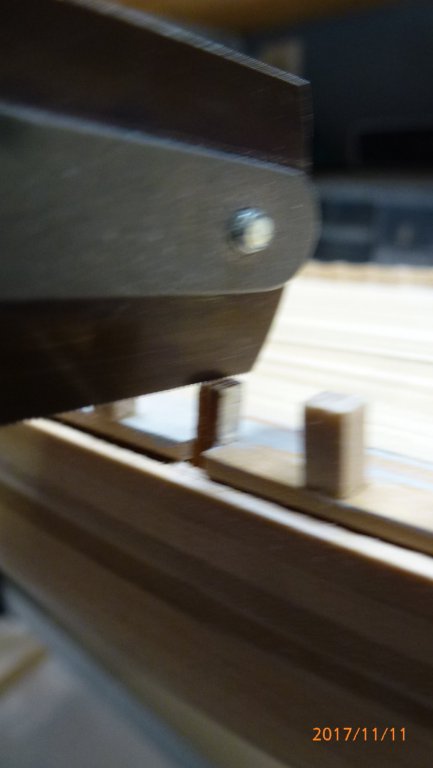
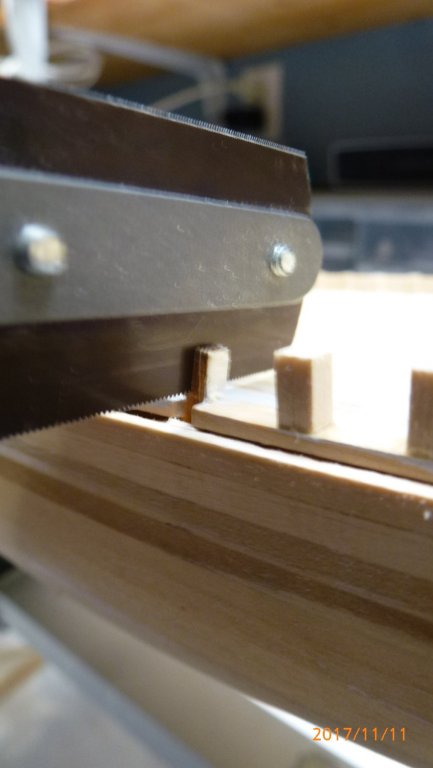
Mike, I bought that saw from UMM-USA. Back to the stern construction. There are two post to be added at the stern, I saw how they are installed they would be prone to break off once installed. So I used this lateral plank for support. Having the notches cut out I dry installed one of the post just to get a verification this was getting somewhat right. Then it was just to add the glue and have them put in place. Once the glue had set in a little I corrected the angle of the post to left. I will use this setup and plank the inside first, doing so will create a sturdy area for exterior planking.
-
Derek, with the aftermath I would have installed the waterway planks first before planking the hull. But yes, I had to do some pre-bending of the full length waterways as I used boxwood. If I would had used the provided basswood this wouldn't be necessary.
-
After installing the waist planks I had to adjust some of the stanchions, as I didn't a clean glue contact. It's kind of obvious in this picture.

-
The way I cut out the bulkhead tops was using my microsaw, cutting the tops into three pieces and from there using a cutting plier to remove the pieces. This way I got a somewhat clean cut.
-
Peter, That is clean planking. Hope I can accomplish the same once I get there.
- 242 replies
-
- 2
-
-
- syren
- model shipways
- (and 1 more)