Search the Community
Showing results for tags 'xebec'.
Found 18 results
-
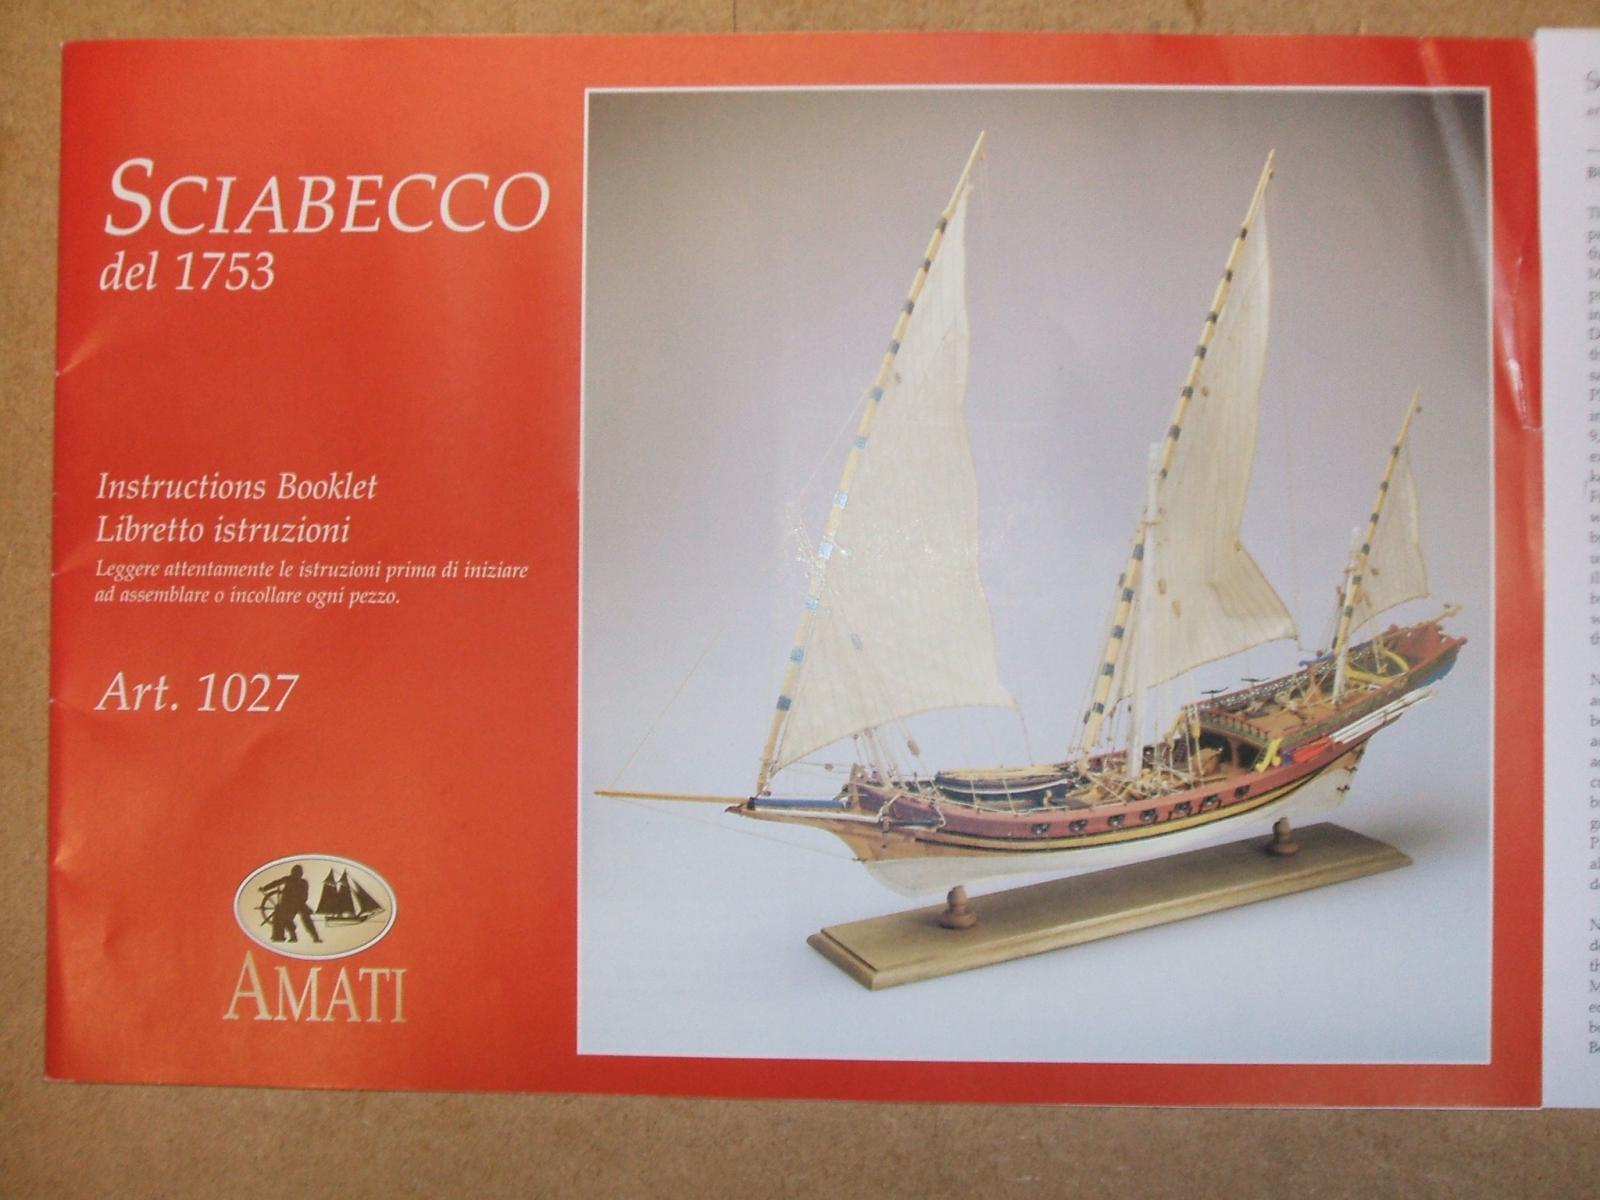
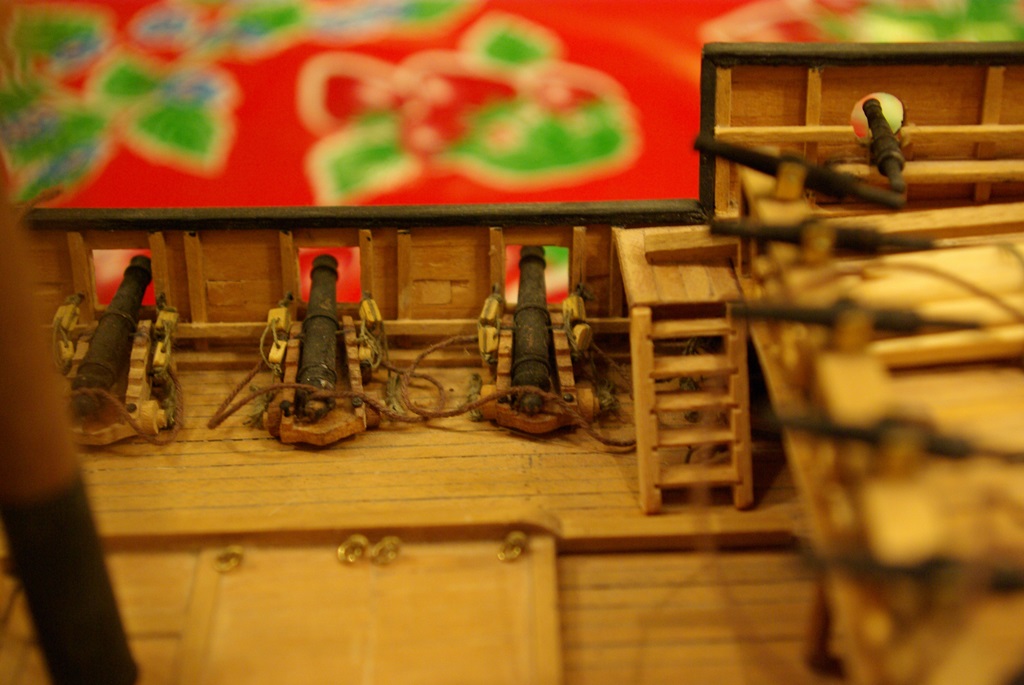
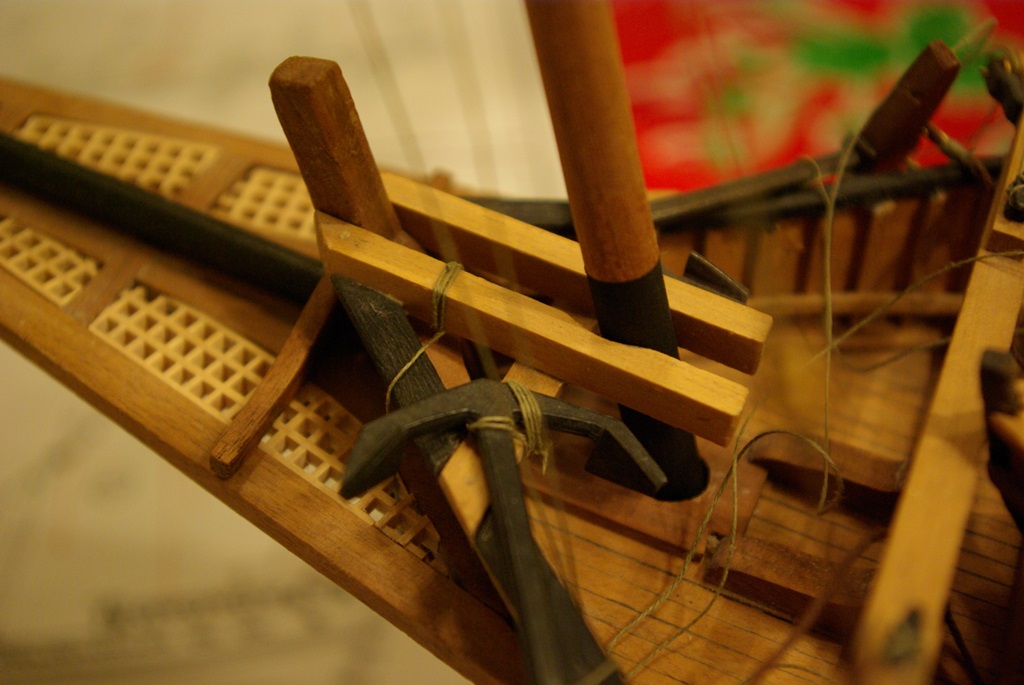
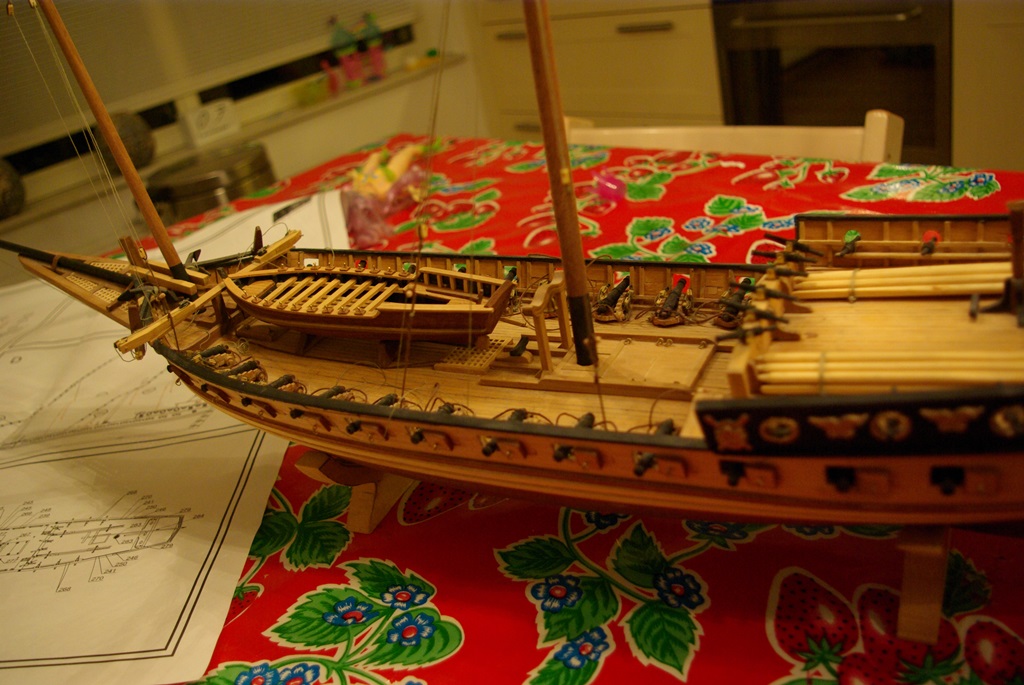
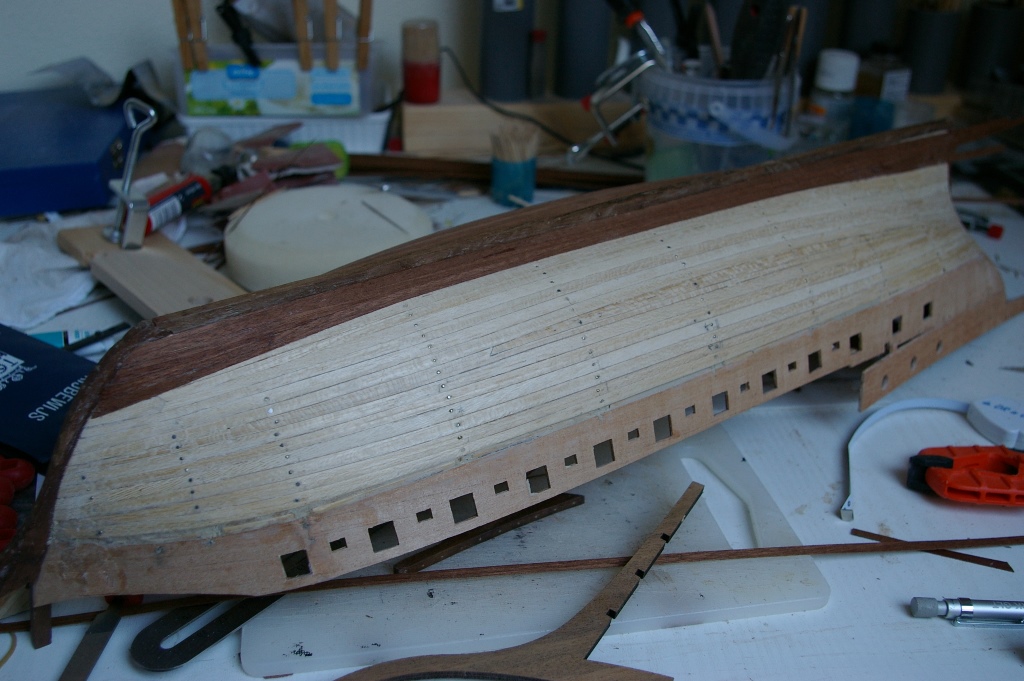
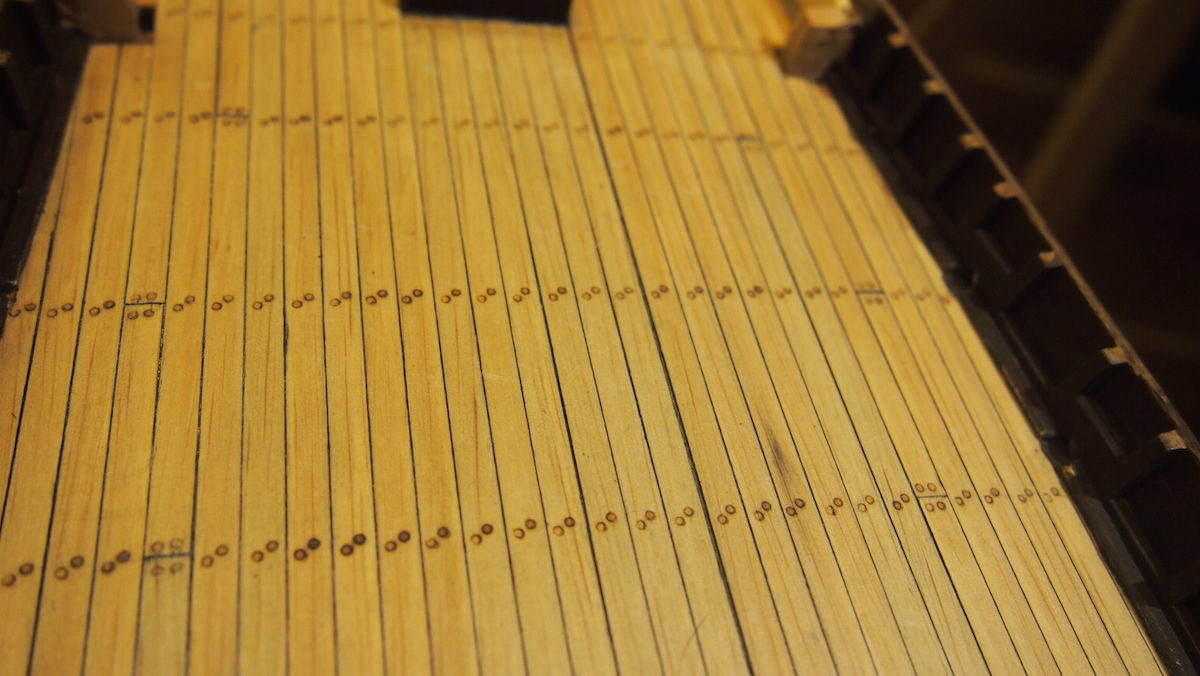
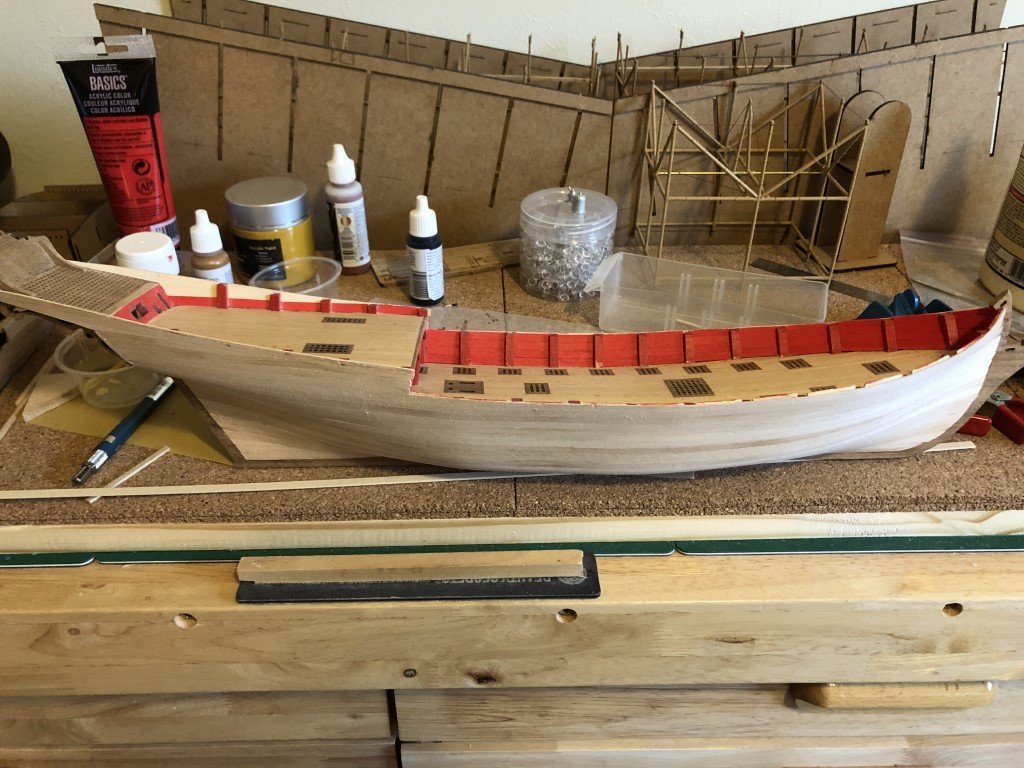
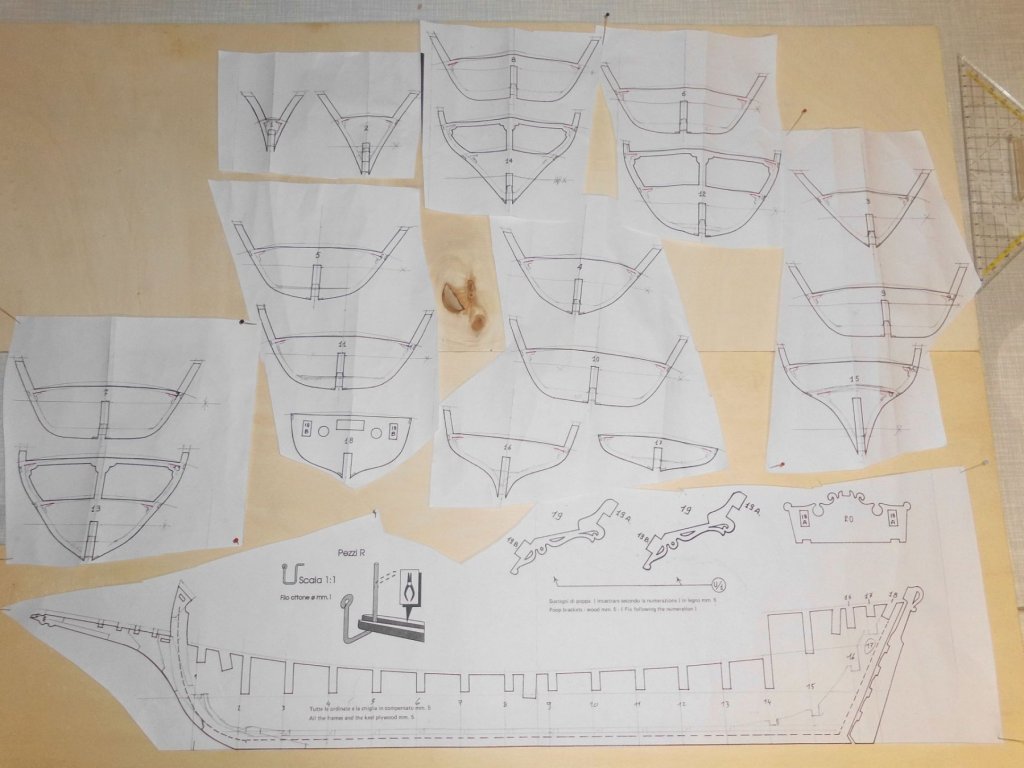
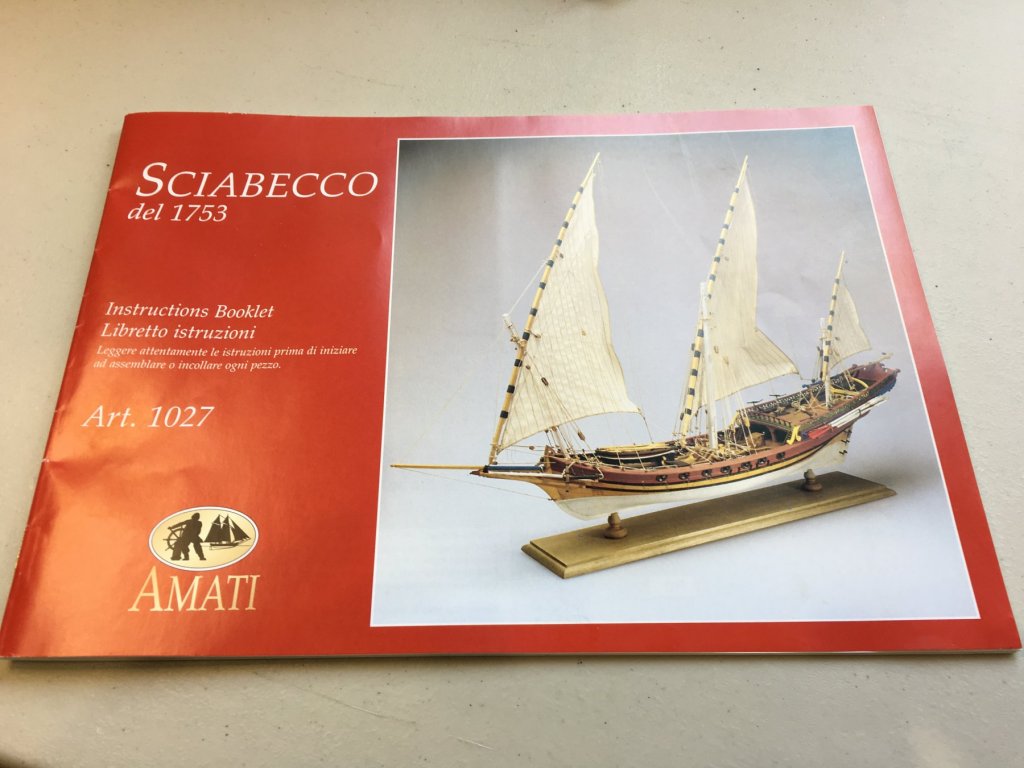
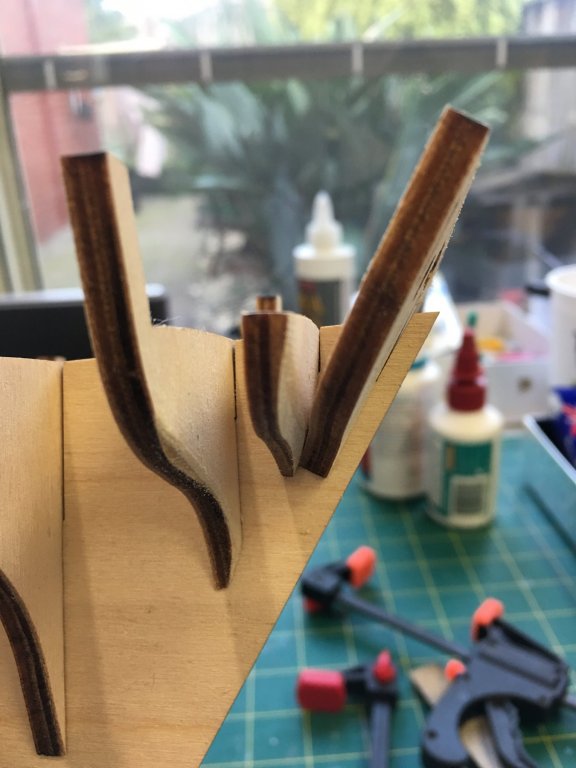
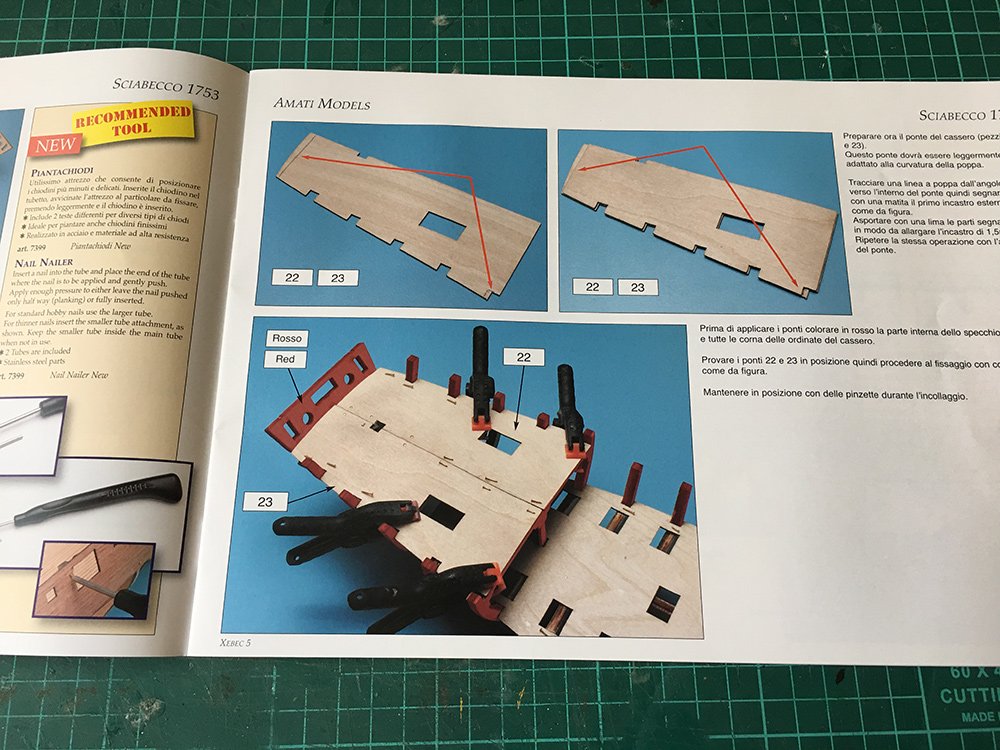
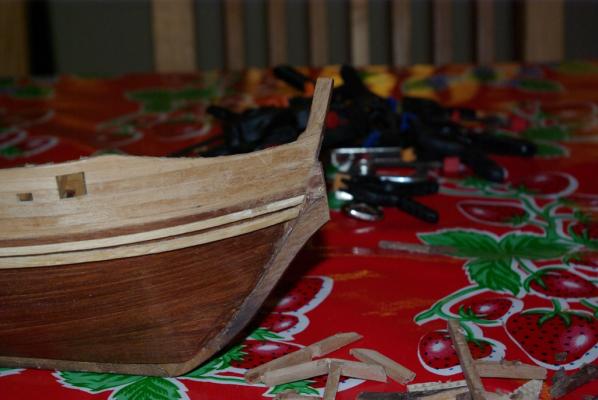
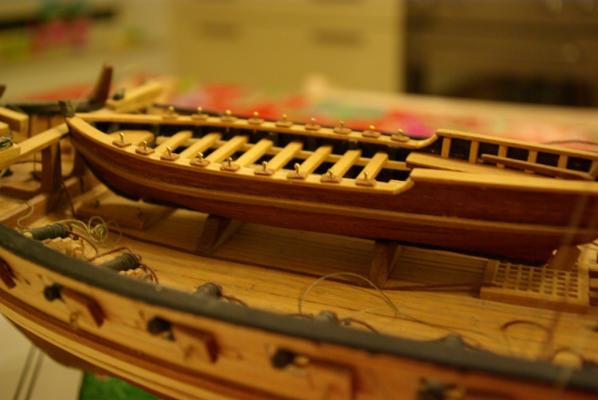
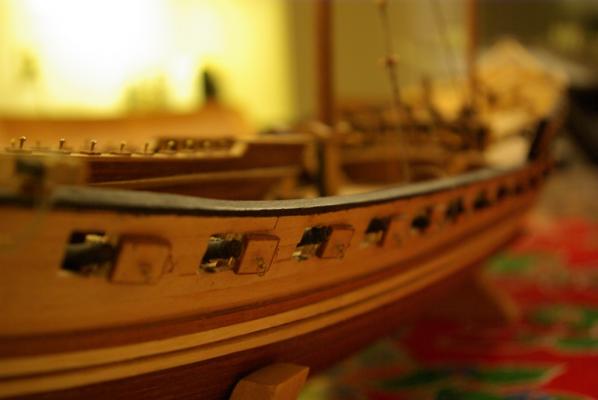
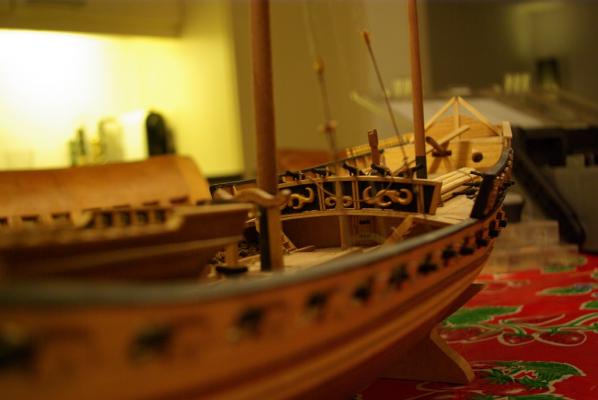
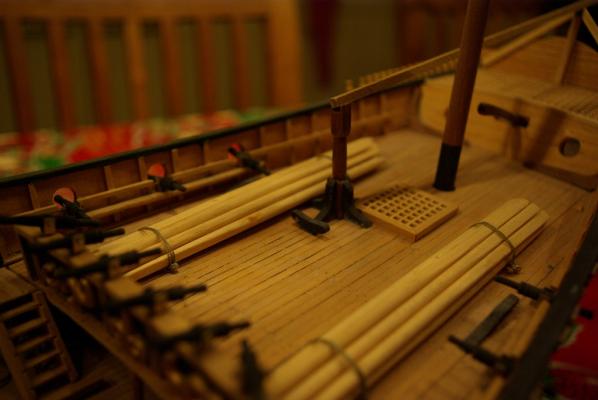
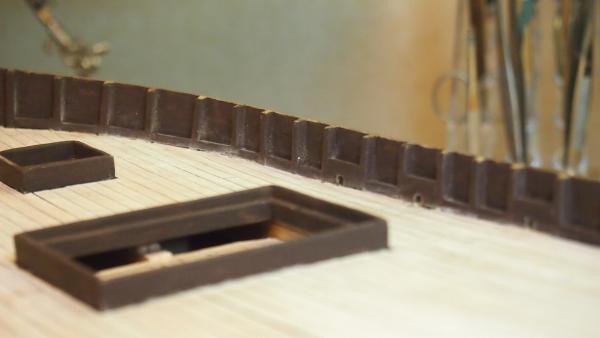
 I hope there are no limits on the number of build logs one can have open at any particular time! I'm trying to make more bench space to get back to may 'main project' - a scratch-built model of L'Invention 1799 based on G. Delacroix's amazing ANCRE monograph. Unfortunately, I have a problem with starting models and not always finishing them directly. So lately it had been pointed out to me, by the resident space allocator, that I don't need more space, I just need to finish a few projects to reclaim the space I need. I concede that this is a truth. There are at least two models, well along that could / should be finished. Once done a good deal of space will open up again. This is a picture of the two as they sat a few days ago: In the back is the Corel model of La Couronne that I purchased in 2011 and started in 2020. In the foreground is the Amati model of the 1753 xebec Sciabecco; purchased and started in 2015. With the help of this log, I hope to make some steady progress and finish the Sciabecco in tandem with my Santos-Dumont 14bis airplane kit build and my Santos-Dumont No18 Hydroplane scratch build project. Big hopes, but I figure something a retired person can achieve. Unfortunately, I don't have any photographs of the early stages of the Sciabecco build so I will try to provide some background in a written form. I believe the key aspects wood be that The plywood keel assembly was replaced with one made of cherry so that the ply's in the stem and stern would not be visible when finished The lower deck was extended / planked past the gratings on the upper deck The gratings were glued to the false deck prior to planking and then sanded flush with the deck. The instructions call for the gratings to be added on top of the deck planking. The large stern grating is made from cherry (this was my first try at making my own grating) and replaces a plastic grating that had spaces too large for the model. Over the last couple of days I have been adding the quick stuff to the bulwarks and getting this material painted to match the interior paint. The first layer of planking was pretty well done, so it shouldn't take much time to prep the model for the second layer. It may get up to 50 degrees (F) here tomorrow - that would be just fine to sit out back for a while and smooth out the hull. At some point I'll open a log for La Couronne - it will be great to get that one done also. I really like the rigging of that time period.
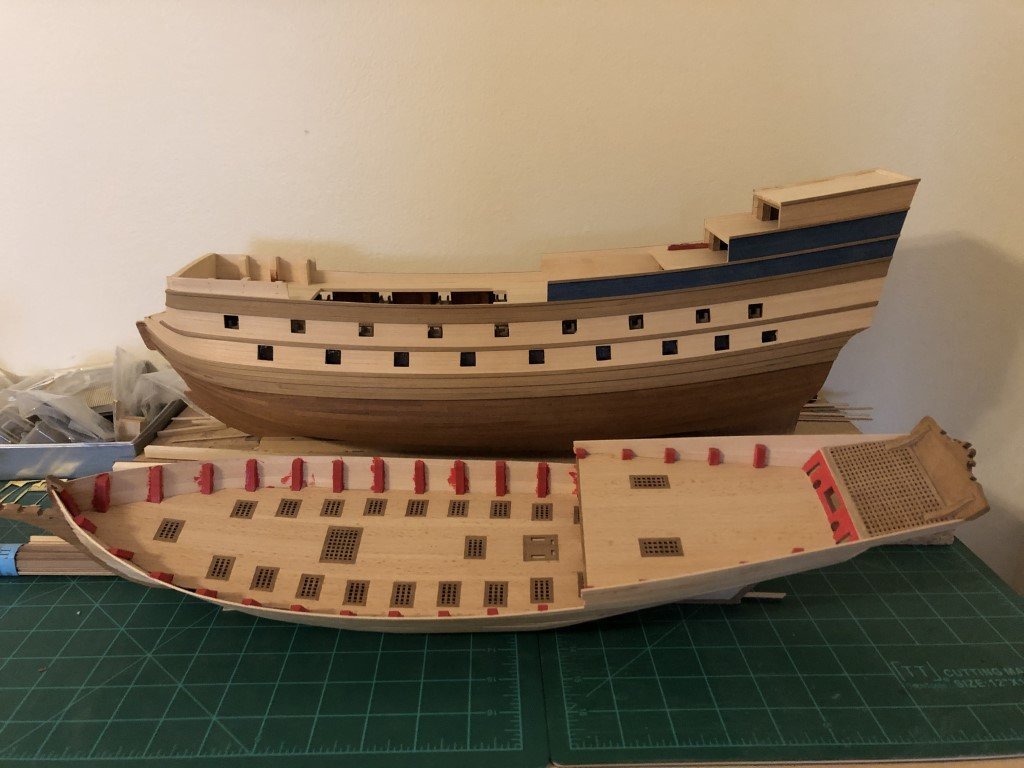
-
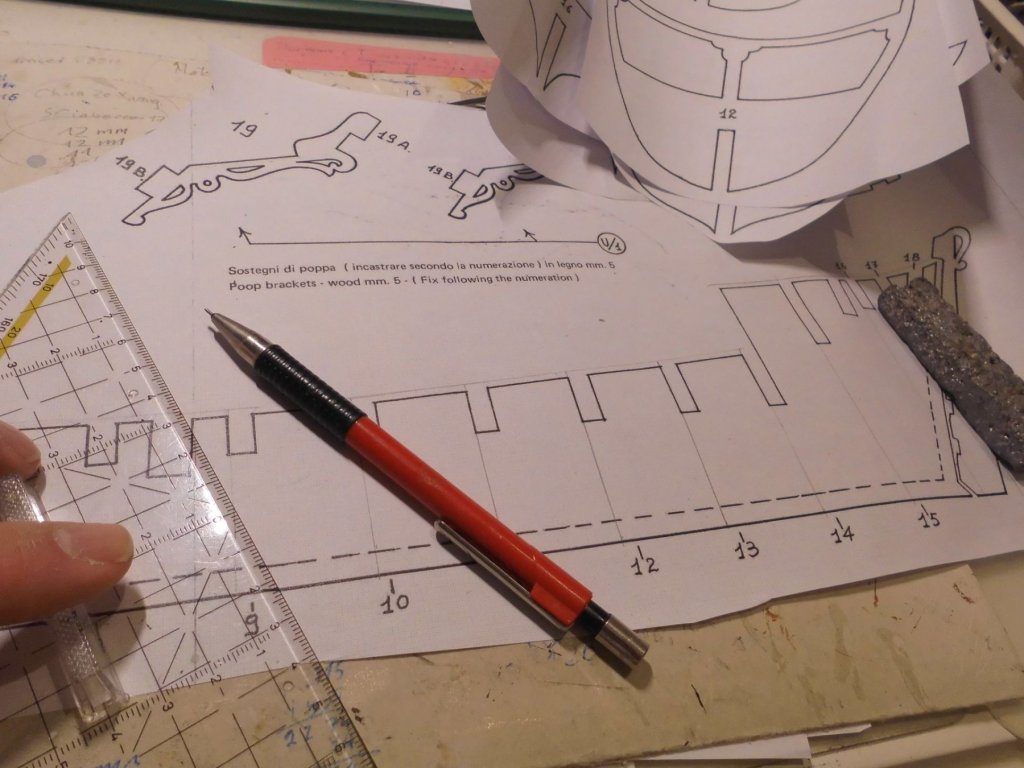
 Ciao a tutti, Ho realizzato lo scaletto e sinceramente è stato abbastanza difficile essenzialmente per due motivi. Il primo motivo: l'utilizzo della linea del ponte per realizzare la dima di pontuale per i riferimenti delle coste e la seconda dima per il cassero sovrapposta alla precedente. Il secondo motivo: il disegno in pianta del ponte, questa misura non tiene conto del cavallino del ponte, quindi se avessi utilizzato questo disegno senza le dovute modifiche delle quote in lunghezza avrei ottenuto sulla dima di pontuale con una sagoma più corta di circa 5mm. Alcune foto dello scaletto. Se notate da una parte ho messo il disegno con la chiglia a pari e nell'altra foto si vede quanto il disegno è stato allungato. Hi everyone, I realized the ladder and honestly it was quite difficult essentially for two reasons. The first reason: the use of the bridge line to create the pontic template for the rib references and the second template for the formwork overlapping the previous one. The second reason: the plan drawing of the bridge, this measure does not take into account the pony of the bridge, so if I had used this design without the due changes in the dimensions in length I would have obtained on the pontual template with a shorter shape of about 5mm. Some photos of the ladder. If you notice on one side I put the design with the keel on the same level and in the other photo you can see how long the design has been stretched Dima di pontuale finita Scaletto Qui ho posizionato la dima del cassero Un Salutone a presto
- 415 replies
-
- 17
-

-
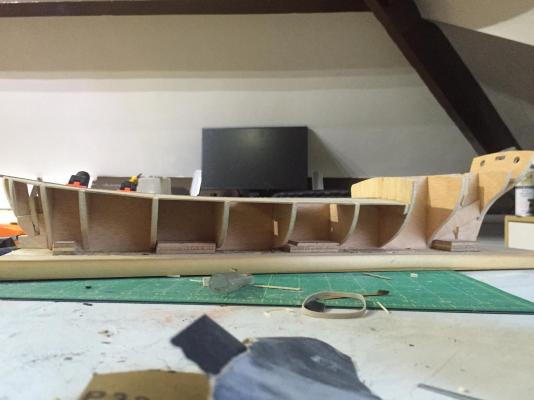
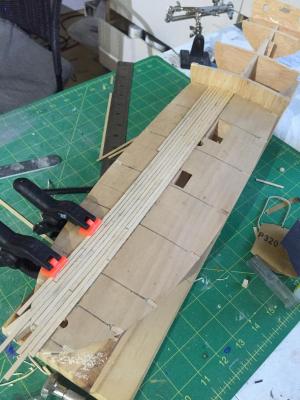
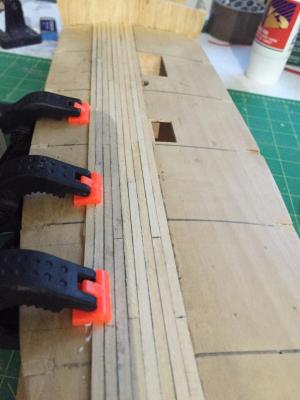
 ***OcCre - Cazador Jabeque / Xebec 1750*** Hello my friends, it's been a while since my last buildlog of Santa Maria Buildlog. Today I would like to present my new log of the Xebec Cazador of OcCre. As a child I was fan of the Redbeard comics, maybe known by some of you. Anyway, one of the titles was "Fight With The Moors" (1973) and describes a story of Moorish pirates who looted merchant ships in the Mediterranean sea. The ships they used were fast, agile and armed to the teeth Xebecs! In the story, ships were plundered, crew were killed, the ship burned to the ground and women were kidnapped and sold on the black market as slaves. It intrigued me because regular ships, even well armed were not capable to cope with these dangerous circumstances and the Xebec's with their ruthless crew were winning most of the fights. Ofcourse this Redbeard story was fiction but based on true events in that timeperiod. A different and dark time compare with today so to say. The Spanish Crown built Cazador mid 18th century to fight the Moors in the Mediteranean Sea. To me, this was the conclusion to take on this ship and build her myself. A beautifull representation of a Spanish Xebec in combat with the Moors is shown below. It's a picture of Ángel Cortellini Sánchez! Source: https://commons.wikimedia.org/wiki/File:DonAntonioBarcelóConSuJabequeCorreoRindeADosGaleotasArgelinas.jpg OcCre - Ocio Creativo made a beautiful kitmodel but compare to reality it has some shortcomings. I'm not sure if I have the possibilities to change a couple of things, but we will see on the way. My workplace is the dining table in the dining room with only my handtools and hopefully a lot of creativity! ☺️ Some specifications of the kitmodel Ref: 14002 Scale: 1:60 Length: 860mm / 33.9 inches Height: 630mm / 24.8 inches Width: 160mm / 6.3 inches Chapter 1 - The Box and parts The boxart is pretty basic but neat and tidy. It looks like OcCre use the box design for almost all their models kits. A picture of the ship makes the difference and is a piece of paper which sticks to the box. It's the contents of the box that has my interest. Wel about the contents inside the box. All things are neatly packed and the milled wood looks all right. Not perfect or of the highest quality, but just fine. What bothers me are the plywood parts. Even the keel, transom parts are made of plywood and stained into a walnut color. I prefer walnut parts instead of stained plywood. Chapter 2 - A new beginning To me the scale of the ship and the less complexity of the model is ideal for the dining table situation. After modeling I can easily clean up the table and put the box, tools and the ship away for the next moment. After inspecting the parts, I start with numbering the plywood parts. After numbering the parts, I'll cut the parts out of the frame and dryfit the bulkheads. The plywood it very thin and brittle. The bulkhead fits nicely on the main plate of the ship. After putting some glue on the bulkheads, it's time to cut out the main deckplate. Hopefully this give the structure some rigidity and strength. Time to plank the deck. I choose a pattern and start laying the strips. Unfortunately the strips a not consistent in thickness and varies widely between 1 - 1,3mm. After a while... Job's done. Time to scrape the deck flush. Also the upper part of a bulkhead needs to be covered with the same strips but placed verticaly. At the aft of the ship, strips of veneer are placed horizontally. I bend the veneer with an iron so it follows the curve of the bulkhead. It's hard to do, but to me it looks a bit nicer instead of straight strips. Time to put another deck plate on the ship. Also this needs to be covered with some strips of wood...it's the same process as on the main deck. Well, it's a start so to say. I'll try to update once a week if possible. If you like to leave a comment, I'll appreciate it and please feel free to ask me any questions. See yah later! Peter
- 204 replies
-
- 12
-
-
- kitbashing
- Woodcarving
- (and 4 more)
-
 There seems to be little information on this ship, with OcCre themselves having nothing useful to tell us. Apparently xebecs played a big part in the second siege of Gibraltor, but that happened four centuries before this ship would have been built! Okay, thanks OcCre. Now to the model, It's actually quite an exciting kit to open with lots of little compartments full of goodies. Not sure of the quality as yet but to a relative newcomer like me it seemed impressive. My only previous build being a Caldercraft Sherbourne. This is the keel with bulwarks attached upon my primitive keel base. Even at this early stage I like the shape of the ship. I'm not a big fan of massive, bulky ships and I find the Cazador quite elegant. At the moment I'm laying the deck planks using 1x4mm maple strip I bought separate from the kit.
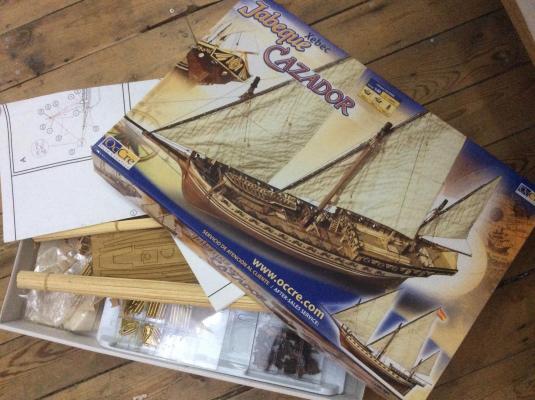
- 13 replies
-
- 11
-
-
 Hello friends, according to the plans of Jean Boudriot, France Scale: 1/48 Species of wood: German Elsbeere Planning and keel-laying: December 2016 Dimensions of the model: Lenght: 1,10 m Width: 0,23 m Hight without mast: 0,24 m The pictures are the example: PES.ru Karl
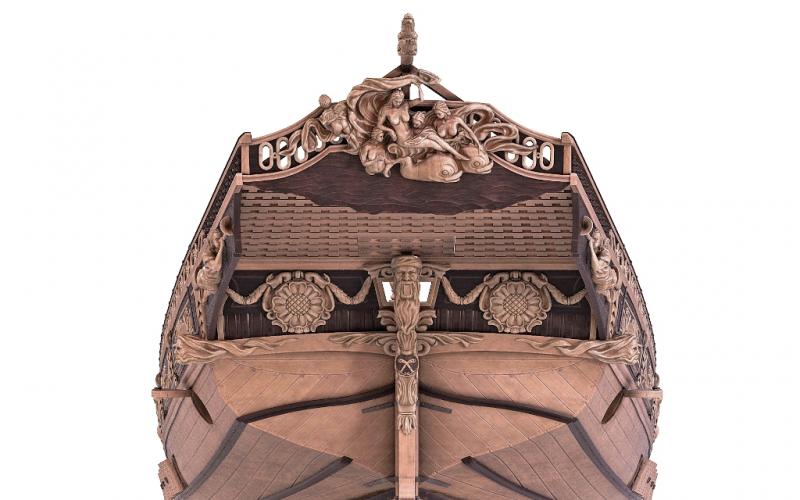

- 313 replies
-
- 32
-
-
 I actually began building this model in 1978 but it's spent most of the time since then languishing in a box packed with Styrofoam peanuts as I moved around the country. Now it's complete at last freeing me up to finish other incomplete ships. My apologies for the mediocre photos. Best Regards, Gary
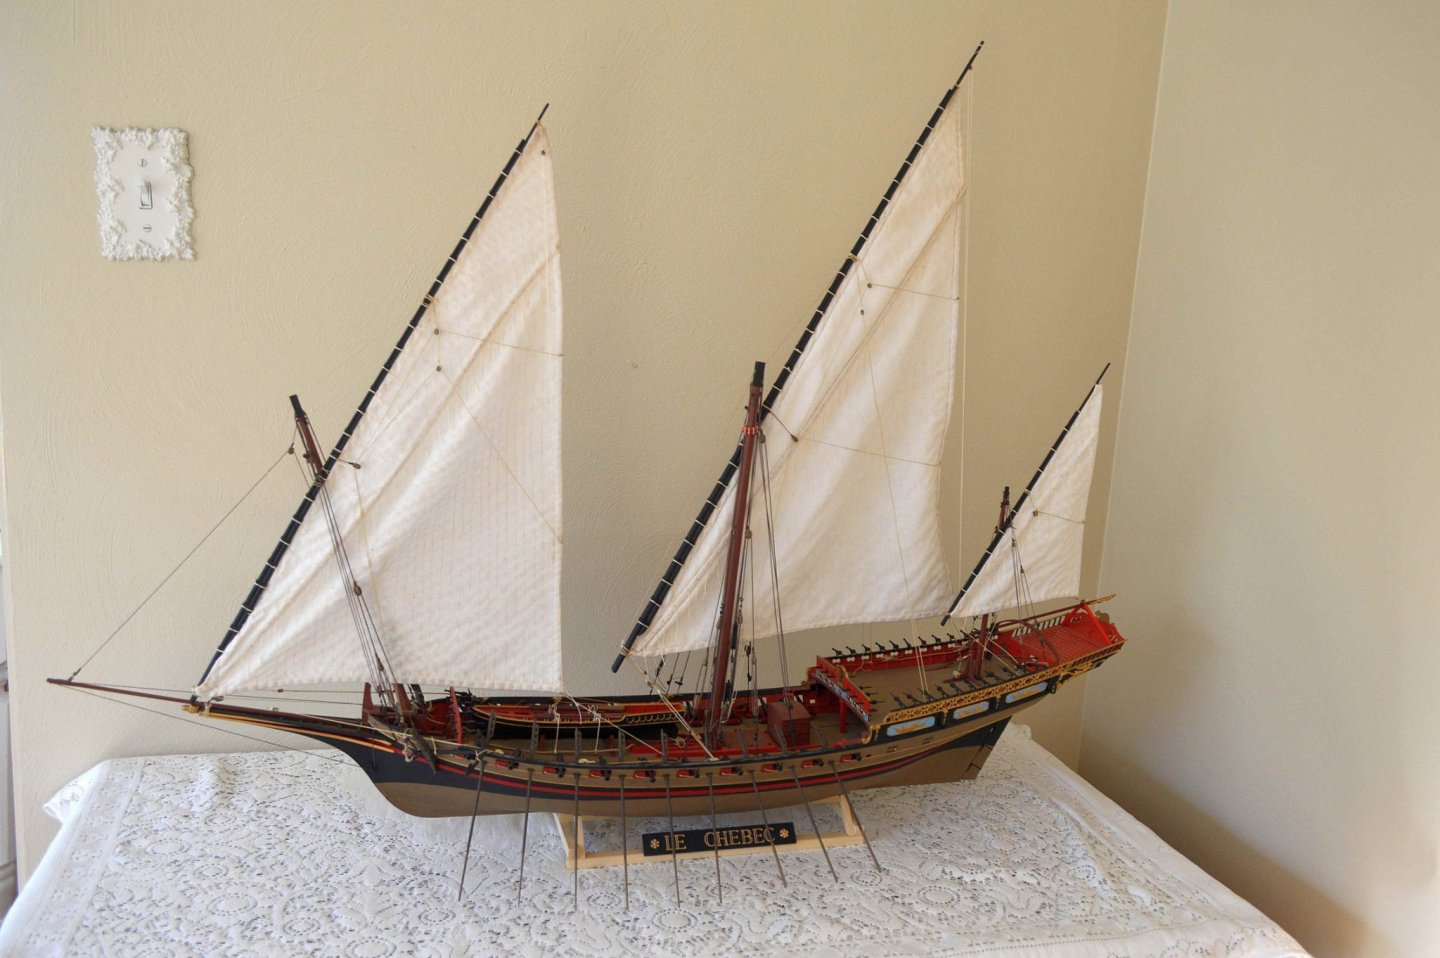


-
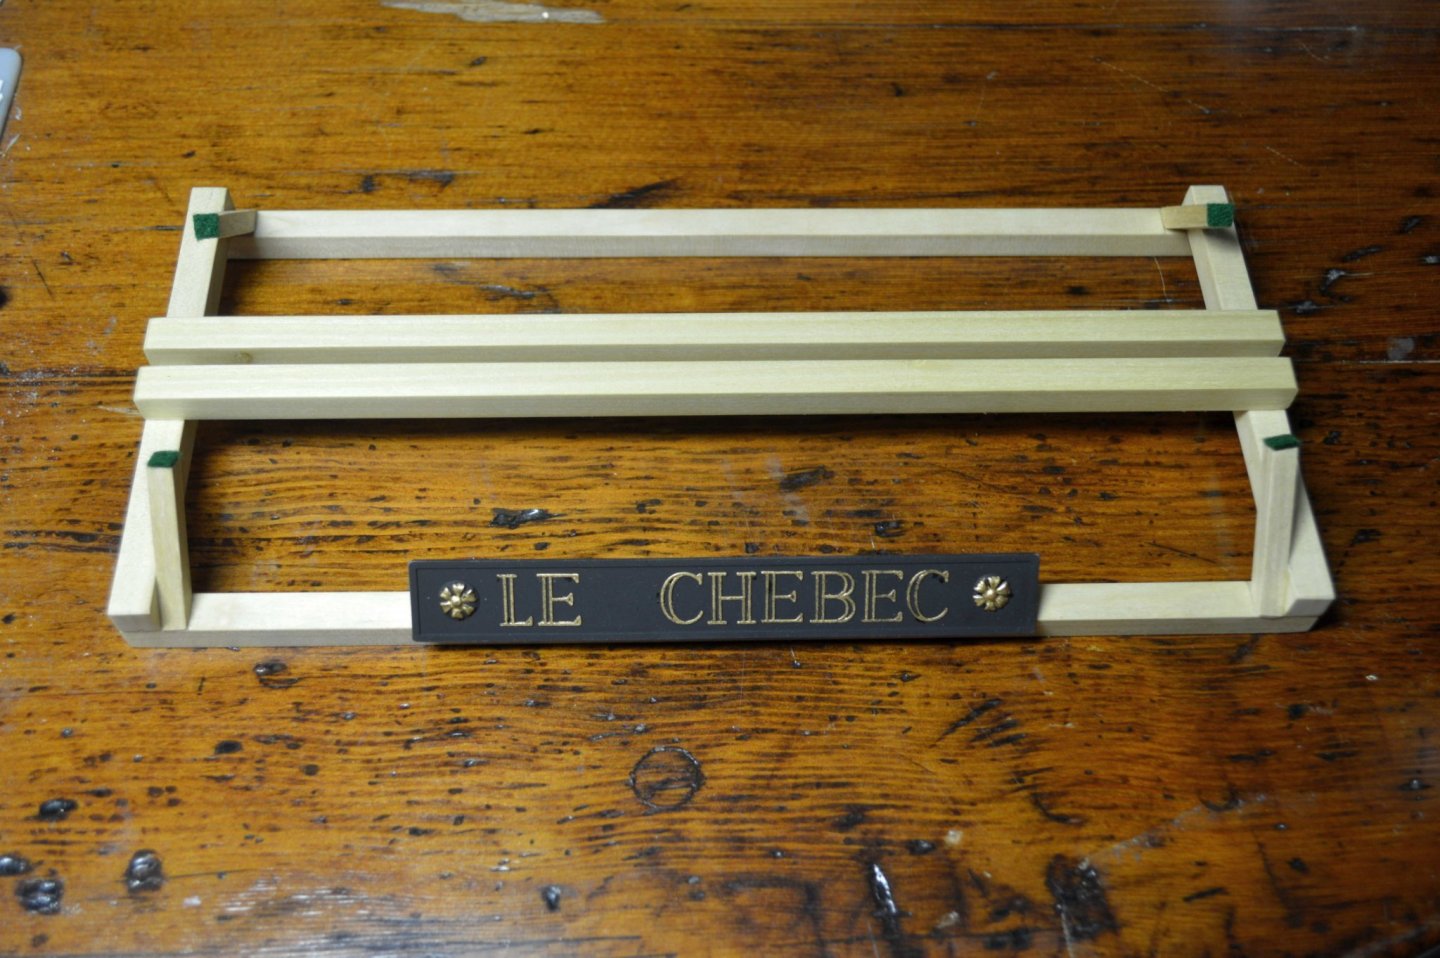
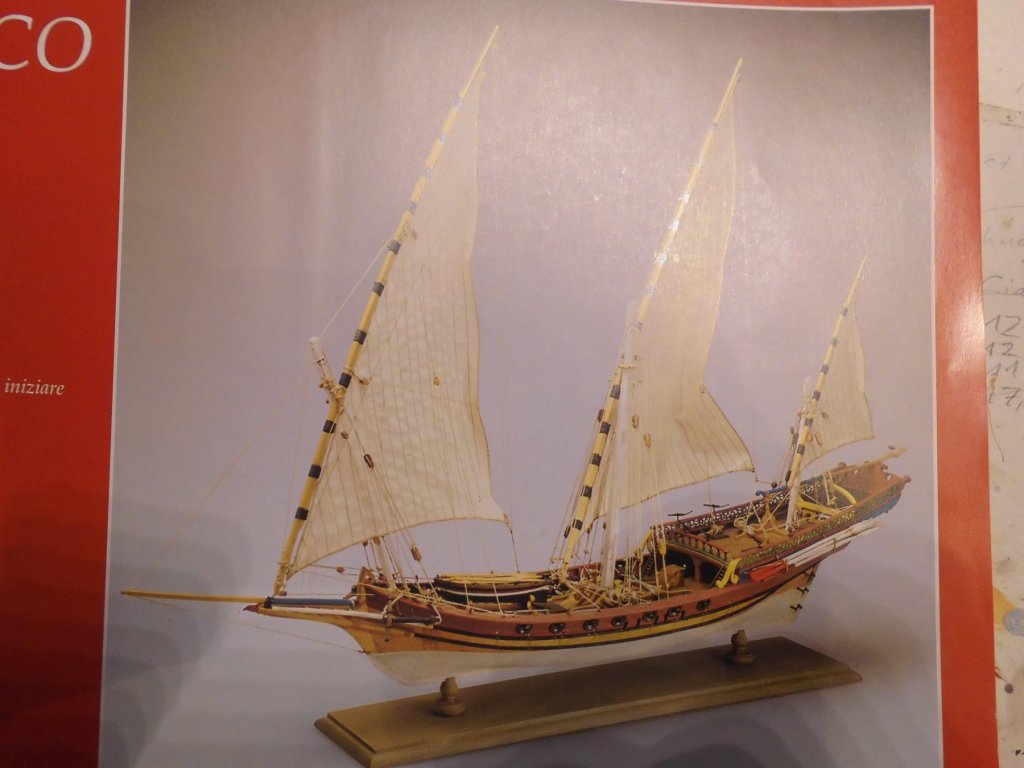
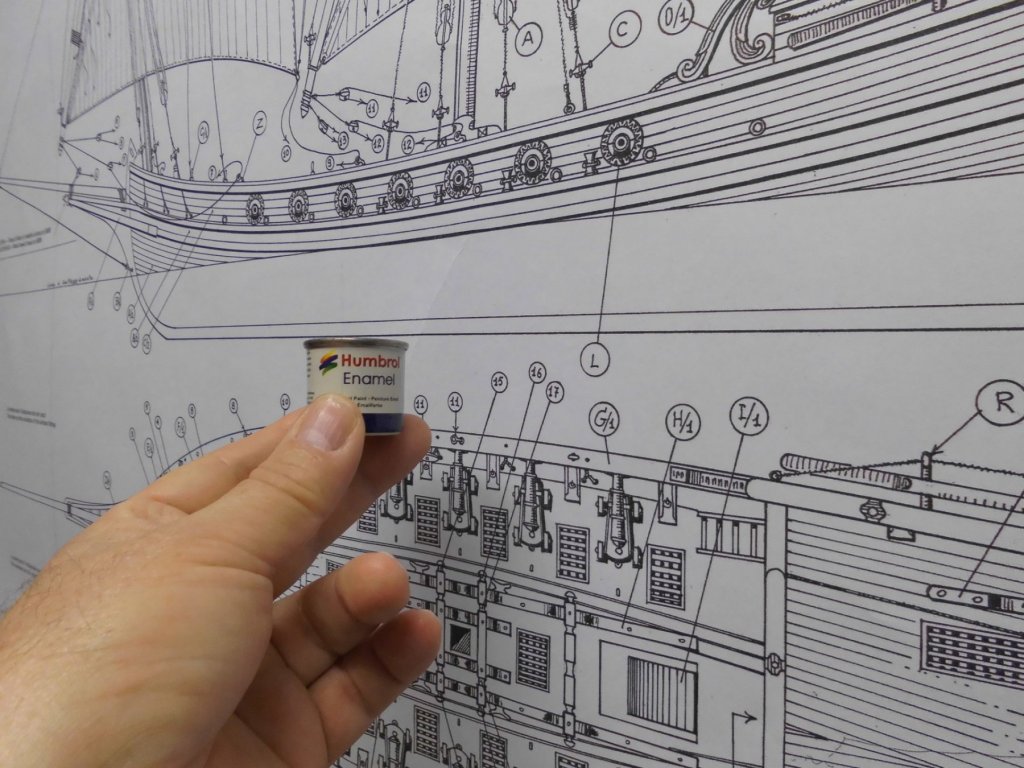
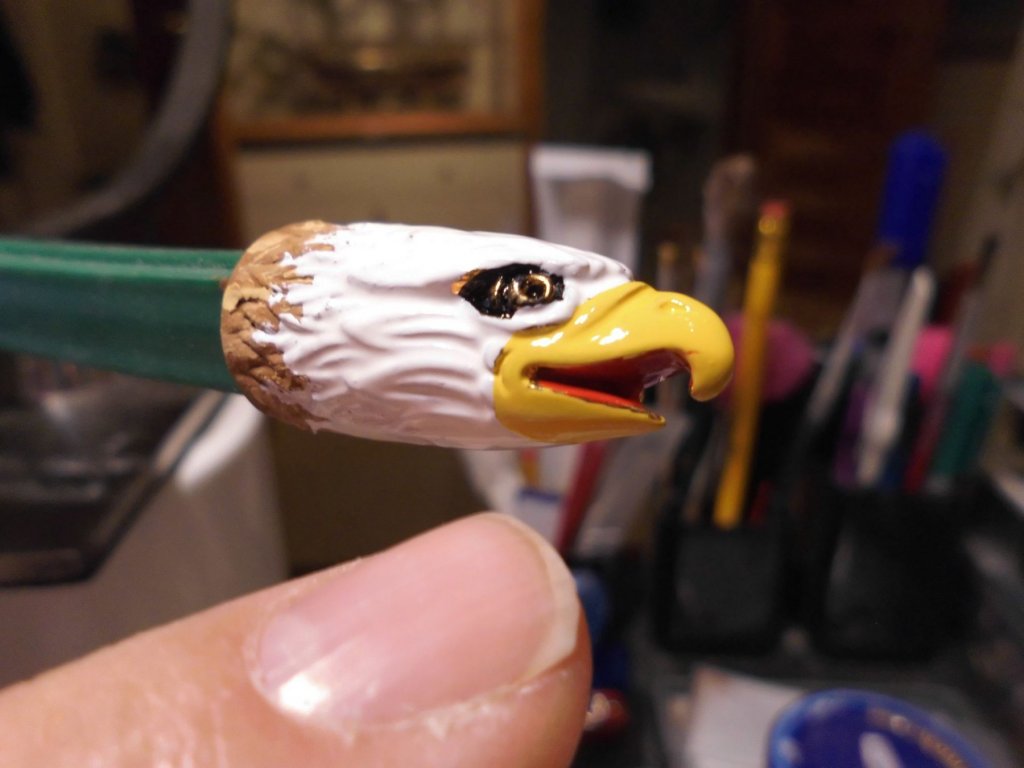
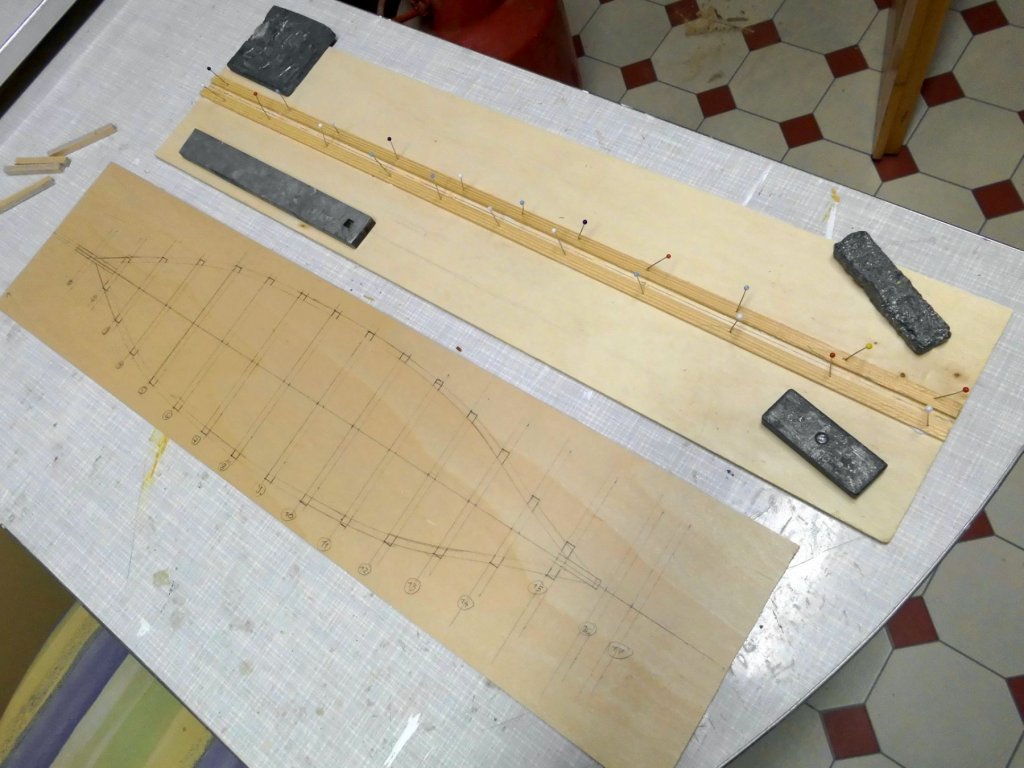
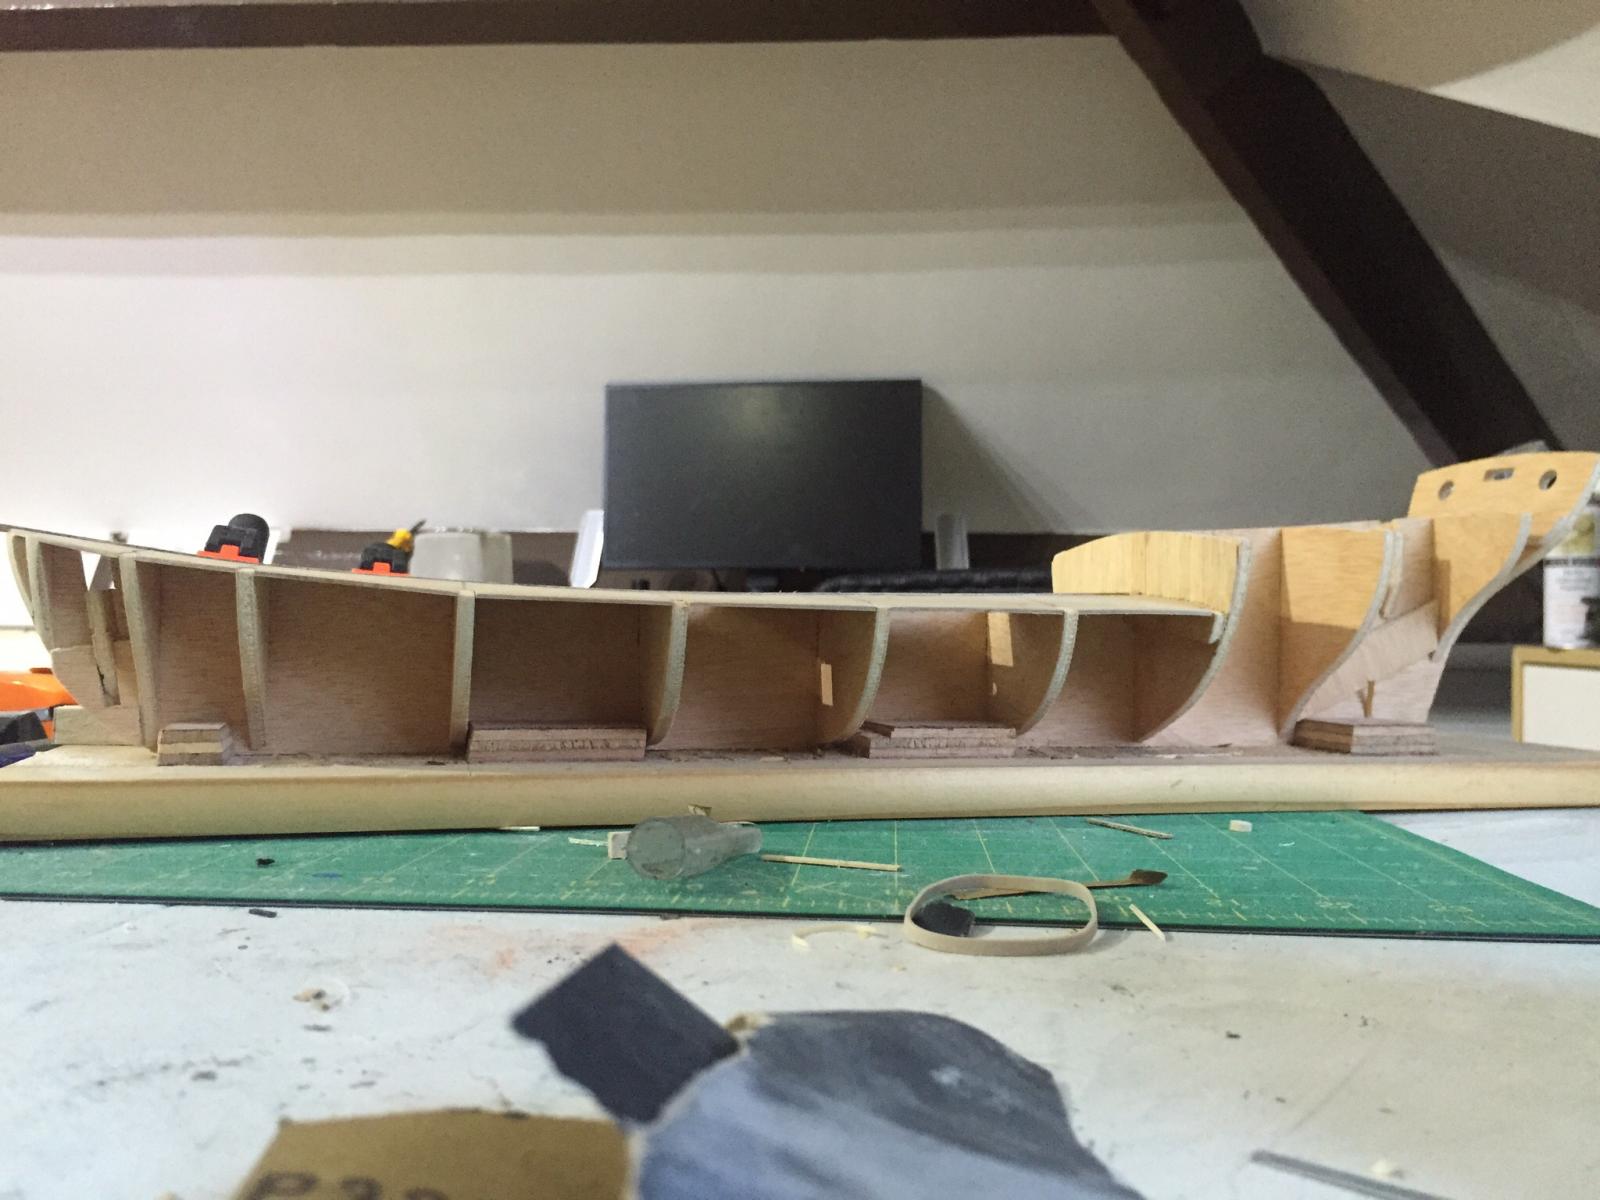
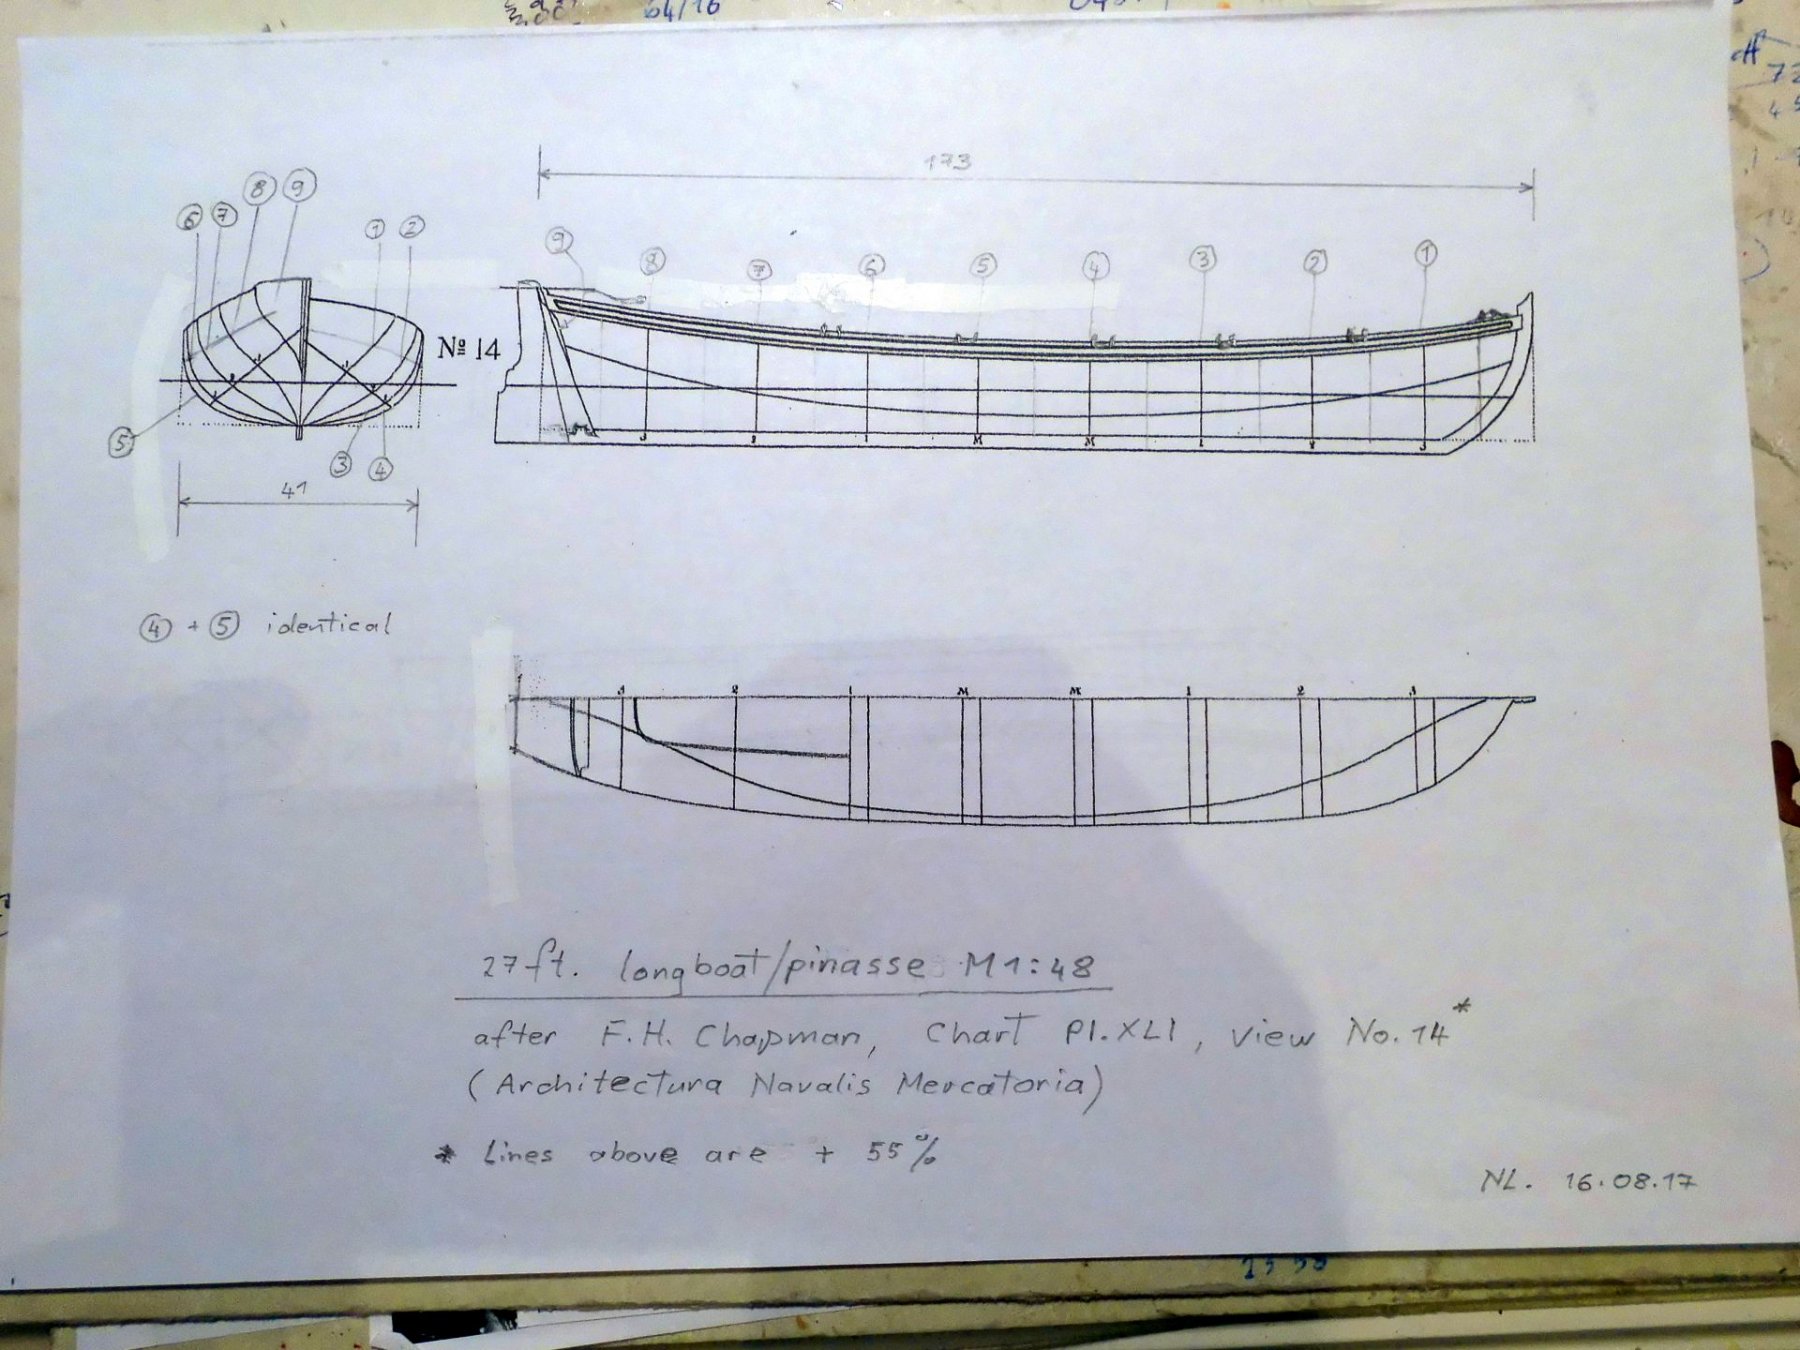
 Introduction: One of the ship types that I`m interested in is the Chebec design. As a model I did`nt want to get it too complicated and too much detailed like for instance the build of the "Le Requin" Chebec would be. So the choise fell on a scratch build model after a basic Amati plan 1:60, that would be enlarged by 25% to scale 1:48, resulting in a new total length of 900 mm. To give the child / project a name, the ship will be "Eagle of Algier", and representing a (fictive) one one of those Mediteranian, North African fast trade- and pirate- Chebecs of the African Barbary coast around mid 18th century. It would have been "Falcon of Algier", if I were able to find a suitable falcon head for using as an appropriate figure head. The ships boat will be a 27 Ft longboat / pinnace after F.H. Chapmans Chart PIXLI figure #14 (Architectura Navalis Mercatoria), scaled to 1:48 With this build I´ll be experimenting with the stand up mode of keel and bulkheads, positioned by a jig fixture, from which the framework can easily be removed afterwards. Usualy I build my models in keel up position. Because the "frames" will become quite fragile, due to thin sizes, I choose 5,2 mm thick ply for the bulkheads, but with 8 layers, (the delivered ply had even 10 layers !) to provide the required strength. The bulkheads will be cut out to resemble frames, and the deck beams will be temporarily cut away in order to fit out the interior hull, then replacing the deck beams again afterwards. It is intended to do 1 layer planking of the hull outside shell only. Enjoy... Nils already enlarged Amati plan by 25% A building instruction with sequential pics, comes along in Italian / English with the plan little paint can for scaling... the name giving figure head (metal diecast) cutting out of the paper bulkheads for further treatment beginning the positioning gig for keel and bulkheads fixture progress... ships boat (may be subject to slight modification, to suit needs)


- 690 replies
-
- 31
-
-
 Hello, Since about several years I built three ships on the scale 1 : 87. I had more time because I had my pension. I built maquettes of historical buildings (castles, old cities) as well. Much of that can be seen on my website; www.constantwillems.nl I follow the forum a few weeks and I realise that I built those ships in a way I do not find on the forum. So I want to explain it. I hope some of you may be interested. The ships I built were a Chebeque, a Tartane and a Galleotta. Before those I built also a Venetian Pinque. All on the same scale. The Pinque has a somewhat different building technic, so I want to keep her out of this topic. All the ships have sailed on the Mediterranean during the 16th, 17th and beginning 19th century. The have my warm interest because of their beauty. I personally consider the chebeque as the most elegant ship ever sailed. It was difficult to find plans and details of these ships. All four ships demanded a considerable time of study before I could begin with the construction. I chose the scale 1 : 87 because I like to built on a very small scale (see also the maquettes) and I have no room at home to place very large models. I use for all models pear wood. I do not paint them, exept the sails. So this is not a regular topic to show the building process from the beginning of a single model. The models are finished, but I like to show you how I worked on the models. So consider the following postings as a building process of a new ship. Constant
 -
Click on the tags in the title above (shown in black) for an instant list of all the build logs for that kit subject.
-
 Click on the tags in the title above (shown in black) for an instant list of all the build logs for that kit subject.
 -
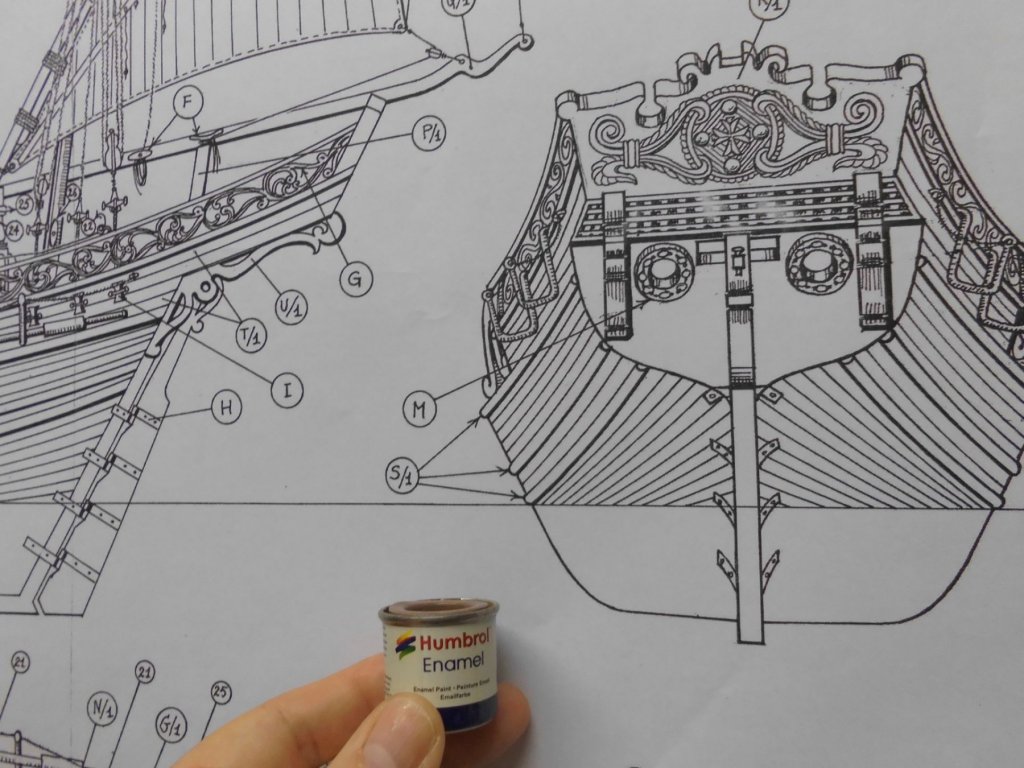
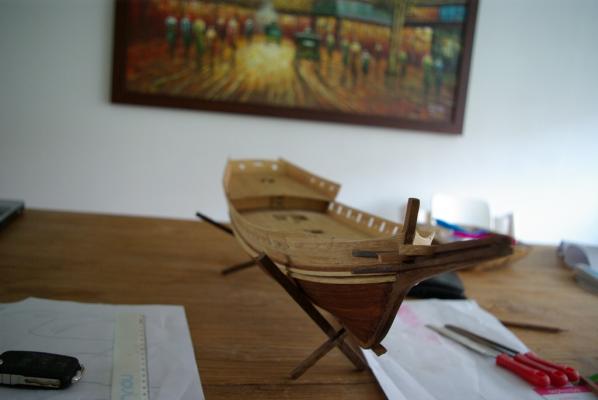
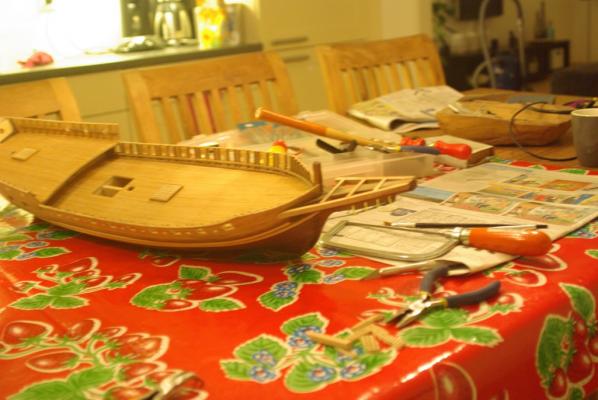
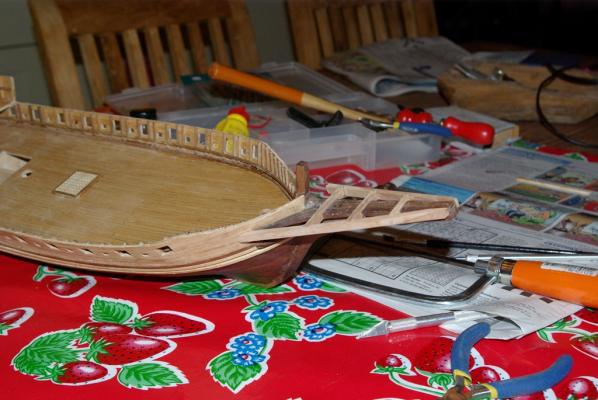
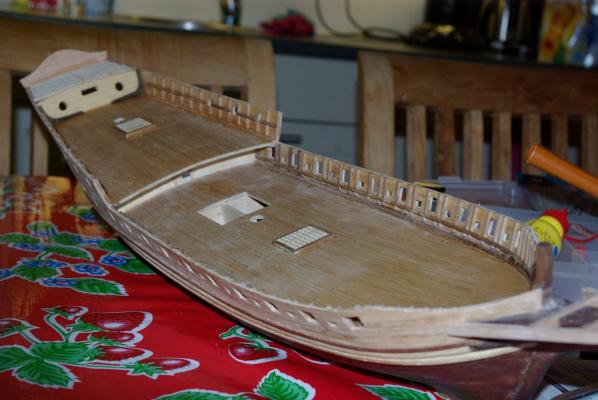
 I have very interested in the sleek lines of the vessel and have just purchased the kit. I am building the SOS at the moment and have decided to start the Sciabecco to give me some variety of stages.rr
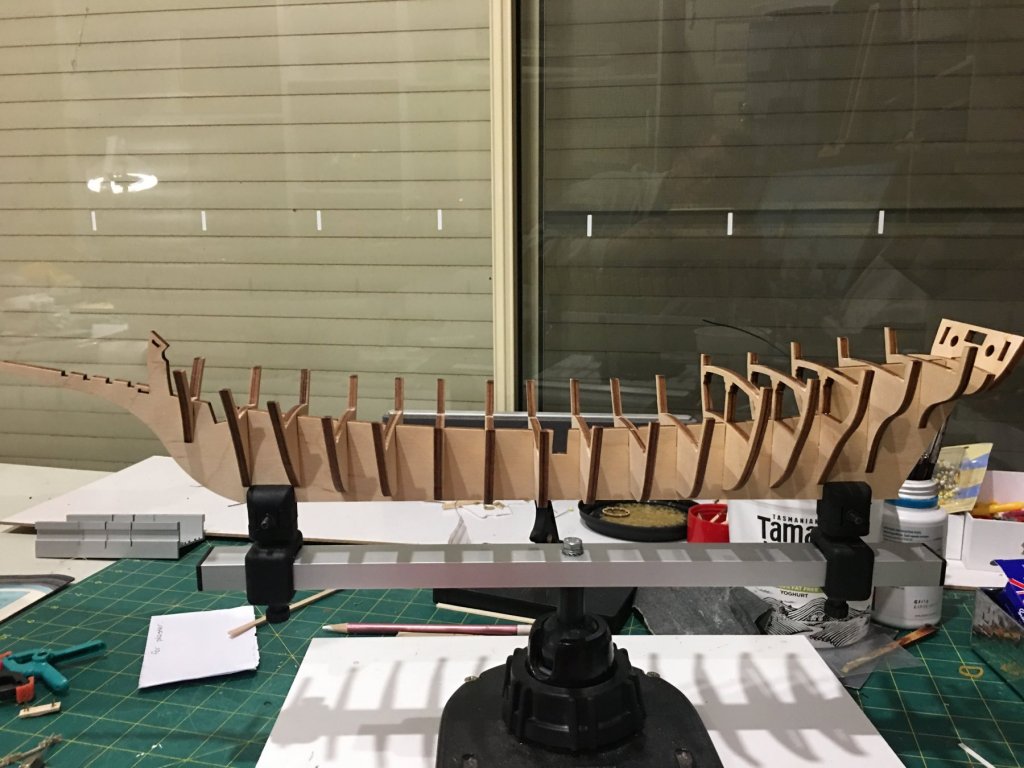


-
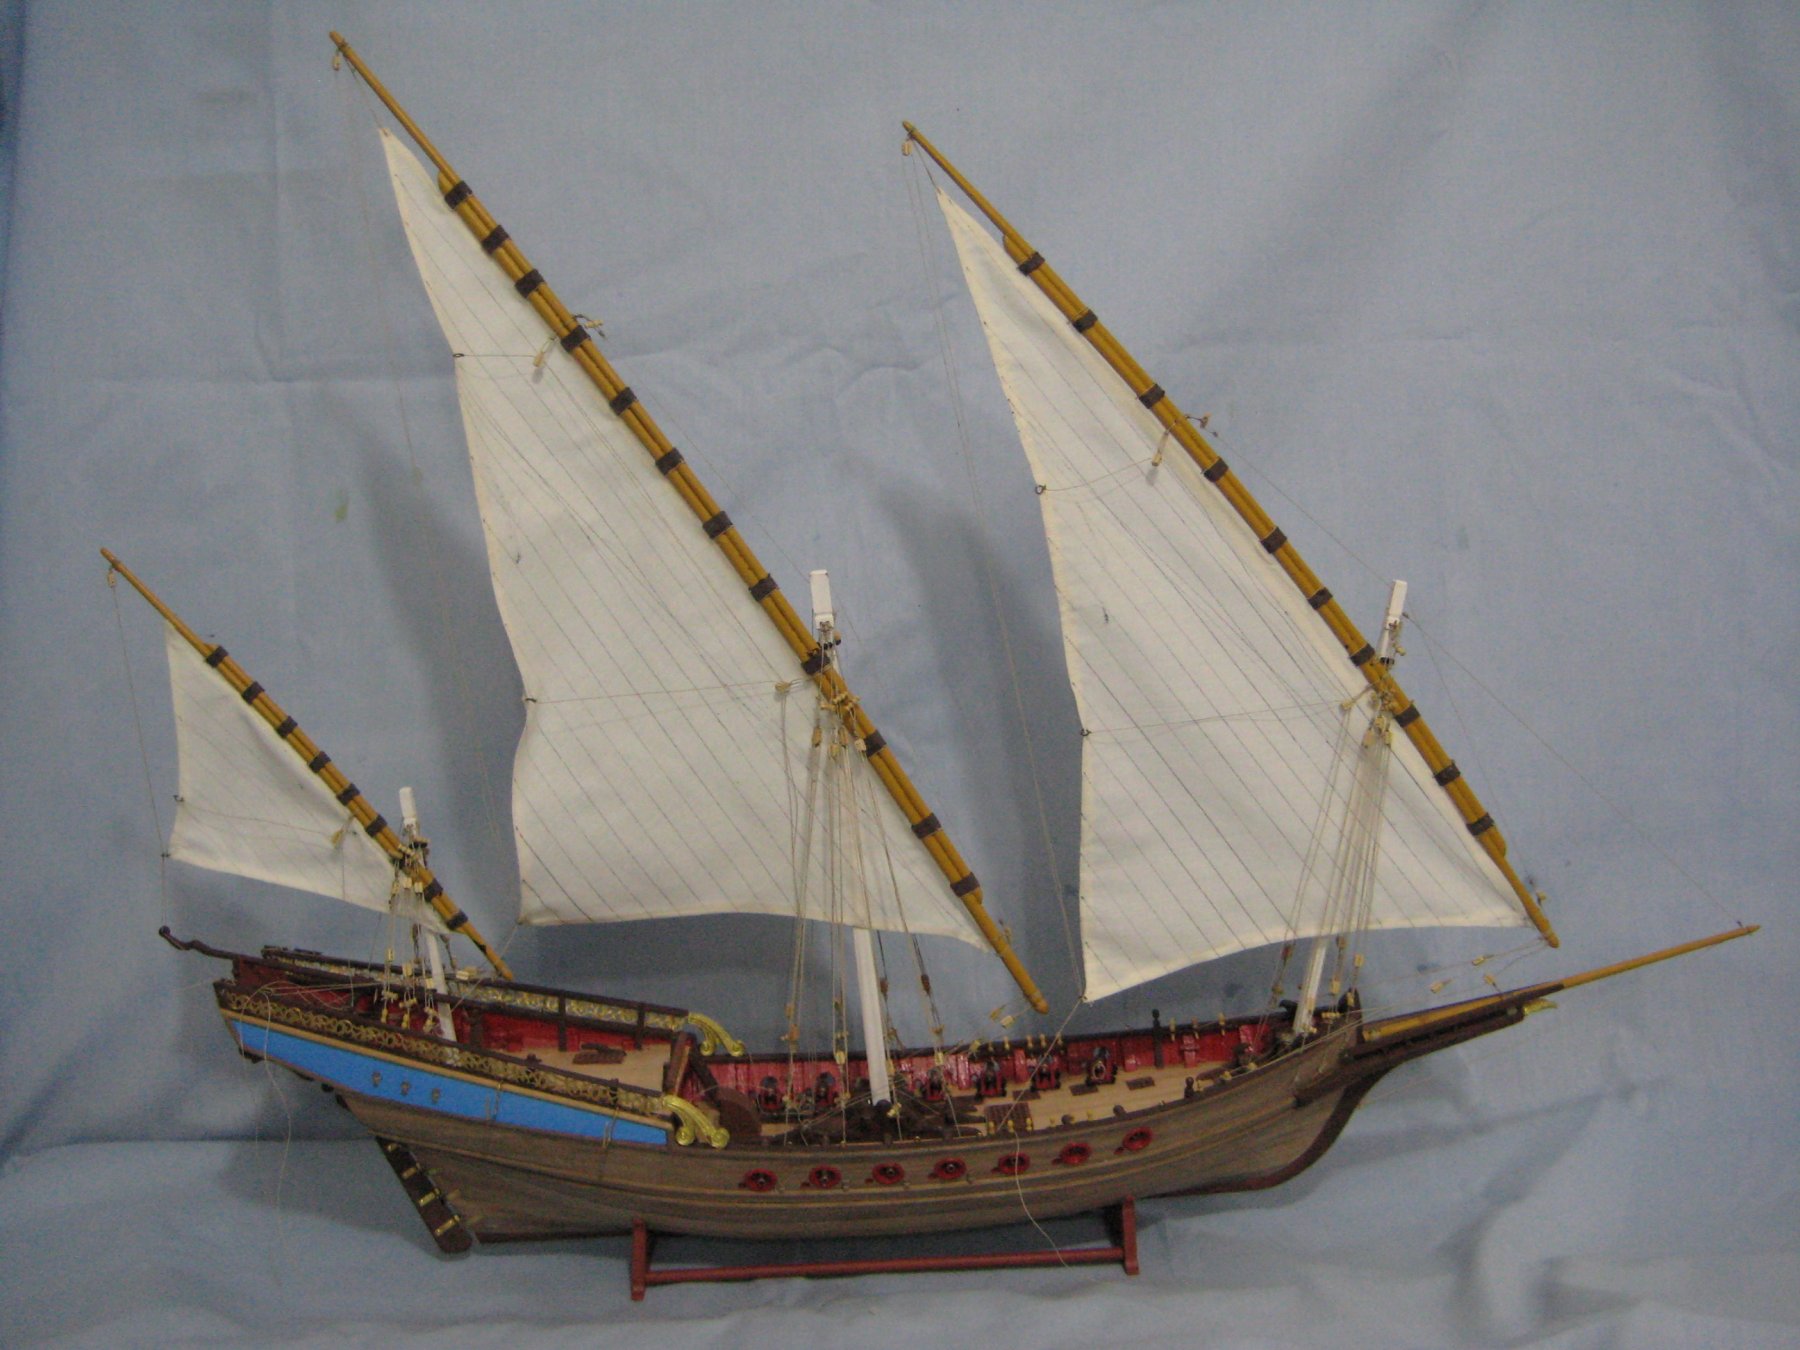
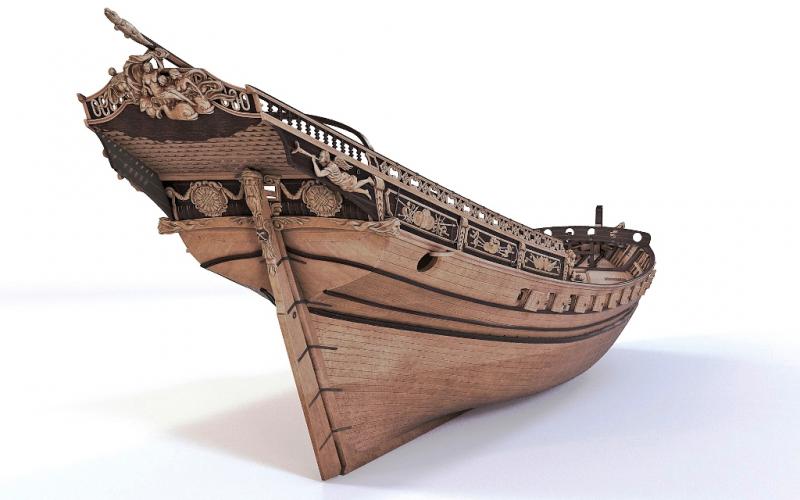
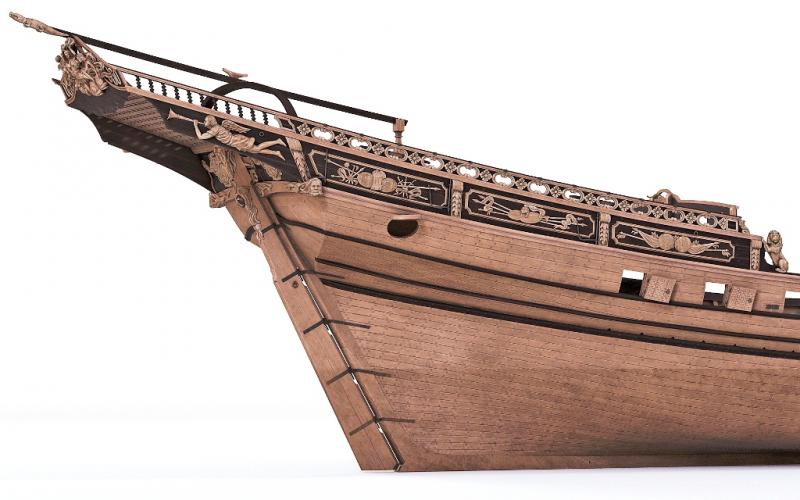
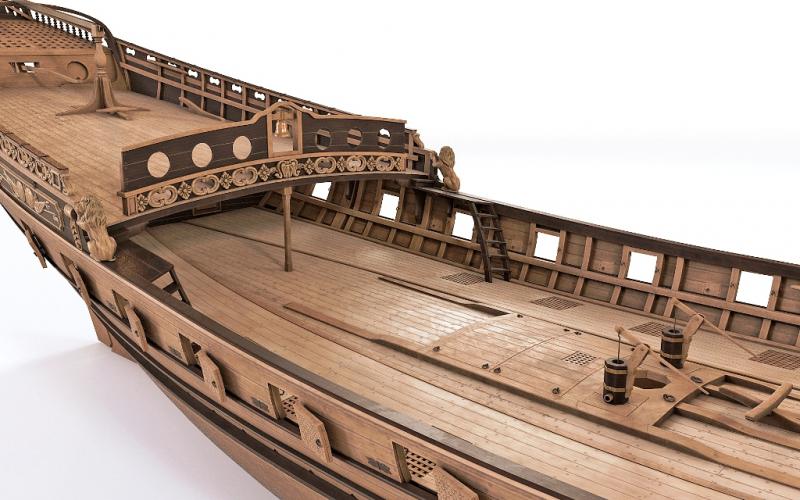
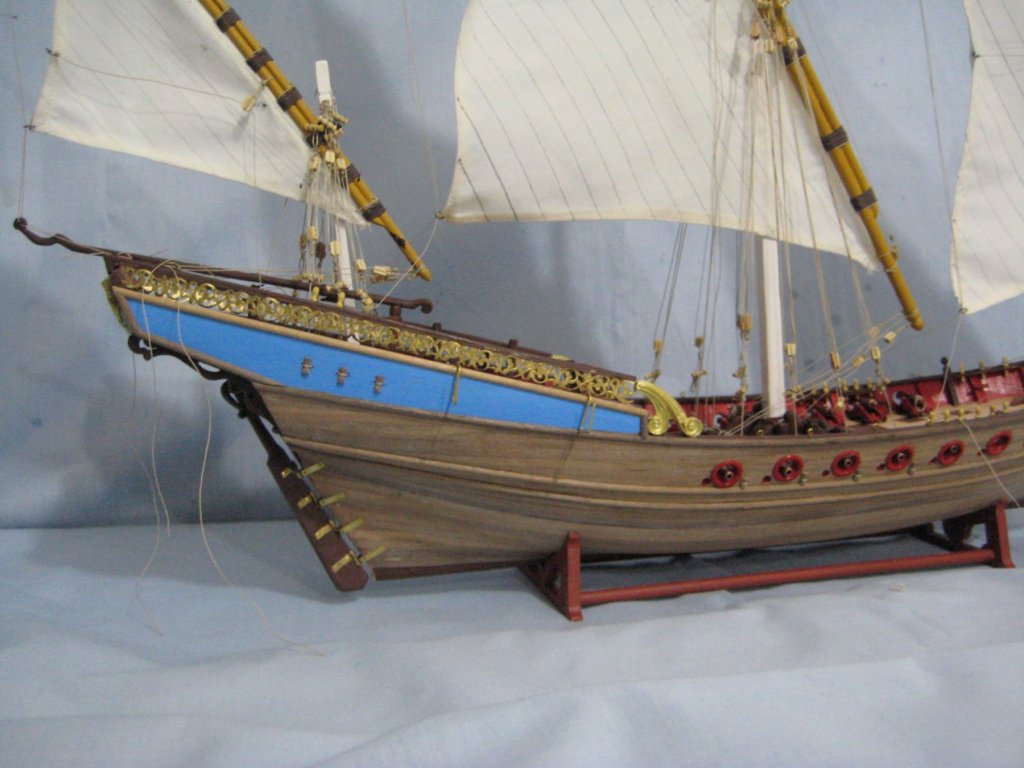
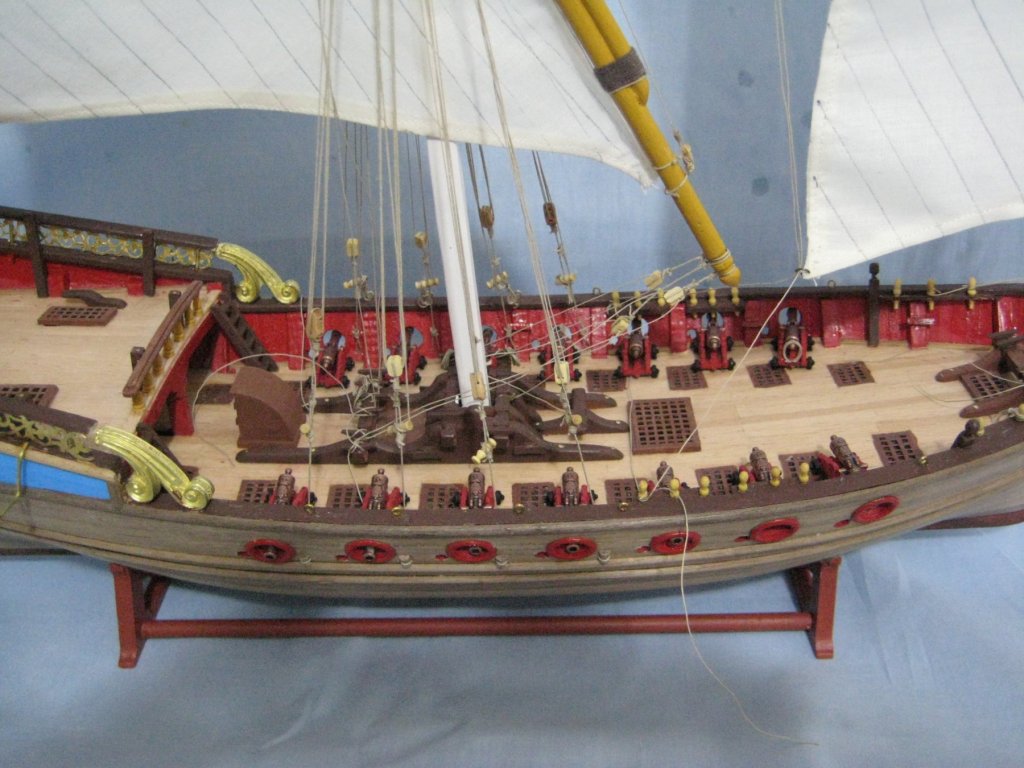
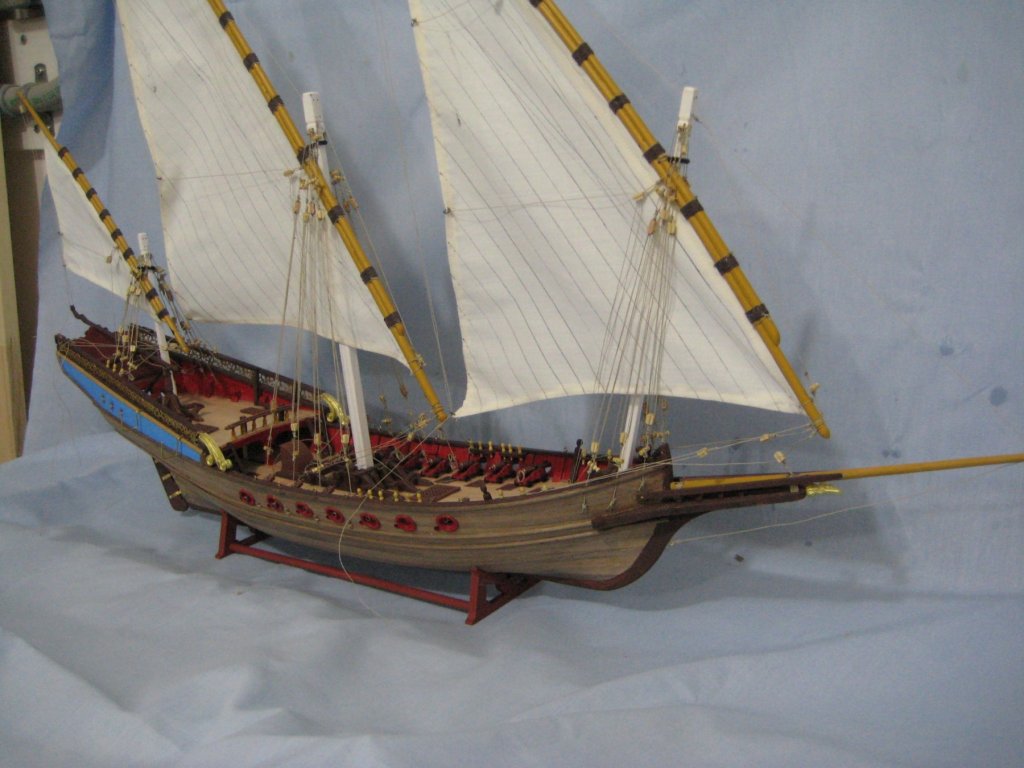
 Türkiye 'den merhaba, adım Adem, Acemice yapmış olduğum Sunbeki modelini sizlerle paylaşmak istedim. Ölçek 1/60 Plandan çalışılarak yaptığım modelin posta ve omurgaları huş kontraplak, gövde sarımı 2 mm ayous çıta üzerine 0,5 mm maun çıta kaplama, güverte 1 mm kontraplak üzerine 0,5 mm armut çıta ile armuz kaplama, direkler gürgen kavela, ızgaralar ve top arabaları lazer kesimdir. Modele satin vernik uygulanmıştır. Toplar kurşun dökümdür ve gerçek döküm top görüntüsü verilmeye çalışılmıştır. Modelin boyu 82 cm, genişliği 16 cm, yüksekliği 64 cm'dir. Google Translate I apologize for the translation mistakes. From Turkey Hello, my name is Adam, I wanted to present you with the Sunbeki model that you have done in a moment. Scale 1/60 0,5 mm mahogany lining, 0,5 mm size on 1 mm plywood, 1 plywood overlay, elbow horn dowel, gratings and ball trolleys are laser cut. Model satin varnish applied. The bulls have been tried to cast bullets and work out the actual cast ball image. The size of the model is 82 cm, 16 cm, and the size is 64 cm.
.jpg.57fd46e79aa8371279707a9c14aadae7.jpg)
.jpg.8044bdb9cf01fc5f3e9fb9b71a03eae2.jpg)
.jpg.0bffc3060e99b804fb122616bb7f460e.jpg)
.jpg.e0ac7d29130148b929a8e3d80614997a.jpg)
.jpg.27fc317e87c17d9c3c8b4e9f36c682a4.jpg)
.jpg.6dd387775761ac1a58dae3bf246727c0.jpg)
.jpg.38a949bd618144102af26f4ebab7252b.jpg)
.jpg.ed78a1b87e1d52b5543aff6198424d60.jpg)
.jpg.f8562f40c1018c7e9c8e60ee24e9f18f.jpg)
.jpg.a11b85149d81599e1afa1a4485ed219f.jpg)
.thumb.jpg.4f3f8cd36baa5a8410bd150f82779b1f.jpg)
.jpg.480fdccd79d778a06861d61cc7c28065.jpg)
.jpg.496e61d8841d20433c117a047255ff71.jpg)
.jpg.639c714e98726543f59e32be7cb9b8d3.jpg)
.jpg.f3269cf8a70ebddfbdad9e4f3a19c591.jpg)
.jpg.3c9607892554417a72841a017cbf44c3.jpg)
.jpg.c98c788094da4ca260b76f6153274d1f.jpg)
.jpg.ef7b9b9c0aa7fe9a78838797e0bdb504.jpg)
.jpg.42527b71429c7c014db352ab4b491d4e.jpg)
.jpg.3d54372ced13142f1e0f9e601c947bc1.jpg)
.jpg.ccf5a44bdefb0e091d7ed4cdcdb0727d.jpg)
.jpg.8a66f26839ff46a8dfdd0c816a76f68f.jpg)
.jpg.cfeb271fb33c25abb7937fee637af498.jpg)
.jpg.1aba261cfbbe2b146953976644566b23.jpg)
.thumb.jpg.80bf7d81d8b9cf7a9a0cab4e95993053.jpg)
.jpg.11b32e8adc0189b4eed79ef0bb8e61b4.jpg)
.jpg.5e5df0845591a70d82914f94bd146b2d.jpg)
.jpg.40b8bed3dd0aa99cc284fea0409a5ecc.jpg)
.jpg.f177925b24a87a8ef609c113b0d67b99.jpg)
.jpg.27929e8759763bbe801e35de4b6a2943.jpg)
.jpg.819eba07f091932418a35e8c549cd69b.jpg)
.jpg.01cc76d8935c3fcd97e751a8e5b04a8f.jpg)
.jpg.c6bc0bb1fcd6dd51de4862d021e7d296.jpg)
.jpg.a6a3b978f43b53bd035ac08218f8e976.jpg)
.jpg.d5c37ca288ce9d208749ea1d0525d935.jpg)
.jpg.f22d514016e328db05b8ef60fc29e7d4.jpg)
.jpg.412fffebc22148cb15f578eb42c78ac1.jpg)
.jpg.2a0033fccf45279868b452a4d3922aad.jpg)
.jpg.b0afad57aadc28c39e9db352e25712f9.jpg)
.jpg.9c0f148e7c0d4f958be3e3096fb94235.jpg)
.jpg.1ed6e0aad8d3e2969fa6569a36e84f00.jpg)
.jpg.867d1ce37116668c6b8ac044f0e7808e.jpg)
-
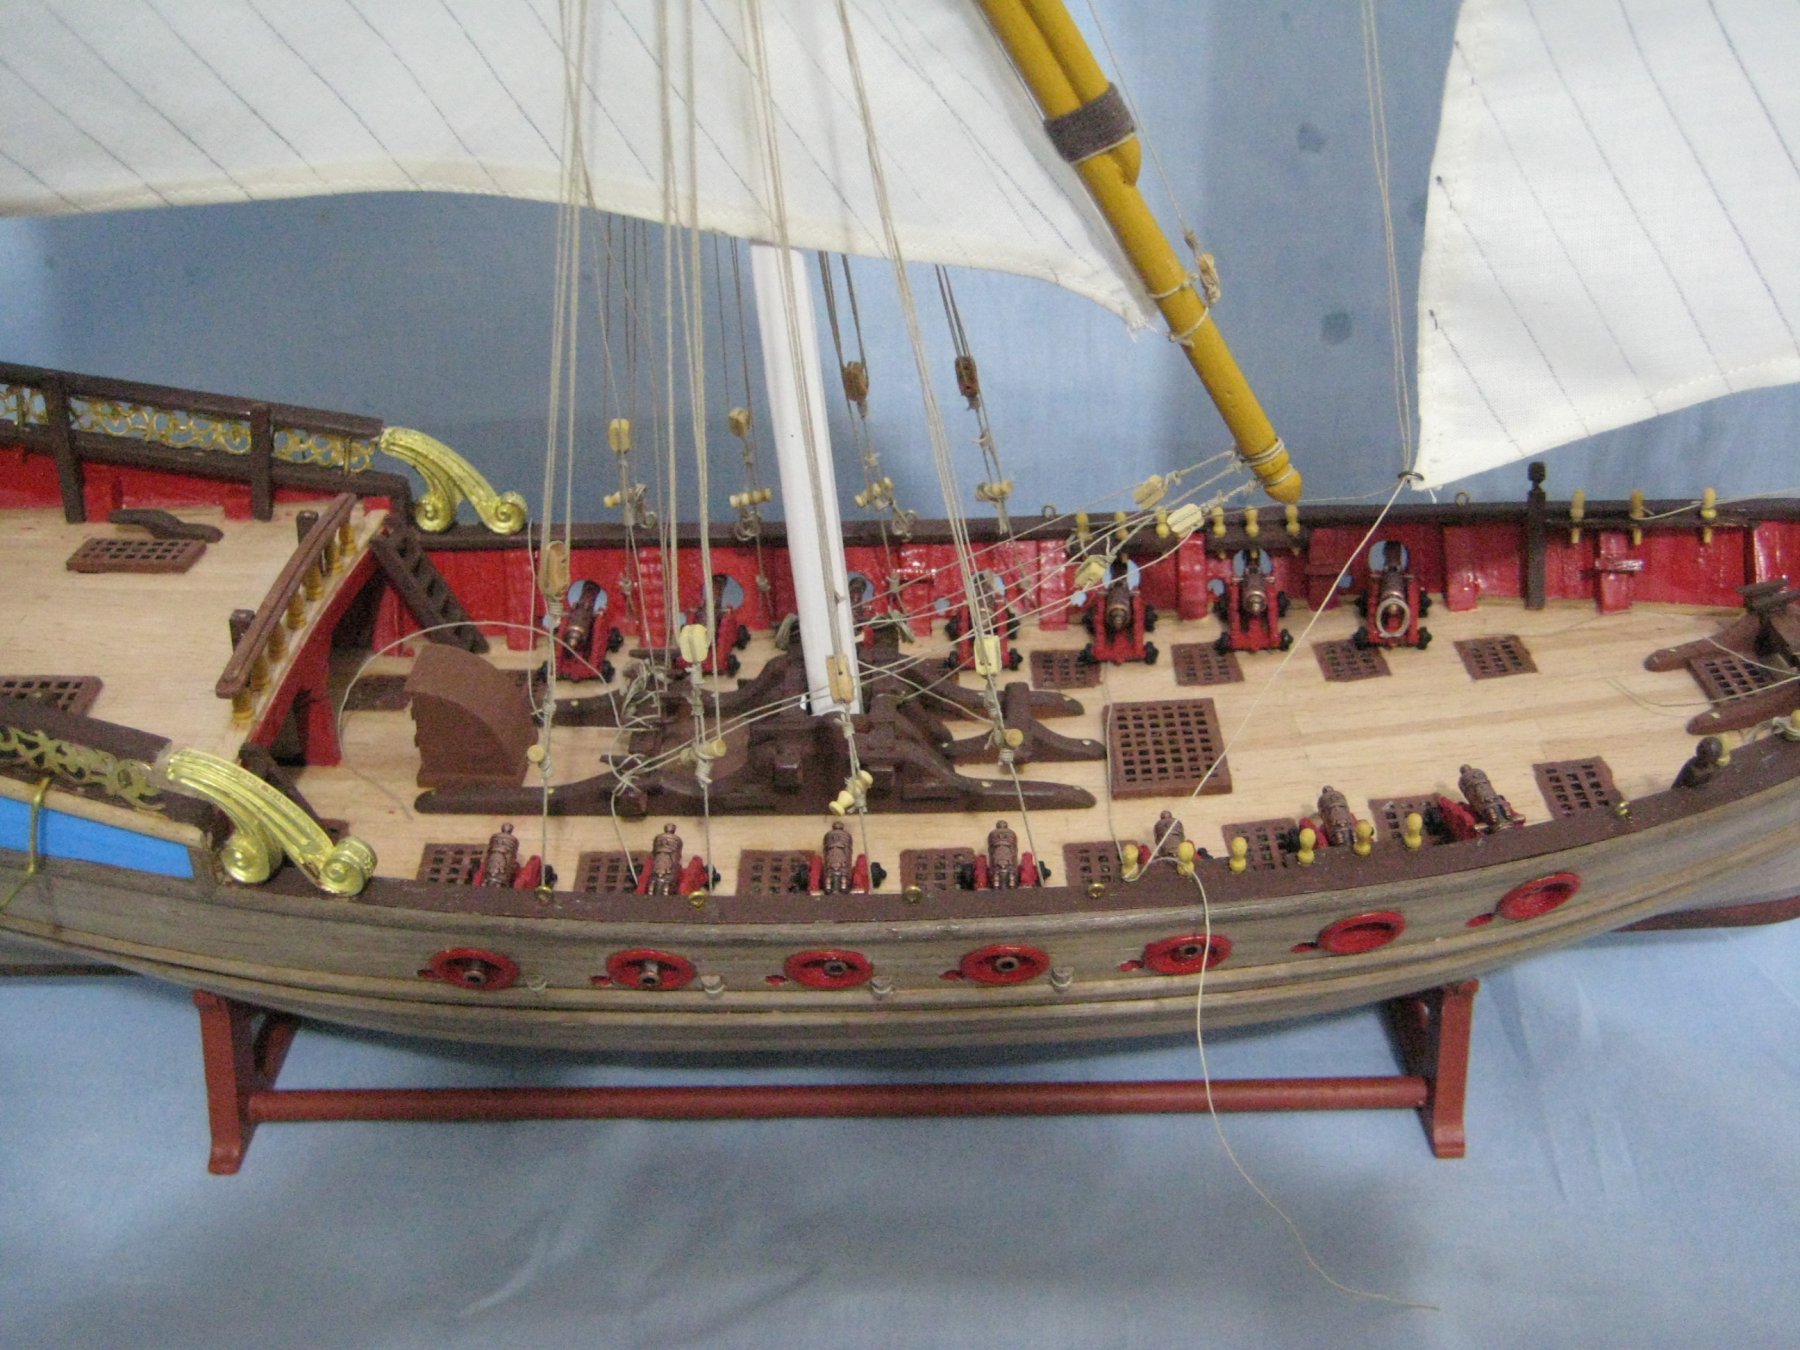
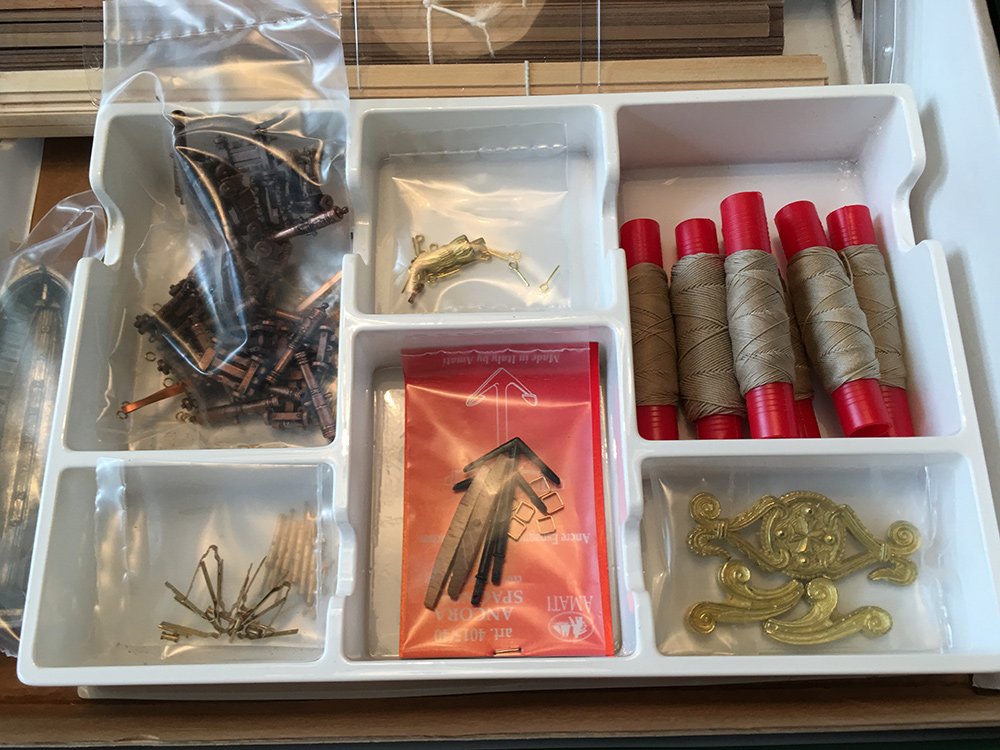
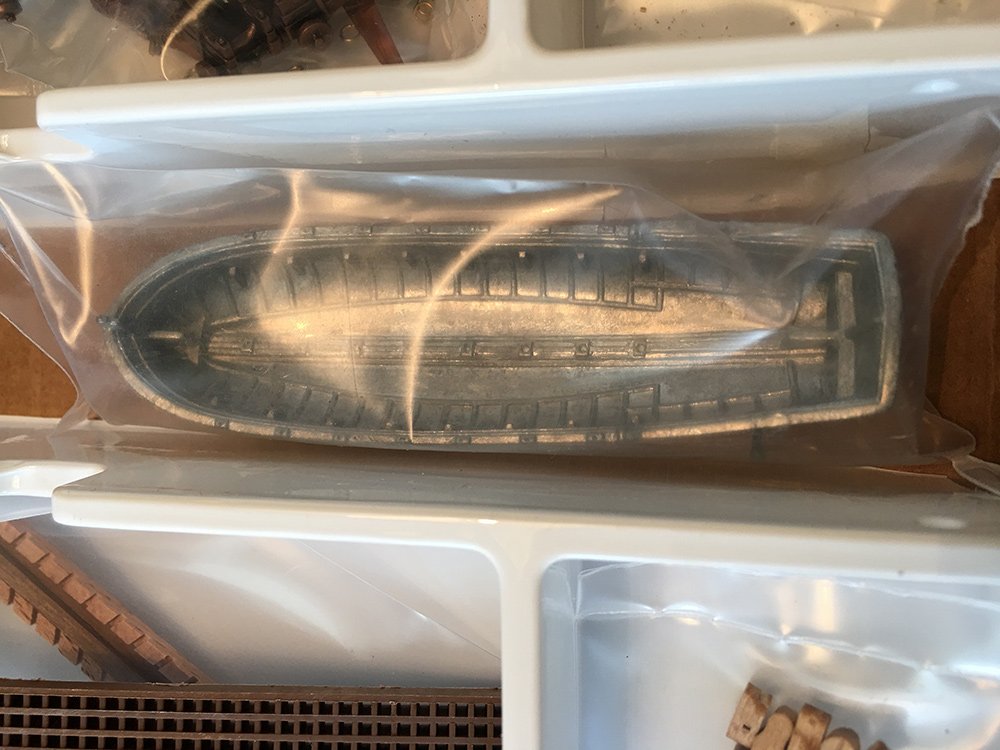
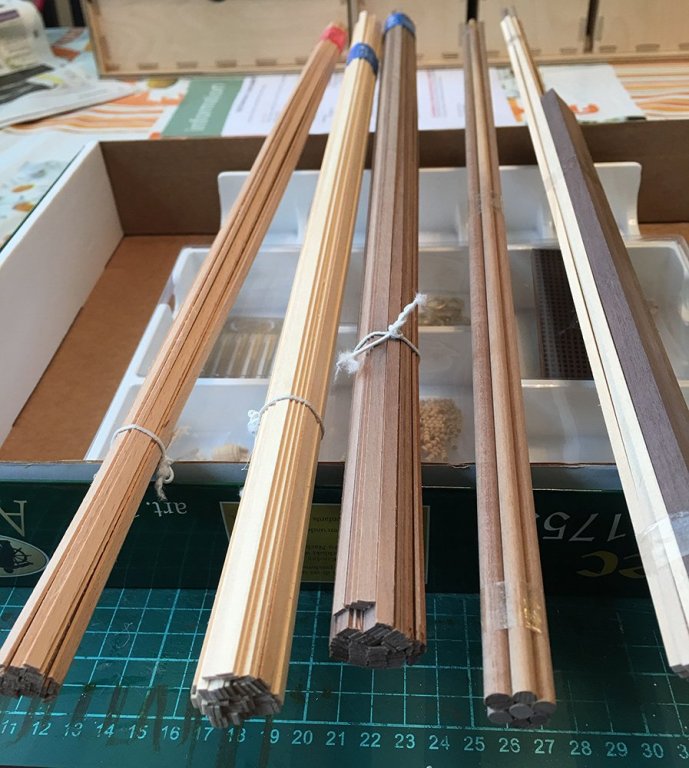
 A fresh start to a new build, friends. This is a Barbary coastal favorite ship of a variety of pirates during the 18th century. I chose this build for a second build in progress to relieve myself from mistakes made on the first build for awhile. I have learned a great deal from you all and really must think every stage of the operation through. The Xebec is a fascinating ship of her day. She was swift and carried a fairly good size armament for her crew typically used by Mediterranean pirates and off the Algerian coastline. I will give more history later. This Amati kit is a museum quality hardwoods and softwoods, metal fittings and cannons, scrollwork, oars, lateen sails, six types of rigging, color plan...I have found this kit to be of very good quality More data to come in good time... John E
 -
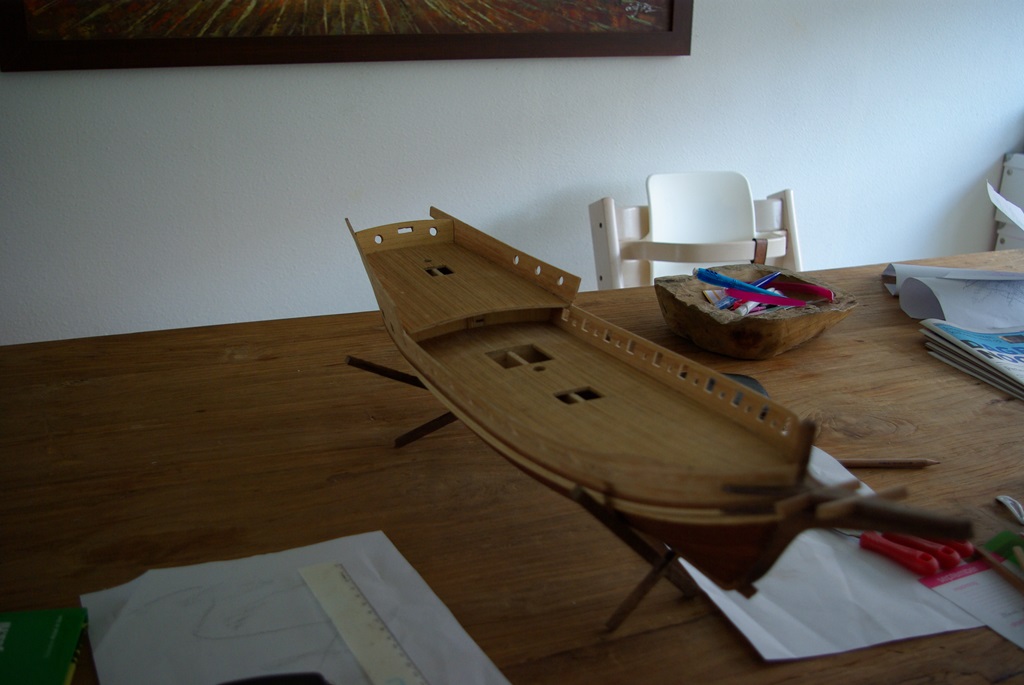
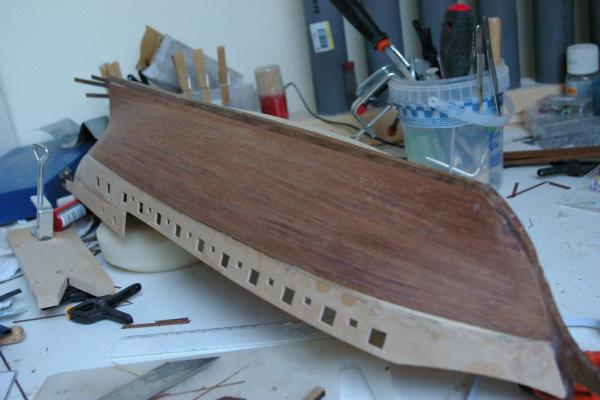
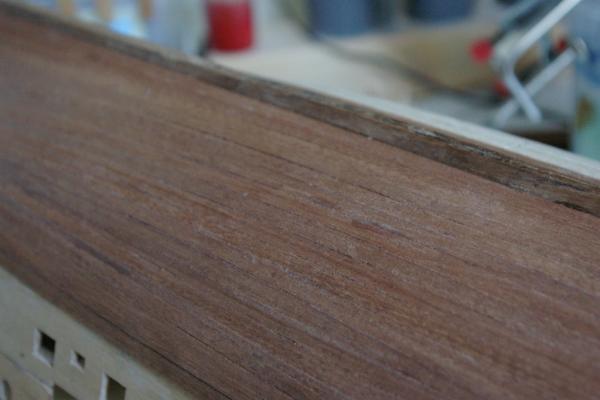
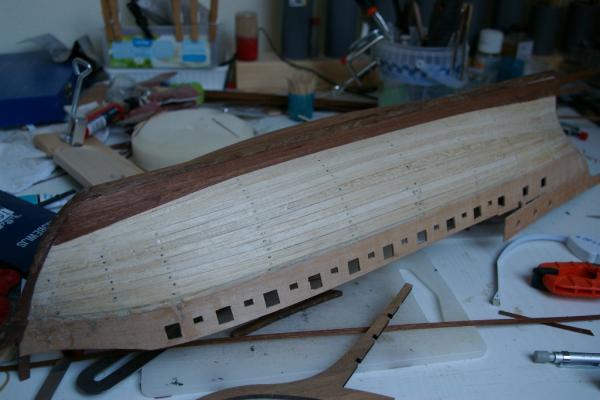
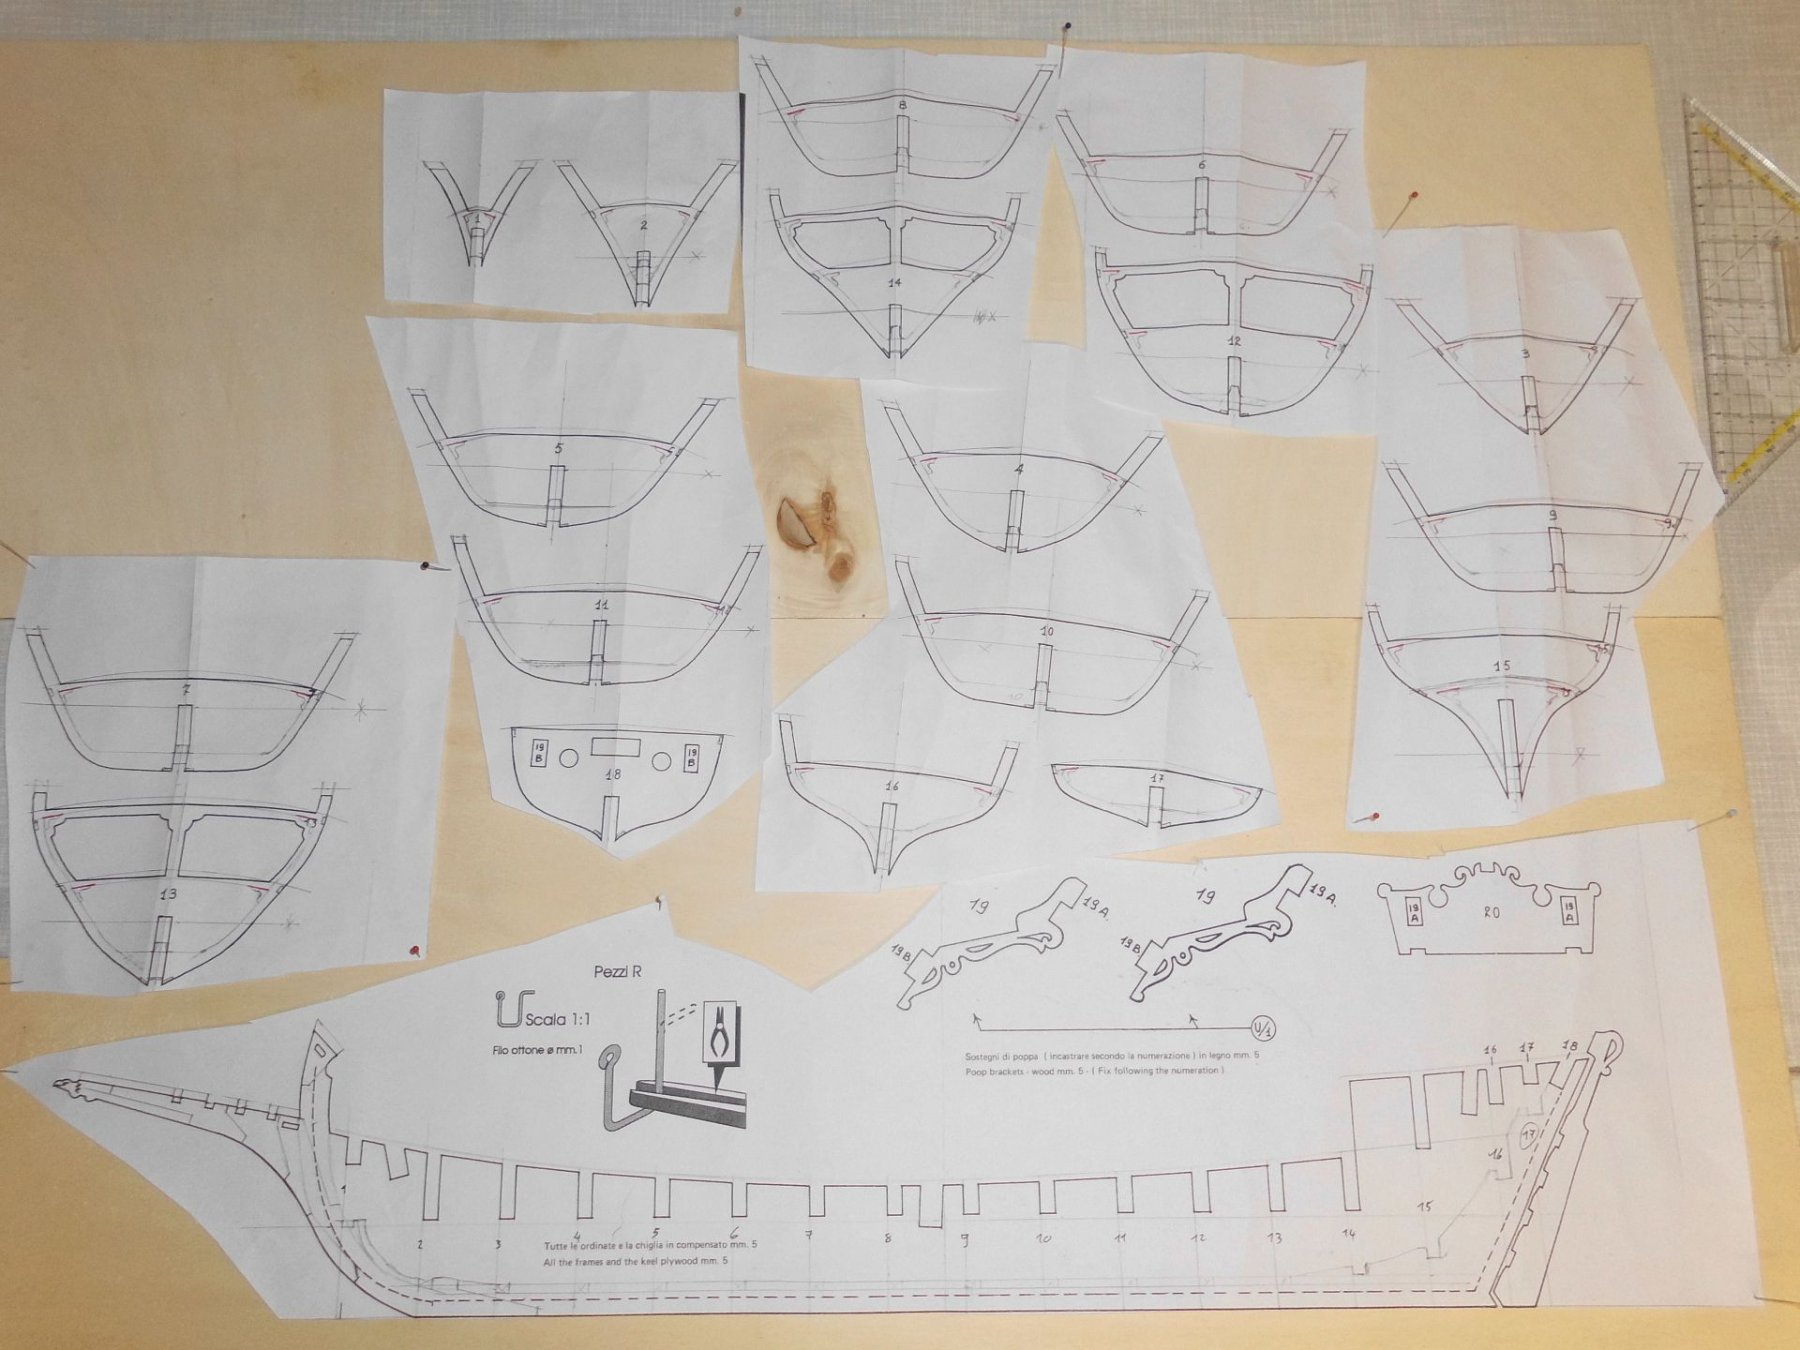
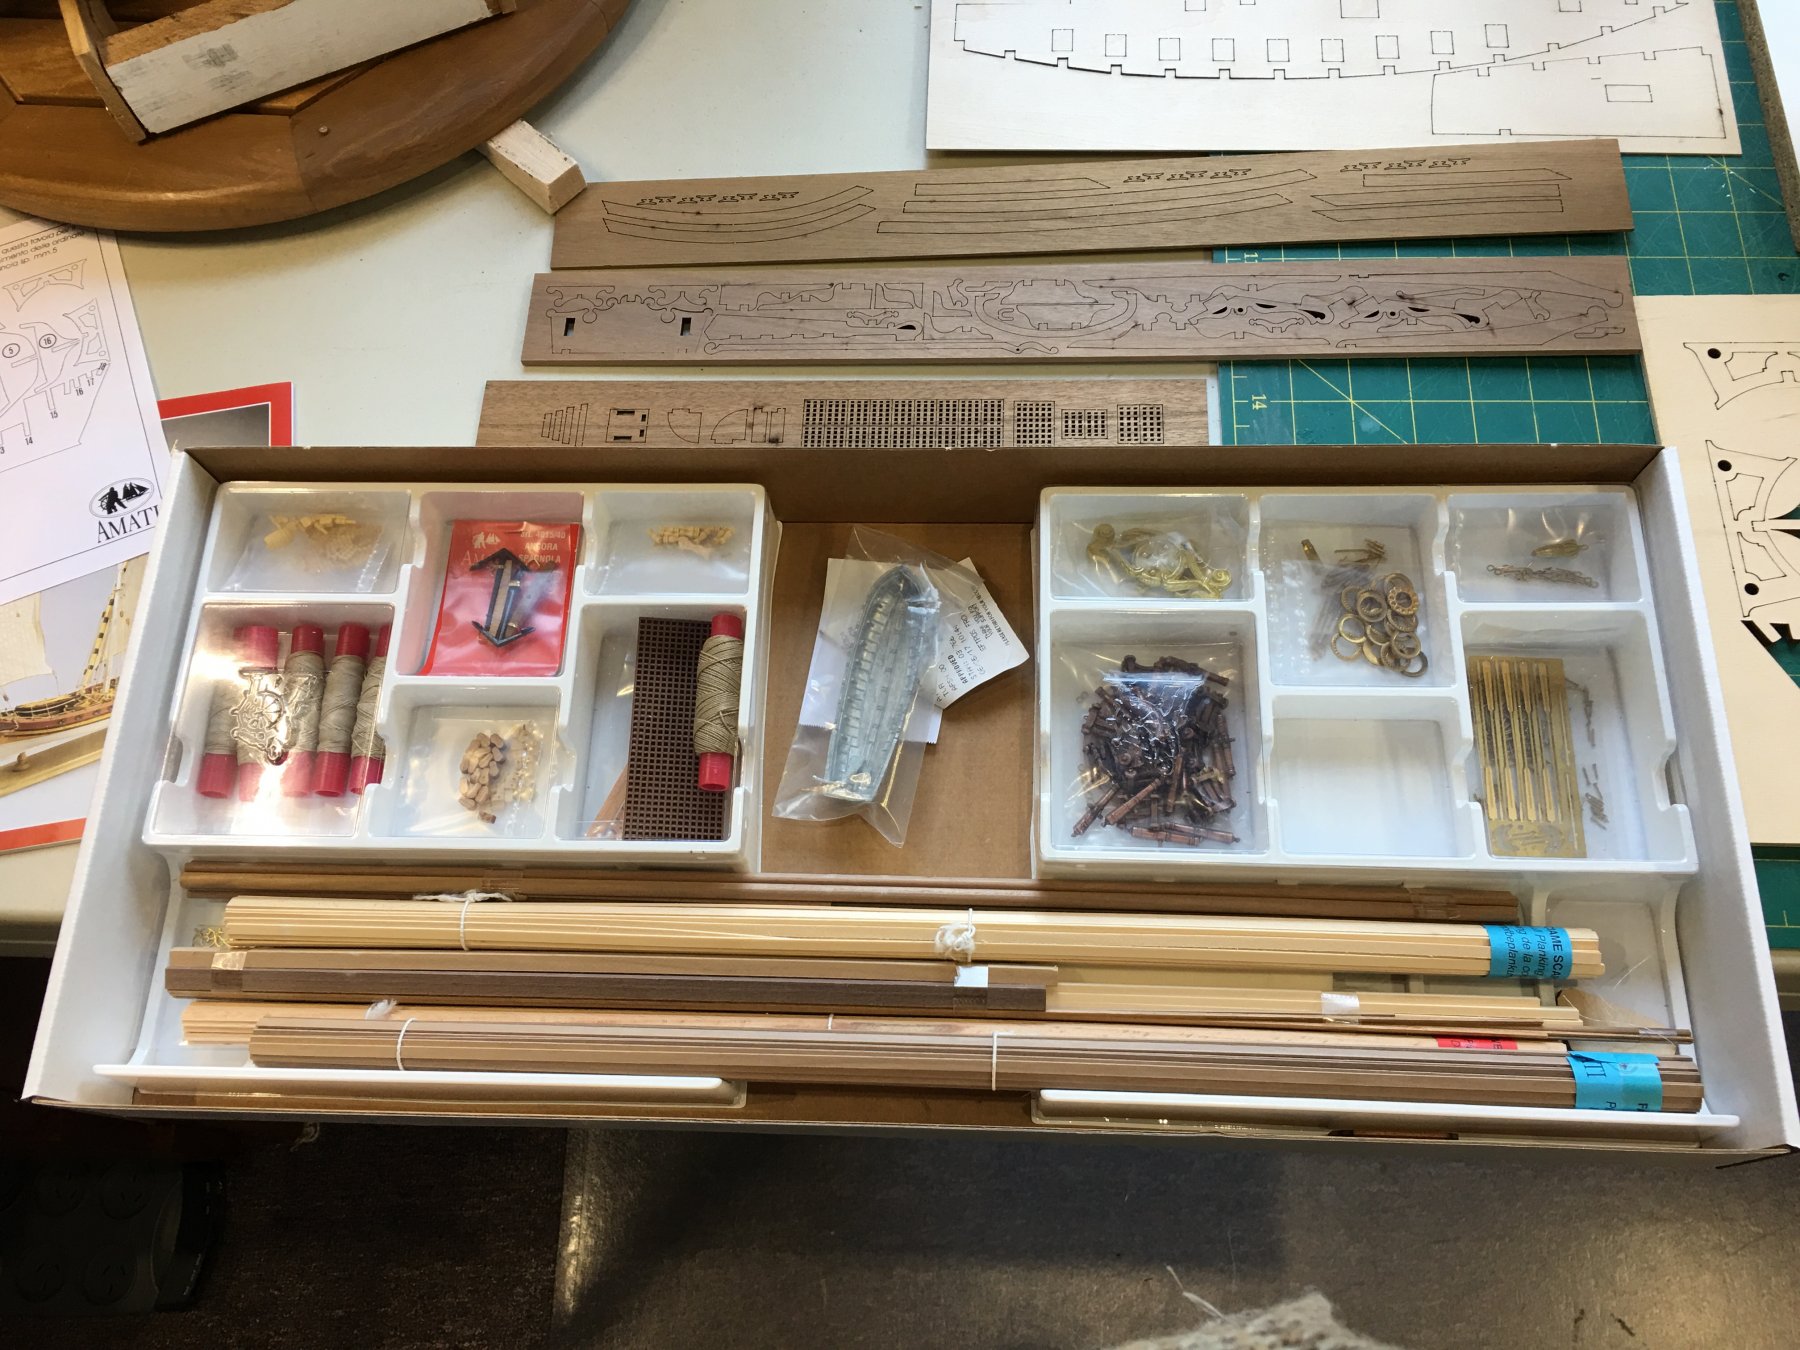
 I purchase a set of Amati Xebec plans 1;60 scale last week, and I must say, these are a very nice set of plans. This model will be built around these plans with some alterations. I used Cherry for the Stem, Keel and Stern and Tulip for the Bulkheads. I wanted to use 5mm ply for the Bulkheads, but my local store only had 4mm ply in stock, as I had a load of 7mm Tulip, I milled it down to 5mm and used that.
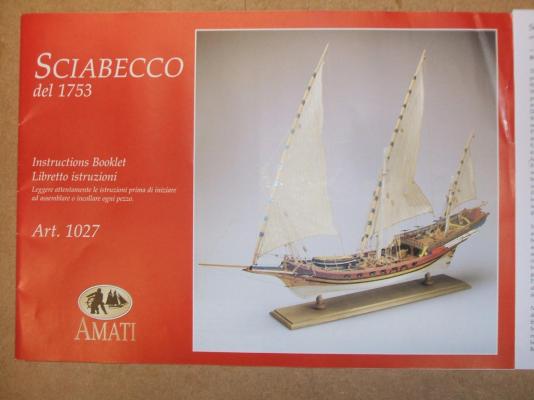
-
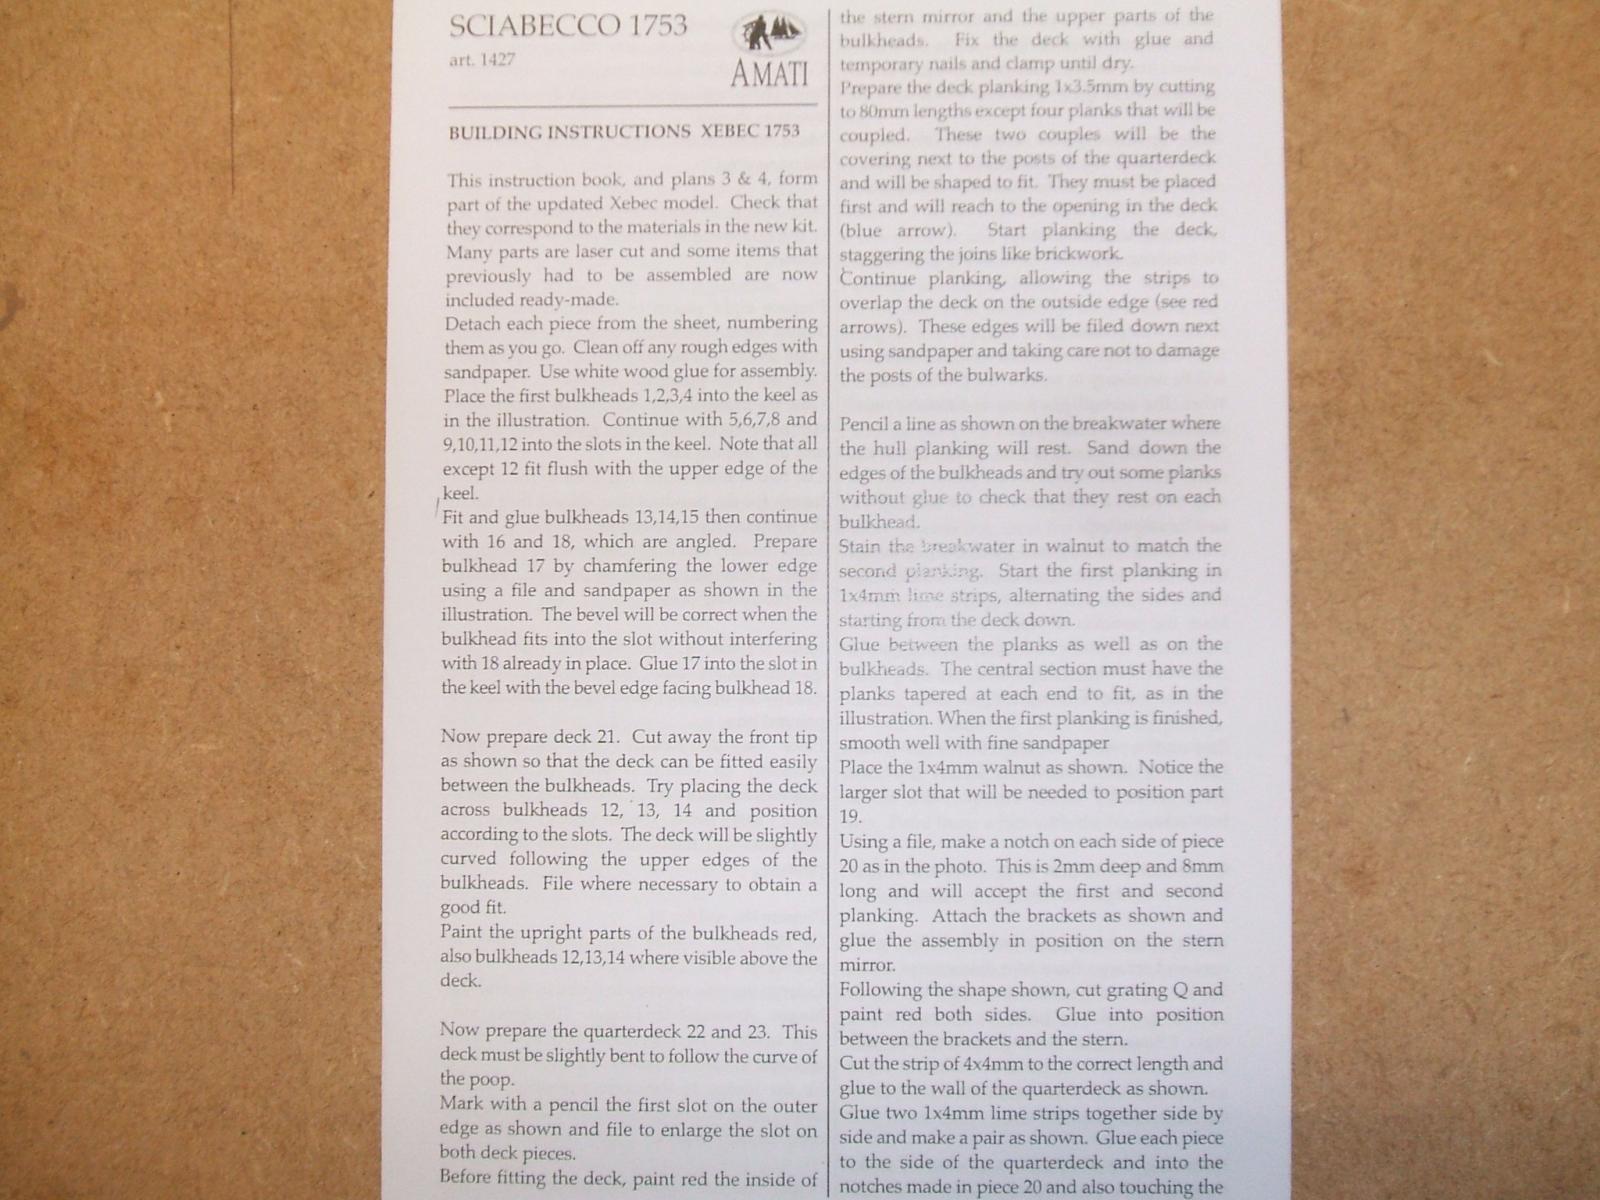
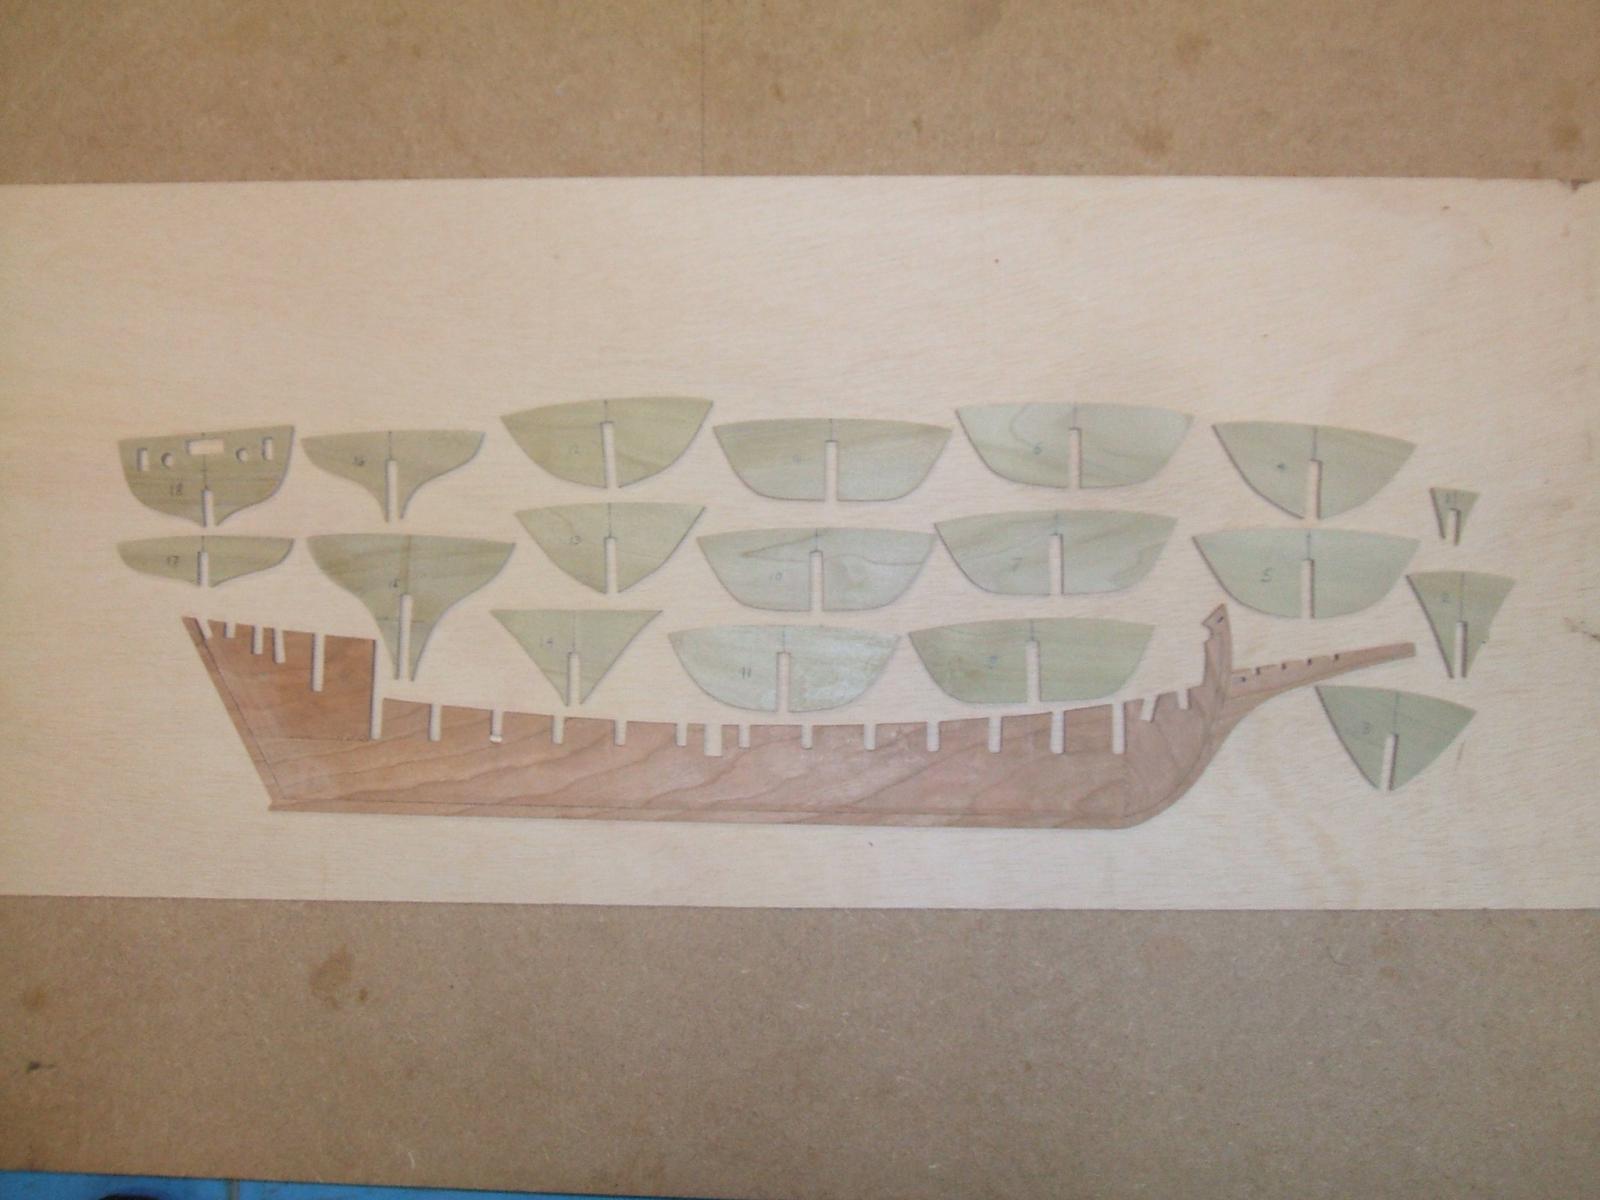
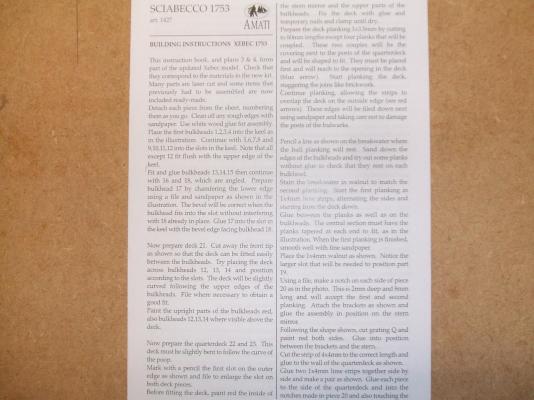
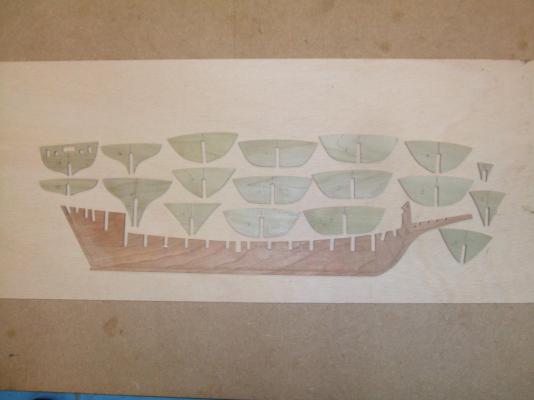
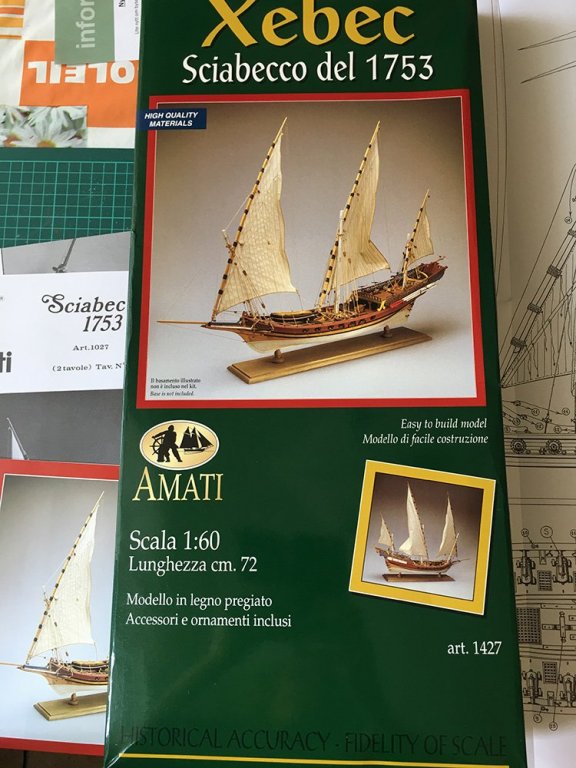
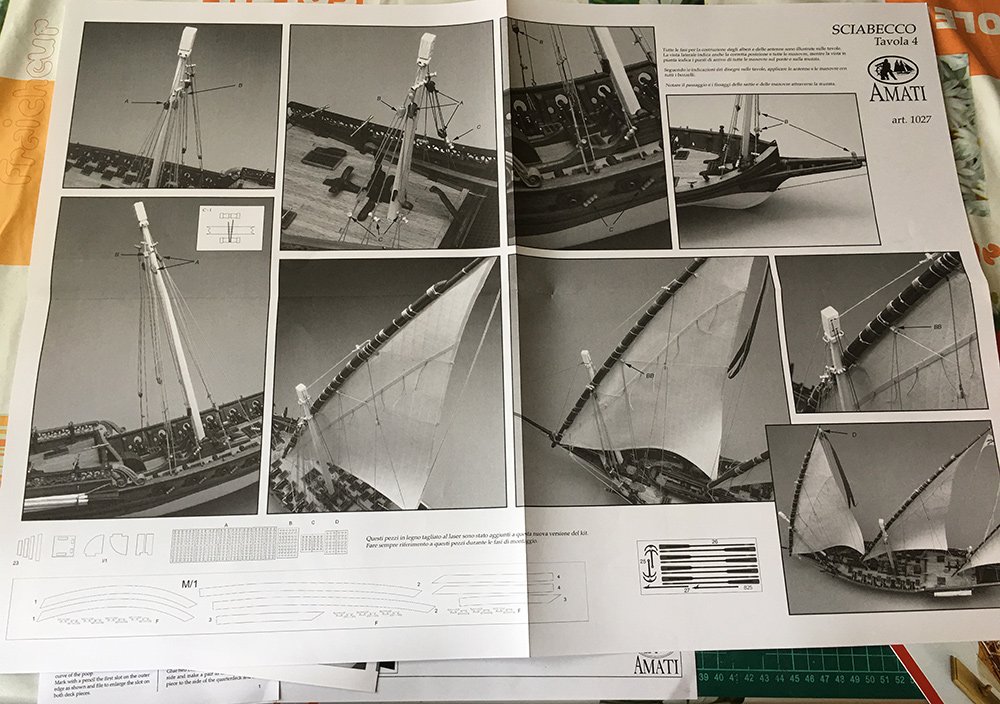
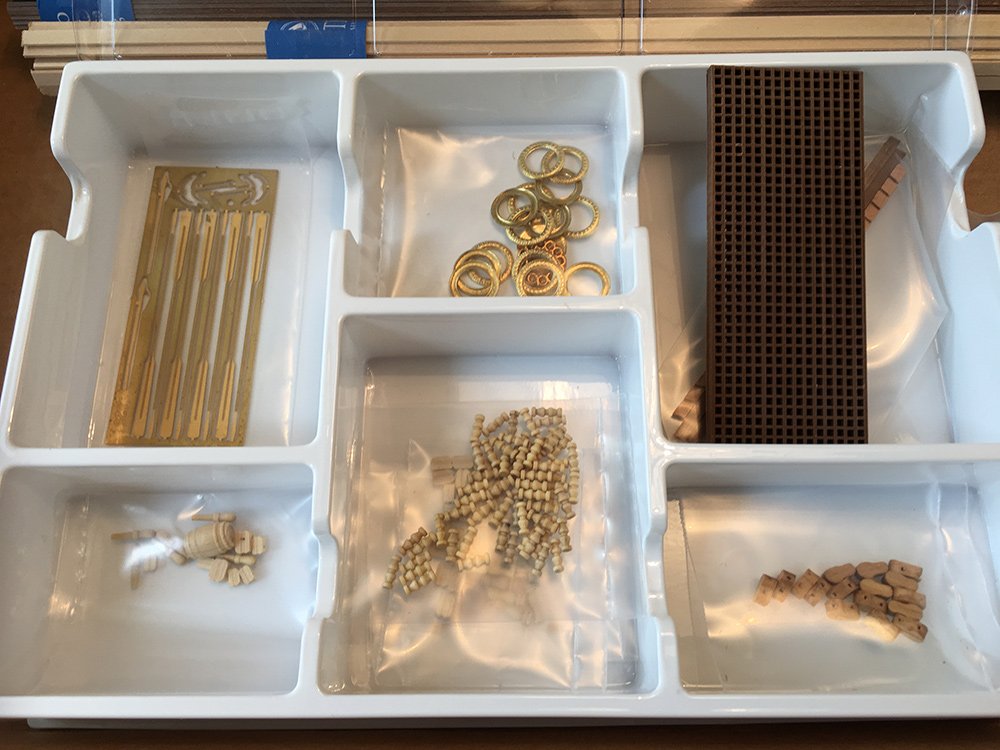
 A new build so I have something to do while waiting for Vasa parts. I ordered this from Maristella and apart from the excellent service Mr. Pavlovich offers I believe that they offer the best prices in Europe. My only regret is that I did not order one of Marisstellas own kits instead. But then again I have a reason saving up money for that in the future. The Xebec is the smallest shipmodel I have had so far. But the rigging is something that I for some reason wanted to try out. And it will be like a practice before I go on with my Pinco Genovese that is more like a semi scratch build from Euromodel Como. Here's the pics: Stuff: They updated the older kit from 1027 to 1427. There are 4 sheets of plans. 3 and 4 are of the updates. Instructions in Italian, but there is a paper included with the English translation. Bits and pieces: More: Ships boat: Wood, Looks like good quality. And we're underway!!!
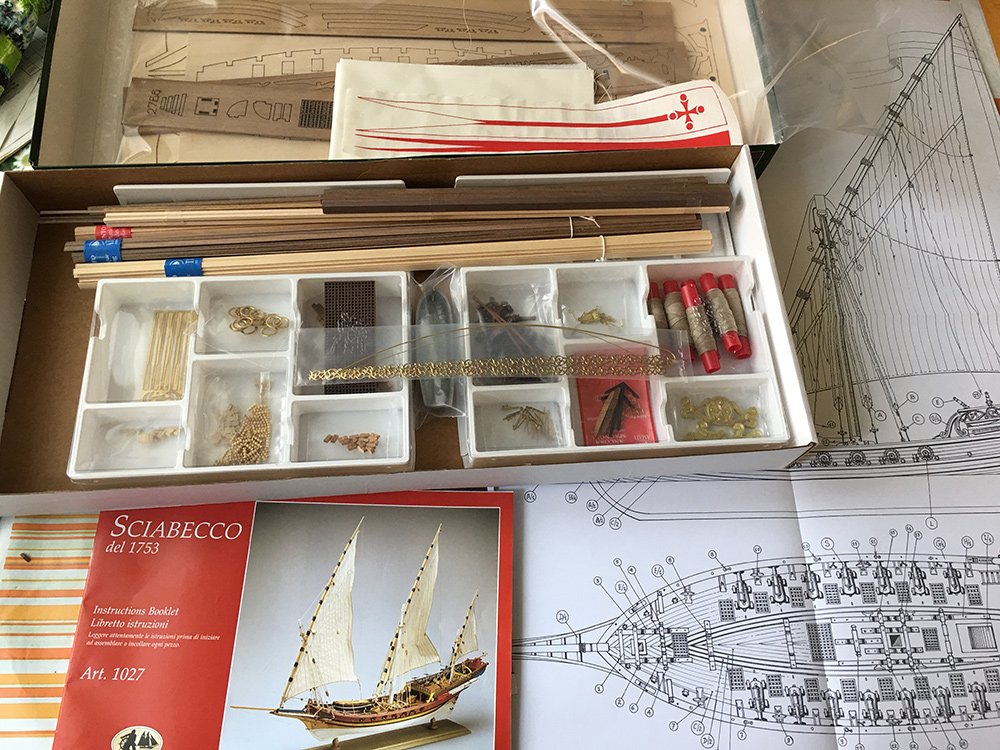
- 18 replies
-
- 13
-
-
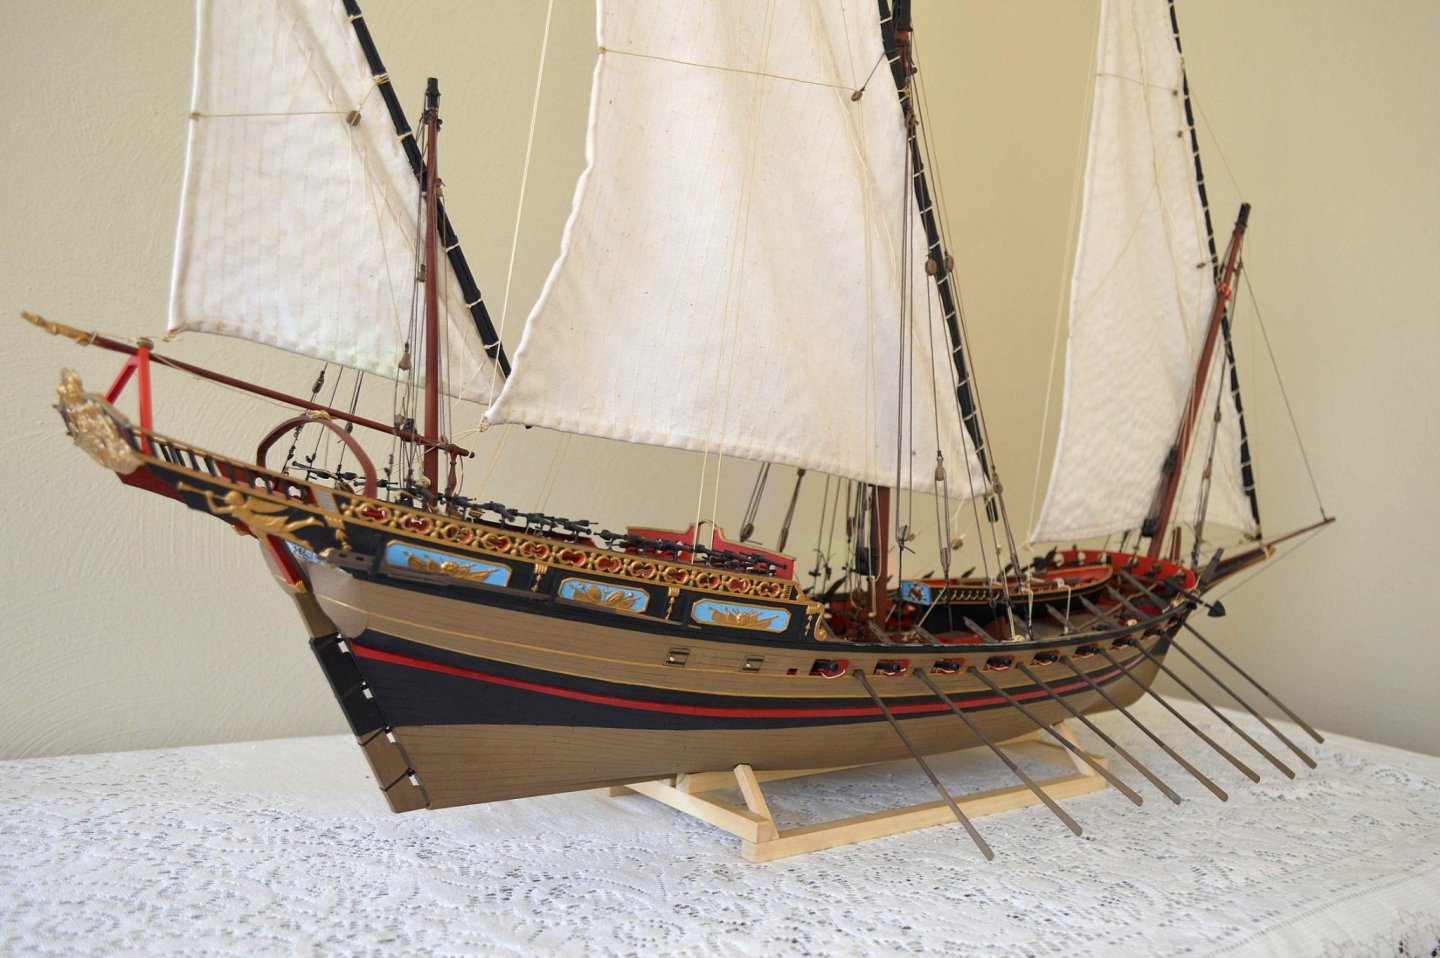
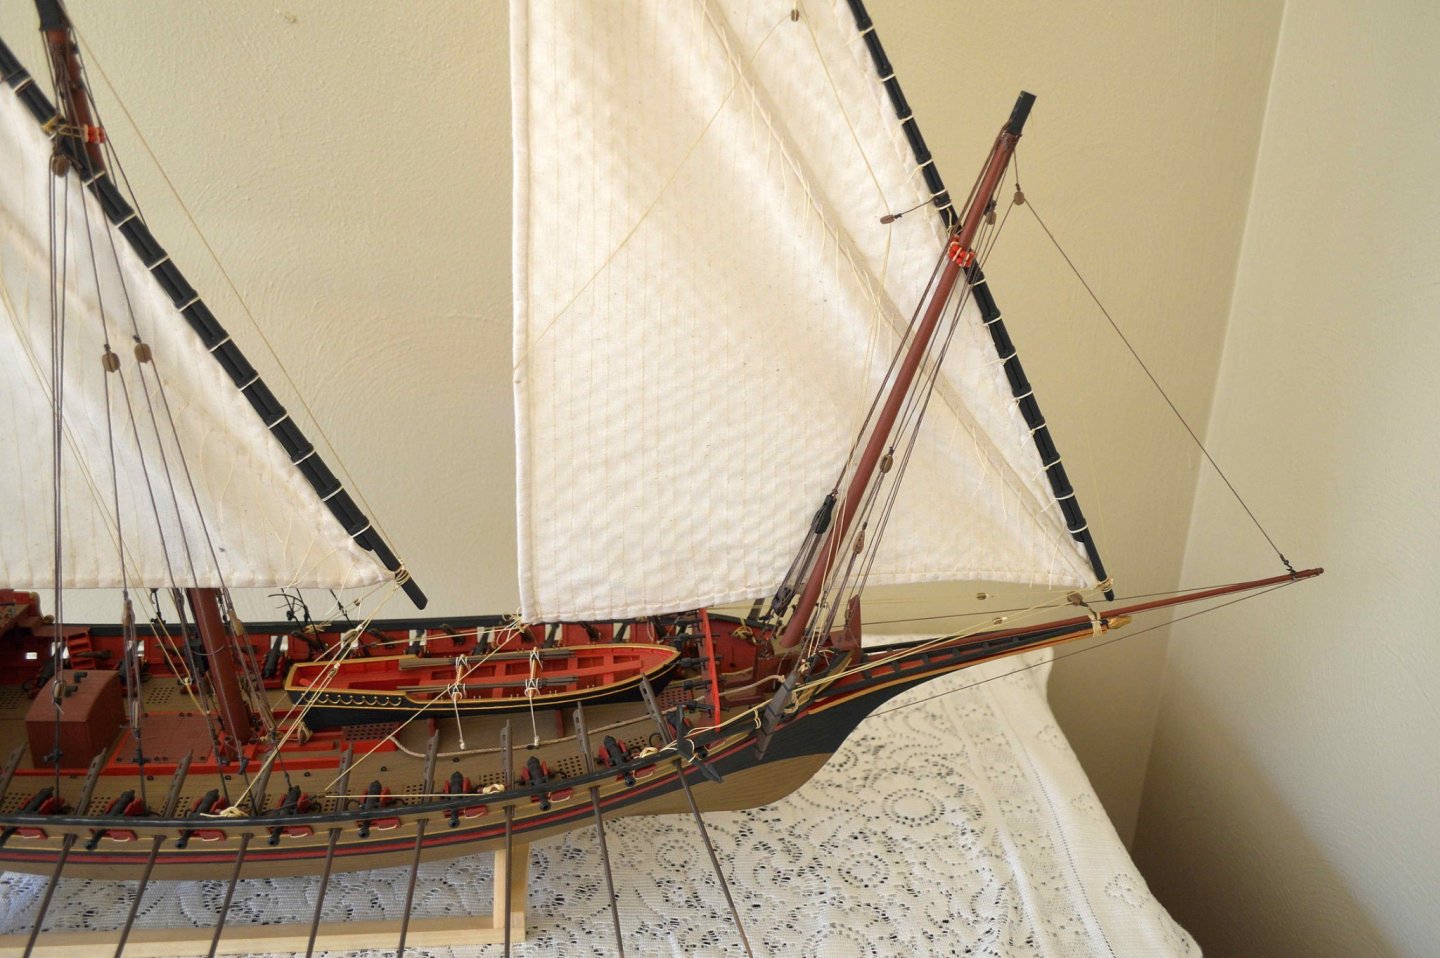
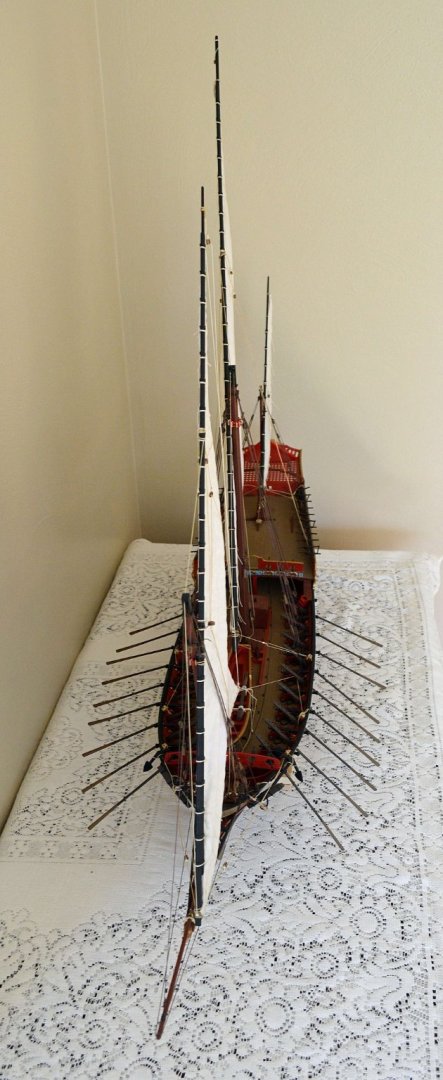
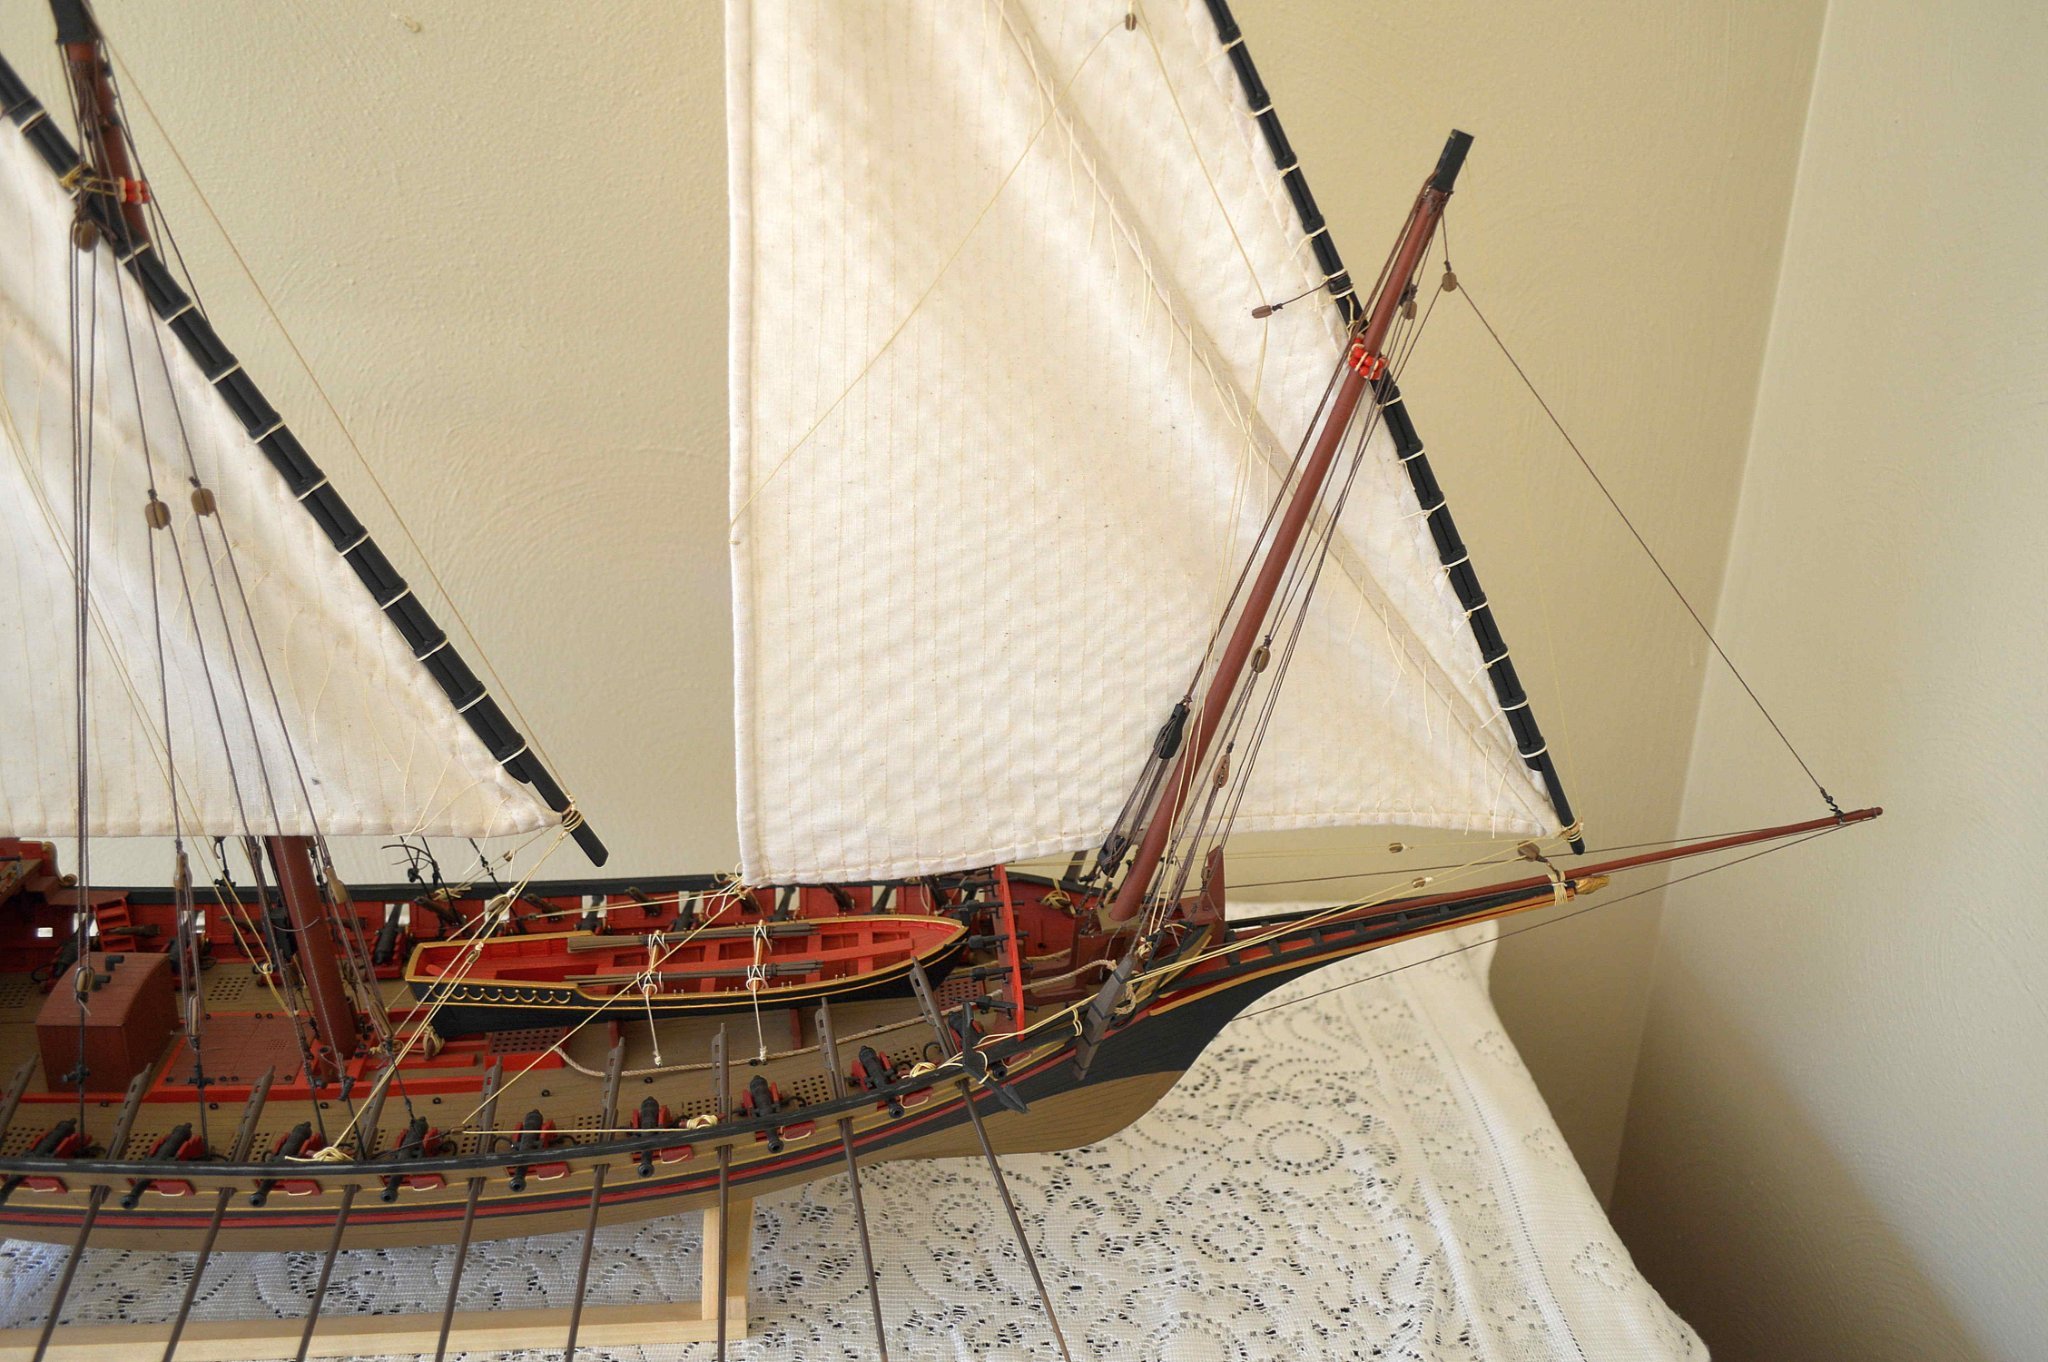
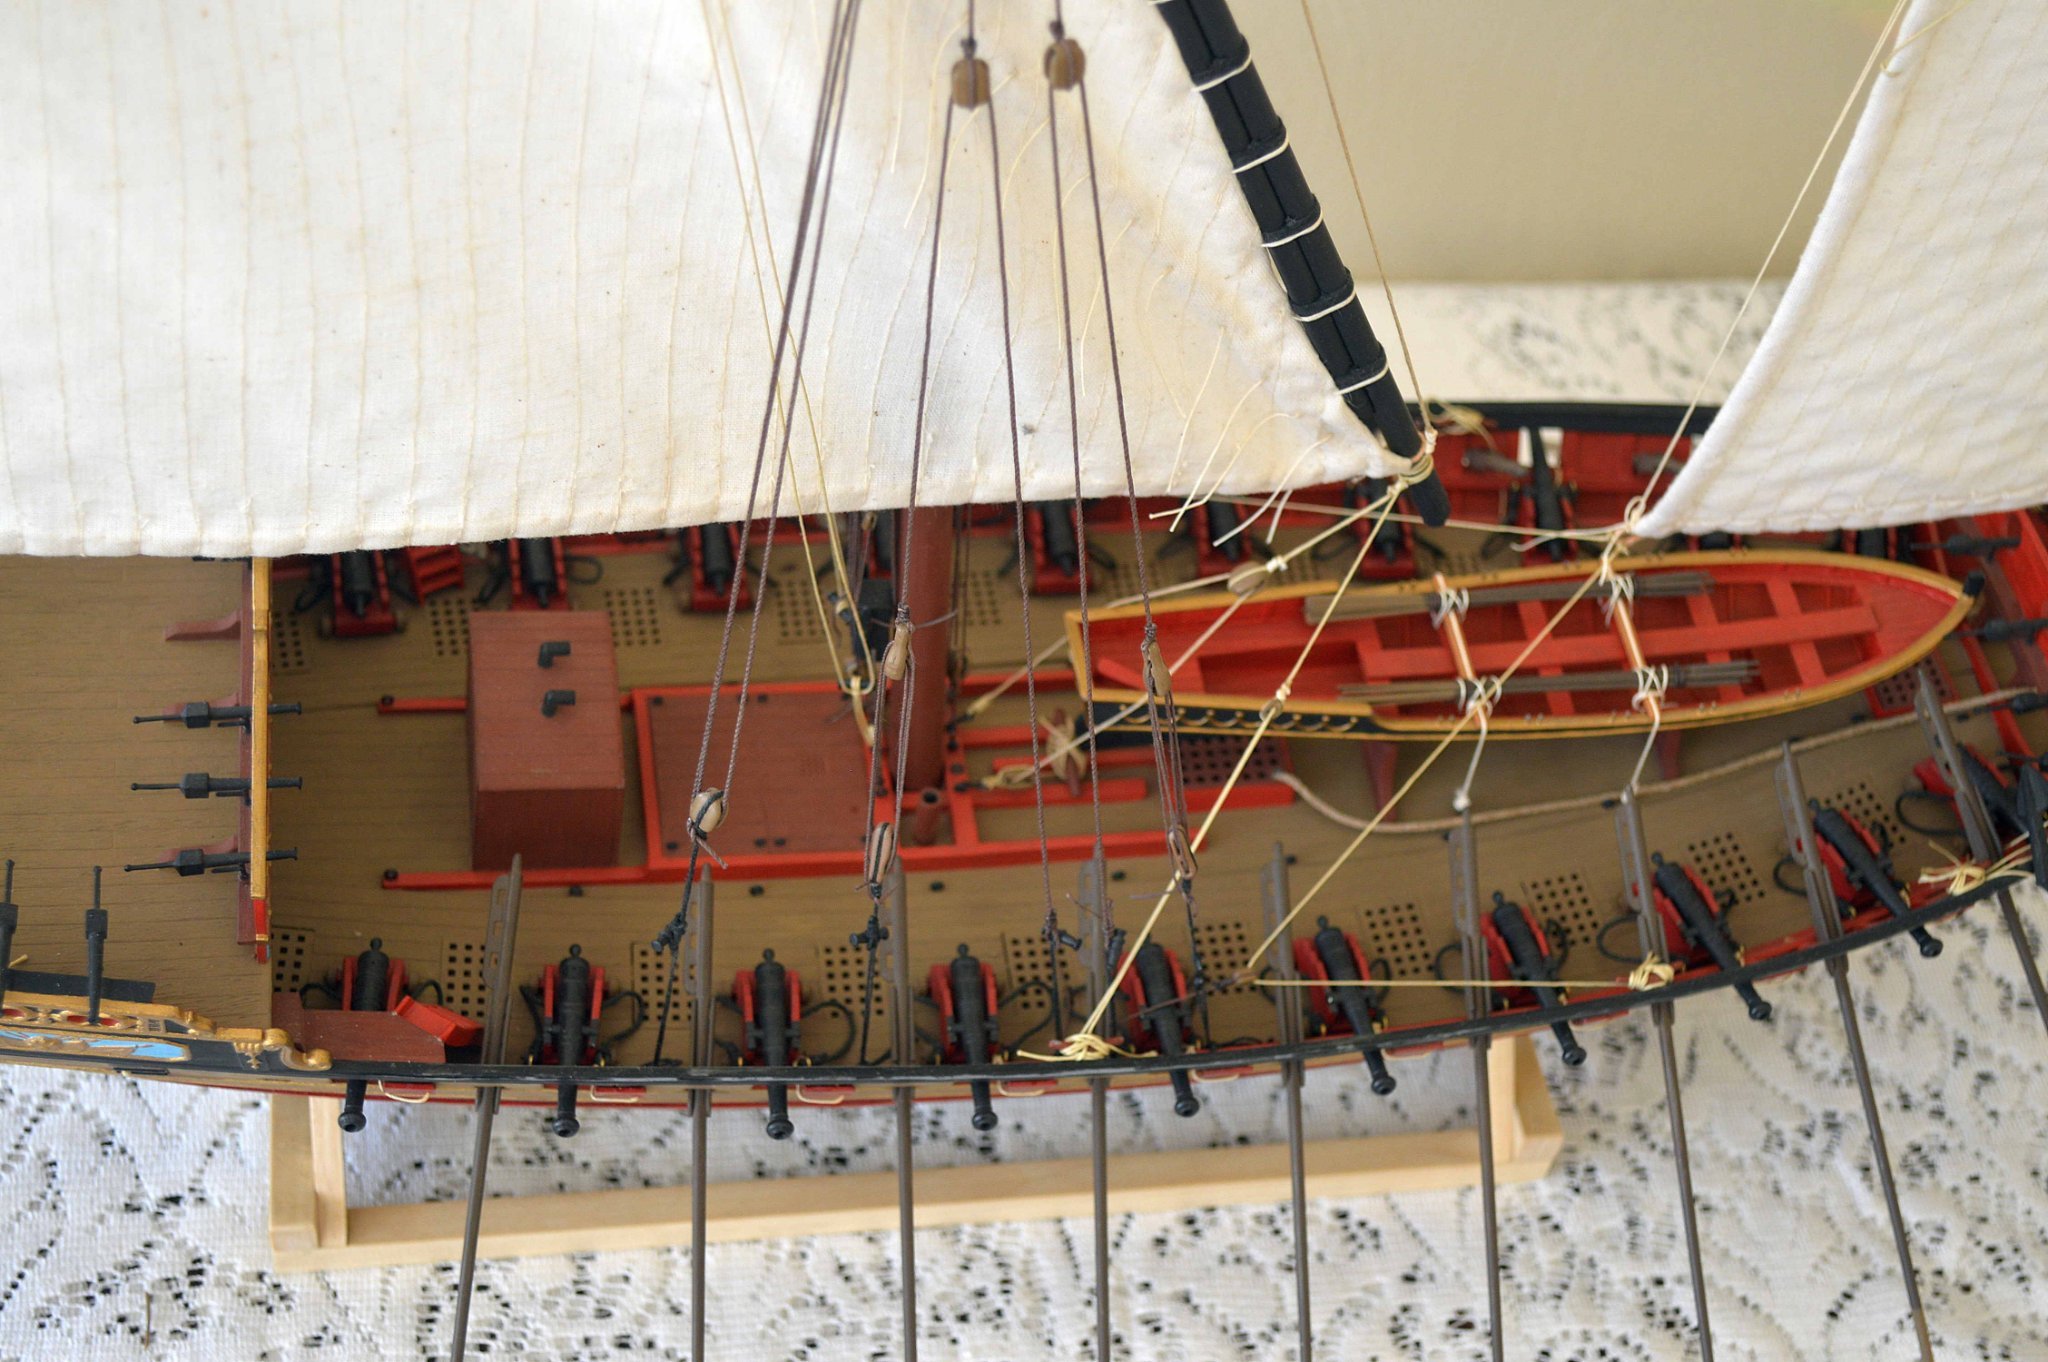
 This is not really a build log as I have my Xebec completed waiting for its display case. These pics are pretty much the completed model !

- 10 replies
-
- 13
-
-
 So I decided to start a small log of my progress on my Occre Xebec "Cazador". Mainly because there's no other log of any Xebec on MSW2. On the old MSW there where several, the log from Alexander Romaschenko has been a great help. Luckily Ilhan still had the pictures.... I'm not too happy with the quality of the Occre kit, I have the feeling it's not complete i'm missing quite some parts and as always there's not enough rope. I've thrown away quite some parts as well. All metal parts and plywood, precut parts. I've made the cannon carts and rigged them. Also i've put the cannons in Brass-black to make them look (they actually are) oxidized. I'm using pear and wallnut for remaking the plywood parts. I've started in 2009 and have been working on and off. I have 4 daughters so got my hands full from time to time 2010: So that's quite nice but not nice enough....... 2011: Current state:


-
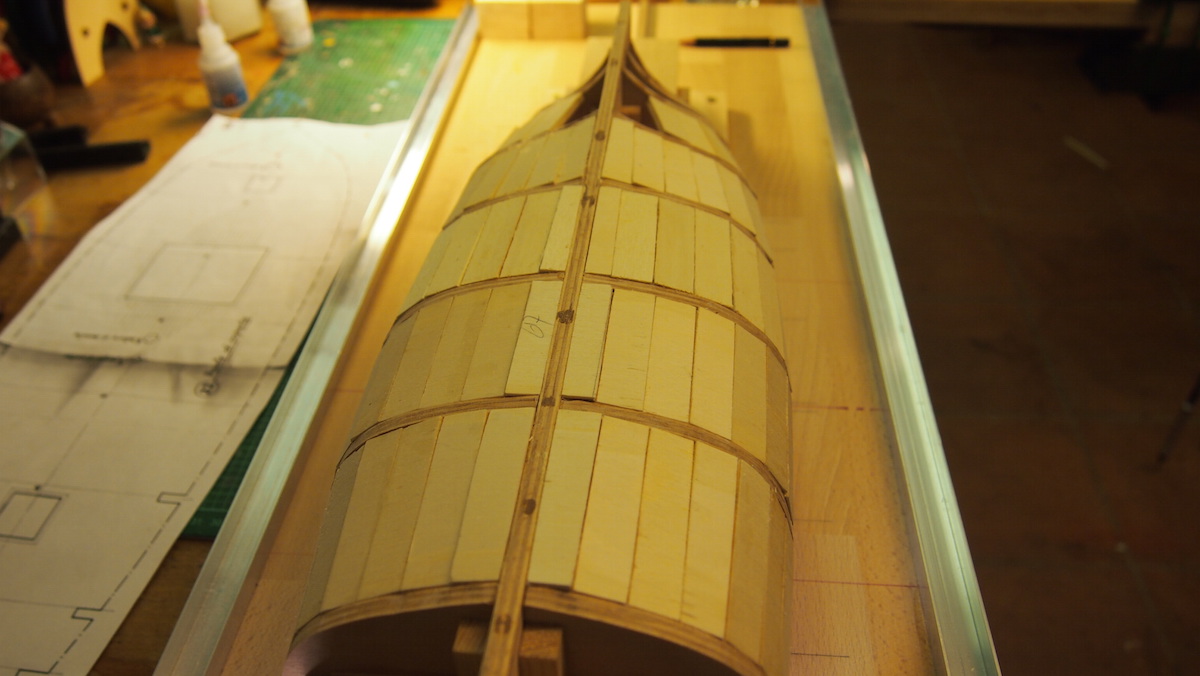
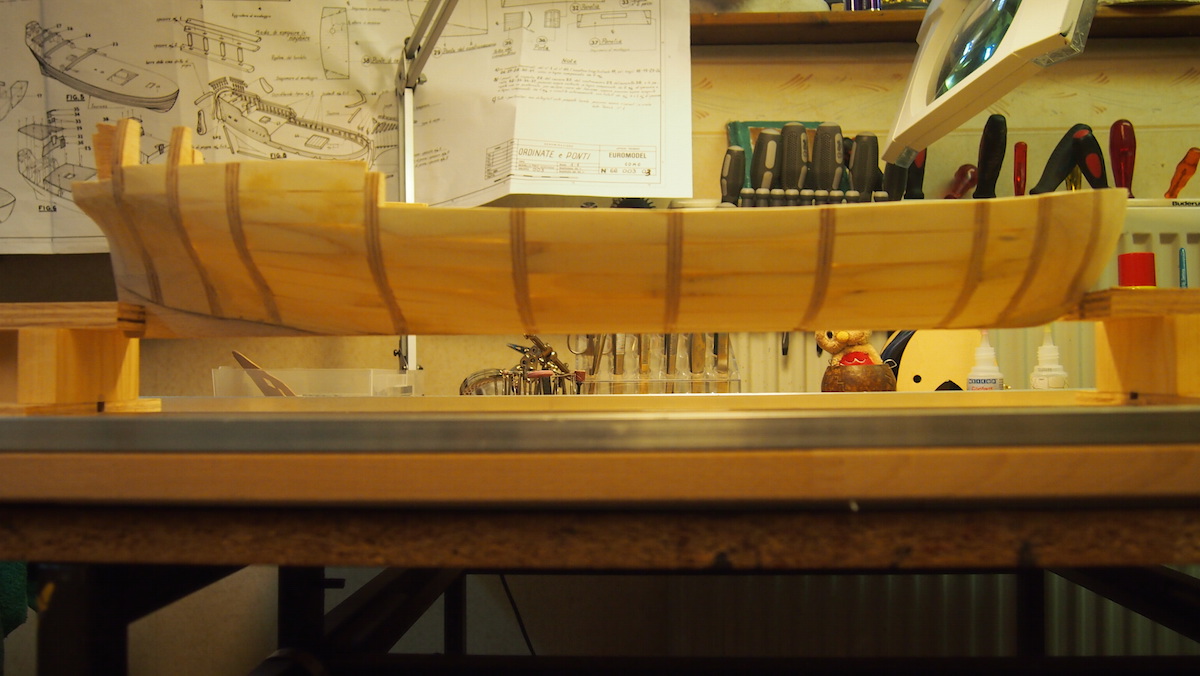
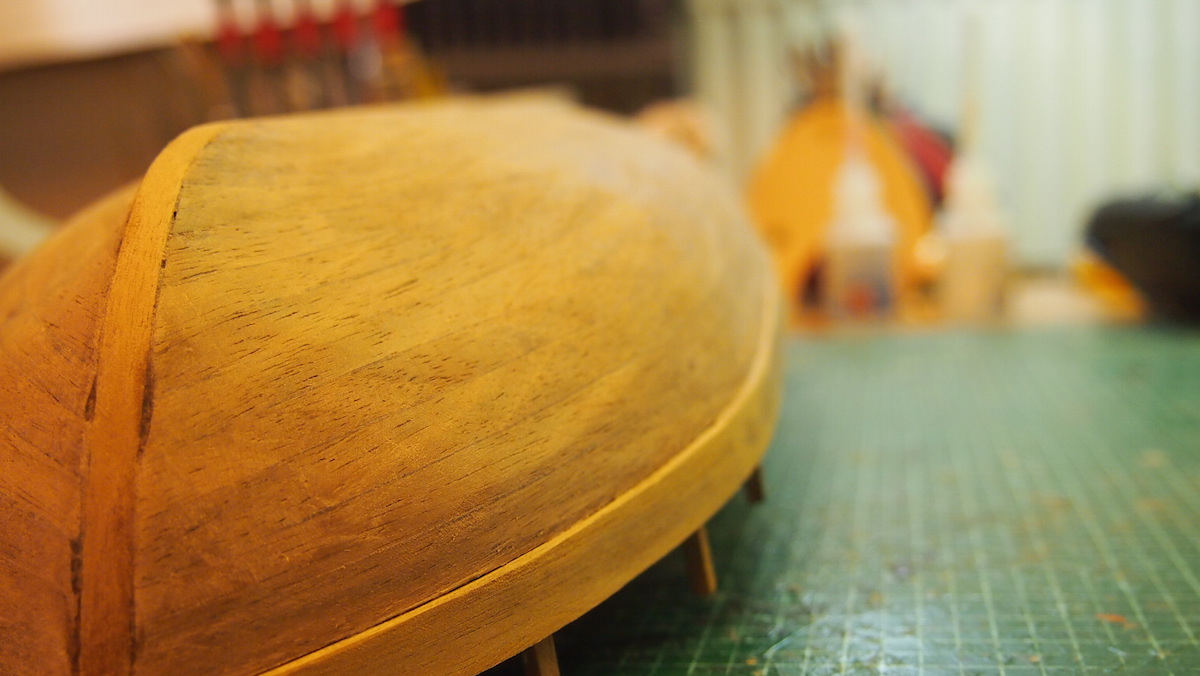
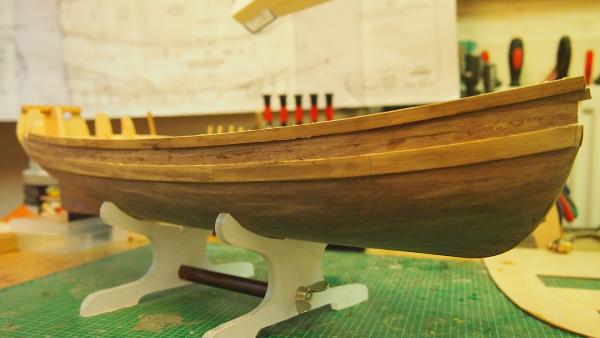
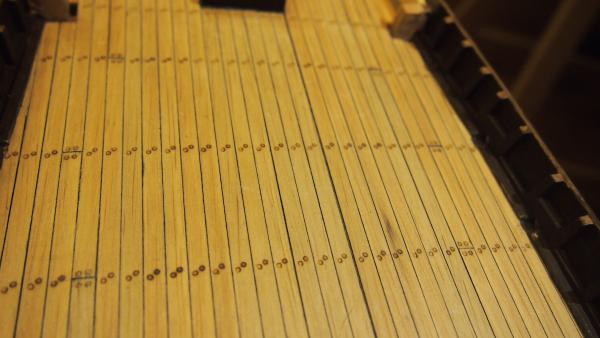
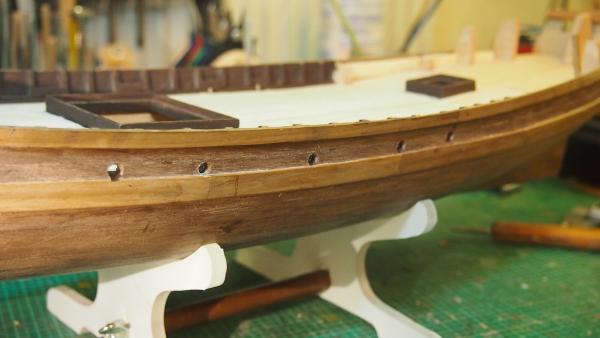
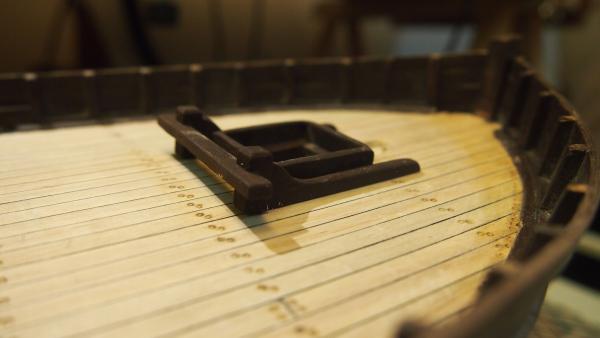
 After many years of useing kits as the base for modelling, I started my first scratch model. Therefor I have choosed a smal ship, not a big one like my HMS Agamemnon. On the Mediterranean took place since the end of the 17th century two particularly fast, lean and sharply built sailing vessels whose hull was probably developed from the galley and the caravel: a native of Venice Galeotte and Xebec. The warships of Geneva and Venice, and also well known as the ships of the northern African pirates. At the same time Pinco was the typical merchant ship in the Mediterranean. In principle, a Xebec. However, not so fast, lean and sharply built, but with a good load carrying capacity. Typical of these ships was the double rigging. In good weather latin sails. In bad weather square rigged. I like this Mediterranean ships, and last but not least at the stern of the Pinco are not so much decorations. I have never before carved such ornaments, but I will do my very best. I began the build August 15. by the plans from Euro Modell Como. Before I started the first planking, it was necessary to make the transition in the forecastle completed. After the first planking I do not get off there. I have made the first planking in a special way. 3mm plywood strips are glued between the bulkheads. The bow and stern sections are filled with balsa. After sanding is the result a strong base for the second planking Second planking is made from wallnut After mounting the hatches on maindeck planking was the next step. I didn't find any information how the scuppers are to be made, and where there position is. And this is my solution: after reinforcing the bulwark at the positions, drilling in the scuppers.
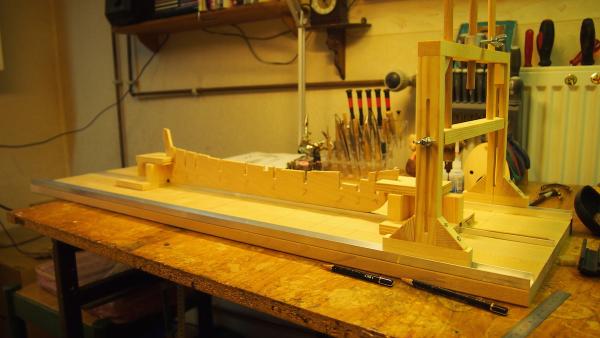


- 67 replies
-
- 10
-


.jpg.9ad5917454a936e37427f76573efe319.jpg)
.jpg.5adaceb11c7da6f124af21e0586d8bac.jpg)